Scissor Cases – Safely Store Your Storks
It’s time for another finishing tutorial! I’m always looking for fun ways to make my cross stitches into useful items, and while the scissor case is definitely not a new concept in the cross stitch community I hadn’t made one yet. So I wanted to try my hand at one myself!
As usual, I’ll not only be walking through how to assemble one, but how I worked out the design space to fit my scissors. Whether you use my template, or are trying to work out the math for a larger pair of scissors I have you covered! So read on, or use the Table of Contents to skip ahead to the bits you’re interested.
This post may contain affiliate links. If you buy something using one of these links, I earn a small commission. However, there is no extra cost to you. Thanks for understanding! Learn more in my Disclosures & Privacy Policy.
Table of Contents
What Is a Scissor Case?
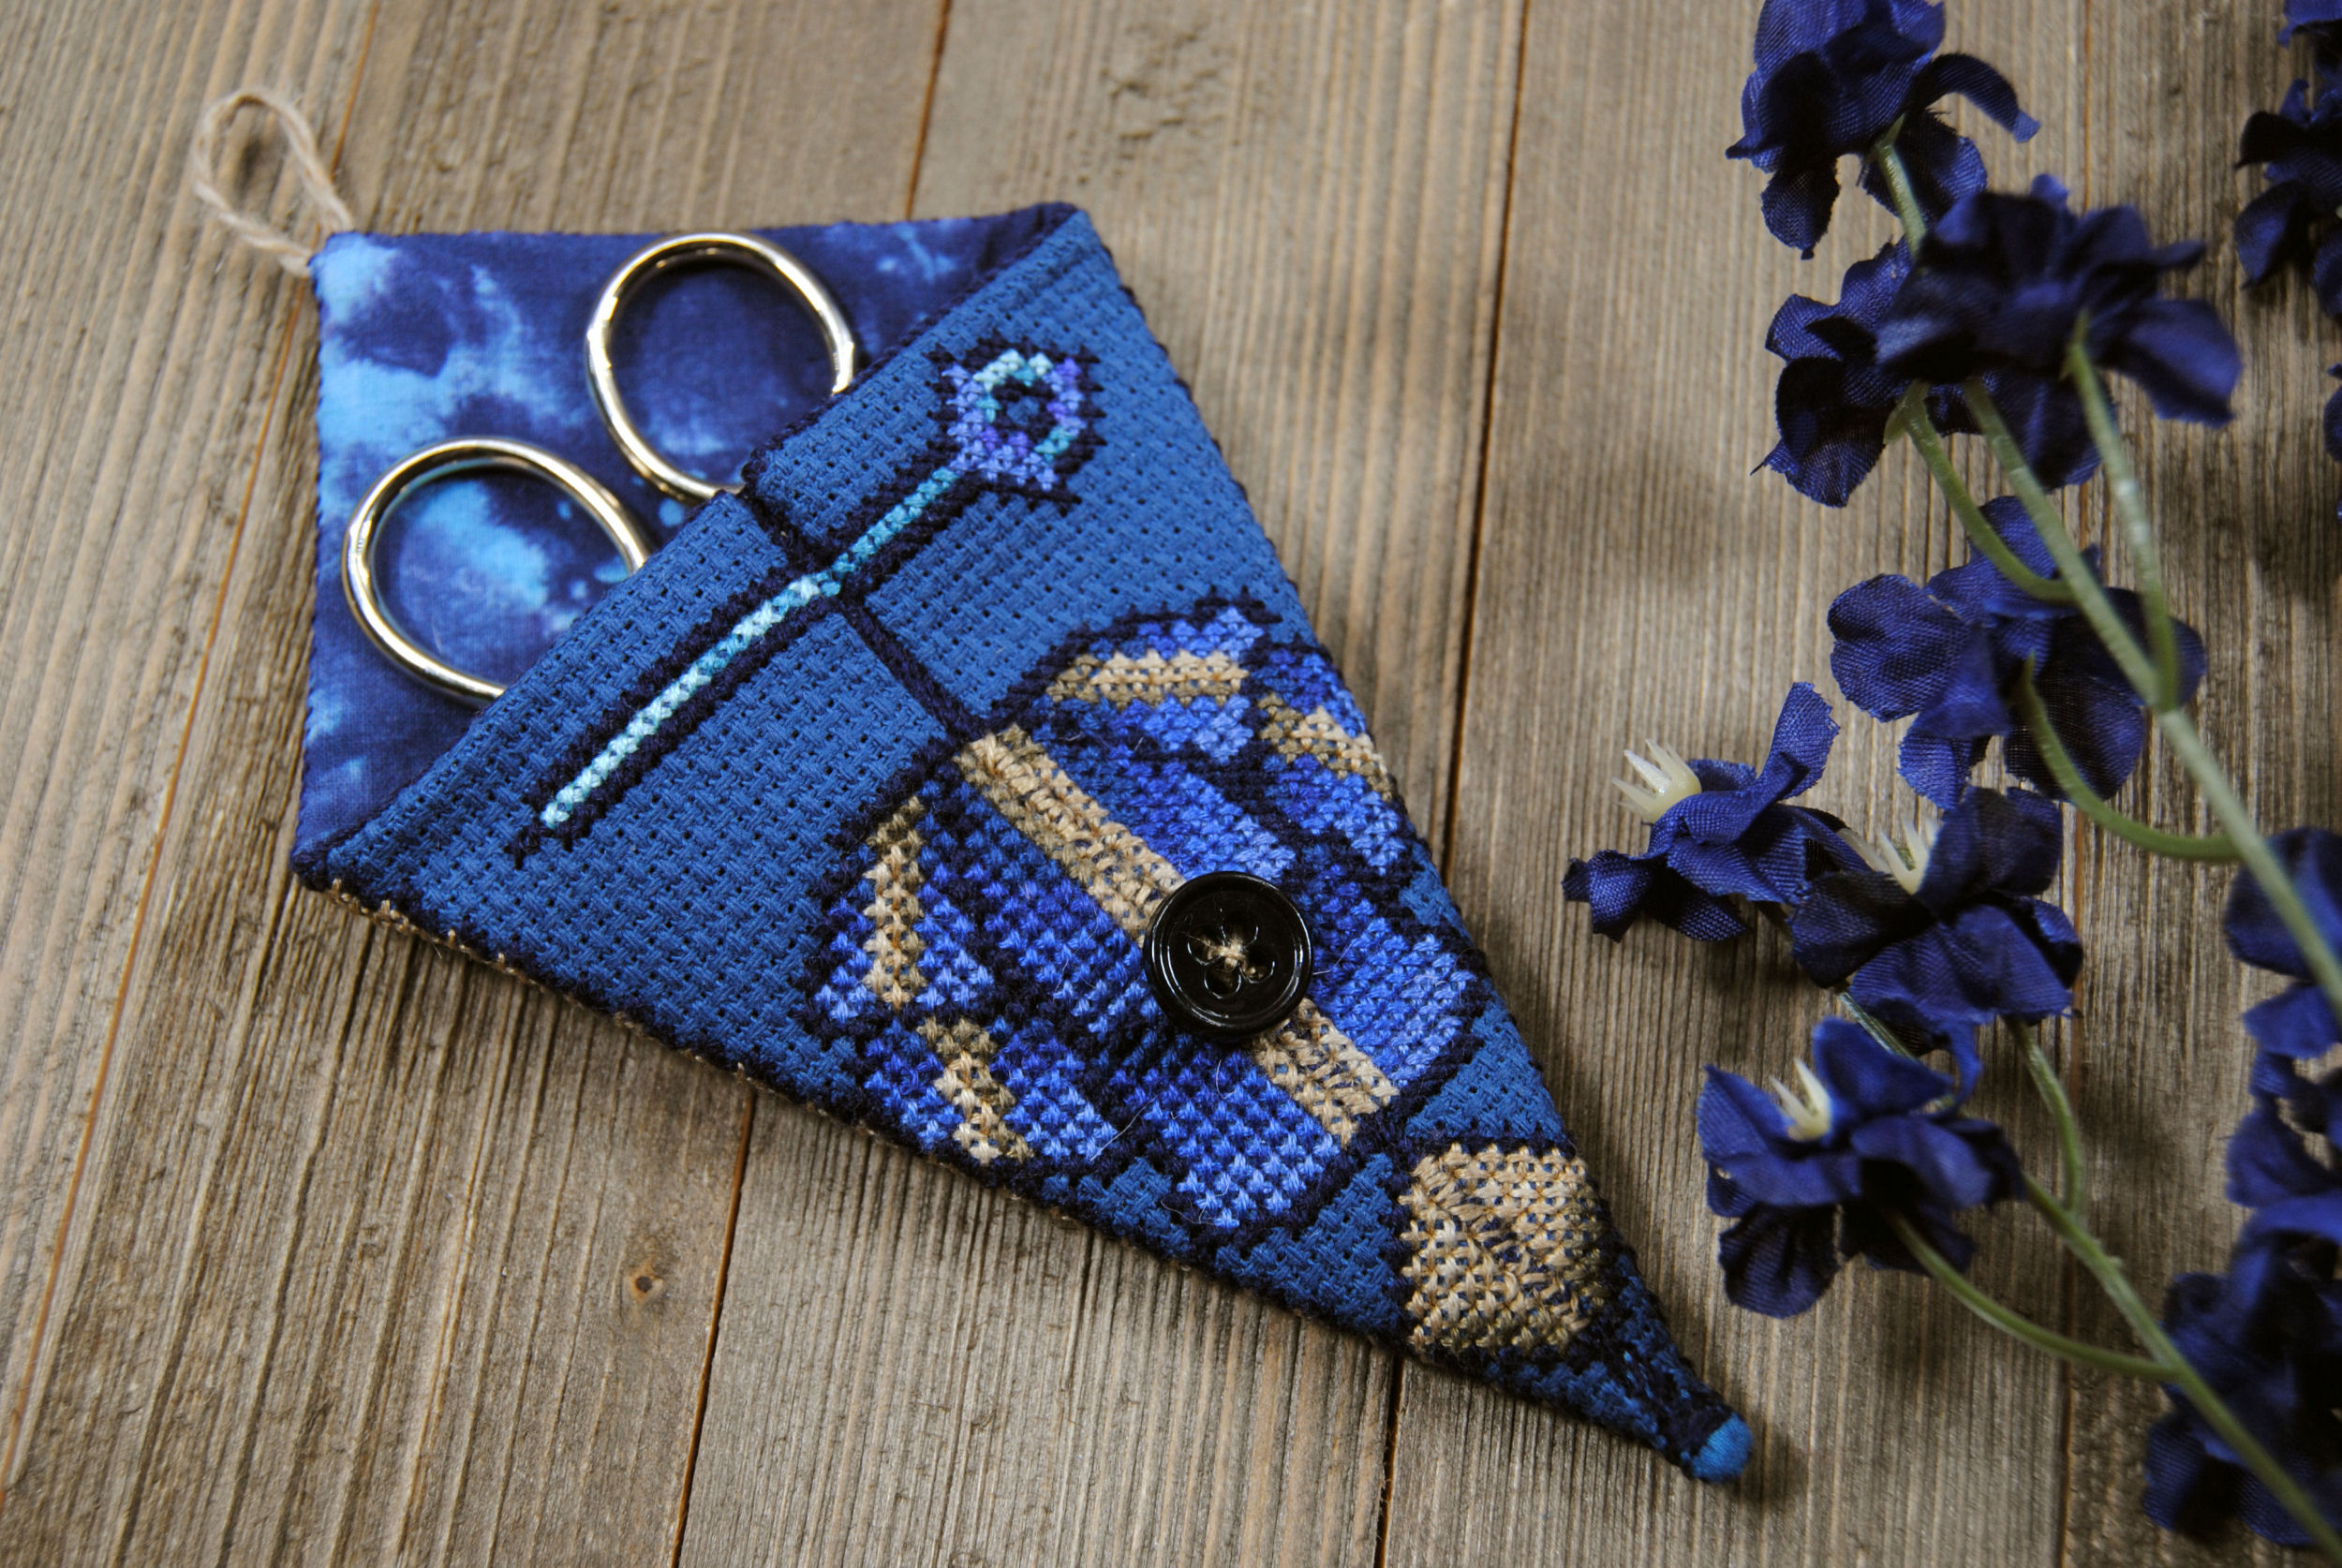
You will be unsurprised to learn that a scissor case is a case that you put your scissors in. These come in all sorts of shapes and sizes, but the most common in the cross stitch community is the triangular ones.
They’re can be decorated or plain and are used to store embroidery scissors, fabric scissors, pinking shears, or even hair styling shears.
Why Use a Scissor Case?
There are a few reasons to consider using a scissor case for your snips. The most common being for travel. If you need to take sewing supplies on the go, whether it be on a road trip or so you can cross stitch on a long flight it’s good to keep them covered. The last thing you want is them opening up and damaging other things in your bag, or even your hand when you reach in to fetch them and they’ve turned themselves about somehow.
Even if you’re not leaving the house though, you may want to keep them in a case to signify to others in your household that these are your scissors and not to be used for cutting up mail or opening boxes. You could label it with a scissor fob, but that extra step to open a fancy case may be enough to put them off from using your pristine fabric scissors.
Lastly, because they’re pretty. Or because you need another excuse for a new cross stitch project. Let’s be real. If you’ve been stitching for a while you have enough projects hanging on your wall already. It can be fun to find new uses for the craft. And if you haven’t gotten to that point yet, having cute sewing accessories like fancy scissor cases or cute biscornu pin cushions can help inspire you to stitch more! 🙂
Other Ways to Store Scissors
So what are your alternatives? What other ways can you keep track of your growing collection of storks?
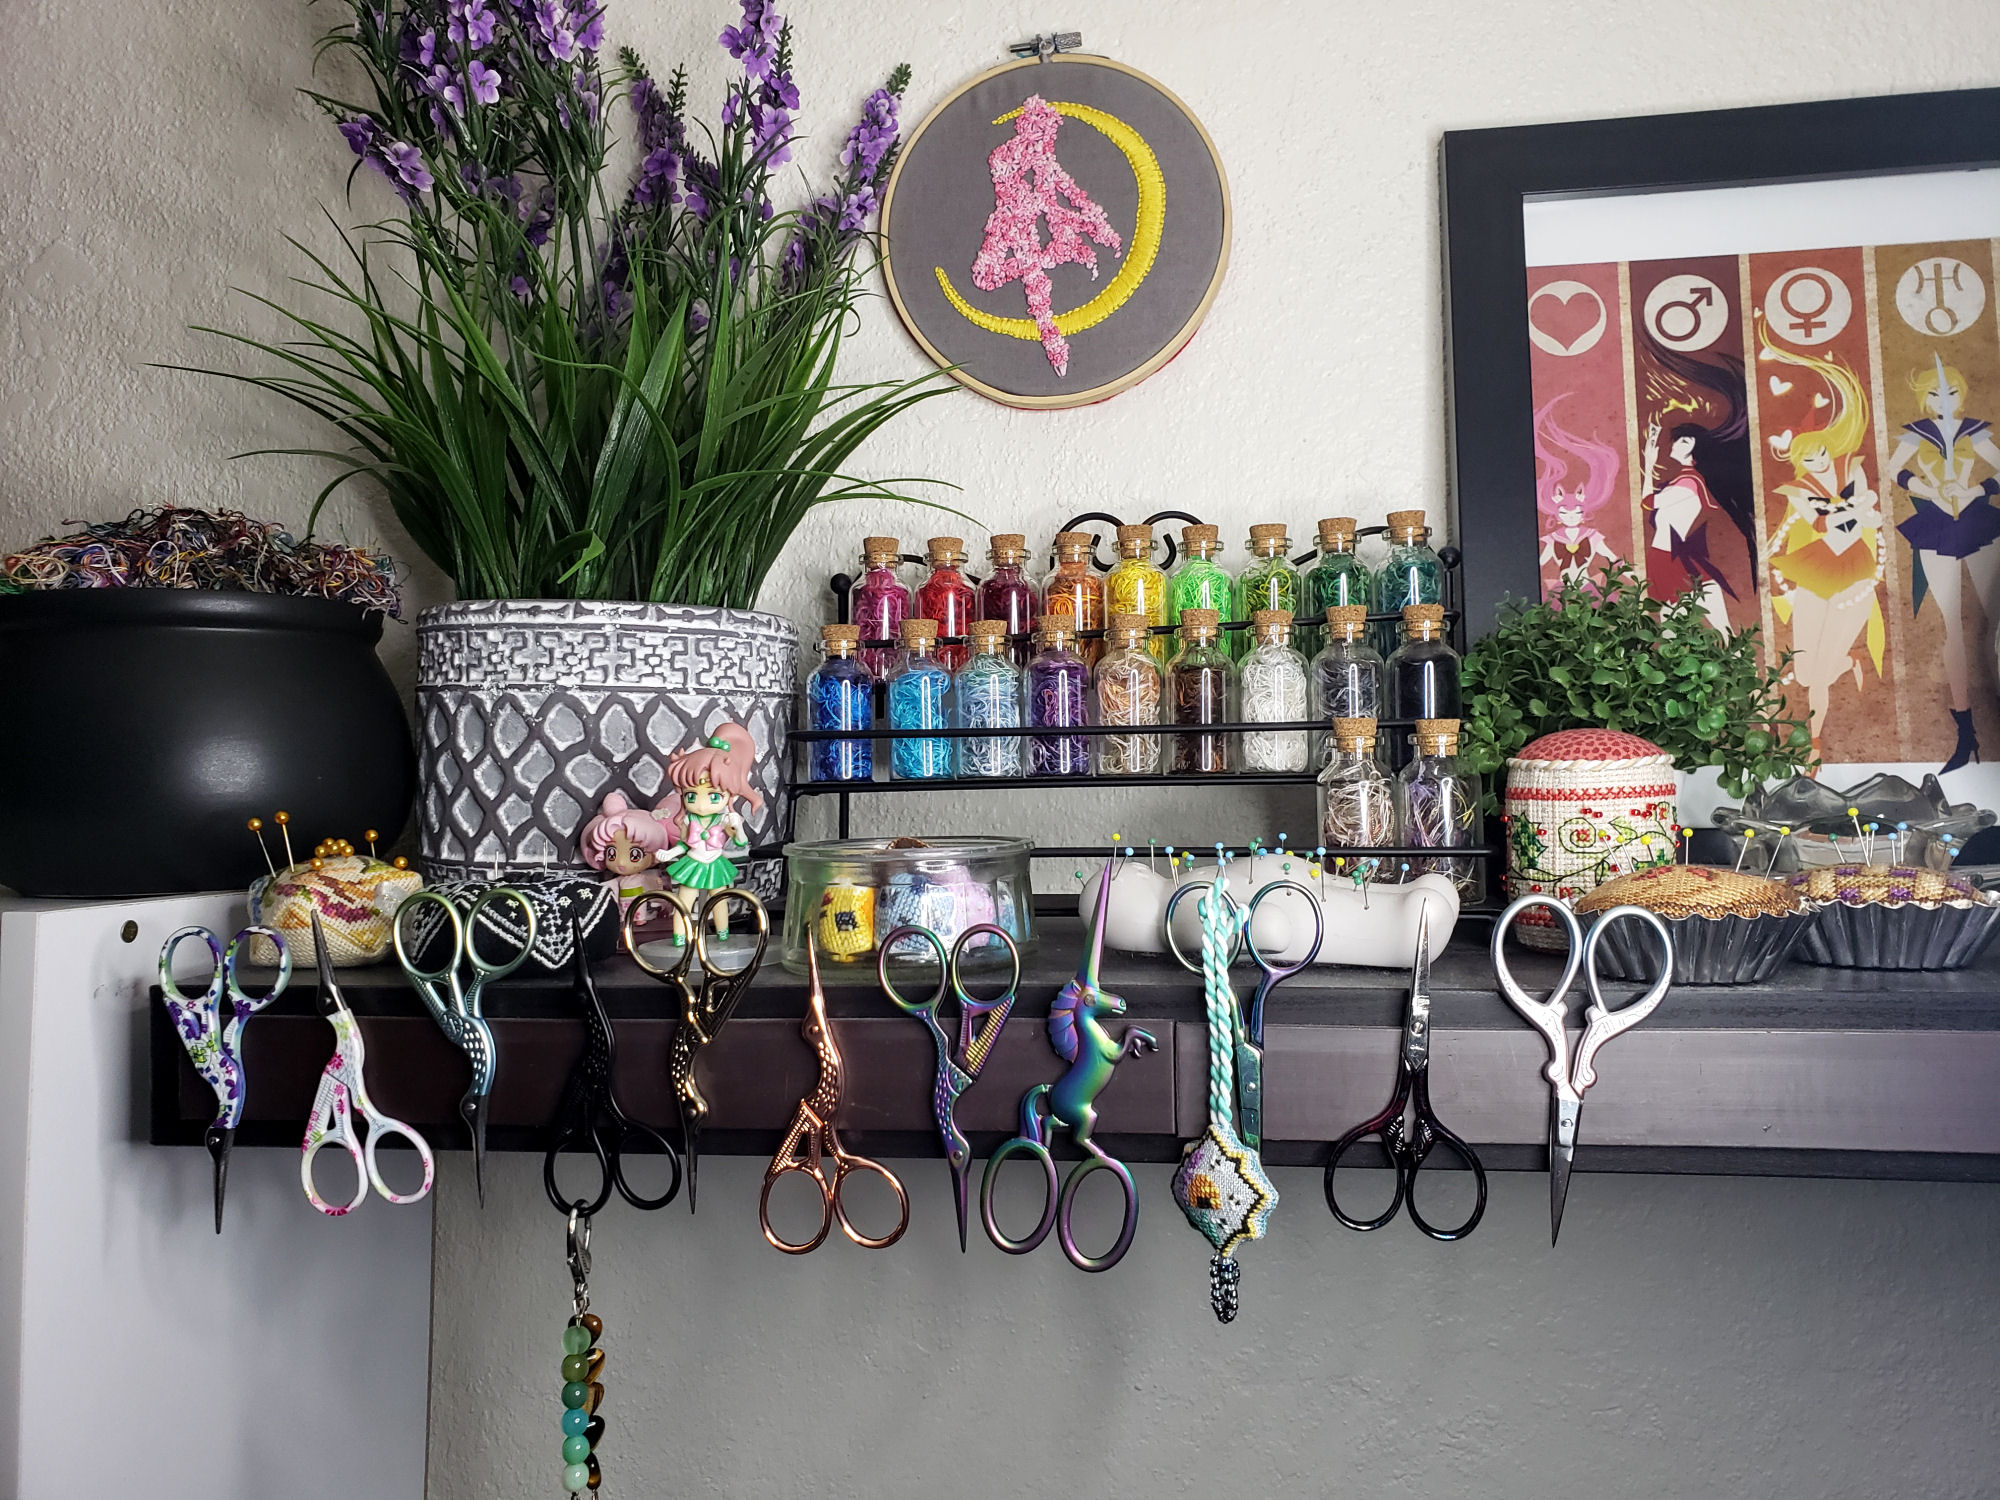
Well, if you have a clear bit of wall or a thick shelf near your favorite stitchy spot, you could use those magnetic strips typically used to store knives in the kitchen. This is a tip I borrowed from Jess of Stitch X to Continue. And I love seeing them all in a row above my desk as I work.
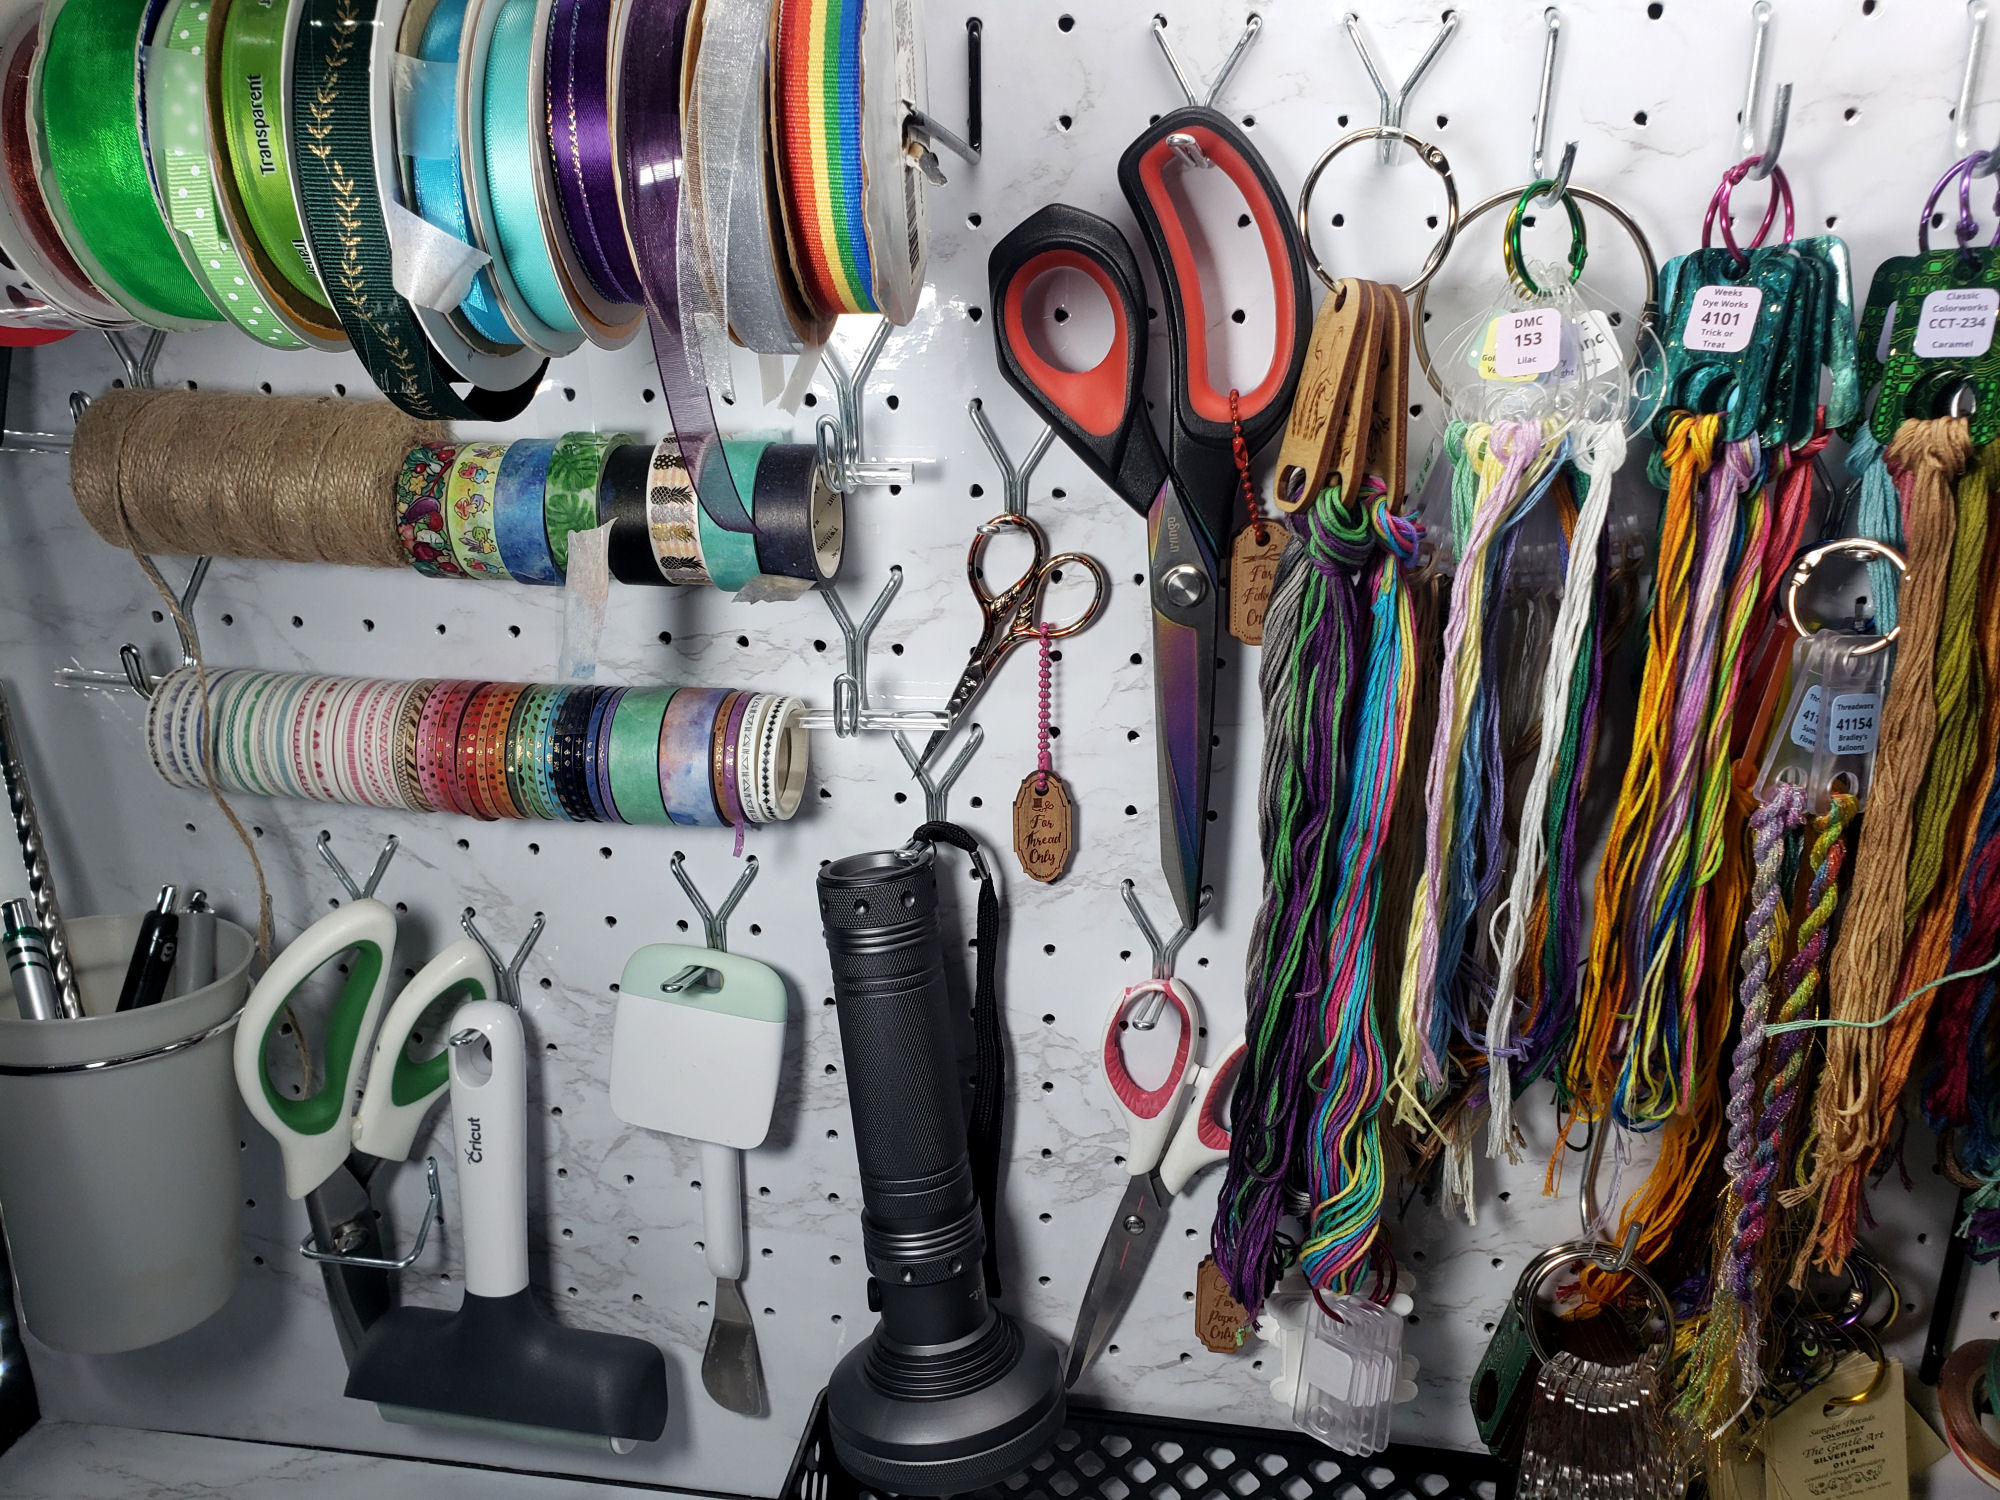
Peg boards are another common go-to if you have the wall space. I unfortunately have my office in a basement where most of the walls are CONCRETE. So while I do have a pegboard on one of the walls, it’s covered in Etsy inventory instead. Luckily my wonderful partner bought me a workbench with a built in peg board for Christmas last year. I use this mostly as my photo station, but of course hang a few of my scissors there as well.
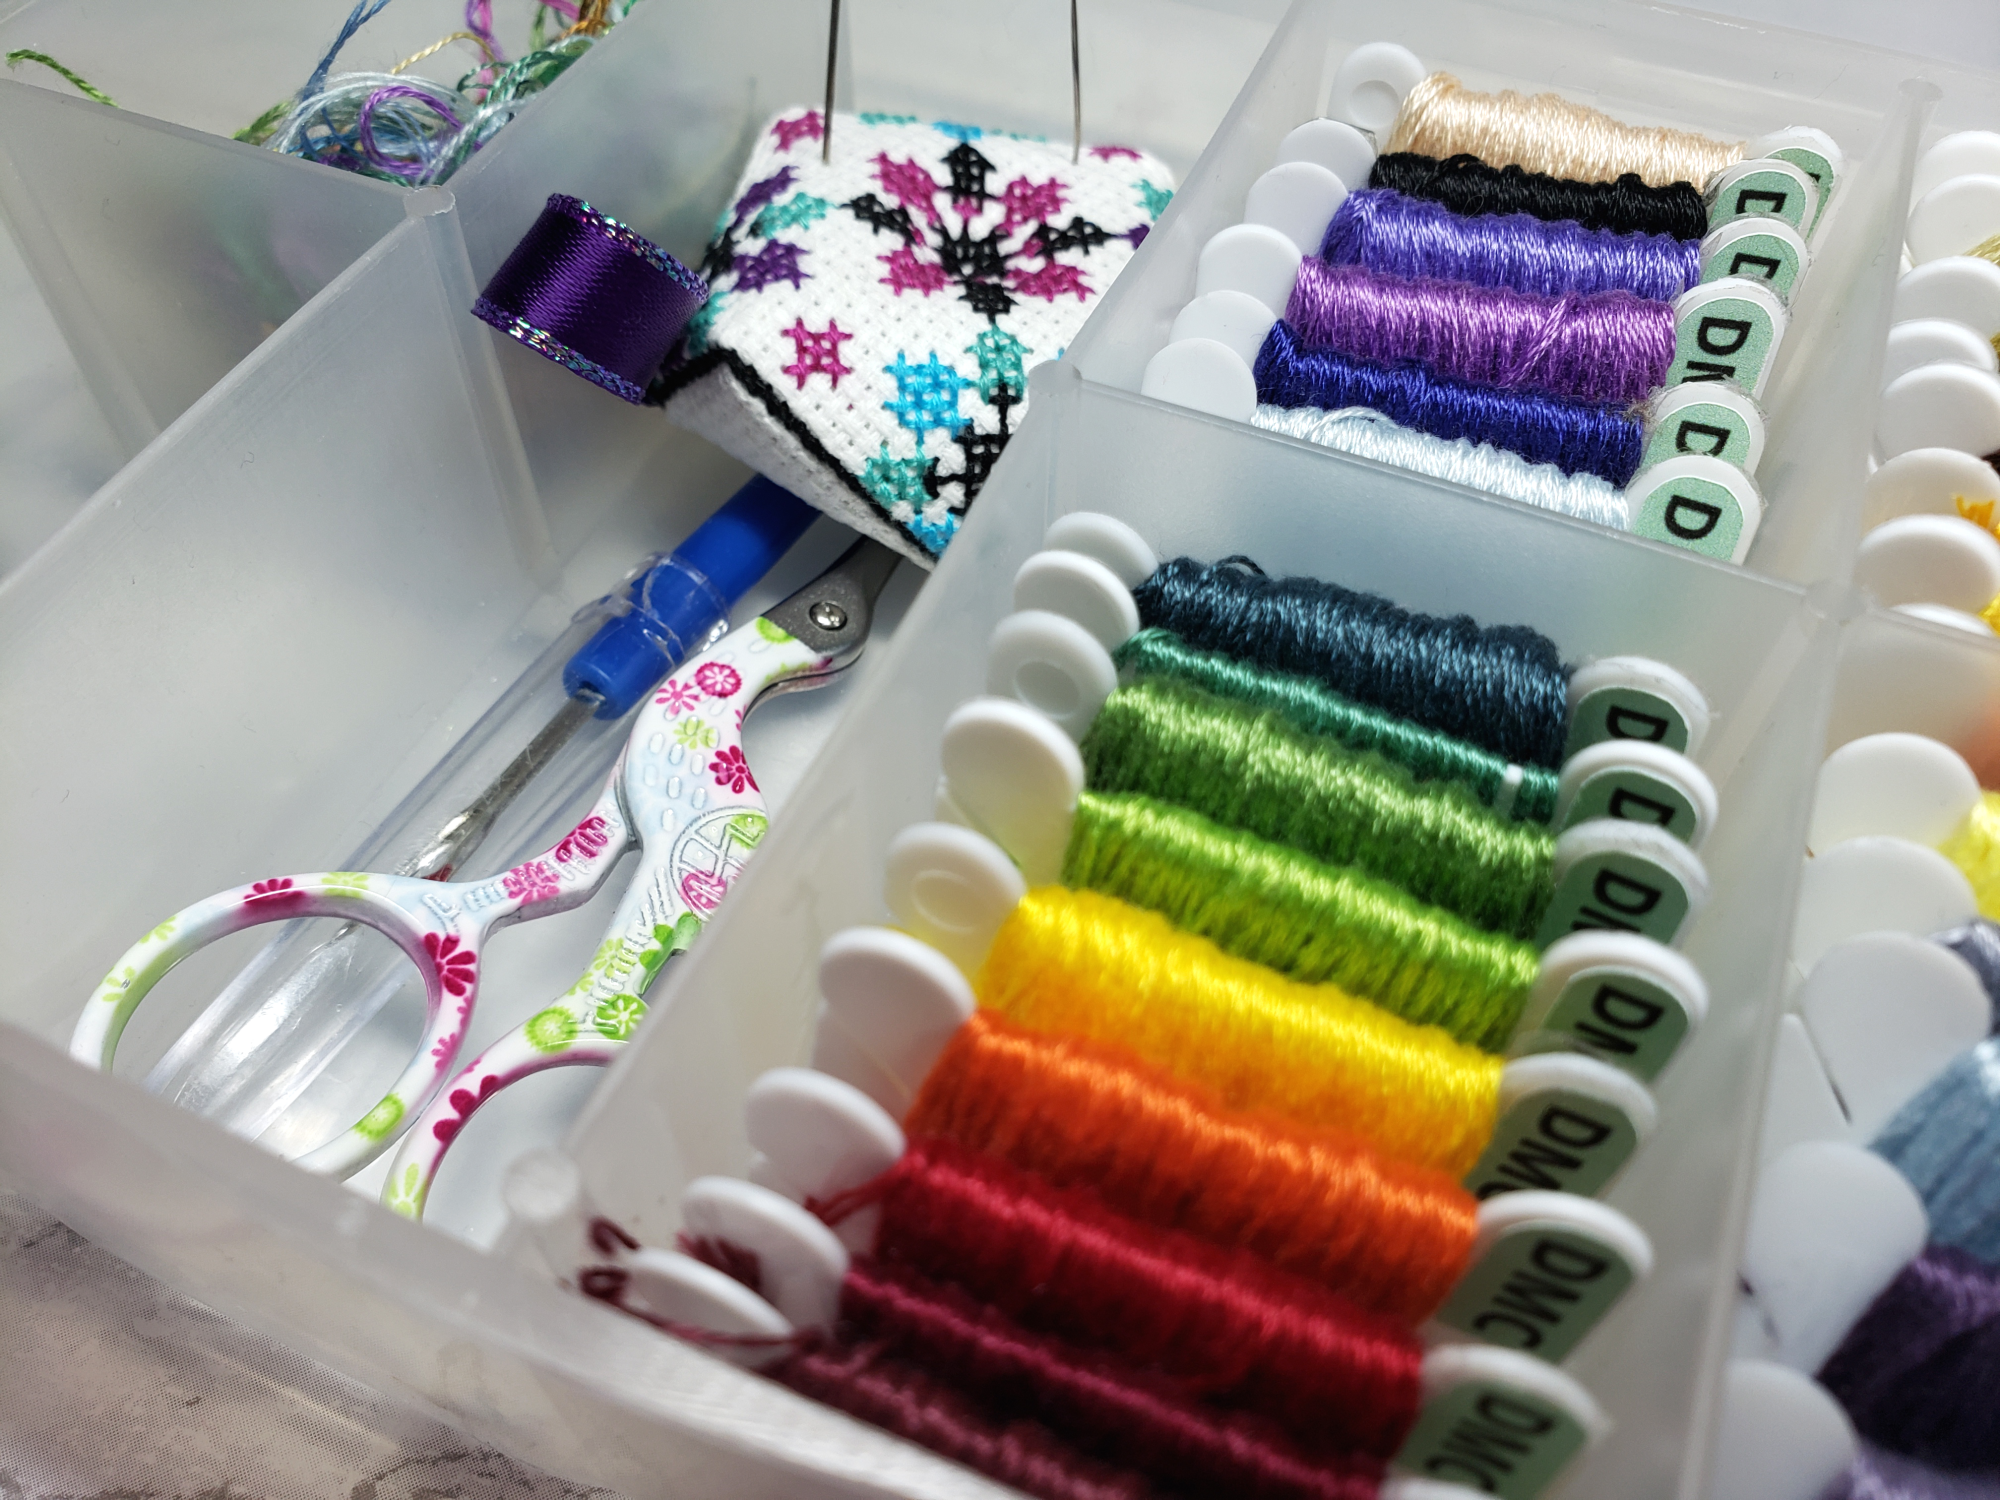
If you don’t have a ton of scissors yet, you may choose to store them with the rest of your stitchy supplies. Or have a pair of scissors for each kitted project you’re working on. You can fit small scissors into the larger sections of your floss boxes, or pack them into your project bags. Some project bags even come with an extra pocket specifically for scissors.
Types of Scissor Cases
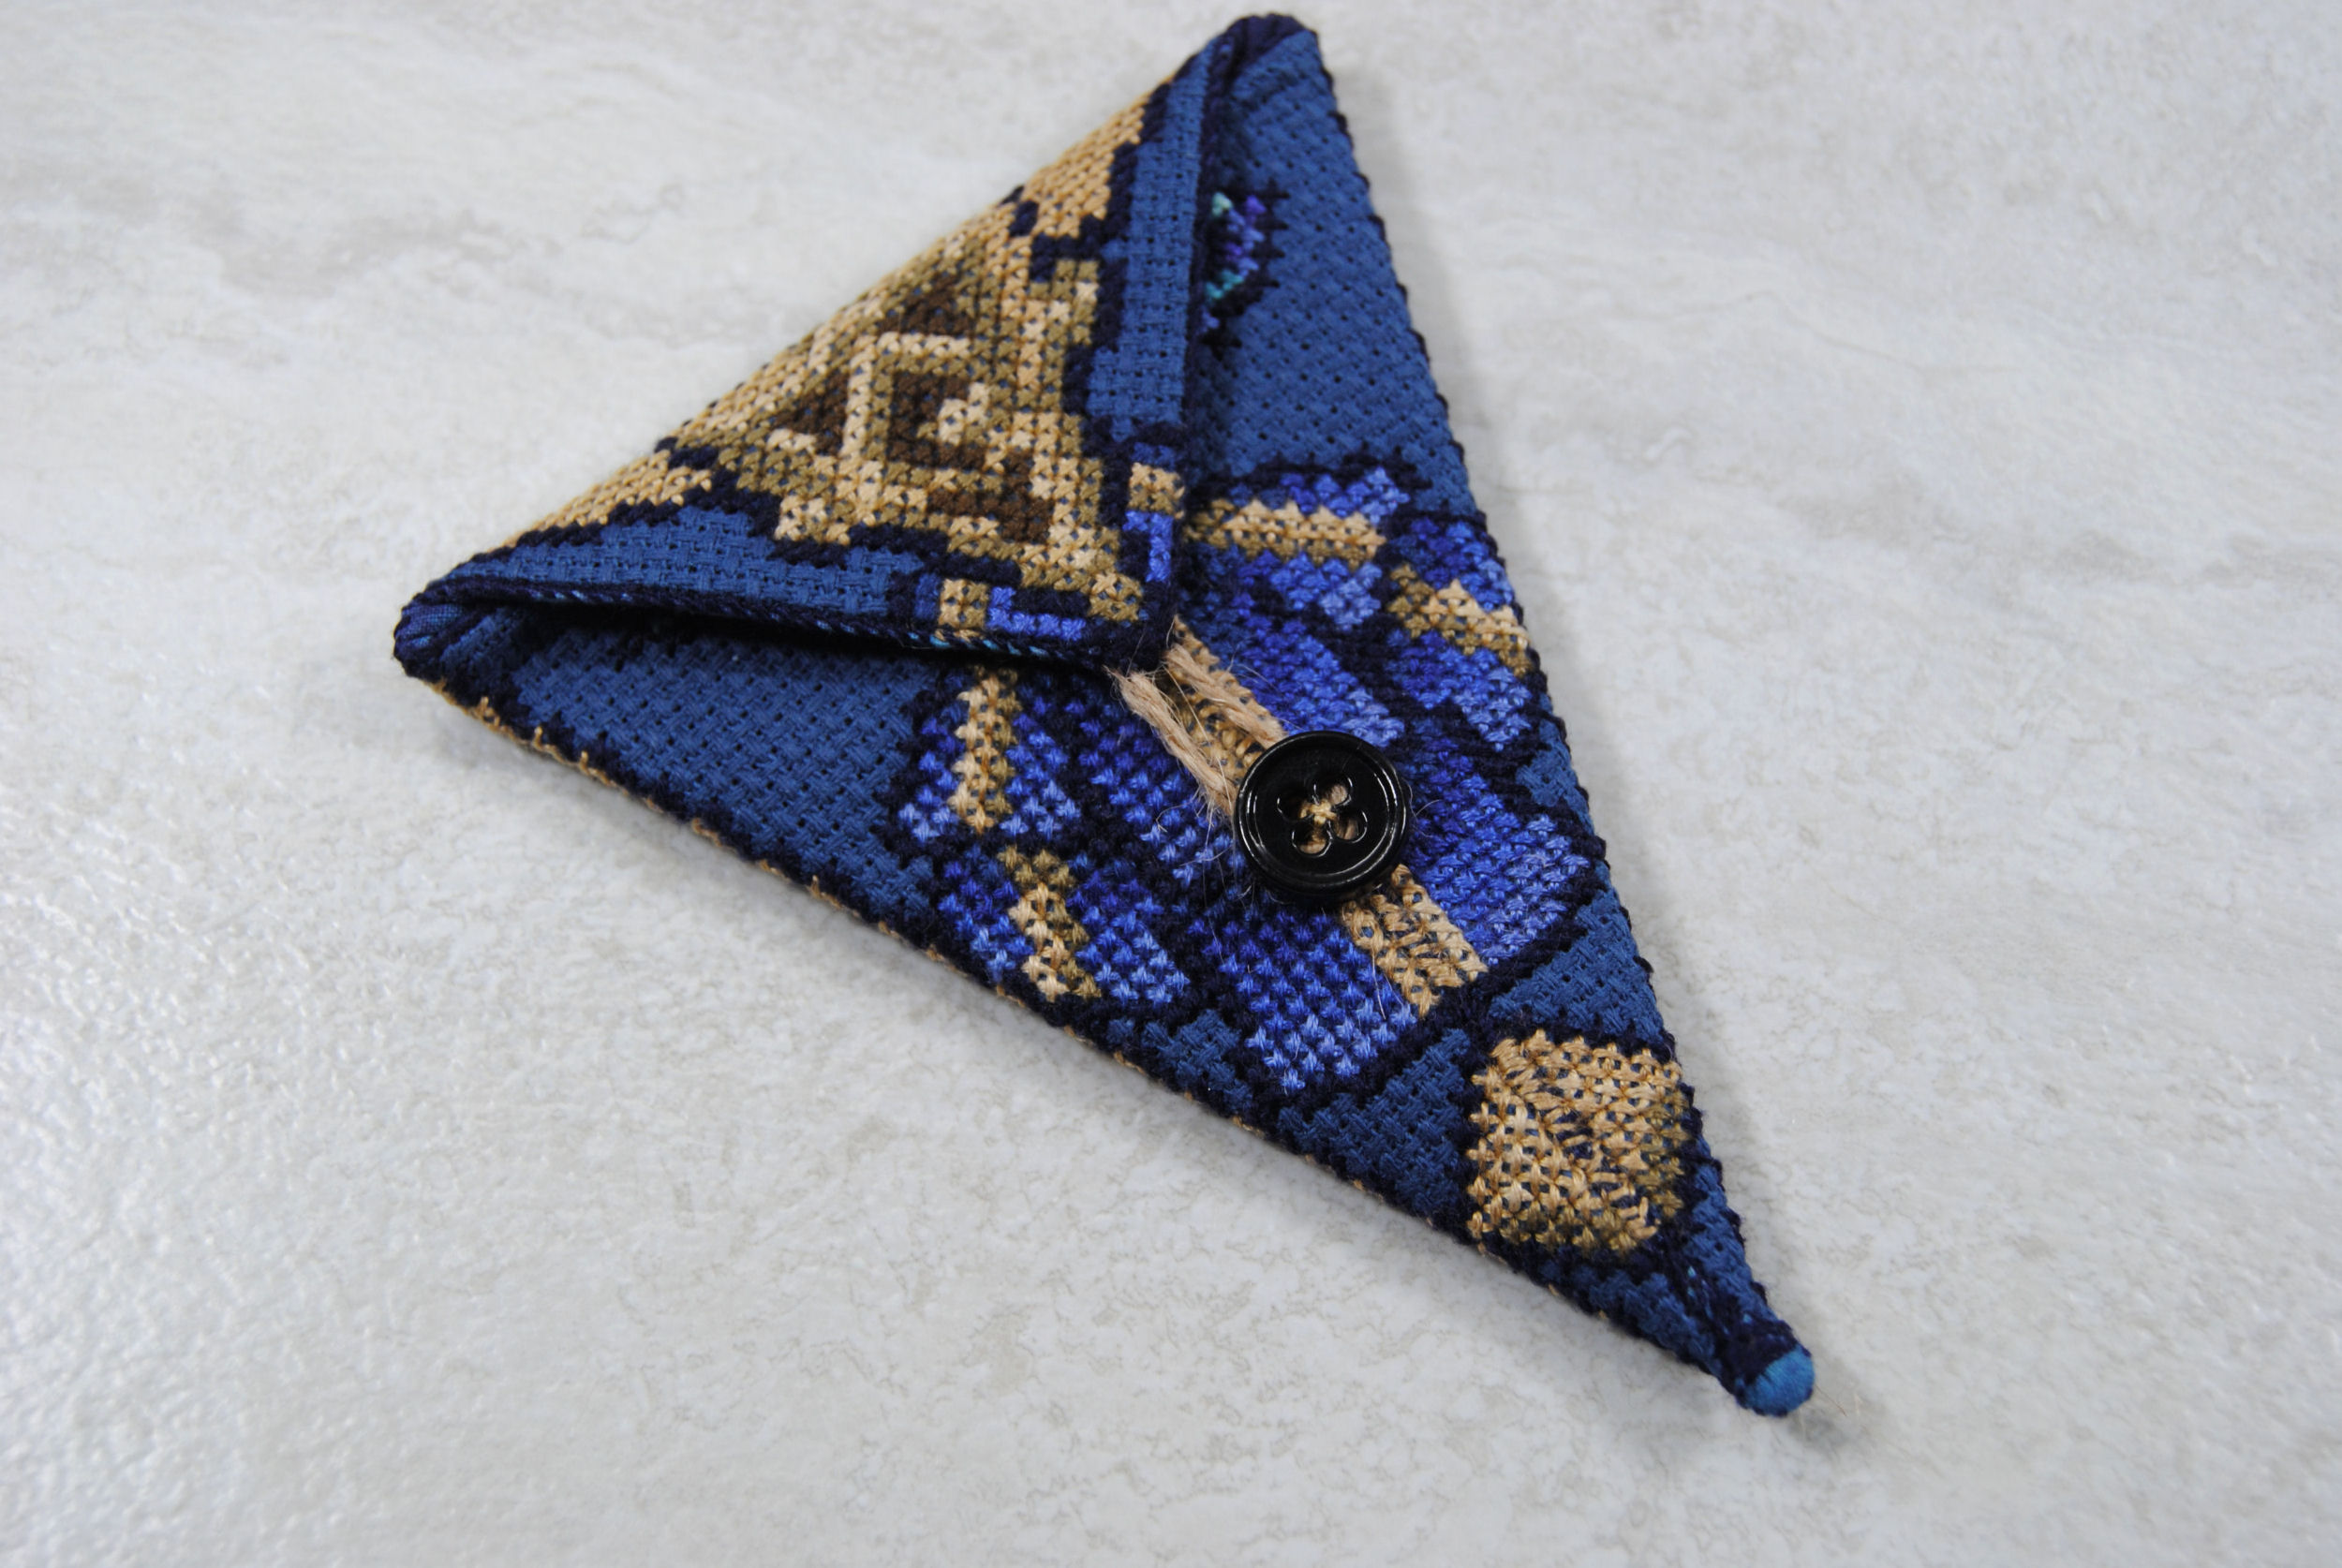
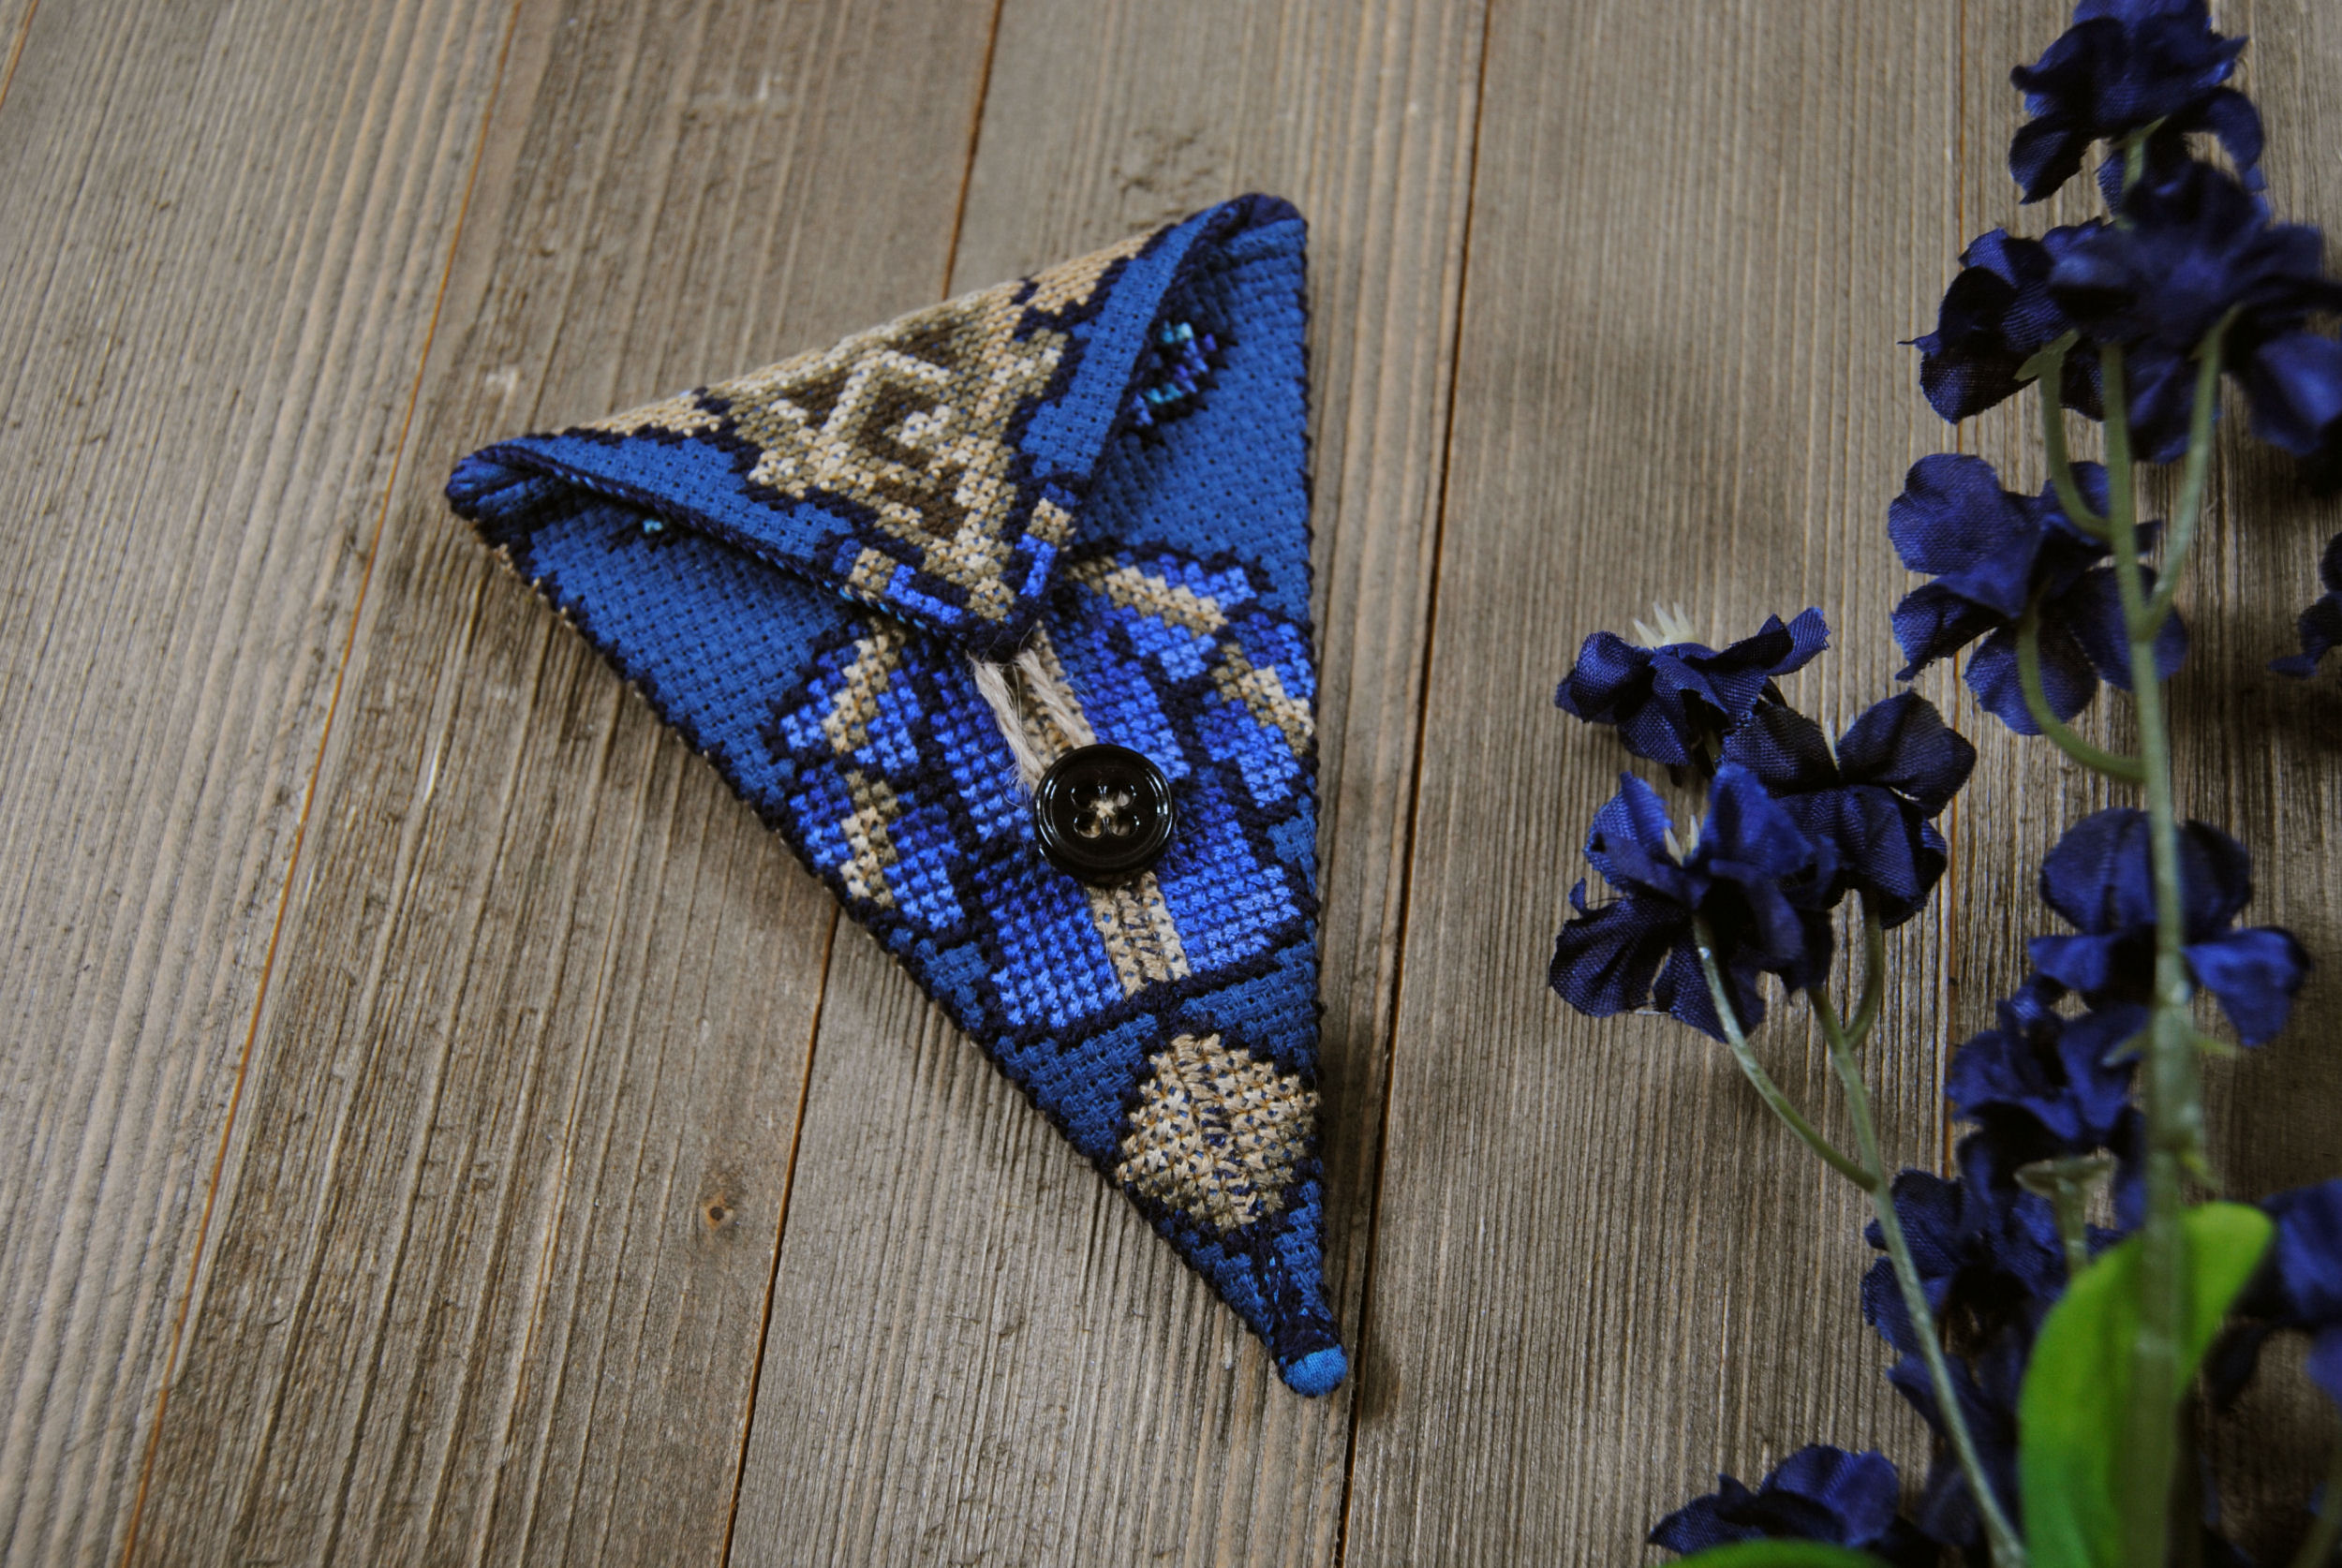
I’ll be covering the style of scissor case most often used with cross stitch. The perfect square of fabric folded into a triangle. You’ve probably seen some of these around, such as the gorgeous ones by Faby Reilly.
But are there other scissor cases out there? Of course! Here’s some tutorials for other styles of scissor cases I found online:
Scissor Case Tutorials
Scissor Cases for Sale
And of course, you could always just purchase a cute case for your snips if you don’t have time to make one!
Here’s a few options I found online:
Sizing Your Scissor Case
Alright, let’s talk about that cross stitch scissor case now.
I’ll be providing a template to use with standard embroidery scissor sizes. But let’s go over how I got there, in case you want to make one for a pair of scissors that aren’t quite standard sized.
First, make sure you use whatever count fabric you’re planning to stitch with. Since I was designing for 14 count I used 14 count to size my design.
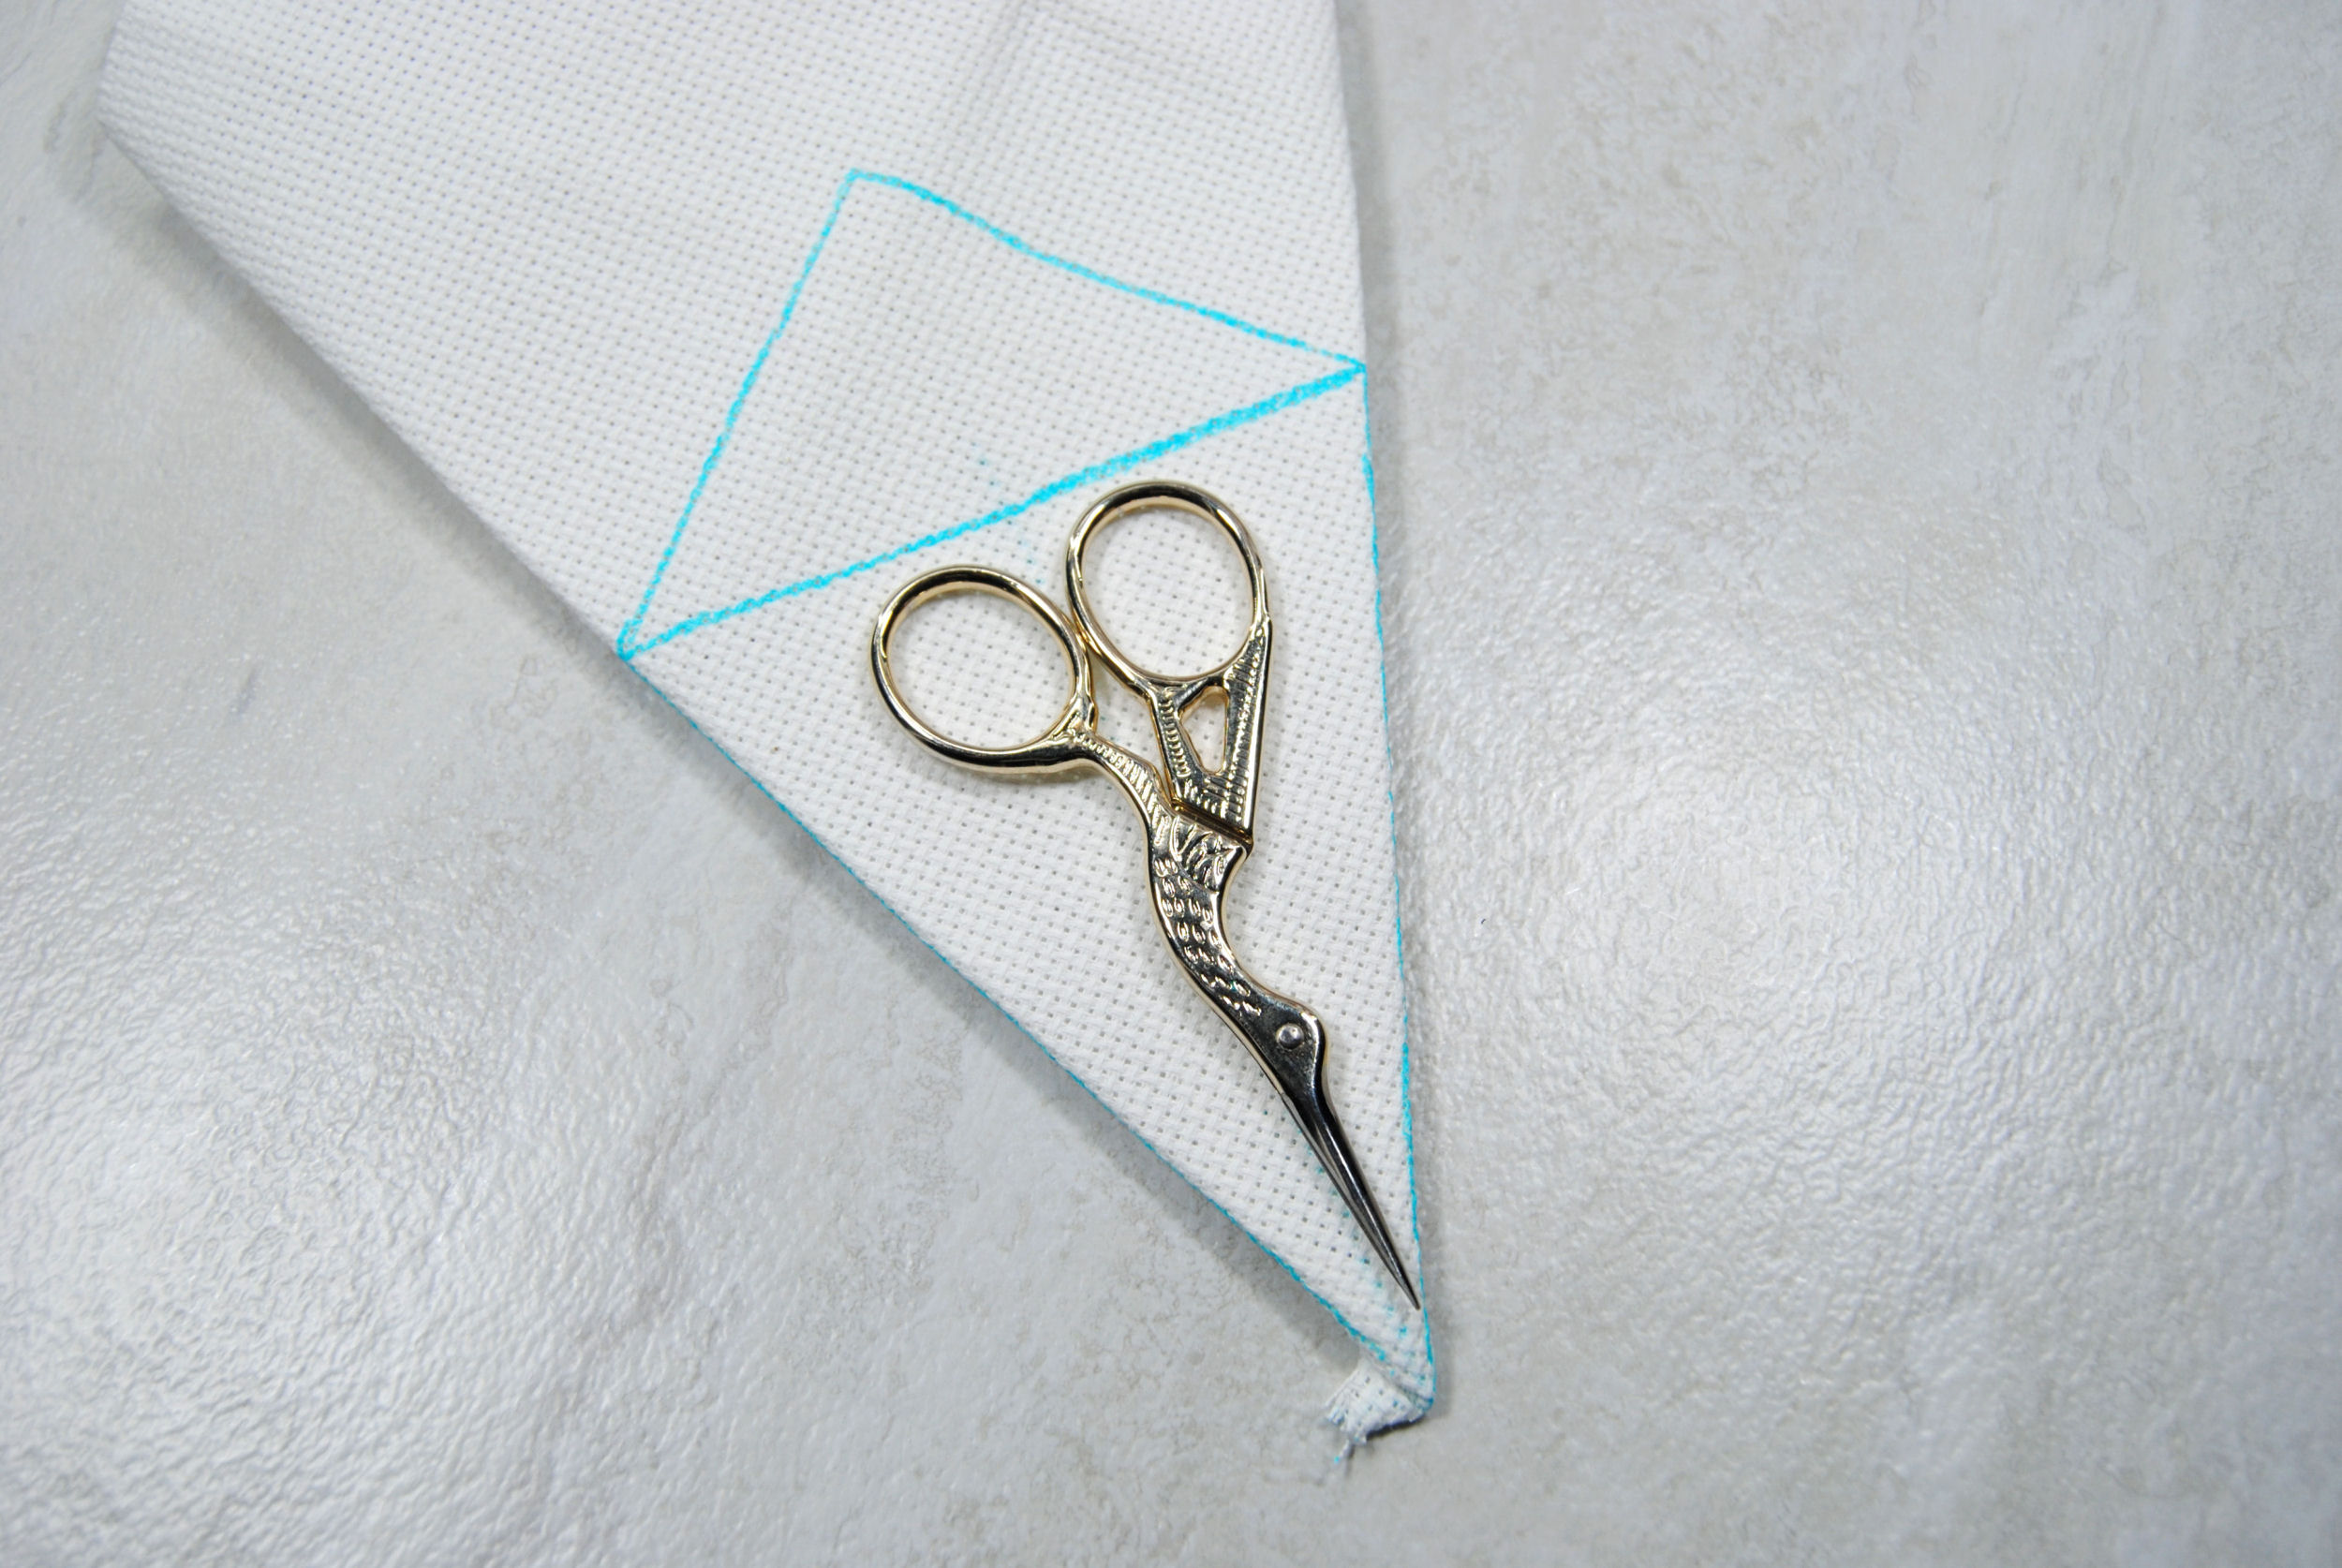
Taking a large piece of scrap aida and a washable pen, I marked my preferred buffer area from one corner. 5 stitches from either side. Then, using a ruler I drew a diagonal line from that corner.
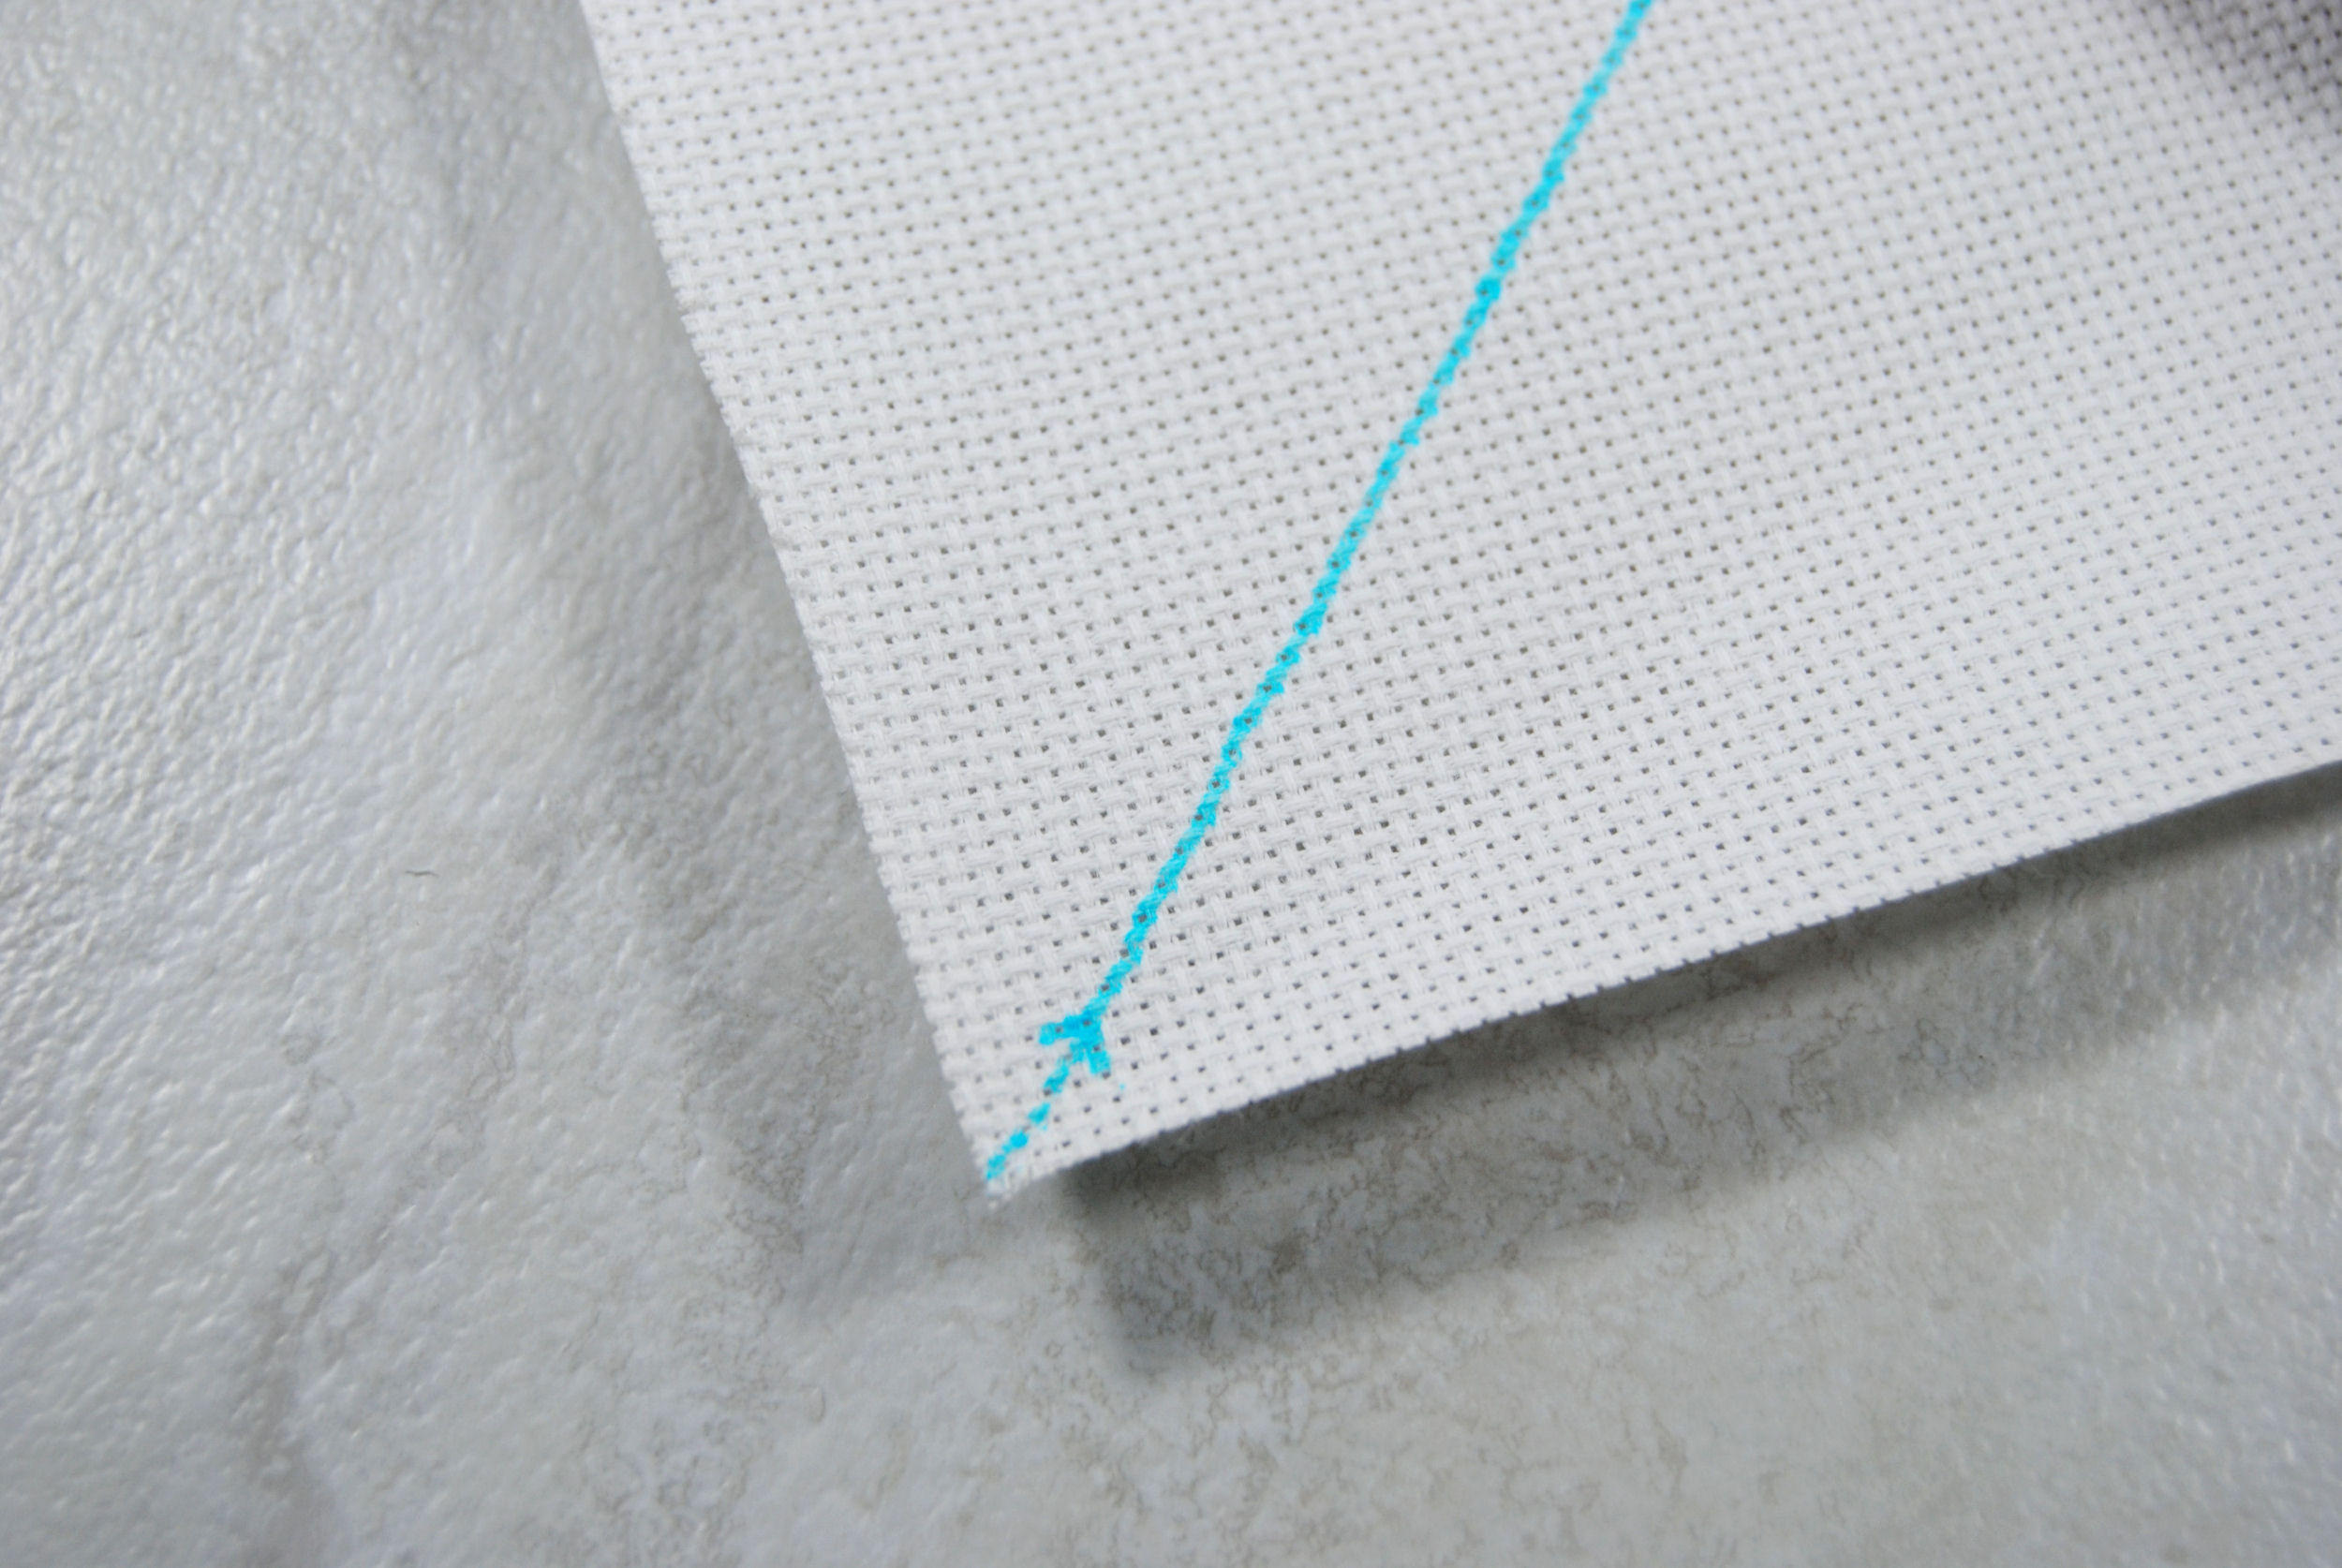
Flipping my fabric over I marked that buffer area out with dashed lines, just so I can see where the stitched area ‘really’ ends.
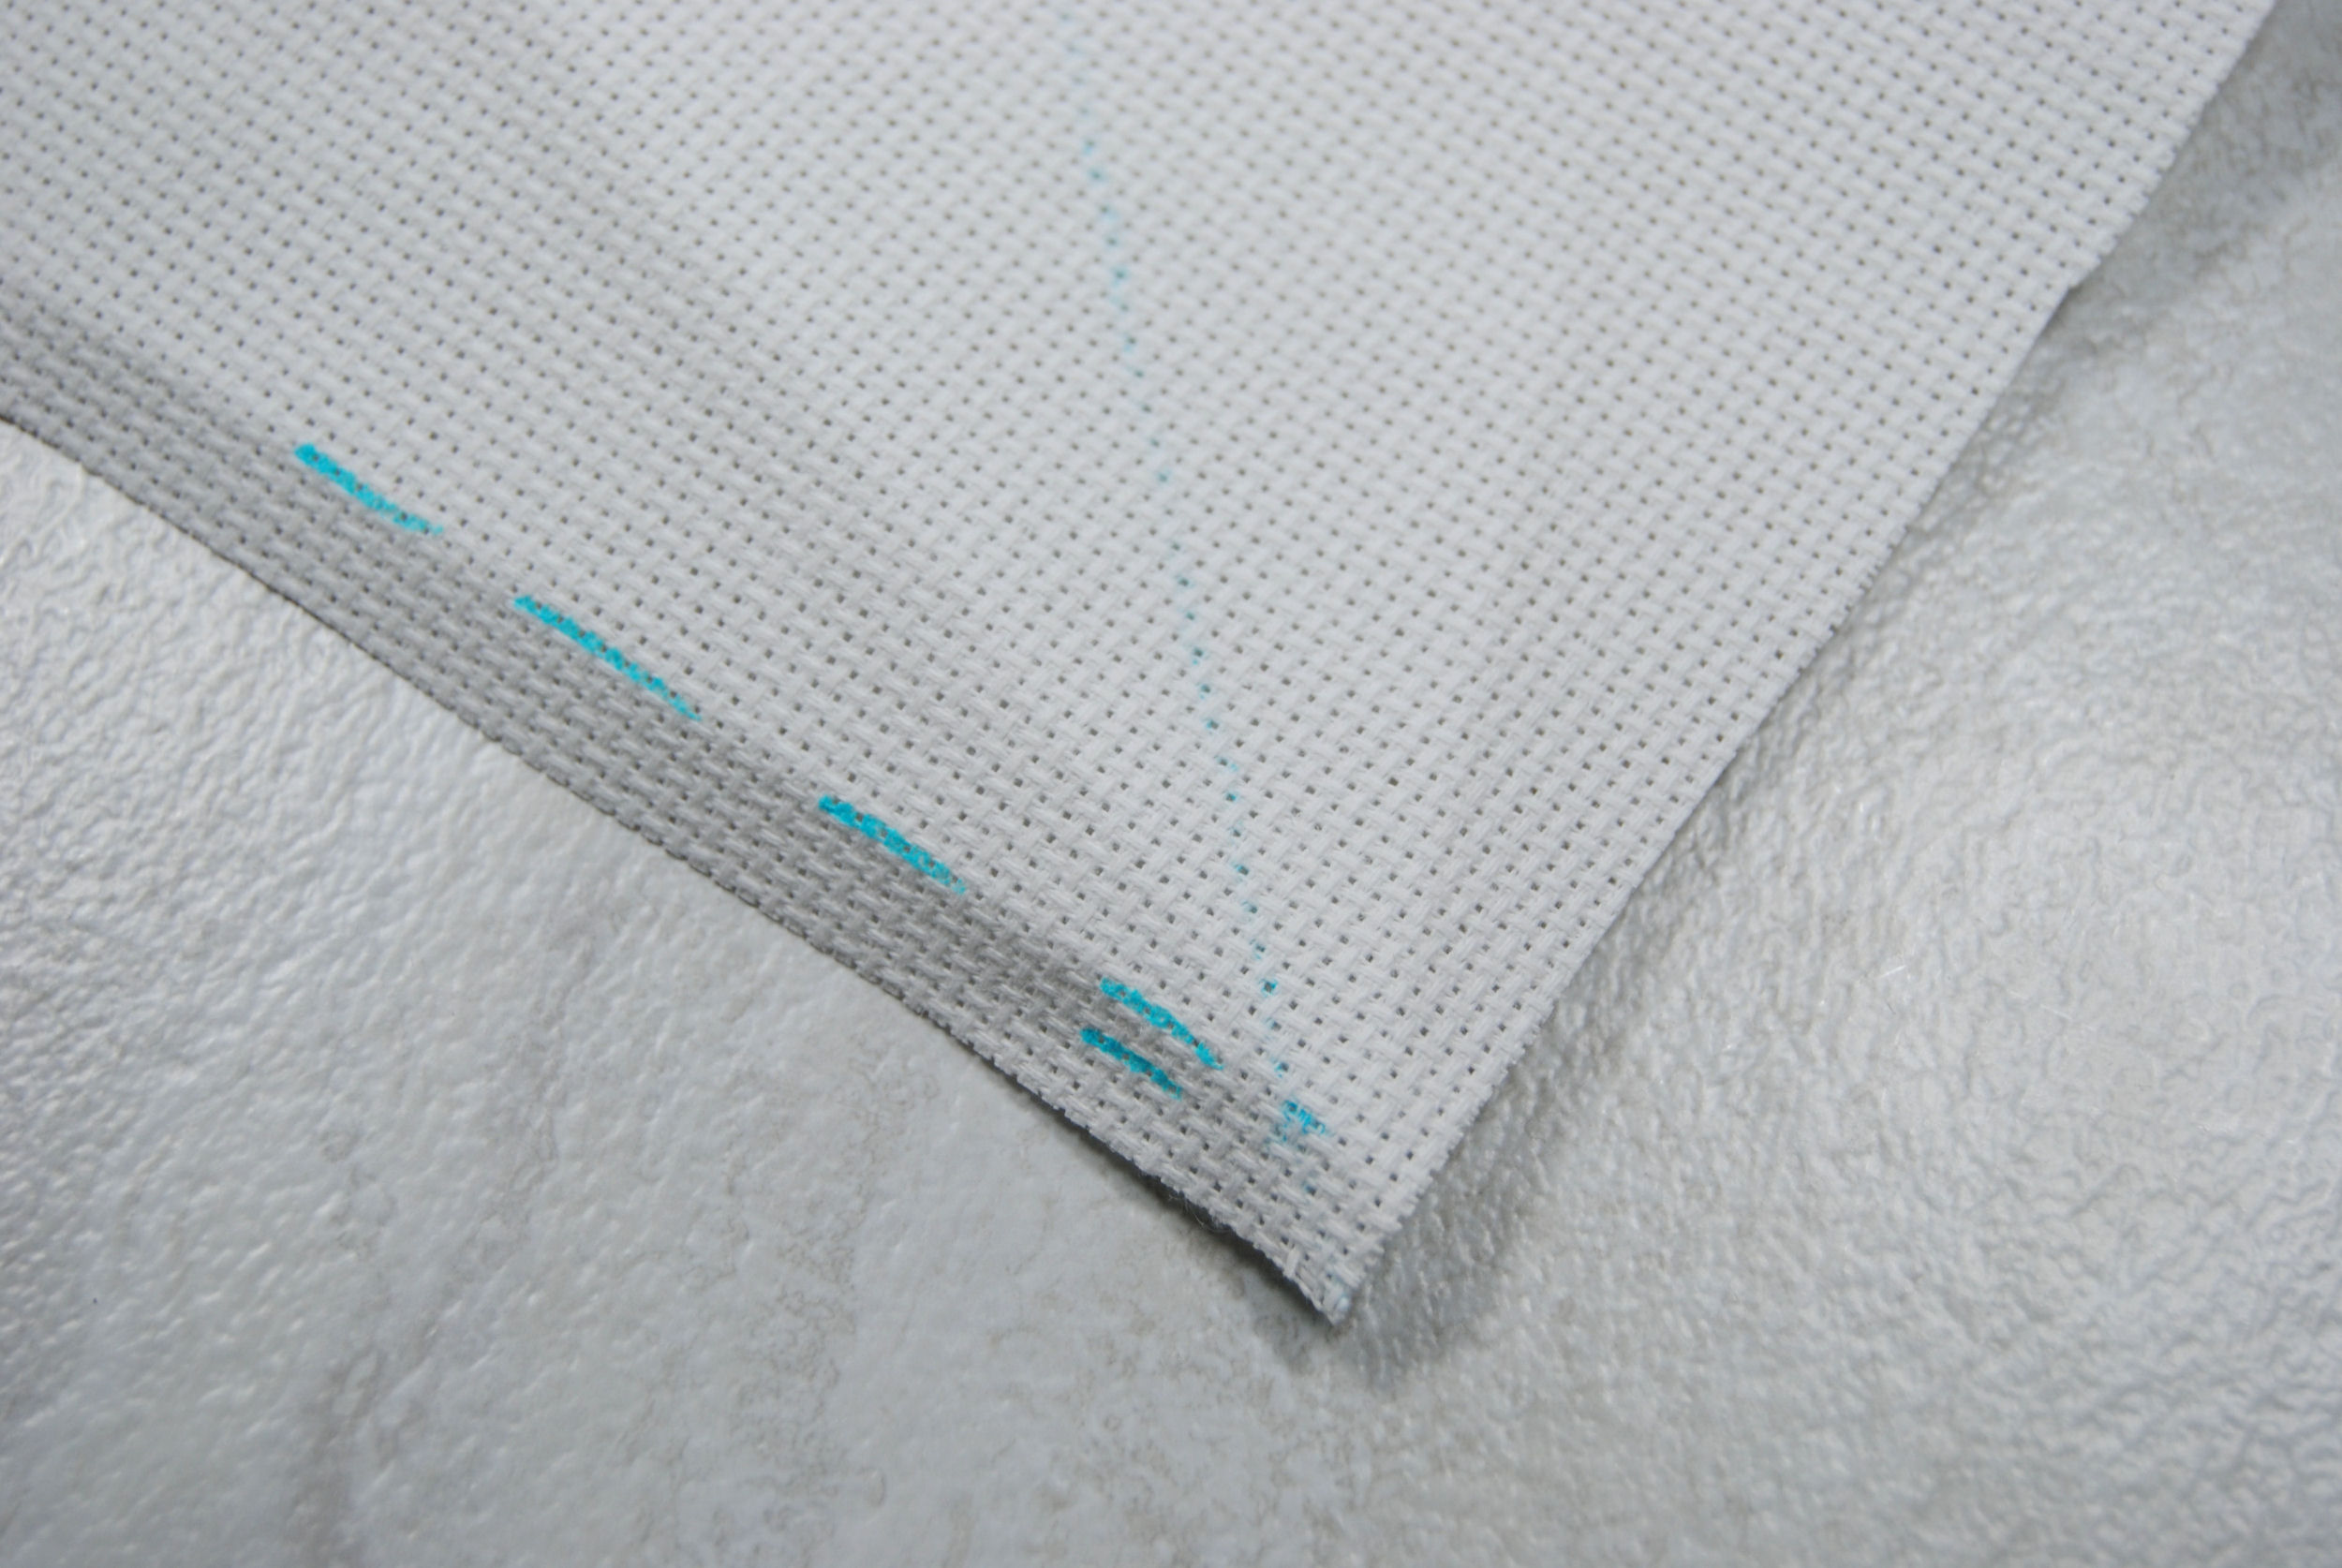
I then folded that dotted line and folded the whole side over to the center line I had marked previously.

Now do the same thing on the other side.
Finally, plop your scissors on top and mark how far up your scissors reach. Try not to put your scissors too close to the ‘point’ of your fabric, as with a liner and everything it may not go all the way to that corner.
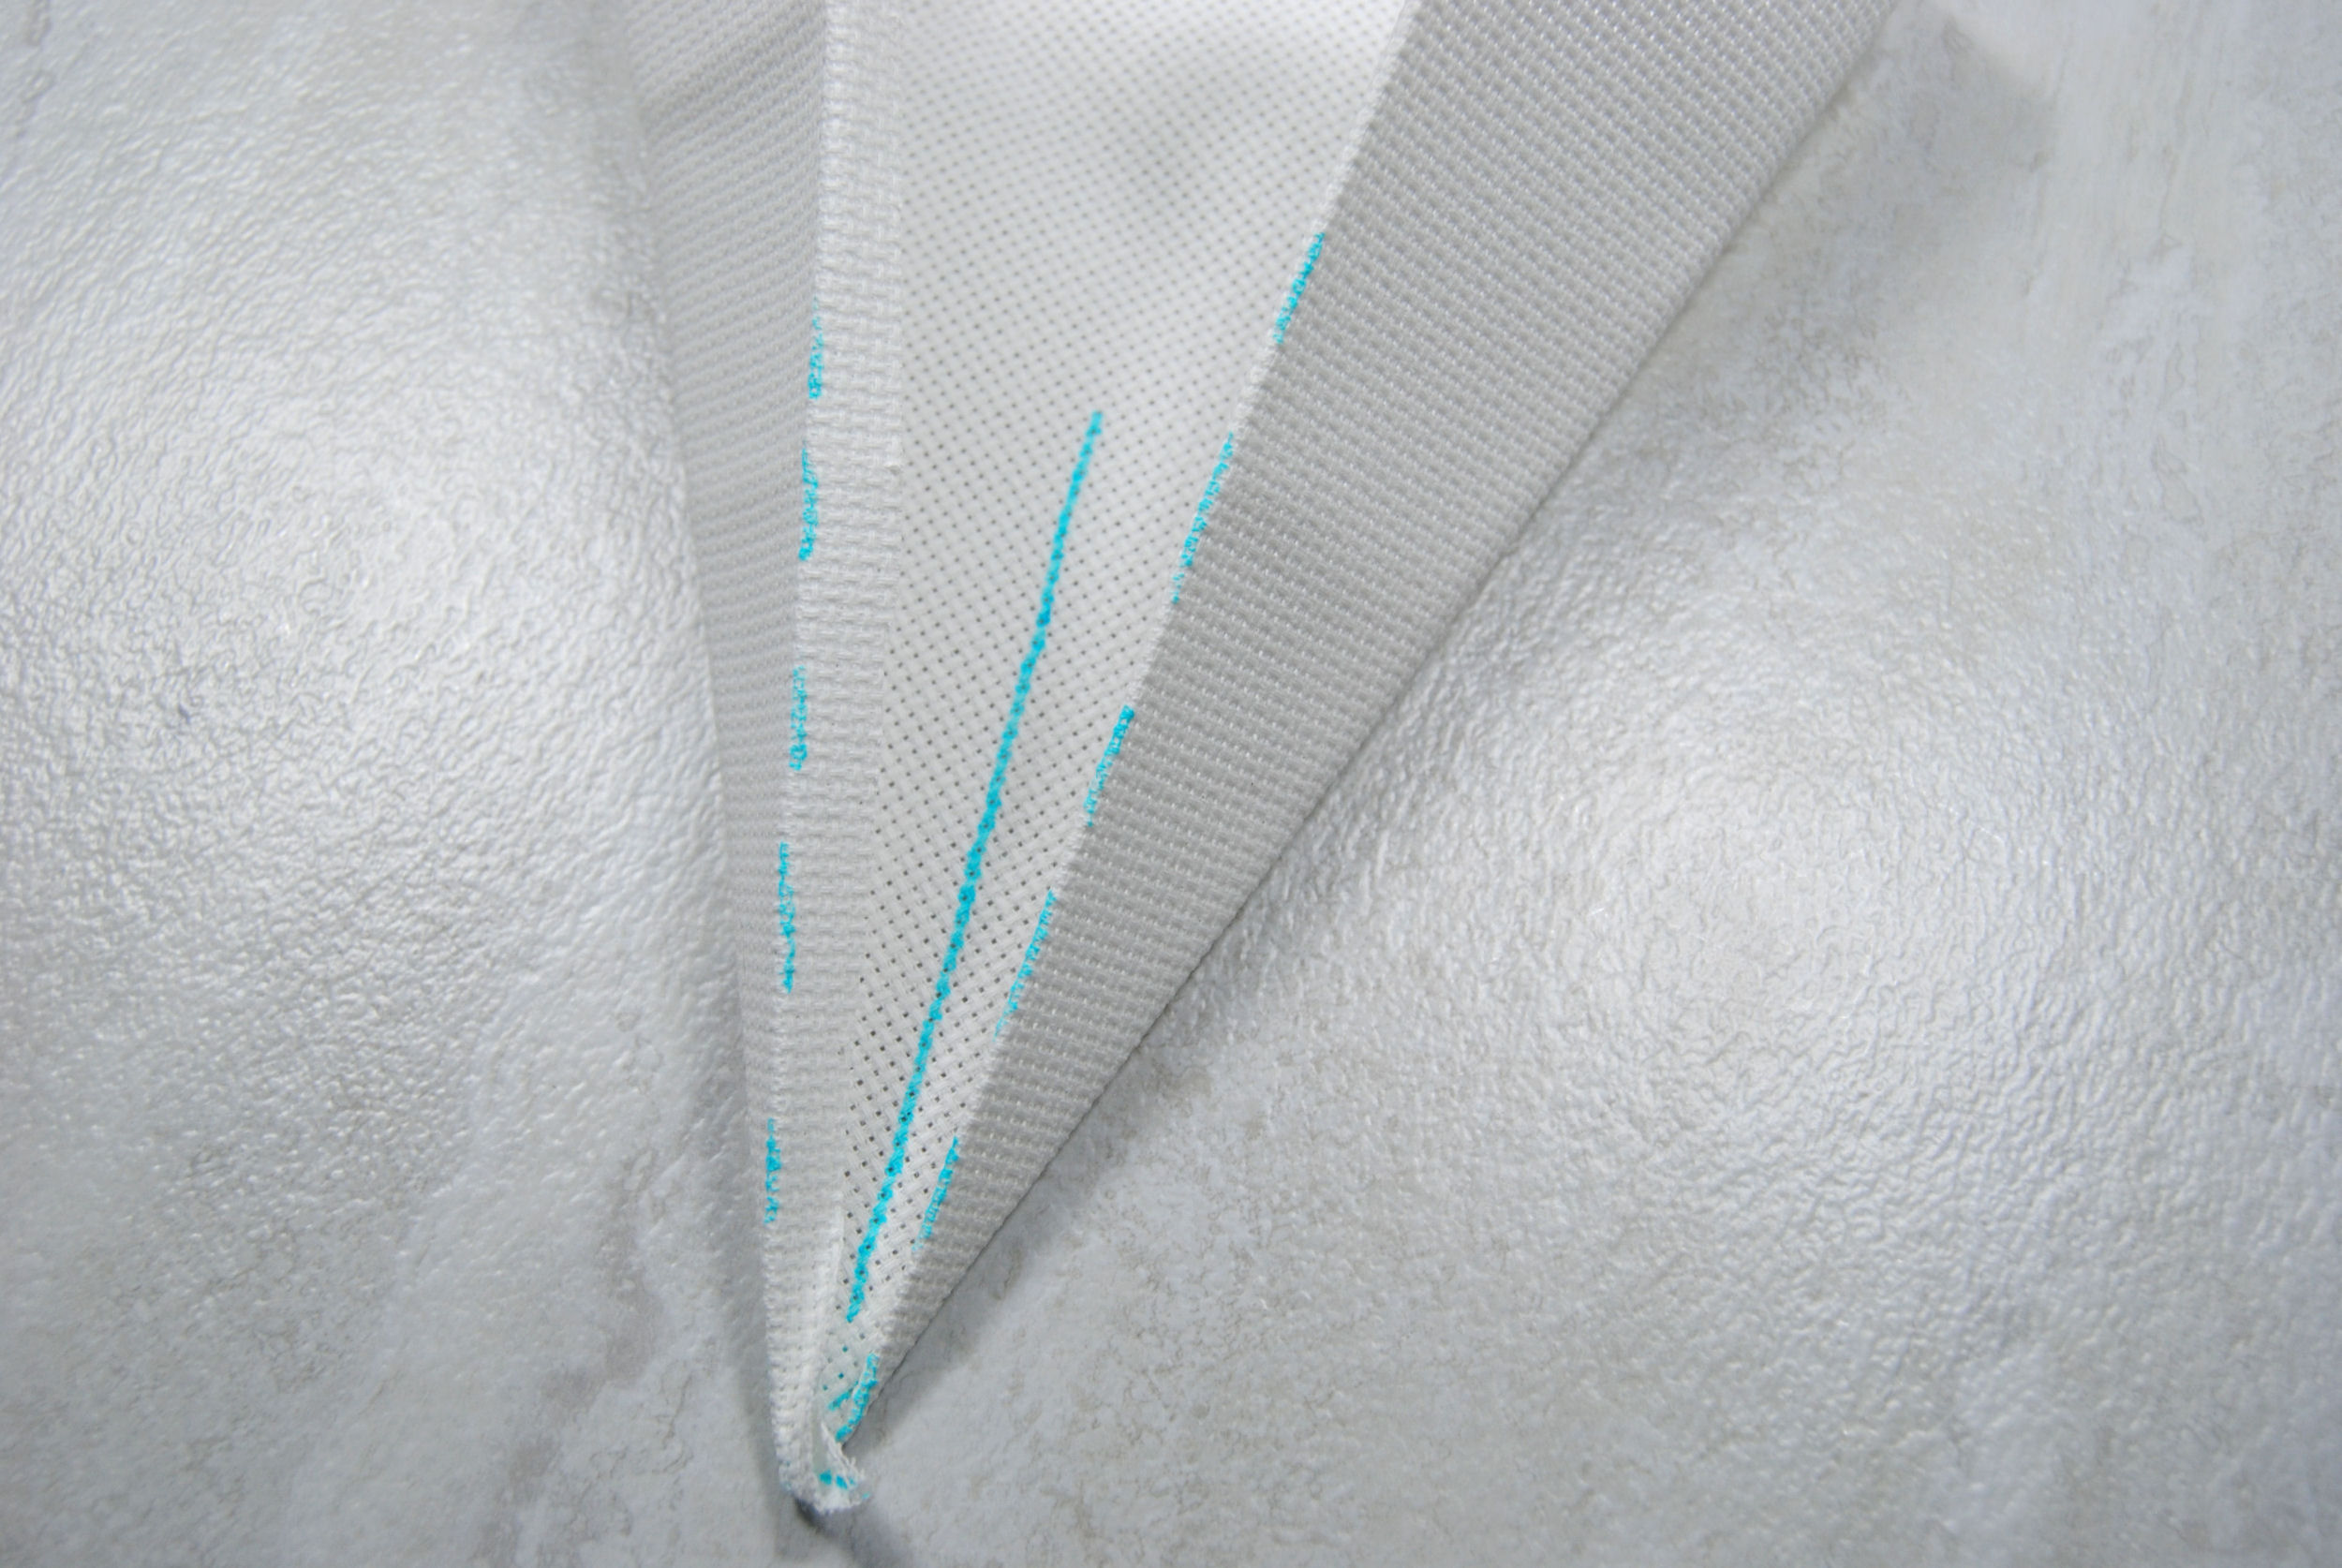
Unfold your fabric and then continue the lines you just started to get the overall size of your stich area. If you’re considering cutting this out, remember to add that extra buffer around this edge.

Marking The Inner Fold Lines
Now that you’ve determined the overall size of your case, you may want to mark the inner fold lines. When designing a pattern you’ll want to know what part goes on the “front”, and which parts have a seam down the middle. Not to mention which part of your design will fold over to form the closing flap.
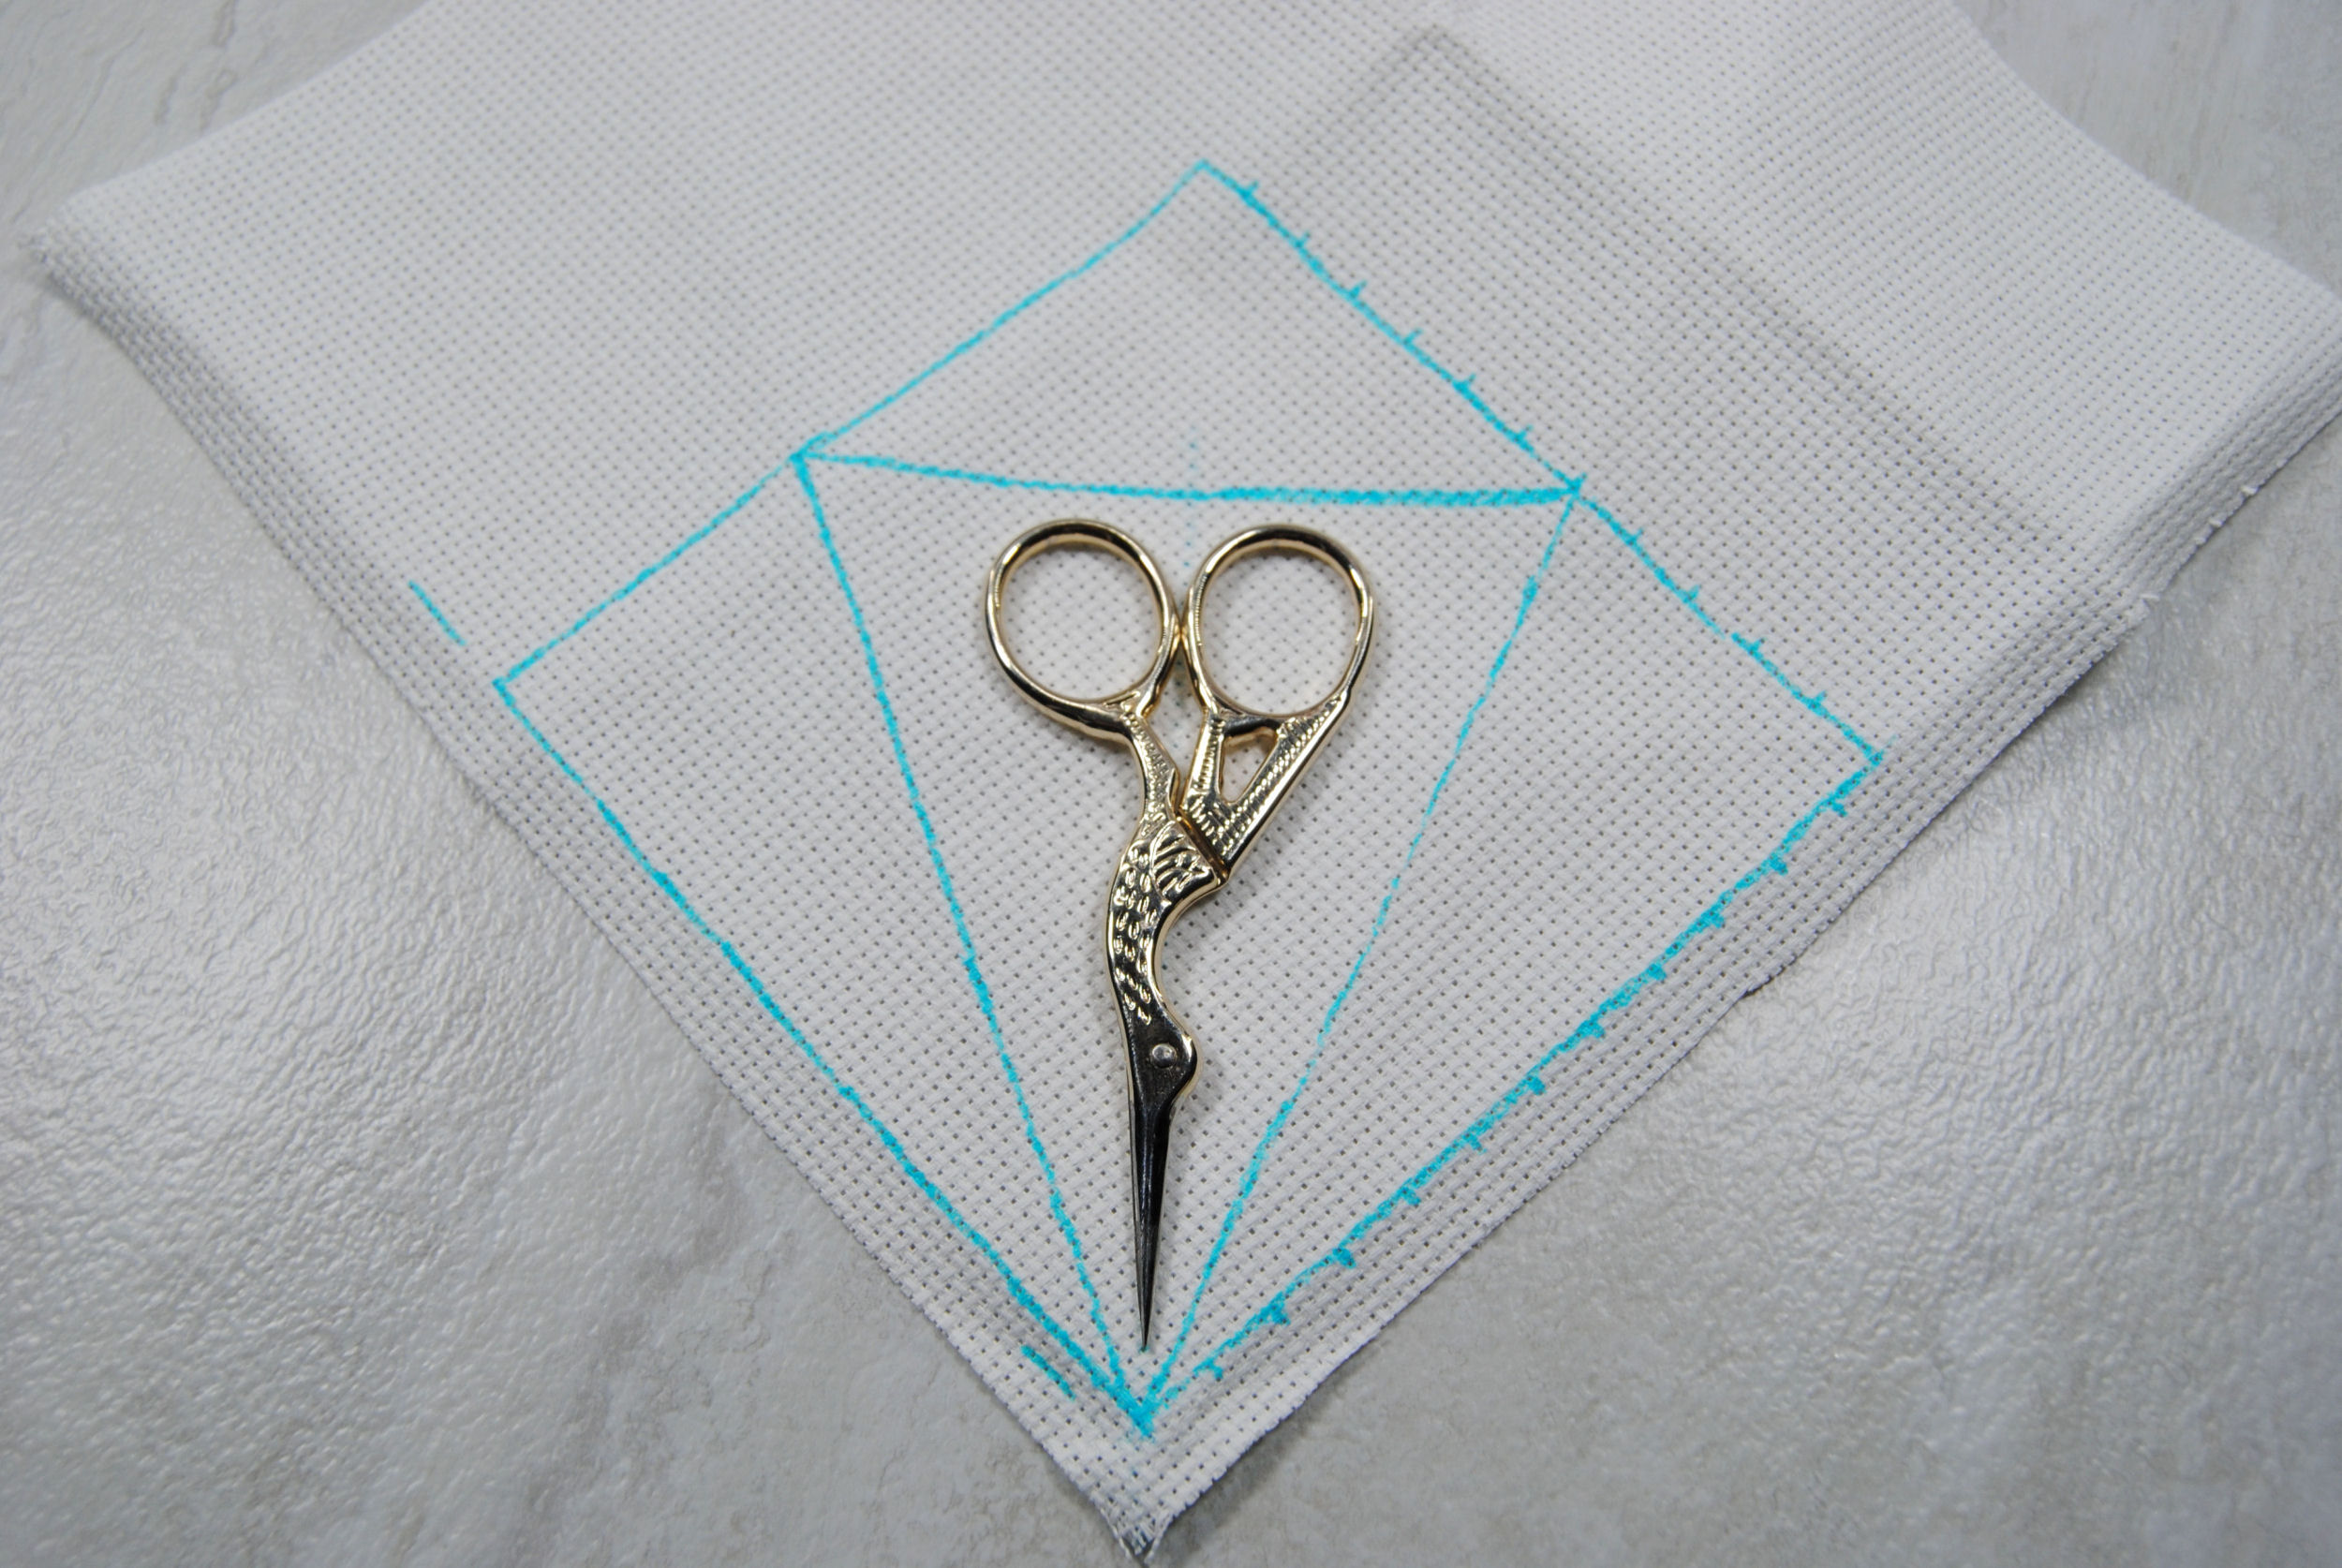
Fold your sides back in as they were before when you were measuring your scissors, and draw a line across those creases.

Now flip over to the ‘front’ of the scissor case, and draw a line across matching the one on your folded side.
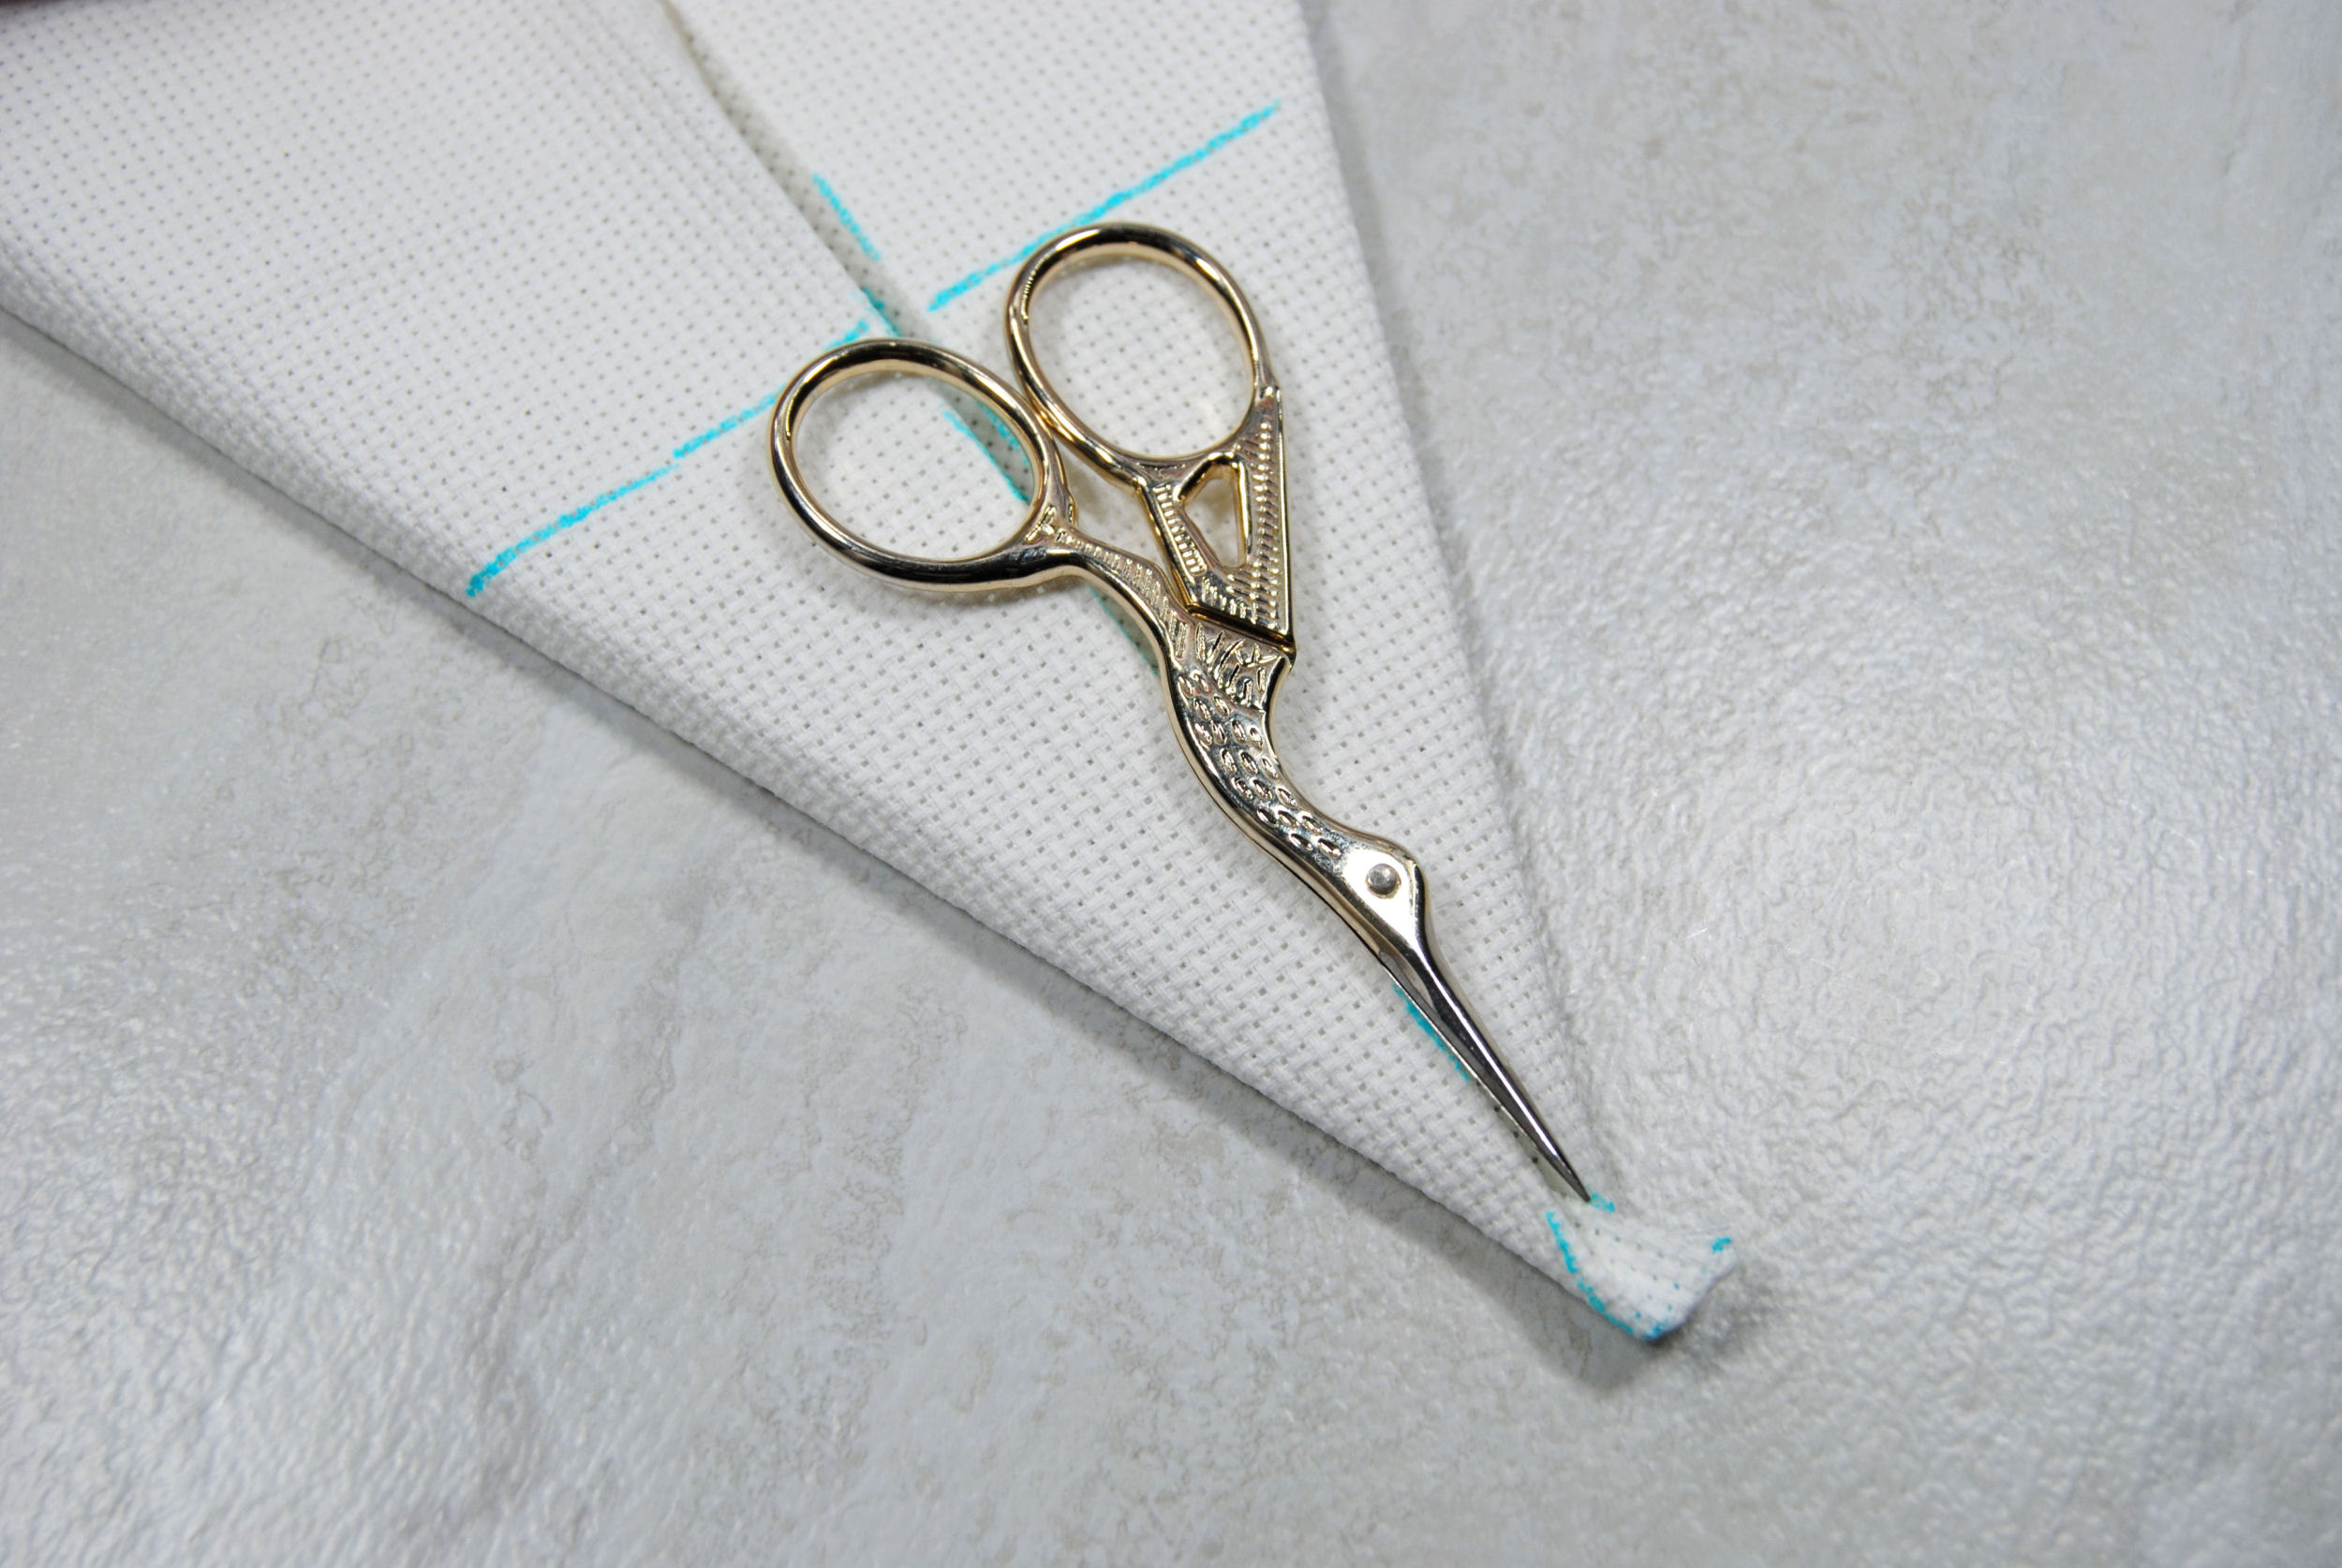
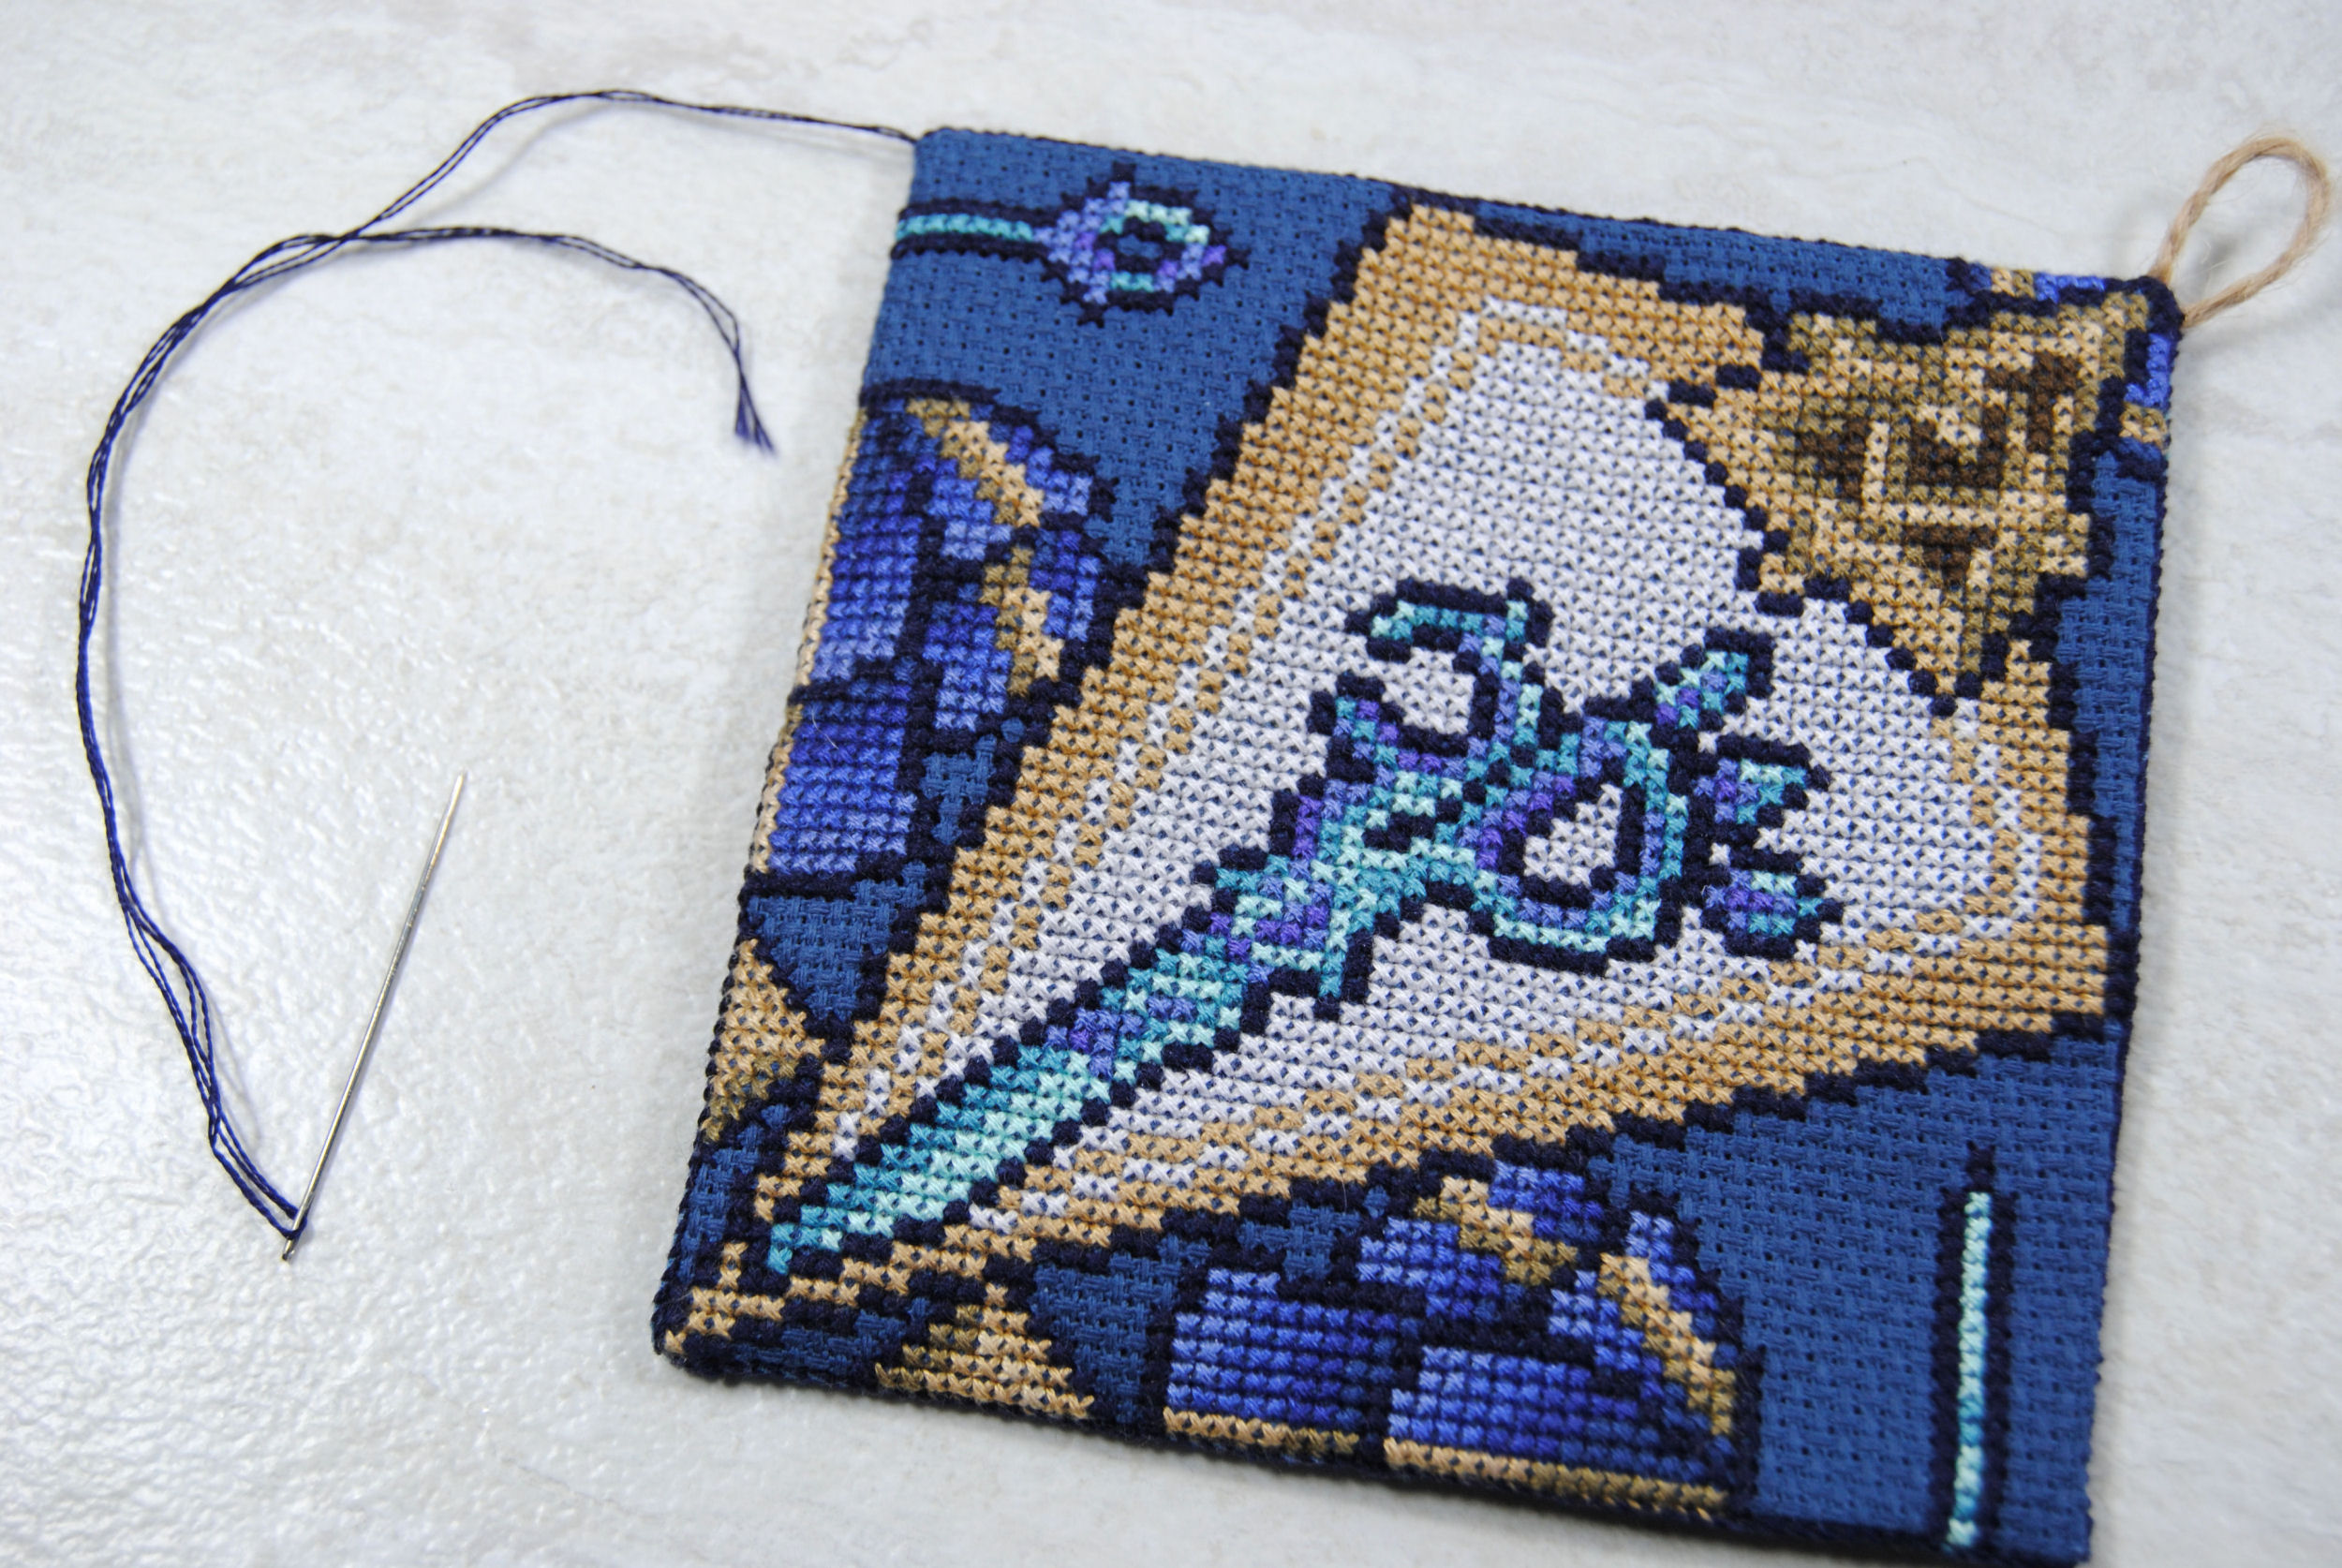
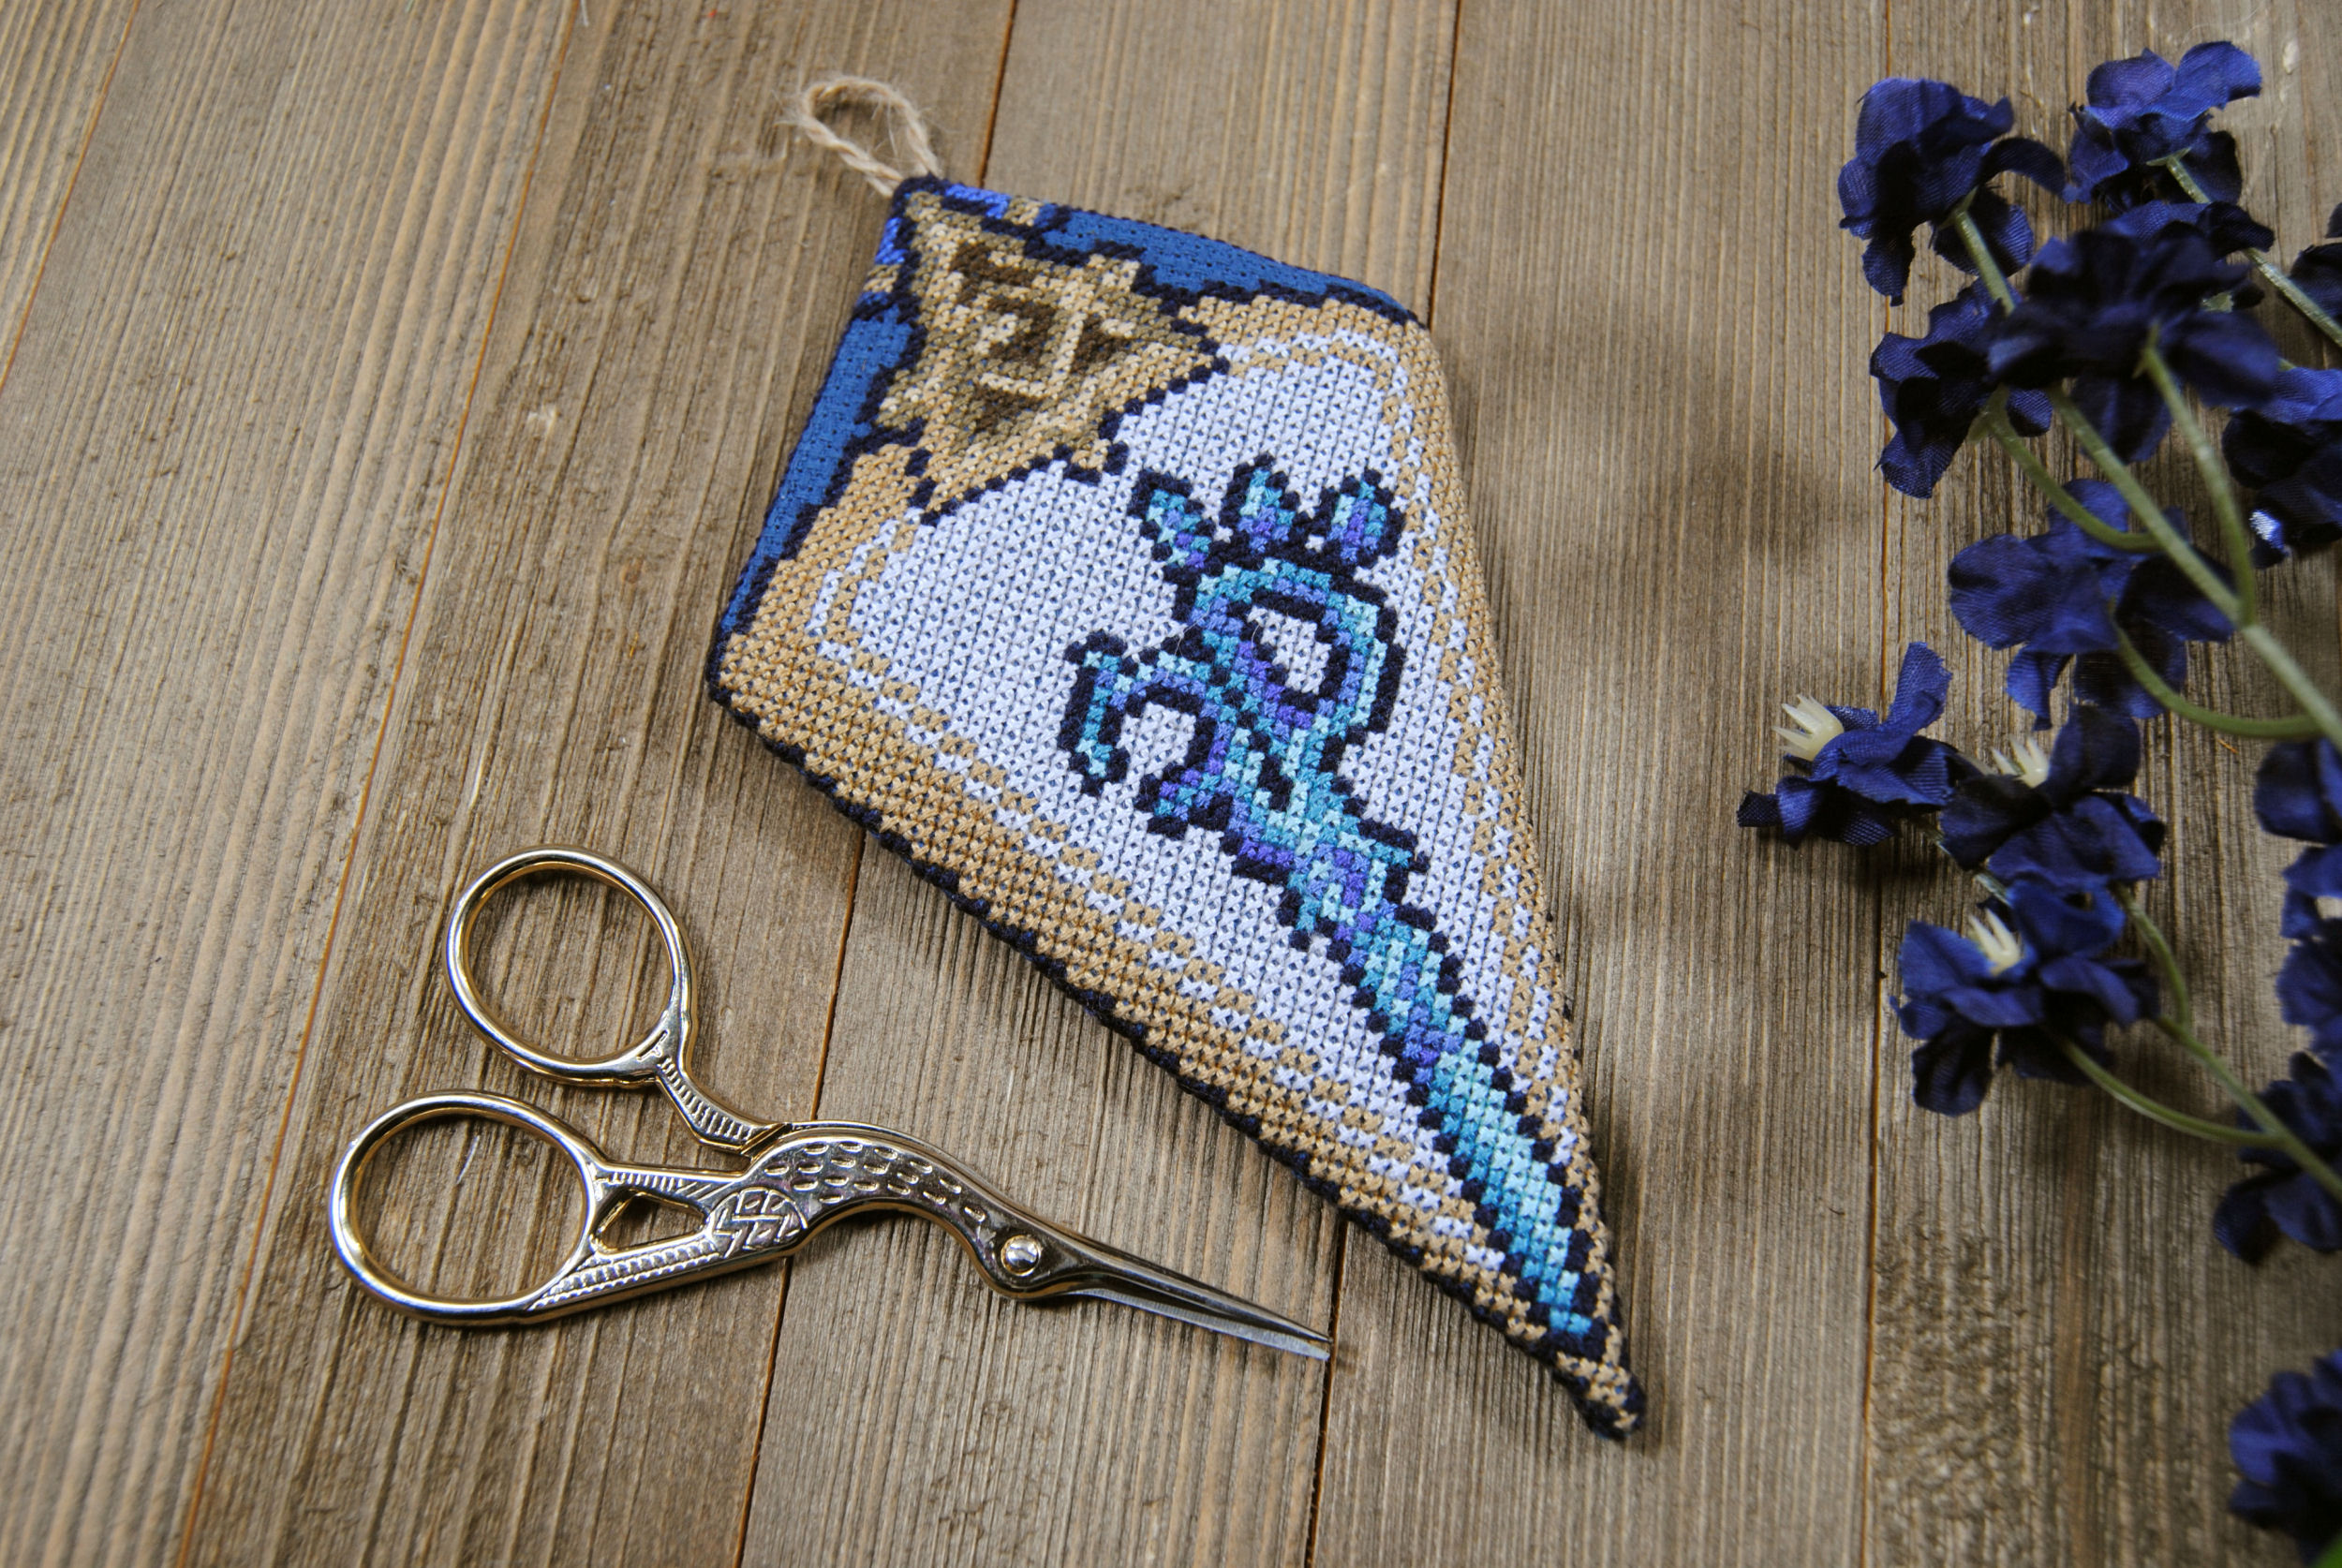
Once unfolded, your overall design should look something like mine. And your scissors should fit comfortably with a little buffer on all sides. And now you know the exact pattern size to work with when designing!
Here’s a digital version for this stork sized one, if you want to print it out and design straight onto that grid. I’d love to see what you come up with, and generally see more designers tackle this unique shape! That’s why I try to release templates with all my finishing tutorials. Have at it! Speaking of designing though…
Designing in 3D
I don’t know about you, but 3D designs definitely mess with my brain. I have aphantasia, and cannot visualize anything. Let alone a complex multi dimensional shape. So for me at least, I have to design manually here and be able to fold up my piece of paper and make sure everything lines up as I want it to on the finished piece. I normally do all my designing digitally, so it’s definitely a learning curve.
Generally I recommend not trying to make the designs on the two outer triangles line up when folded. Most designs I see just have two stand alone designs on either side. But I was determined to make mine line up for some reason. So folding paper and designing straight across that seam makes it so much easier. At least for getting the main shapes right.
I even folded up that same scrap piece of fabric and drew the outlines on it using frixion pens so that I could make sure the top flap lined up right even with the extra bulk the fabric would have that the paper does not.
Once I had my outlines down, I copied them into a pixel art program and actually finished up the design itself. If you’re better at visualizing or are comfortable cropping and moving around elements in your design to test how they work… you may be able to design straight digitally! Go with whatever makes the most sense to you!
Cross Stitch Scissor Case – Materials
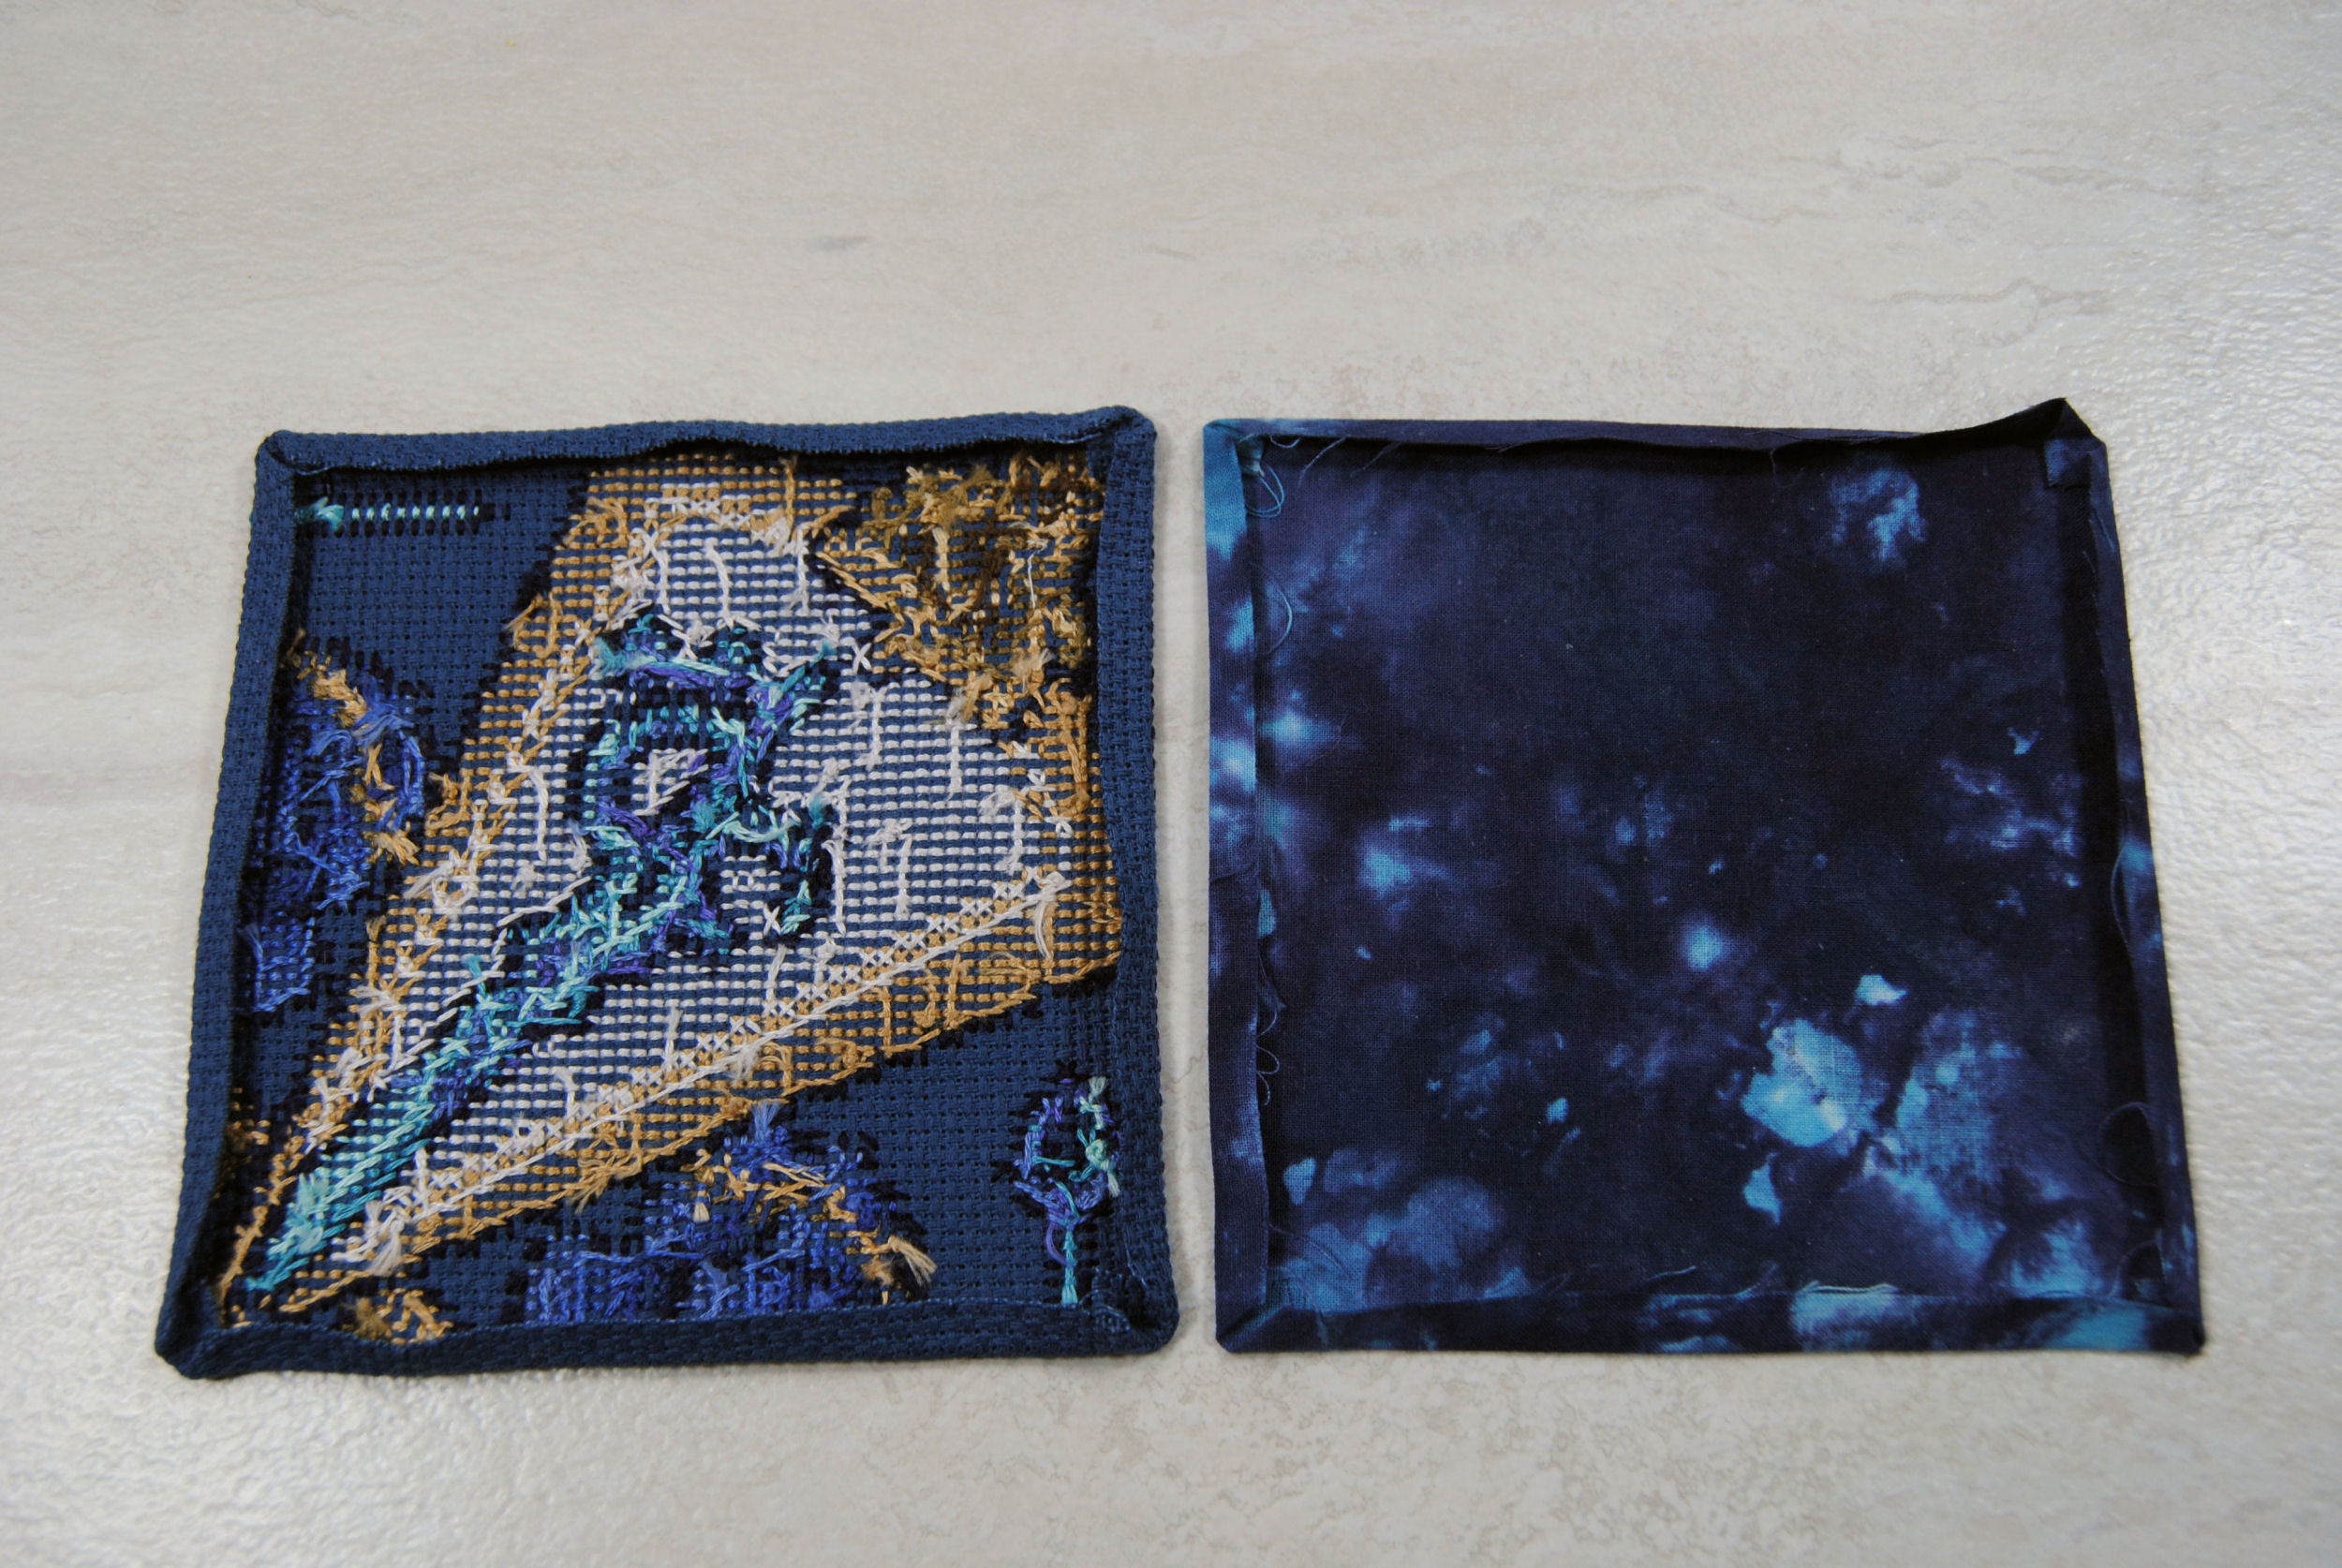
Now you have your design and have theoretically stitched it. You’ve hopefully also stitched a backstitch square outline around the whole thing. Just like assembling a biscornu, we’ll be using that backstitch outline to stitch up the scissor case.
(The pattern I’m stitching will be available on my Etsy once its Patreon exclusivity period is over.)
If you look real closely you’ll notice the backstitch on mine matches the stitches around it. So where there are no stitches, it’s dark blue. But along side the ribbon it’s the same gold as the design itself.
This isn’t entirely necessary, but if you’re wanting to make the seam down the middle a little less obvious it certainly helps.
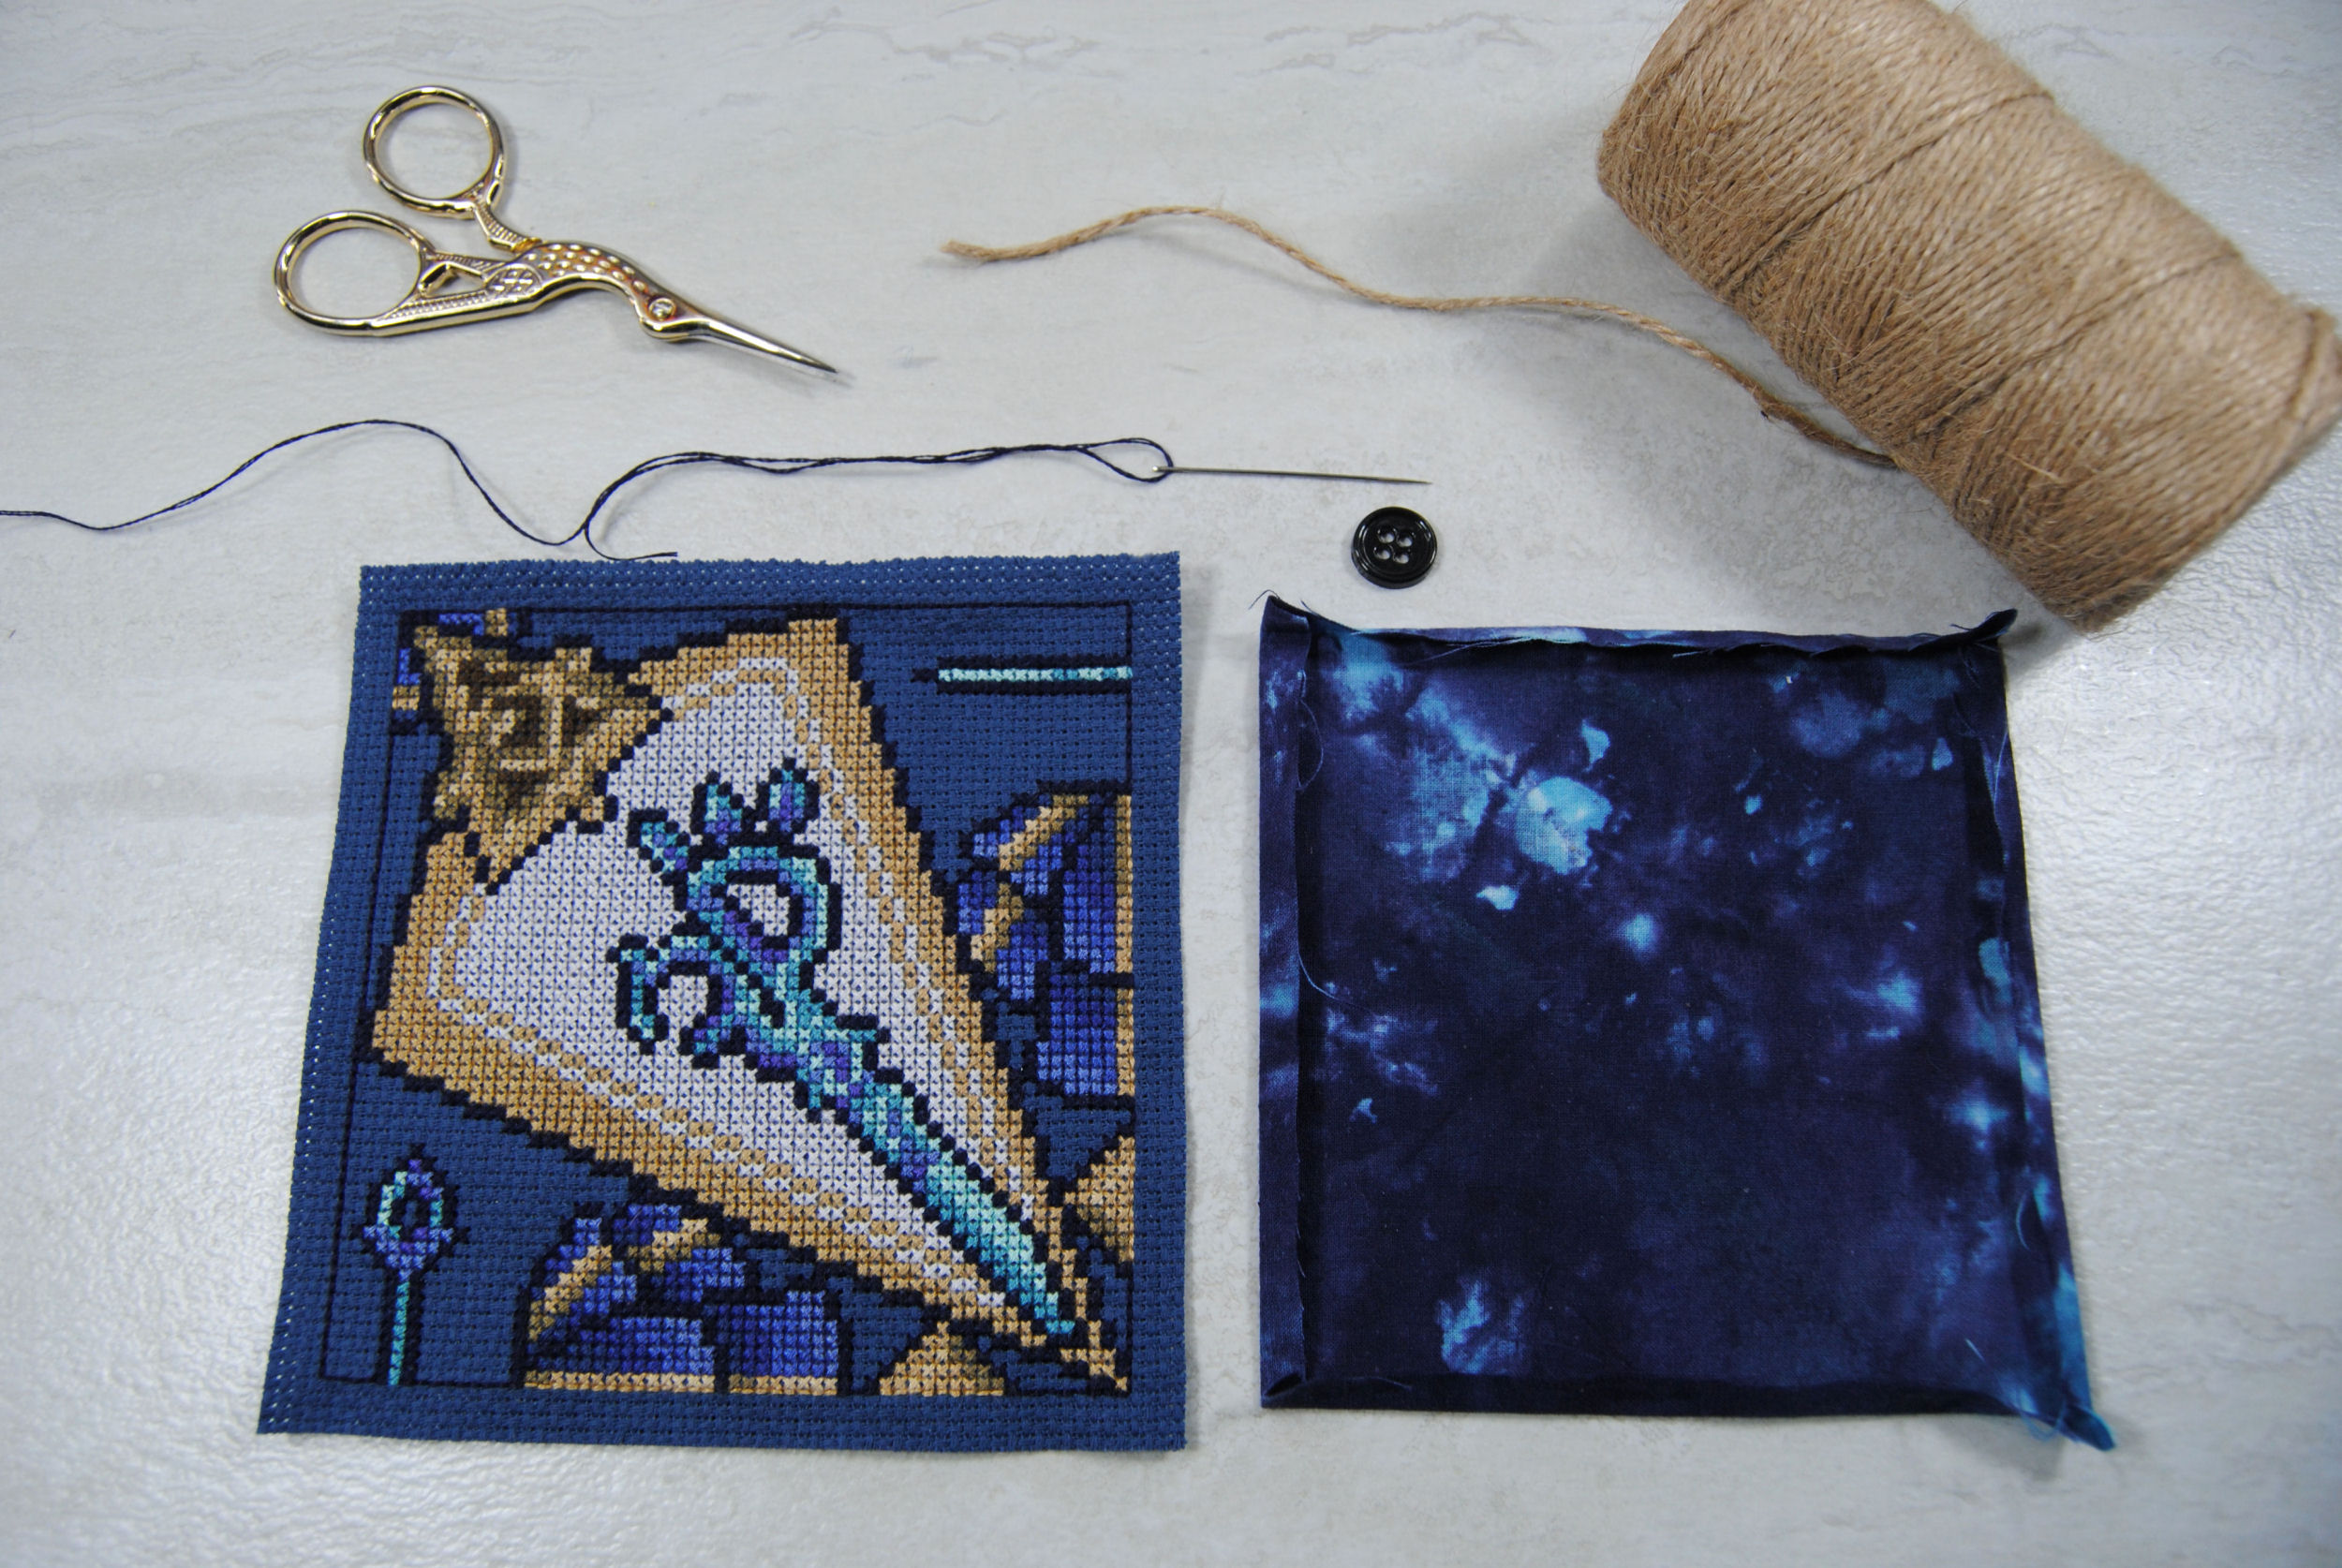
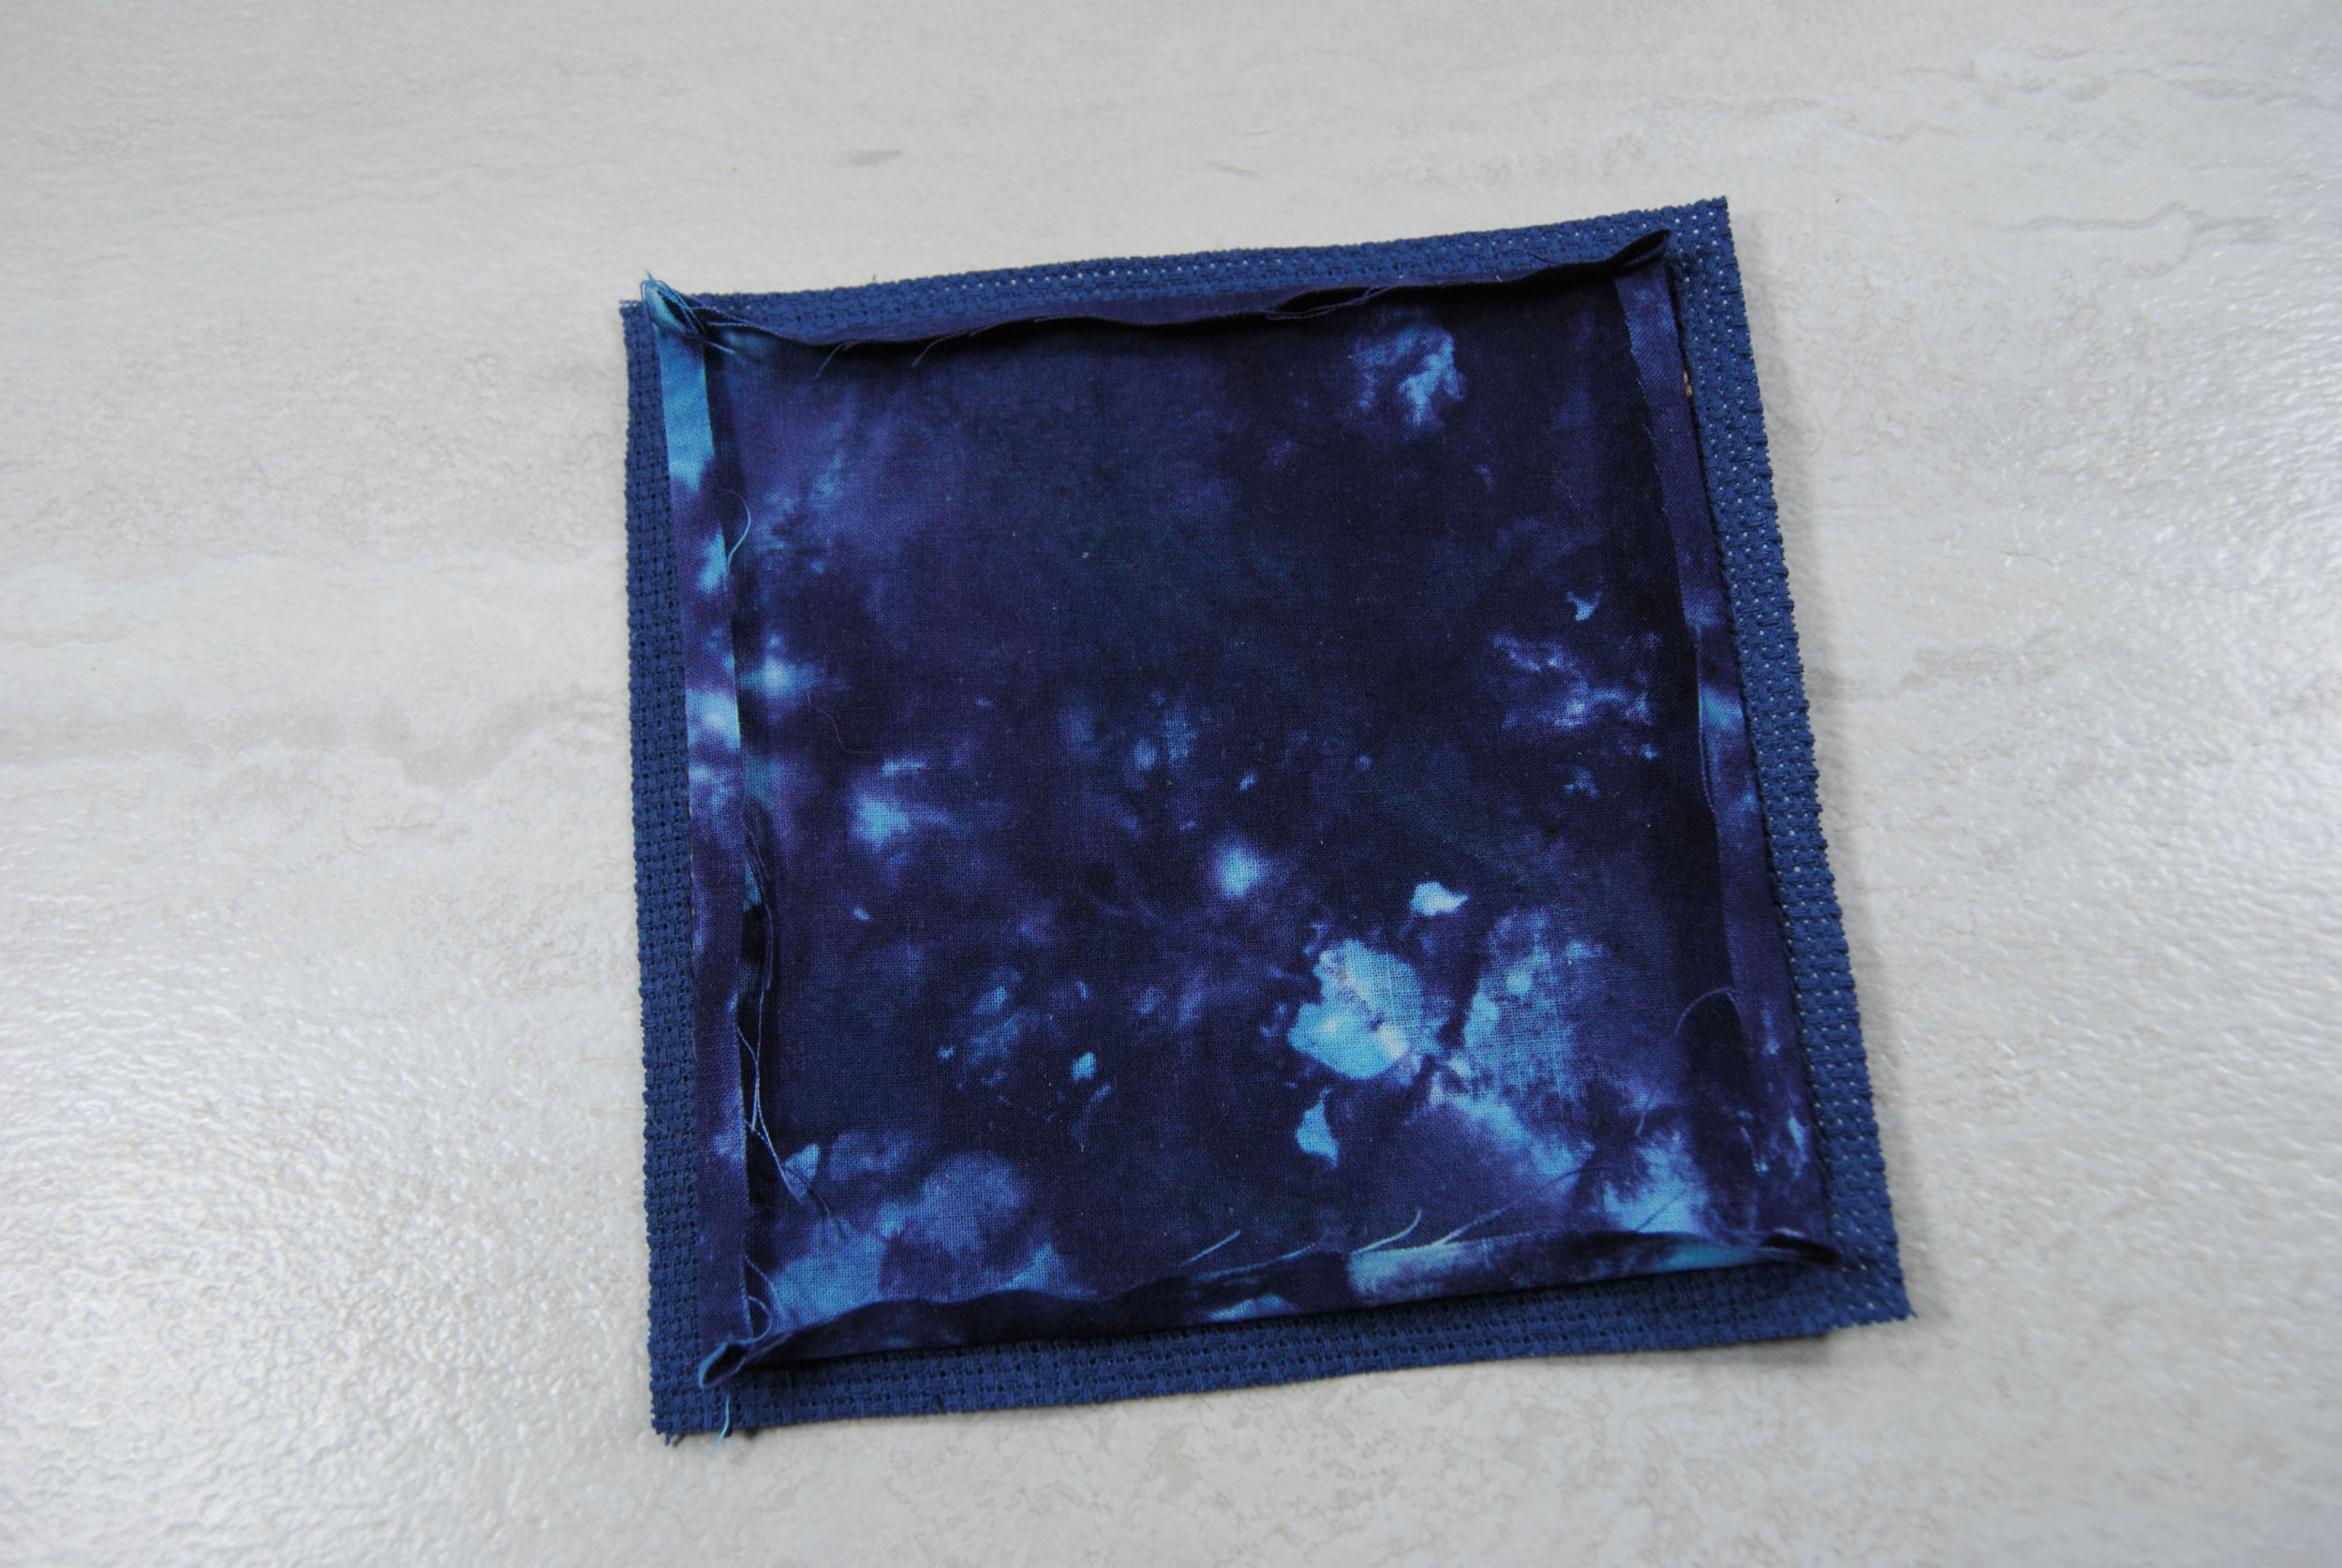
Other than your main design, you’ll need a second piece of fabric the same size as your pattern that will act as the inner lining. Thin cotton will work best for this as you don’t want to add too much bulk as it will be harder to fold.
You’re mainly just covering up the back of your stitches so the scissors don’t catch on those threads as you’re putting it in the scissor case.
You’ll also need whatever closure you’re using. I’m using a button and some jute twine. Because I have a lot of it and the colors work well with my design. You might prefer something like snap buttons. Or at least some slightly elastic cord to make it easier to latch it into place.
Lastly, you’ll also need needle and thread to assemble it. Preferably in the same color as your backstitch outline.
Preparing Your Fabric
You’ll notice in my photo above that my lining fabric is already folded up to match the inner backstitch border of my stitched piece. I clearly forgot to take the materials photo before getting started. Regardless, this was my first step.
Lay your lining fabric on top of your design and fold up each of the edges along where the backstitch is.
Then iron it down to ensure it stays down while you’re working with it. Do the same for your stitched piece.
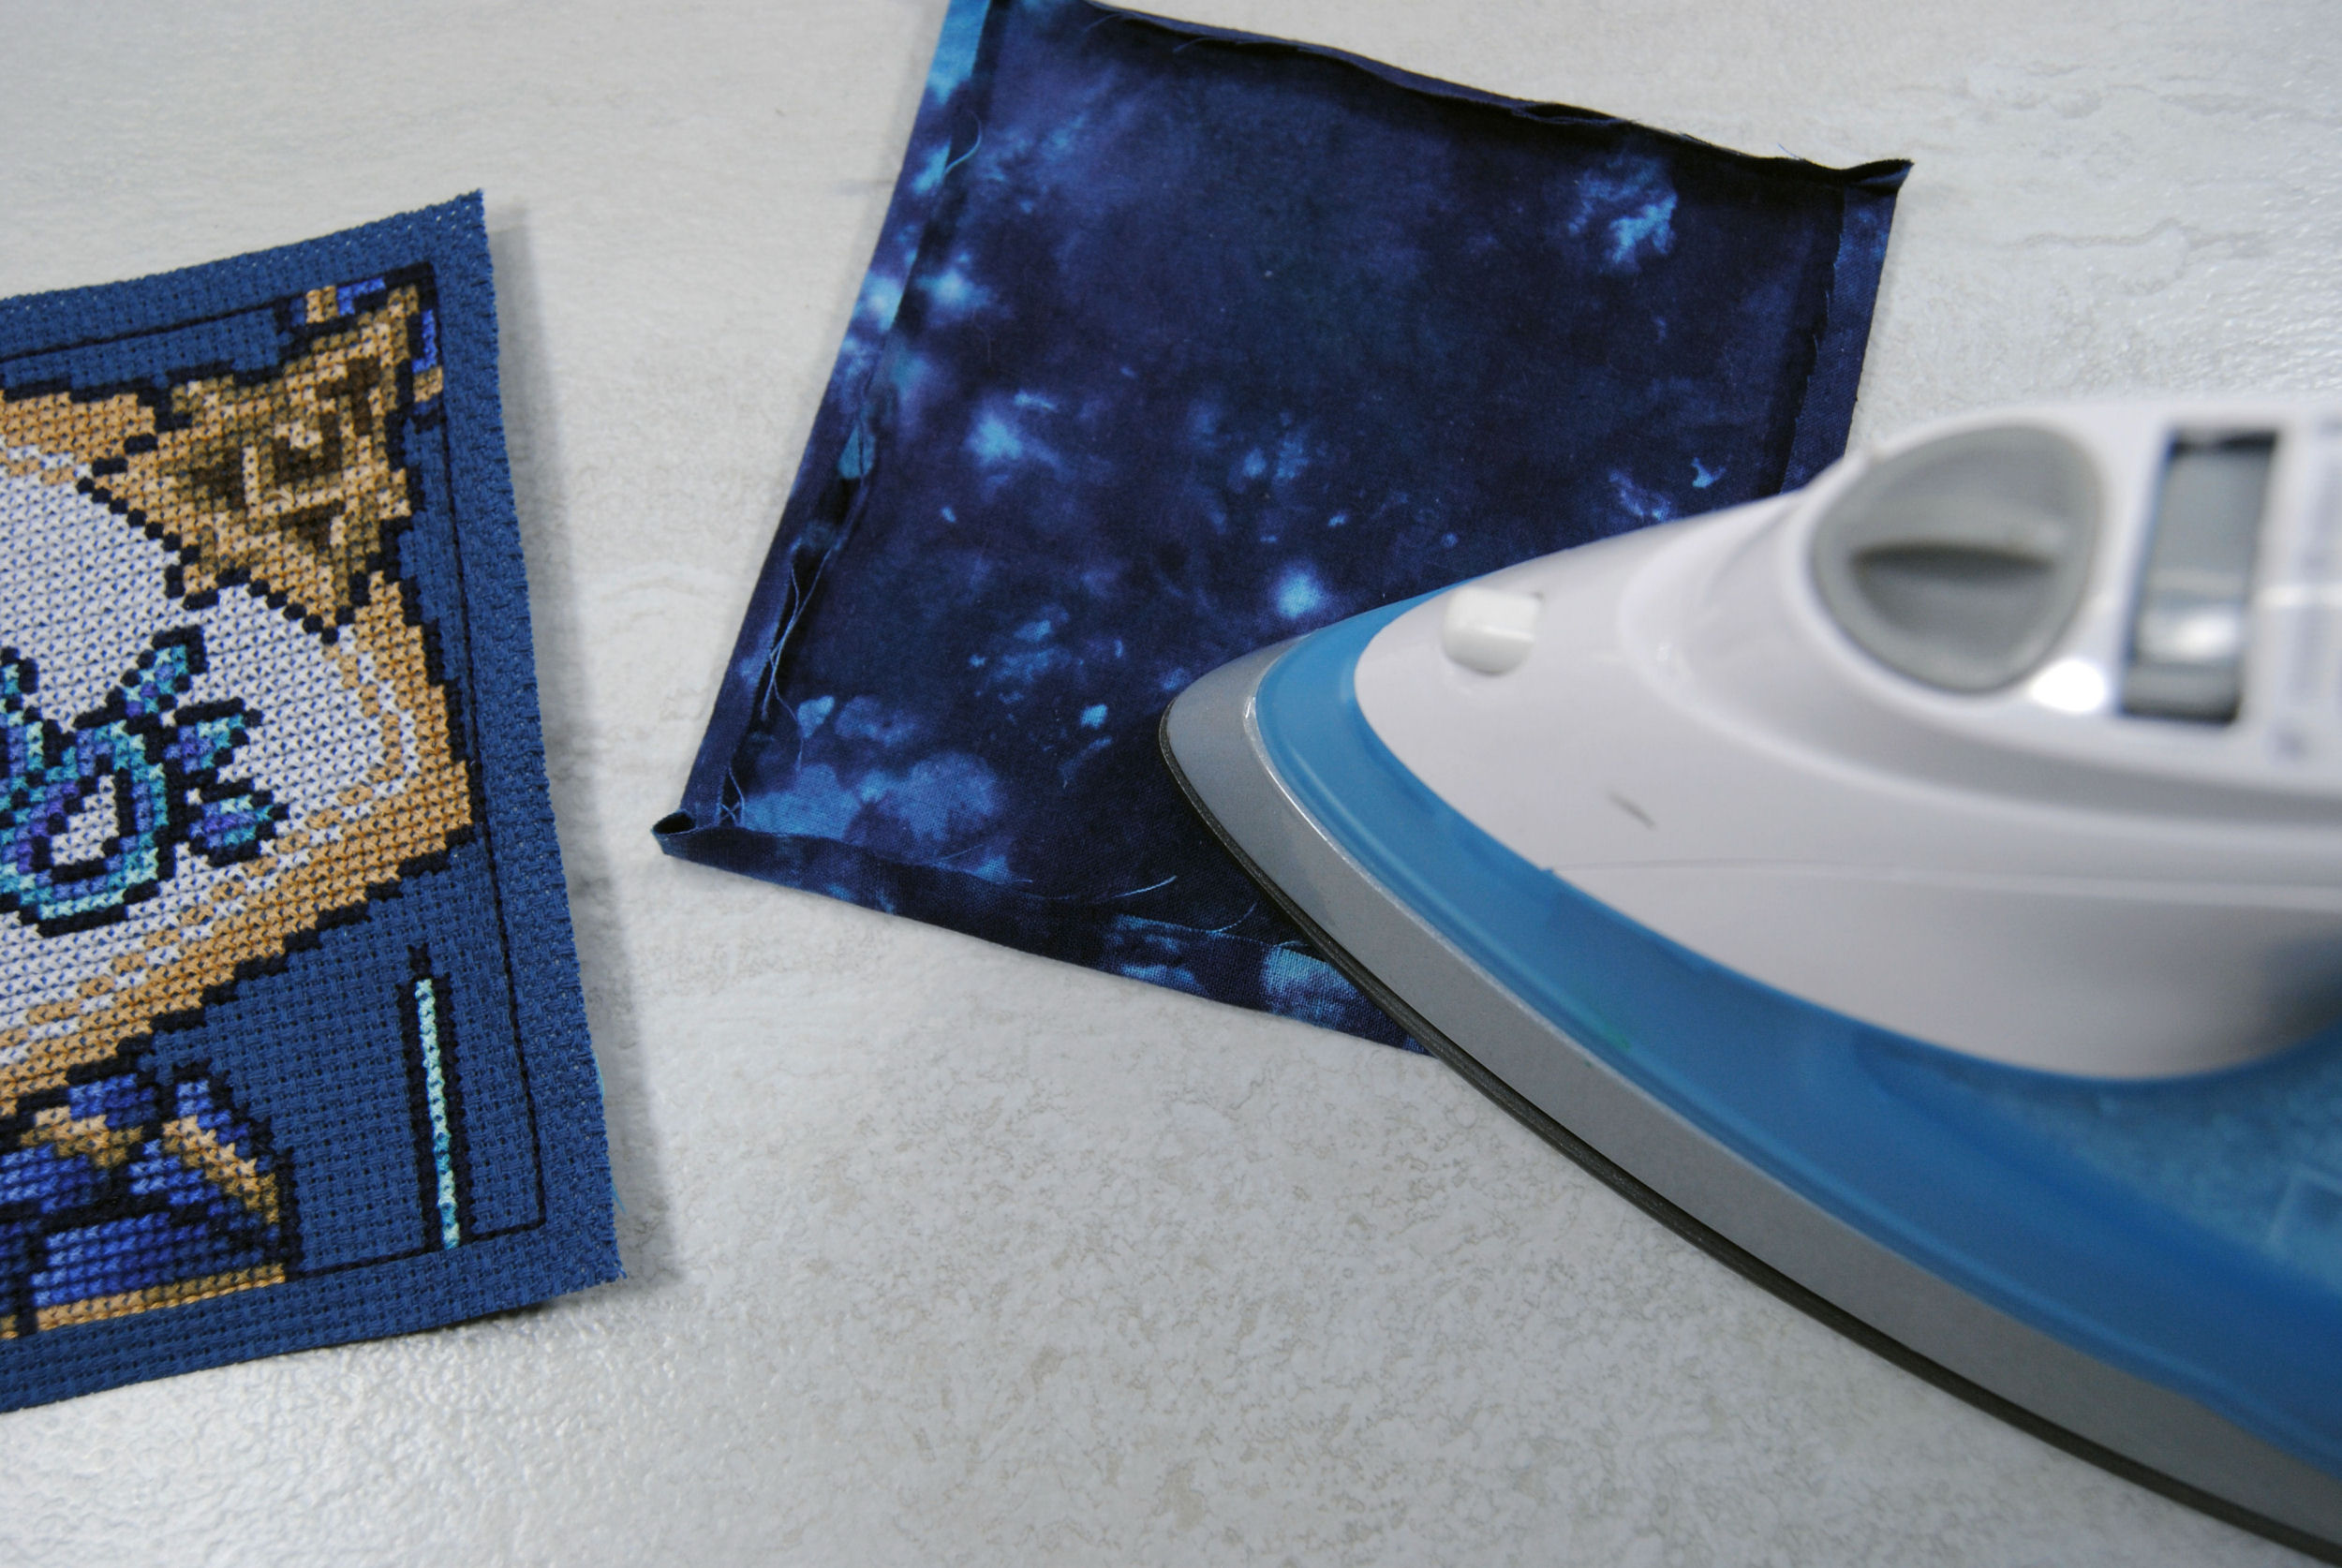
For both, you may want to flatten the corners a bit as well. Basically, fold down the corners first, or cut them off entirely. (I recommend cutting them off, as you’ll see later.)
Then fold in the sides and press them into place with your iron.

In the end, the important part is justto make sure both are the same size.
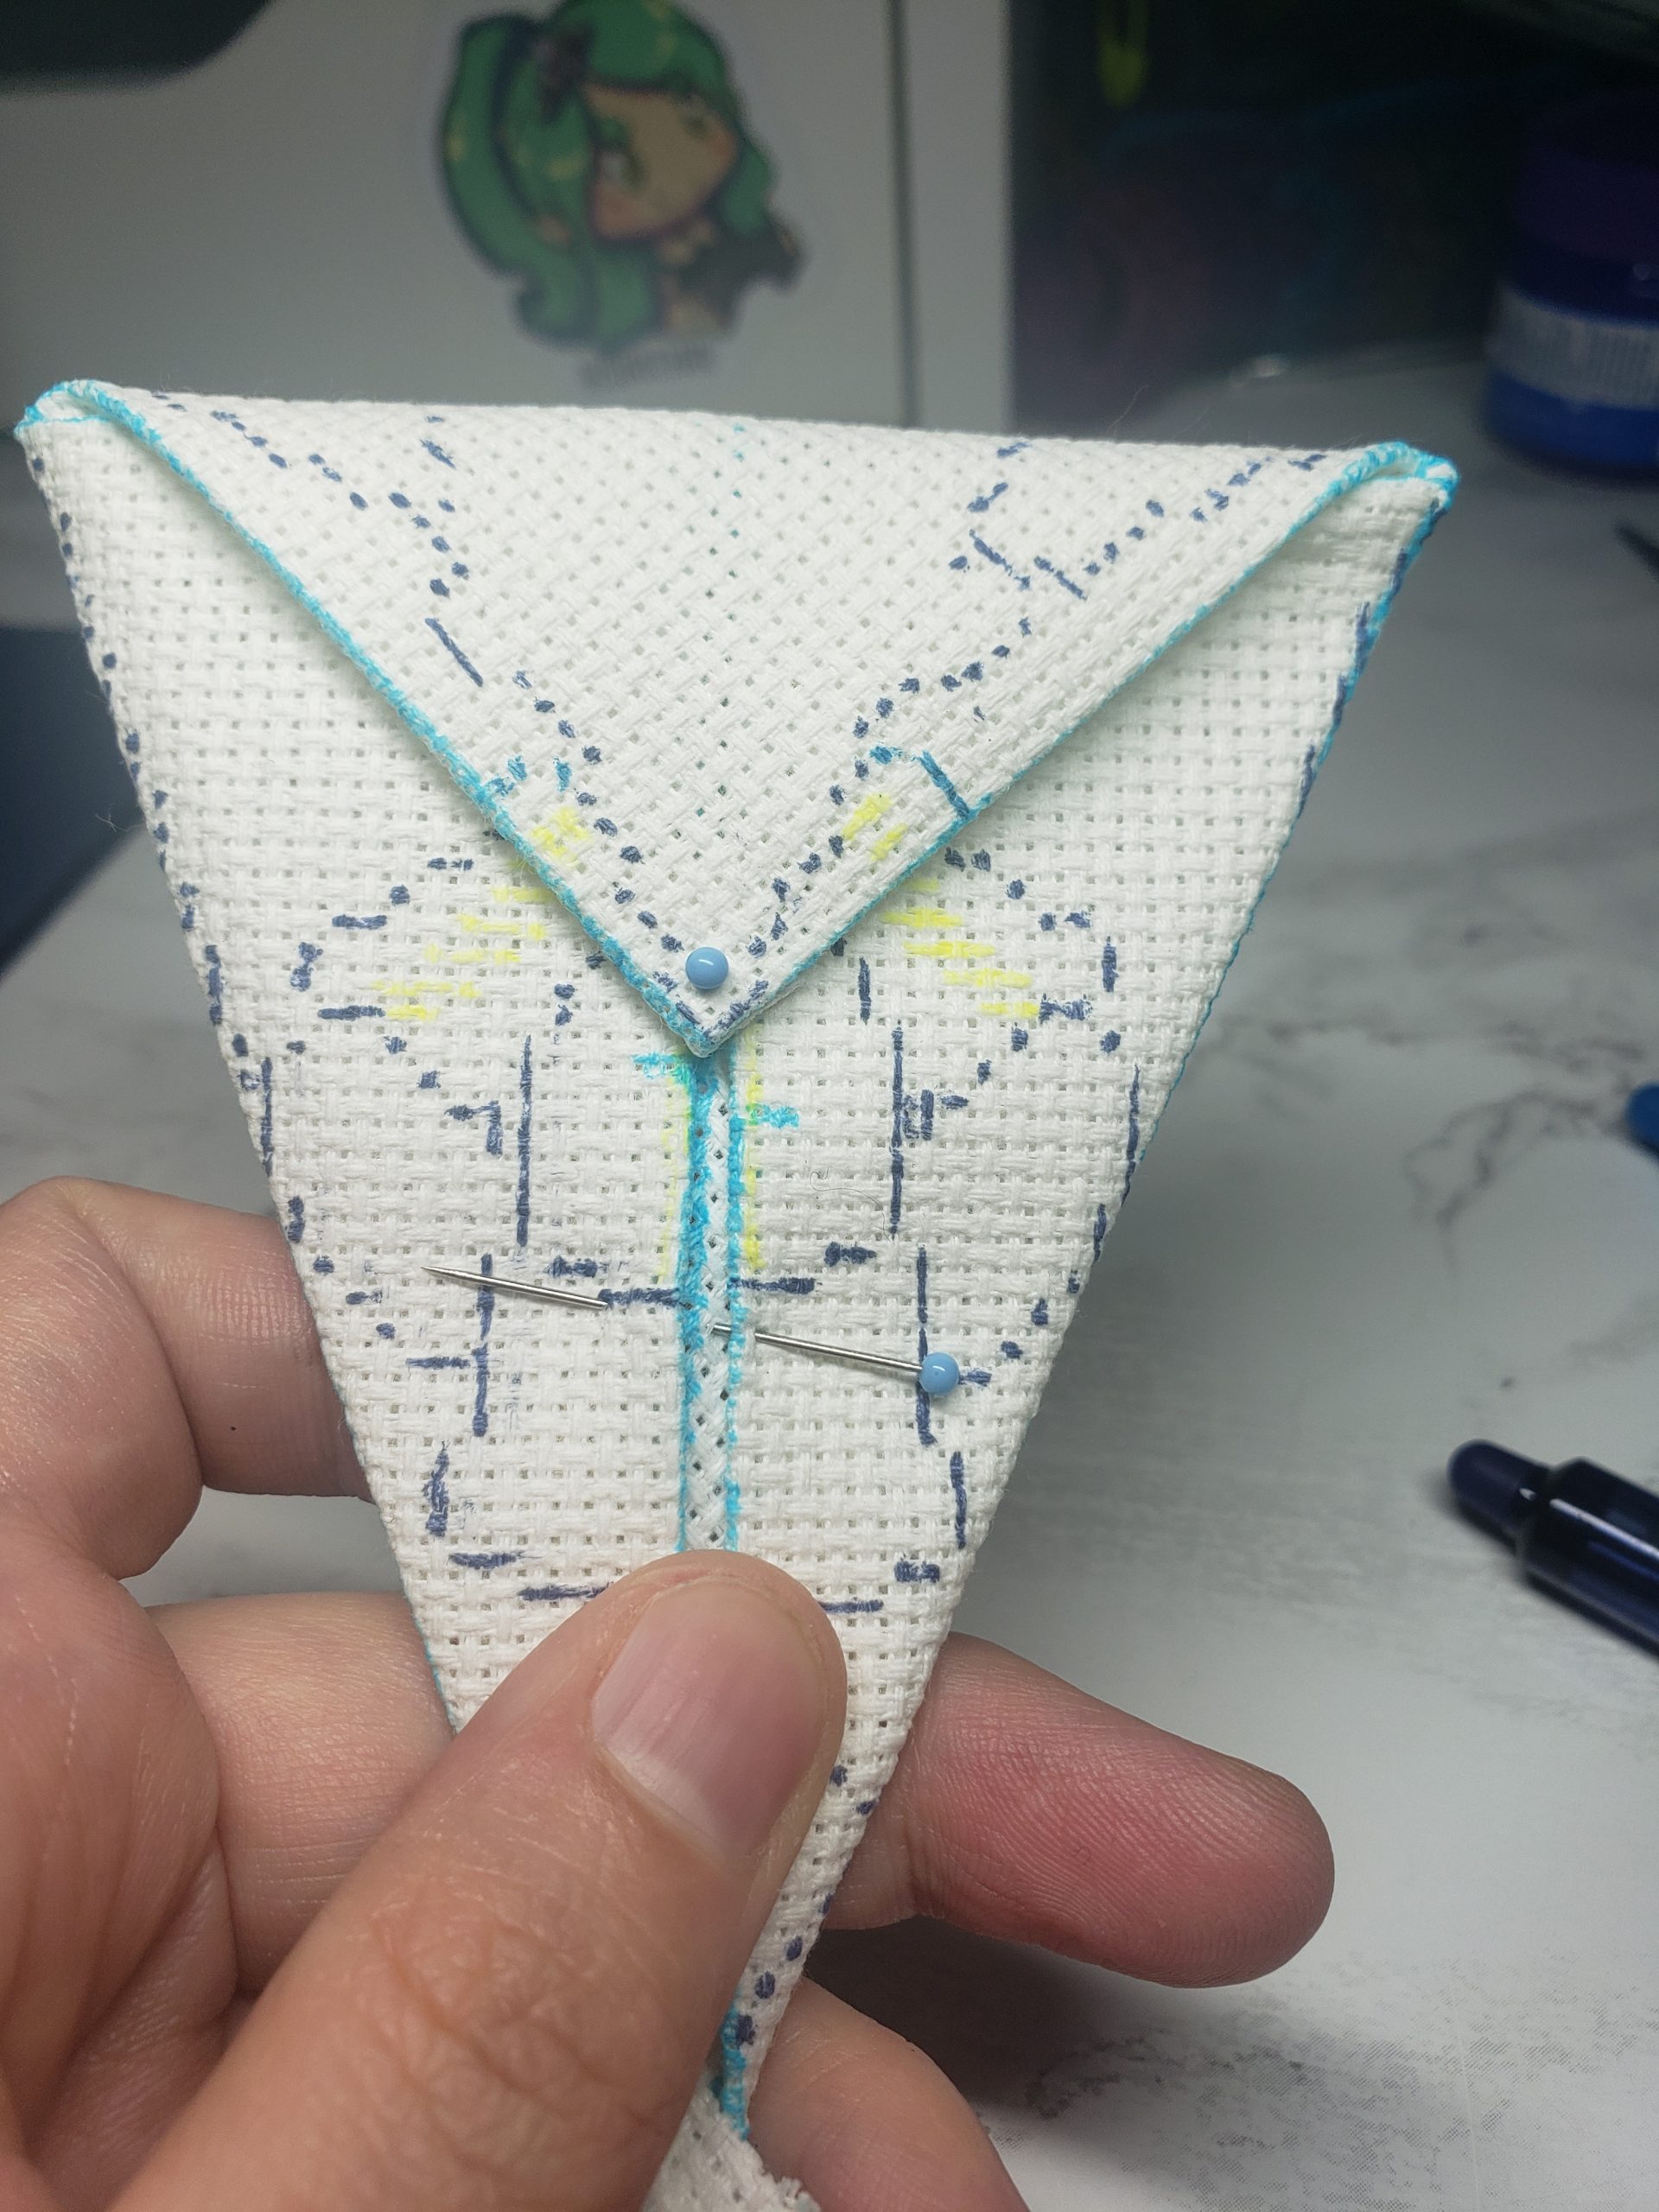
Attaching The Lining
Using pins or wonder clips, line up your two fabrics ‘wrong’ sides together. This is your last chance to make sure that lining fabric is the same size and your folds are straight.
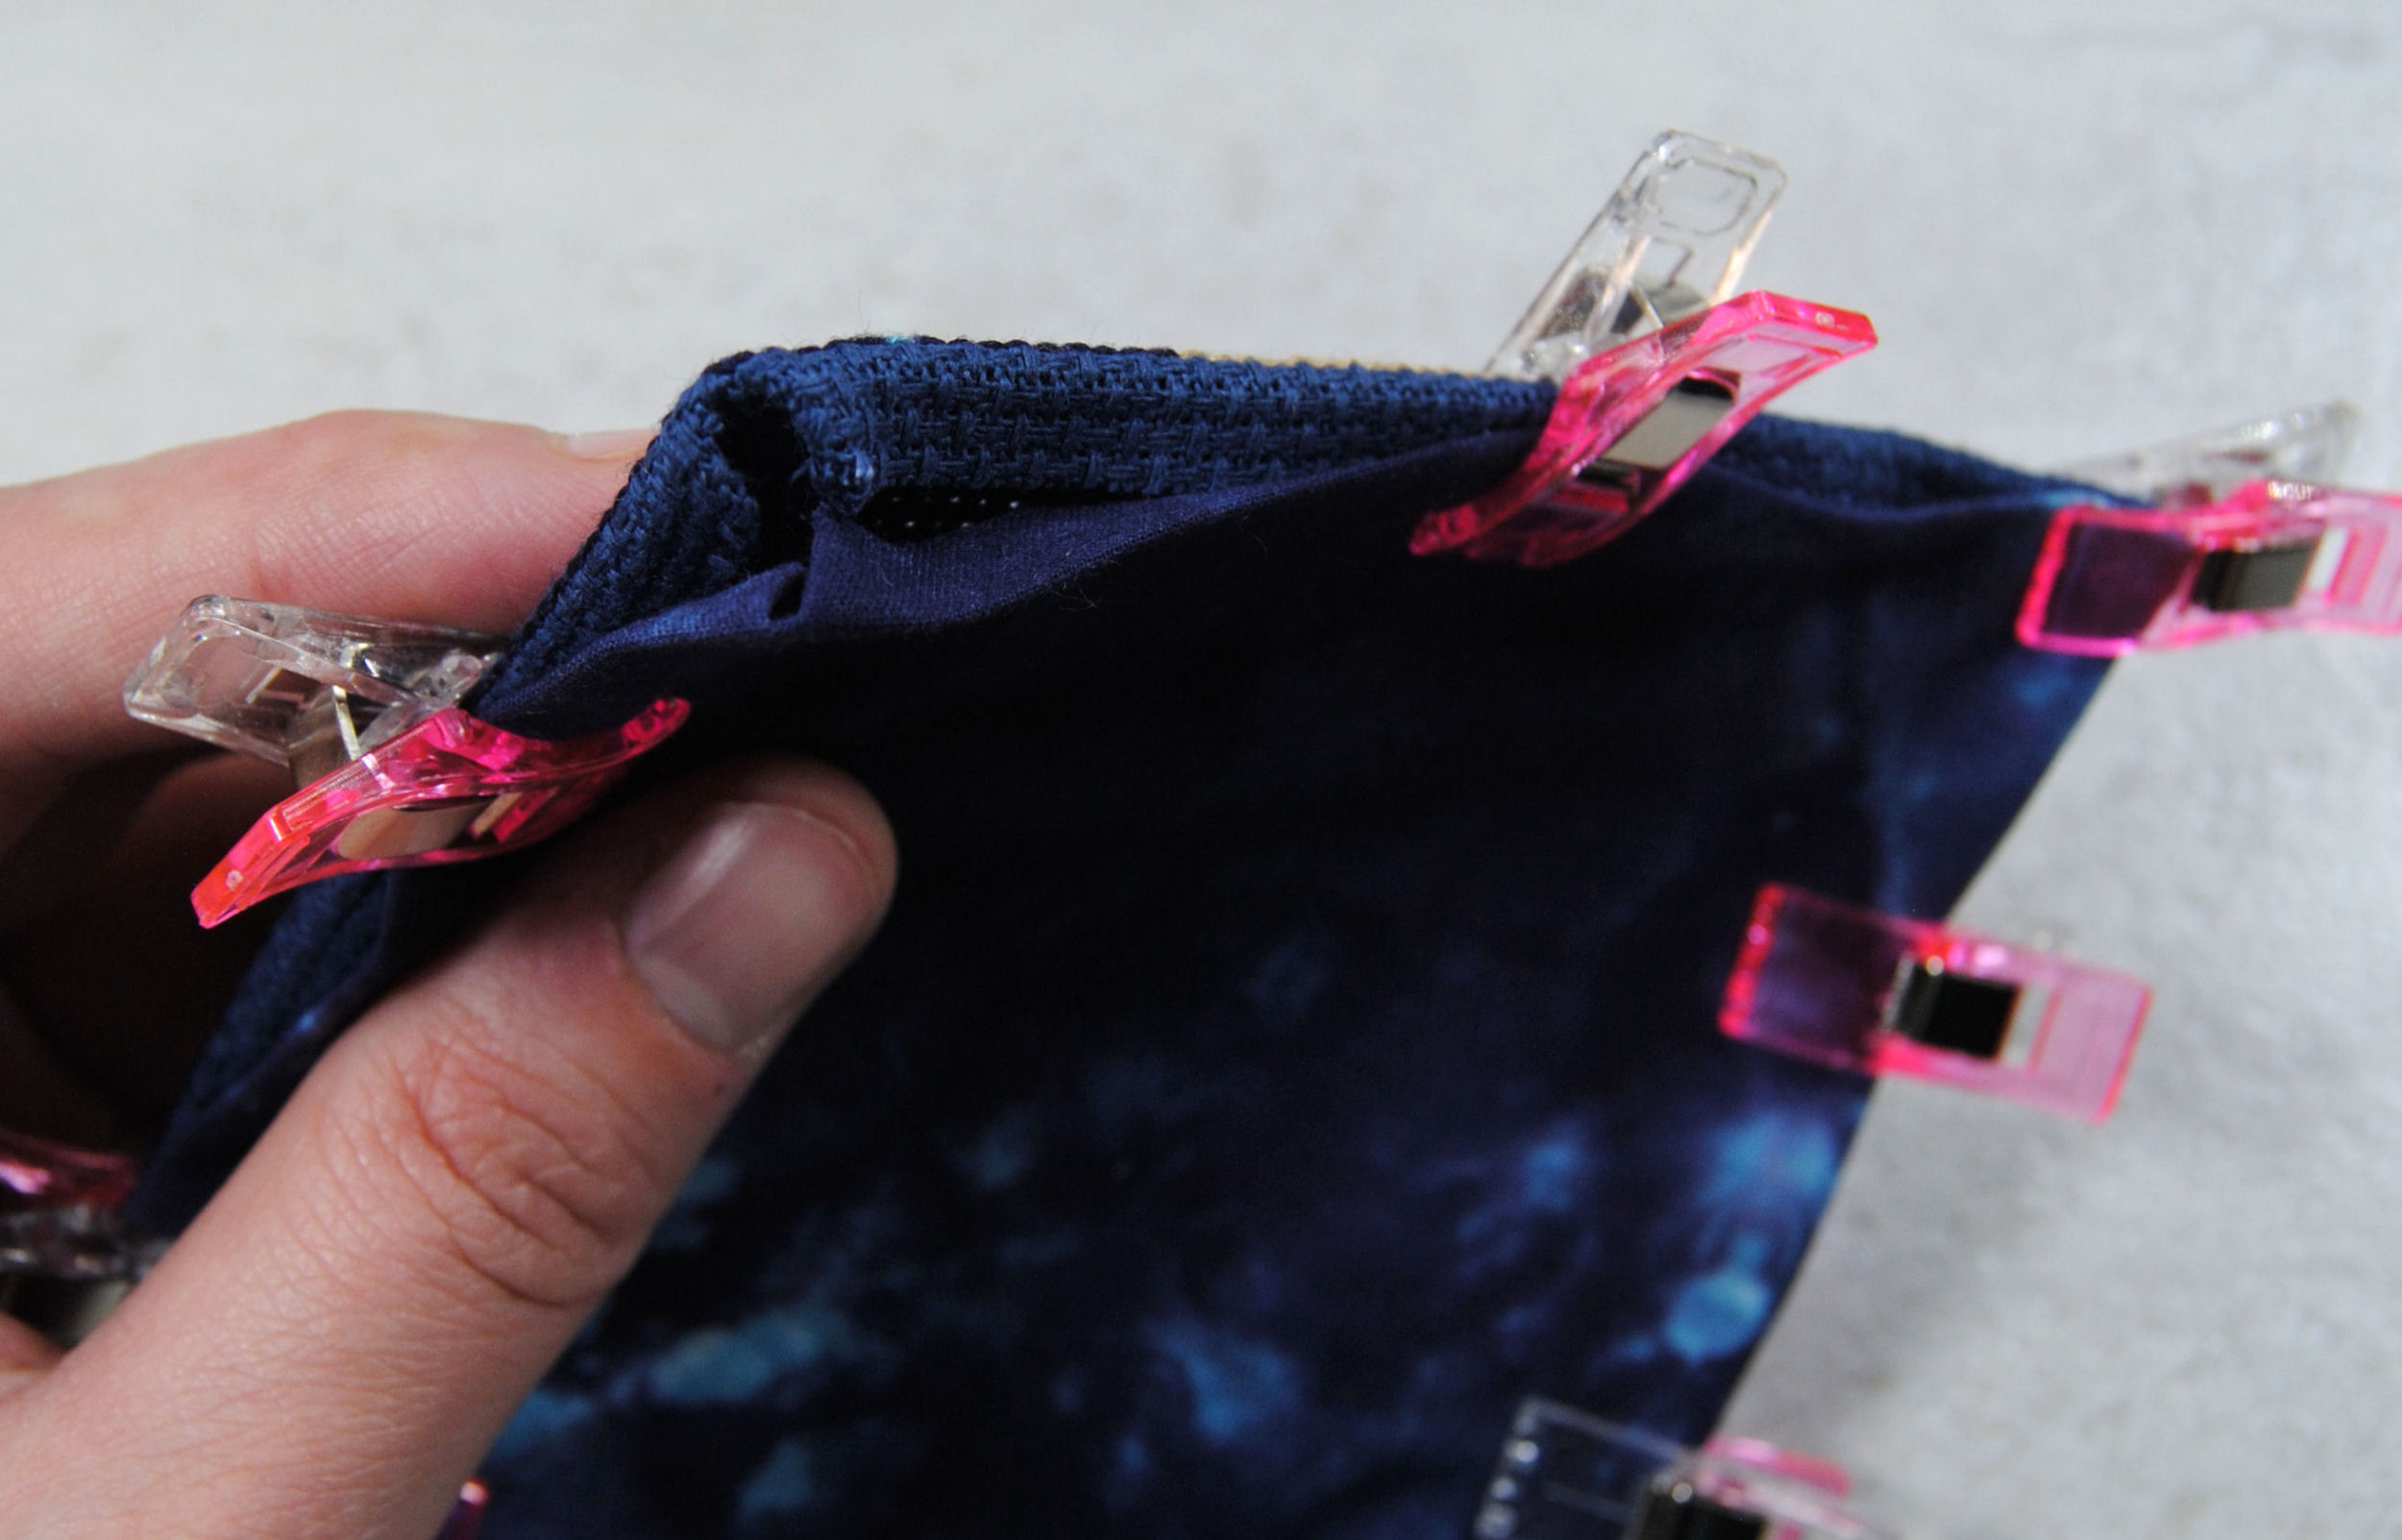
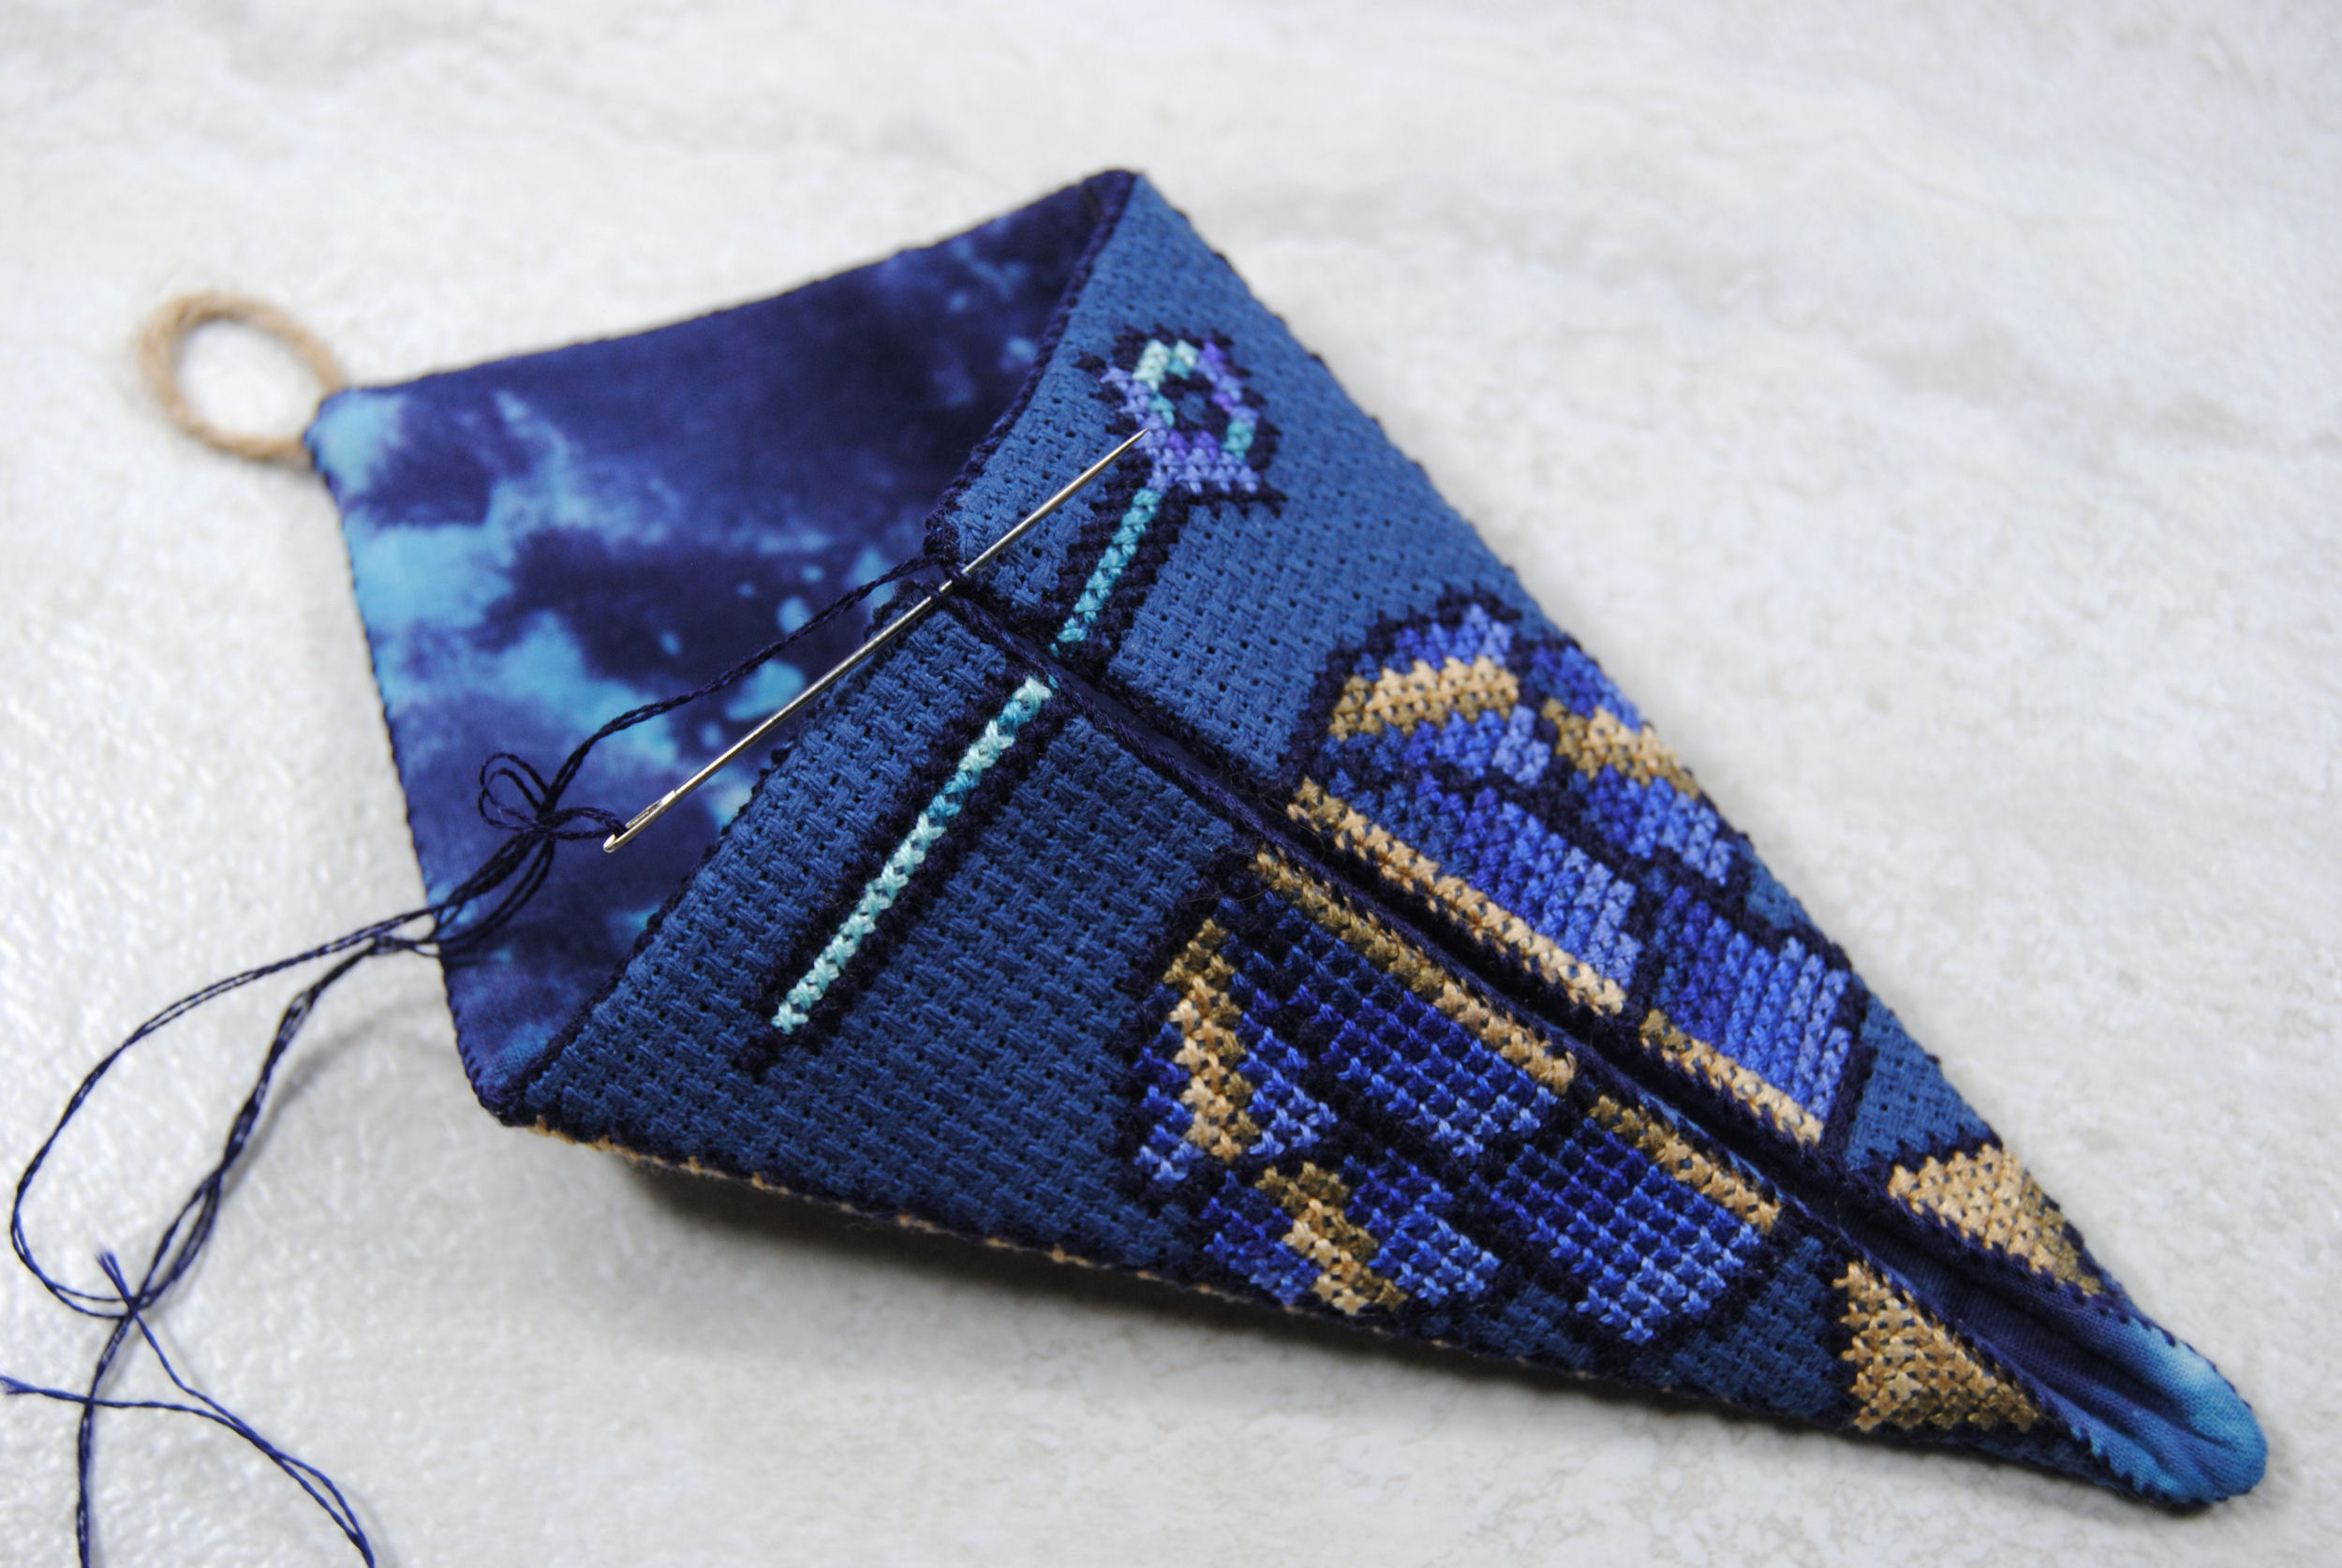
It doesn’t technically matter where you start, as you’ll be going all the way around. But I started in one of the corners above that middle seam. That way once I make it all the way around I can just fold up the piece and start stitching straight down the middle seam without having to rethread my needle.
If you’re doing a cord loop at the top like I am, I mainly recommend NOT starting with that corner.
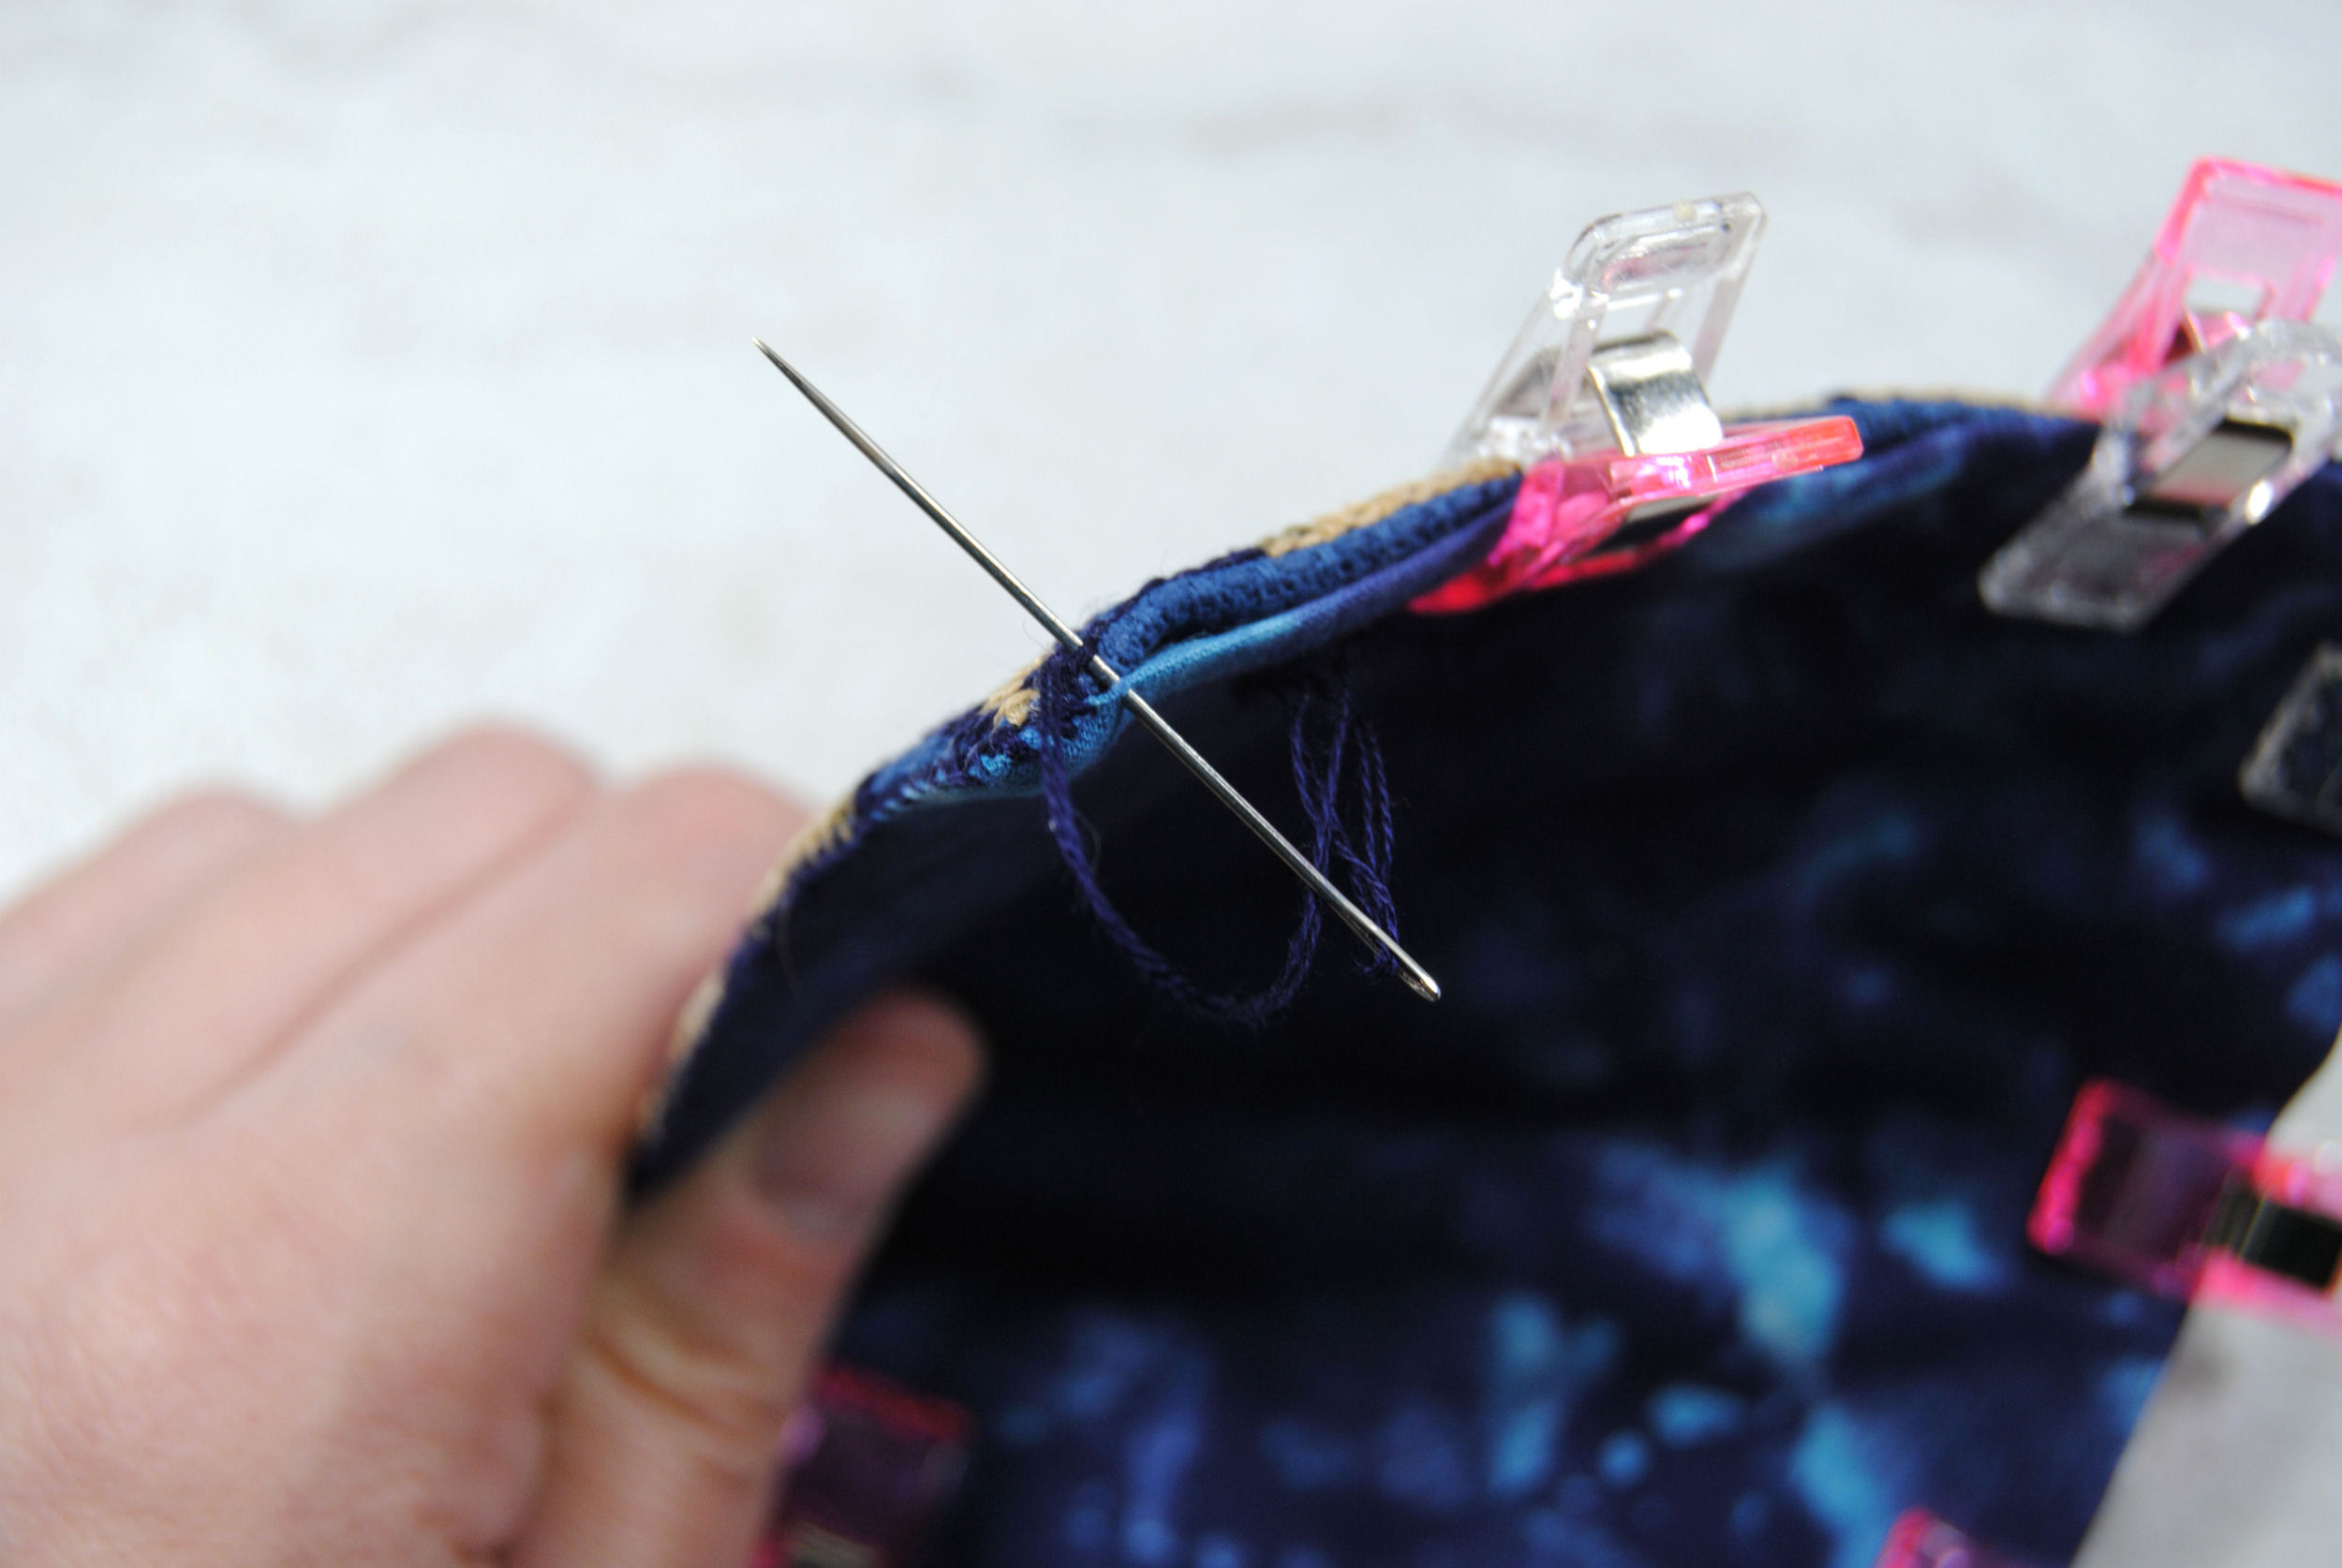
Unlike biscornu and other similar assembly processes, the lining fabric doesn’t have backstitch along it to match up with your aida. So you’ll just be stitching through the fabric itself this time.
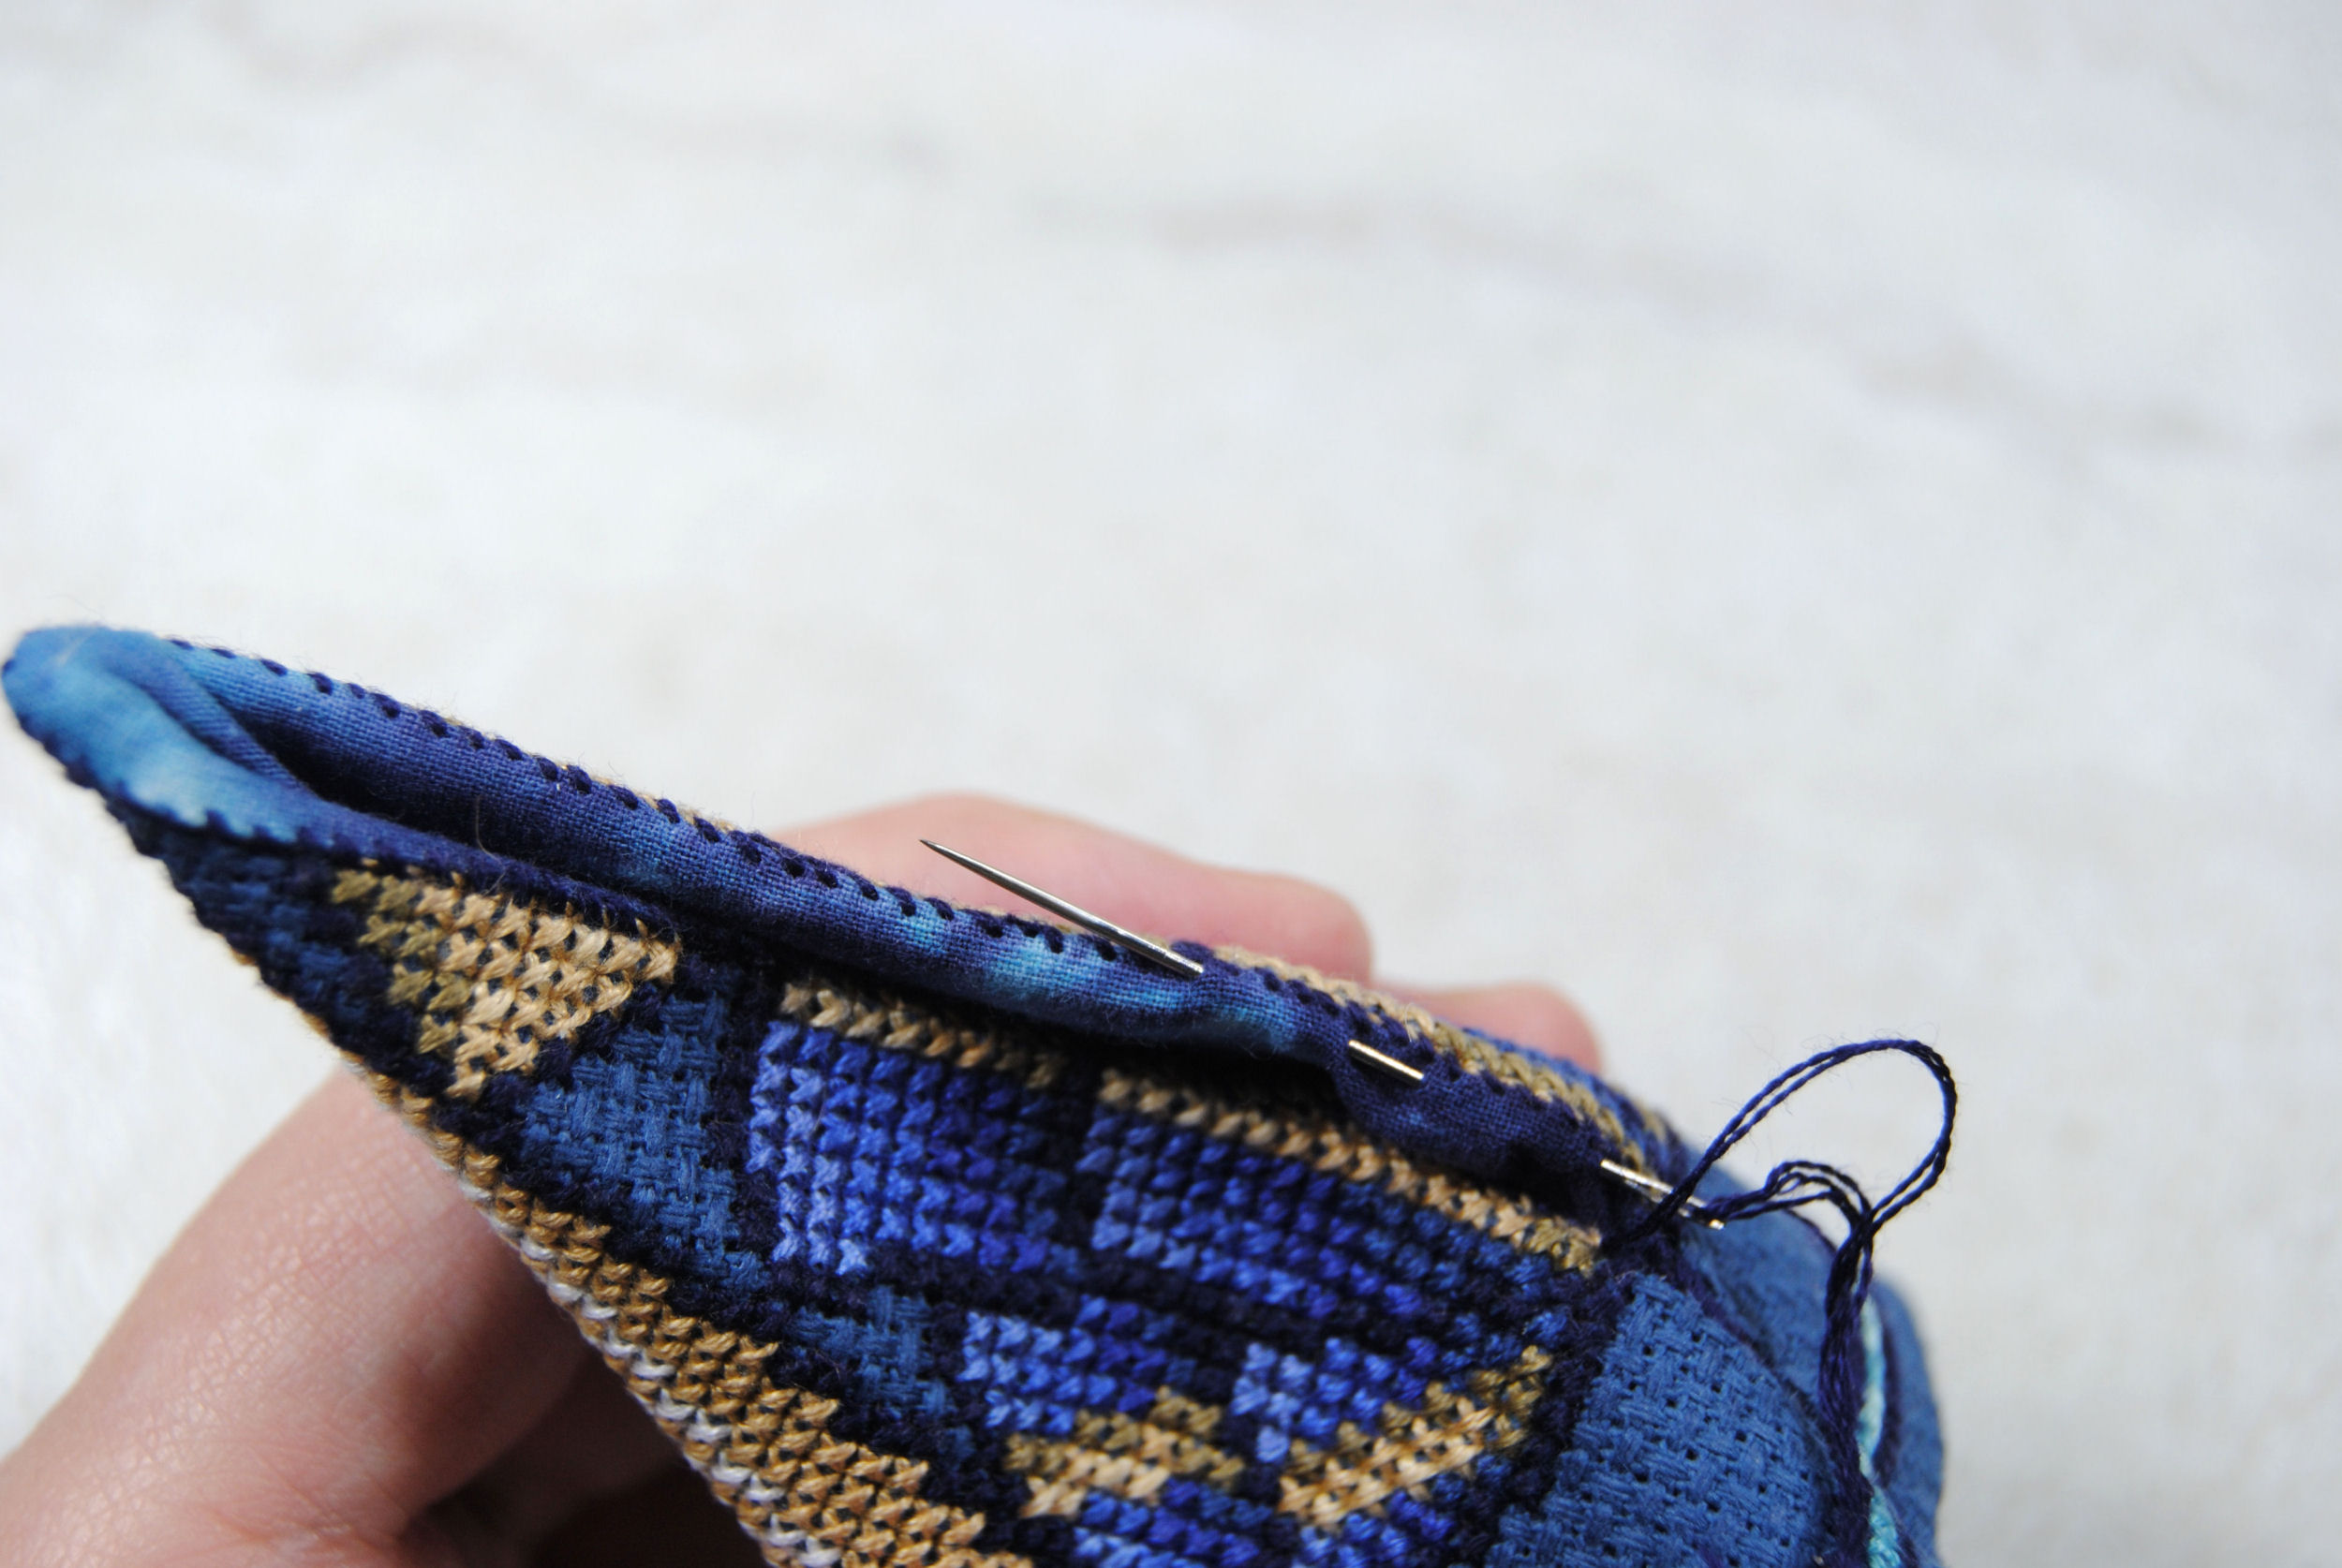
This part’s hard to photograph, so I’ll be showing a few angles of the process in the hopes it will make sense. I started by piercing the corner of the liner and coming up through the corner of the stitched piece.
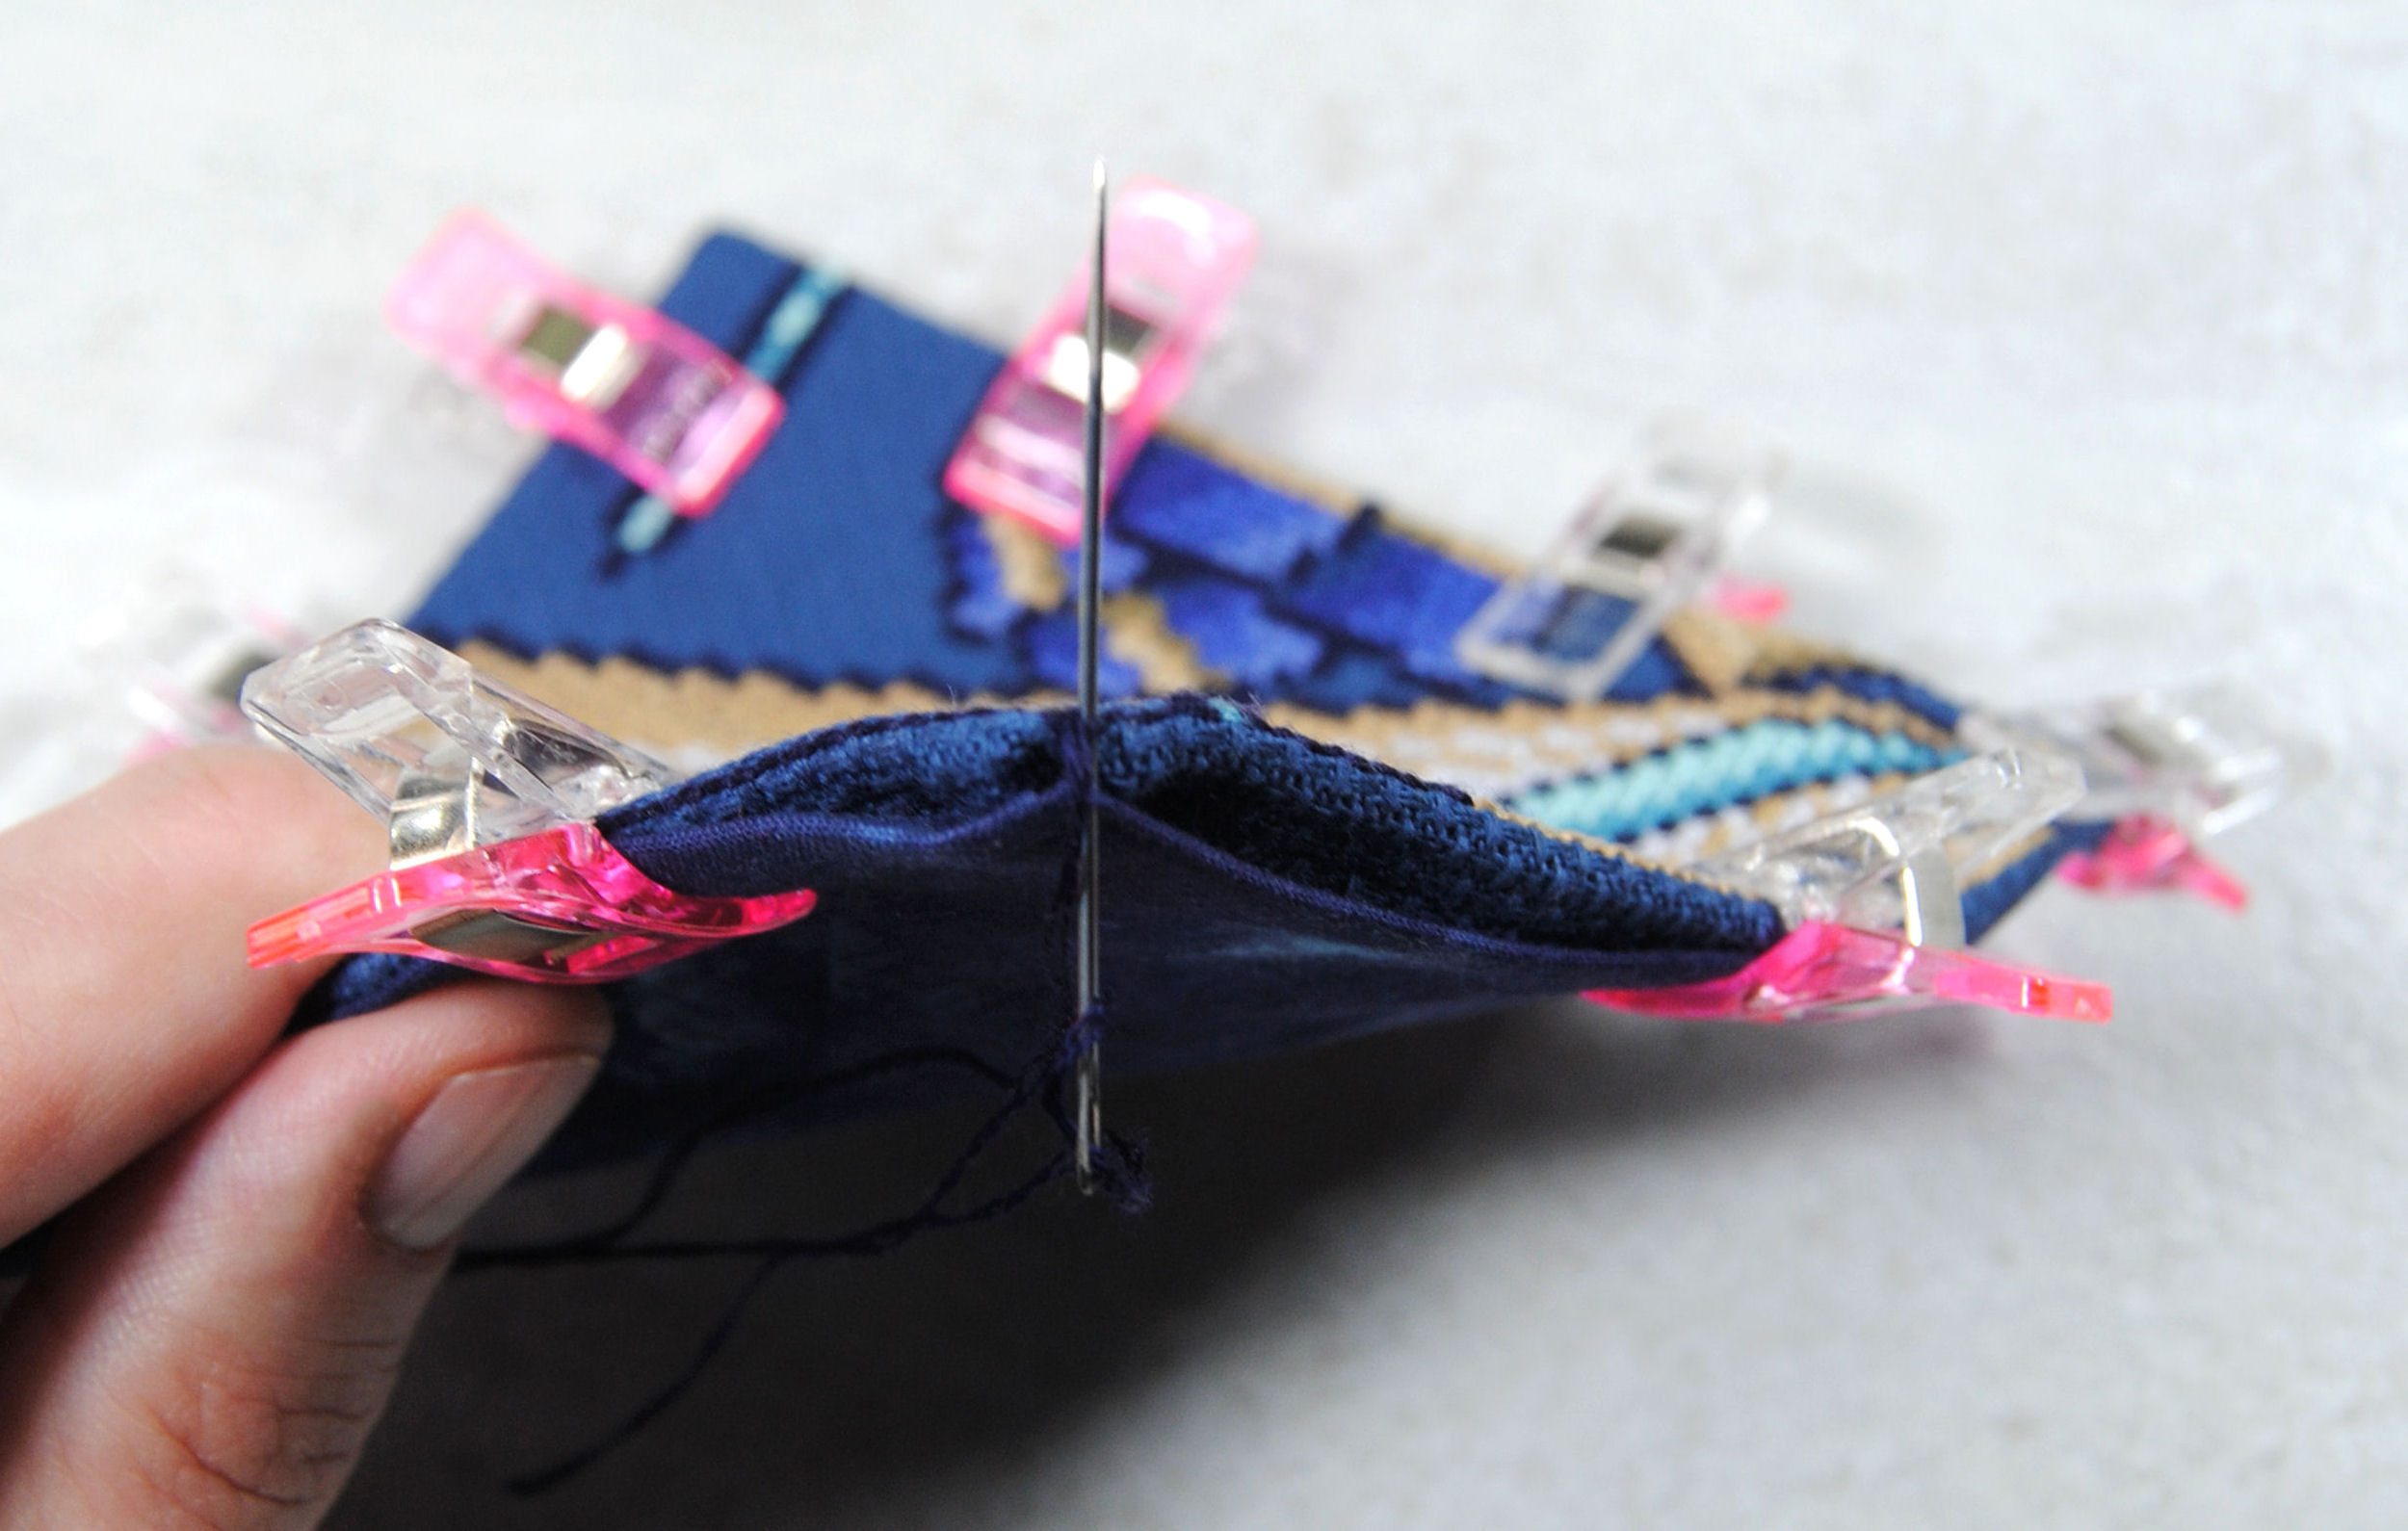
I then stitched at a bit of an angle, piercing the edge of the lining fabric but still stitching under the backstitch, which helped to keep the stitches evenly spaced.
While I probably should’ve stopped and switched to the matching gold thread here, I decided it was too much hassle and continued with the blue. Basically hoping that when I go to stitch the seams together later it will cover this bit up.
It mostly did cover up this blue, and I’m fine with how it came out. But maybe keep reading and see how it looks below before deciding if it’s worth the extra effort now.
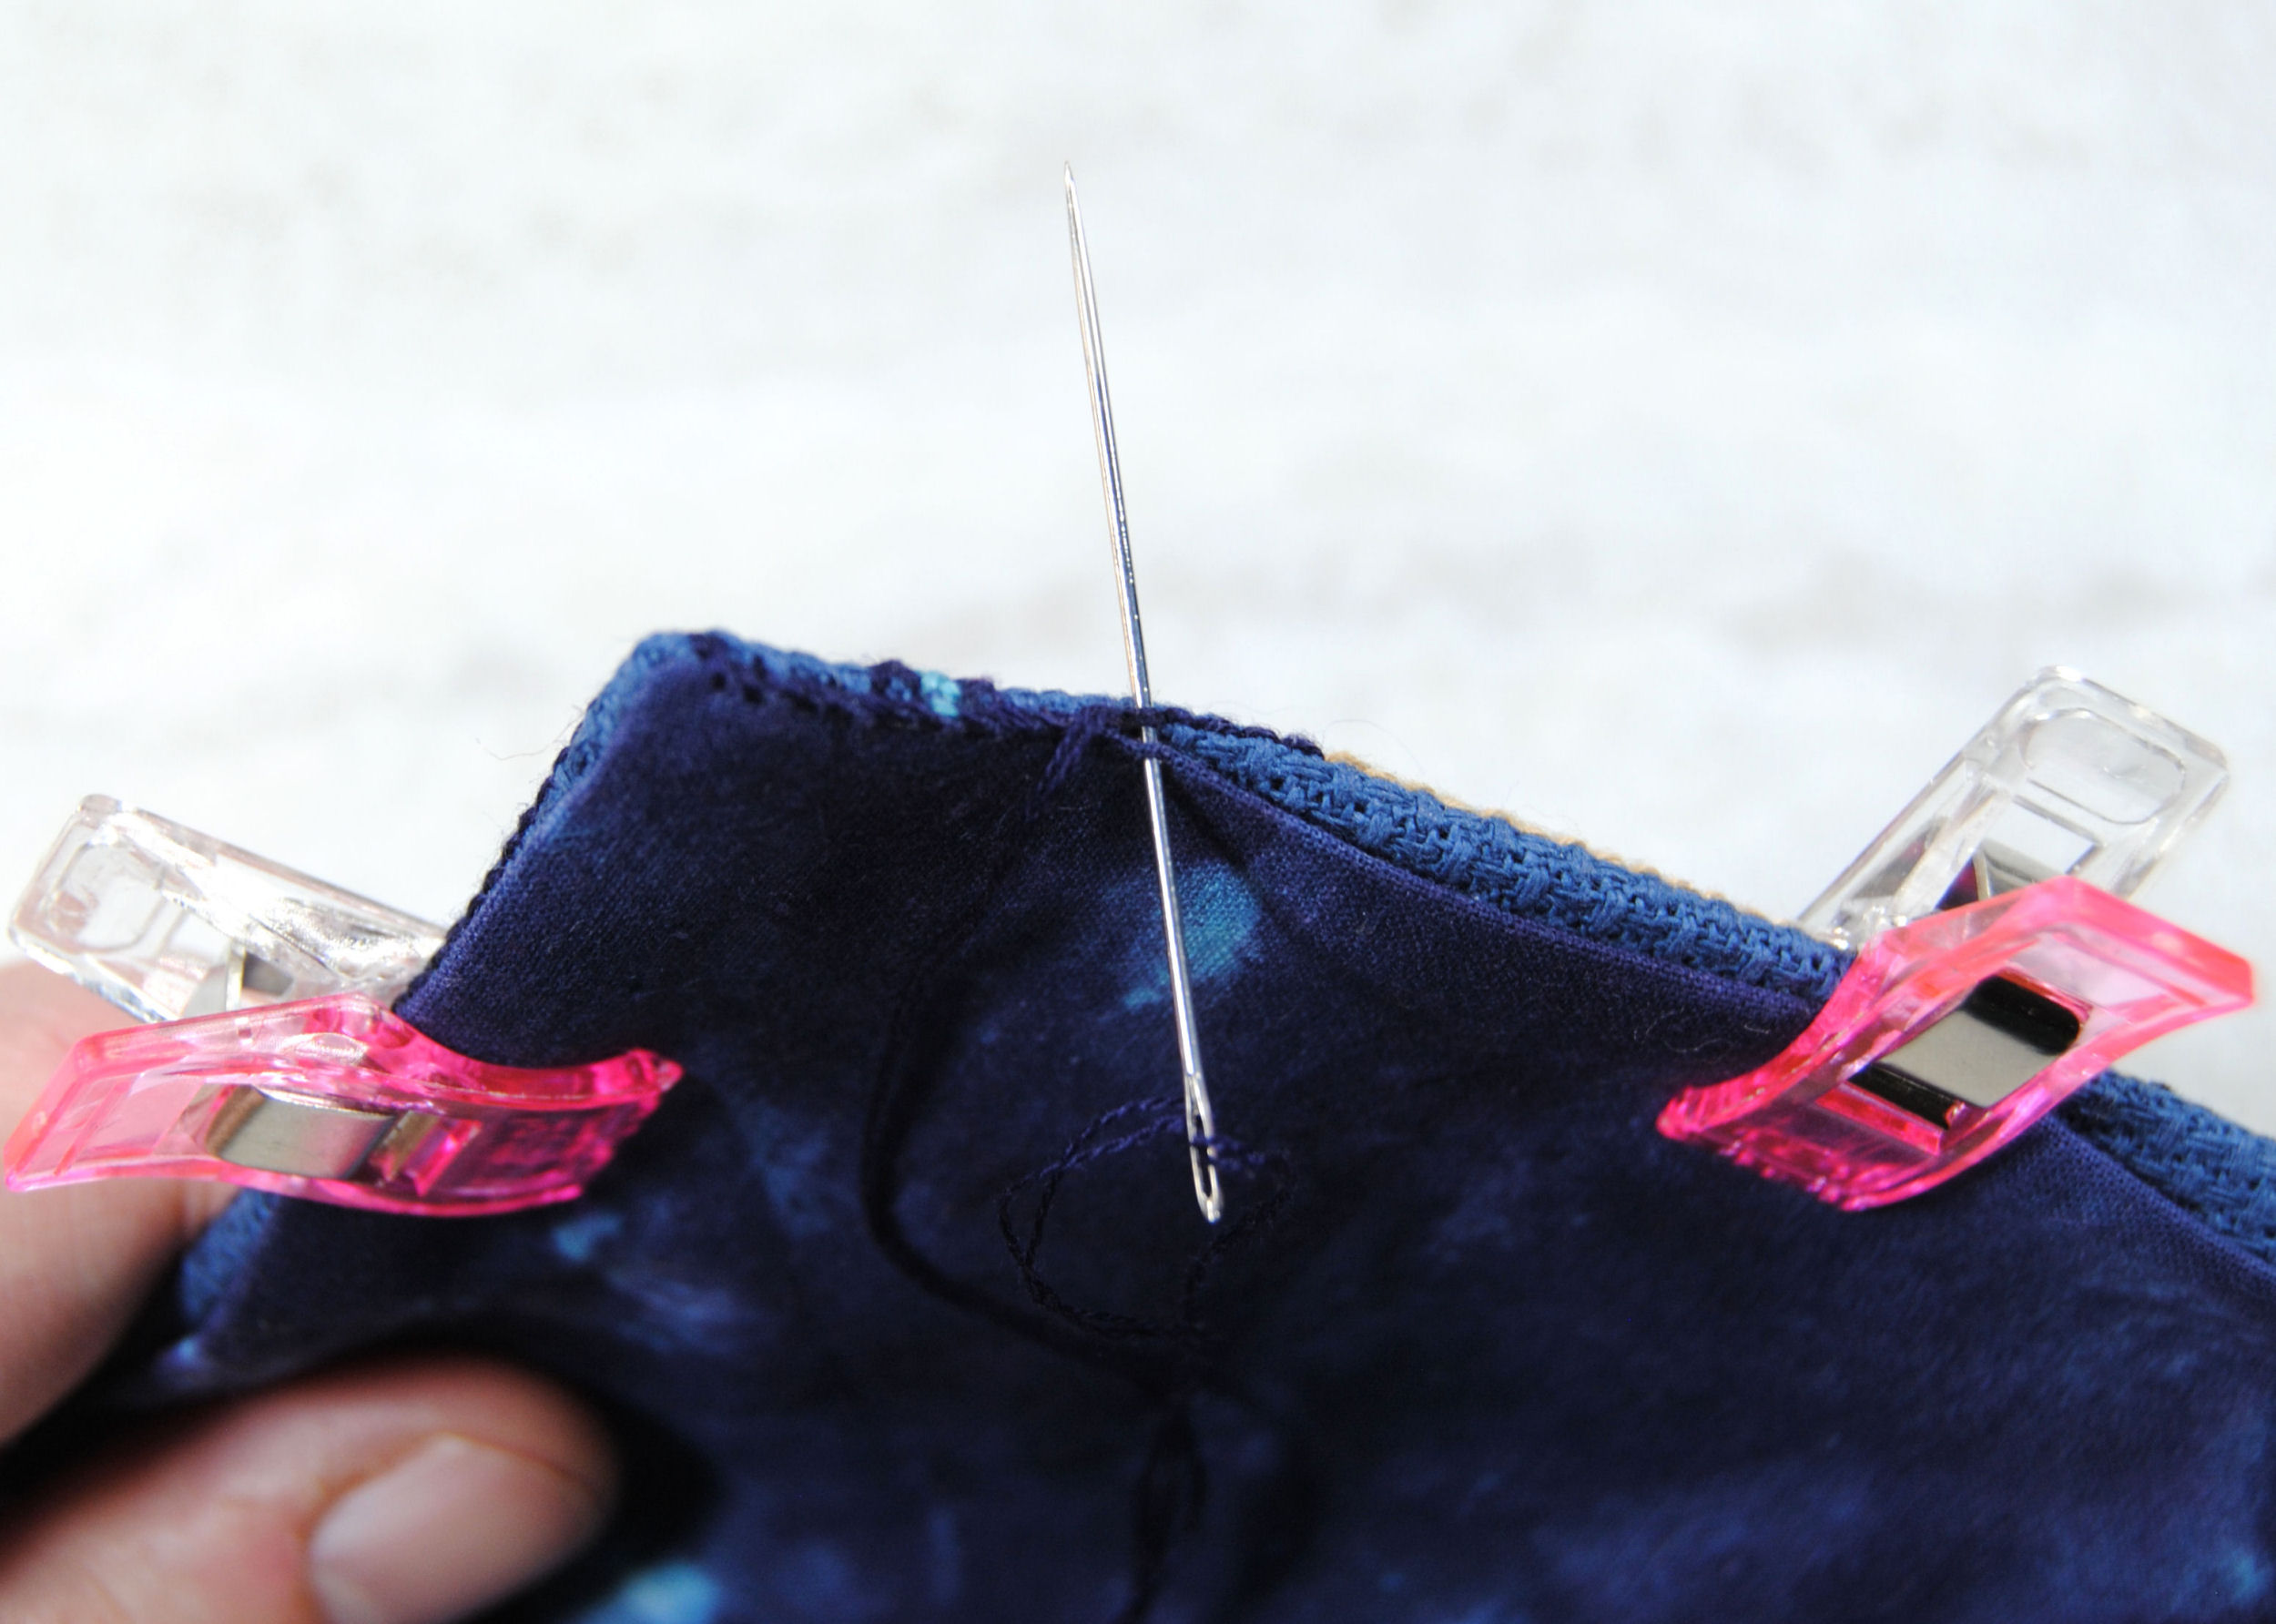
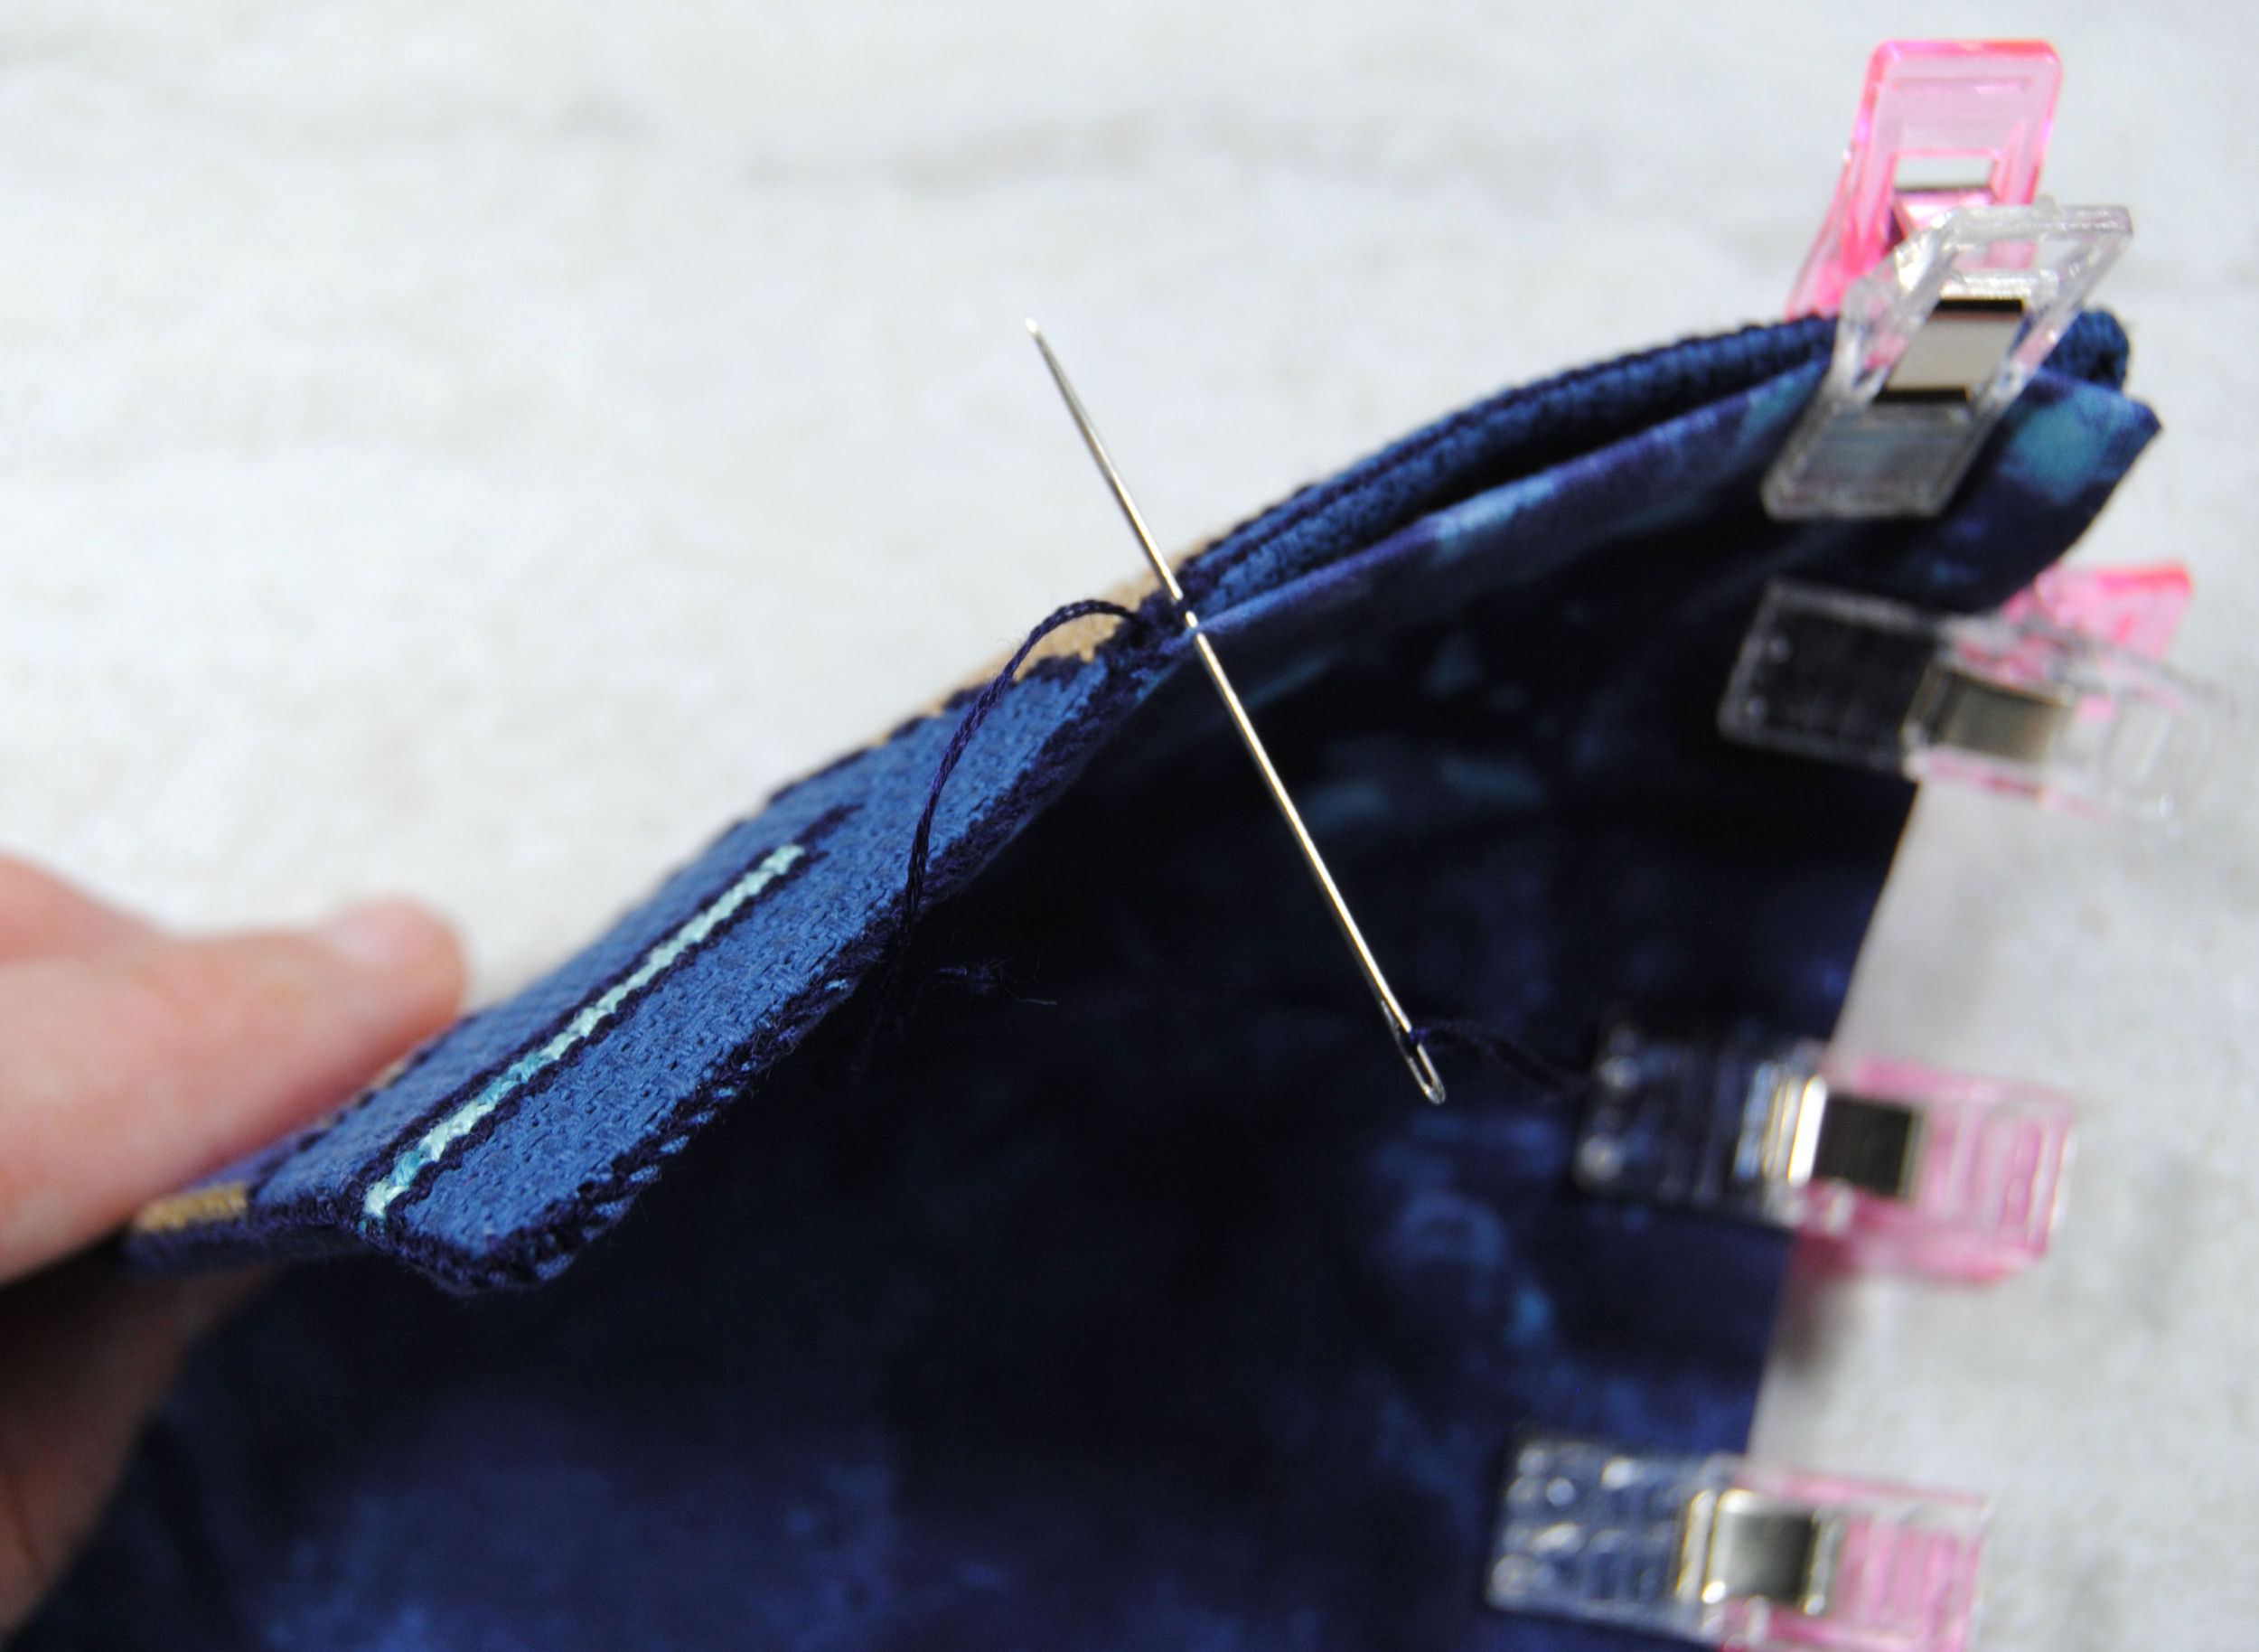
Turning the Corner
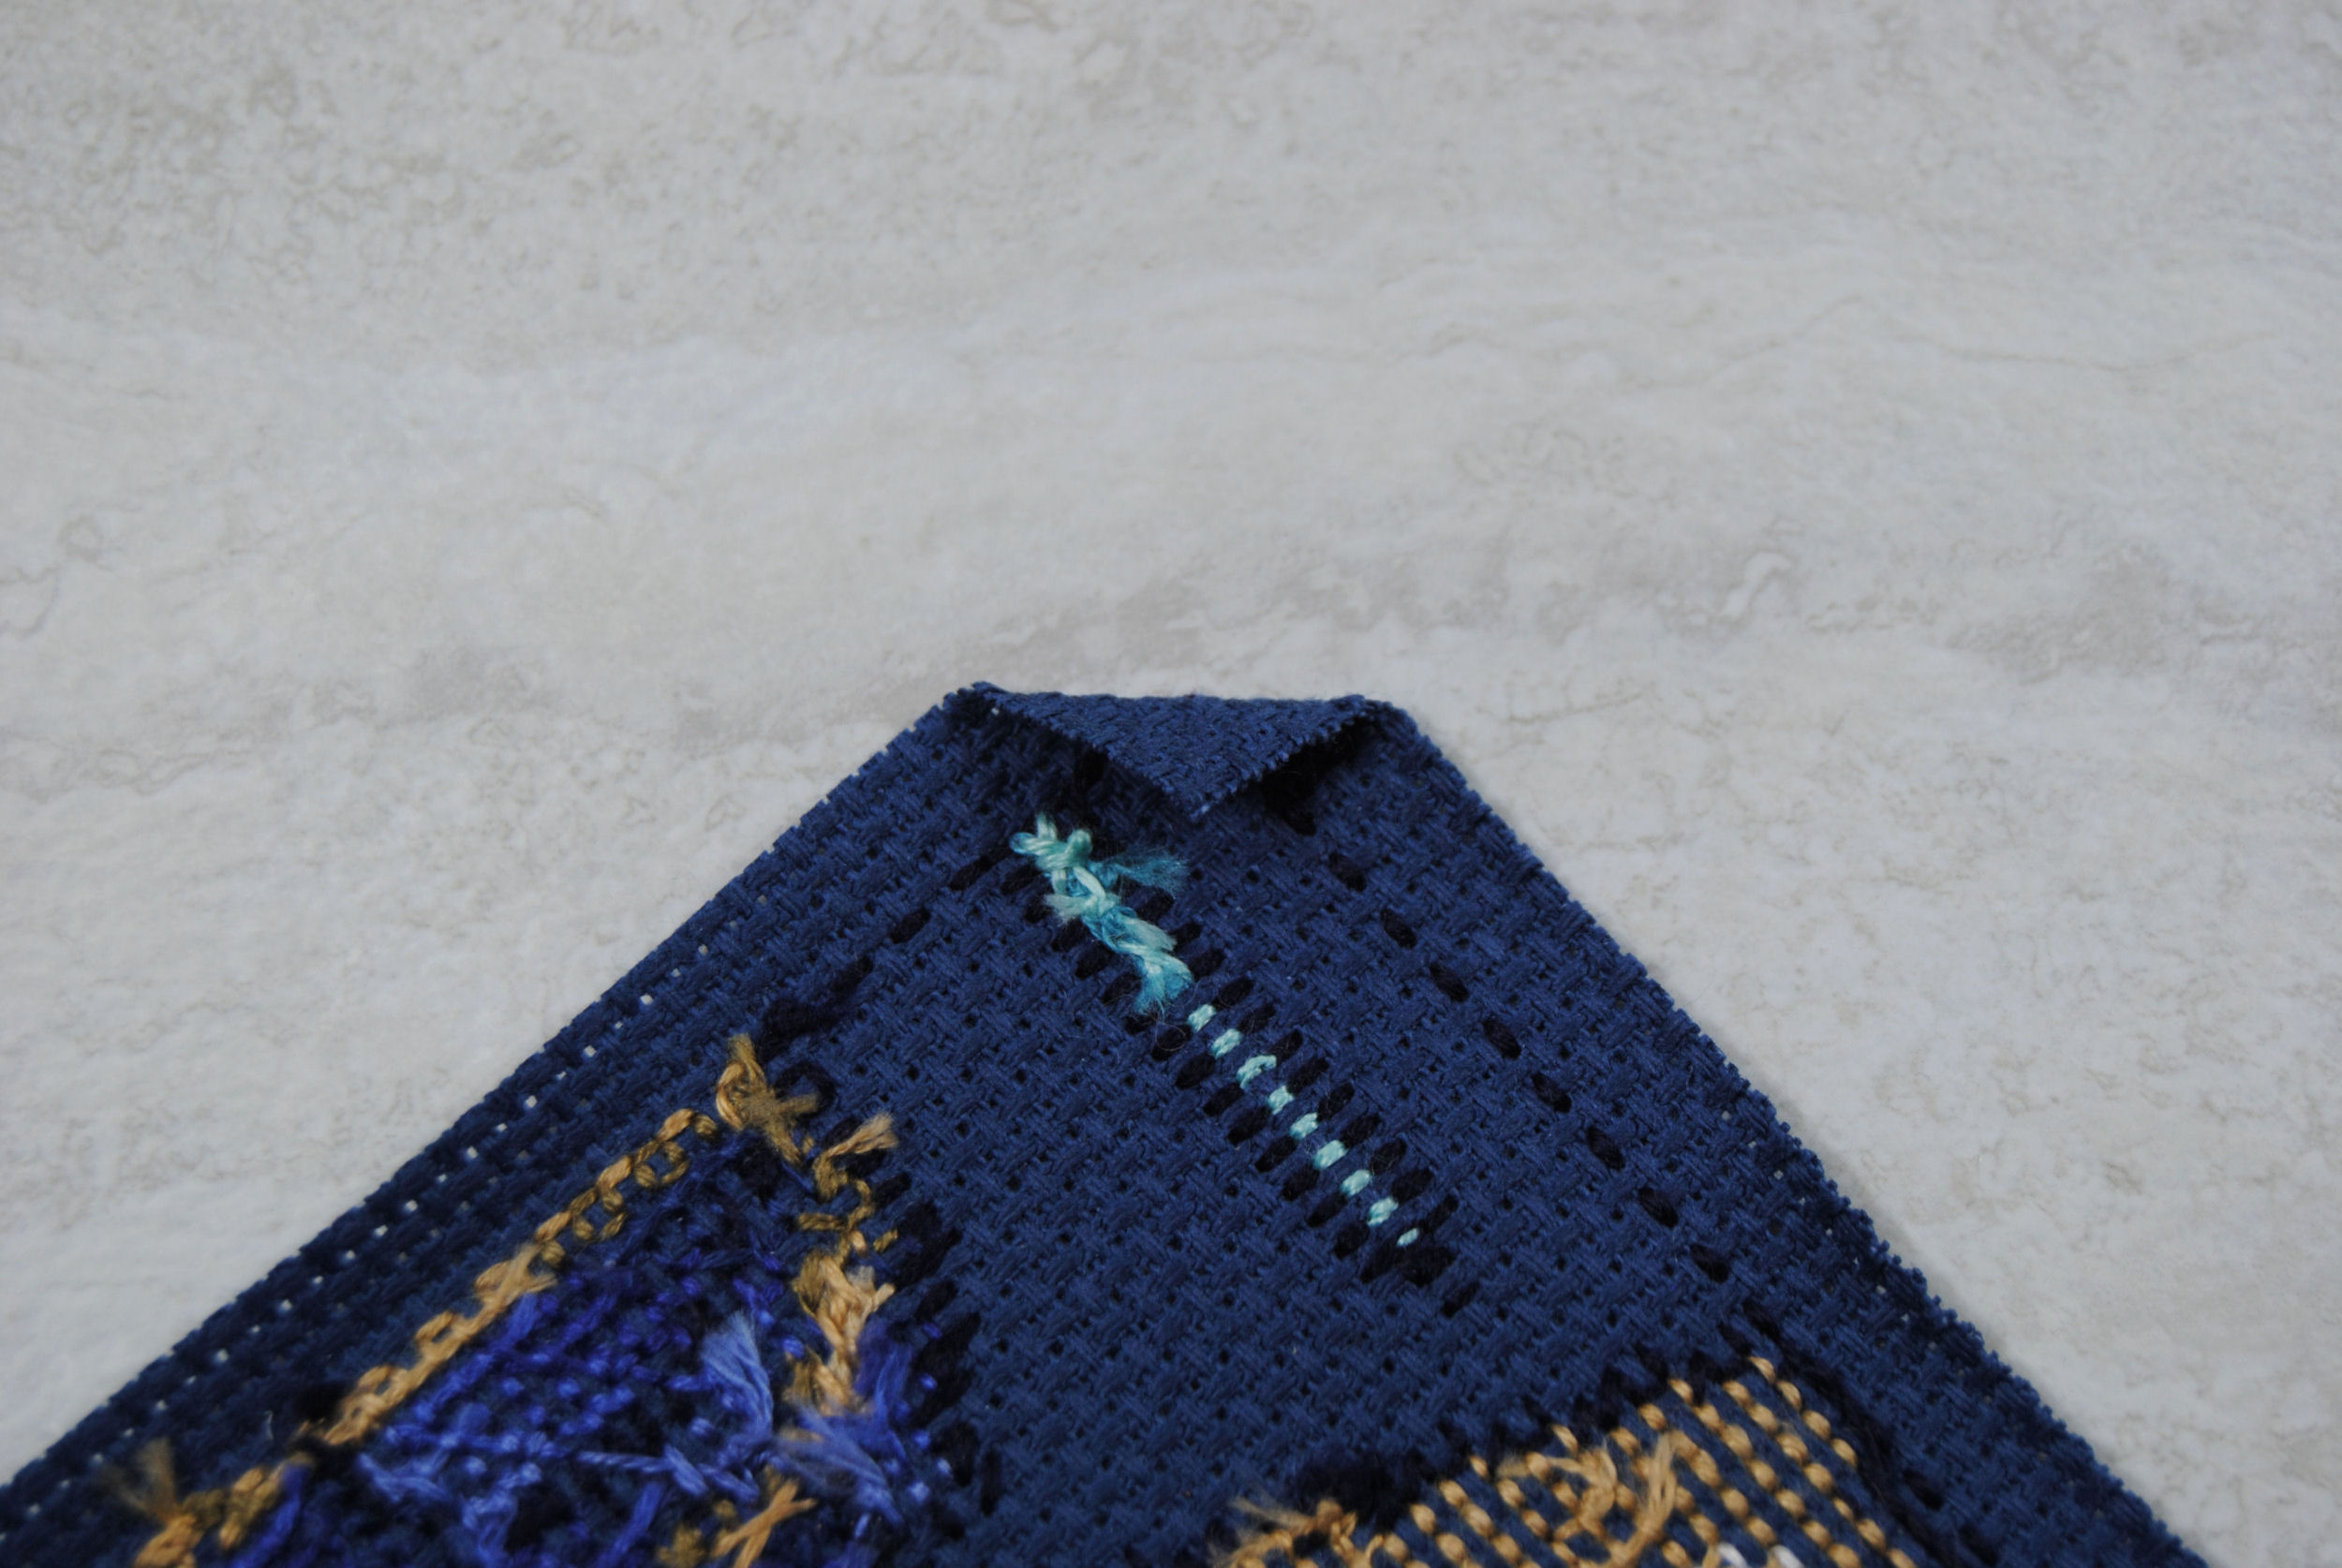
The corners are a bit tricky, especially if you didn’t trim them like I recommended earlier. I certainly wished I had by this point. But I’m stubborn, so I kept going. Just take it slow and you’ll be fine.
While the corner looked puffy at first, it did flatten out alright as I kept going.
When you reach the corner you want your loop to be, go ahead and stick that loop of cord in. Make sure you stitch through and around that cord a few times for security. This seam is what will be taking on the most stress of the finished project, so it’s important that it’s pretty secure. You’ll be pulling on it every time you go to close or open the scissor case.
If you’re using snap closure instead, you might want to stitch on the closure here before stitching up the edges in this area so that you can still access the back of the liner.
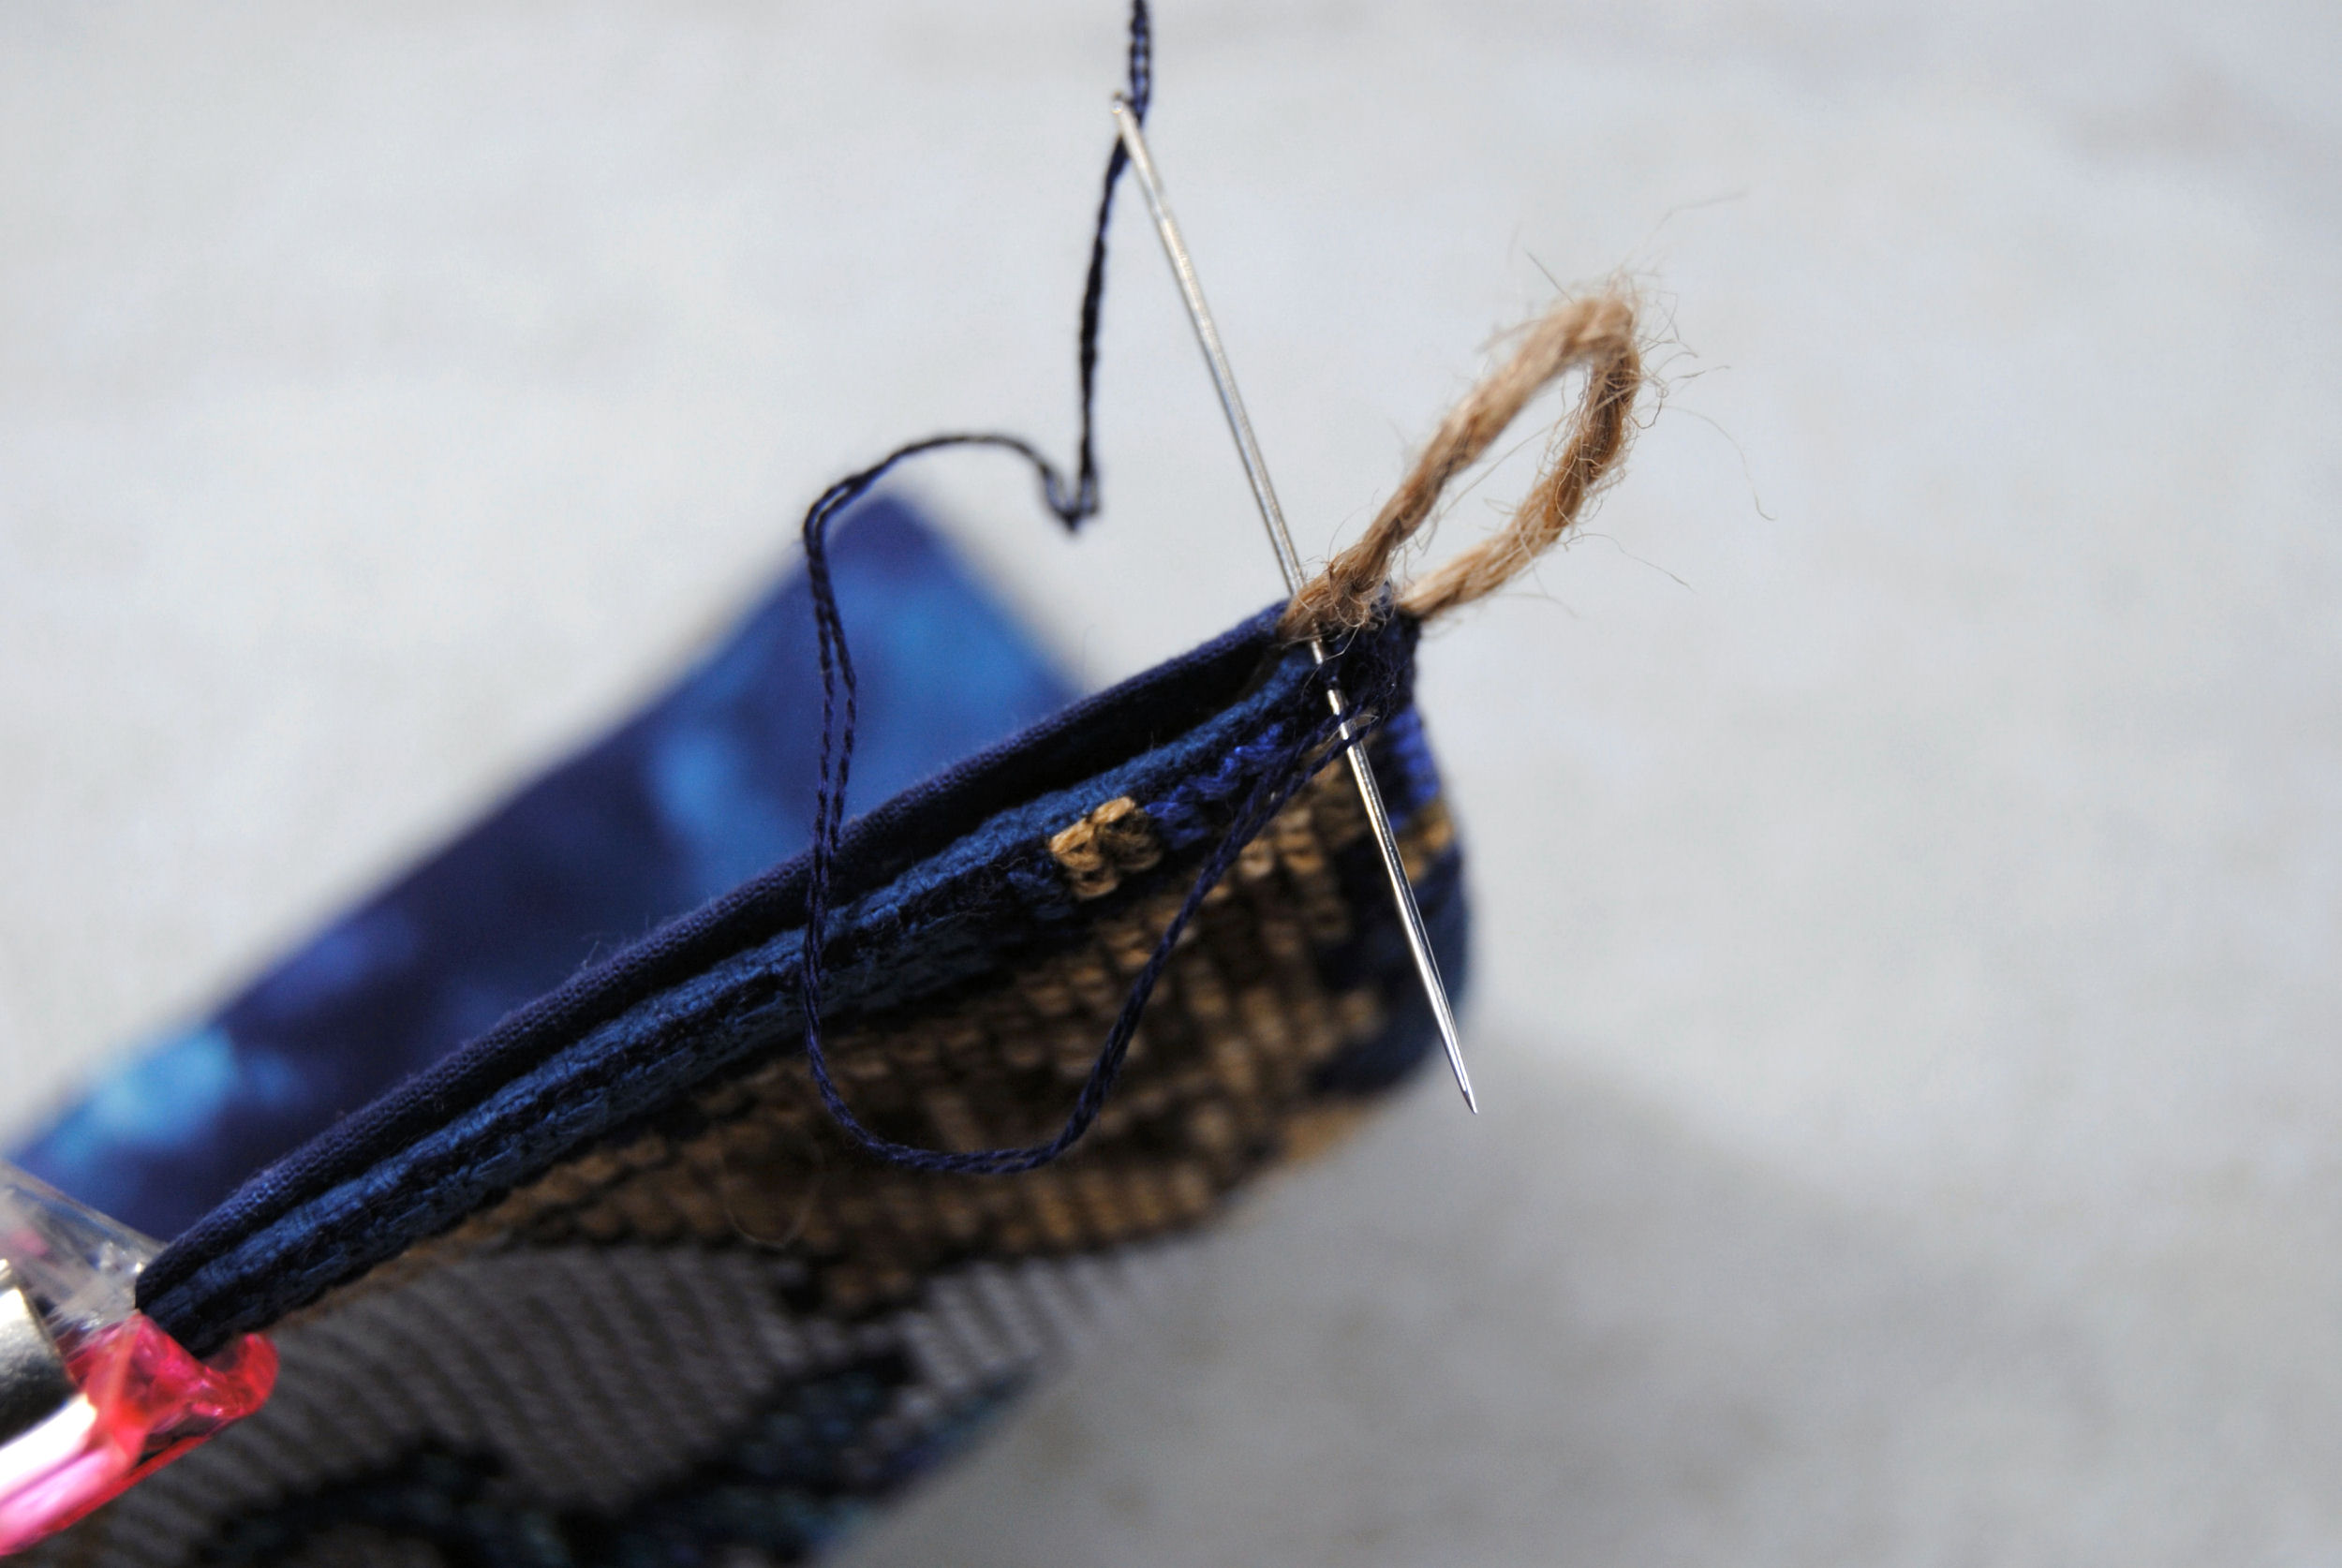
Once that’s done, just keep stitching until you’ve made it all the way around your piece. If you started at one of the corners above the middle seam like I did, don’t finish or trim your thread! We’re gonna keep stitching!
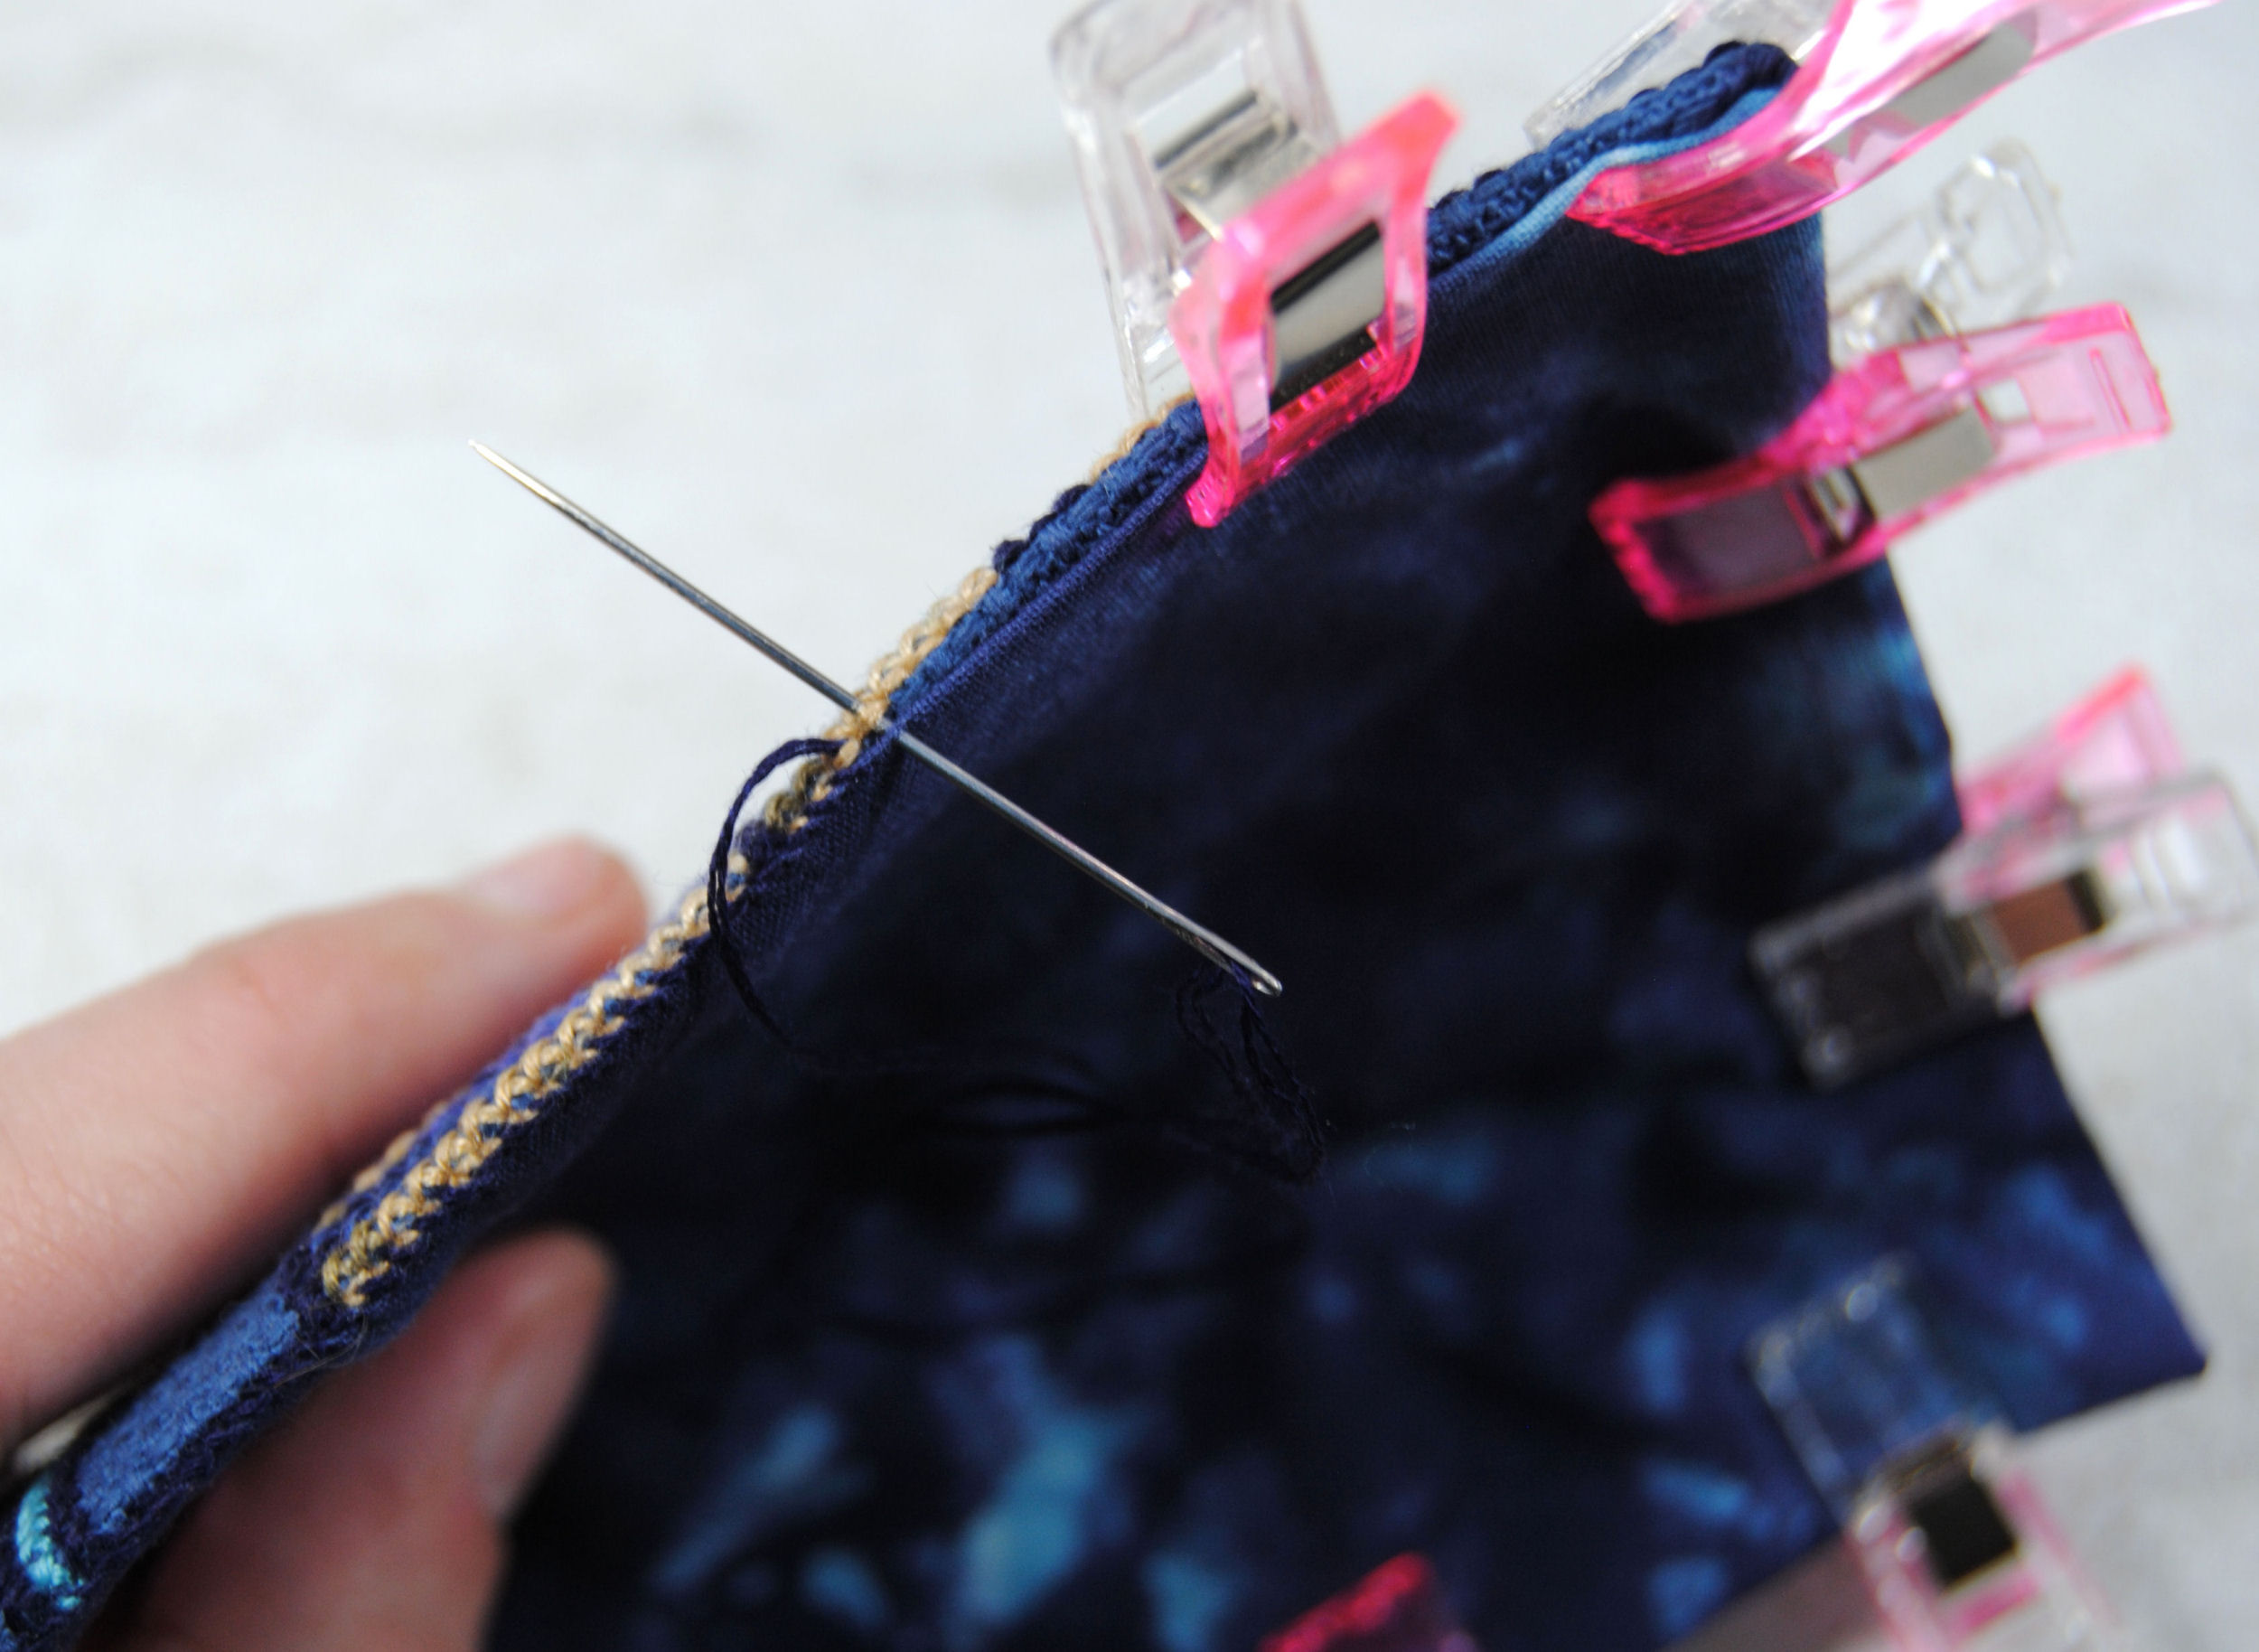
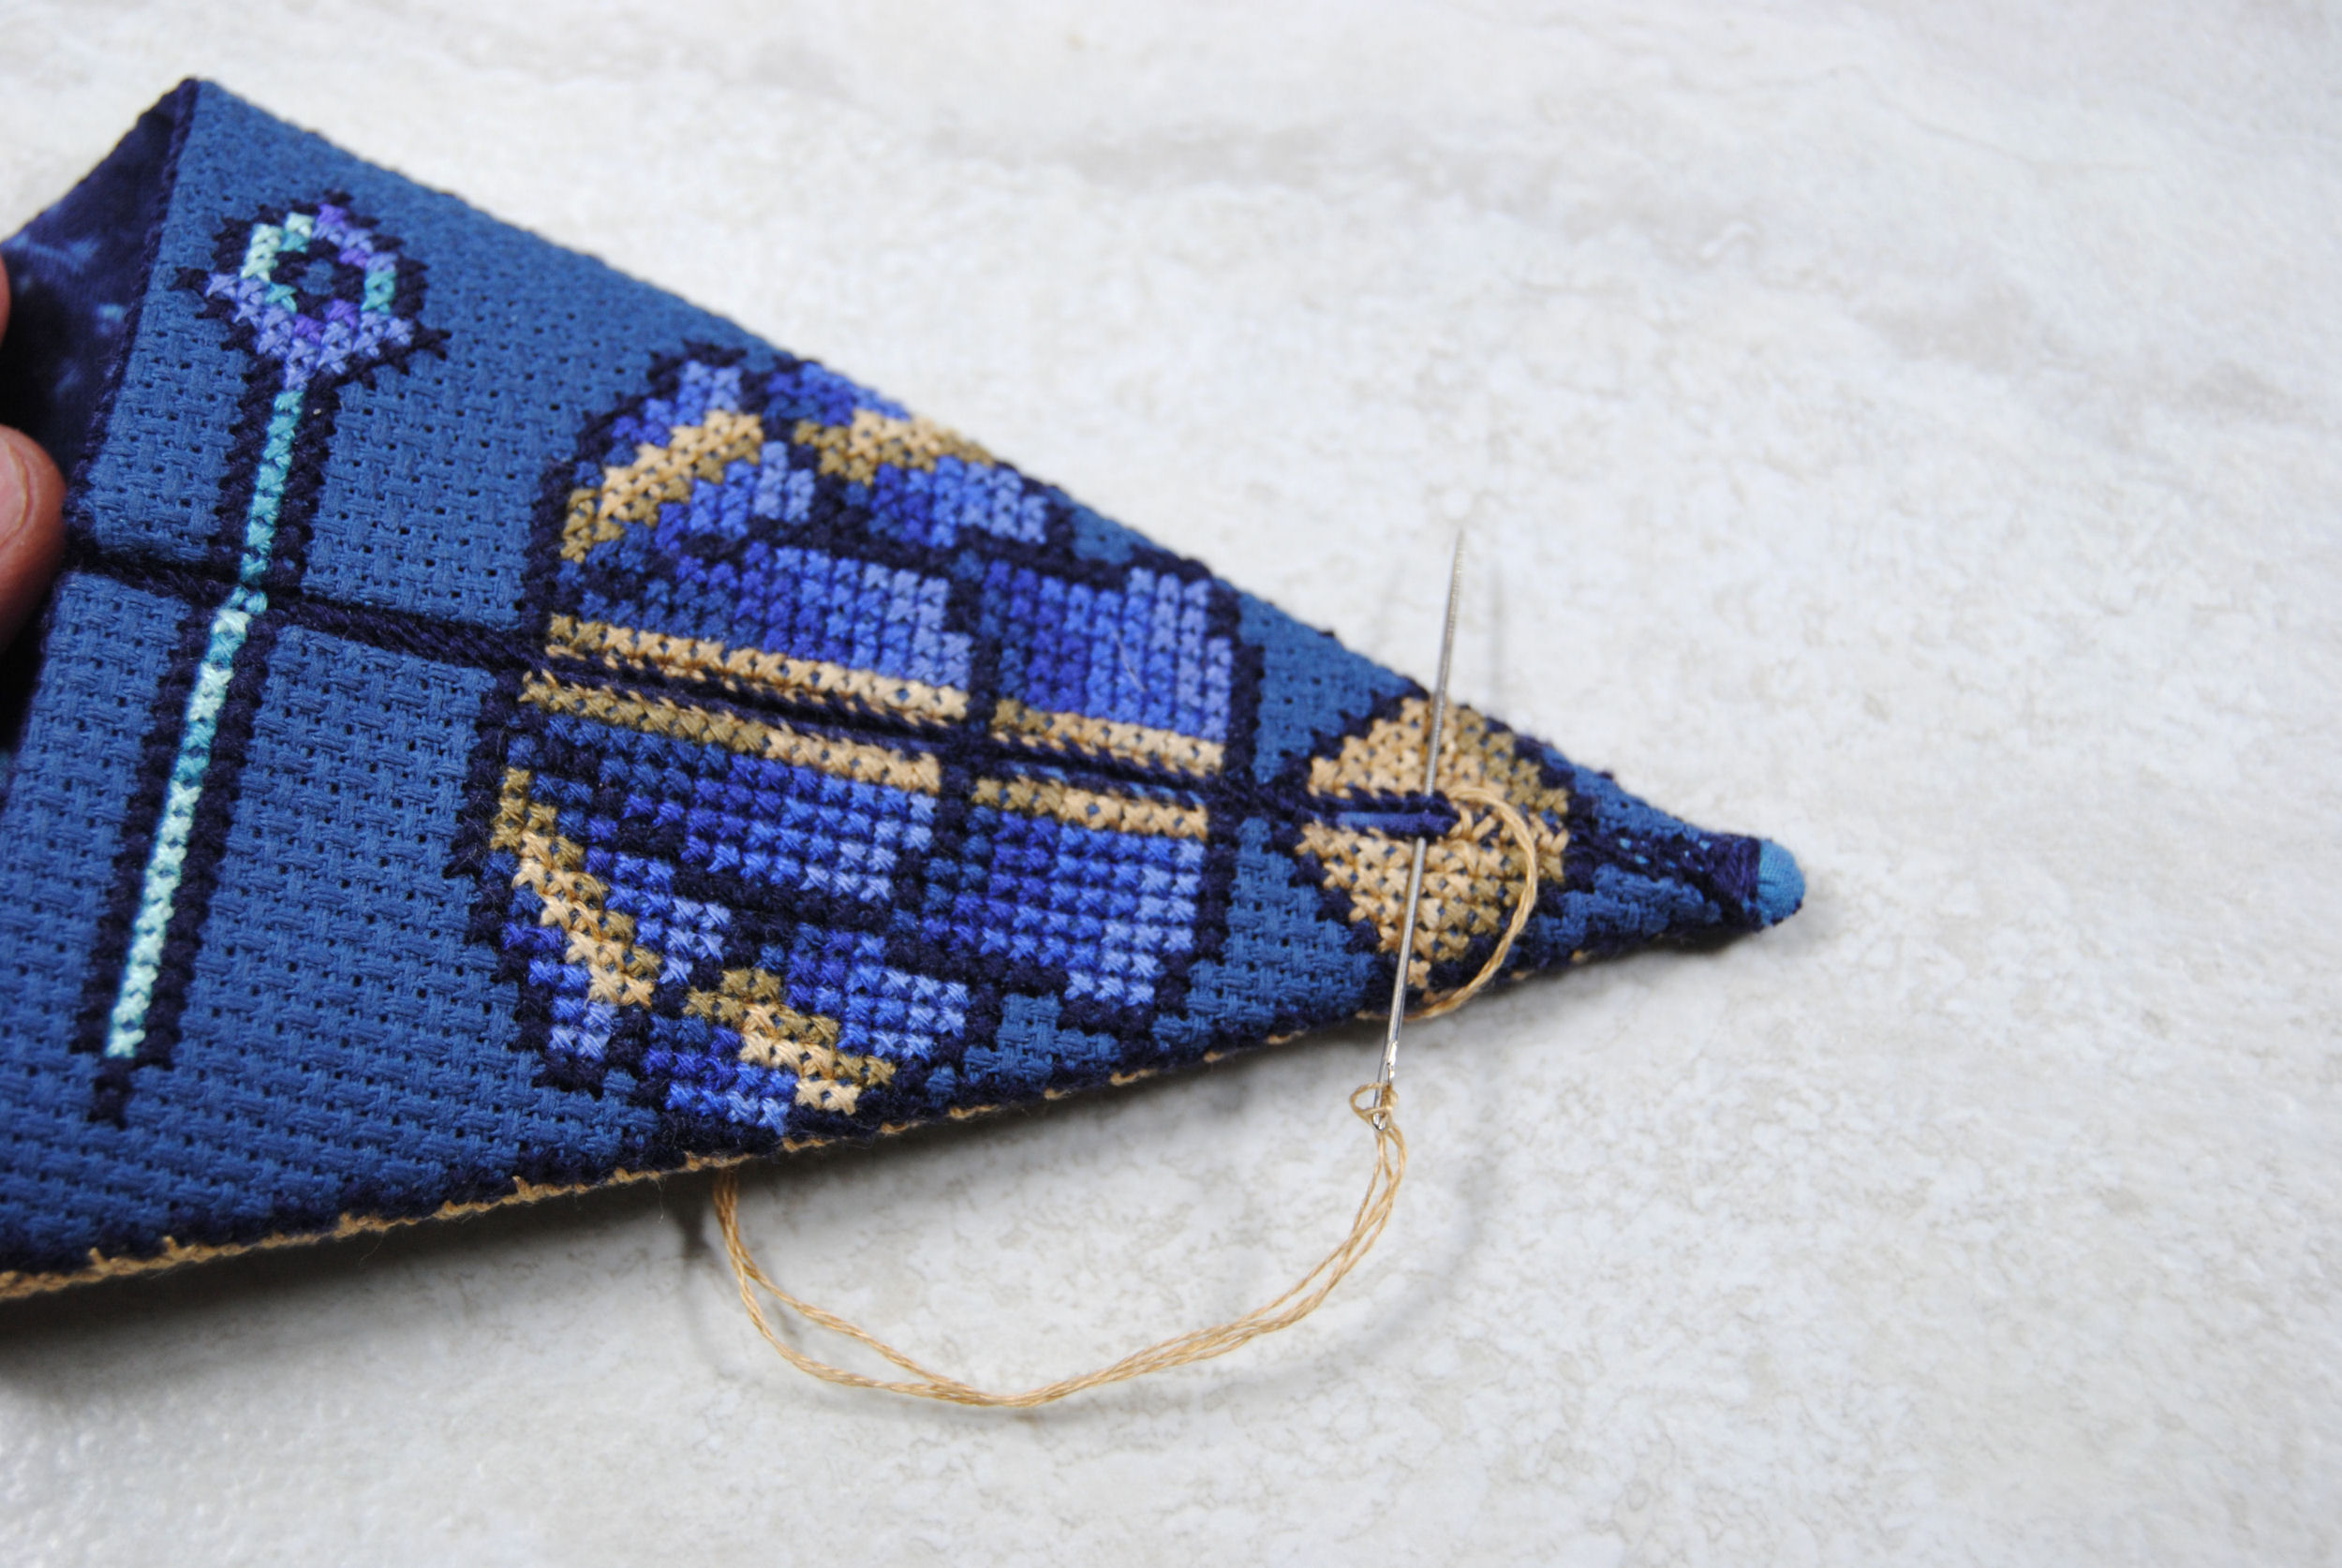
Stitching The Seam
Now both sides have backstitch so this part should be a lot easier! Just stitch under the backstitch on both sides, always stitching in the same ‘direction.’
If you’ve got backstitch sections in different colors like me, I just stitched through the lining a bit to get down to the next section that used that color. Just to avoid having to rethread my needle a bunch. We’ll get back to it later.
The tip is again where I regretted not trimming my corners at the beginning. But at this point I was far too invested to unstitch this whole thing. So I did the best I could and it just has a little… uhhh. Tip of the inner lining showing. To make sure it was secure I stitched back UP the last few backstitches before securing my thread and trimming it, though.

Then in my other color, I went ahead and stitched up those sections, trying to cover up where I was lazy and stitched up the lining using the dark blue instead. It’s not super even because I put an extra stitch here and there to cover up some blue. But it does its job!
Attaching Closure
Once that’s done you’ll be attaching the other half of your closure. Whether you’re using a loop and button or a snap button, the tricky part is making sure you get it in the right place.
I recommend folding over your flap and seeing where exactly it needs to go. Preferably with your scissors IN the case to account for any extra bulk.
I also recommend just lightly stitching it on and testing the closure a couple of times before really stitching it on there securely. Just in case you need to move it up or down a little bit.
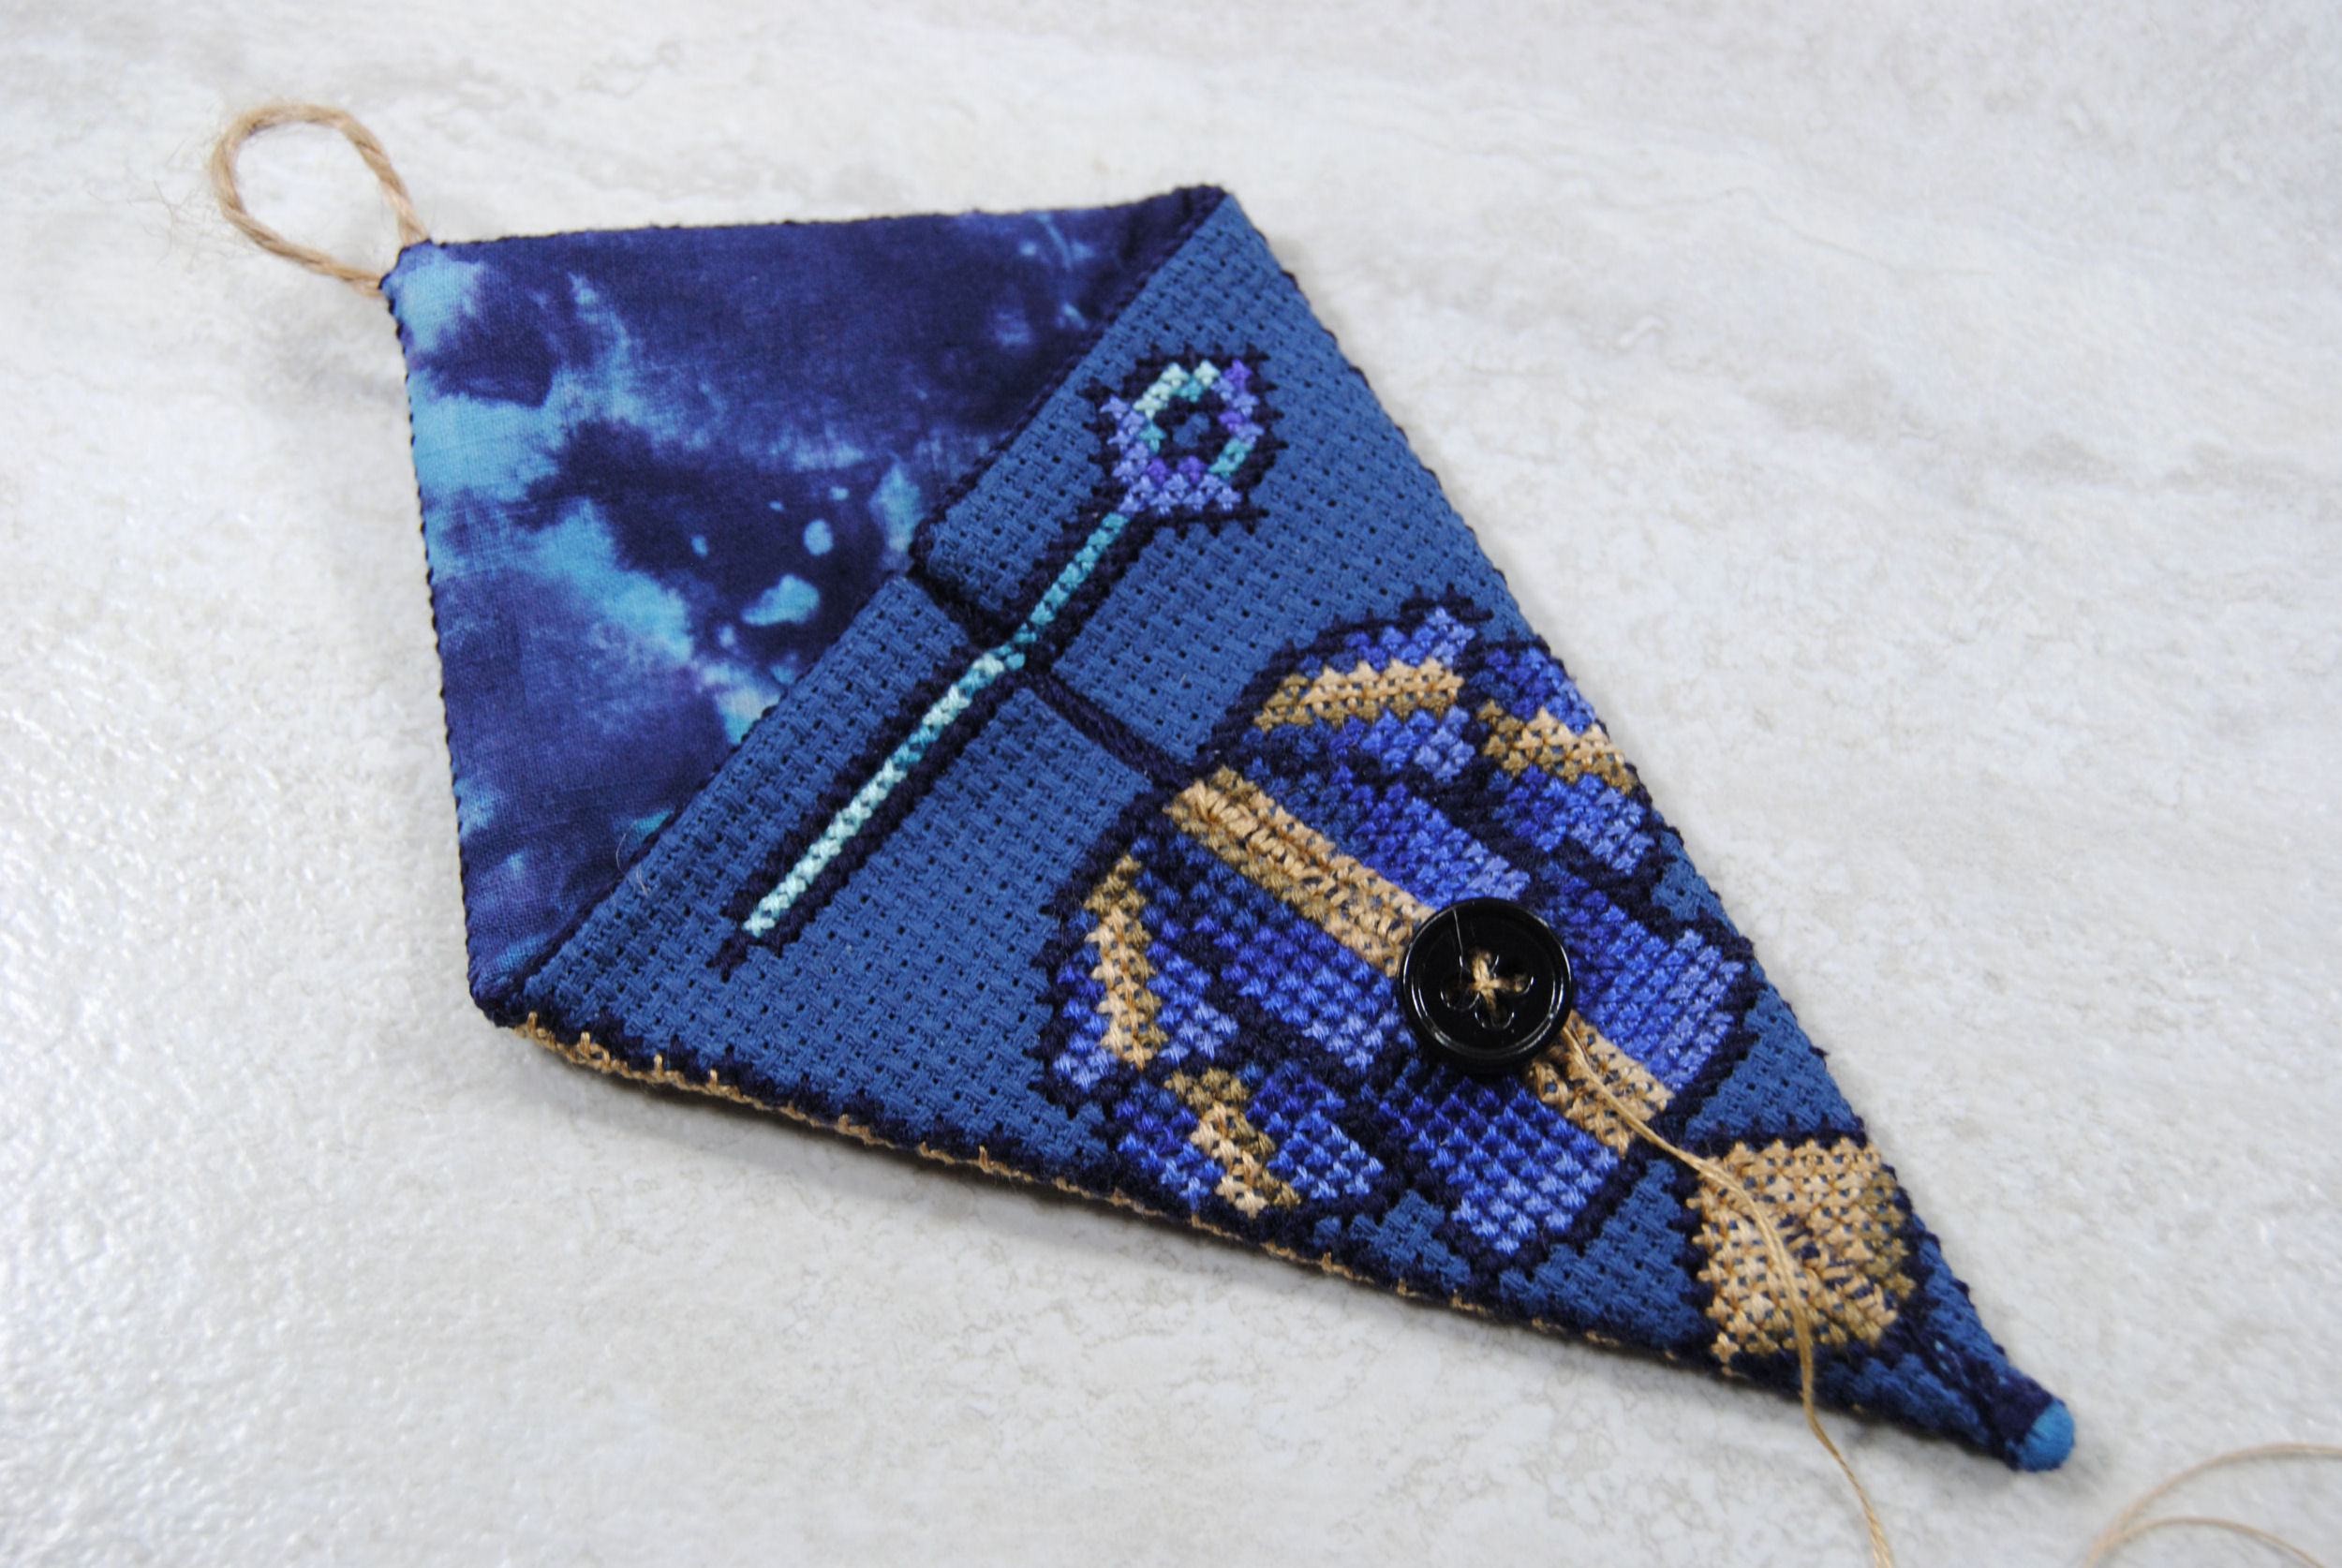
You want it to comfortably fold over and loop into place without scrunching up the top of the pocket too much.
If your loop has no elastic (like mine), you want it to be able to reach over the button to get into place, but not so loosely that it can easily come off.

But that’s it! You’re done! Now the really fun part of taking photos in an attempt to do justice to this double sided design. Triple sided if you count how the flap changes the look of the ‘back’!

I hope you found this tutorial useful! Now get out there and make your own scissor case!


