Streaming Setups for Crafts: Share your Cross Stitch With the World!
Today I wanted to put together a resource that I wish I had when I was starting out streaming. Some examples of stream setups and how to best capture crafts on camera while chatting live with other crafters. Whether you cross stitch, or do some other art or craft and just stumbled across this article somehow.
Or maybe you don’t want to stream yourself but just want some suggestions for new crafty streamers to follow and don’t mind a bit of behind the scenes info as well. 😉
If you’re a complete beginner, we’ll go over the basics of Twitch and what programs are commonly used for streaming. Skip ahead if you just want to see some actual stream setups people use and get some equipment suggestions. Including some higher end setups for those of you who’ve been streaming for a while already!
Use the Table of Contents to get around this article as needed. It’s gonna be a long one, I think.
This post may contain affiliate links. If you buy something using one of these links, I earn a small commission. However, there is no extra cost to you. Thanks for understanding! Learn more in my Disclosures & Privacy Policy.
Table of Contents
What is Twitch?
It may sound boring to some, but you can actually watch someone create art. In real time. You can type a question at them and get a response a few seconds later. If you’re also crafting and have it on in the background it can be a great way to keep yourself motivated with your own project. There’s something for everyone out there, so check out the ‘Makers and Crafting‘ category on Twitch and have a look around at what people are streaming right now!
Few of you probably know this, but I started streaming my cross stitch on Twitch way back in… 2015. Yep, before the categories Art, Crafting, Creative, or anything existed. There were only games at the time and I had to stream as “Not Playing” and thus not show up on ANY Twitch listing. I had to rely on word of mouth and Twitter alone. As far as I knew, I was the only one streaming cross stitch. And it was a blast. Having people to chat with while I worked was absolutely wonderful. There were times were there were literally hundreds of people watching me make little Xs out of string. Wild!
Later, the Creative category was launched and I encouraged others to stream cross stitch as well. And nowadays there are hundreds, if not thousands of people streaming cross stitch, perler beads, quilting, watercolors, resin pouring, oil painting, and everything in between! I don’t stream as much anymore personally, but I still definitely encourage people to try it themselves! If only to have some company while they craft.
Or if you just want to hang out with someone who’s also crafting or want to learn how to do said craft, you can find a stream you’ll enjoy watching. In fact, you should definitely watch a variety of streams before jumping in yourself so you know more or less what is expected. That said, if you’re reading this you’re probably already familiar with streaming and just want to know how to start. So let’s get to it!
Streaming Programs
Back in the day there weren’t a ton of options for streaming. It was the free program OBS (Open Broadcaster Software) aaaand that’s about it. It was a bit clunky and took a lot of trial and error to set up.
Nowadays there’s a lot of different programs and a whole TON of tutorials on how to set up layouts and things for streaming games. Even OBS has greatly improved and is much more intuitive and has more features than ever before. Most of the programs are free and there’s no right or wrong here, just whichever program makes the most sense to YOU in terms of UI and navigation.
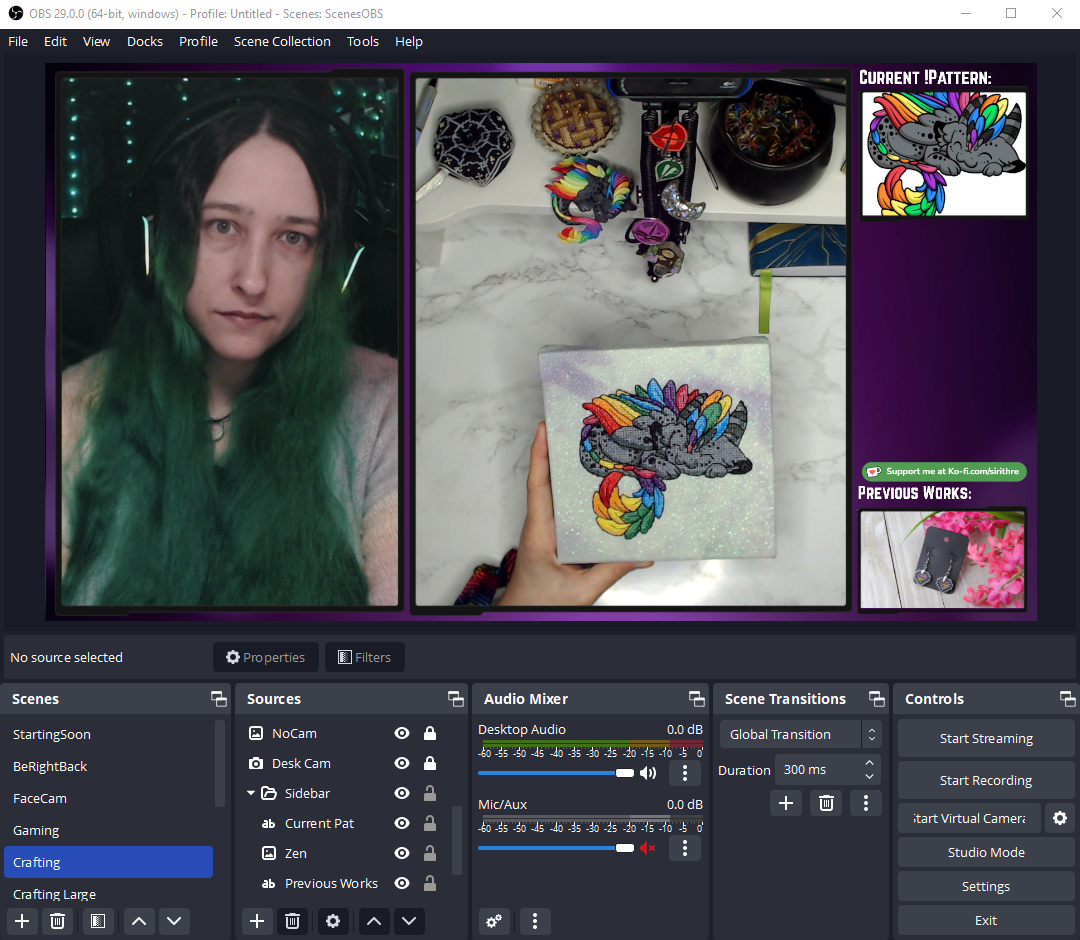
These are just a few of the most popular ones:
- OBS (pictured)
- Twitch Studio
- XSplit
- Streamlabs
I’m not going to go super in detail on these here or we’d be here all day, so check the support pages for each of these programs for tips on getting started and setting up scenes.
Oh, and OBS and Streamlabs both have Mac options if that’s something you need.
Streaming Games vs Arts & Crafts
Most tutorials will be about streaming games or digital art, but honestly streaming crafts isn’t that much different! There are a few differences though. Let’s talk about them.
Camera Required
Instead of adding in a game screen in your program of choice, you’ll be adding a webcam instead. While video game and digital art streamers can get away starting out with just a microphone, you really do need at least a webcam to stream traditional art so people can see what you’re doing!
Many streamers choose to include a second webcam to show their face as well, since viewers like being able to form a more personal connection with the person streaming. However, it is absolutely not a requirement and just a single camera pointed at your hands is more than sufficient!
Posture / Staying in frame
While gaming you don’t usually have to think about where your hands are. But for crafting you’ll need to be mindful of working under said camera. It’s not unusual while crafting to move around a lot and drifting off-camera is more common than you’d think. It can take some getting used to, and having a frame or stand to hold your project in place can help. You can always try recording yourself for a bit first to get a feel for that.
Talking Points
In a way, gaming is much easier to stream. Because you can generally commentate what you’re doing in game. That cool thing you just did. How terribly you failed that last level. That sort of thing. But it can be tough to keep a rolling commentary on slow crafts. Especially at the beginning when you probably don’t have a lot of people chatting to bounce off of either.
You definitely do NOT have to fill every quite moment with chatter, but it can certainly feel that way. So having some things to talk about prepared can help. Whether it’s a funny story that happened the other day, your plans for future projects, or what you had for lunch. Get creative.
Streaming Requirements
So what do you need to get started? Not a lot, honestly. We’ll get into specific recommendations later, but here’s just an overview of what you’ll need.
Internet. Seems obvious. But the key here being internet speed. If you’re on dial-up or satellite you might have a hard time with this. Then again, people stream from their phones while out and about as well. You may just have to turn down your bitrate and sacrifice a bit of quality. Don’t be afraid to try!
A computer. Since you’re not playing a game while streaming you can get away with a much lower resource computer. It just needs enough memory to be able to process the video feed and stream content onto Twitch. “Enough” will vary depending on how many cameras, if you want to play music or have fun sound effects. But in this day and age you likely have something capable of streaming. Even if that’s just your phone.
A webcam. At least one to capture what you’re working on. Built in laptop cam will work for facecam, but it’s gonna be tough to point it down at your project and still be able to see chat. Same with phones. You can point it down at your work but you’ll need another device to be able to effectively see chat. So an external webcam is easier if you have one available. It doesn’t have to be terribly fancy. Especially starting out when you’re not sure you’ll even enjoy streaming. You can always upgrade later!
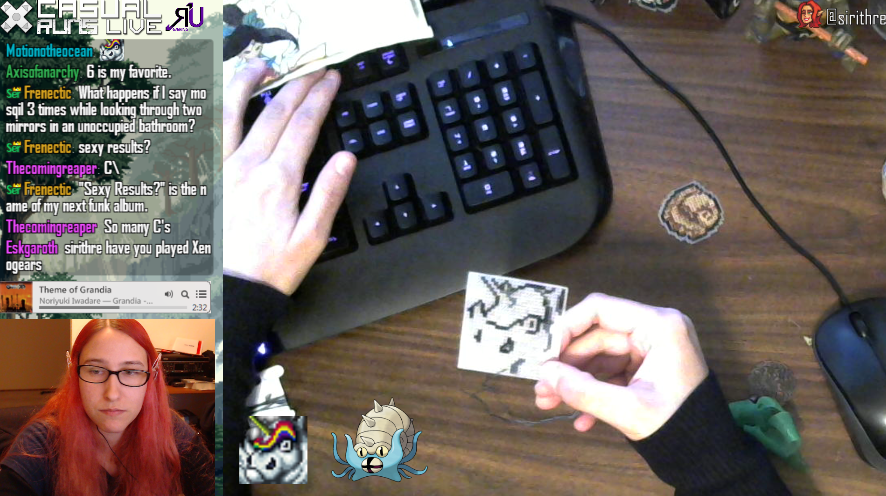
Even if you think your setup looks terrible, people will still watch. Just check out this wonderful potato quality old Xbox 360 camera I had pointed at my desk back when I started. 640H x 480V video @ 30 frames per second. Mmmm.
Having just googled it to get those stats I can also confirm there are some on ebay for under $10 including shipping right now. Wow.
A microphone. Whether a fancy stand mic or the one on your headset. If it’s enough for a zoom call, it’s more than enough for streaming. And technically, this is optional! I’ve seen plenty of streams that don’t use a microphone and just have music playing while they work. It does mean having to stop what you’re working on to type in chat though, so it may not be ideal for crafting.
Your project of choice. Yep, that’s it. Whatever it is you’re working on right now.
How to Actually Set Up Your Streaming Area
Okay, okay, here’s the actual reason I wanted to put this article together. The questions I see asked most often. Knowing you need a webcam pointed at your hands is well and good, but how to actually set that up physically on your desk?
The thing is, everyone seems to do this a little differently based on what they have on hand and the area they’re working with. There is once again no right or wrong here!
Examples are super helpful to get the ideas rolling though, so I reached out to some streamers to see if they’d be willing to share how they have their cameras, computers, and microphones set up so you can pick and choose the setups that fit best for YOUR space. I’ve included THEIR affiliate links where applicable, so they still get credit for recommending these items to you!
Whether you plan to stream yourself or not, I encourage you to follow these kind souls and check out their crafty streams some time! I tried to get people who stream at all different hours of the day so there should be at least one that fits into your schedule.
OphiNstitch – Cross Stitch, Pixel Art, and Games
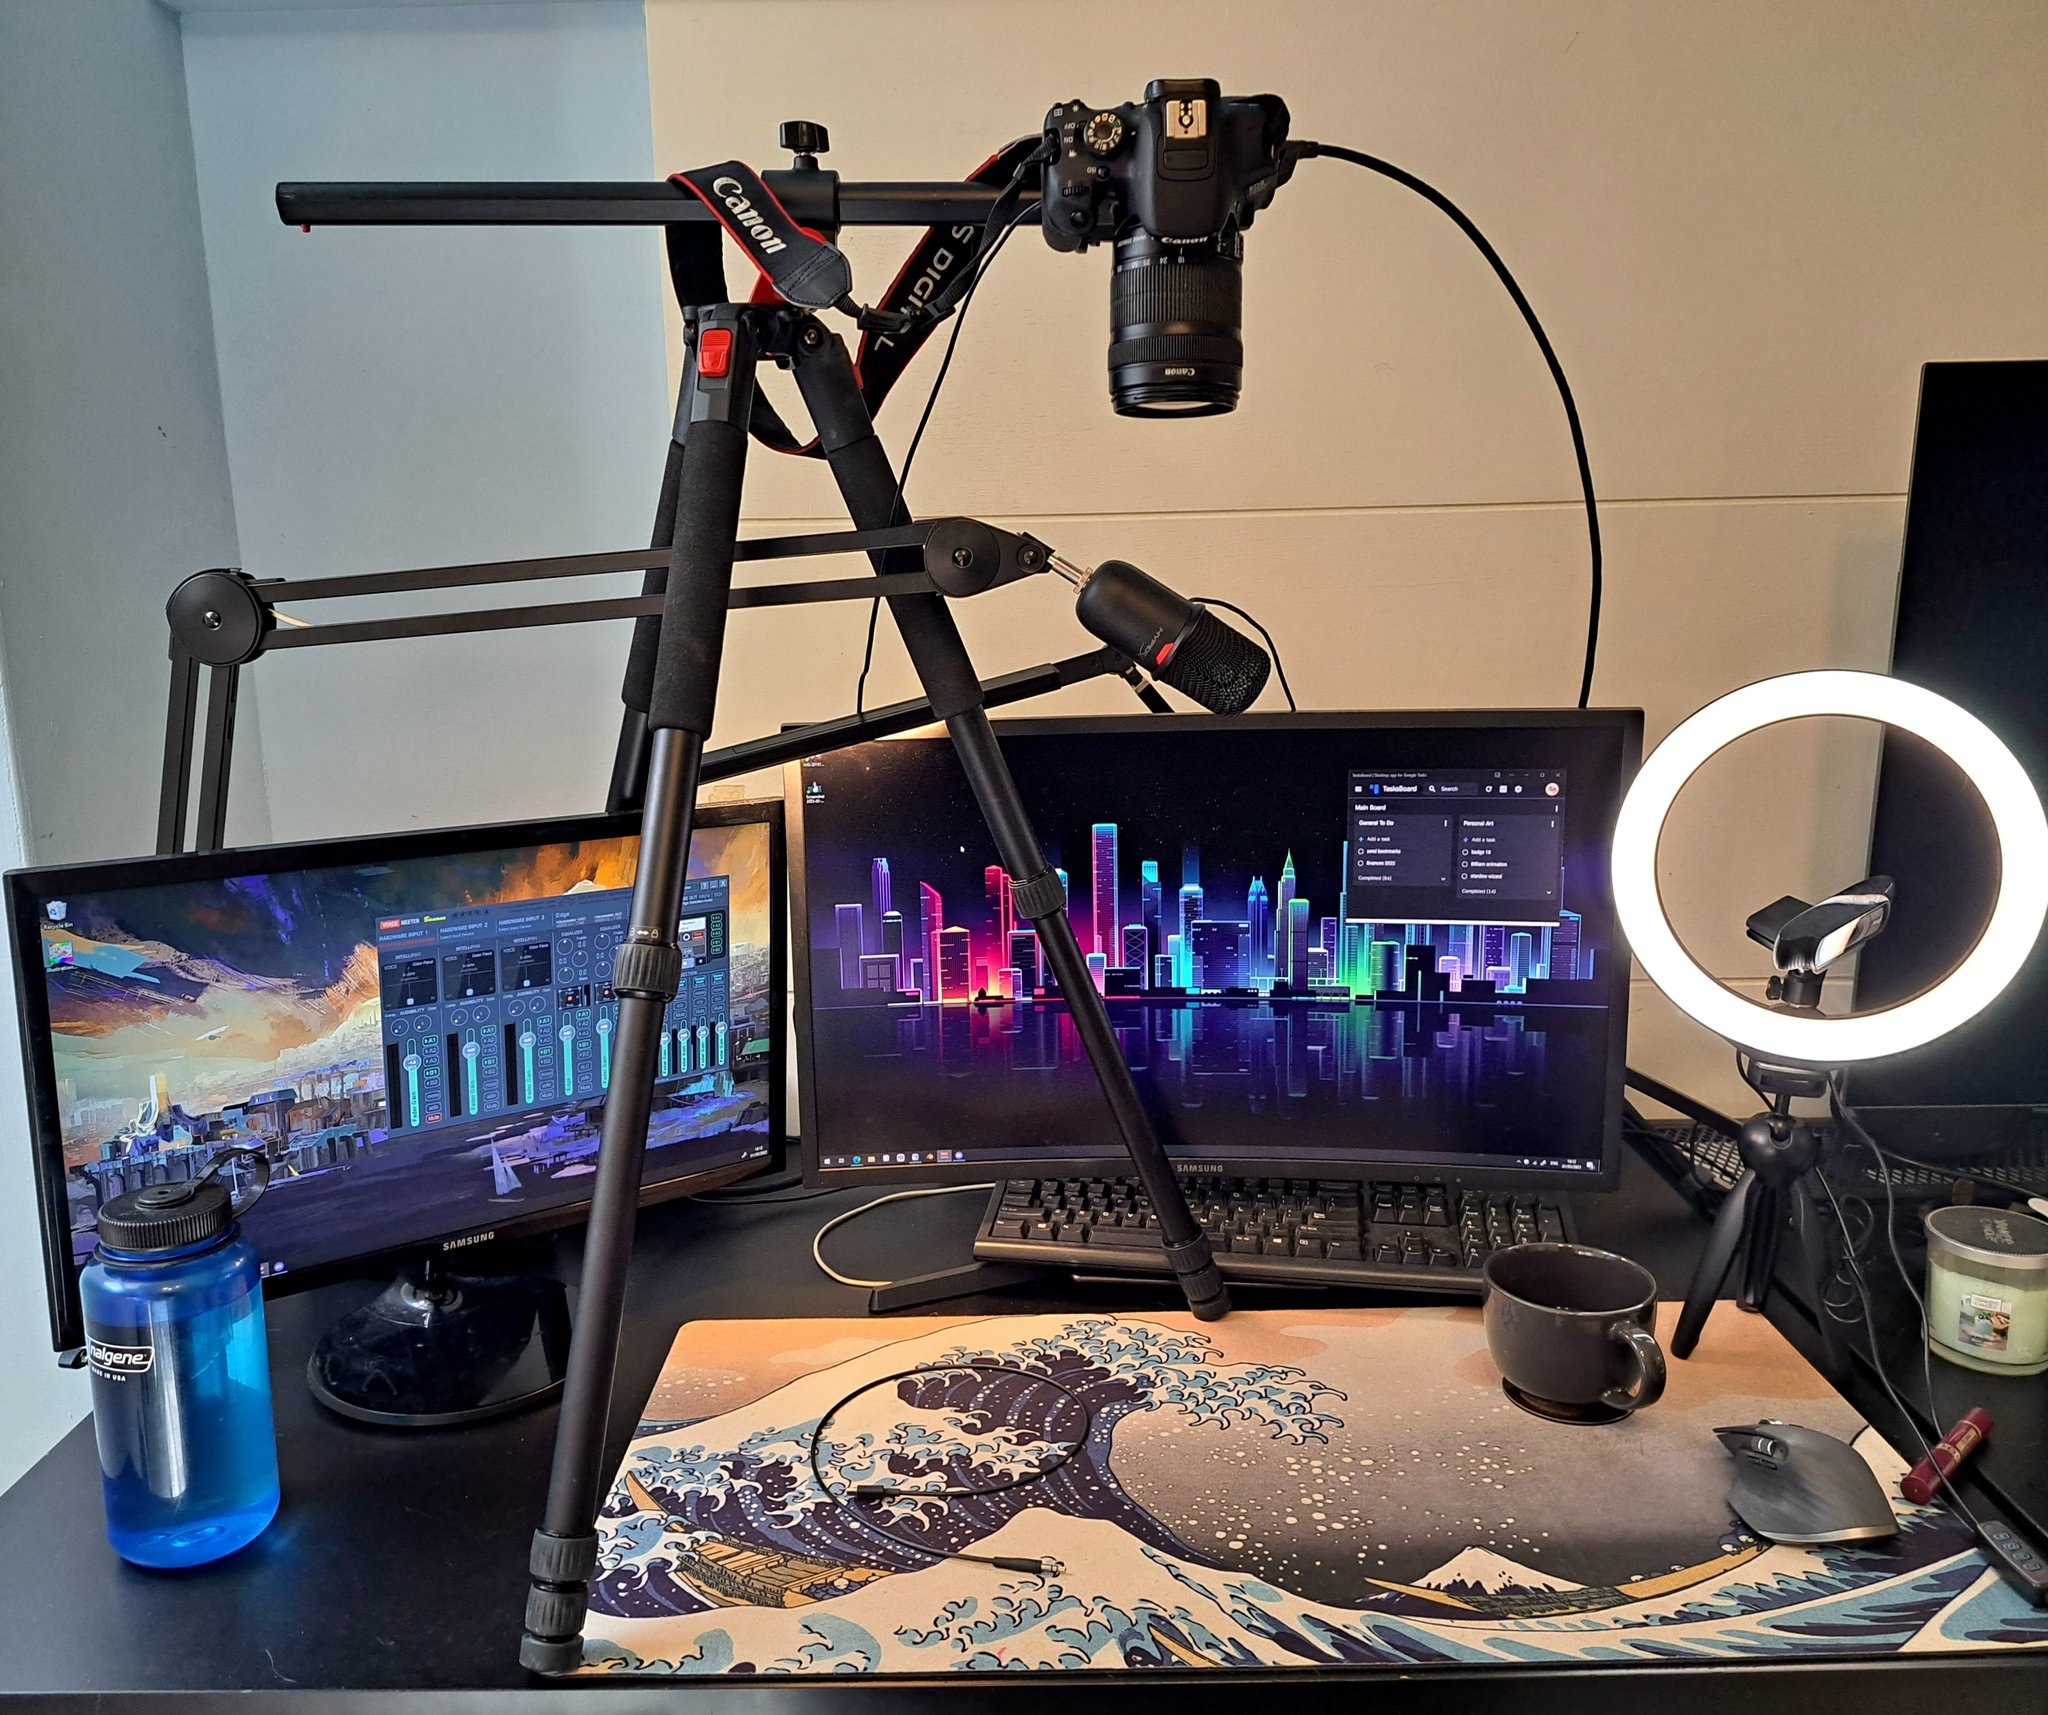
Ophi is a Palestinian pixel artist living in Taiwan, who also streams their cross stitch! They were nice enough to send over not just their current setup but also the one they started out with!
Not everyone has a DSLR to start, but this 10 year old Canon 700D was more than enough for a high quality hand cam, with a tripod strong enough to hold the camera horizontally. If you have a DSLR on hand or are willing to invest in one it can be great for capturing all the fine details of your craft. Plus you can manually adjust focus rather than having to do it via software like most webcams. You’ll most likely have to get a capture card to feed the camera output to your PC though. Ophi uses a Live Gamer Portable 2 Plus for this.
Their facecam though is a standard Logitech C920 which you’ll probably see in most setups here today. In fact, that camera also worked as their microphone to start since it has one built in!
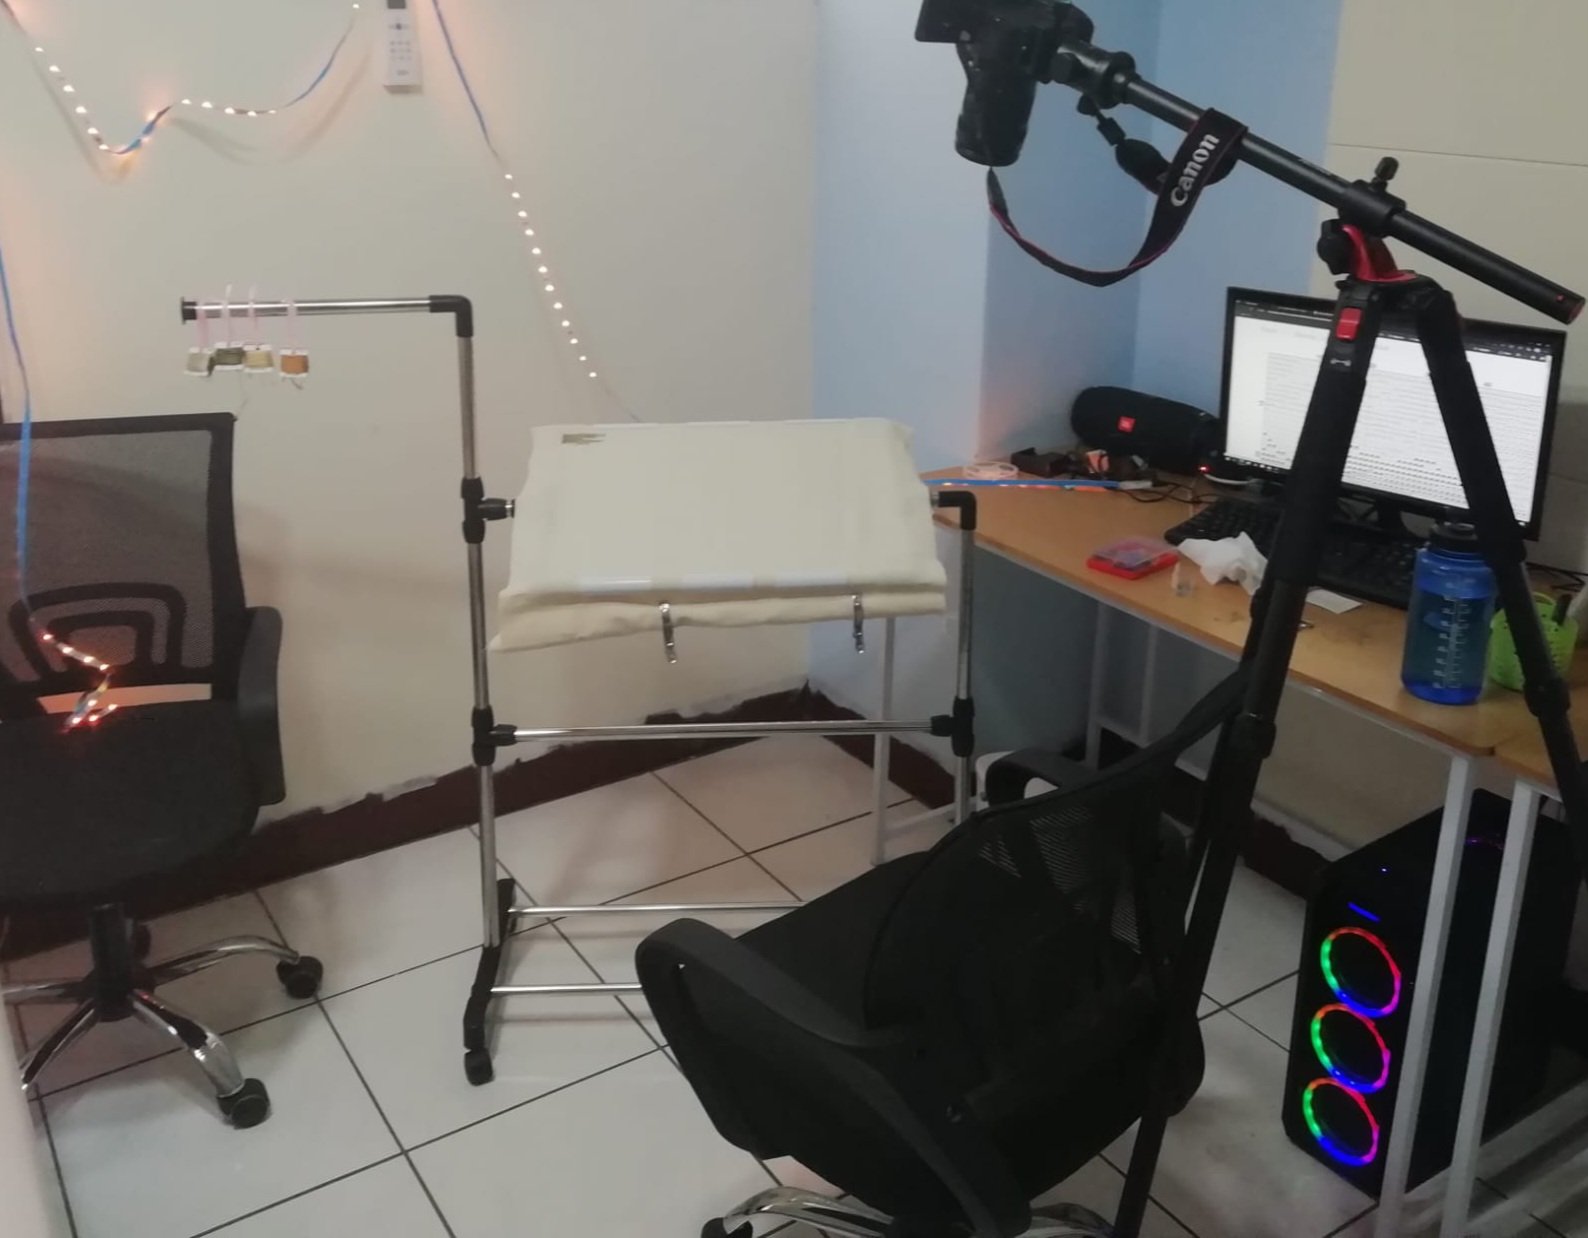
They later upgraded to a Hyper X Solocast microphone which is held over their workstation with a boom arm. And also added “the cheapest ring light I could find” to hold the webcam and make sure their space is well lit.
They also advised to have several projects going when streaming, as streaming the same thing repeatedly can be draining. Being able to switch between projects or even crafts can help keep you interested, as well as your viewers!
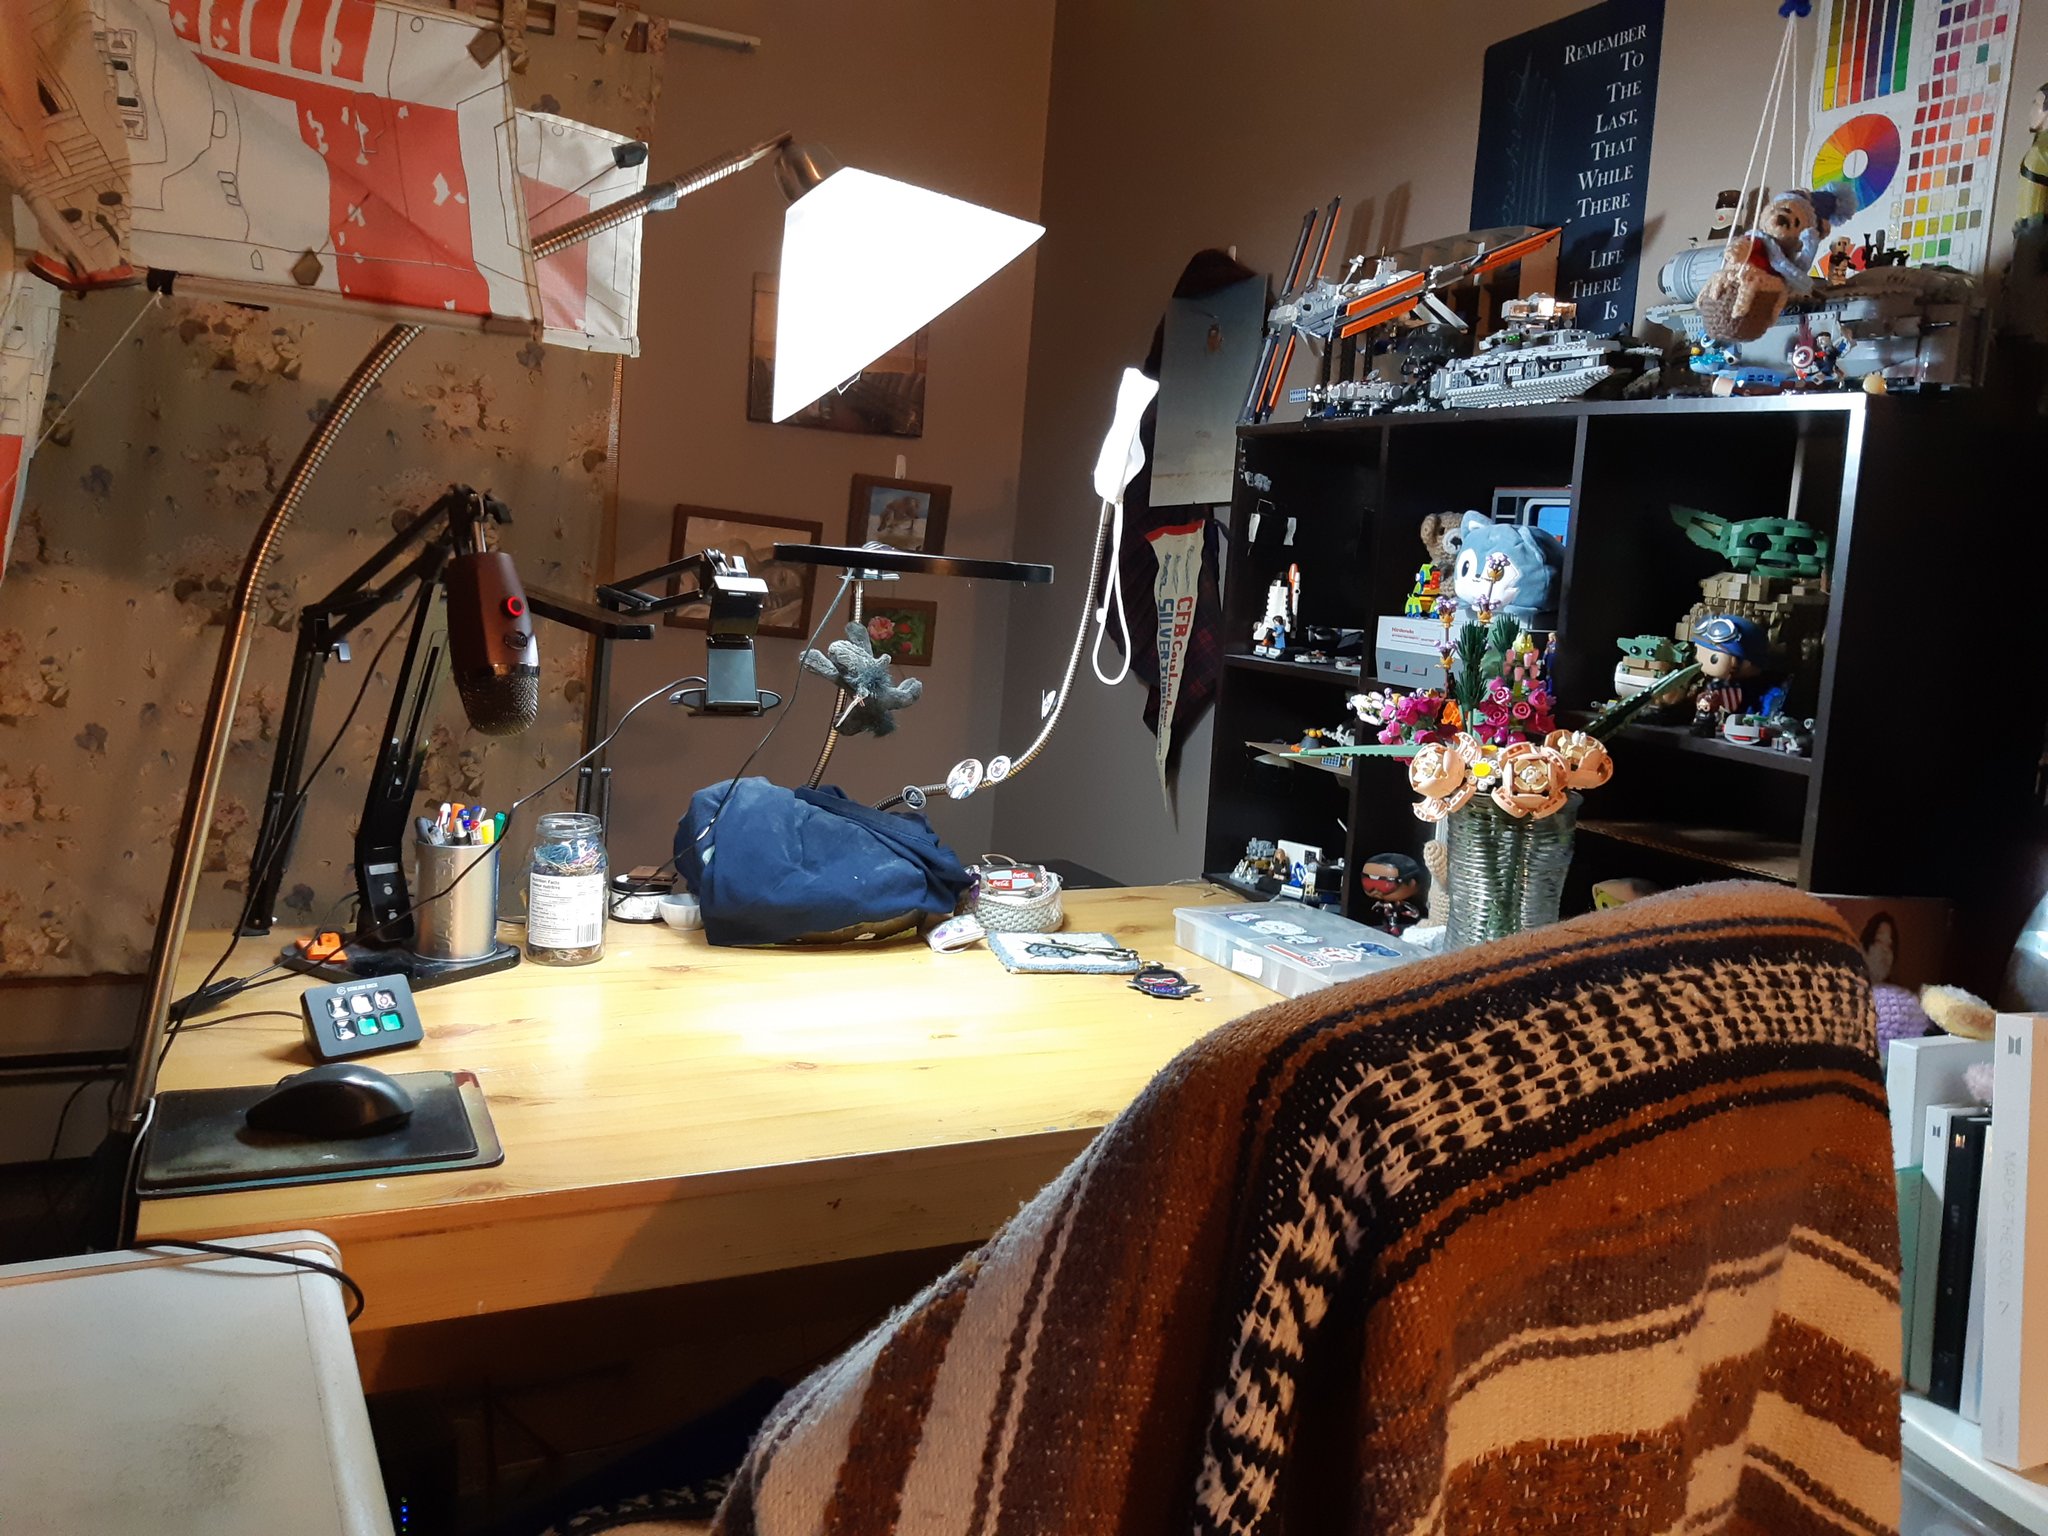
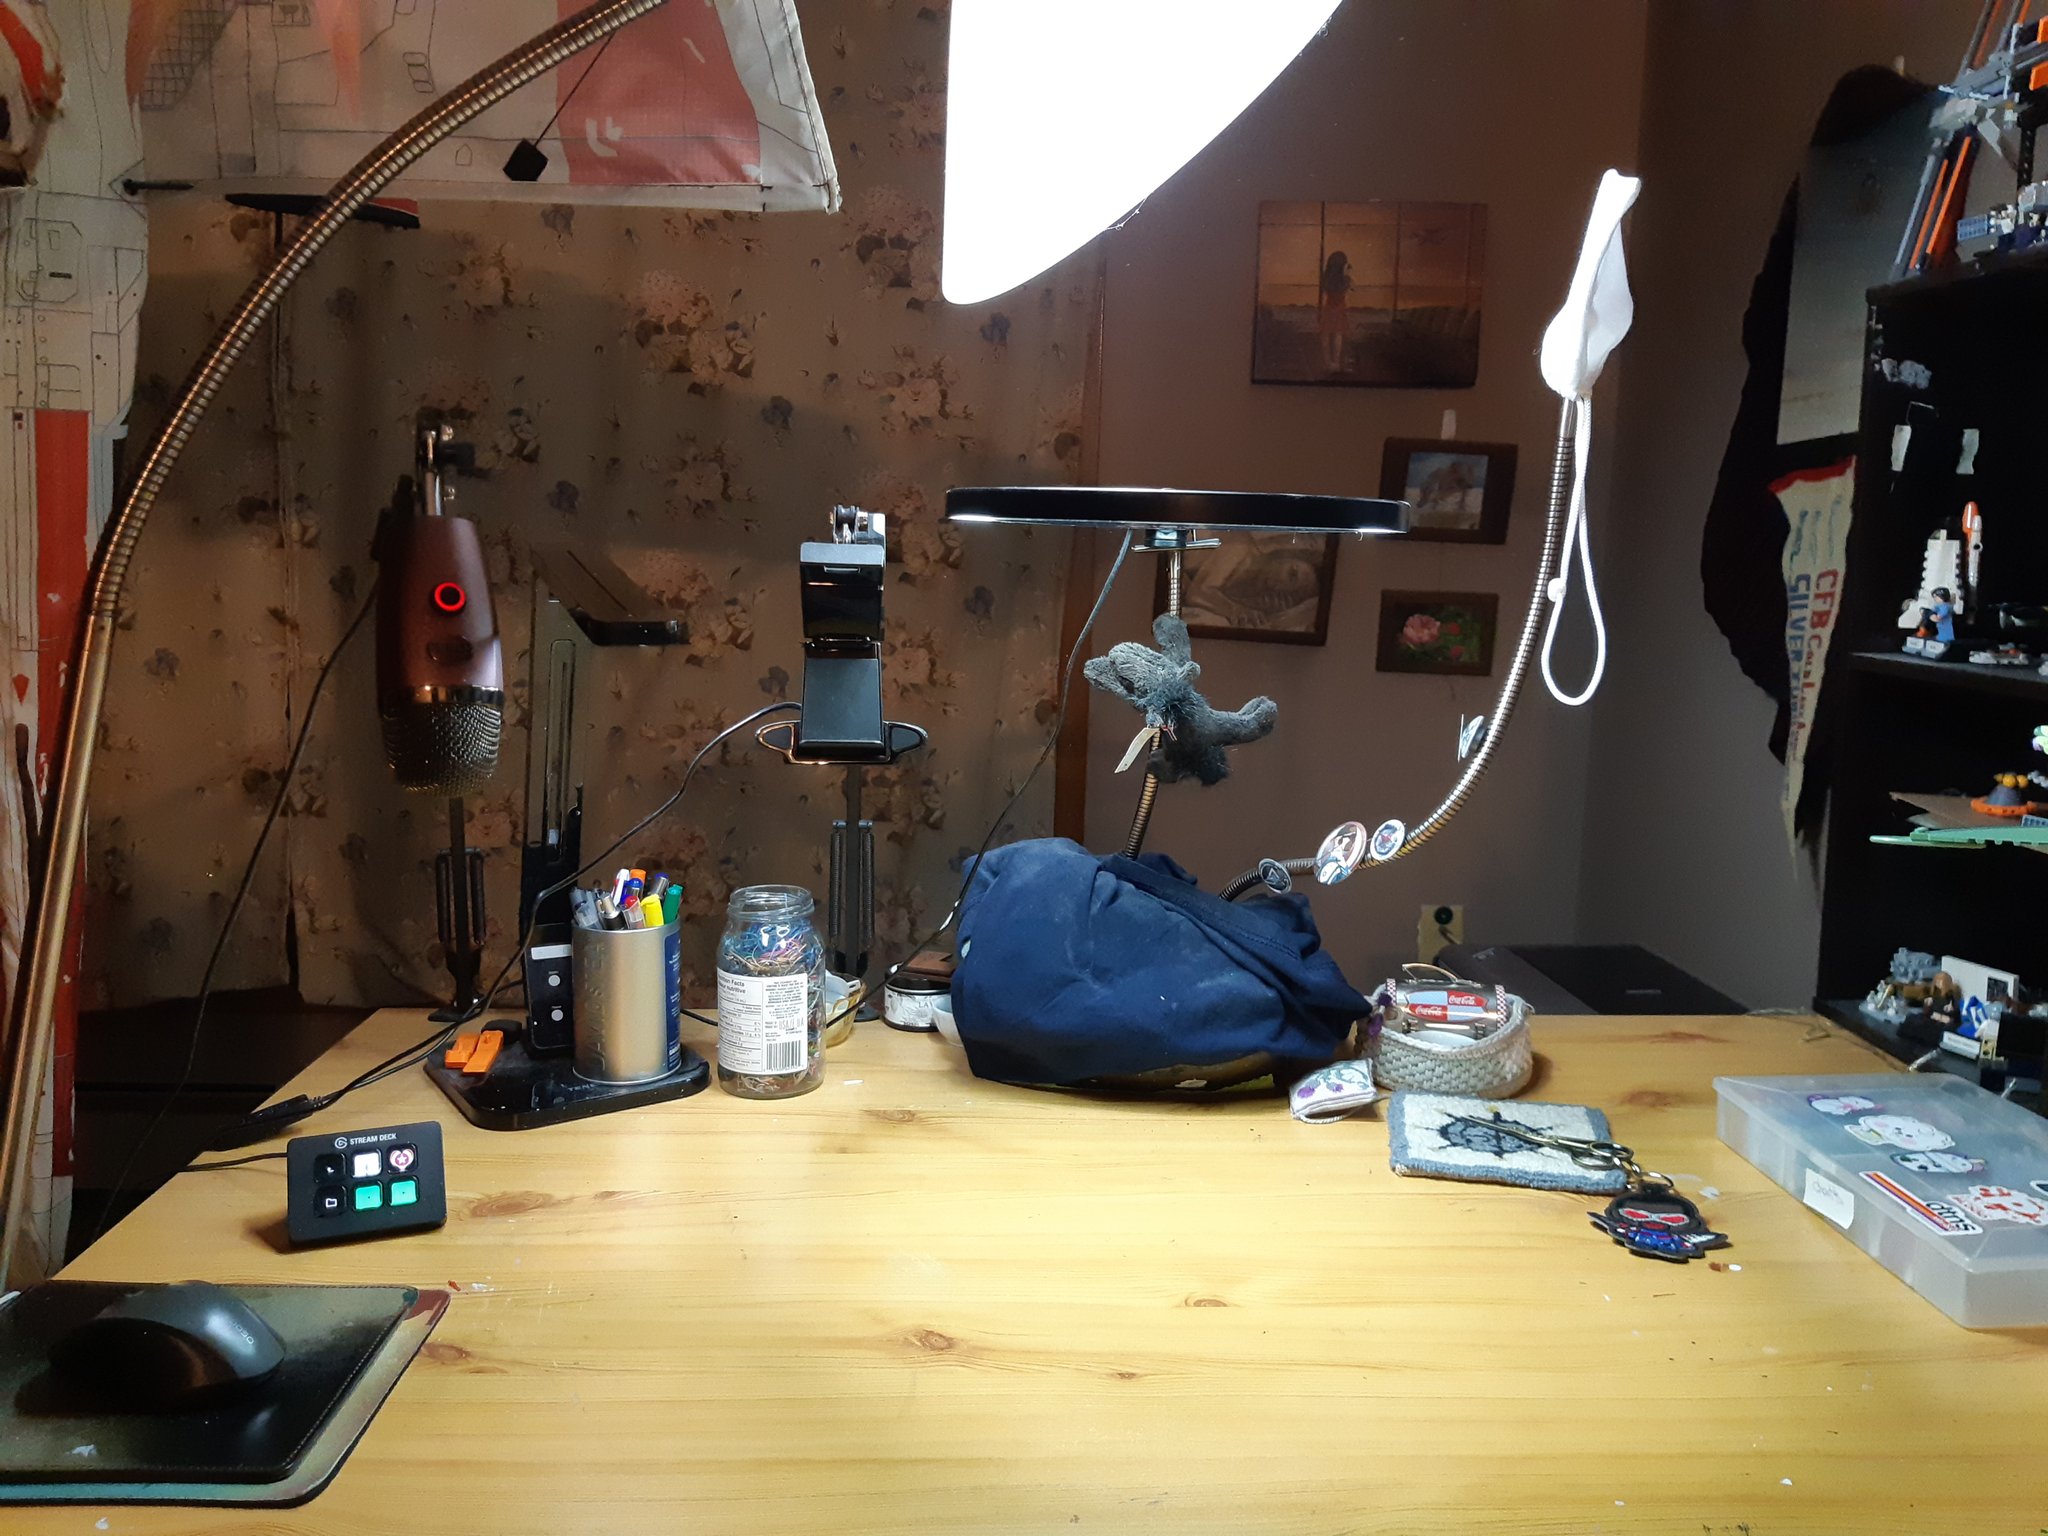
AzureKoi – Cross Stitch, Resin, and Many Other Crafts
AzureKoi streams mainly cross stitch and the making of resin needle minders, so she has cameras pointed both at her desk, and a crafting table to the side. And of course a dog cam. Because if you have a pet this is absolutely essential. Your viewers will thank you.
At least two of the cameras are the Logitech C920, but she warns that having two of the same camera can have its own issues, as the camera drivers often can’t tell them apart. Her workaround for this is to reinstall one of them using just generic webcam drivers. Using different camera models or different brands can help avoid this issue in the long run, though.

If you look real close you can see the crafting table camera is attached to her table lamp using zip ties and a toilet paper roll. Don’t be afraid to get creative with how you mount your camera! It’s not like your viewers will be able to see that most of the time. Until we point it out here, of course. Seriously though, zip ties are wonderful.
More importantly, she also marked on the table in sharpie (which is covered in kraft paper) exactly how much of the table is being captured by the camera. This way she knows exactly what is and isn’t on-camera at any given time. Brilliant!
The stitch cam is on a suspension mount coming in at an angle to get as much stitching in frame without blocking the facecam. Using a desk clamp like this can make it easier to move the camera out of your way or reposition it on the fly.
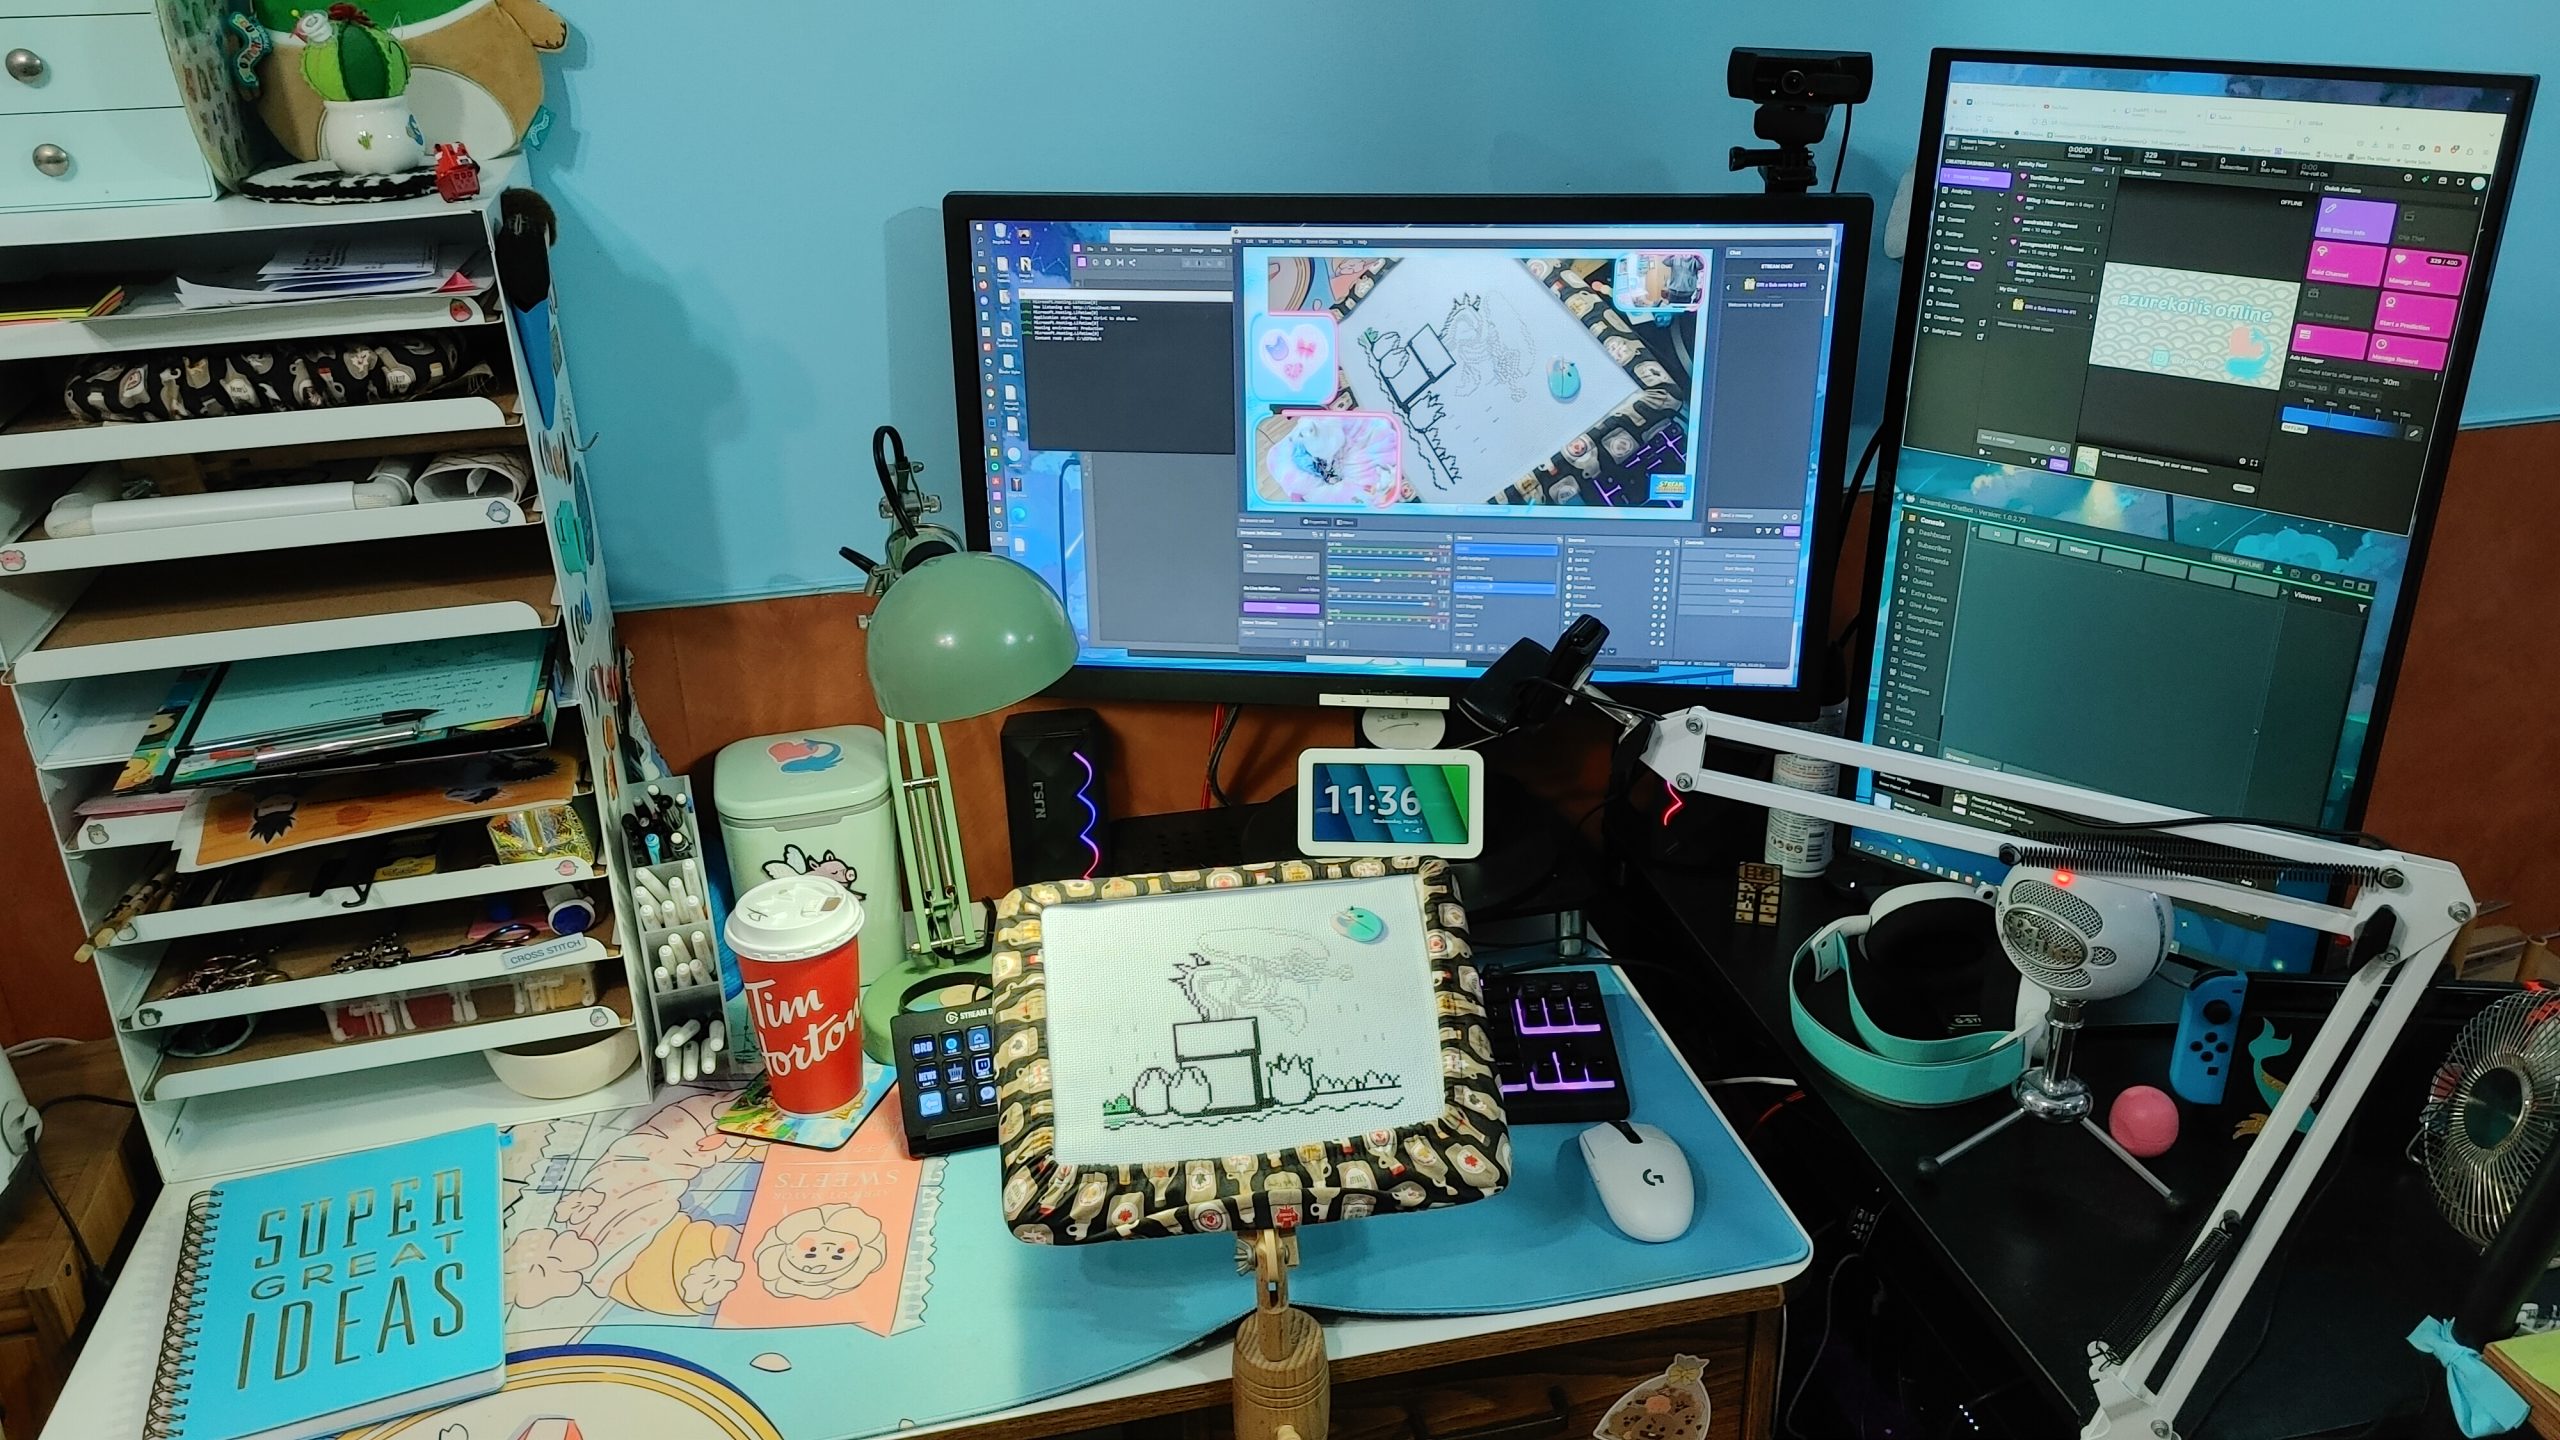
She also recommended keeping your facecam a bit higher than your face level and pointing it down a bit to get that perfect 15 degree selfie angle. 😄 Another good tip here is to keep your chat window near your webcam so that when you’re reading chat you’re looking generally at your camera and chat feels more like you’re talking to them rather than at your project.
The microphone pictured is a snowball mic that was gifted to her. But if needing to move around a lot for a stream, having a wireless headset definitely comes in handy. Another gifted item was that streamdeck you might see peeking out from behind her project. While absolutely not necessary it can be quite useful for quickly switching between cameras, break screens, and so forth.
That shelving unit on the left holds all the materials and patterns for her current WIPs making it easy to switch projects without any stress. Having everything within reach means not having to get up as often. This includes keeping some Tim Hortons on hand if you happen to live in a place with access to it. 🤣
OBS is her streaming software of choice, but she also recommends GIFBot if you’d like to add a bit of excitement to your stream via gifs and sounds.
BlackSheepMeet – Cross Stitch, Diamond Painting, Knitting, and Much More!
Ariana streams allll sorts of different crafts. From assembling LEGOs to cooking chicken wings! As such she’s gotten very familiar with setting up hand cams depending on the project. For now though we’ll be discussing her main desk setup.
Her desk has pull out section turning it into a corner desk which becomes her crafting area. Like most of us she started out with the Logitech C920s, but has since upgraded to the Elgato camera for her facecam. This facecam is kept on a flexible gooseneck mount so it can be easily adjusted from crafting to pc work on the fly. Meanwhile, craft cam is kept on a suspension arm to keep it more stable over the current project. She also uses an Elgato Wave 3 as her microphone.
For diamond painting she likes to use an easel so that it’s held up and more comfortable for crafting. Those clamps on the side keep it from sliding around as well. For cross stitch, she uses a lap stand instead, setting it on that same desk area and using some Quakehold! or Museum Putty to keep it from moving around as she works.

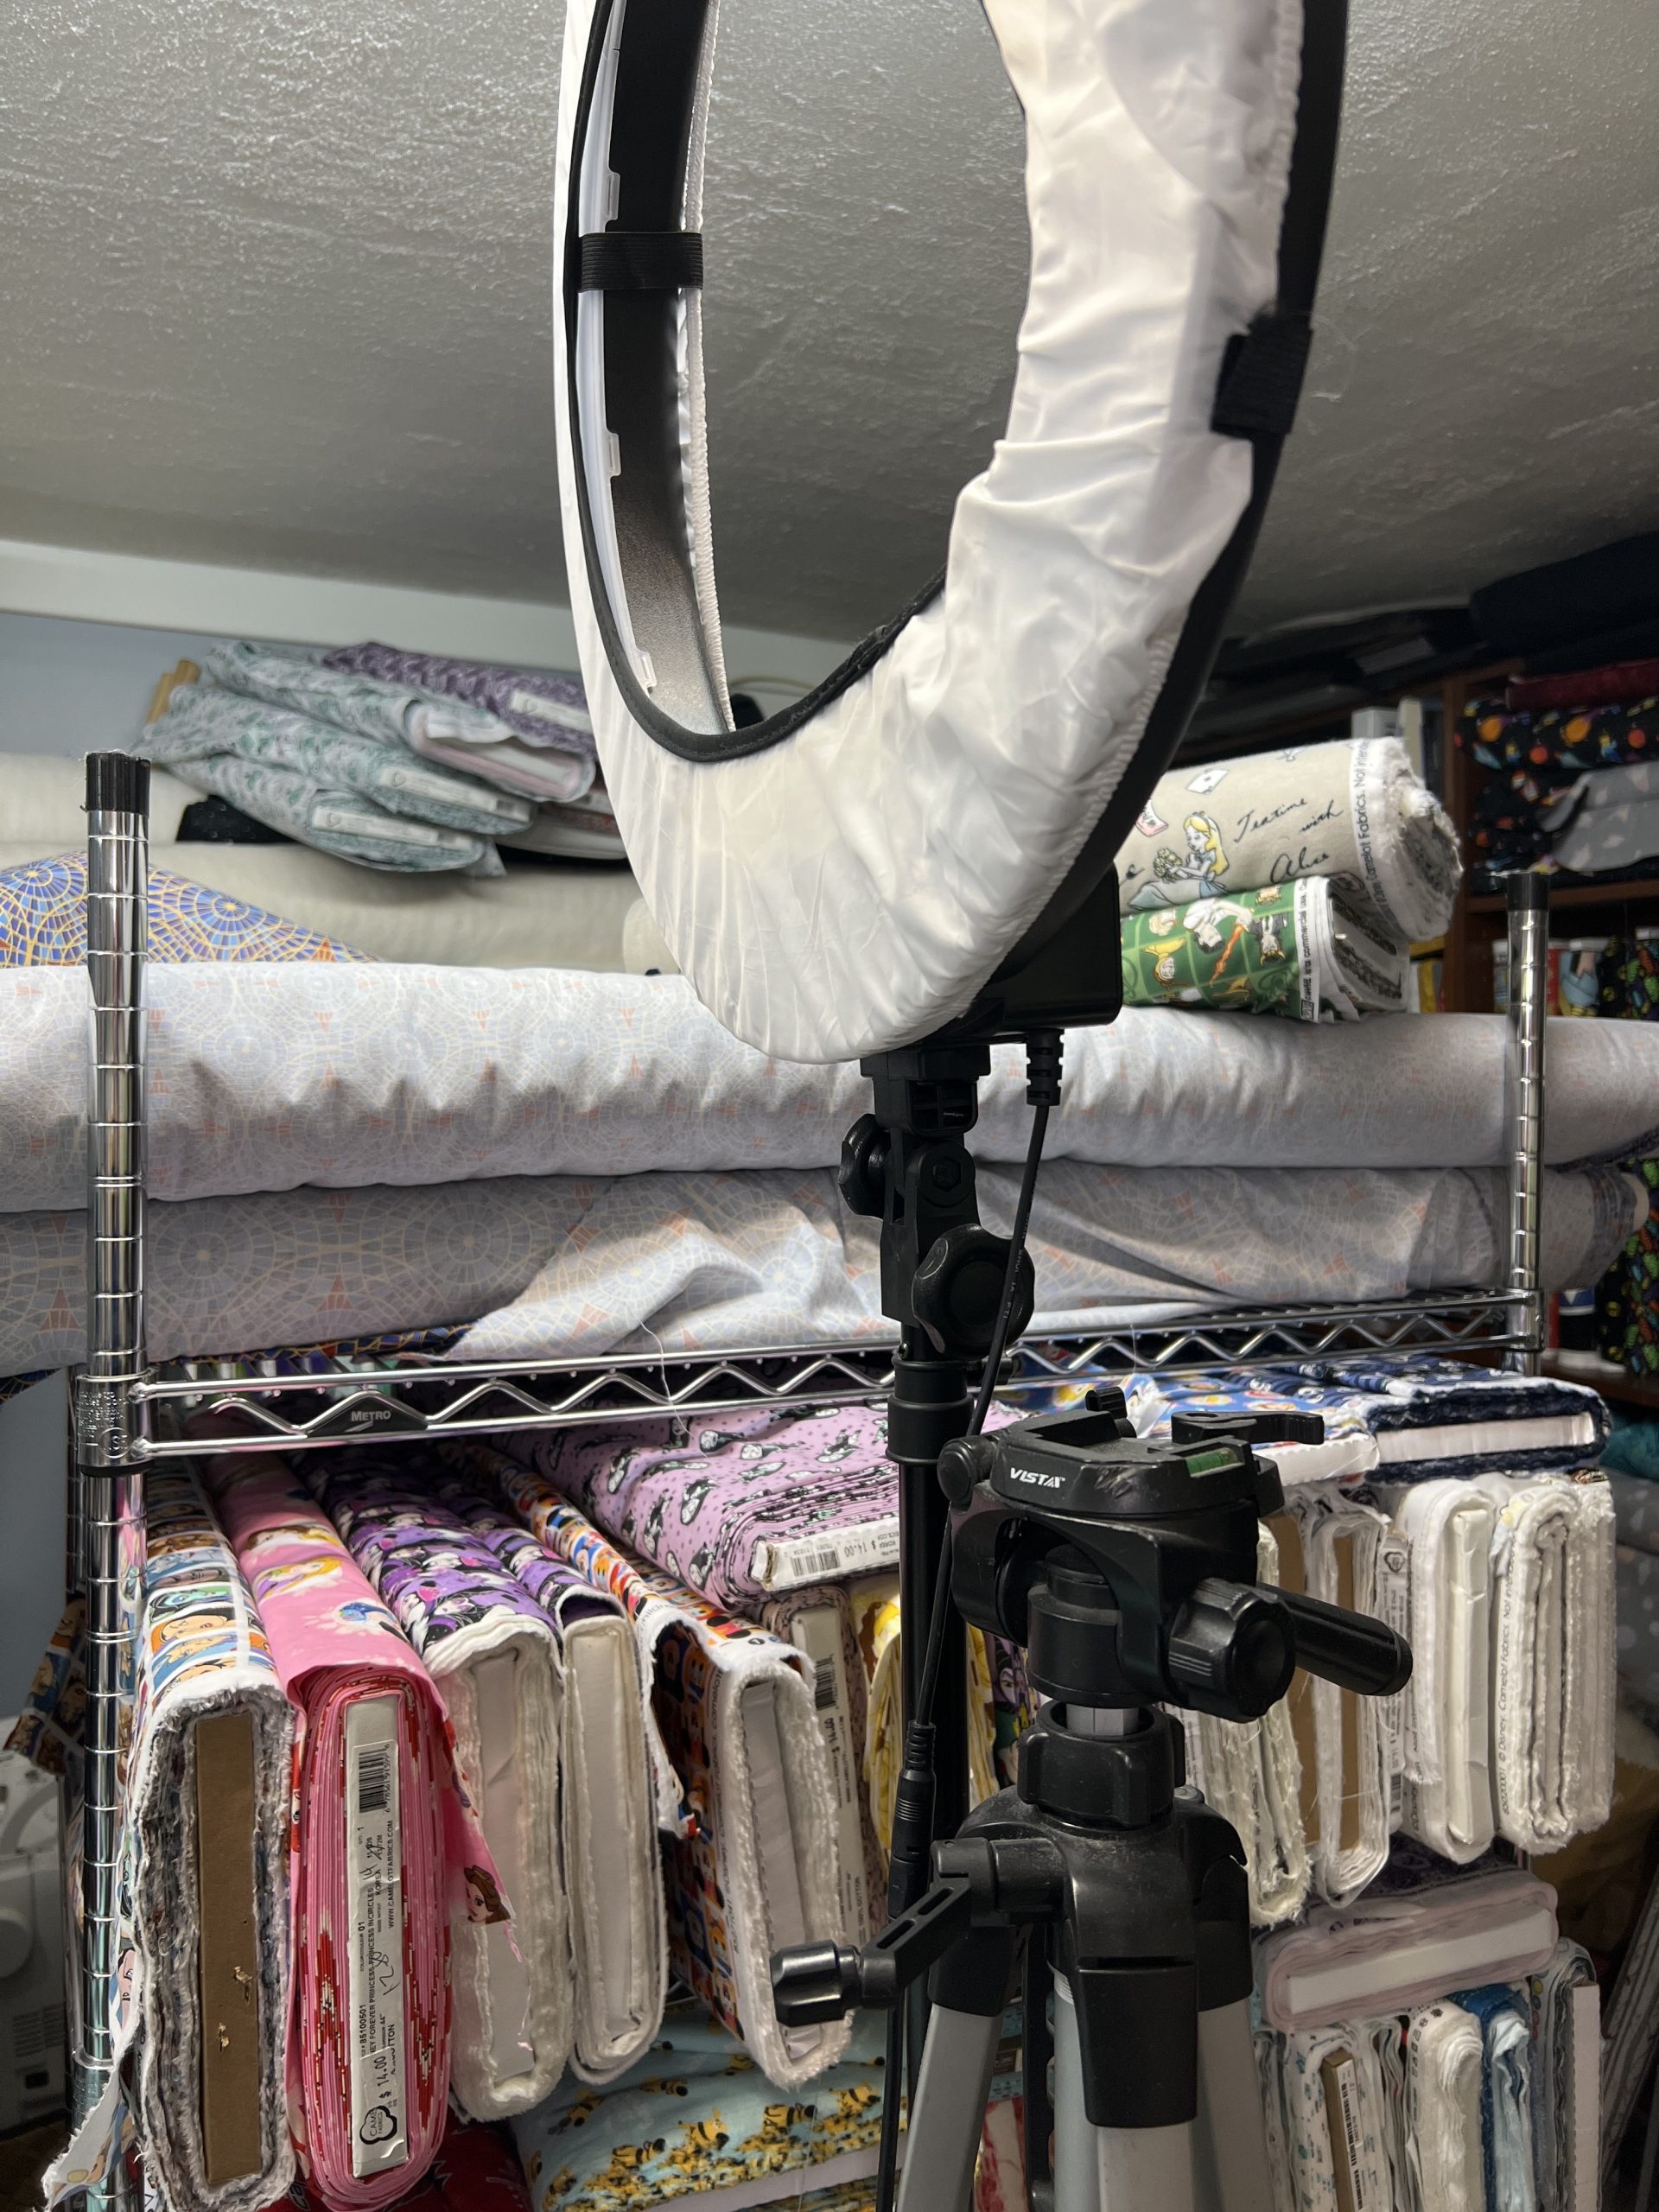
During the day that window behind her crafting space provides ample natural light, which is always ideal. But since she mostly streams at night, she also has an Elgato Keylight behind her monitors and a small lamp to the right. Both are pointed at the wall to reflect light and keep it from being too harsh.
While we’re mostly focusing on desk setups today, sometimes it’s good to remember that the stuff behind you adds to stream as well. Here she shows off how colored flood lights can really add to the mood and provide lighting too. Plus, having a gallery wall behind you can get chat asking questions and allow you to talk about your previous works and interests!

Quiltoni- Quilting, Gaming, and Charity Streams
Quiltoni‘s setup is a lot more complicated, so I’ll let her take over from here:
Hi! I’m Toni, the Pixel Quilter! As someone who has been streaming and making YouTube tutorials for over six years, my set up is a little different. I didn’t start out with this setup and have been slowly adding to it over the years. It is super efficient to record videos and live stream (I do both through OBS).
First let’s look at what I use to hold my cameras. There are a few different ways I do it.
Tripods. The good old fashioned tripod set up. My main camera uses this one.
The dog camera uses this tripod (it has to be much lower so smaller)
Clips. I use these camera clamps to stick cameras to my bookcases, desk, lights, anything I can.
Arms. I have two arms that attach to my desk and bookcase so I can move and position the camera any way I want. Or this stand if I need a longer arm. They can use both the clamp they come with or switch out to the wall mount. (I also use an arm for my microphone)
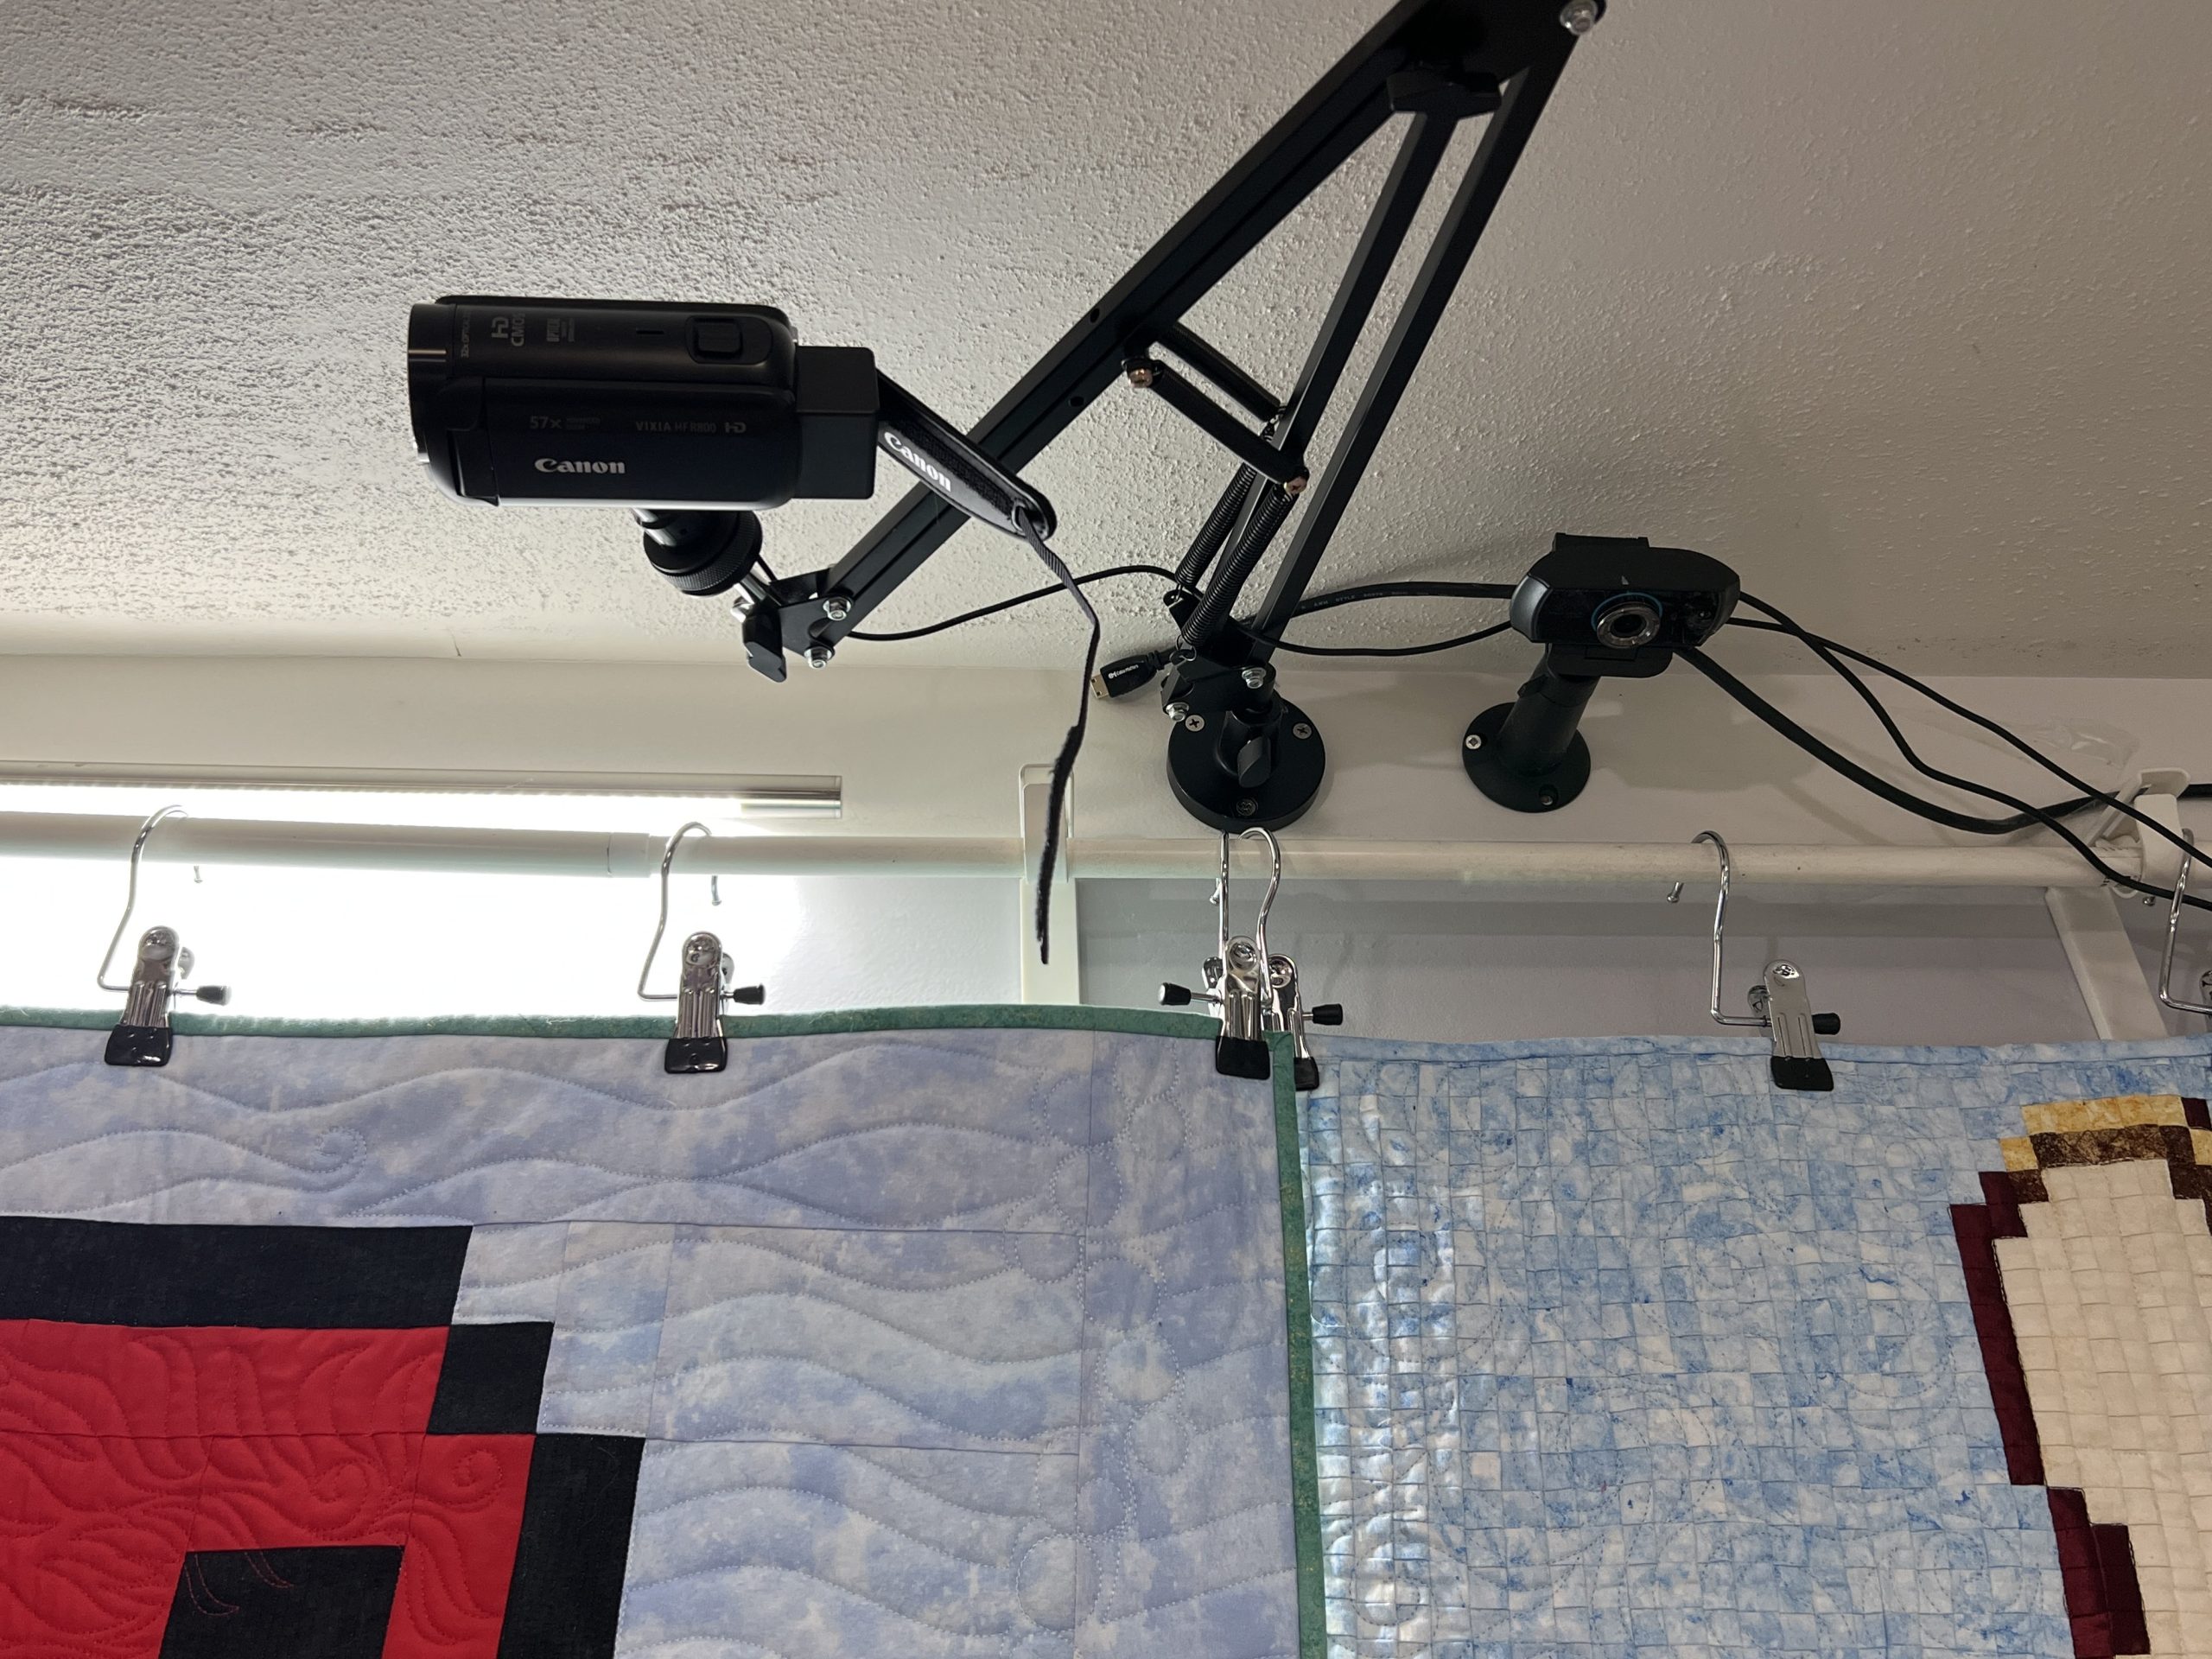
Mounts. The last way I hold my camera is through wall mounts. Some are mounts with arms for better mobility. These are permanent structures that I have the wires taped along and around to my computer to keep them out of the way.
Lighting is a topic that a lot of people overlook. This is super important for your setup. I make sure all windows are covered and am using daylight bulbs when filming to show off what I an doing. I use the following lights:
Now let’s take a look at the cameras! There are two types of cameras. USB and Capture Card. USB cameras can just plug in a go, but they don’t give you the best picture for filming AND beware Logitech. If you have more than one Logitech, they MUST be on different USB hubs or they will conflict with each other and one won’t work.
USB Cameras I use (yes, I have all of these plugged in right now):
- Logitech C920 (I have 2 of these, so 3 logitechs on 3 different hubs)
- Logitech C922
- Annirose 1080p Webcam
Capture Card Cameras are exactly that, cameras that can’t connect to your PC without a capture card. There are two ways to accomplish this, with an external capture card or an internal capture card.
The external is a lot less money (and you don’t need to take apart your desktop for it) but it is a little trickier to set up and you can only have one camera plugged in at a time. I now use my external capture card to capture my Switch when gaming. I use the Elgato HD60X. It can capture cameras or game systems. The Elgato Cam Link is less money but captures Cameras only.
The Blackmagic DeckLink internal capture card is what I switched to. It is amazing and a dream to work with. I have 3 camcorders hooked up to it so all I have to do is push a button and switch cameras. No more moving the camera in between takes for the shots. It is expensive though. You also need to install it inside your desktop computer (or have someone install it for you). If you have the money and the technical know-how, this is ideal.
So what camcorders do I use? I have 3 of the same exact ones, just one of them is newer than the other two. I ADORE the Canon Vixia HF Series. They are easy to work with and can be used for either capture card. Just make sure it has an HDMI port of some kind (regular or mini is fine) so you can plug it into the capture card.
When you look at everything I have set up you might think “That is 3k-5k of stuff!” and you wouldn’t be wrong. My set up is NOT for the beginner, but it shows you where you can start and things you can add over time when you have the time and money.

If you need any other ideas for mounting or products I am always happy to help! I even made a video about some of this and how to position the camera when you are filming. So I hope this helps in some way with the setup of your dreams!
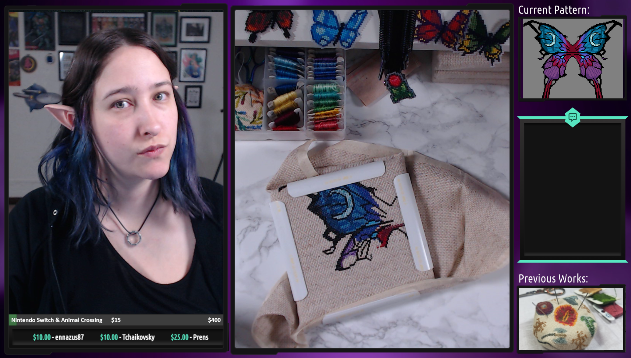
AuroraLee1013 – Cross Stitch and Mixed Media Art
Aurora Lee has quite the cozy setup to show here as well as some words of wisdom to share.
First, let’s talk equipment. While it’s important to her to have a face cam, the quality itself isn’t a high priority so she uses a generic Skype camera from years ago. It’s on a swing arm that she swings to the side after her streams.
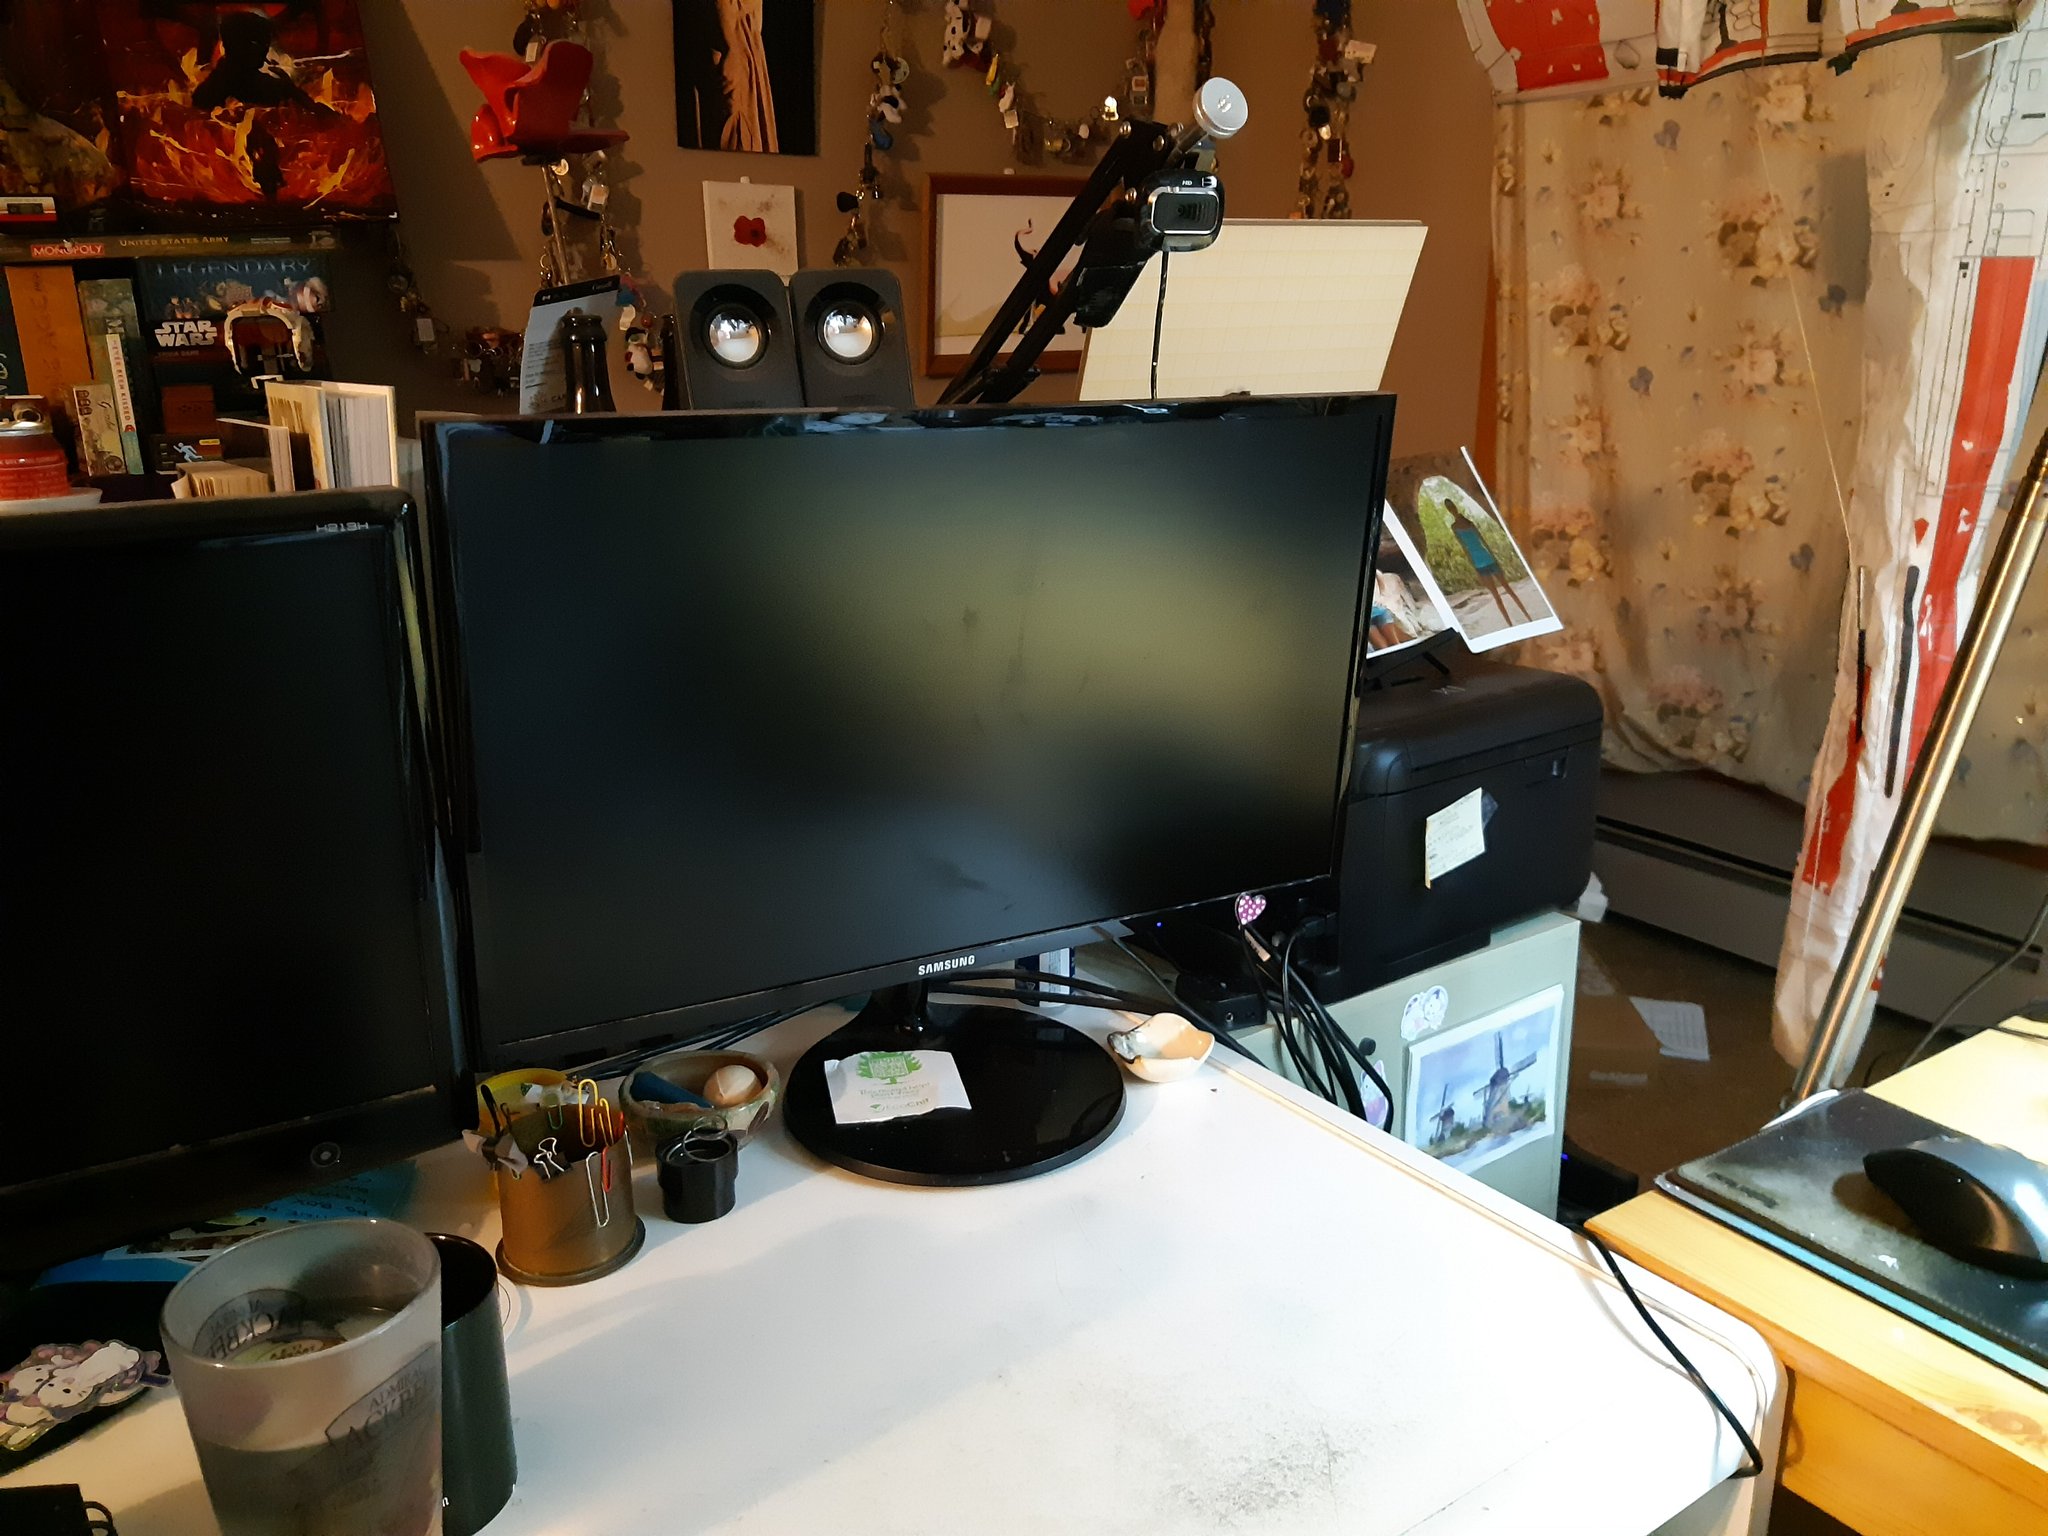
Meanwhile, we have a Logitech c920 for the ‘sky cam’. It allows her to do some pretty extreme close-ups which comes in handy for teaching a technique, or just showing off stitch work. It’s also on a swing arm.
The microphone is a Blue Yeti Nano. Previously on a small stand, but now graduated to a proper swing arm as well.
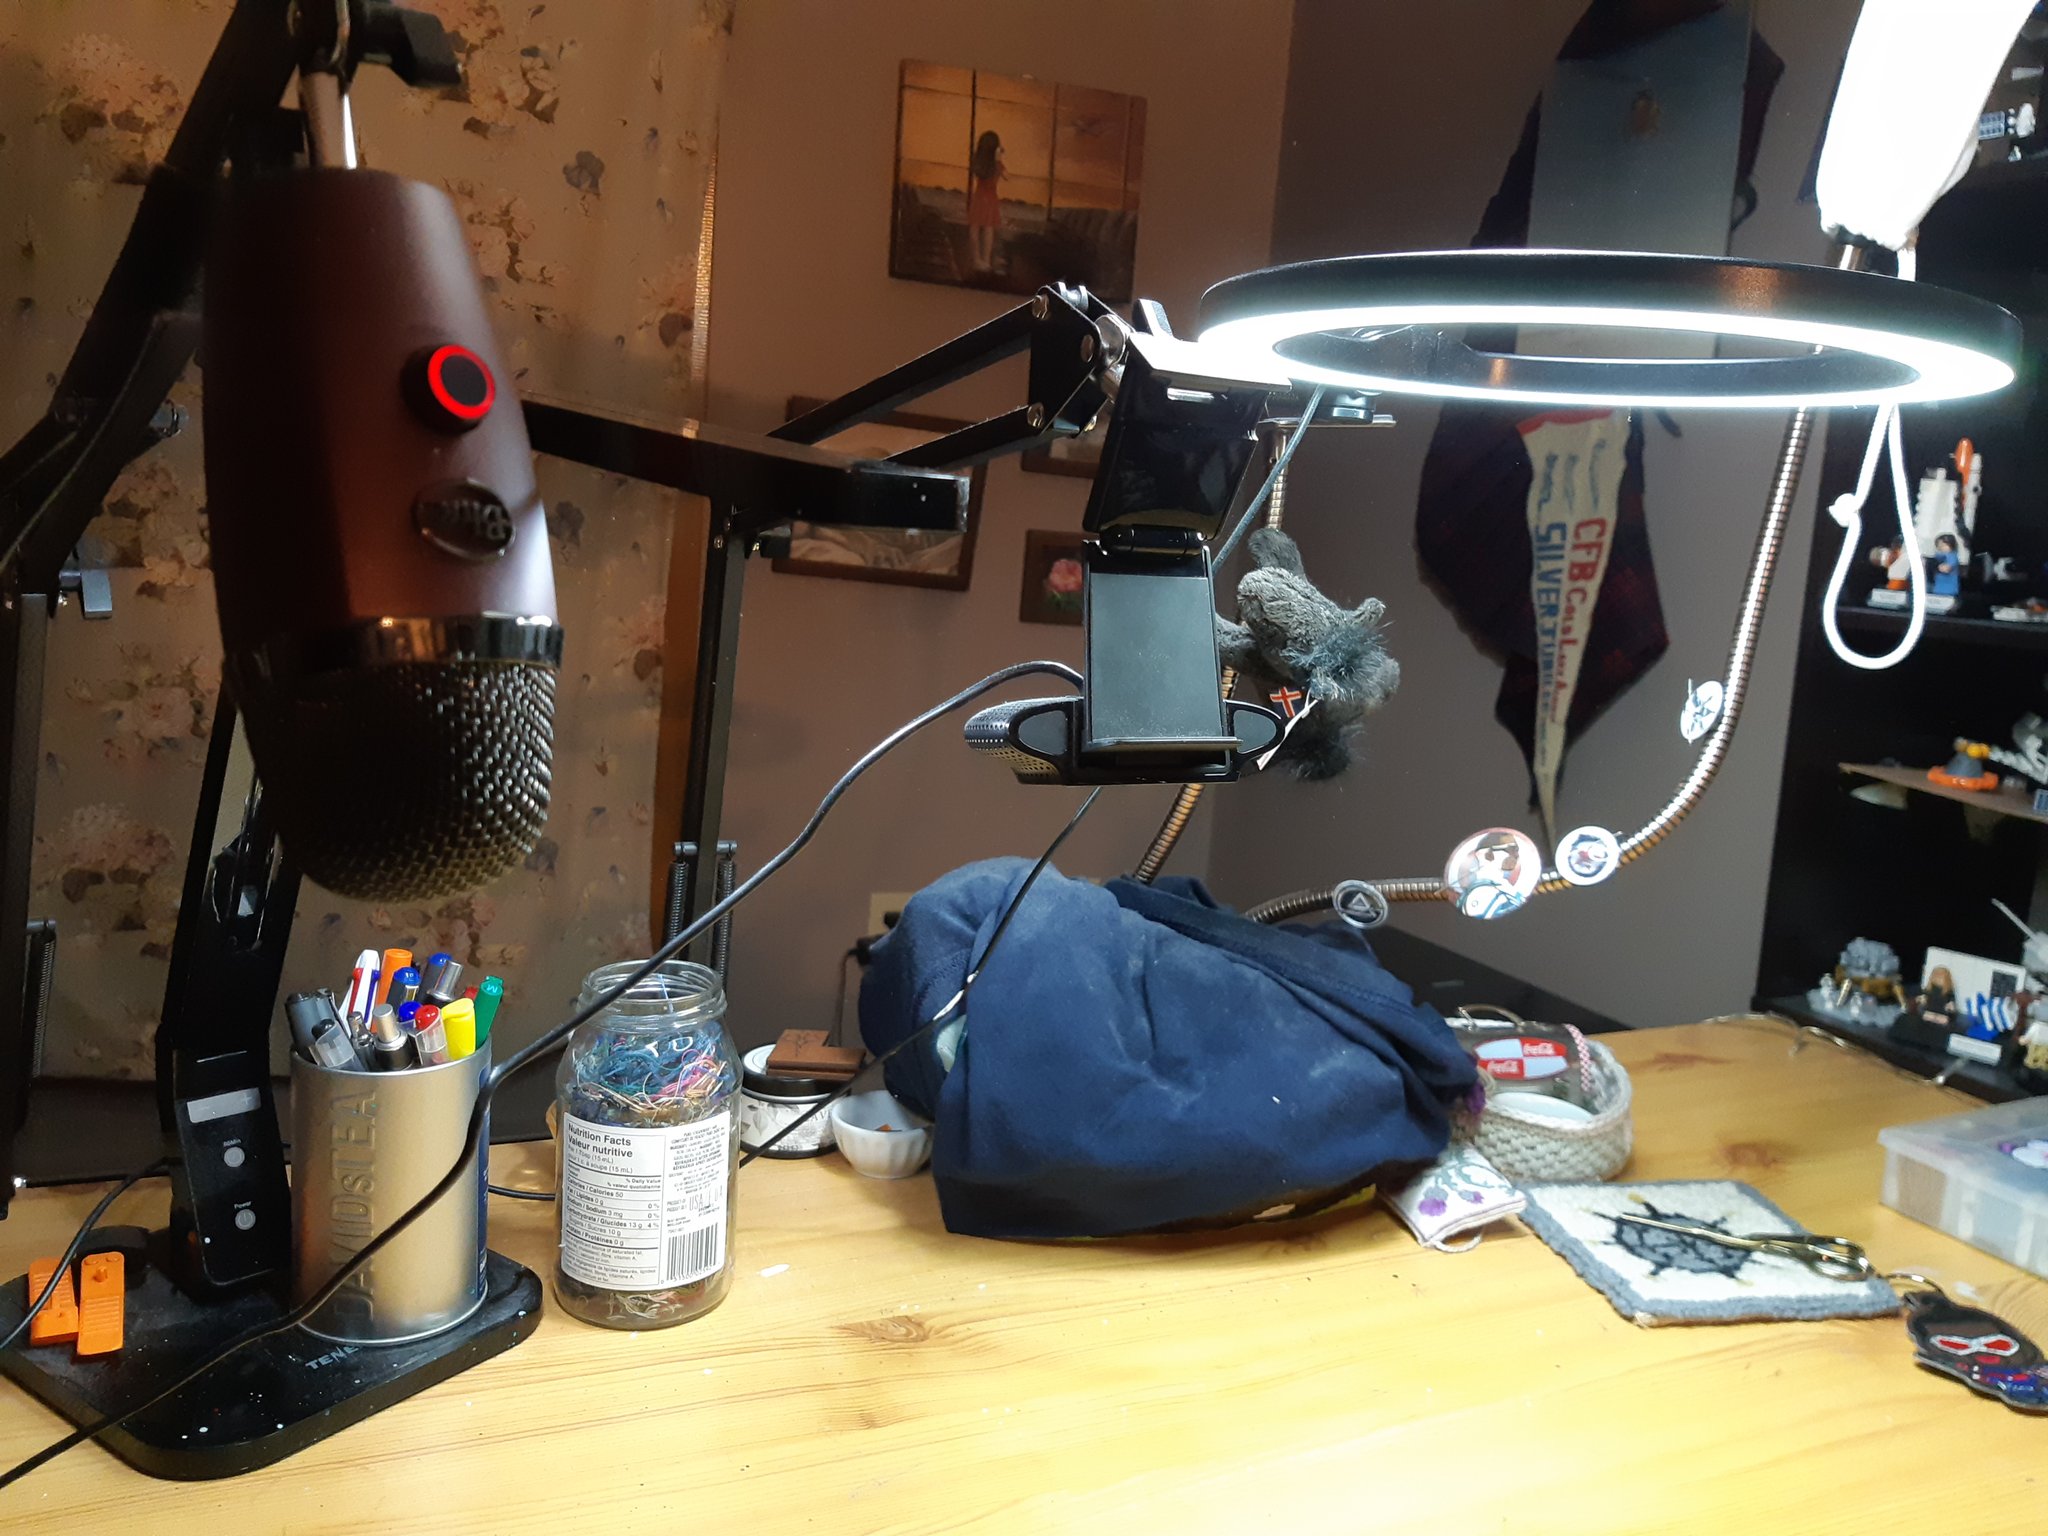
For lighting we have LED desk lamp and a cheap ring light, aimed down at her project to keep it evenly lit Finally, a floor lamp nearby use to light the facecam background.
A simple setup, but looks super cozy and I bet is nice and comfortable to stream from. More importantly, Aurora has some great advice for actually streaming:
Above all else – Have fun! Don’t go into streaming thinking you’re going to make a bunch of money. If you do, great! But that will likely make the whole thing a lot more stressful.
Don’t feel comfortable using a face cam? Then don’t. Some viewers prefer streams with face cams as they feel ‘closer’ to the streamer, but v-tubers/no face cams are increasingly popular so feel free to stream in a way that makes you comfortable!
Don’t allow your chat to dictate how or what you stream more than you’re comfortable with.
Do make changes to your stream (schedule, content, set up, etc.) when needed, or when it stops being fun.
Unless you have reached a point in your streaming career where you can consistently rely on streaming income to pay bills, and it has therefore become an actual job, then this should be fun!
Do set up a schedule and stick with it as much as possible. Make sure it’s reasonable with your schedule and mental health. Start small, even if it’s just one scheduled stream a month or week. You can add ‘bonus streams’ when you feel like it and you can increase the scheduled streams when you’re ready. Being consistent is important, especially as you’re growing. Your viewers will know when to expect you, and, if you’re anything like me, a publicized schedule will give you more incentive to stream.
No matter how many viewers you do or don’t have, how much you talk or don’t talk, when you are streaming, you are performing and it can take a lot out of you. This is why boundaries and starting small is important.
While good quality gear is important, don’t go out and drop a bunch of money before you’ve even started. Buy inexpensive necessities first – borrow them if you can! Then upgrade once you know you’re planning to keep going and/or can afford it. The sky cam and mic are, in my opinions, the most important pieces.
The same goes for fancy overlays and emotes. Unless you’re a digital artist and can create those items yourself, wait before commissioning someone to do your art.
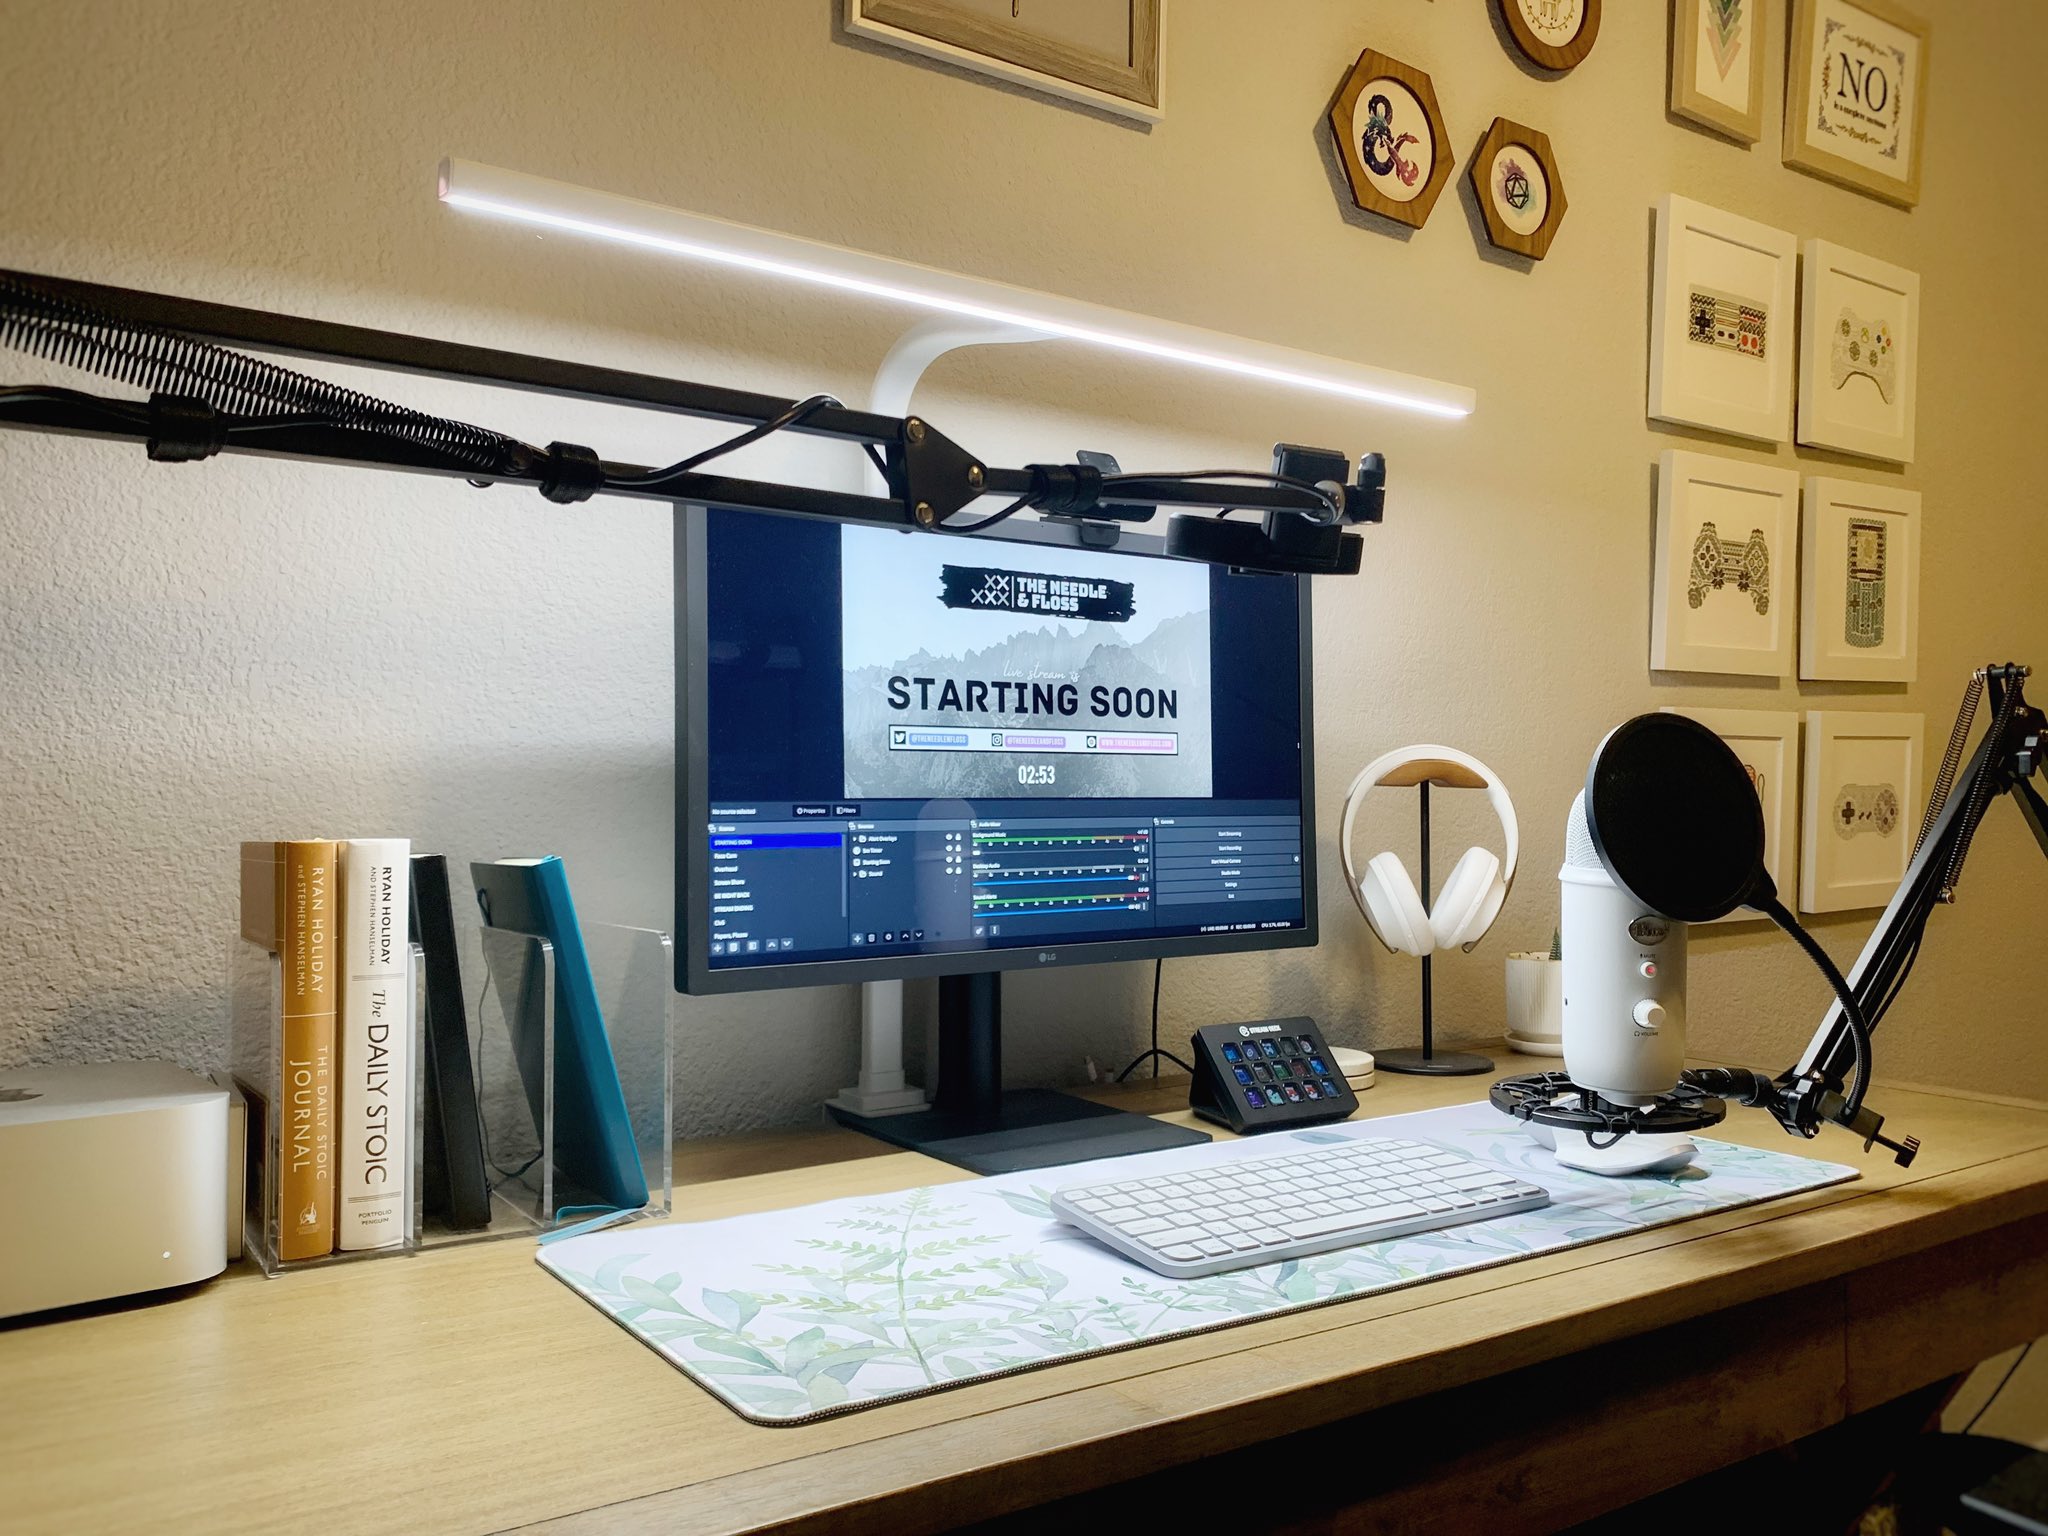
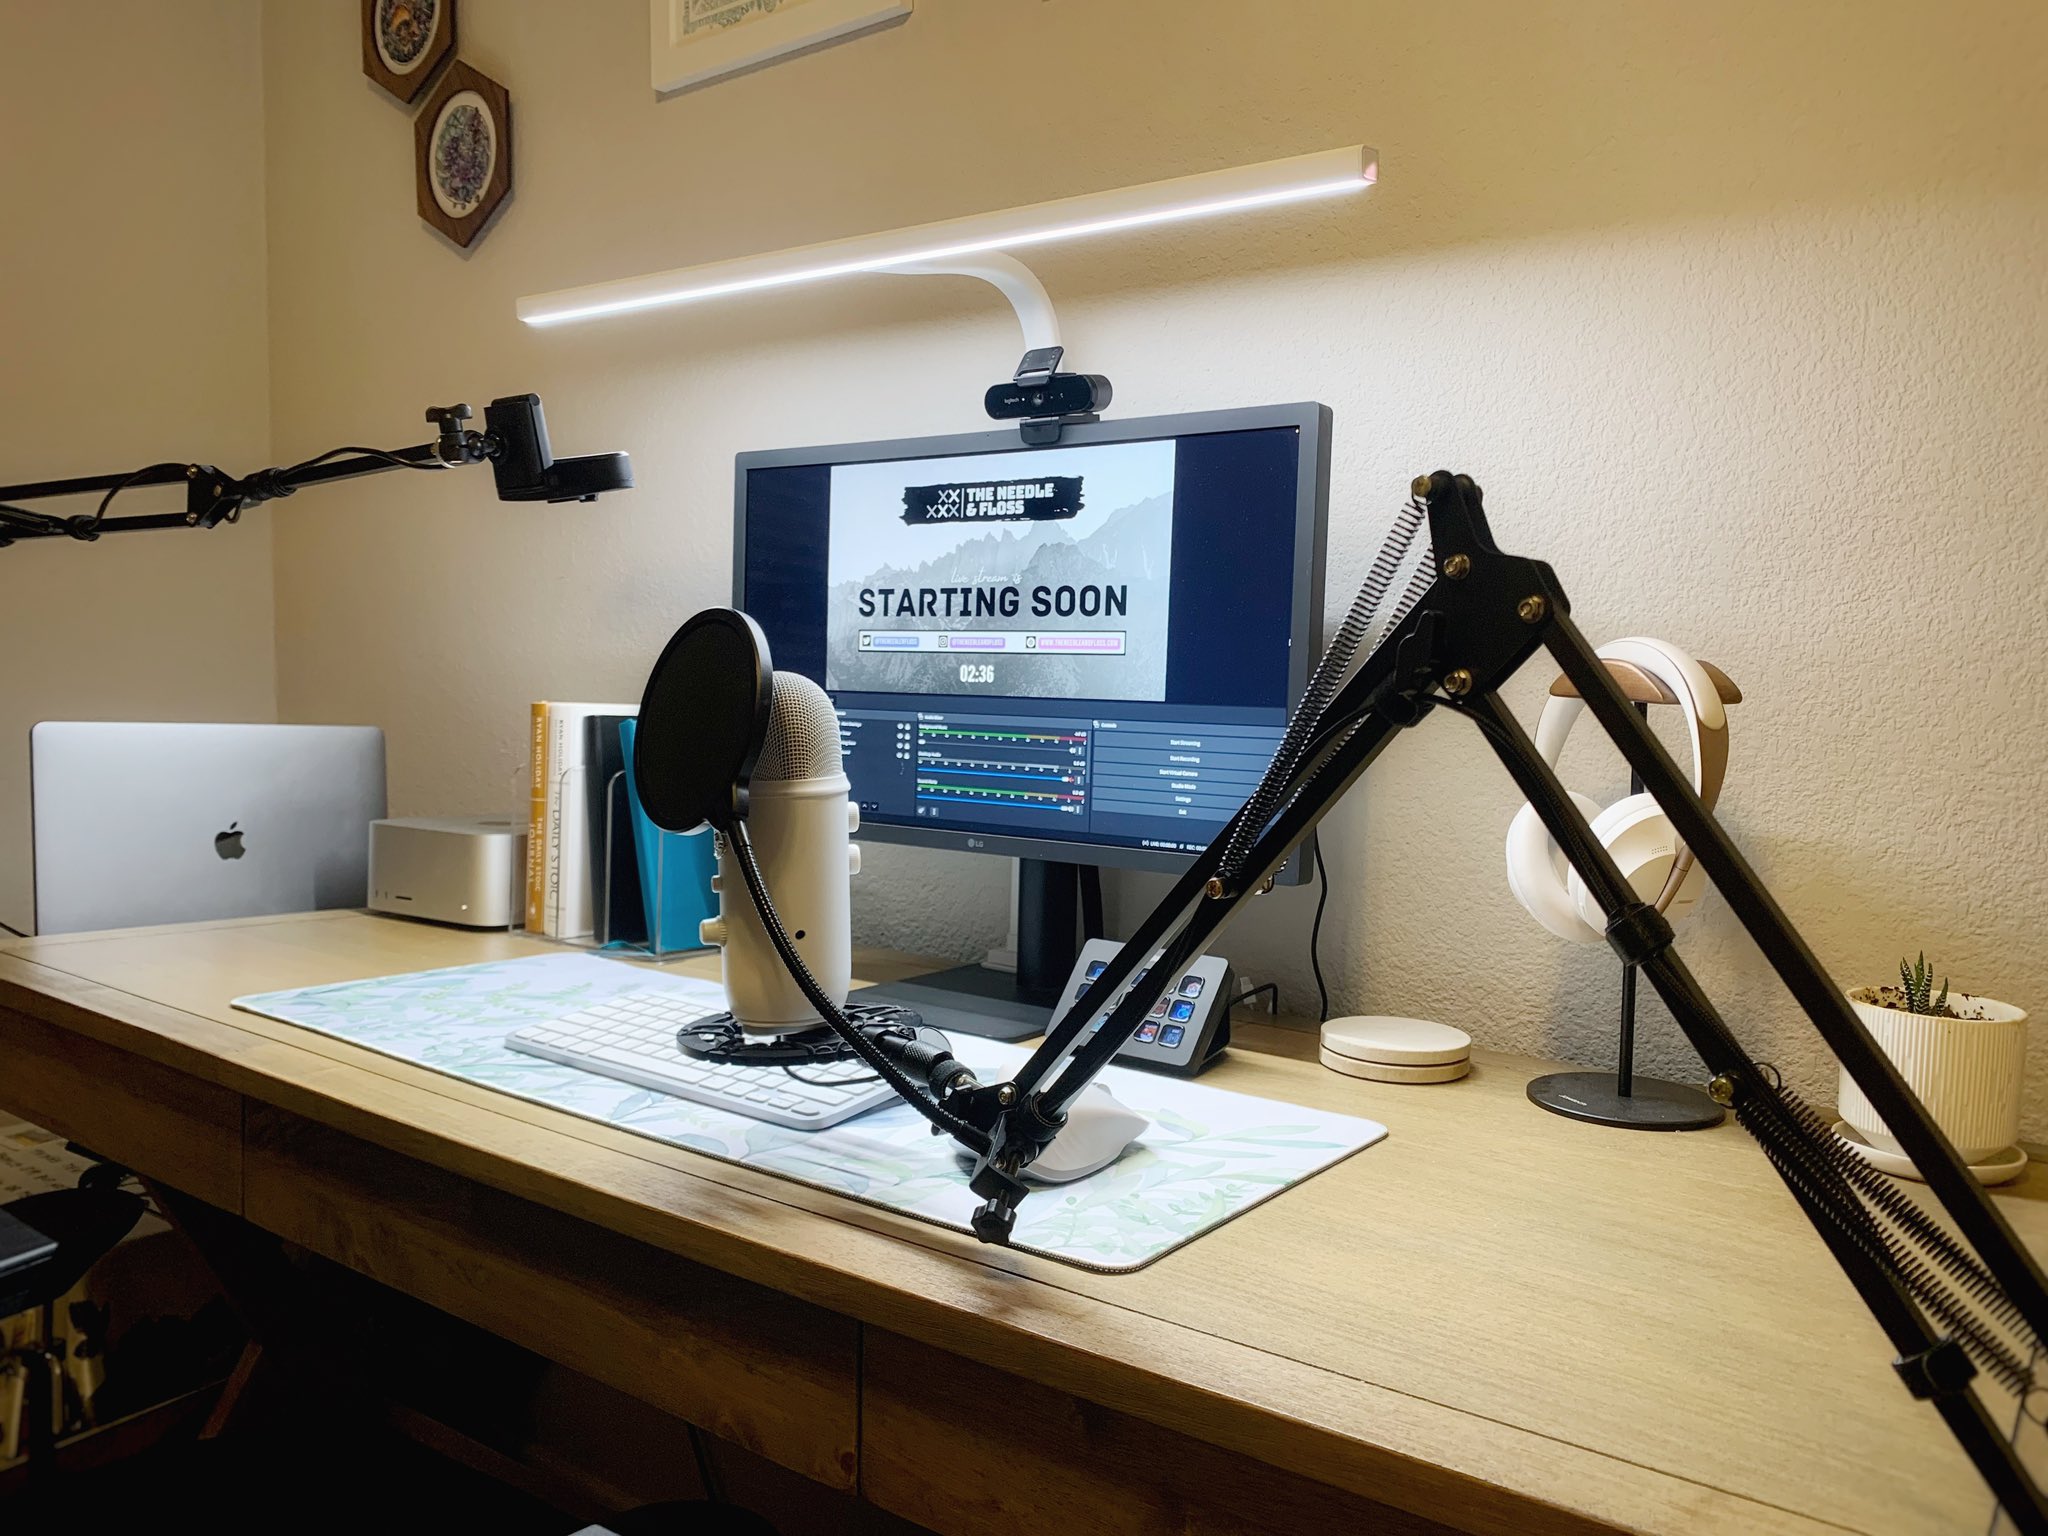
The Needle and Floss – Cross Stitch
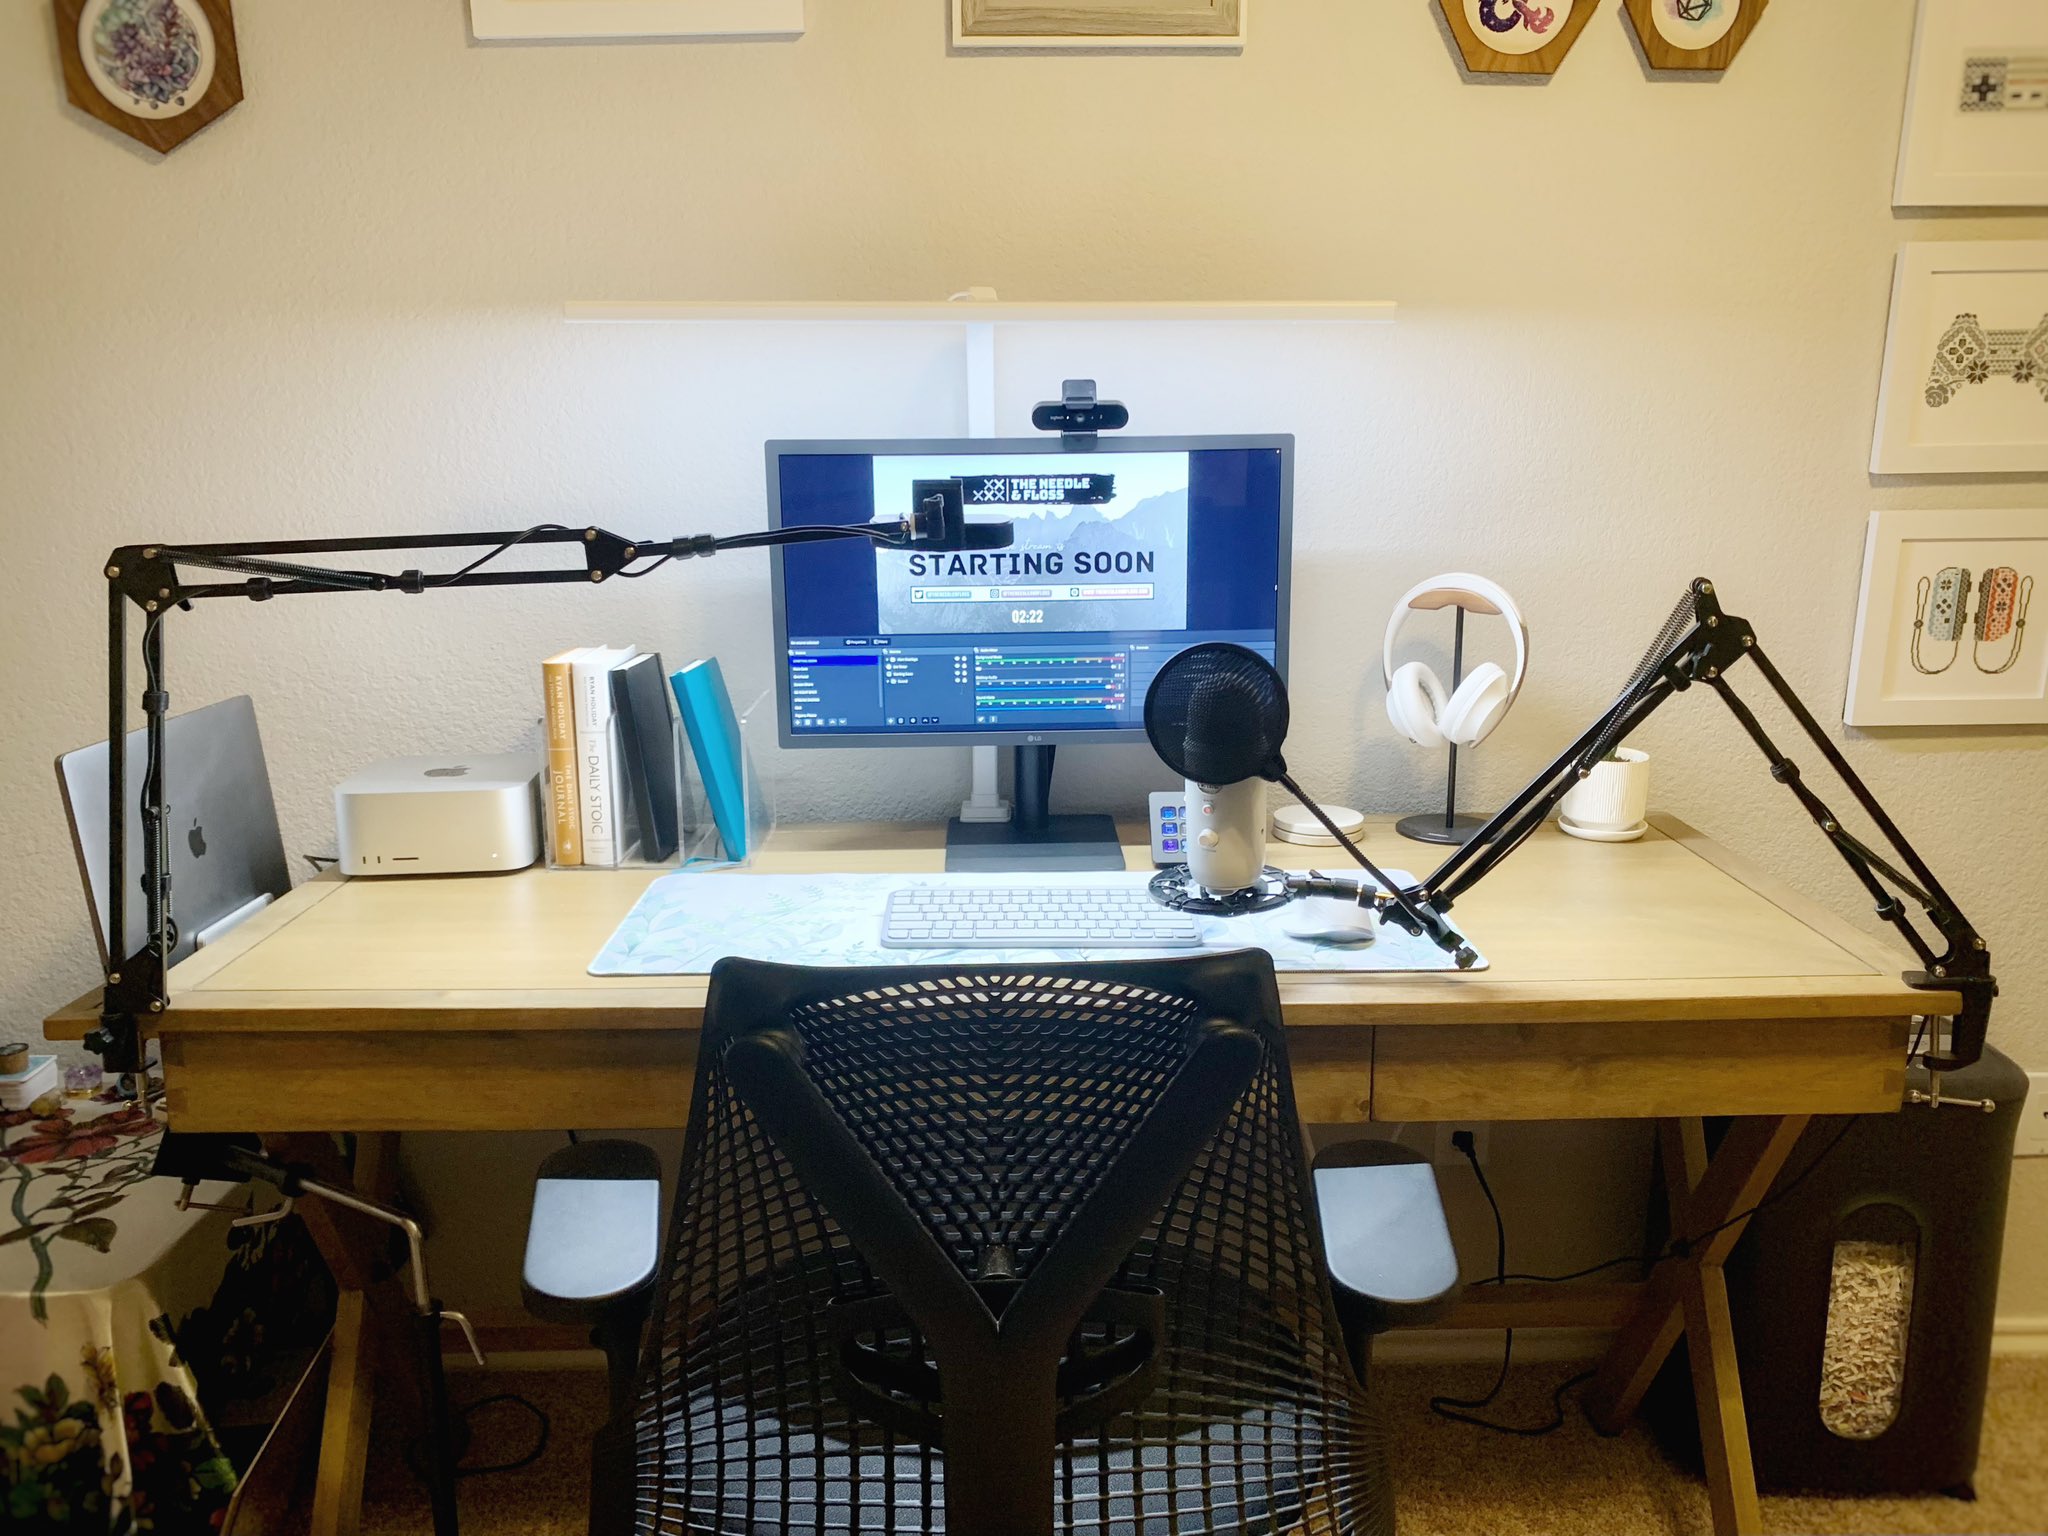
Next up we have a sleek setup from Jessica of TheNeedleAndFloss. She works from home as well so her stream setup is primarily for her day job.
For cameras she uses a Logitech BRIO as a facecam, and is planning to upgrade her desk cam to a BRIO as well. She used to do FlossTube also and had a Blue Yeti mic left over from those days which got repurposed for streaming.
Both the mic and desk cam are on boom arms to make it easier to move around. It really helps to be able to move your camera and mic around to your optimal spots (and out of the way when you’re not using them.) It also means that you can move them around really easily during stream too, so you can adjust even as your posture or craft changes. They don’t need to be expensive, but you need to make sure they can handle the weight of what you’re using them for.
Next up some ‘nice to haves’ that are definitely not required but are a good place to start if you’re looking to do some upgrades.
Pop Filter: Attaching a pop filter to your mic will help filter our hard P sounds and that can crackle and sound super loud.
Mic Shock Mount: This piece of equipment fits between your boom arm and the mic itself and will remove any vibrations that the mic may pick up from whatever stabilizer your mic is attached to. (Usually boom arms are mounted onto desks, so this would remove noise caused by vibrations from keyboards and mice usage, just general movement on your desk.) You’ll want to make sure the shock mount fits your microphone.
Steam Deck: This would be one of the last things to get and it’s definitely not necessary but Jessica has found that since getting it, it’s made her streaming experience a lot more seamless.
Jessica also has some excellent advice for streaming in general:
- Take frequent breaks. (She usually tries for a 5 minute break once an hour.)
- As tempting as it is to look, hide your viewer and follower numbers. Seeing low numbers can be demoralizing in the beginning. You’ll hear this advice a lot from other streamers as well. When you hid your numbers, it can allow you to enjoy the actual act of streaming a lot more.
- Just start. Your setup doesn’t need to be perfect at the very beginning. Look at it as an experiment and tweak and upgrade things along the way.
- Watch other Maker & Crafting or Art streams to see what they do and get ideas for your own streams. Plus if you interact in chat, you’ll start to integrate yourself into that niche’s community.
HeatherBizzo – Knitting, Crochet, Cross Stitch, and more
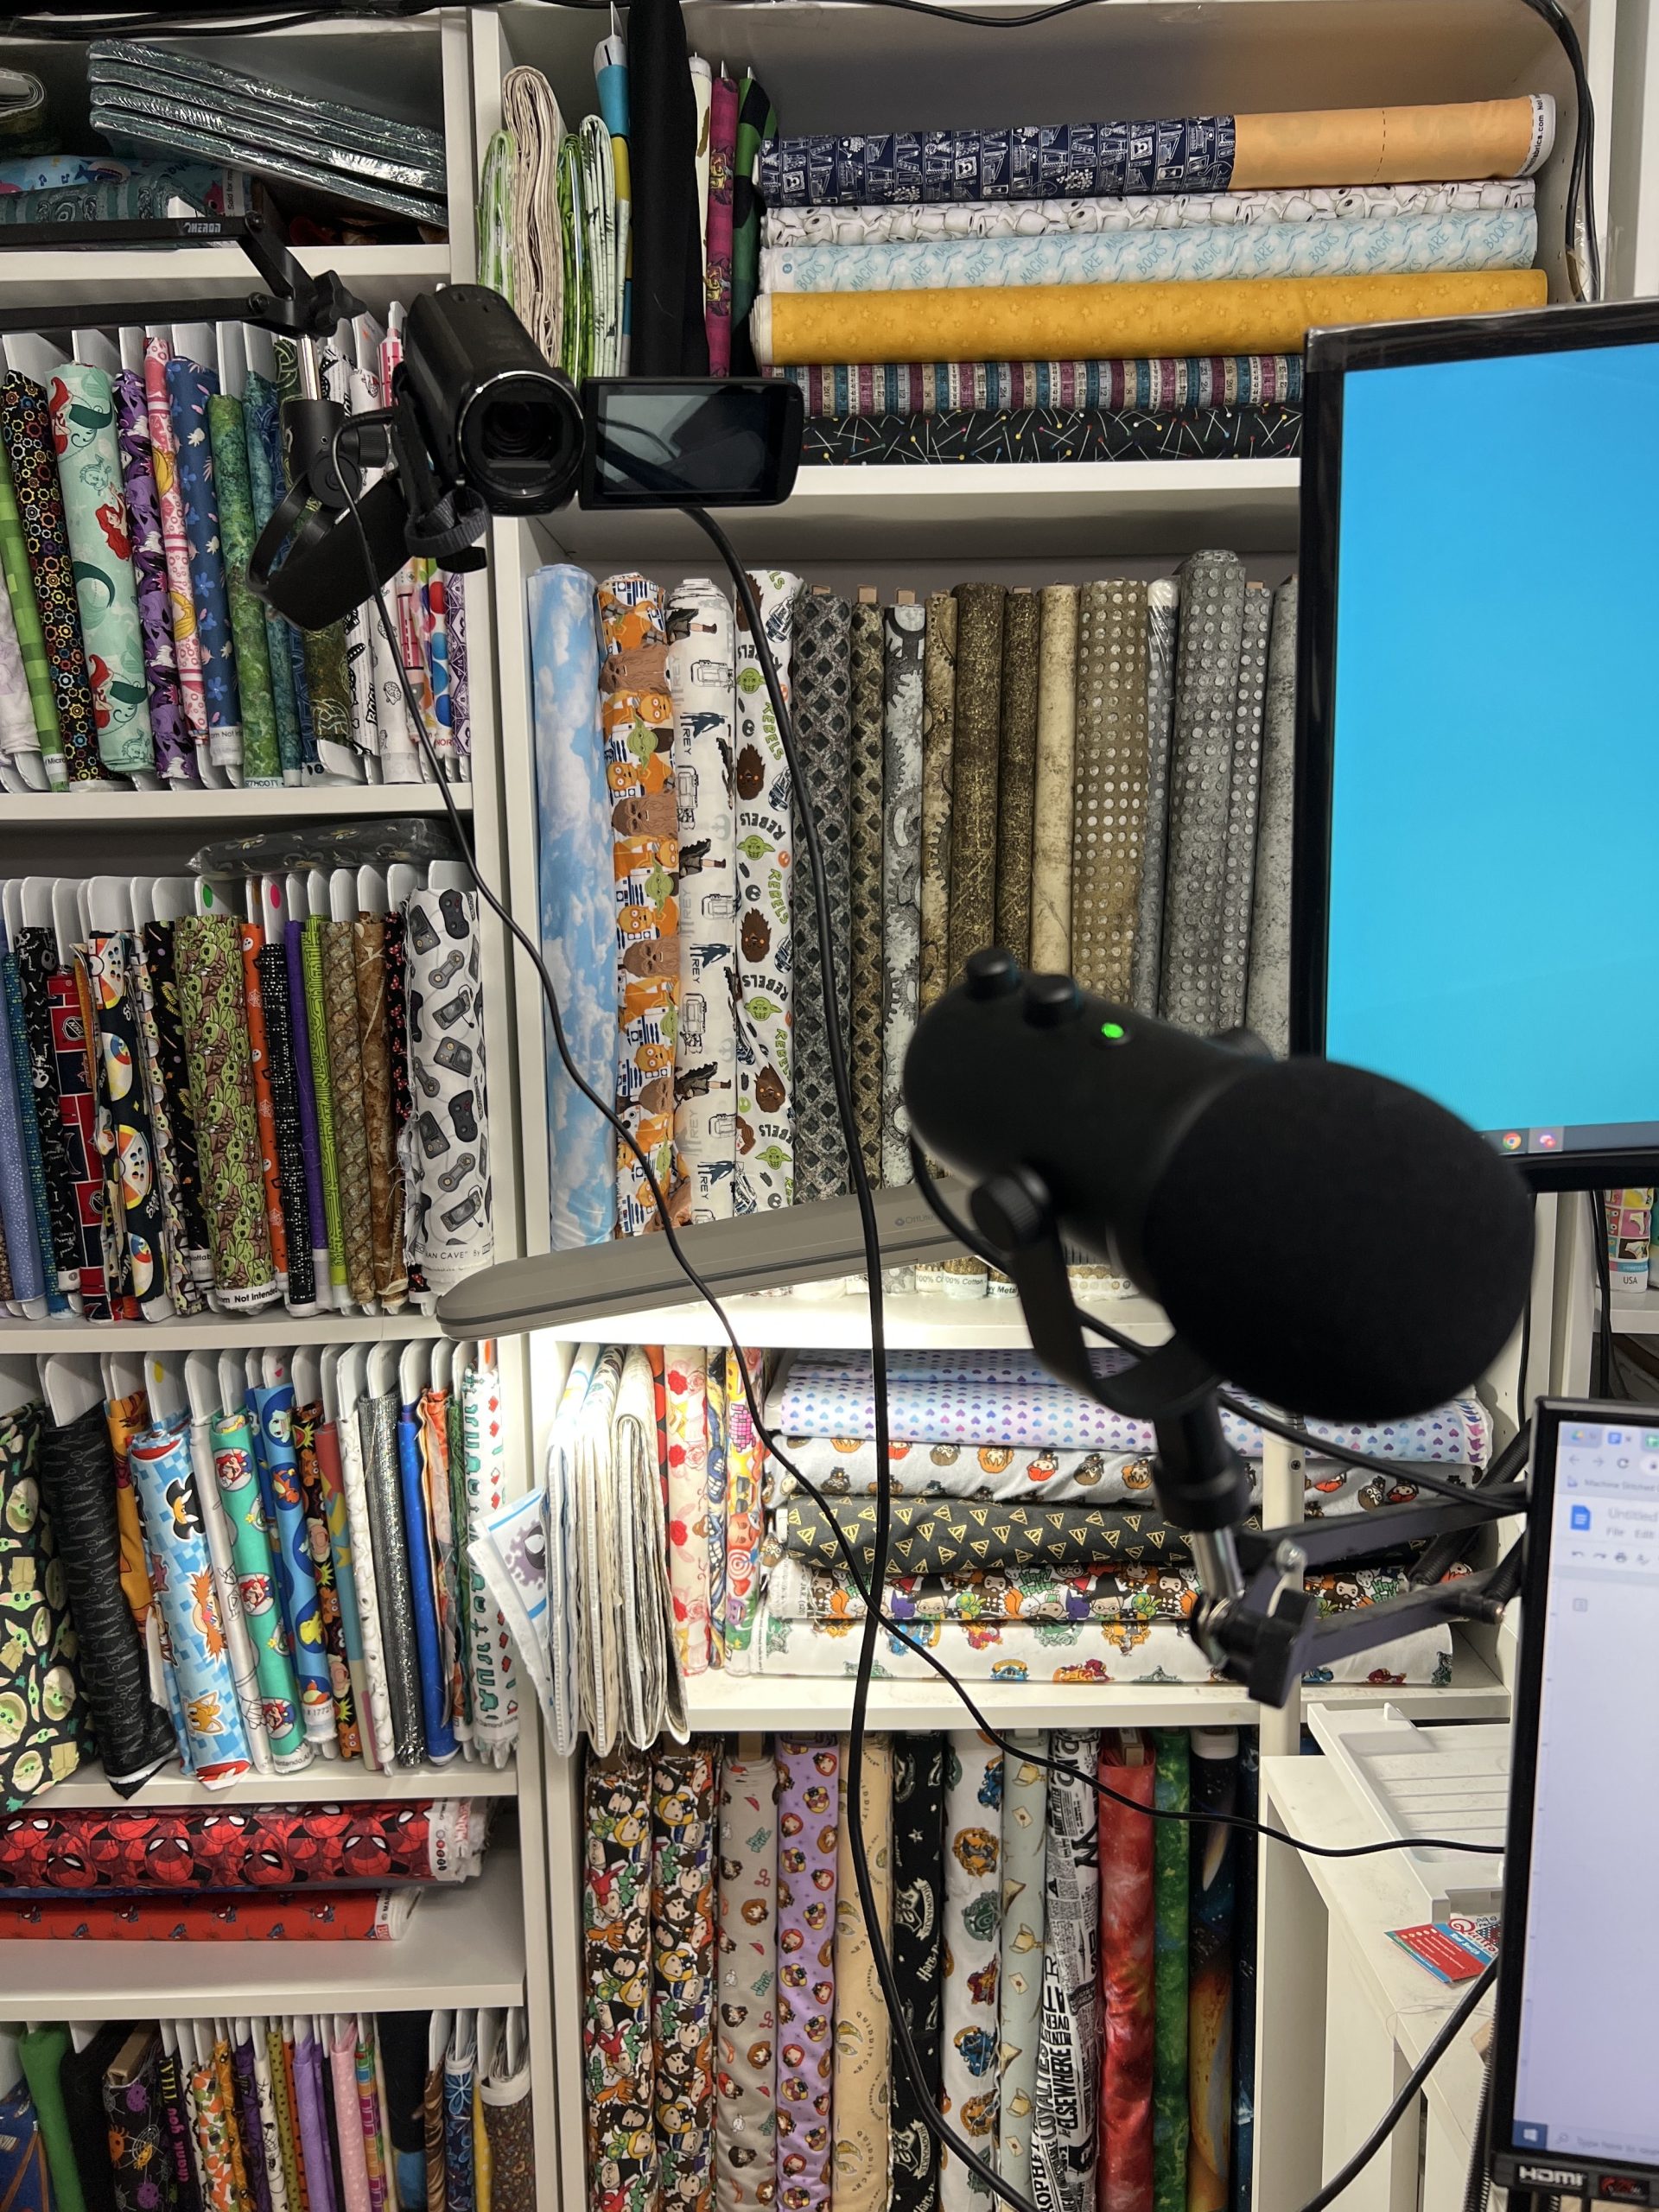
From Heather we have another simple but effective setup, reminding us to just start with what you have and upgrade as you go. While she started with no facecam at all, she now has a NexiGo N960E hovering above her monitor and a Logitech C922x pointed down at her desk. She also uses a Sudotack Microphone.
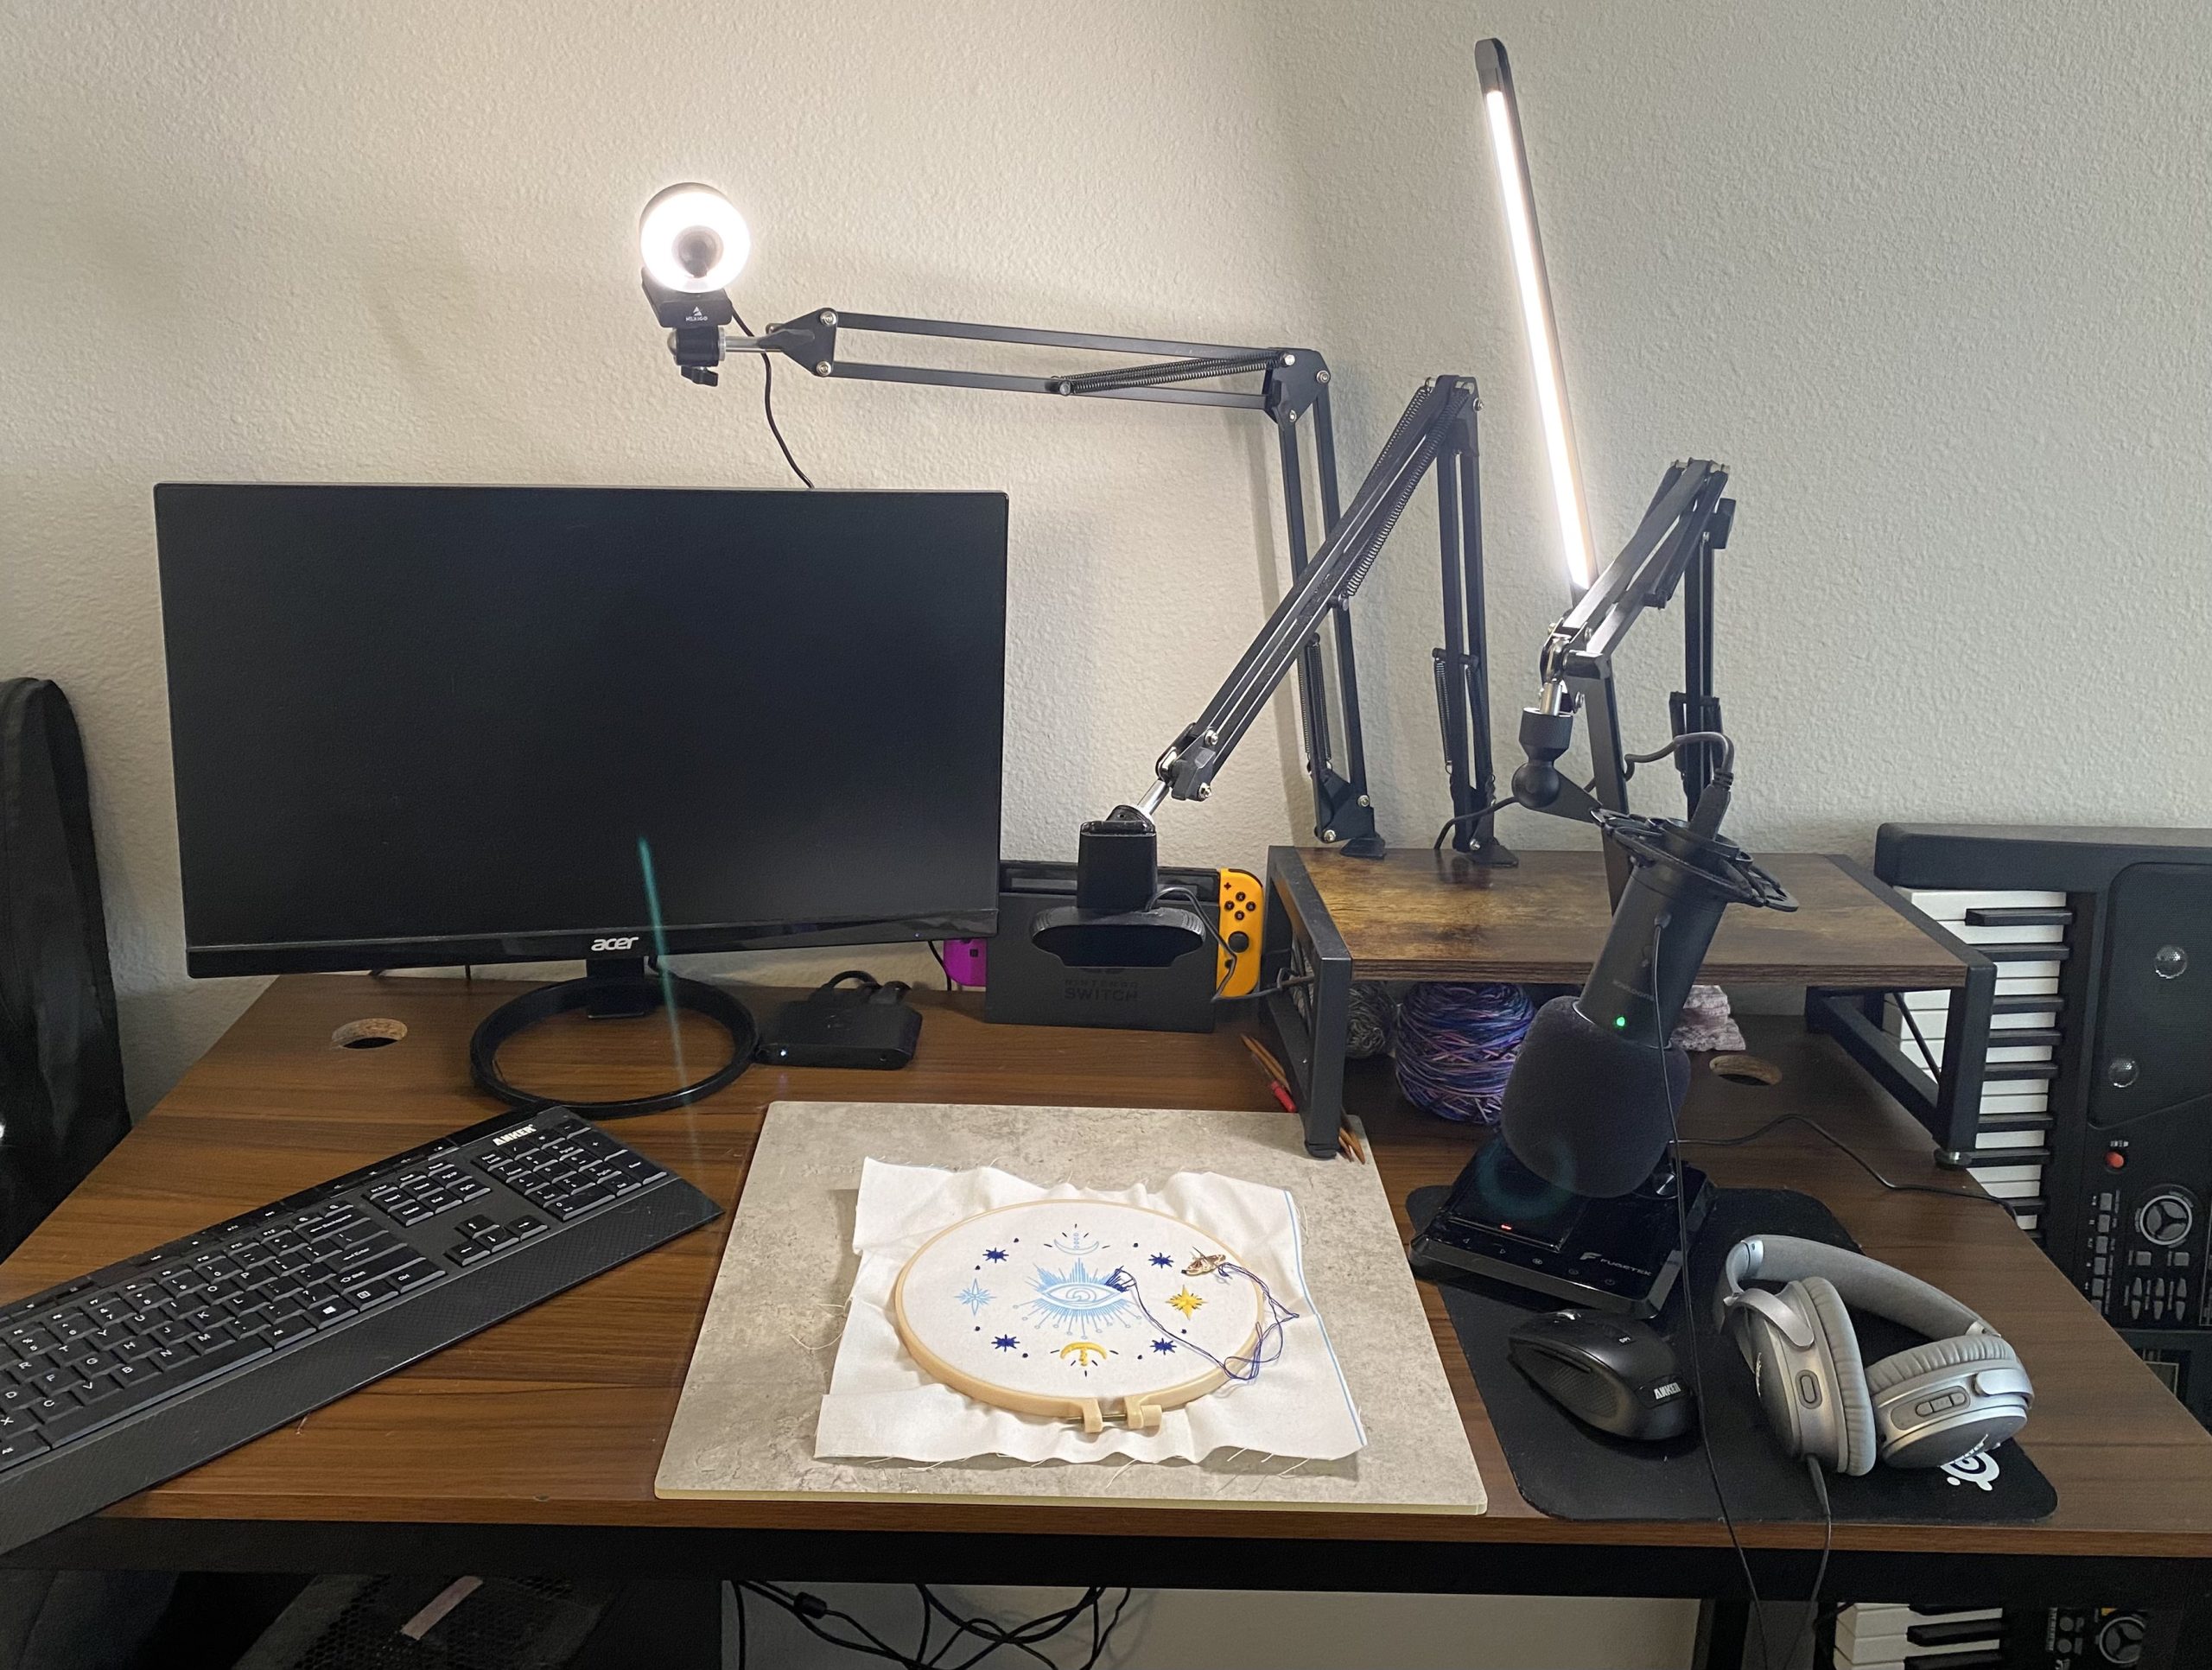
While we’ve seen those mount arms in previous setups already, what’s important to note here is that her desk actually doesn’t allow for clamps! If your desk is too thick or has a weird lip preventing you from using a boom arm, you can get creative what you attach it to instead! Here, Heather uses a monitor stand which also doubles as yarn storage!
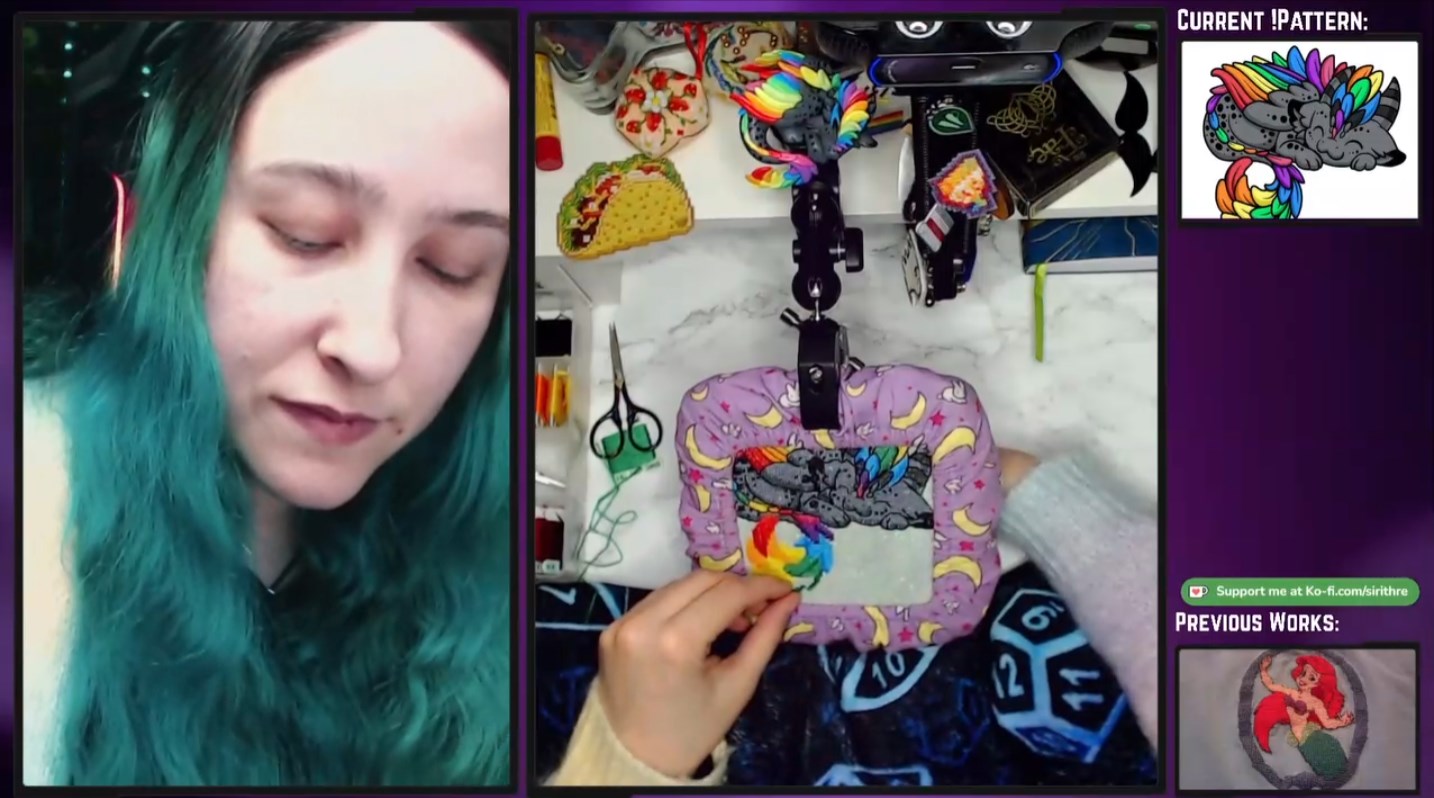
Sirithre – Cross Stitch and Games
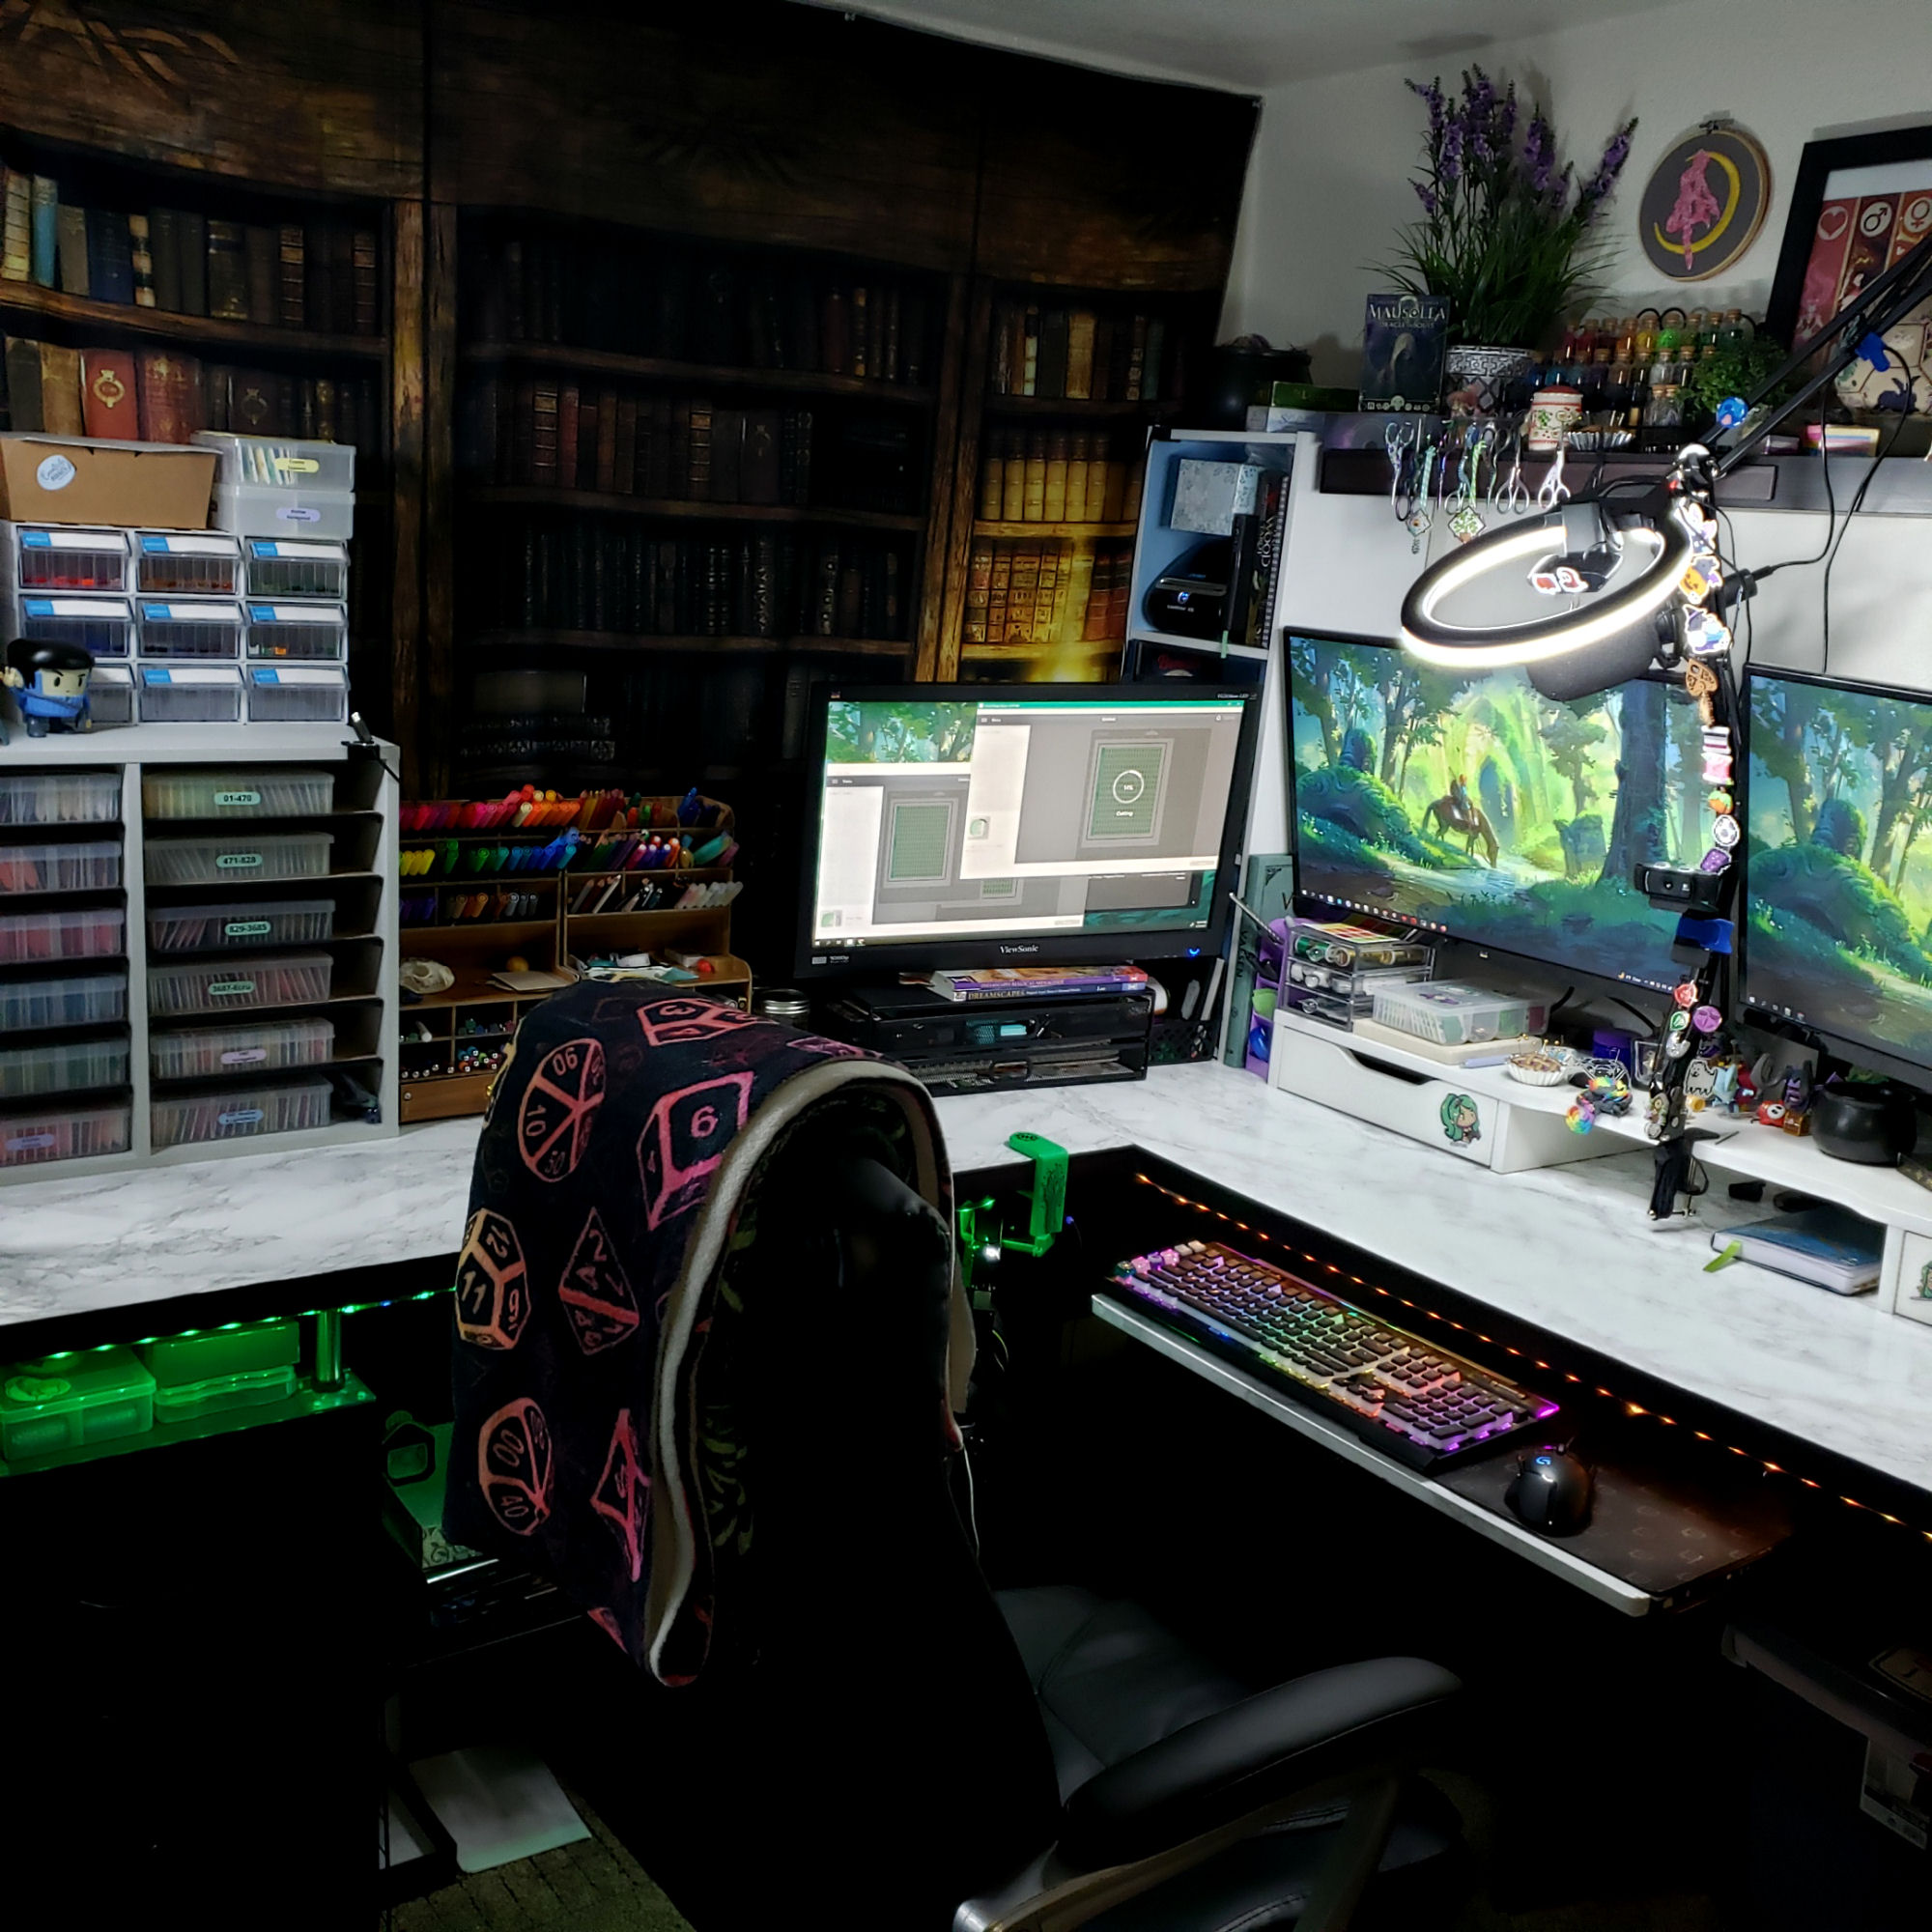
And back to Siri. Finally, my own current setup I don’t stream much anymore, but I streamed regularly for years and this is my latest setup. I still occasionally hop on stream in the middle of the night (US) when I’m in the mood though, so you’re welcome to toss me a follow. Having my cameras and lighting always in place makes it easier to stream spontaneously!
Between my main two monitors I have a desk clamp arm stand holding a ring light with a logitech C920 camera in it pointed down at my desk. A second C920 is zip tied halfway down the arm to point at my face. That monitor stand it’s clamped to is actually a LINNMON Tabletop from IKEA, but they don’t seem to sell it anymore. 🙁
Another suspension arm is clamped to the shelf above my desk. This one holds my AT2005USB microphone over my middle monitor so that no amount of bumping the desk on accident will vibrate it.
I also sometimes use a camera desk clamp with a ‘super clamp‘ attached to hold my Qsnap under the overhead camera while I stitch. Otherwise I tend to slowly drift off camera over time, which is something you may not think about when first going into streaming. But keeping your project on camera is a skill itself! Now to learn not to lean forward so much and not let my forehead take over the face cam…
If curious, you’ll find a full tour of my office / studio here on the site.
But I of course didn’t start out this way either. My old setup was just a gooseneck arm clipped to my very messy desk and pointed at a Q-snap stand my partner cobbled together from PVC. And yes the camera absolutely got in my way while I was stitching, lol. We all start somewhere!

Work With What You Have
So now that you’ve seen a few different setups, let’s discuss what they all have in common: They’re all unique. In other words, there’s no “right” way to do things and everyone is just working with the space they have and the equipment they have on hand or have purchased over time.
Whether you’re fitting everything onto a small desk, or spreading out and running cameras throughout your craft room. Work with your current space, and then expand or rearrange your setup as you go. People watching are here to see your craft, not necessarily your super techy setup. Just have fun and engage with your community and it’ll be fine. 🙂
That said if you have a unique setup of your own you’d like to share, feel free to reach out to me if you’d like me to add it here! Whether it’s a simple desk setup with inexpensive equipment or a fully decked out space.
You Might Also Like:
Learning Sashiko as a Cross Stitcher
Design Challenge: Colors I’ve Never Used Before
