Pendibule Ornament Tutorial: Unique Cross Stitch Finishes
I’ve seen the word pendibule mentioned in relation to cross stitch on the internet for some time now, but no one seems to know what they are or where they come from. And recently, they’ve been popping up all over the place again! So I thought I’d do some research and try to explain it a bit better. Spoiler alert: I don’t know either.
Table of Contents
Where are pendibules from?
The only thing people seem to agree on is that it originated in France. Or at least the name did, as it’s based on “pendule” meaning pendulum. Regardless, it clearly takes some inspiration from French and just like with the biscornu, cross stitchers have adopted the word to describe a very particular finishing style. Though some spell it pendibulle with two l’s instead.
The name certainly does kind of describe the shape and the fact it’s typically hung to dangle like a pendulum.
My google searches did not help me find a source, though the earliest references I could find (in French or English) were from around 2007 and 2008. Though it’s likely they’ve been around much longer, either in physical books/charts or simply sites/blogs that have been lost to time and are no longer hosted.
What is a pendibule for?
In most of the search results I did find, regardless of the year they were from, there was almost always someone asking what they’re for.
First of all, disabuse yourself of the notion that art needs to be “for” anything. Things don’t need to have a purpose to bring joy. They can be purely decorative. A framed cross stitch or one left on the hoop on hung on a wall doesn’t have a “purpose” other than to exist as art. Well this is no different. Being pretty is its purpose. And as far as I can tell, that’s exactly what the pendibule used for – ornamentation.
That said, you could give it a secondary purpose in much the way we use biscornu or humbugs. You could use it as a pin cushion, fill it with potpourri, or make it heavy and use it as a pattern weight. It’s all up to you.
Where to find Pendibule patterns
Honestly? A large amount of the pendibule patterns I found were…. of questionable origin. You know the type. A blurry jpg on pinterest that links to a broken site. A site suspiciously full of scanned in cross stitch magazines that definitely do not have any sort of permissions to publish them online. That kind of thing.
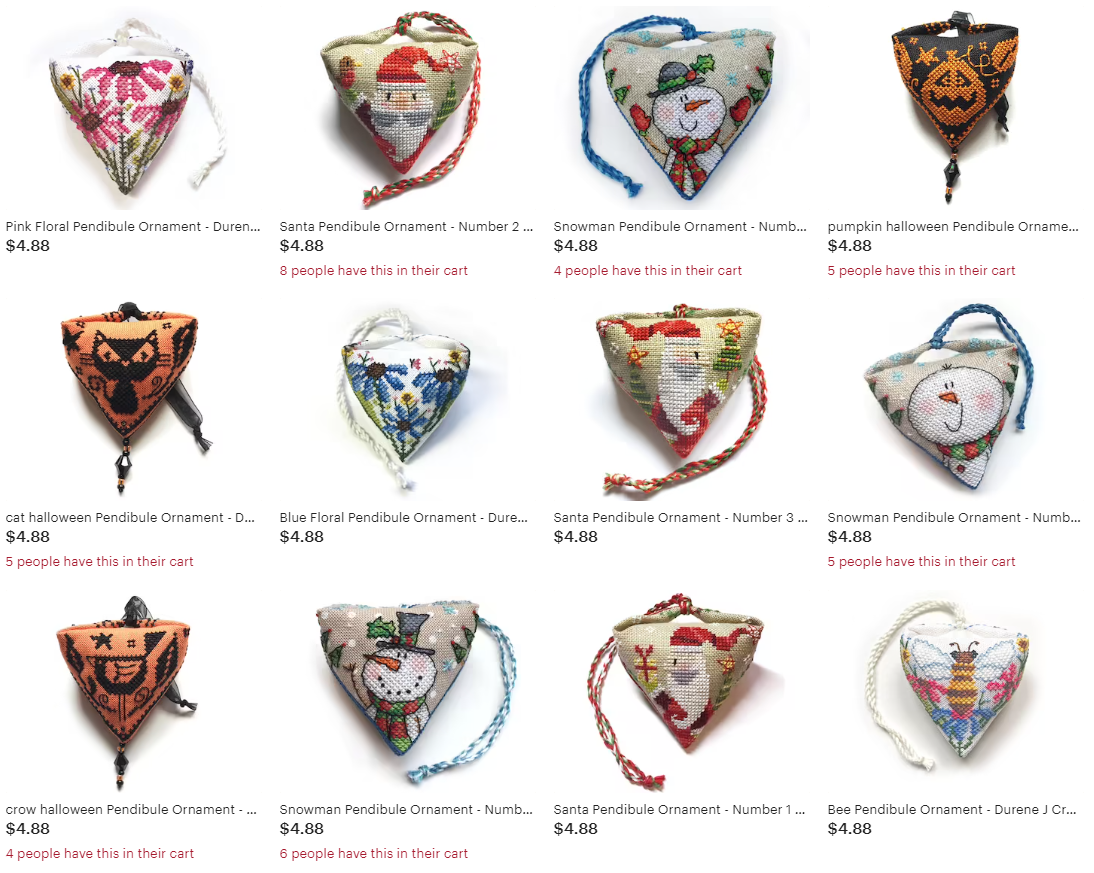
The only modern designer I found making pendibule patterns was Durene Jones. Which, considering her popularity explains why I’ve been seeing them around the cross stitch community again lately.
They’re SUPER cute though, so no complaints here! Definitely check out her shop!
That said, I’d love to see more designers give us their take on this shape. So let’s discuss what makes the pendibule shape and how to design a pattern for it.
Designing your own pendibule
To really design something for this shape, we need to understand how to put one together. So make sure you read through the full assembly tutorial to understand it properly.
However, the basic idea is that it is a largish square, which gets folded in half diagonally and stitched together into a triangle, lightly stuffed.
The points of the triangle then get stitched together to form the pendulum shape, and a ribbon is attached where those points meet.
Creating a size test
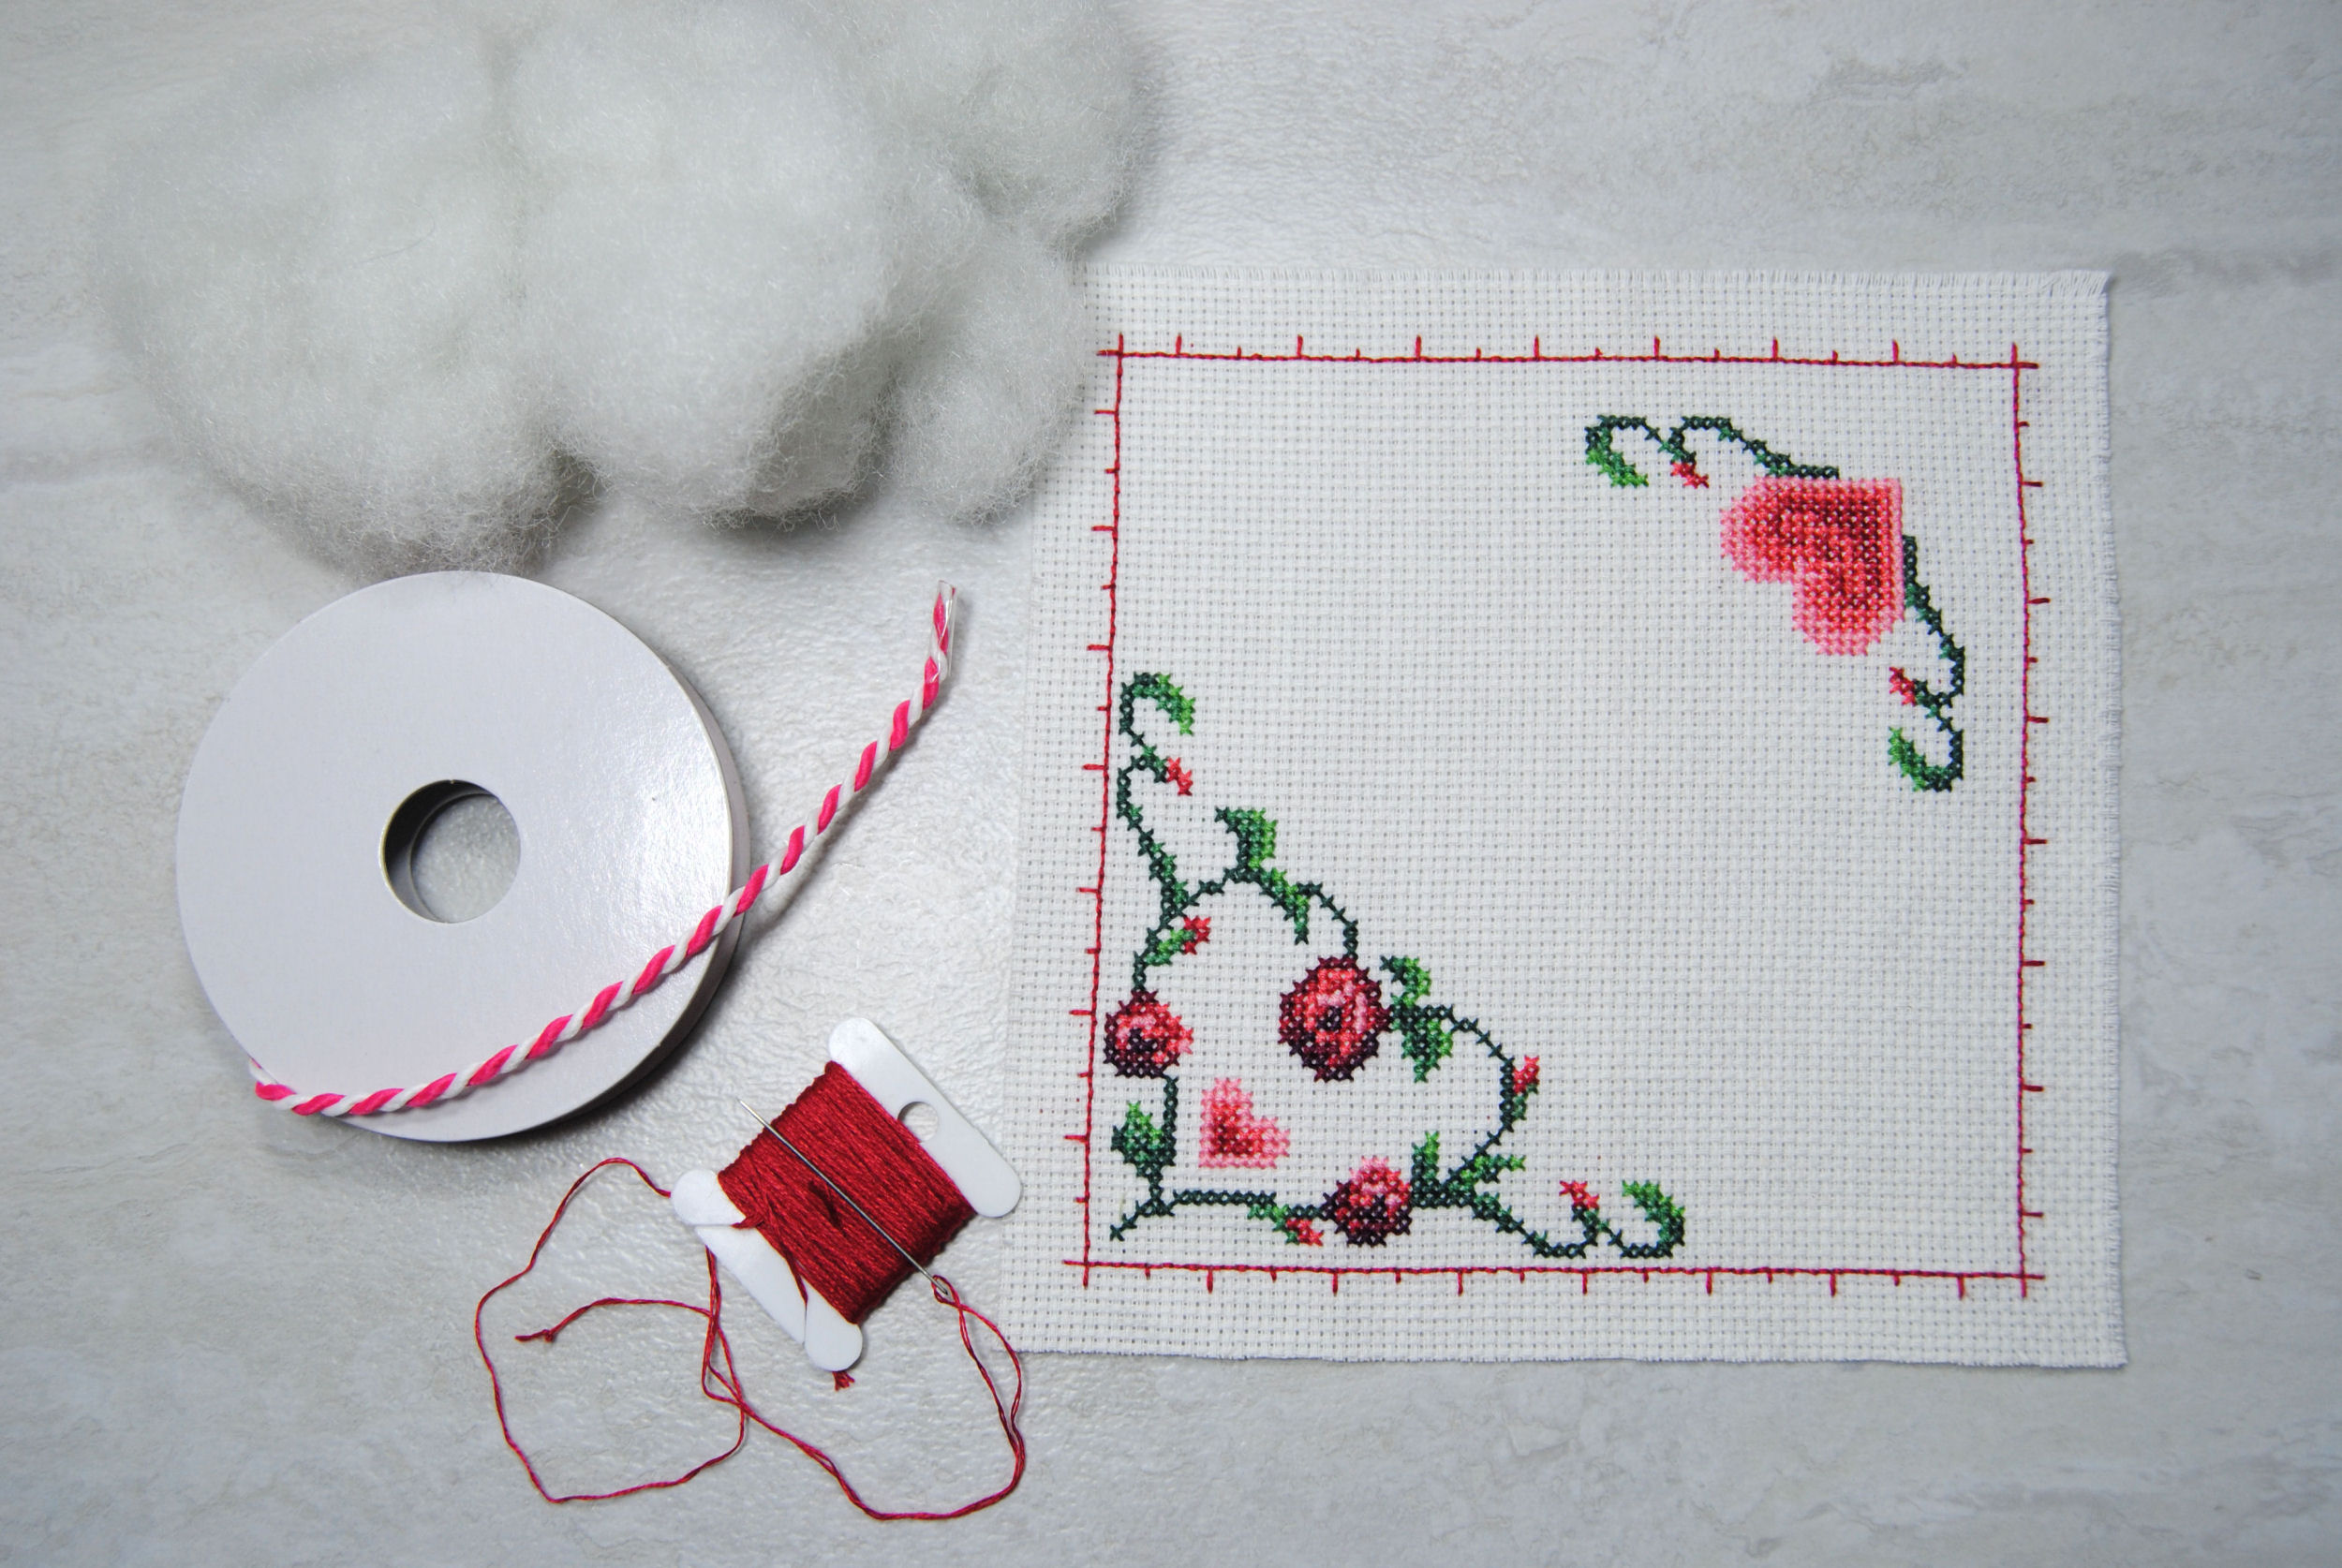
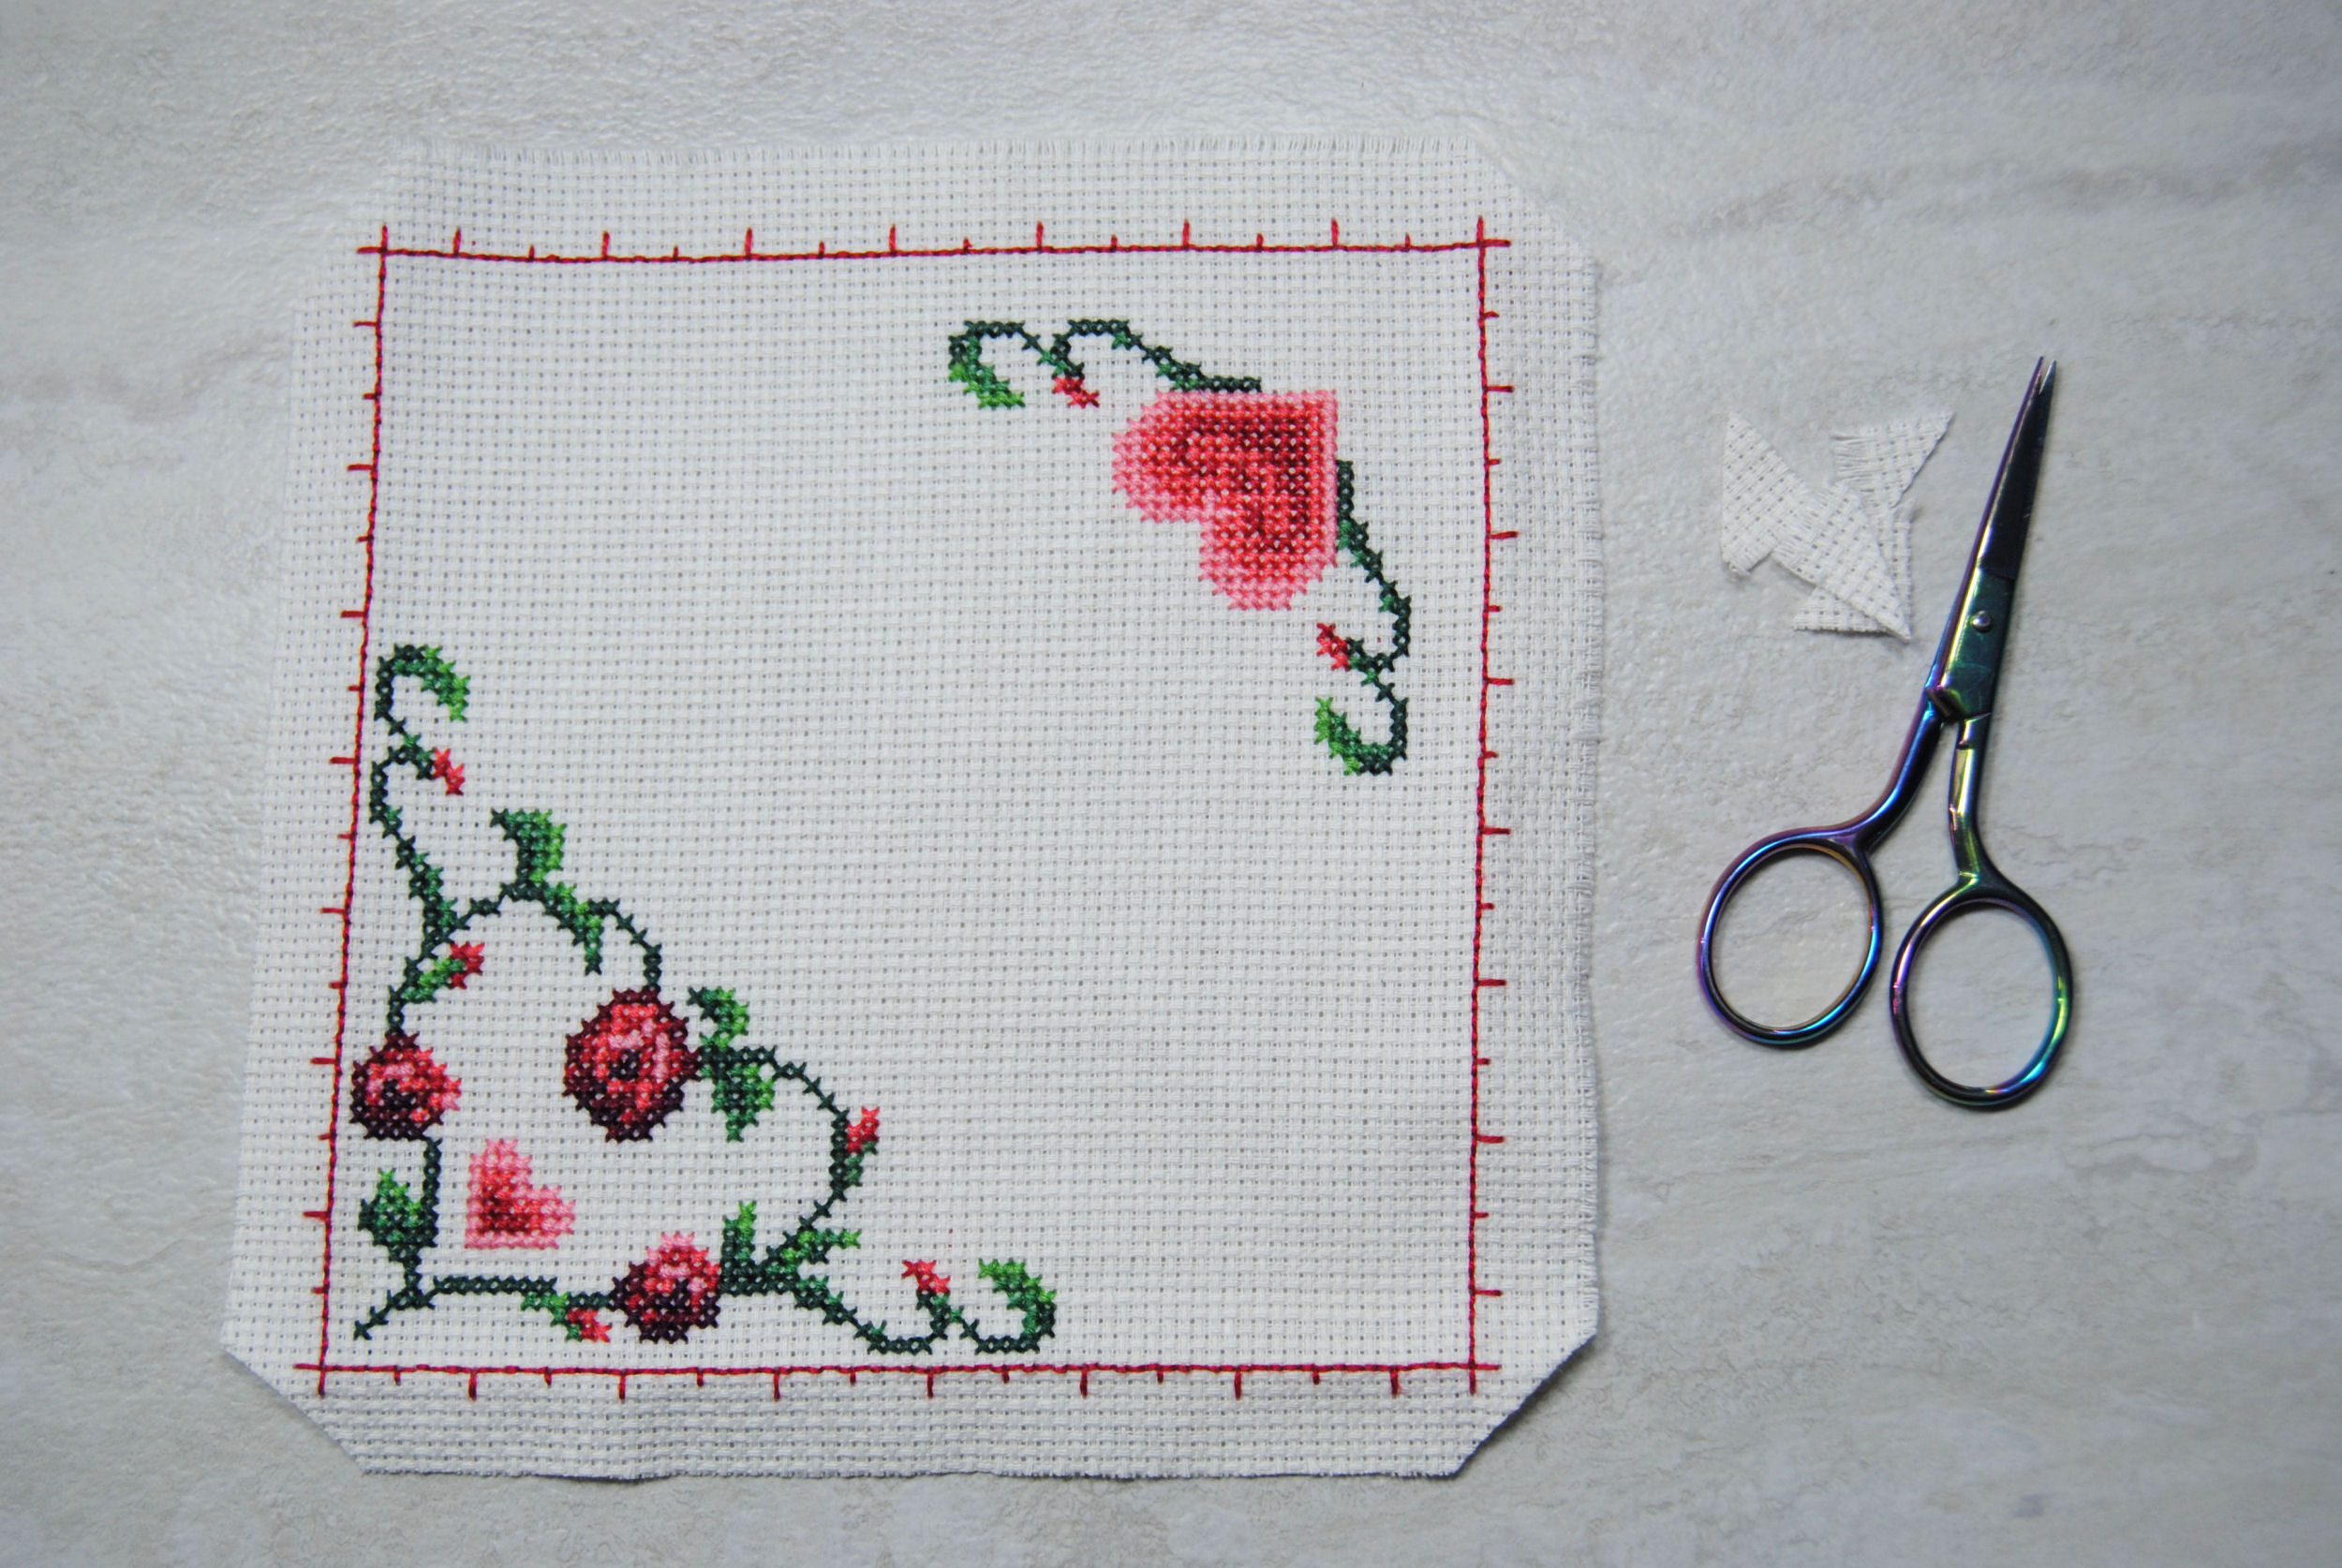
Can’t quite picture that? That’s okay. I can’t either. The main thing to note is the “safe” area to design in. So I made one myself to find out. I chose kind of an arbitrary amount of stitches for mine, as I haven’t purchased any pendibule designs or found one online that I really wanted to stitch.
So, I randomly decided my test square would be 75×75 stitches. I drew this out on a scrap piece of aida with a water soluble pen. Once that was done, I then pinned it together as if I was assembling it, lightly stuffed it, and folded it up to find out what sections of the cloth were still visible, marking them off with my pen.
….then took it all apart without bothering to take photos of it for this tutorial. Whoops. Regardless, this is what the shape ended up looking like this. Feel free to use this as a template for laying out your own designs.
Sample pattern template

The center strip is what’s hidden by the top flaps. And the outer triangles are going to be the main part of your design. You can of course adjust the size of this square as you see fit, but the general proportions should stay about the same.
That doesn’t mean you can’t stitch in that middle area, mind you. Just that it’s more likely to be a subtle repeating design, or just a thin border along the edge. The design examples I saw during my research seem to leave that area pretty bare and just decorate the seams themselves.
Most designs also usually have a “front” side triangle that is a little more elaborate, with a “back” that is a bit smaller or slightly different. But that’s up to you. You could have the same design on both sides.
Pendibule Tutorial – Materials
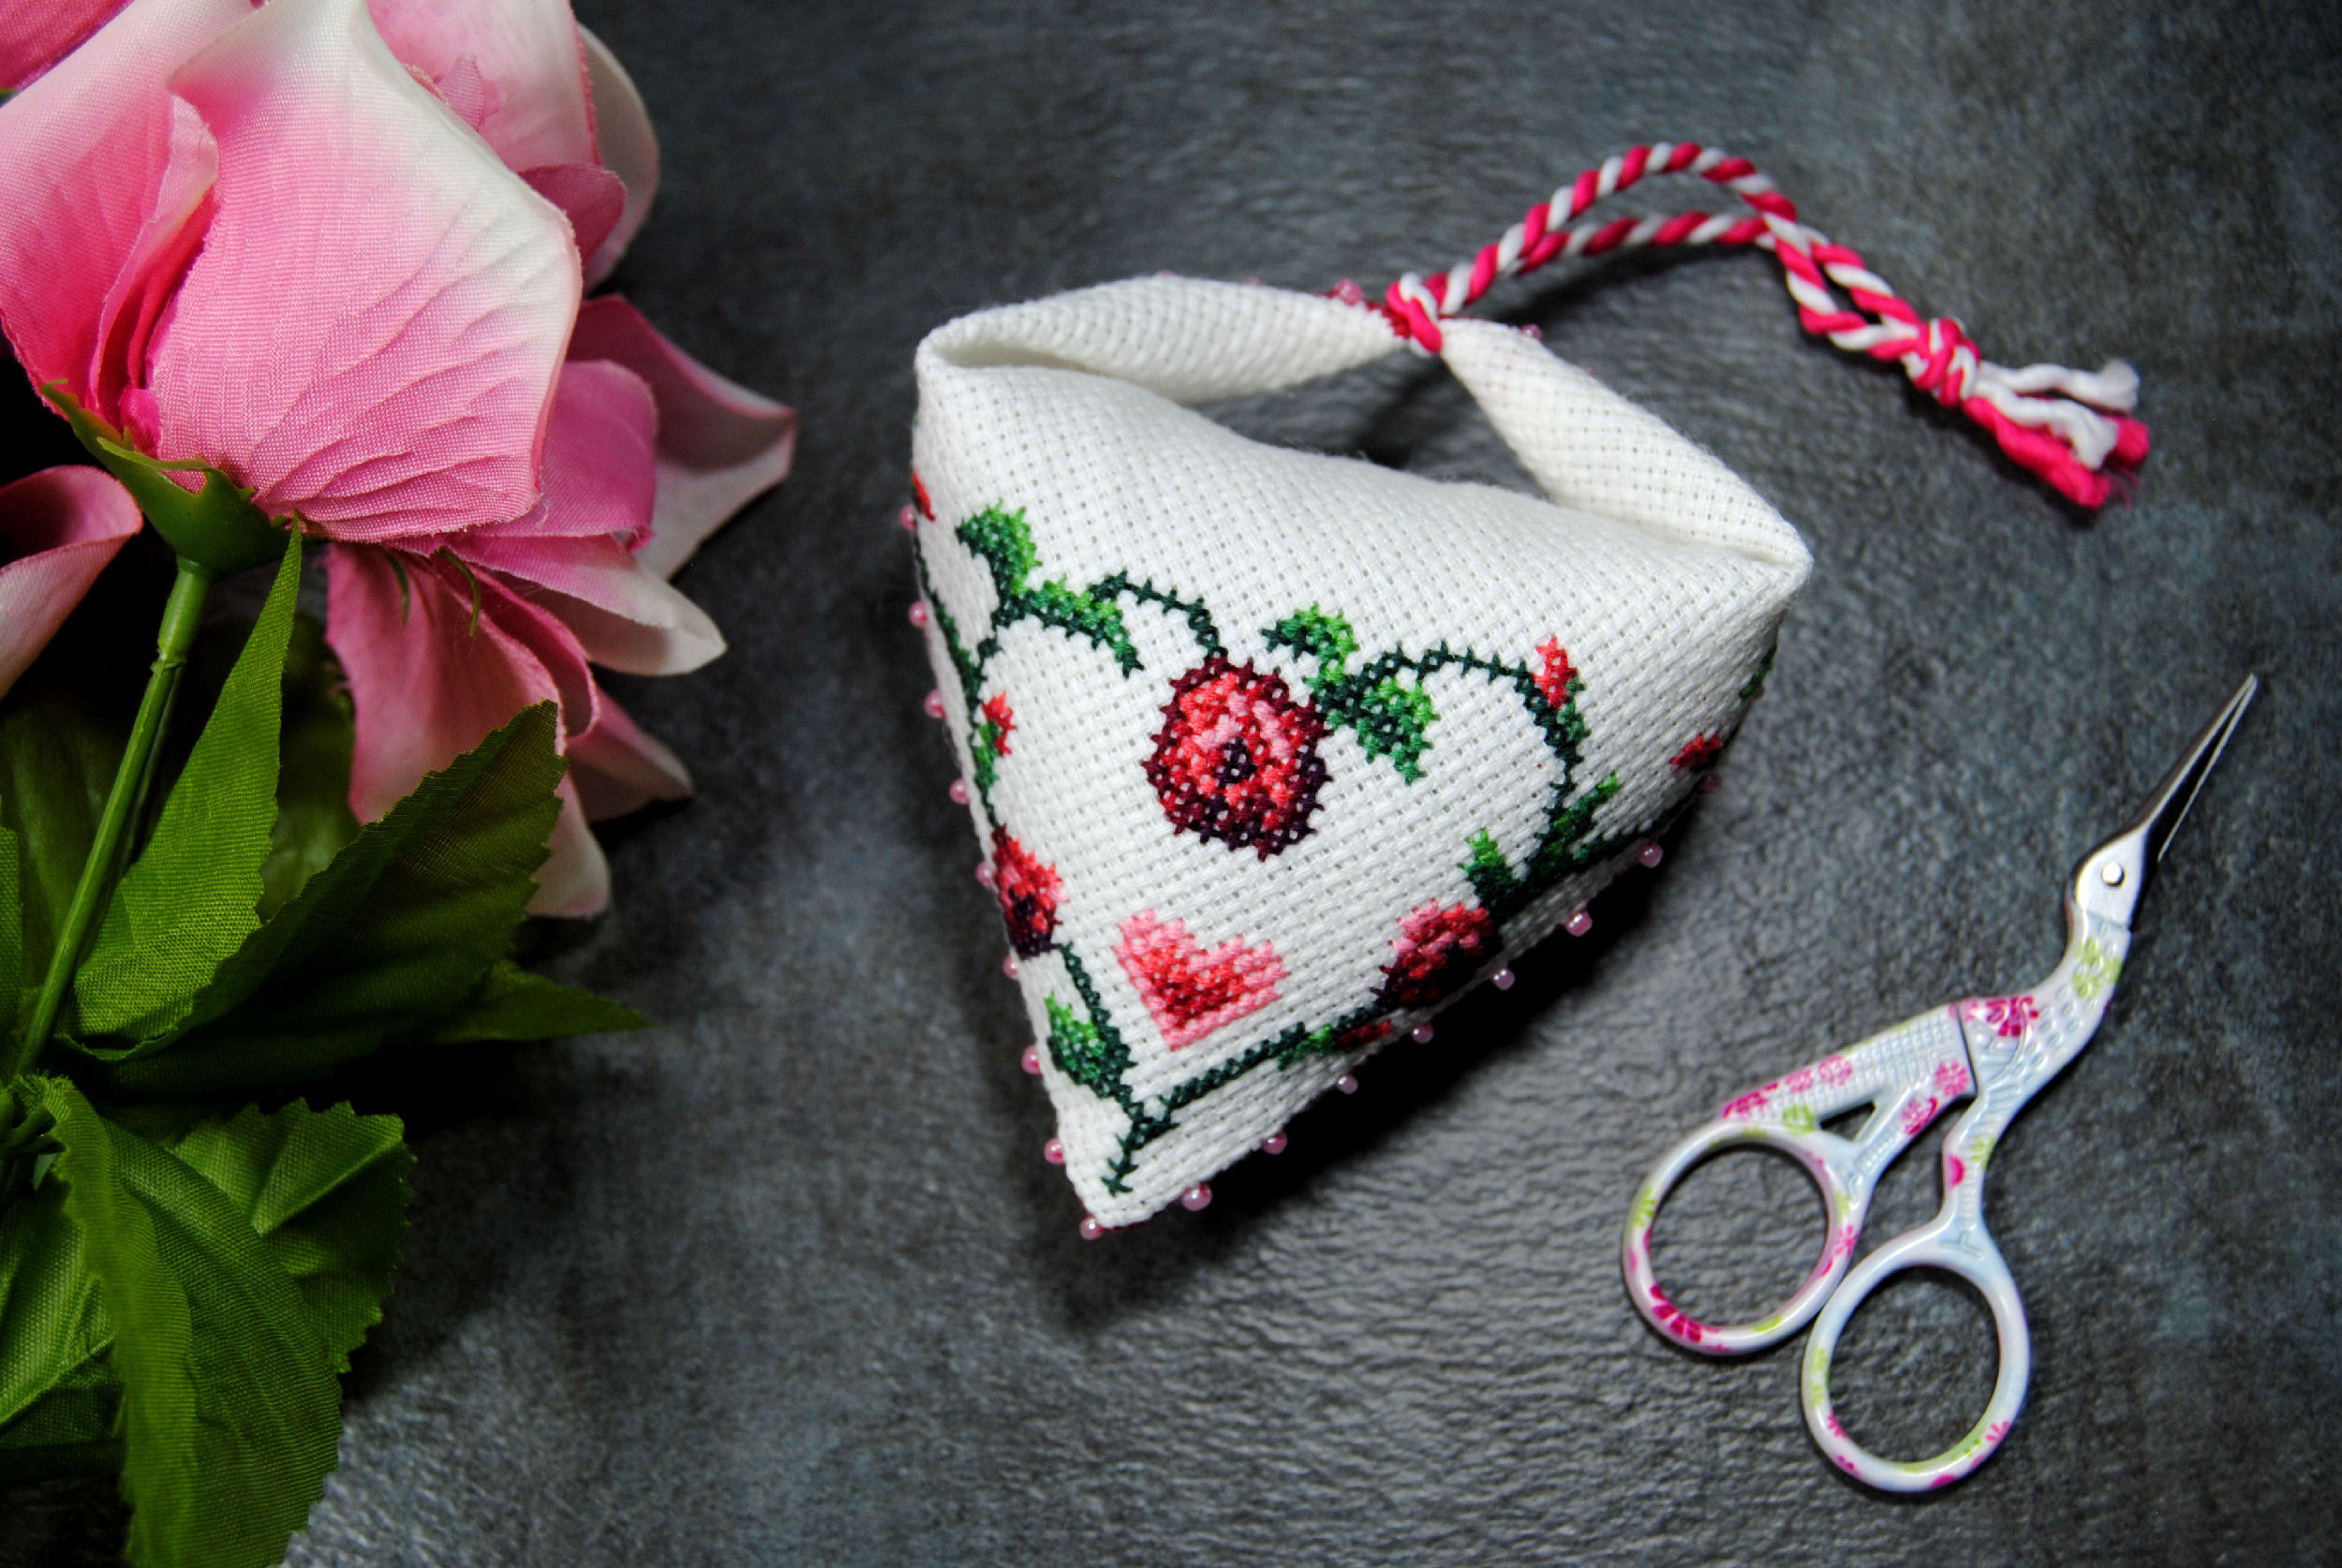
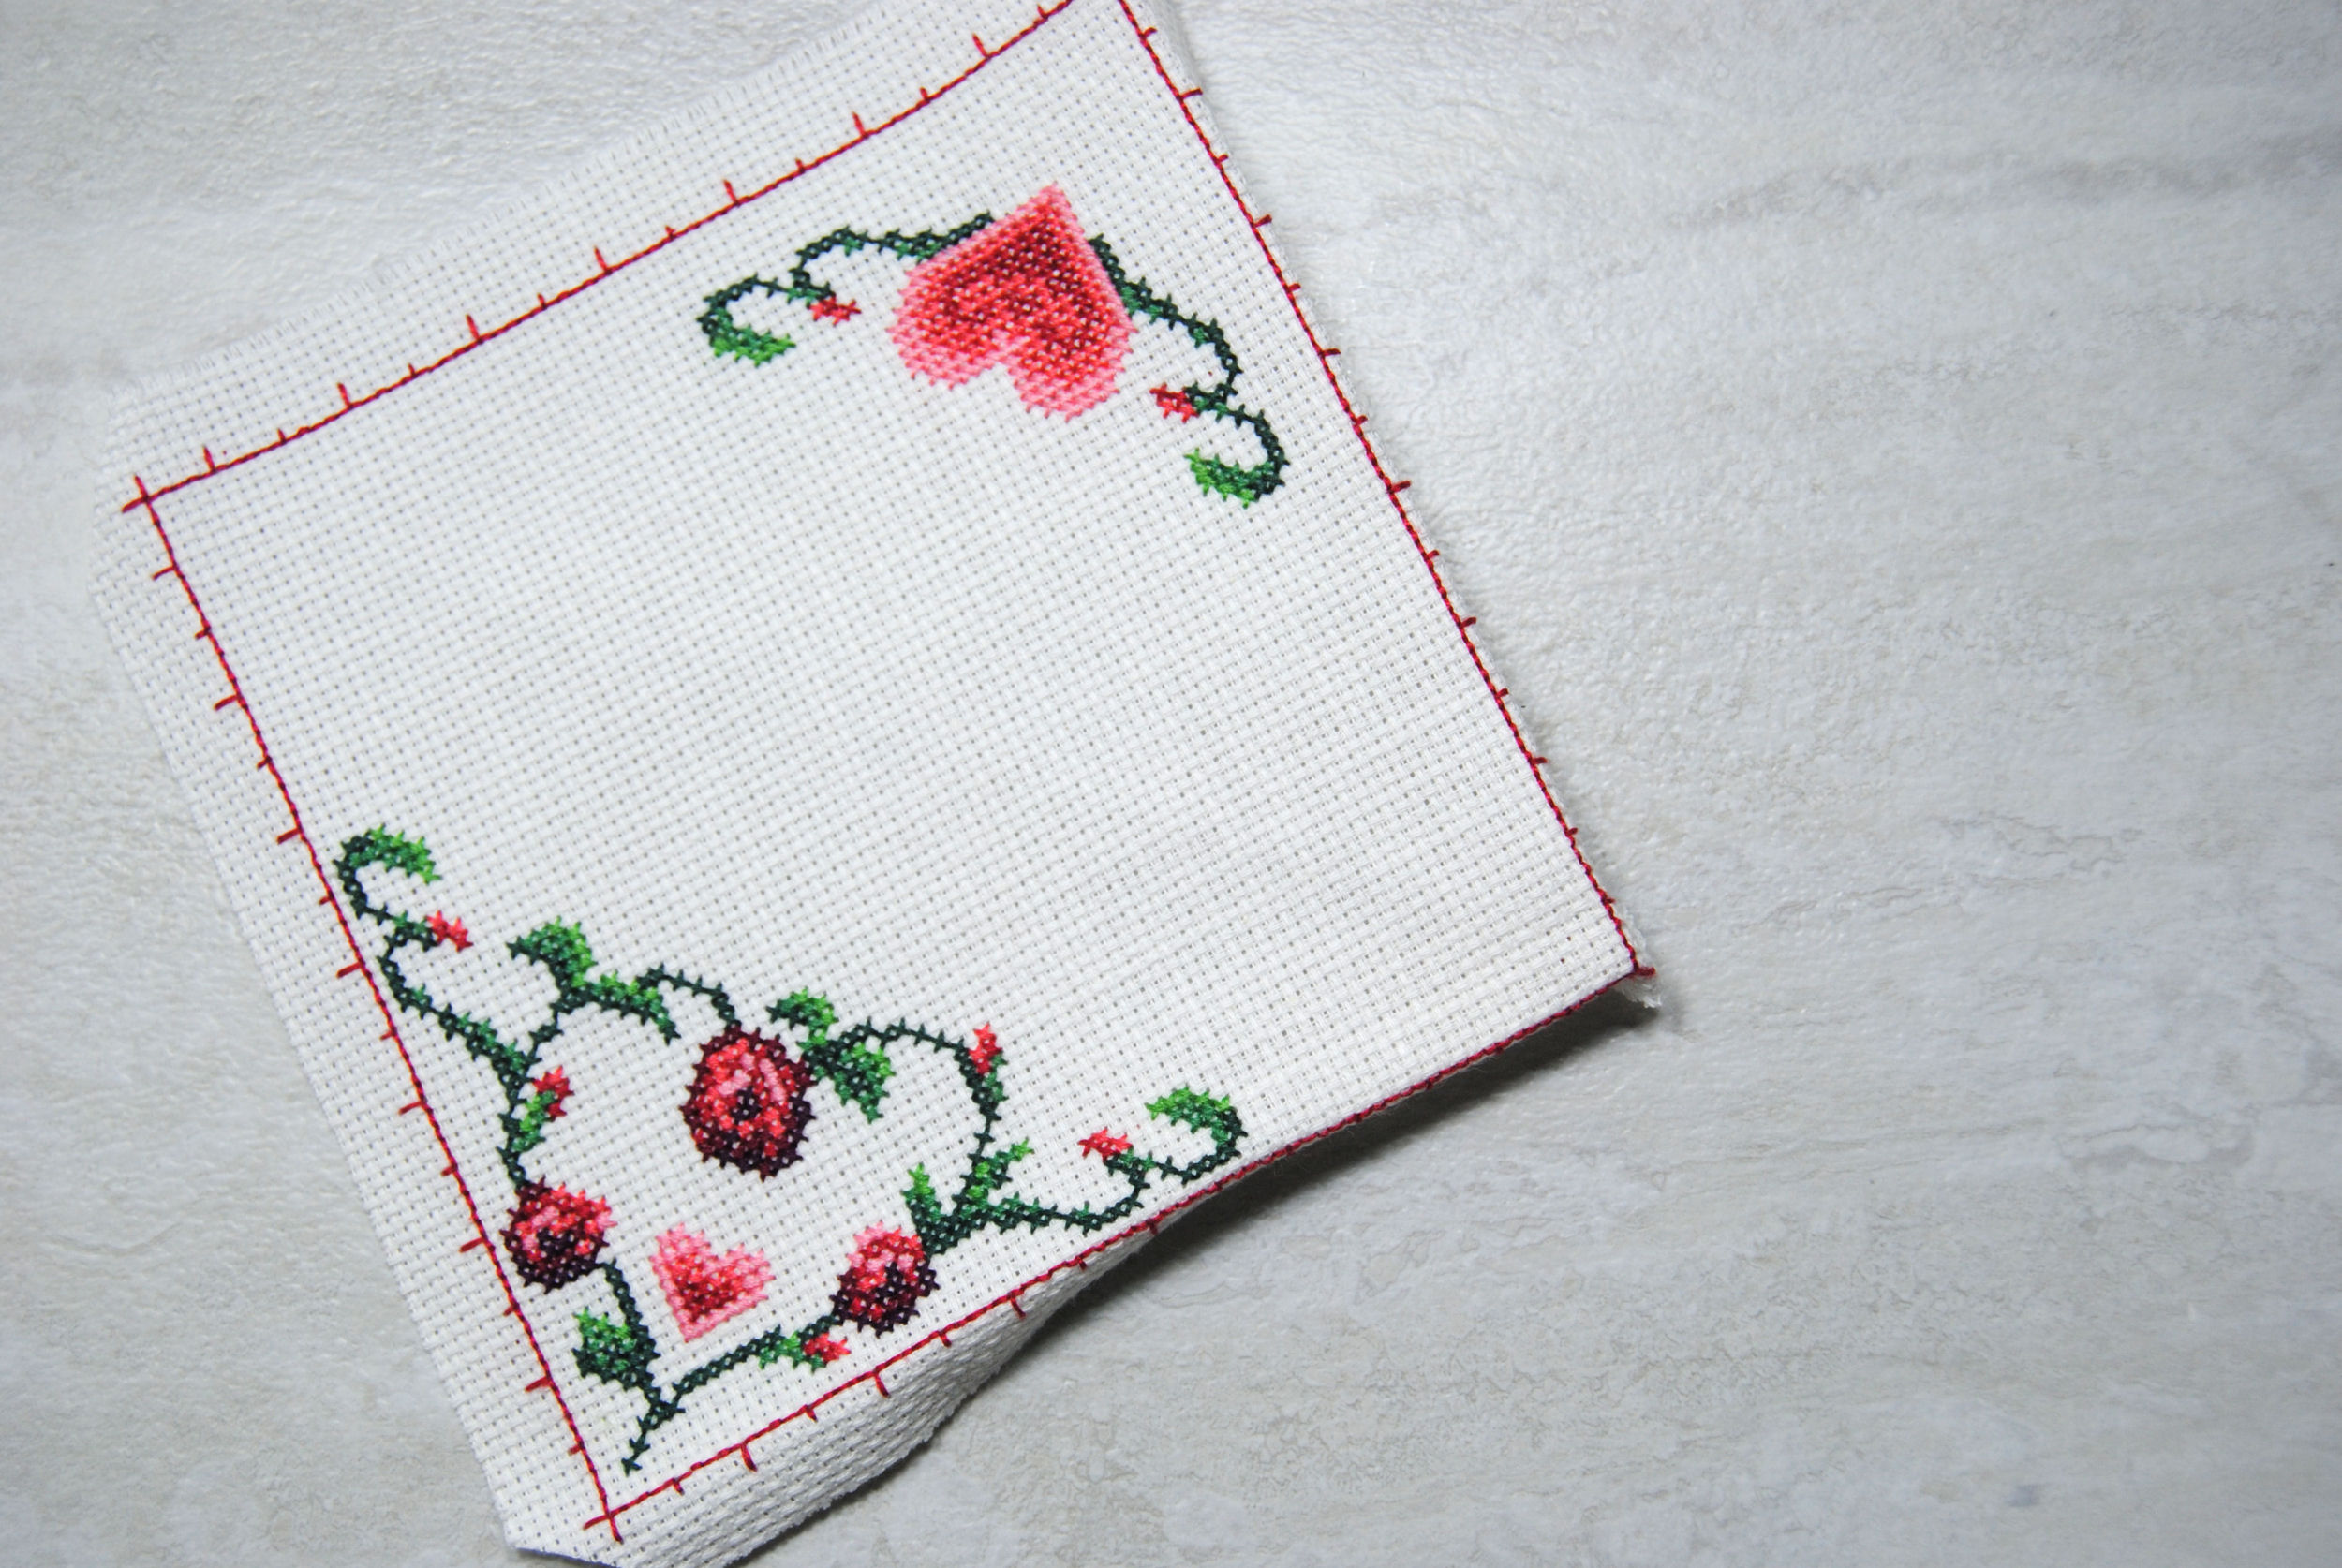
Got your design? Good. I ended up making mine a valentines themed one, since it was for my February patreon rewards. So that’s what you’ll be seeing in my photos.
You don’t need much to assemble it, though:
- Your finished design, with a full backstitch border around it. I also mark off every 5 stitches just to make it easier to count out the border, but those dashes will all be hidden inside the finished piece, so they’re optional.
- Needle and thread in the same color as your backstitch.
- Something to stuff your pendibule with. I used polyfil.
- A cord or ribbon to hang your pendibule by.
- Optional, beads or other embellishments. I ended up using these the pink from these cute 2mm pastel seed beads. You can learn more about embellishing your cross stitch with beads here on my site.

Preparing your design
As mentioned, make sure you have backstitched all the way around your design just like you would for a biscornu.
To make it easier on yourself during assembly, I also recommend trimming your corners as close to the backstitch as you’re comfortable with depending on how much your fabric frays.
If you’re using a stiff aida like I am, you may also want to consider folding and ironing your edges. This way you don’t have to fold as you go during assembly. A softer fabric may not hold the fold as long, but you can also iron sections as you go.
Stitching the seams together
If you’ve ever made a biscornu, humbug, or omamori you will be familiar with this technique. But just in case, let’s go over it here.
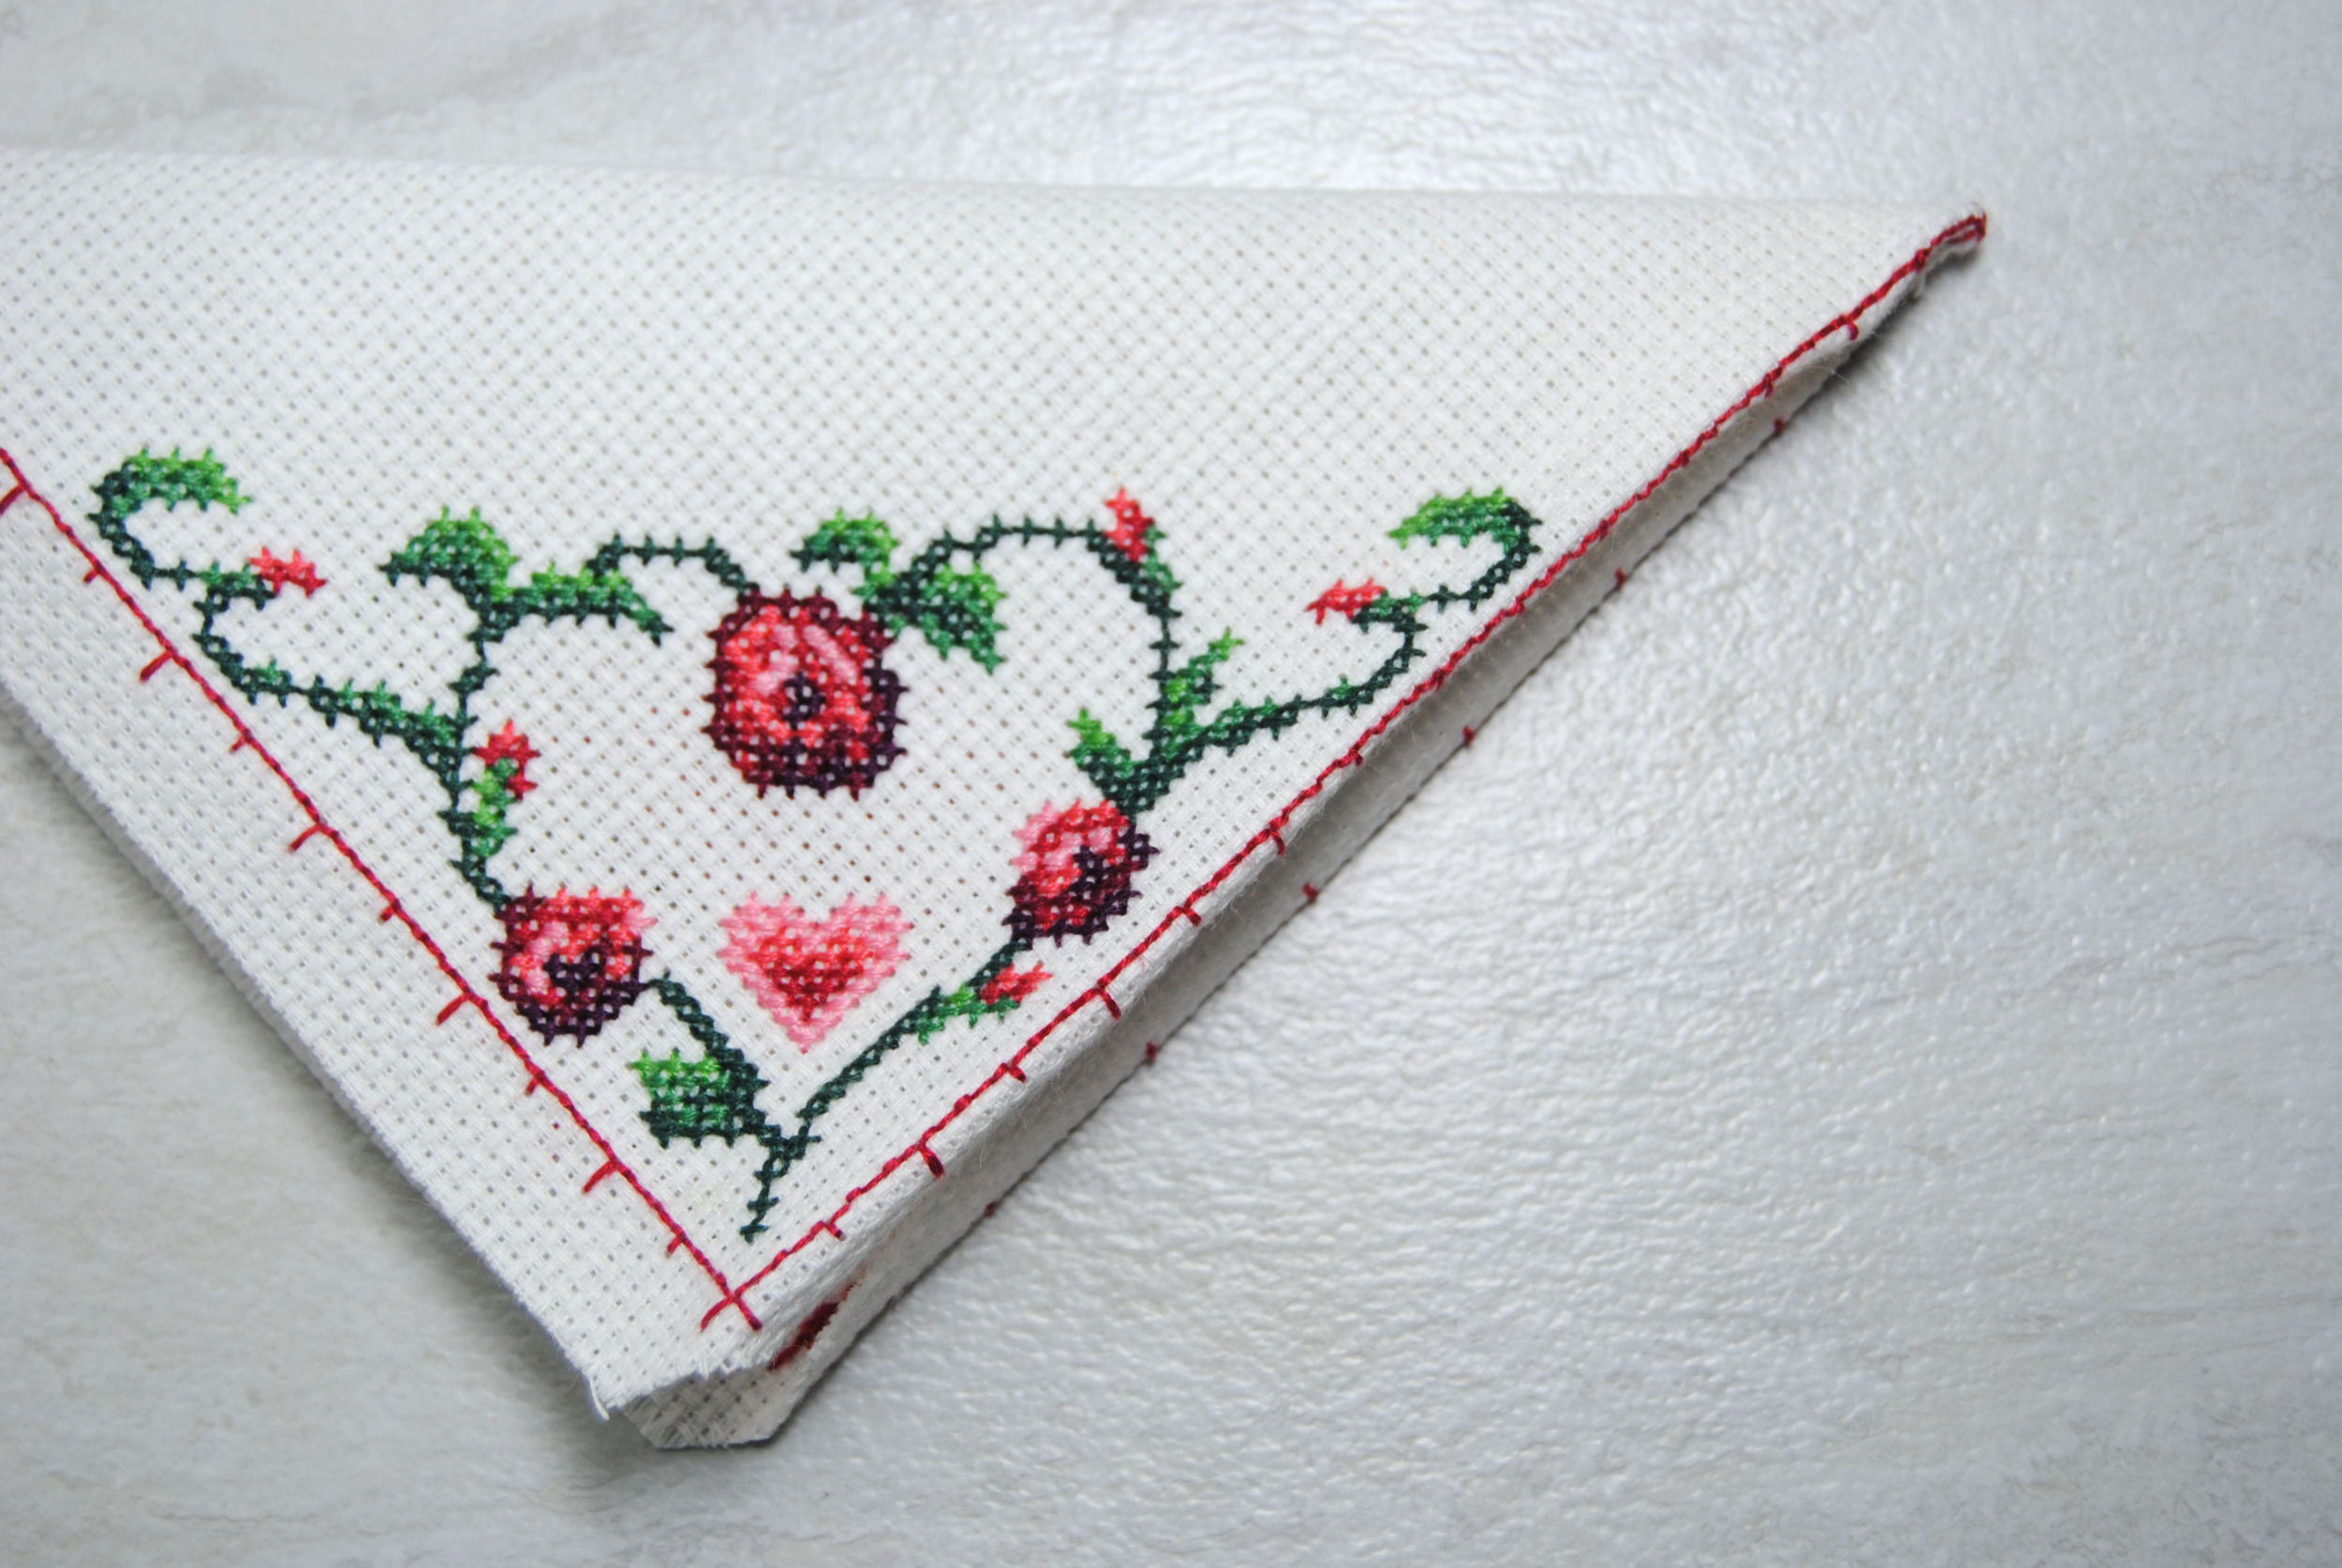
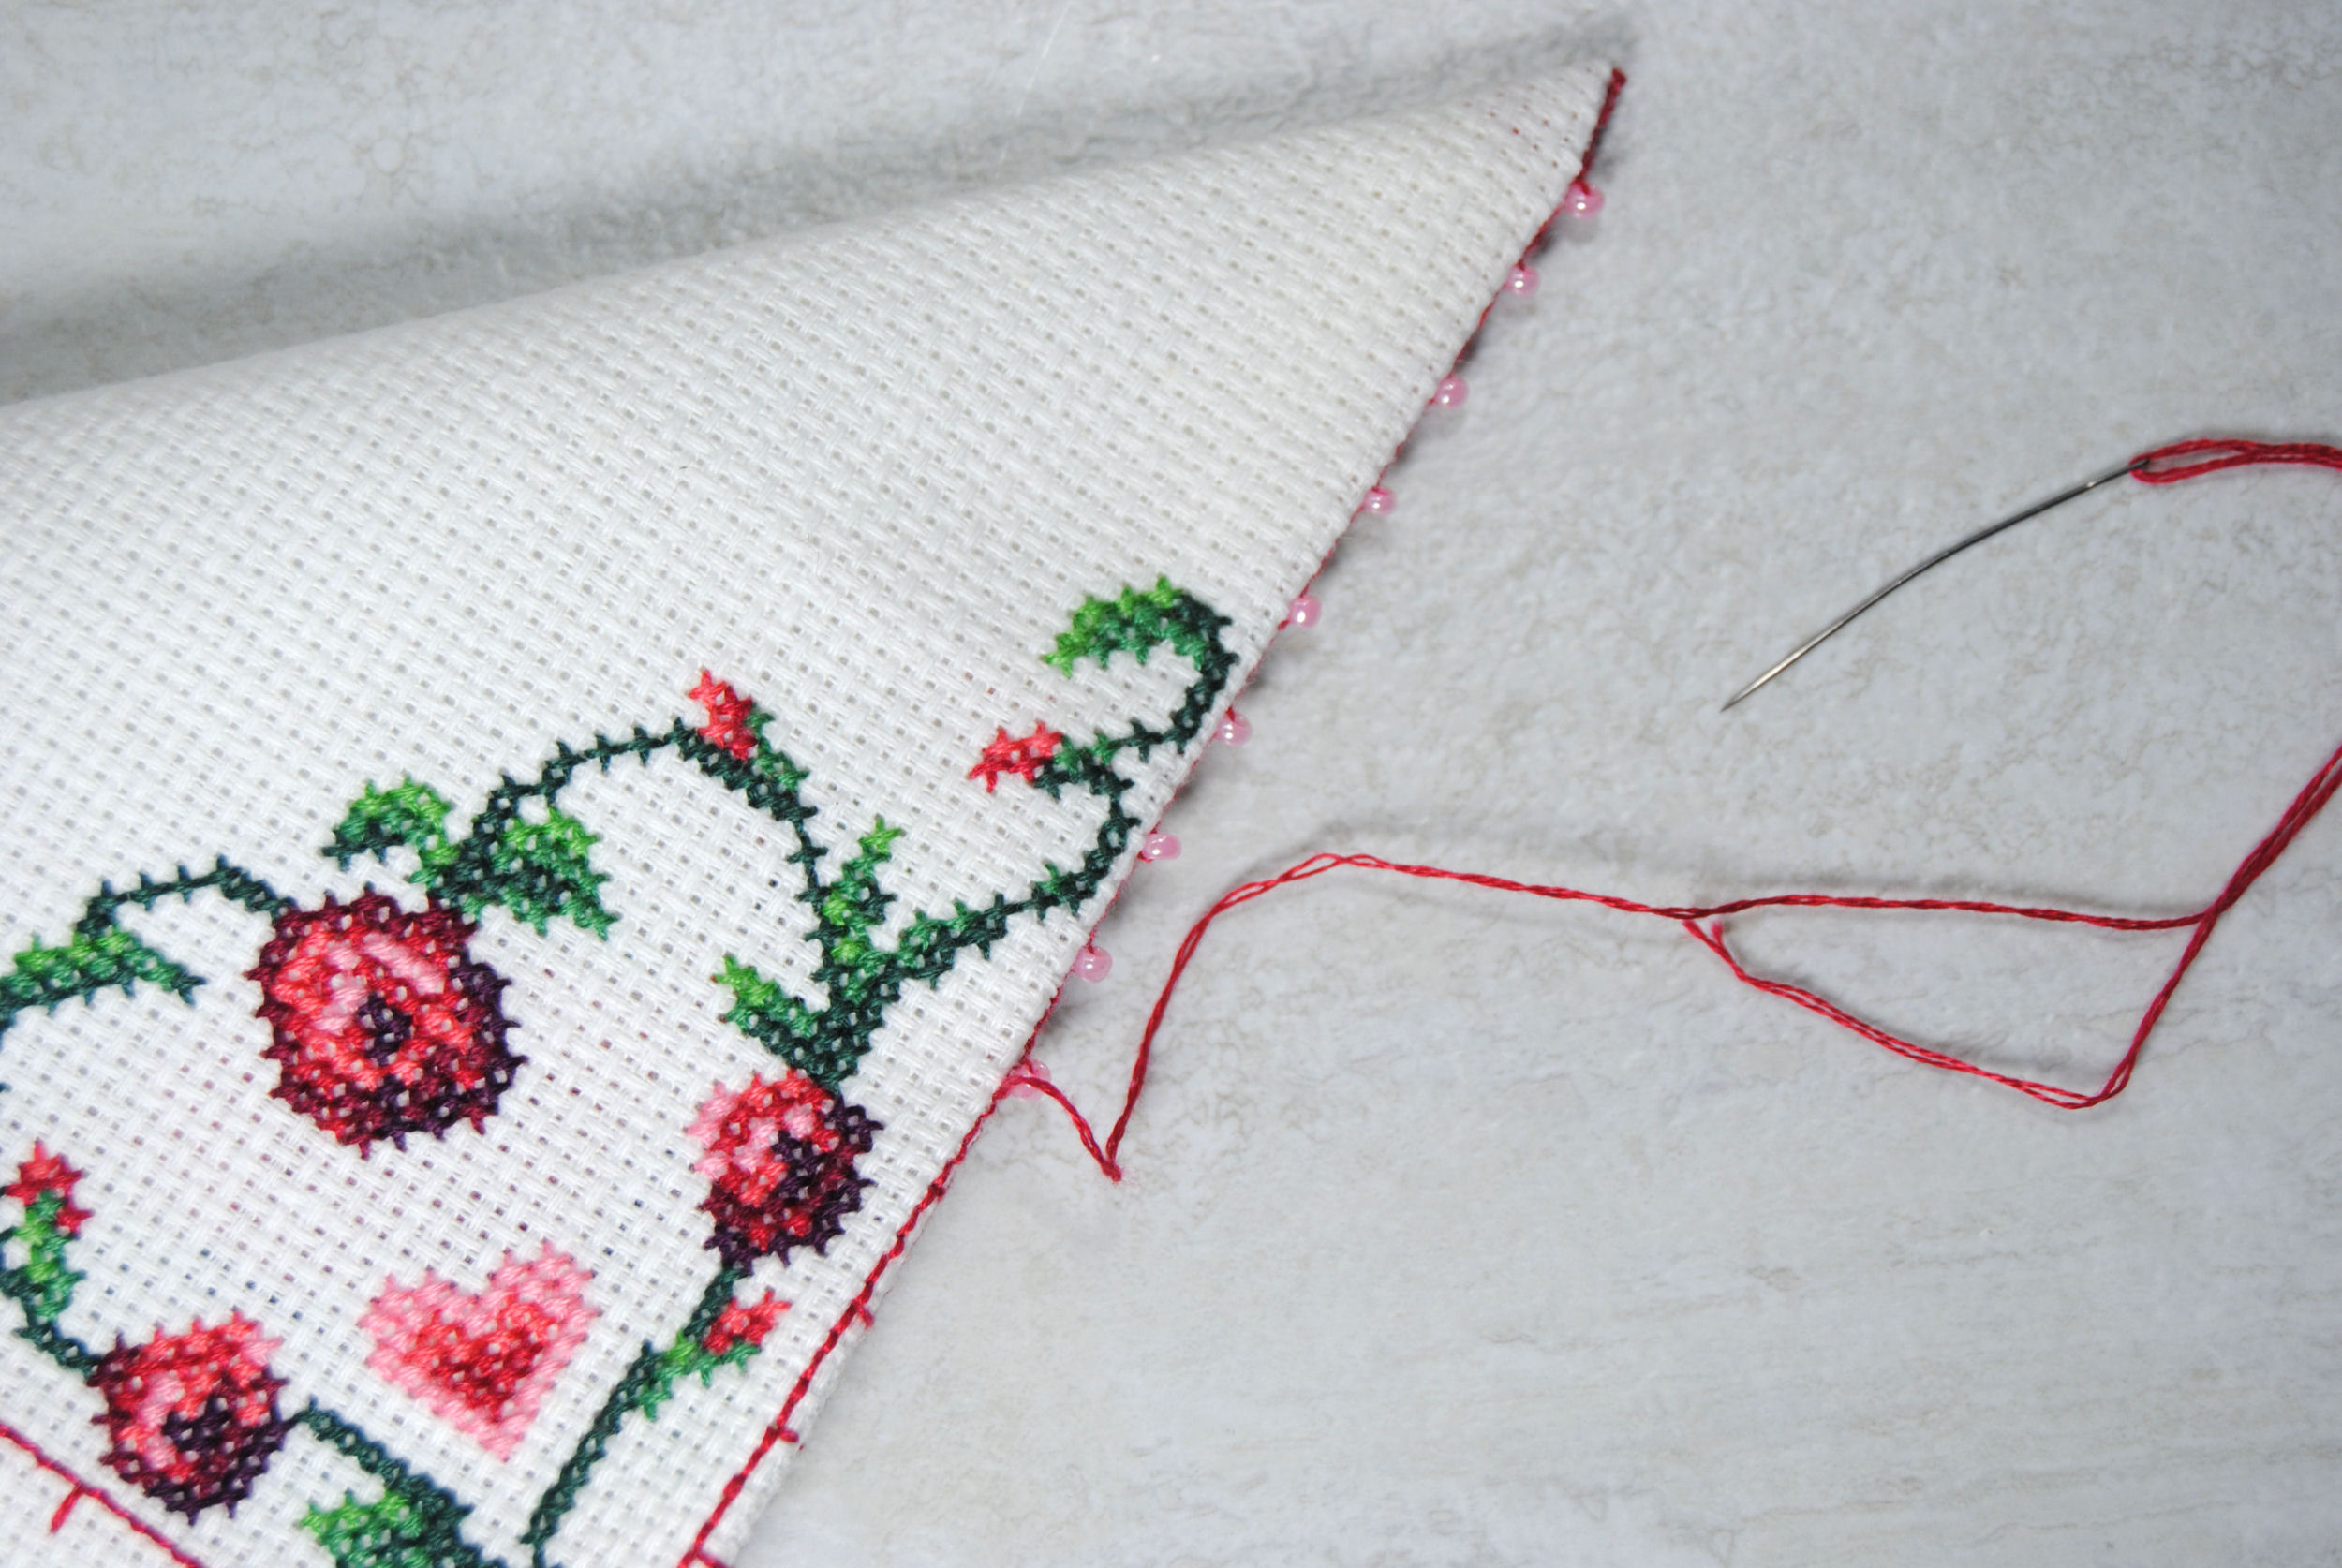
First, fold your fabric in half diagonally to make that triangle shape:
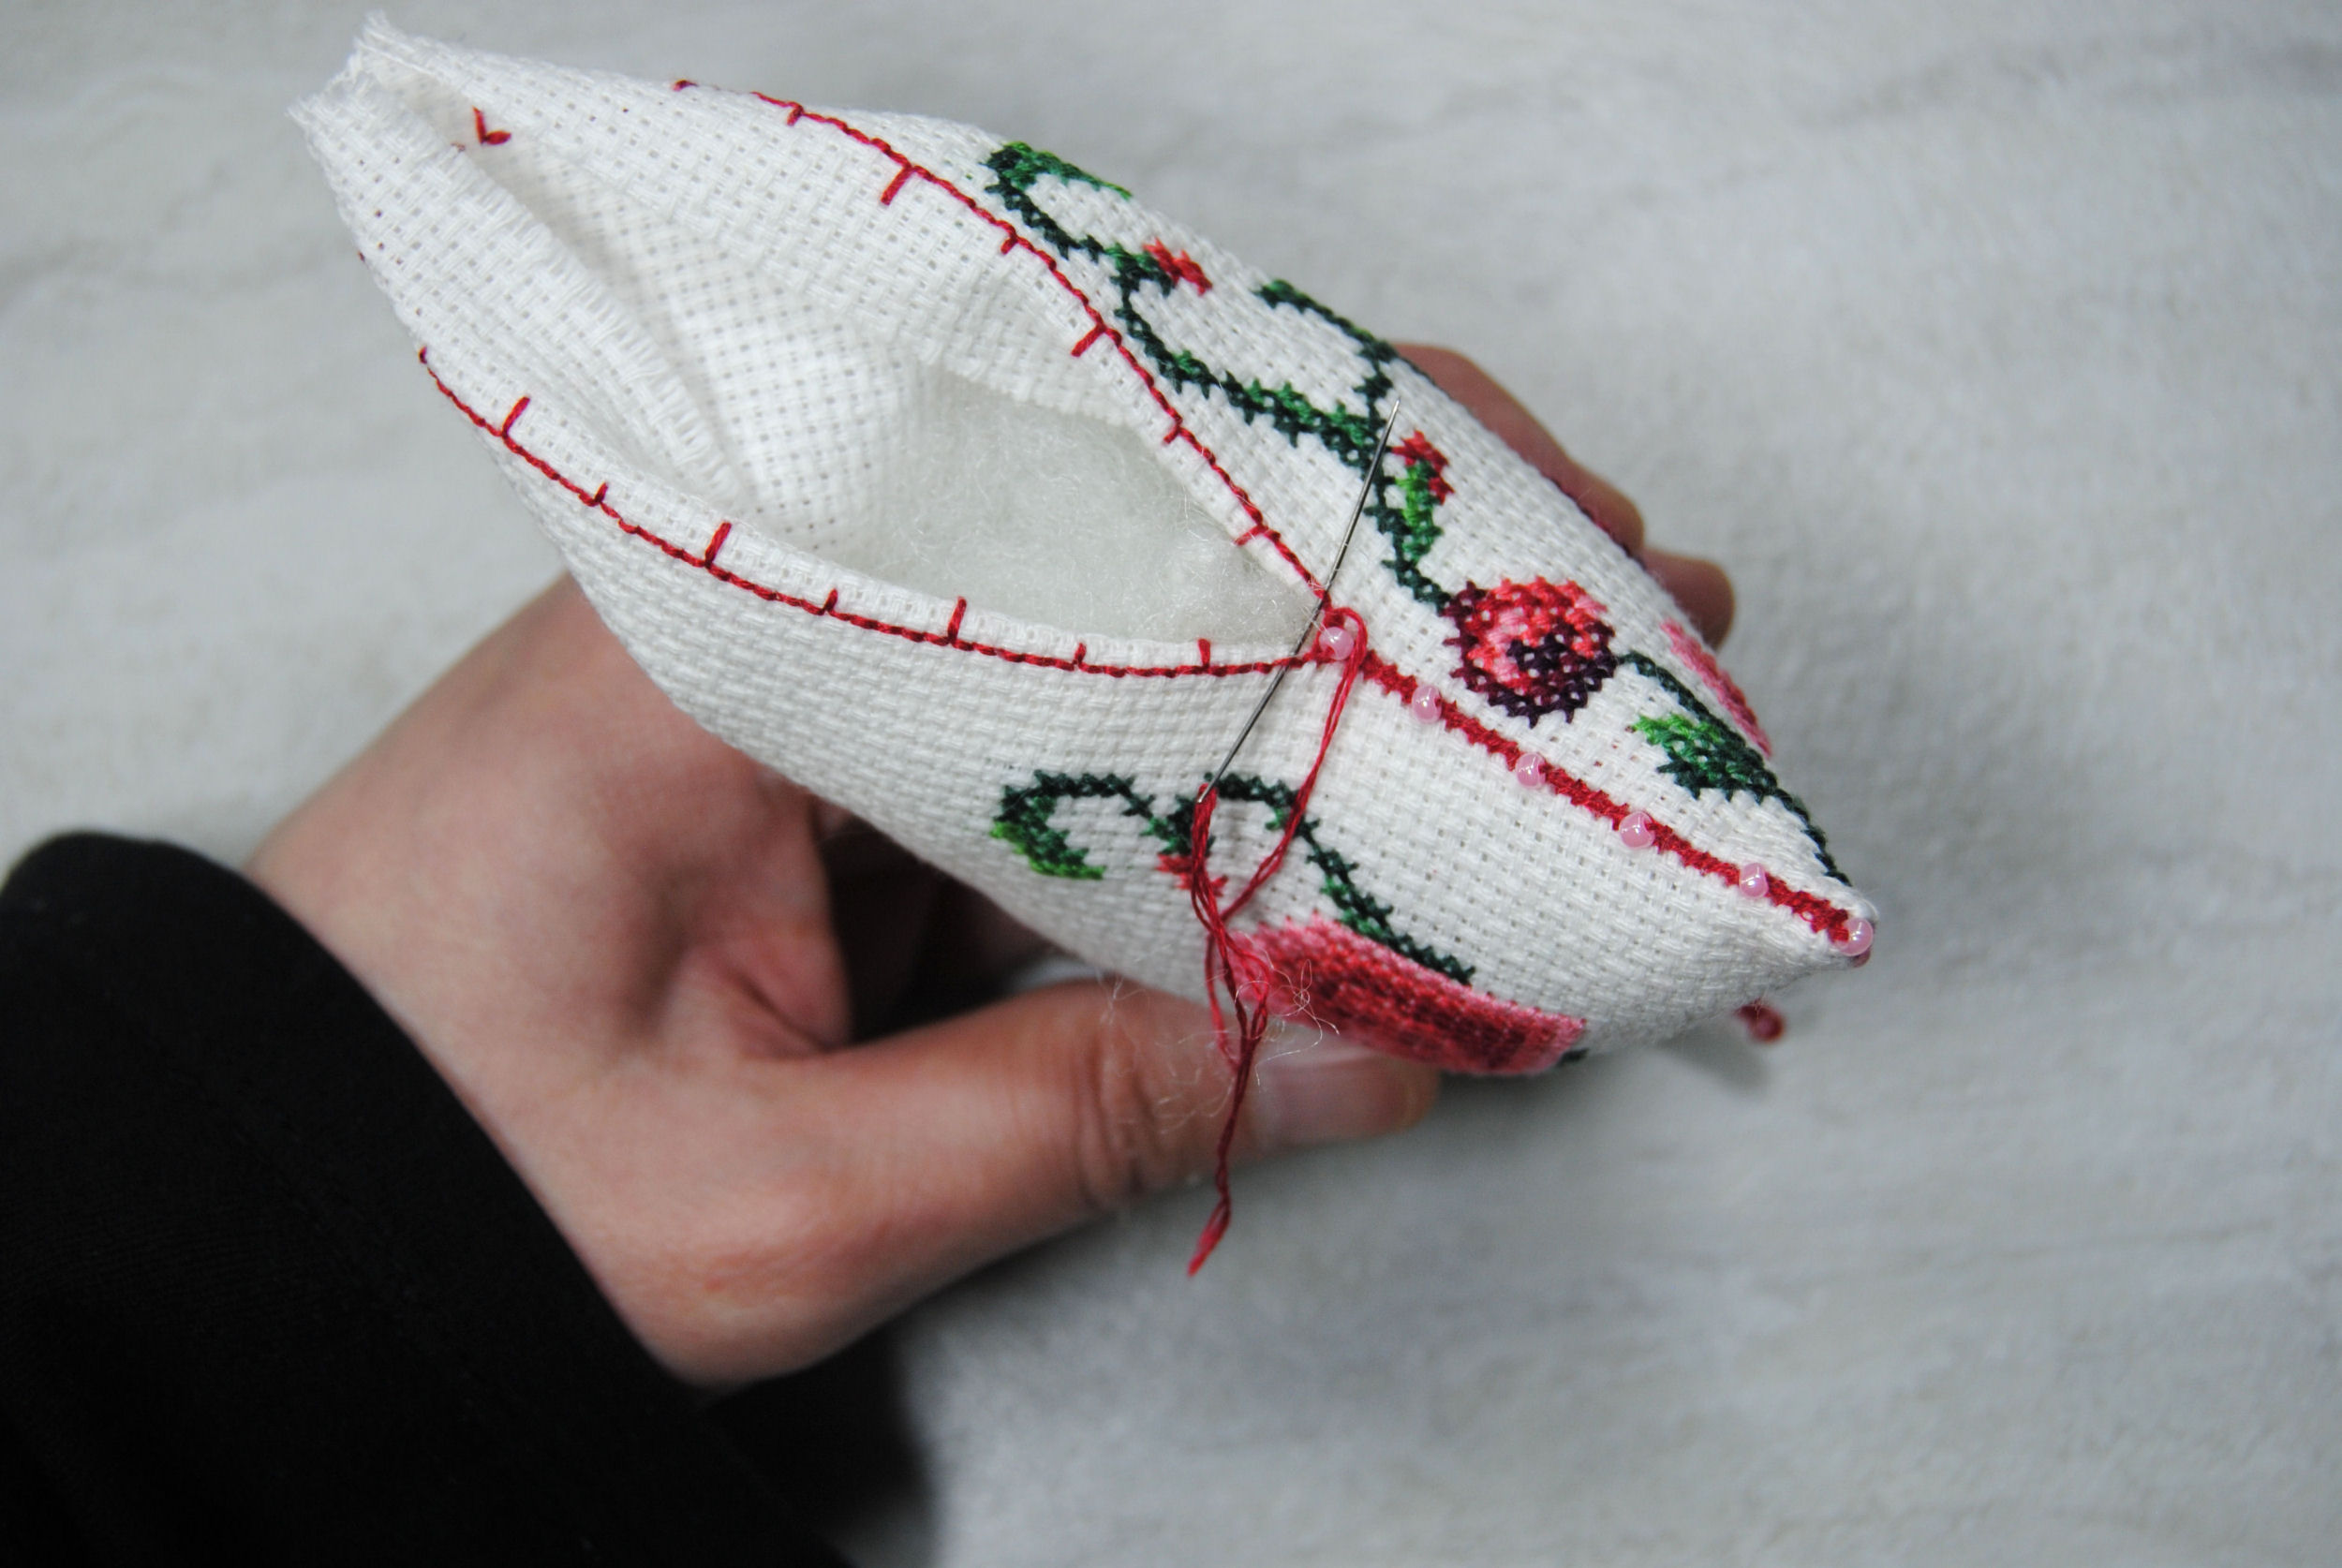
Next, anchor your thread on the back (or use a knot) and bring your needle up through the very point one side. You’ll then be stitching through the backstitches to stitch the edges together.
Make sure you’re always coming from the same direction. In my photos, I’m always working from right to left.
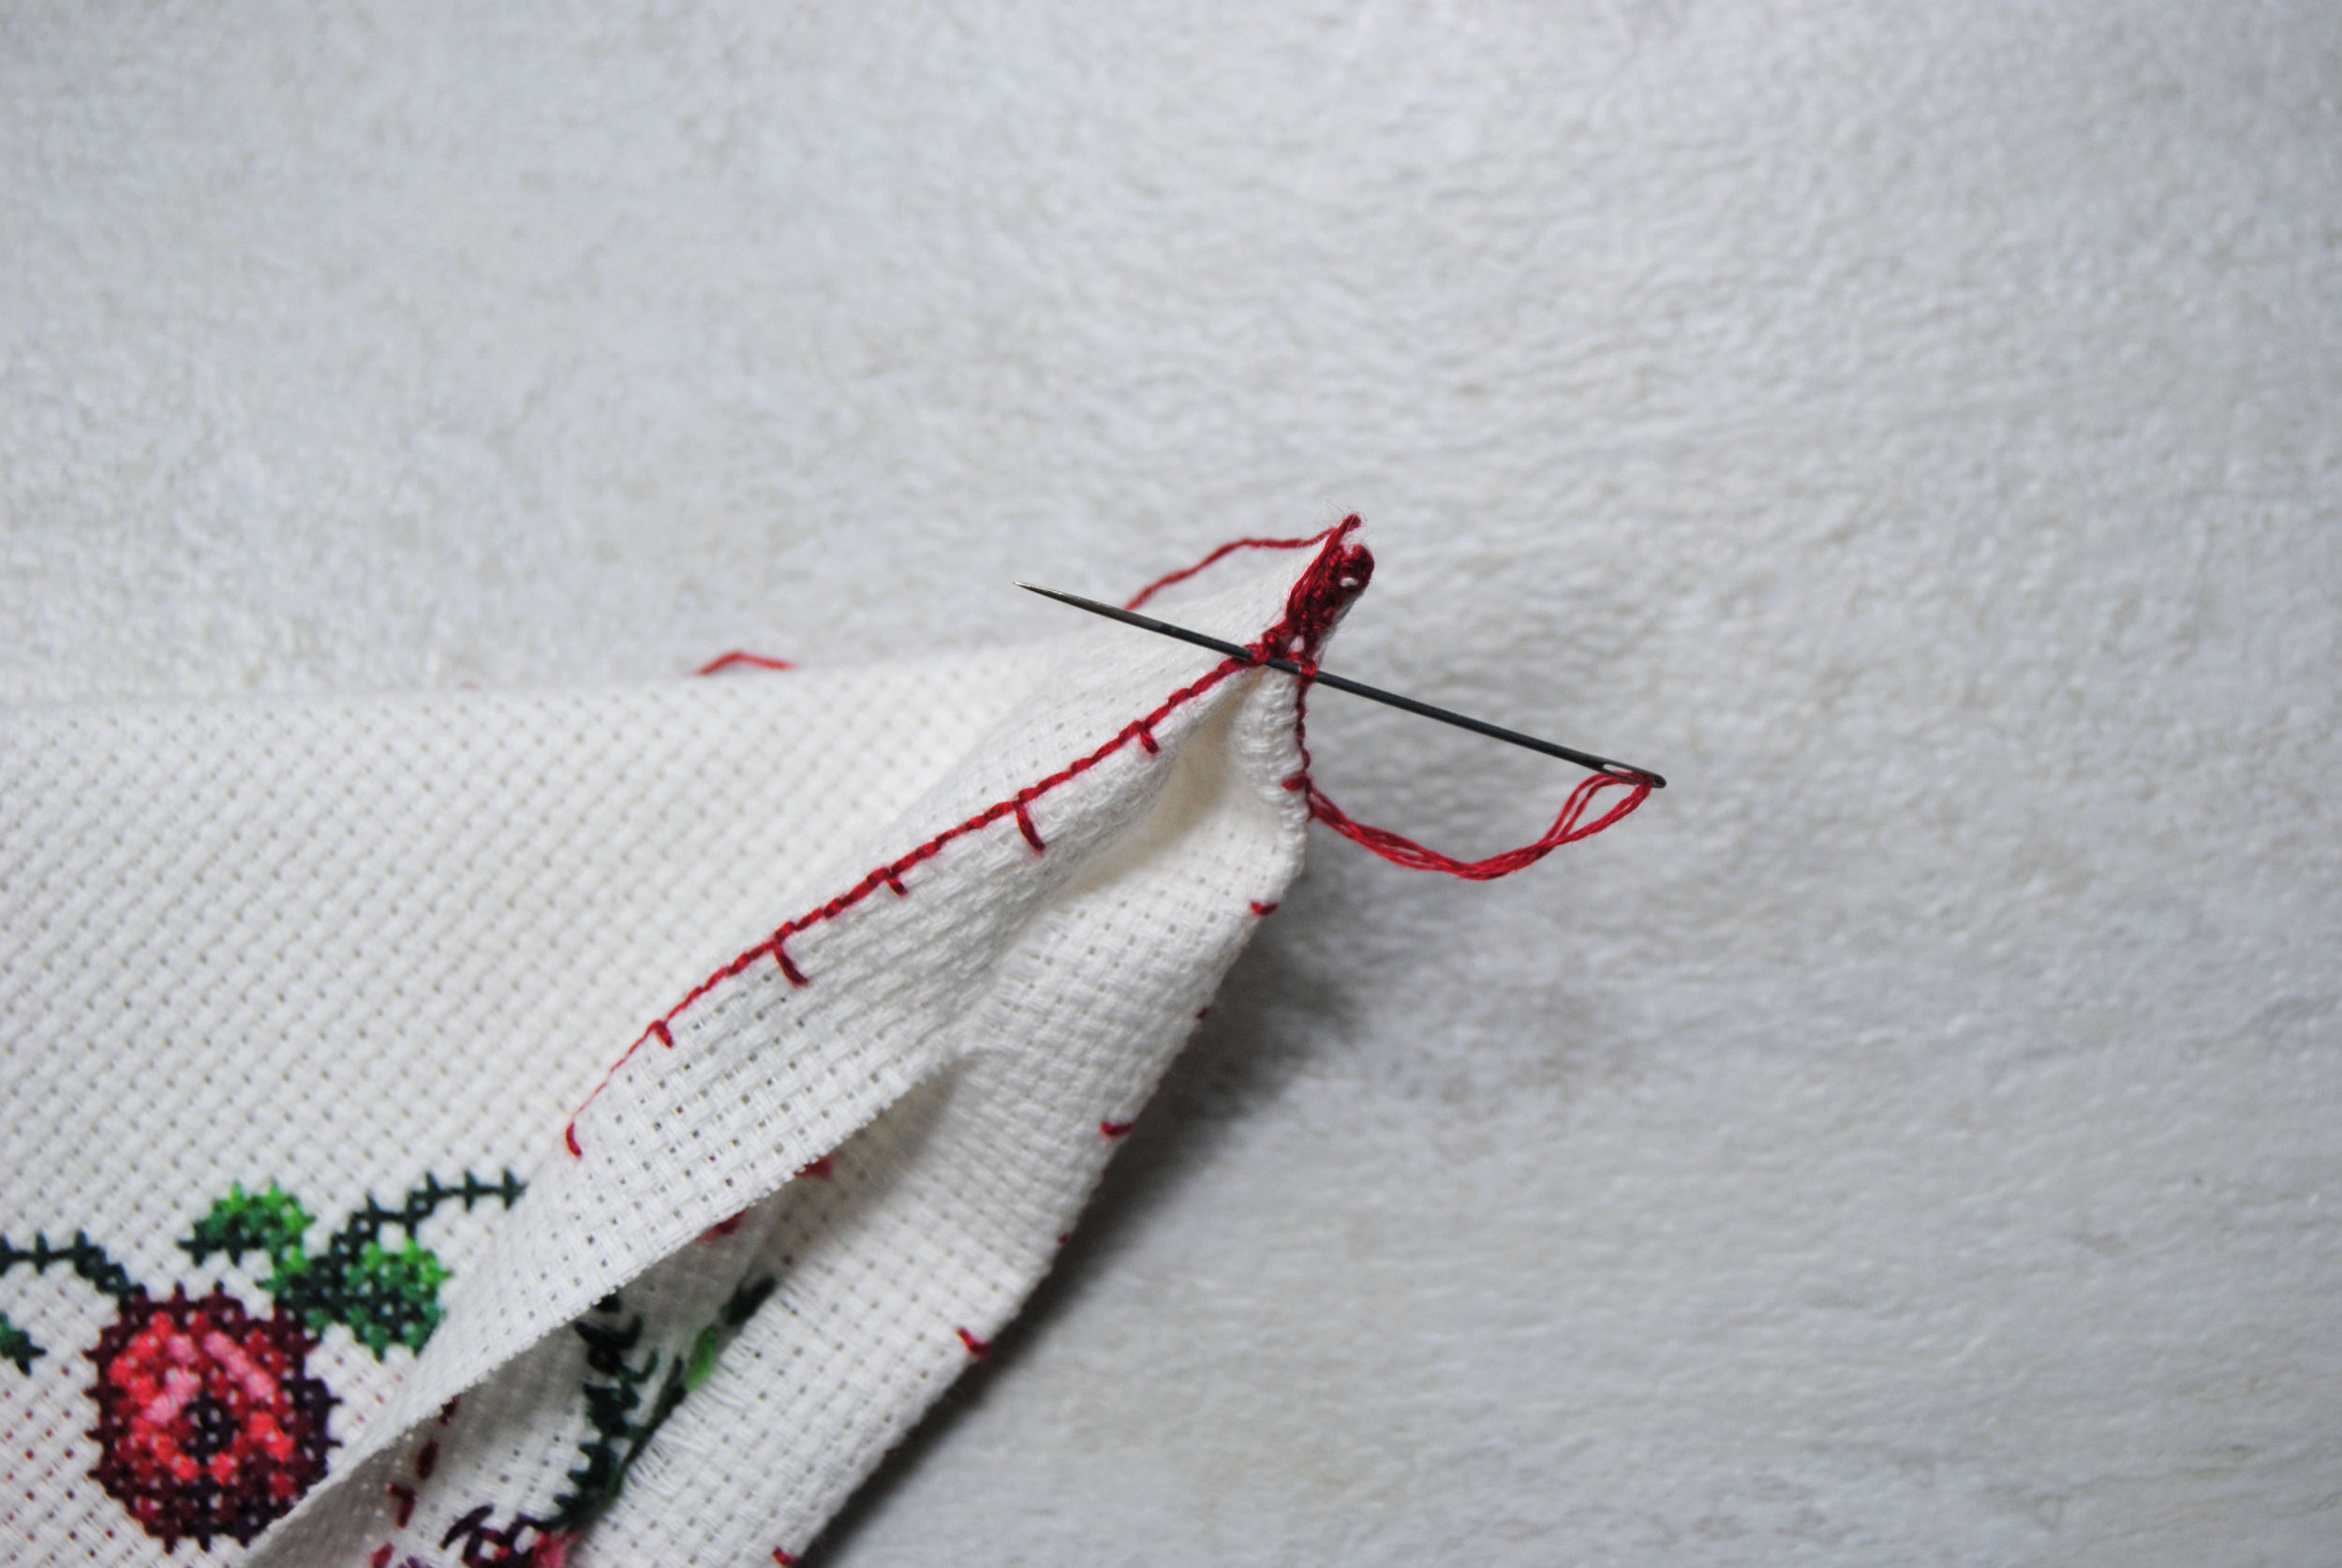
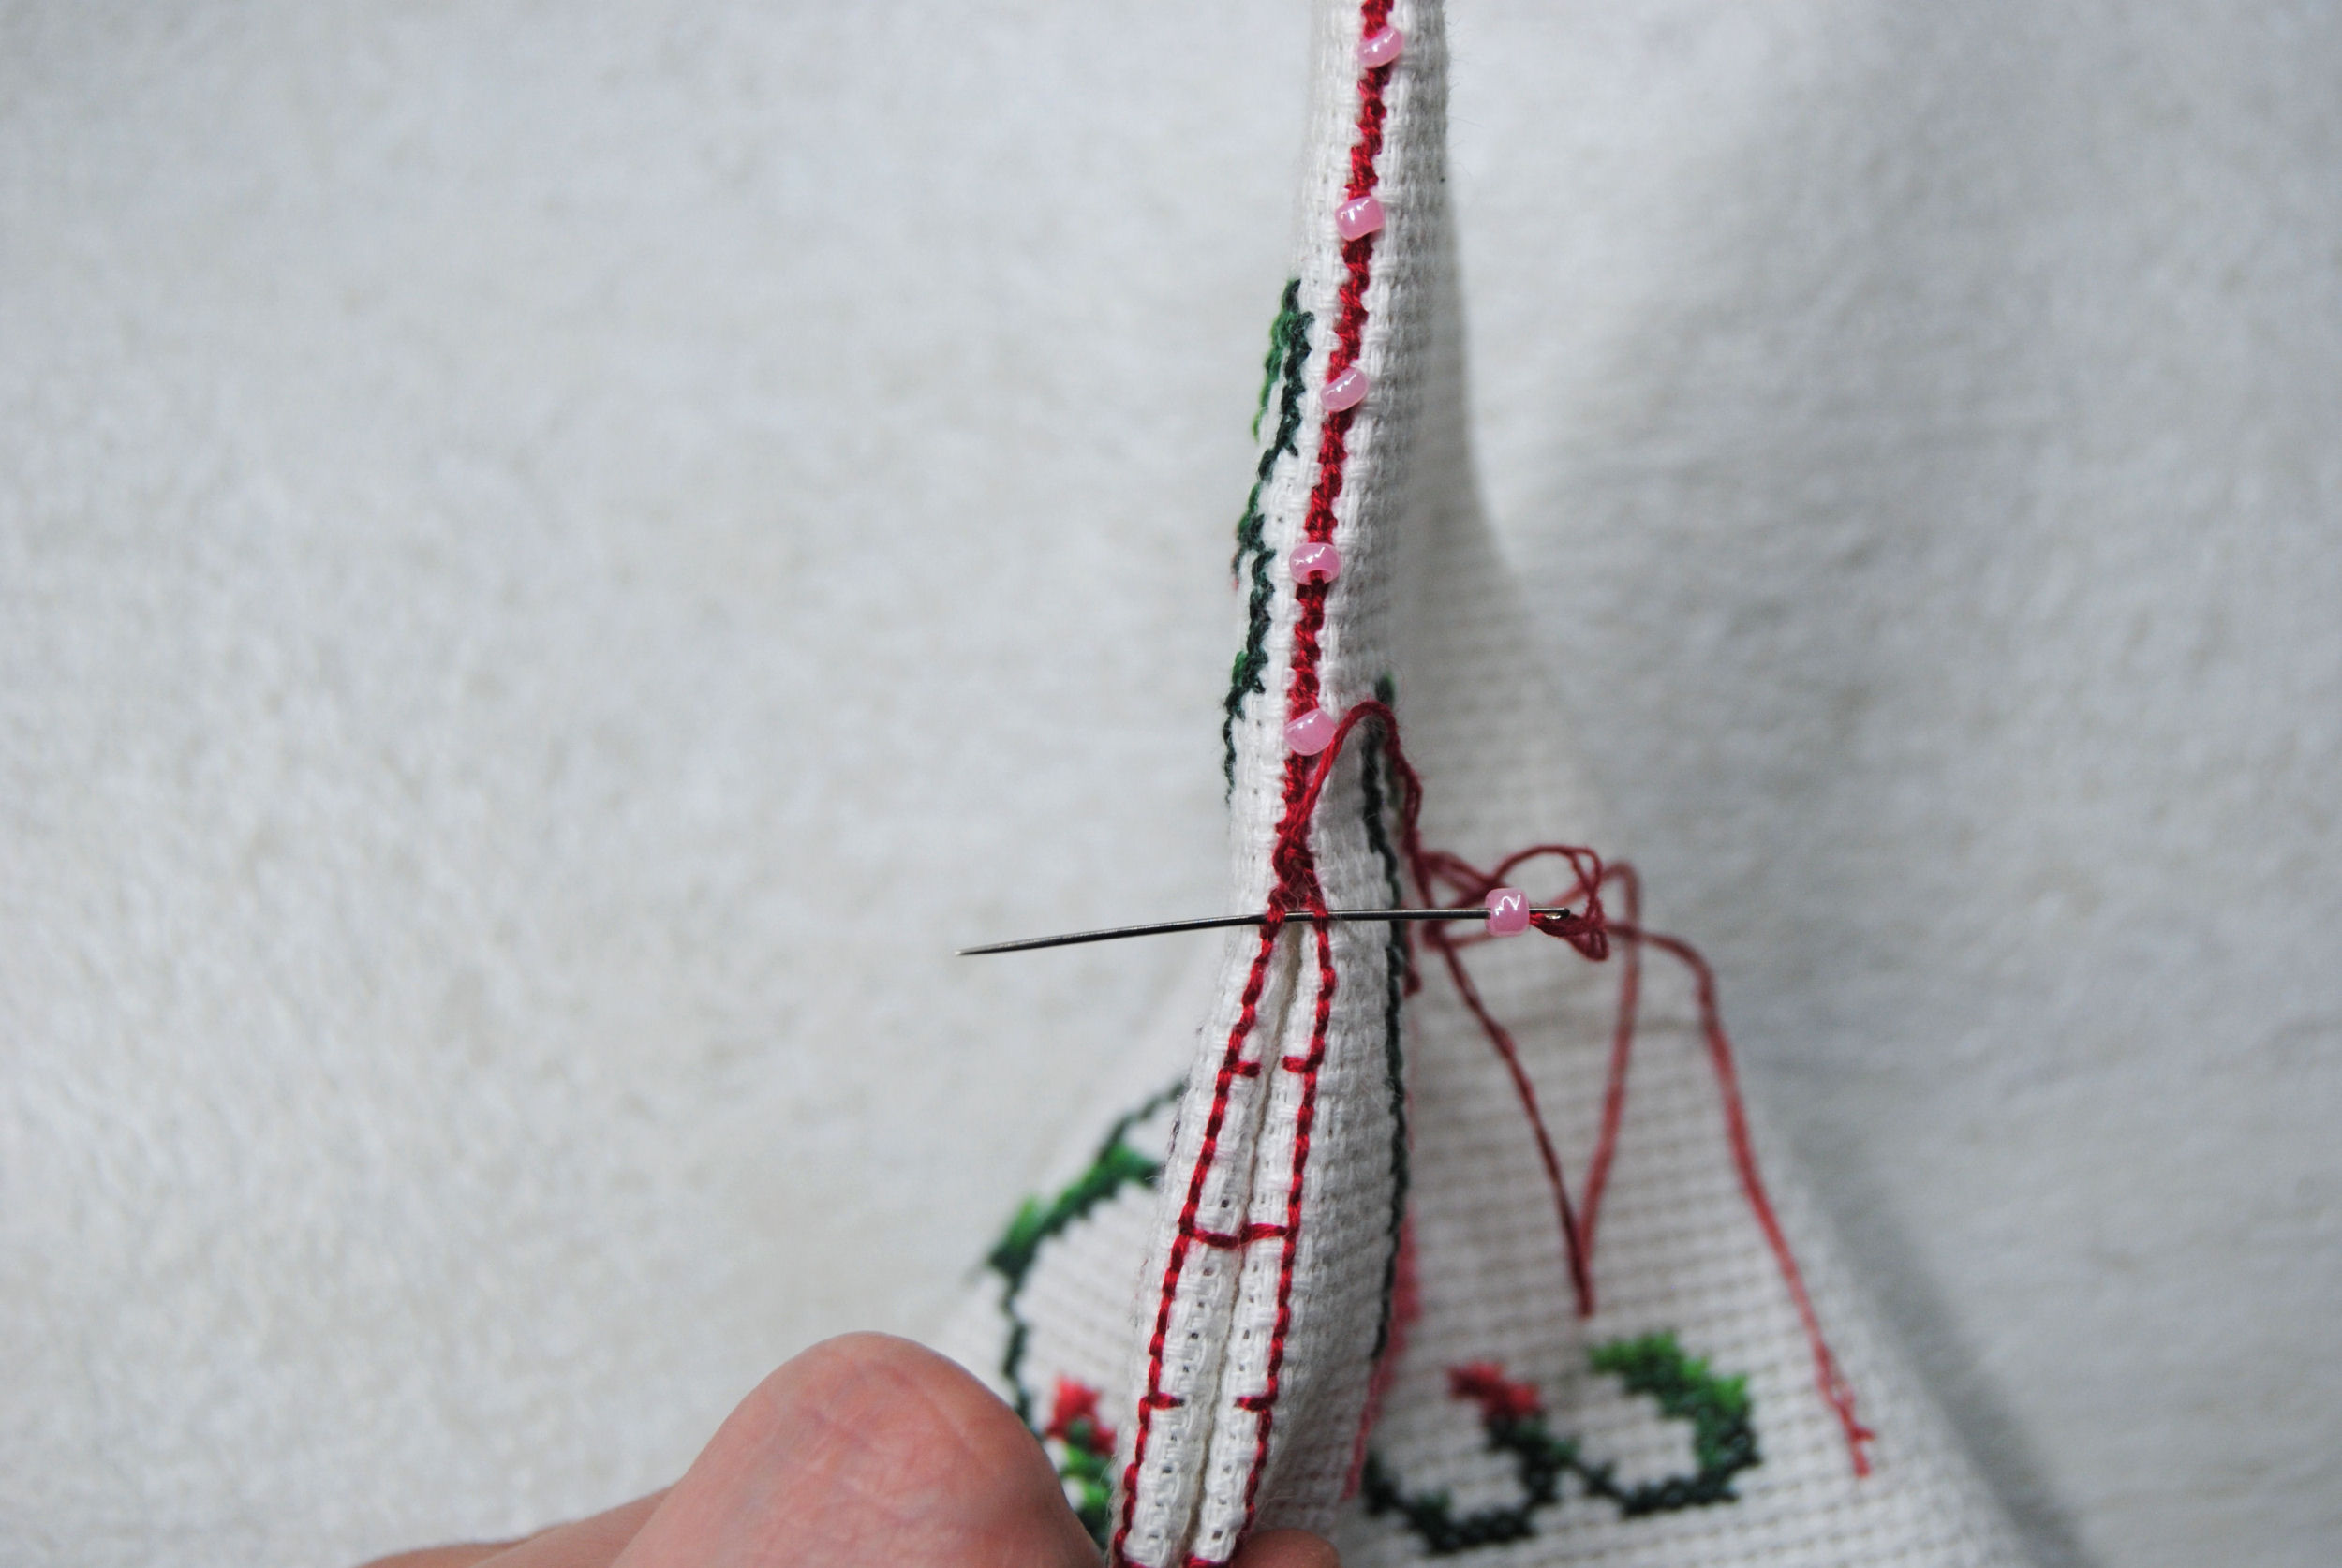
Keep stitching down the edge. If you’re adding beads, you can add them as you go like I did, or do it at the very end. Up to you! I did mine every 5 stitches.
Keep going until you get to that corner. You may need to fold in the edges here if you didn’t iron them down earlier. Take that corner slowly, as it can be a bit fiddly.
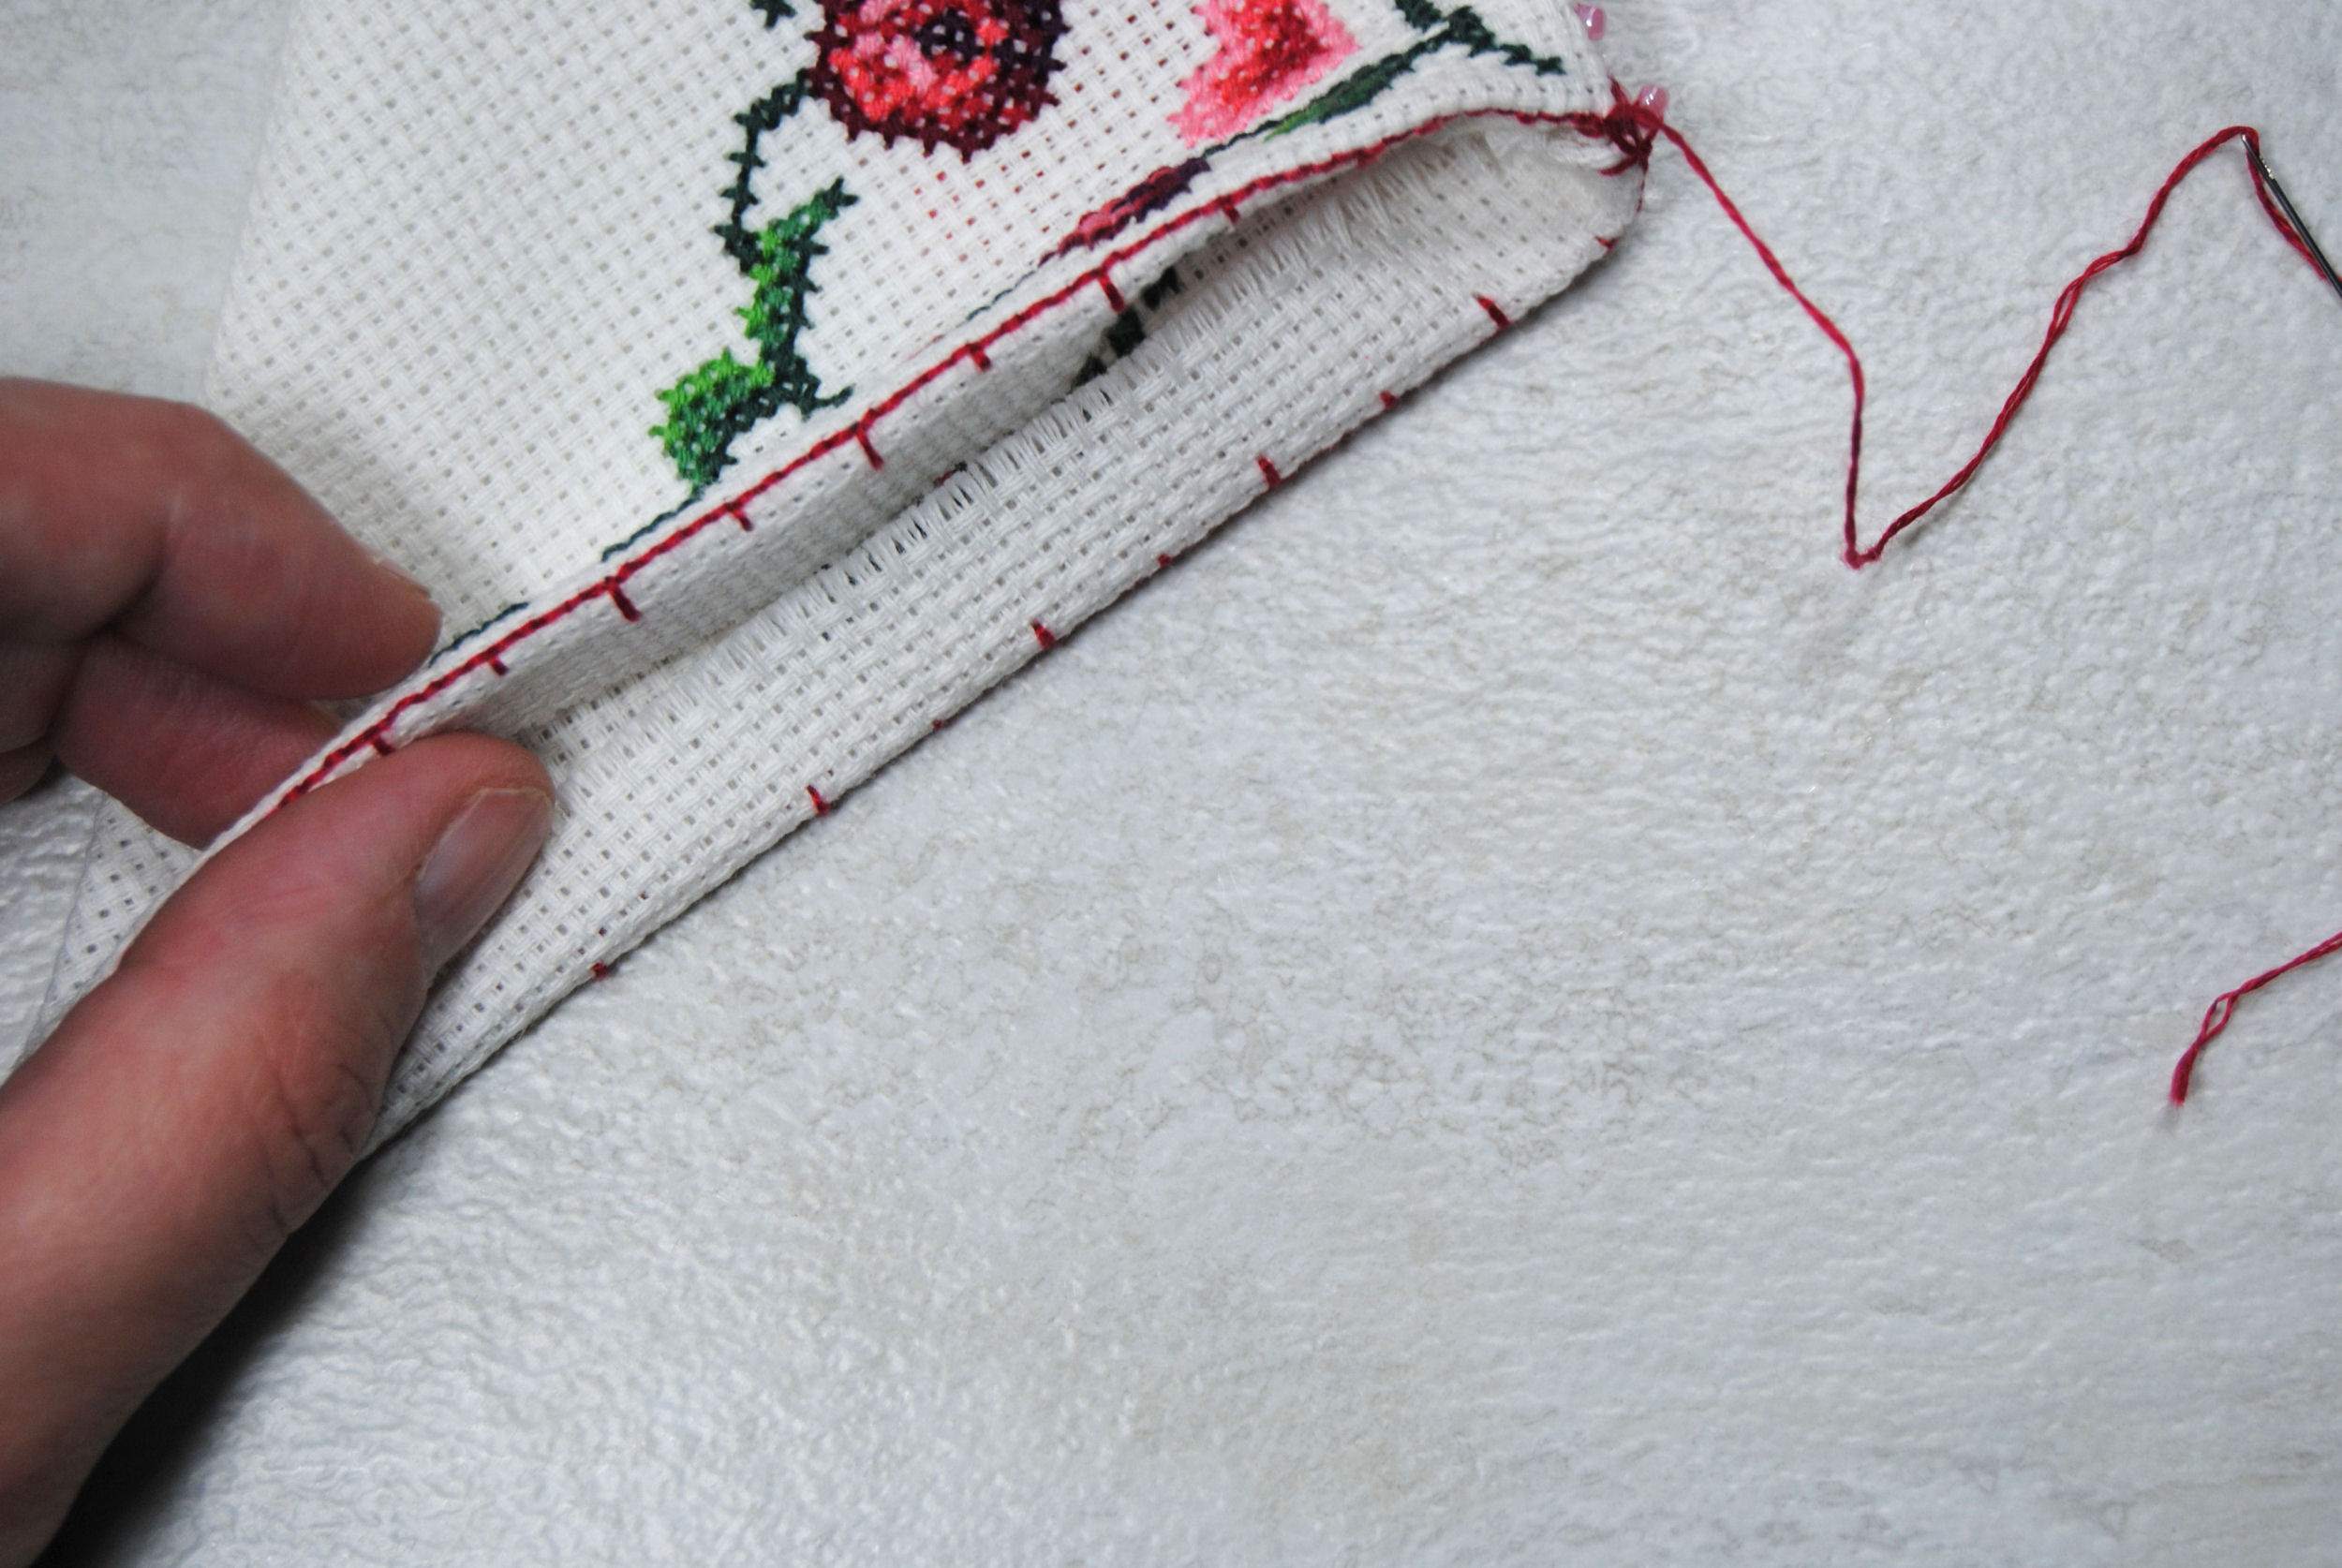
It’s not too much different than what you’ve been doing, so just keep going and stop about halfway up that second side.

Stuffing your pendibule
Now that you’ve gotten it mostly stitched up, slide in some stuffing while you still have an open section to do so. Focus on making sure that stuffing gets down into that point we made at the bottom. Use a chopstick or similar rounded stick object to shove the stuffing into place without accidentally piercing the fabric.
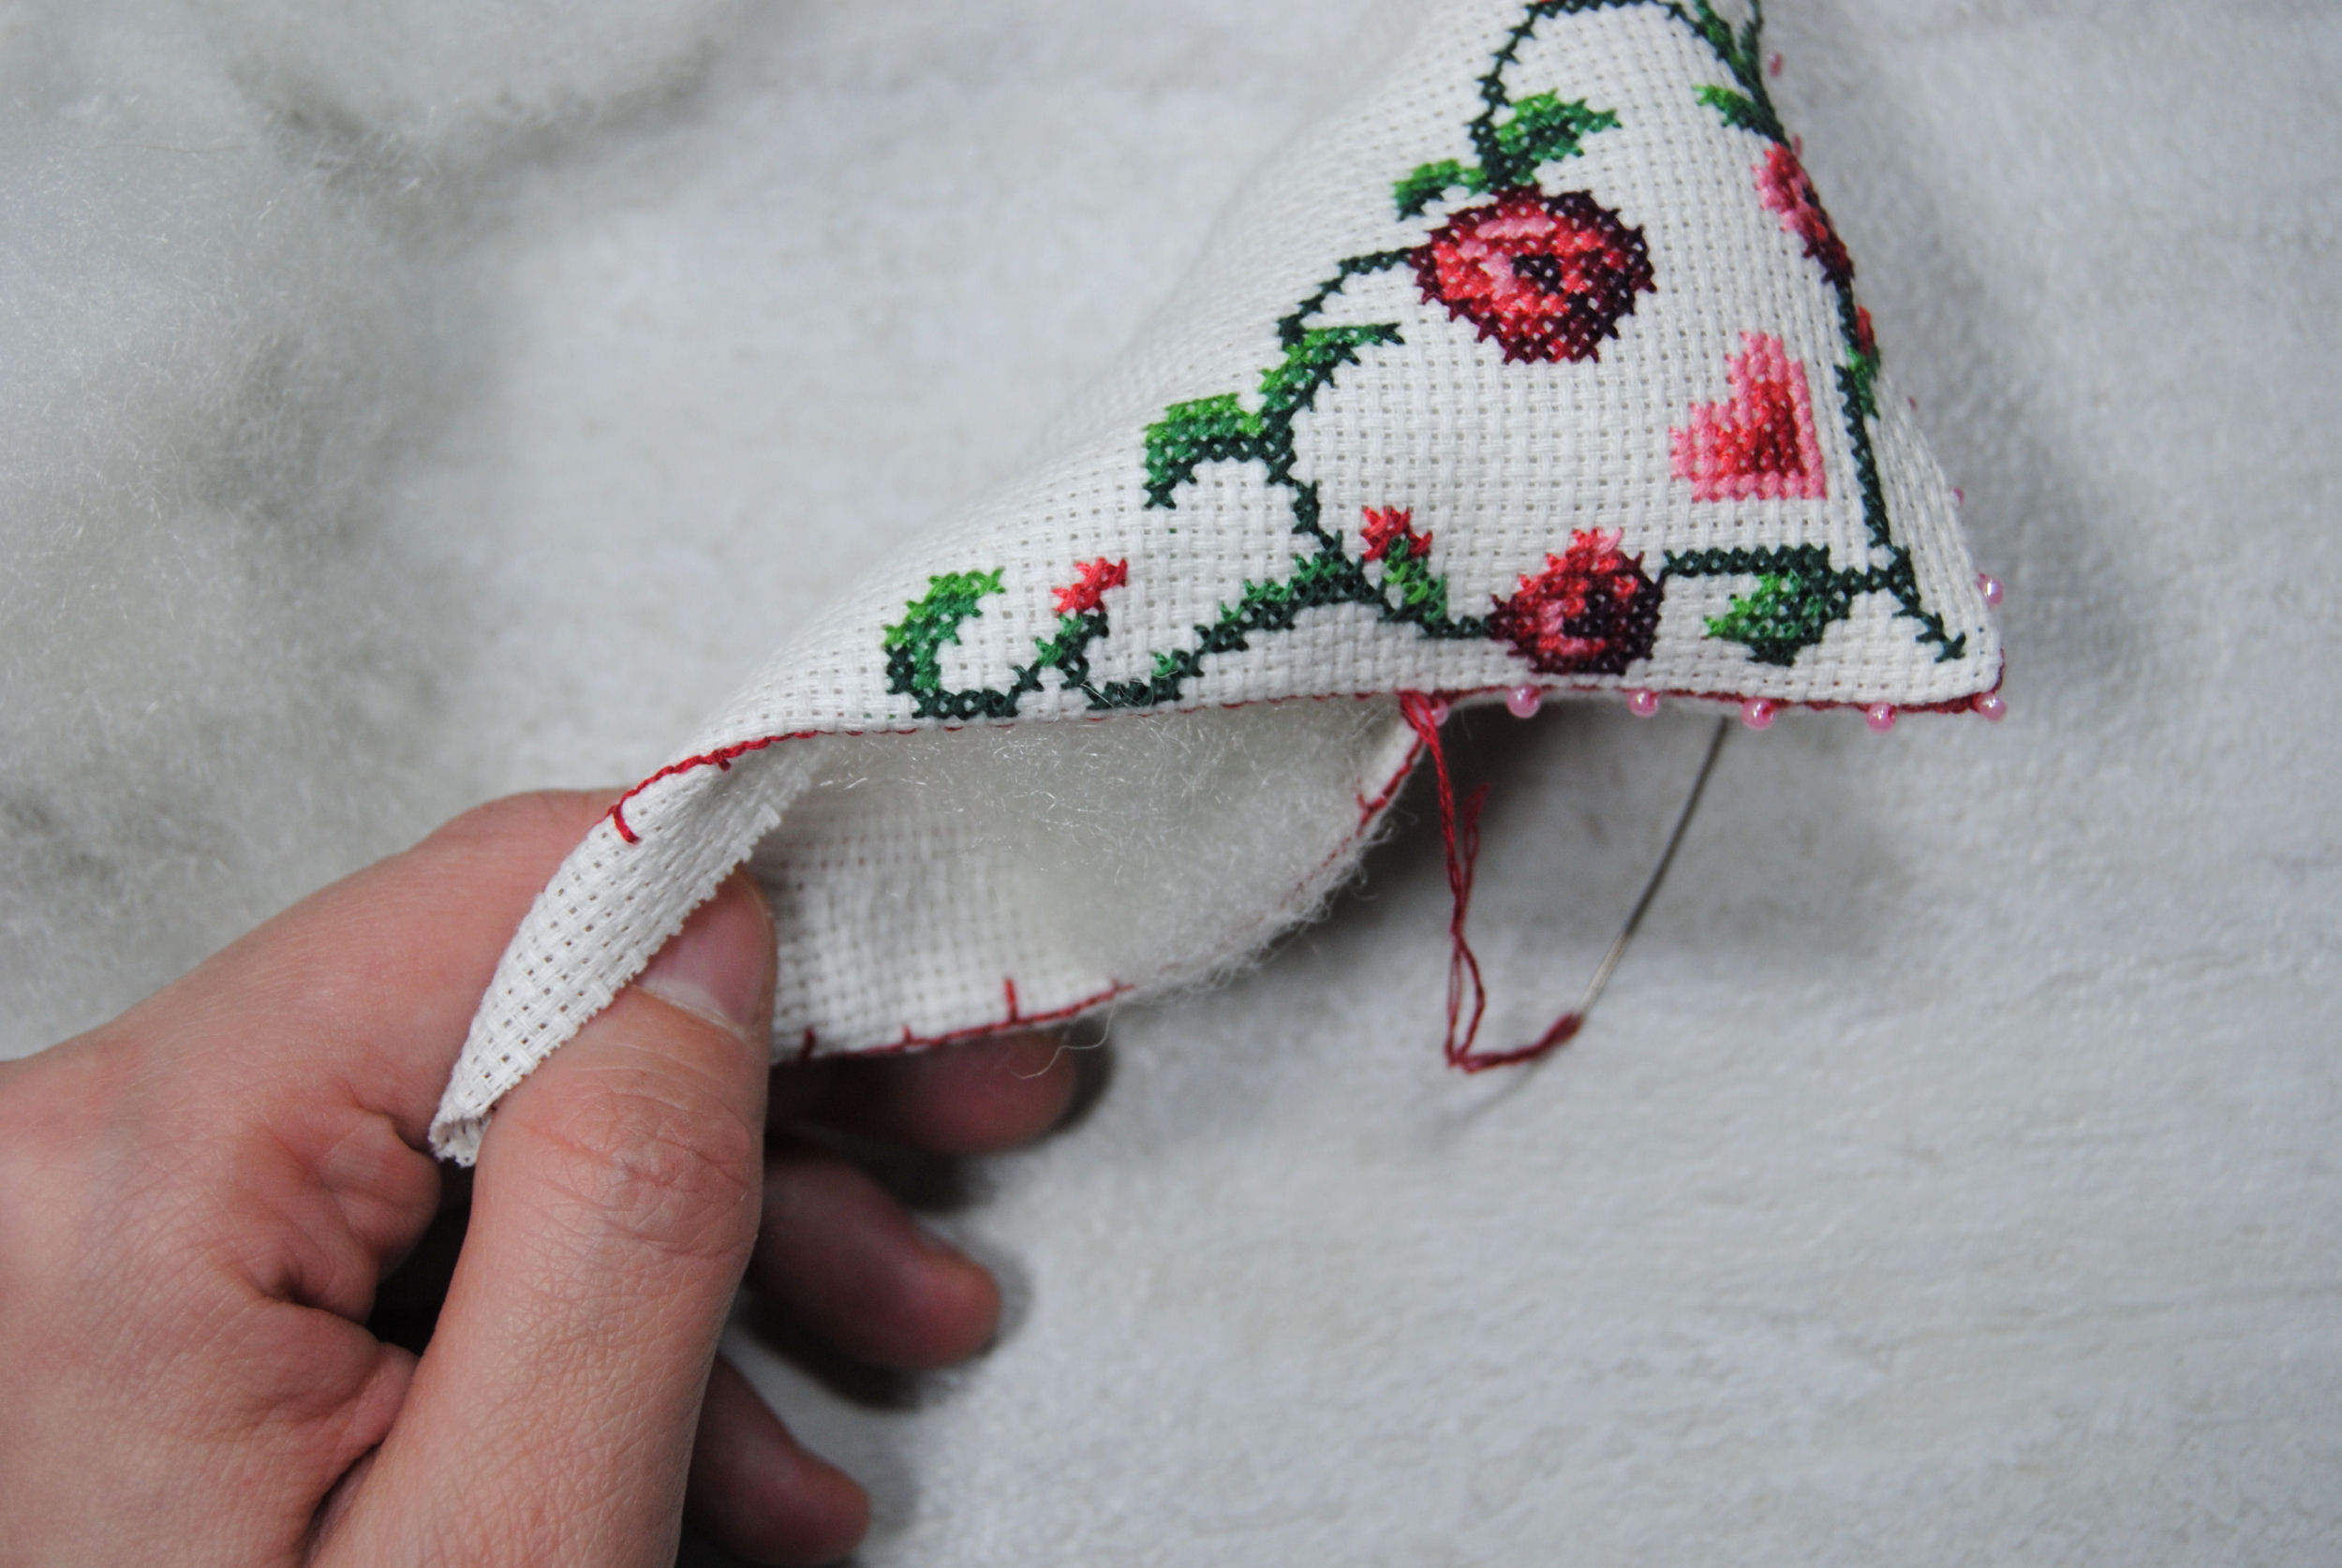
Before you continue stitching, I recommend folding up the edges as if you were done or pinching at the edges of your stuffing. Test to see if there’s enough stuffing. If it’s stuffed too much, it’ll be hard to fold up. If it’s not stuffed enough, it’ll be too loose /flat in the middle even with the edges folded up.
You want that shape to hold on its own for the most part. So adjust your stuffing as needed now.
Finishing your pendibule
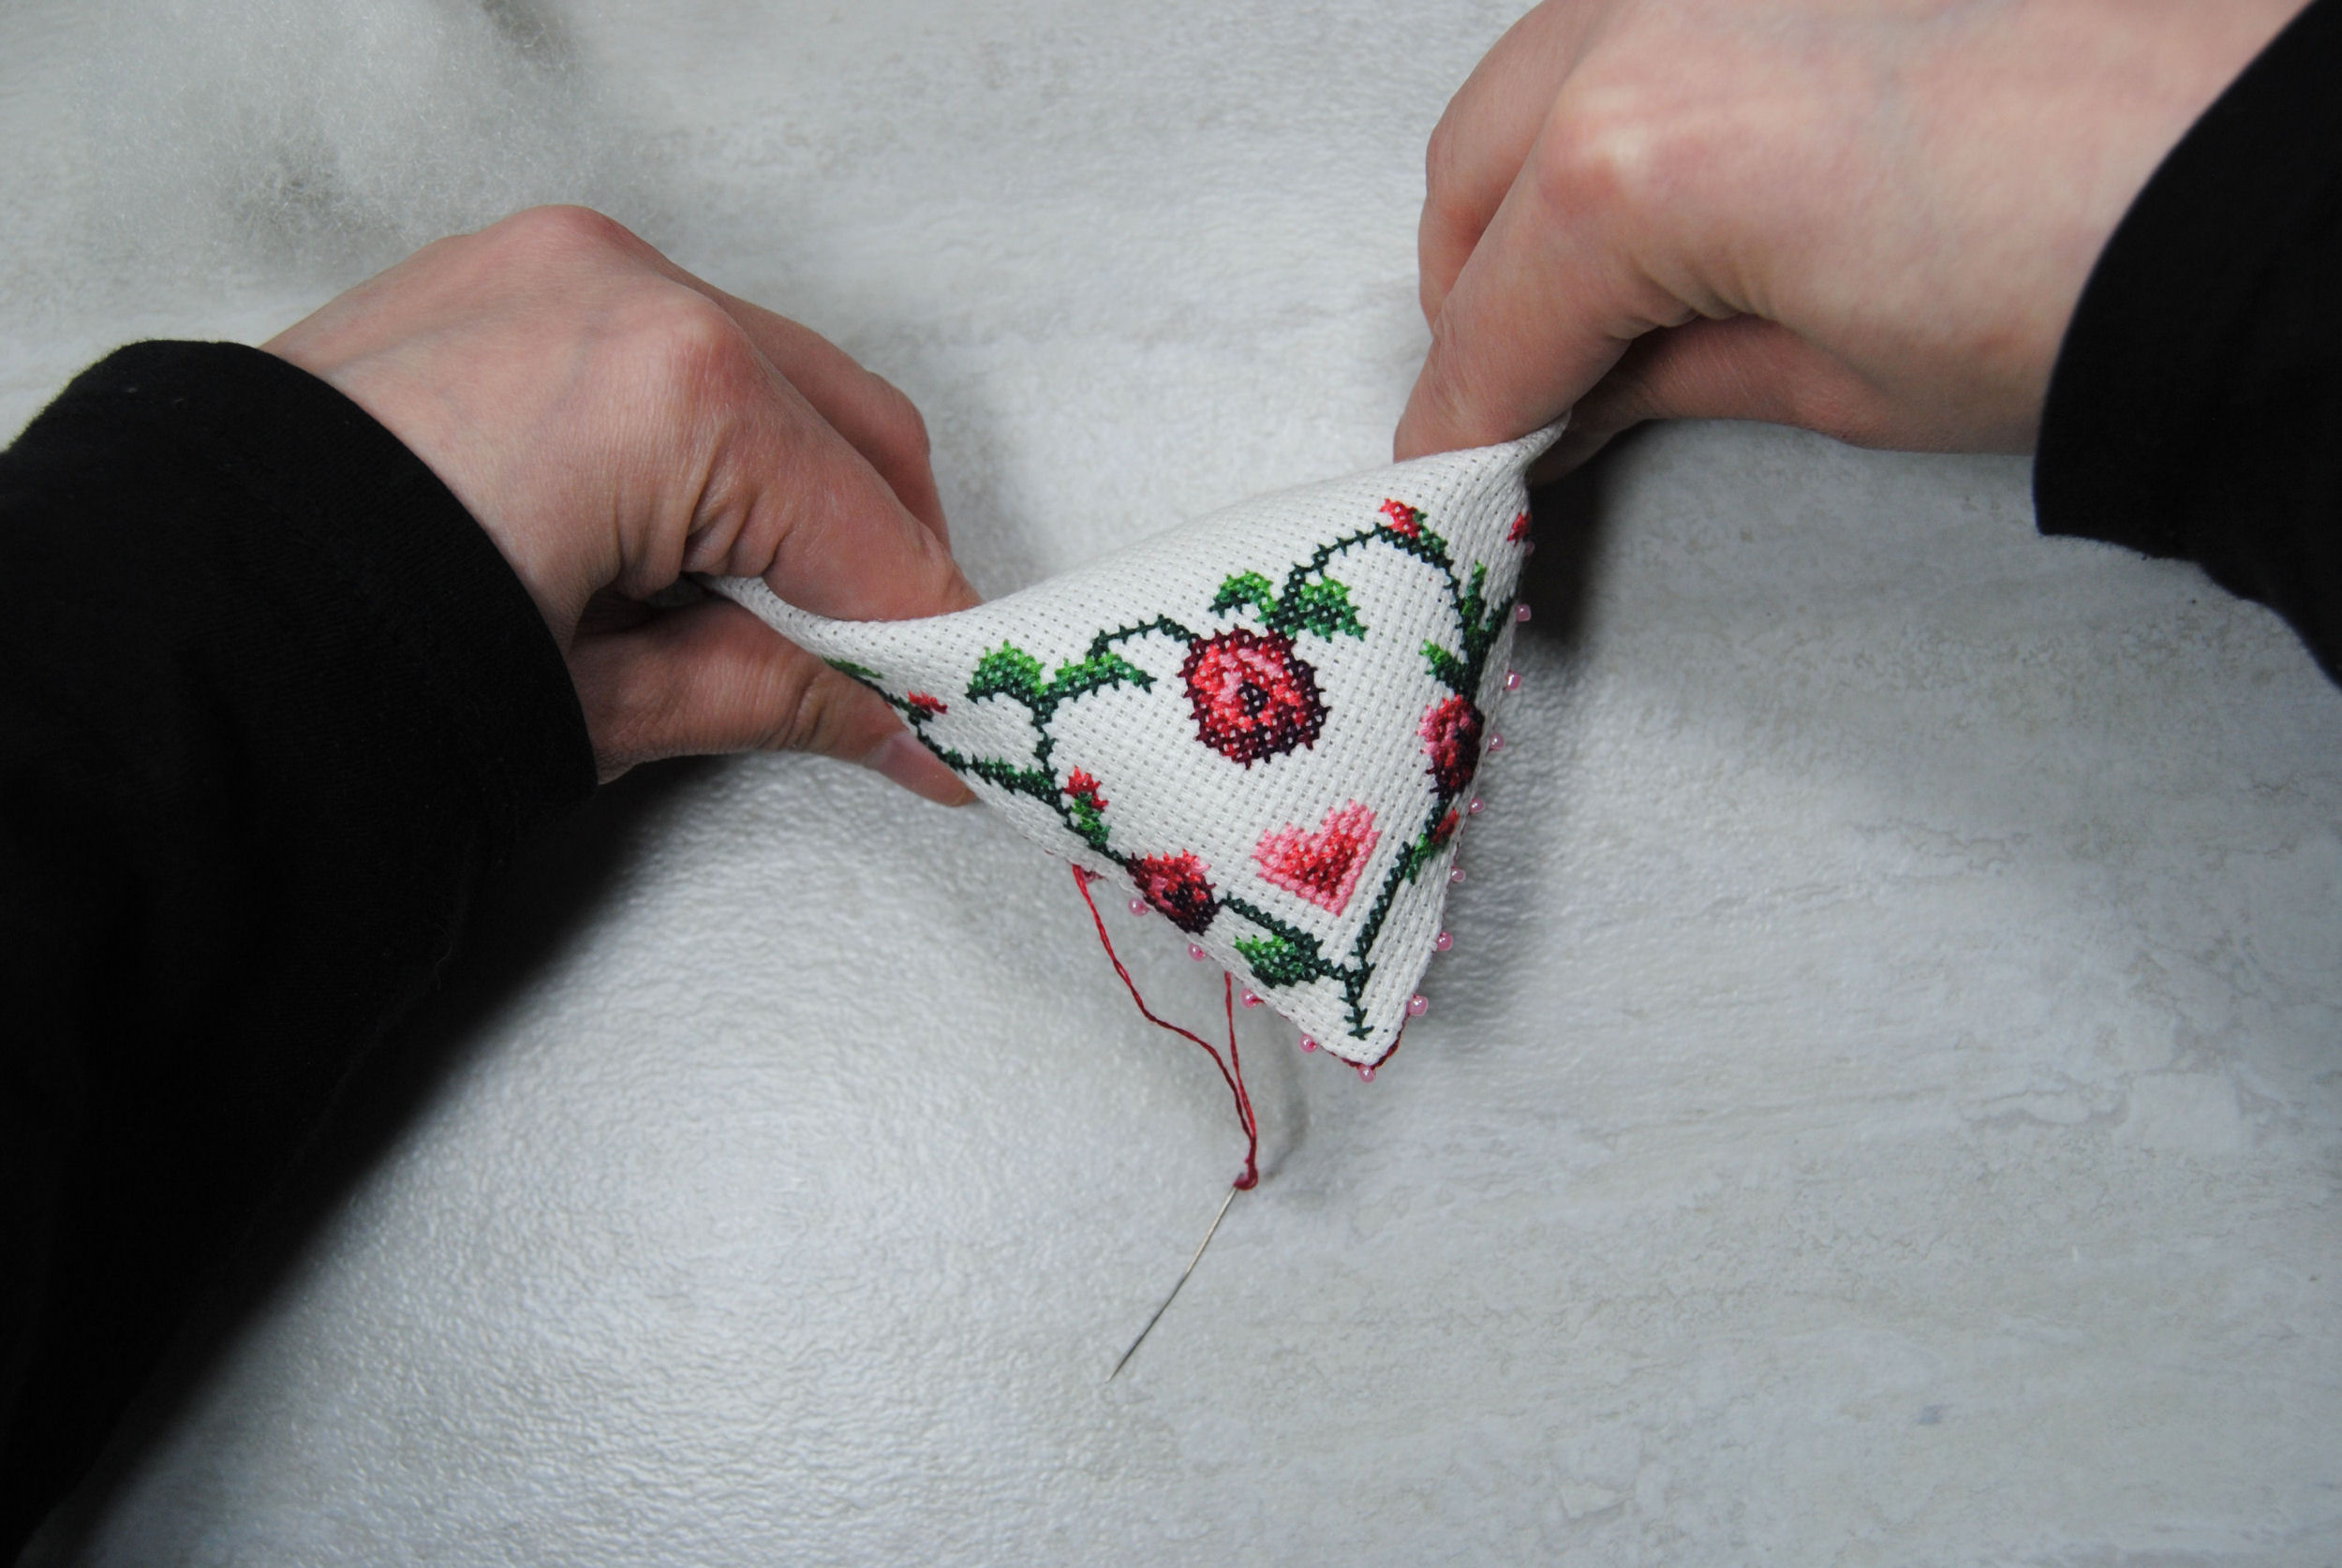
Once you’ve got the stuffing how you want it, finish stitching up that last edge. It’ll be slightly more annoying than before as you may have to push the stuffing back down to keep it from trying to escape.
The very tips of the triangle do tend to get a bit bulbous, which is why we trimmed those corners at the beginning. If you’re having trouble stitching it closed, you may need to trim your corners a bit closer.

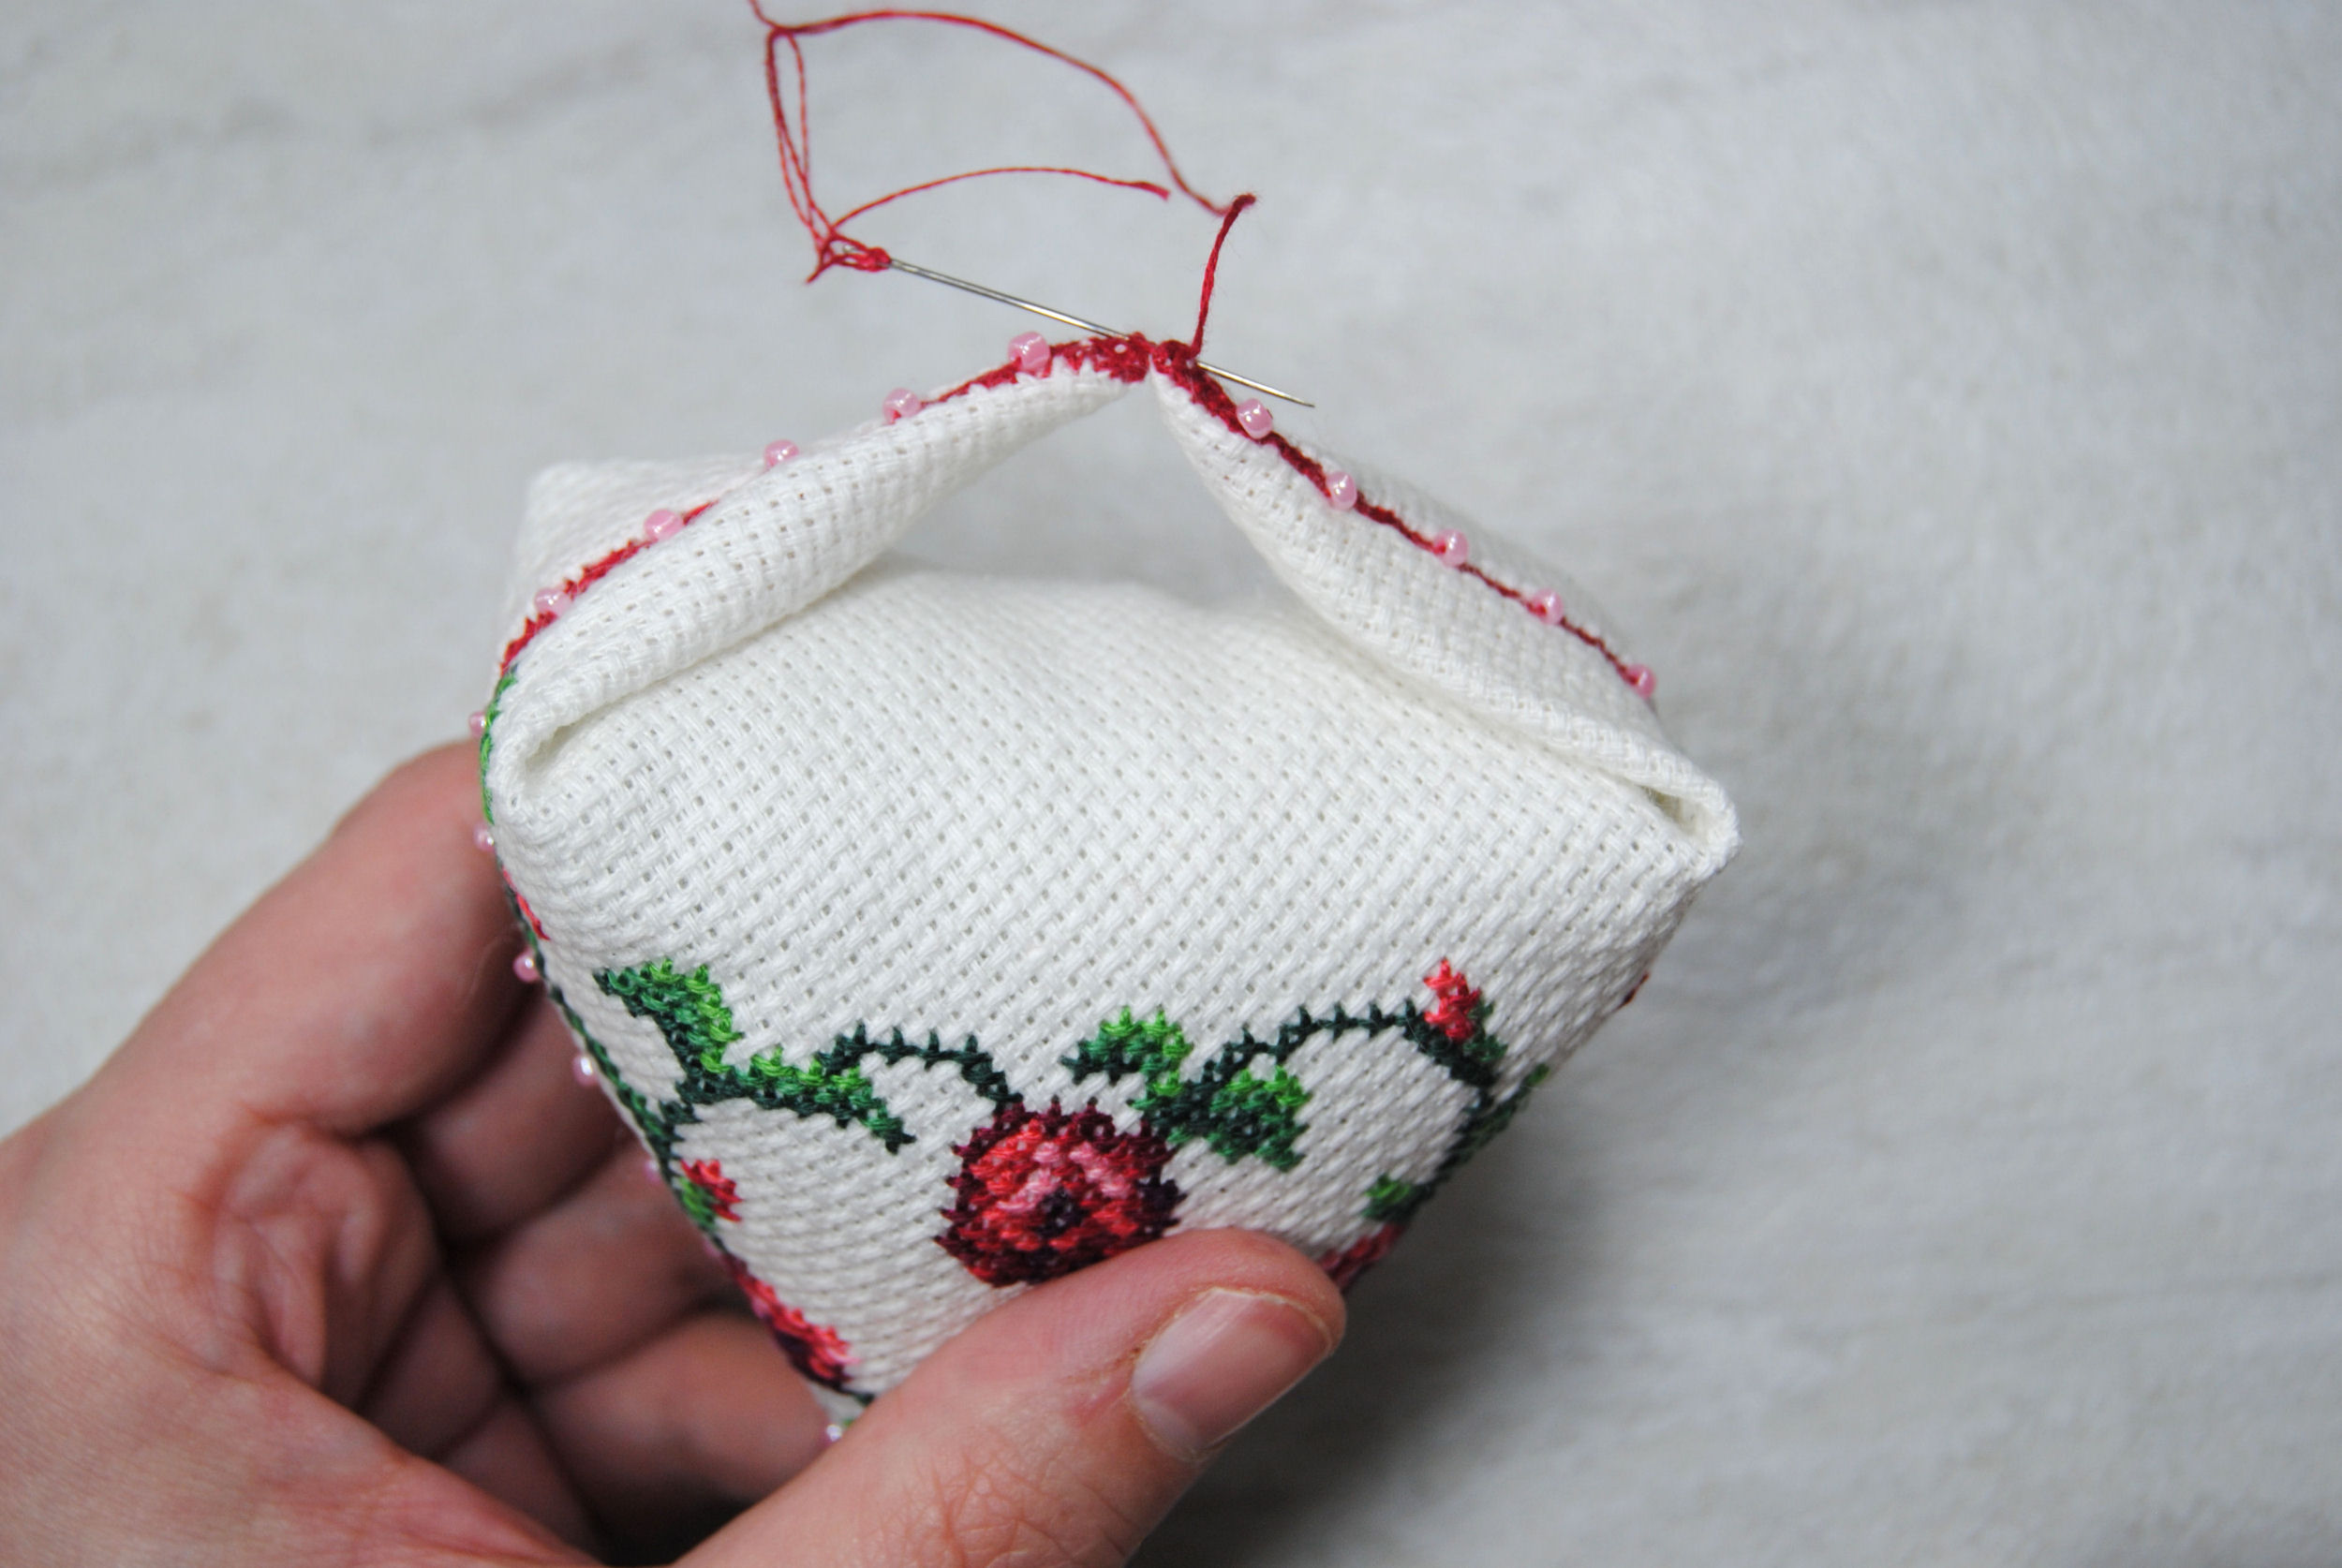
But once you’ve got that point stitched up, don’t trim your thread just yet! In stead, go ahead and fold up the corners and stitch through the opposite point.
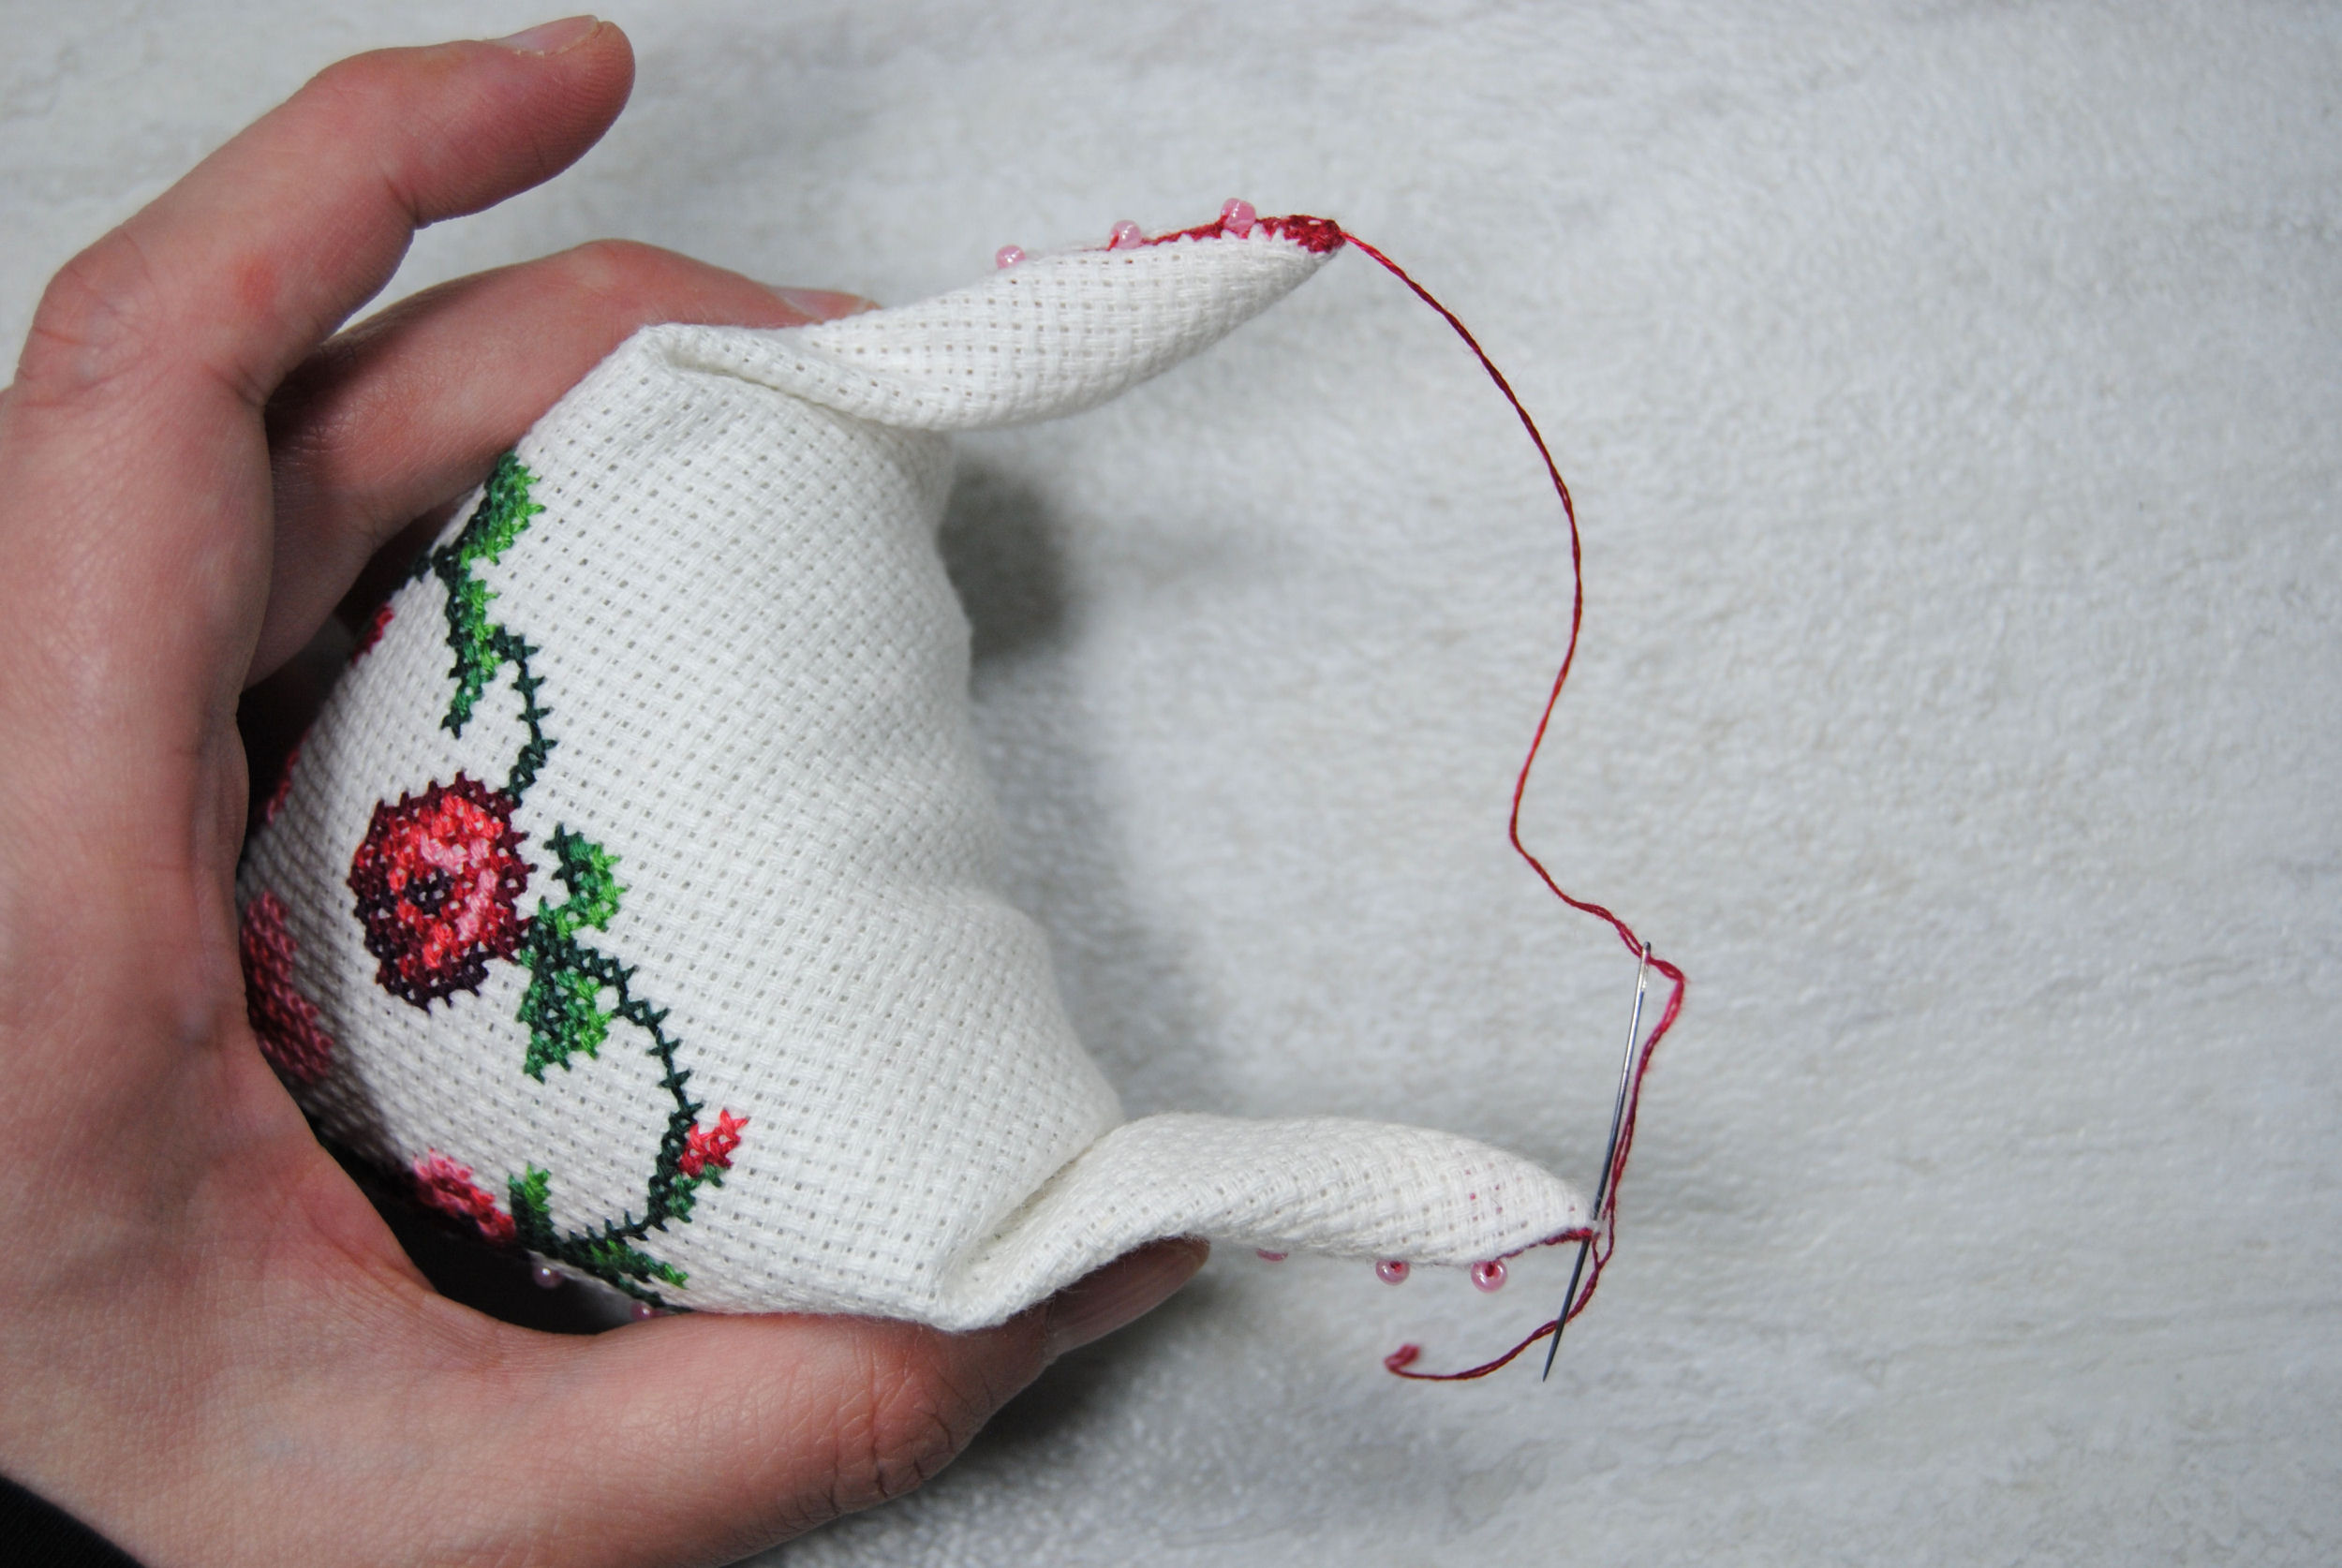
You’ll want to stitch through these a couple of times to make sure they’re super secure, as this is the point that will be stressed the most in this finish.
Hanging your pendibule
Finally, the main shape is done and all that’s left is attach your ribbon or cord so that you can hang it up.
I cut a length of cord twice as long as I wanted to hang it from, and just looped it under where I just stitched my points together.
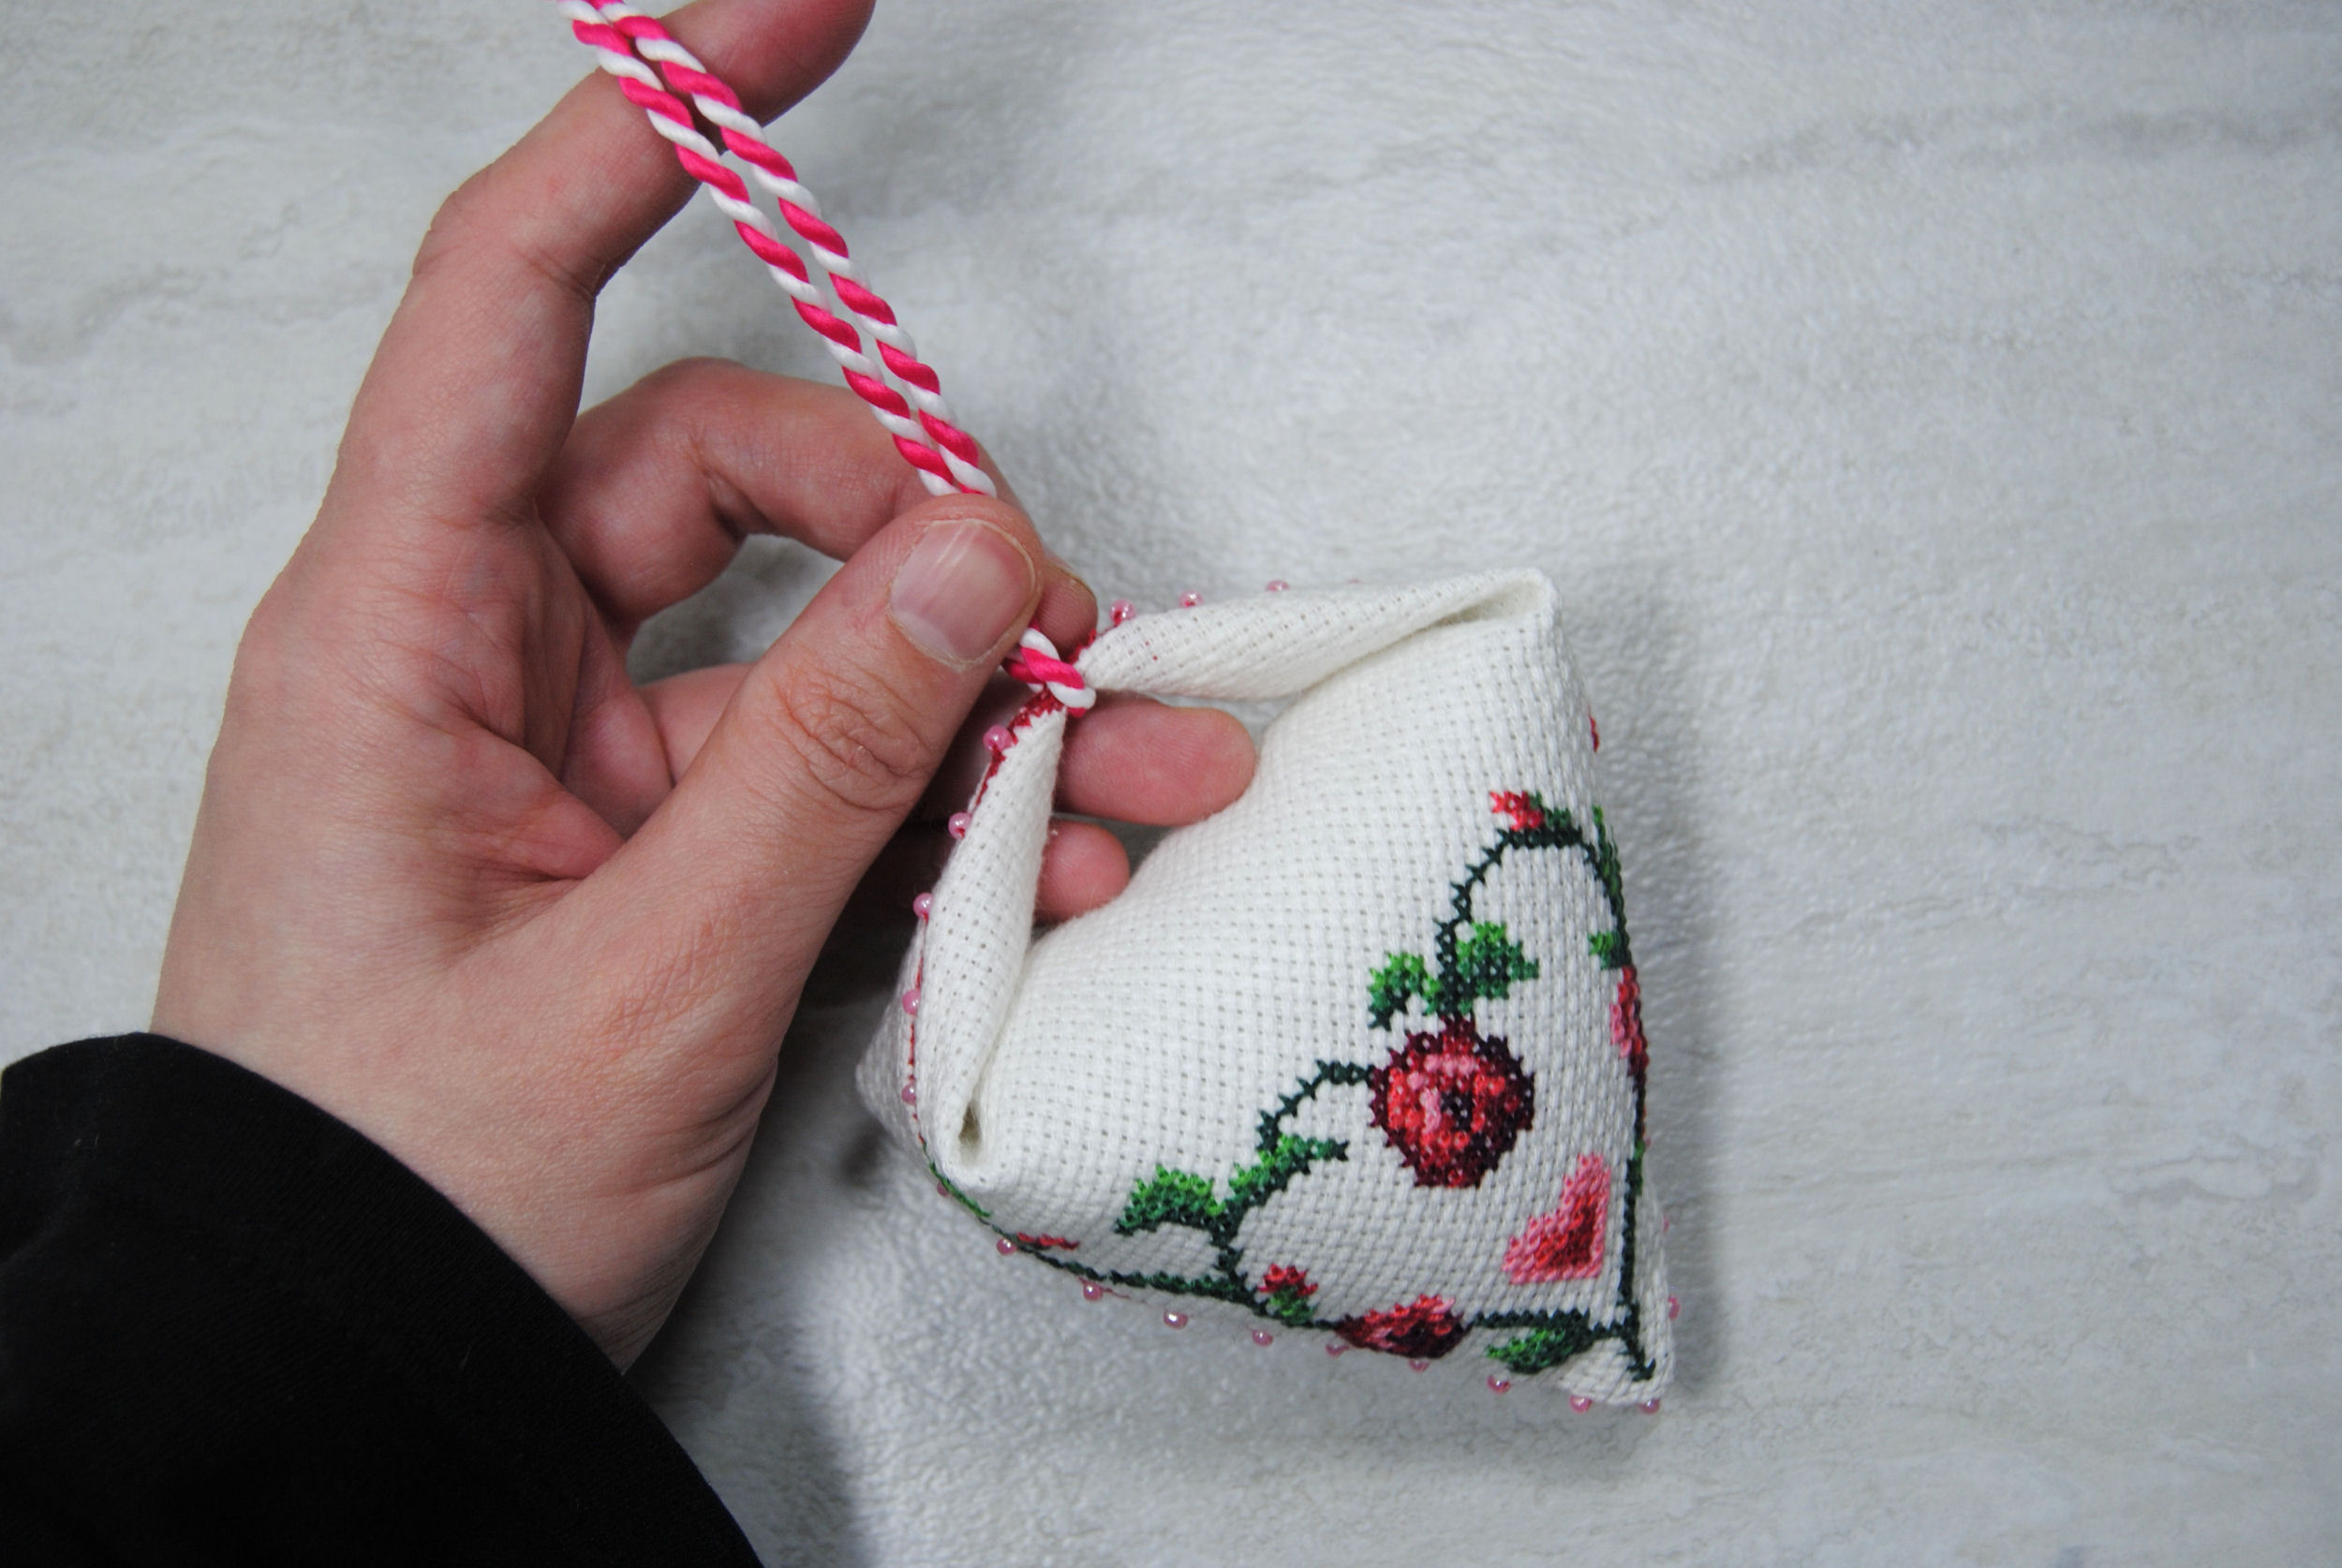
I then tied a simple knot to hold it in place. You can also stitch through the cord and the fabric to make sure it’s secure in place.
Finally, I tied the loose ends of the cord into a knot as well, and removed the tape I had put on the tips to keep my cord from fraying apart.

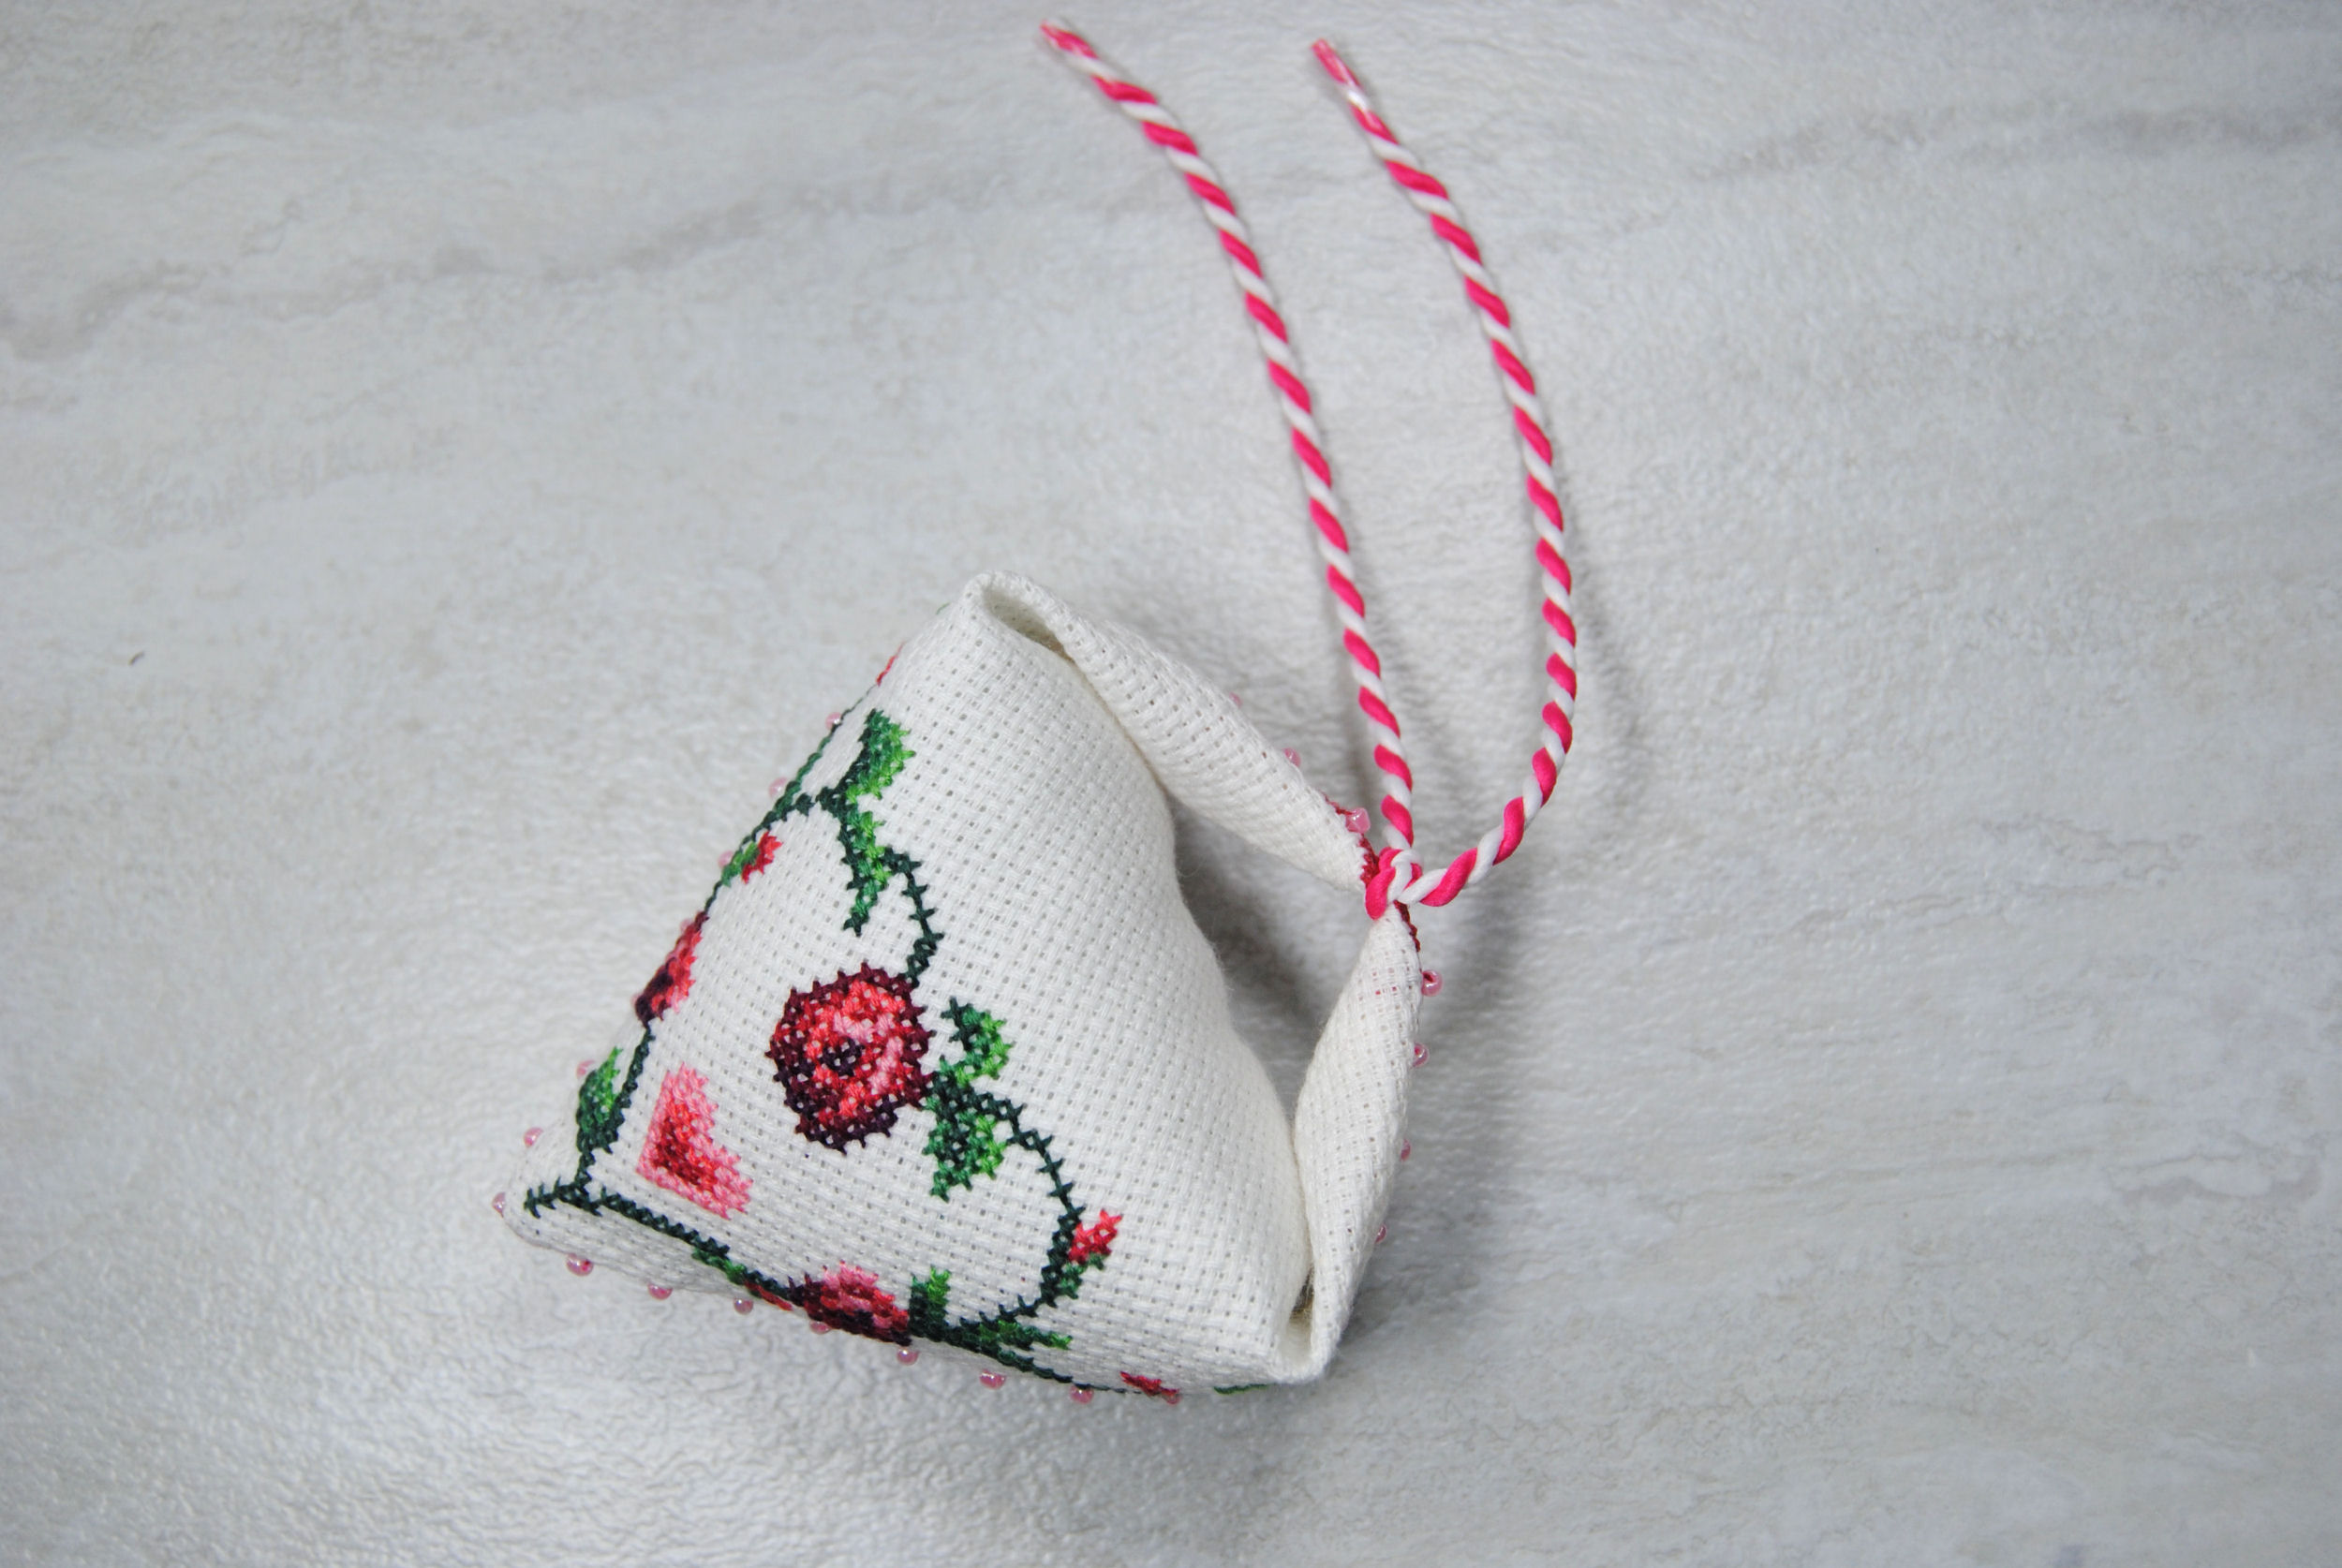
What it looks like from different angles
Photographing a 3D object is always tricky as you obviously can’t see all sides from a still photo. So here’s some shots from different angles:
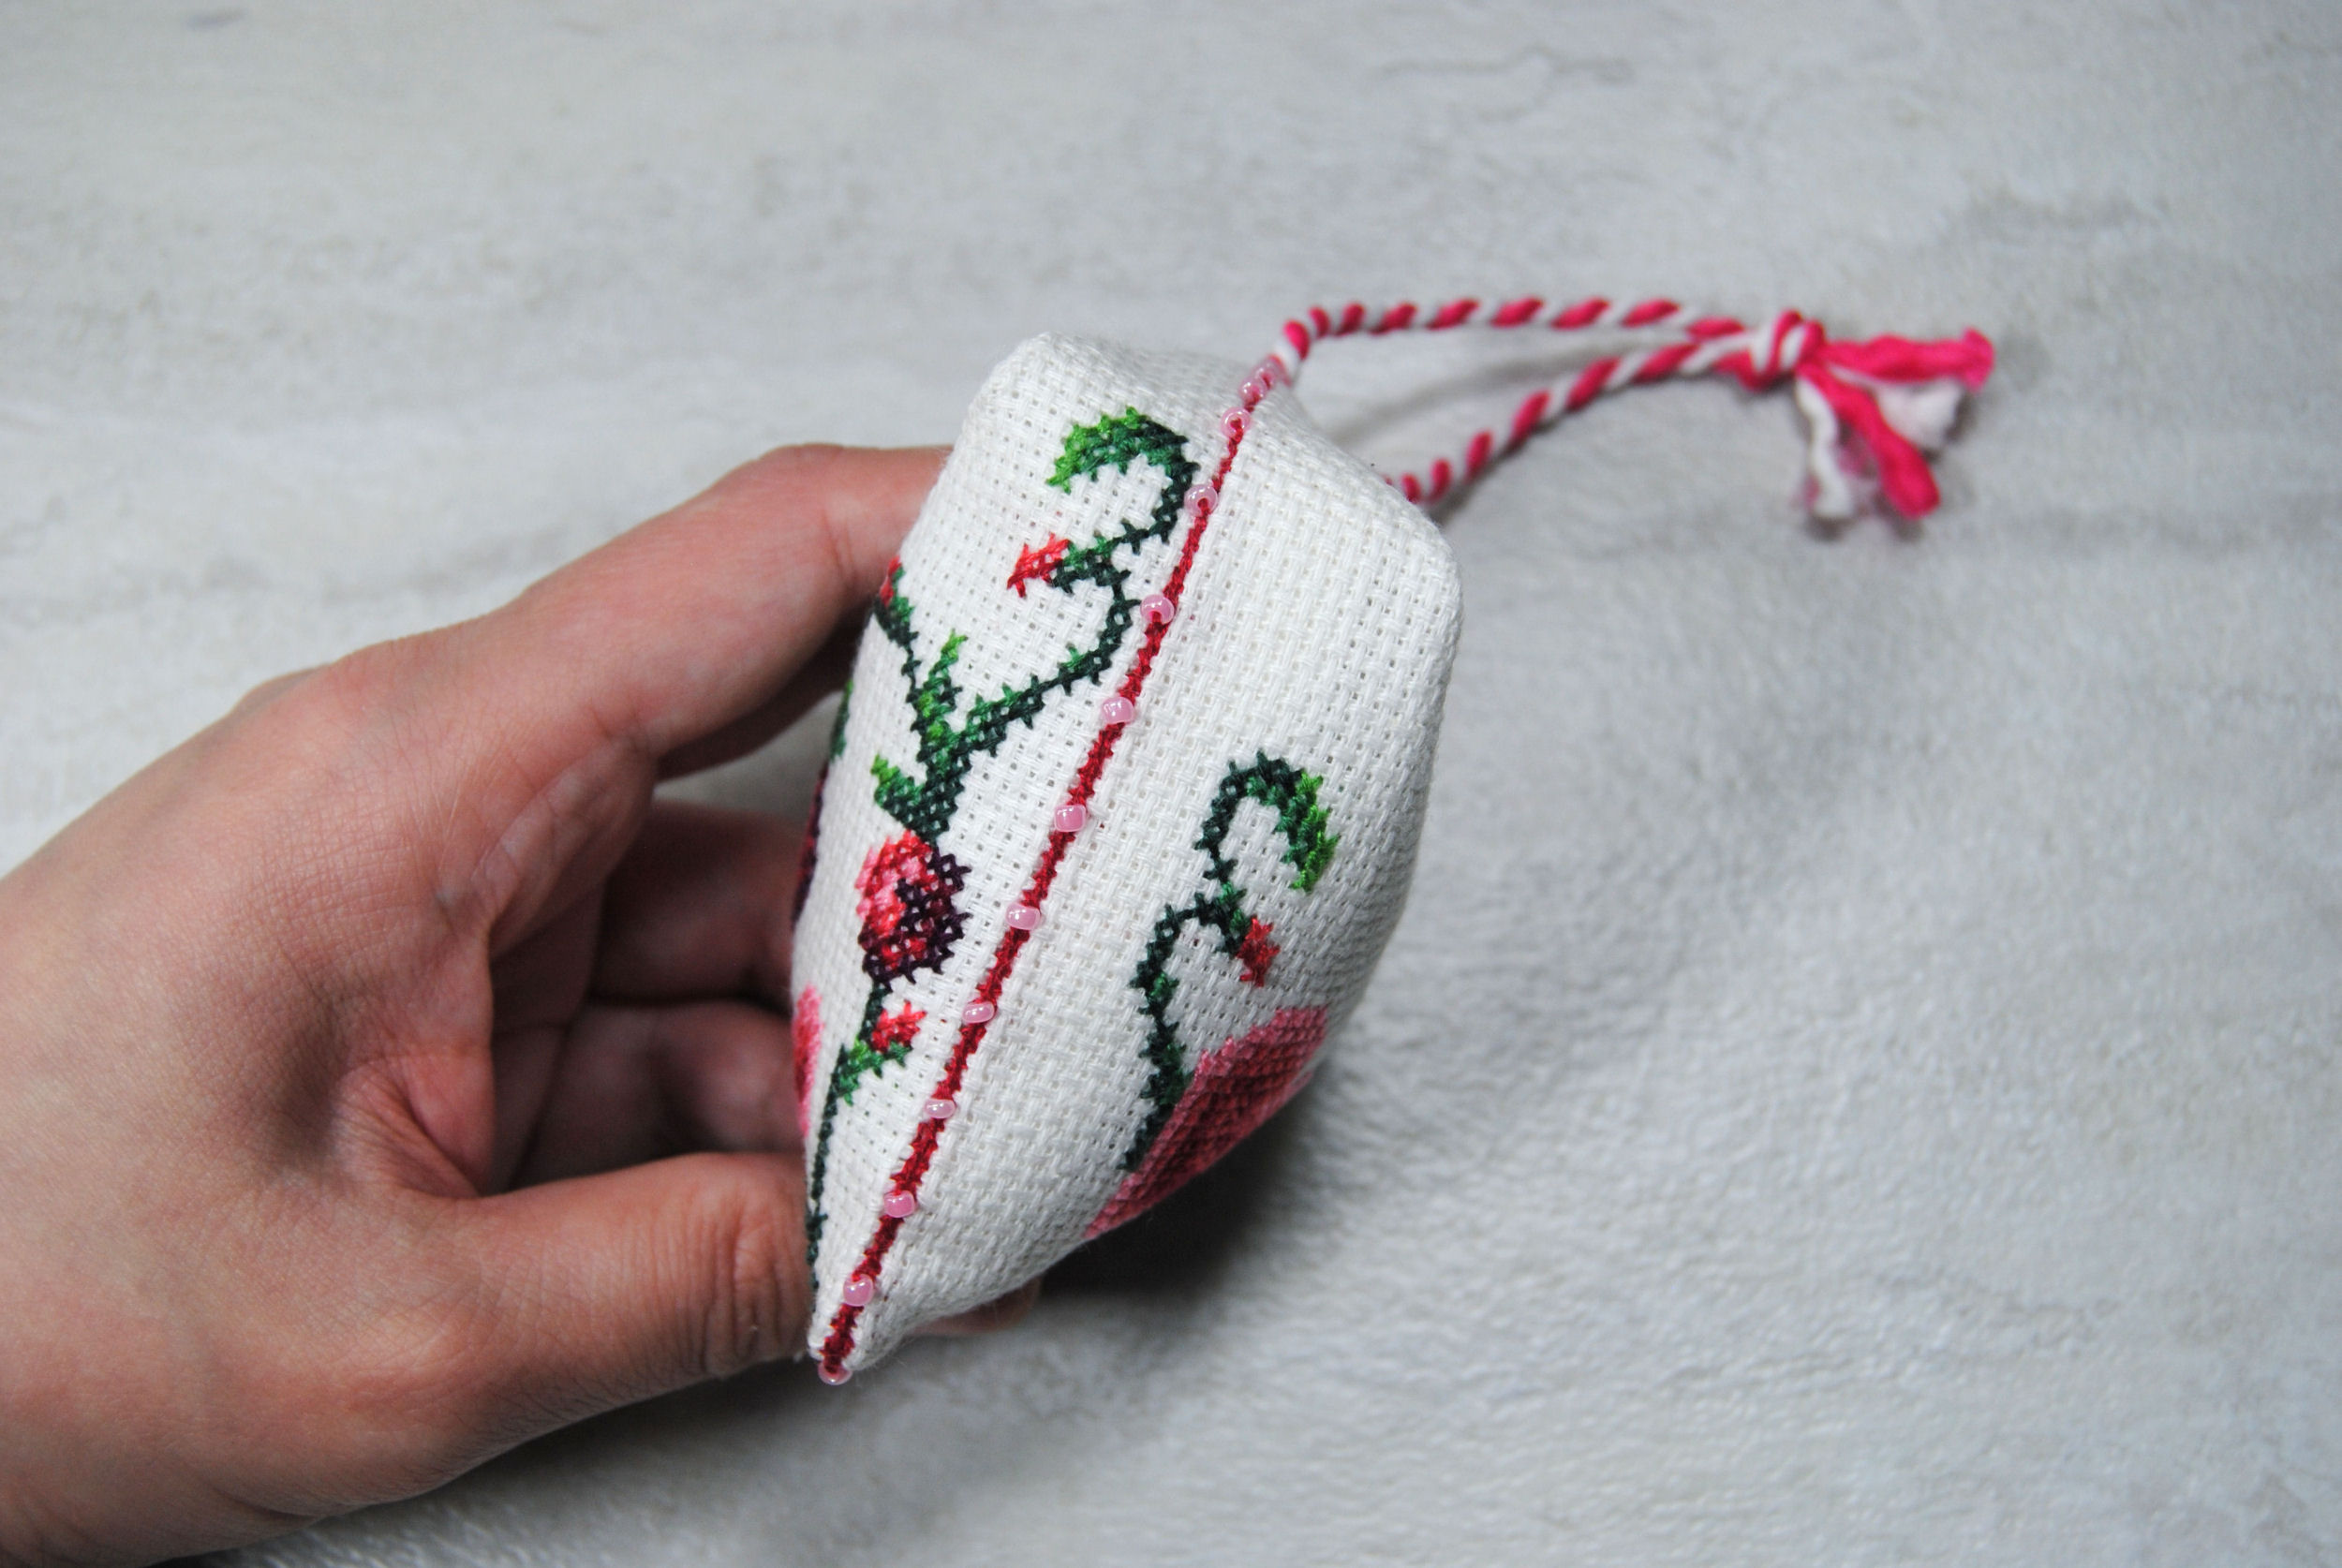
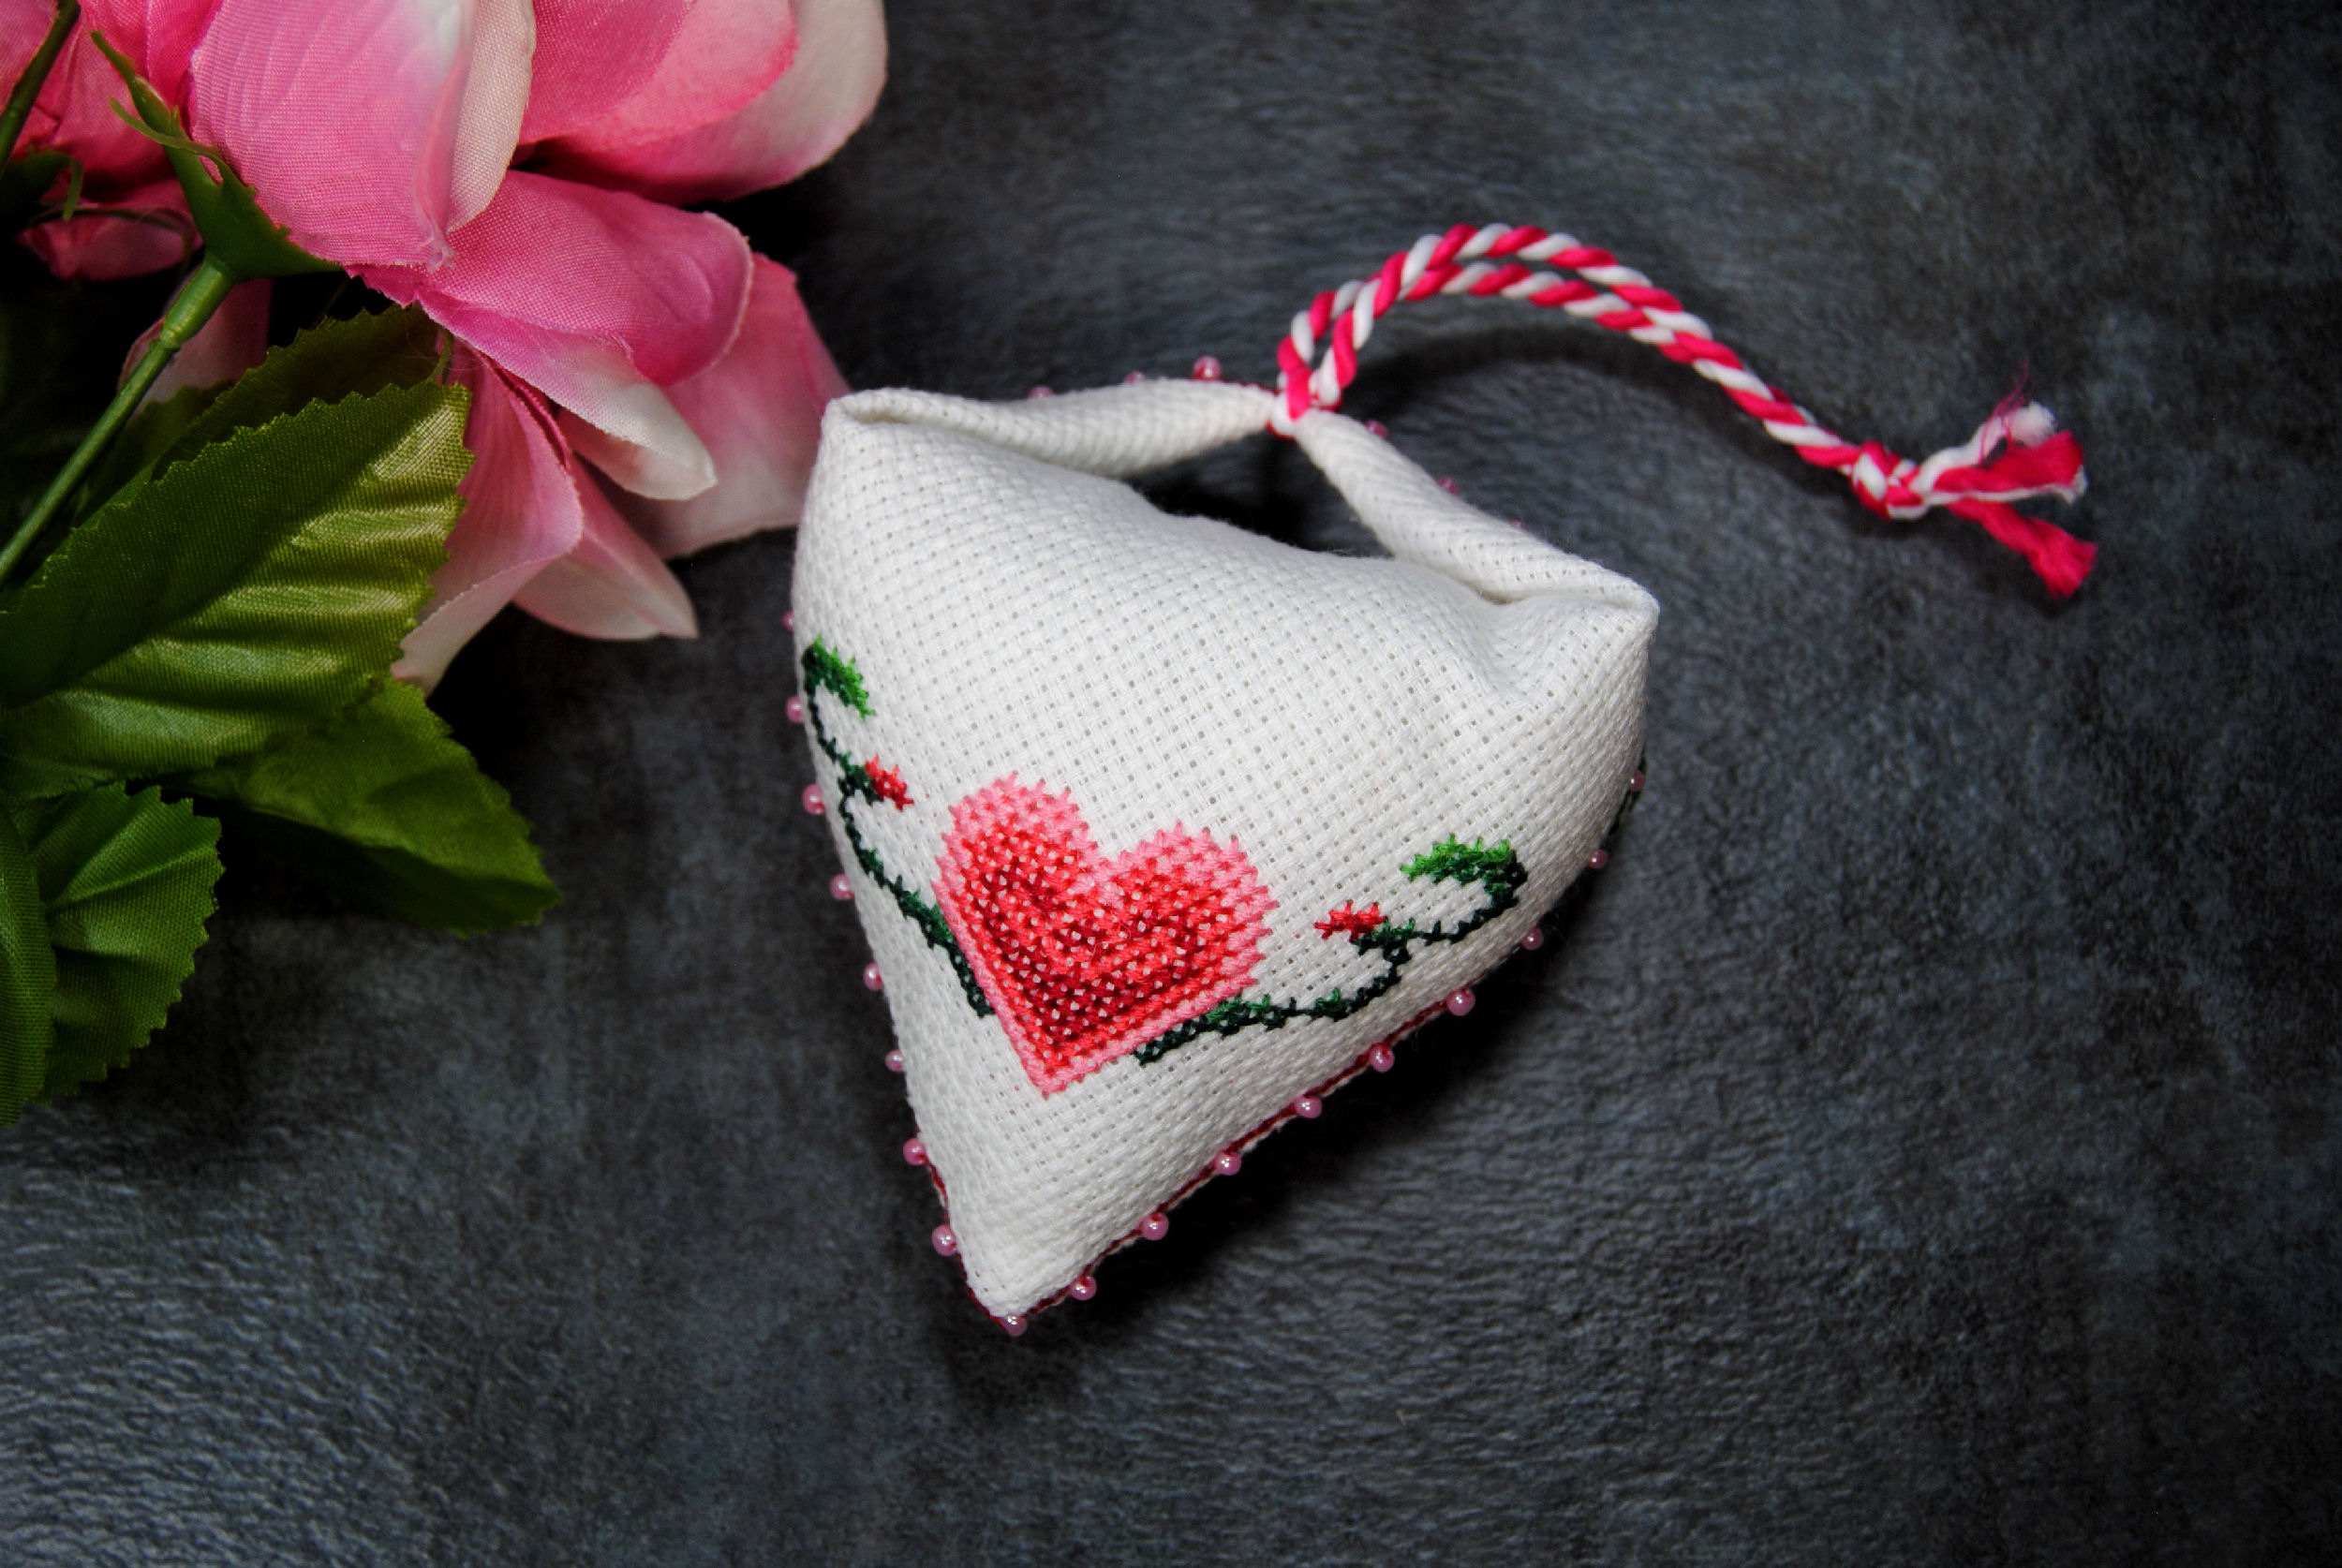

And that’s it! It’s all done. You have a cute, double sided, 3D hanging ornament.
Some Christmas themed ones would look great on your tree this year. 😉


