Scissor Fobs: What Are They and How Can You Make One
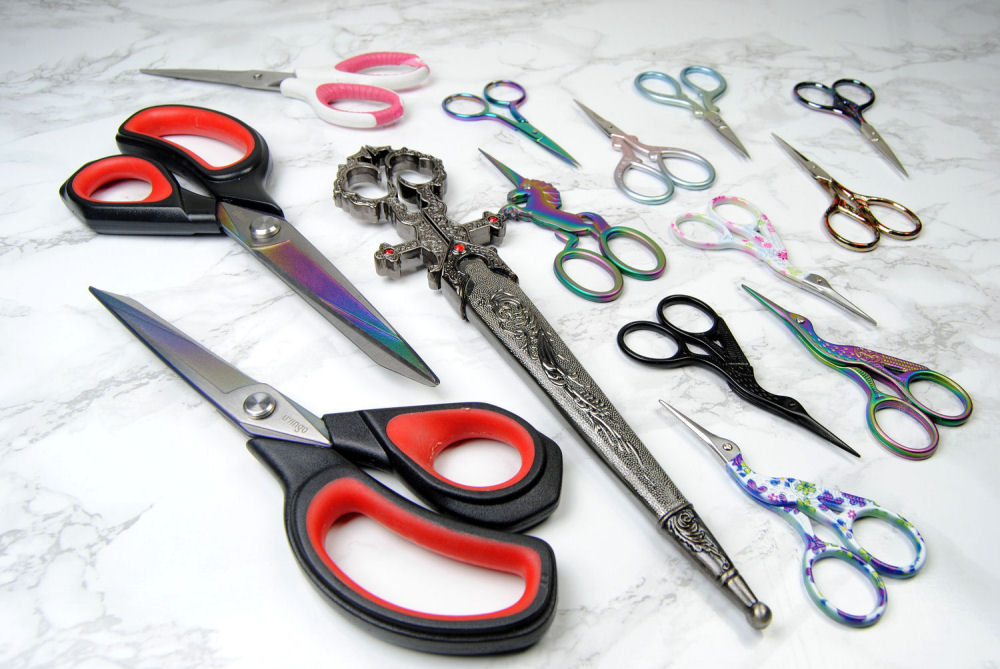
This article was pretty much inevitable for me. Those of you have been following me for a while know that I have a fair amount of scissors at this point. And honestly, most crafters probably do as well. So making a scissor fob or two seems like an obvious next step in my scissor obsession.
But yes, this tutorial is basically a big excuse to make and purchase some fun things to decorate my scissors with. Even if you only have a couple pairs of your own, you may want to consider making one of your own too!
But what ARE they? What’s the point? Why do I need one? I’m sure many of you have asked yourself these questions or similar. So let’s discuss.
This post may contain affiliate links. If you buy something using one of these links, I earn a small commission. However, there is no extra cost to you. Thanks for understanding! Learn more in my Disclosures & Privacy Policy.
Table of Contents
What IS a scissor fob?
Quite simply it’s a small item you attach to your scissors. They take many shapes and forms. Strings of beads. Tassels. Charms. Strings of beads with tassels and charms.
Some are made from Sculped clay. Or from felt. Many are small cushioned embroidery pieces. Or even crochet! Pretty much anything you could attach to a pair of scissors, just like you would attach a keychain on your keyring.
There’s so many creative scissor fobs out there that I’ll be linking to various ones I found interesting throughout this tutorial. I found so many while researching this article, that I just wanted to share them with you. 🙂
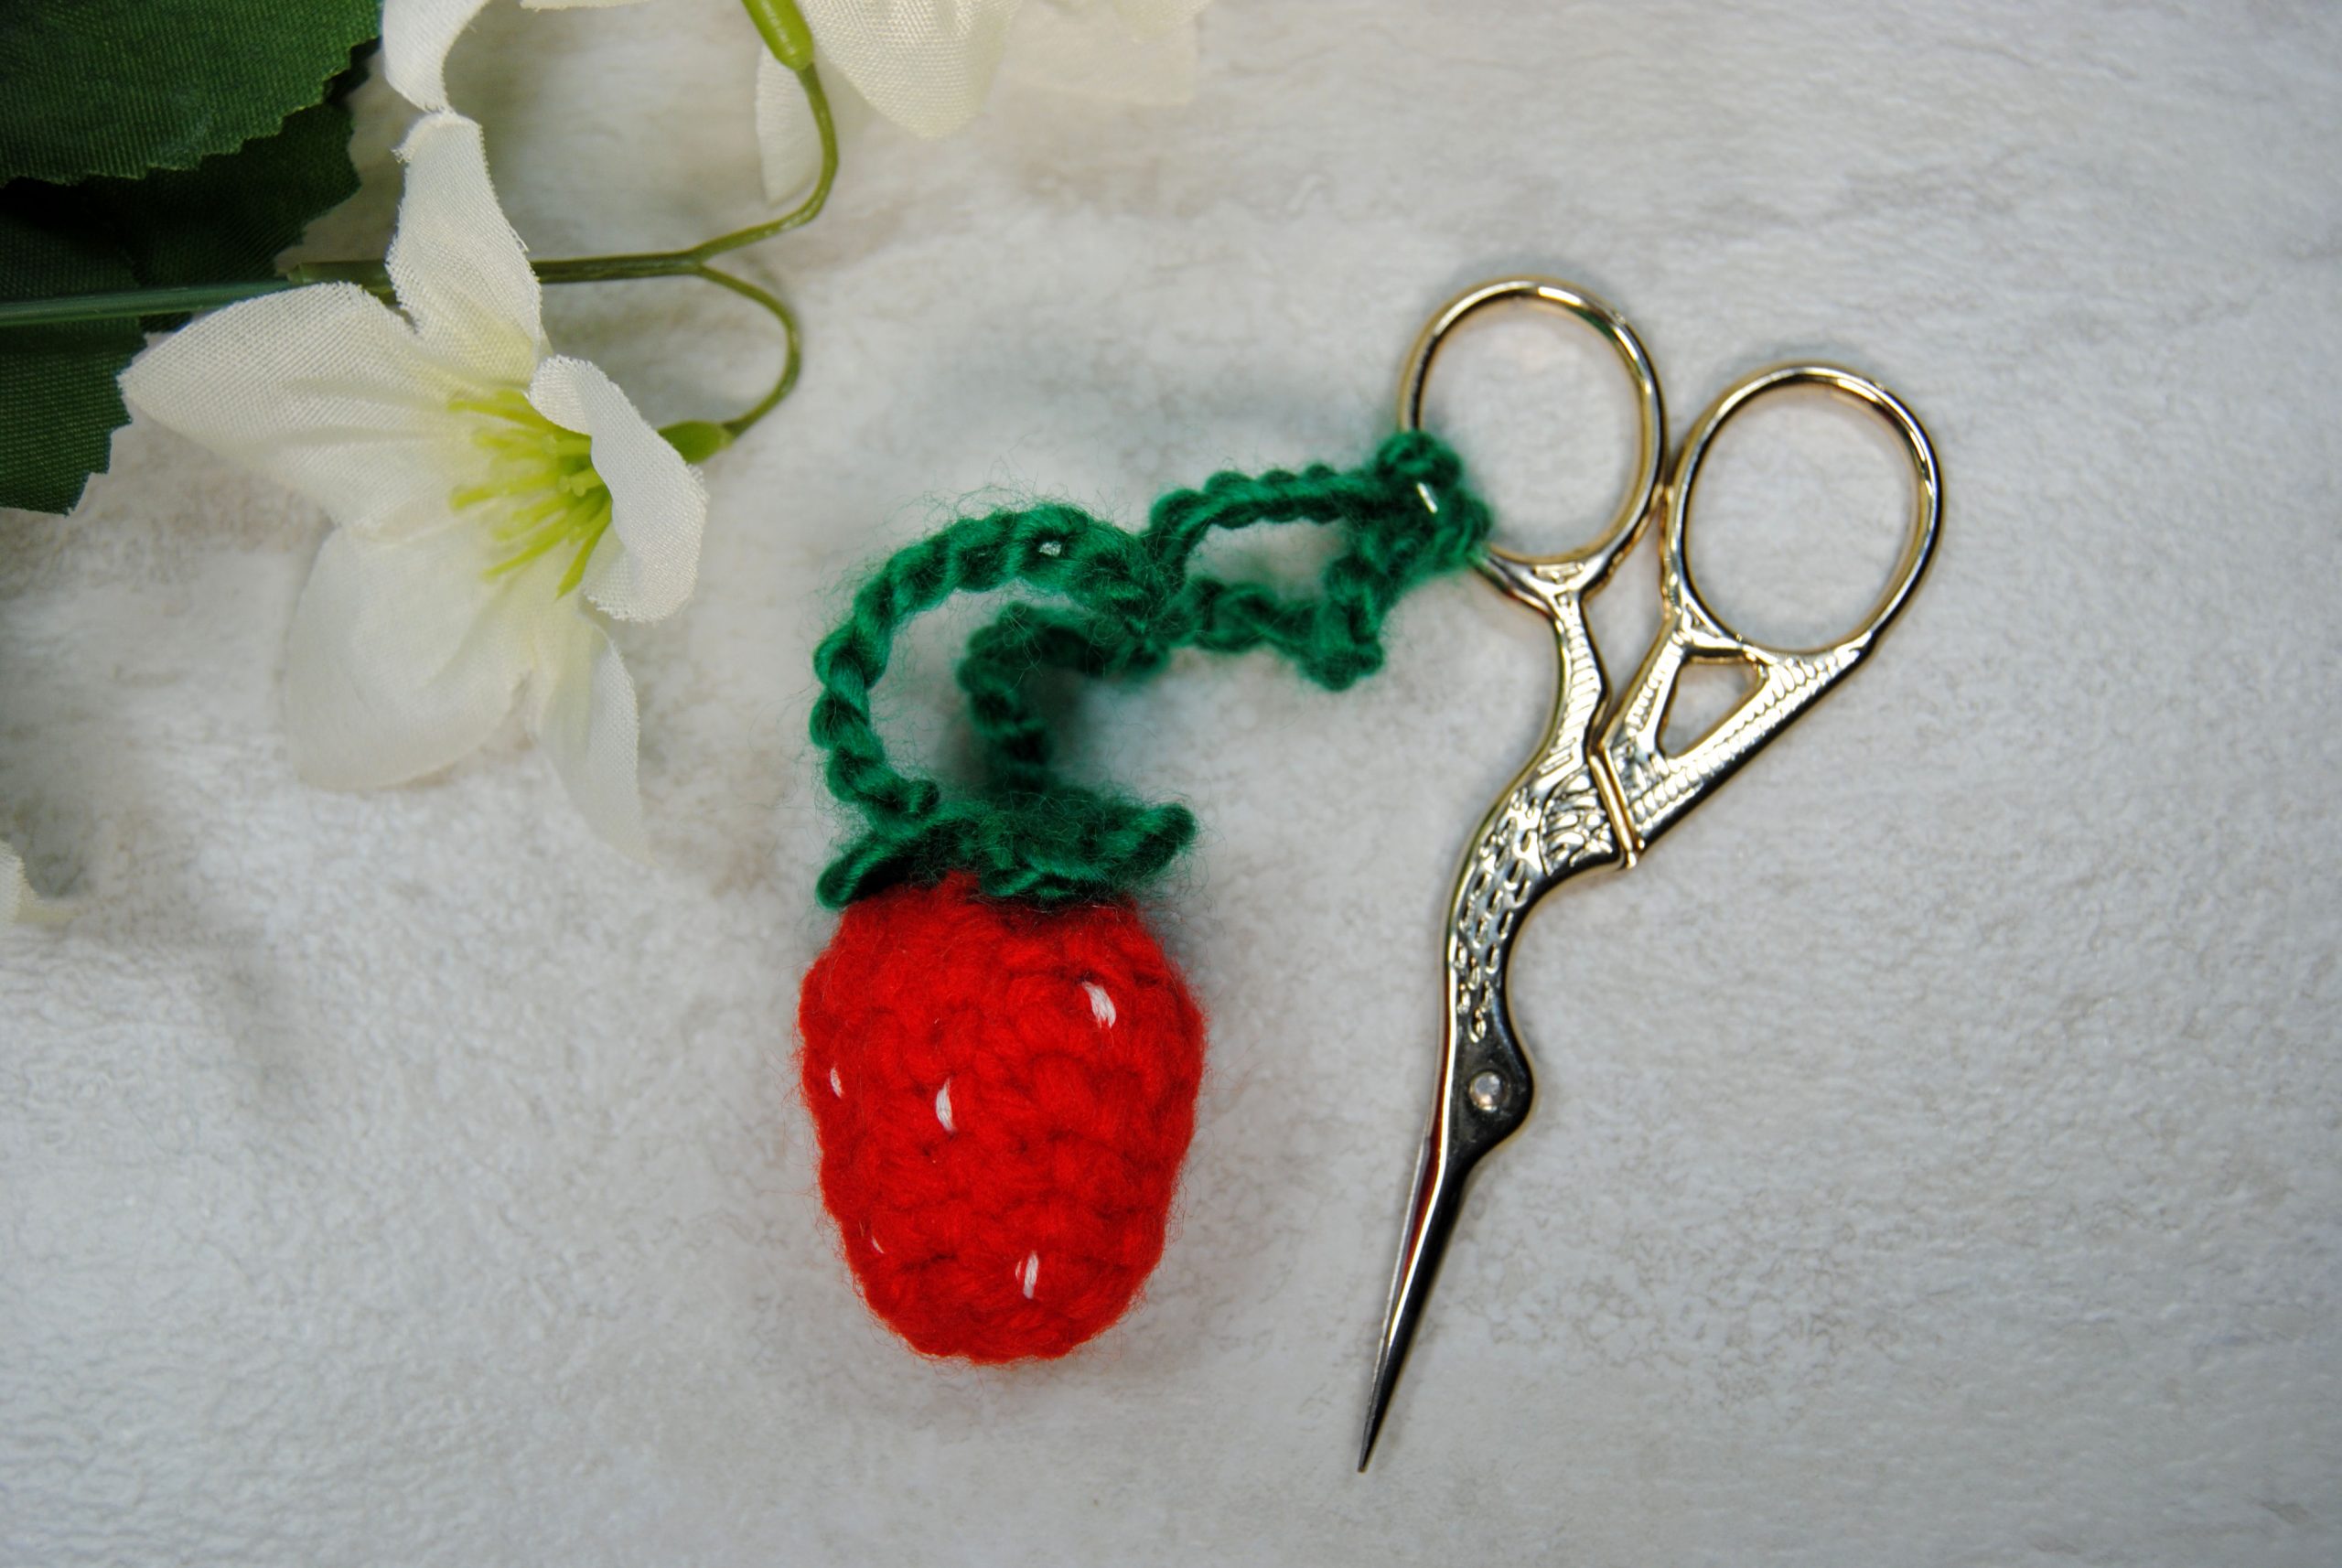
I’m very much still a newbie to crochet, but I still managed to make this vaguely strawberry shaped scissor fob using this free pattern on ravelry. And then just made a long chain to attach it to my scissors with!
What is the purpose of a Scissor Fob anyway?
First of all. Things don’t NEED to have a purpose. They can be purely decorative.
A framed cross stitch or one left on the hoop doesn’t have a “purpose” other than to exist as art. Well this is no different. In a very basic level, scissor fobs can be quite beautiful. So we’ll put that down as the most obvious purpose.
However, your humble scissor fob can be useful in other ways, too.
Telling scissors apart
Okay, you probably know your own scissors pretty well at this point. But does anyone else use them? Are you concerned your partner will accidentally use your fabric scissors on paper? Do you go to stitching retreats and find that seemingly everyone has a similar pair of stork scissors at this point?
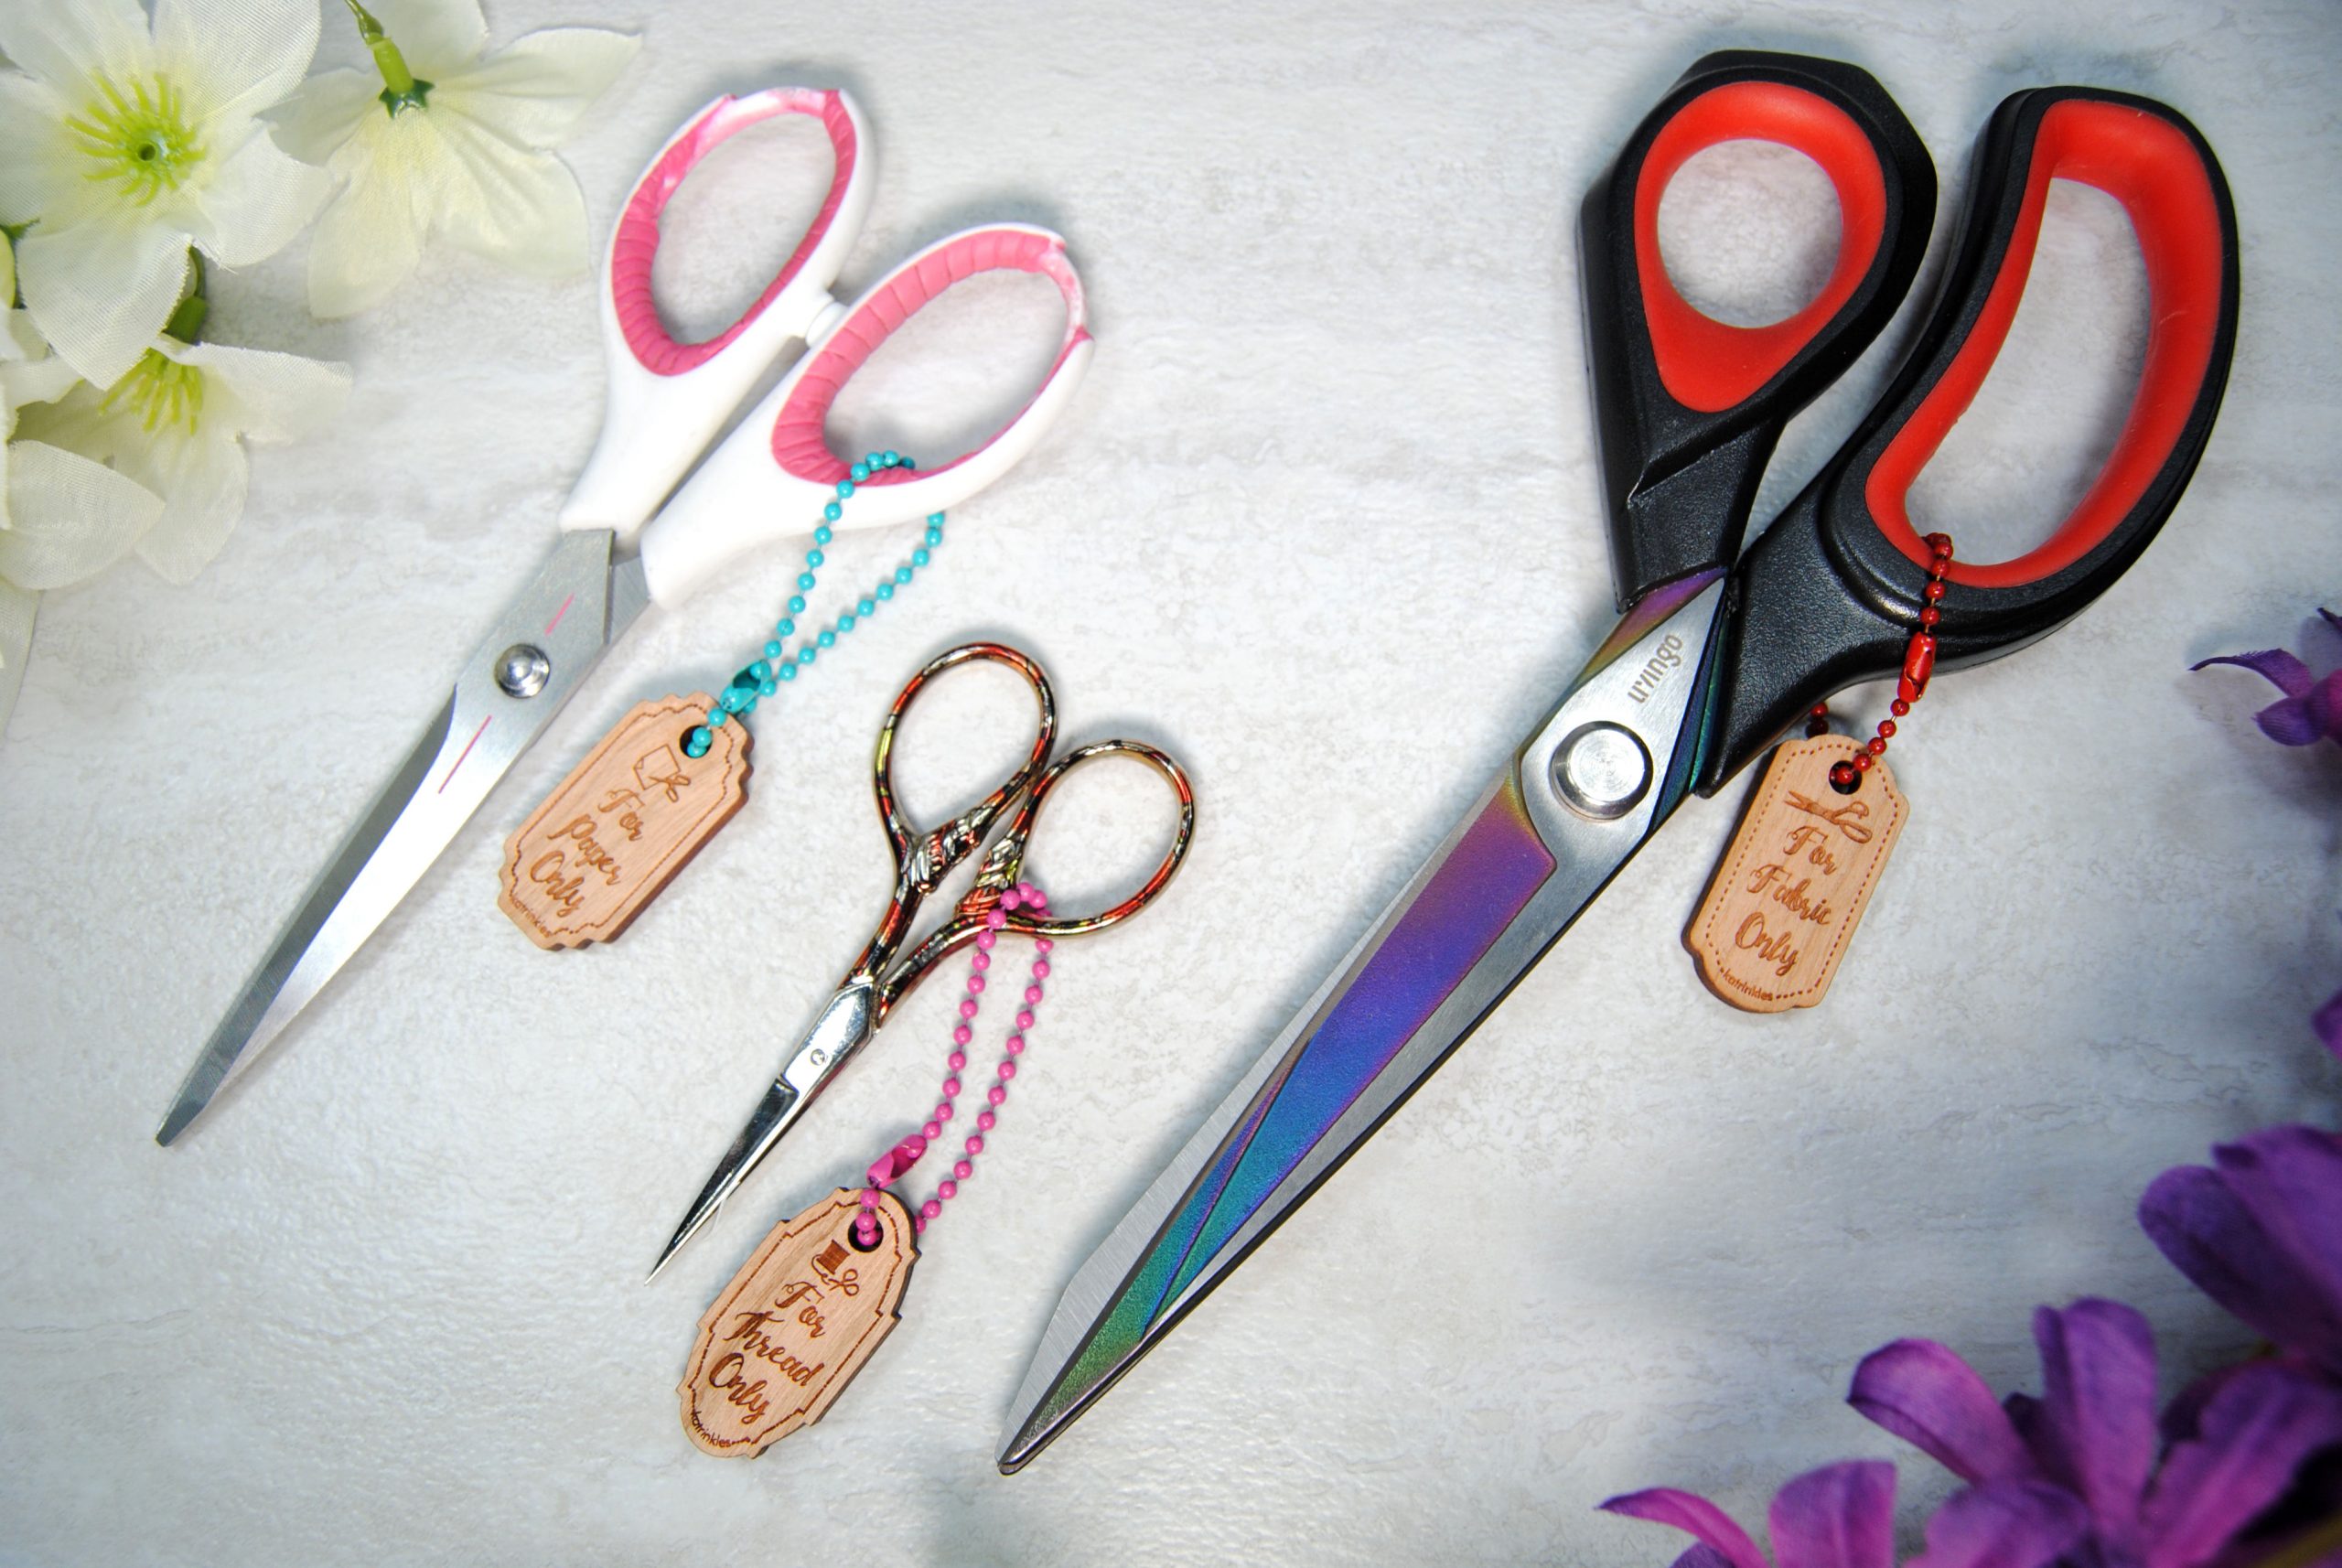
It’s not unusual for seamstresses and tailors to label their fabric scissors in some way. To remind yourself which pair has been designated for fabric only, or warn others to avoid using them for the wrong purpose. Some do so by tying some fabric or a ribbon onto the handles or even printing labels for them. But a decorative fob can be enough to clue someone in to the fact that these scissors are special in some way.
For example, I got these wooden tags to properly label my main fabric, paper, and thread scissors. And yes, my paper scissors are just retired scissors that have clearly seen better days.
Make your scissors easier to find
For our next fob purpose, I want you to think back on a time you’ve misplaced your scissors. Did they slide into the couch? Were they buried under a pile of crafting materials? Were they in plain sight but you still somehow missed them even though you swear you checked there already?
It happens to all of us sooner or later, especially with small embroidery scissors. But by making your scissor larger or simply more colorful it will help it stand out easily.
Those small scissors can’t slide between the couch cushions if you have a nice thick blackwork cube attached to them.
Keep other, even smaller objects from getting misplaced
Don’t lose your scissors often? That’s okay, how about your needle threader? Those are small and easy to lose. But not if it’s attached to your scissors!
Working on a small project or on plastic canvas and can’t use your usual magnetic needle minder? Attach it to your scissor fob instead!
Always want to have a couple of pins nearby? Pin cushions can be attached as well!
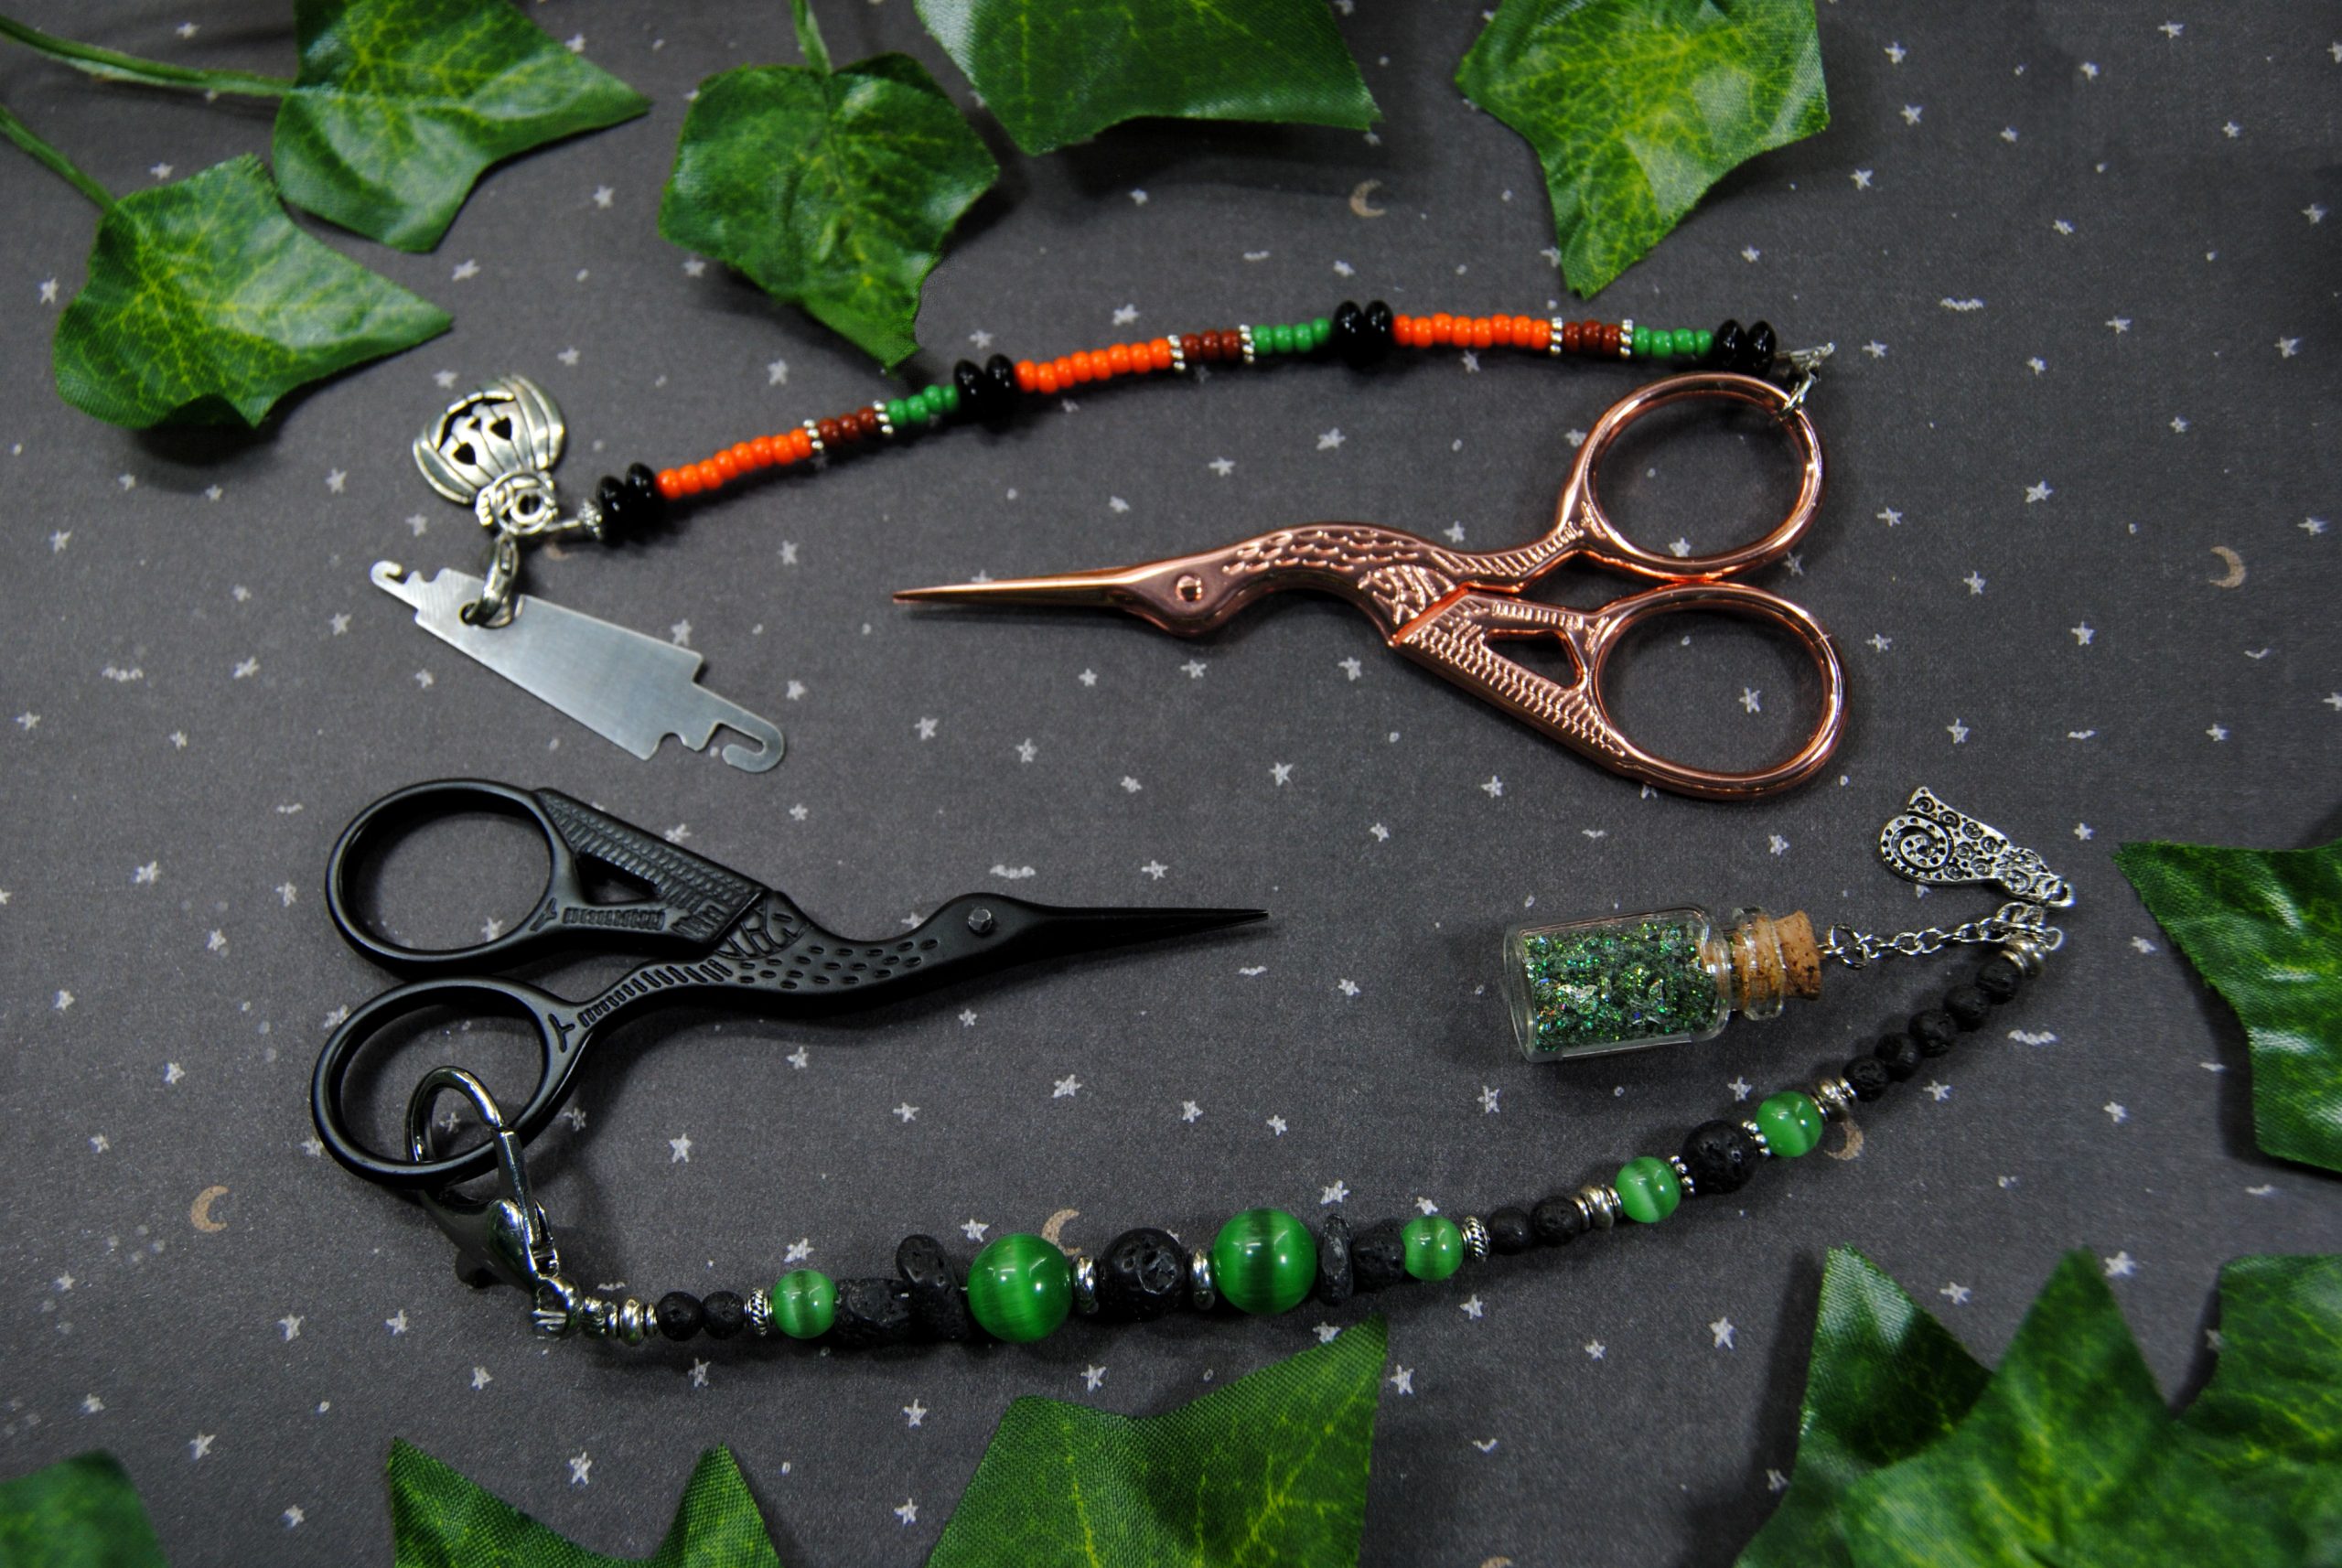
Want a thread cutter attached to your fabric scissors? That’s an option too! I even managed to find one with an attached seam ripper! But it appears those are no longer for sale, so you’ll have to make your own.
The two pictured below are from the Etsy store stitchz4bitchz.
Protect your scissors
This one seems a bit of a stretch at first. However, I found a couple of mentions online that fobs should be heavier than your scissors. So that if you dropped your scissors, the fob would hit the ground first, potentially avoiding having your scissors falling tip first and damaging them. Mine certainly aren’t heavy enough to serve that purpose now, but pretty clever design if that used to be true!
Whether you believe that or not, I also found scissor fobs that have a rubber tip attached to them so you can protect them that way when not in use. I bet that would also come in handy when traveling to avoid accidentally stabbing yourself when reaching into your project bag.
Alright, you’ve convinced me. Now how do I MAKE a scissor fob?
Okay, okay. You’re here for the tutorial bit I’m sure. Well, as I’ve already discussed there is a bajillion ways to design and make your own scissor fob. BE CREATIVE.
But this site deals in mostly cross stitch tutorials, so that’s what we’re gonna use to make one today. Cross stitch!
Now, you could just make a small biscornu, attach a longer ribbon or cord to it and call it good. But I already have a biscornu tutorial here on the site. I even have a tutorial for making a humbug, too! Both could easily be used as a scissor fob
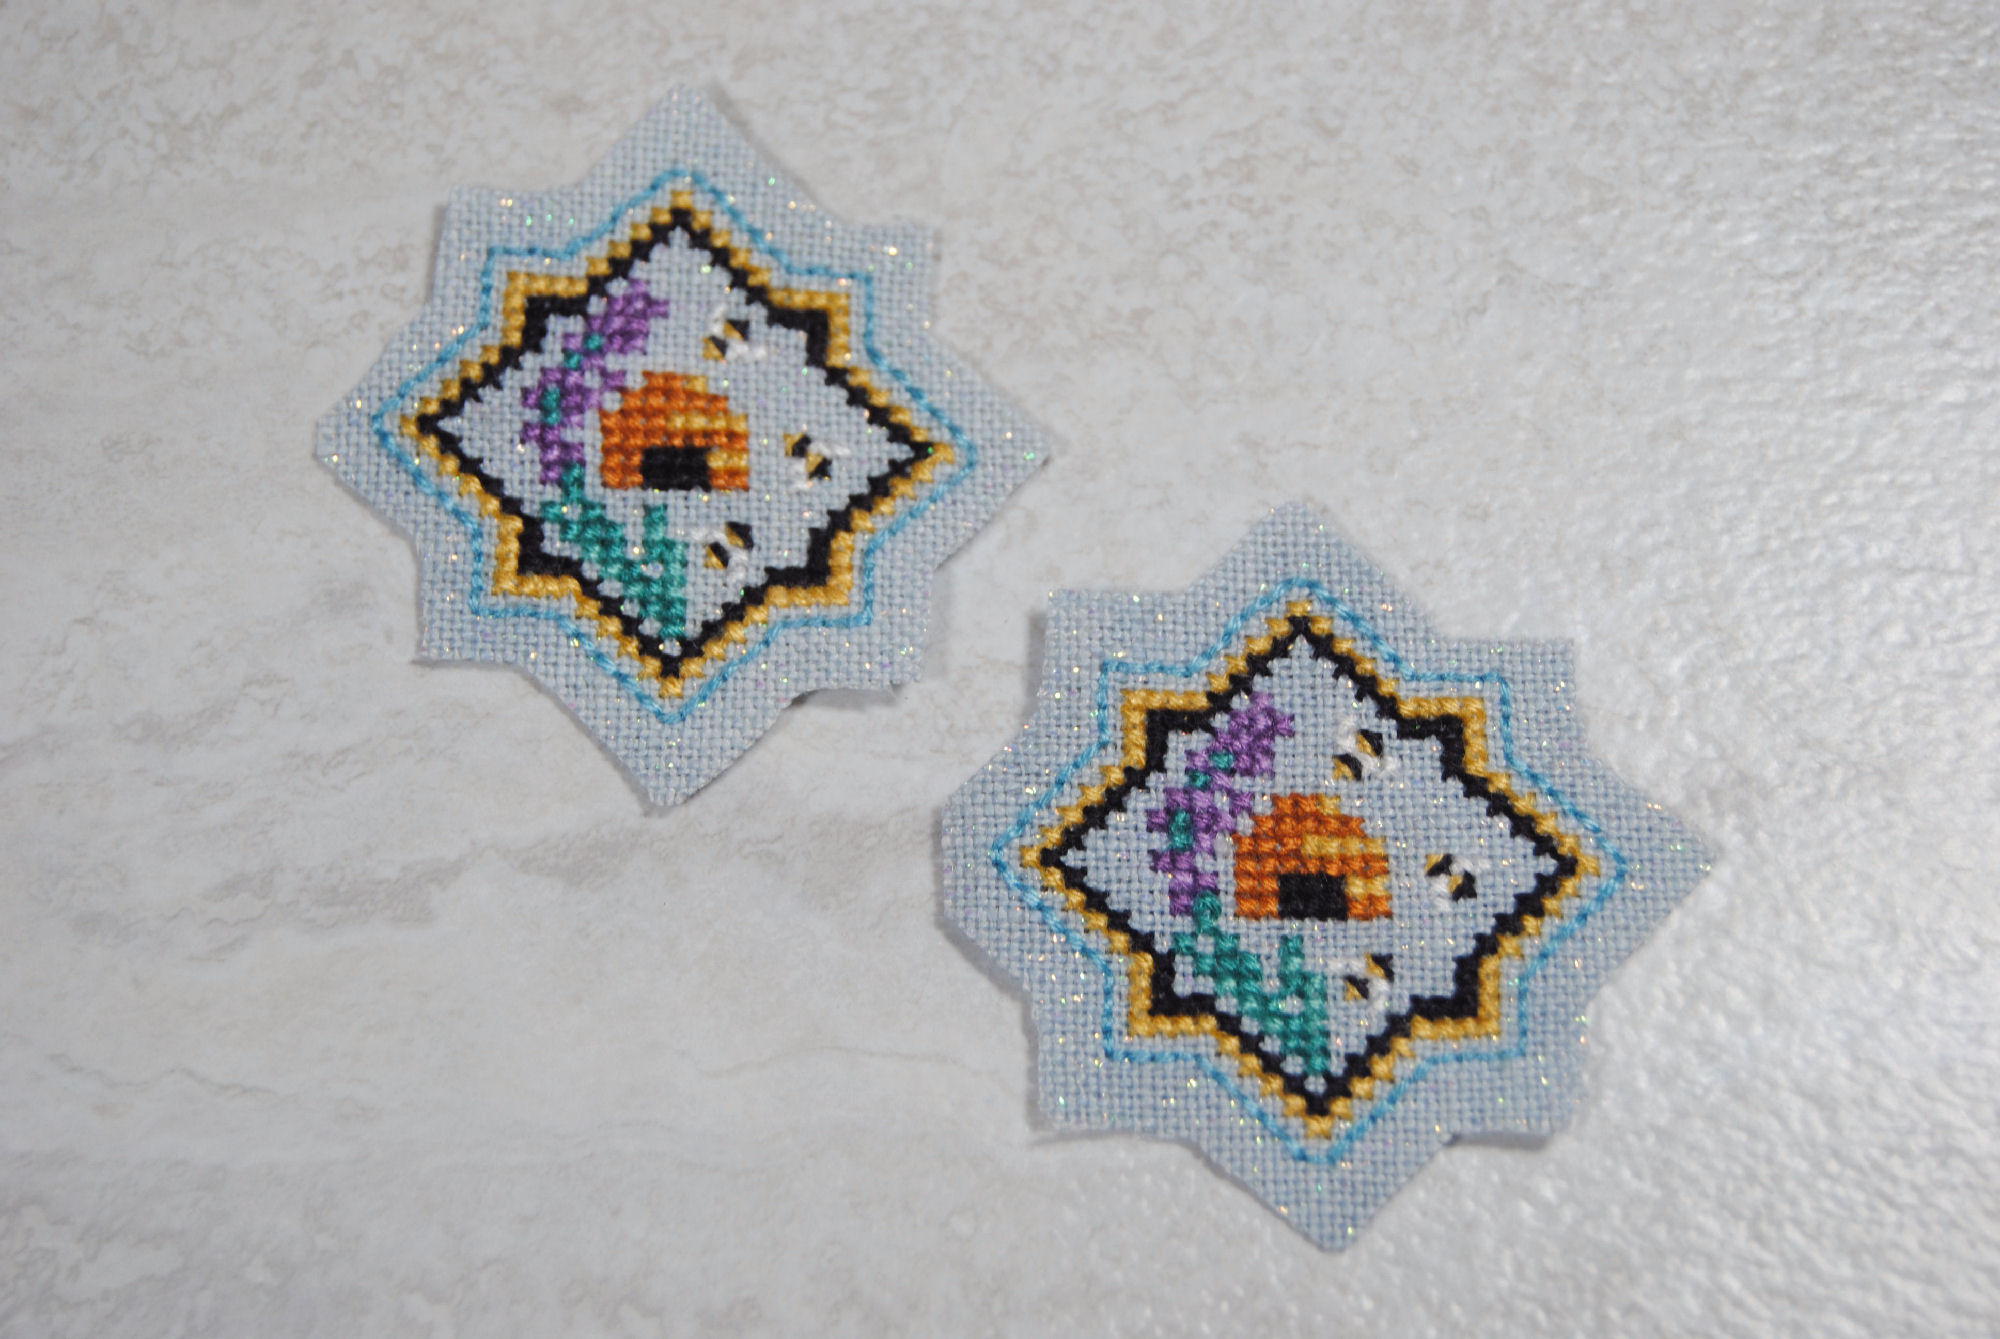
So instead, today I thought we’d make a small pillow type fob. But instead of just stitching two squares together, I wanted to play with some fun shapes. Browsing Pinterest I found a Christmas ornament using an eight pointed star and I really wanted to design something similar, but small enough to not be too much larger than my embroidery scissors. This is what I came up with!
A bit less christmassy, and much more springtime themed! Also it gave me an excuse to borrow these quarter-stitched tiny bees. This pattern is available for free on my Ko-Fi or Patreon.
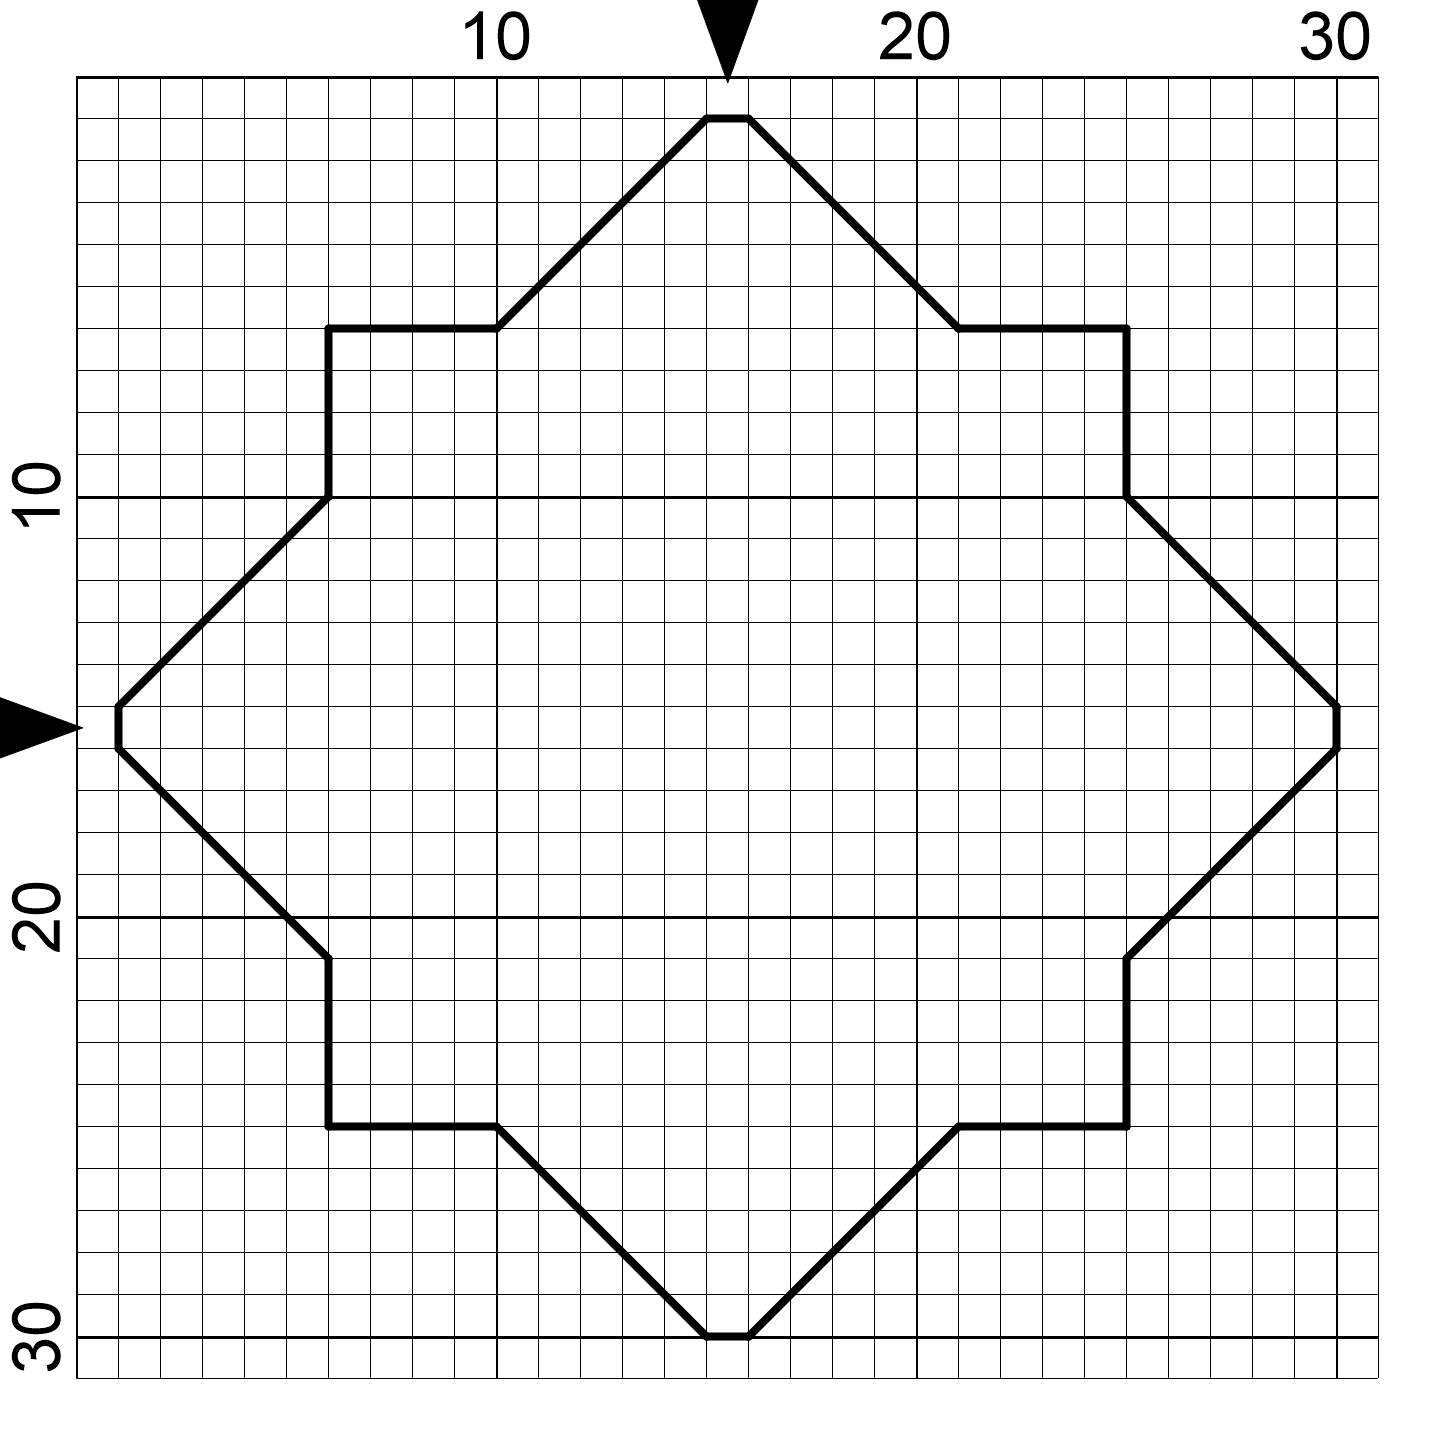
If you’d like to design your own instead, here’s the backstitch outline for your reference. I stitched mine over 2 on 36 count, so it’ll be a little bigger if you stitch using 14 count normally. About 2.2″ square.
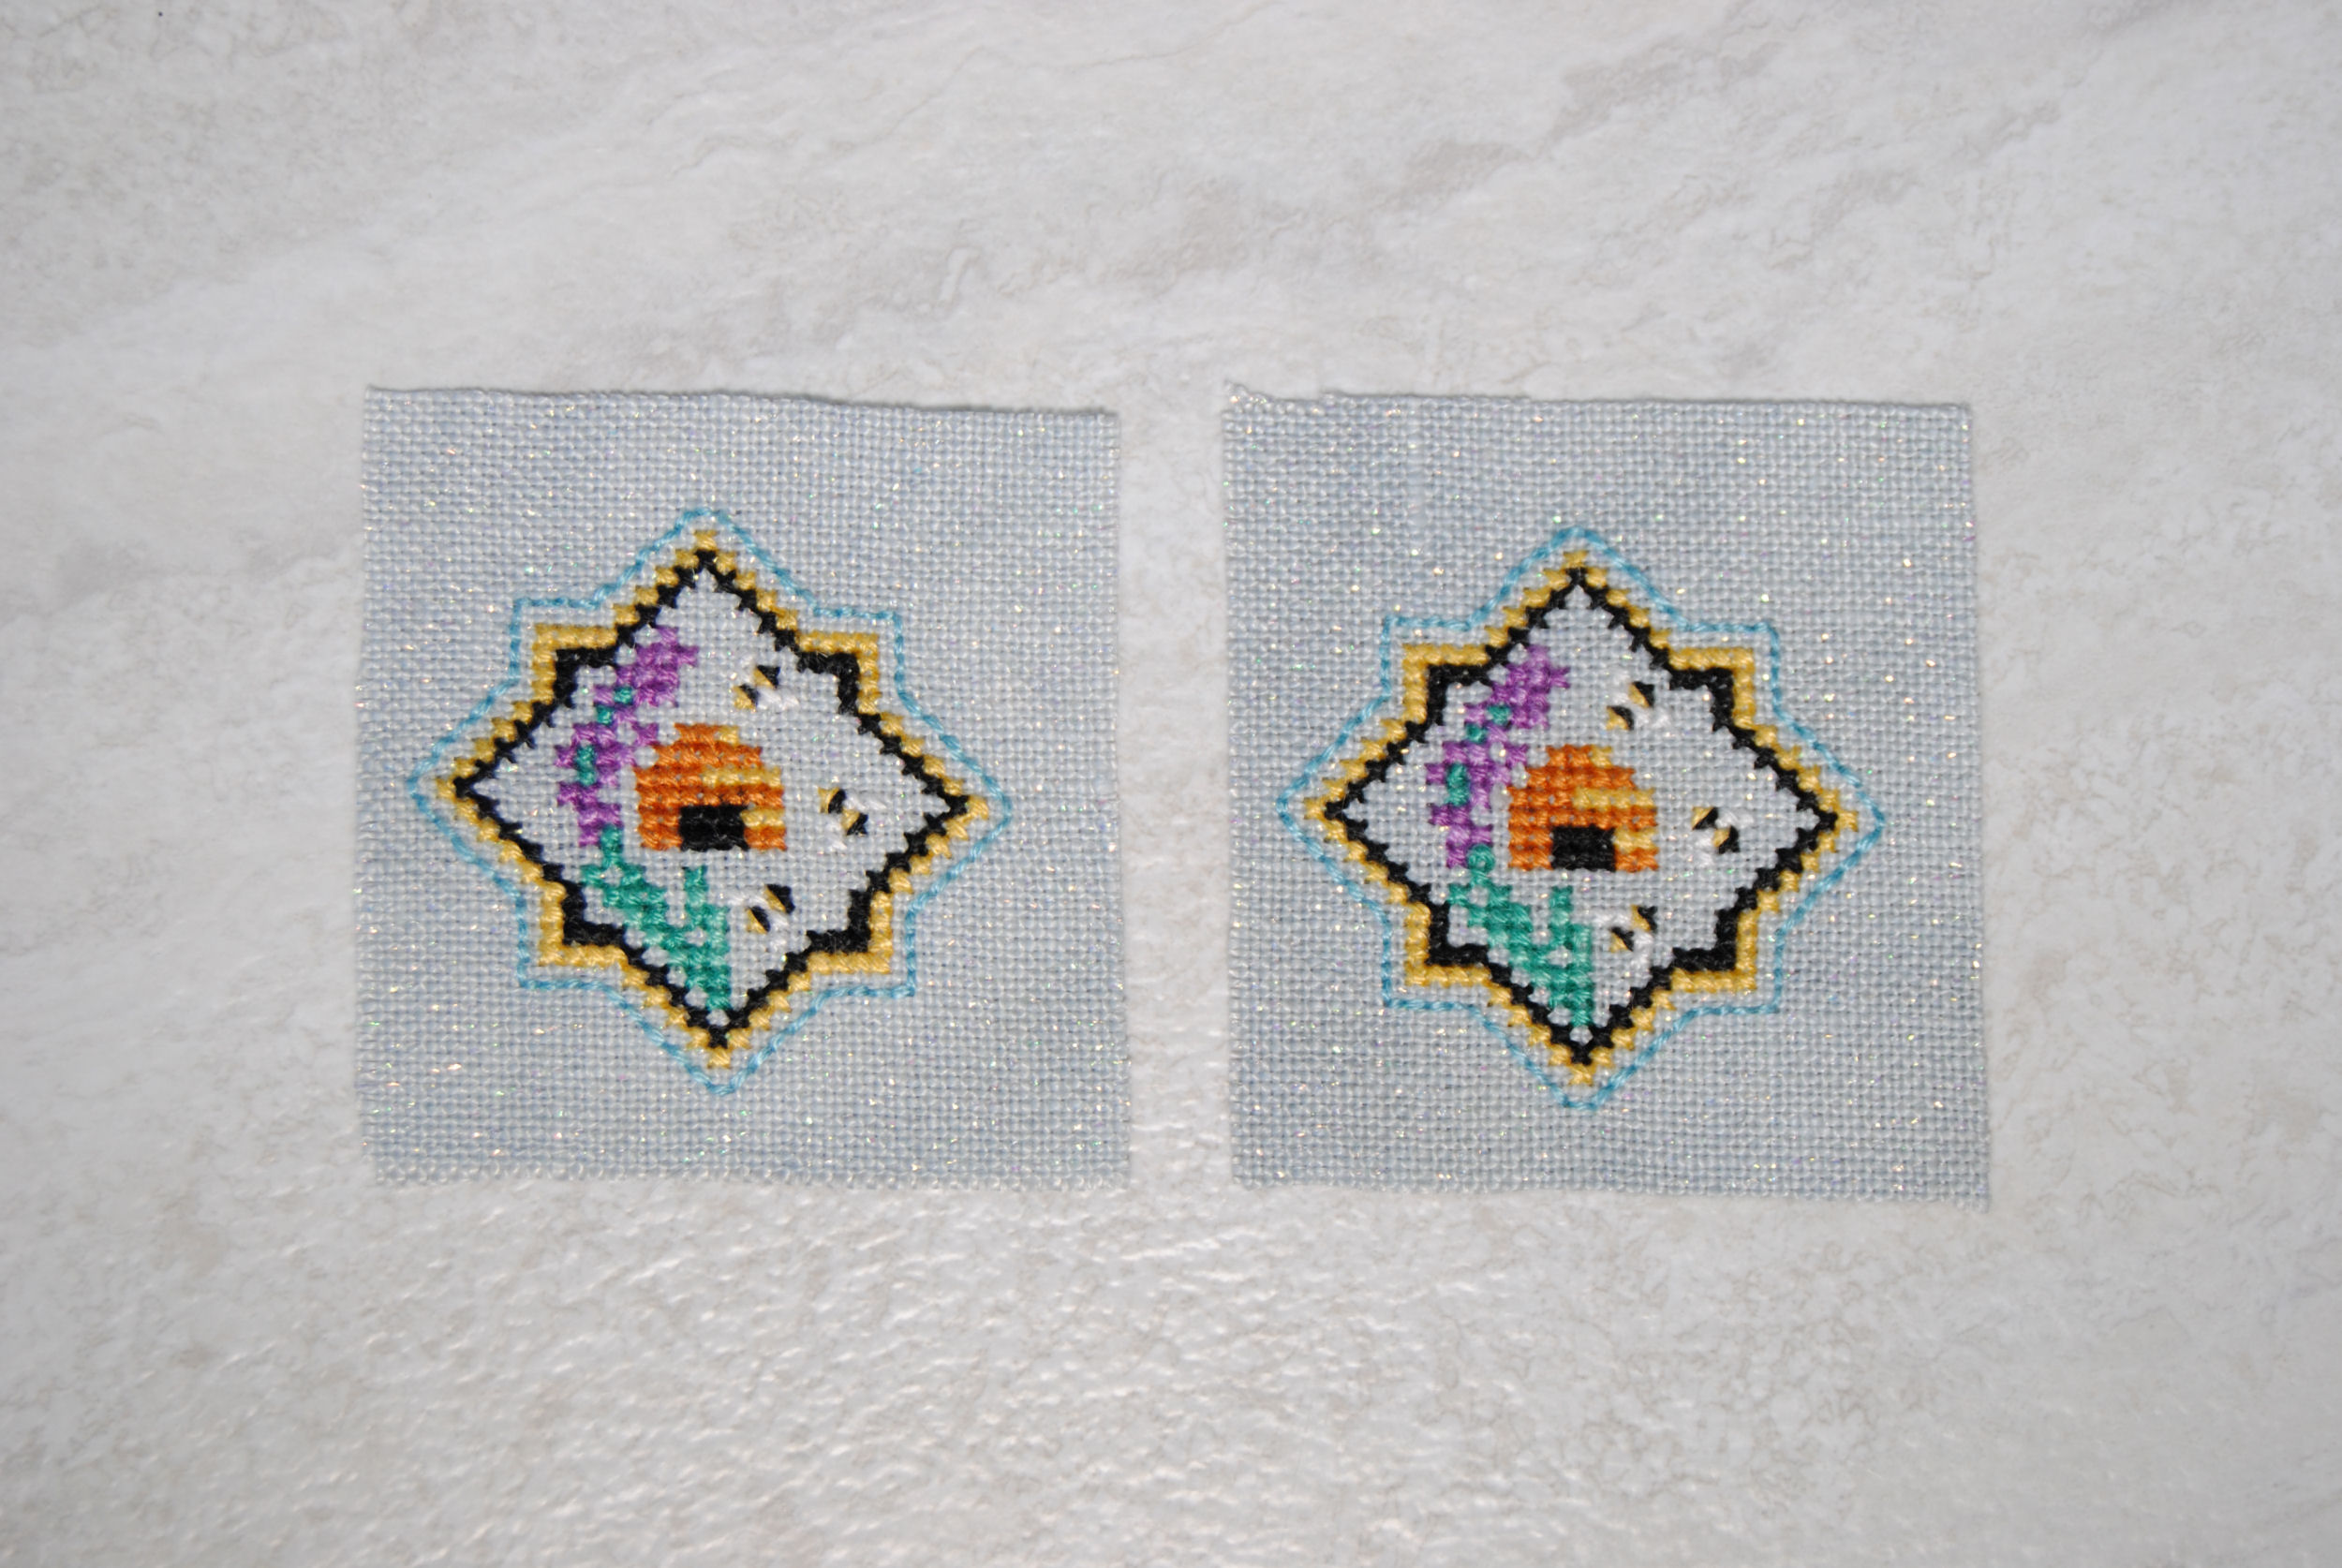
Make two of your design
They can be the same on both sides if you want, or you can do different designs. Heck, one side can be blank if you want.
But you at least need two pieces of fabric with the same backstitch outline on each one. Whether that be this octagonal star, a plain rectangle, or another fun shape like a heart.
You’ll then want to trim your fabric as close to that backstitch as you feel comfortable. This will vary depending on your type of fabric and whether or not it likes to fray a lot.
I left myself a fair amount of room as this linen did like to fray a bit. However, I did end up cutting off some of the points later because they kept getting in the way.
Attach the two shapes together
Pick a place to start and anchor your thread on the back of the project. Then bring your needle up from between two backstitches. Finally, start stitching the two pieces together by running your needle underneath the backstitching to connect them.
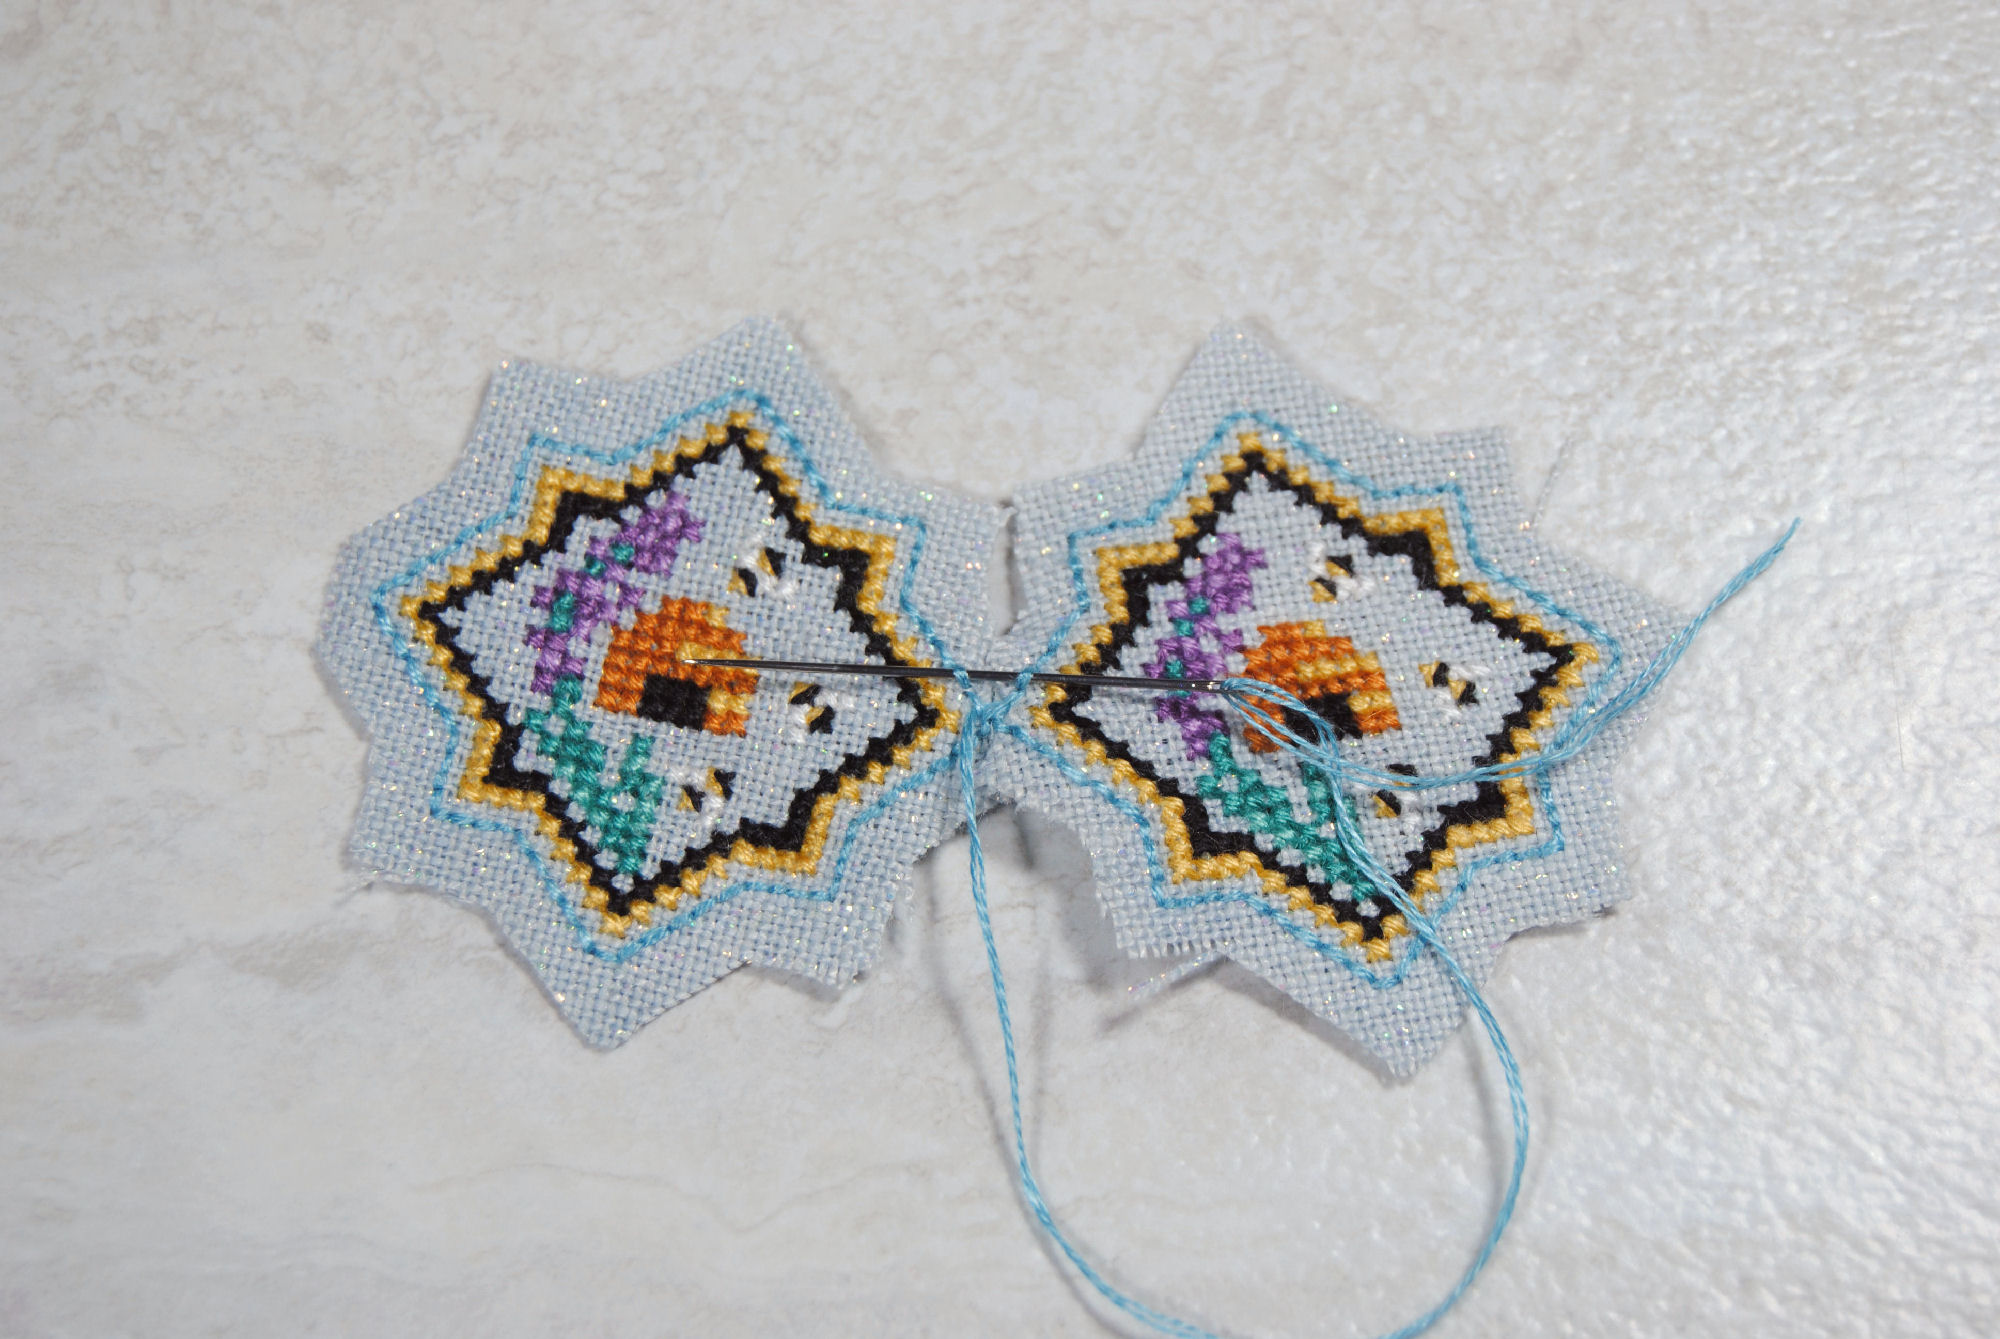
I would recommend not starting at either the ‘top’ or ‘bottom’ of your design, as we’ll want to attach a cord to the top as we stitch. And possibly decorate the bottom. I’d also recommend working towards the top to begin with so we can attach our fixture sooner rather than later.
Keep stitching those backstitch lines together until you get just before the top of your design. You’ll see my fabric is already fraying a bit. That’s normal. It’ll all be tucked inside in the end so don’t worry too much about it.
If you’re using a “pointy” shape like I am, you’ll also want to turn your piece over and use a chopstick or pencil or something to make sure that point keeps its shape properly.
Attach a cord, ribbon, or lobster clasp.
Once we’ve reached the top we’ll want to sew in whatever we’re using to attach this thing to our scissors.
If you’re using cord or a ribbon, you want to make it long enough that you can loop your fob through it to attach it to your scissors. Or, you want to stitch the middle of the cord into your fob so you can tie the other end around your scissors. But make sure you’re stitching THROUGH the cord or ribbon as you continue stitching the backstitch together
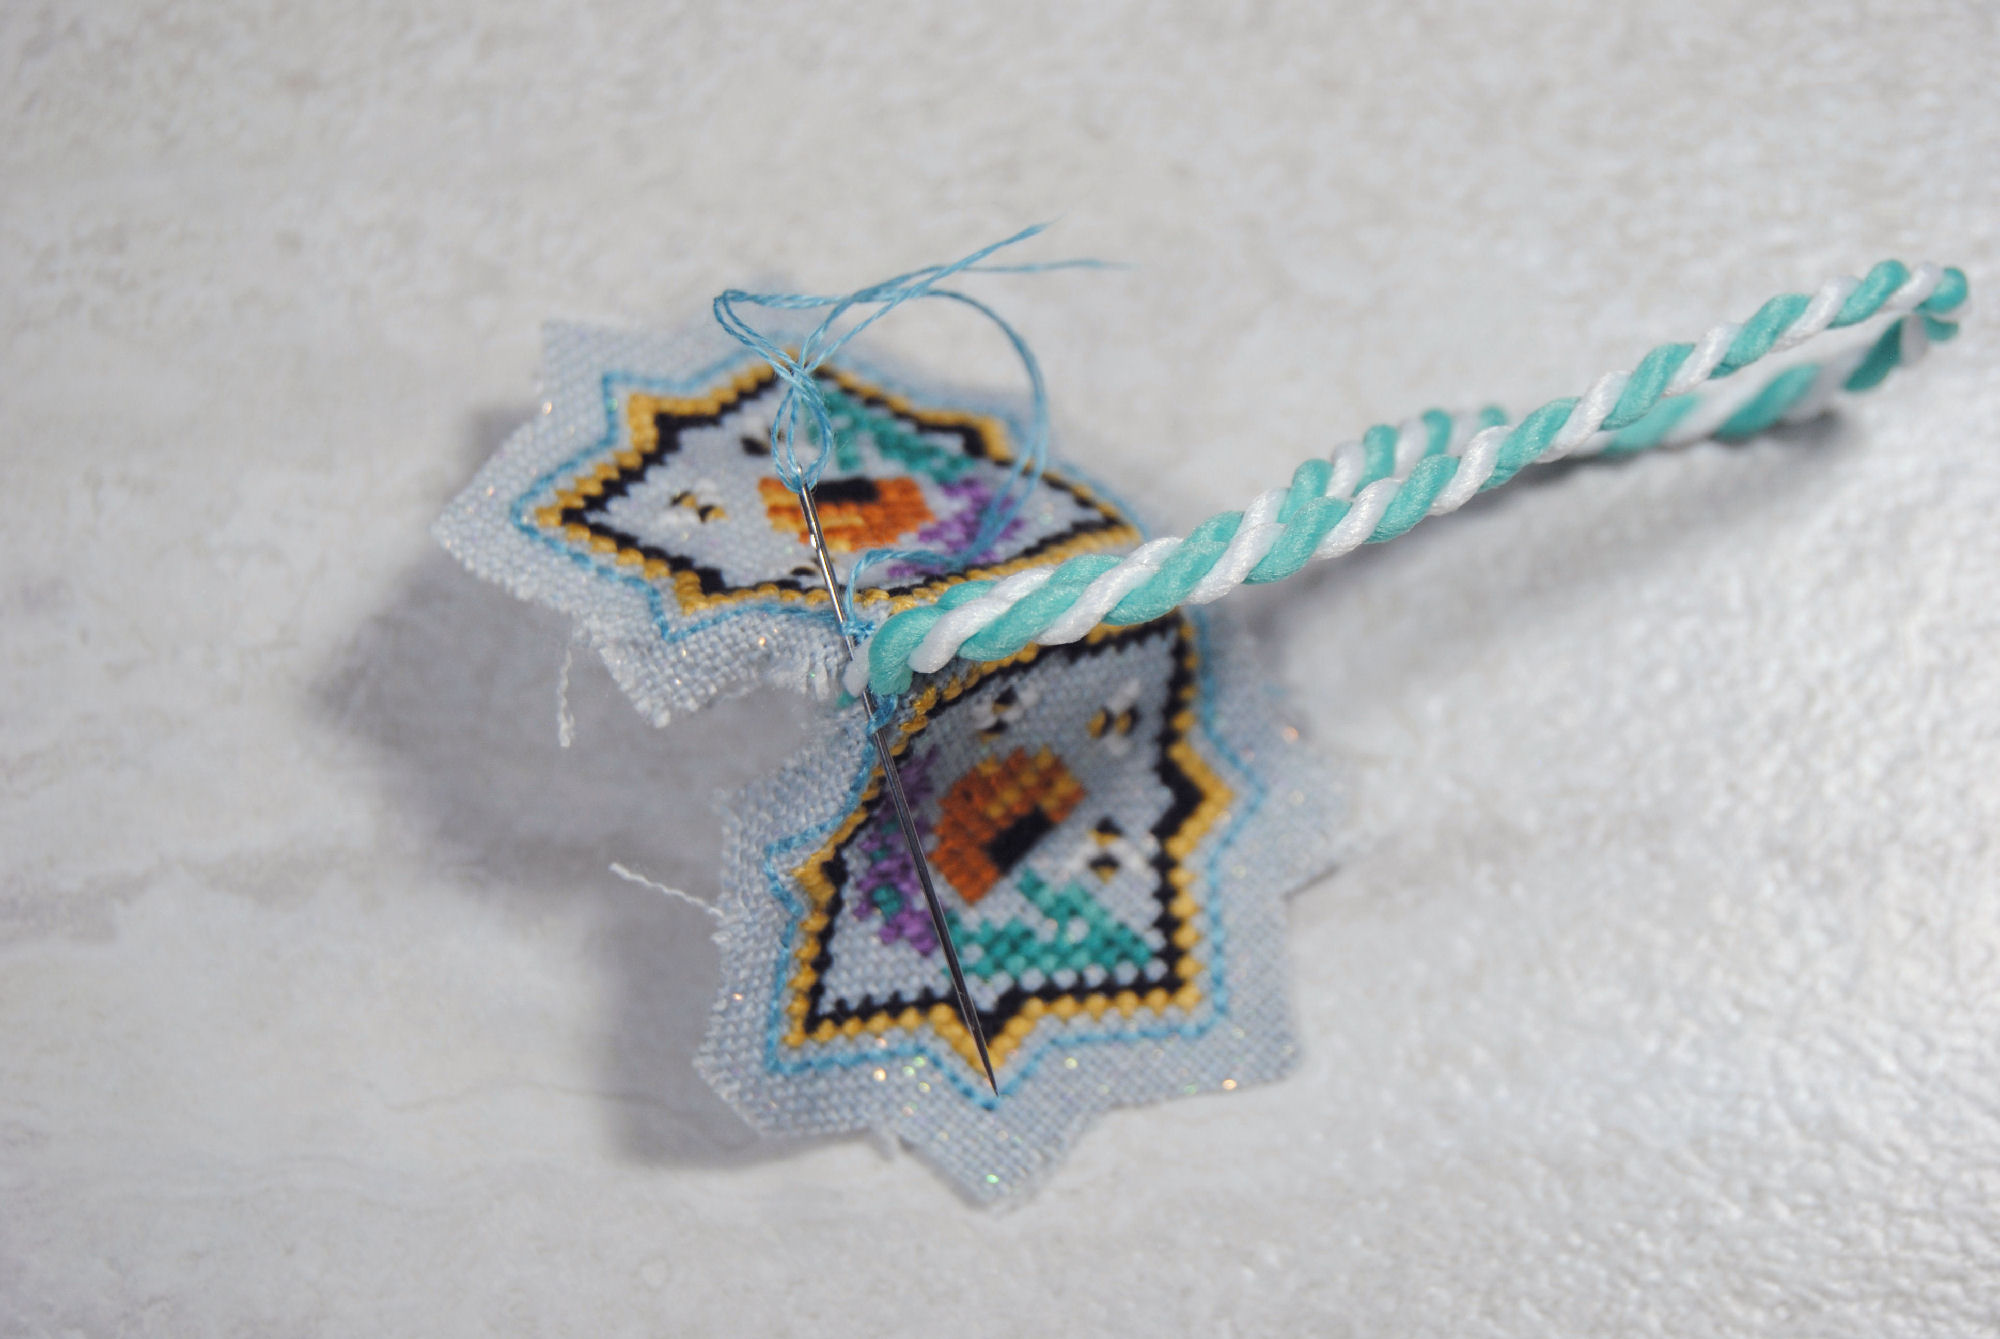
Alternatively, you may have noticed some of the scissor fobs I’ve shown and linked to so far make use of large lobster clasps to make them easy to attach to embroidery scissors. String some beads on here. Use a chain. Get creative here, if you like. Then go back to stitching your outline.
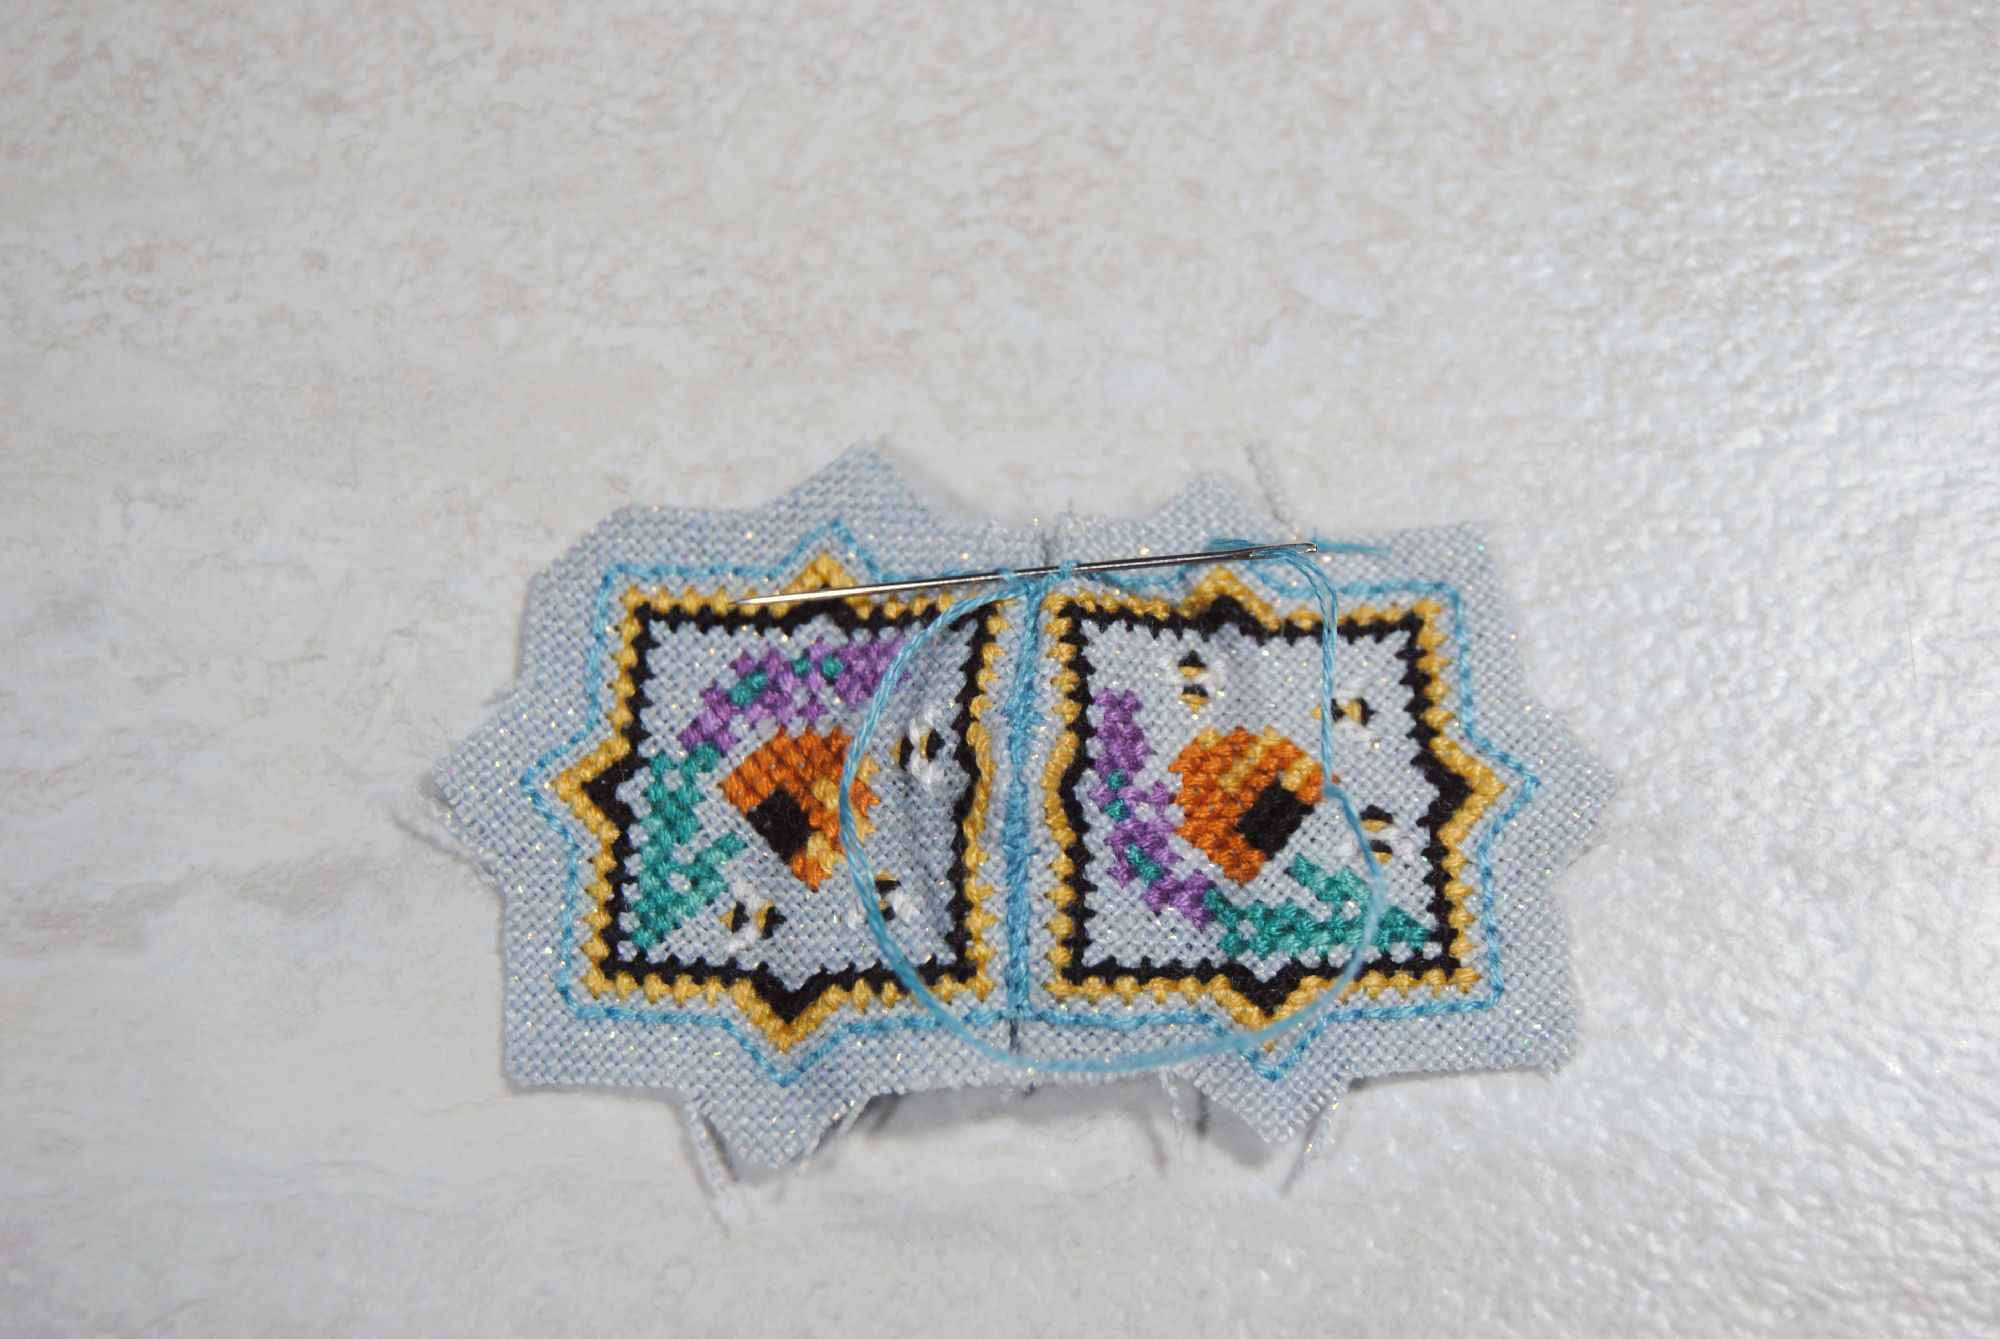
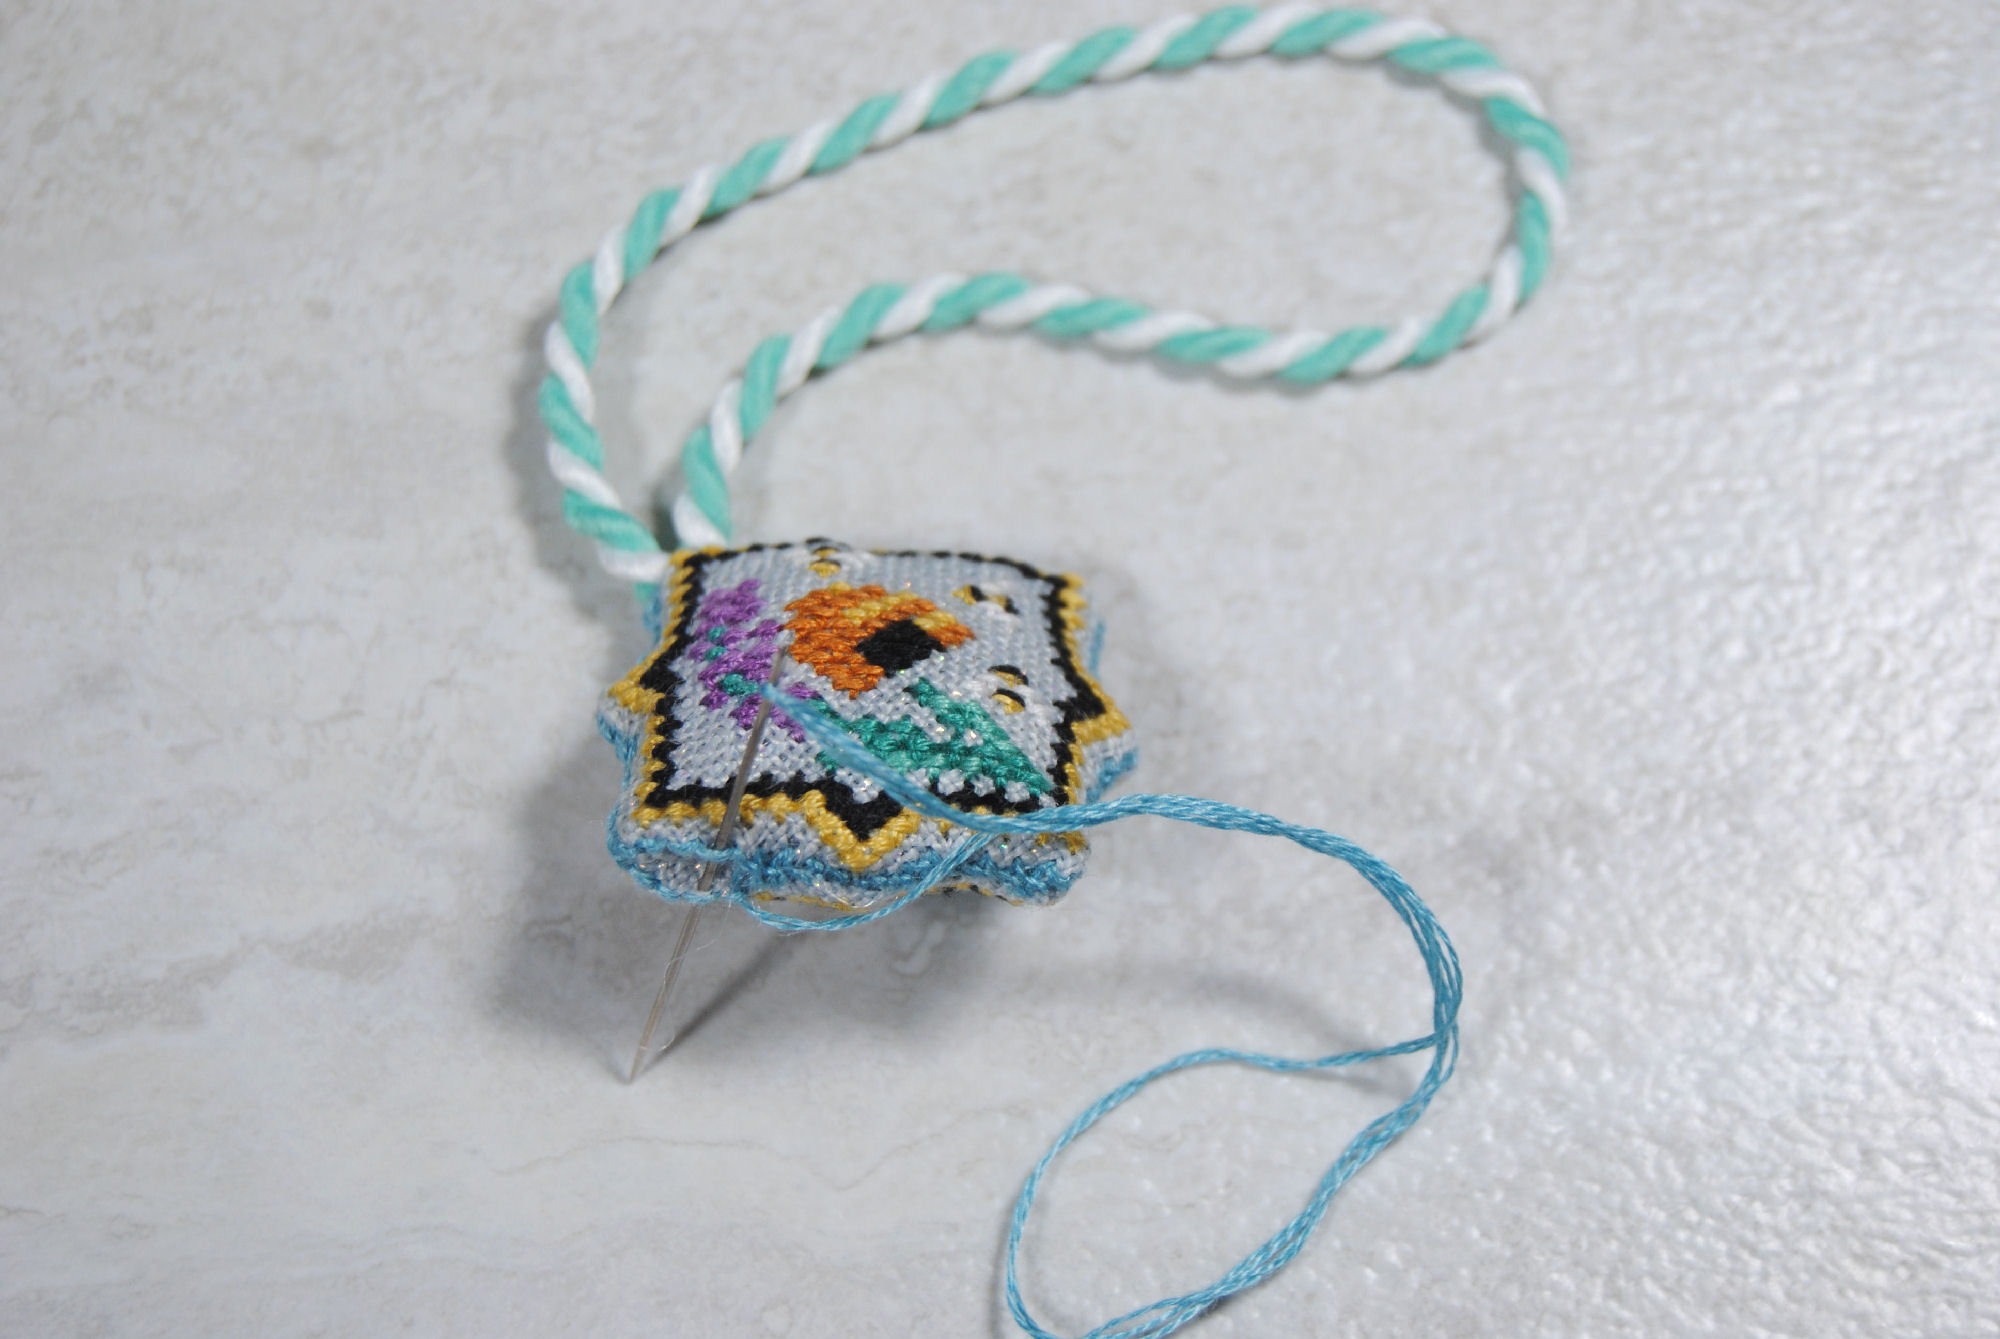
Halfway point
I kept stitching until I got to the ‘halfway’ point on the other side so I could show you how the cord looks like on the inside for me. You’ll note I had wrapped both ends of the cord with some tape to keep them from unraveling. But I forgot to take a photo before I started stitching it up, so I’m mentioning it now.
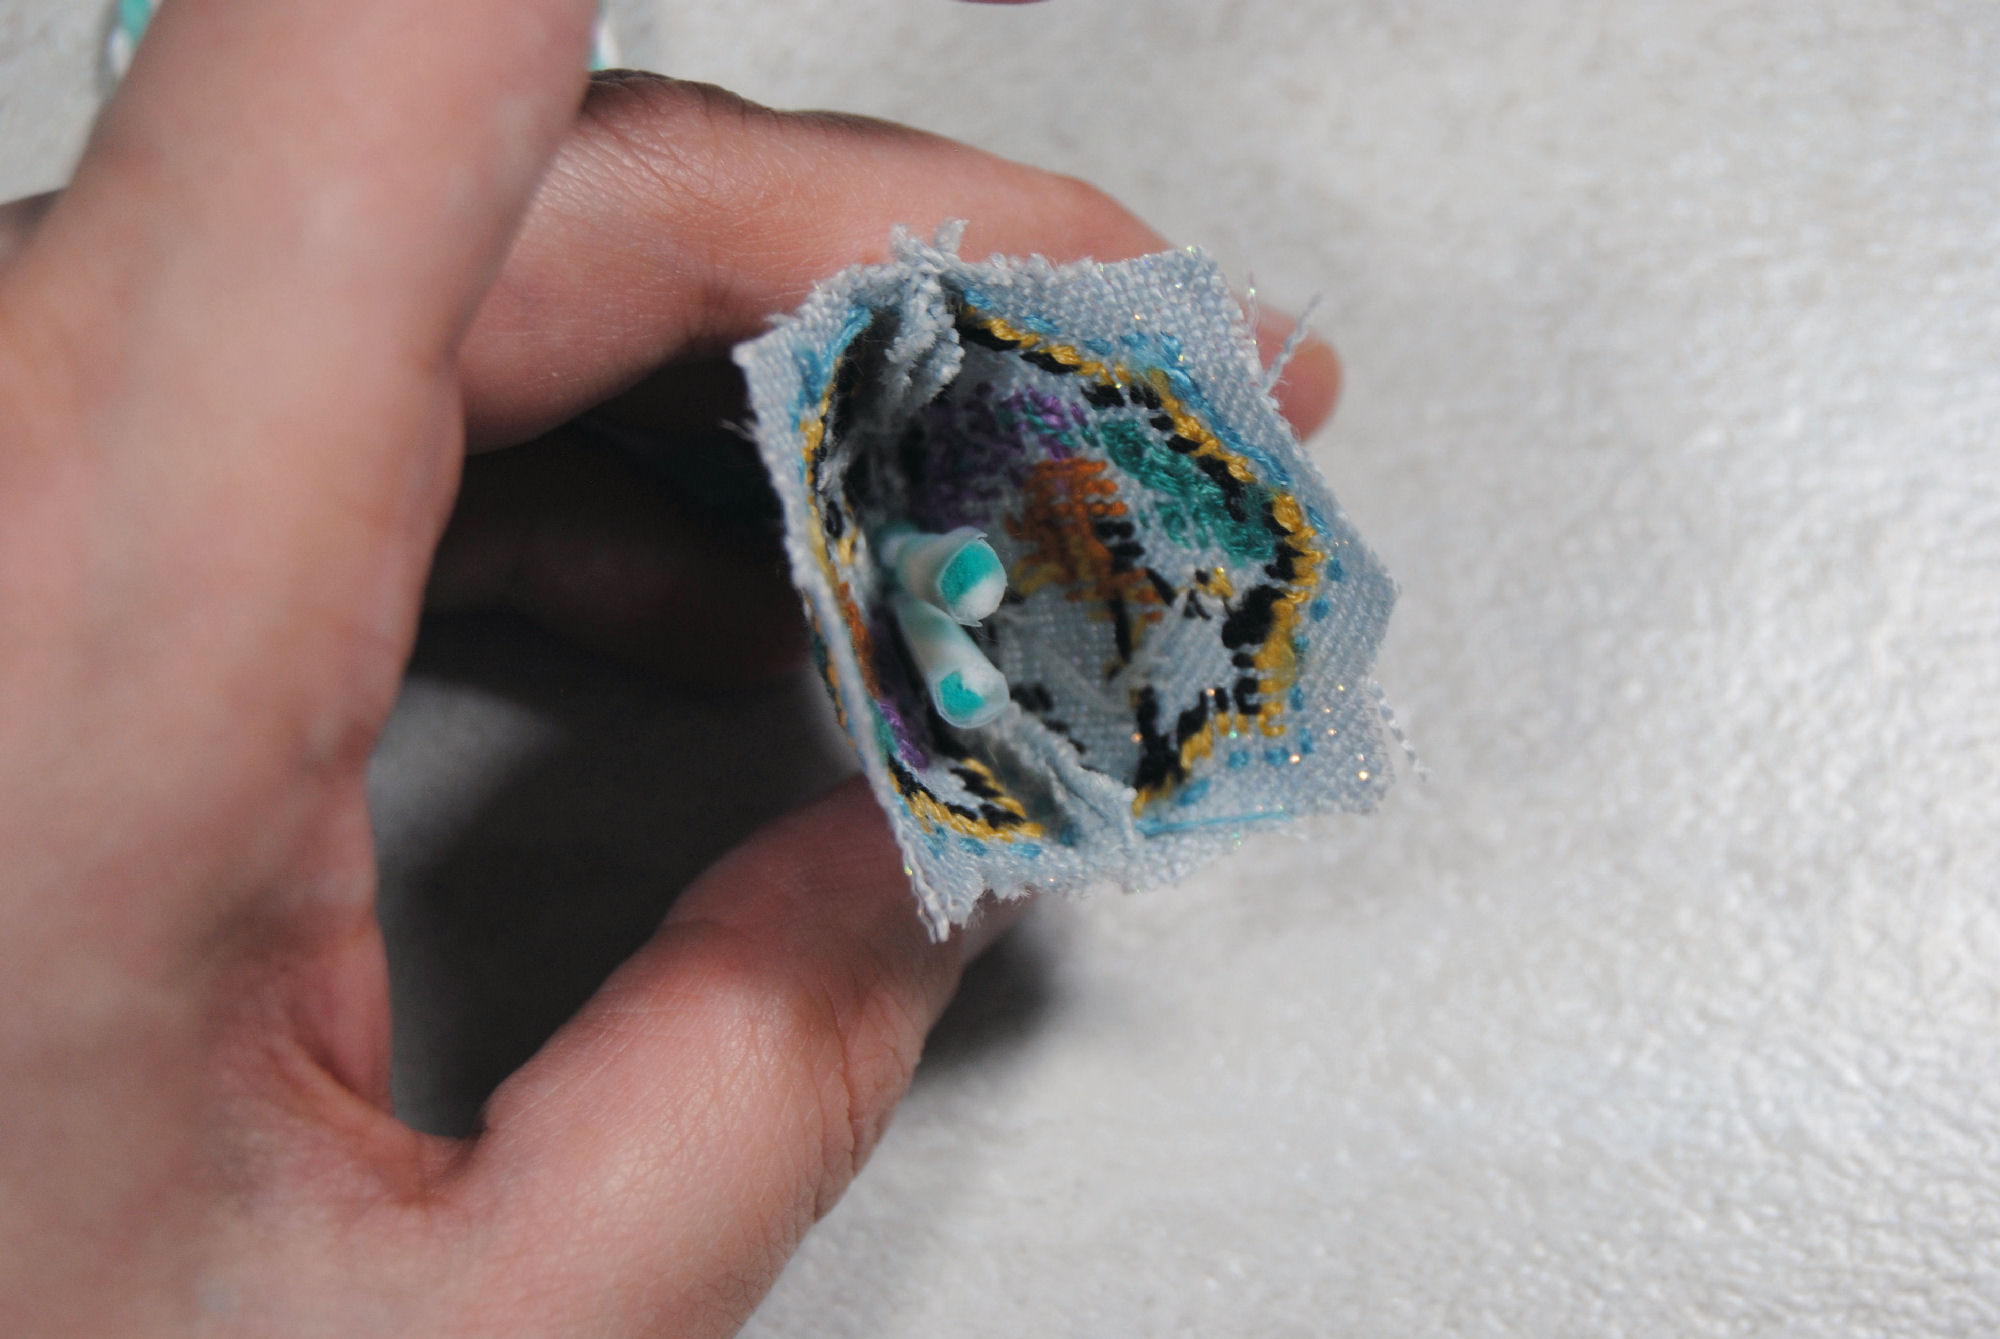
Now’s also a good time to reach in there with a pointy object and push the seams into shape as needed.
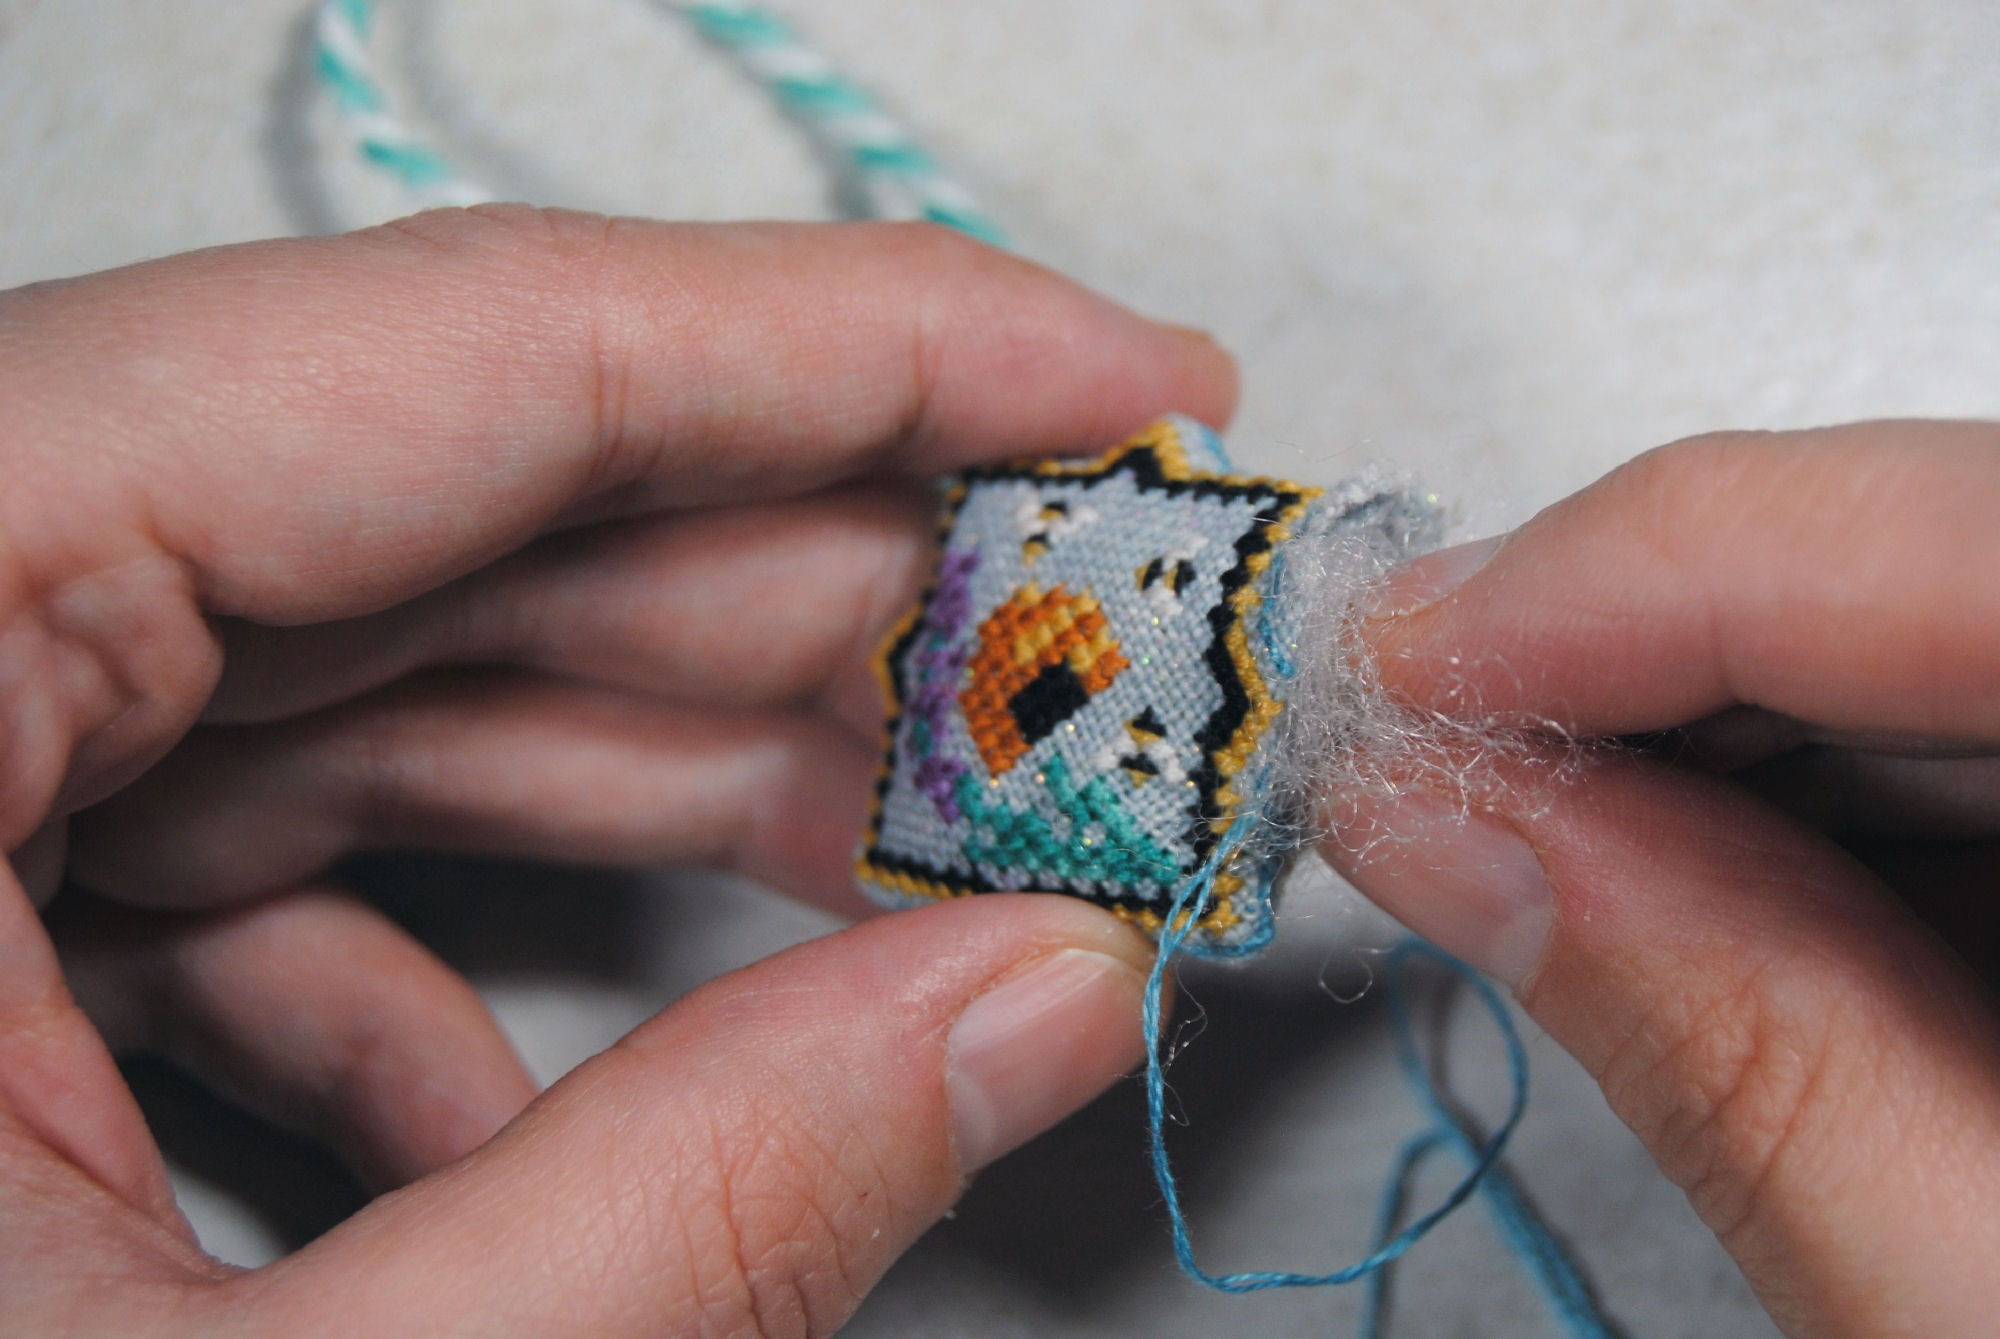
Stitch to the bottom
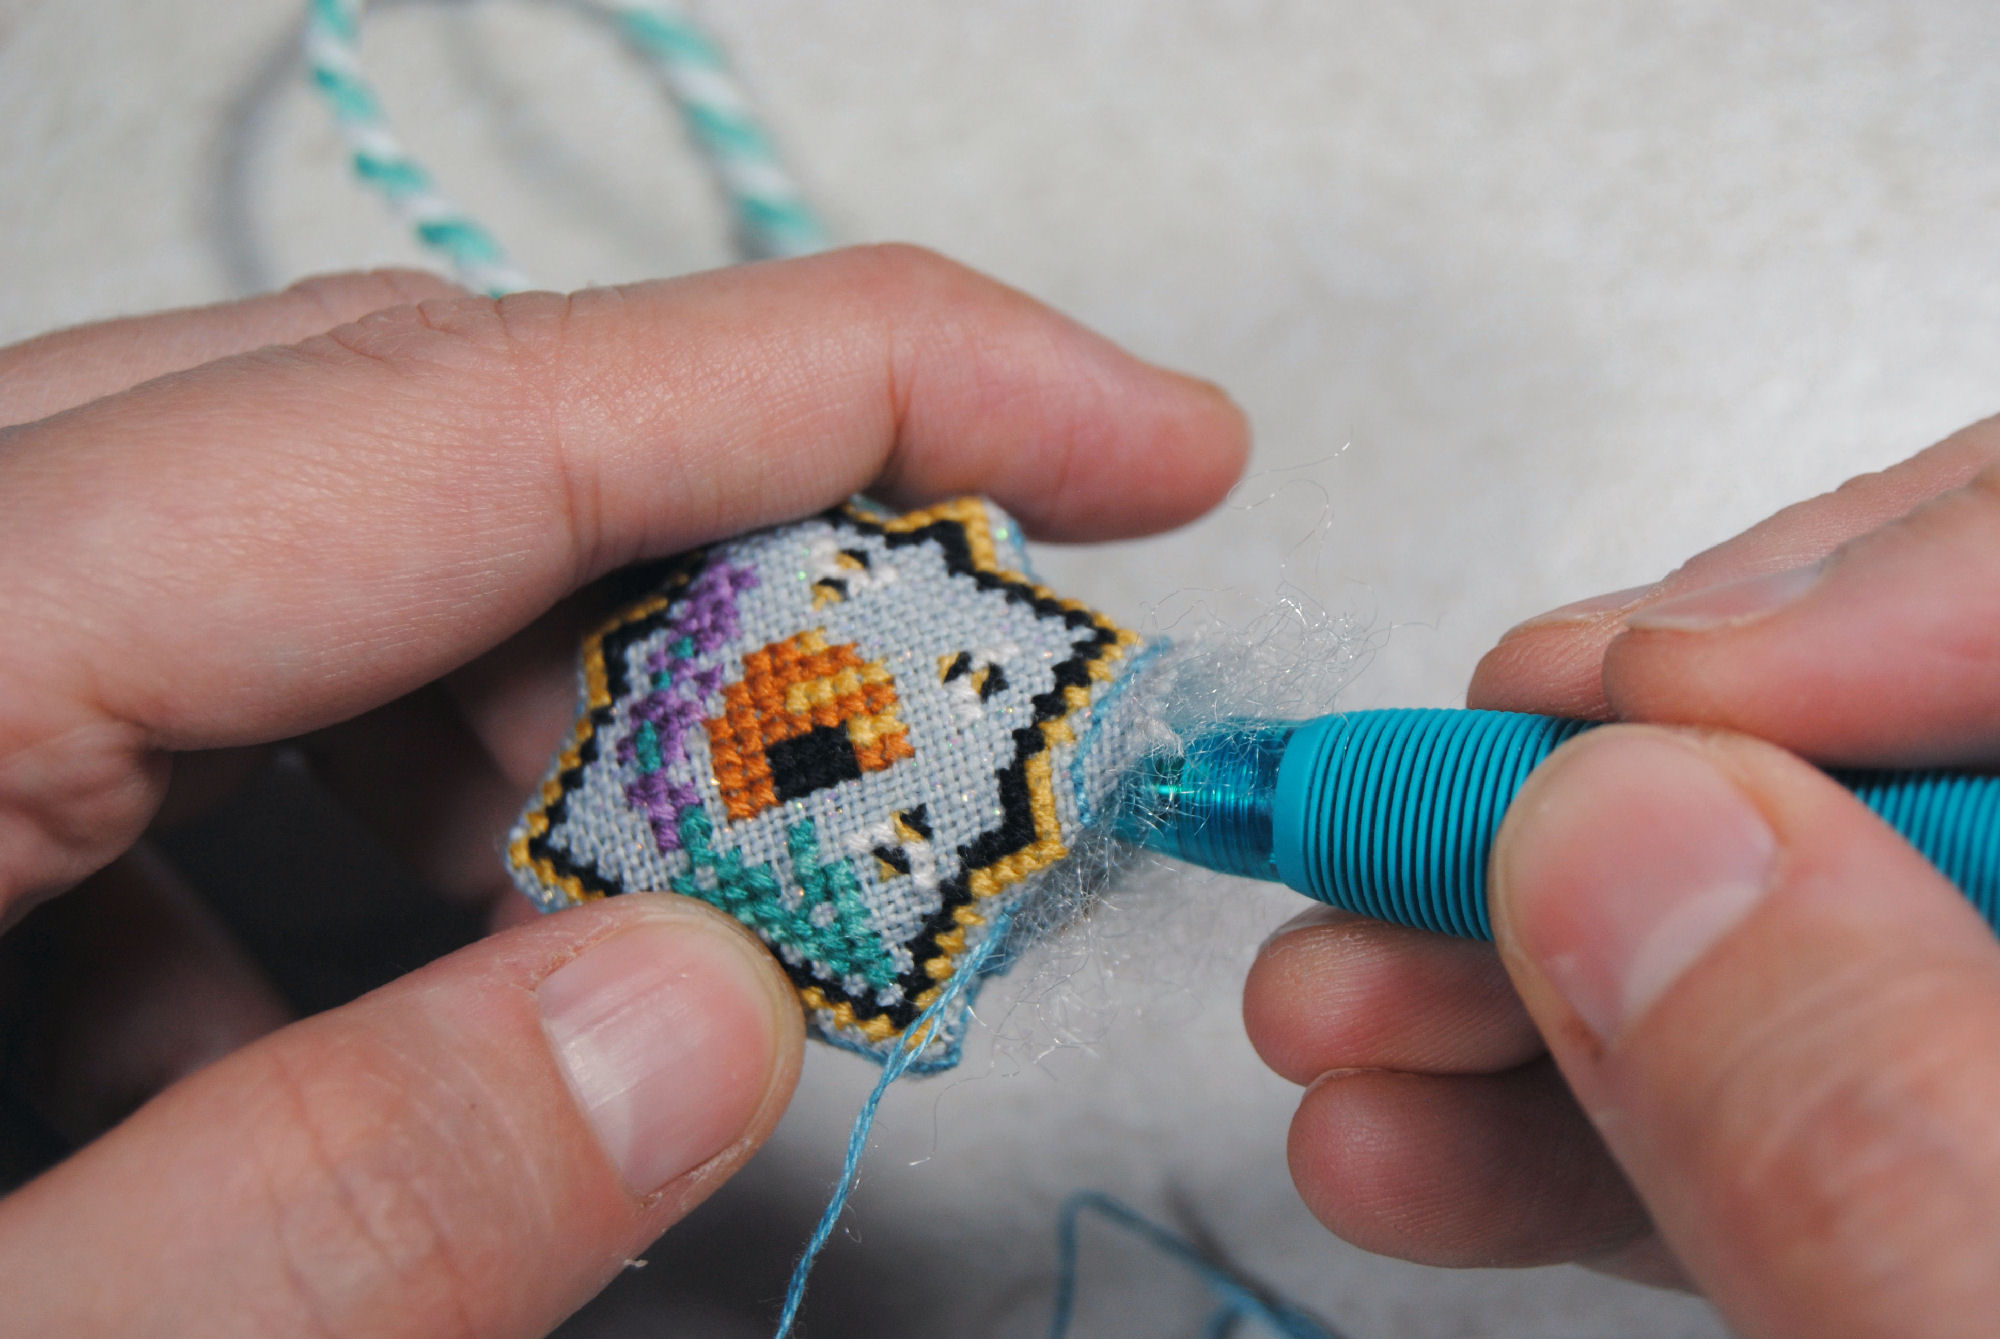
After that brief poking break I kept on stitching until I reached the bottom of the design. Now with 3/4ths stitched up I filled my little shape with some PolyFil. You don’t need a ton for such a small shape, but you do want it slightly OVER stuffed, as it will compress over time.
You can also choose to fill it with whatever you have on hand. Whether that be orts, dryer lint, rice, or whatever else you use to fill your biscornu and similar finishes. If you want to add another cord, ribbon, tassel, or charm to the bottom you can add it now if you wish. I’ll be adding my embellishment later, though.
Again, use a chopstick, pencil, or whatever else you have on hand to tuck in your filling as you continue stitching around the edge.
You can also use your needle to carefully push the fabric and stuffing in as you go.
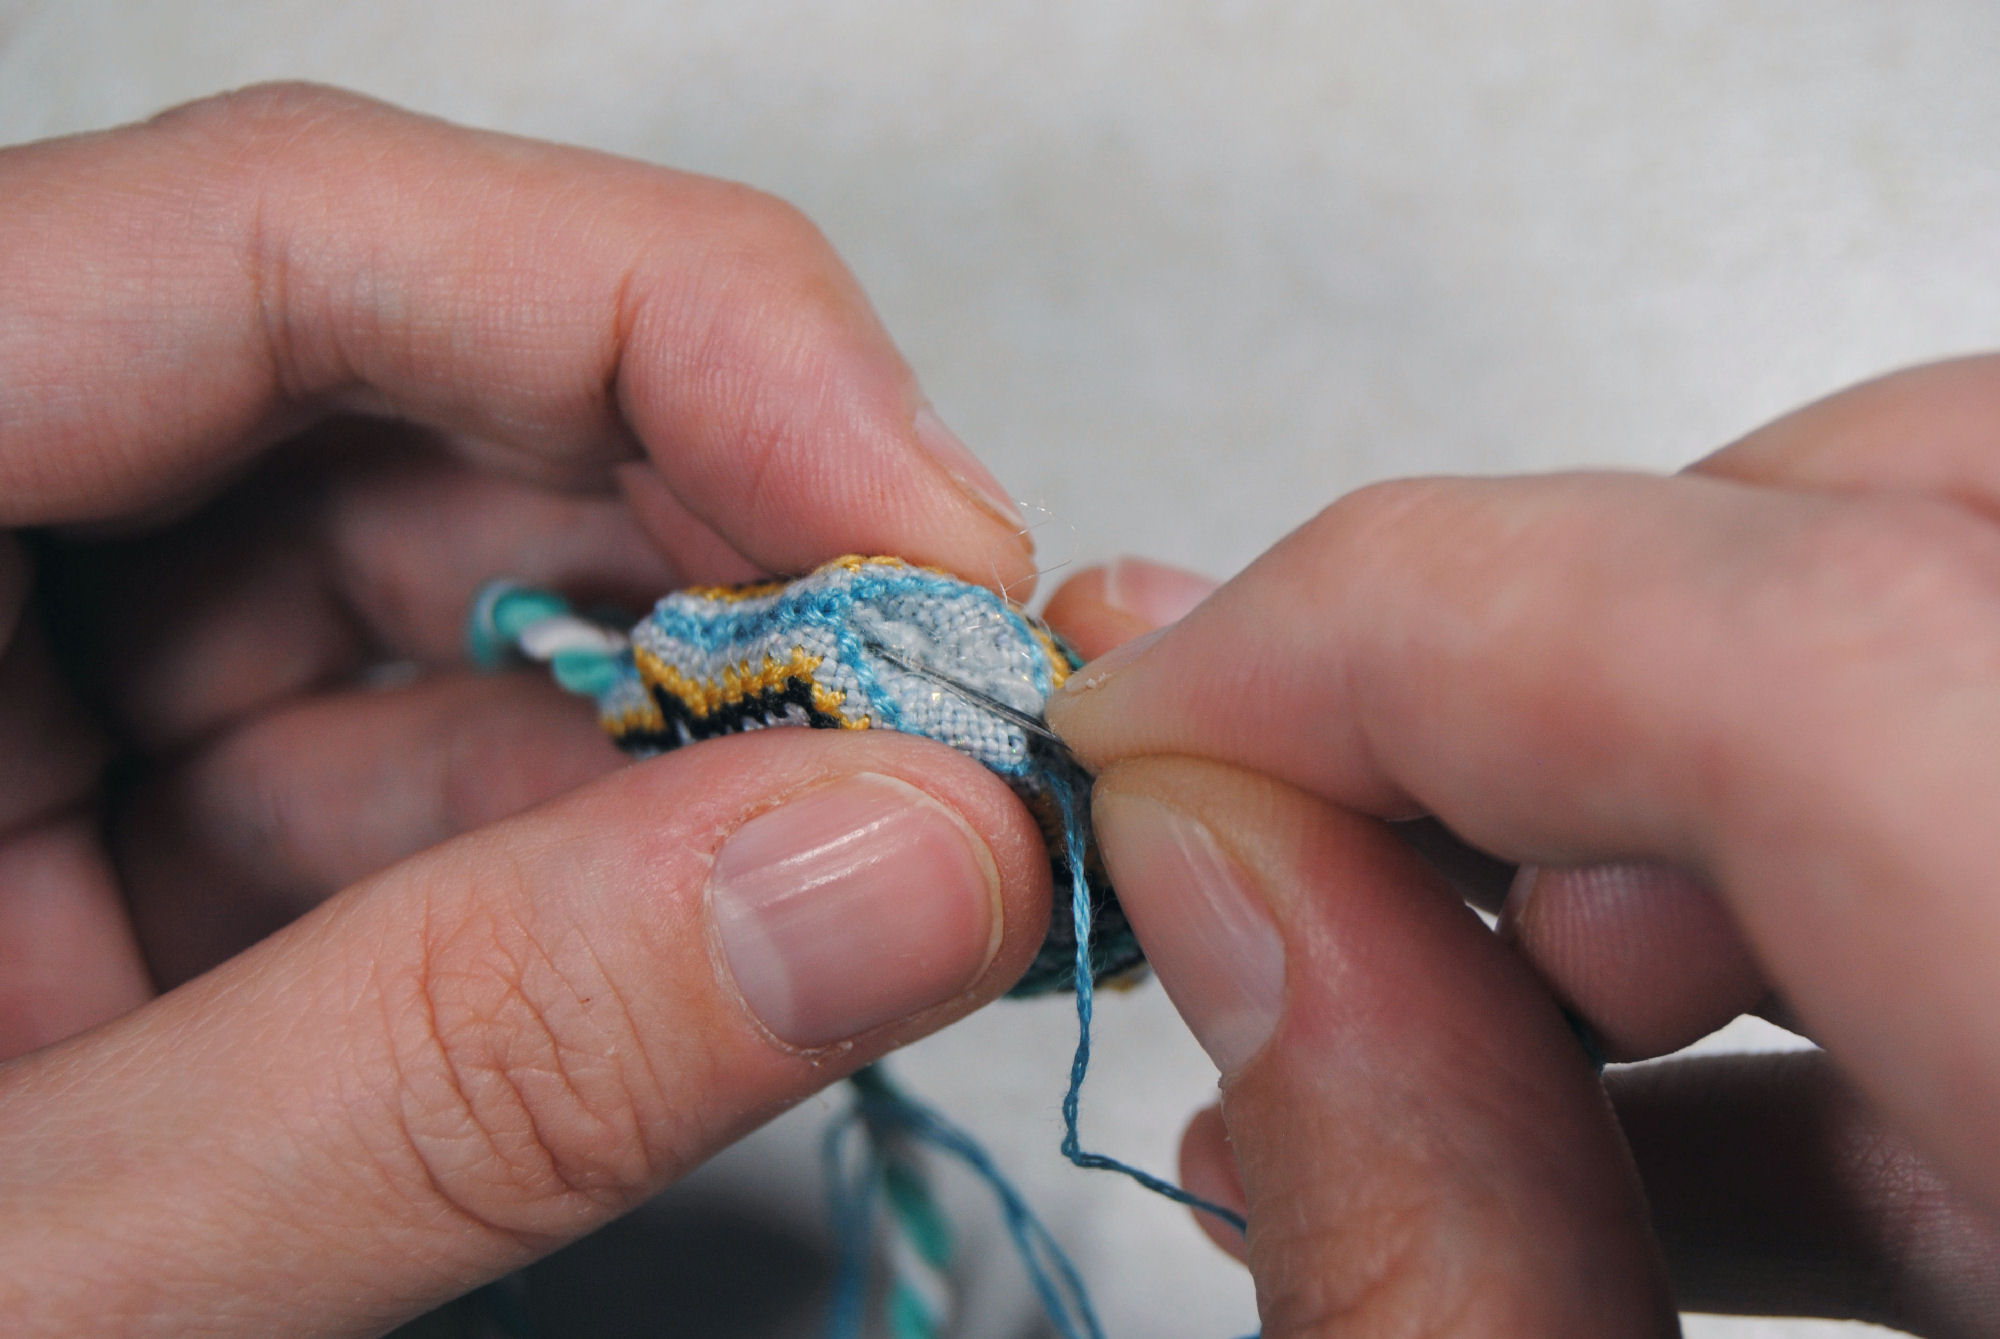
Eventually, you’ll make it all the way around your design and you’ll be able to tie it off or tuck it into some of the surrounding backstitch before trimming your thread.
Embellishing your scissor fob!
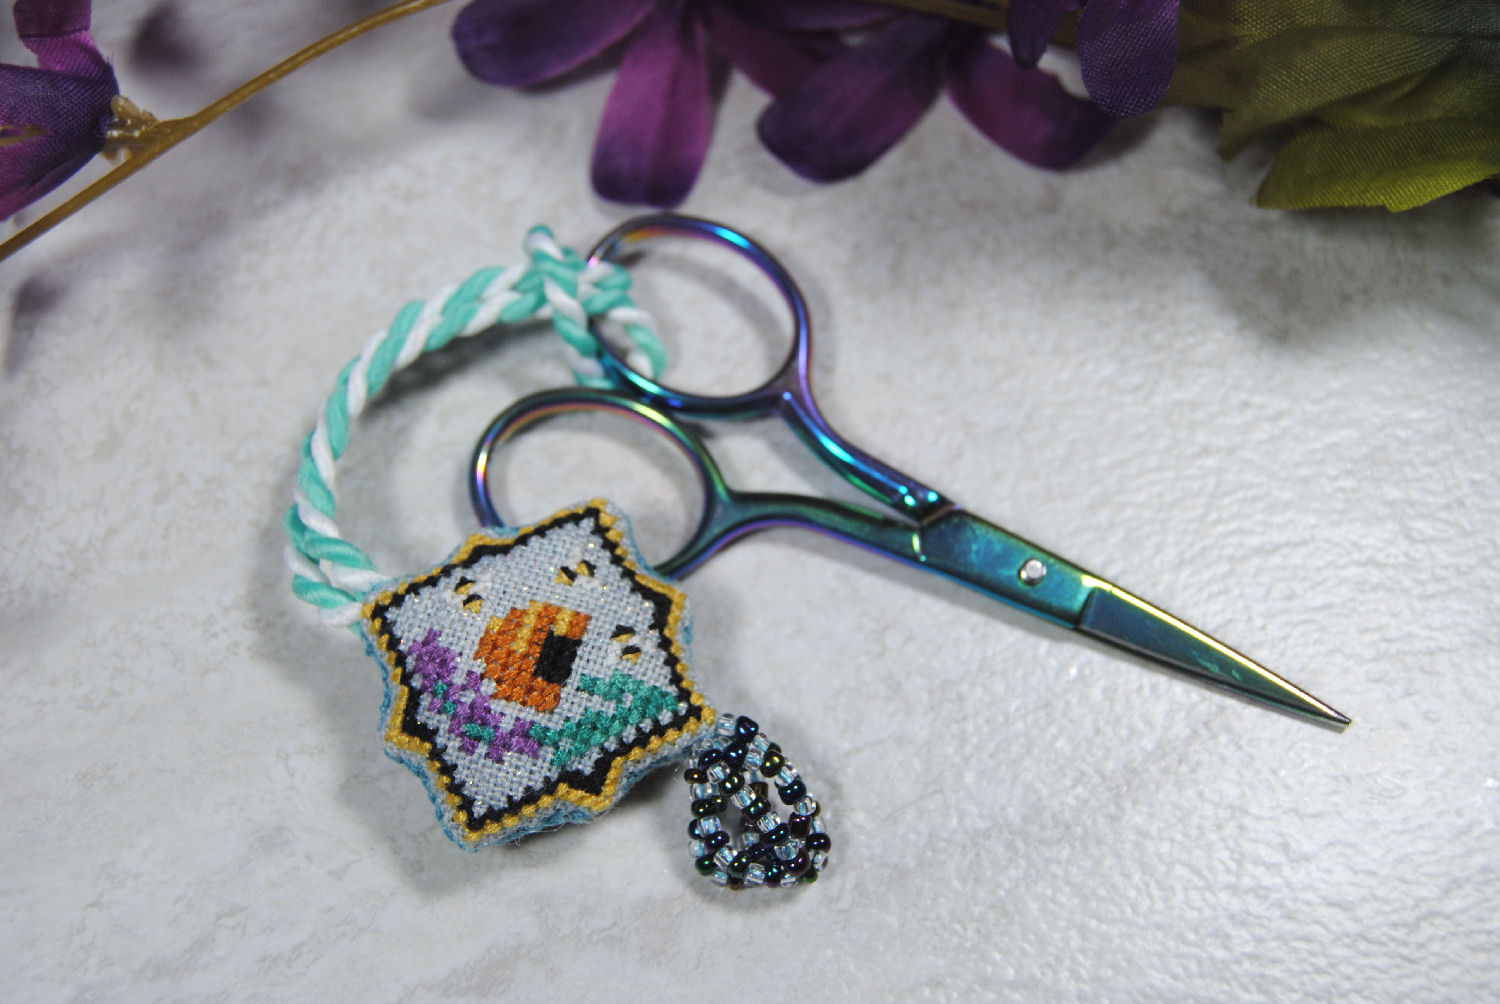
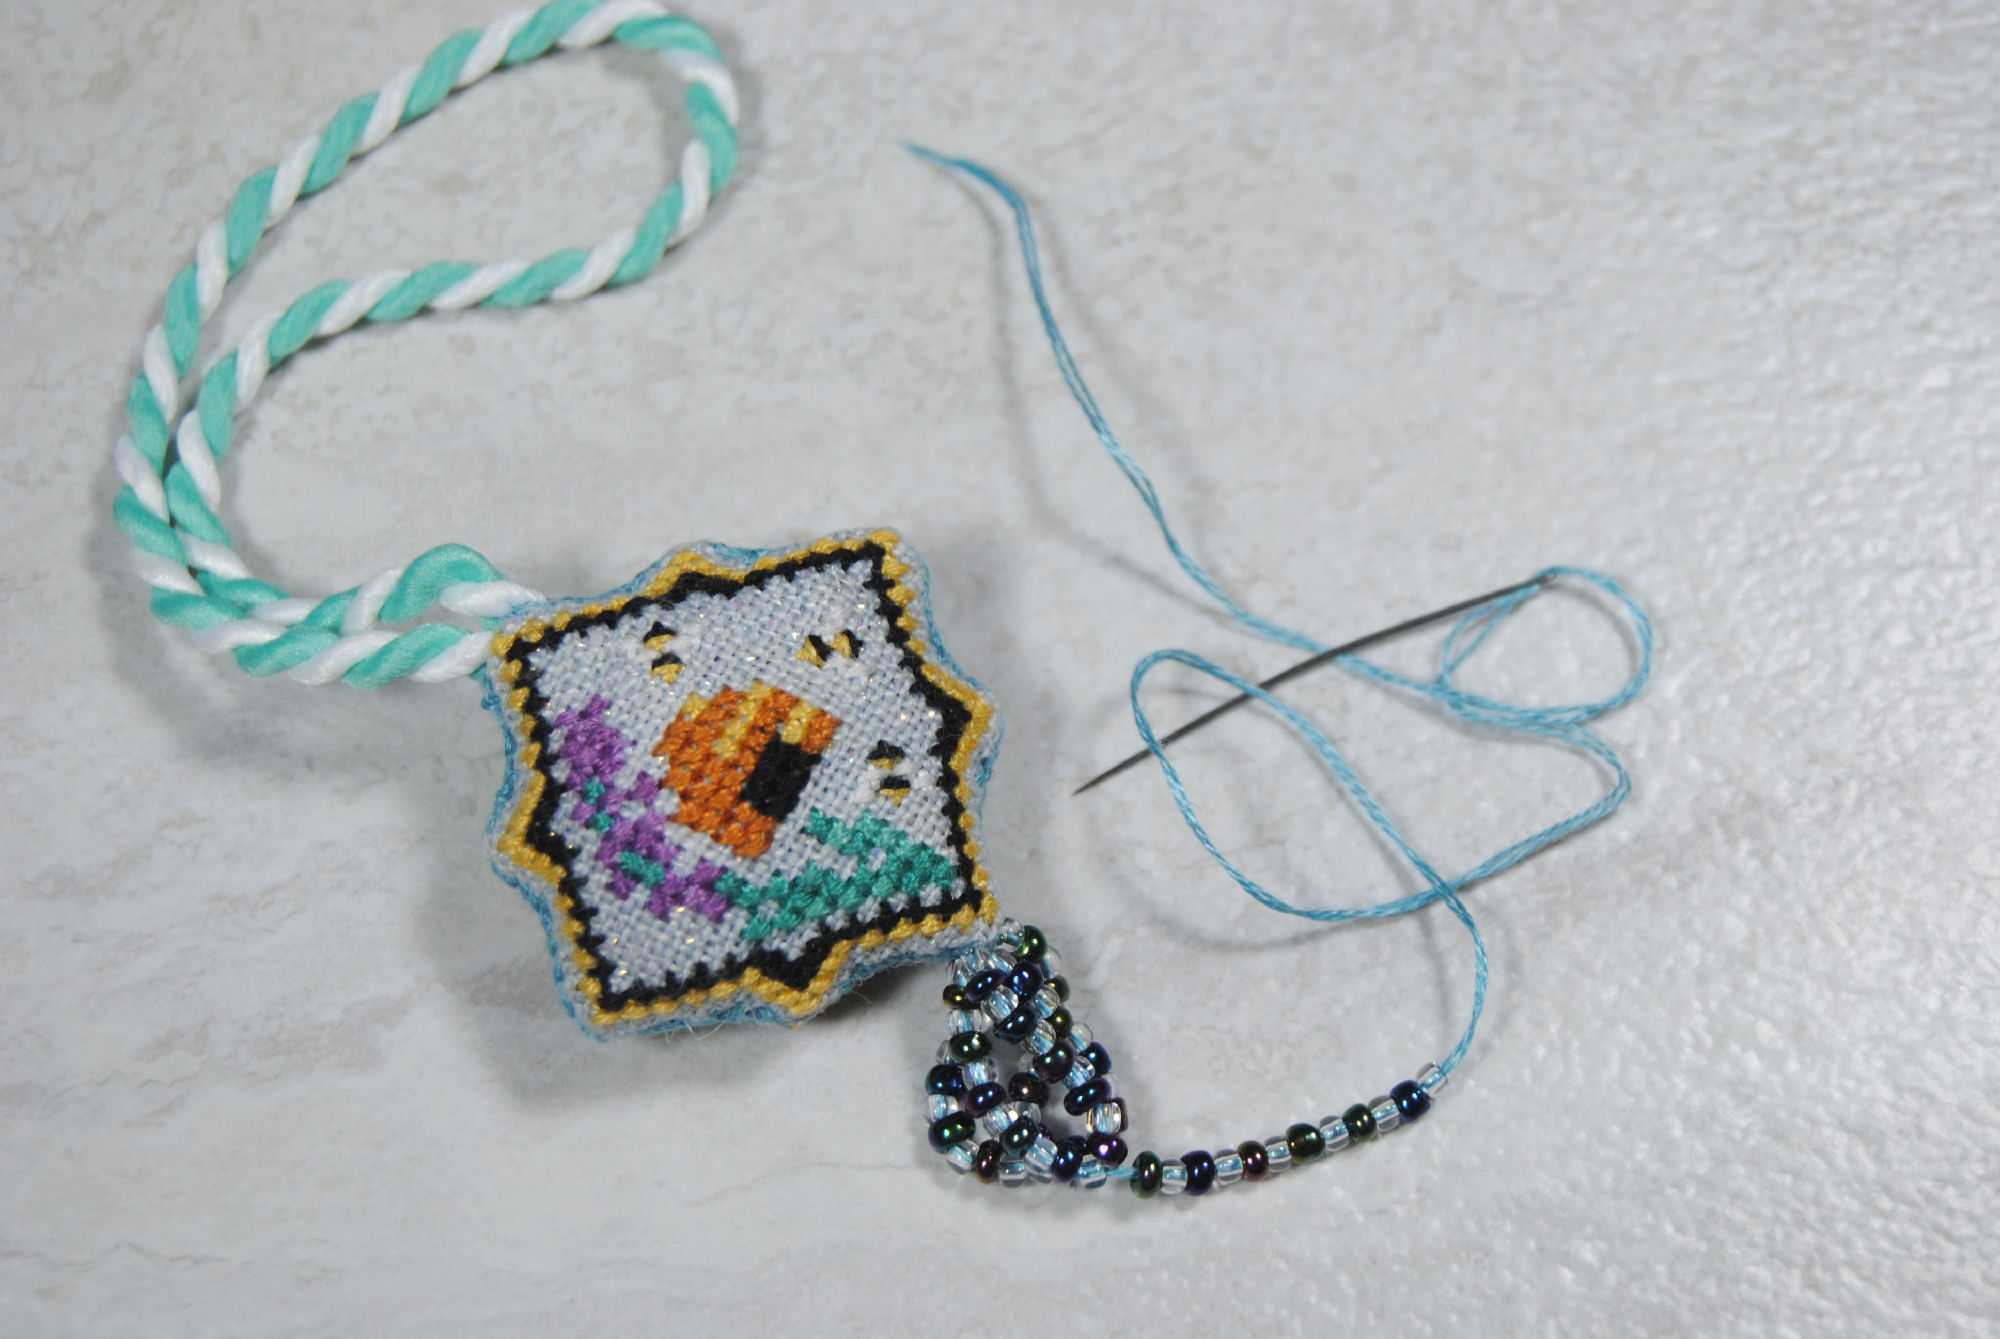
Now you could just be done here. But I wanted to add a little more to it. I’ve had these iridescent beads for ages and never seem to find a good excuse to use them, so I decided to make a tassel-like shape out of them.
If you’ve never worked with beads before, I have an article on working beads into your cross stitch projects as well. For the curious, these are 11/0 sized glass beads by the brand “Cousin”.
I also used clear beads, allowing the color of the thread to tie it together with the rest of the fob.
Admittedly I did not take many photos of the process, so I’ll try and describe it in words instead:
I anchored my thread to the bottom of my fob, then made a string of alternating rainbow and clear beads twice as long as I wanted my ‘tassel’ to be (about 4cm), and then looped back to the top and stitched it to my fob where I had started.
Then I did it again, stopping at the halfway point to run my needle through the middle bead of the previous loop.
Finally, I did the same thing one last time, making a bundle of what looks like 6 small strands all connected at the top and bottom.
The Finished Scissor Fob
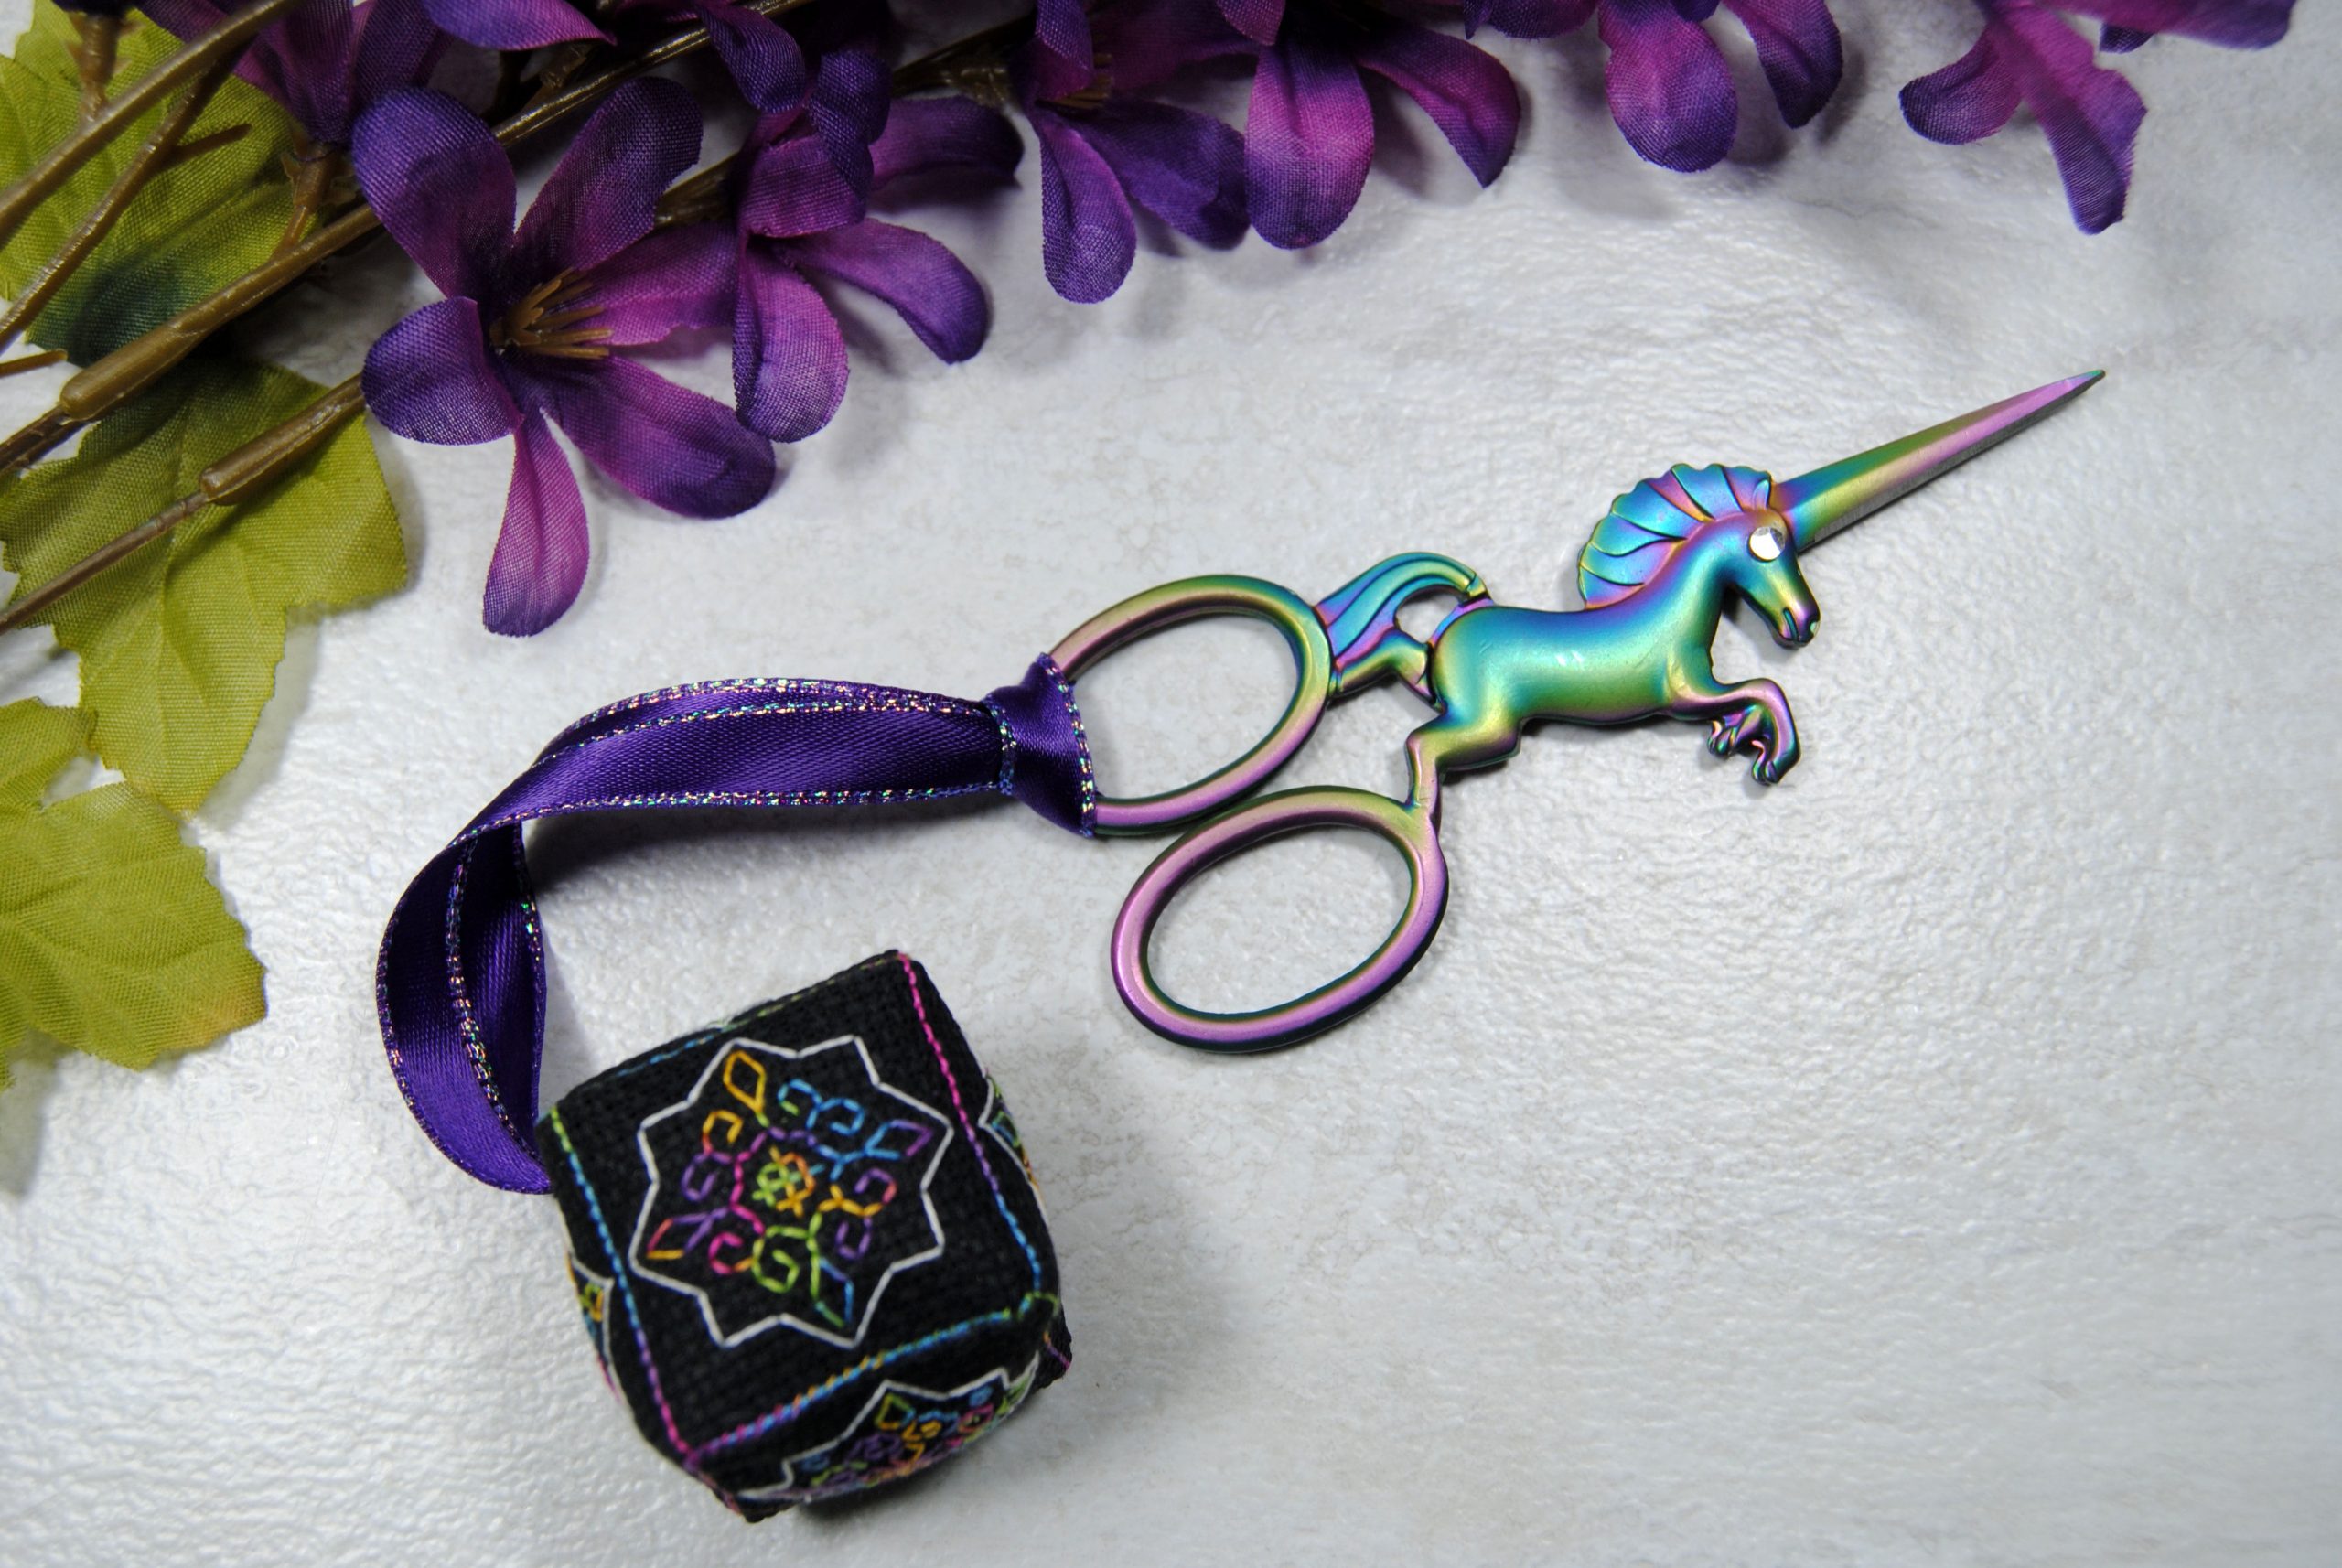
And here it is, attached to some rainbow scissors to match the rainbow beads.
Now to get to work on my next project. A biscornu that matches my new scissor fob. By the time this article goes public, it should be done. So make sure to follow me on Twitter or Instagram to see how that turned out!


