
Snowglobe Ornament – Add Some Holiday Magic to Your Cross Stitch
Back in July I did a couple of ornament tutorials using styrofoam balls. I really enjoyed it, and have made another 7-8 as gifts for my family so far. But I wanted to try out yet another style of ornament, so I’m here to share with you the process for making a snowglobe ornament!
If you’re curious about the other tutorials, find out how to make a Quilted Cross Stitch Ornament or a Fabric Ornament.
This post may contain affiliate links. If you buy something using one of these links, I earn a small commission. However, there is no extra cost to you. Thanks for understanding! Learn more in my Disclosures & Privacy Policy.
Table of Contents
Materials
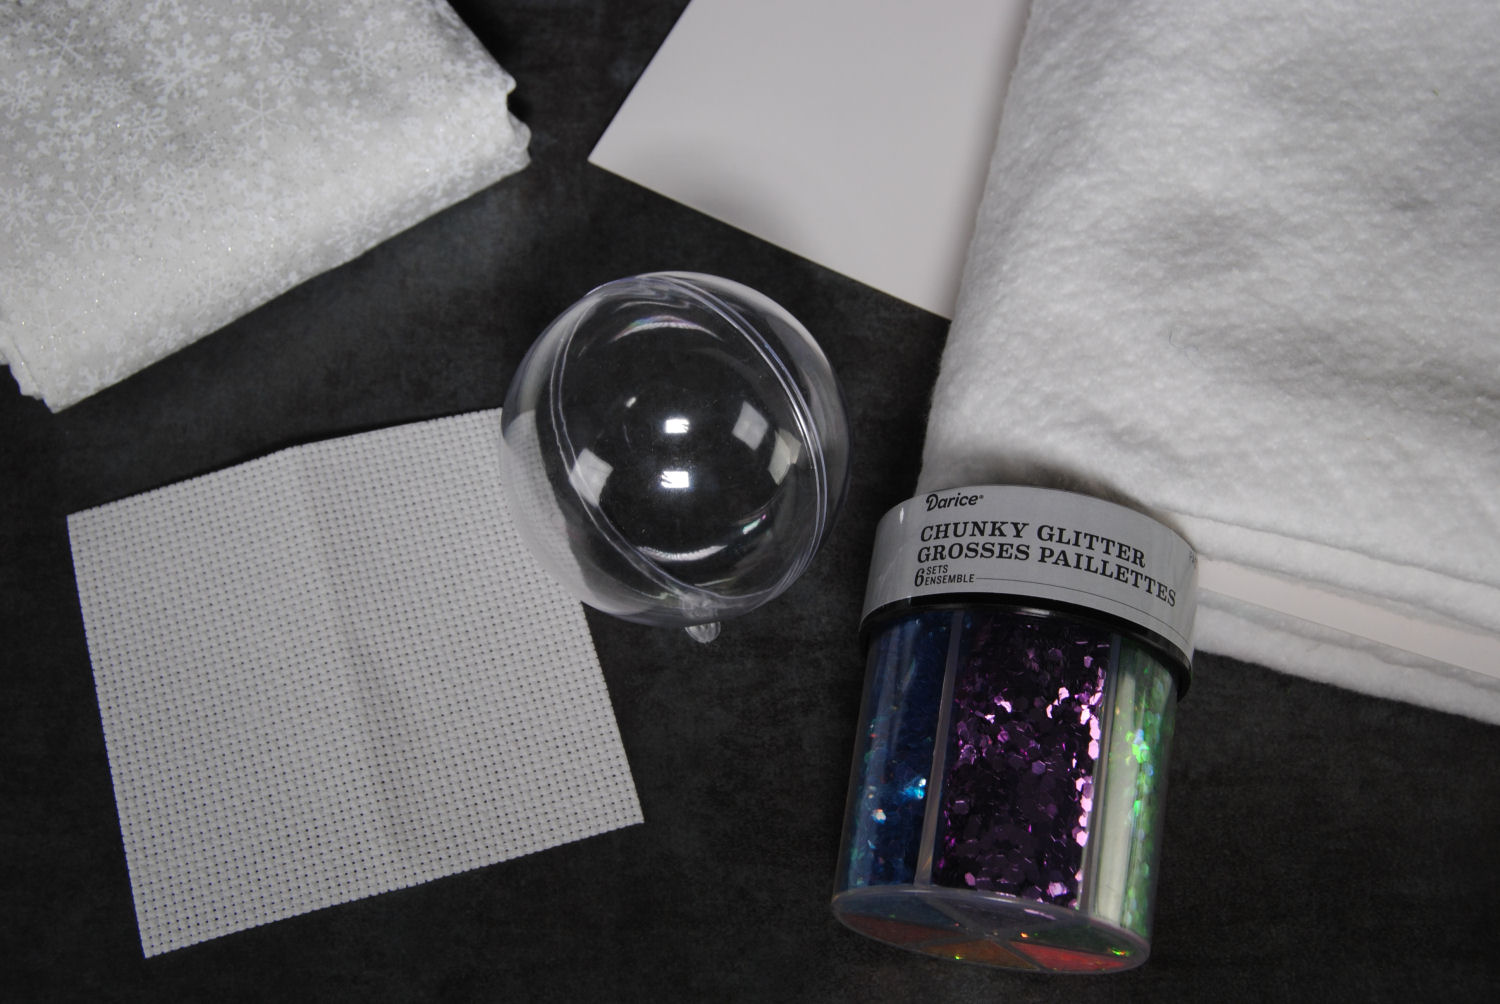
- Clear, snap-together plastic ornament – The ones I got came with various sizes, some waaaay too small for any cross stitch. For my example I used the 7cm (3 in) ball. You can find packs with just the size you want, or use the sizes you don’t need to make Ort Ornaments. It’s up to you!
- Backing Fabric – If you don’t want to stitch your design twice, you can opt to use some fabric on the back that you think would look good with your design. I chose this glittery snowflake fabric.
- Backing Board – Cardstock or thin cardboard. I typically use comic book backing board.
- Cotton batting or craft felt – Optional, but gives your ornament a bit more dimension.
- Snow – It’s a snowglobe, so you need something to use for snow! Get creative. You can buy the little styrofoam balls, craft snow, or improvise with what you have on hand. Glitter or chopped up leftover orts make great alternatives.
- Cross Stitch – You’ll want to figure out the size limit of your design depending on the size of the ornaments you chose. And your fabric based on the design. I’ll discuss how to do that below.
Choosing Your Design

The first thing you’ll want to do is measure the size of your snowglobe ornament so you can pick an appropriately sized cross stitch pattern.
I simply traced half of my globe onto aida with a cheap washable fabric pen. You can also trace in pencil lightly and just stitch on the other side, Or use a spare scrap of aida figure out size instead.
Now count out the widest point, starting from inside the circle. You don’t want to count anything on your line or partial stitches. Ideally your design will fit entirely inside the lip of your ornament.

This is the size I ended up with. I designed my pattern around this size. But if you already have a pattern in mind, or you’re having trouble finding something that fits — try using a higher count fabric! You can fit just a bit more in using 16 count, or double your space by using petit point!
If you want my cute YuleCat pattern, you can get it on my Patreon or Etsy
Prepping Materials

The next thing we’ll do is cut out two cardboard circles that fit inside your ornament. Again, I traced the outside of the ornament, then trimmed it down so it would fit snugly just inside the ornament.
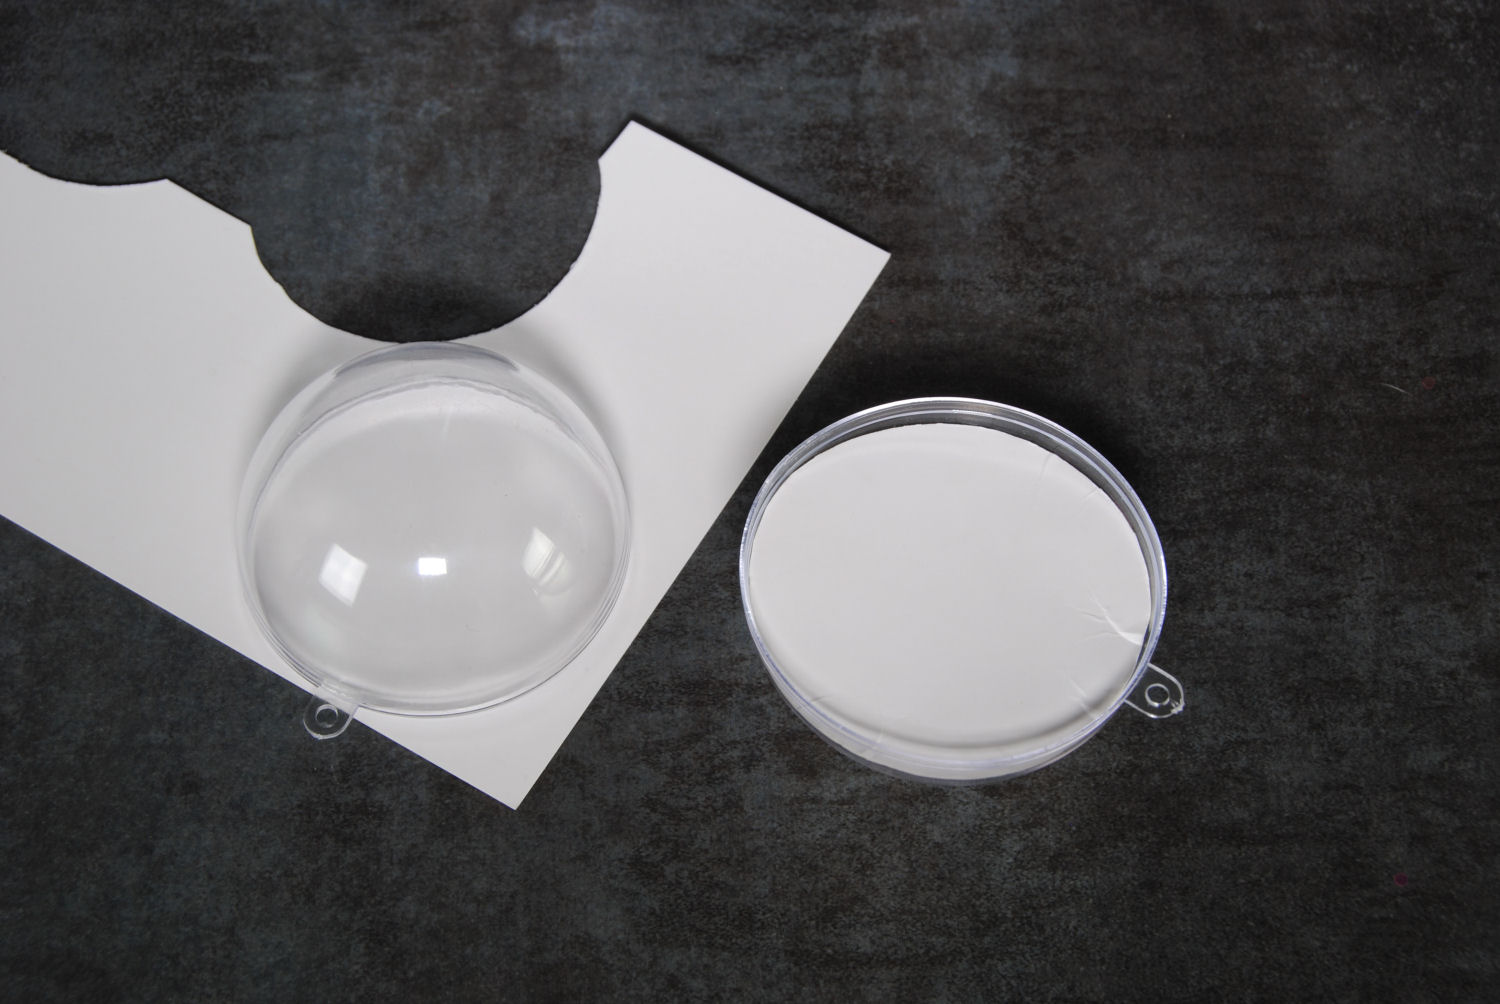
Test to make sure it fits. If it gets stuck inside — that’s good! It’s the right size. Feel free to use a pin or needle to stab through it and use it as leverage to pull it back out, though. This won’t be visible in the end product.
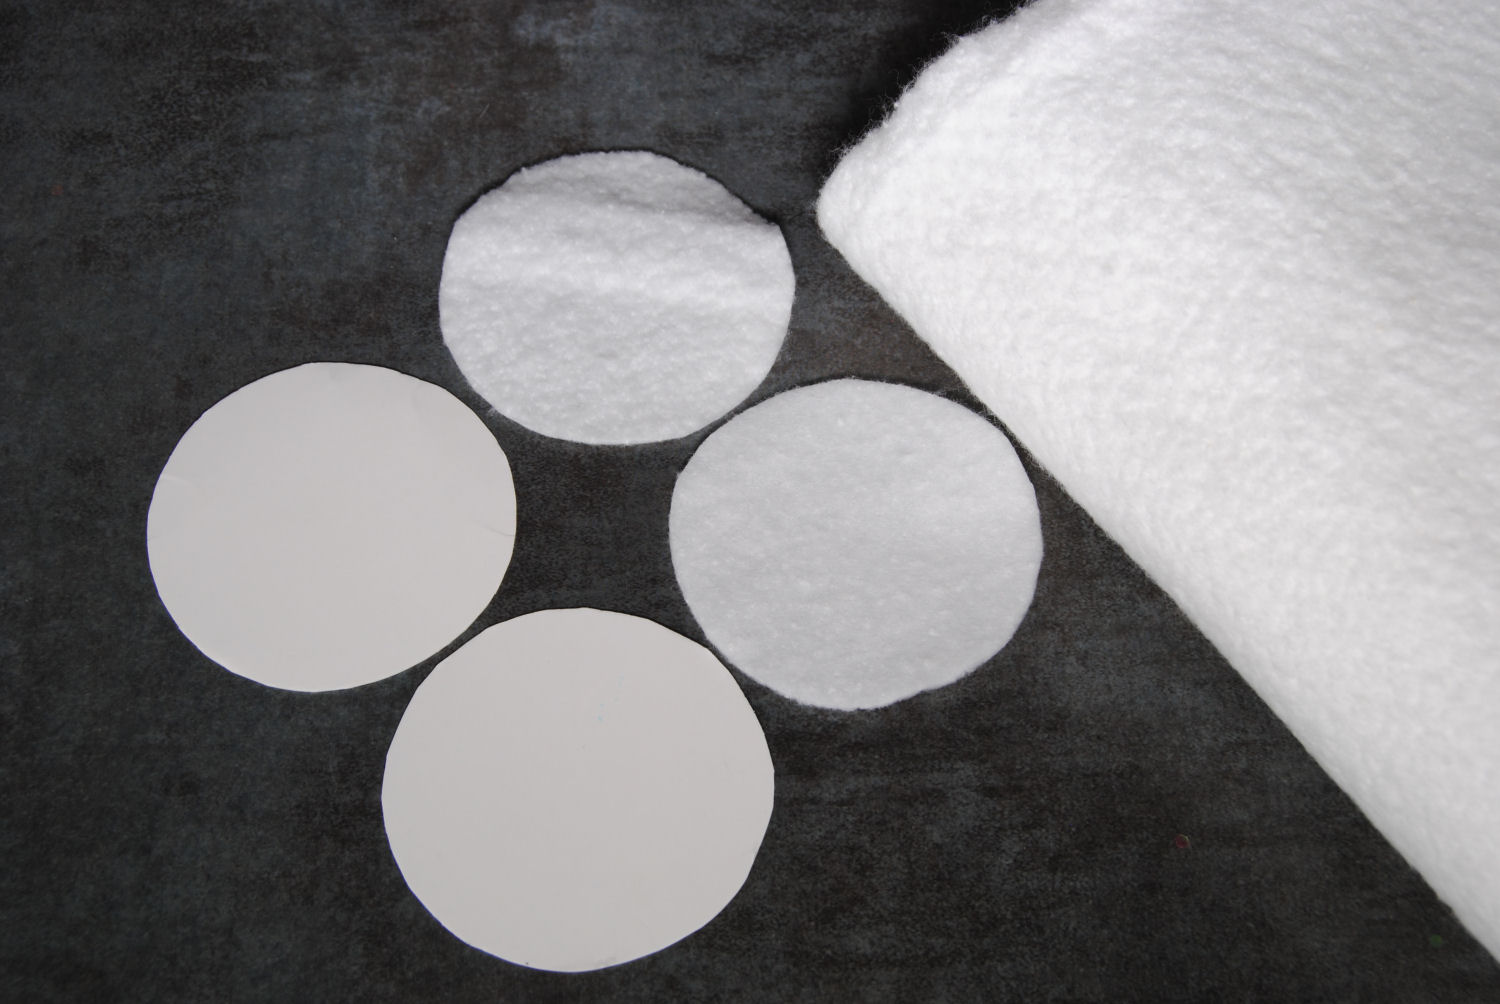
If you’re using batting or felt, also cut out two to match your backing board.
Preparing Your Cross Stitch
If you’ve read my flat ornament tutorial, a lot of this will sound very familiar. It’s the same concept, just crammed inside a ball instead of edged with cording.
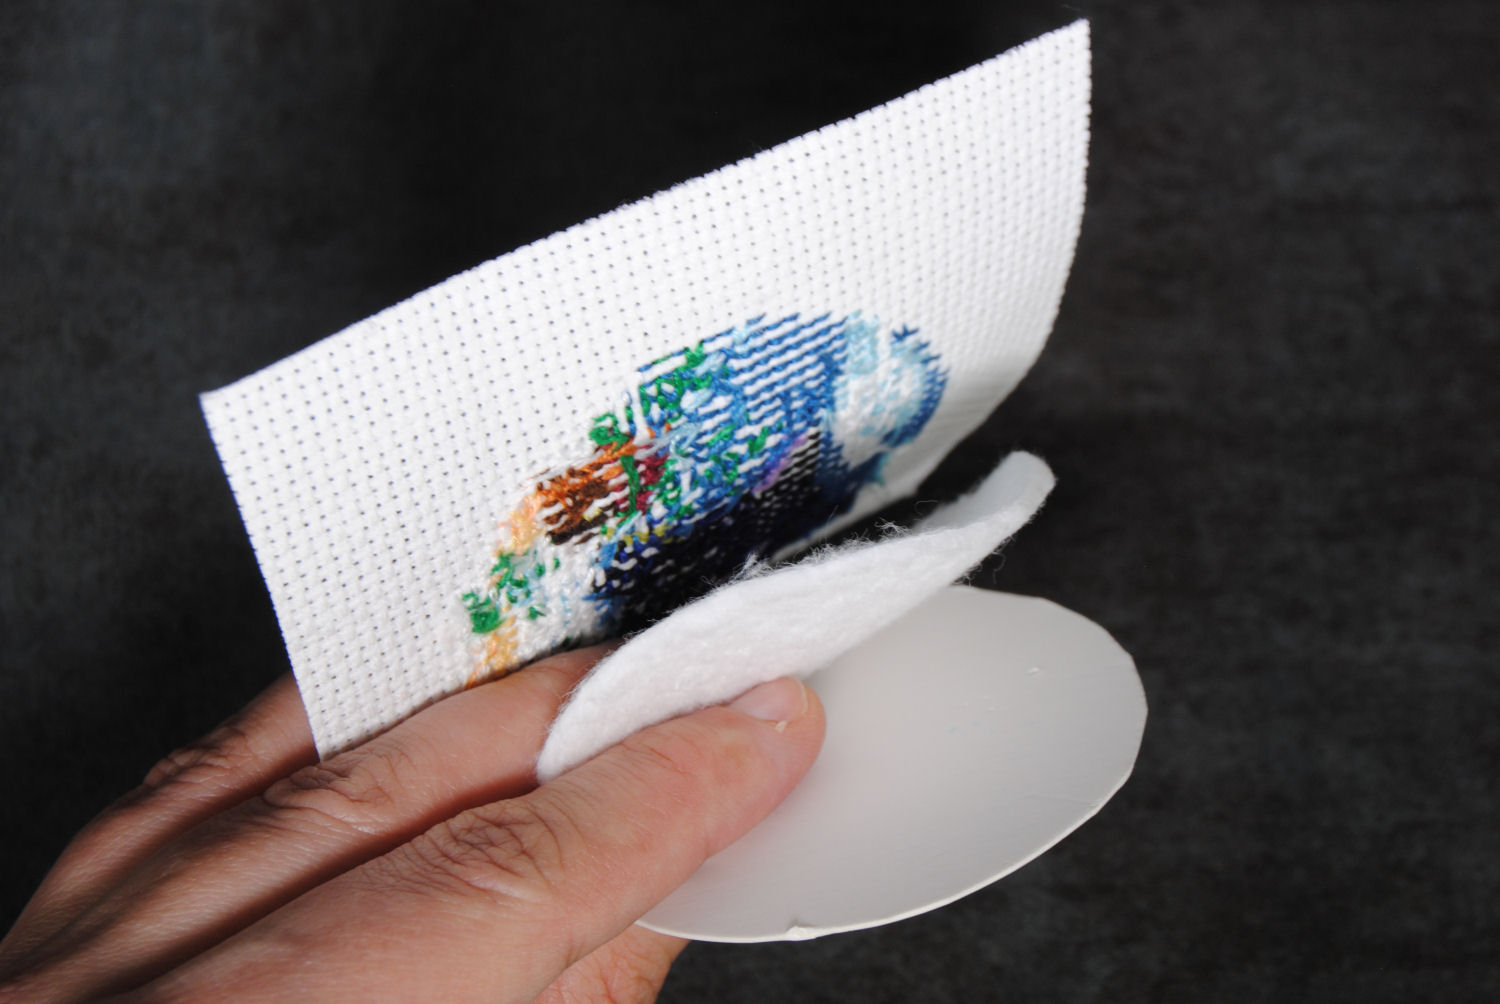
Get your finished cross stitch and place your batting and cardstock circles on the back, lining it up with your design as best you can.
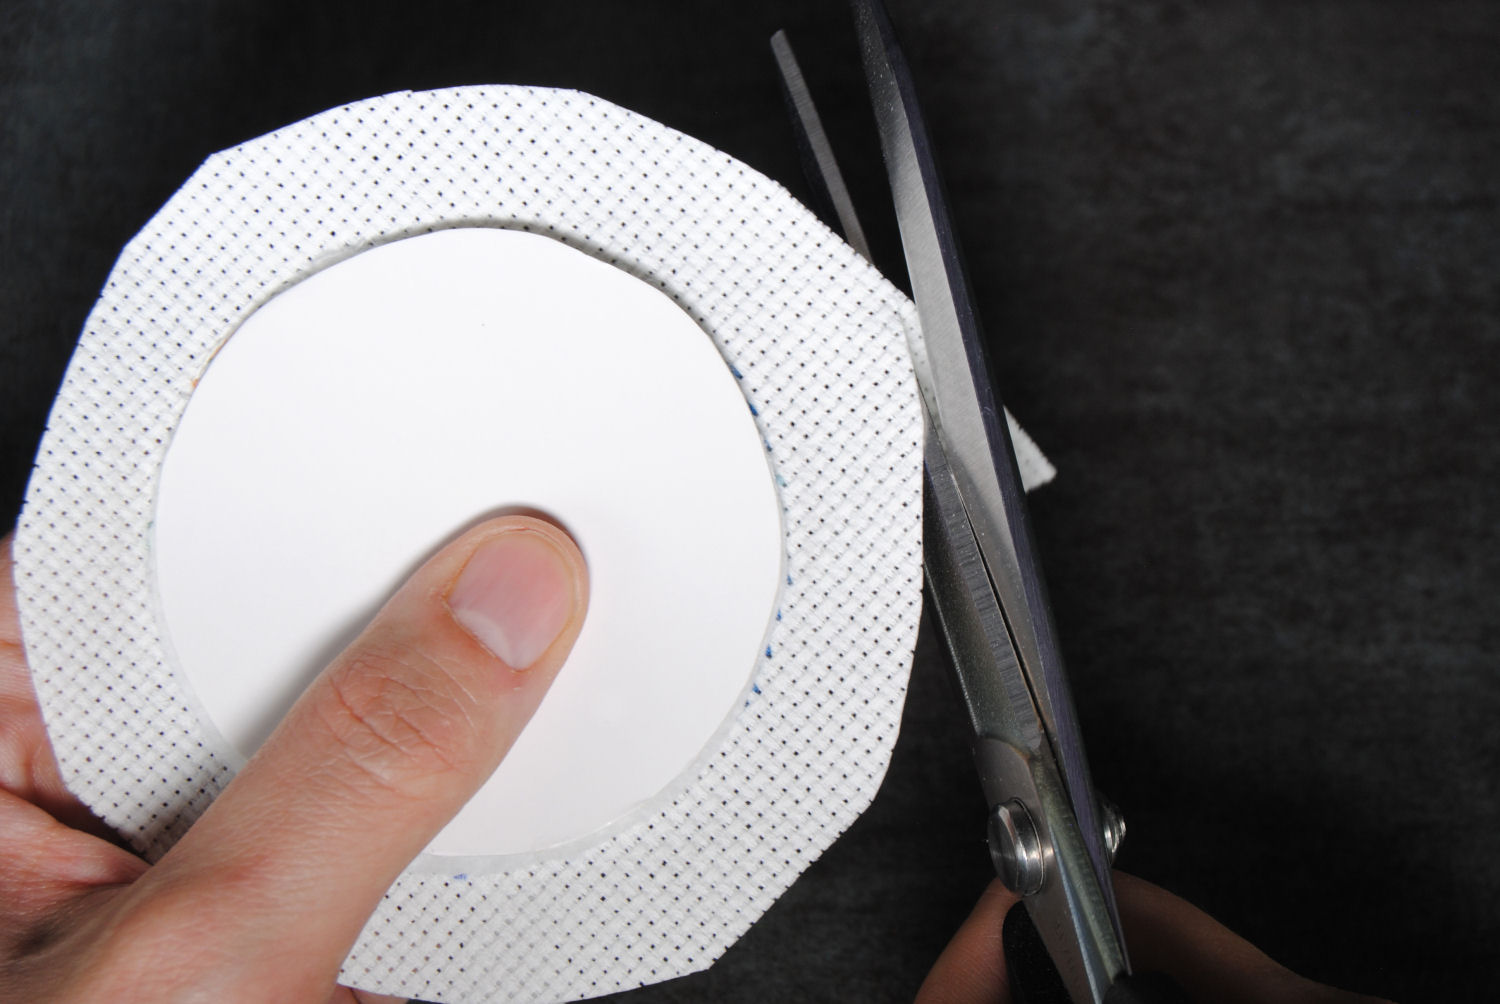
Trim your fabric to about half an inch around your cardstock size. It doesn’t have to be tidy.
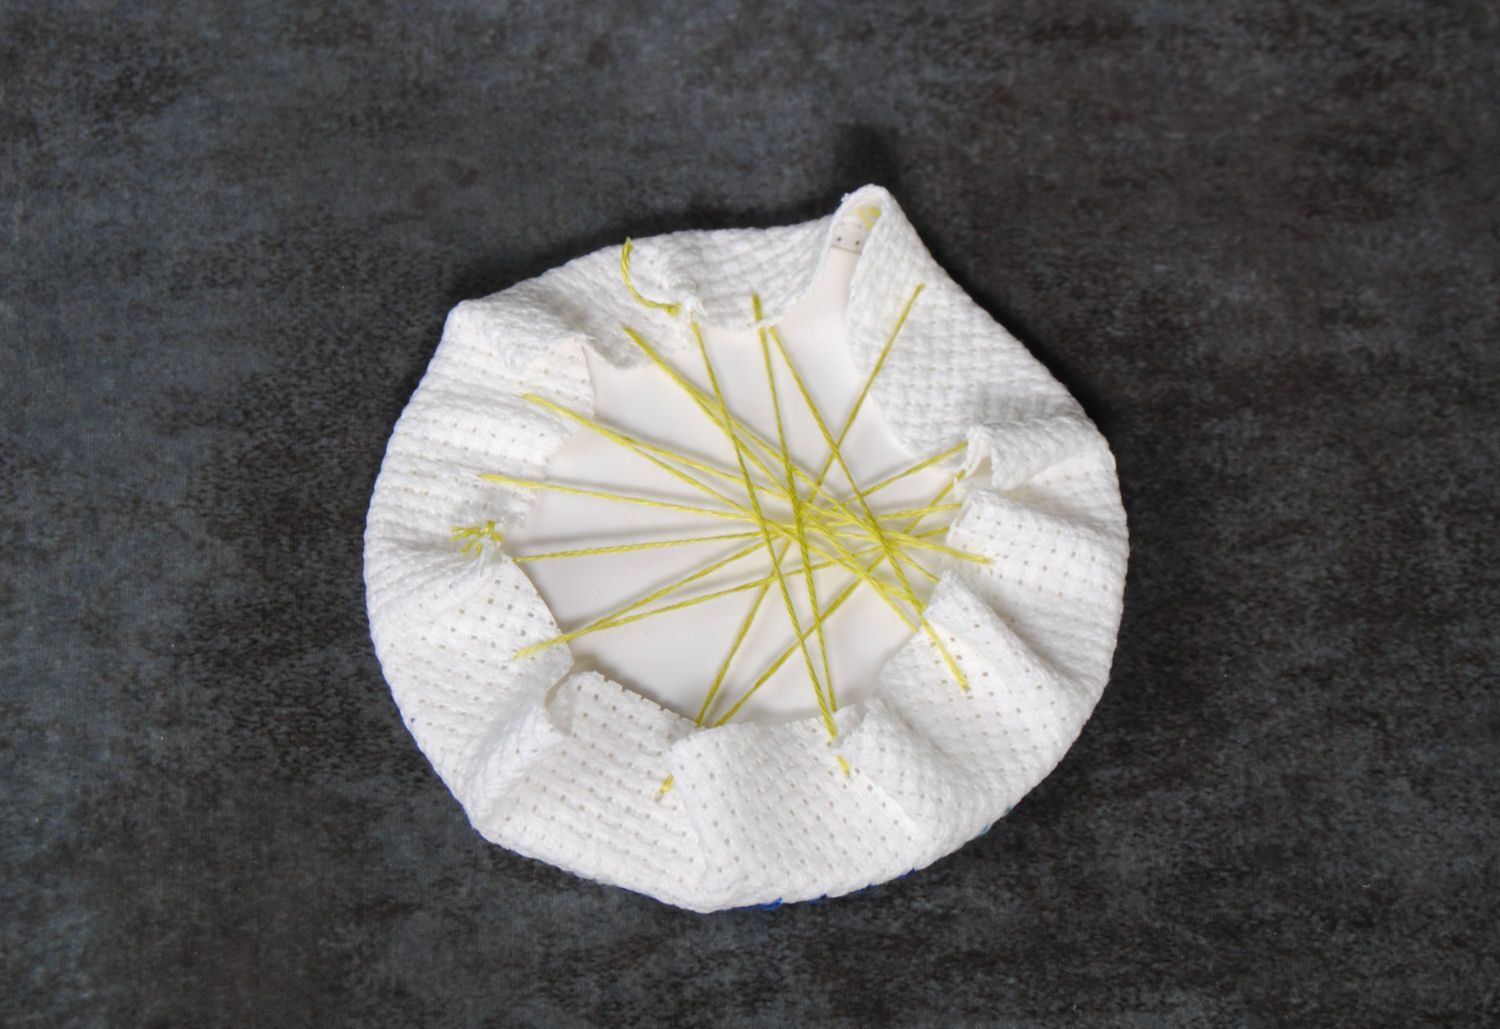
Using any color thread (it won’t be seen), haphazardly stitch across the edges of your fabric, pulling it tight around your cardstock. You can sew a running stitch around the edge to help cinch it in like I did in my flat ornament tutorial, or just stitch across like I did this time. Whichever’s easier for you.
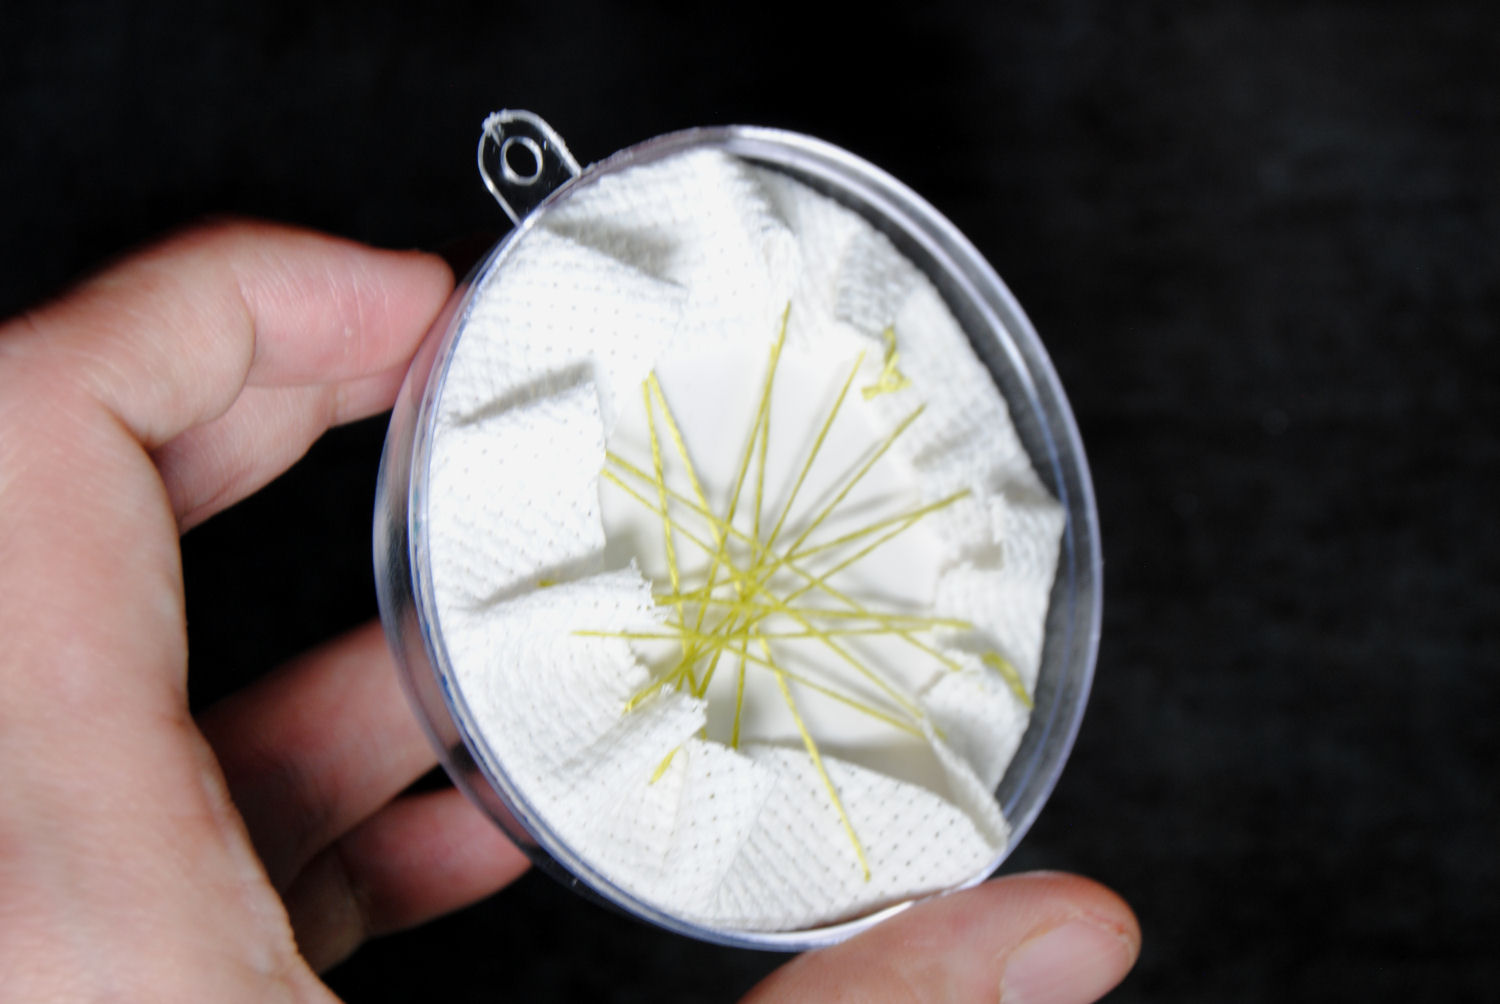
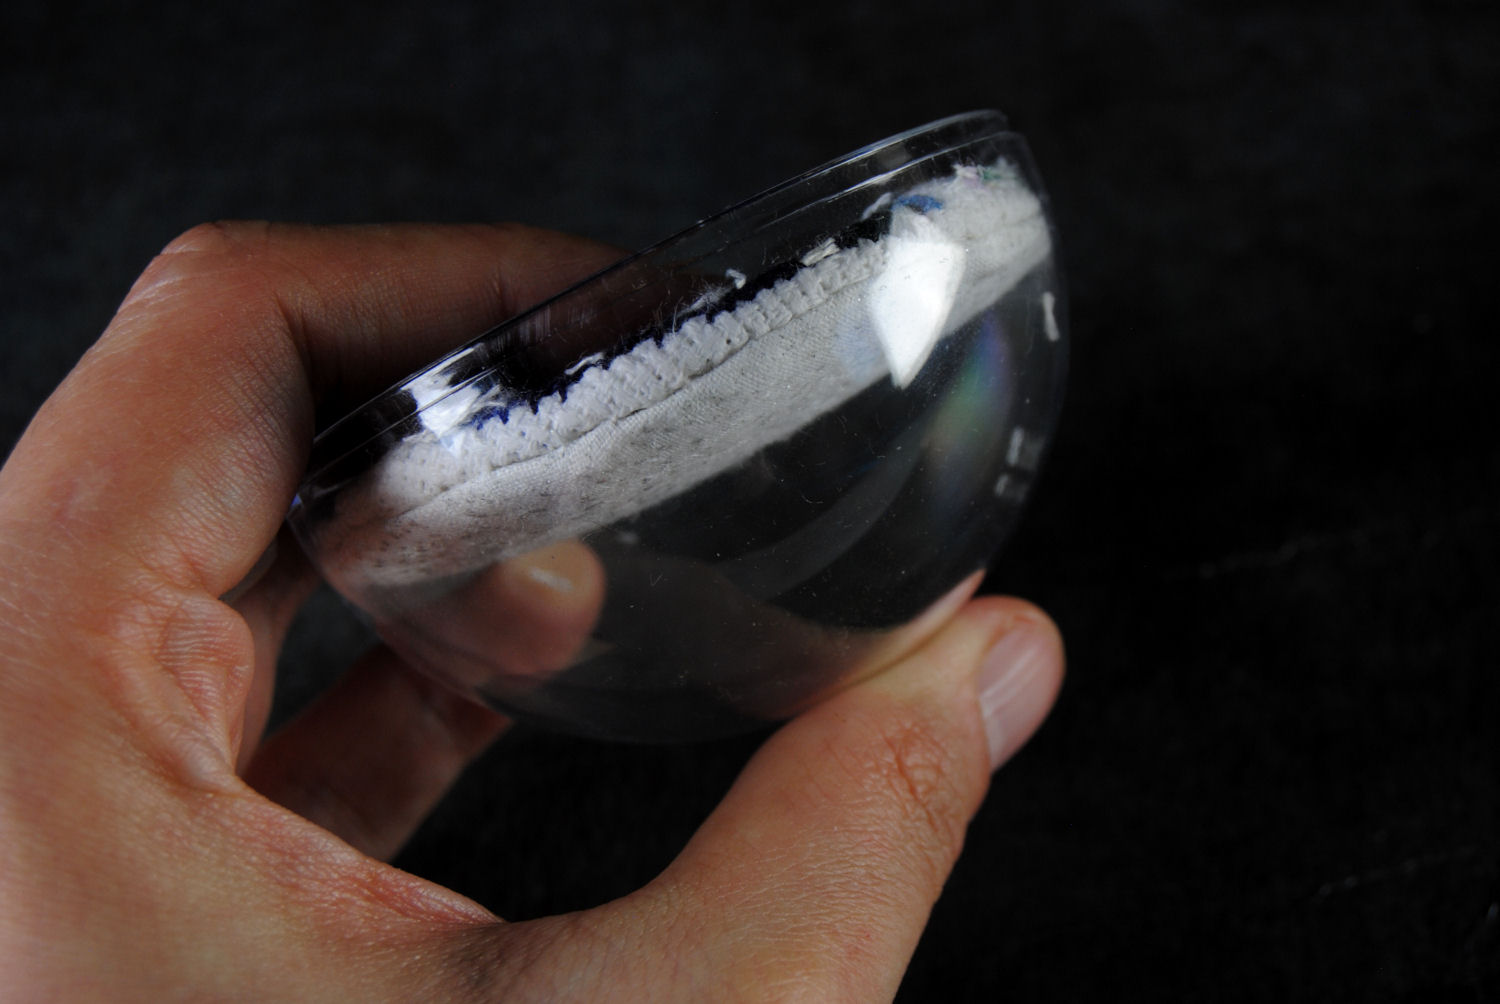
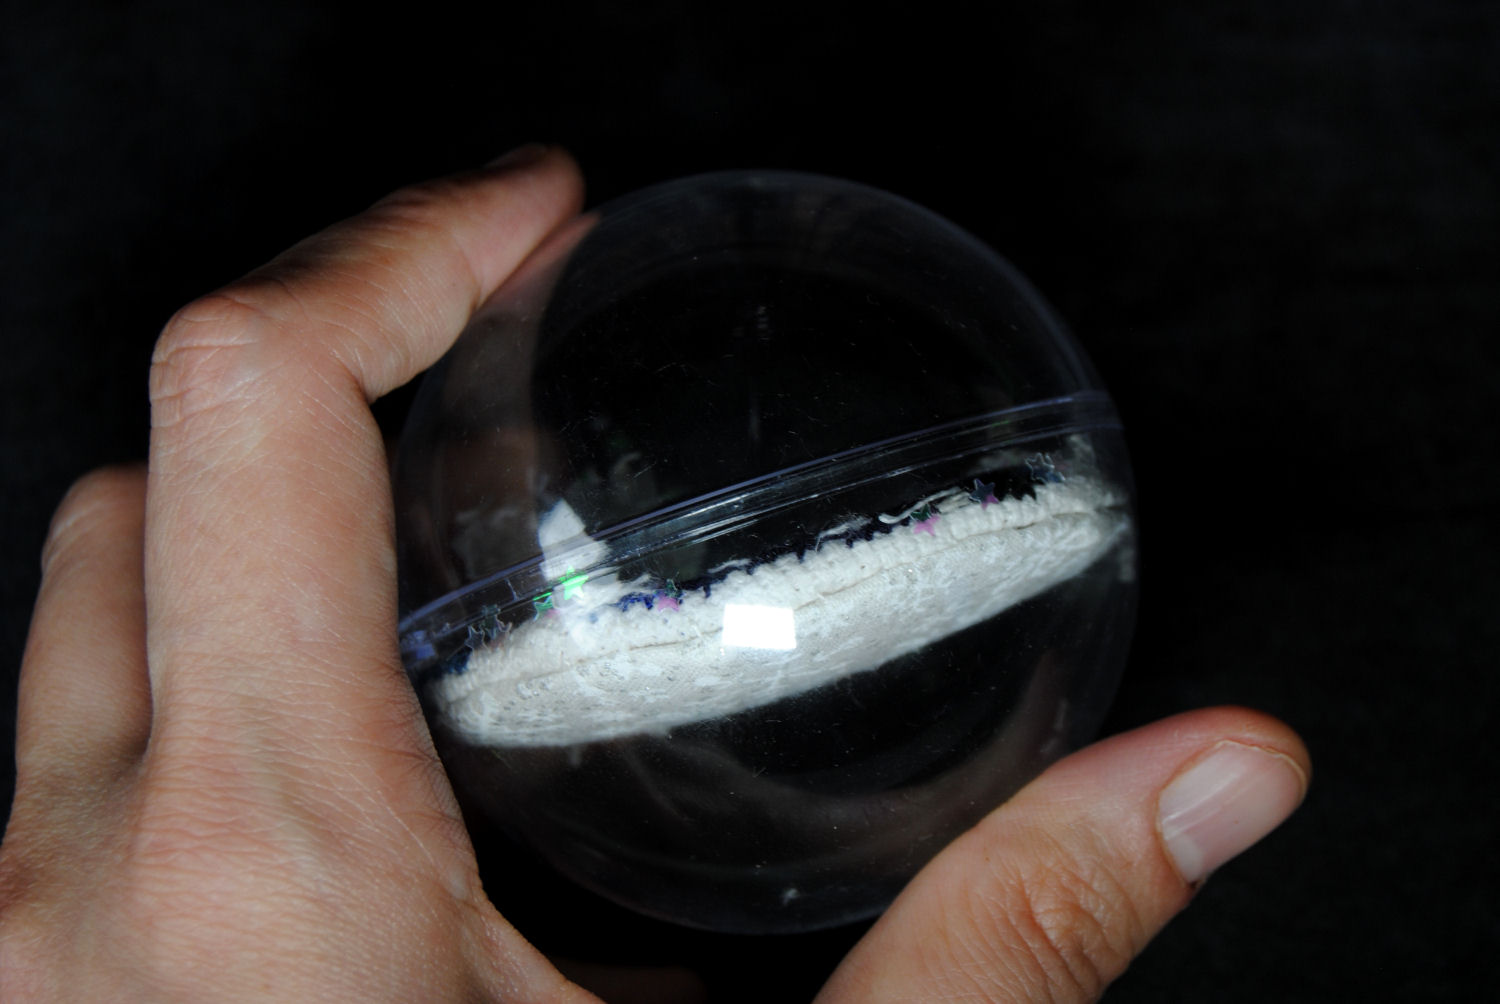
Test to make sure it still fits snugly just inside your ornament with the added fabric! If it doesn’t, pull it back out, and trim down your cardstock a little bit more. You’ll see mine is a little ways into the ornament so it’s not right up against the seal.

Now do the same thing with your second cross stitch or backing fabric! You’ll have two discs to work with now. You’ll note mine are not perfectly round — that’s okay! The plastic ornament will obfuscate the lumpy edging.
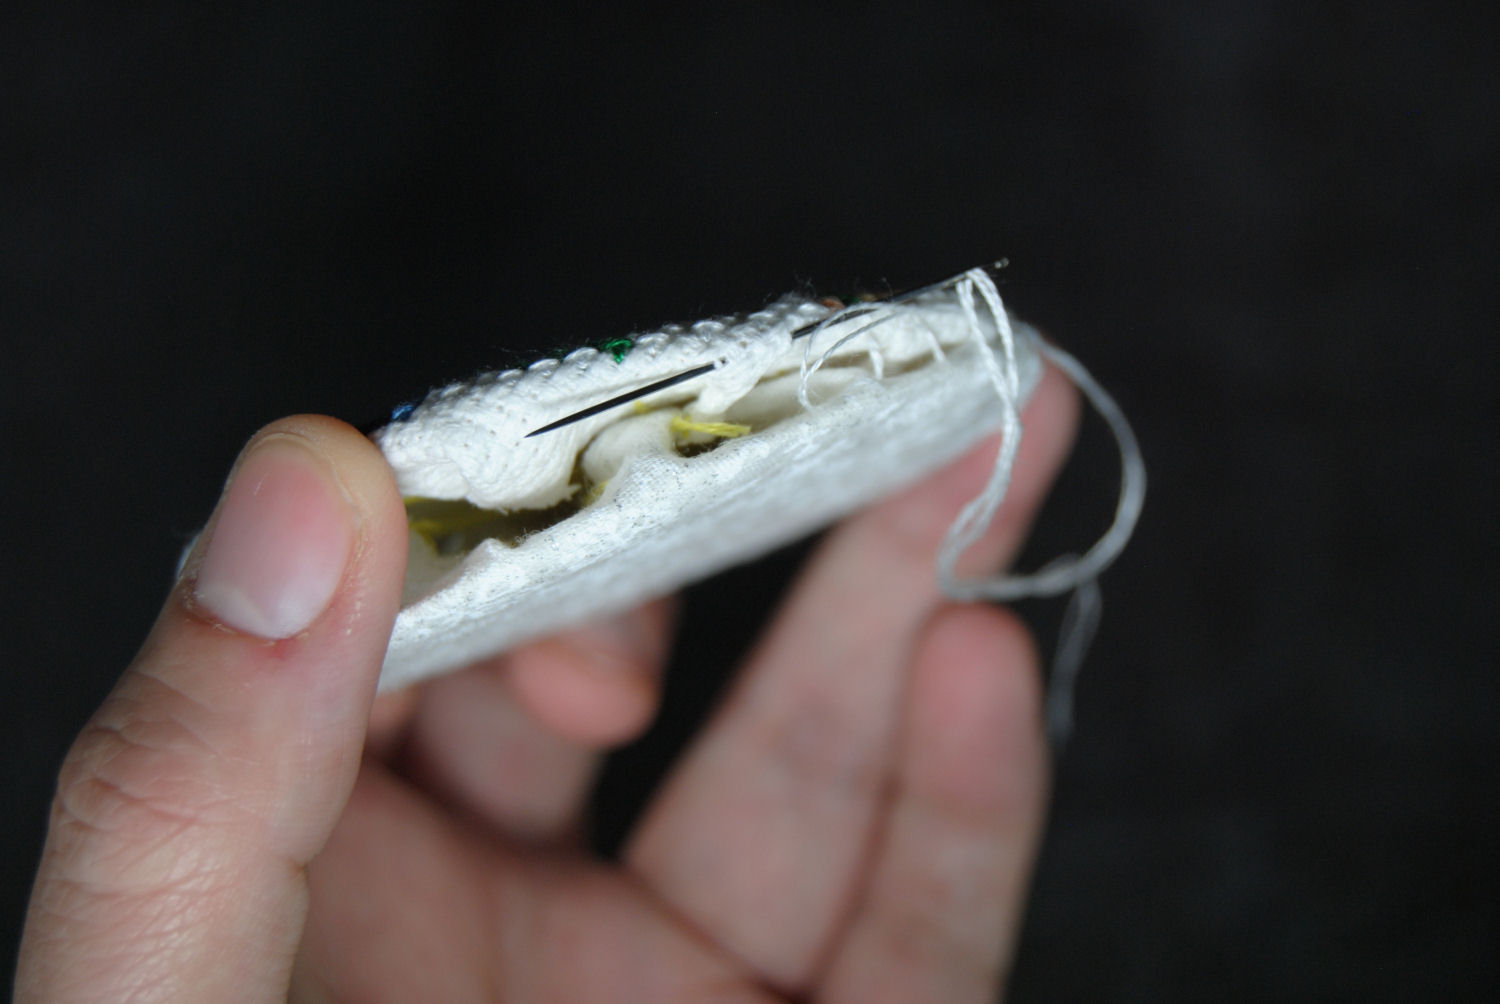
Using a thread color that is similar your fabric colors, use a simple ladder stitch to subtly sew your two discs together.

Making Snow
Now that you’ve got your flat ornament, it’s time to turn it into a snowglobe. First up — preparing the snow. If you’ve bought pre-made snow, this is more about choosing just how much snow you want in the ornament.
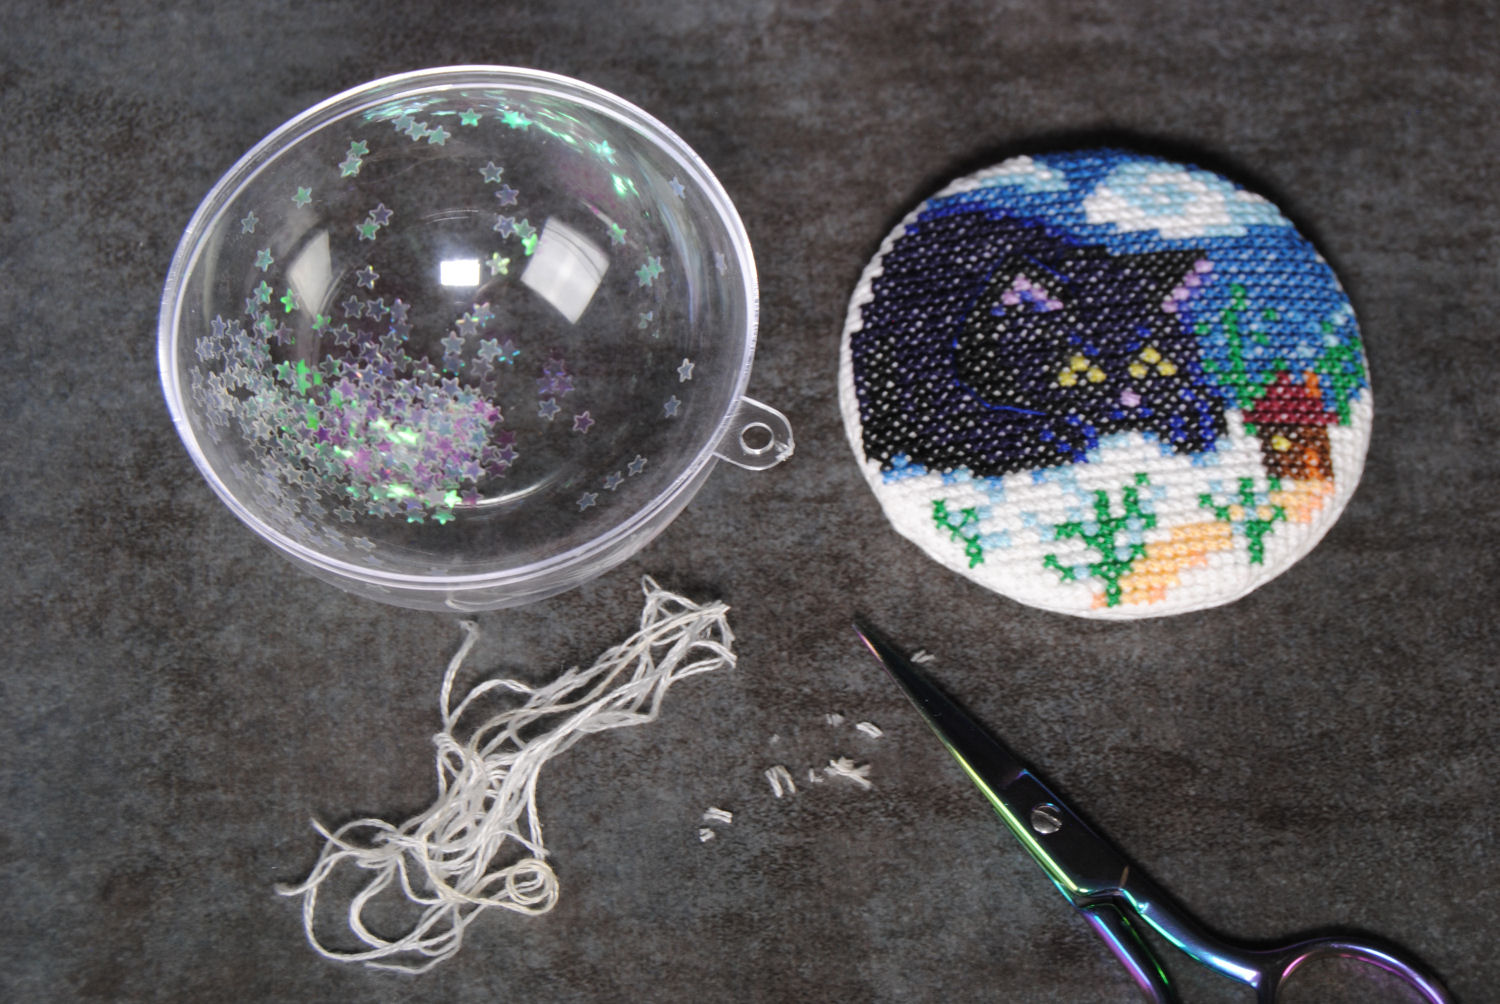
If you’re improvising like me, it might involve chopping up ORTs or scrap fabric to make tiny snowflakes. I ended up mixing in some little star glitter.
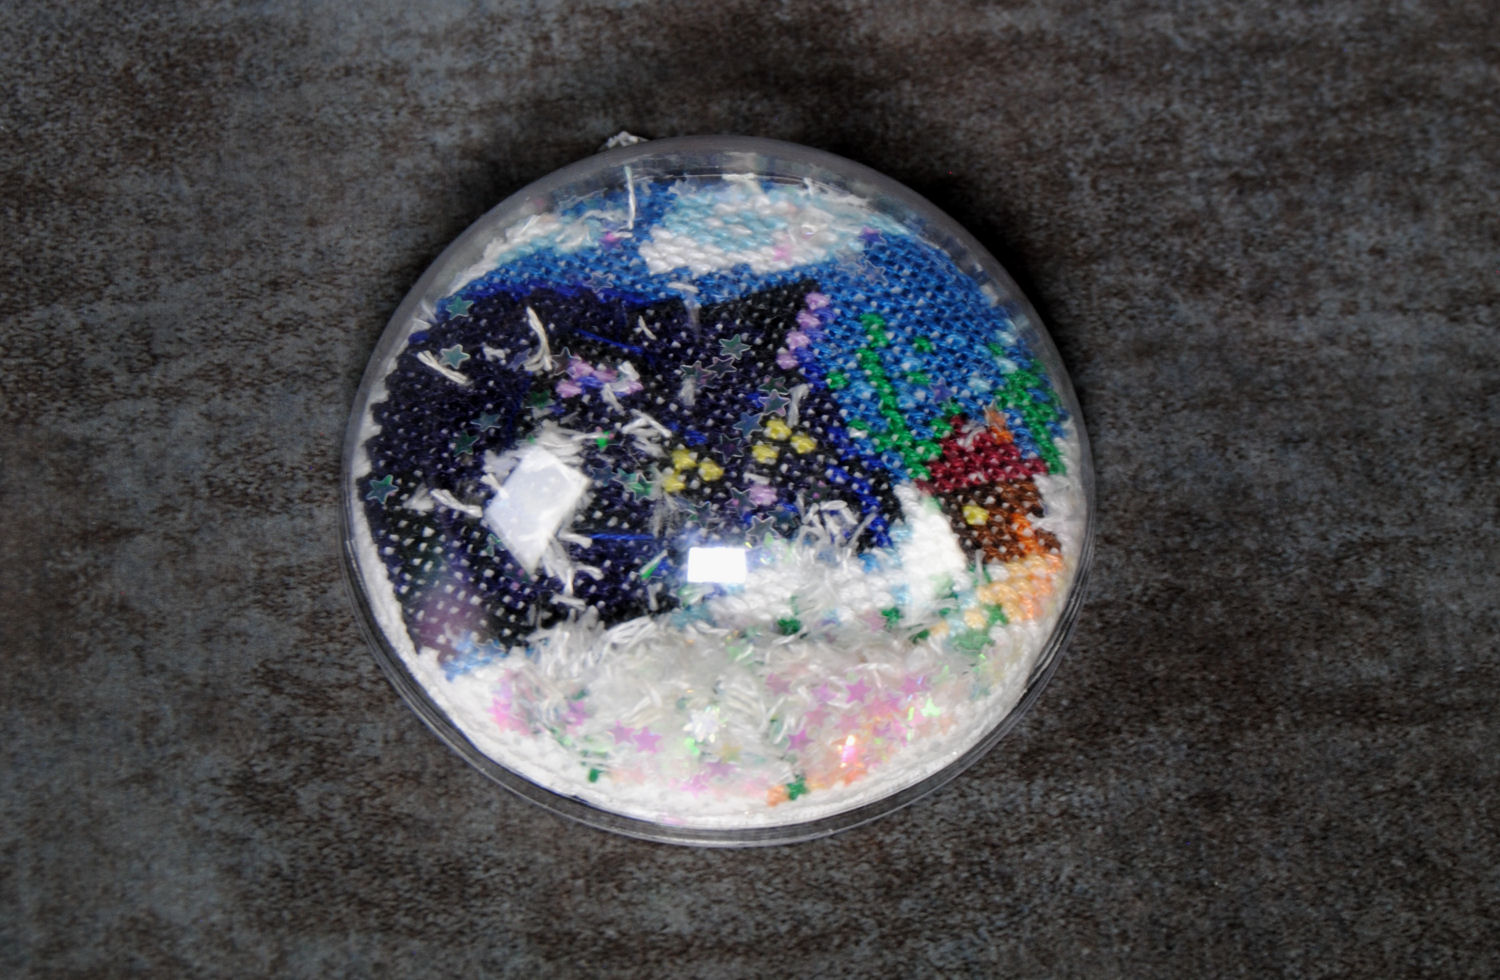
I then tucked the cross stitch disc into the ornament with the glitter. Make sure that the top of your design lines up with the hanger!
Unfortunately I decided it seemed too cramped, so I pulled the disc back out.
Instead, I tucked it in backwards to the other half of the ornament so that it was further away from the snow.
The ornaments I got are pretty snug, so I did not feel the need to glue it closed or anything. I even tried dropping it on my craft table from a decent height and it did not crack open. But if you have kids or pets, it may be best to err on the side of caution.
The Finished Snowglobe
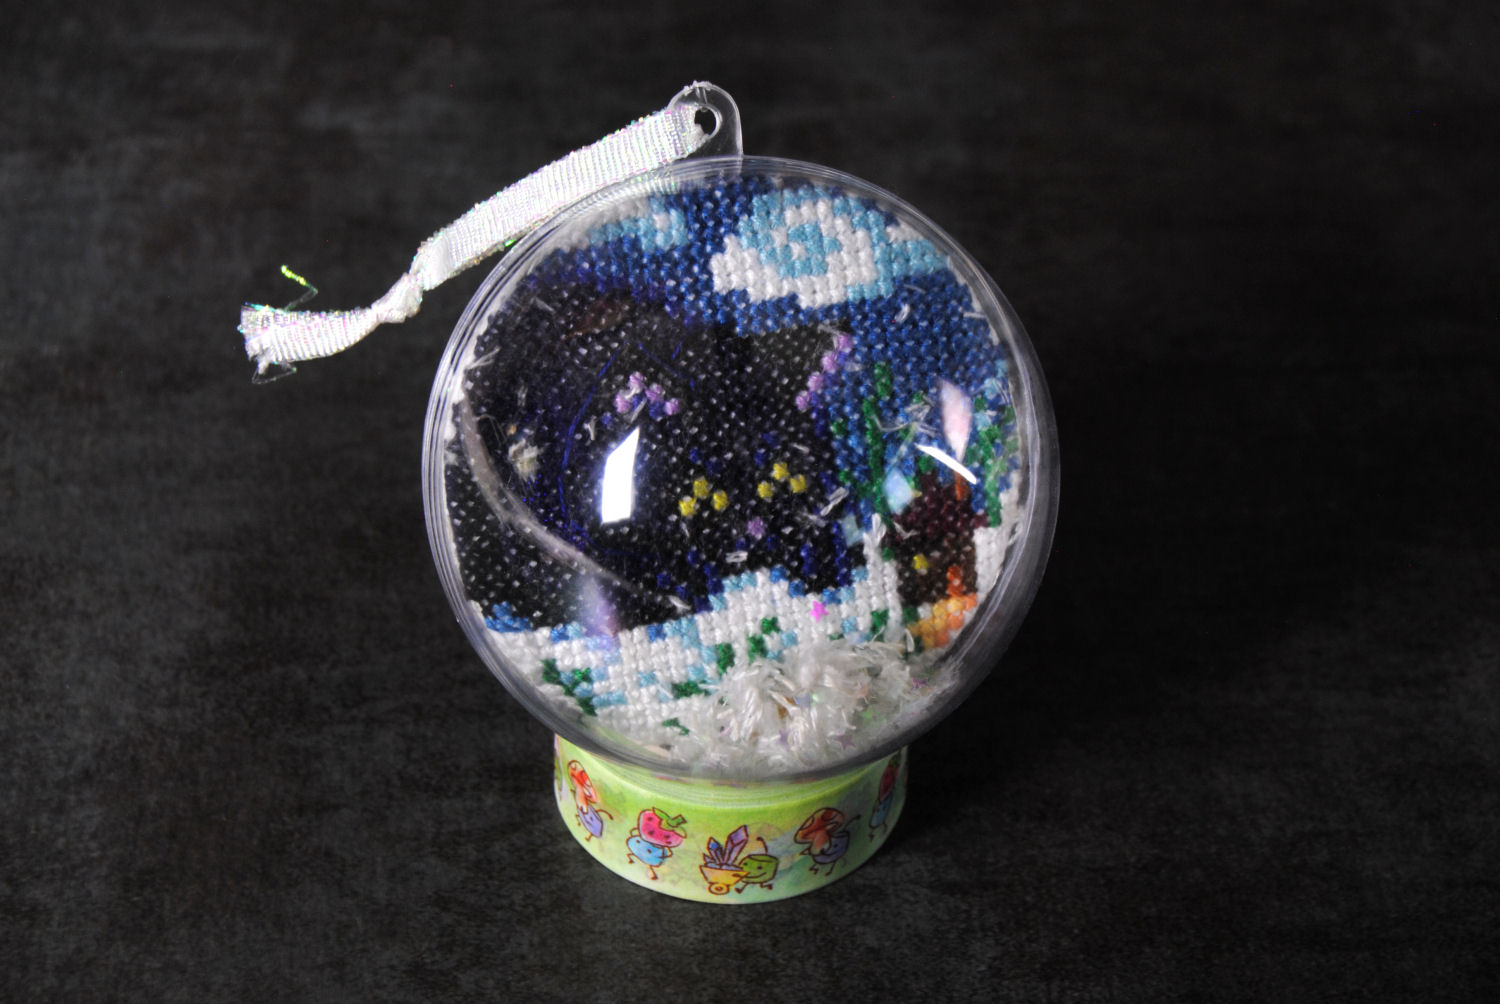
Finally, I attached a little loop of ribbon and then spent the next several hours complaining about how hard reflective plastic balls are to photograph. I ended up using a roll of washi tape to hold it up for this photo so I could get a clear view. 😉
I think it turned out pretty cute! What do you think? Will you be making some snowglobe ornaments this Christmas?


