Framing Tips for Cross Stitch – Inexpensive At-Home Finishing Techniques
My patreon voted for me to write about framing tips despite knowing full well I am terrible at framing. I feel the need to warn future readers as well. I am not an expert and would recommend getting your piece professionally framed by someone familiar with cross stitch/needlepoint.
However, that can get EXPENSIVE. And I too am broke. So today we’ll be researching and exploring some techniques to cheaply frame things at home for gifts. That said, I still want to focus on doing our best to preserve the stitch itself so it can be easily undone and framed professionally in the future if we ever get some sort of crazy windfall in which we can afford to do so.
I also went through this process on my YouTube channel if you prefer video tutorials.
This post may contain affiliate links. If you buy something using one of these links, I earn a small commission. However, there is no extra cost to you. Thanks for understanding! Learn more in my Disclosures & Privacy Policy.
Table of Contents
First, what NOT to do when framing your project.
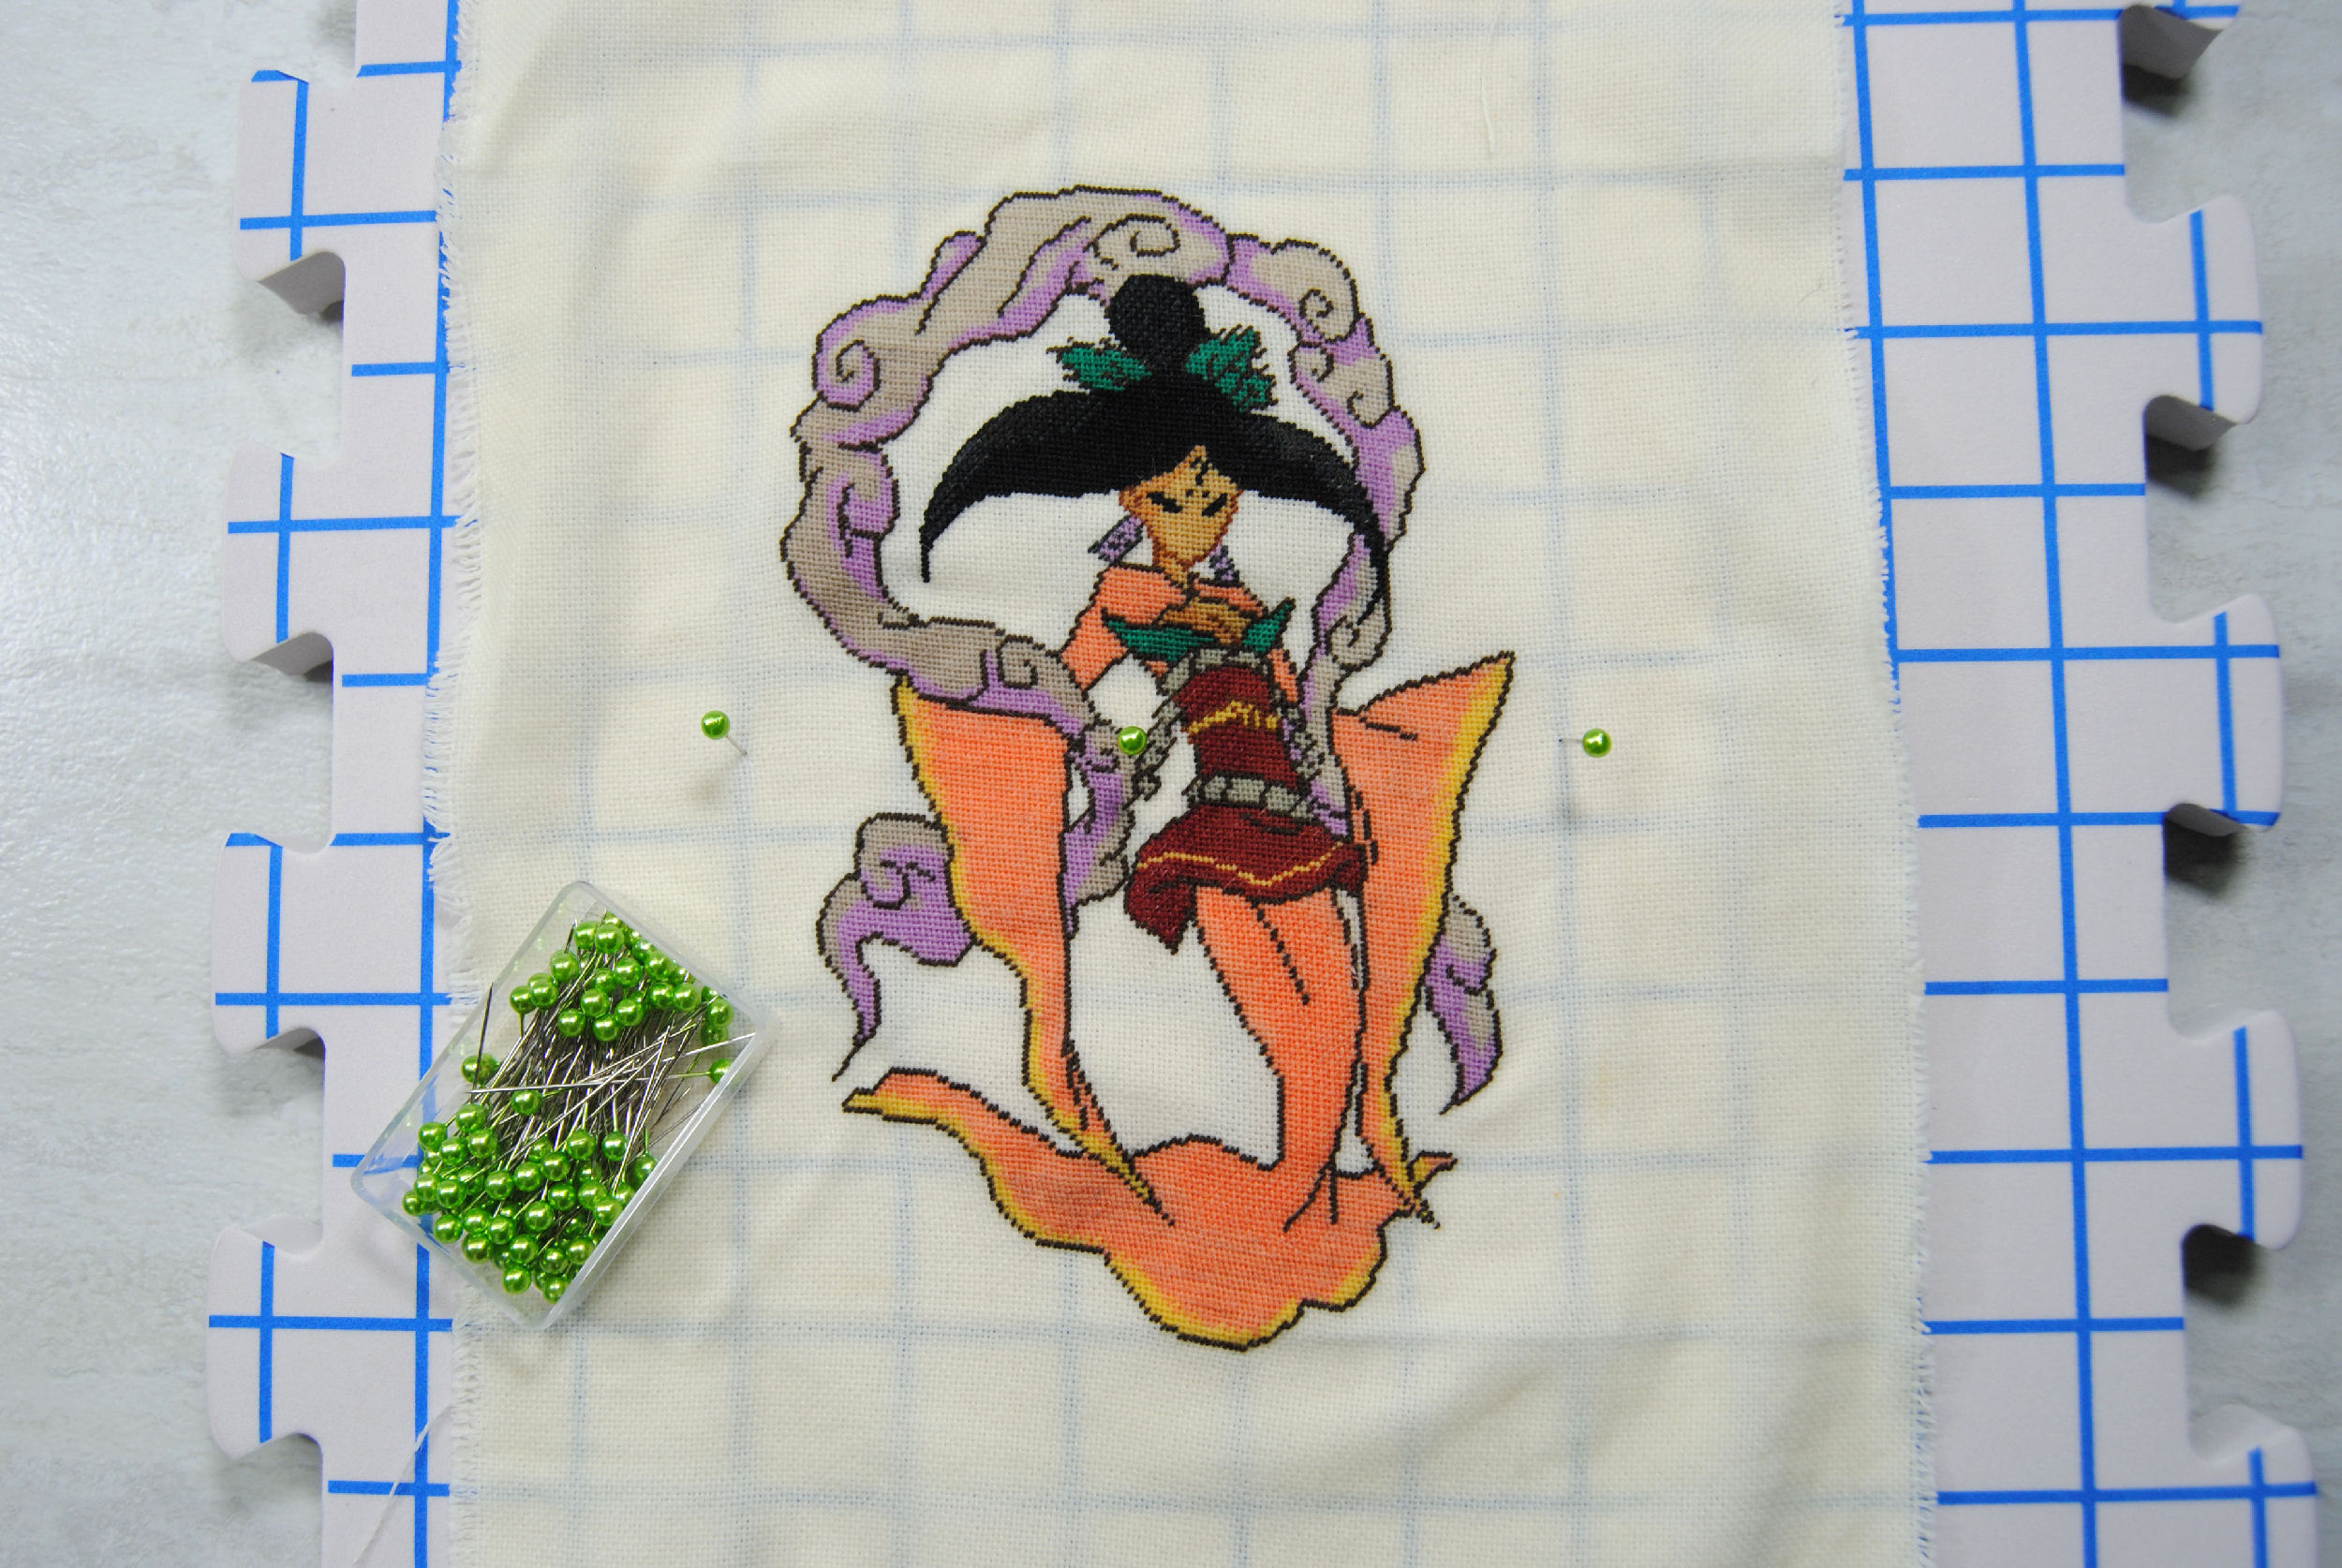
I really need to stress the fact I have no idea what I’m doing. So let’s show you the piece I’ll be reframing today. I stitched this back in 2014. And it has been in a drawer somewhere since then.
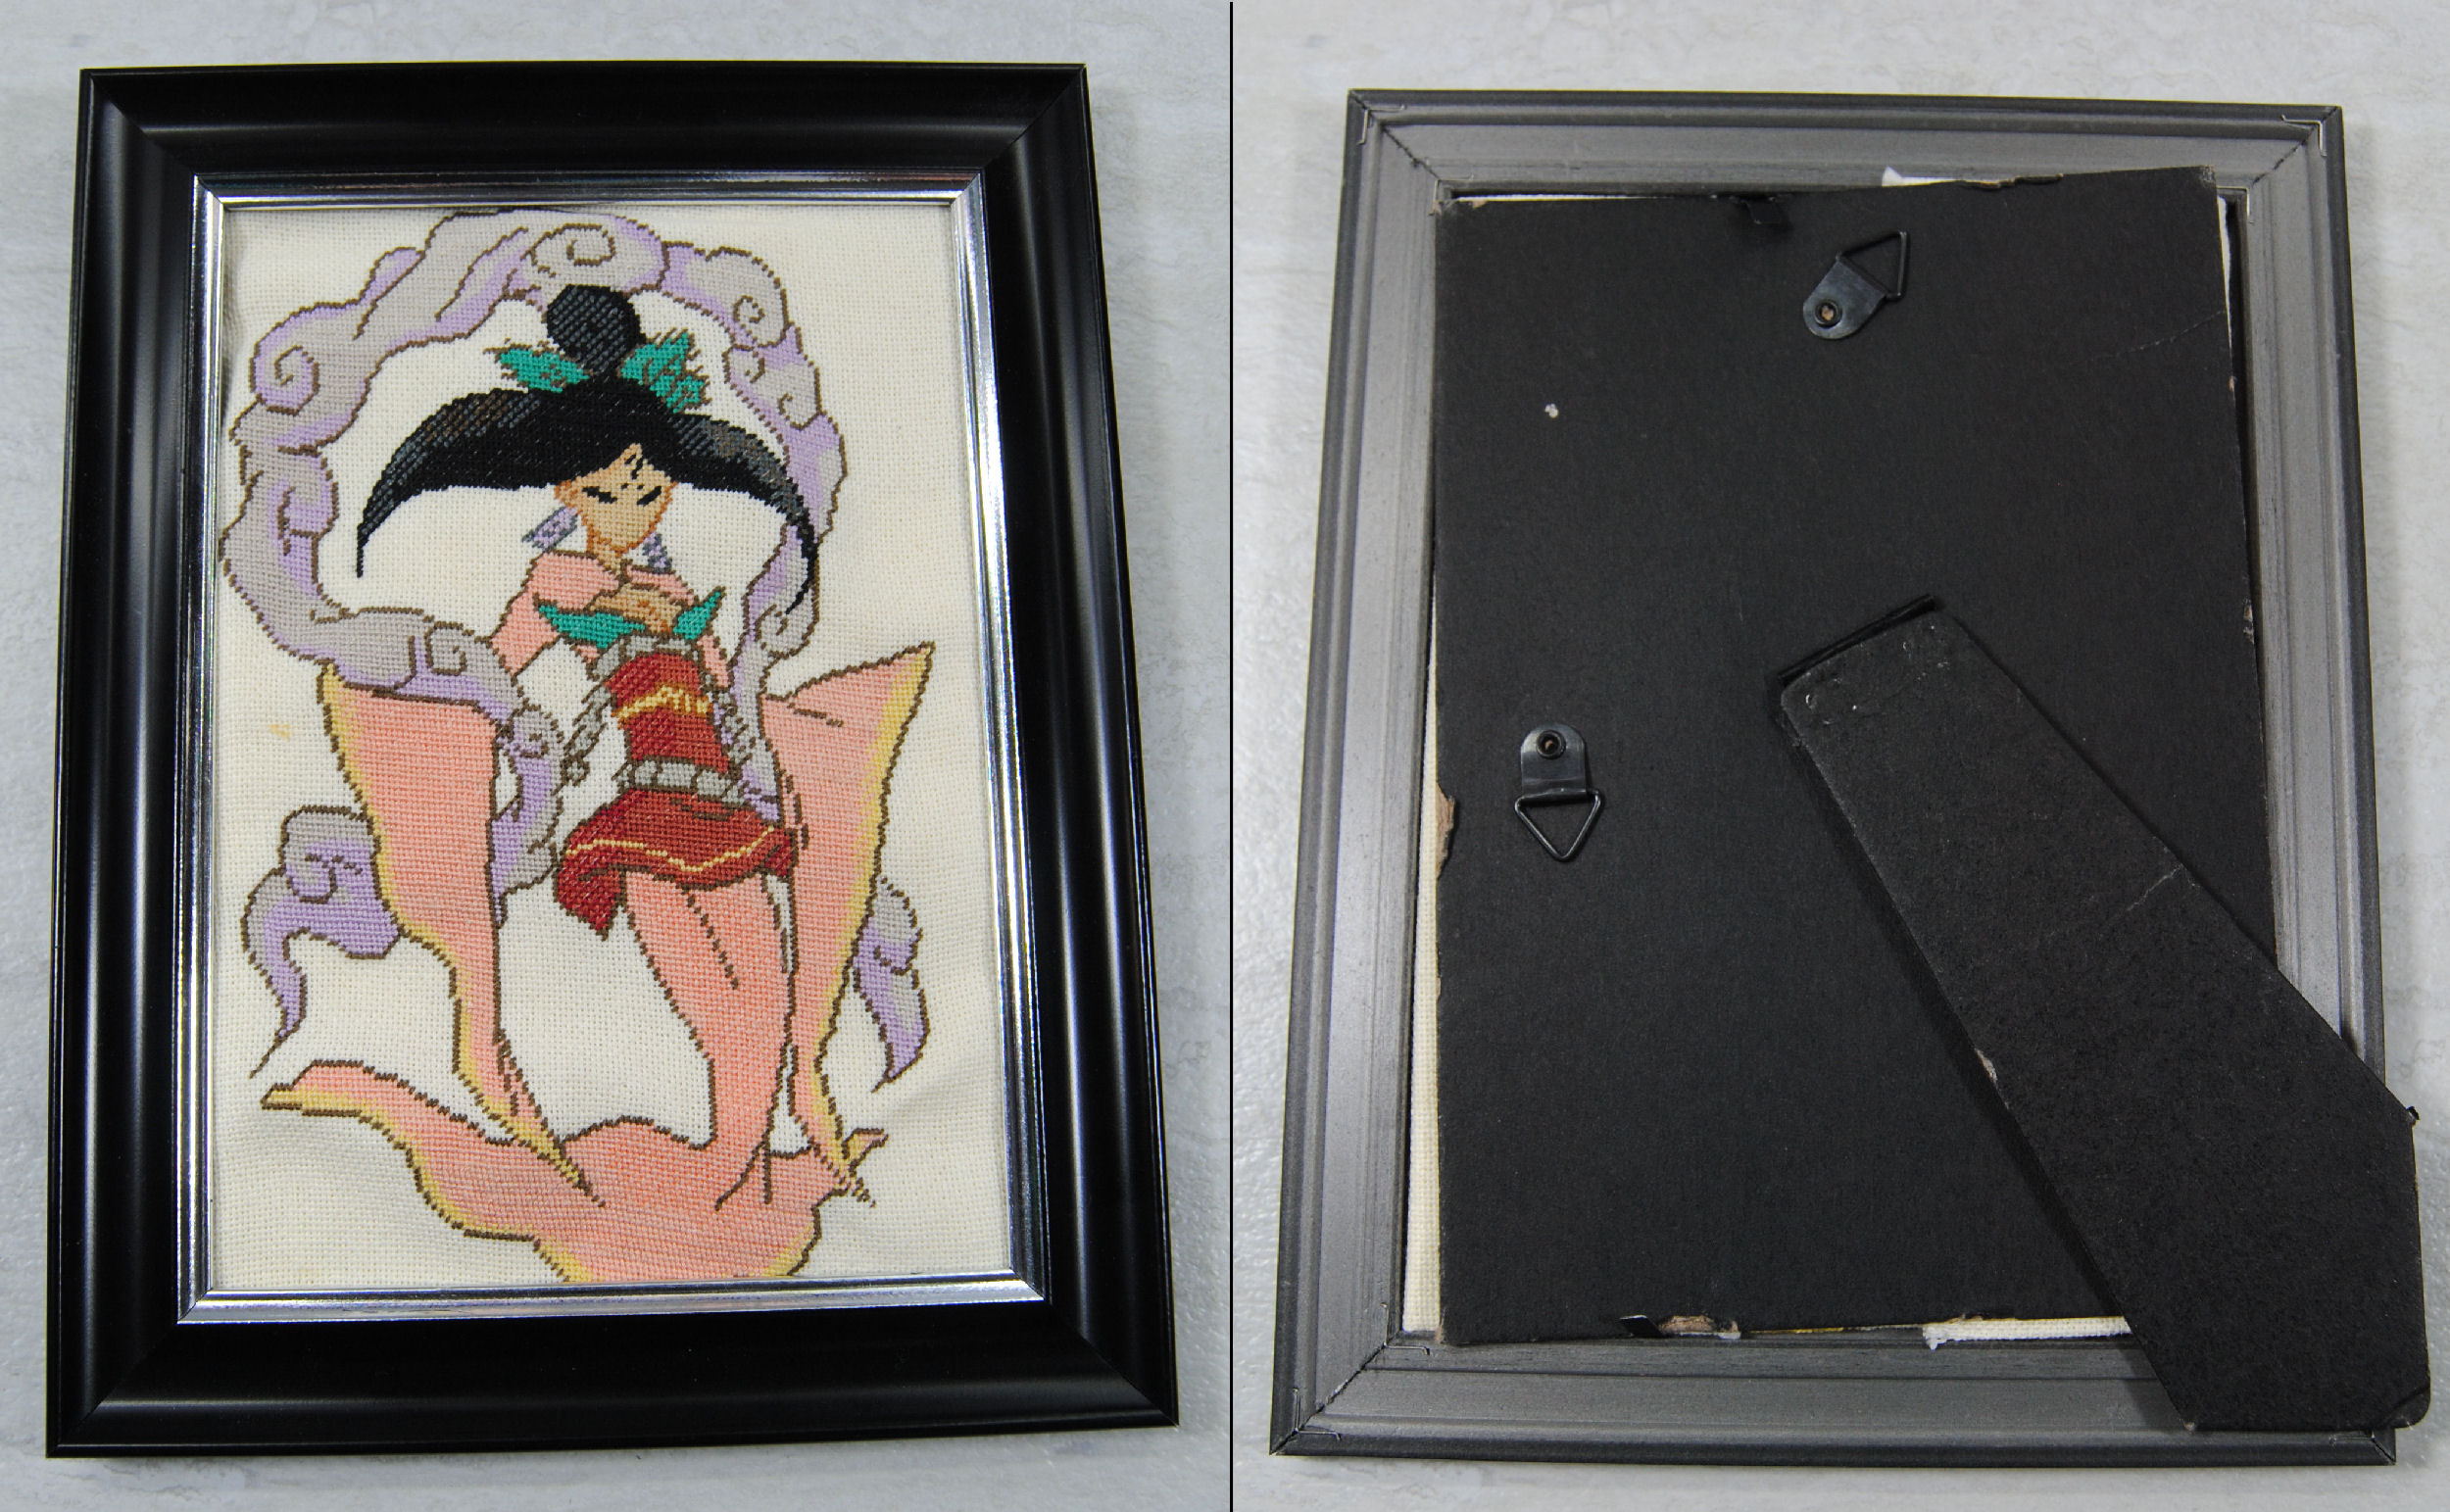
So let’s take a moment to unpack this. Yes, that is some sort of stain to her left. I have no idea what it is.
There’s no glass. I took it off to take photos without glare and… lost it? Idk, I haven’t seen it since 2014. It’s clearly wrinkled and you can the shadows on the edges from where it’s buckling in on itself.
The stitch itself is larger than the frame. Which I honestly kinda like. So it’s not really an issue to ME, But you might not like it. The silver along the side kinda clashes with the warm tones of the design and yellowish tone of the fabric.
Not only is the stitch crooked, so is the backplate. It barely fits. It’s bursting at the seams. Not surprising considering how it was just folded into a roughly 5×7 rectangle and haphazardly crammed in there.
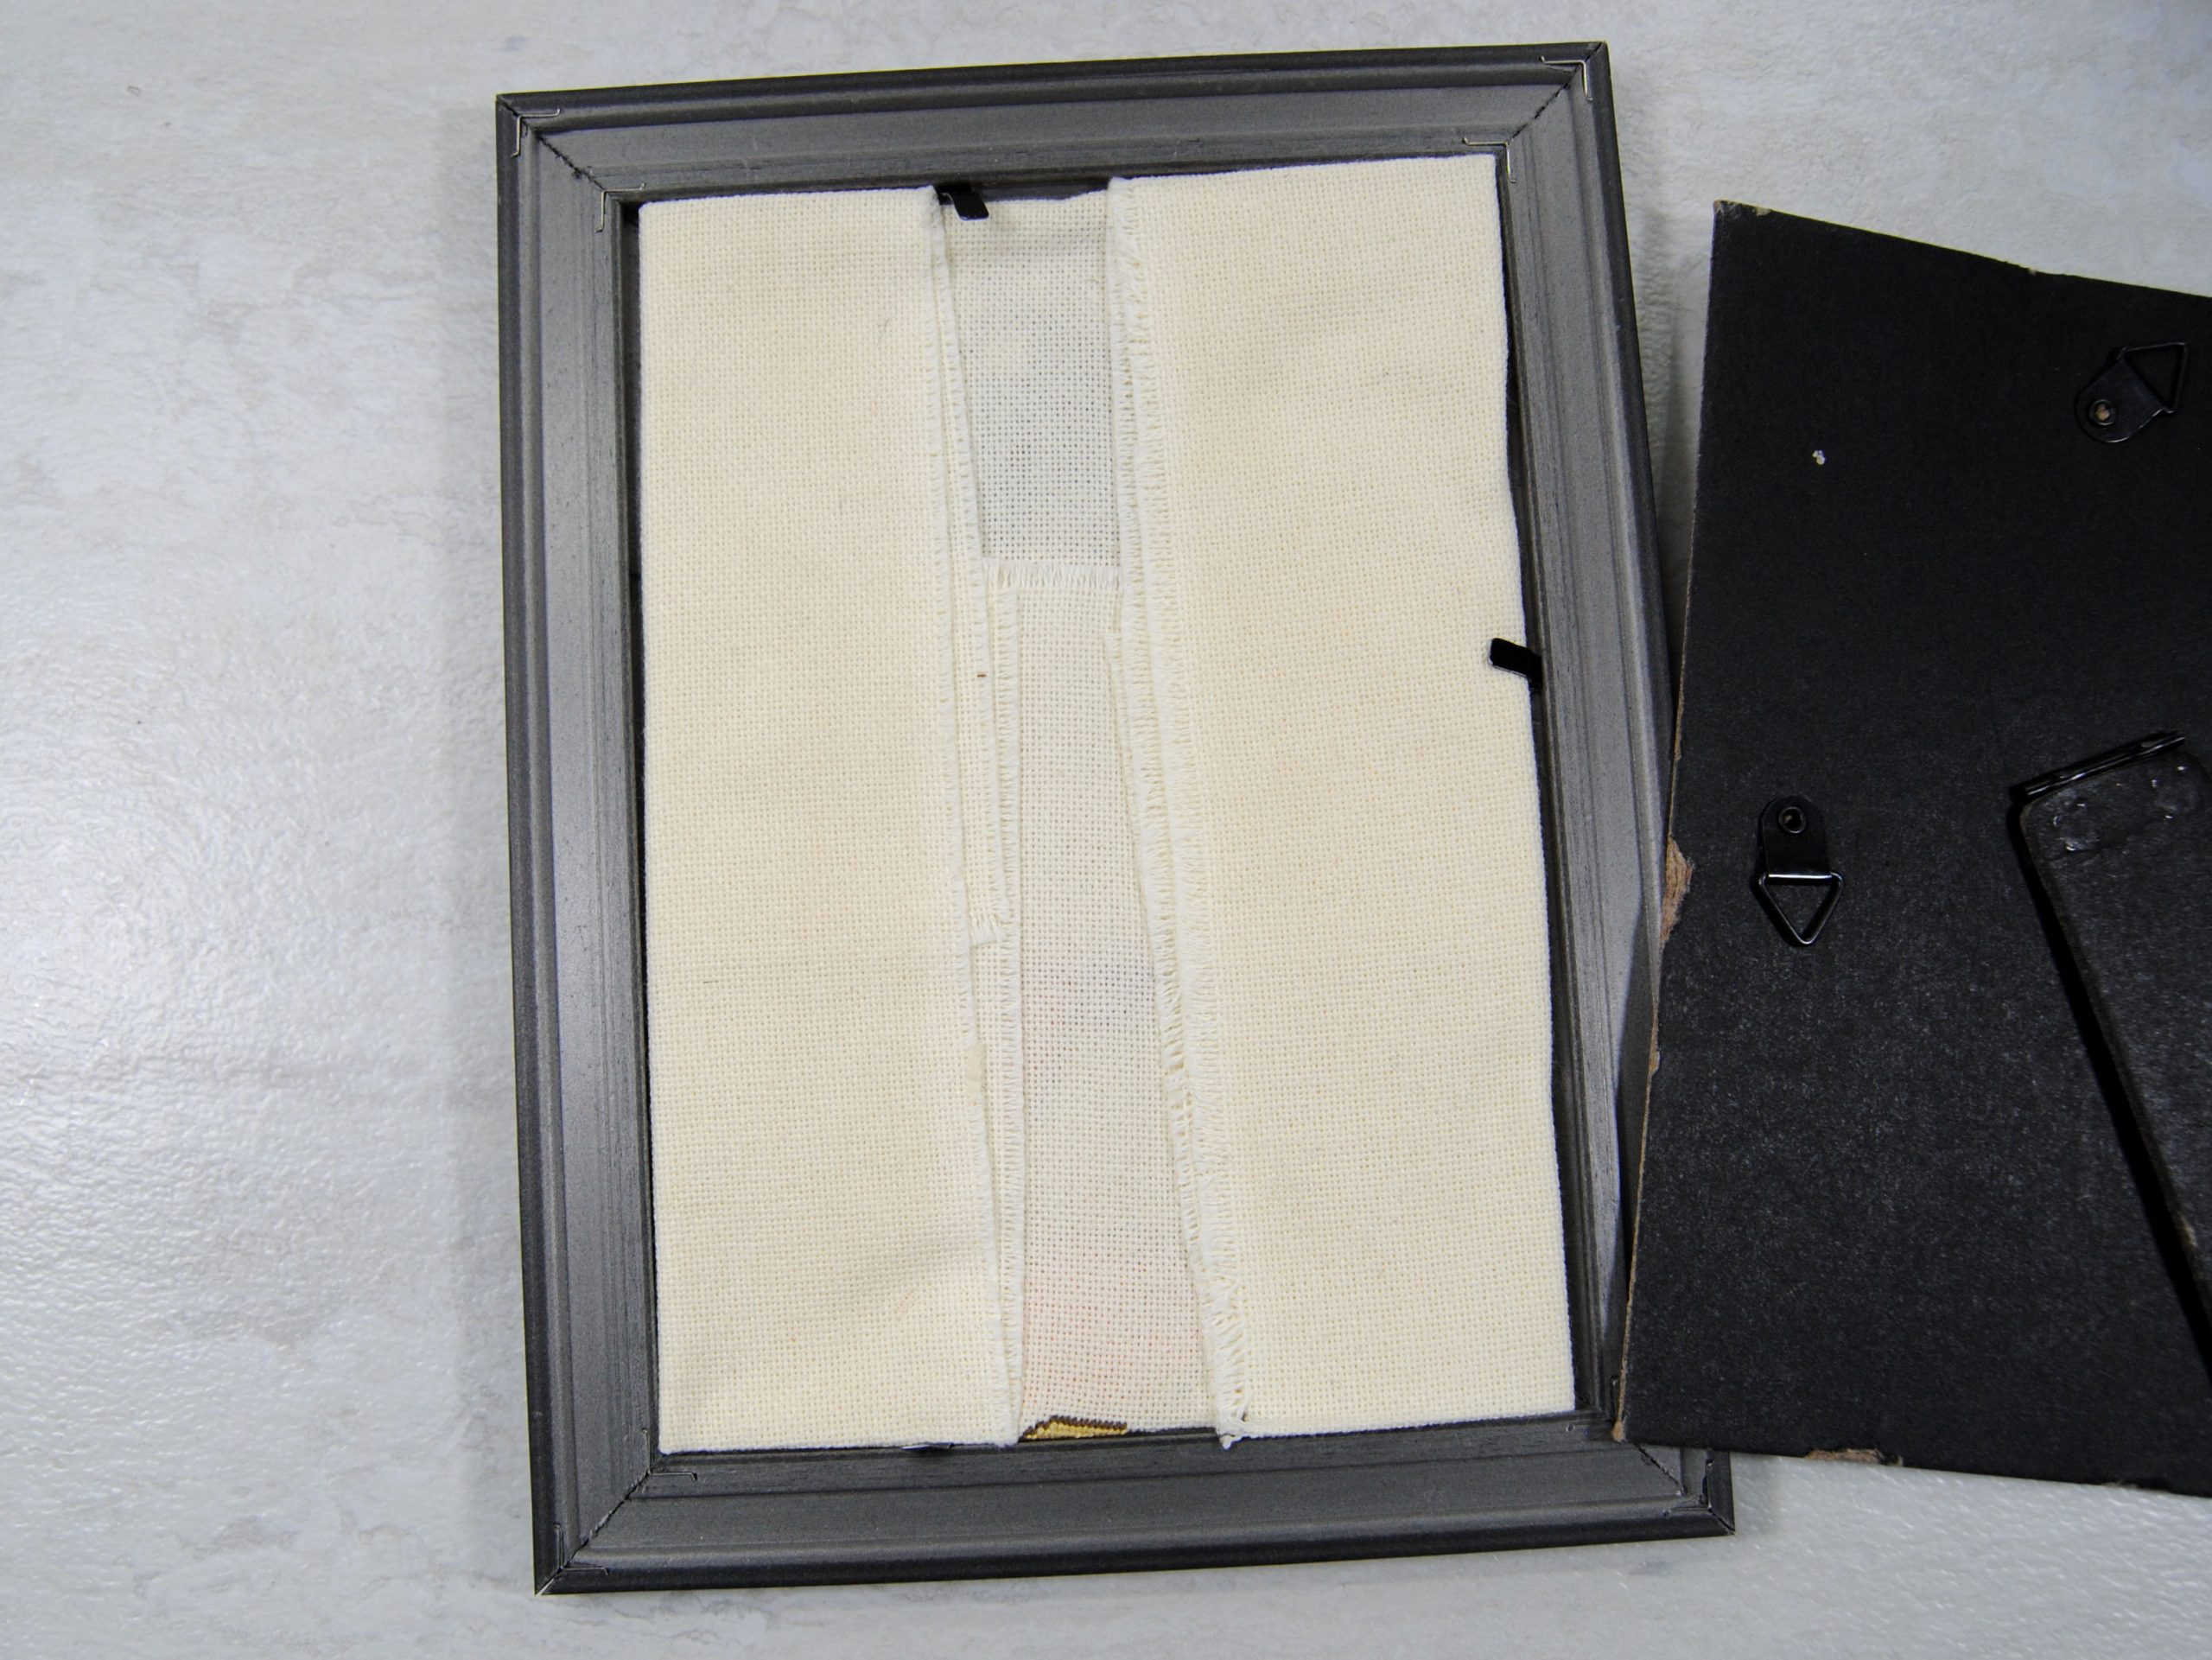
Clearly this framing job wasn’t meant for long term. I just needed some nice photos for my instagram or twitter. I then promptly tossed it in a drawer and moved on with my life. Oof. On the bright side, I did not use any sort of glue or sticky tape / sticky board and thus the fabric has not been damaged and I can now go and re-frame it without issue.
You can make anything look good in photos! Decent lighting and a convenient prop covering up that stain… and it’s fiiiiiine. See? If that’s all you need out of a frame, that’s okay! But if you’d like to find a more long term solution, read on.
We know what’s hiding behind this pretty photo now. And I certainly wouldn’t want to give this as a gift or sell it. So let’s fix that.
Materials

So what do you need for this framing method?
Something to frame
Your finished cross stitch, preferably with 2″+ border on each side. (This varies, of course. If you’re framing something small you don’t want the border to be bigger than half the frame size! If you’re interested in this Princess Sakuya pattern, it’s actually one of my Patreon exclusive designs. 😉
A frame
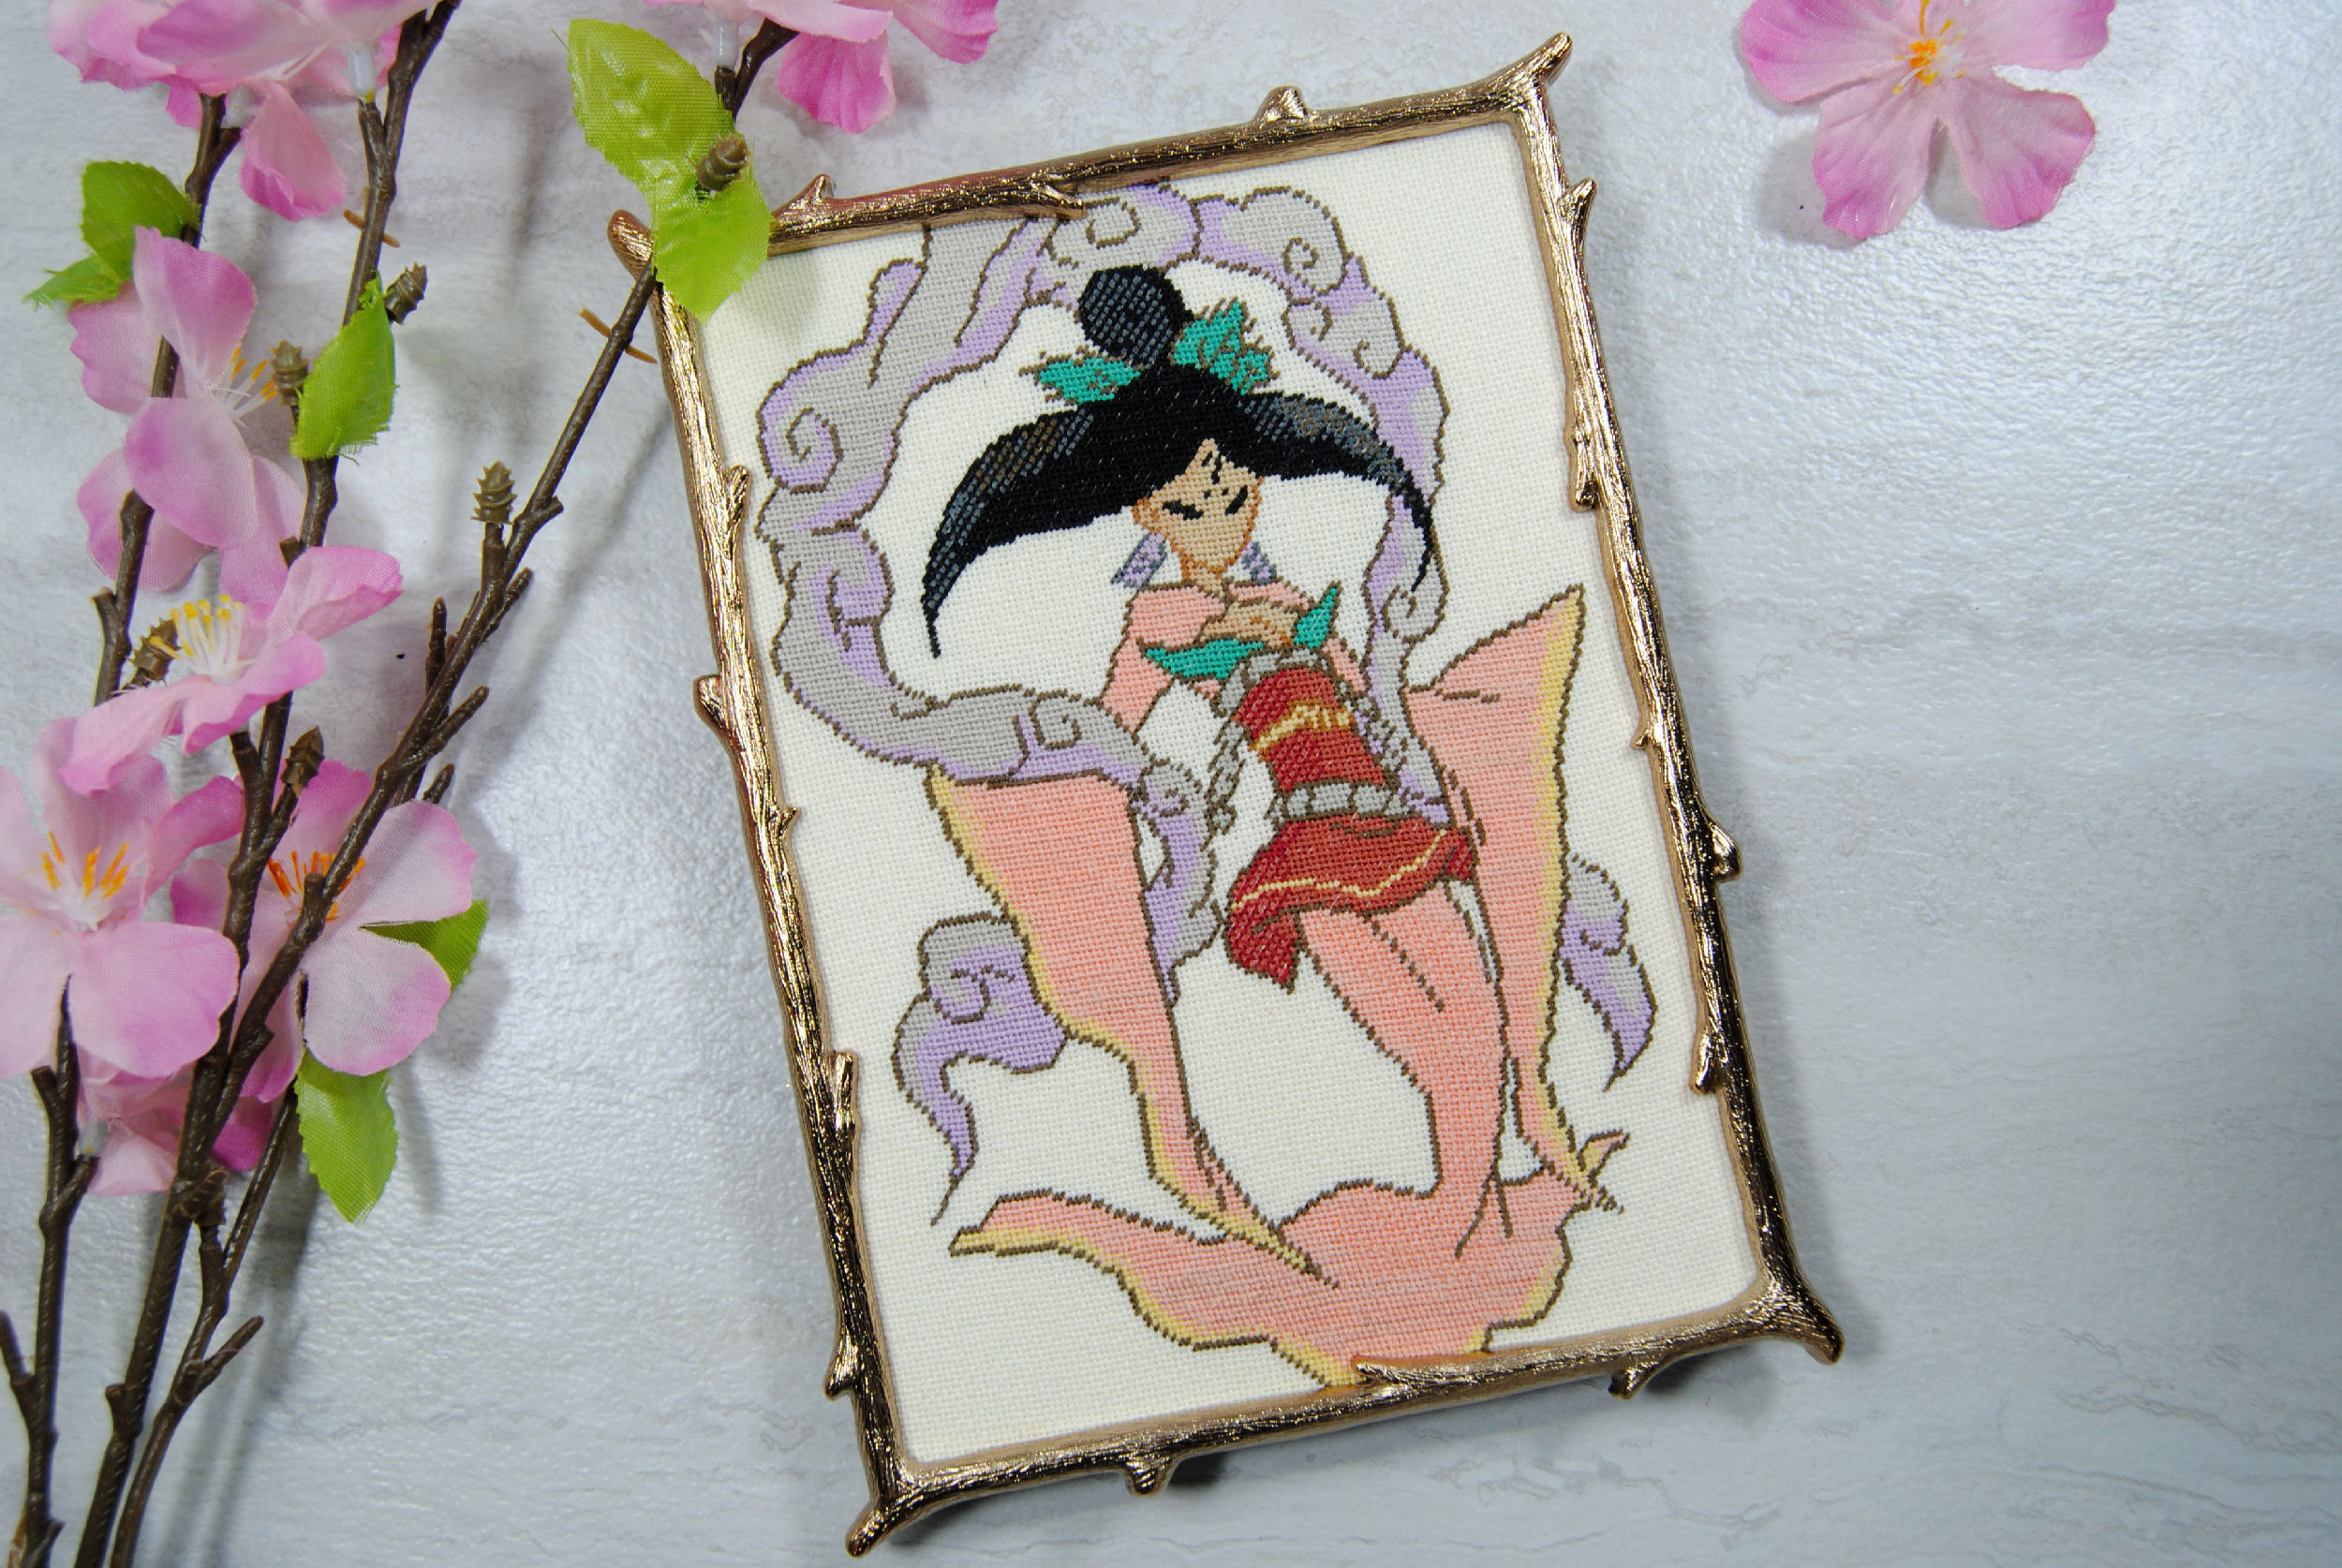
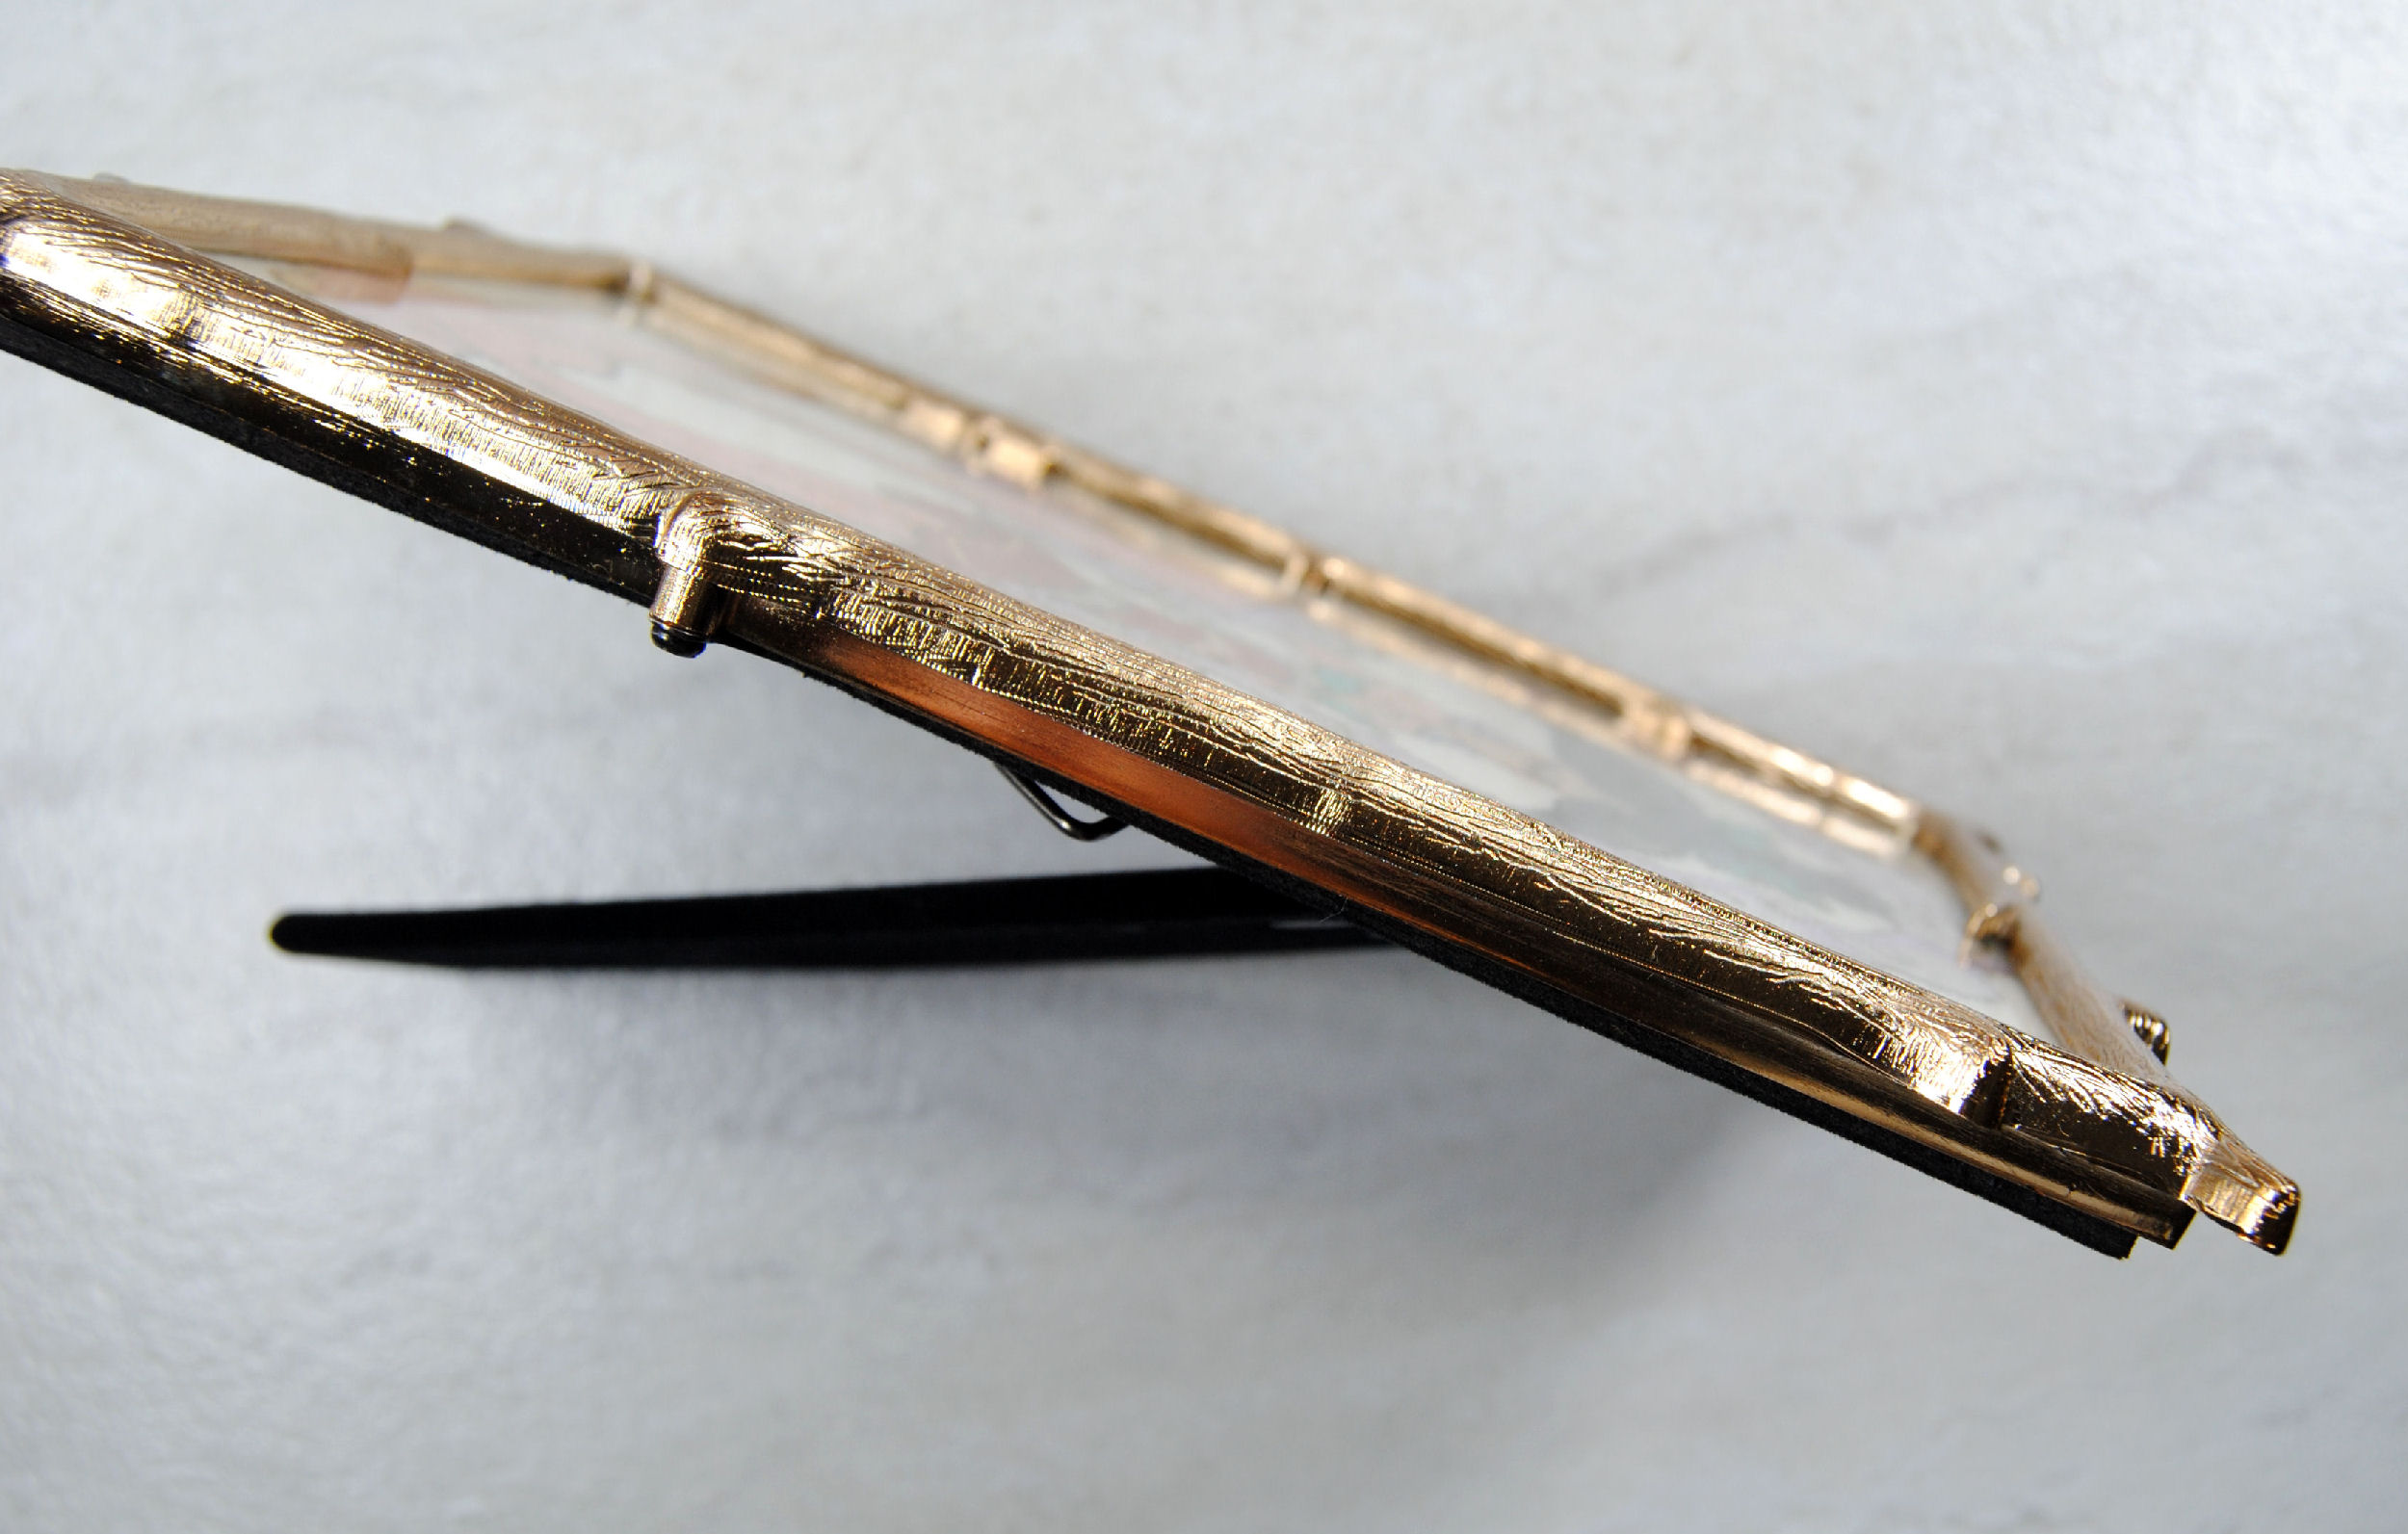
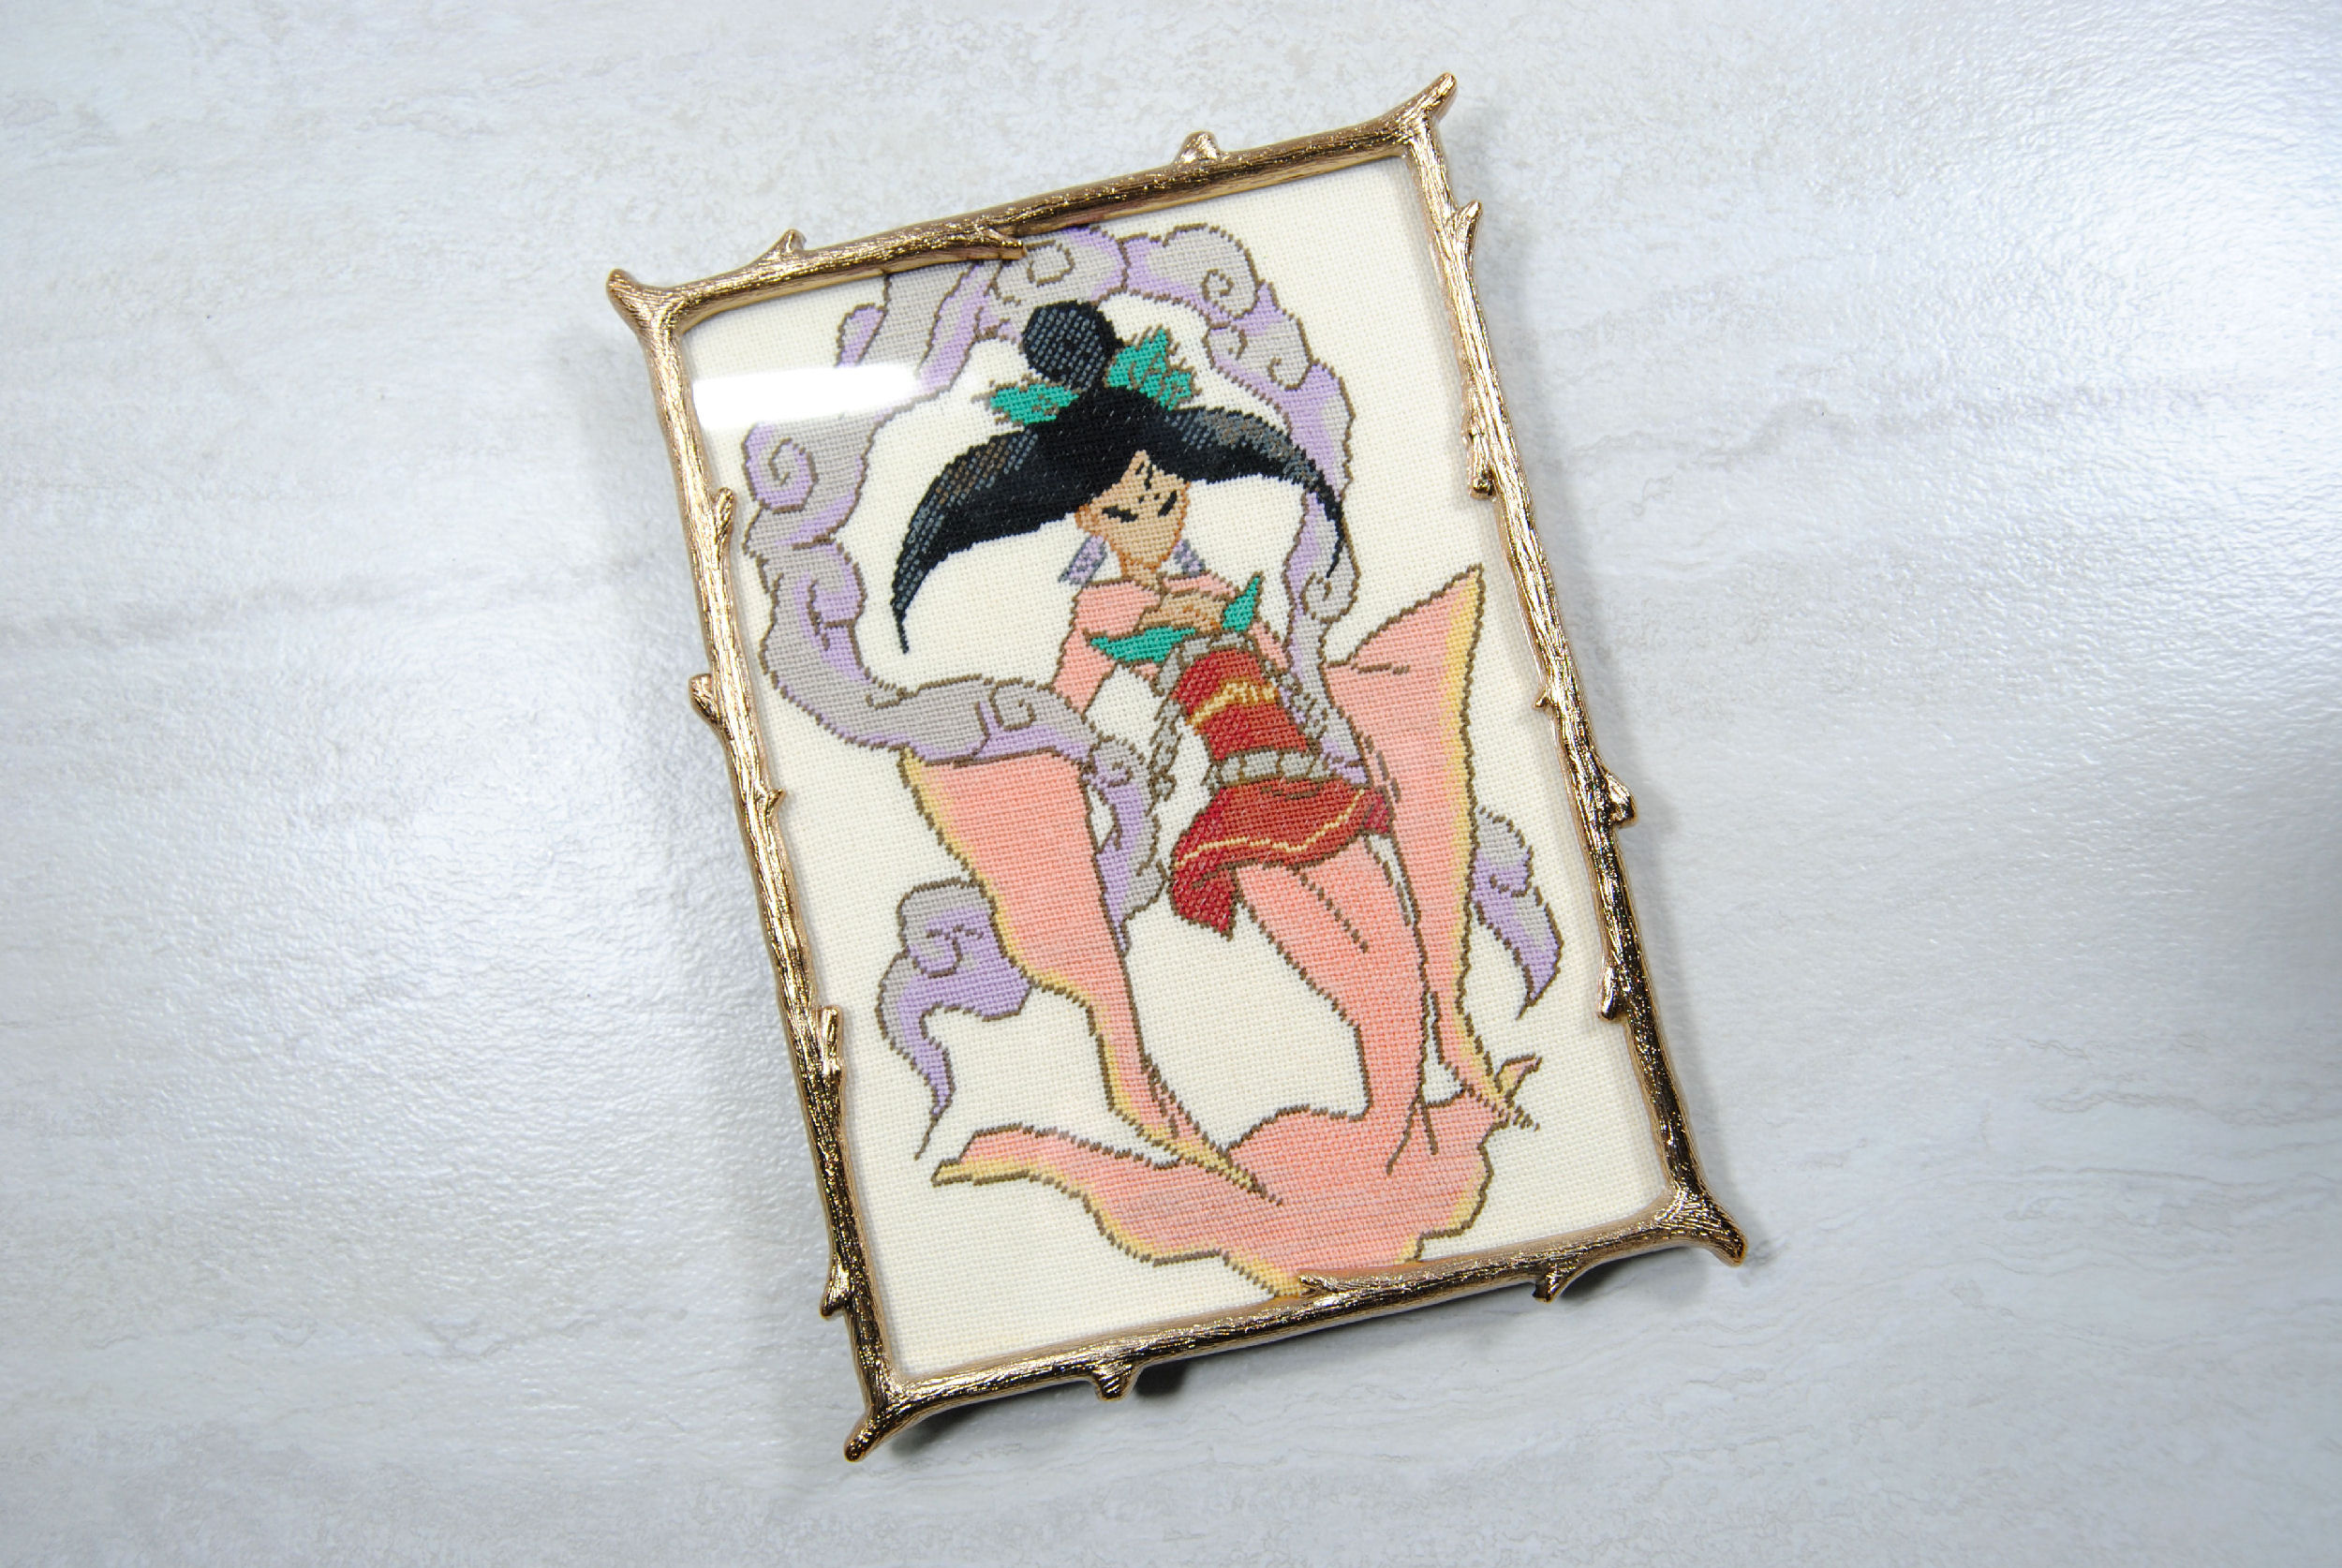
I got my frame from Lawrence Frames, because I wanted one with a tree motif since the character is a tree spirit. I found this one made to look like tree branches and I loved it.
Unfortunately, I did not find this frame in 6×8. So I will be sticking with the same size frame as before despite the stitch being a teeensy bit bigger than that.
I also went for gold this time instead of silver to better suit the fabric color.
Mounting board
A thin, acid-free board to mount the stitch to. I use Comic Book boards, as they’re designed for long term storage of comic books. Comic book collectors take archival quality very seriously, so we know our stitch is in good hands.
Some people swear by self-stick mounting board as you just stick your stitch to it. Which is also ideal if you don’t have a ton of extra fabric around your project. So keep that in mind if you don’t like sewing up the back like I’ll be doing here shortly. But please, make sure it’s an acid free board/adhesive such as Pres-On, and research online to make sure it *actually* is acid free and not just advertised as such.
Thread
Sewing thread is best, because it is designed to actually withstand tension. Unlike embroidery thread. Also, it’s cheaper.
However if you have some off-brand embroidery thread you don’t mind ‘wasting’ on this, it will work too. Just be careful when pulling tight, as it’s more likely to snap.
The color of the thread doesn’t matter as it’ll be hidden inside the frame, but I chose a color similar to the fabric.
Pins
This is optional depending on your project. I’ll be using them today to straighten out how incredibly crooked and warped my fabric is. It may not be necessary at all for you if you are using starched aida.
However, this 28 count evenweave isn’t quite that even anymore and she’s become kind of a parallelogram rather than a rectangle. I have a bunch of cute colorful pins I use to take photos of pin cushions, biscornu, and the like, so I’ll be using those for this project.
Alternatively, thumbtacks and pushpins could be used instead.
Blocking Mats
If you do need to straighten out your fabric, you’ll need something to pin it to. I used blocking mats. These are typically used for blocking knit/crochet projects, but the same ideas apply here. They’re thick foam mats with 1″ lines for easy straightening.
Now, knit/crochet projects are typically larger, so the main pack comes with 9 squares, pins, and a storage case.
My cross stitches are generally much smaller, so I only got the ‘extension kit‘ which came with 3 squares, which was more than enough for me. And I have plenty of pins on hand already, so didn’t need those either.
Don’t want anything fancy? Some thick cardboard larger than your project will work in a pinch. Just, uh, wipe it down first to make sure your fabric isn’t collecting a bunch of dust from it.
Does your project need washing?
I already pointed out that random stain on the front, so my project definitely needed washing. Additionally, since I needed to fix the sizing of my fabric, I wanted to start blocking with it a bit damp.
If you’re not sure if you can or should wash your project, check out my tutorial on washing cross stitch projects. I gently washed my project using the methods outlined in that article, then allowed it to dry for about 15 minutes. I did not want it to completely dry up before moving on to blocking, but I didn’t want it to be sopping wet either. No ironing yet!
If the colors look extra “bright” in the next few photos, it’s because it’s still damp.
Blocking your fabric
Before we get on to framing, let’s talk about blocking. As stated before, my fabric was a bit warped and the whole design was leaning a bit. To fix this, I decided to block my project before framing her again. Your piece may not need this, so feel free to skip ahead.
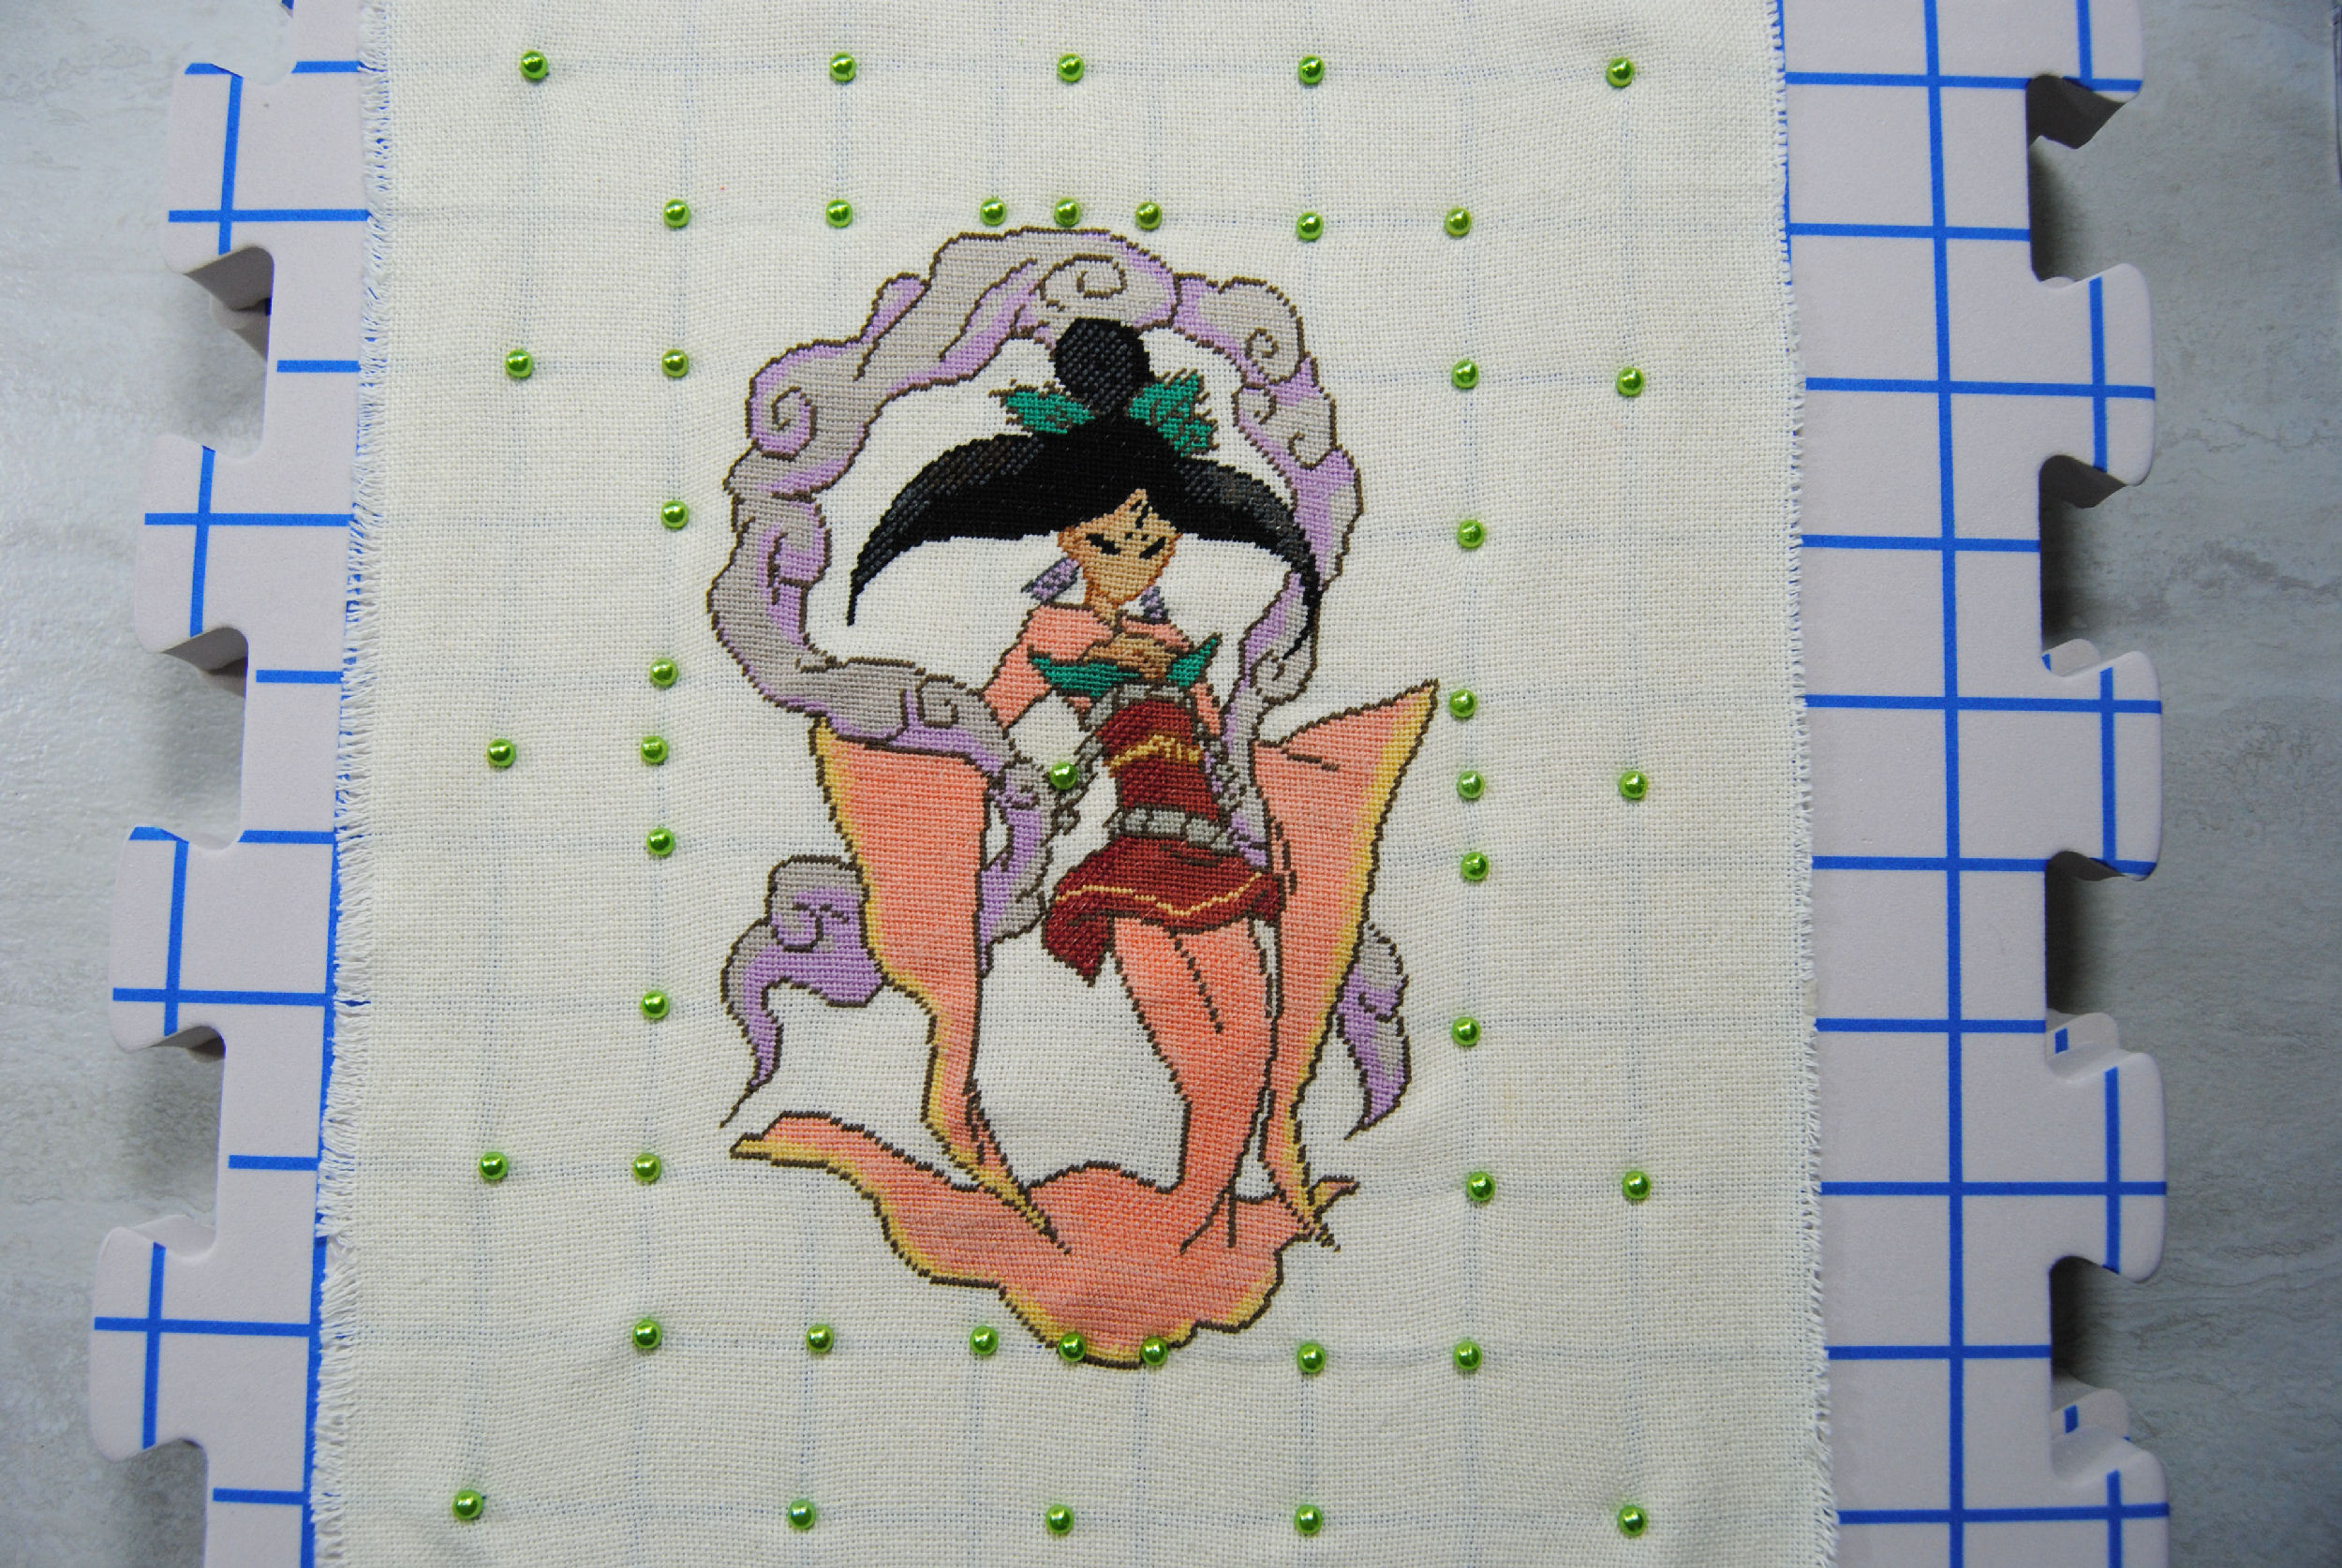
The mats I used have 1″ lines on them, so I picked a 5×7 section to match my frame size and lined up my stitch with it. Referencing my pattern I determined the exact center of the design, and pinned it to the center of that 5×7 section. Pulling gently on either side I started with a single pin on each side. Then one at the top and bottom.
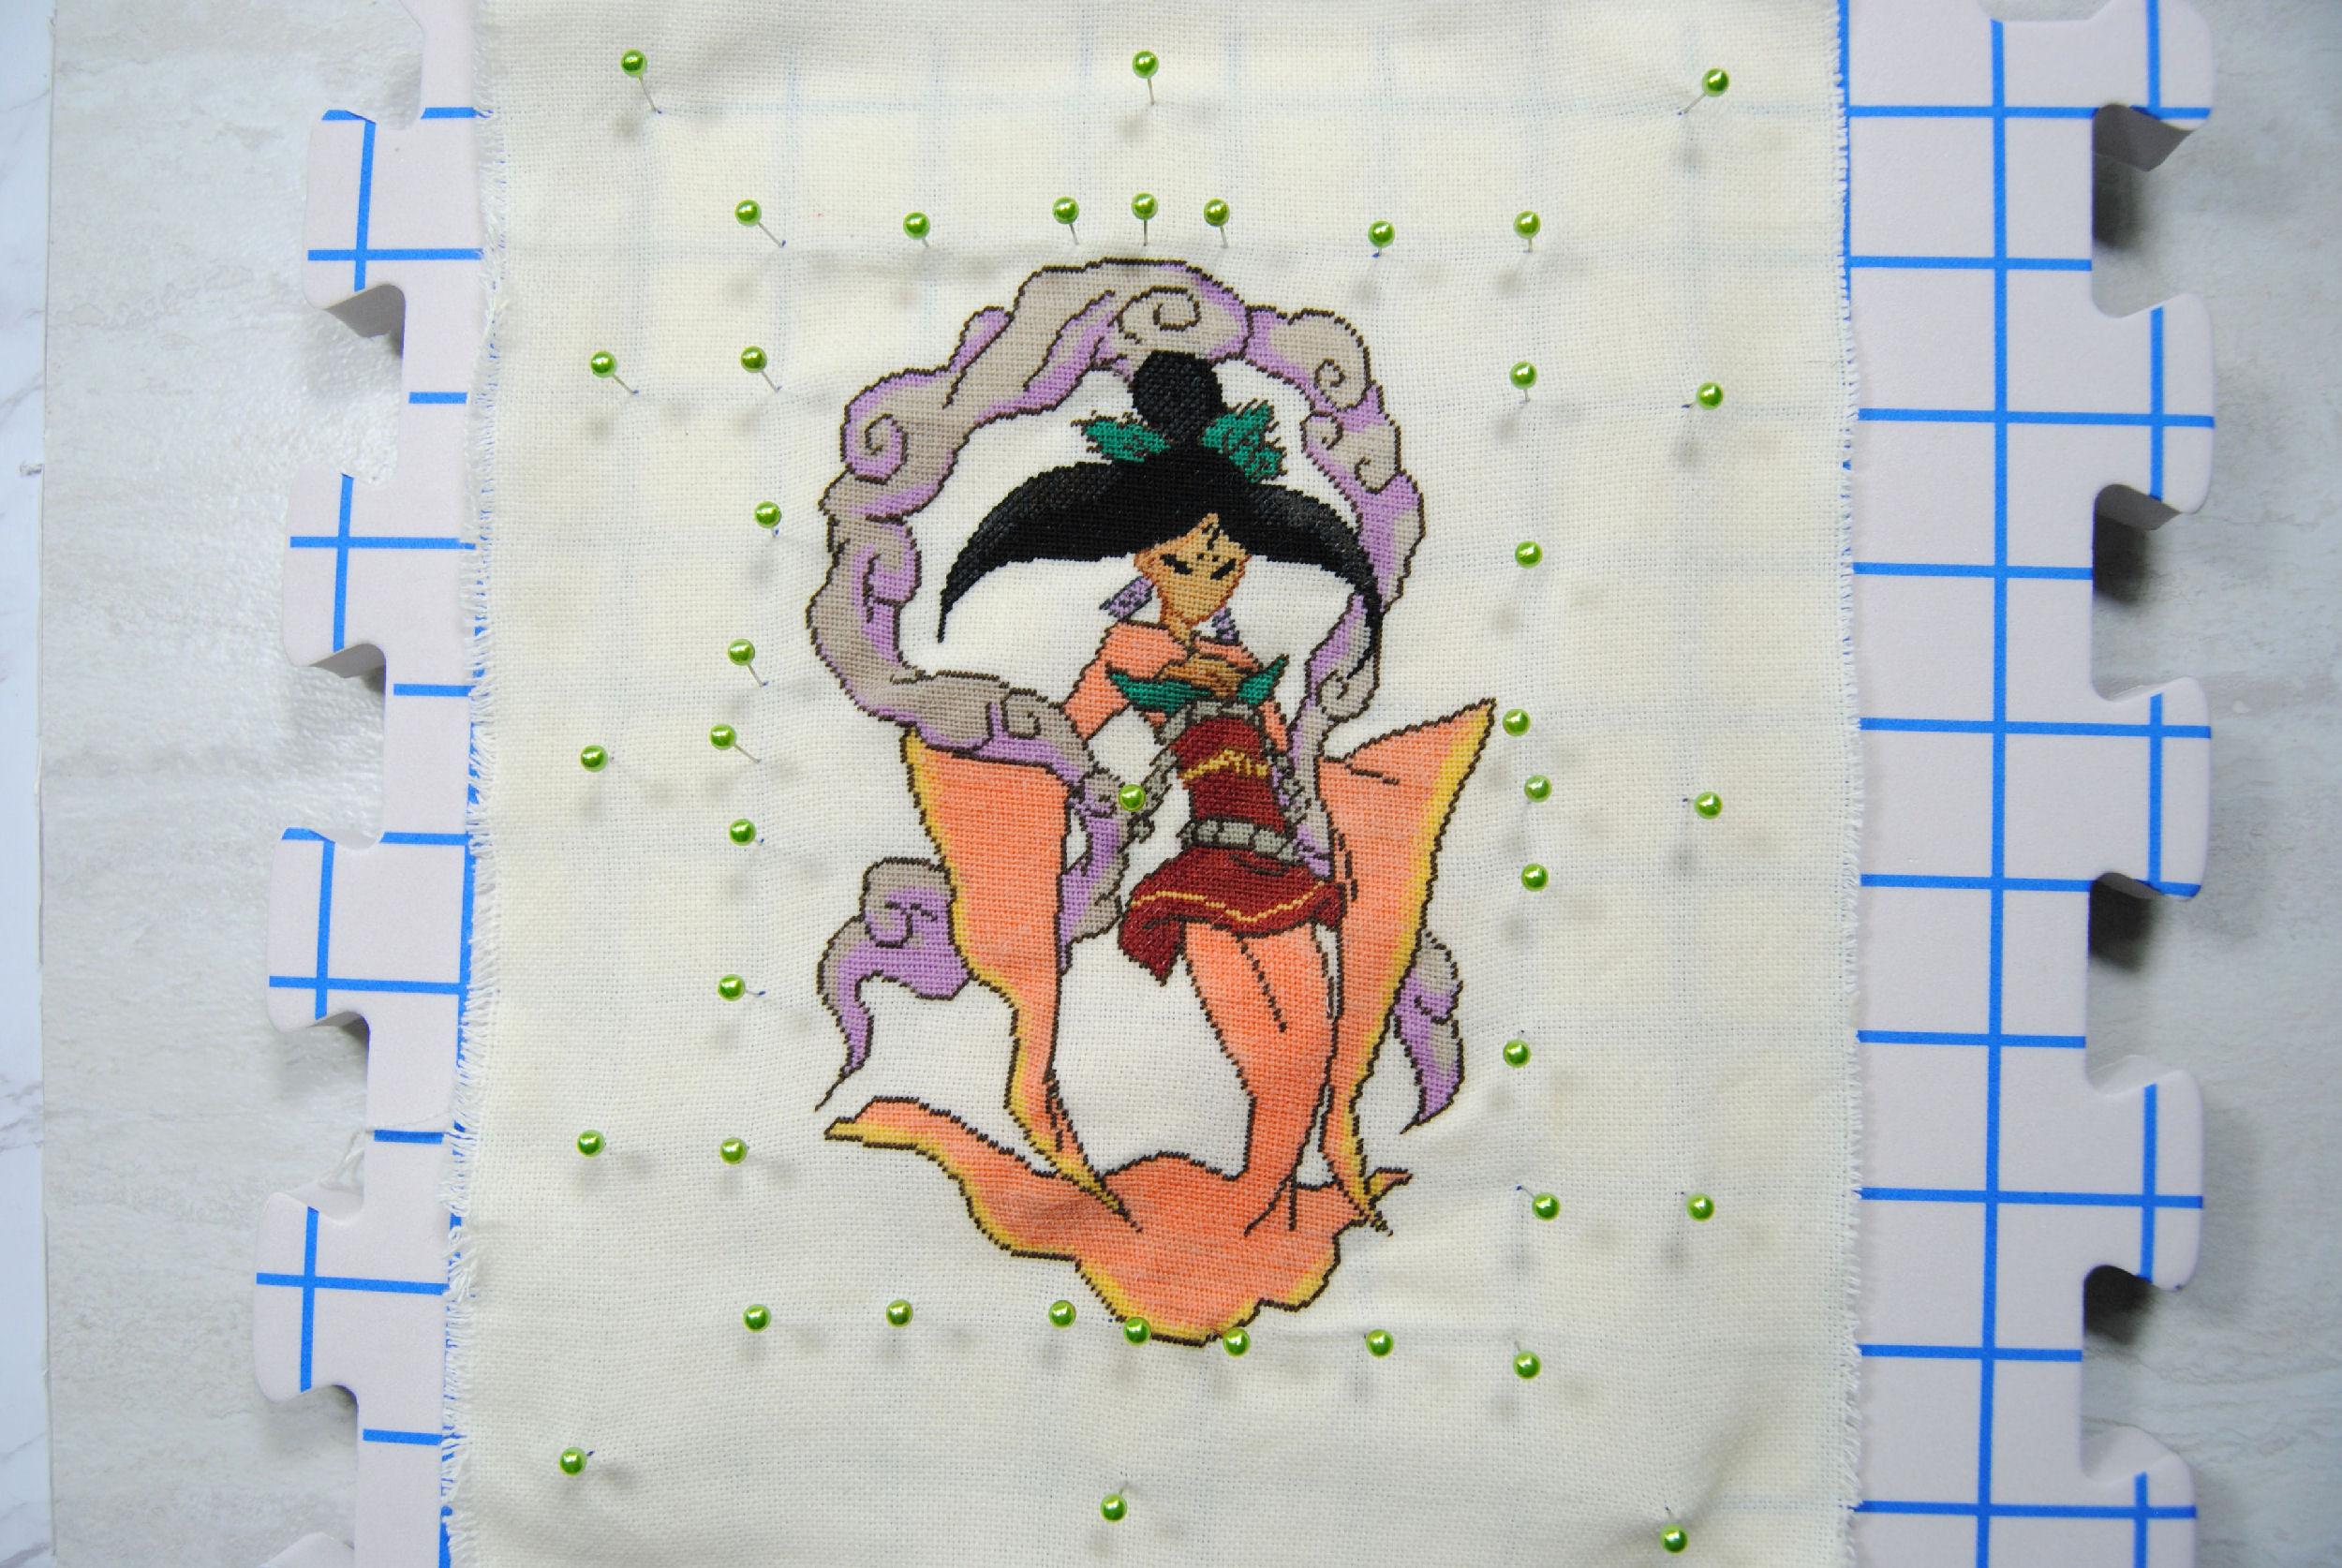
After that, I worked my way around, counting every 28 squares and lining up the pin with one the intersections of blue lines. You can see it dried a bit more as I did this, since the fabric is no longer as transparent as when I first started pinning.
You will want to gently pull where needed to get it to stretch out to the right proportions as you pin. Other sections were very loose where the fabric had warped, don’t worry about those yet. They should shrink as the fabric dries.
I also did a few extra pins around the outer edges, stretching the fabric a bit to keep it taut.
My pins are longer than this foam board is thick, so they stick out quite a bit. This was bothering me, so I stacked two of the mats together and pushed the pins all the way through so that the fabric was actually being held flat to the mats.
You’ll note it’s now easier to see through the fabric again so you can line up your pins easier.
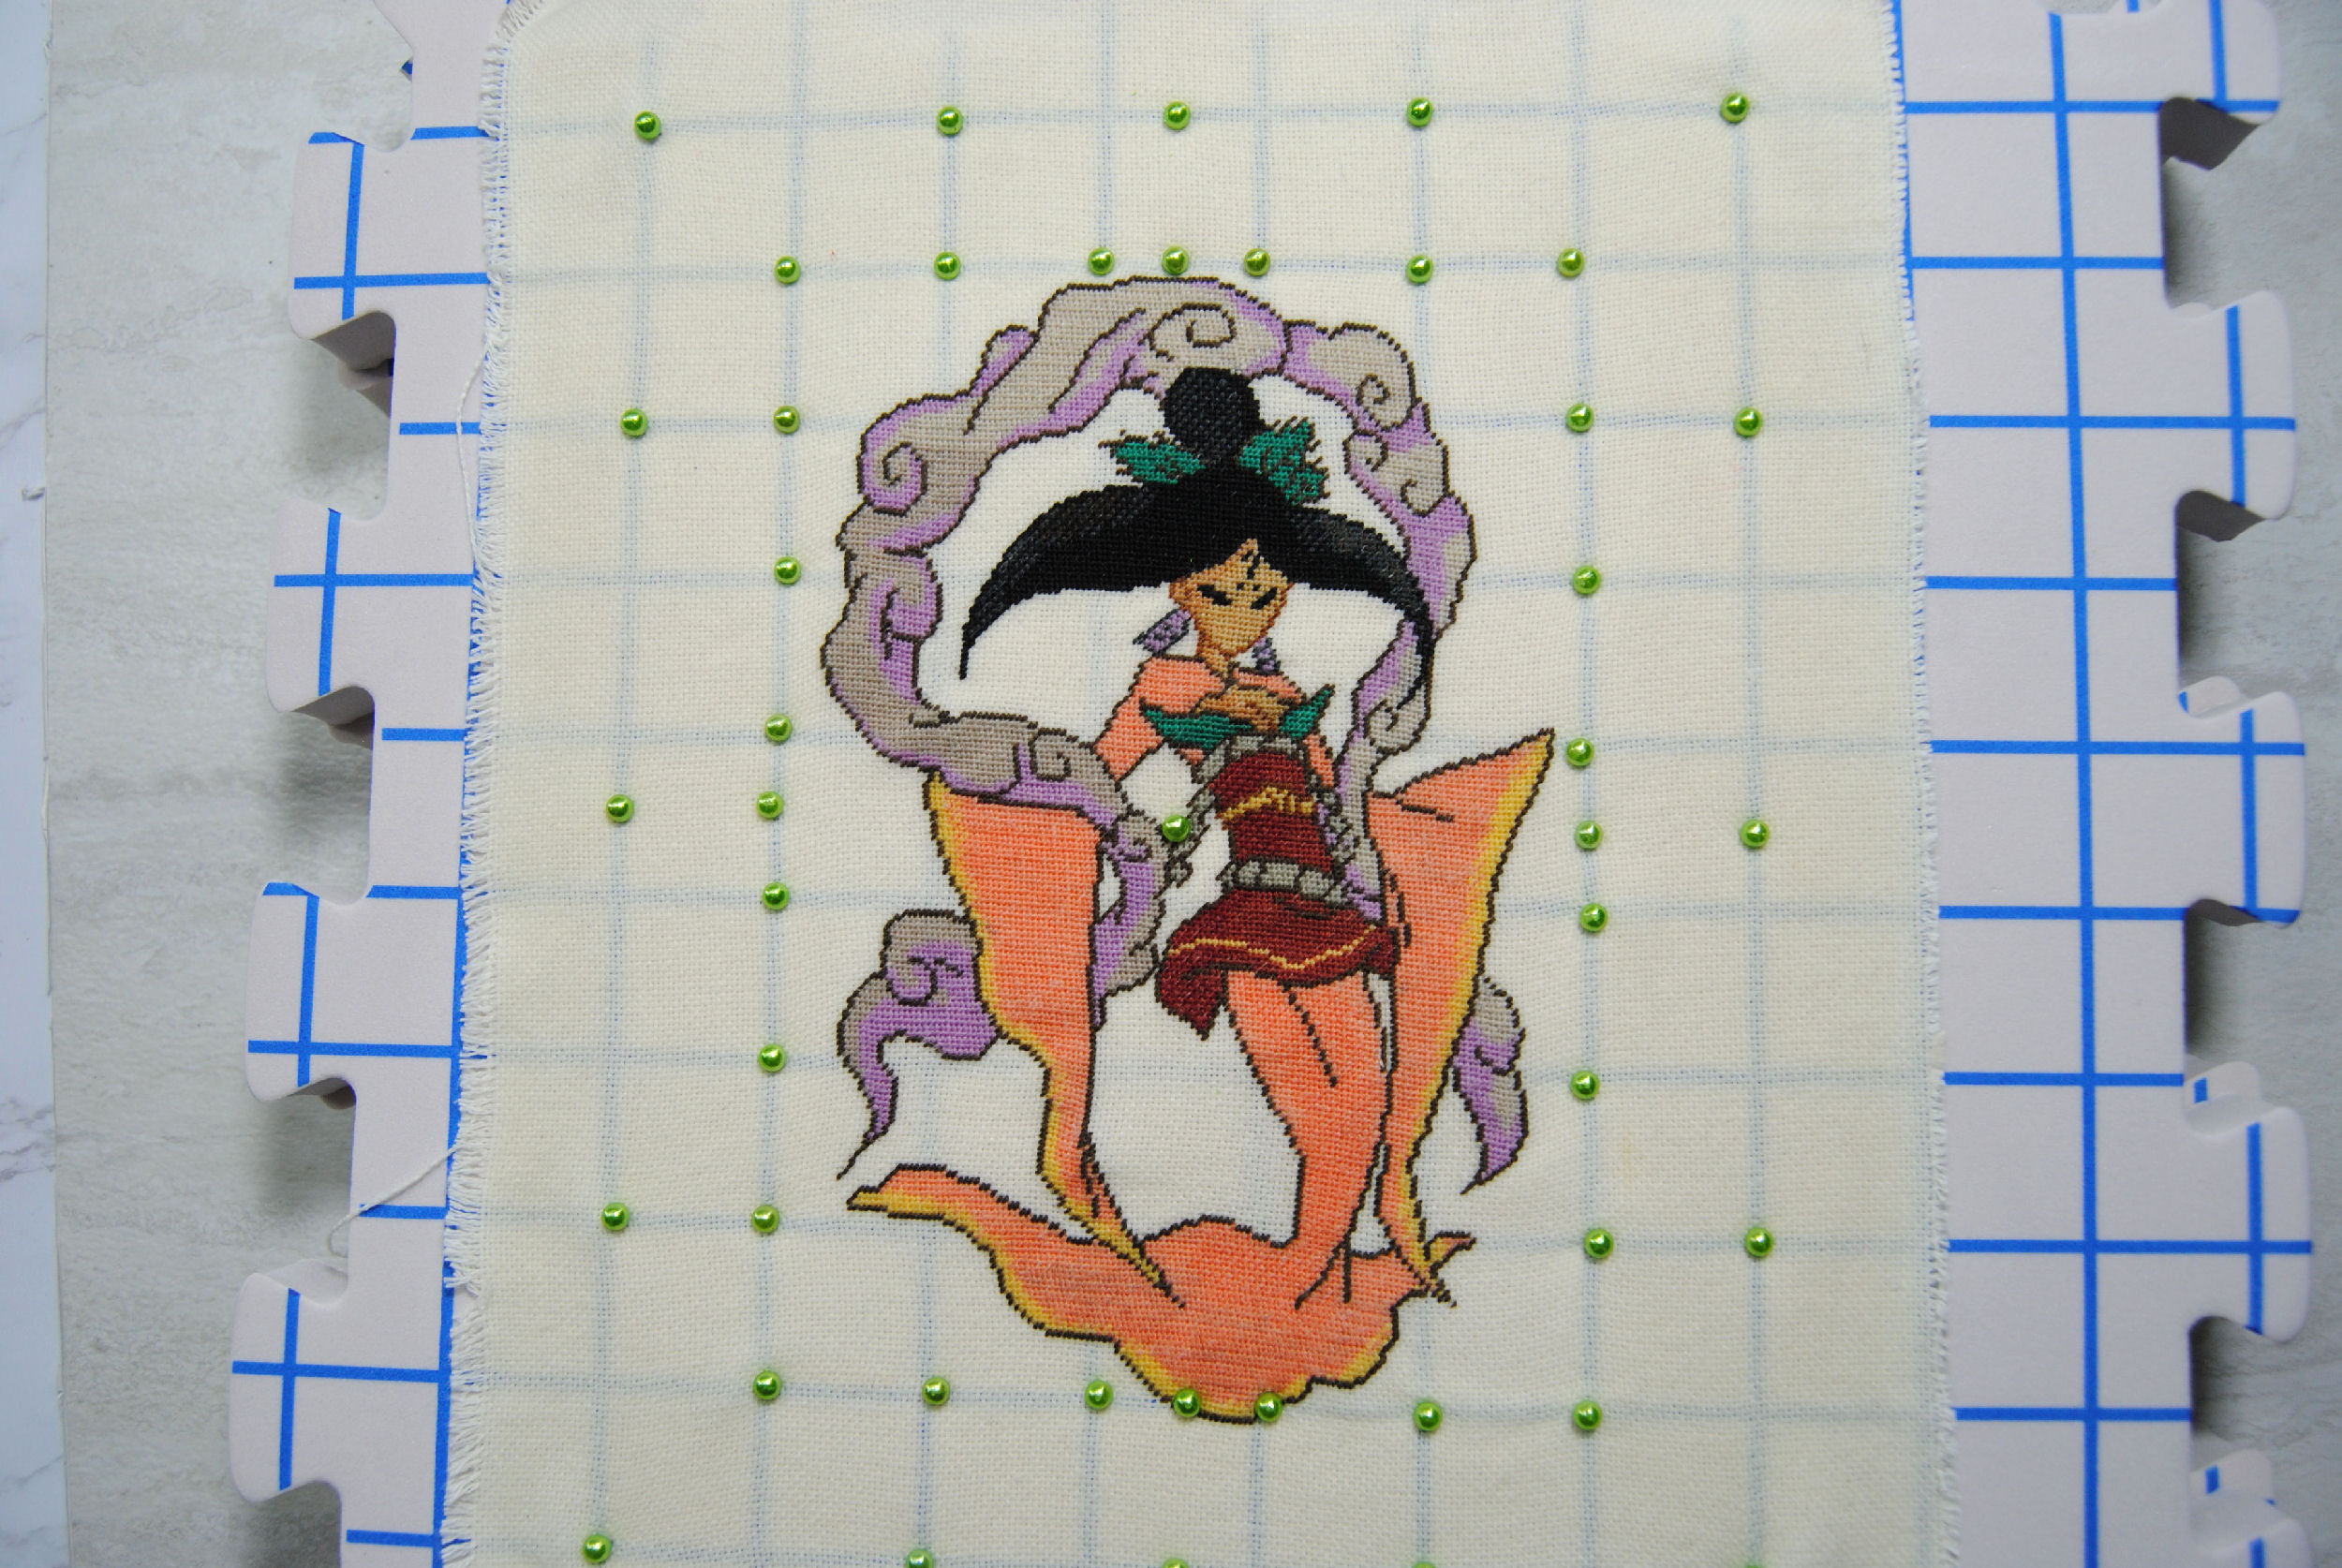
Finally, I did something else for a few hours and let it fully dry.
Preparing your backing board for framing
While we’re waiting for that to dry, I took the time to cut down one of my comic book boards to size.
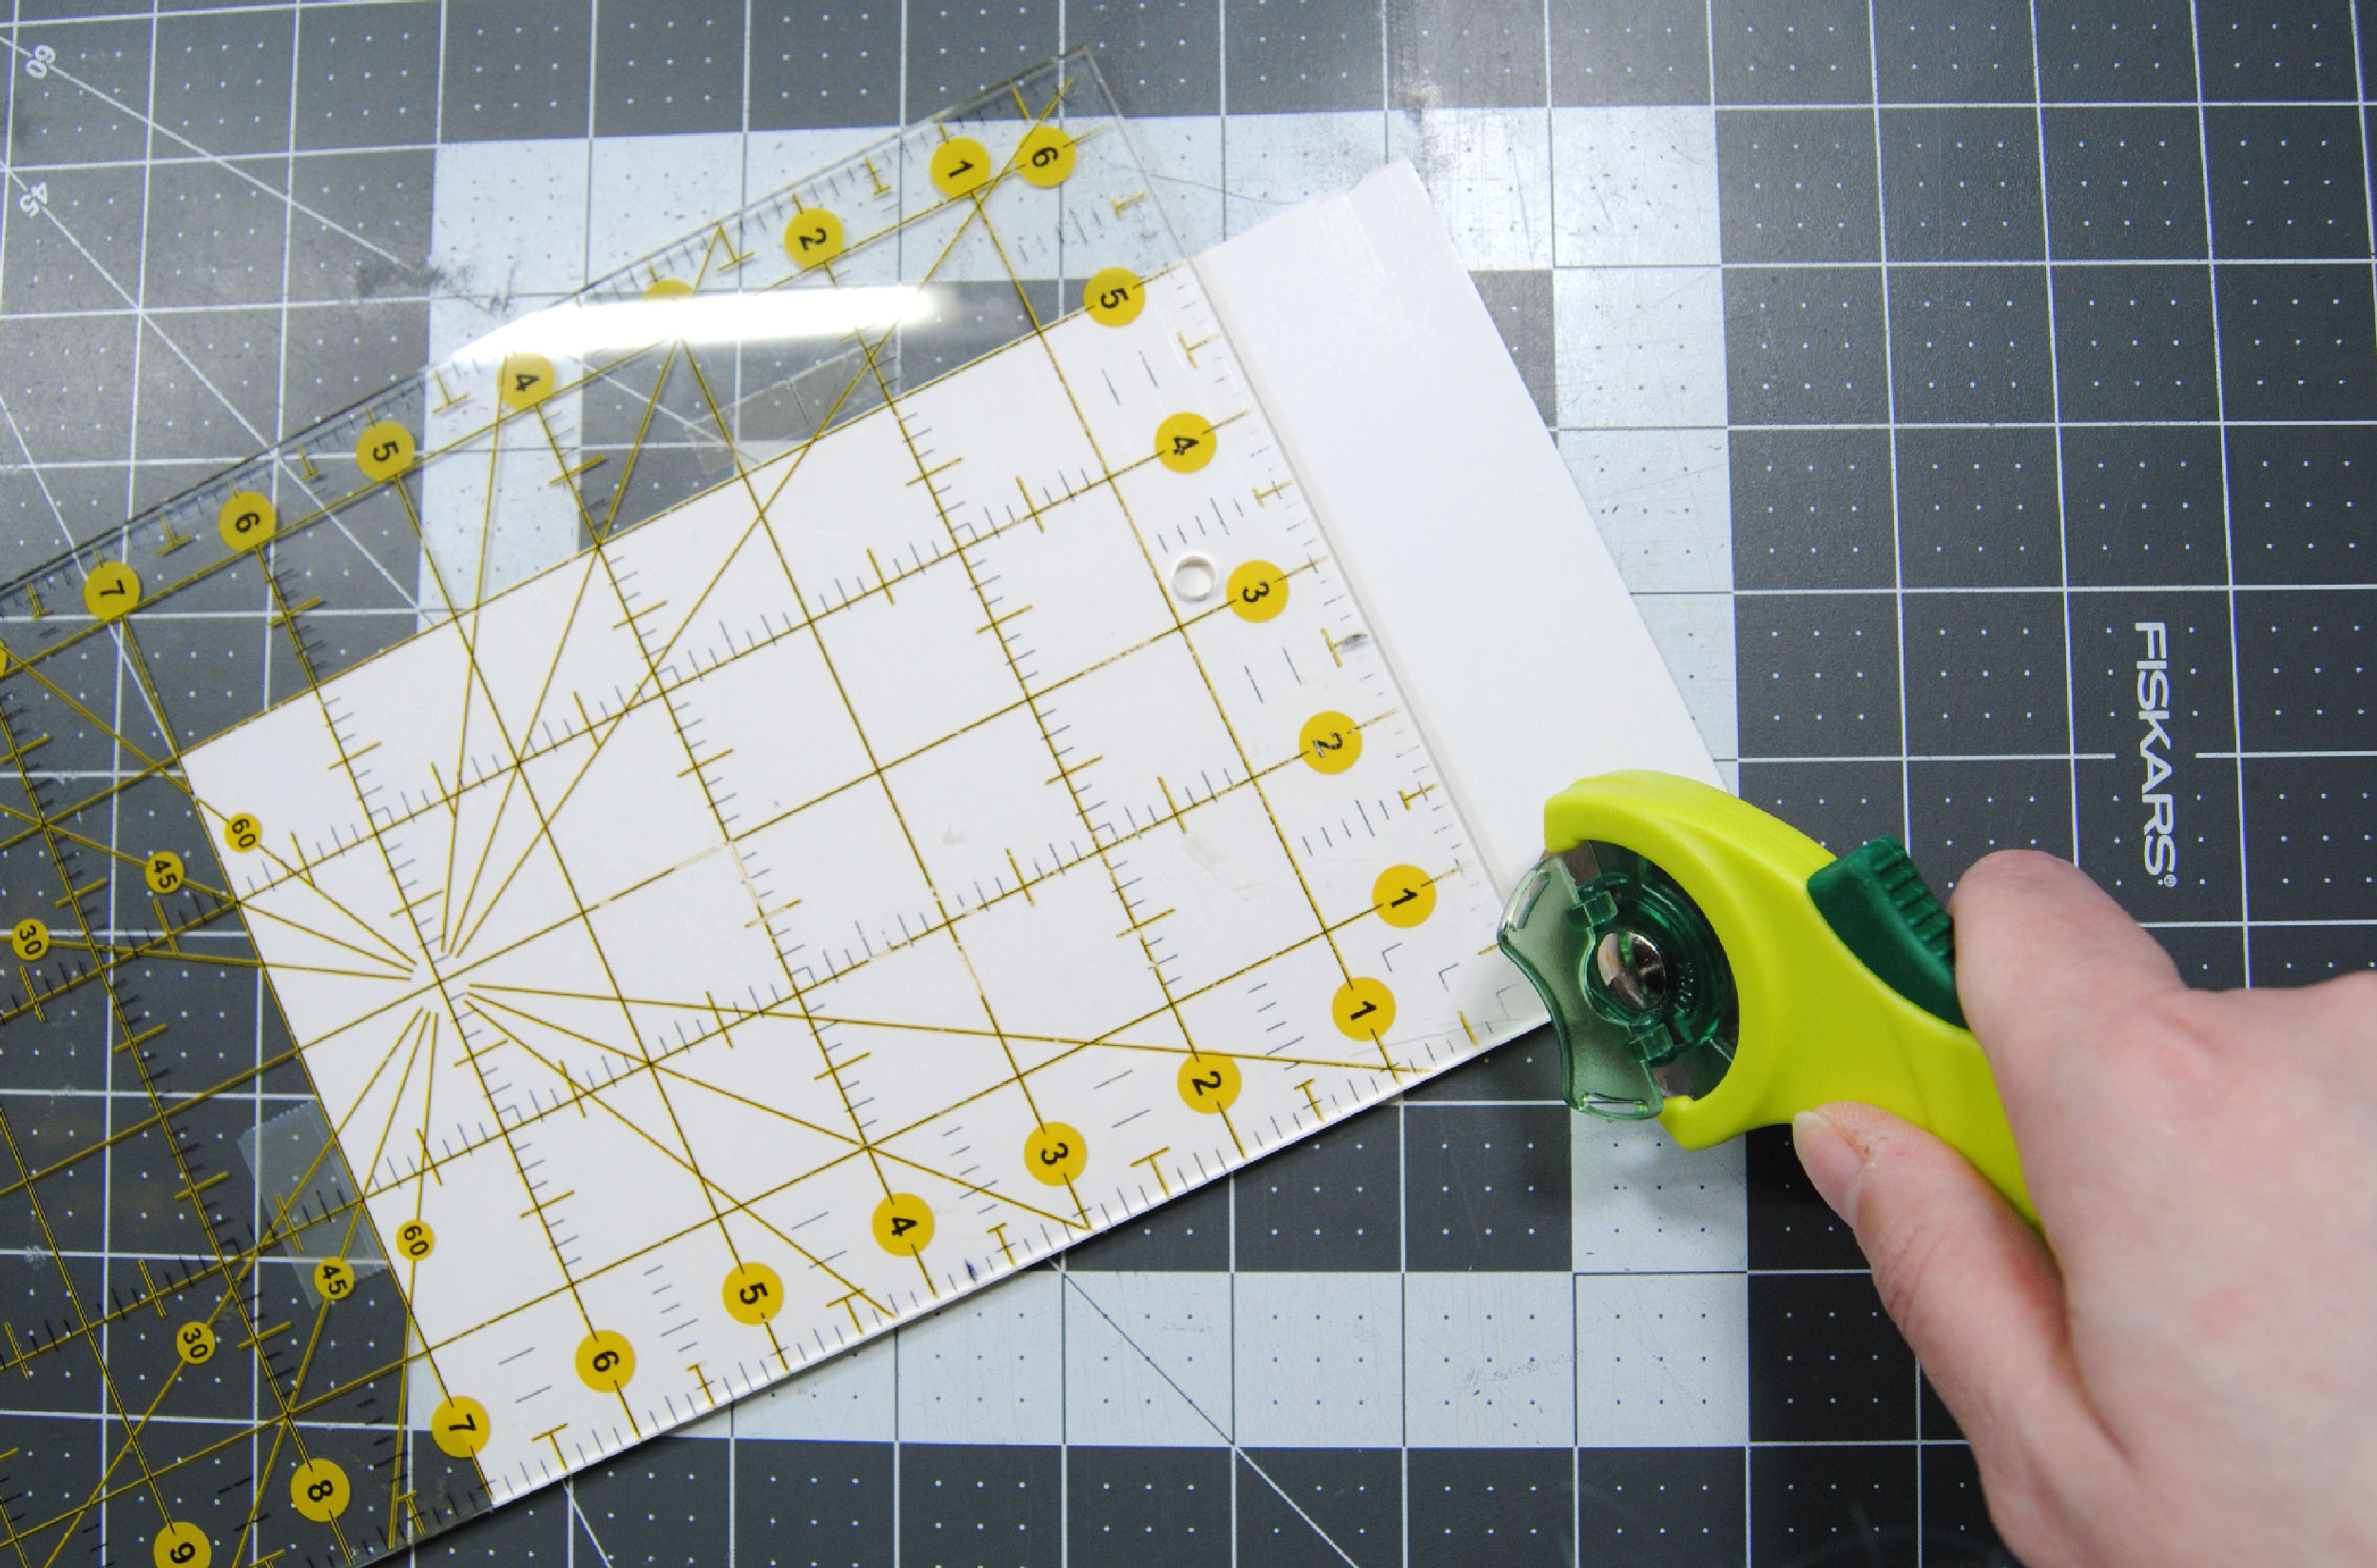
I wanted the board to be just UNDER 5×7 so it fits well in the frame even once we have that fabric wrapped around it. Don’t worry, that rotary cutter is ONLY used for paper. I have another one for my fabric. I’m not a monster.
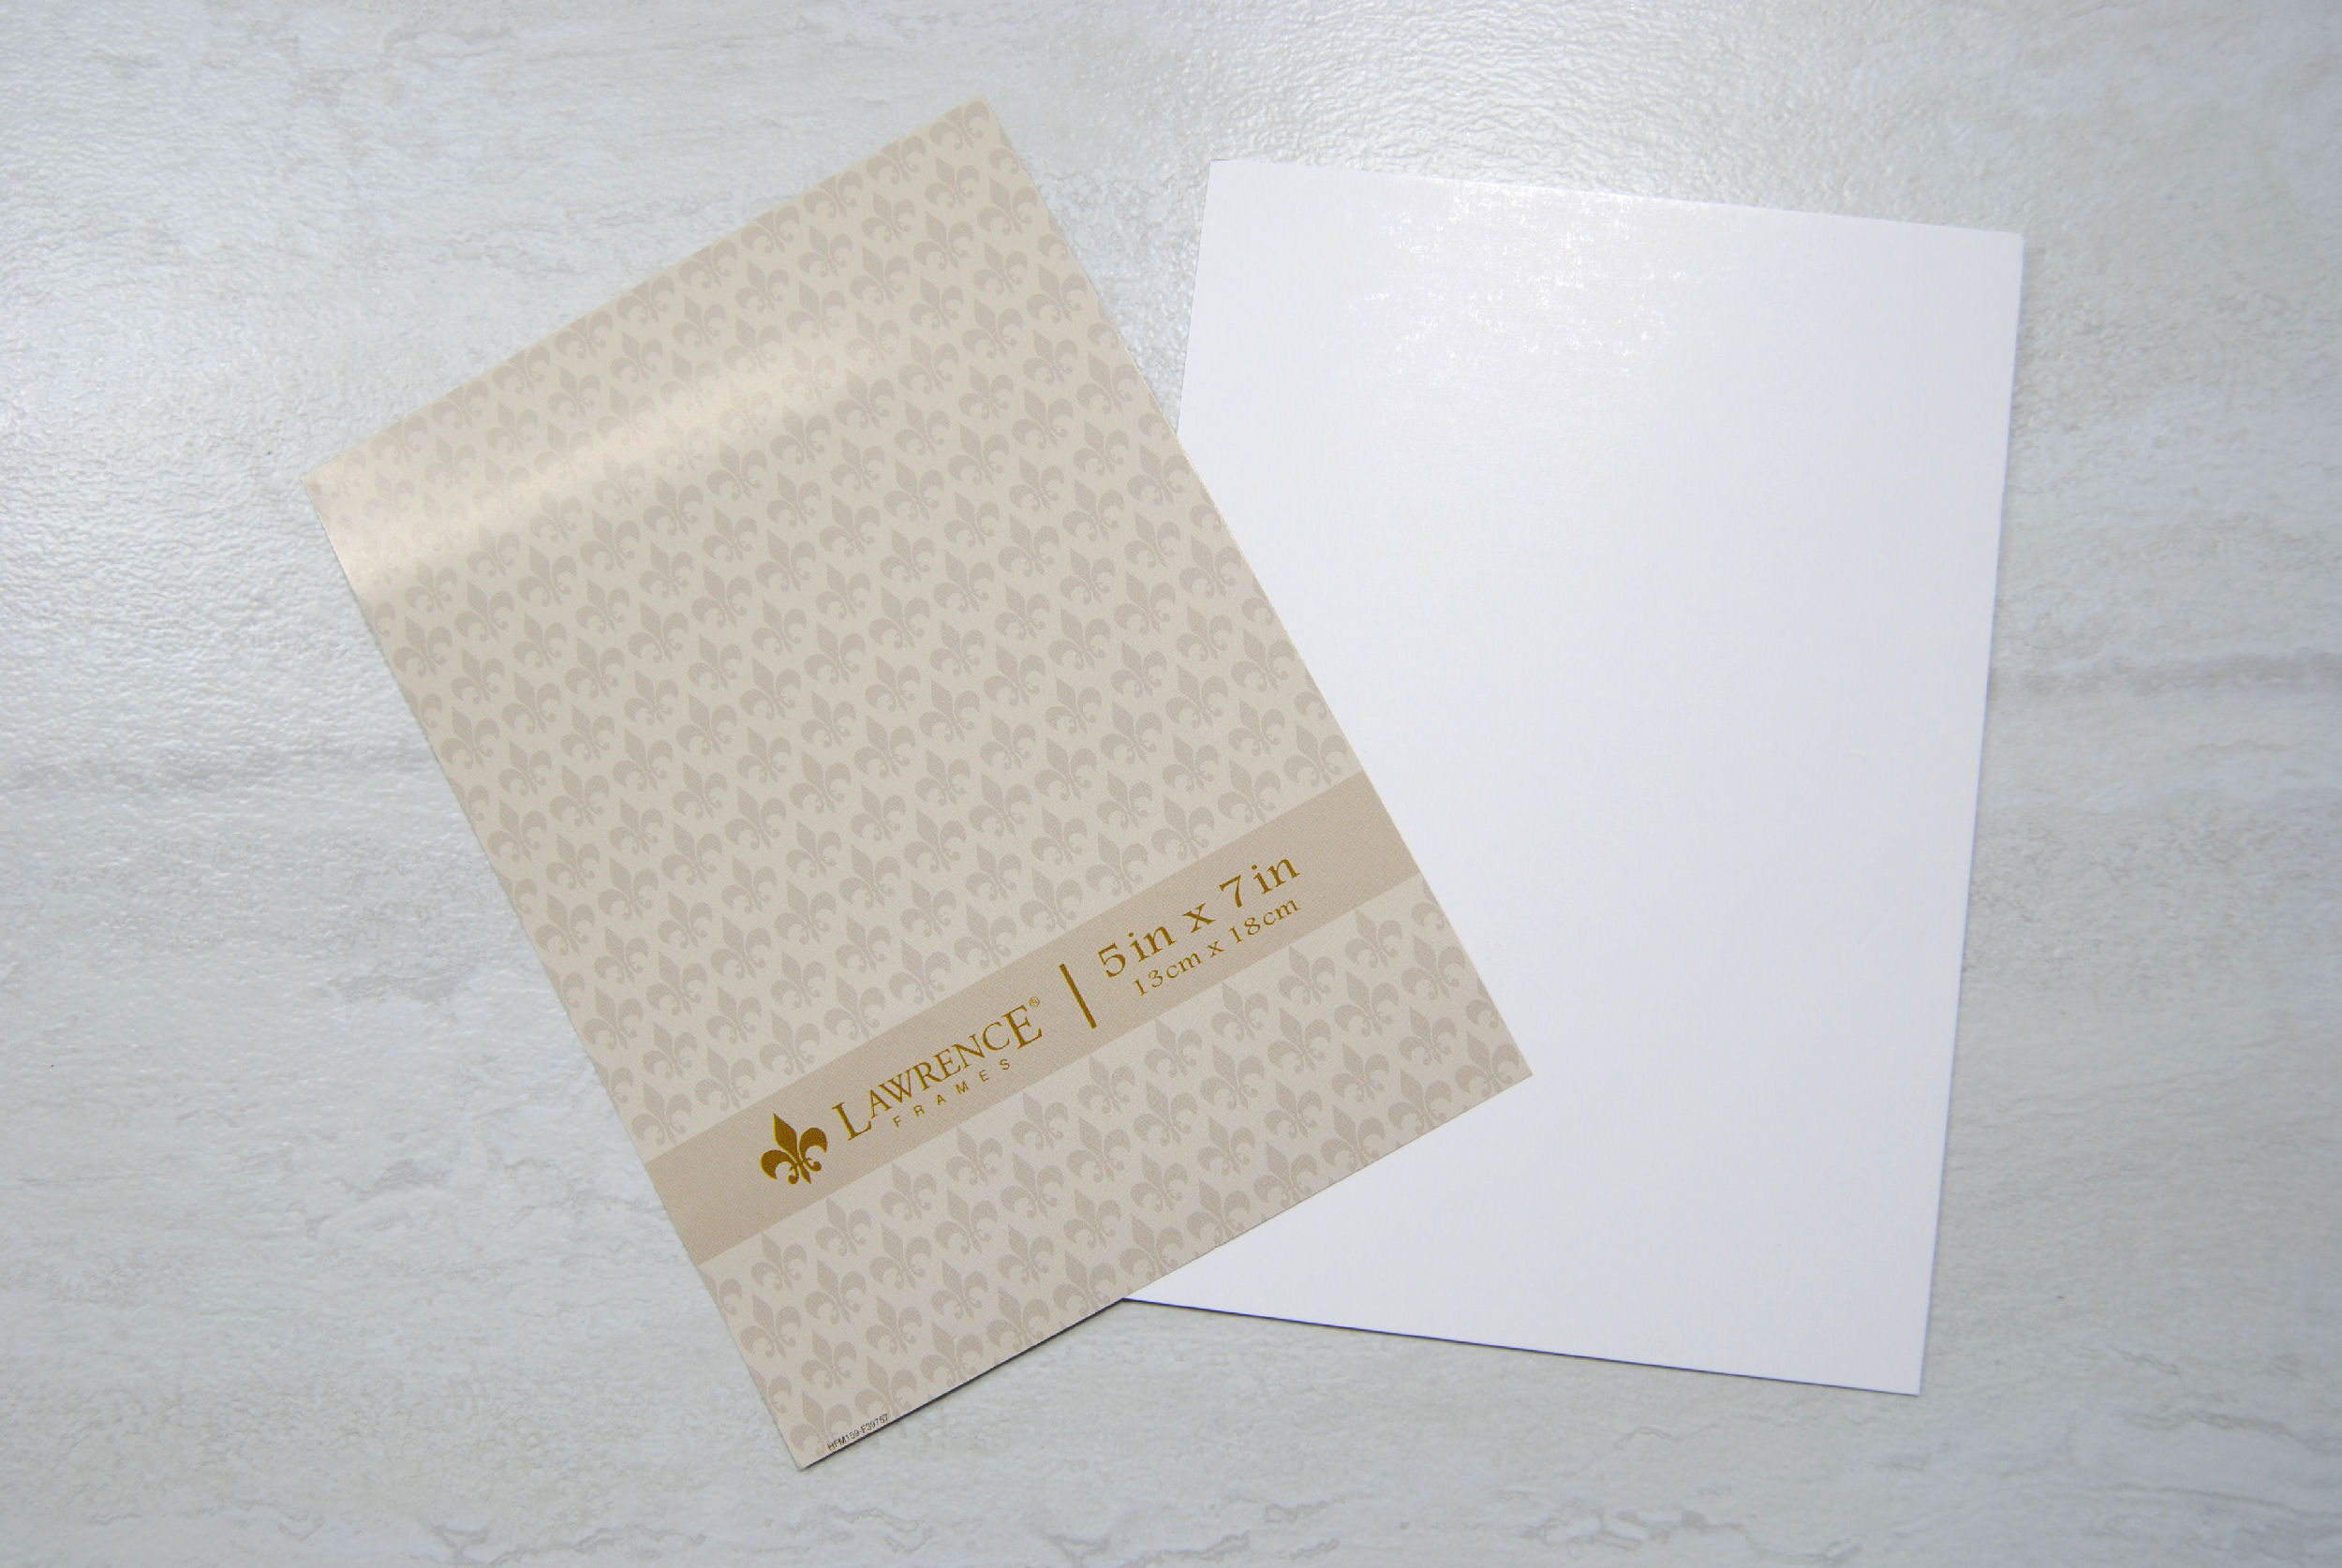
Your frame might have already come with a board. Mine just came with a thin very bendy piece of paper, so I wasn’t about to use that. But you could also potentially use that if yours came with something stiff enough to keep its shape. But again, it needs to be loose enough to fit despite the fabric around all four sides.
Ironing your project
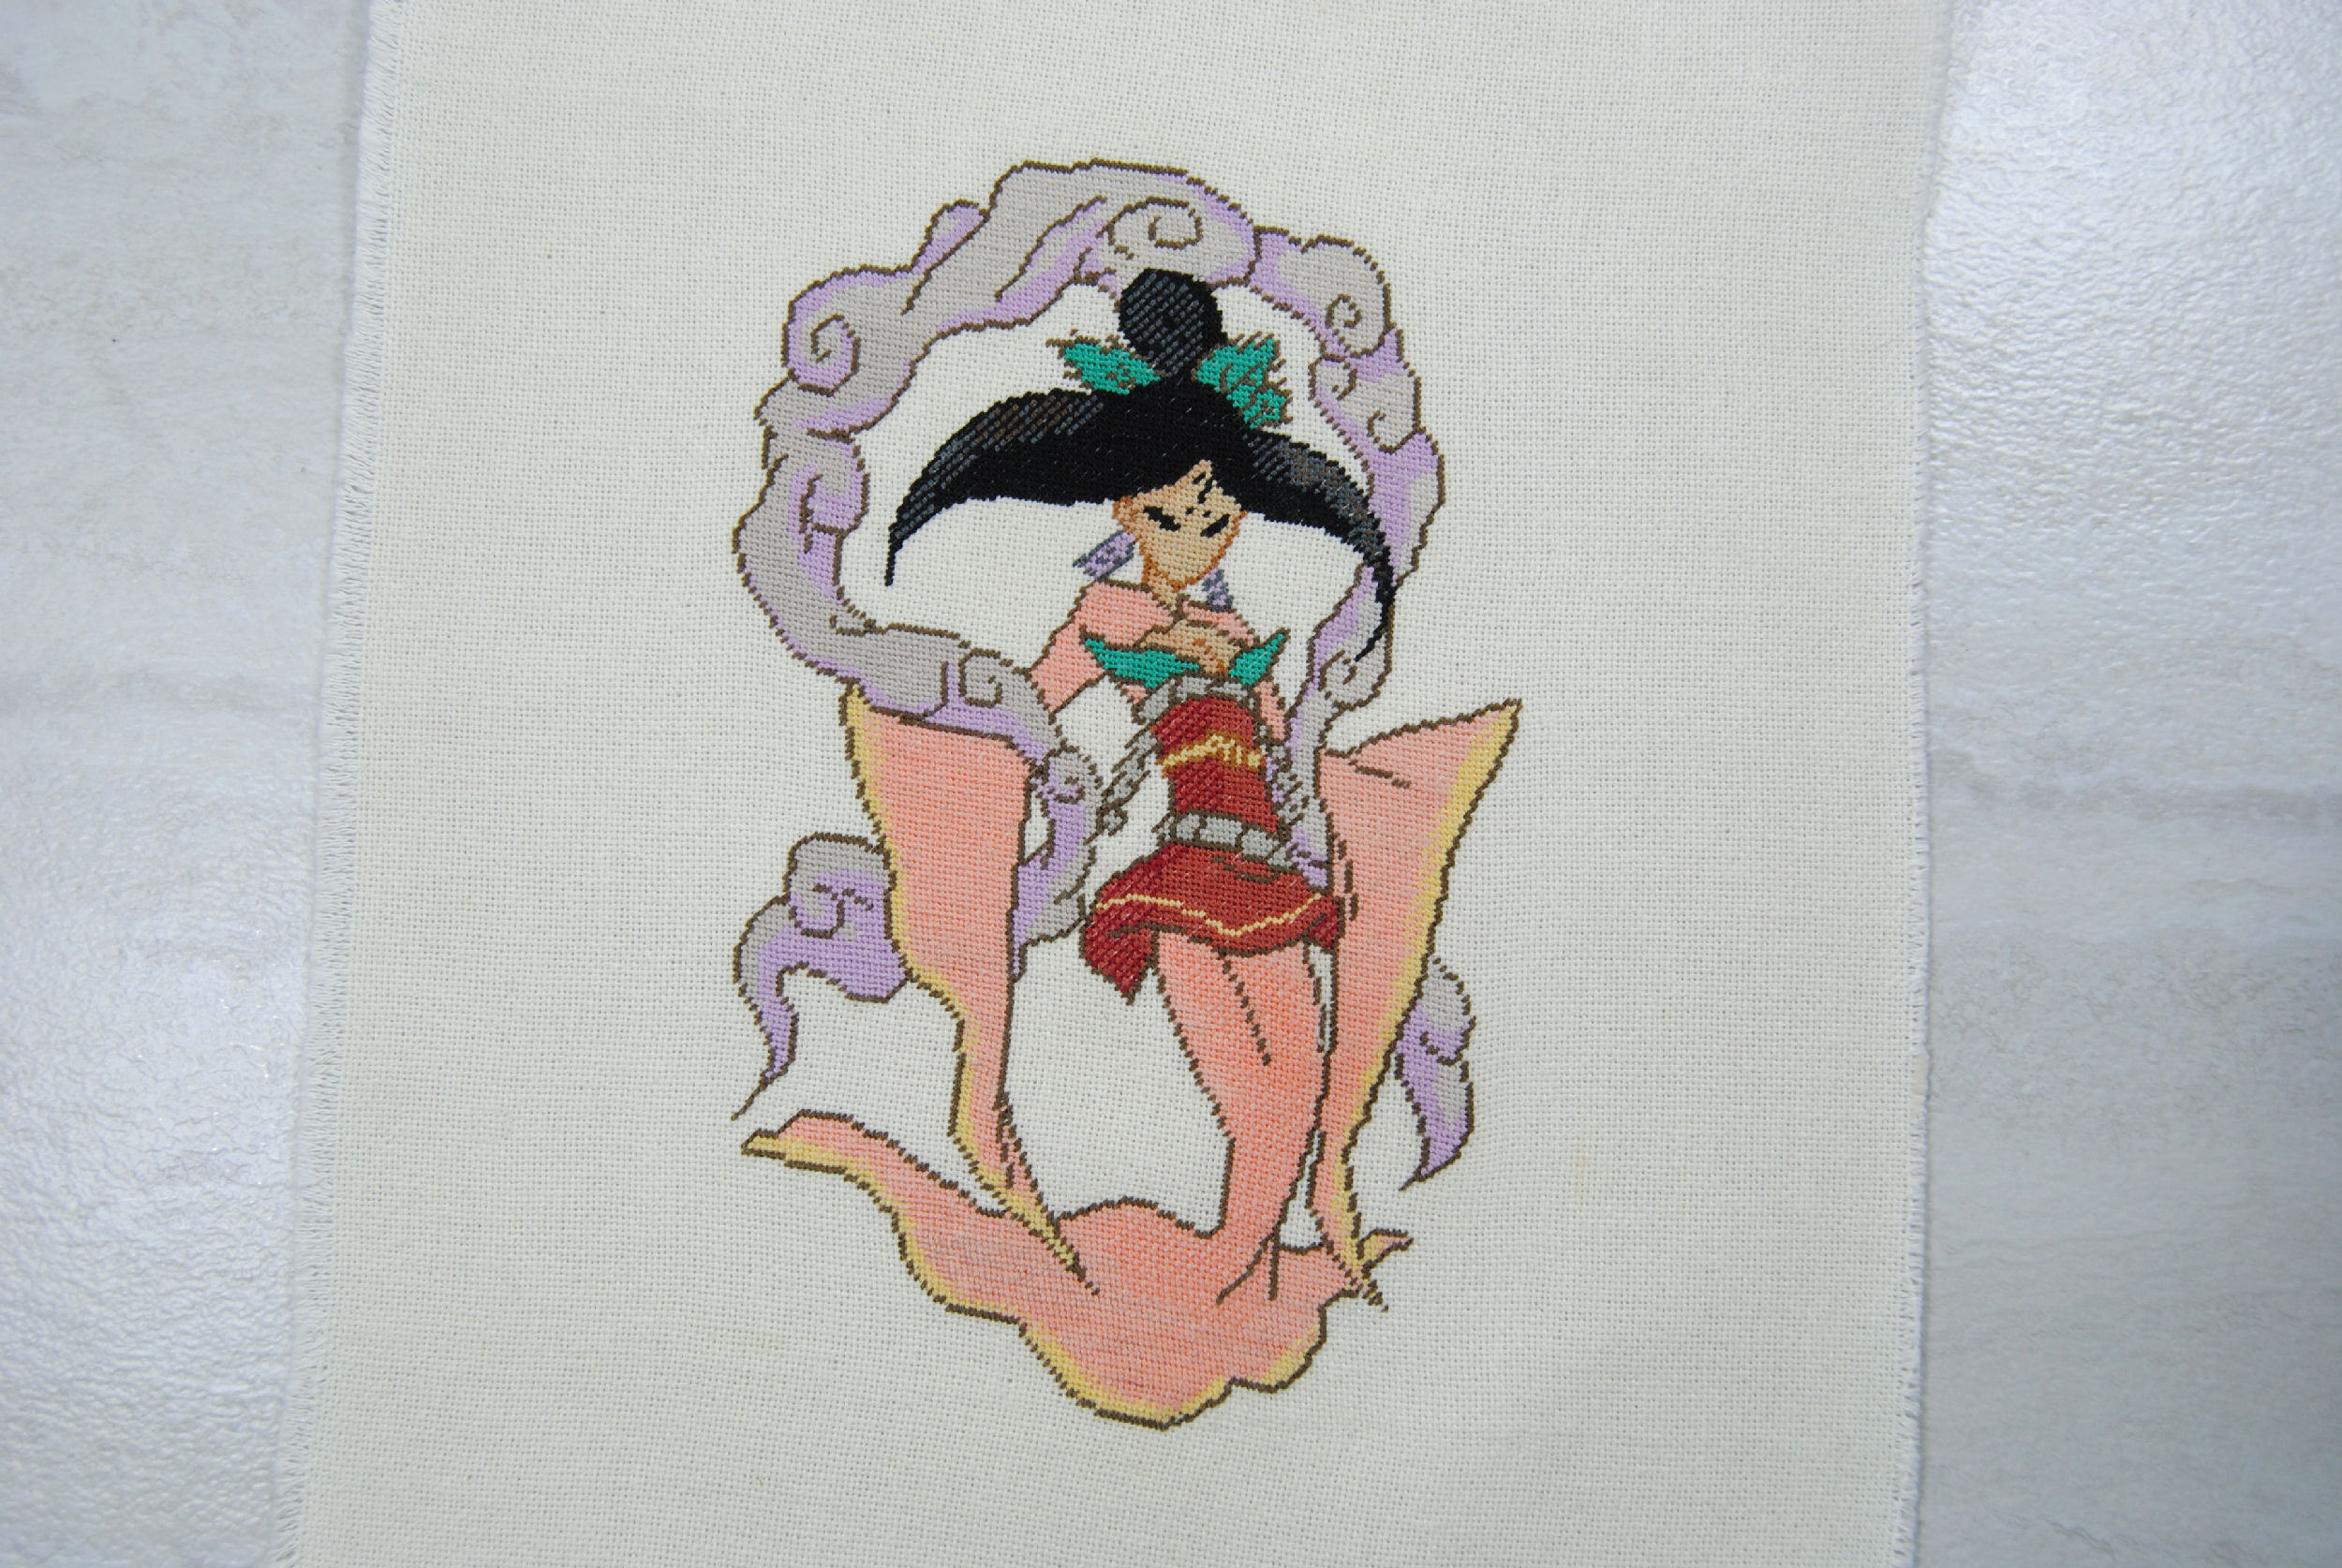
Alright, we’re back and it’s now fully dry. You’ll see there’s not as many ‘bubbles’ in the fabric as it has dried to the shape I pinned it in. There’s still a few though, so let’s get rid of any remaining imperfections by ironing it.
But first let’s pull out all the pins, and… OH NO. LOOK AT ALL THE HOLES.
Just kidding! Don’t panic! That is to be expected! It won’t even be as noticeable on lower counts like 14. But the holes will be there! And that’s okay, ironing will take care of that too.

Some of those holes will be more persistent than others. So if need be drag a ruler or your nail gently over the hole to push individual threads back into place as you iron. You can re-dampen specific spots if needed. But only if your fabric is color fast. And even then, try to avoid ironing wet stitches to avoid any bleeding.
Take your time and be gentle and it’ll be okay. You can’t even tell they were there now:
But even if there were some still there, they’re right on the edge of the frame size and won’t be visible in most frames.
If you’re using a frame where those edges might be visible and you’re concerned about holes, consider pinning further out on the fabric so they’re hidden on the backside.
Lacing your project for framing
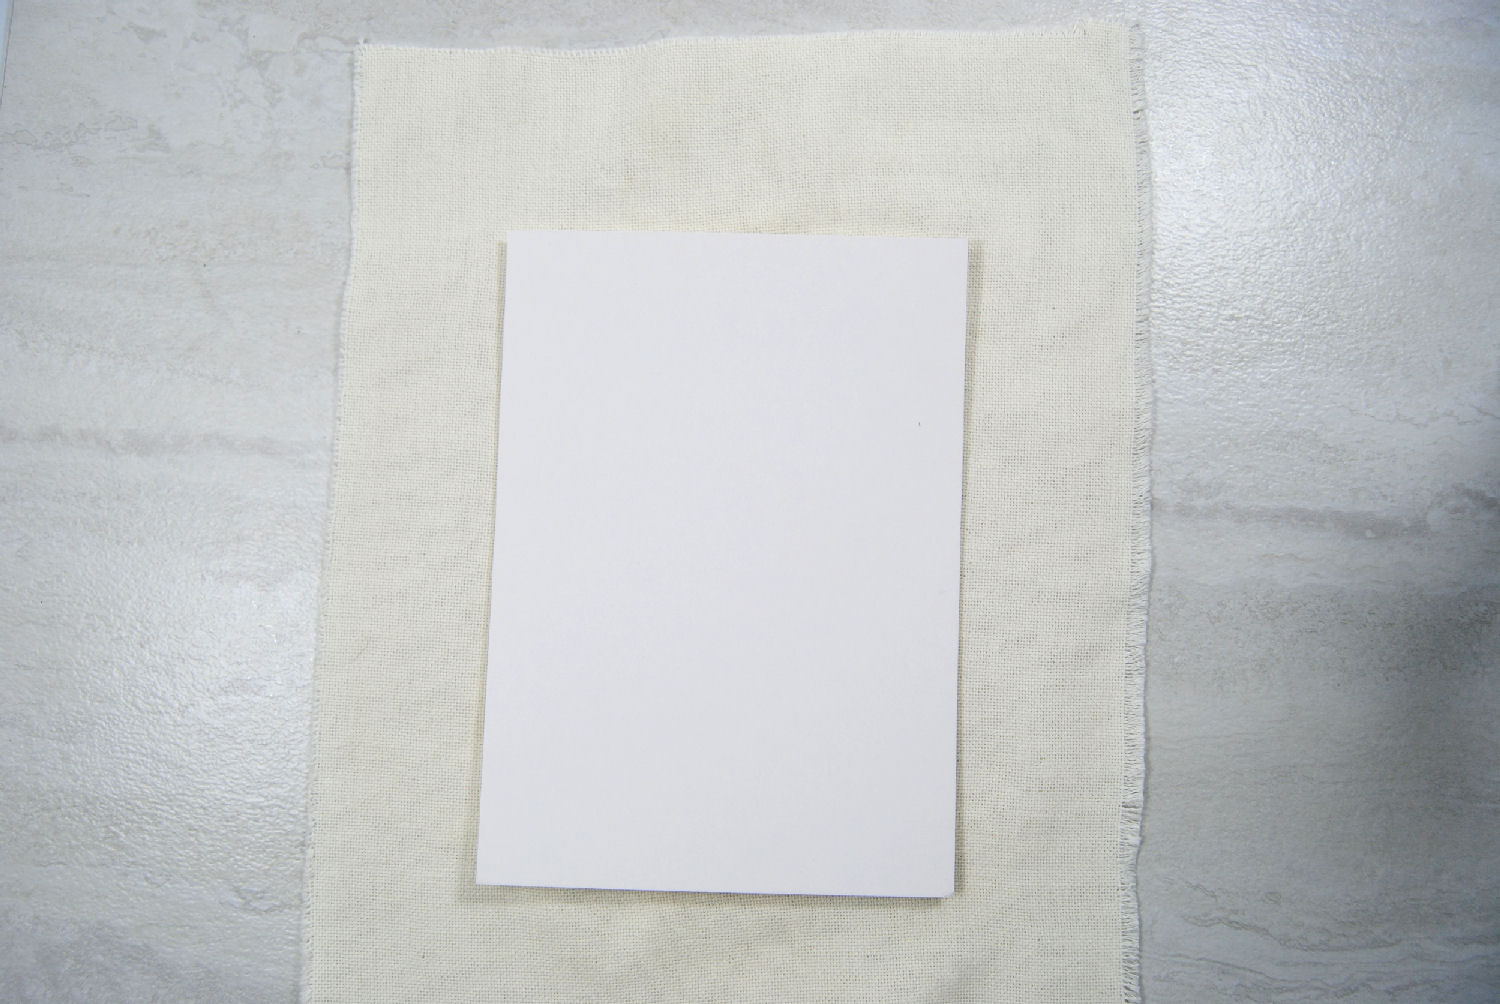
Now for the ‘fun’ part. Or tedious part, depending on how you feel about lacing. Lay your board onto the back of your project, centering it as well as you can. Fold over the two longer sides and hold it in place while you look at it from the front to make sure it’s straight.
You’ll be able to wiggle it around a bit later to fix minor imperfections before framing, but you want to at least be in the ballpark now.
You will also want to put it into your frame so you can make sure it will FIT in the frame. If it doesn’t, you need to trim a little bit more off of the mounting board before getting started.
Start stitching
Using your sewing thread, you’ll want to start stitching the fabric together. Mine don’t have an especially large gap since I had all that extra fabric on the sides. But this works just as well even if you only have enough to get around the edge of the board.
You’ll just need a lot more thread and patience, as it WILL try to slide around while you’re stitching.
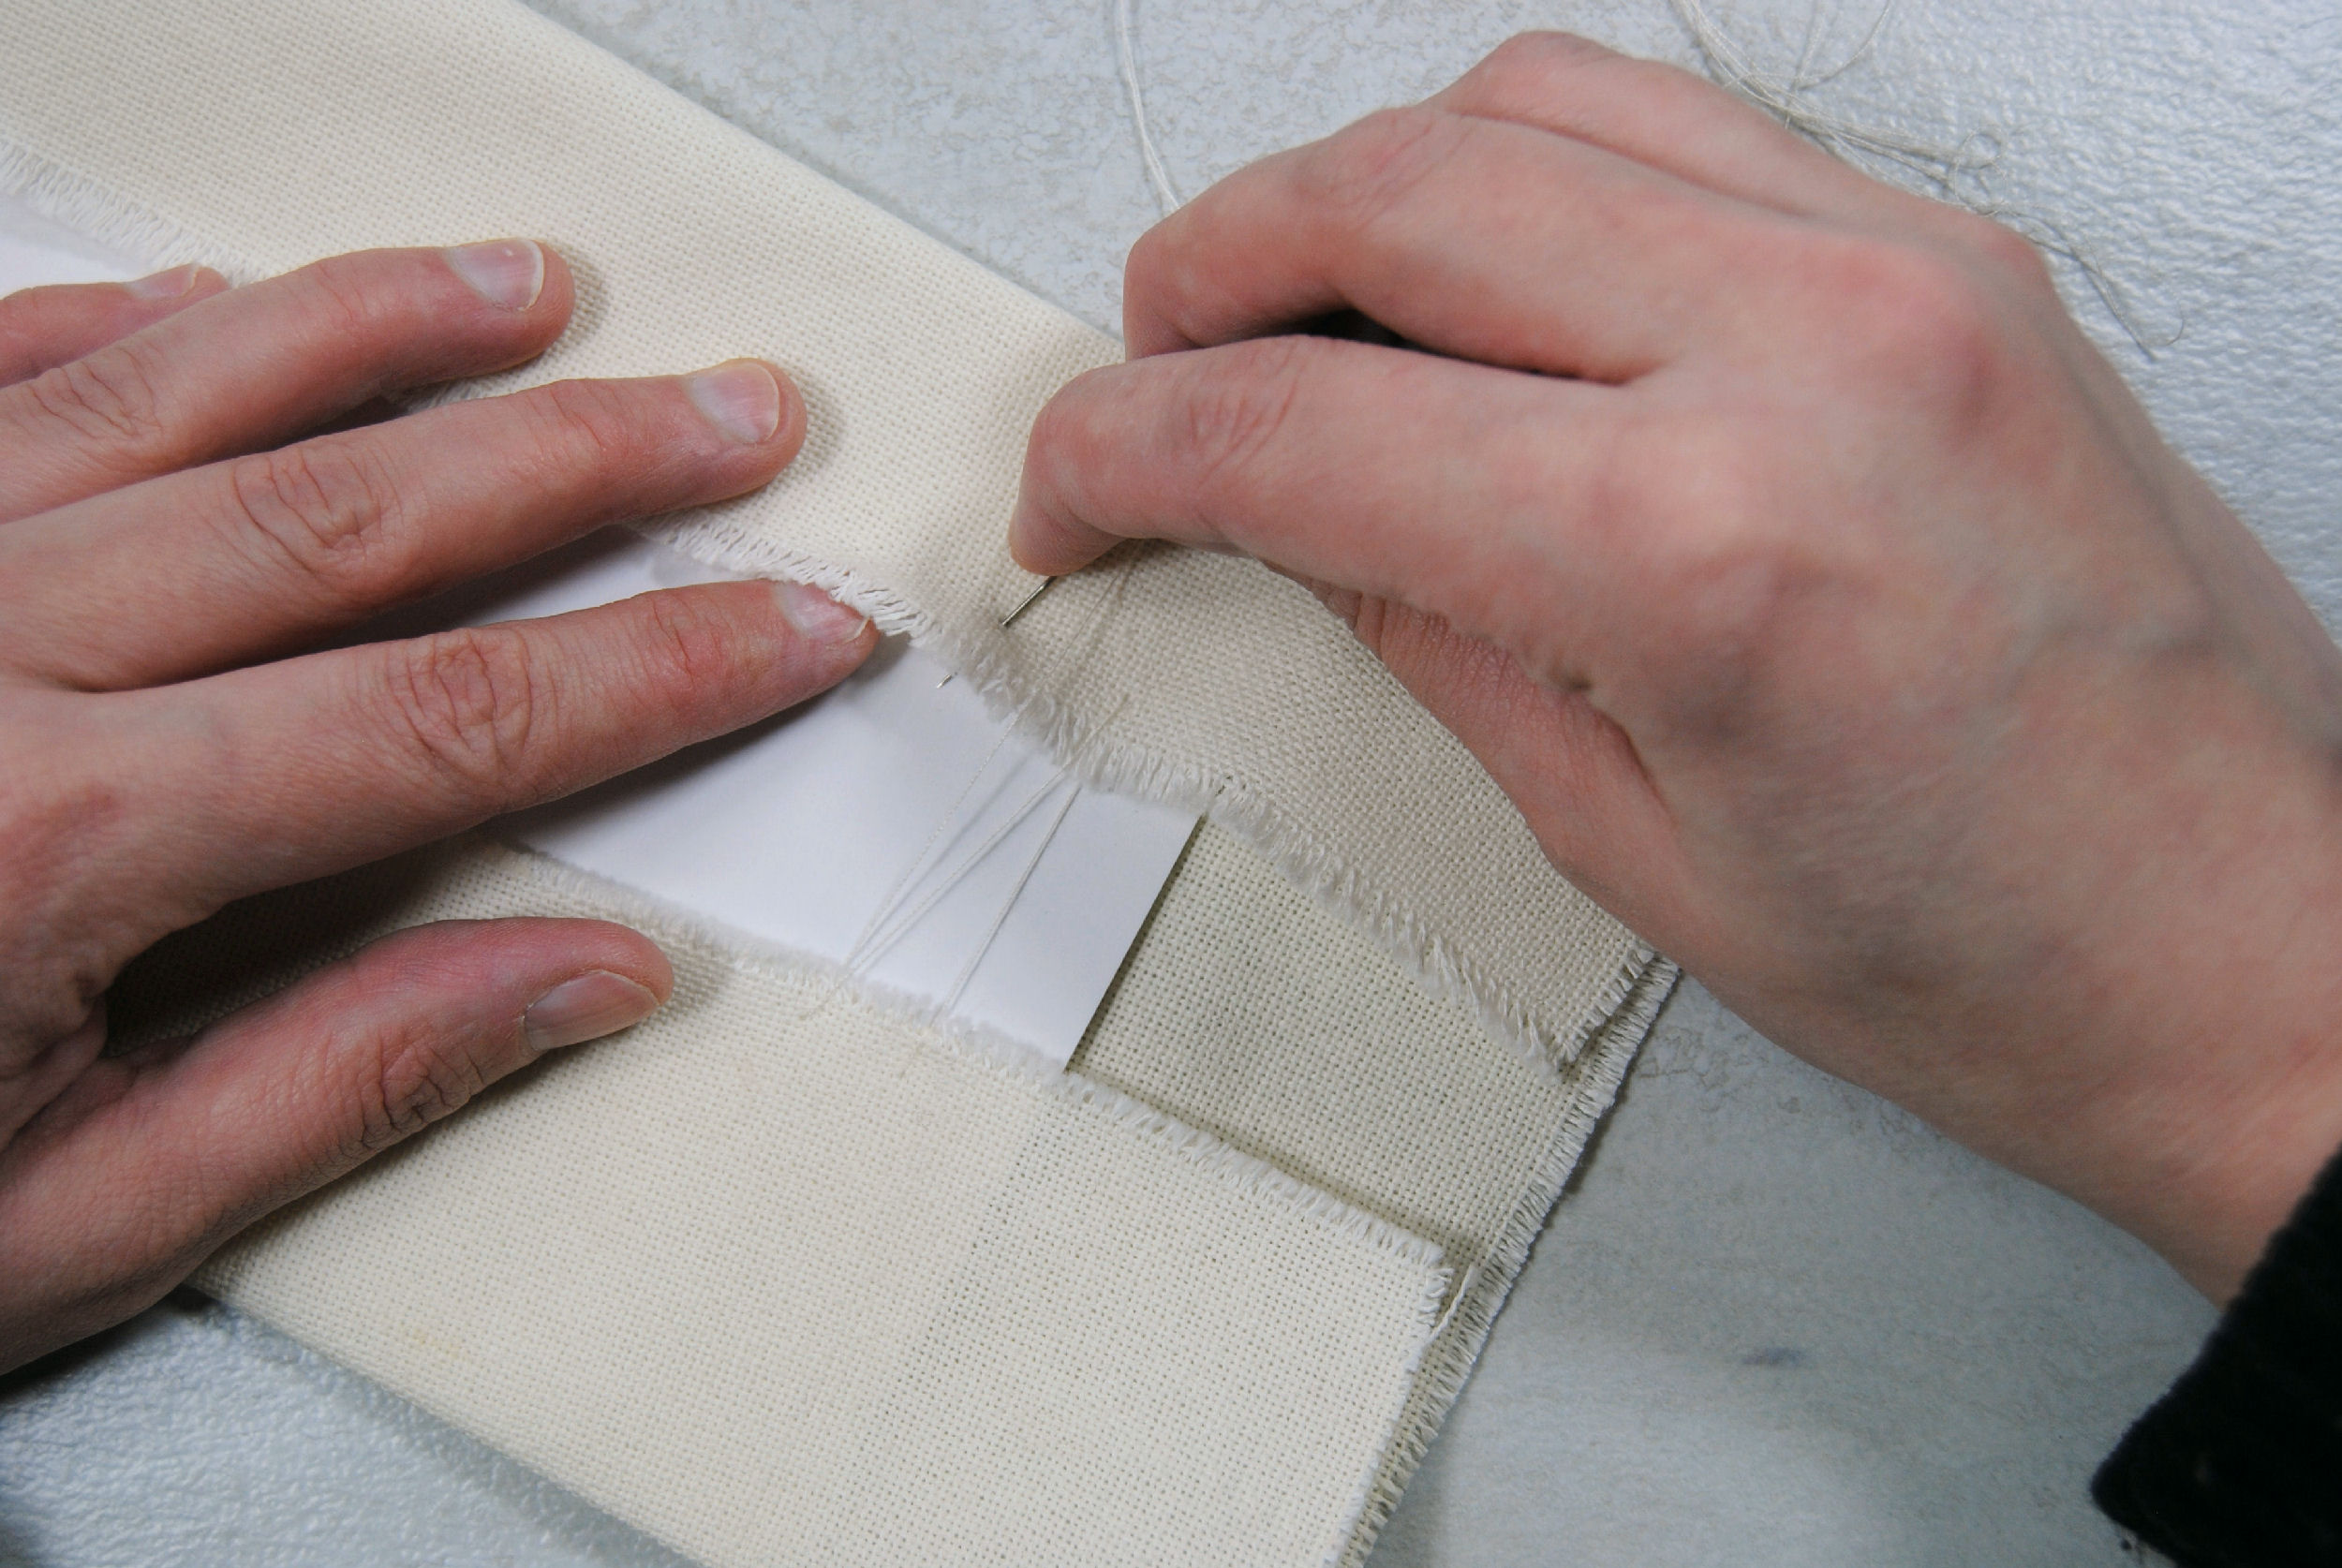
Keep going stitching up the back, pulling the thread taut as you go. You want it to be held tight to the board. Flip it over once in a while to see if you’re still centered, and shift the fabric one way or the other as needed.
You’ll note that my fabric was already a bit frayed along the edges, that’s fine. You can trim that off if it bothers you. But you’ll also see that I’m stitching several squares away from the edge. Since you’re pulling the thread tightly as you work, you don’t want it to pull the strands of fabric out entirely!

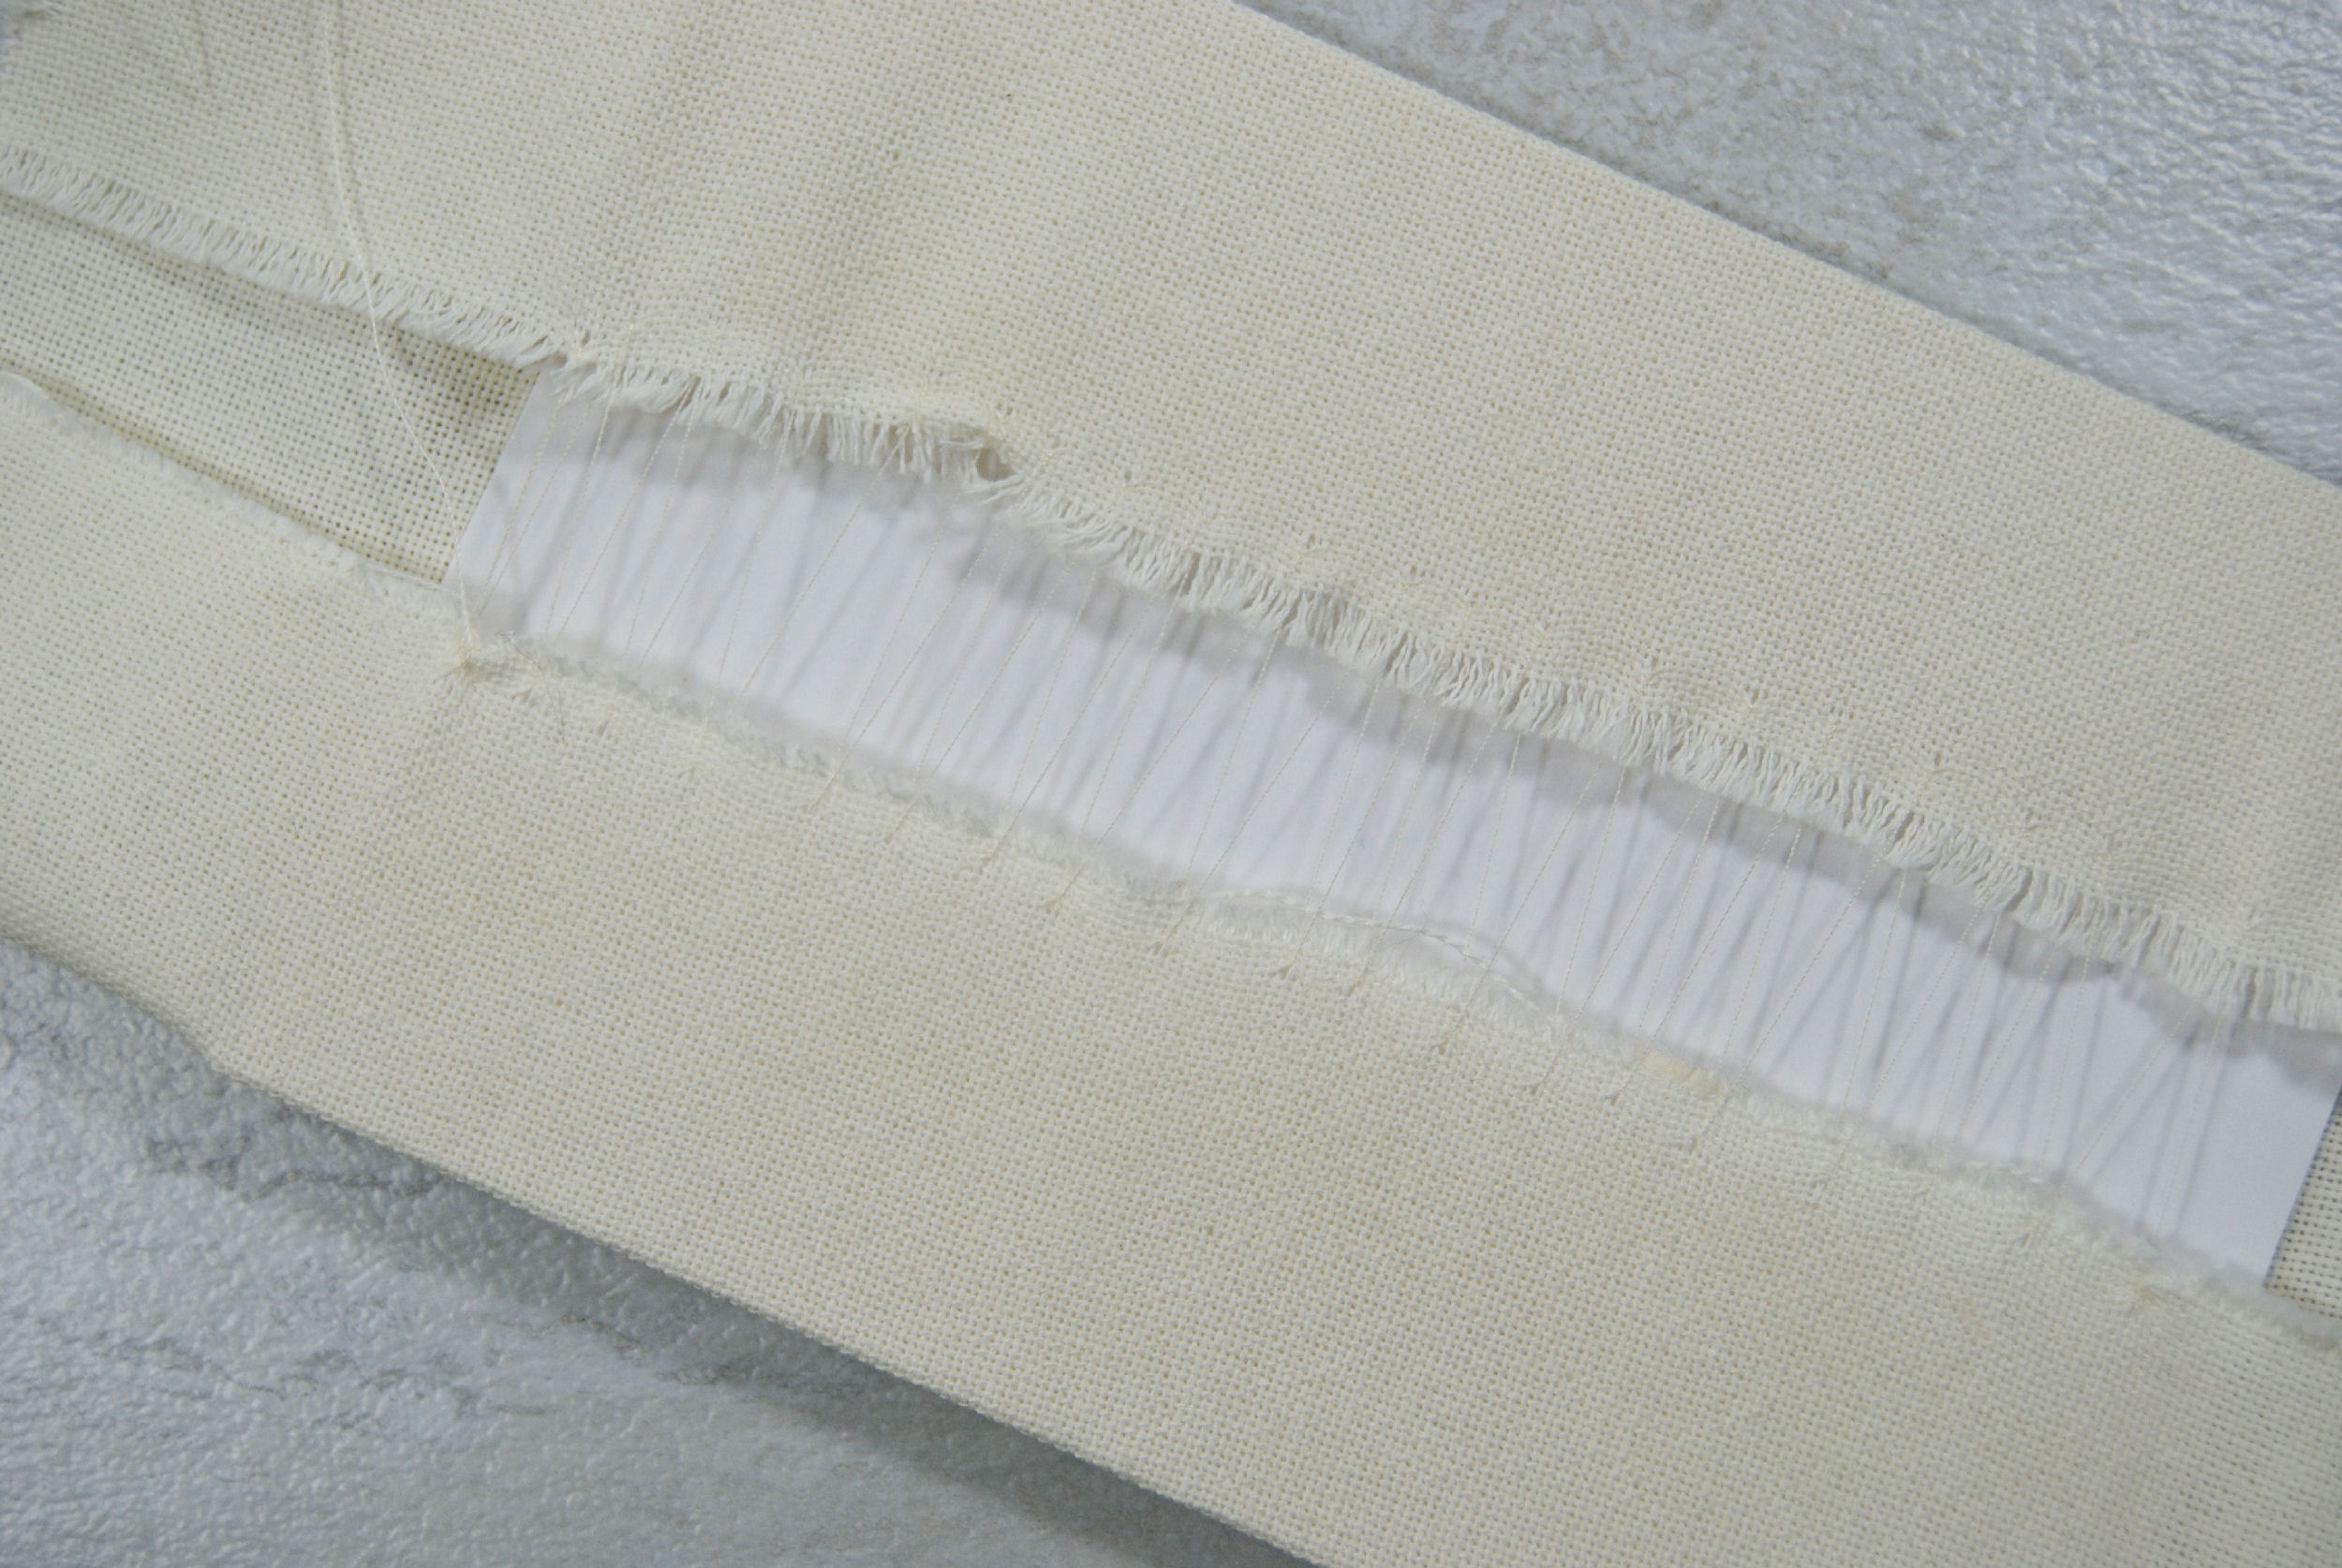
Once you’ve finished the longer sides, you have one last chance to peek at it from the front and slide it around into position if it’s off center.
Now do it again, on the other side
Carefully fold the shorter sides down, making sure that the fabric doesn’t extend out past the sides of the piece. You can also stitch the ‘flaps’ down to the sides you’ve already done to make sure they don’t slide around as much.
If it helps, iron the edges a bit to help them stay in place while you work. You want these to sit as flat as possible so it still fits in your frame.

Lace up these two sides as you did before, keeping things tight, but not pulling too hard or your board will start to bend.
Once you’re done stitching that up, you can put it into your frame. It should fit snugly, but not too tight.
Since most frames don’t have thick fabric in mind, it may bulge a bit once you put the back of the frame back in.
If you’re shopping for frames in person, try to go for deeper frames if you can.
If you can’t shop in person and you somehow ended up with a very shallow frame, then it may not fit right. If so, you may want to consider that sticky board option again, as you can trim off the excess fabric without worrying about having your work slide around. 8BitStitch has a great video on how she frames things using that method if you’re interested in trying out that method.
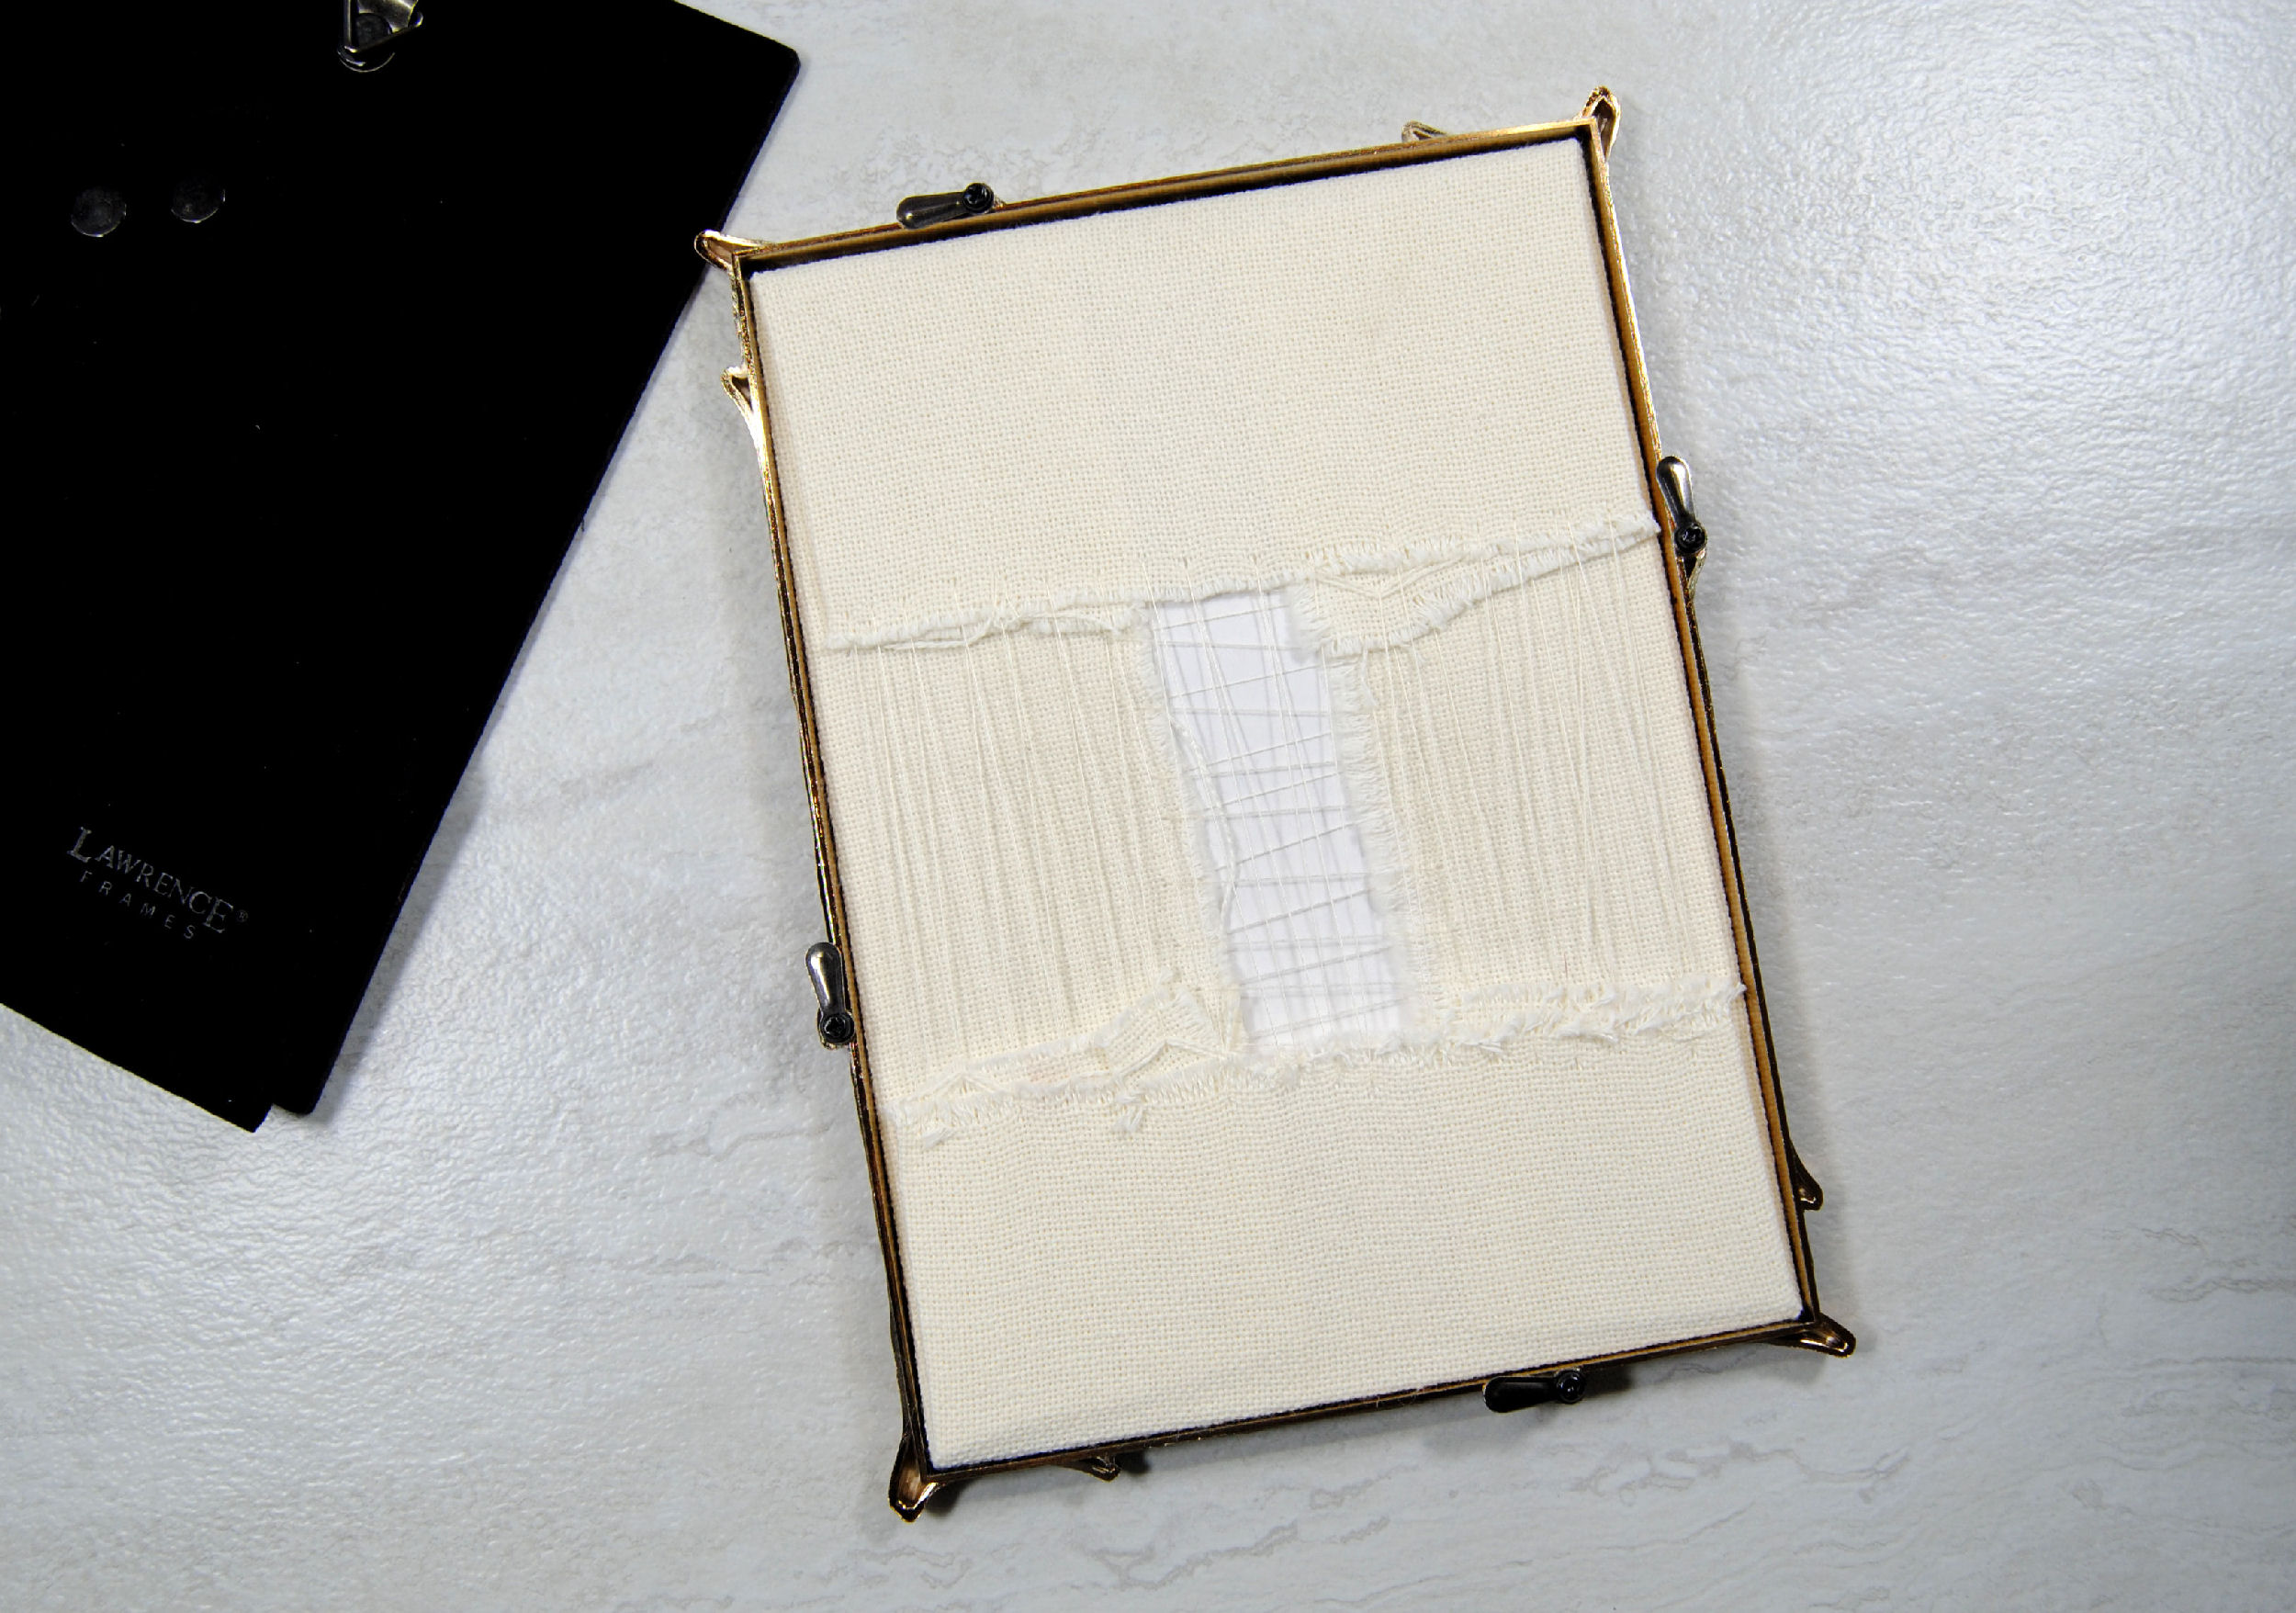
The Finished Framing
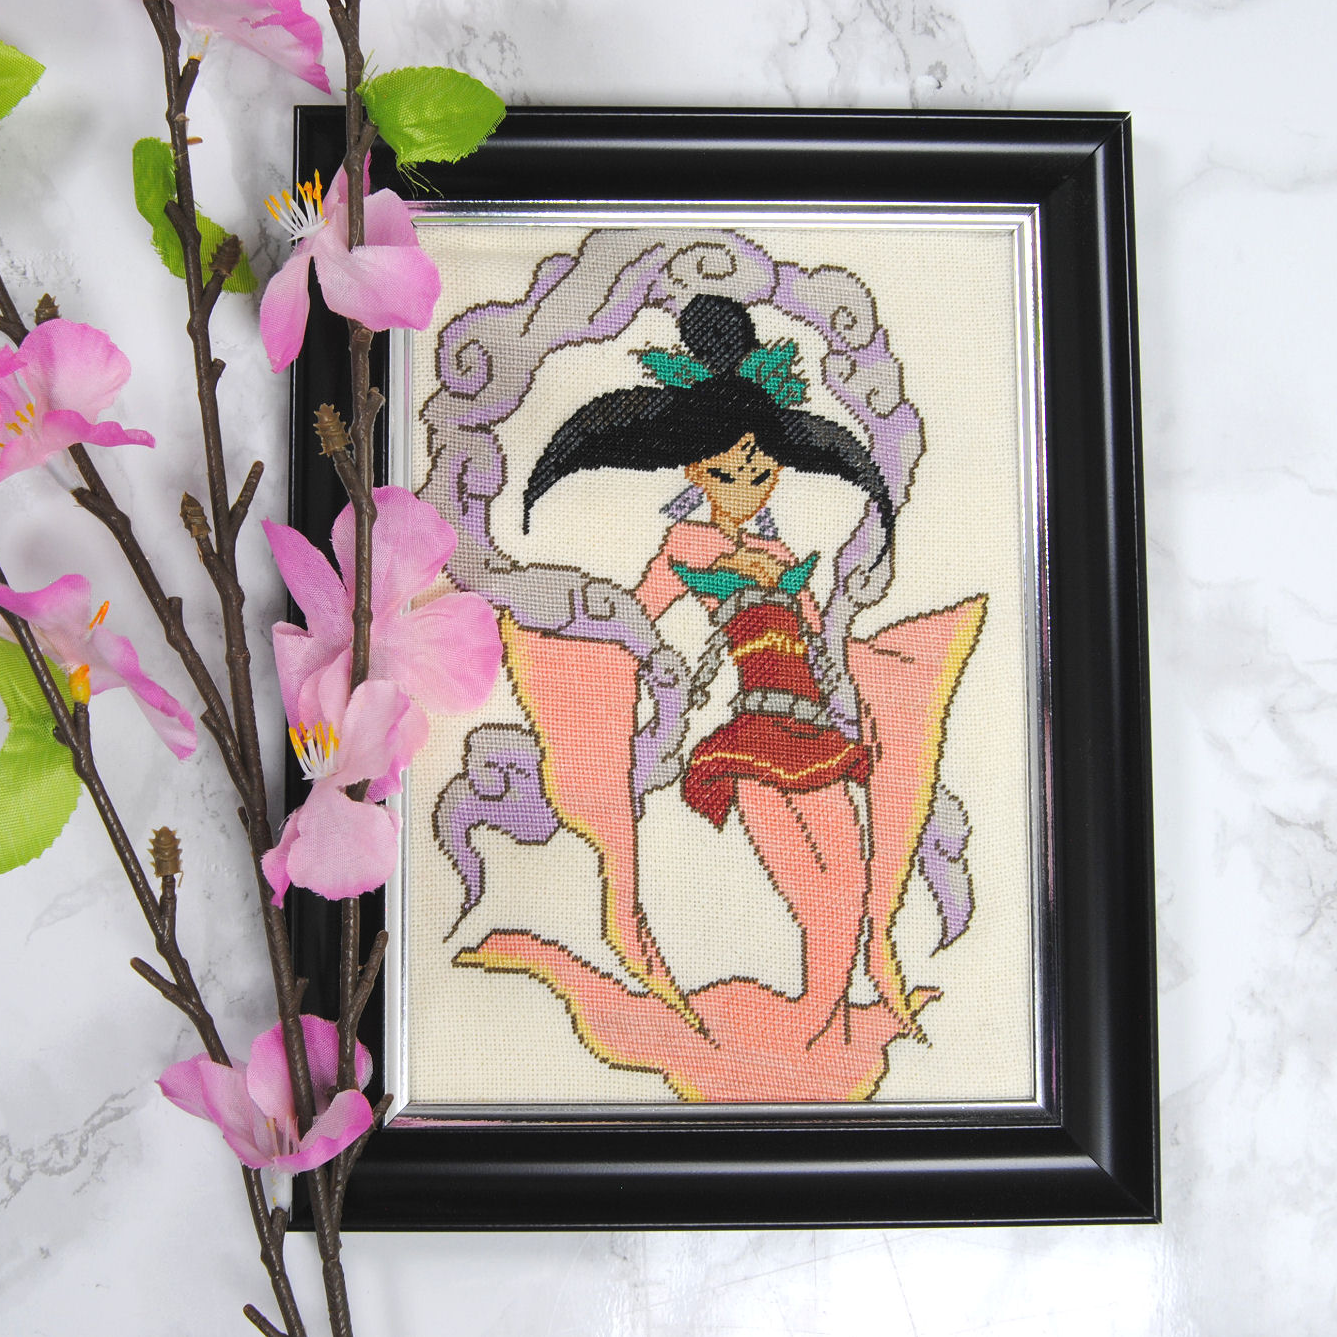
I think this turned out pretty decently for my first attempt at ‘properly’ framing. Or at least better framing than whatever I was doing before, anyway. It isn’t anything fancy, there’s no mat involved or anything. But it is much nicer looking than it was. Though I definitely should’ve have gone up a size in frame.
However, taking photos of a glass frame is awful (look at that glare!) so I took out the glass before taking any further photos.
Don’t worry, replaced it once I was done taking photos. Now she can sit on my shelf protected from dust this time. It would also protect it from some sun damage. If it wasn’t going to be in my basement office and never see the sun again anyway.
Anyway, here’s a somewhat satisfying before/after photo for sticking through to the end of this post:
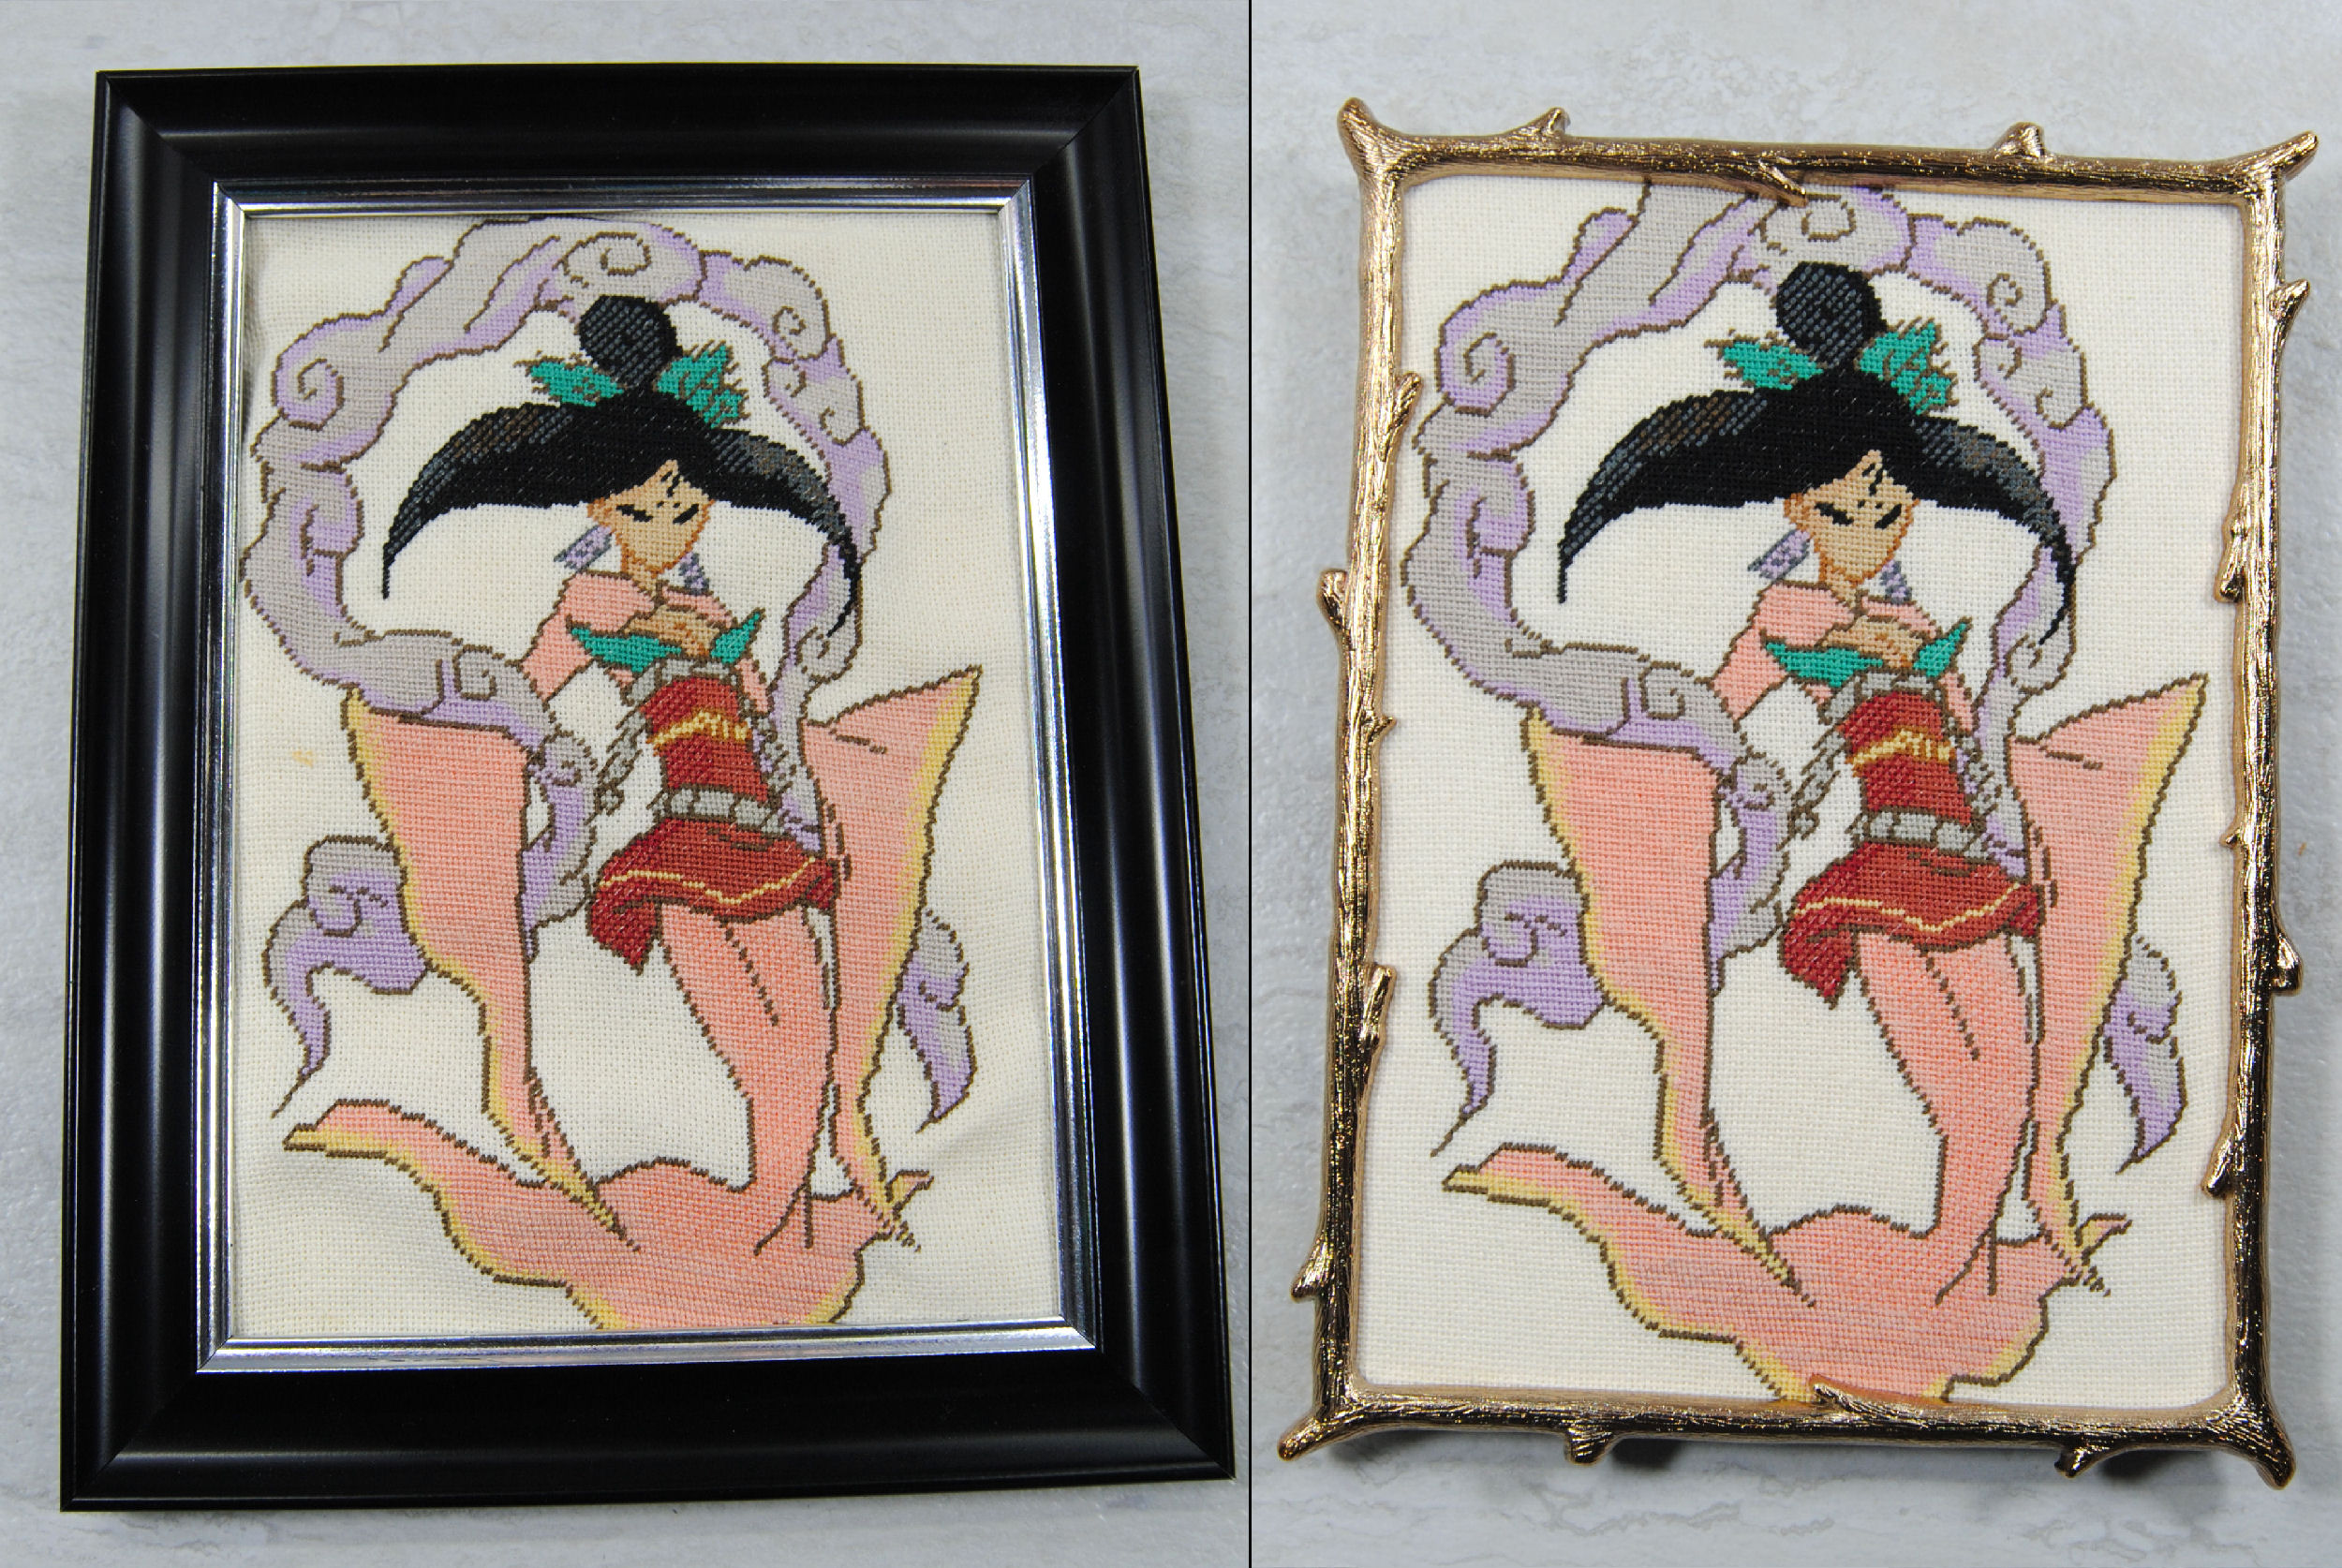
I’d love to see your own attempts at framing using this method!


