Beads: Accenting your Cross Stitch Projects with flair
Table of Contents
Why Beads?
There’s a few different reasons you might decide to add beads to your project. The most common reason being the pattern called for it. But that isn’t always the case!
This post may contain affiliate links. If you buy something using one of these links, I earn a small commission. However, there is no extra cost to you. Thanks for understanding! Learn more in my Disclosures & Privacy Policy.
There are plenty of designers out there that love to incorporate beads into their designs. You’ve likely seen some Mirabilia or Châtelaine designs around and marveled at their brilliance. Perhaps you’ve thought they were too complicated at your skill level because of the beading.
Well I’m here to tell you it’s a lot simpler than you think. And you don’t have to wait for a pattern to tell you to use beads in order to try them out!
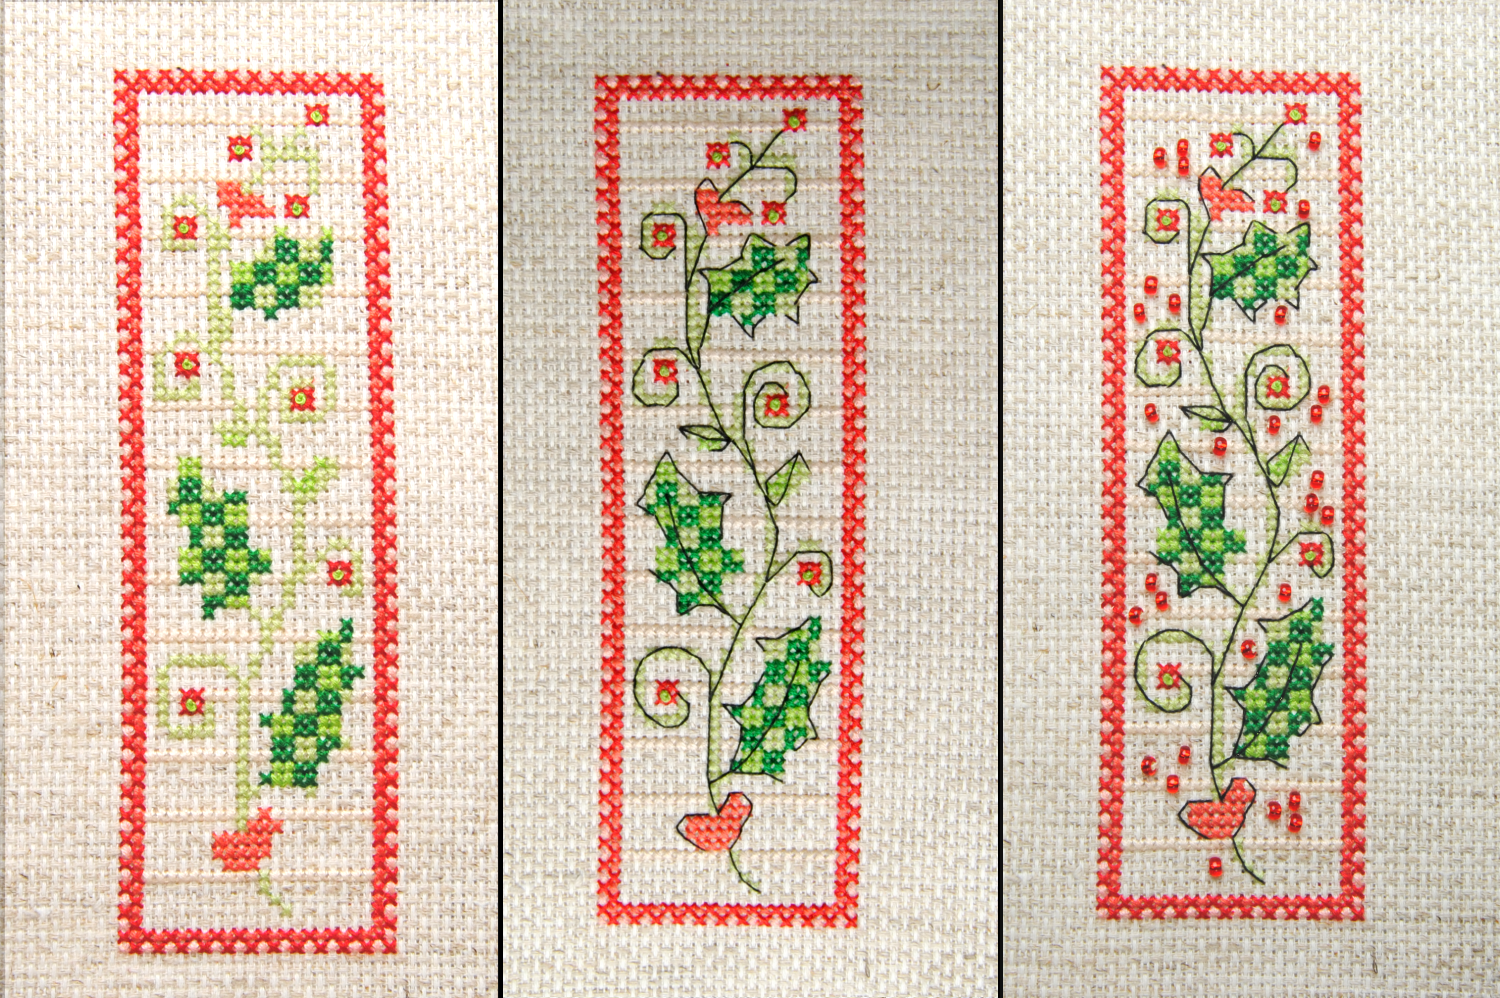
Beads make great replacements for french knots. You can incorporate them into geometric borders. Try using them instead of confetti stitches in pattern backgrounds as well.
Seed Bead Brands
Most cross stitch designers that include beads in their patterns will cite Mill Hill bead numbers. This is, quite frankly, because Mill Hill markets themselves to needle workers and often works with the designers.
That does not make it a bad product~! It’s great we have a company out there working with stitchers to design a product that works well with our medium.
However it is certainly not the *only* bead brand out there and any seed beads will work with your project. If you can’t invest a lot in beads right now, you can easily substitute for any beads of a similar color
Your project is no less beautiful if you use dollar store seed beads rather than ordering fancy brands. Just keep in mind quality and sizing may vary and try to keep brands consistent on a single project.
For reference, here are some of the more well known / quality brands:
Most Local Needlework Shops and online stores that cater to needlework will have at least Mill Hill available for purchase. See my Resources post for some worldwide stores you may not know about.
Bead Sizes
As mentioned briefly above, bead sizes will vary from brand to brand. Additionally, some brands are more rounded while others are boxier. This makes picking out beads seem quite daunting to some.
There are no wrong choices though, only personal preference. You may want to experiment and decide for yourself what style and size you prefer.
Though brands can vary, here are a few common sizes and what they mean:
| Size | Outside size in millimeters | Hole size in millimeters |
| 8/0 | 3.1mm | 0.90mm |
| 11/0 | 2.1mm | 0.70mm |
| 15/0 | 1.55mm | 0.40mm |
As you can see, the smaller the size listed on your beads, the larger the bead actually is. For most cross stitch projects, you’re likely to be using an 11/0 sized bead. But you can size up or down depending on how you want your finished piece to look.
Needle Sizes for Beads
Due to the size of these beads, you’ll need a needle that can easily fit through the bead and have room for some thread as well.
Ideally, you’ll pick up some beading needles. These are longer as they’re designed for beading where you want to be able to load many beads at once onto a needle. More importantly, they’re thin with a small eye to help it easily slide through the bead. Watch out though, as they are usually pretty sharp.
A size 28 tapestry needle should be thin enough for 11/0 beads in a pinch, though. That’s what I typically use.
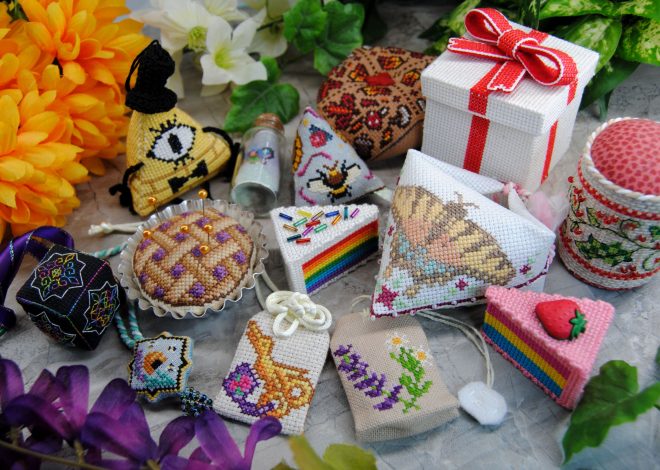
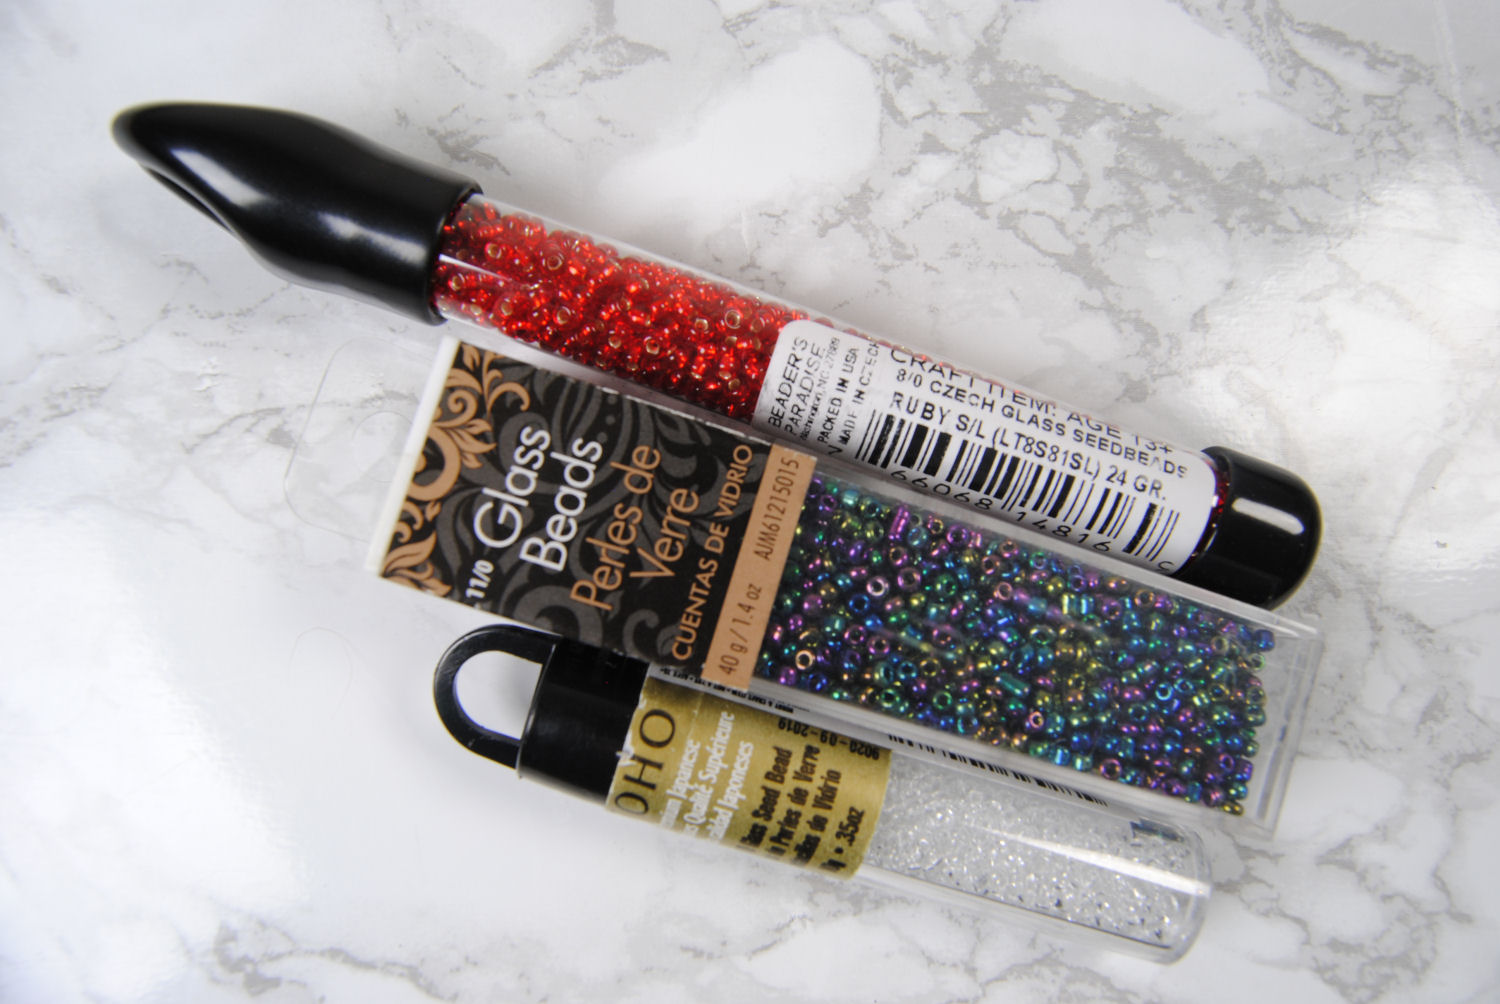
Bead Storage
Something to think about when you’re picking up beads is how you’ll store them. Most of the major brands come in little vials or packaging that can be easily stored. If you’re buying inexpensive beads in bulk though, they could just come in bags.
Other brands come in sets in what essentially looks like a smaller thread box. But those tend to not seal right and bead colors get mixed together in shipping or if you don’t keep it exactly flat at all times. Read reviews and keep this in mind when purchasing.
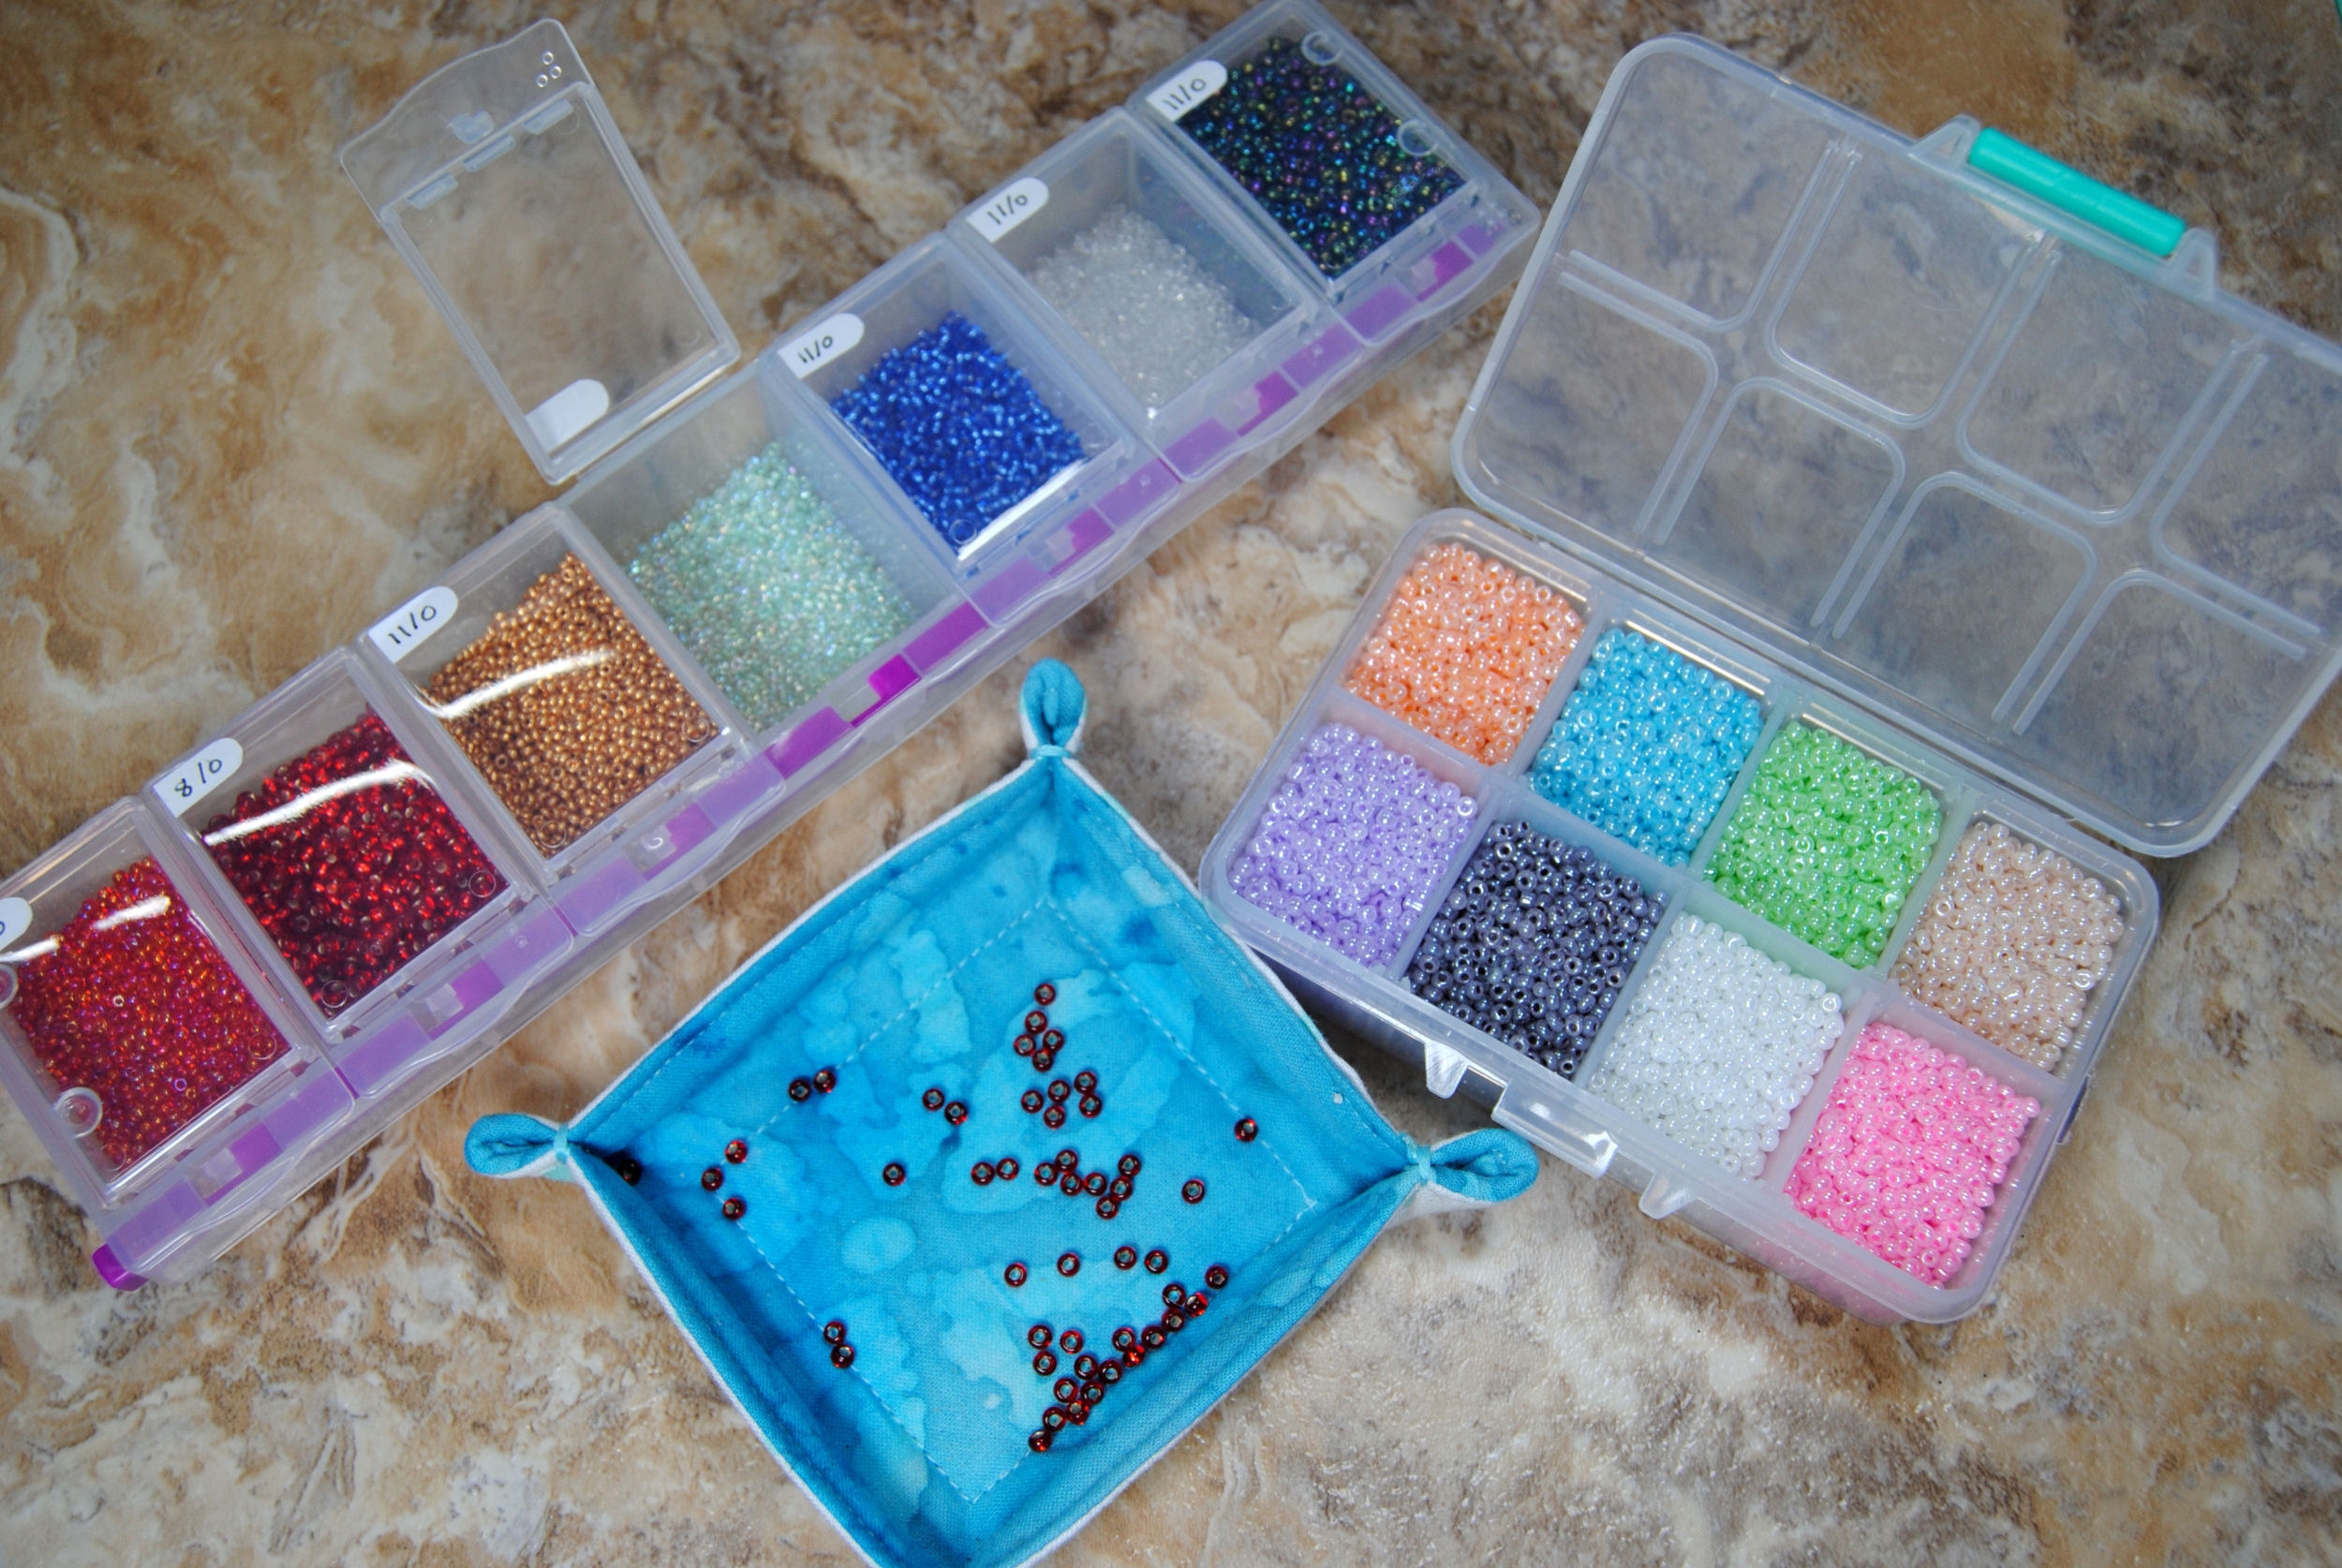
If you’re planning to keep a lot of different color beads, I’d recommend picking up something that allows for individual closed storage. These ‘diamond painting’ storage boxes work well. That way if you accidentally drop the box or set it down too hard, you don’t have to worry about all the colors getting jumbled together.
Pictured above is the CraftMates Lockables, which are definitely rebranded pill organizers. So, uh, do with that information what you will. There are a lot of cool pill sorters out there.
You’ll also see these cylindrical bead containers in craft stores. I personally find the lids to not screw on/off easily or wear out over time, but your mileage may vary.
Update 2025: I actually use the ARTDOT storage system now. They’re designed for diamond painting, but work great for beads. And you can fit SO many beads in these. Plus the drawers are modular and you can expand easily.
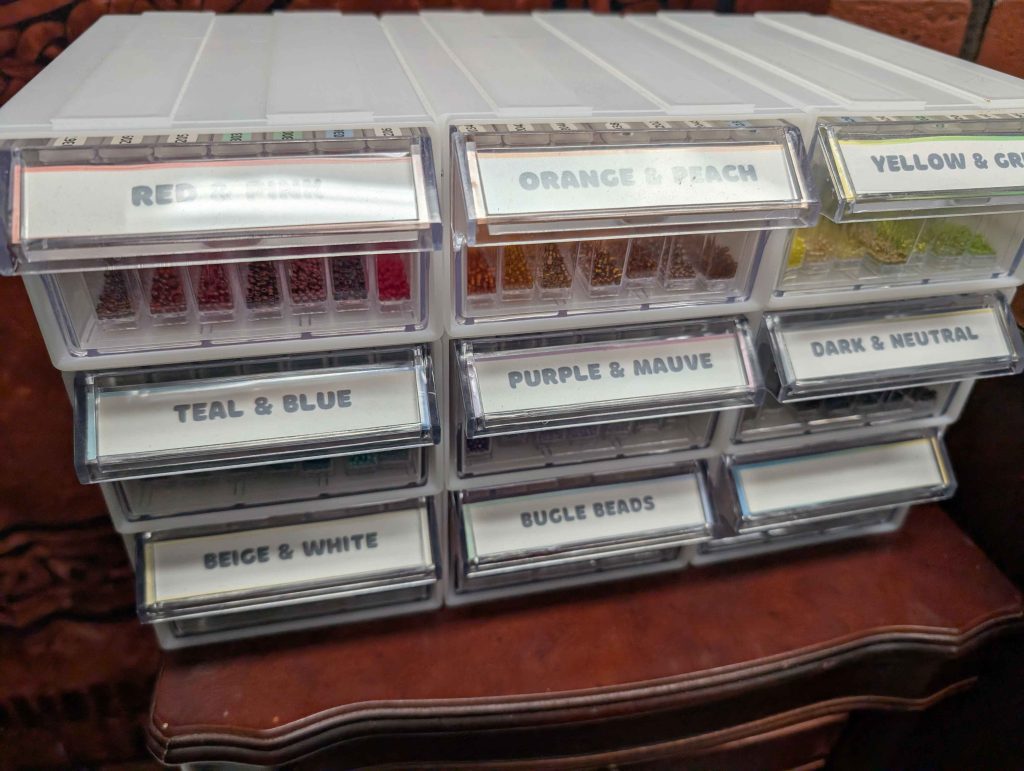
I then printed Mill Hill labels for them, which I do sell on my Etsy store. I color coded mine, so white is glass, green is antique, blue is frosted, and any purple ones are petite. Makes it real easy to find what I’m looking for at a glance!
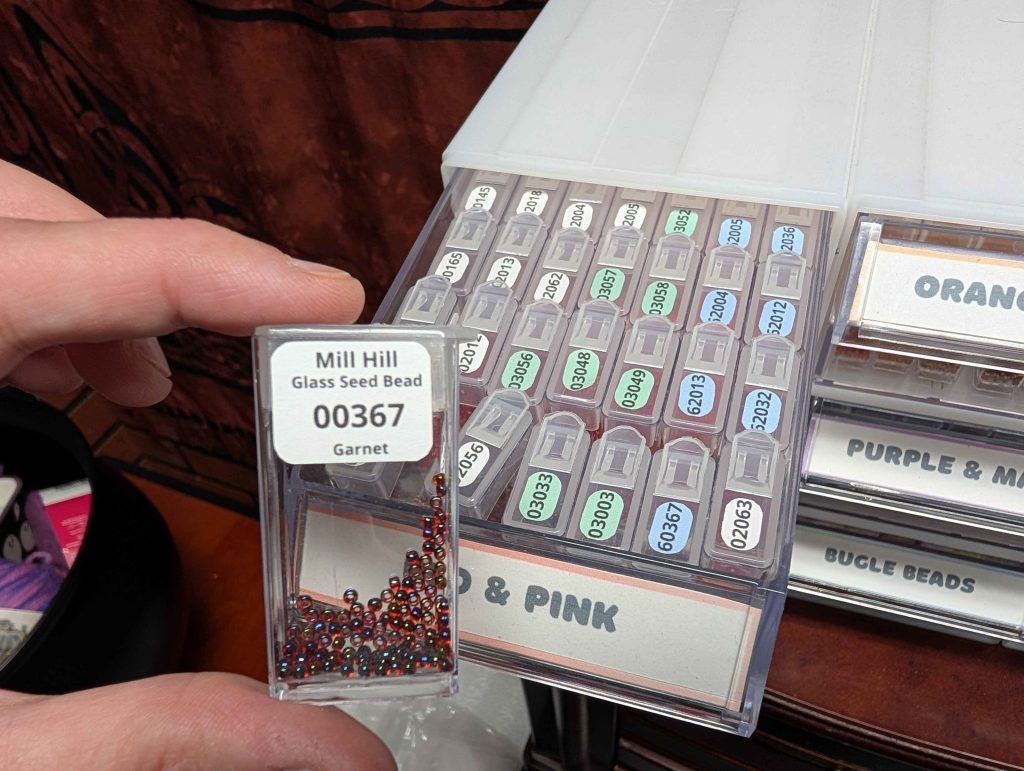
(I mostly use misprint labels, so ignore the fact that one’s slightly off center, lol)
Working with Beads
The other thing to think about is how you’ll be working with them. If they’re in a tall, skinny vial it’s going to be hard to get individual beads out and onto your needle.

It’s a lot easier to work with if you have them on a flat surface and can just pick up a single bead with your needle.
If they came in one of those multi color boxes, you can work straight from the box by just dipping your needle into a color to pick up a bead. Be careful not to bump the box doing this though as beads like to hop into other compartments and get mixed together.
If you have a small bowl or lipped plate, this is a great way to work with beads without having to purchase additional tools.
If you like to sew as well, you could make your own fabric tray like mine. I used this tutorial and absolutely love them.
They do make some absolutely gorgeous bead tray/organizers though. Like this carved wooden tray. Or this leaf patterned sectioned tray. You know. If you’re the kind of person that likes even their storage boxes to be beautiful.
How to attach a bead to your project
My example features a free design by Durene Jones I stitched for March 2020’s Pixel Stitch RPG quest. I used 8/0 sized Czech beads with a 28 tapestry needle and one strand of thread.
Actually attaching the beads to your project is as simple as stitching your normal X stitch, but with a bead in the middle.
It is recommended to do beads as the last step of your project. You don’t want them to get crushed by a hoop or Q-Snap if you still have a lot of work to do. I like to finish all my cross stitch first, then apply backstitch and french knots. Finally, I pull my project off the Q-Snap and add the beads in-hand.
Try to use thread color that matches your fabric so it blends into the background. Alternatively, try some invisible thread or fishing line.

Here, I used a single strand of DMC 951 and brought my needle up through the bottom left corner, through a bead, and back down in the upper right corner.
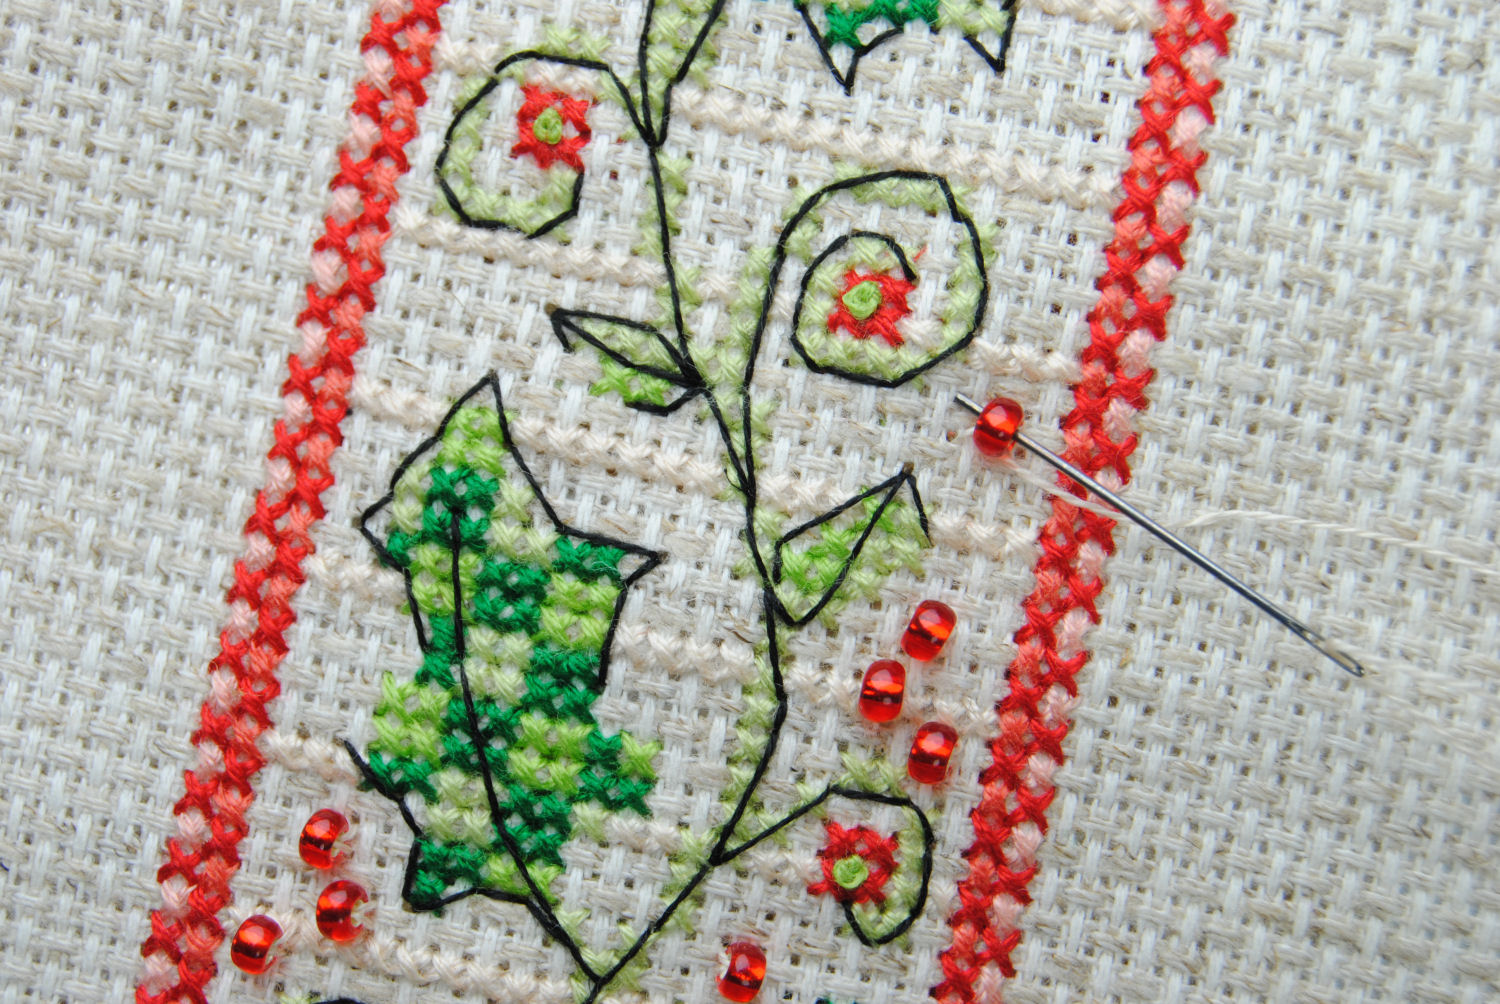
I then came back up from the bottom right corner, though the bead and back down in the upper left corner.
You can alternate the direction of the stitch if you normally do your \ stitch first. Just make sure you’re going through the bead each time while making that X.
Take it slow at first until you get this rhythm down. It’ll be over before you know it though and you’ll have a fully beaded design!