Blending Filament – Adding Sparkle to your Embroidery Thread
Here on my site I’ve discussed a fair amount of metallic thread brands used in cross stitch. From DMC’s Mouliné Étoile to lesser known brands like Bijoux and Accentuate. You can get metallic threads in SO many different colors, and even variegated metallics! But what if instead of hoarding a pile of various colored metallic threads you could just add a bit of sparkle to the plain cotton thread you’re already using? Well that’s exactly what blending filament can do and more!
This post may contain affiliate links. If you buy something using one of these links, I earn a small commission. However, there is no extra cost to you. Thanks for understanding! Learn more in my Disclosures & Privacy Policy.
Table of Contents
What is Blending Filament?
Blending filament used to be the go-to for adding metallic flair to your stitches and are still referenced frequently in older designs. Sometimes even by the old company name Balger, which is now Kreinik.
Modern metallic threads and braids are meant to be stitched on their own, often even without the need for splitting strands. By contrast, blending filaments are designed to be mixed with other threads to accent your standard cotton thread. It’s typically a very thin and flat metallic fiber similar to old school Christmas tinsel.
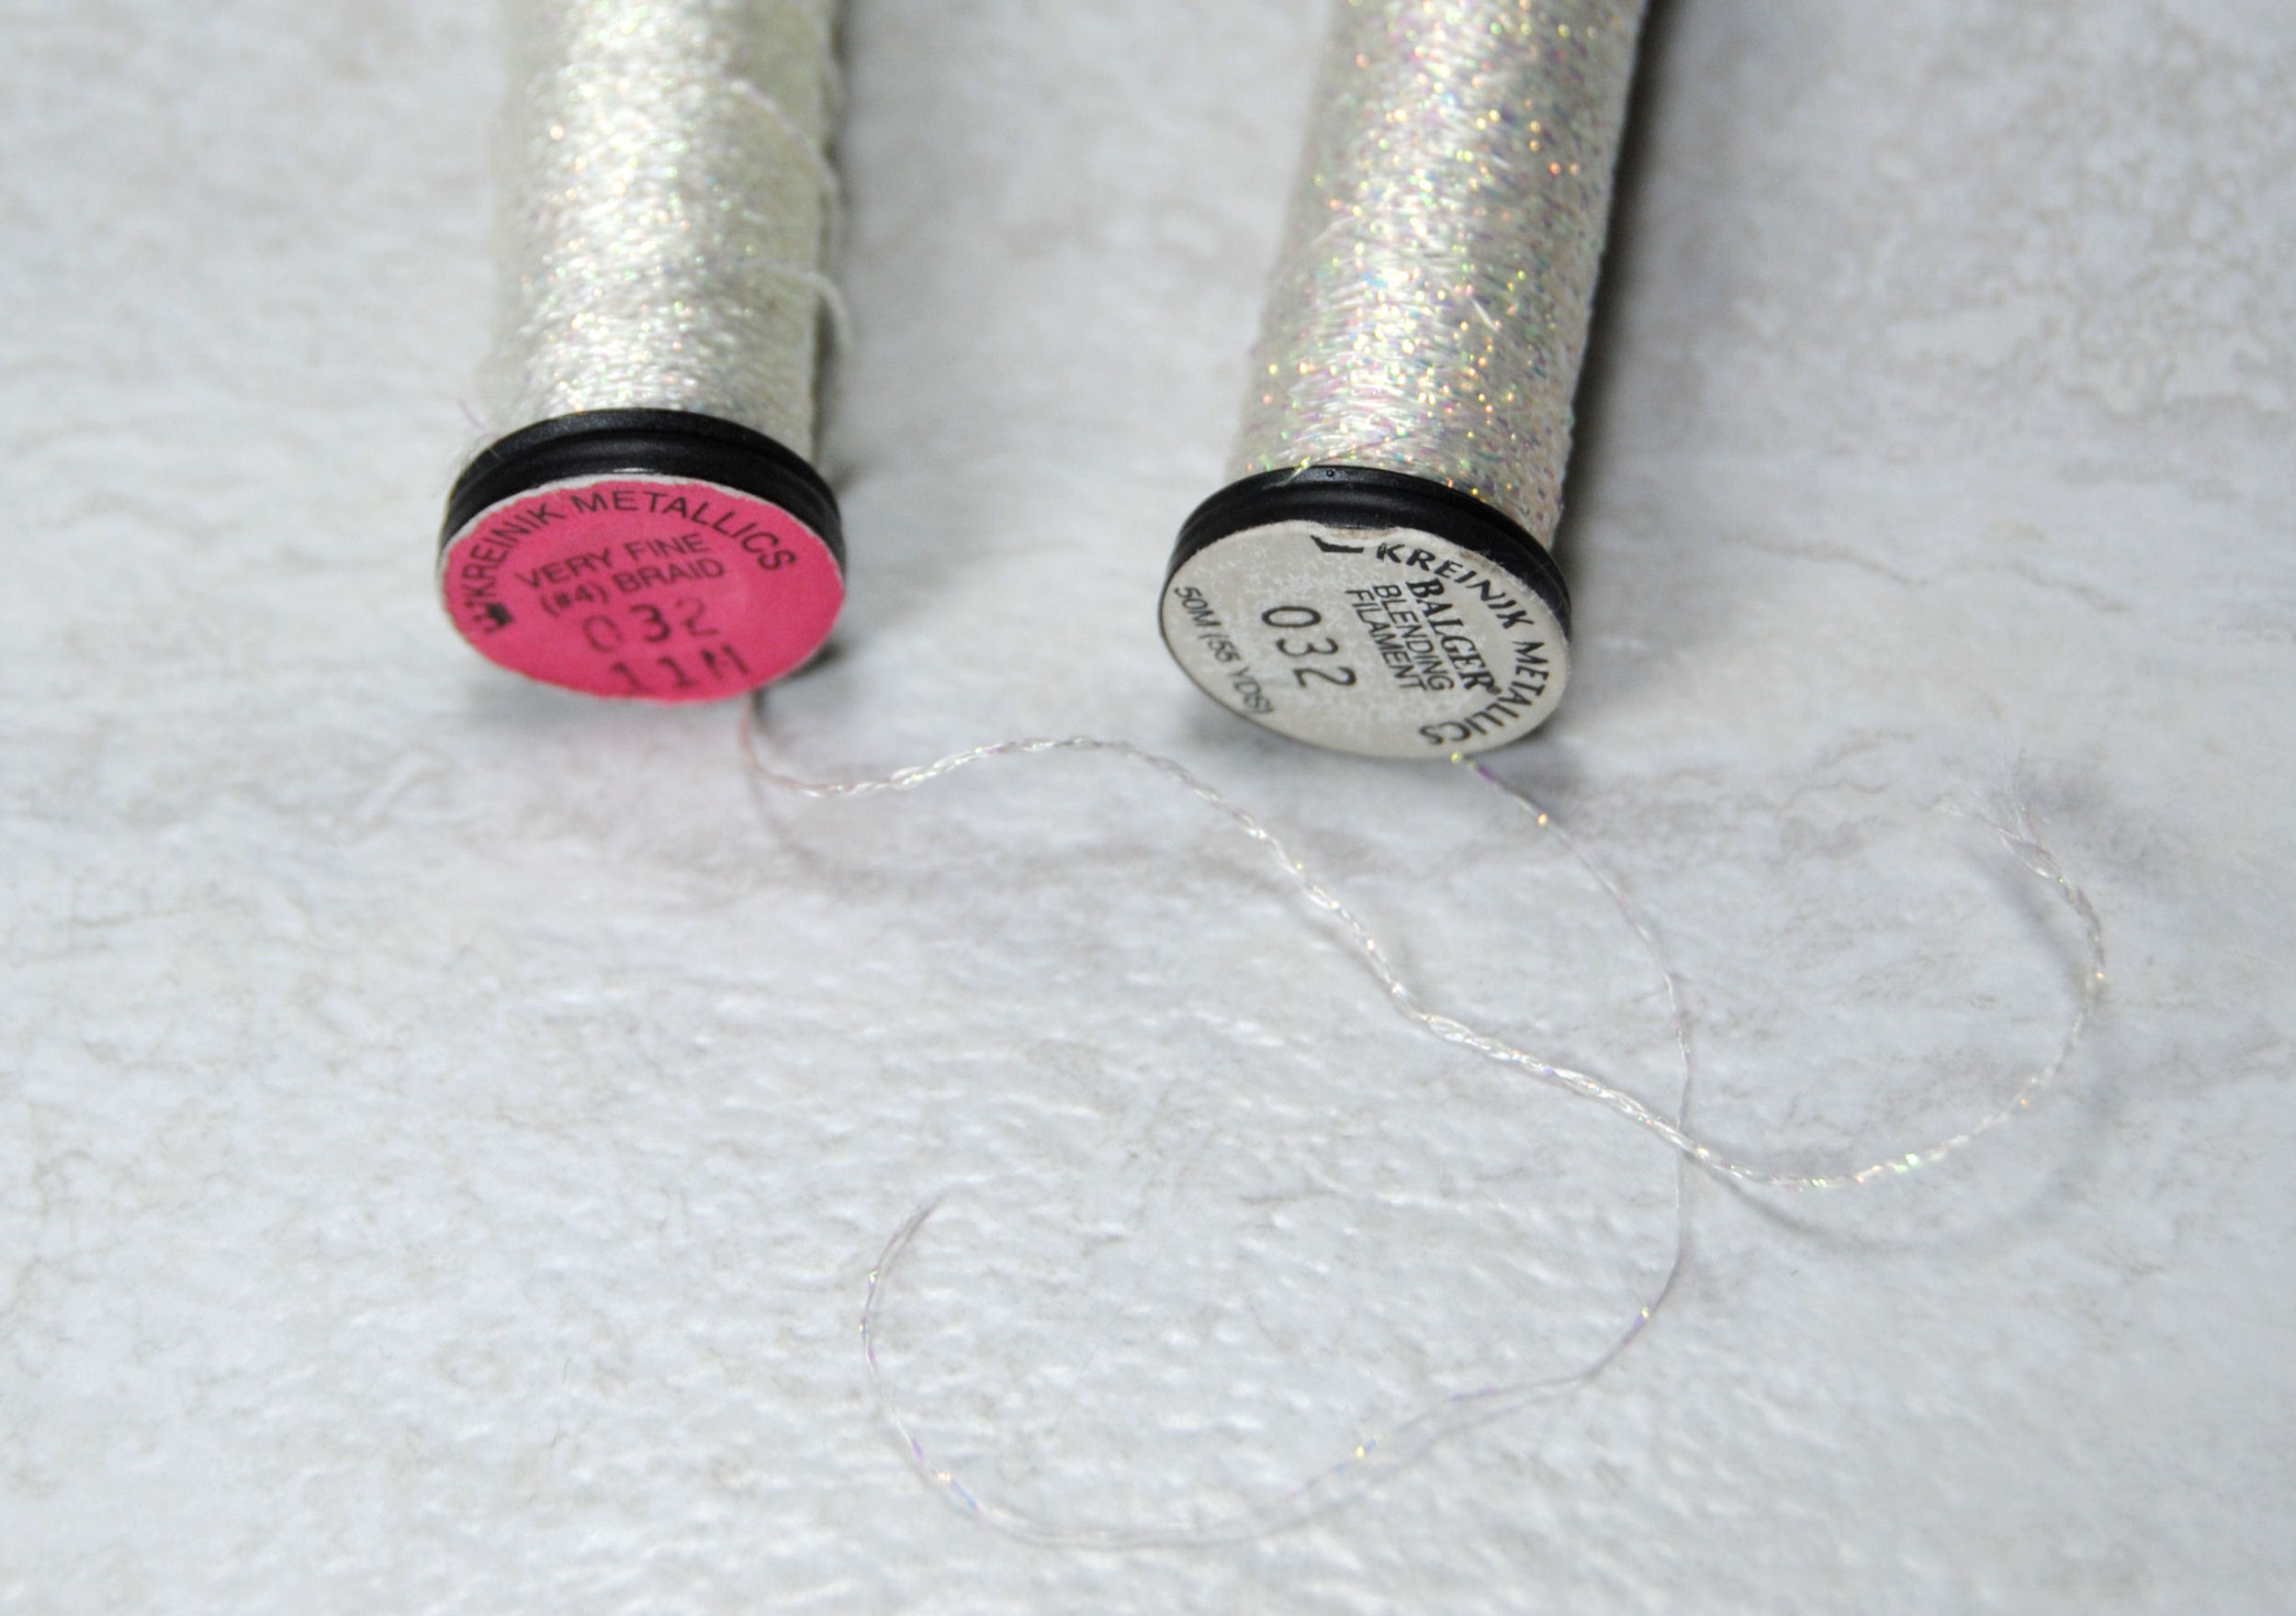
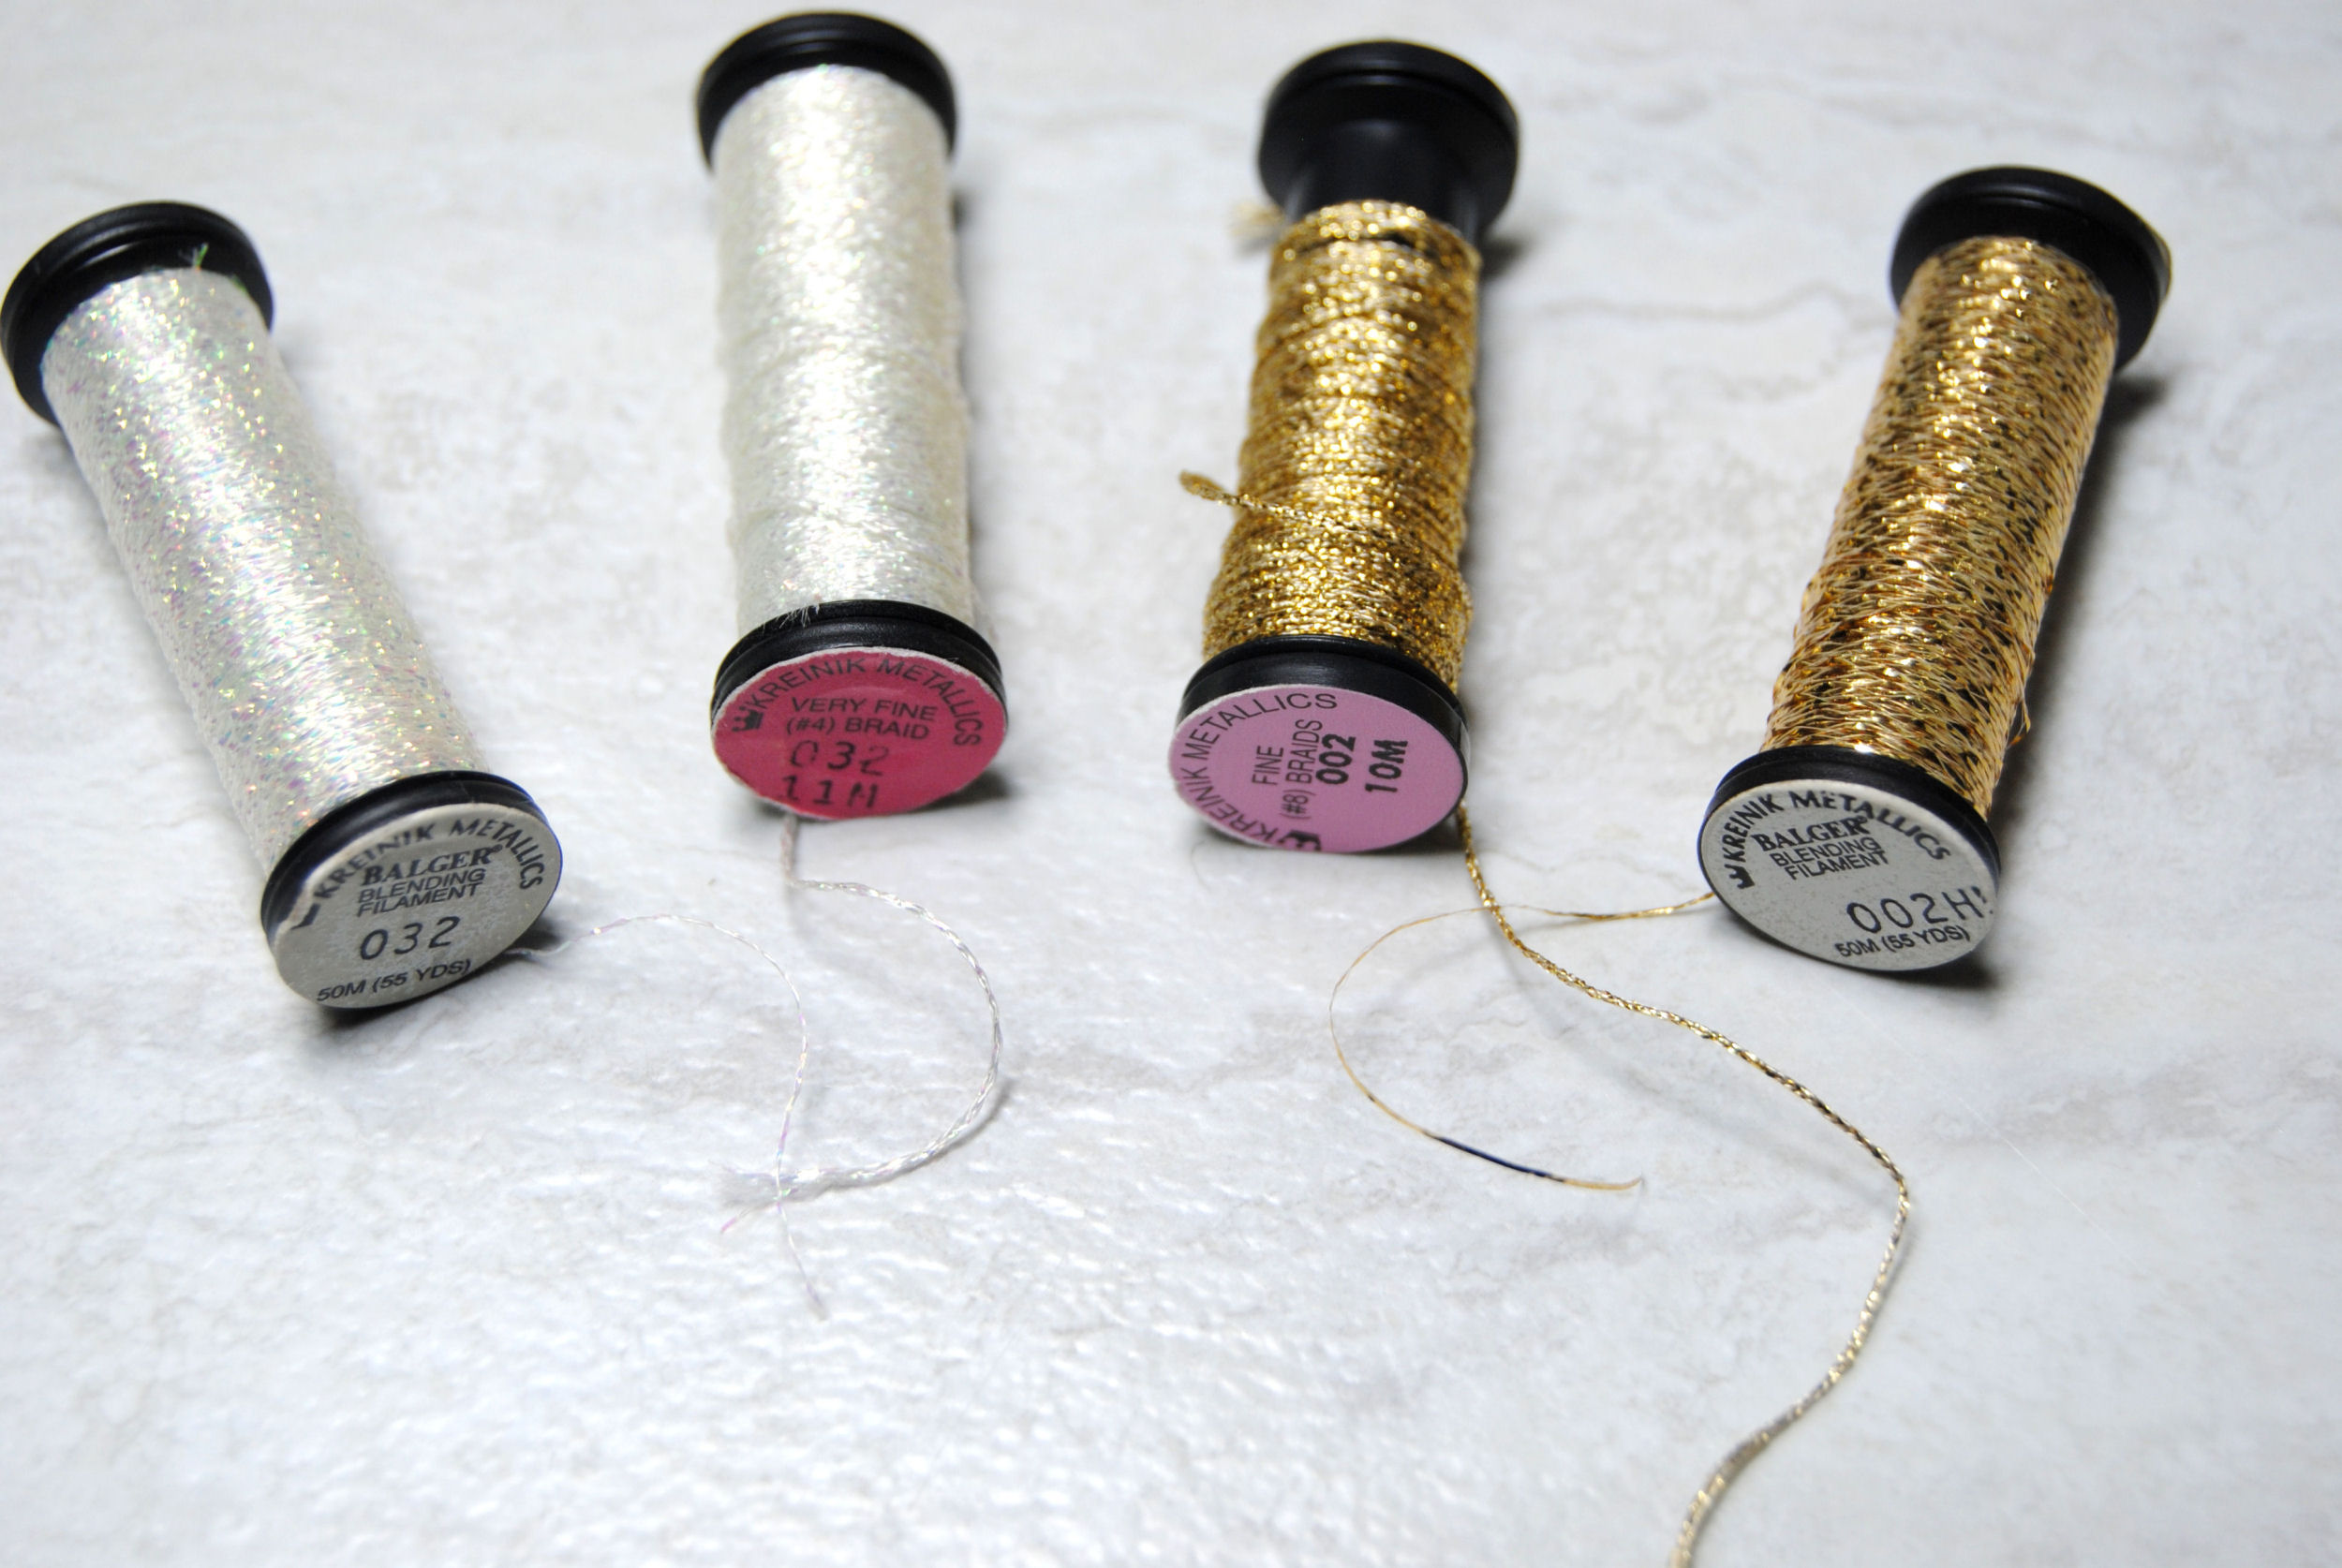
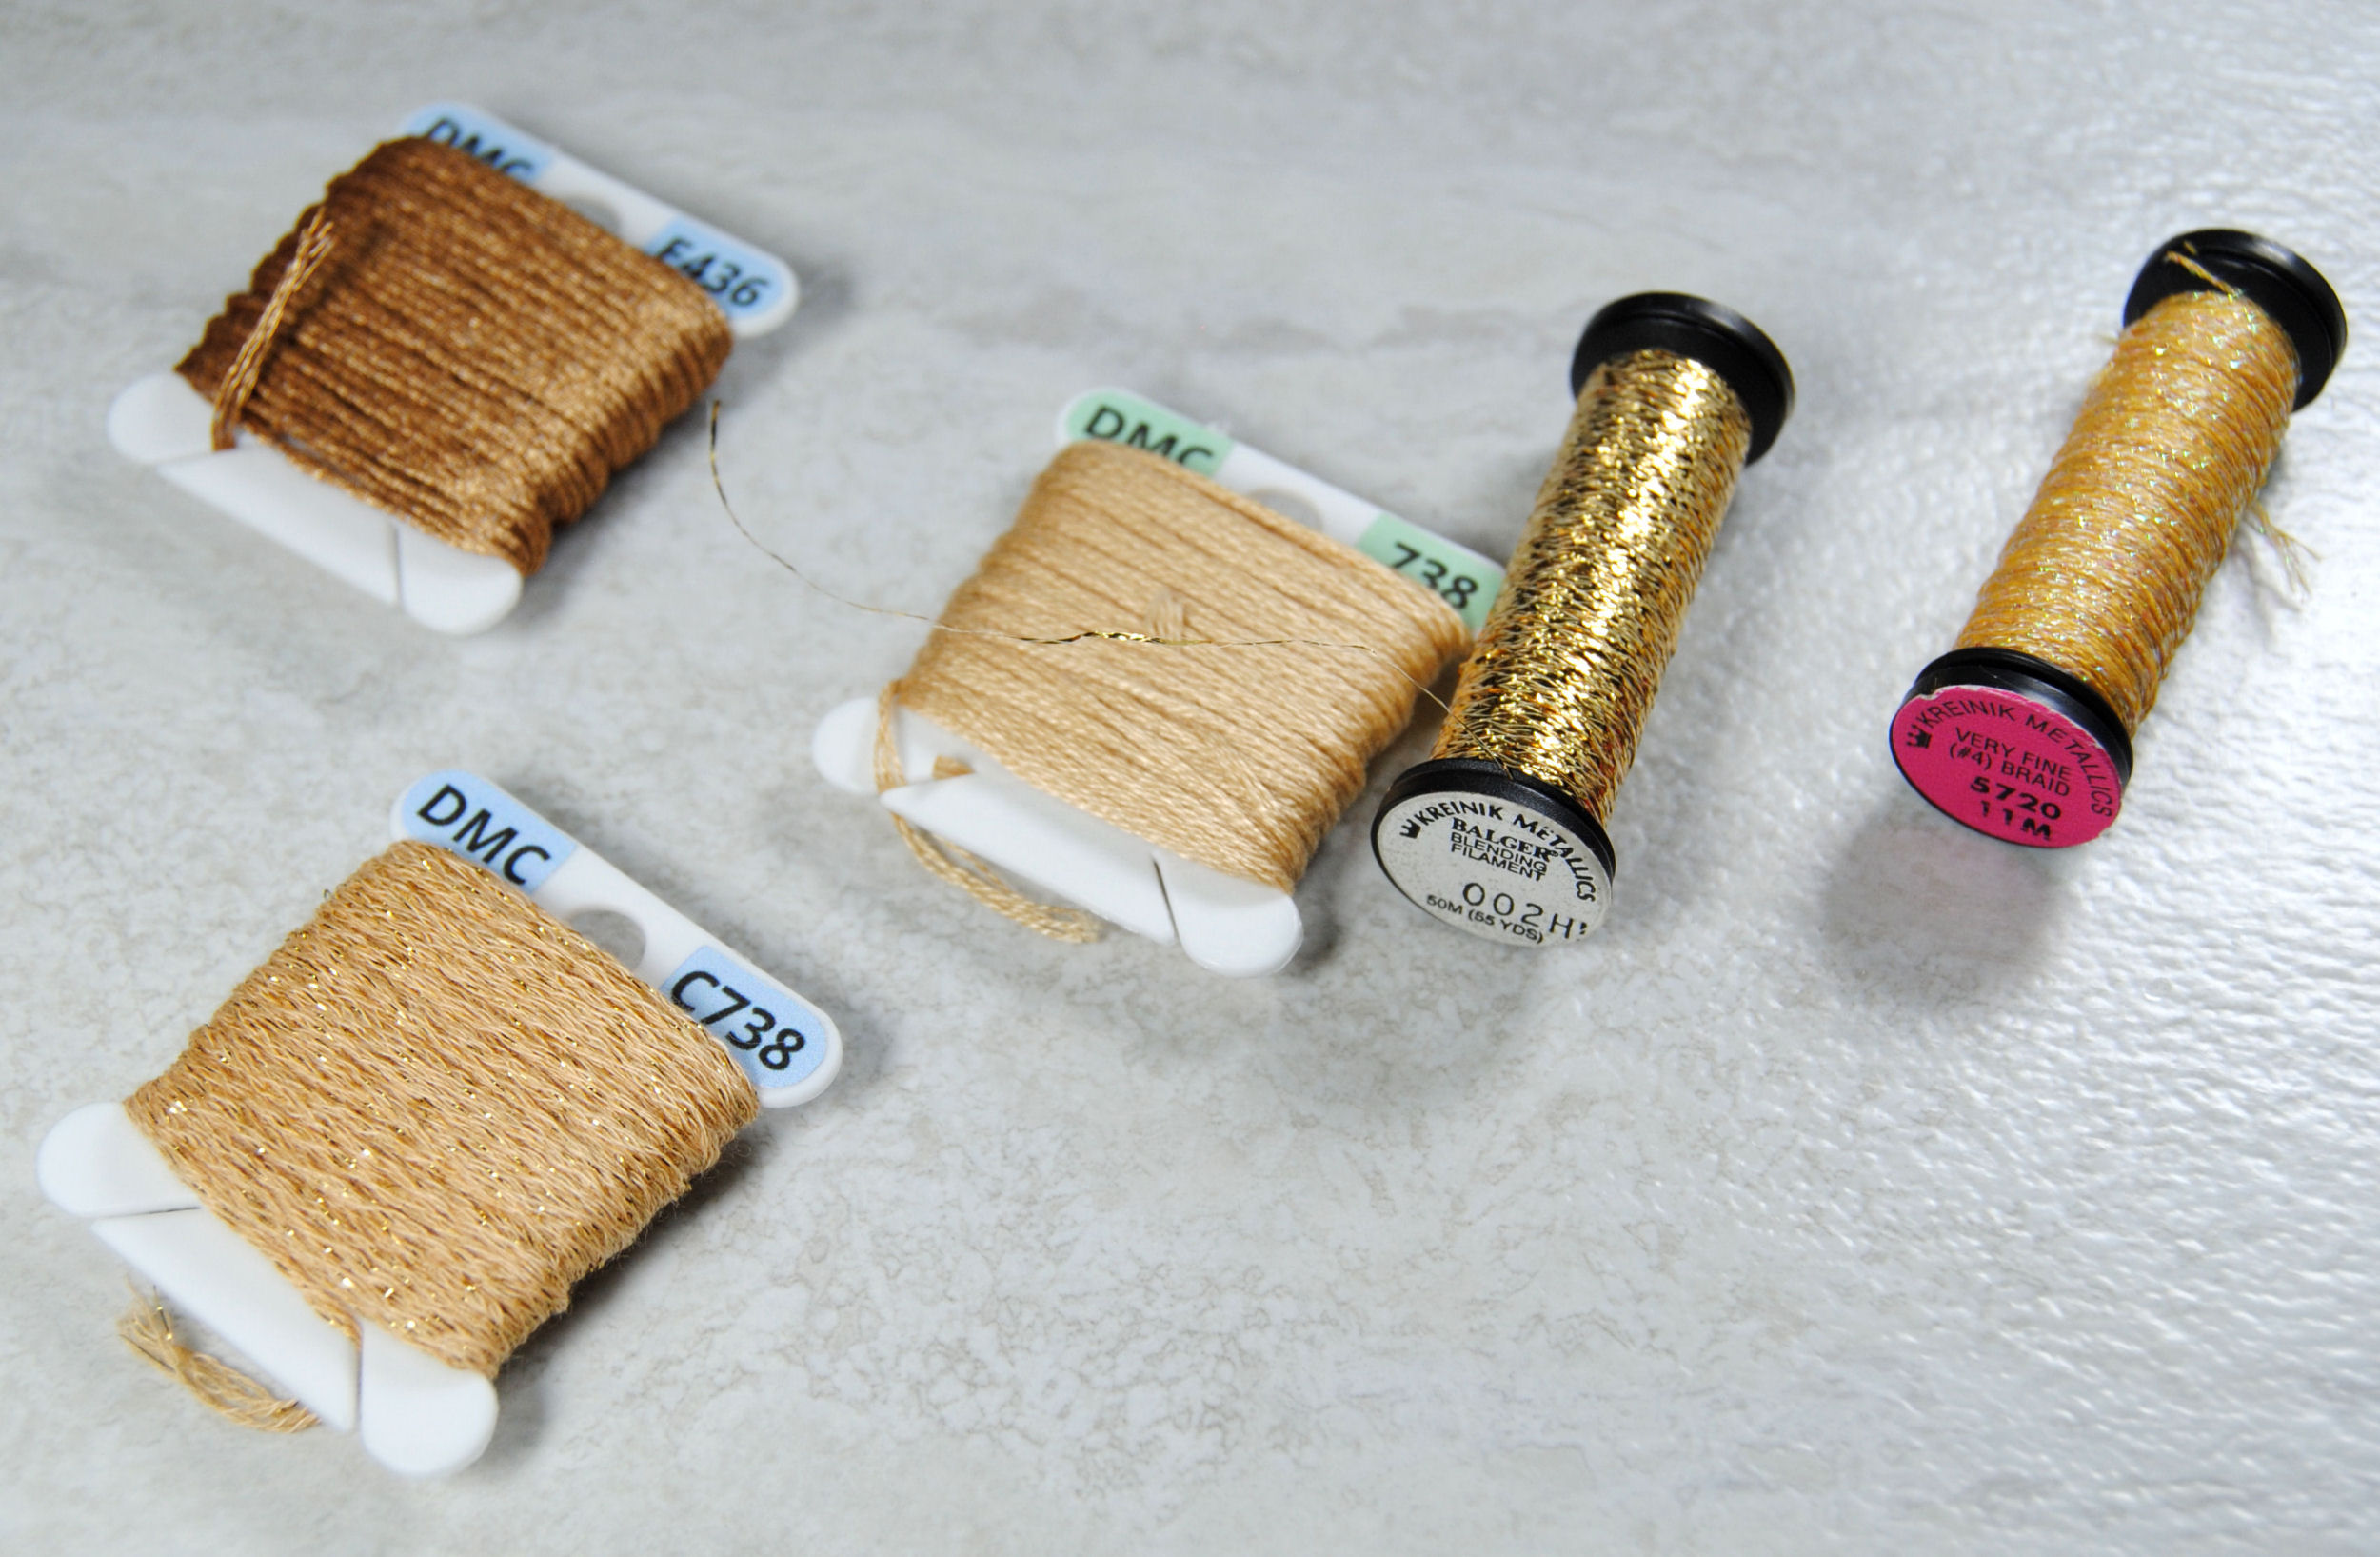
Above you can see Kreinik blending filament as compared to Kreinik #4 Very Fine Braid.
Due to the nature of this thin strand, it’s a bit more delicate and is known to break or stretch easier. Kreinik blending filament comes with a very thin string wound around it to protect it from static and give it some support for this reason.
While blending filament is mainly used to get a bit more of a subtle shimmer rather than a completely metallic braid, it is also used by some for gridding due to it being both thin and hard to pierce.
Where To Find Blending Filament
The leader in this type of thread is going to be Kreinik. They’ve been selling the stuff for decades. And while I also recommend their braids, today we’re just talking about their blending filament. You can order it through Kreinik directly or find it in online specialty stores like 123Stitch.
Your Local Needlework Shop (LNS) likely also carries Kreinik. If you’re in the US and aren’t sure where your nearest LNS is, try NeedleTravel. It probably isn’t 100% complete, but would be a great place to start!
You can also check destash groups, Facebook marketplace, or luck out and find some old spools at a thrift store / op shop.
However, Kreinik can be sometimes be harder to find overseas. It is sold worldwide, but you may have to look for specialty shops to find it in-store. The Kreinik website used to have a store locator making it easy to find international stores, but it’s been down for a while now. However, they’re very responsive to emails and phone calls and are happy to help point you in the right direction if you need some help finding a retailer near you. I also have a general list of worldwide cross stitch resources, which can help you find retailers in your area.
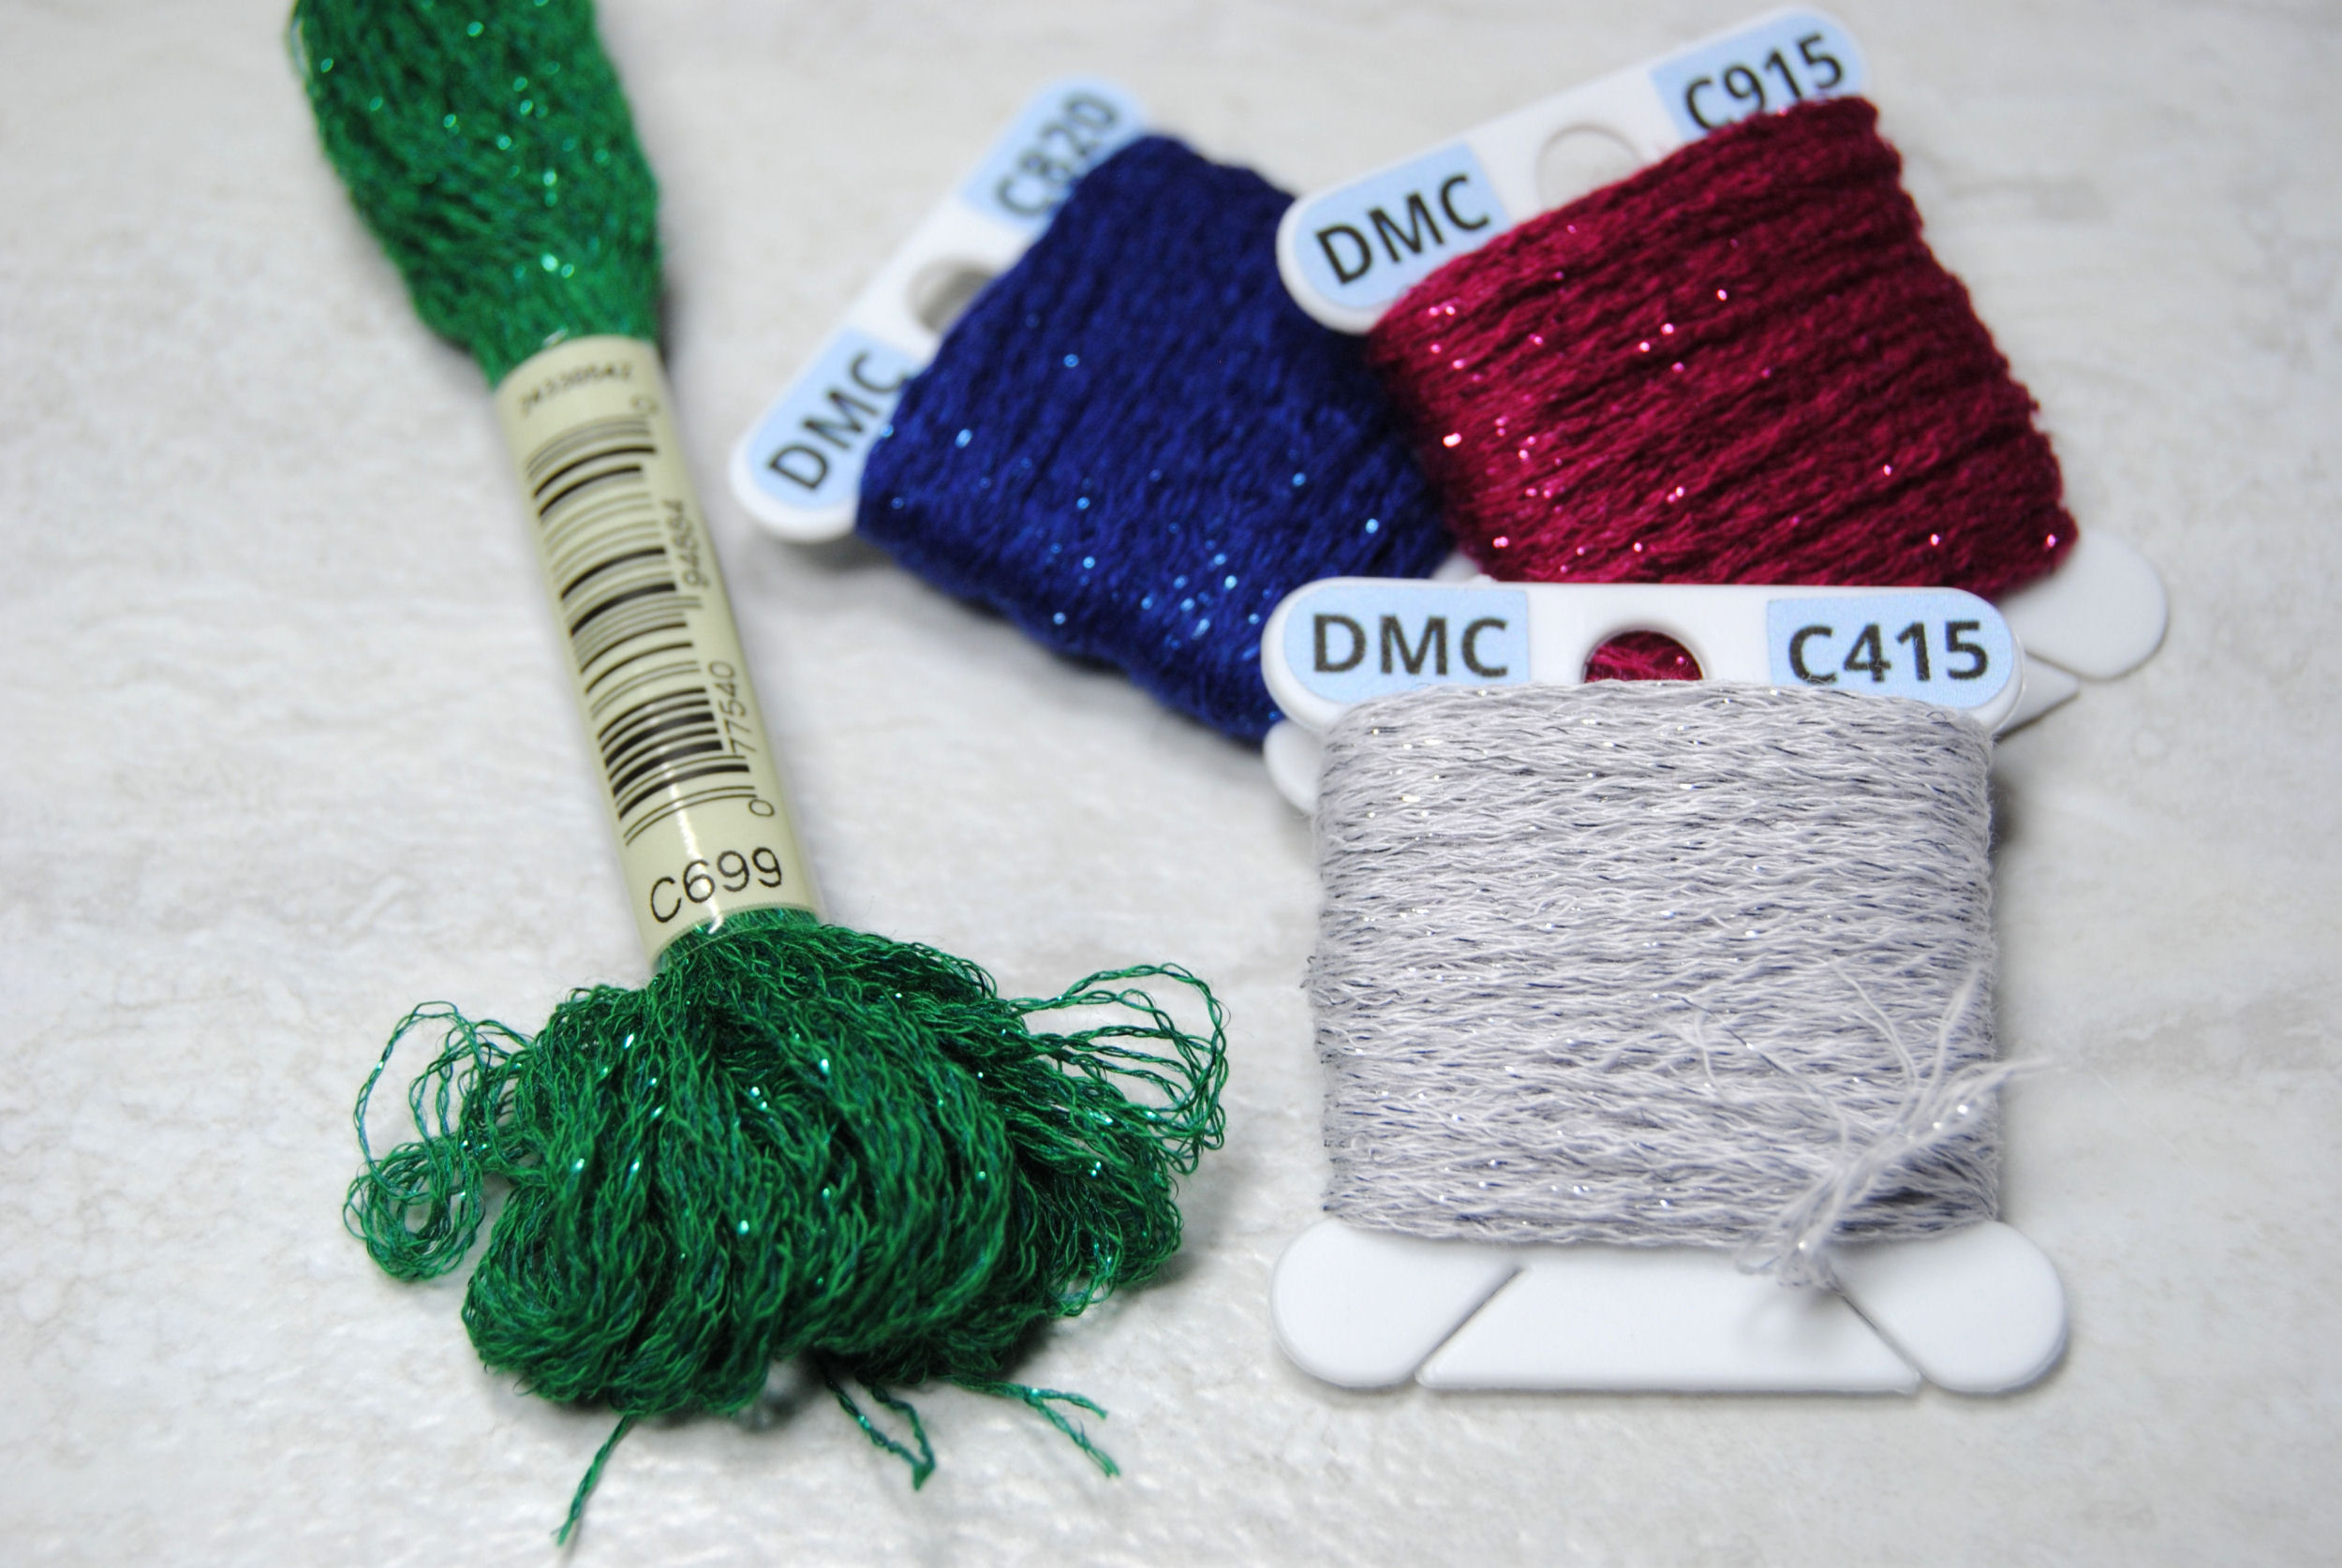
If you just can’t find them, there are other brands that have similar threads and may be easier to find such as Sulky Metallics, also known as Gütermann Sulky. But really any thinner metallic thread will work to give your stitching a bit of flair. I’ve even used Sulky Glowy threads for blending to add glow in the dark!
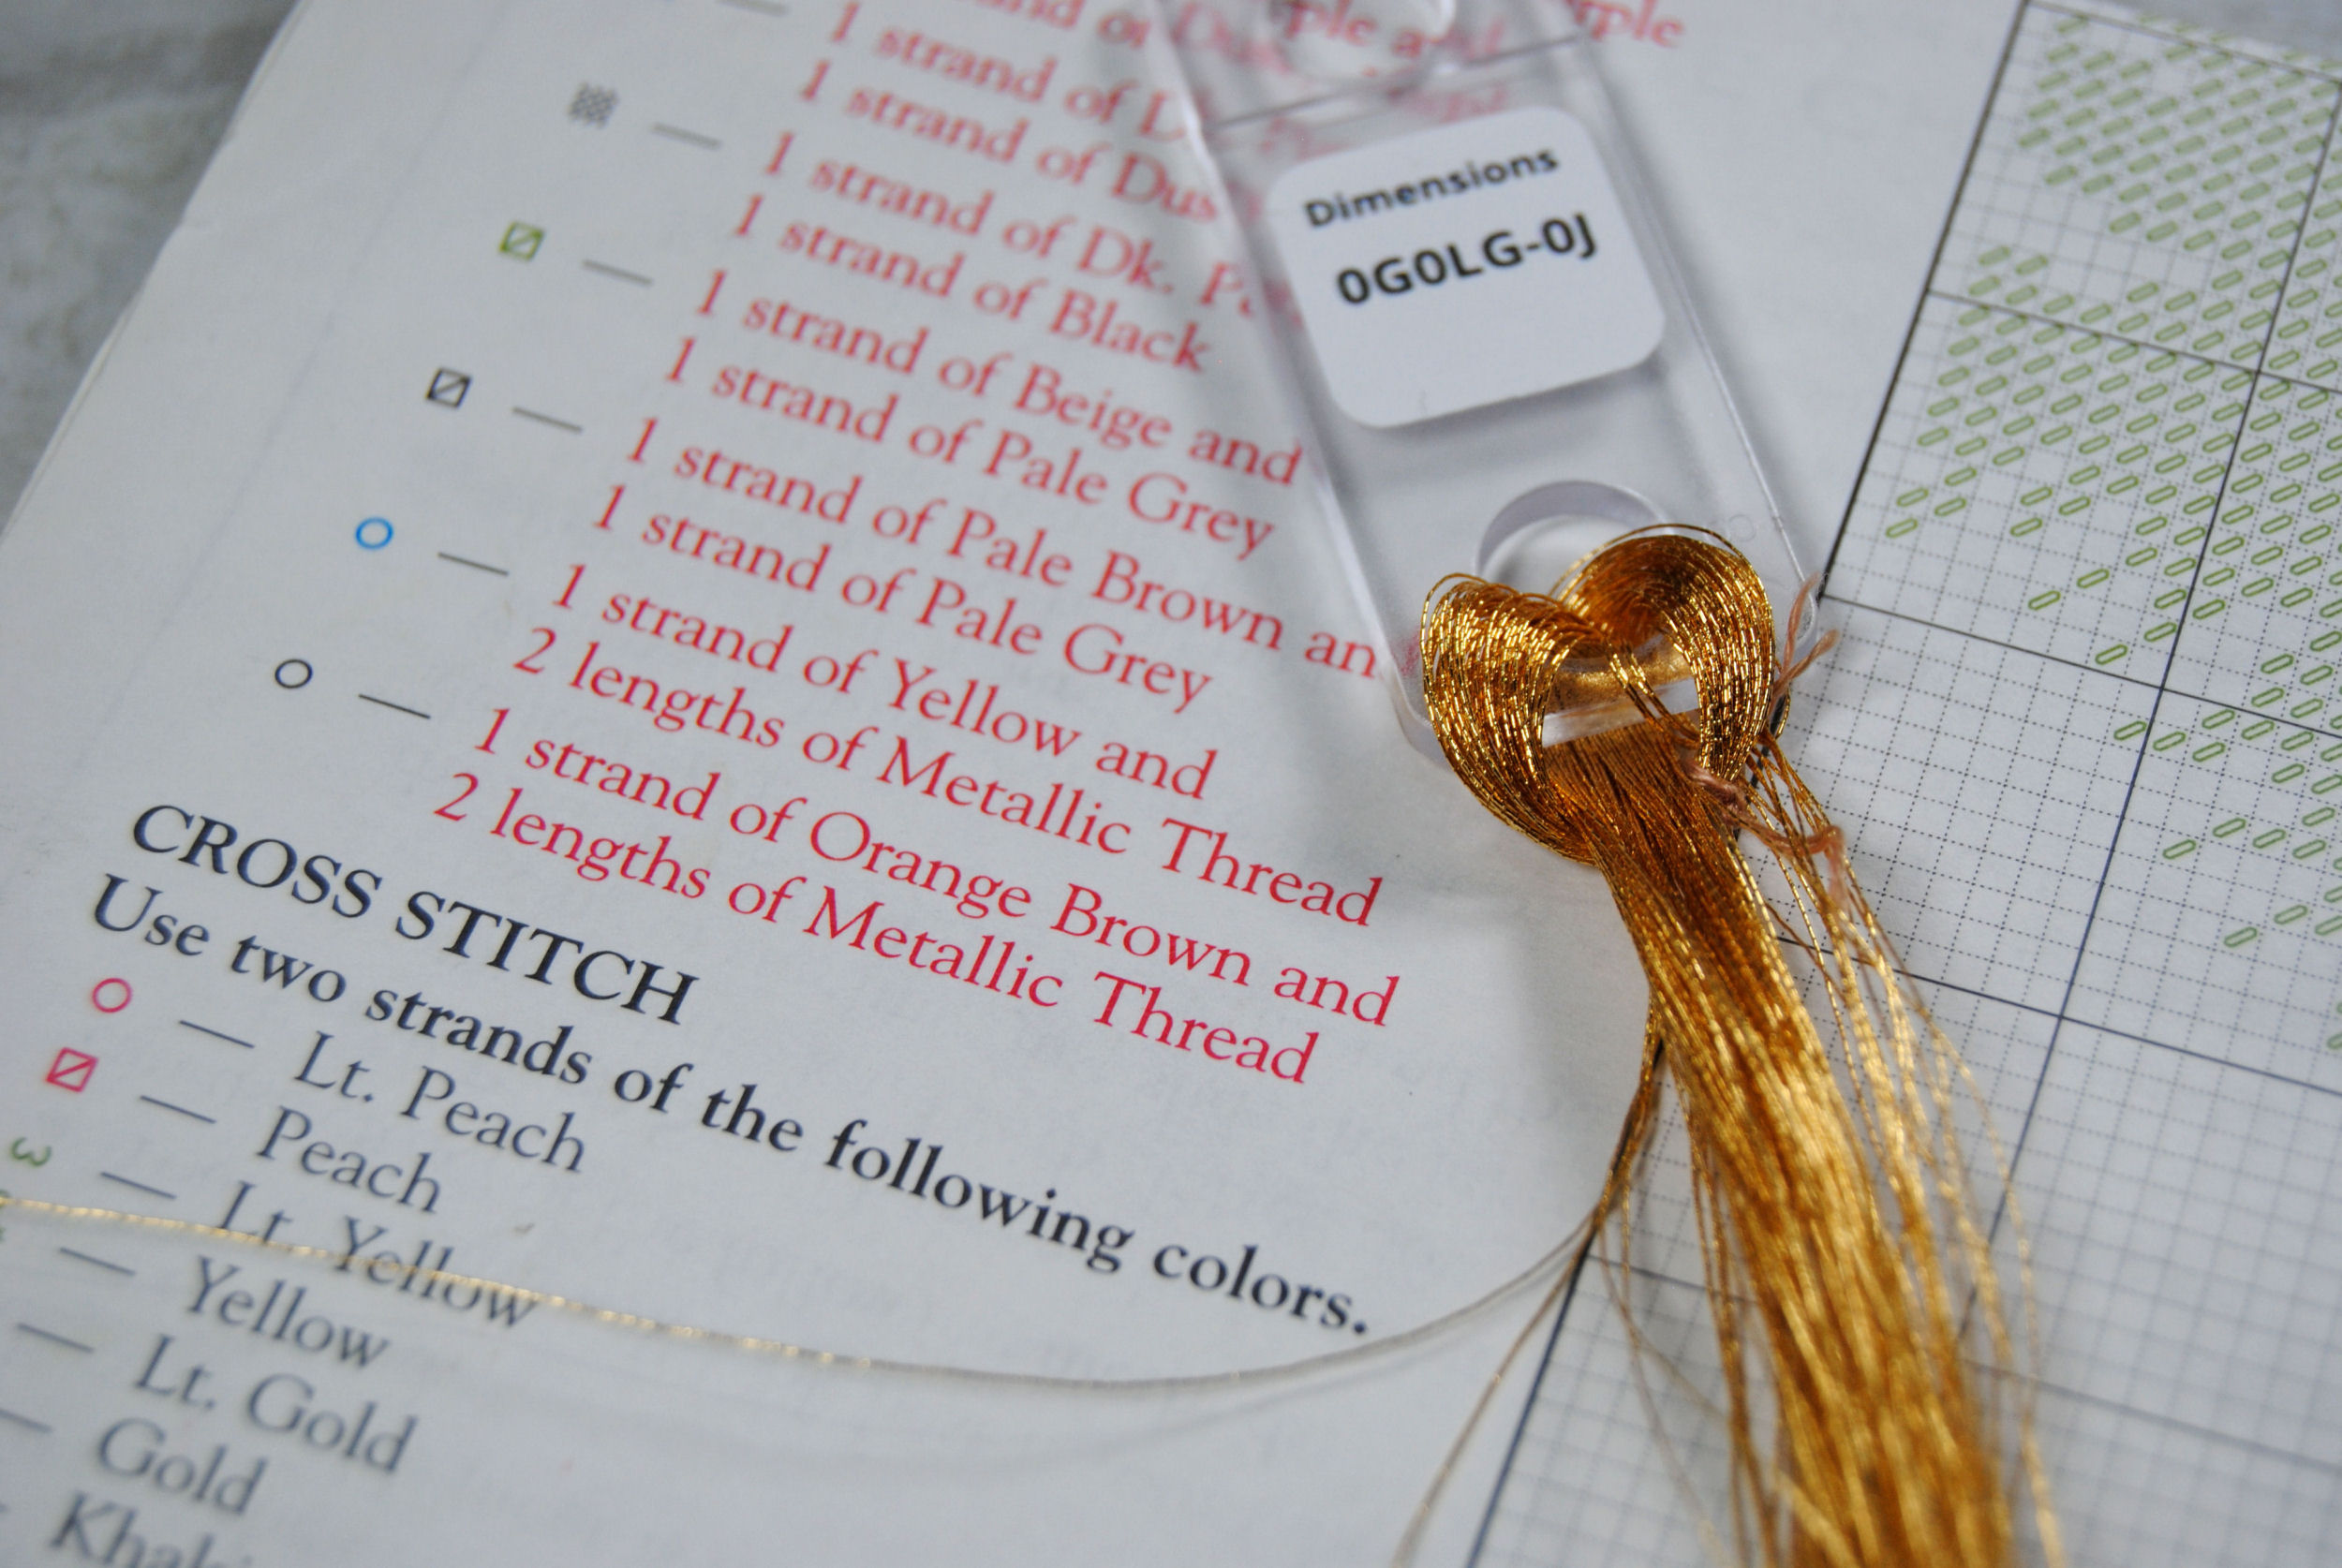
In fact, Dimensions Kits also use blending to create various metallic colors! They sometimes provide thin metallic thread and indicate that you should mix it with strands of different colored cottons.
Recommended Colors to Buy
While looking for retailers that carry Kreinik you may have noticed blending filament ALSO comes in hundreds of color options. I mentioned earlier that you could just mix it in with your thread to make any color metallic thread instead of having to buy a ton of different ones! Well… that’s still true. But the color of the filament can also have a huge effect on your finished project.
In most examples the color of the cotton thread you’re using should complement the filament. However, you could augment or contrast the color depending on what kind of effect you want! I’ll be showing a few examples of this later in this article.
If you look real close at Mouliné Étoile you’ll notice that each color uses a matching color filament to really work well together, which is a defining feature of this line. But maybe you would prefer a contrasting color to make for a nice variegated effect instead!
The most versatile colors of course are going to be silver and gold. In Kreinik, that’s 001(Silver) and 002(Gold) No matter what color you mix these with, they should look like they belong. My personal favorite is 032 (Pearl) as it’s a much more subtle pearlescent shimmer. These are often the most common colors called for in patterns.
Which one you choose is going to be dependent on your preferences, though. Gold sparkles are very common on Christmassy themed things, while silver sparkles might fare better on wintery scenes.
What do all these letters mean?
If you’re looking at the Kreinik order page you’ll also see there’s often variations of each color, denoted by a letter after the number.
- “HL” stands for Hi Lustre, so extra shimmery.
- “V” stands for Vintage, which has more of an antique finish.
- “F” is for Fluorescent, aka glow-in-the-dark.
- “L” is Holographic, which will be… well, holographic. (HL was already taken)
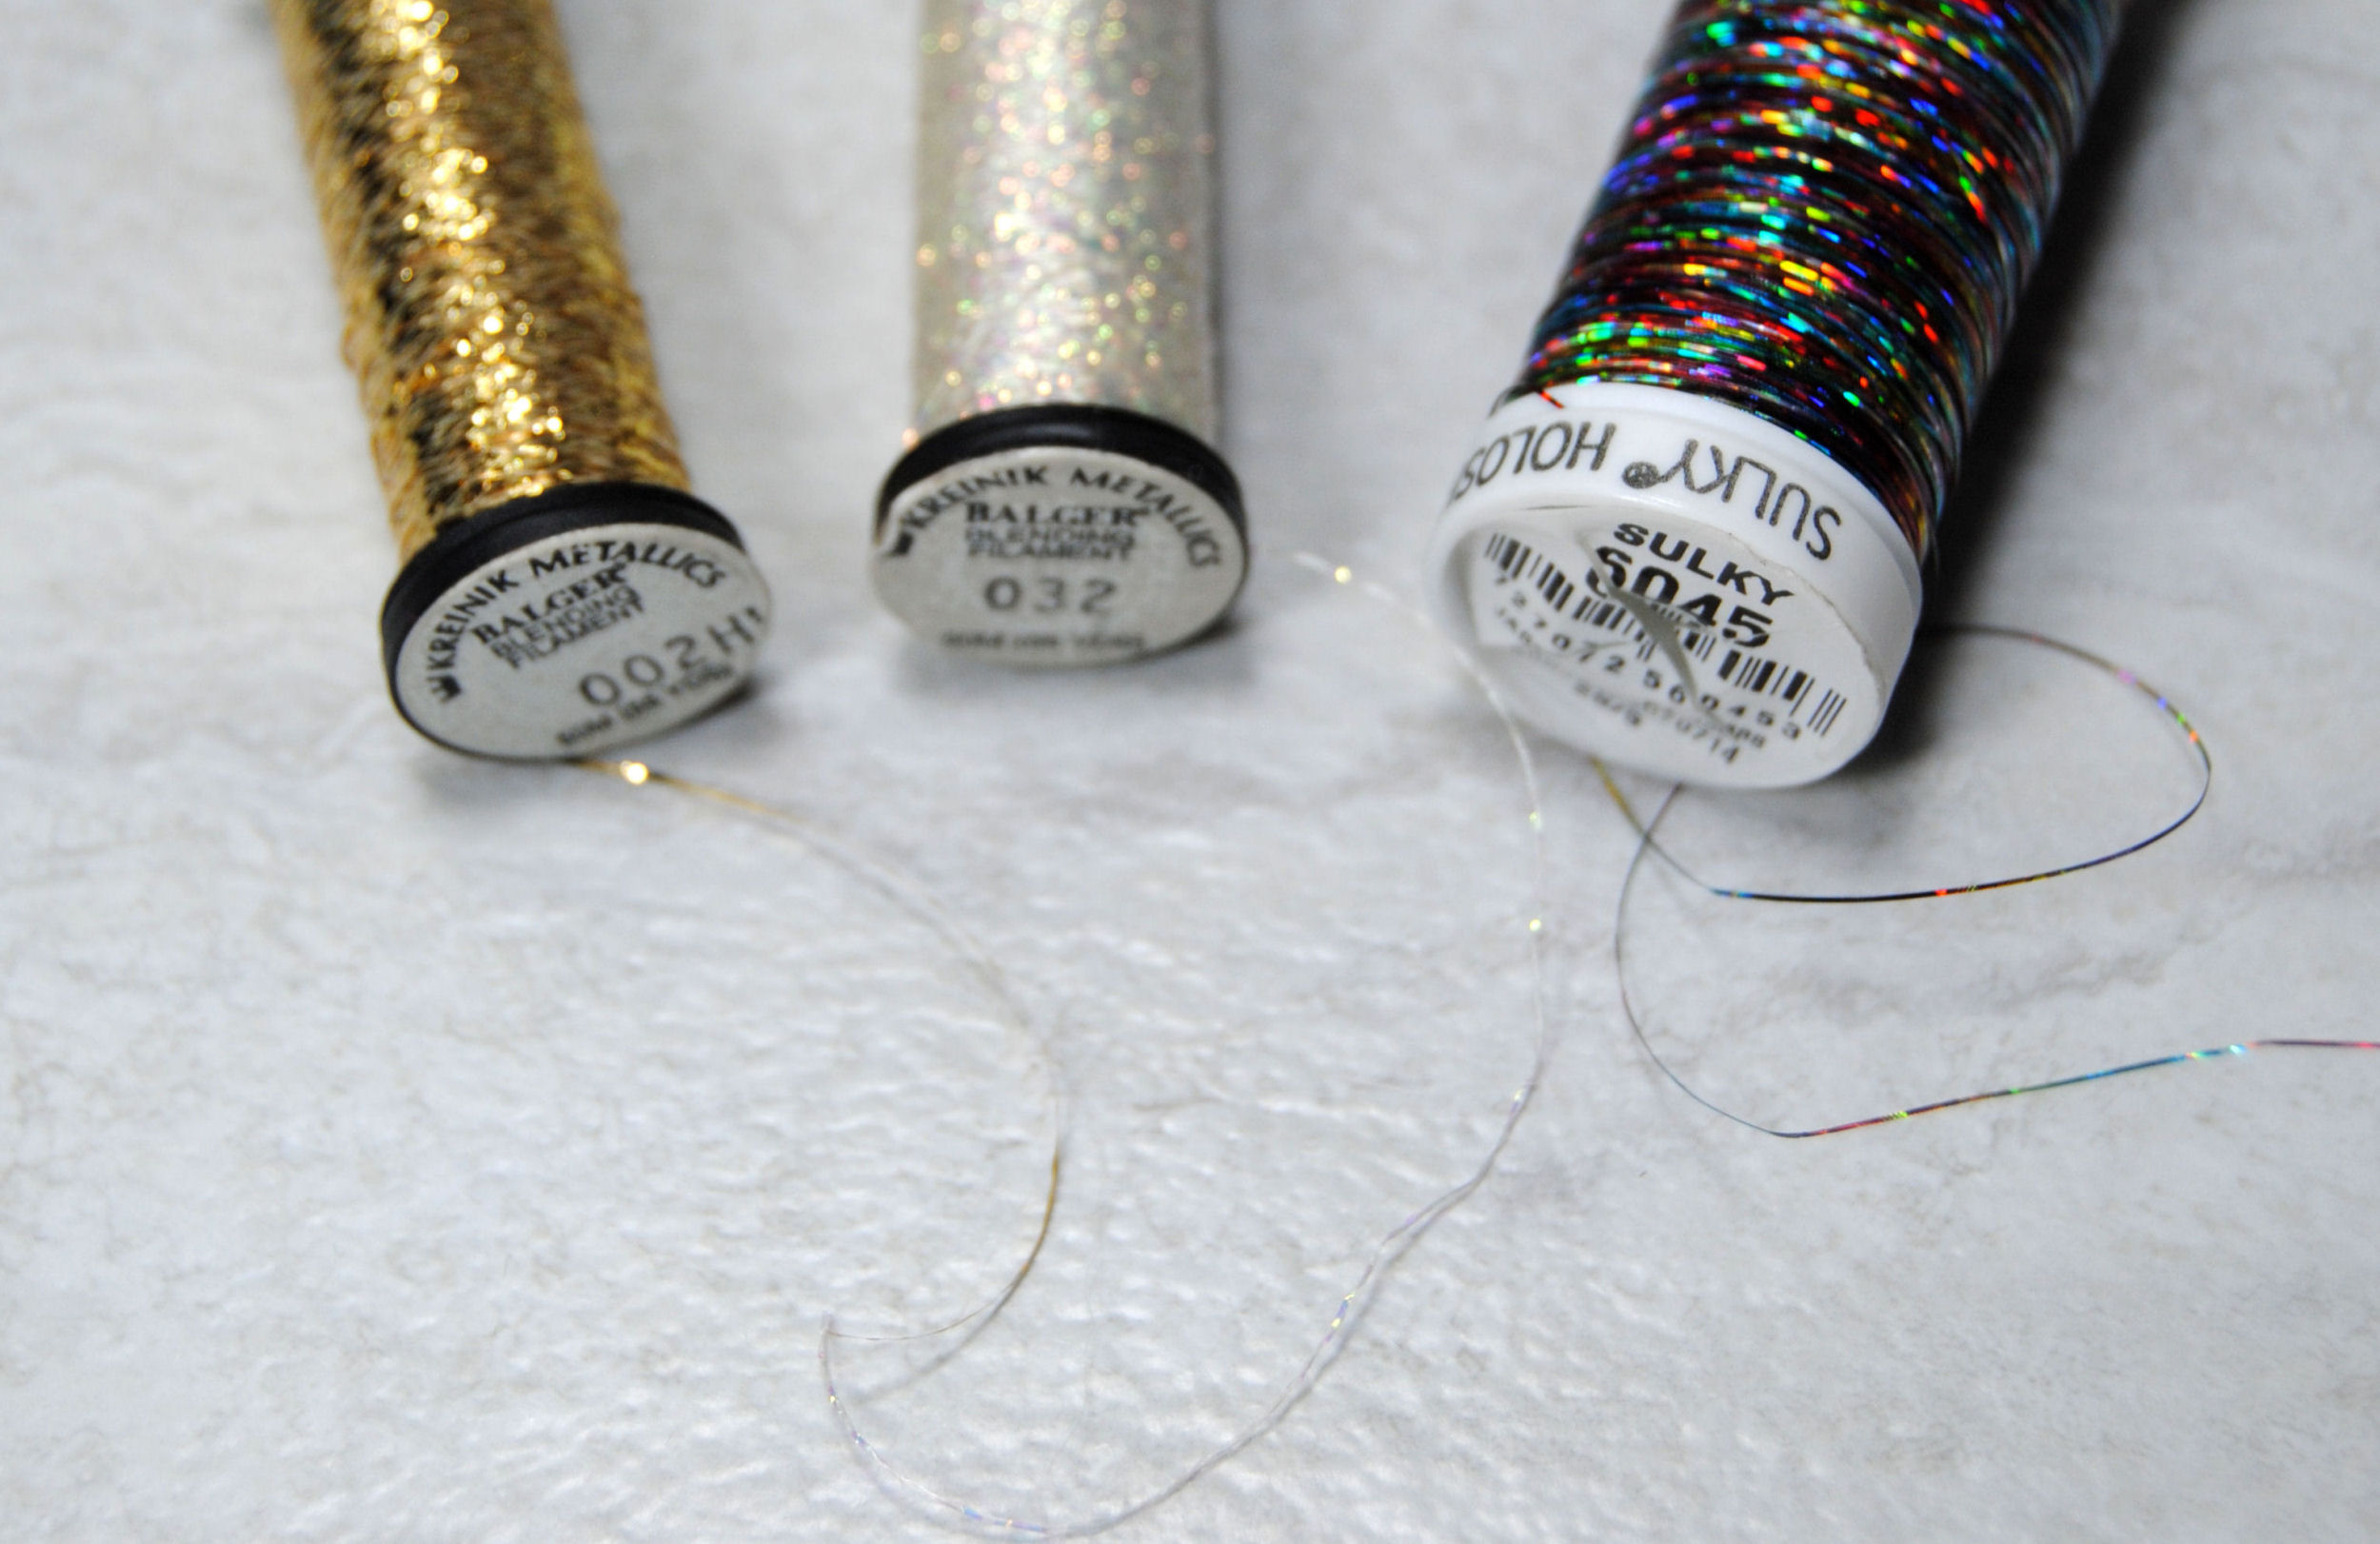
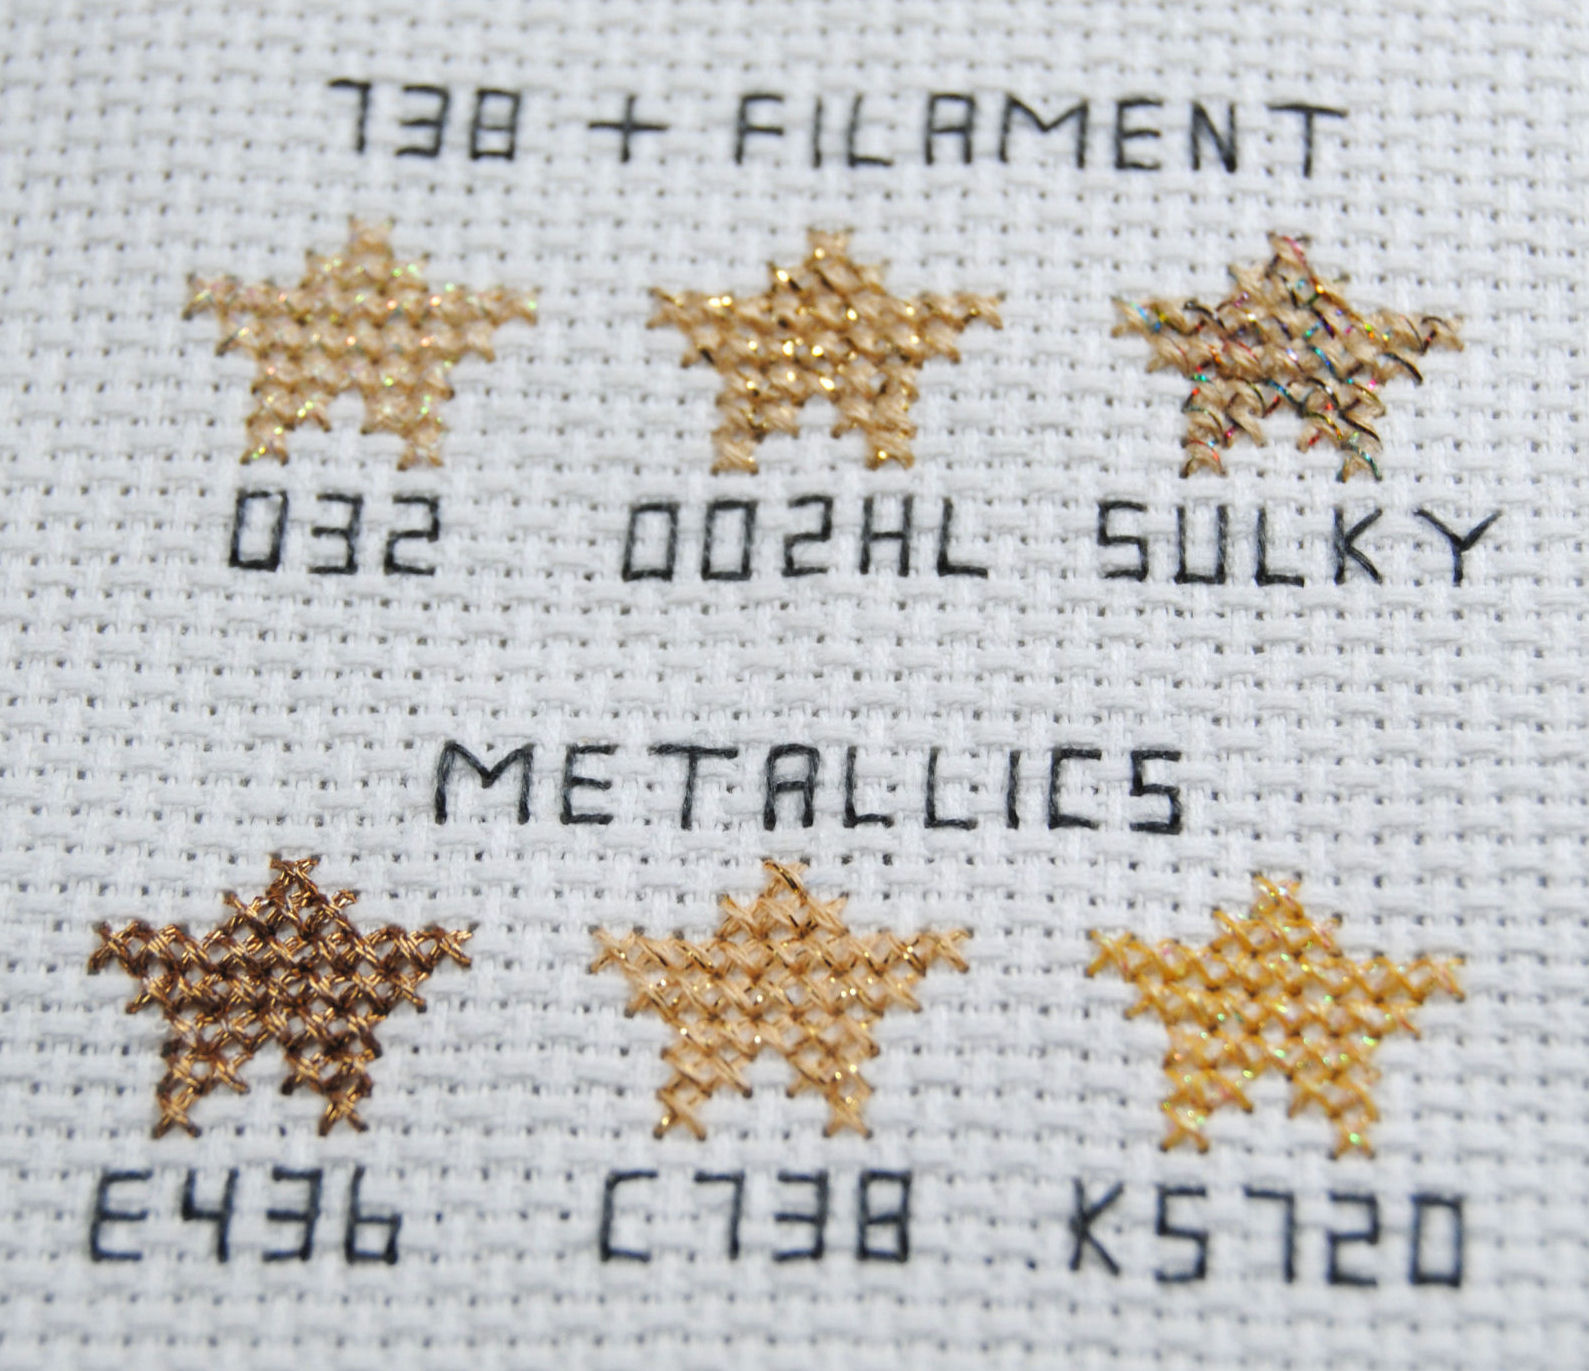
For my examples below I’ll be using Kreinik 002HL (Gold), Kreinik 032 (Pearl), and for contrast we’ll compare them to Sulky Holoshimmer 6045 (Rainbow)
How to Use Blending Filament
There’s a few different ways to use blending filament in your designs. The first being the most common, blending it in with your cotton.
Stitching With Blending Filament and Cotton Thread
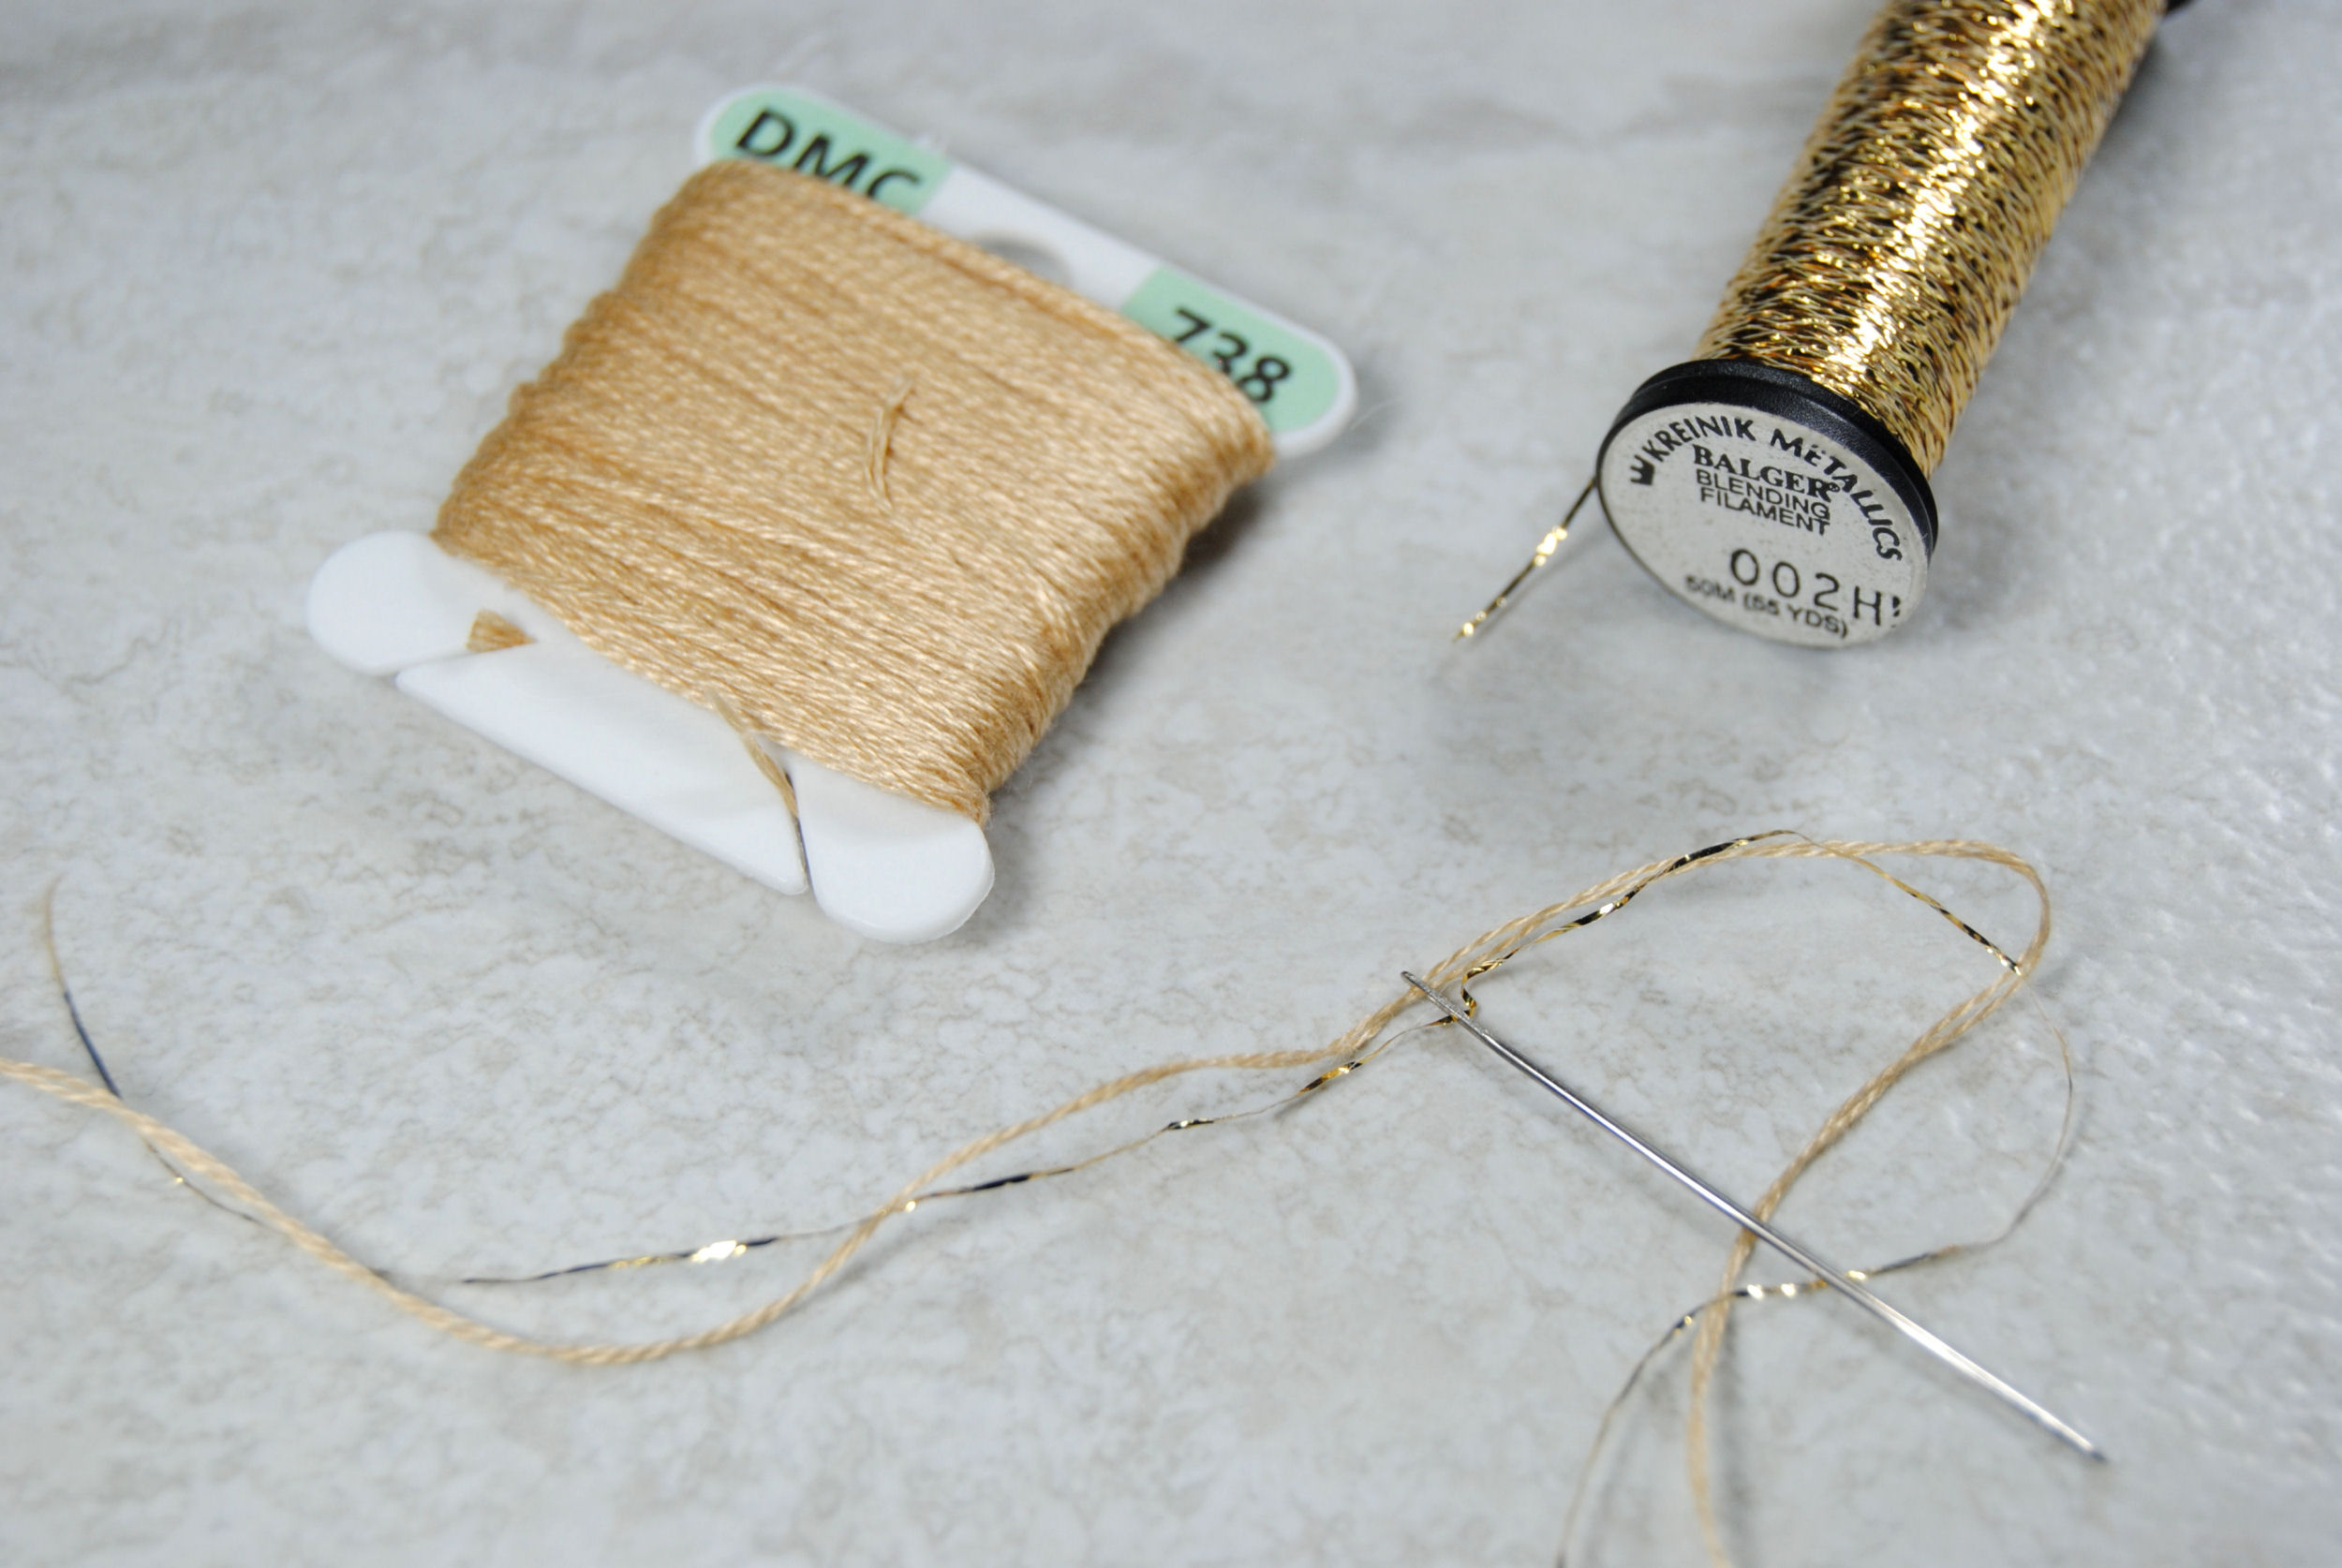
If you’ve encountered blending filament before you’ve likely seen this method. You simply mix a single strand of the blending filament with your cotton thread.
This is the same whether you prefer to stitch with one strand, two strands, or even three strands of cotton thread. Though of course the amount of sparkle will vary dependent on the ratio of cotton to filament.
For this example I’ll be using two strands of DMC 738 and 1 strand of Kreinik 002HL
If this is your first time stitching with the stuff, I recommend using much shorter strands than normal, and taking things extra slow. While not as horrific as stitching with DMC Light Effects can be, this unique thread can tangle or break somewhat easily.
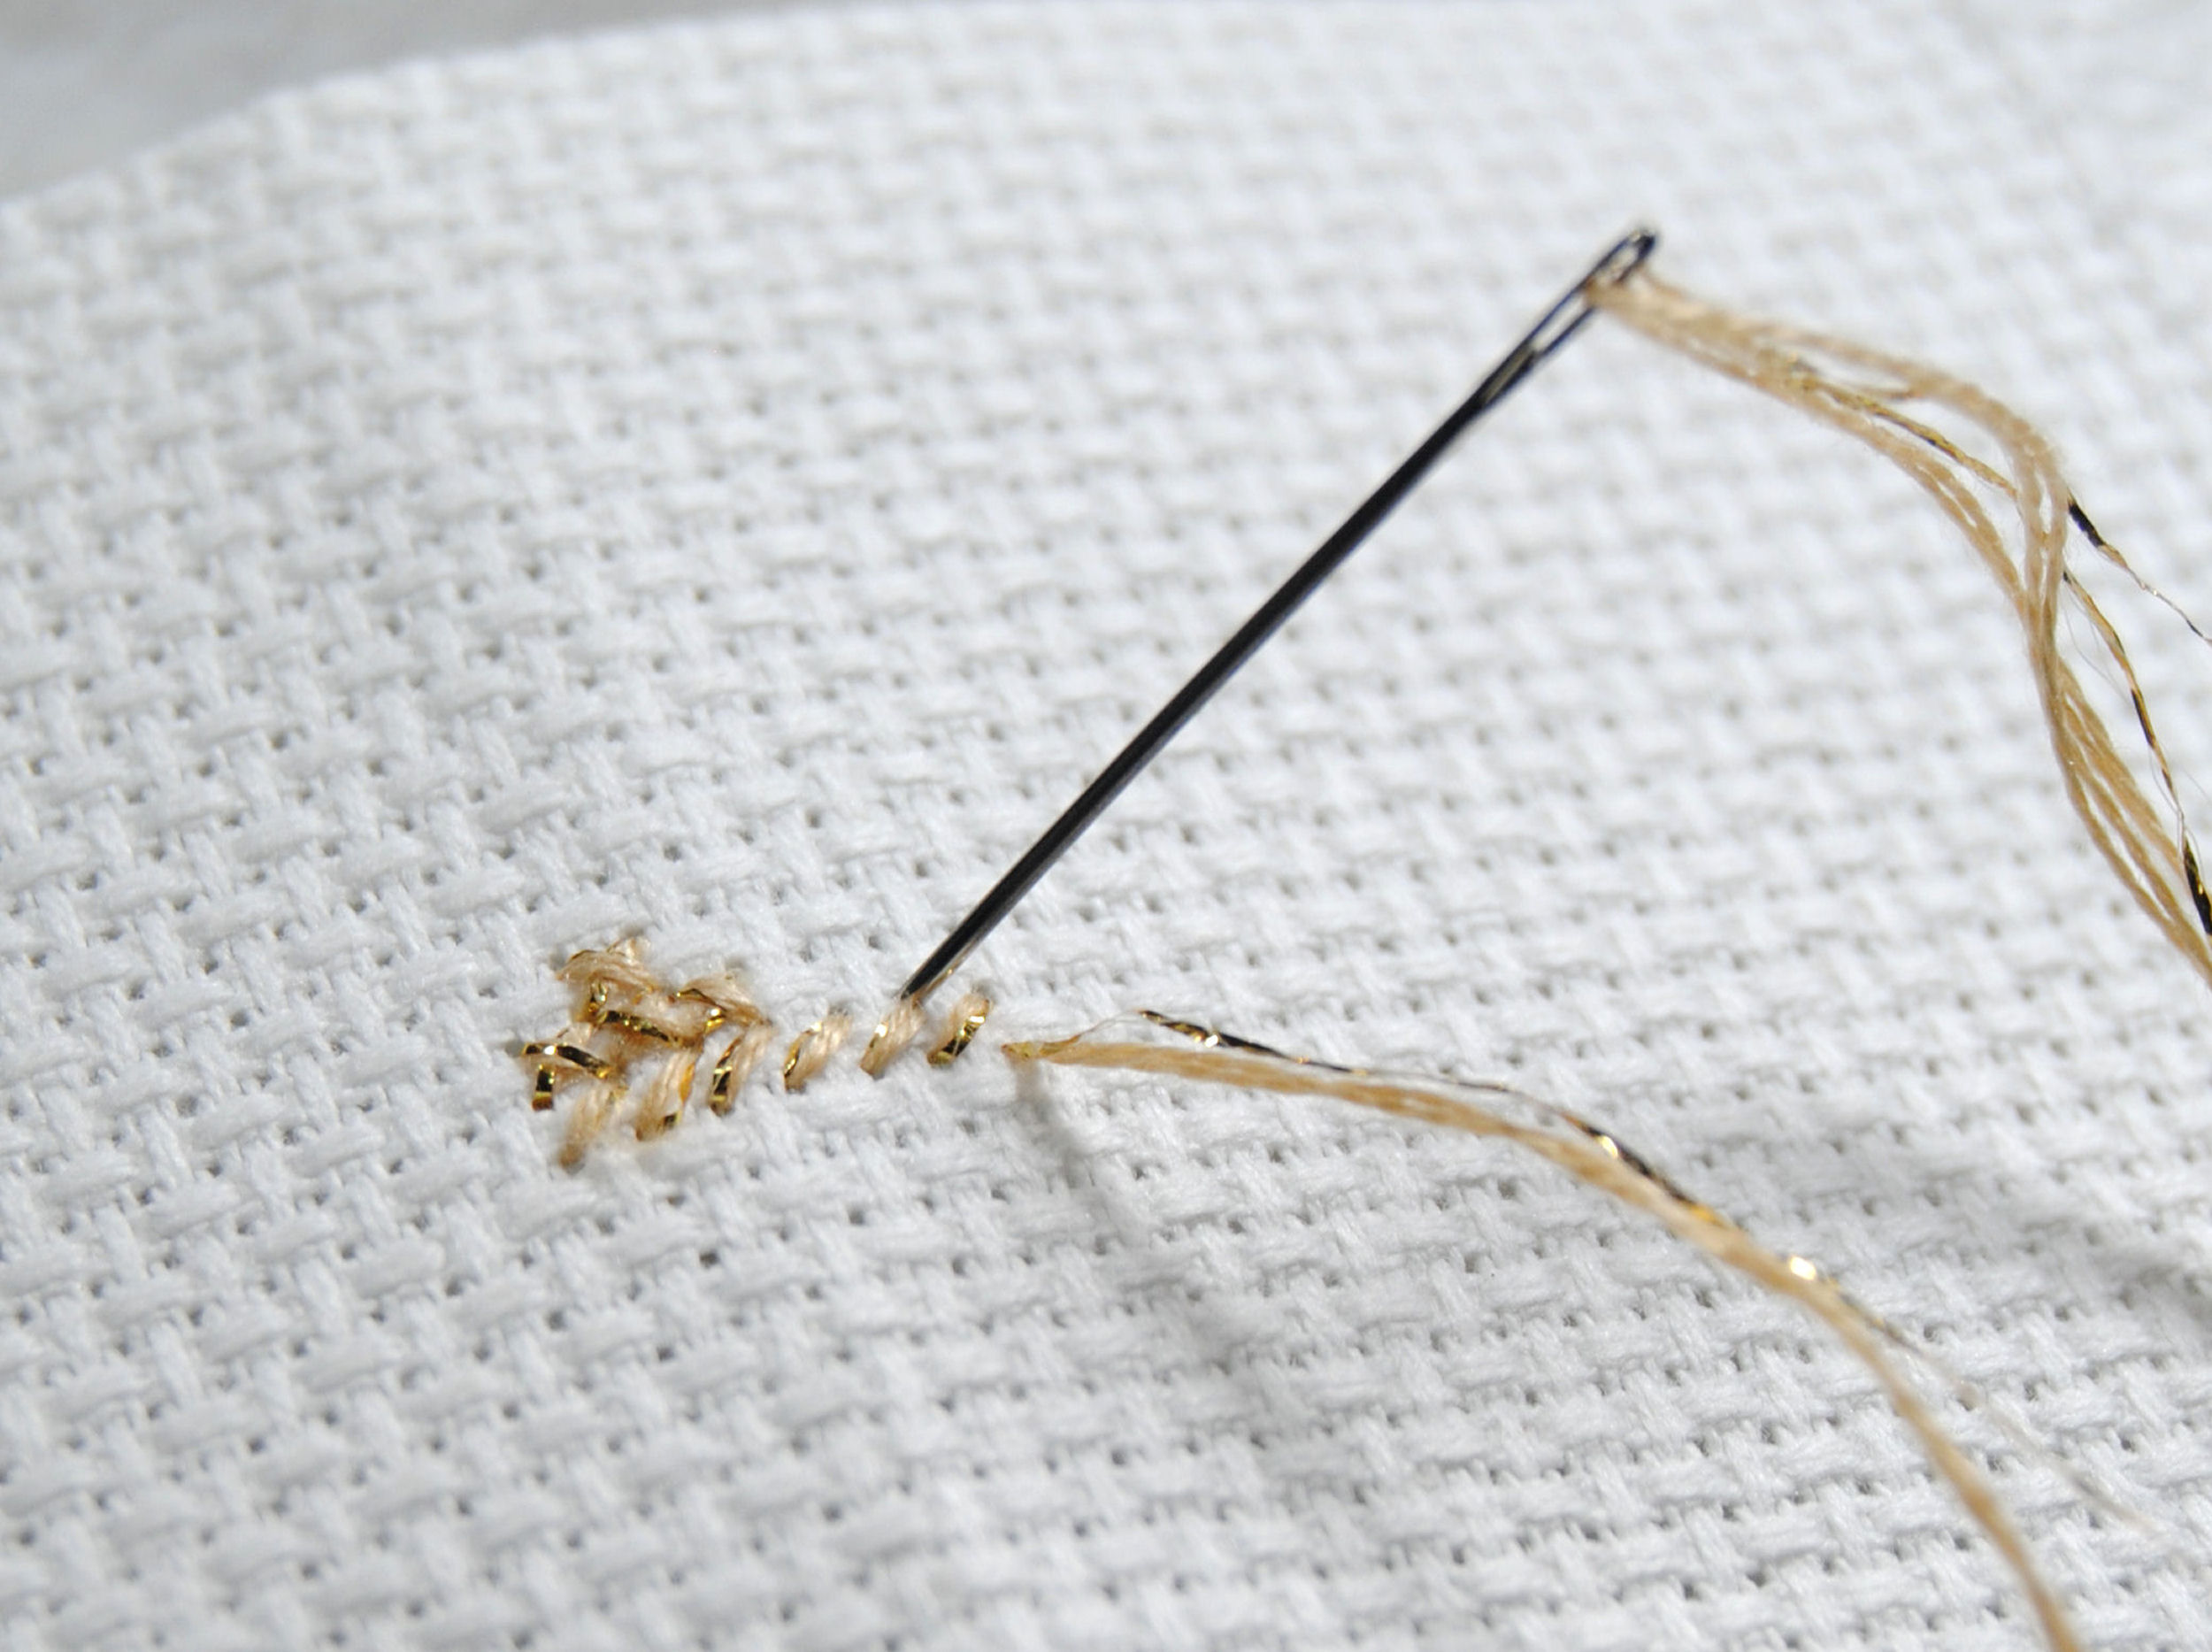
One of the benefits of this method is that it gives the sparkle a bit more randomness to it depending on how you stitch. Sometimes the filament will be tucked under the cotton and other times it will be right on top. If you’d prefer your stitches to be more uniform though, consider railroading as you stitch.
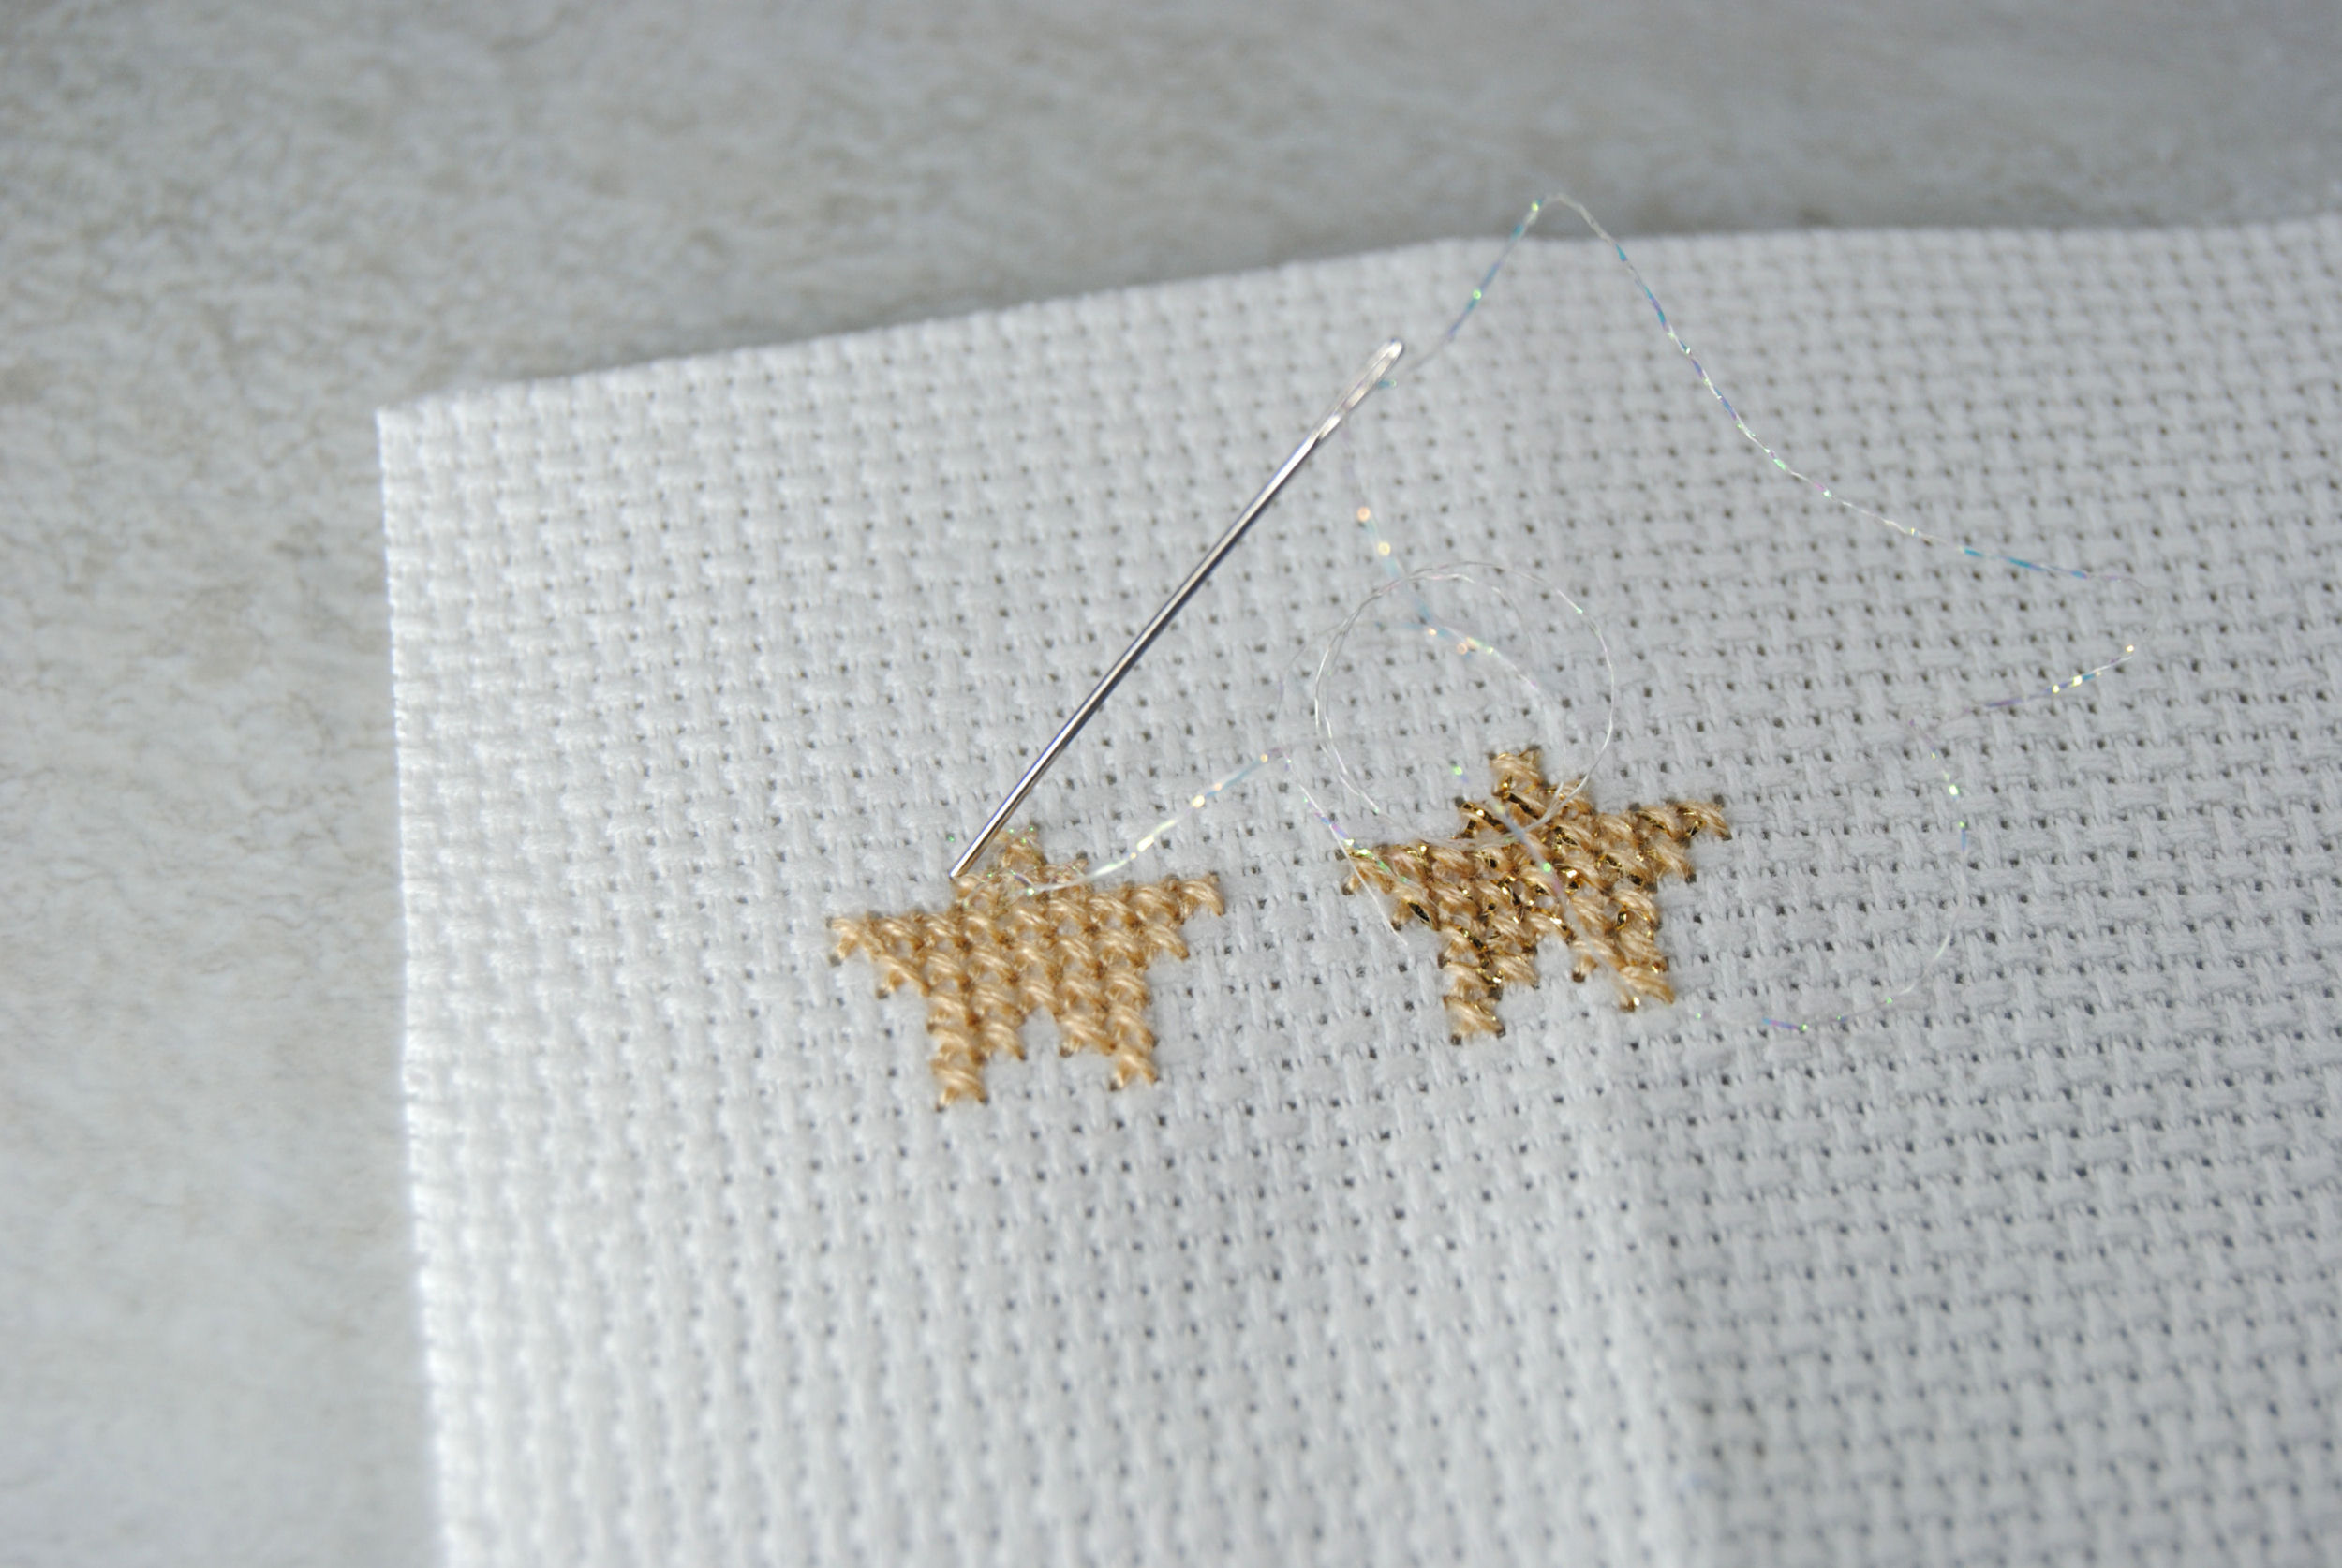
Stitching on Top of Existing Stitches
If you’re struggling with getting both the cotton and the filament to come through at the same rate, this next method might be the way to go. Simply stitch the cotton stitches as you would normally, and then go back and stitch on top of those stitches with the blending filament.
This will allow you to focus more on keeping the filament under control, and also gives you stronger coverage of the sparkle provided by the filament.
This is harder to see in my example since I used Kreinik 032, but it may be easier to see in the final comparison of the three methods.
Is it more work to essentially stitch the same area twice? Maybe. But the results can be well worth it!
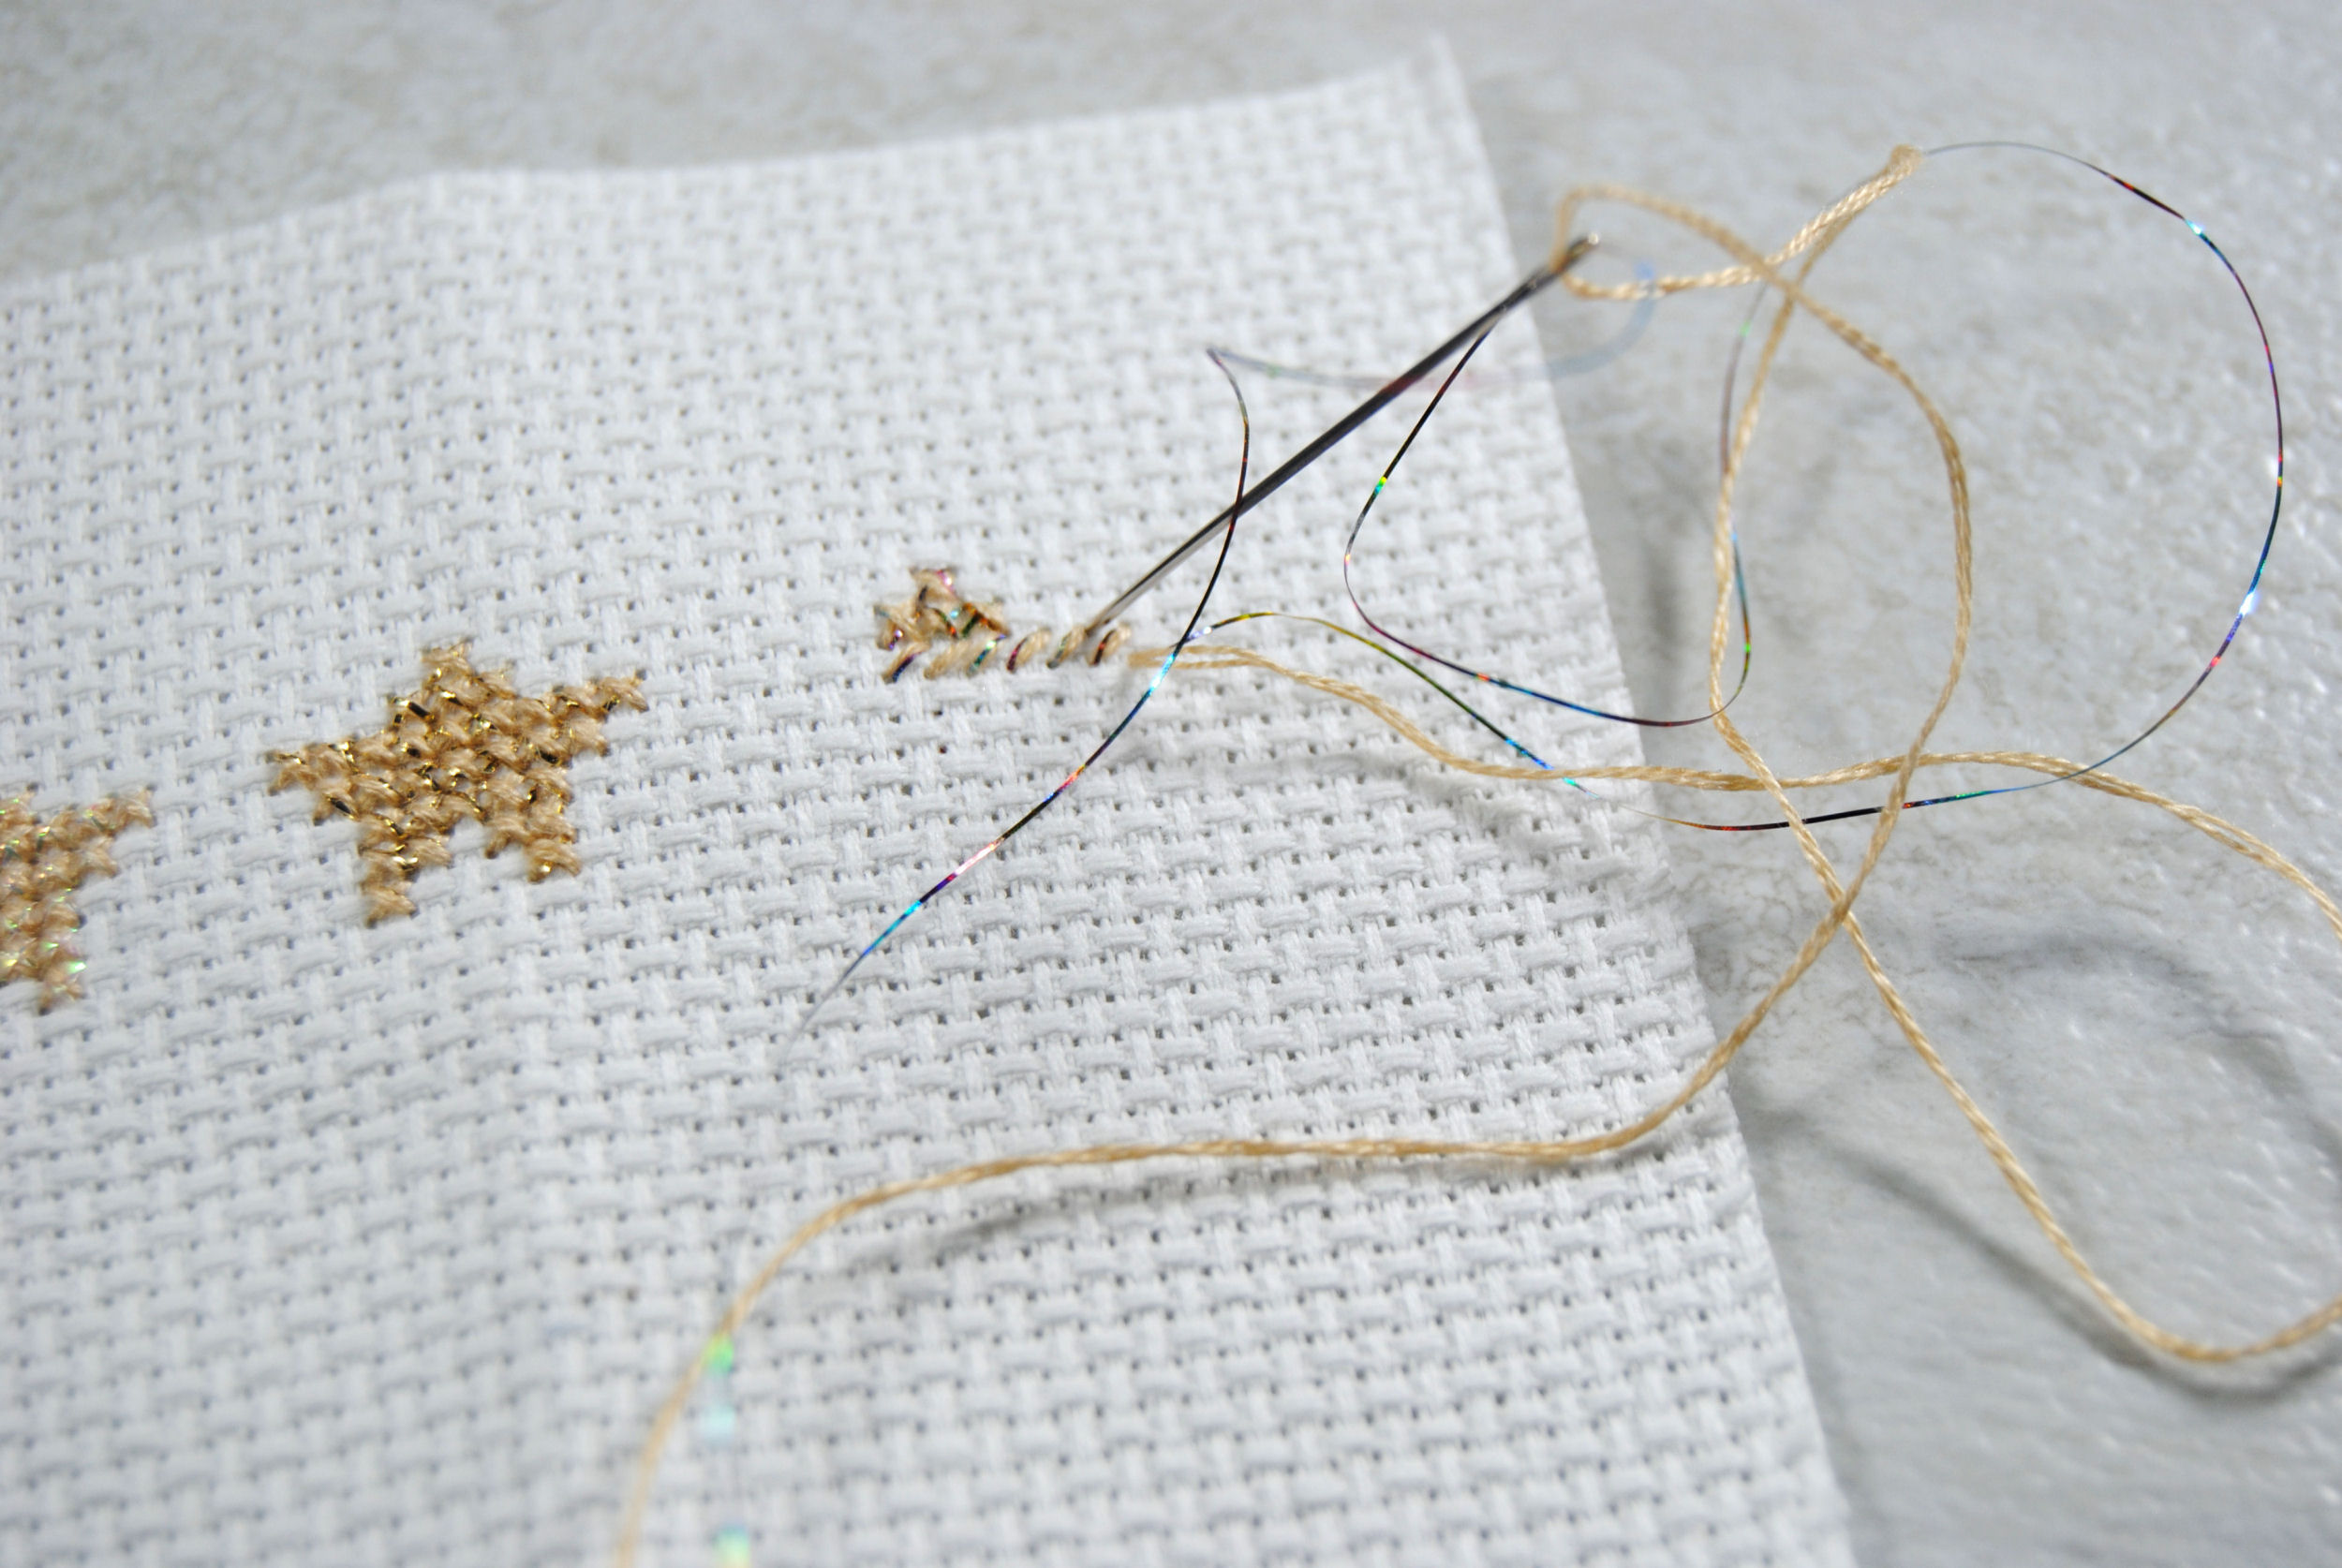
Stitching Without the Core
Lastly, some stitchers prefer to stitch without the core thread that is wrapped around Kreinik’s blending filament. If you look super closely there’s a thin white strand bundled along with the filament. If this core bothers you, you can simply separate it from the strand and stitch without it.

Rather than doing that, I’ll be using the Sulky Holoshimmer as an example, as it does not come with a core. As you can probably see by my image it was much more prone to curling up and was a bit harder to manage. But ultimately looks about the same as it would with the core. I’d recommend experimenting and see which you prefer.
Comparing the Three Methods
Finally here’s a closeup comparing the three methods used above. But more importantly showing you just how big a difference the color of your blending filament can make!
These were all stitched using DMC 738 as the base, but they look super different due to the colors of the blending filament.
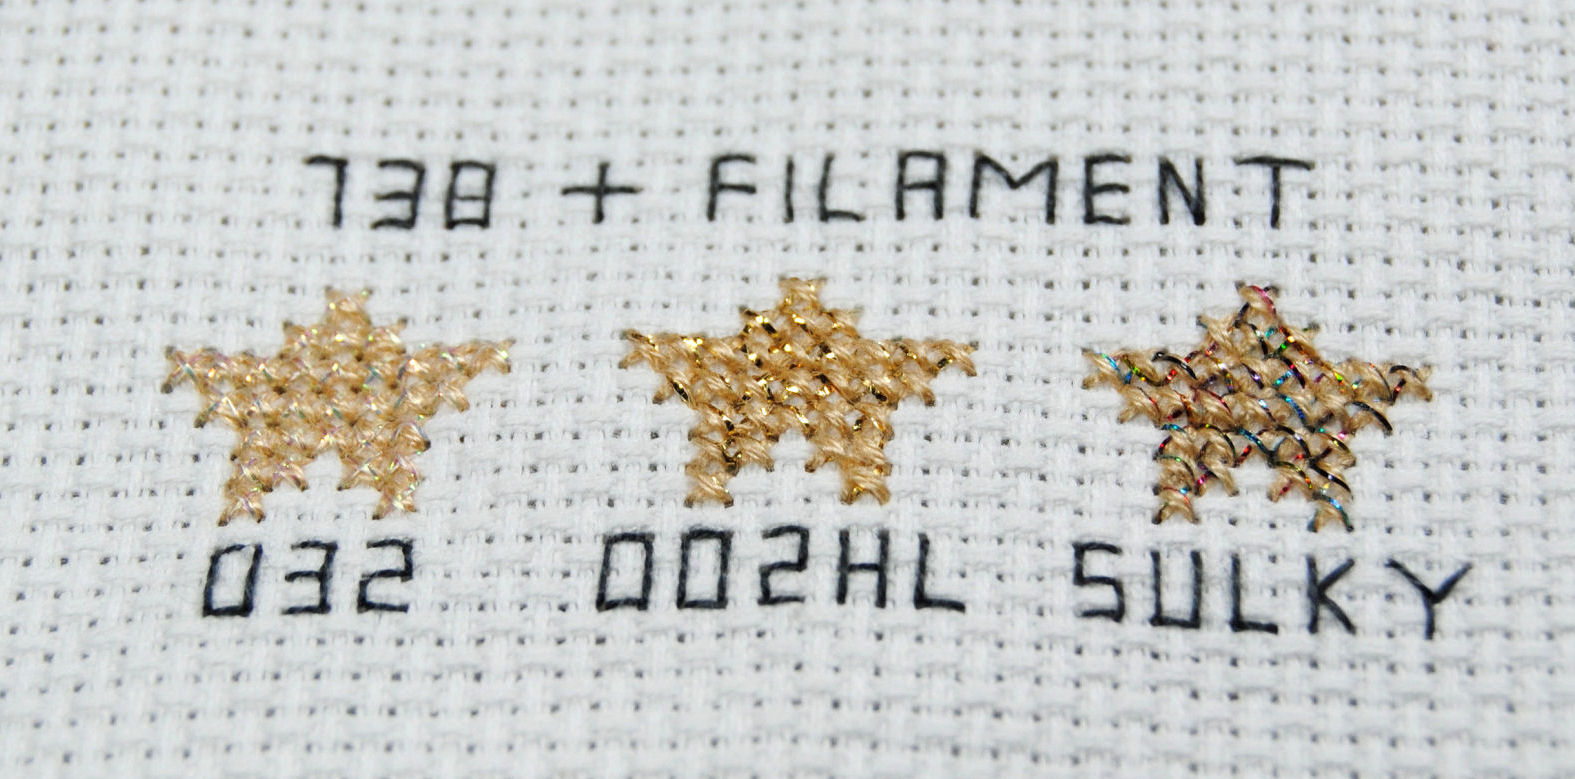
And it shows the importance of complementing your cotton with your filament. The rainbow sulky looks a bit silly in this example, but is absolutely gorgeous when mixed with a darker shade such as 939 or 310. Unless that contrasting effect is the effect you’re going for, of course!
Comparing Blending Filament to Other Metallic Threads
So why take the time to use blending filament when you could just buy metallic threads? If you found this article because an old pattern specifically called for it… well you could certainly find alternatives if you really wanted to. In this section I’ll do some test stitches to compare to the most common metallics so you can see how they differ.
I don’t have exact color matches for all of them, but it should give you a general idea.
Light Effects
First, I tried the dreaded Light Effects thread in E436. This is the closest color to the 738 I used before. And yes I do own all the Light Effects threads, there’s just not a good match for this light beige-y color. Either way, the effect is the same. You’ll see it’s quite bold in its sparkle being entirely metallic in nature.
Mouliné Étoile
For the second star I used Mouliné Étoile in C738. Thanks to Mouliné Étoile’s numbering convention it made it easy to match to the ones we’d already done. C738 is essentially just 738 with a blending filament built in during production. You’ll note in the final side by side that it’s an even more subtle shimmer than our Kreinik filament!
And as noted earlier the filaments are generally matched to the thread colors which is nice. The downside being there’s only 35 shades of the stuff. So if you’re wanting a metallic version of any of the other 407 colors in the DMC line (including discontinued threads), then you’ll need to mix them yourself. 😉
Kreinik Braid
Lastly I wanted to show the difference with just plain Kreinik braid, which is designed to be stitched by itself. I used a single strand of Very Fine #4 braid in 5720. I could’ve gone with 002 but I wanted to find a match for the 738+032 effect I had made earlier. And while this is a little more orangey than 738 it’s definitely a very similar effect!
The main difference being it’s all built into one braid instead of having to be stitched twice.
Below you can see these three different metallics as compared to our samples from earlier.
Other Metallic Threads
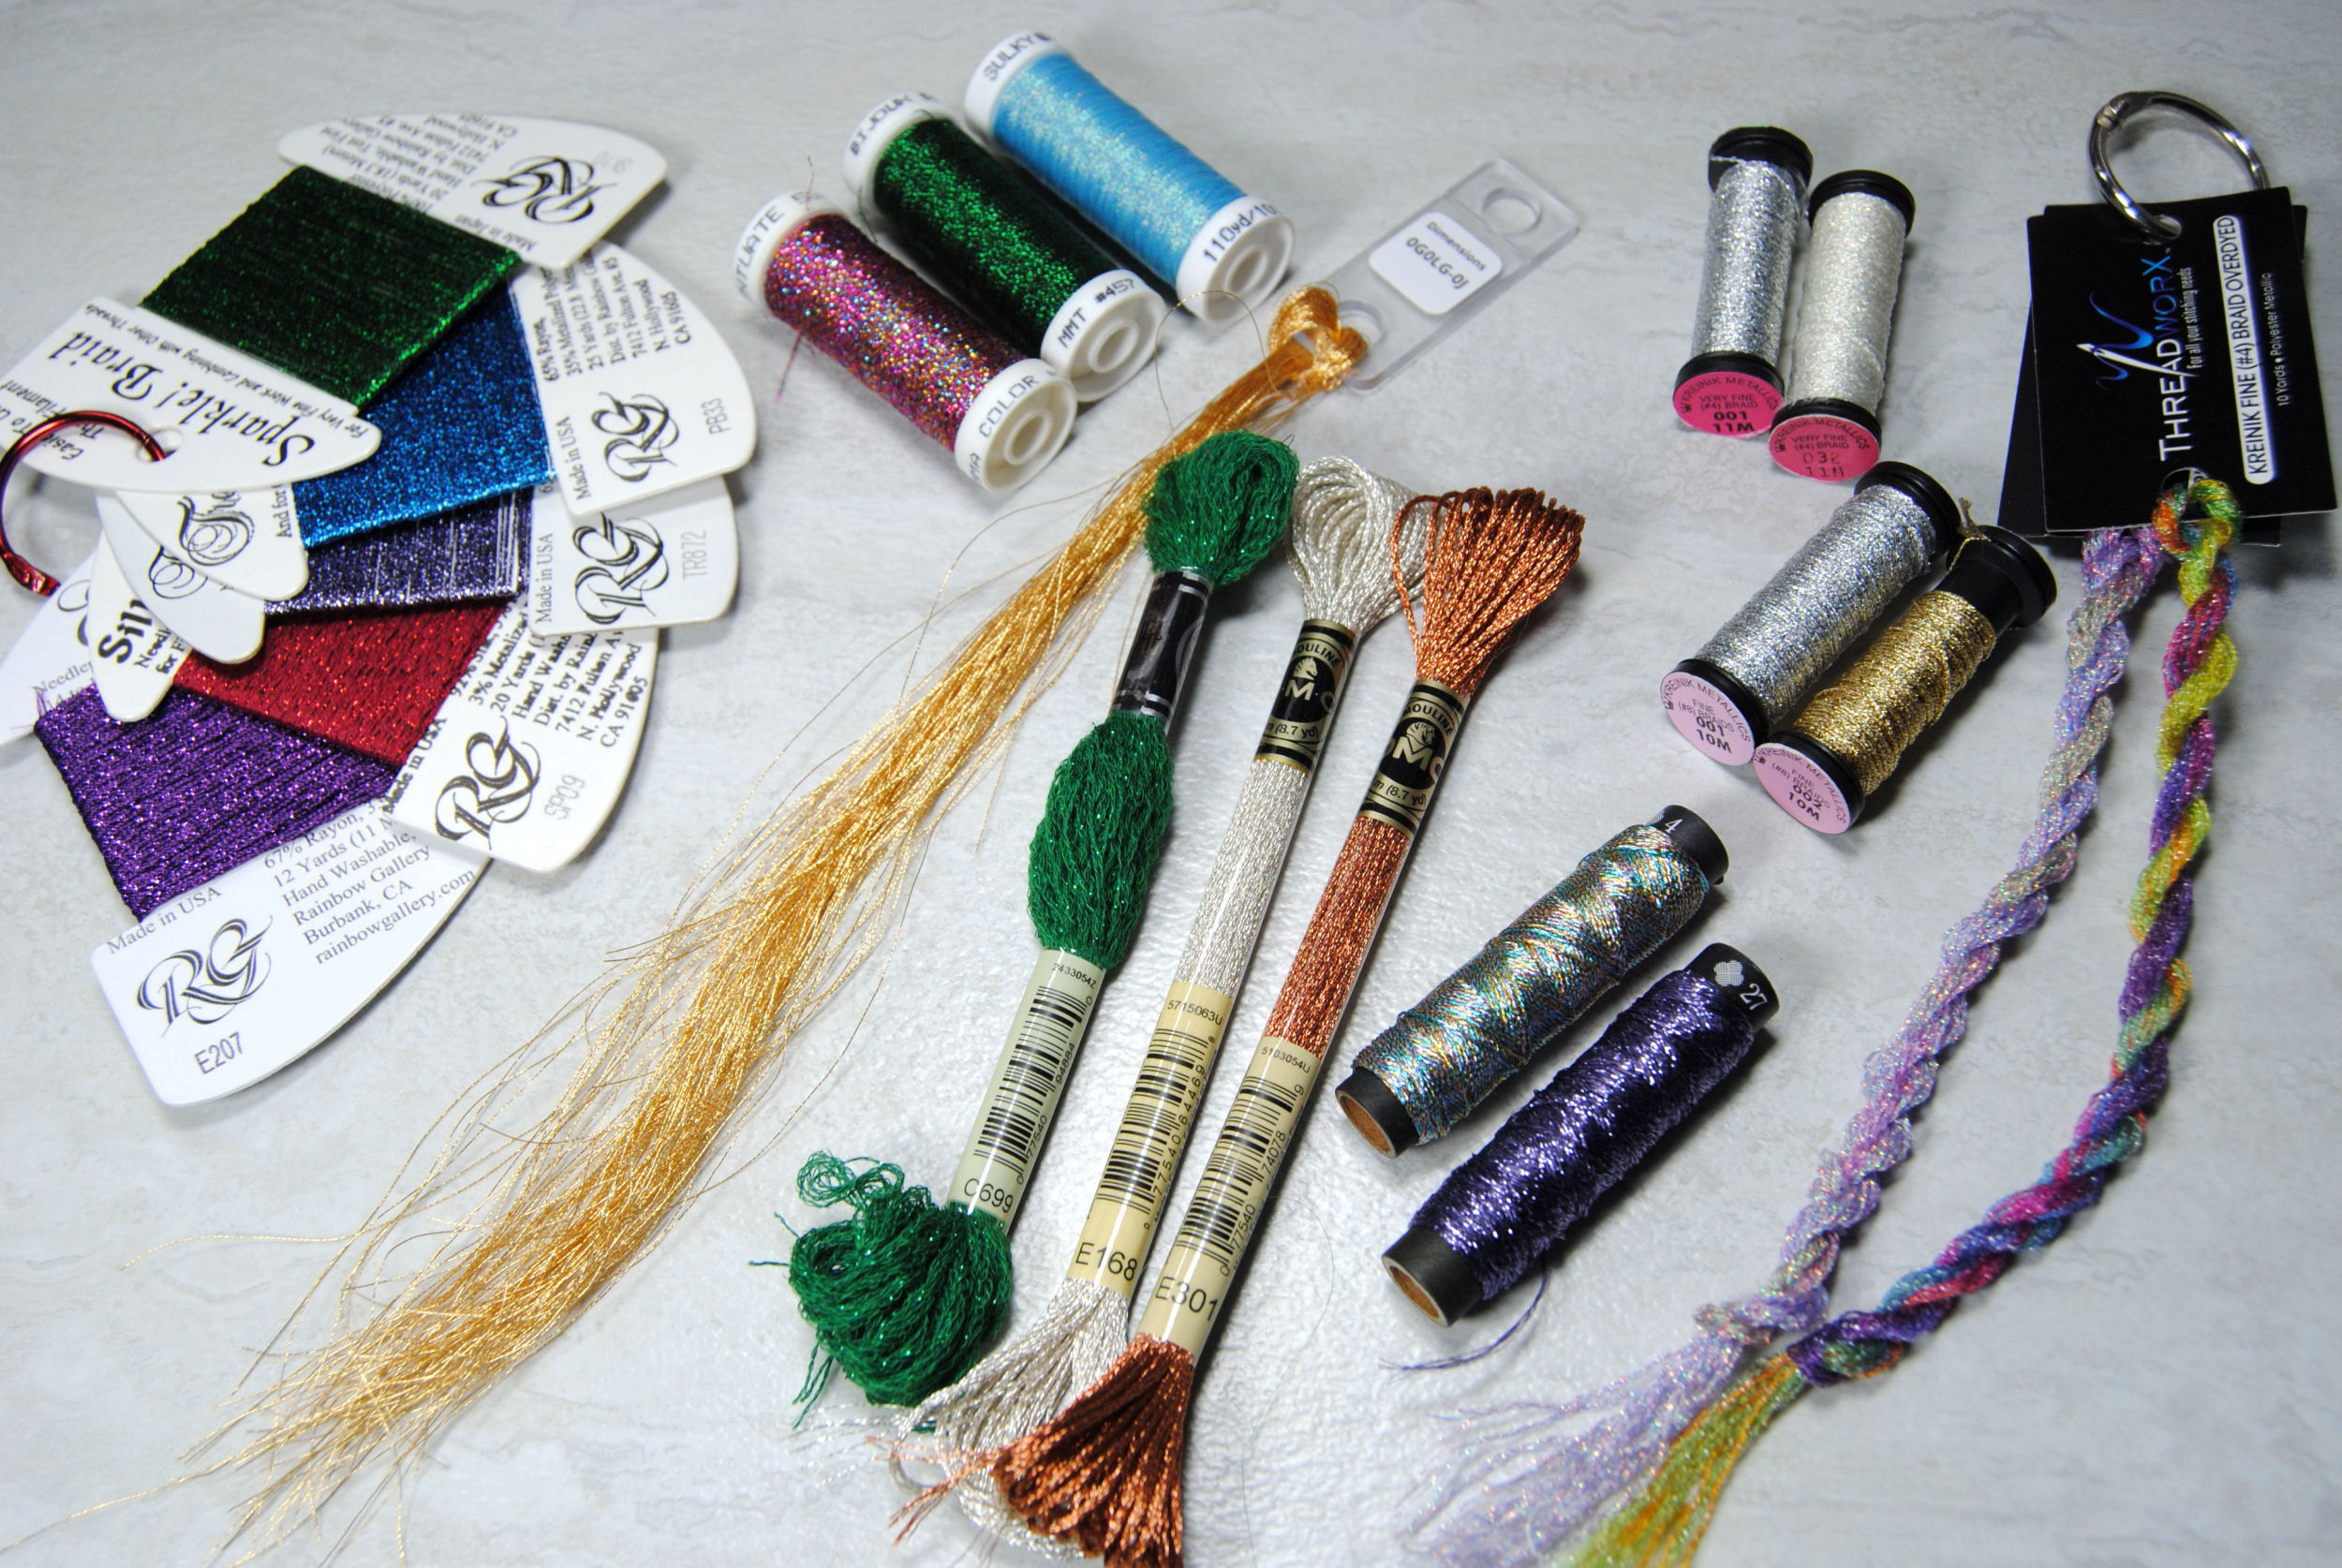
These three are far from the only metallic threads out there though. And everyone seems to have a different preference. While my favorite is Kreinik, you may find you prefer other brands such as Rainbow Gallery or Lecien Nishikiito.
Not Light Effects though. No one will ever prefer Light Effects. Trust me.
If you’re able though, I’d recommend trying a few different brands before settling in to build a collection of any sort. Everyone’s different, and you’ll never know your preferences without comparing them to other similar threads.
Caring for Your Blending Filament
I wasn’t sure where to fit these tips in here. But since it’s a type of thread you may not have used before, they need to be said. So, just in case…
Do Not Iron Your Project
Yep you read that right. Try not to iron your finished piece if you’re using blending filament. Or at least, make sure you have a buffer between the iron and your threads and use a low heat.
I mentioned it in my article on Washing your Cross Stitch, but seriously. Try not to iron specialty threads. While it may not completely melt away like the Sulky Glowy did, it can and will stick to your iron.
Here’s the care instructions directly from the Kreinik site just in case:
Care
– Kreinik.com
Kreinik Blending Filament is hand or machine washable and dry cleanable. Cool water is recommended. Do not use bleach. It can also be tumble-dried on low setting. When ironing a finished piece containing Blending Filament, do not iron directly on the thread; use a cloth, and do not use steam.
Don’t Use Thread Conditioner
If you’re the type of person who uses thread conditioner, you may want to hold off. Or at least, probably don’t run your filament through the conditioner, as it can stretch out pretty easily as it is. The added friction of running it through beeswax or silicone is probably not going to help.
Maybe condition your cottons and then add in the filament afterwards. Or do the stitch on top method and only condition your cotton. Or only condition the ends of the thread. Again, experimentation is key here!
Have Fun
Most importantly, have fun with it! Add that extra little bit of flair to your projects and don’t worry about whether a pattern ‘calls for’ metallic or not. You can add it in wherever you want!