
Tea Bag Cross Stitch Scissor Fob Tutorial
I’ve been enjoying making scissor fobs, and even made a tutorial for some cute geometric ones. But then I thought: what if I made one to look like a tea bag? So I did. Aaand here we are. Welcome to my brain.
I’ve already discussed in that tutorial what scissor fobs are and why you might need one, so I’ll cut to the chase here and get right into the tutorial. You’re welcome.
This post may contain affiliate links. If you buy something using one of these links, I earn a small commission. However, there is no extra cost to you. Thanks for understanding! Learn more in my Disclosures & Privacy Policy.
Table of Contents
Tea Bag Template
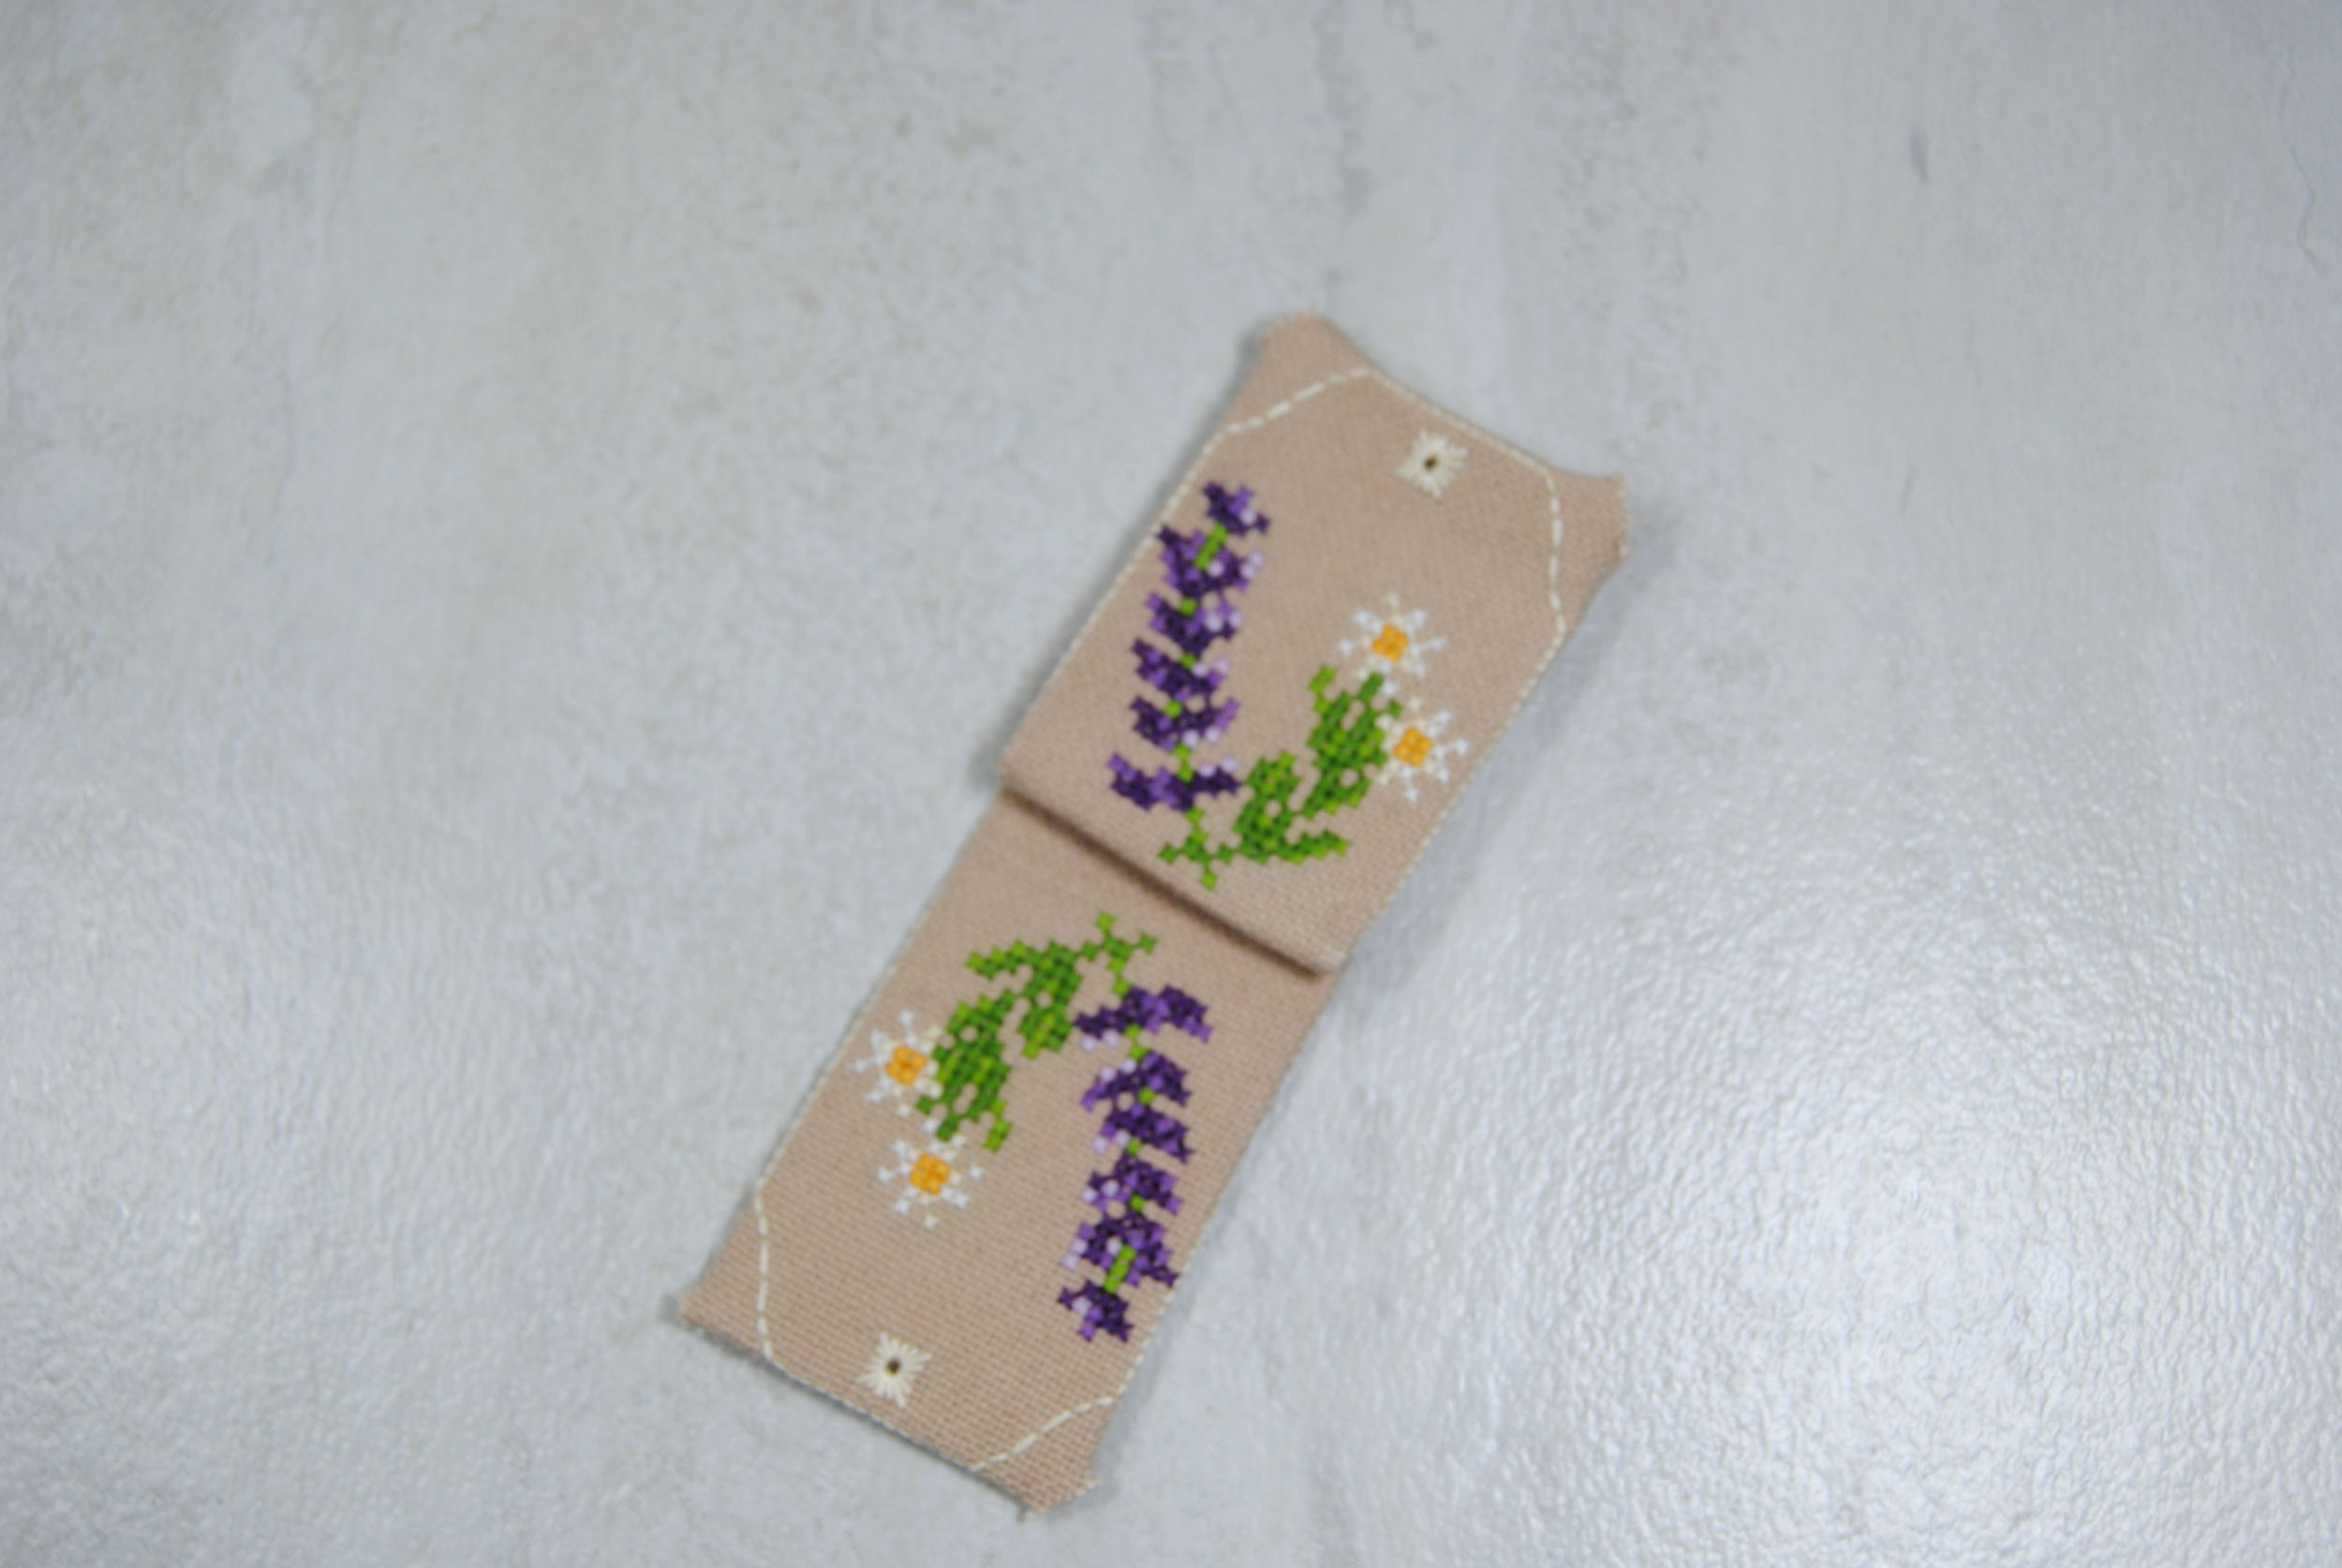
To start, here’s the general outline I used. The red lines are not to be stitched, just to show where it will be folded so you can avoid putting your pattern in those areas. You should be able to click on this image to get a larger version of it.
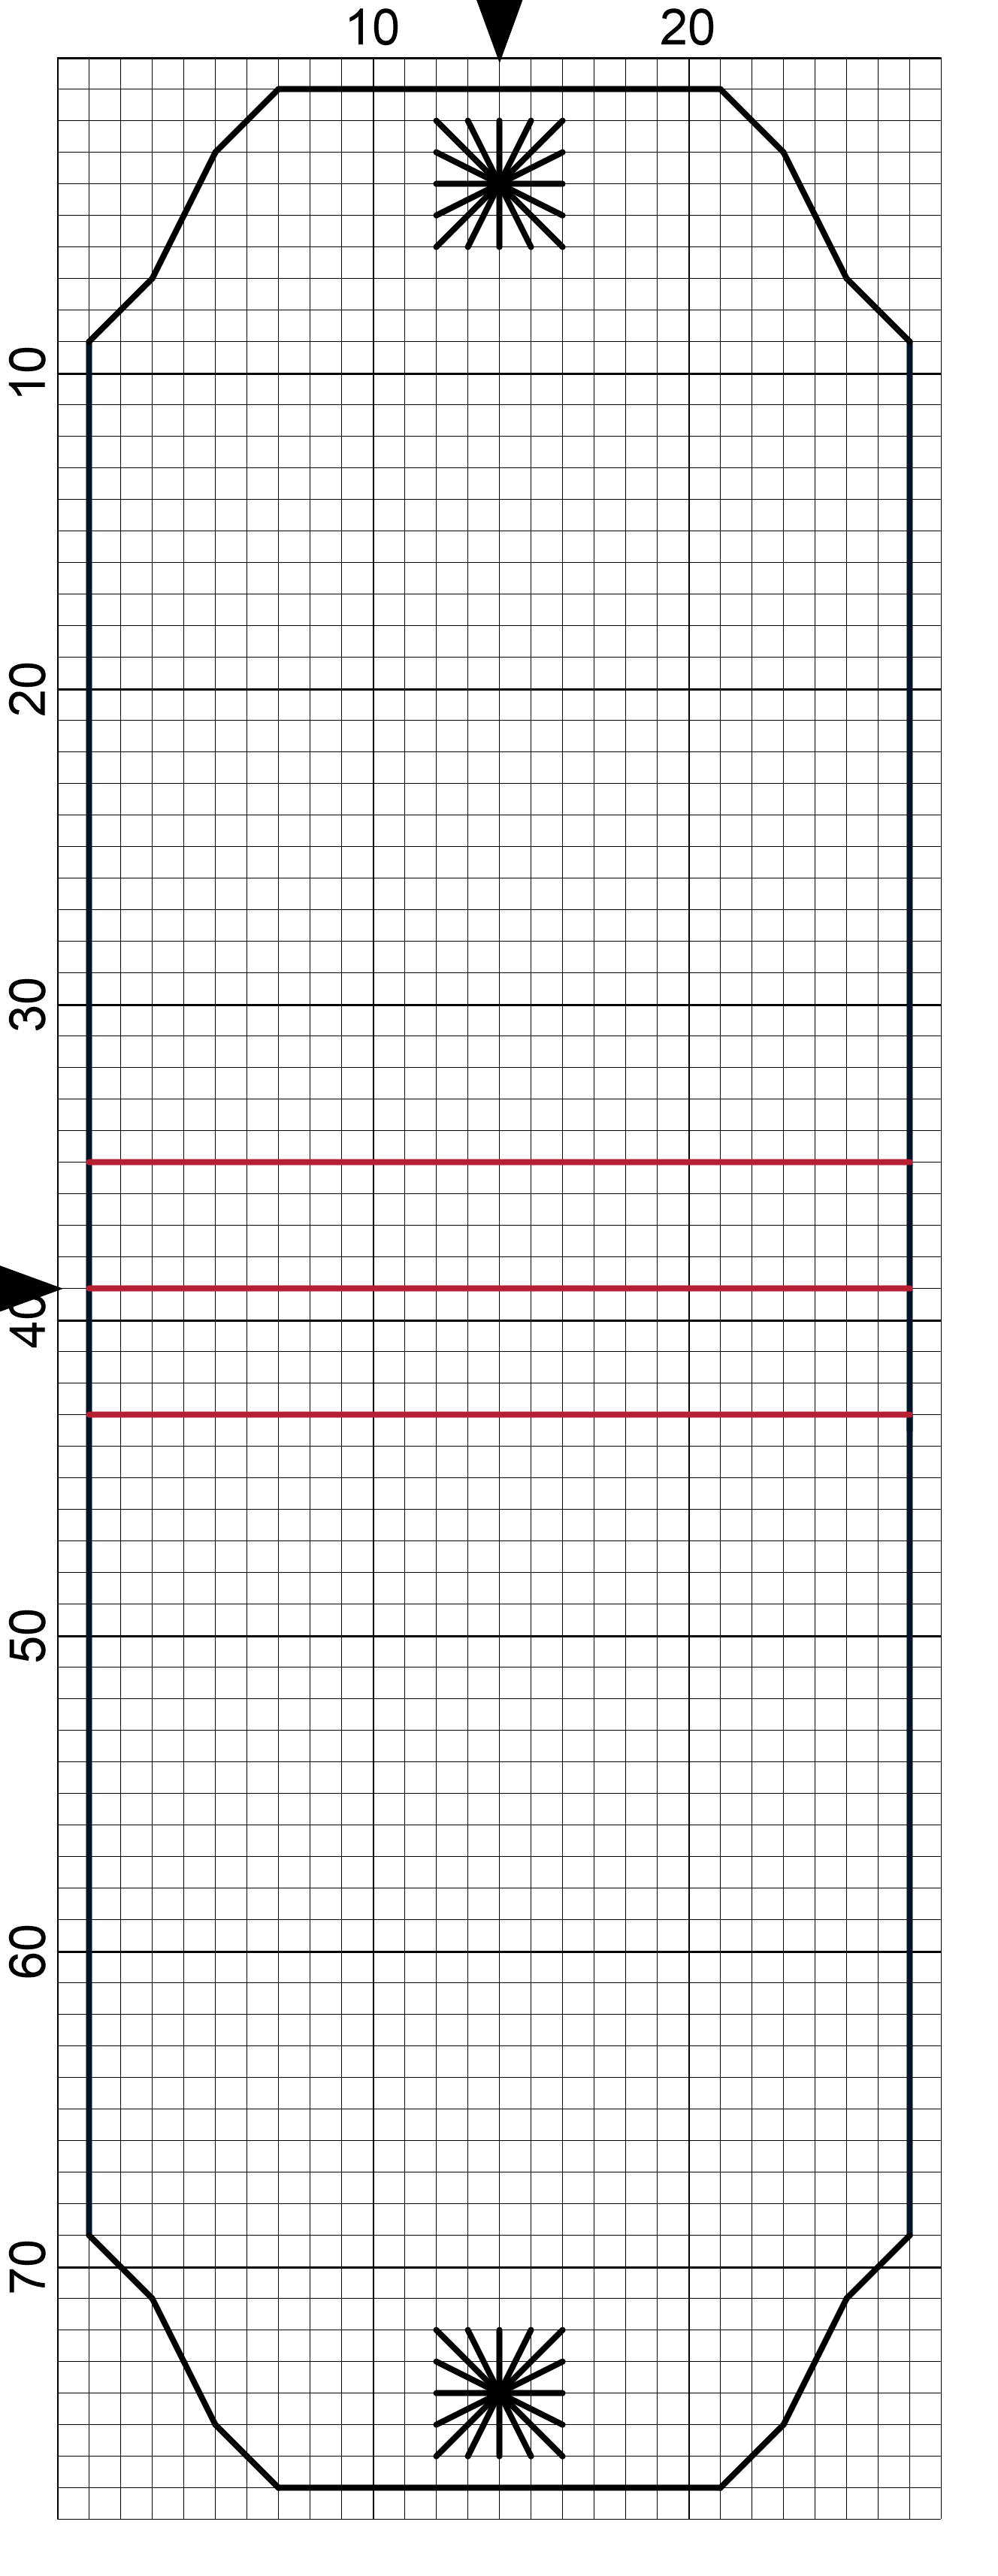
The patterns I’ll be using will be available on my Patreon / Etsy, of course. But anything that fits in a roughly 25×25 square will work for this. The finished size of your tea bag will depend on your choice of fabric counts. I’ll be stitching a few examples on different counts to demonstrate.
For this tutorial, I’ll be using 28 count, but stitching over 2. So It’ll be the same size as if it was on 14 count.
Making the Eyelet
Not familiar with that starburst shape at the top and bottom of that template? It’s basically a variation on the algerian eyelet.
Basically, you need to make a hole in the fabric to put our cord through. But cutting leads to fraying and can wear over time. So instead, we’re using thread to make this starburst shape, all going through that same center hole.
You’ll want to pull somewhat tightly as you go to spread that hole open so you can thread some cord through it later.
Cutting your Fabric
Once you’ve stitched your tea bag outline and the design you want on it, cut your fabric as close to the backstitch as you are comfortable with.
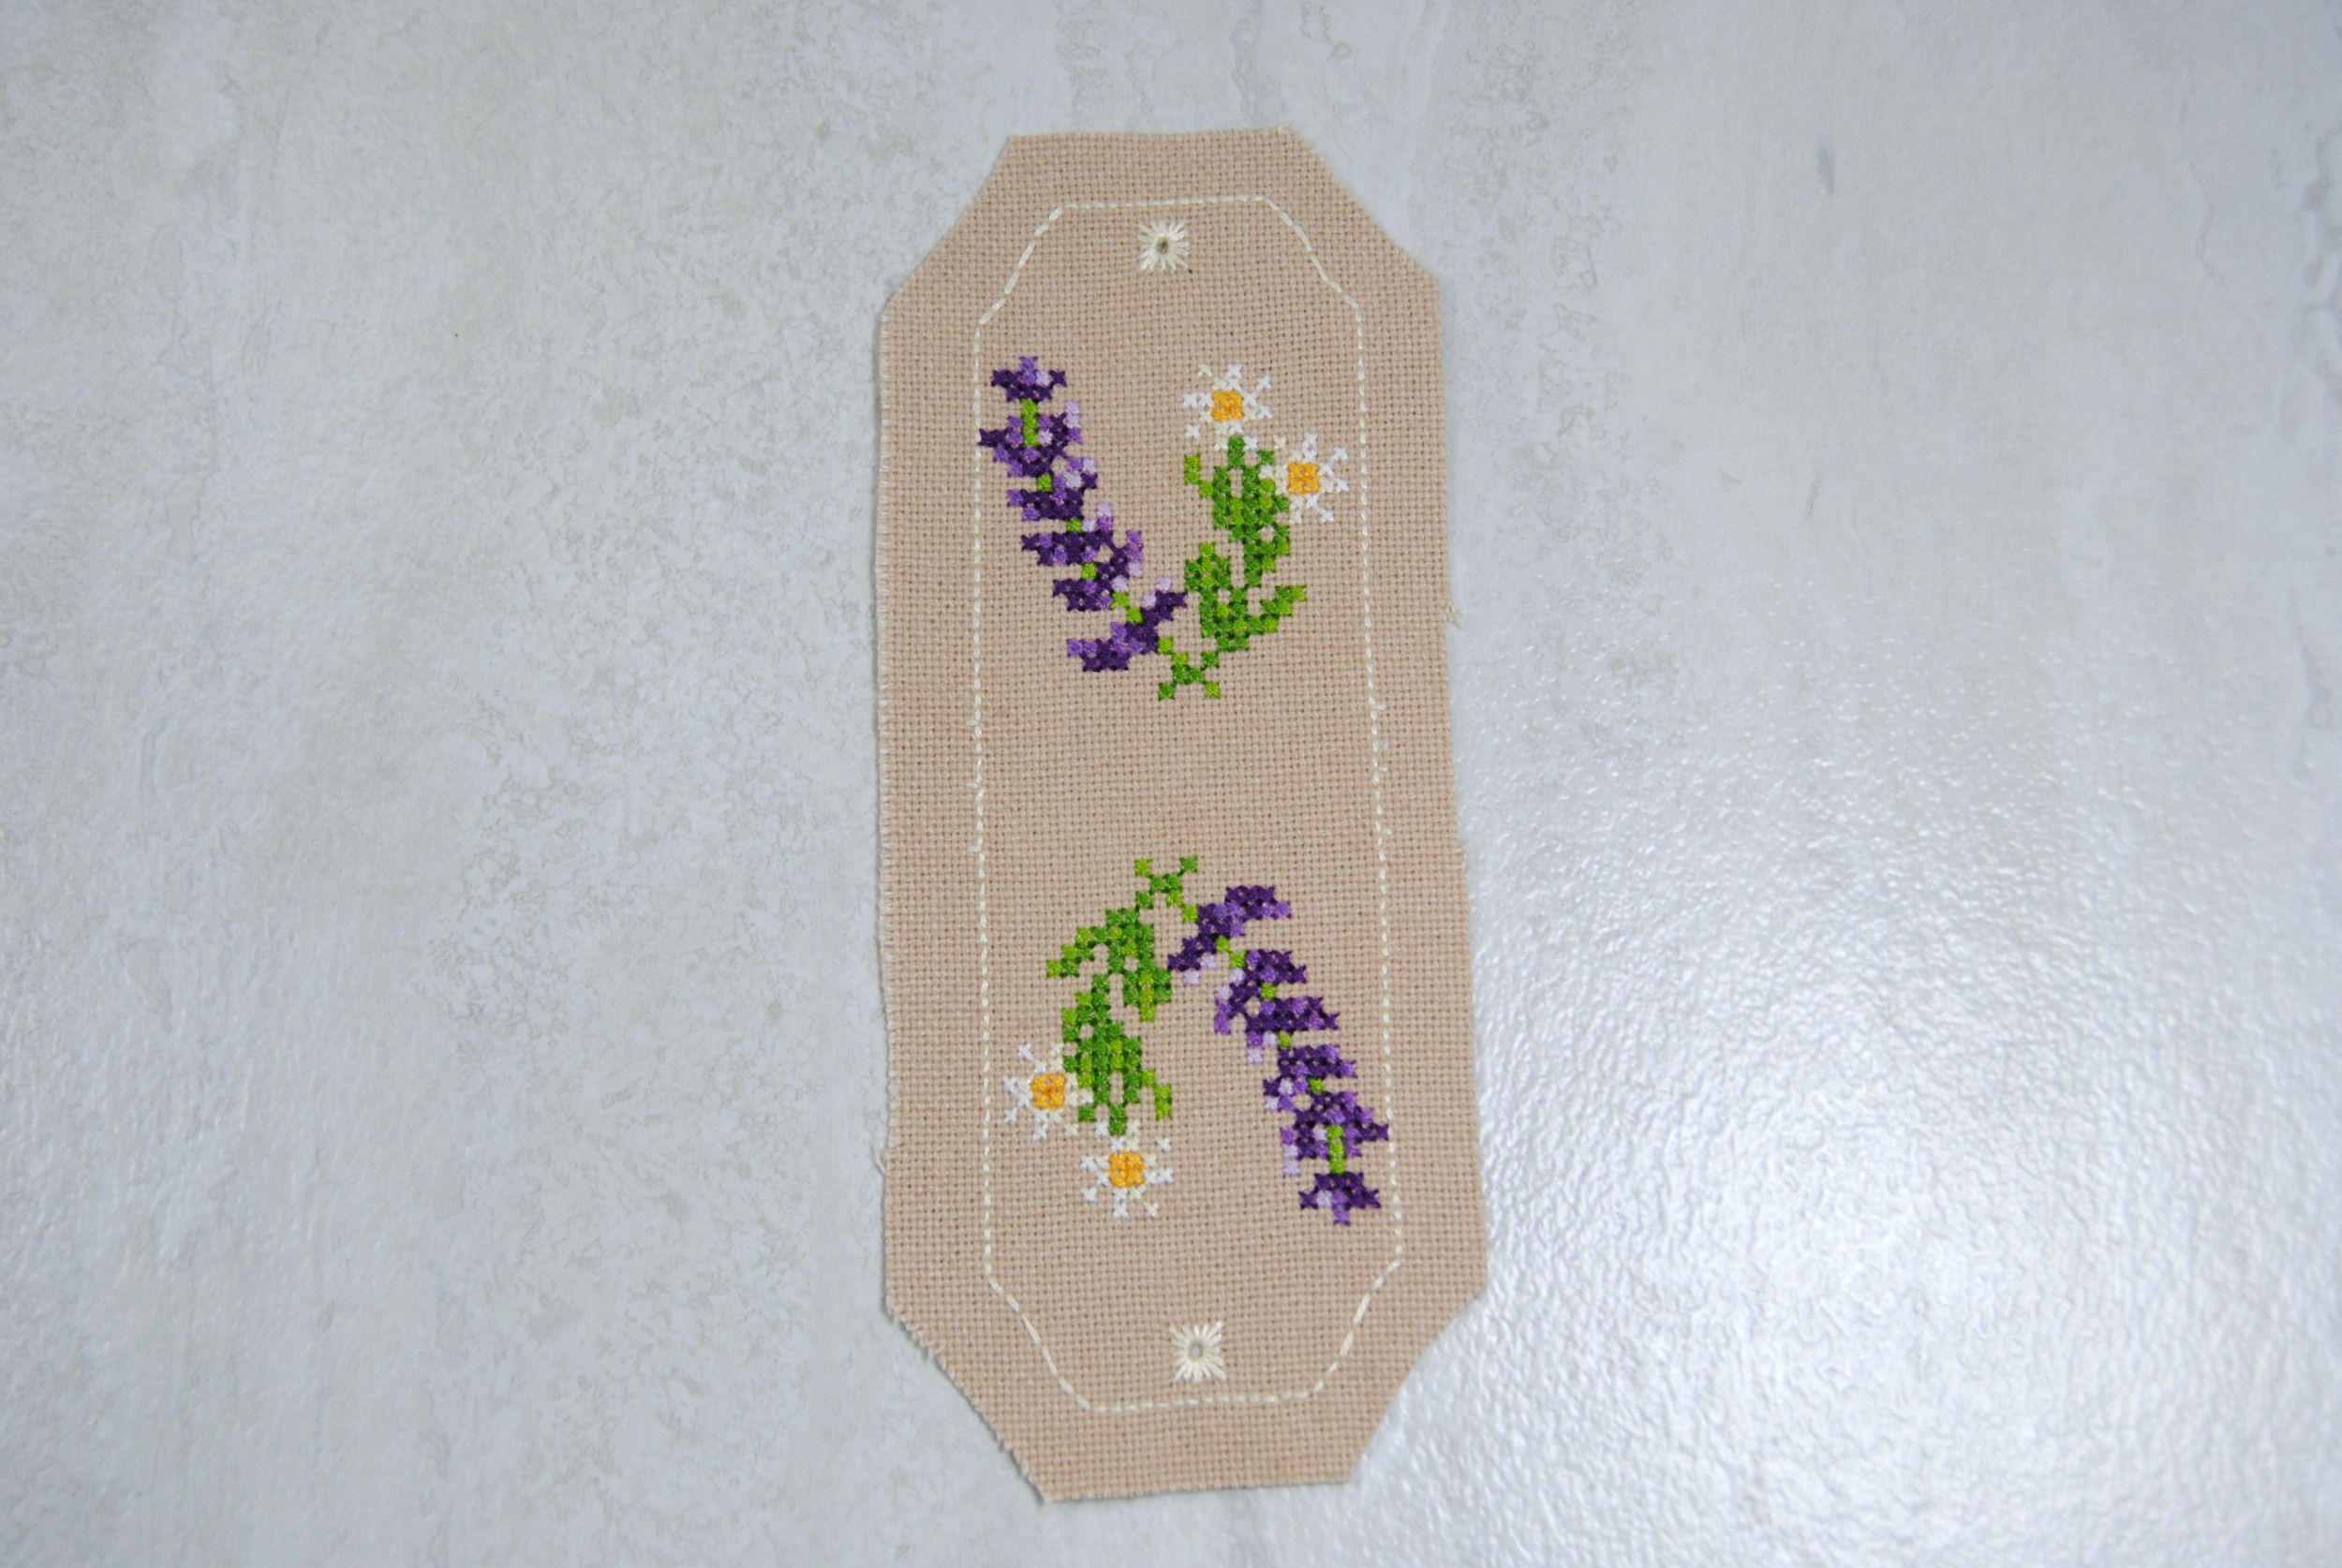
This much of a border worked fine with this evenweave fabric I was using. But when working on 16 and 18 count fabrics I found I also needed to cut closer, trim the corners, or cut slits where the folds are. So your trimmings may vary as needed.
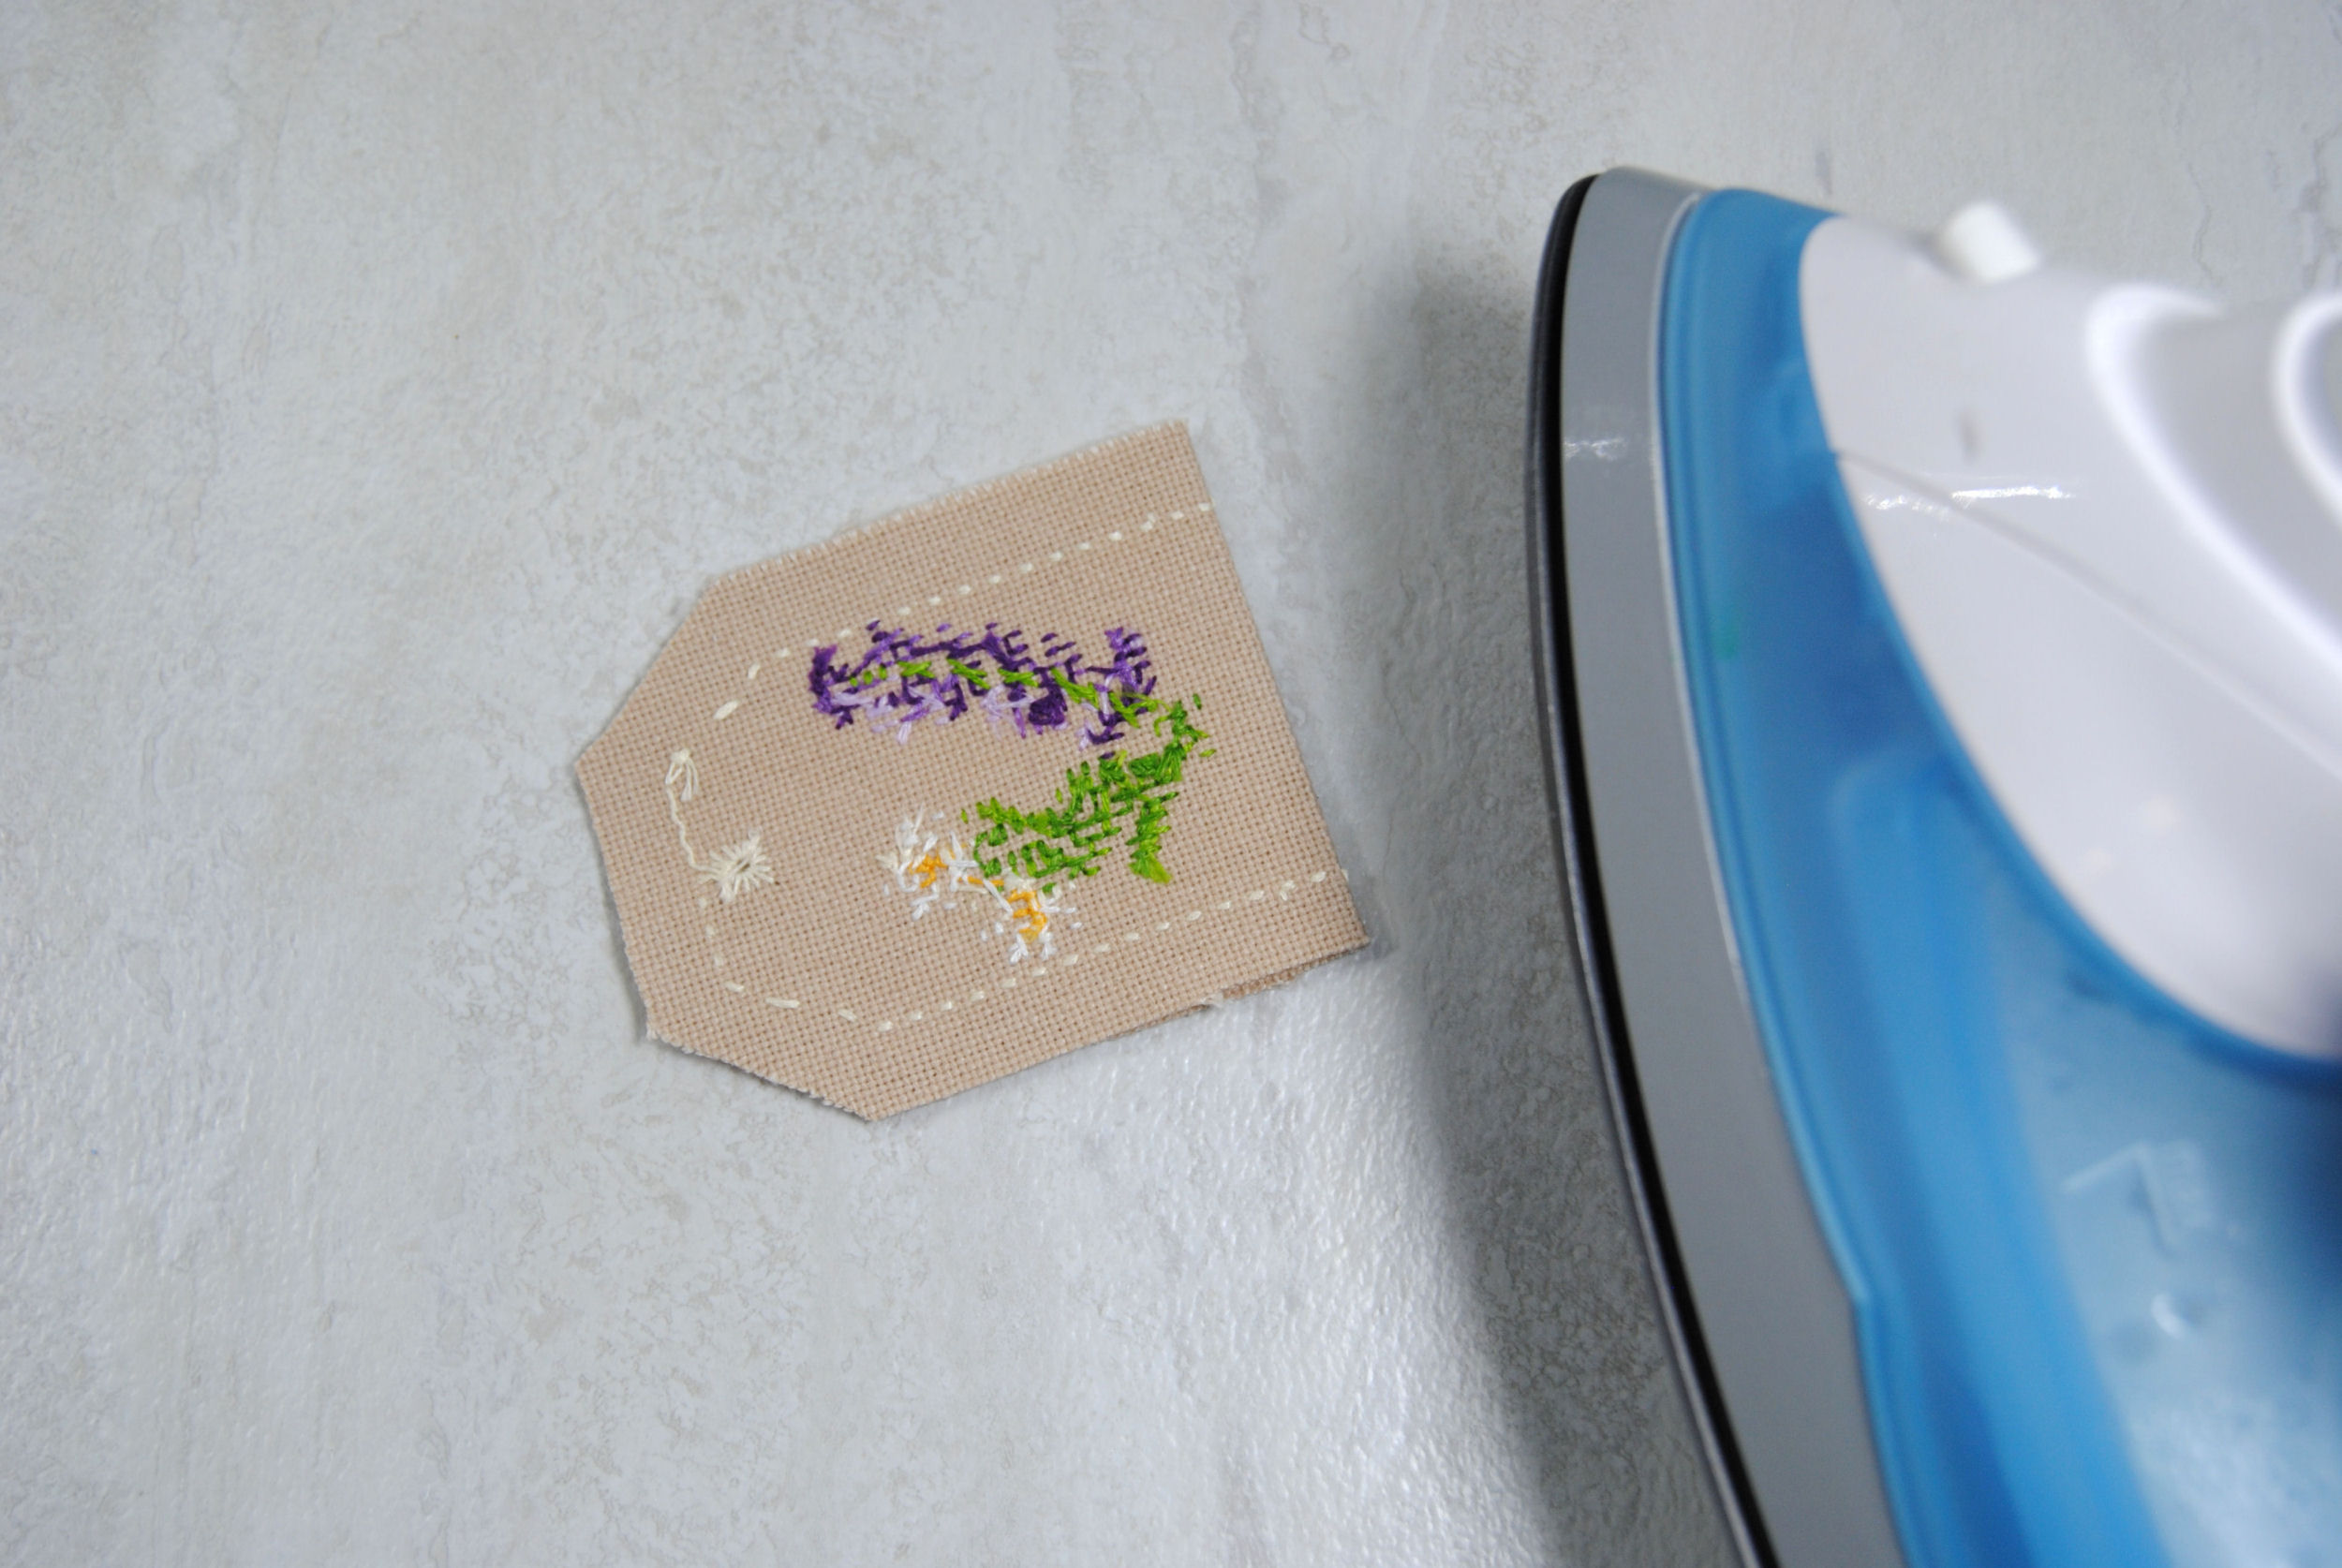
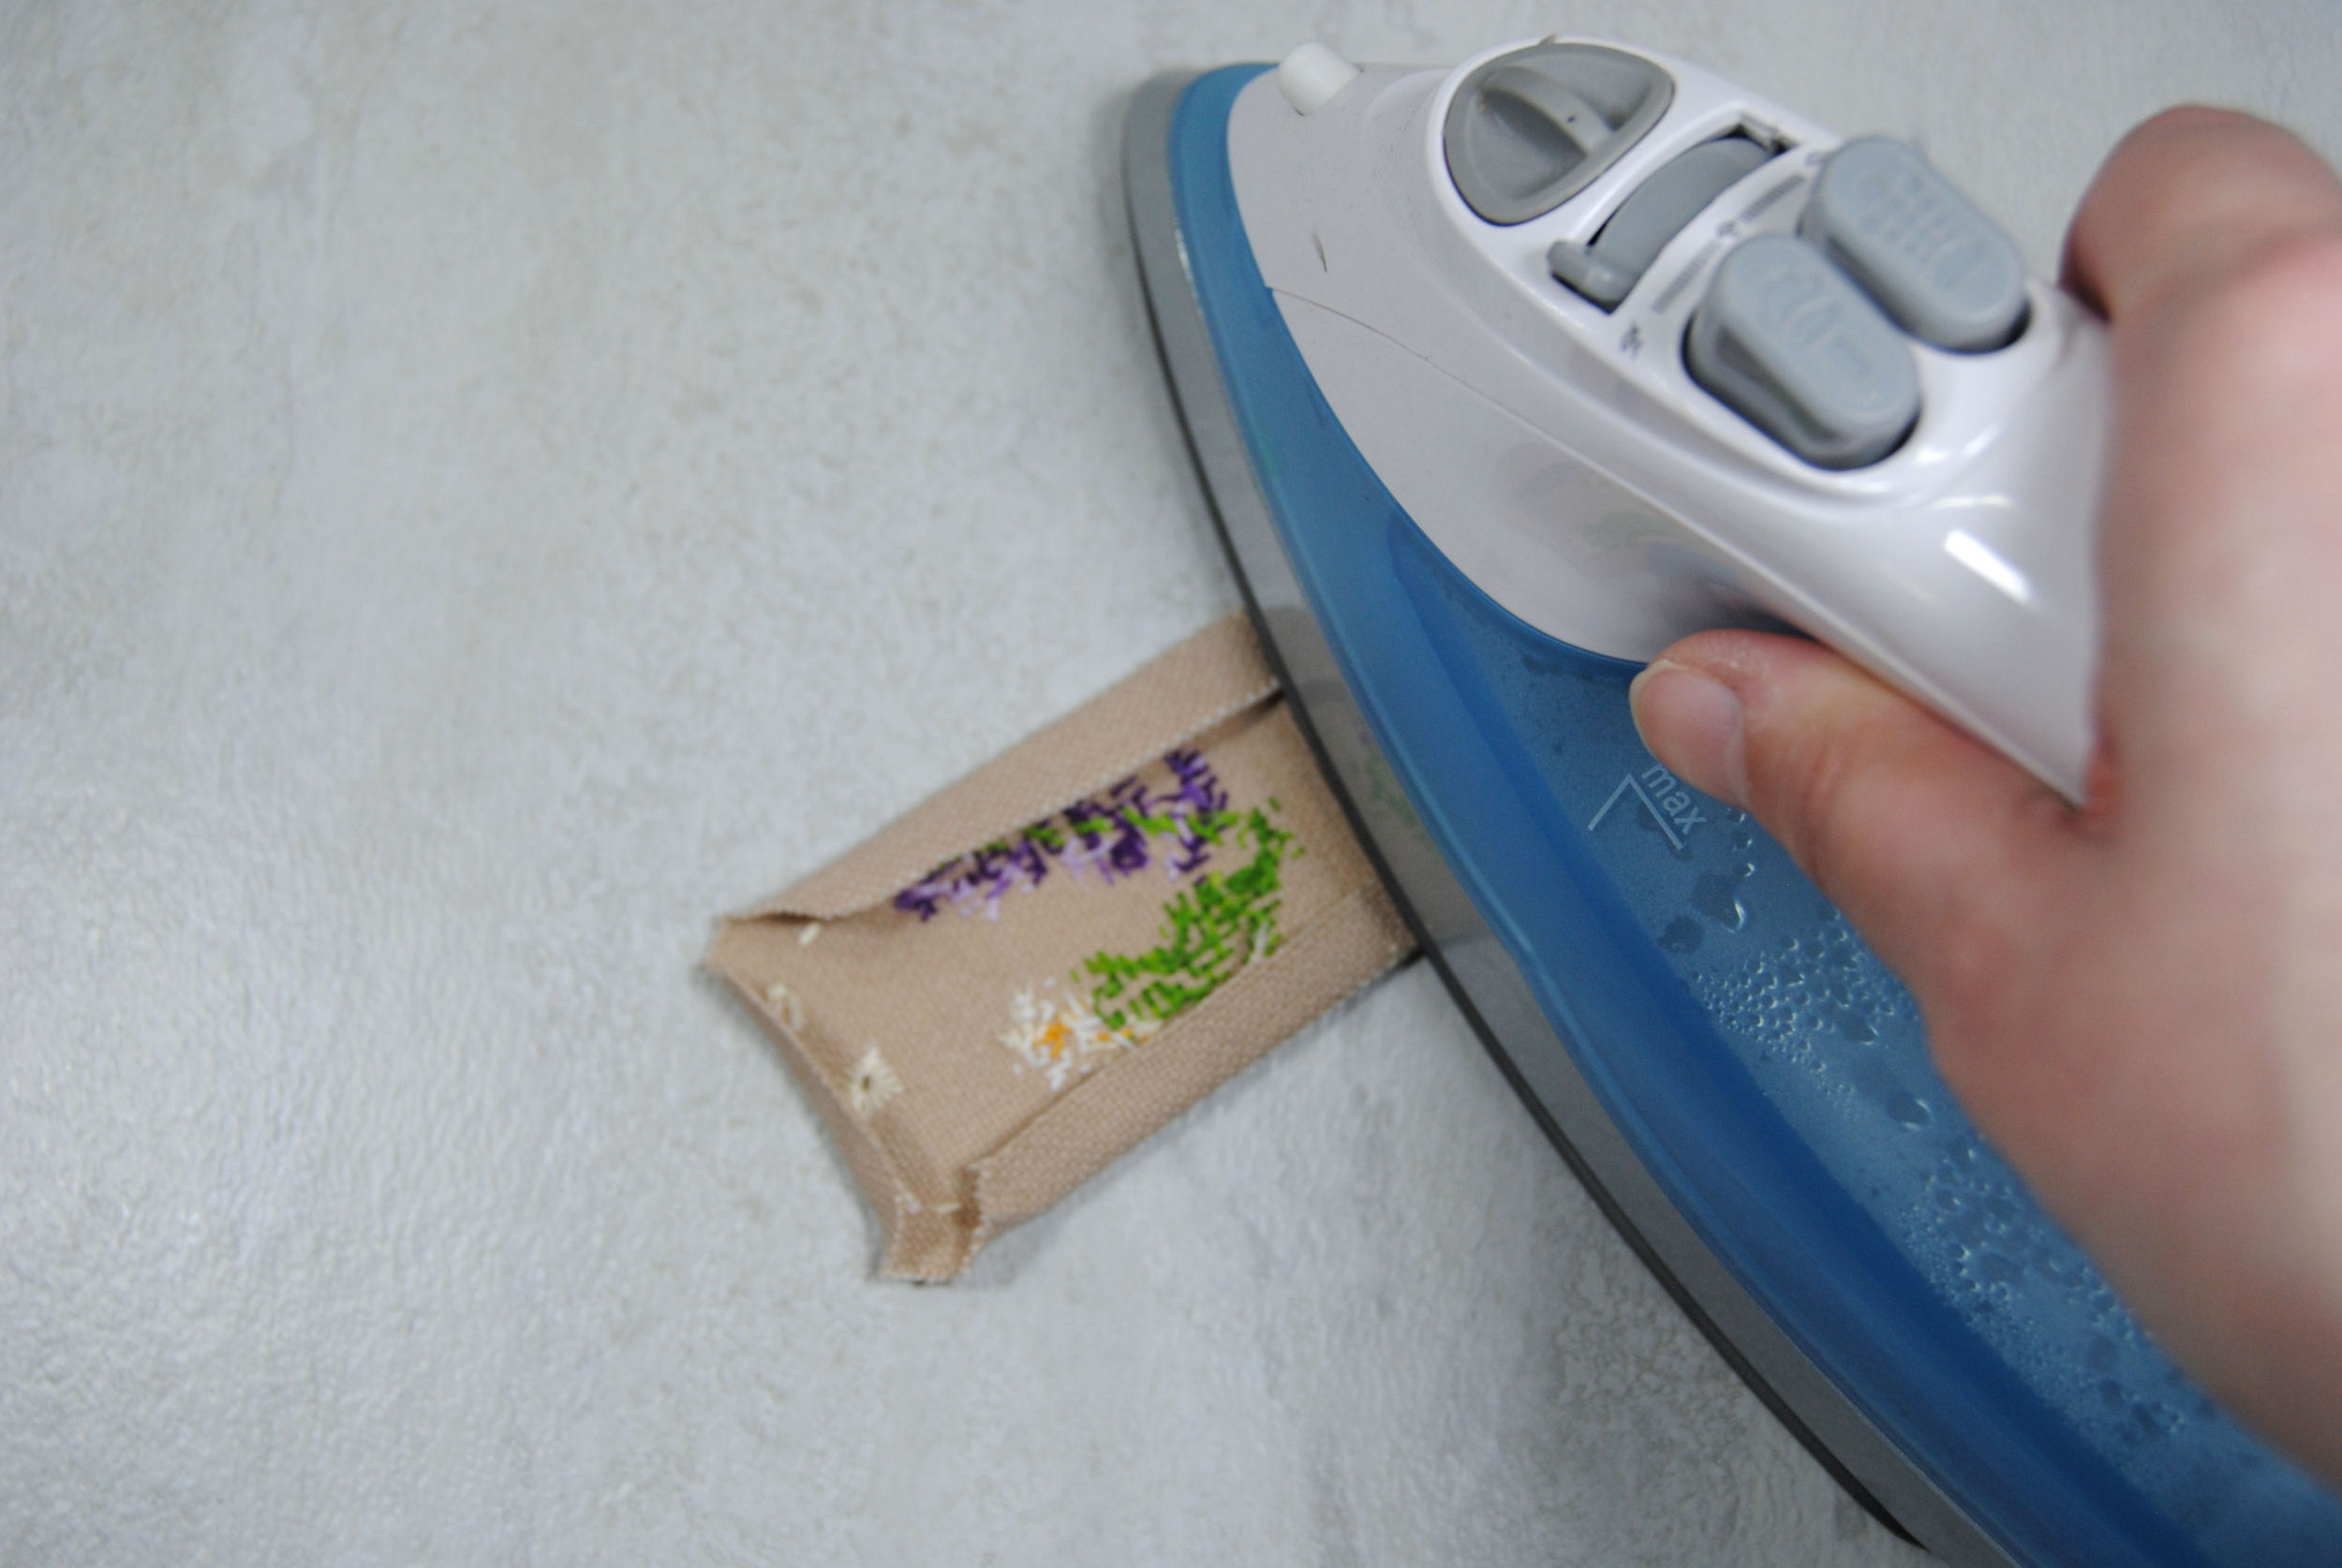
Ironing the folds
To make the tea bag shape I ended up carefully taking apart a tea bag to see what it was like. Only to learn it was just a long tube folded up. So that’s why the initial template shape here is a long rectangle. So let’s fold it up now to make the traditional tea bag shape.
Use an iron to press your folds if possible, as it’ll make it them stay in place better.
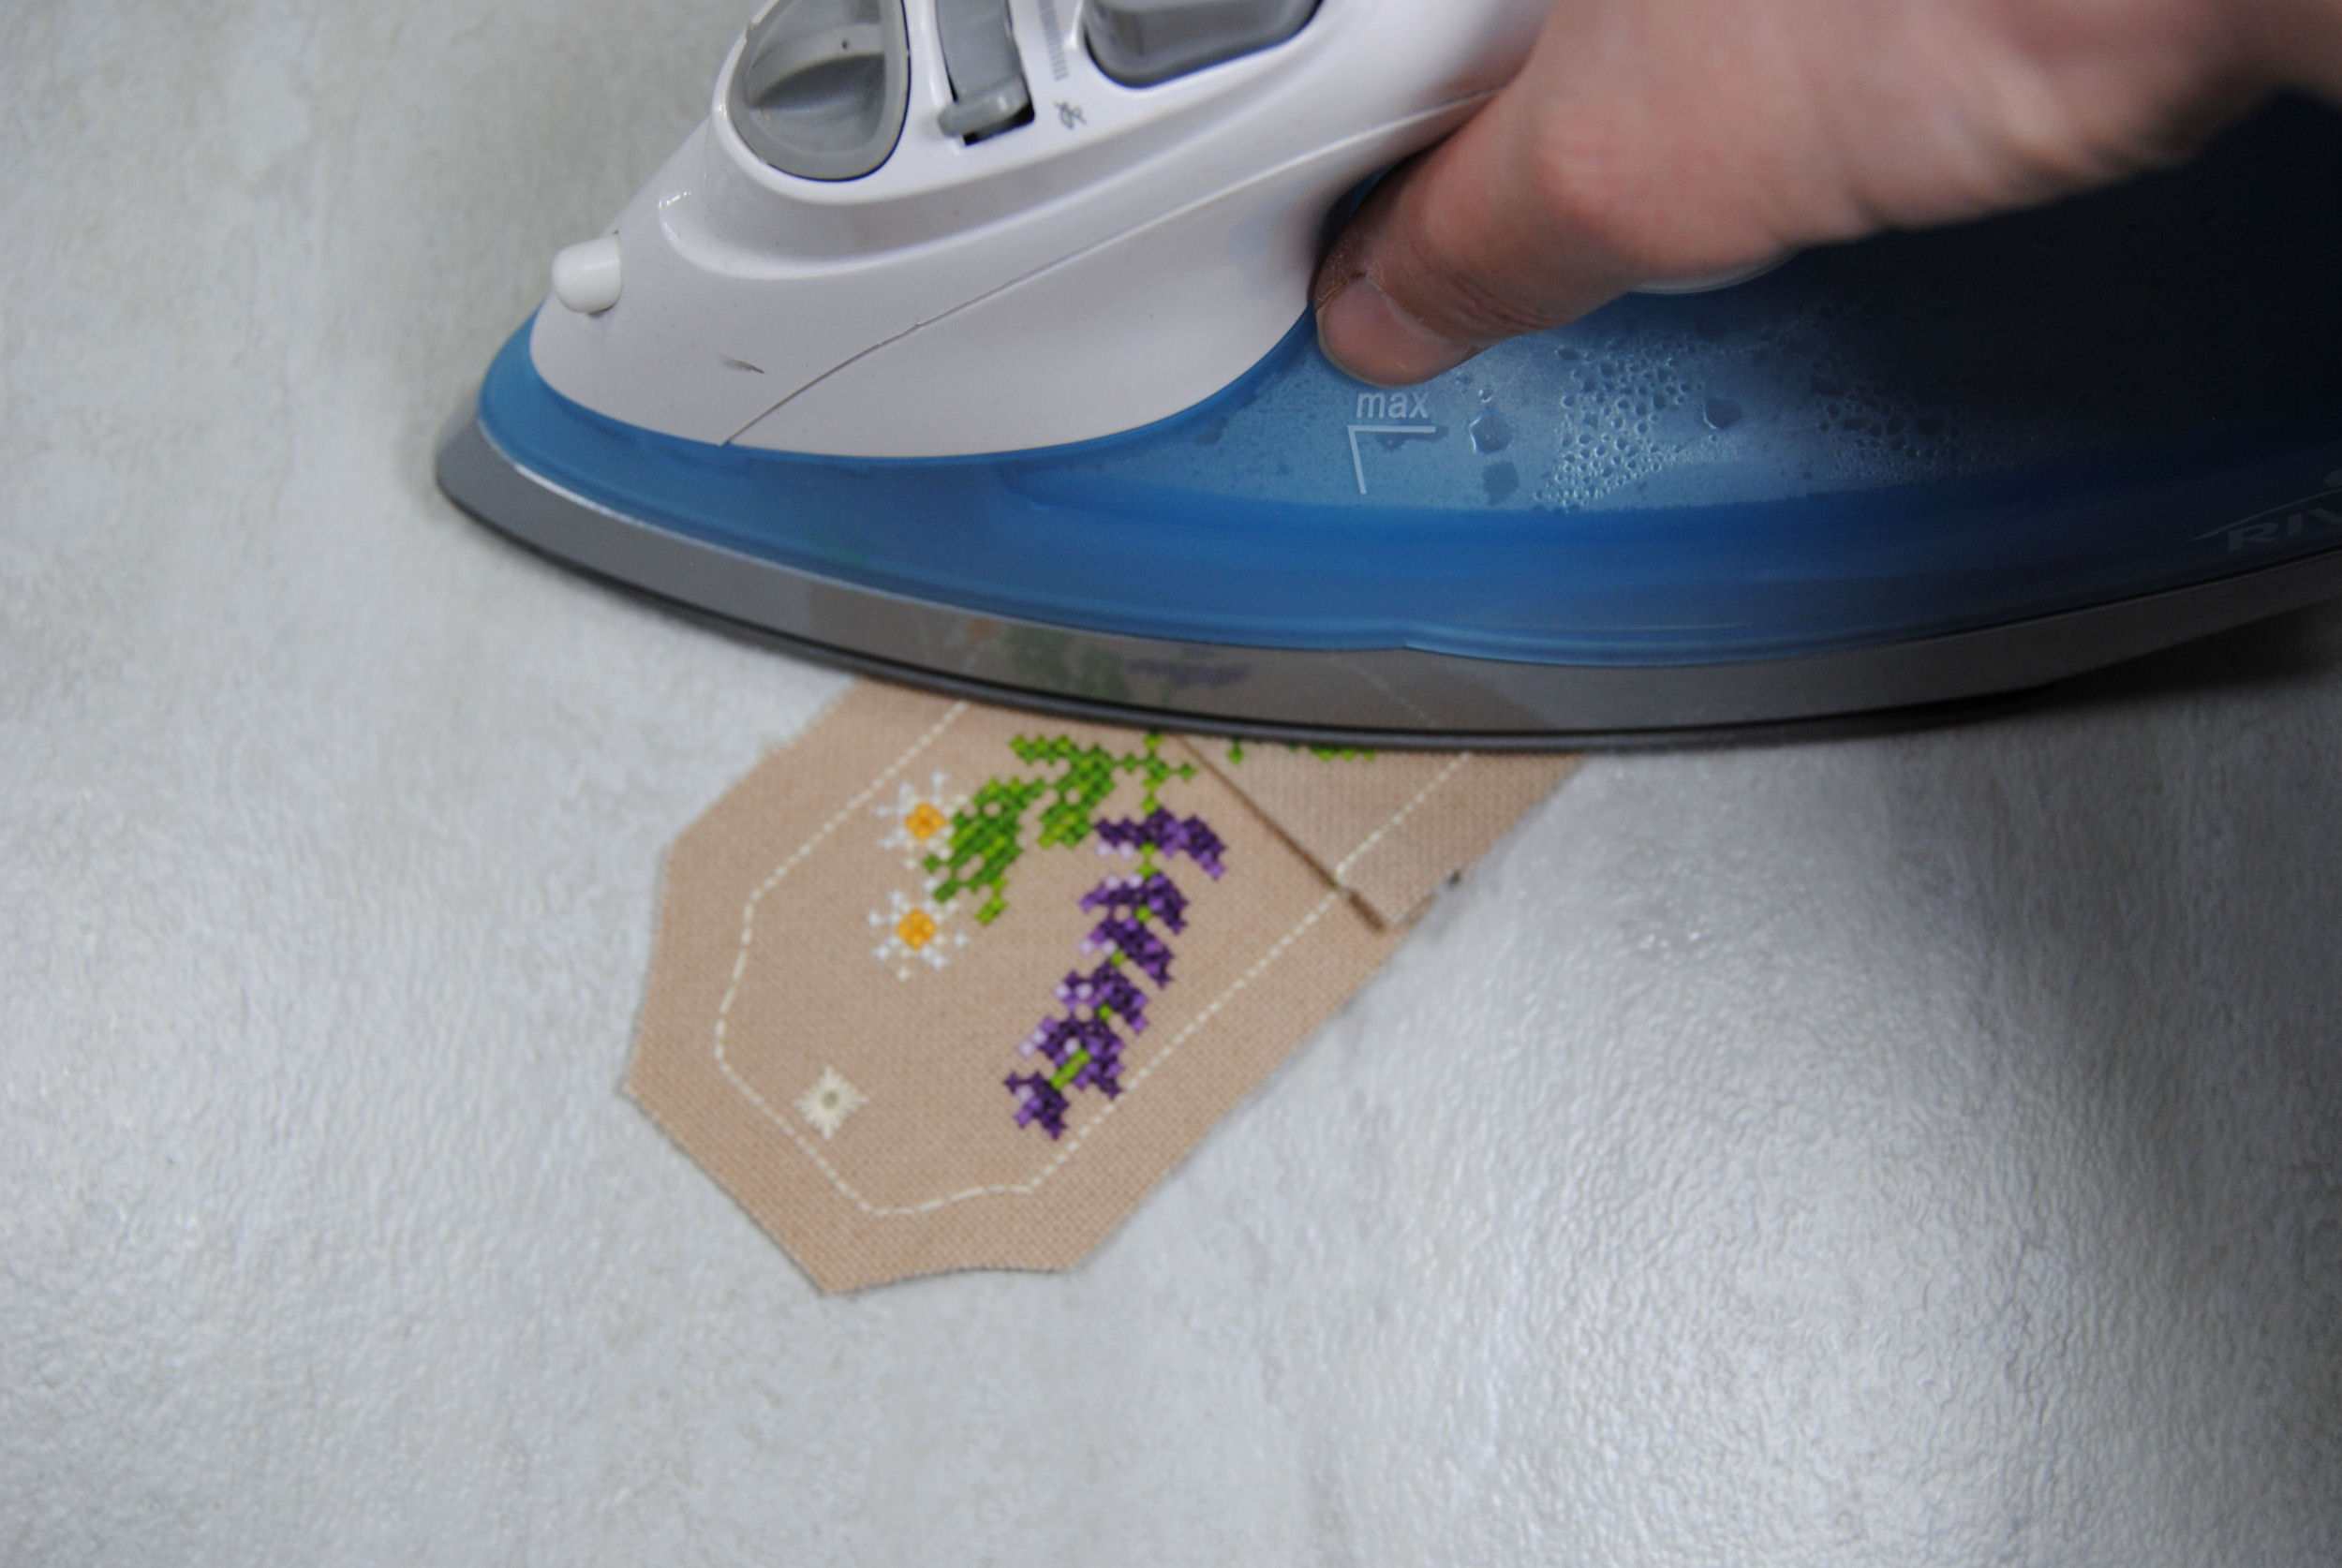
First, we’ll be folding it in half with right sides together as shown below. That’s the middle red line on the template.
I then folded back one of the panels and pressed it in place as well. Use the outside red lines from my pattern template above for reference.
I then realized I hadn’t yet pressed the border fabric in, so I did that real quick. All the edges will be on the inside of the teabag, so let’s get them out of the way now.
Lastly, I’ll fold up the Second side and press that as well.
This was actually really hard to photograph, so here’s a photo from the side angle to see what shape you’re going for:
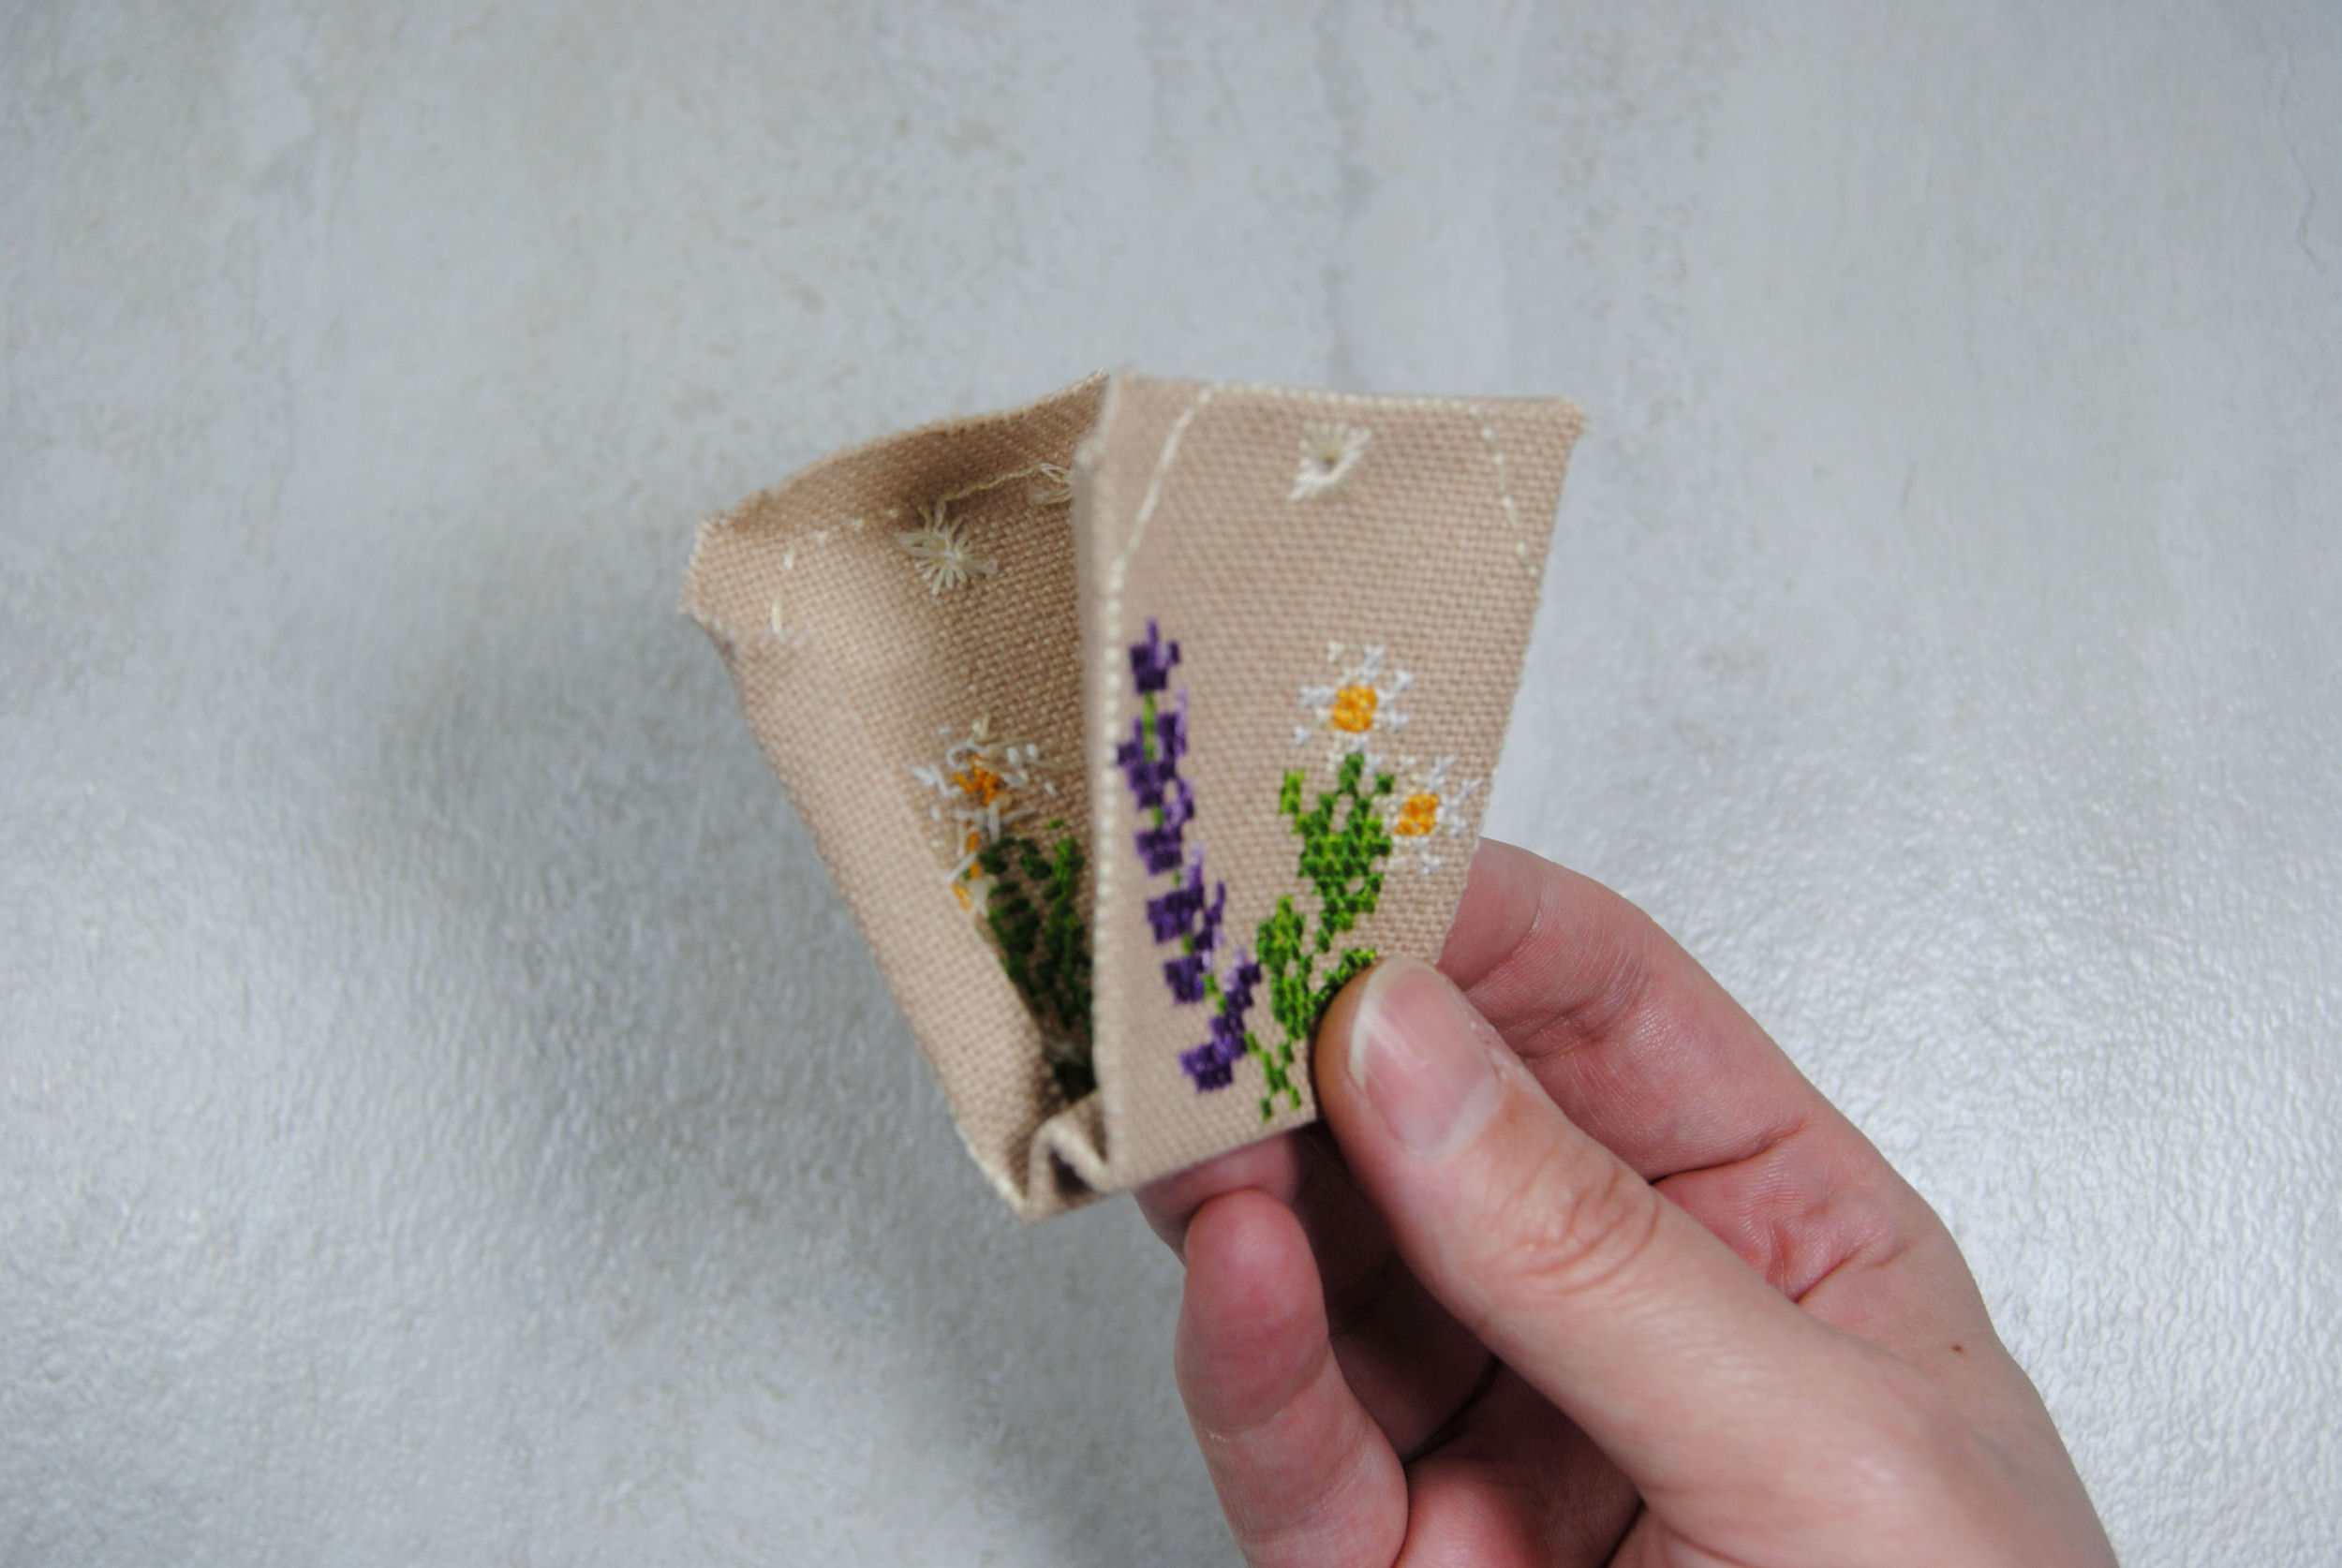
Sewing up the bag
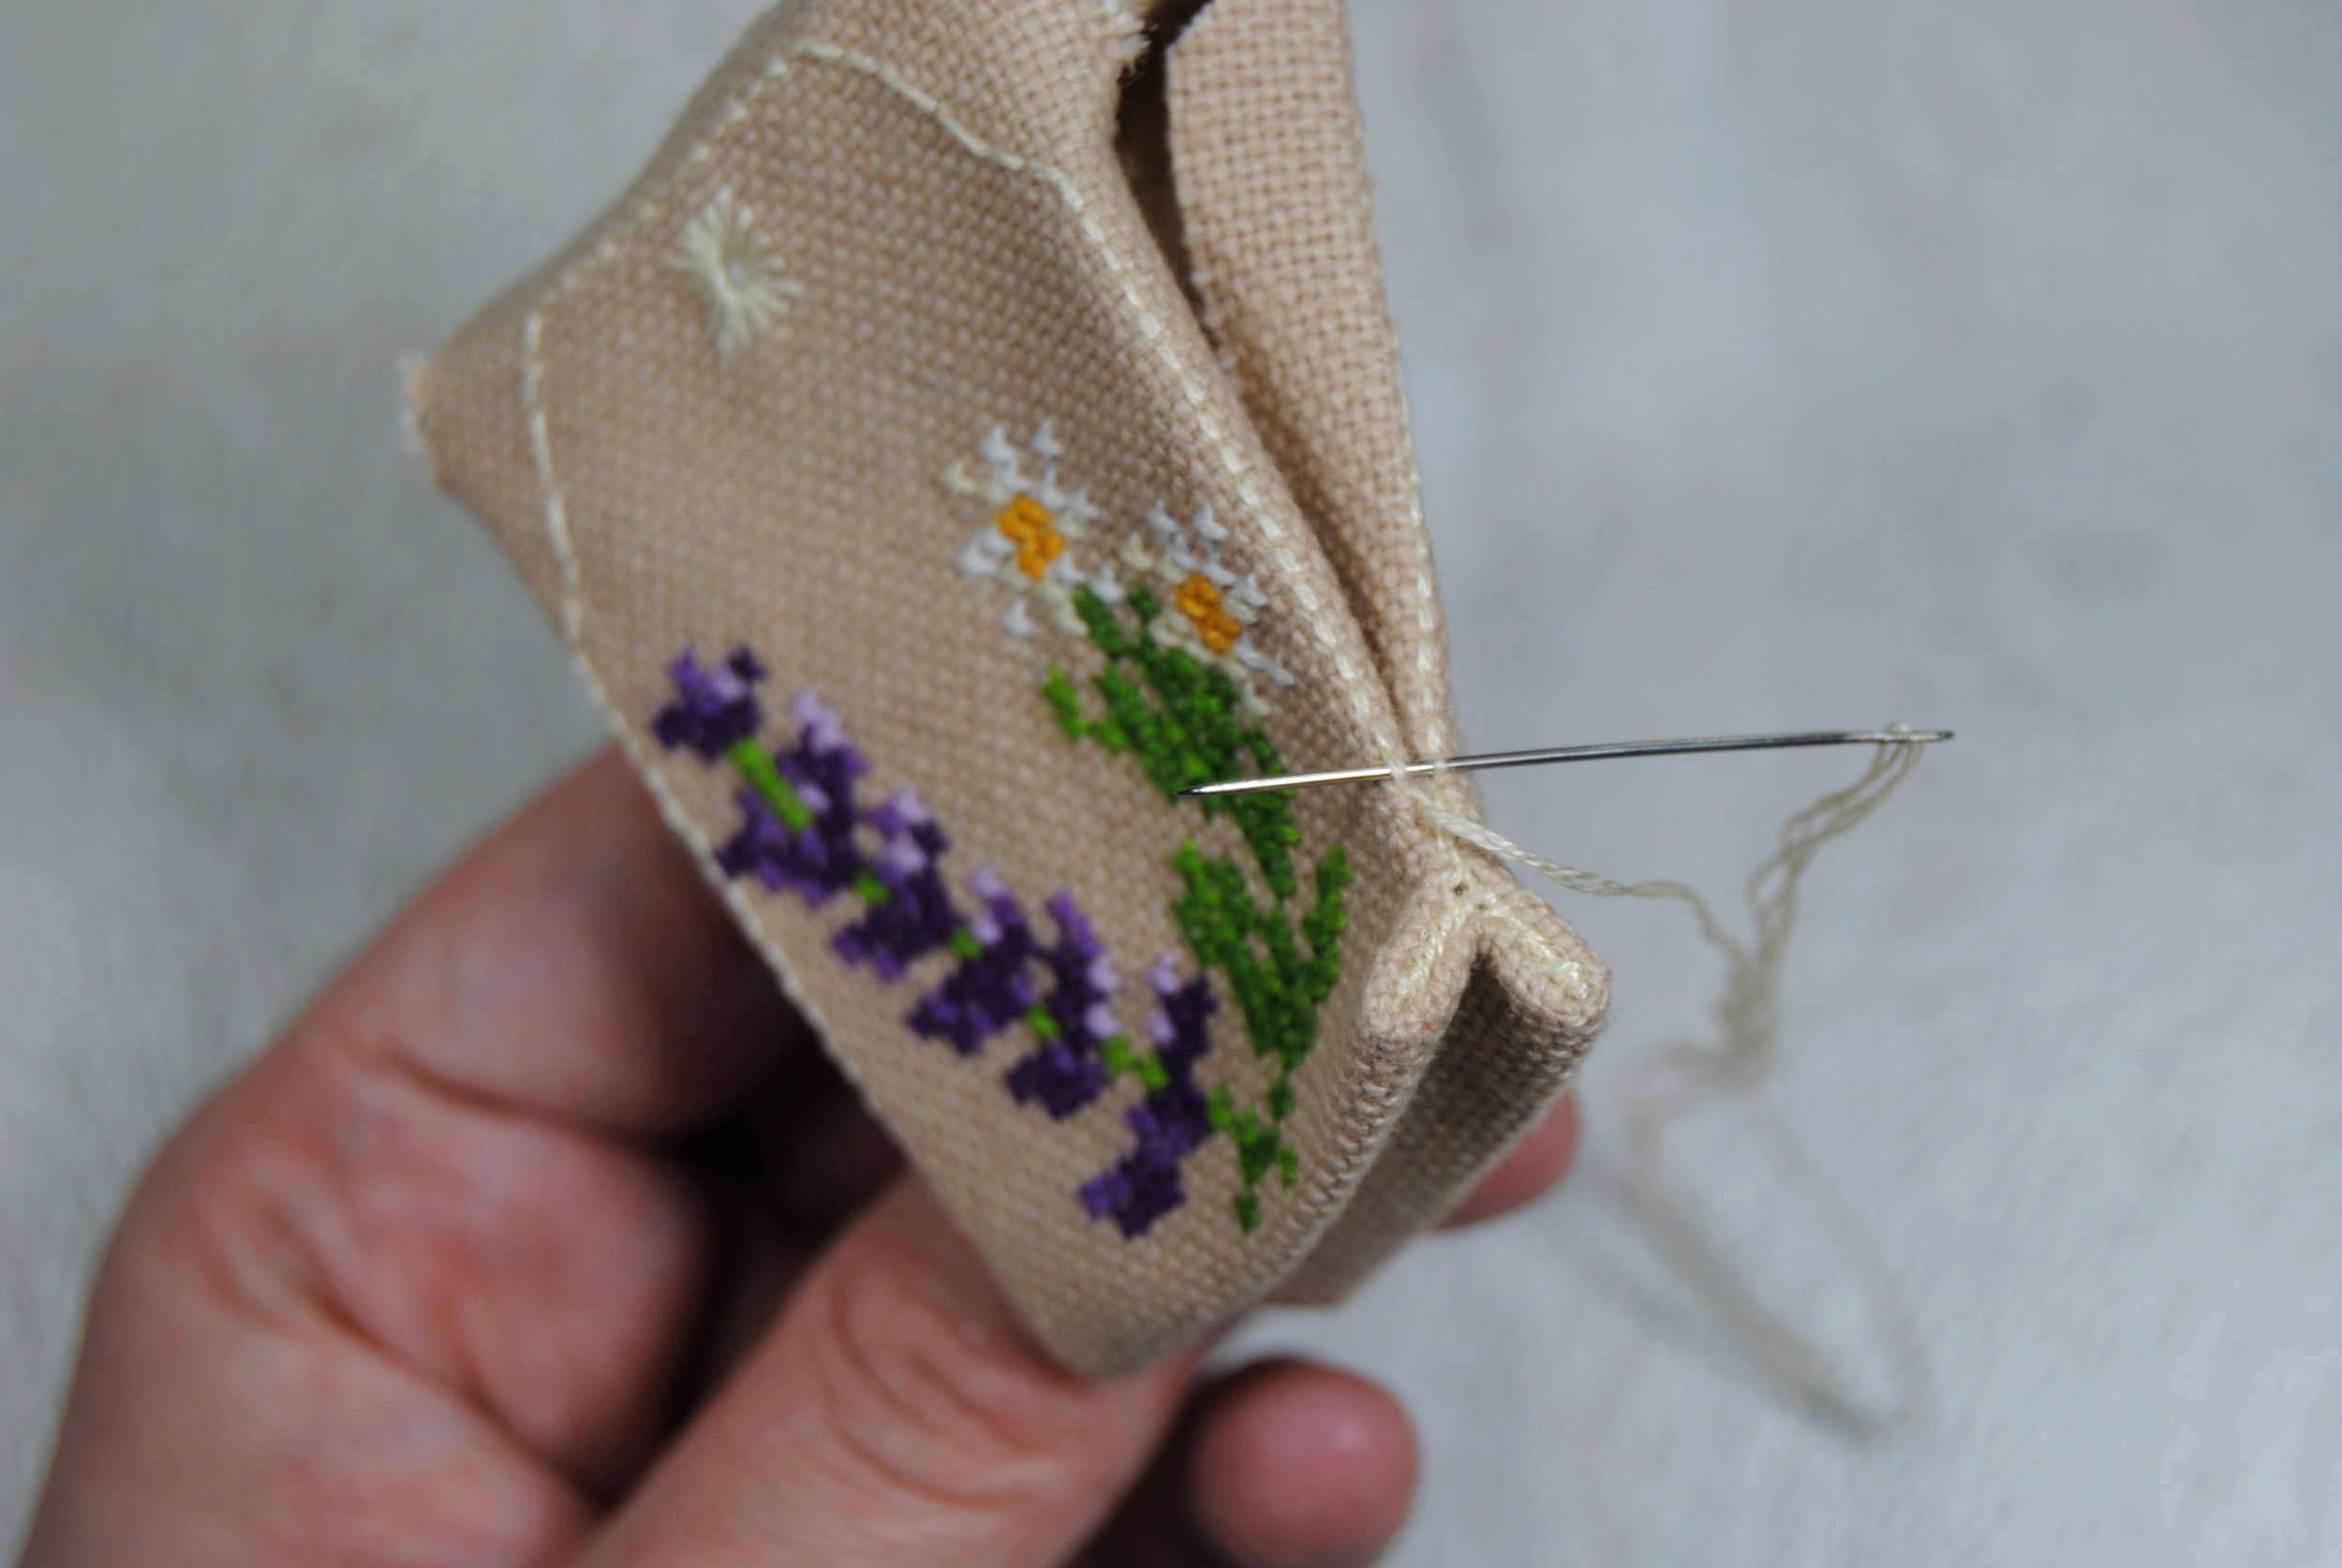
Now it’s just a matter of stitching up the side seams. We’ll be using the same technique I use for a lot of these kinds of finishes and essentially stitching the border backstithes together. If you’ve ever made a biscornu or humbug, you’ll be familiar with this process. If not, take a look at the photos to see what I mean.
I started on one of the folded edges and stitched together one of the ‘legs’ of the bag.

Rather than proceeding to stitch together the rest of that side, I skipped over to the other corner and stitched up the second little fold first.
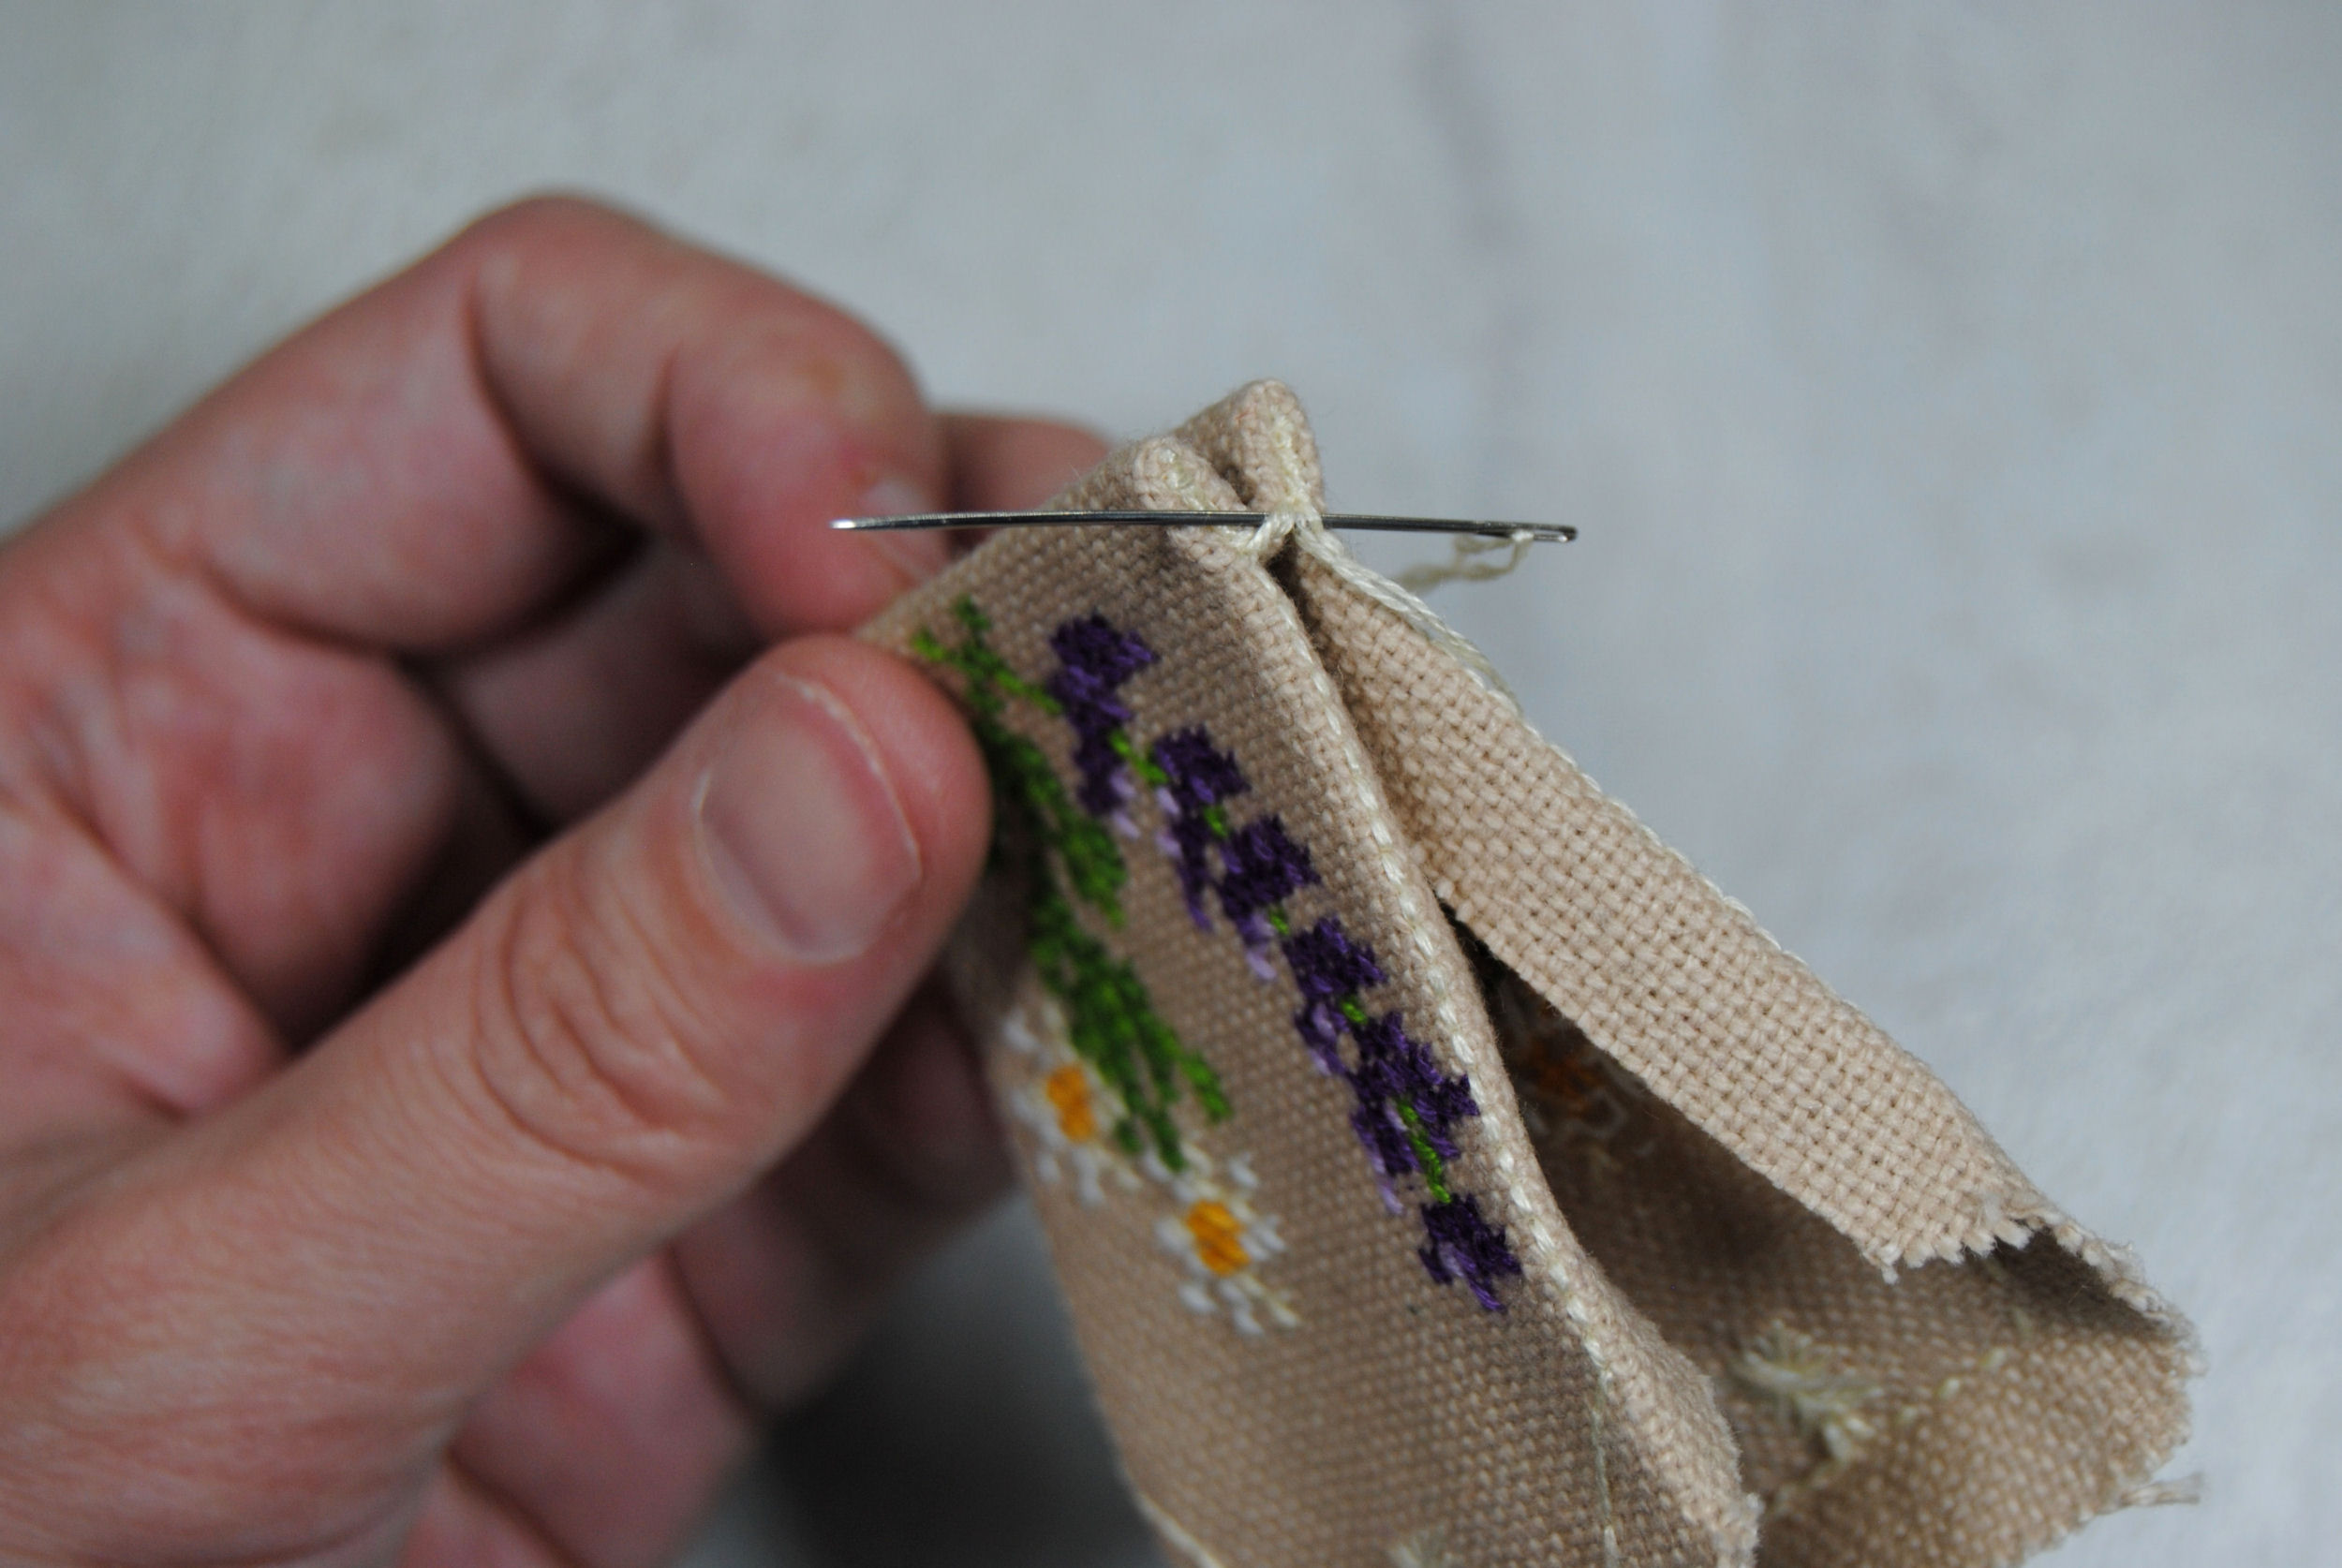
Once those were stitched, I flipped it around and proceeded up the side of the bag.
Once you get up to the diagonal lines at the top, slow down. They are a bit trickier as they are little wider than just a single stitch, but they work essentially the same way. Just take it slowly.
You can do a couple of stitches for the wider ones if it feels more secure.
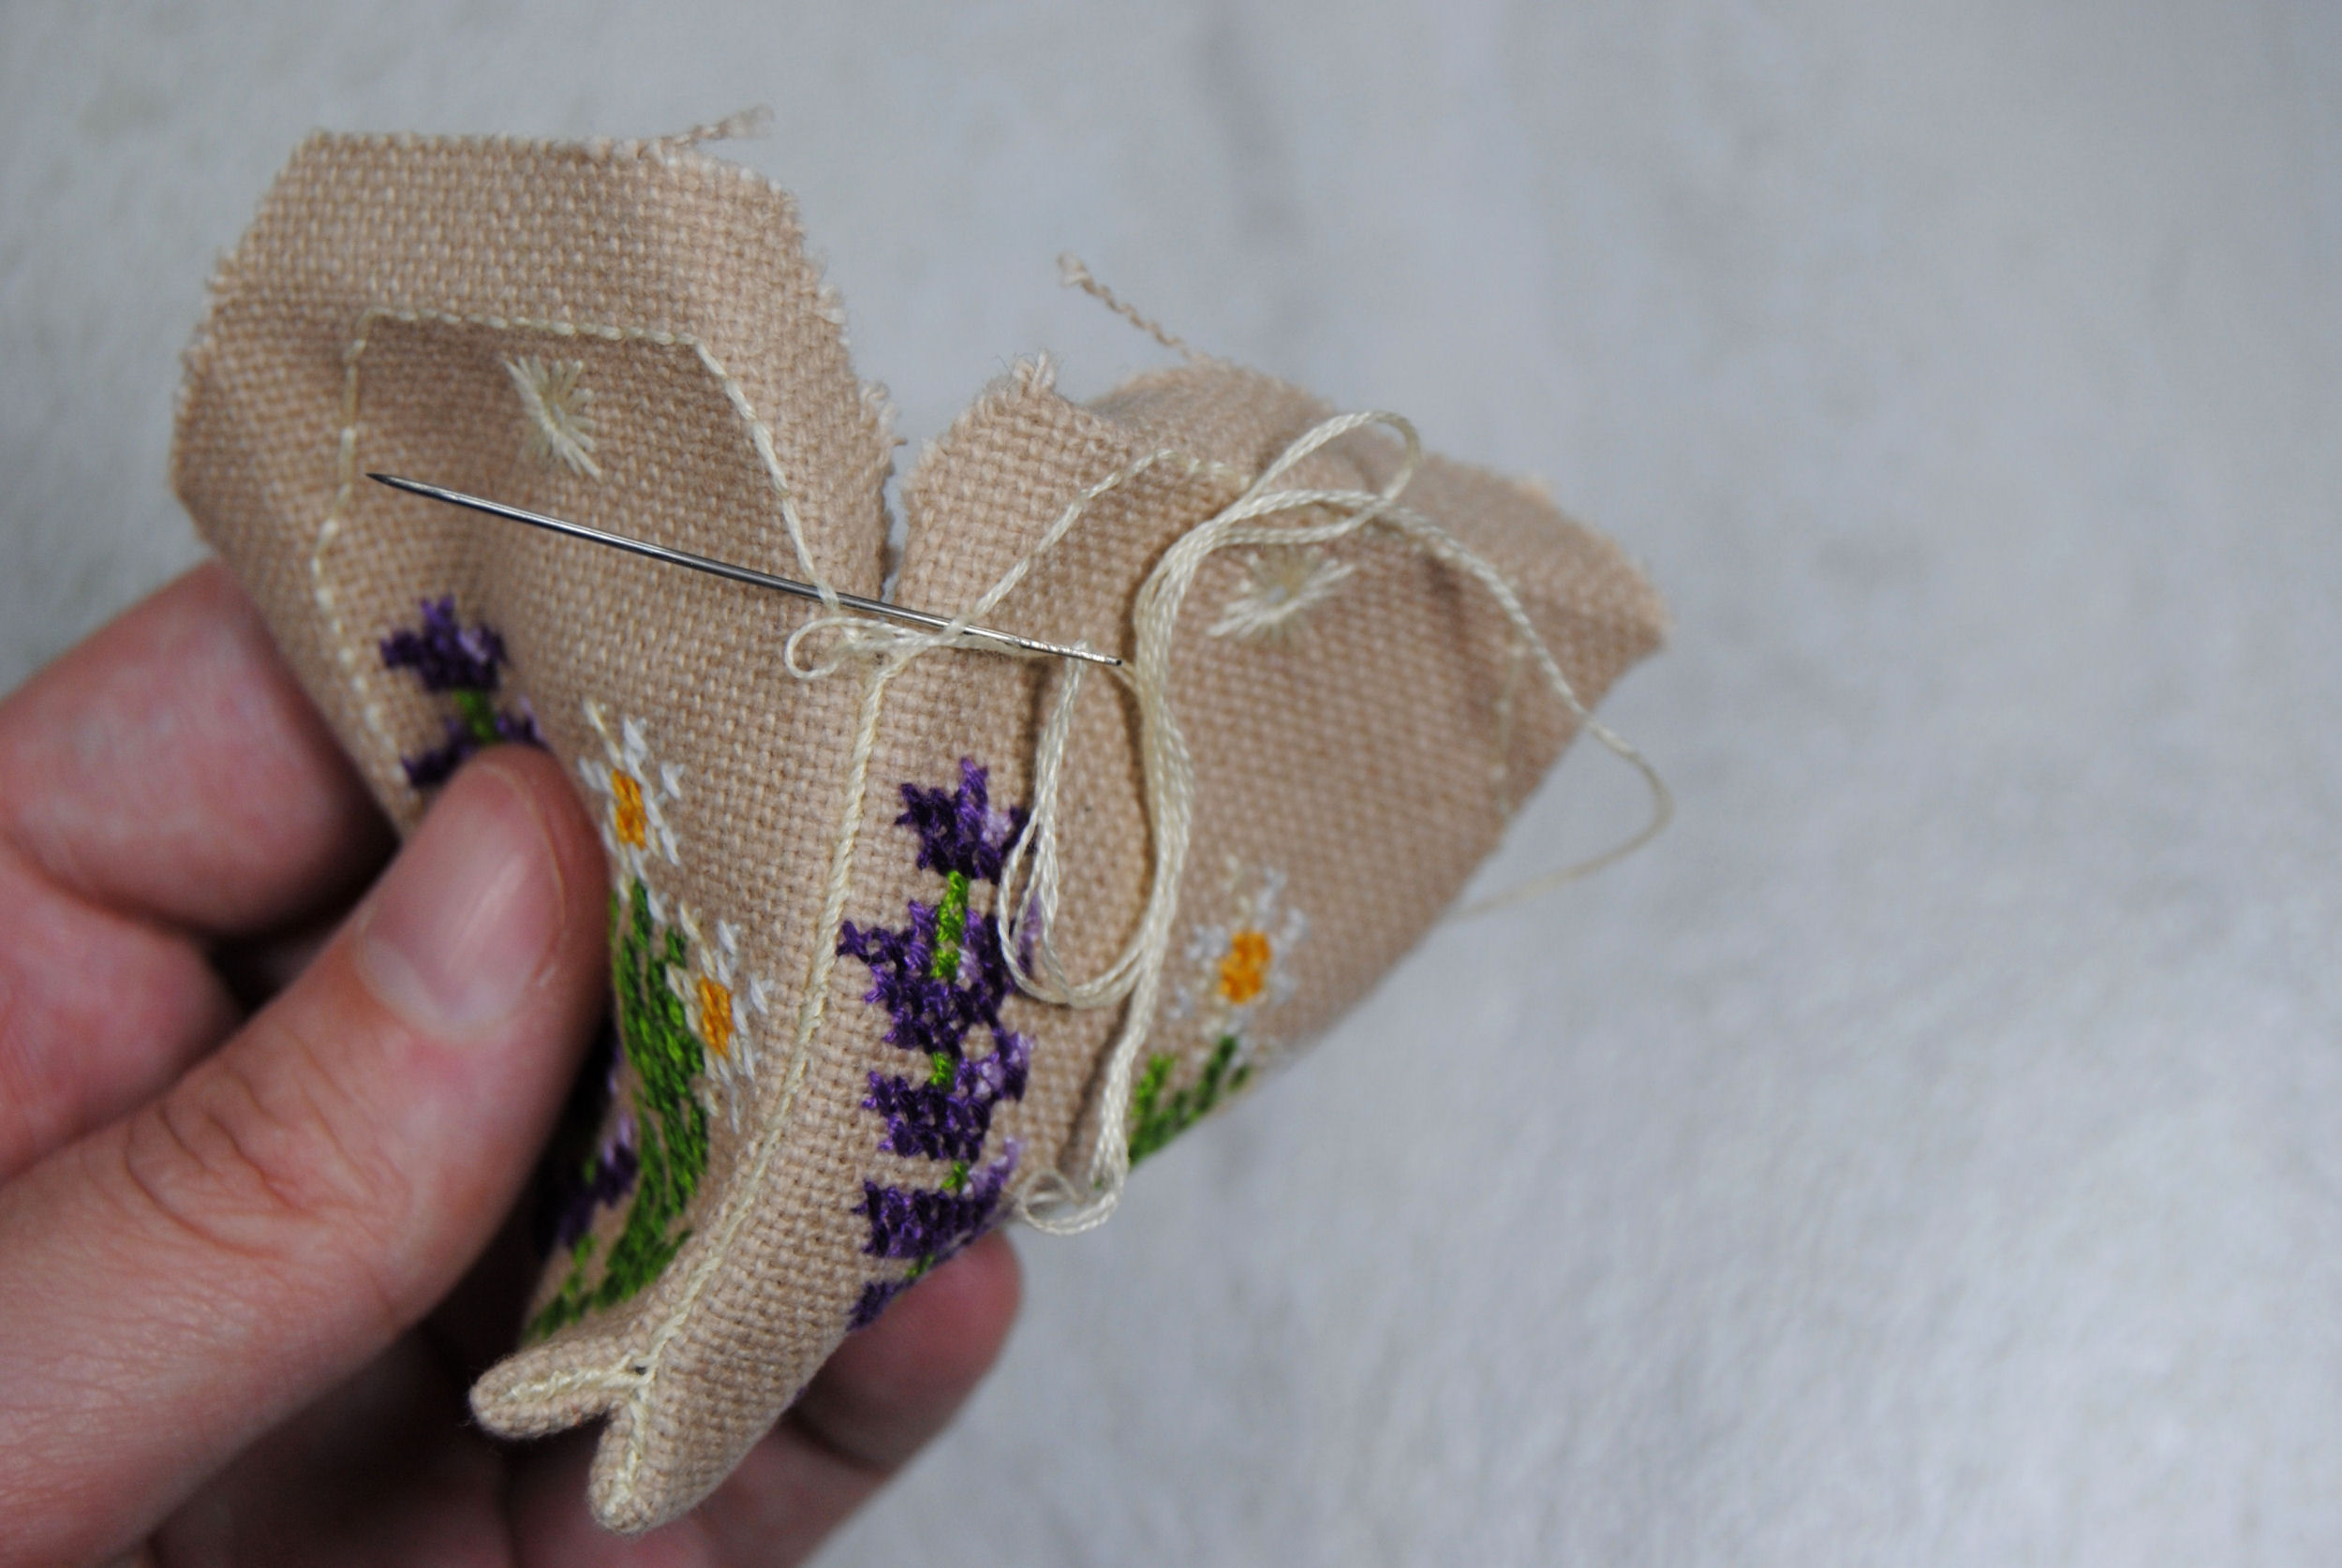
If you’re having trouble getting around those corners though, consider trimming your fabric closer or cutting a little slit in the edge fabric so it can fold over itself.
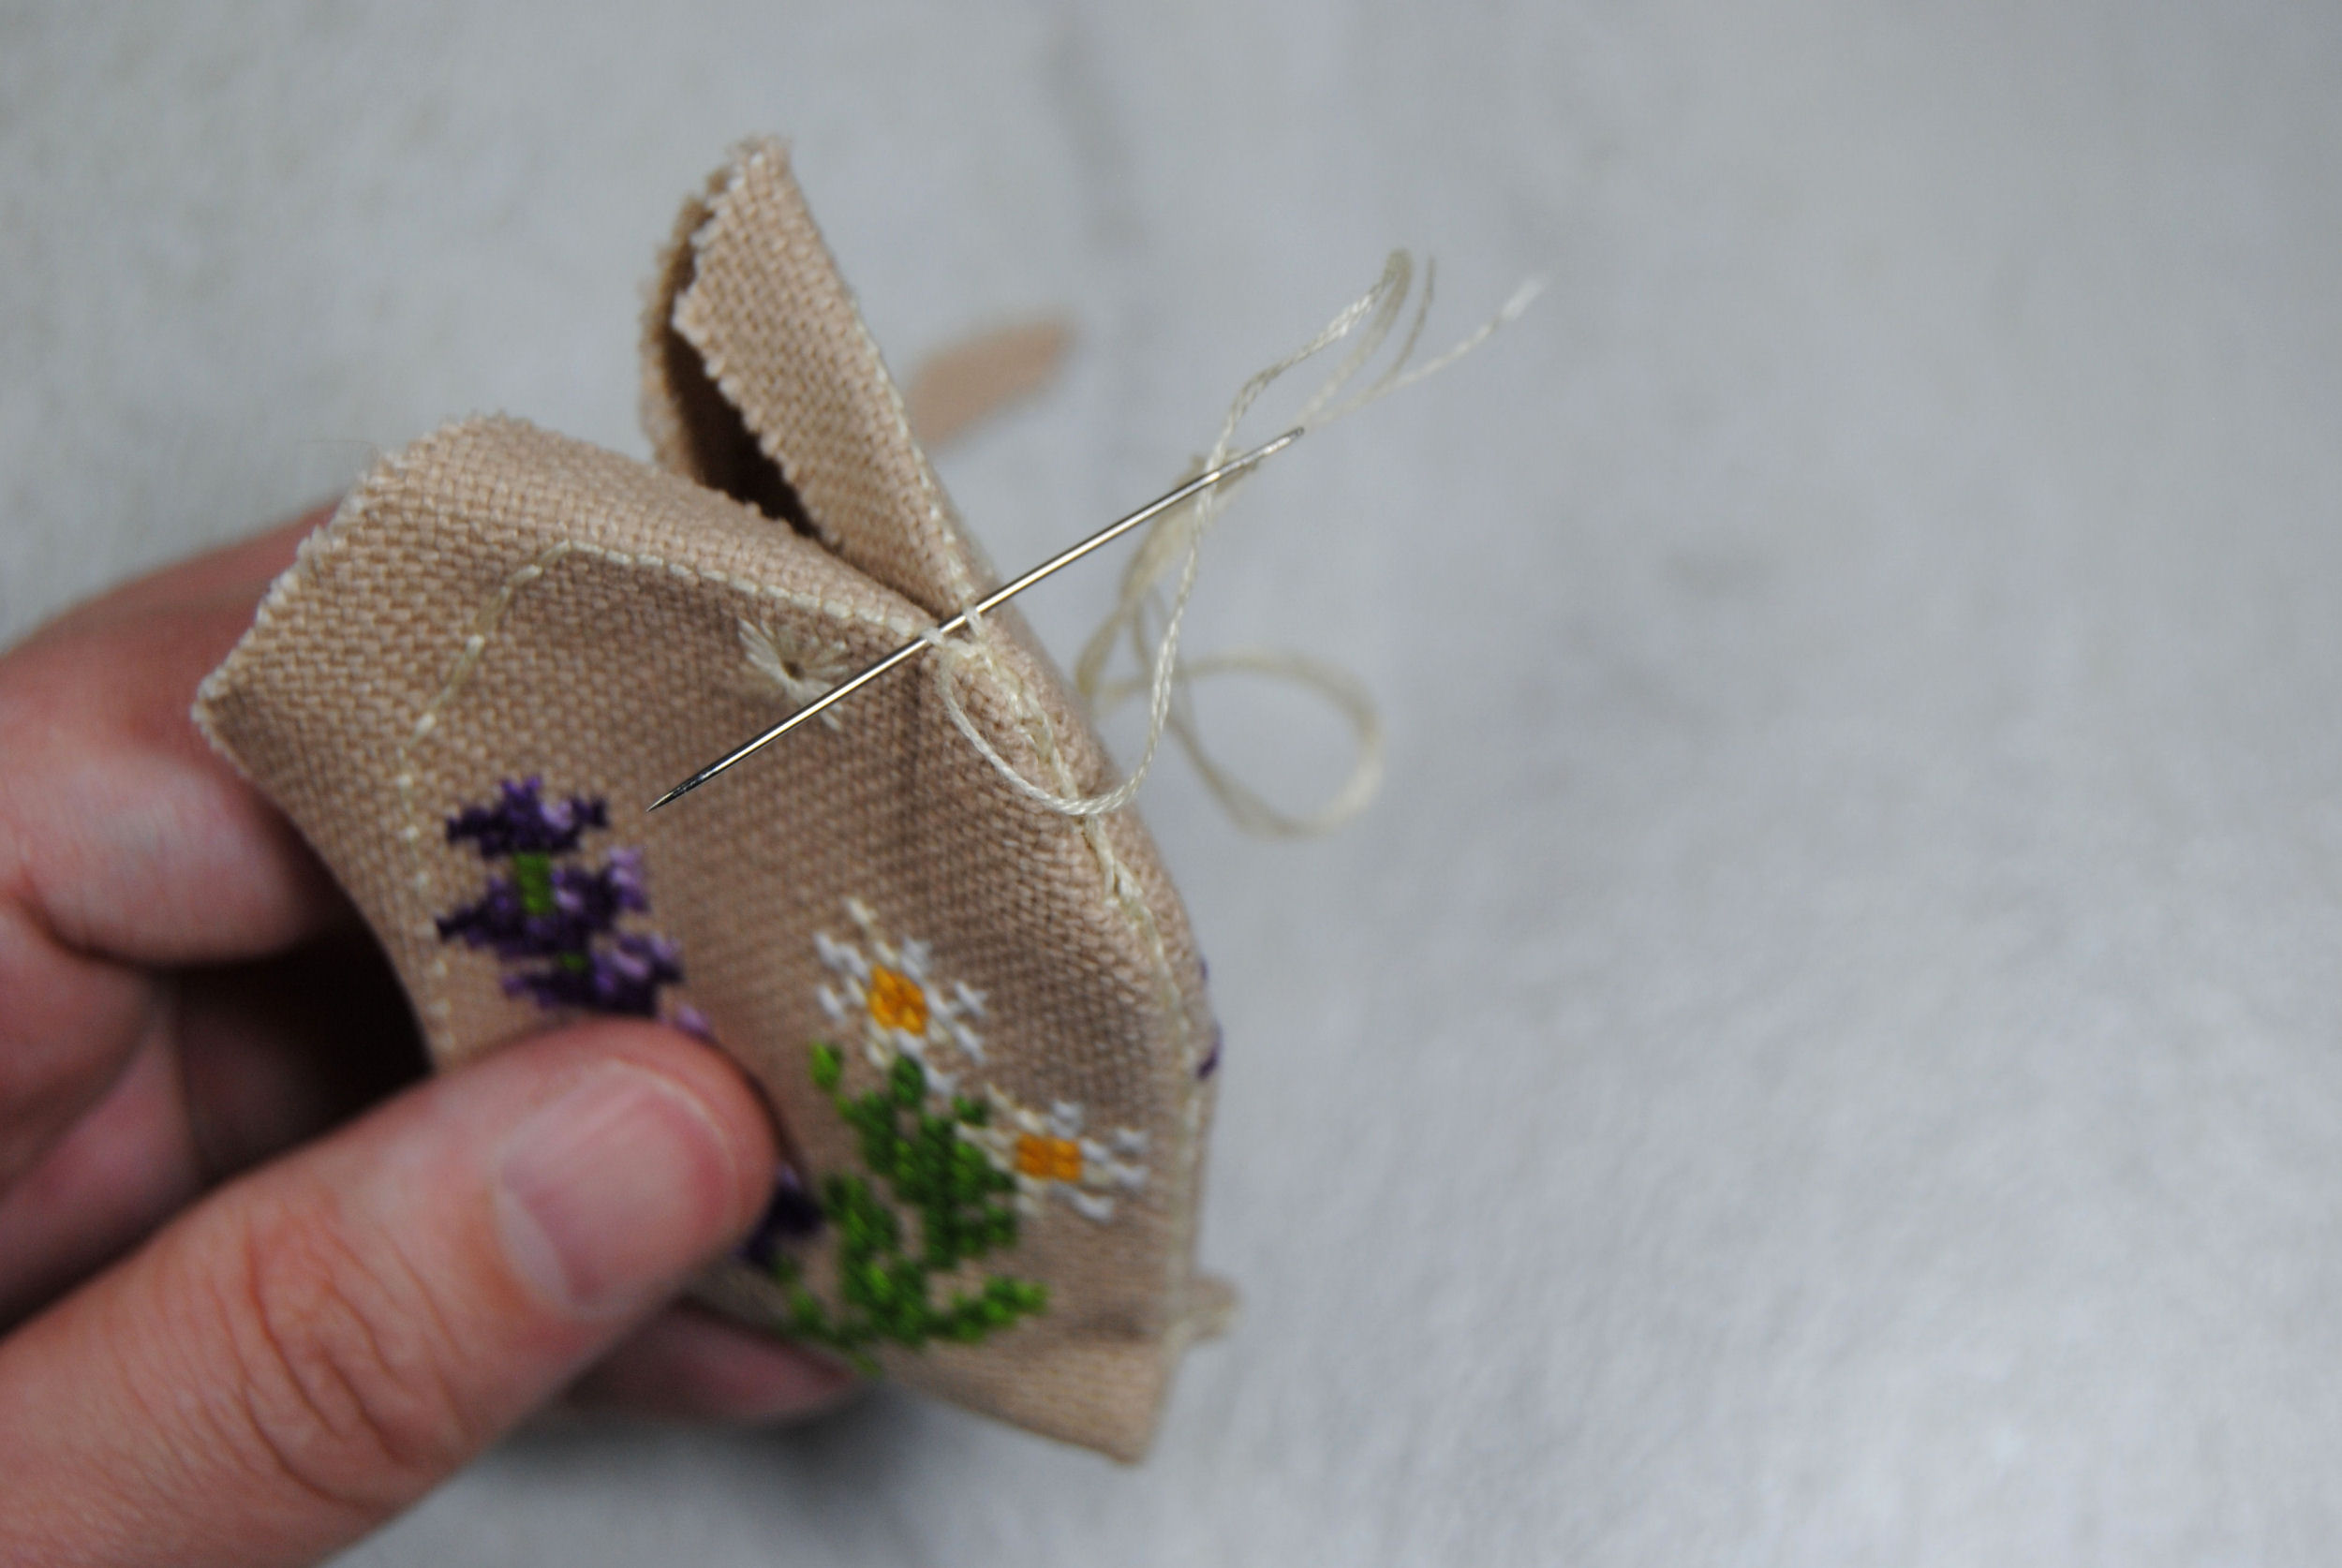
Speaking of trimming your fabric, it’s especially important that the fabric around that top eyelet is trimmed as you’ll want to be able to get cord THROUGH the two eyelets later. So if you have fabric folds covering those up it’s going to make it more difficult.
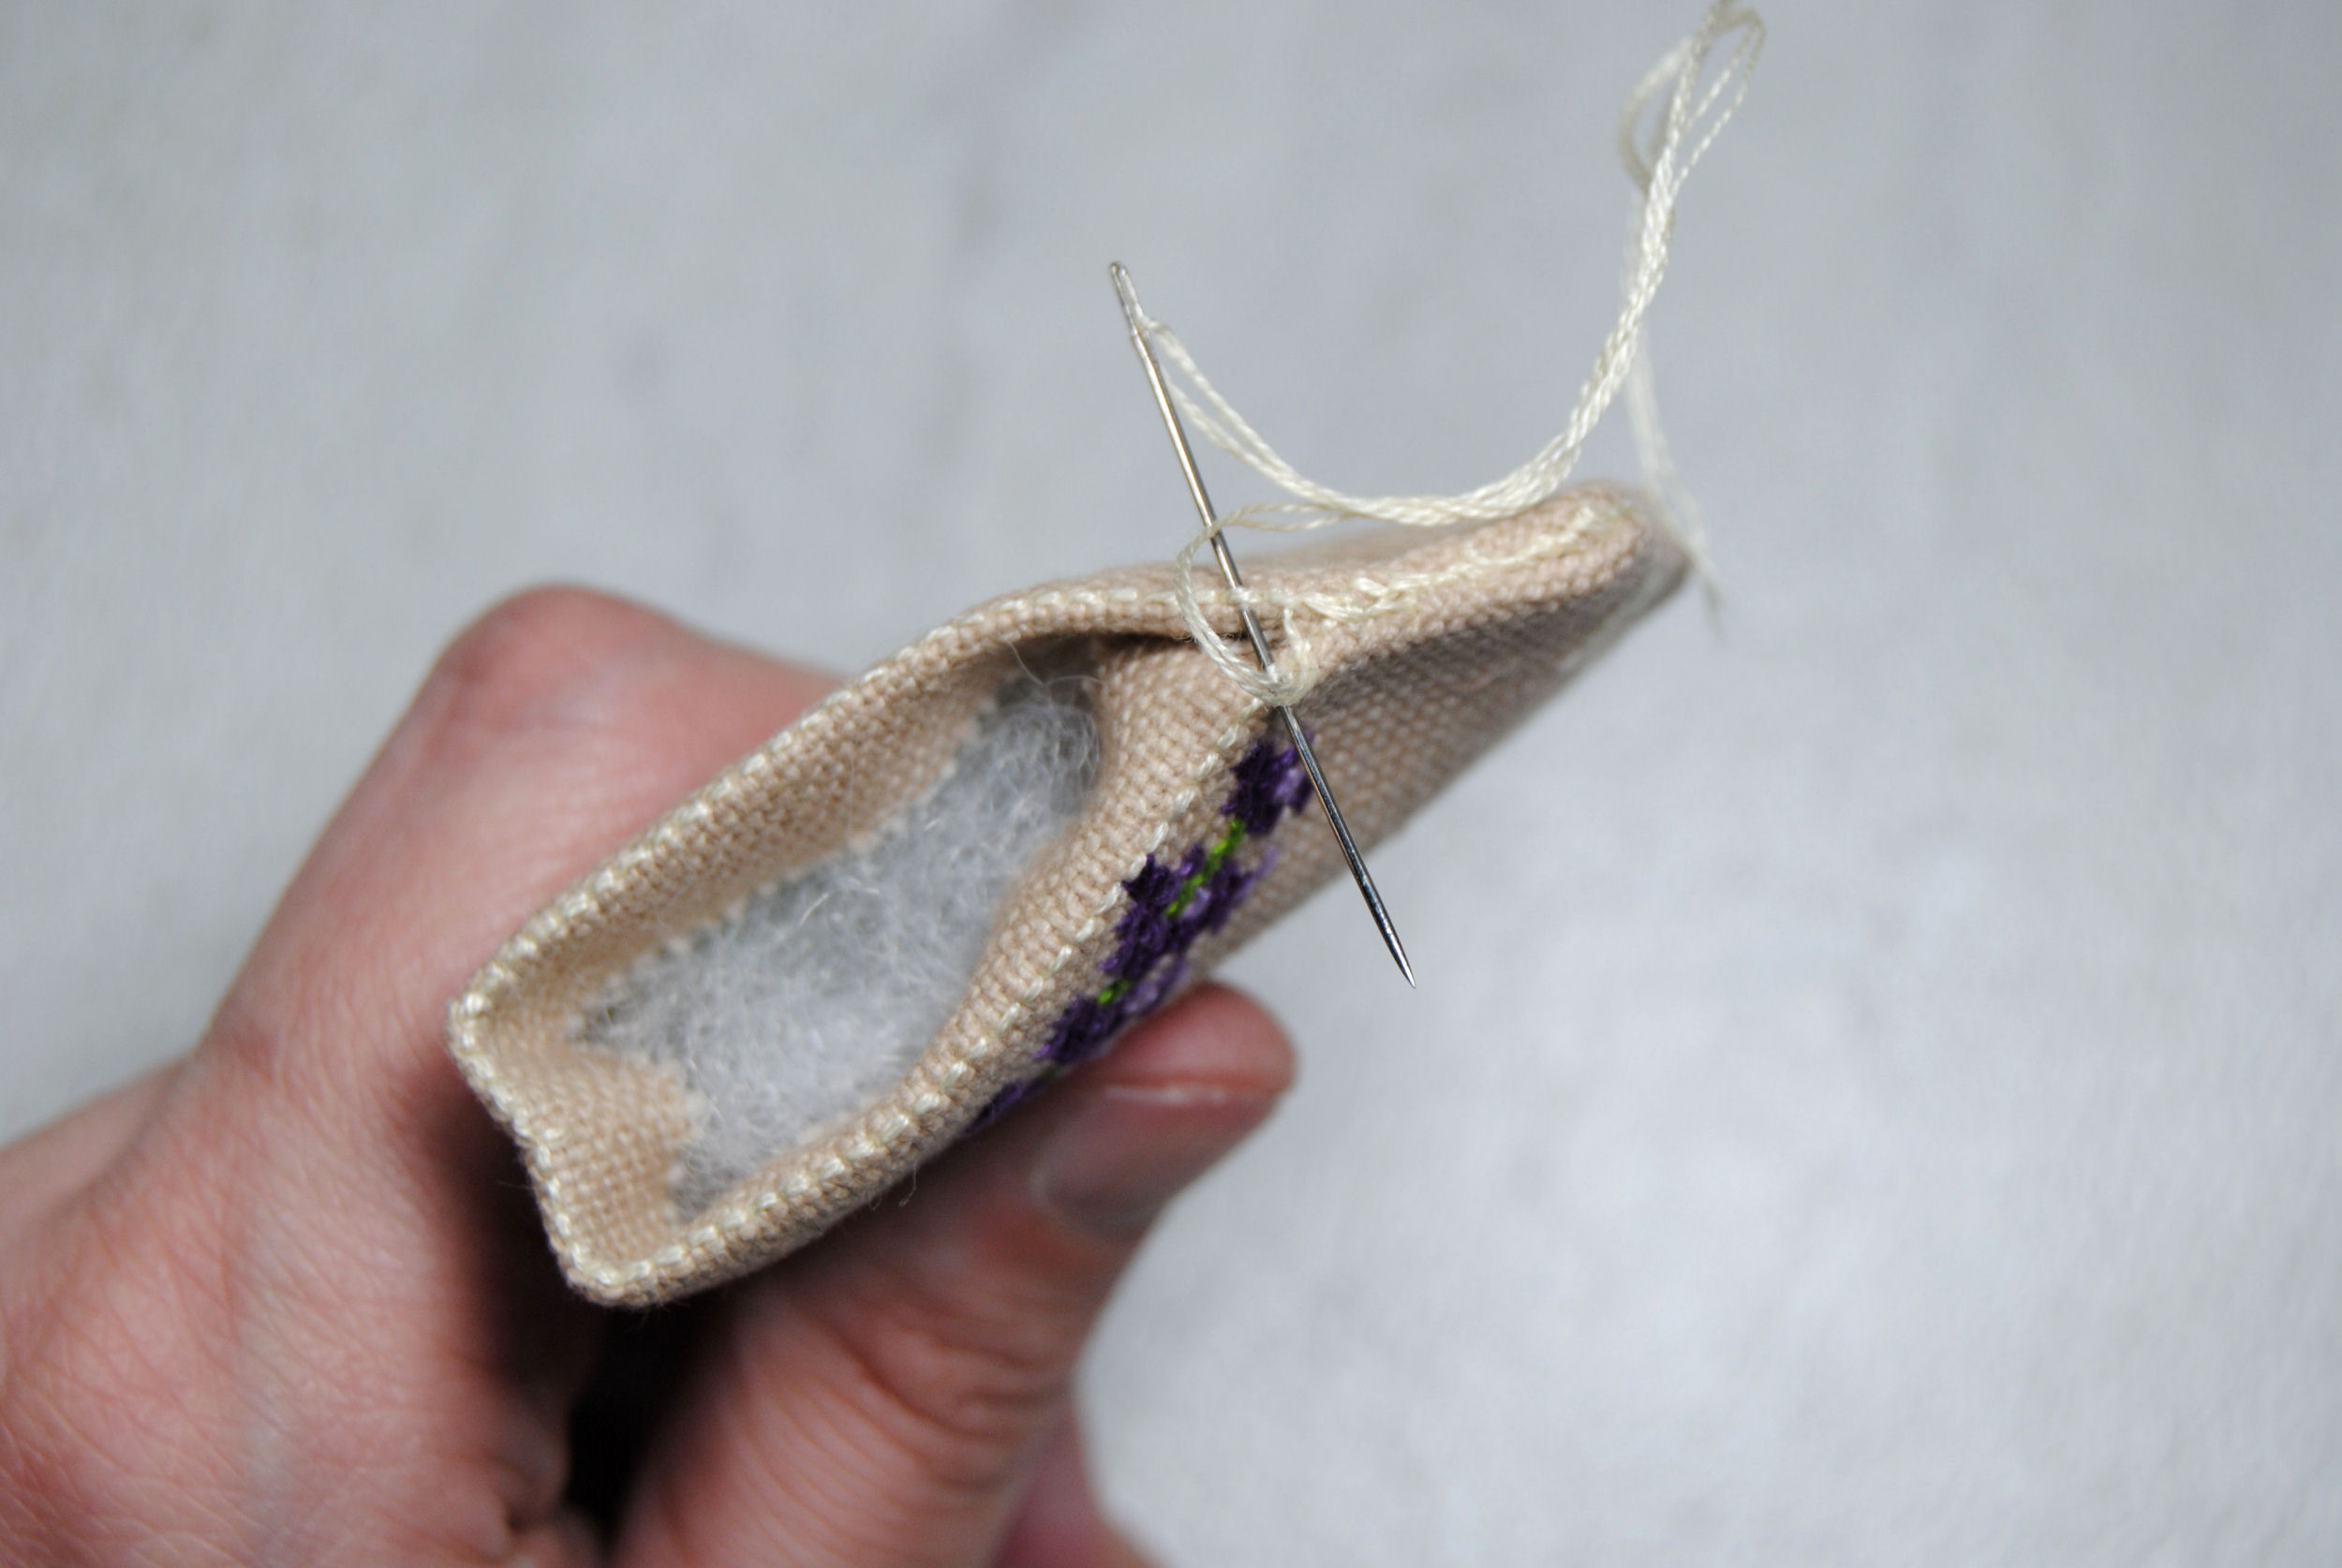
Stuff Your Tea Bag
Once you’ve made it 2/3 of the way around, you’ll want to consider lightly stuffing your scissor fob before closing it up. Here, I just used some polyfil, but this would be a great time to use up some orts, scrap fabric, or even dryer lint.
Tea Bags aren’t usually very plush though so I kept the filling very light. Just enough to imply there was something in there.
Attaching a Cord
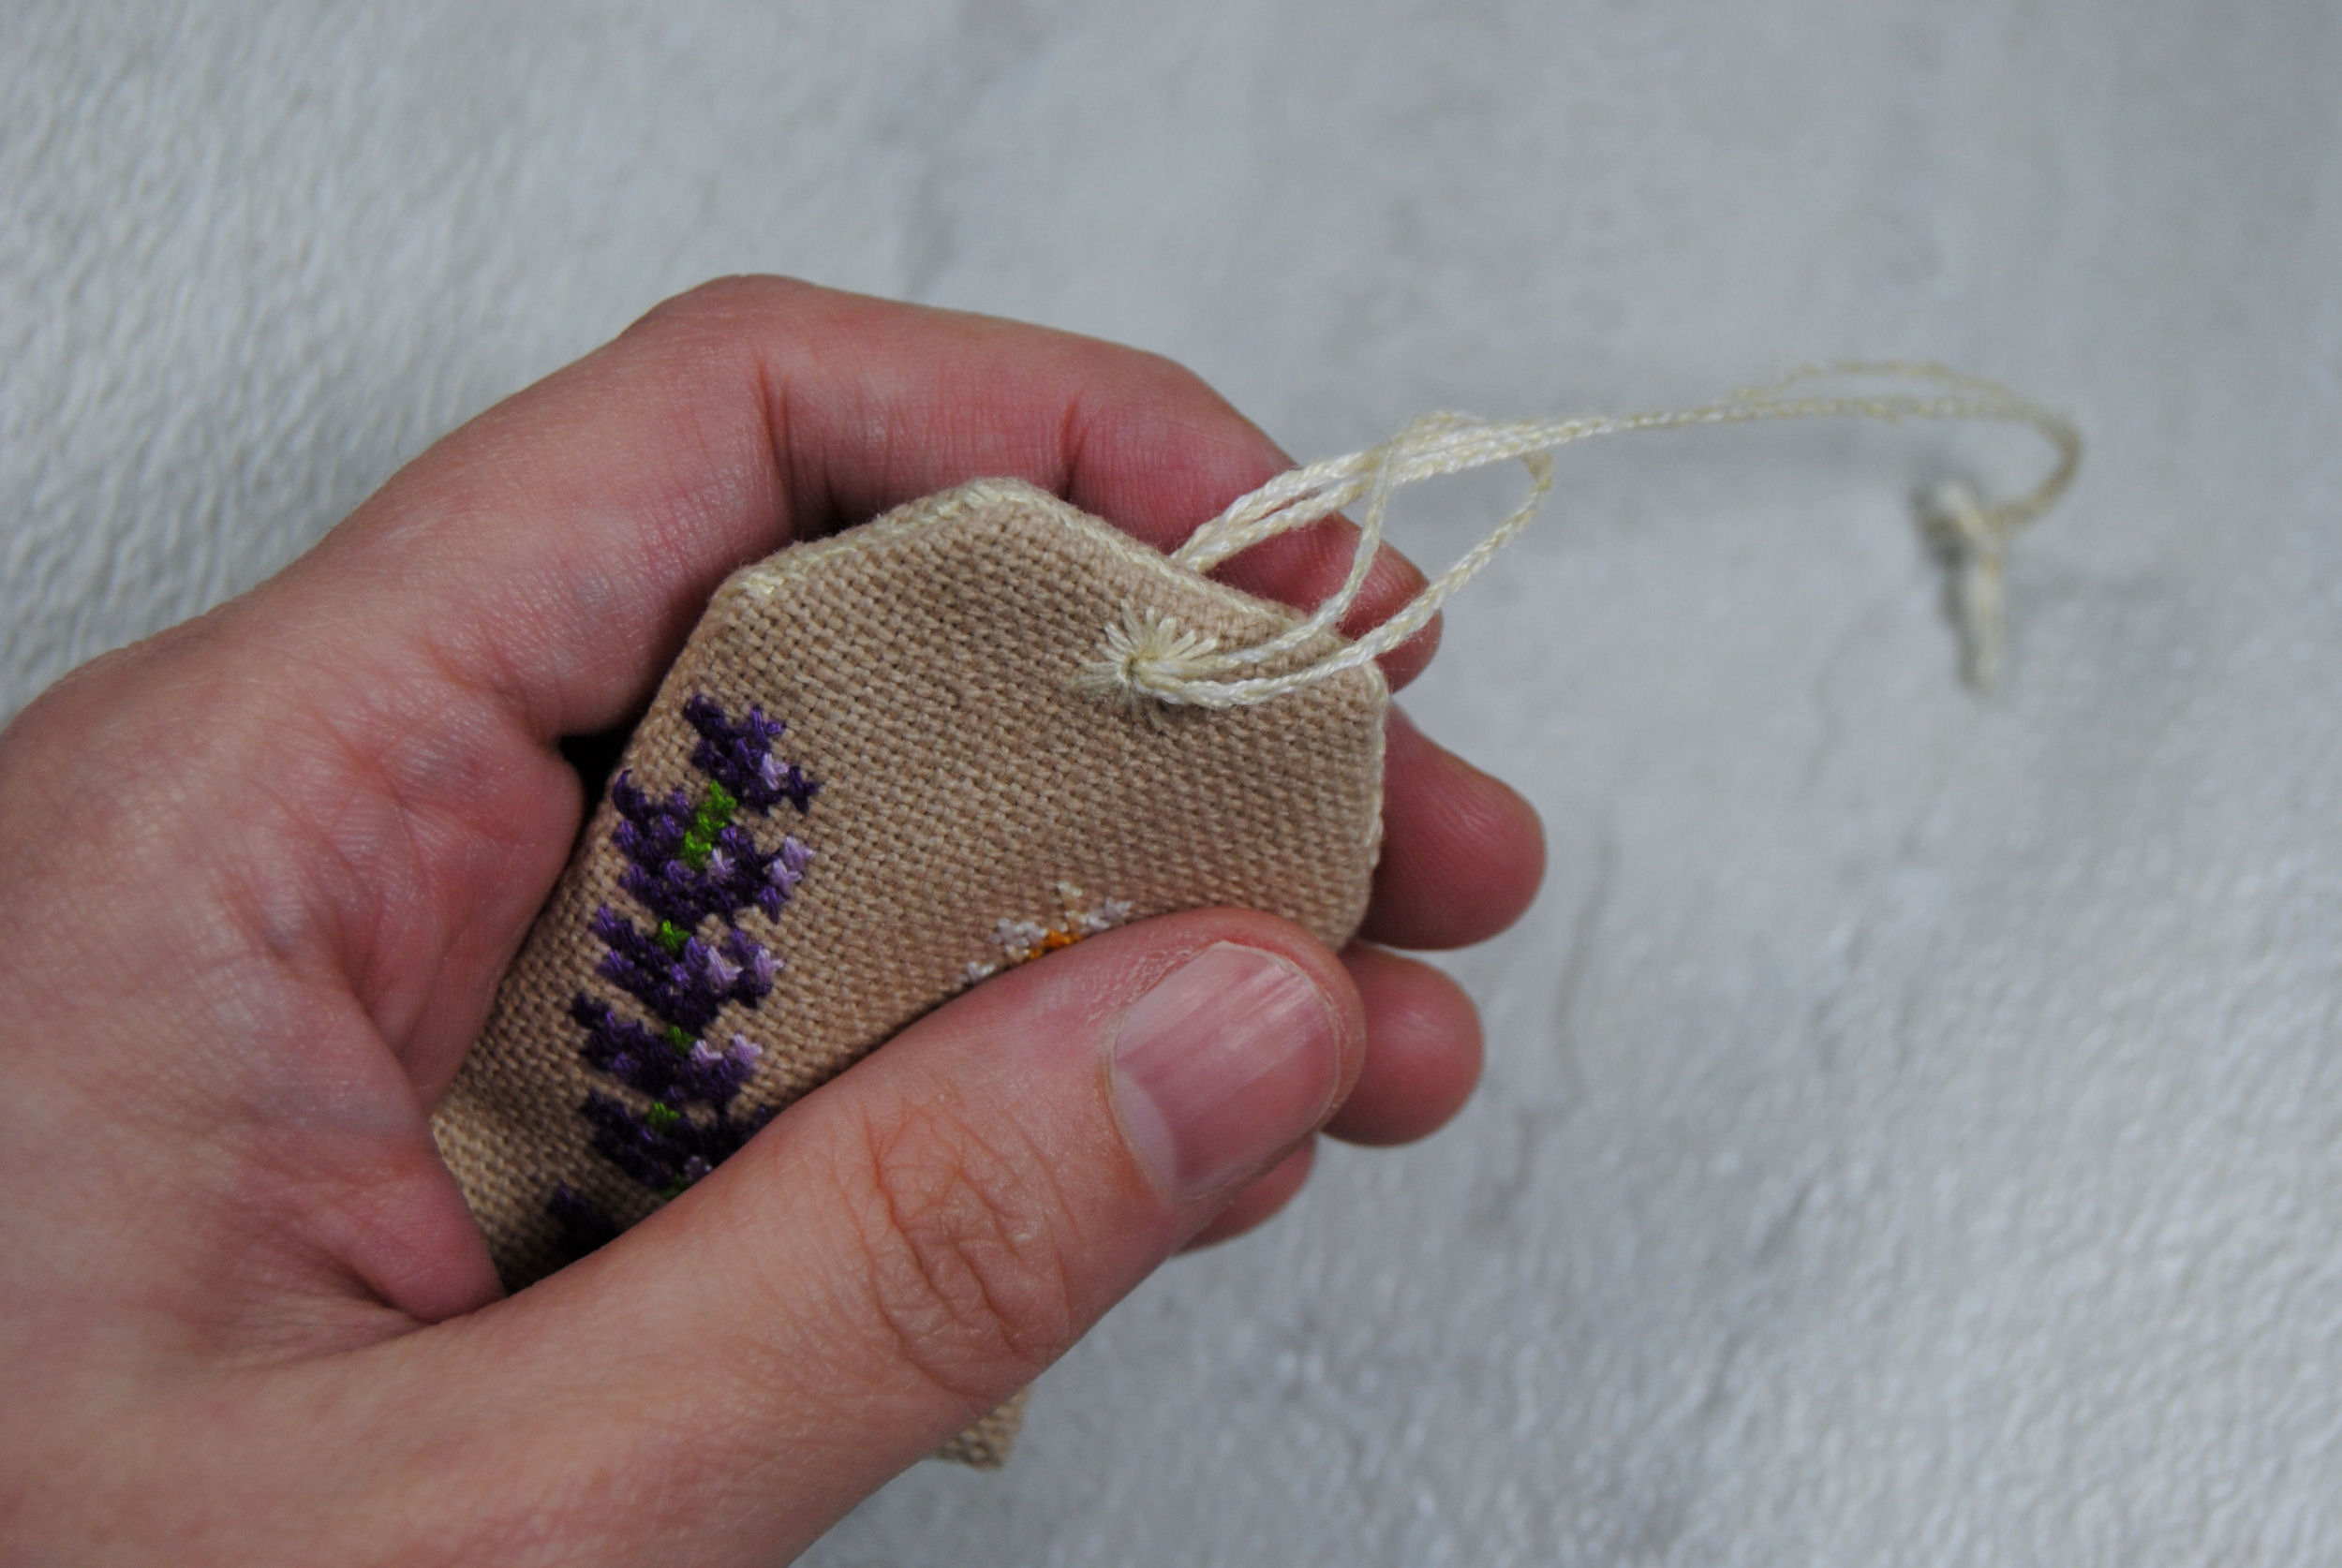
I completely forgot to take photos of this, but you’ll also want to consider what it will be hanging from. I’d thought about using some of the silk cord from my omamori tutorial, but I wanted it to match the colors of my thread.
I also wanted it thin enough to fit through my eyelet, but to reinforce it a bit so I wasn’t worried about it snapping. So I took the pale yellow from the border and mixed it with some white thread…. and just braided it together to make my “cord.”
This braid is about 10″ long, but you just want it to be long enough even when folded over to be able to easily attach it to your scissors. It probably didn’t need to be quite as long as mine.
Using a thick yarn needle normally reserved for weaving in crochet tails, I threaded the middle of that braid through my eyelet.
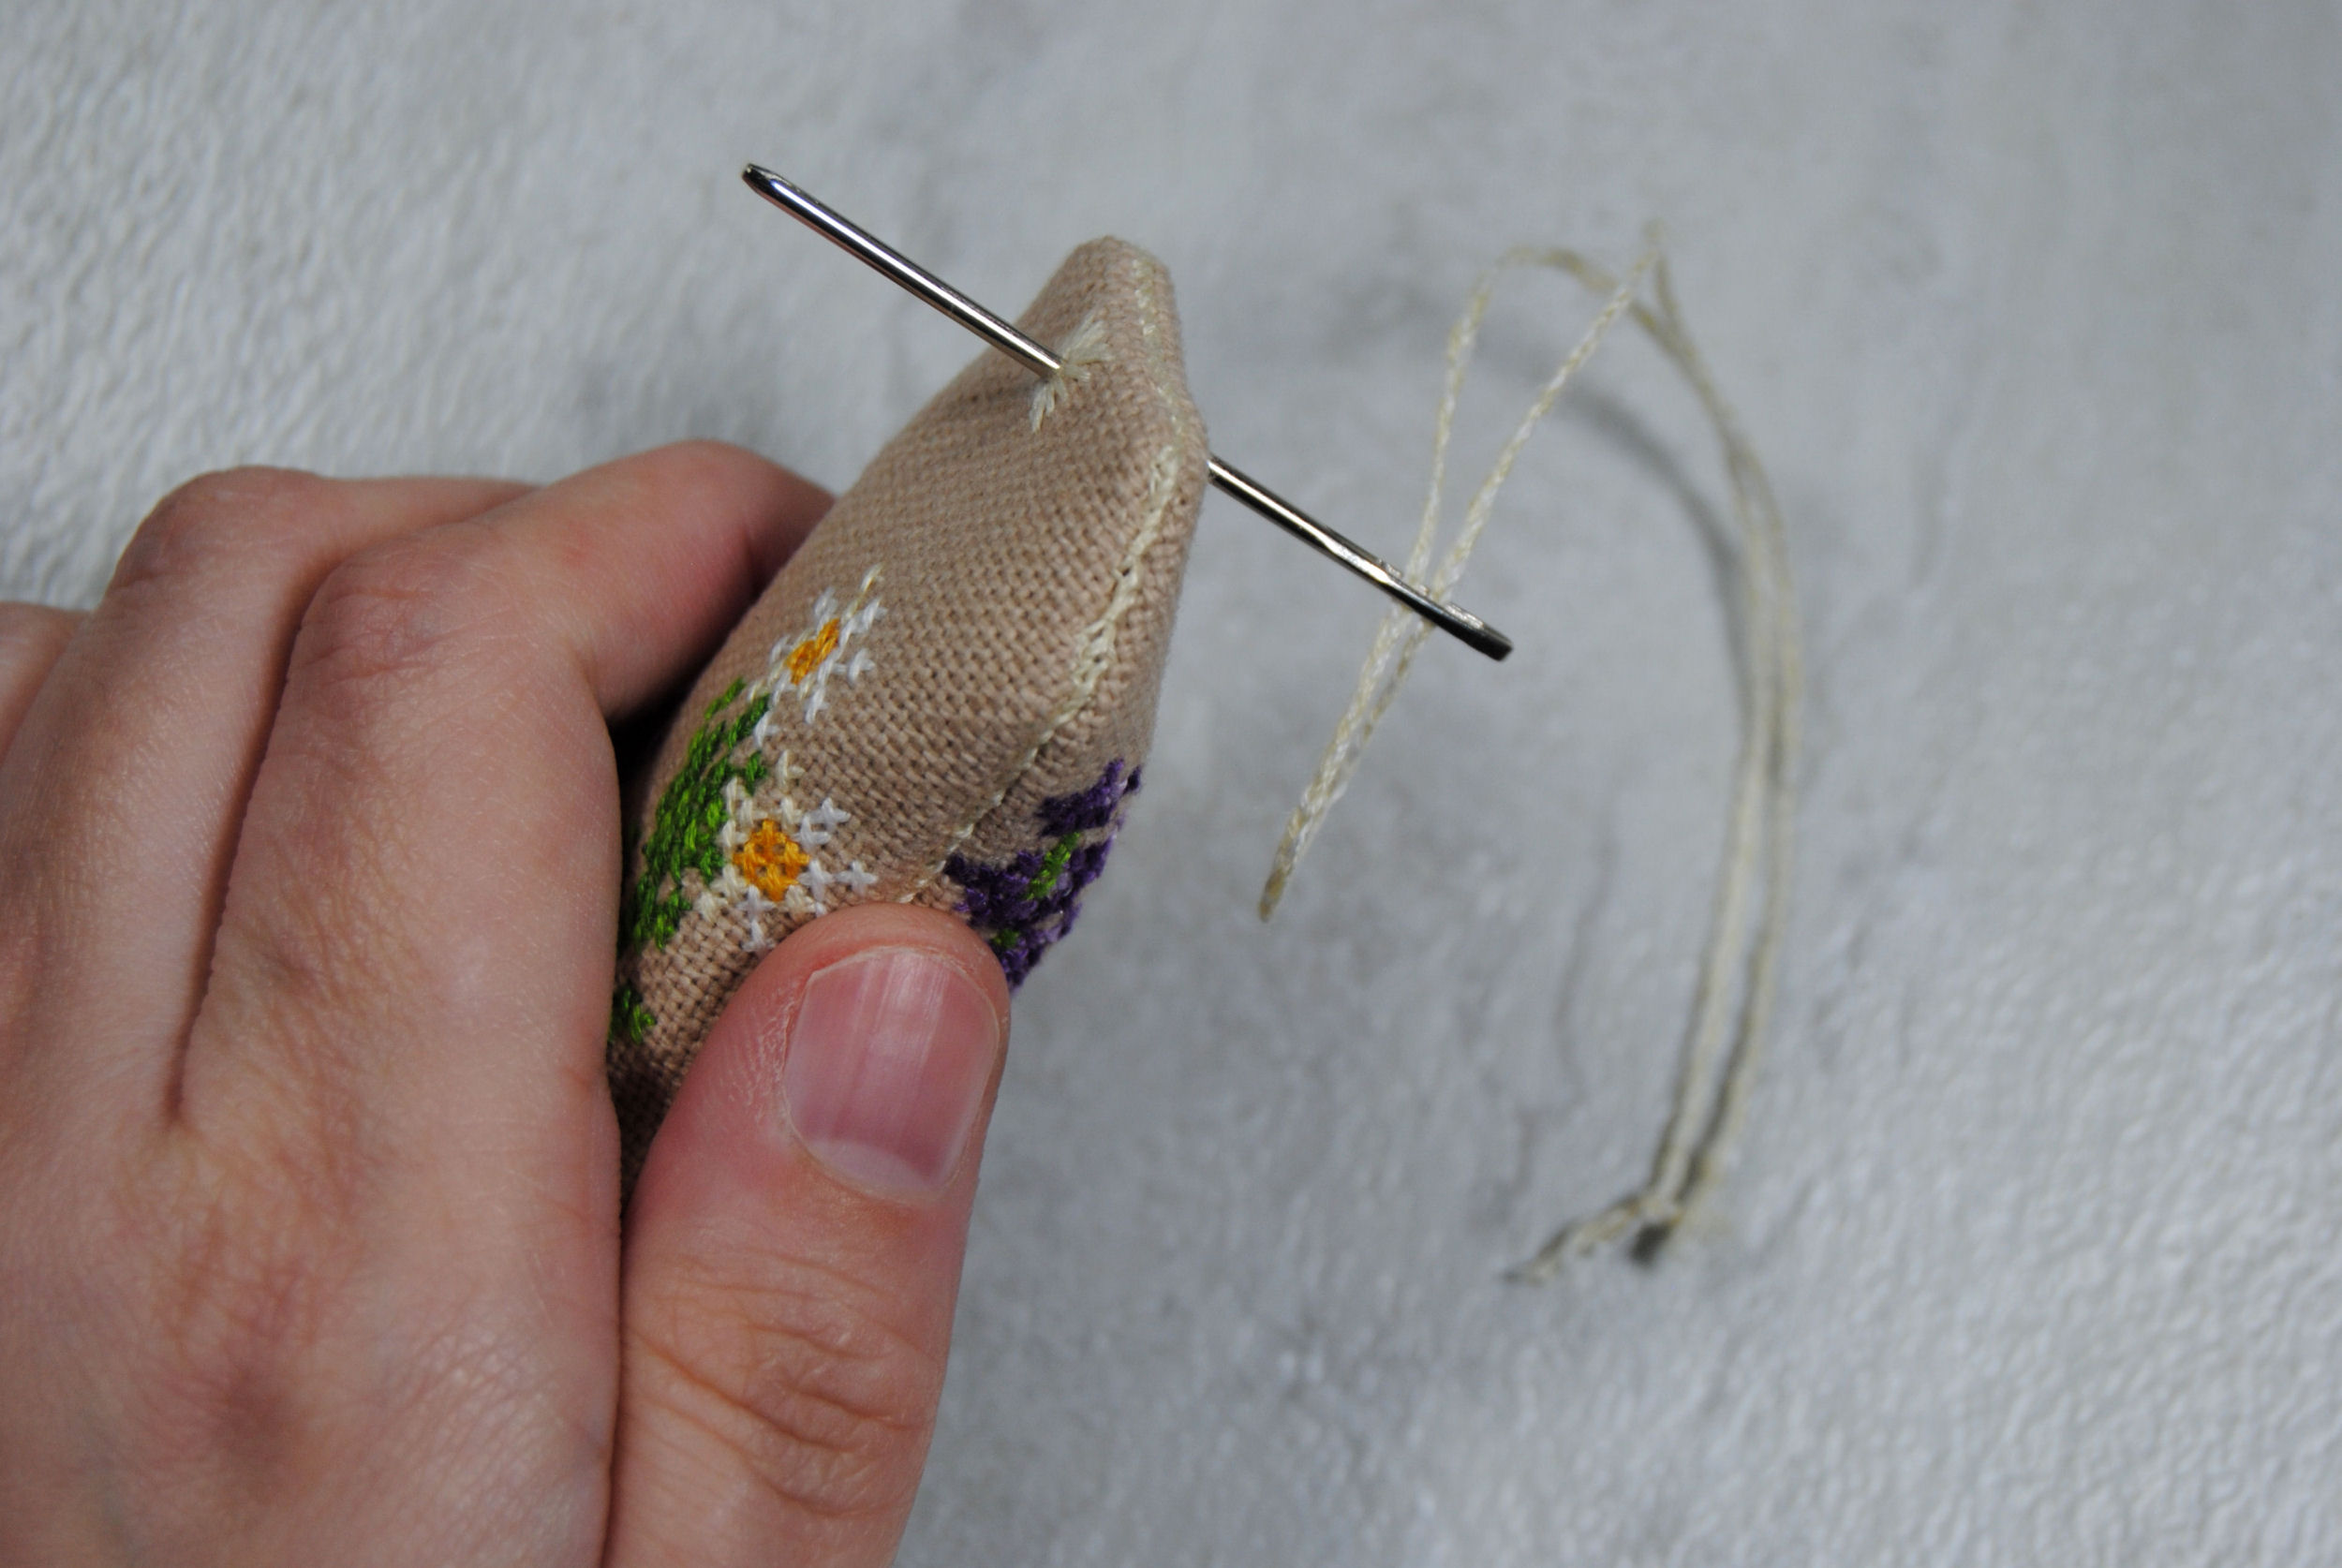
I then tucked the ends of that braid through the loop on the other side to secure it in place
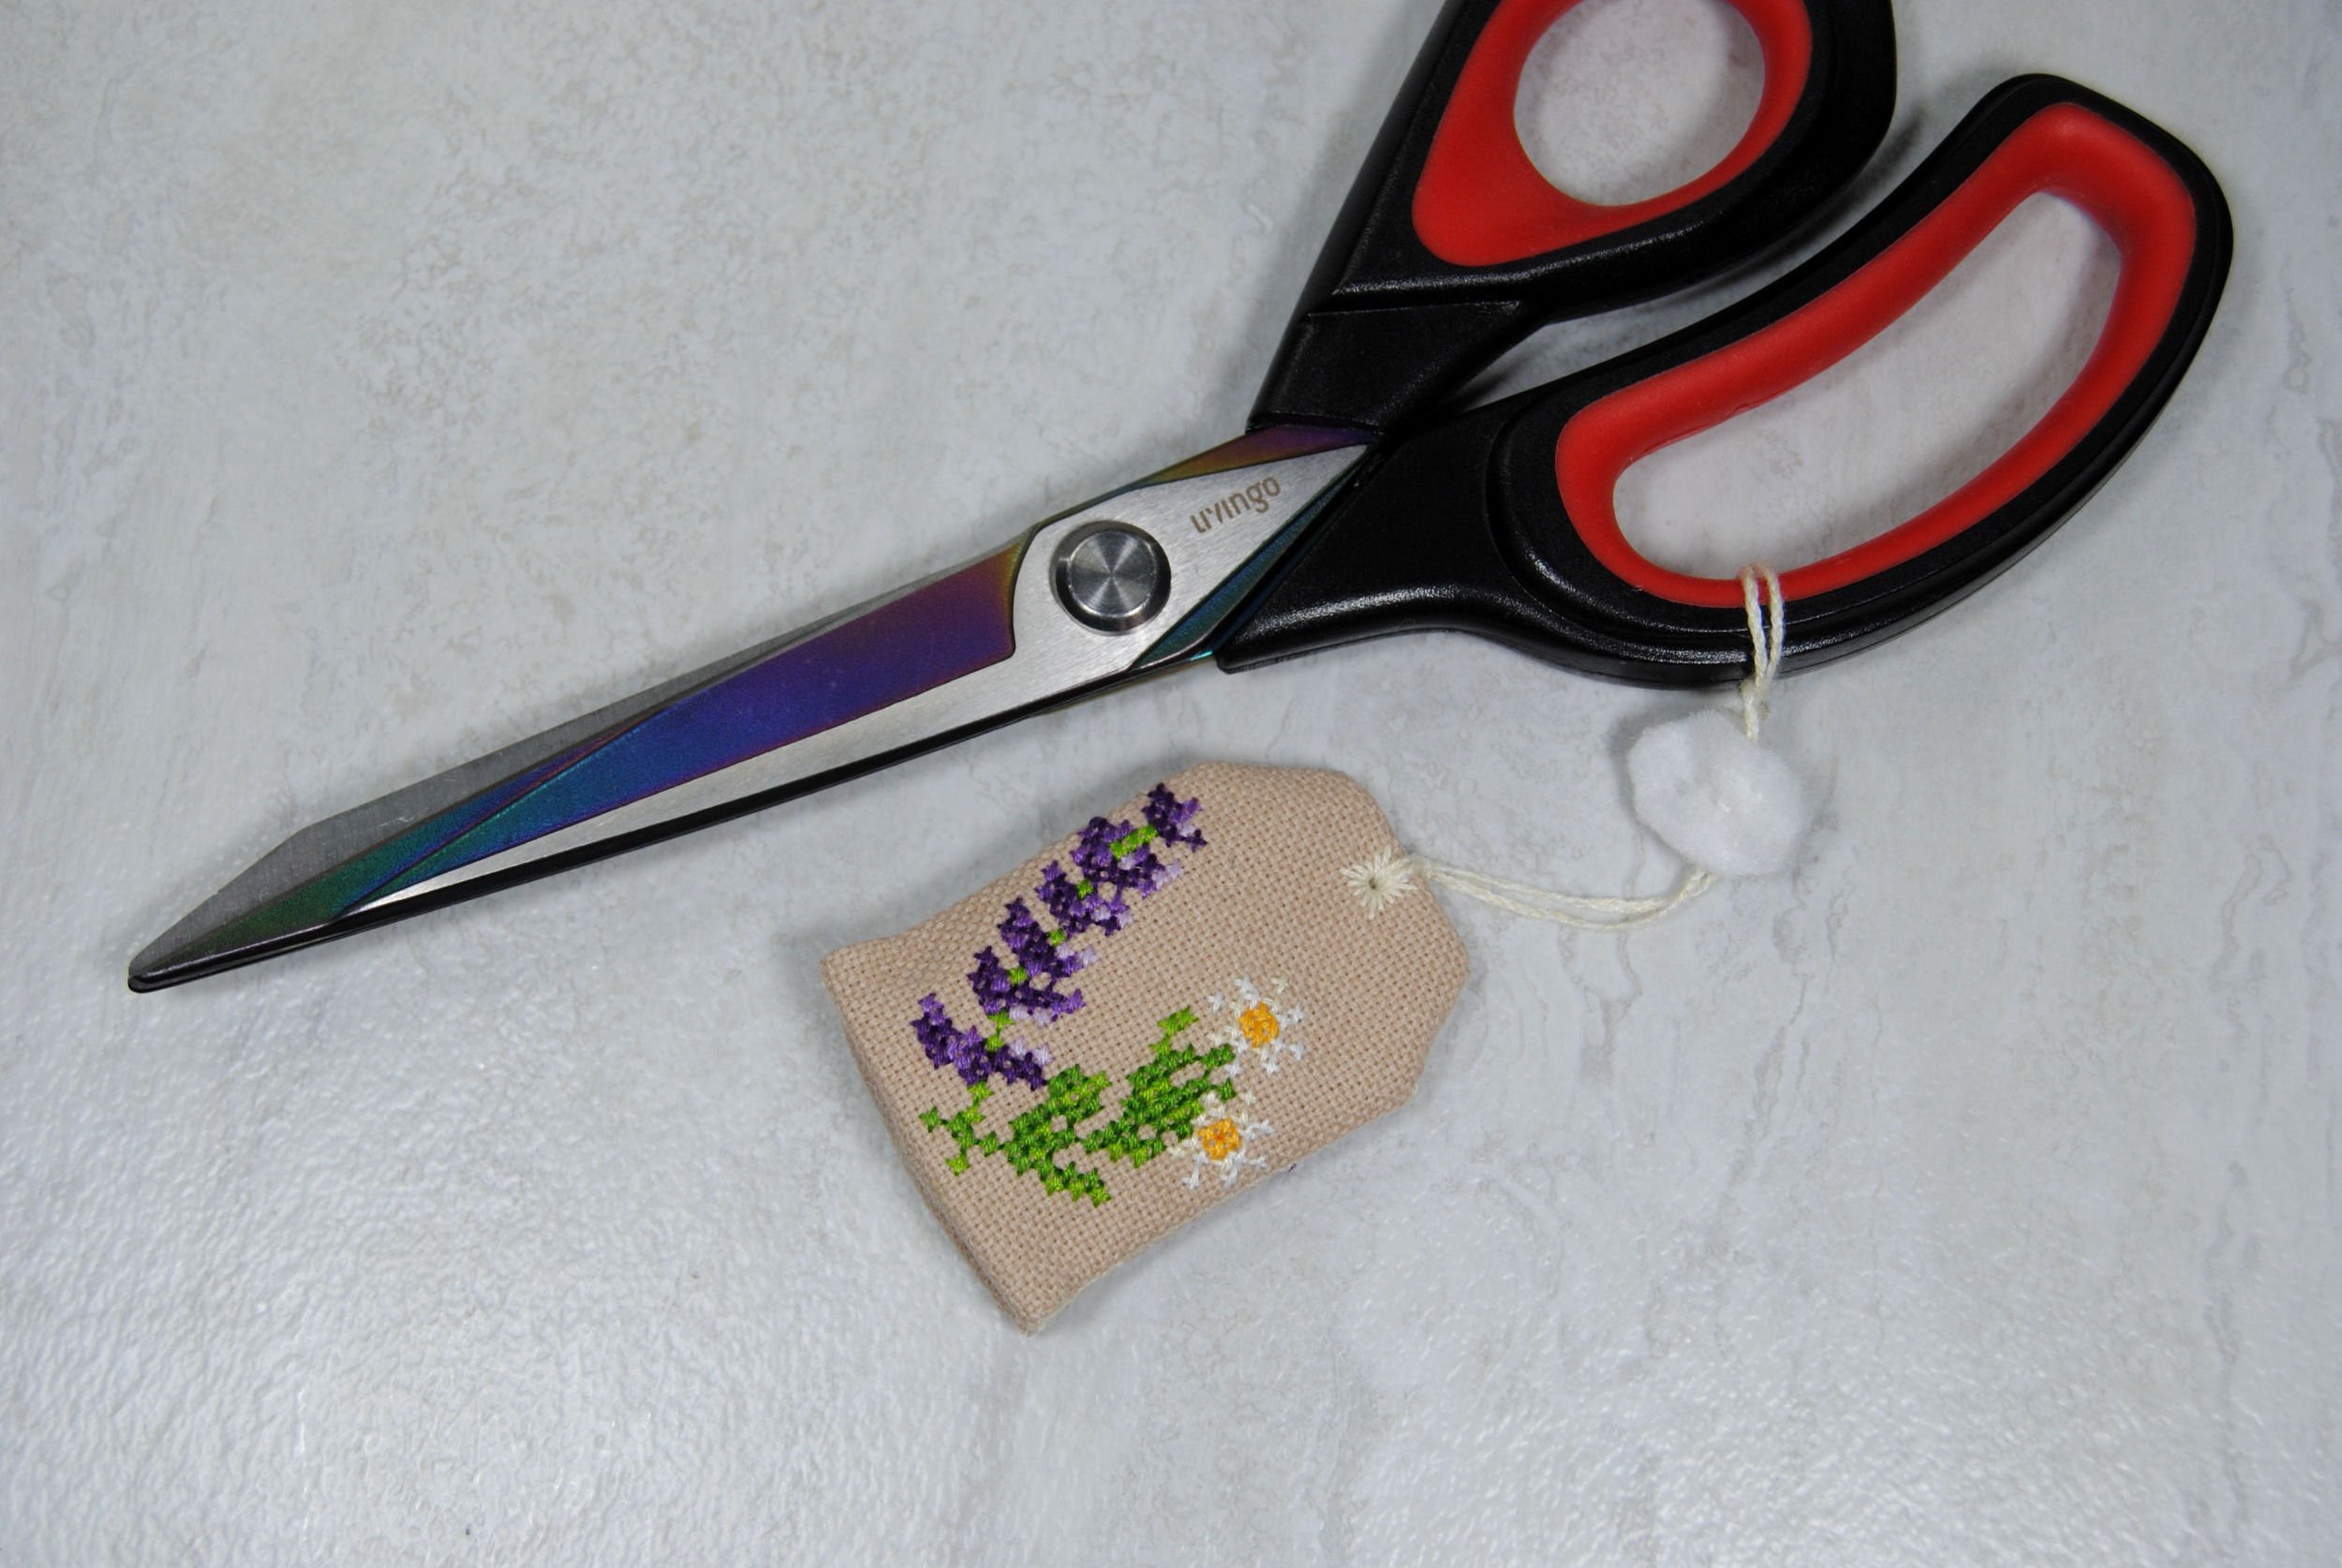
Attaching Your Tea Bag Label
I could’ve just knotted my braid ends together and called it a day, but I wanted that vaguely octagonal paper tag at the end of my cord to truly mimic a tea bag. So I cut two of that shape out of some spare felt. You could just use paper and staple it on for authenticity. Or you could embroider something on yours for added flair.
I simply stitched the felt pieces together being careful to sandwich in the ends of the braided cord. I stitched through those layers quite a few times just to make sure it was secure. And so it’s officially done!
Attach the Fob to Your Scissors!
Finally, the fun part. Actually attaching it to your scissors!
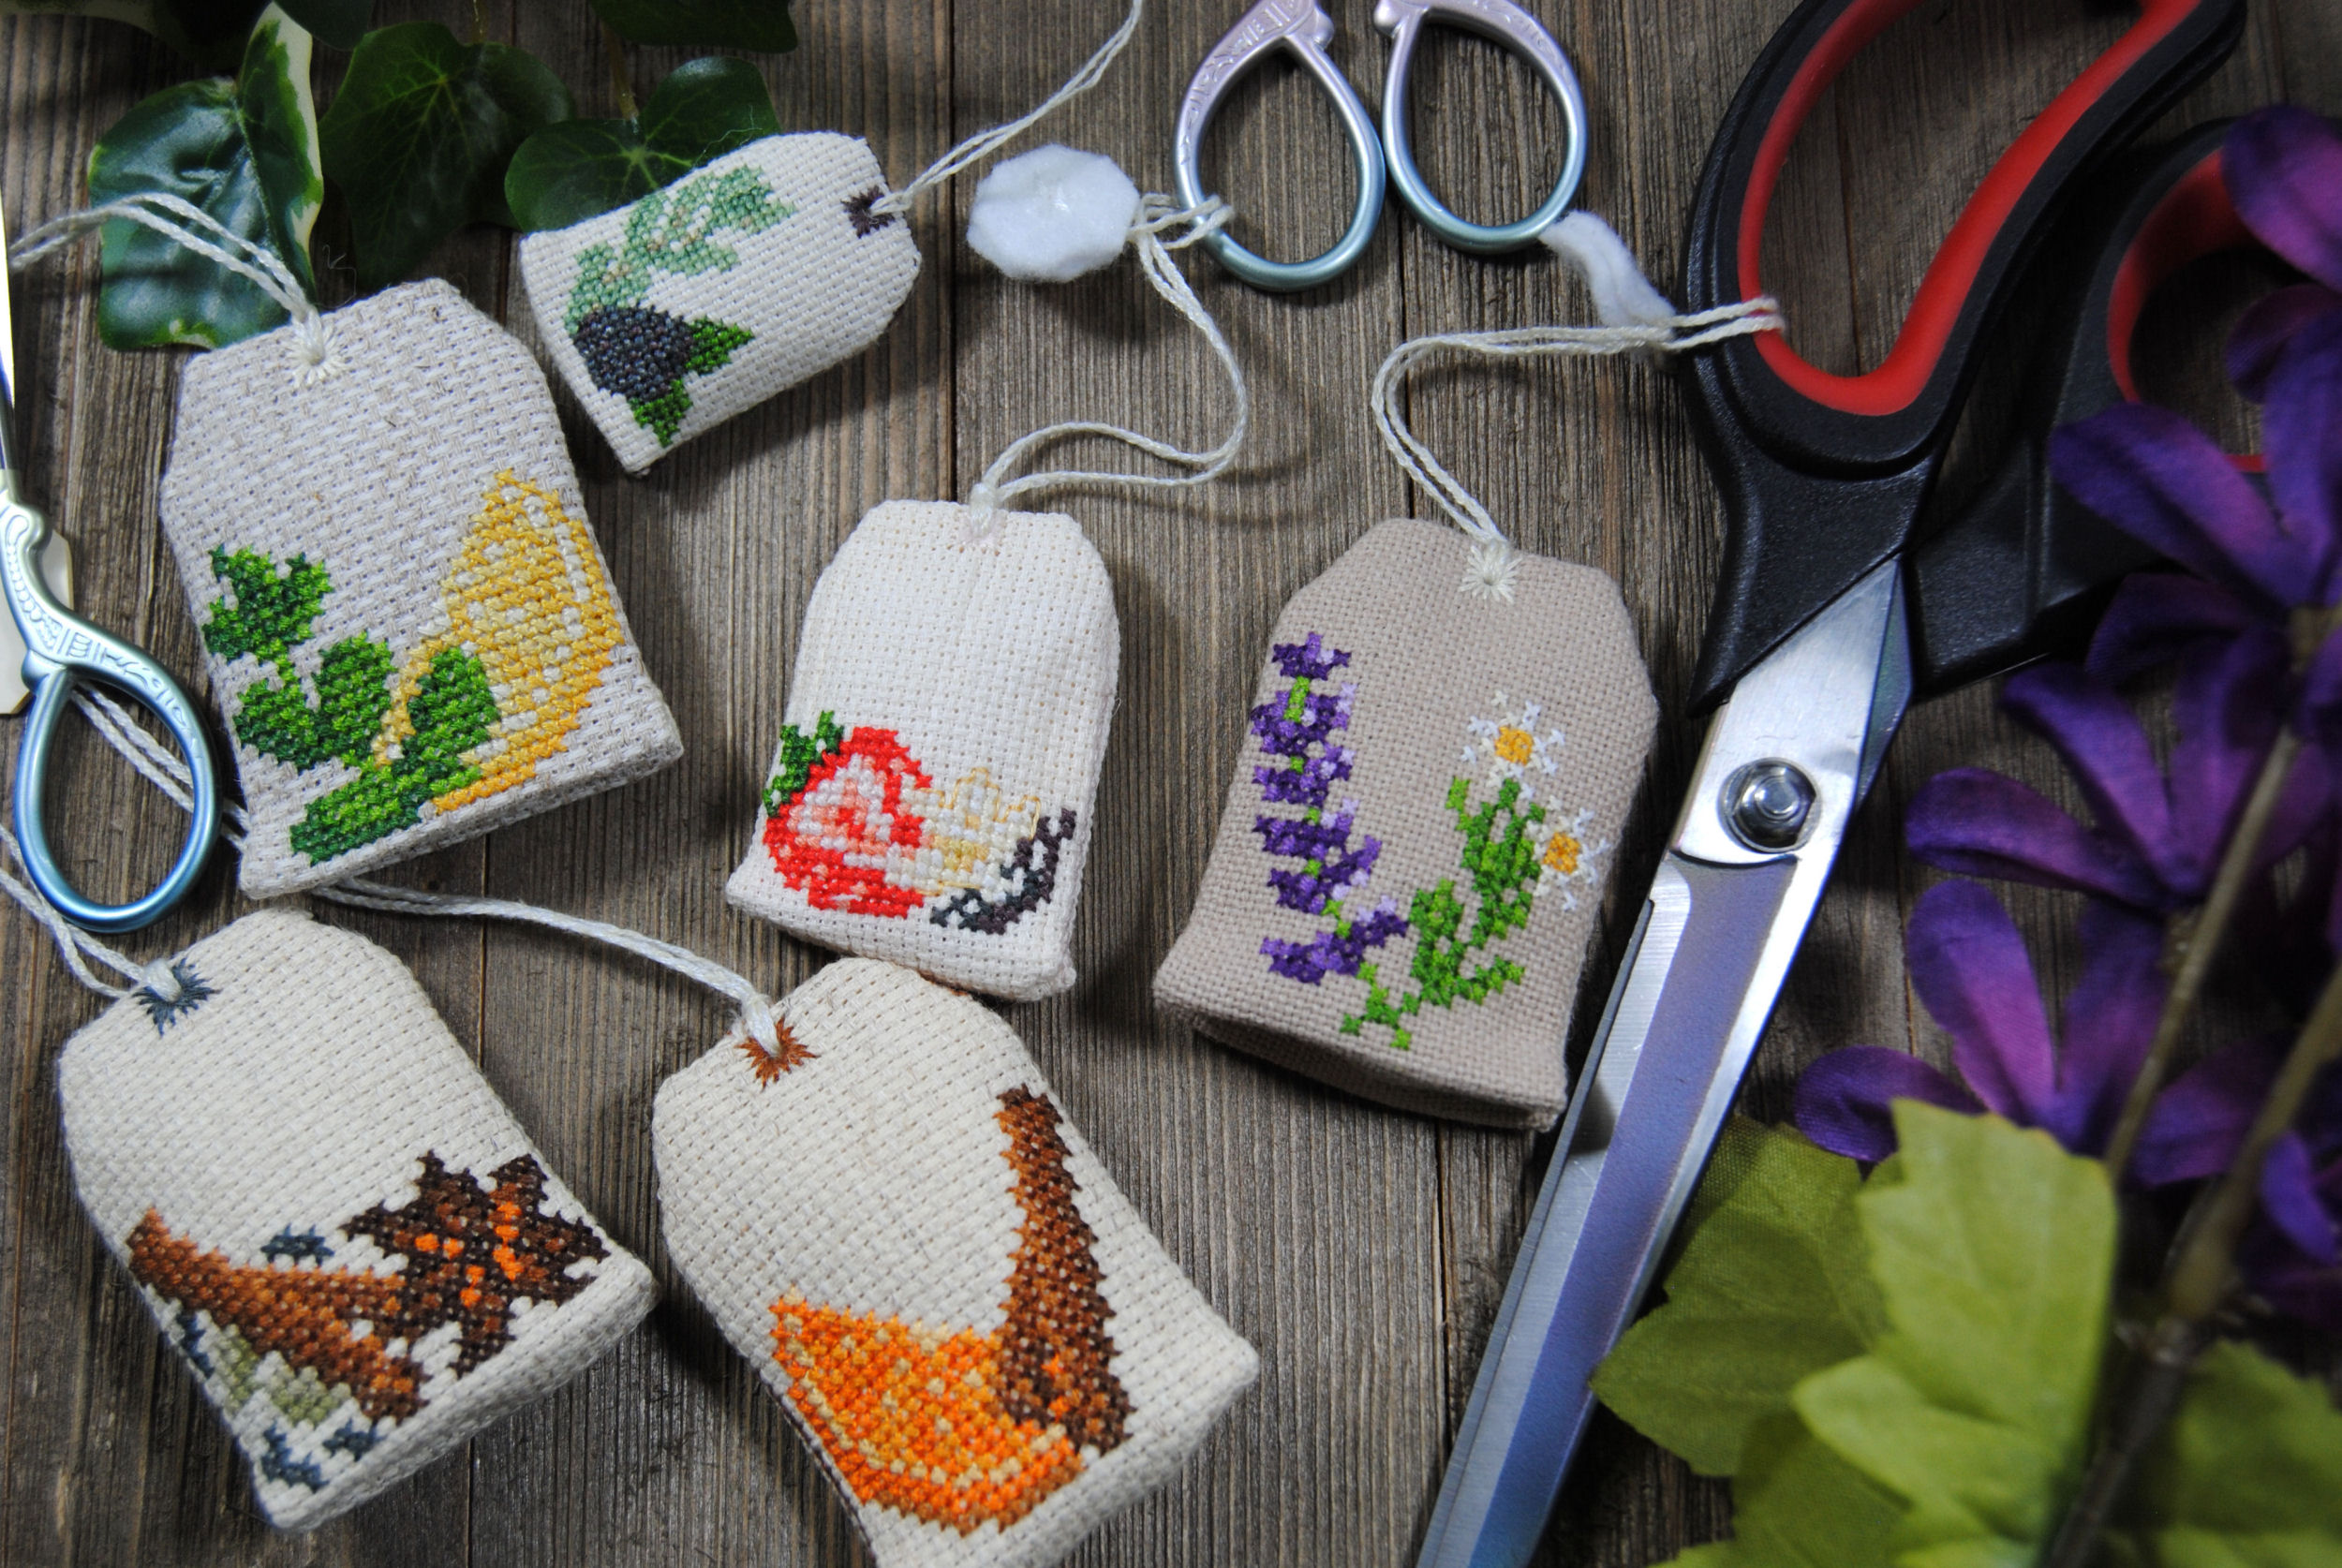
As promised, I made some on several different fabric counts.
The chai and orange spice are both on 14 count. As well as the lemon mint, though it’s a different brand/color than the other two. The strawberry vanilla is on 16 count.
The blackberry sage is super cute on 22 count. But man was it tough to assemble.
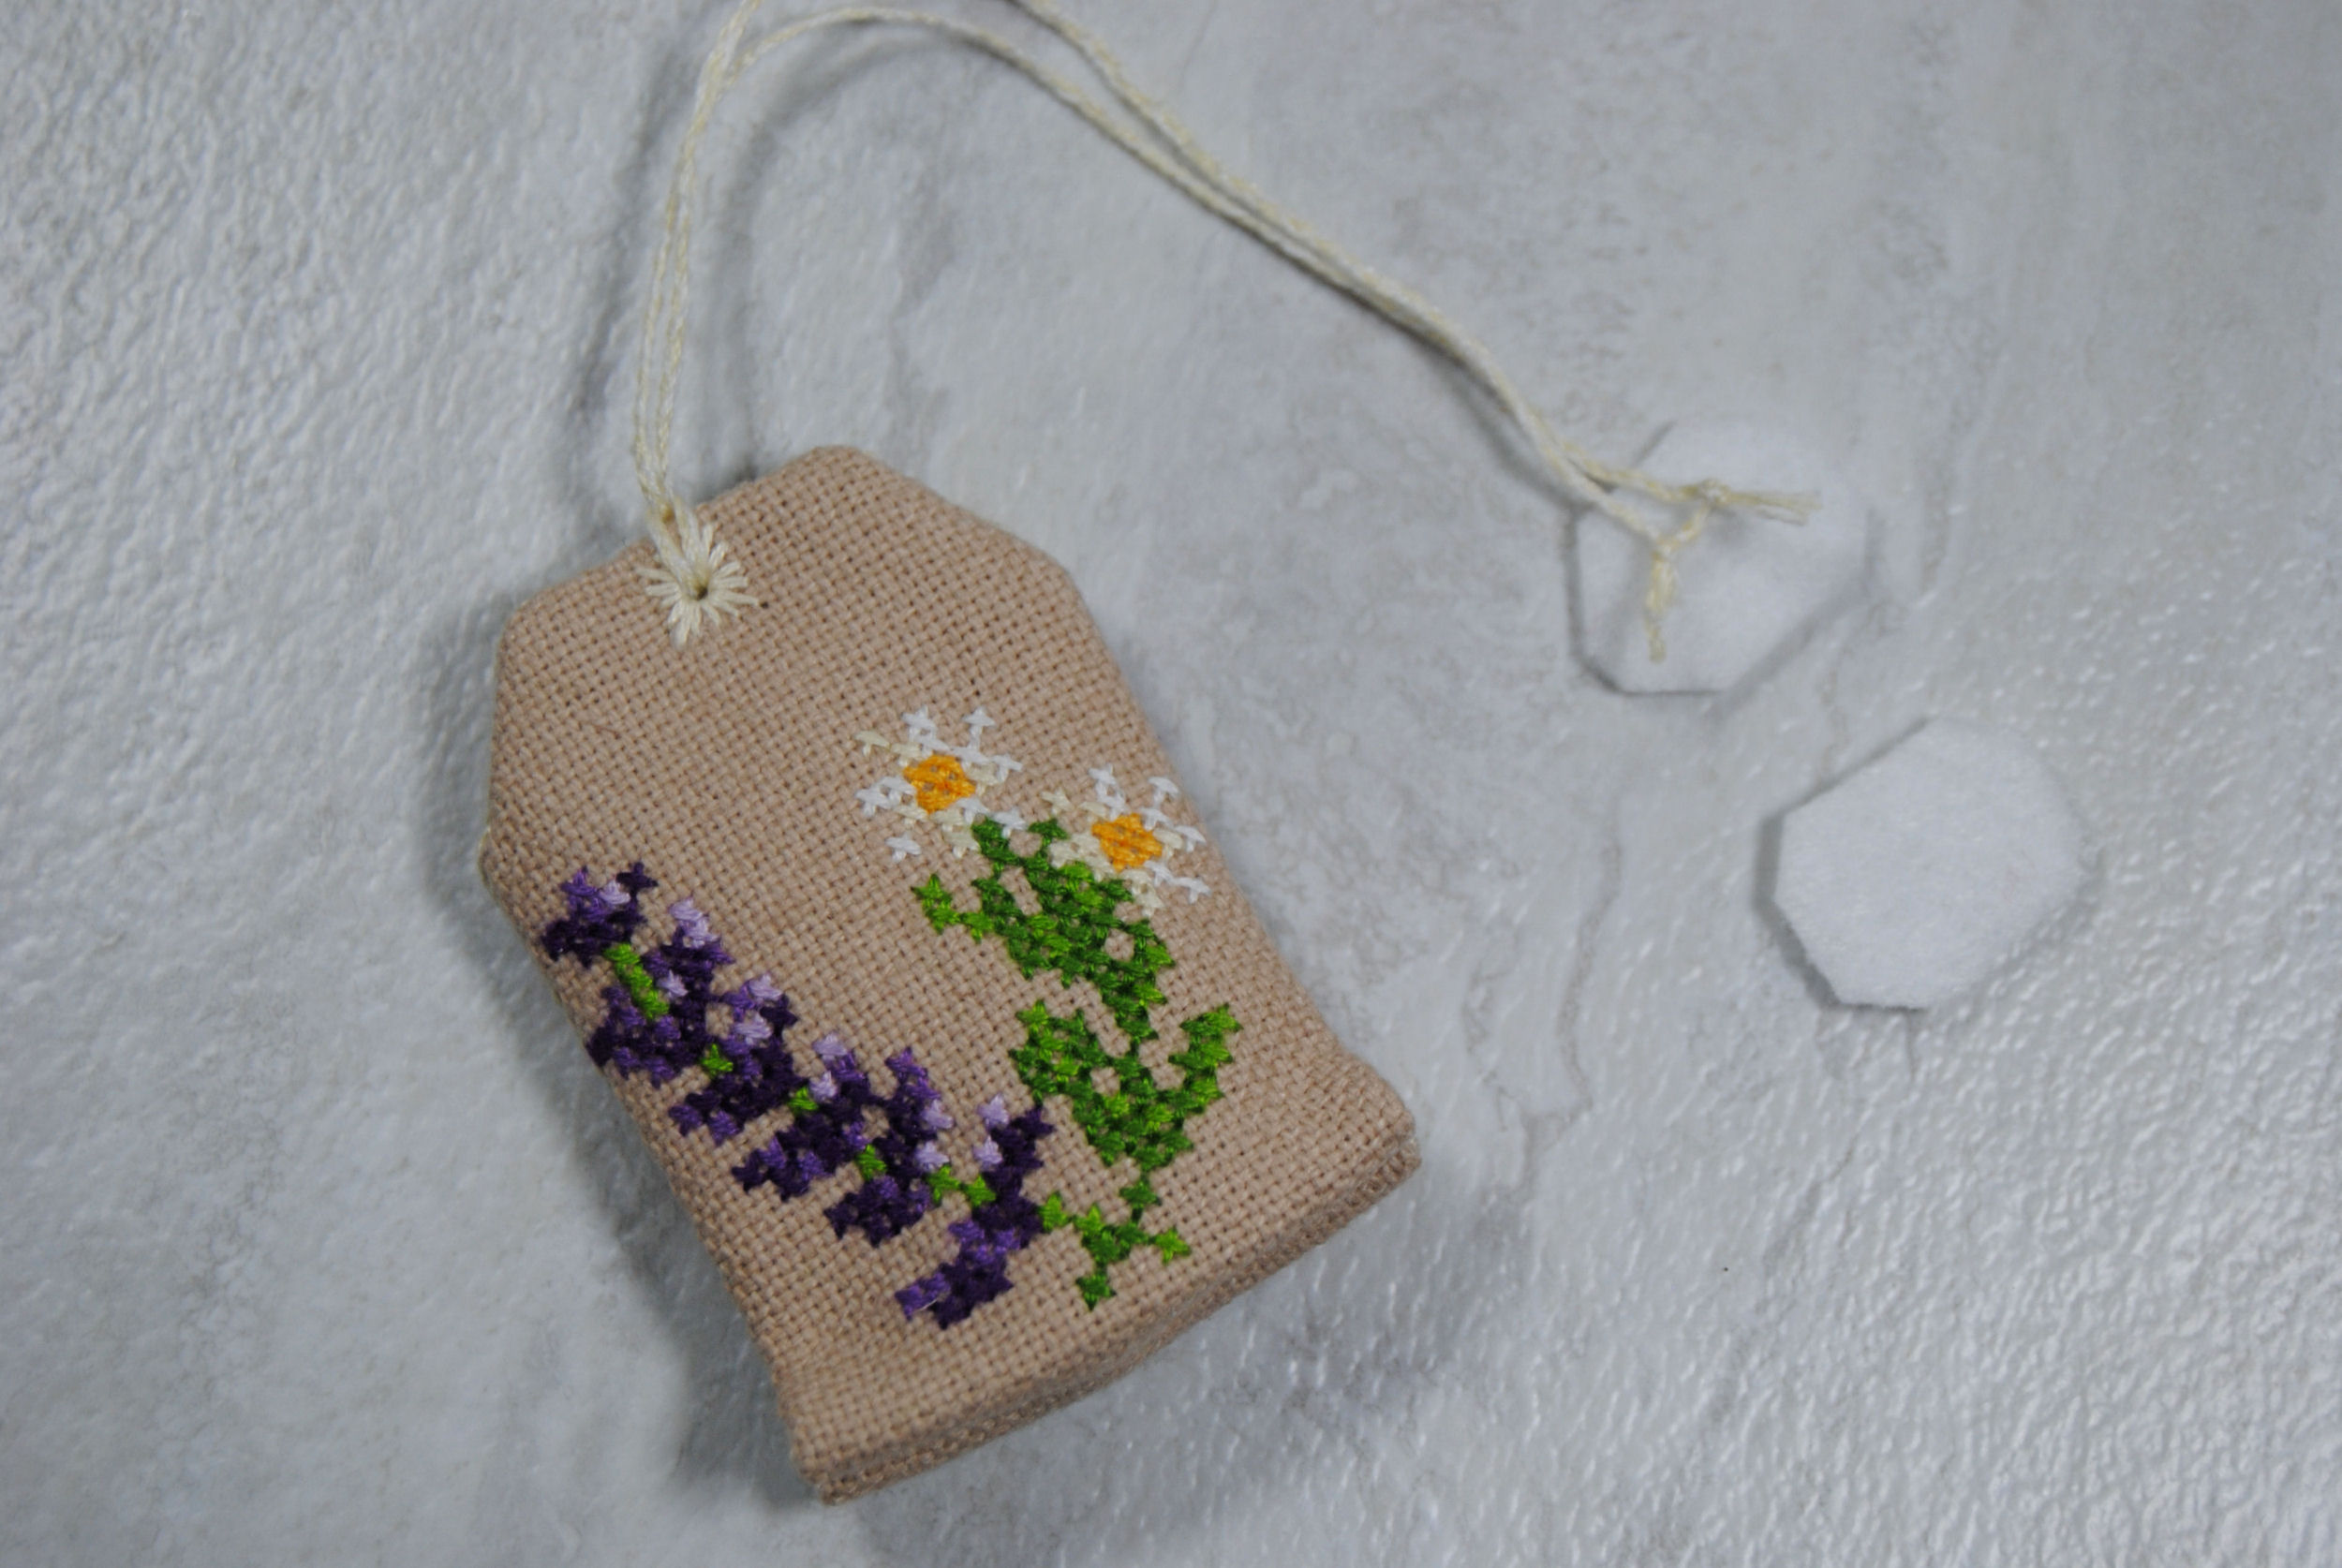
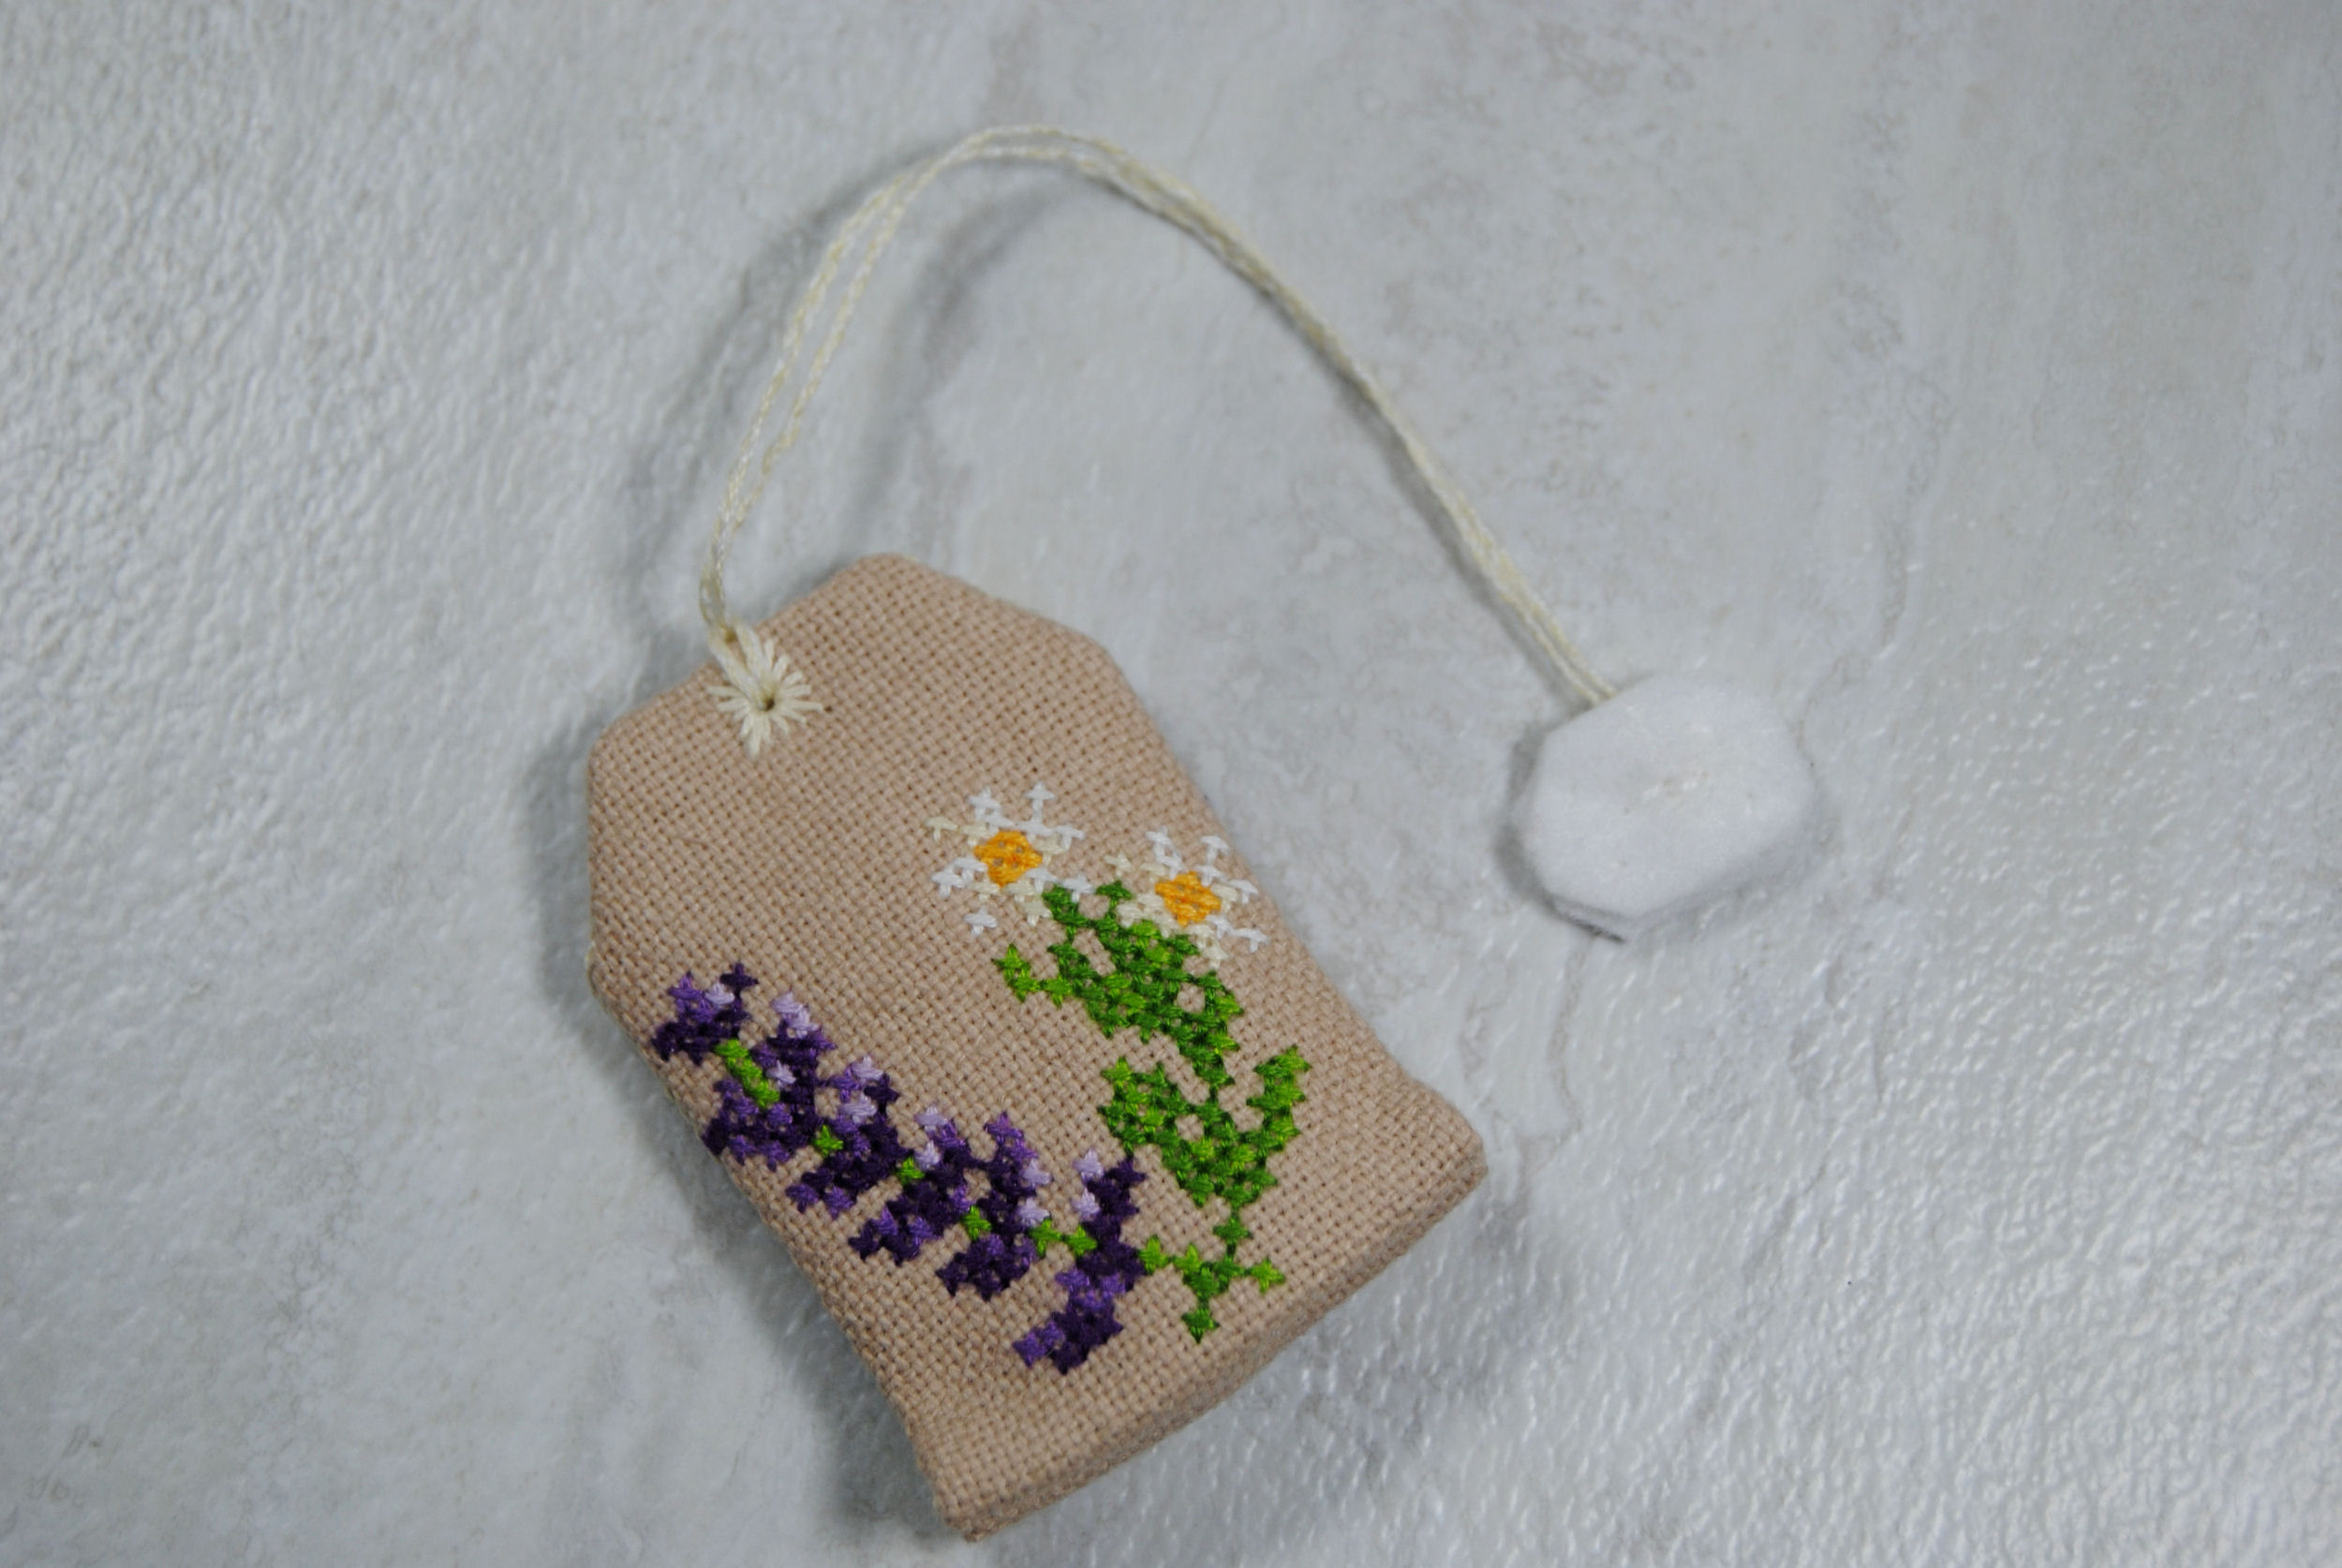
And of course the lavender chamomile is on 28 (but stitched over 2, so it’s the same size as the 14 count ones)
As always, I’d love to see what you make! If you end up making a little teabag scissor fob, be sure to tag me @sirithre on Insta/Twitter so I can see!


