Cross Stitch Bookmark Finishing Tutorial
Table of Contents
Why Cross Stitch a Bookmark?
You can make bookmarks in a ton of different ways, as we’ll discuss shortly. So why then cross stitch a bookmark? Are cardboard ones not good enough? Of course they are. Cardboard is fine. And plastic. Or metal. Whatever type of bookmarks you normally use.
But as a cross stitcher, eventually you get to the point where you have SO many things to hang on your wall that you just start looking for ways to use your projects in other ways. You’ll find a number of such tutorials here on my website: pin cushions, needlebooks, stitching on clothing, etc.
If you happen to also be a book reader, the thought of using it as a book mark has likely crossed your mind. This is probably the finish I’ve seen asked about the most over the last several years. So then why is this the first time I’m attempting to make one?
Two reasons: One, I mostly listen to audiobooks so I can stitch while I read. This makes bookmarks less useful to me. Two, there’s dozens of different ways to tackle making a cross stitch bookmark and which one you choose is going to depend on your individual preferences. So I’ve been putting off researching this tutorial for years.
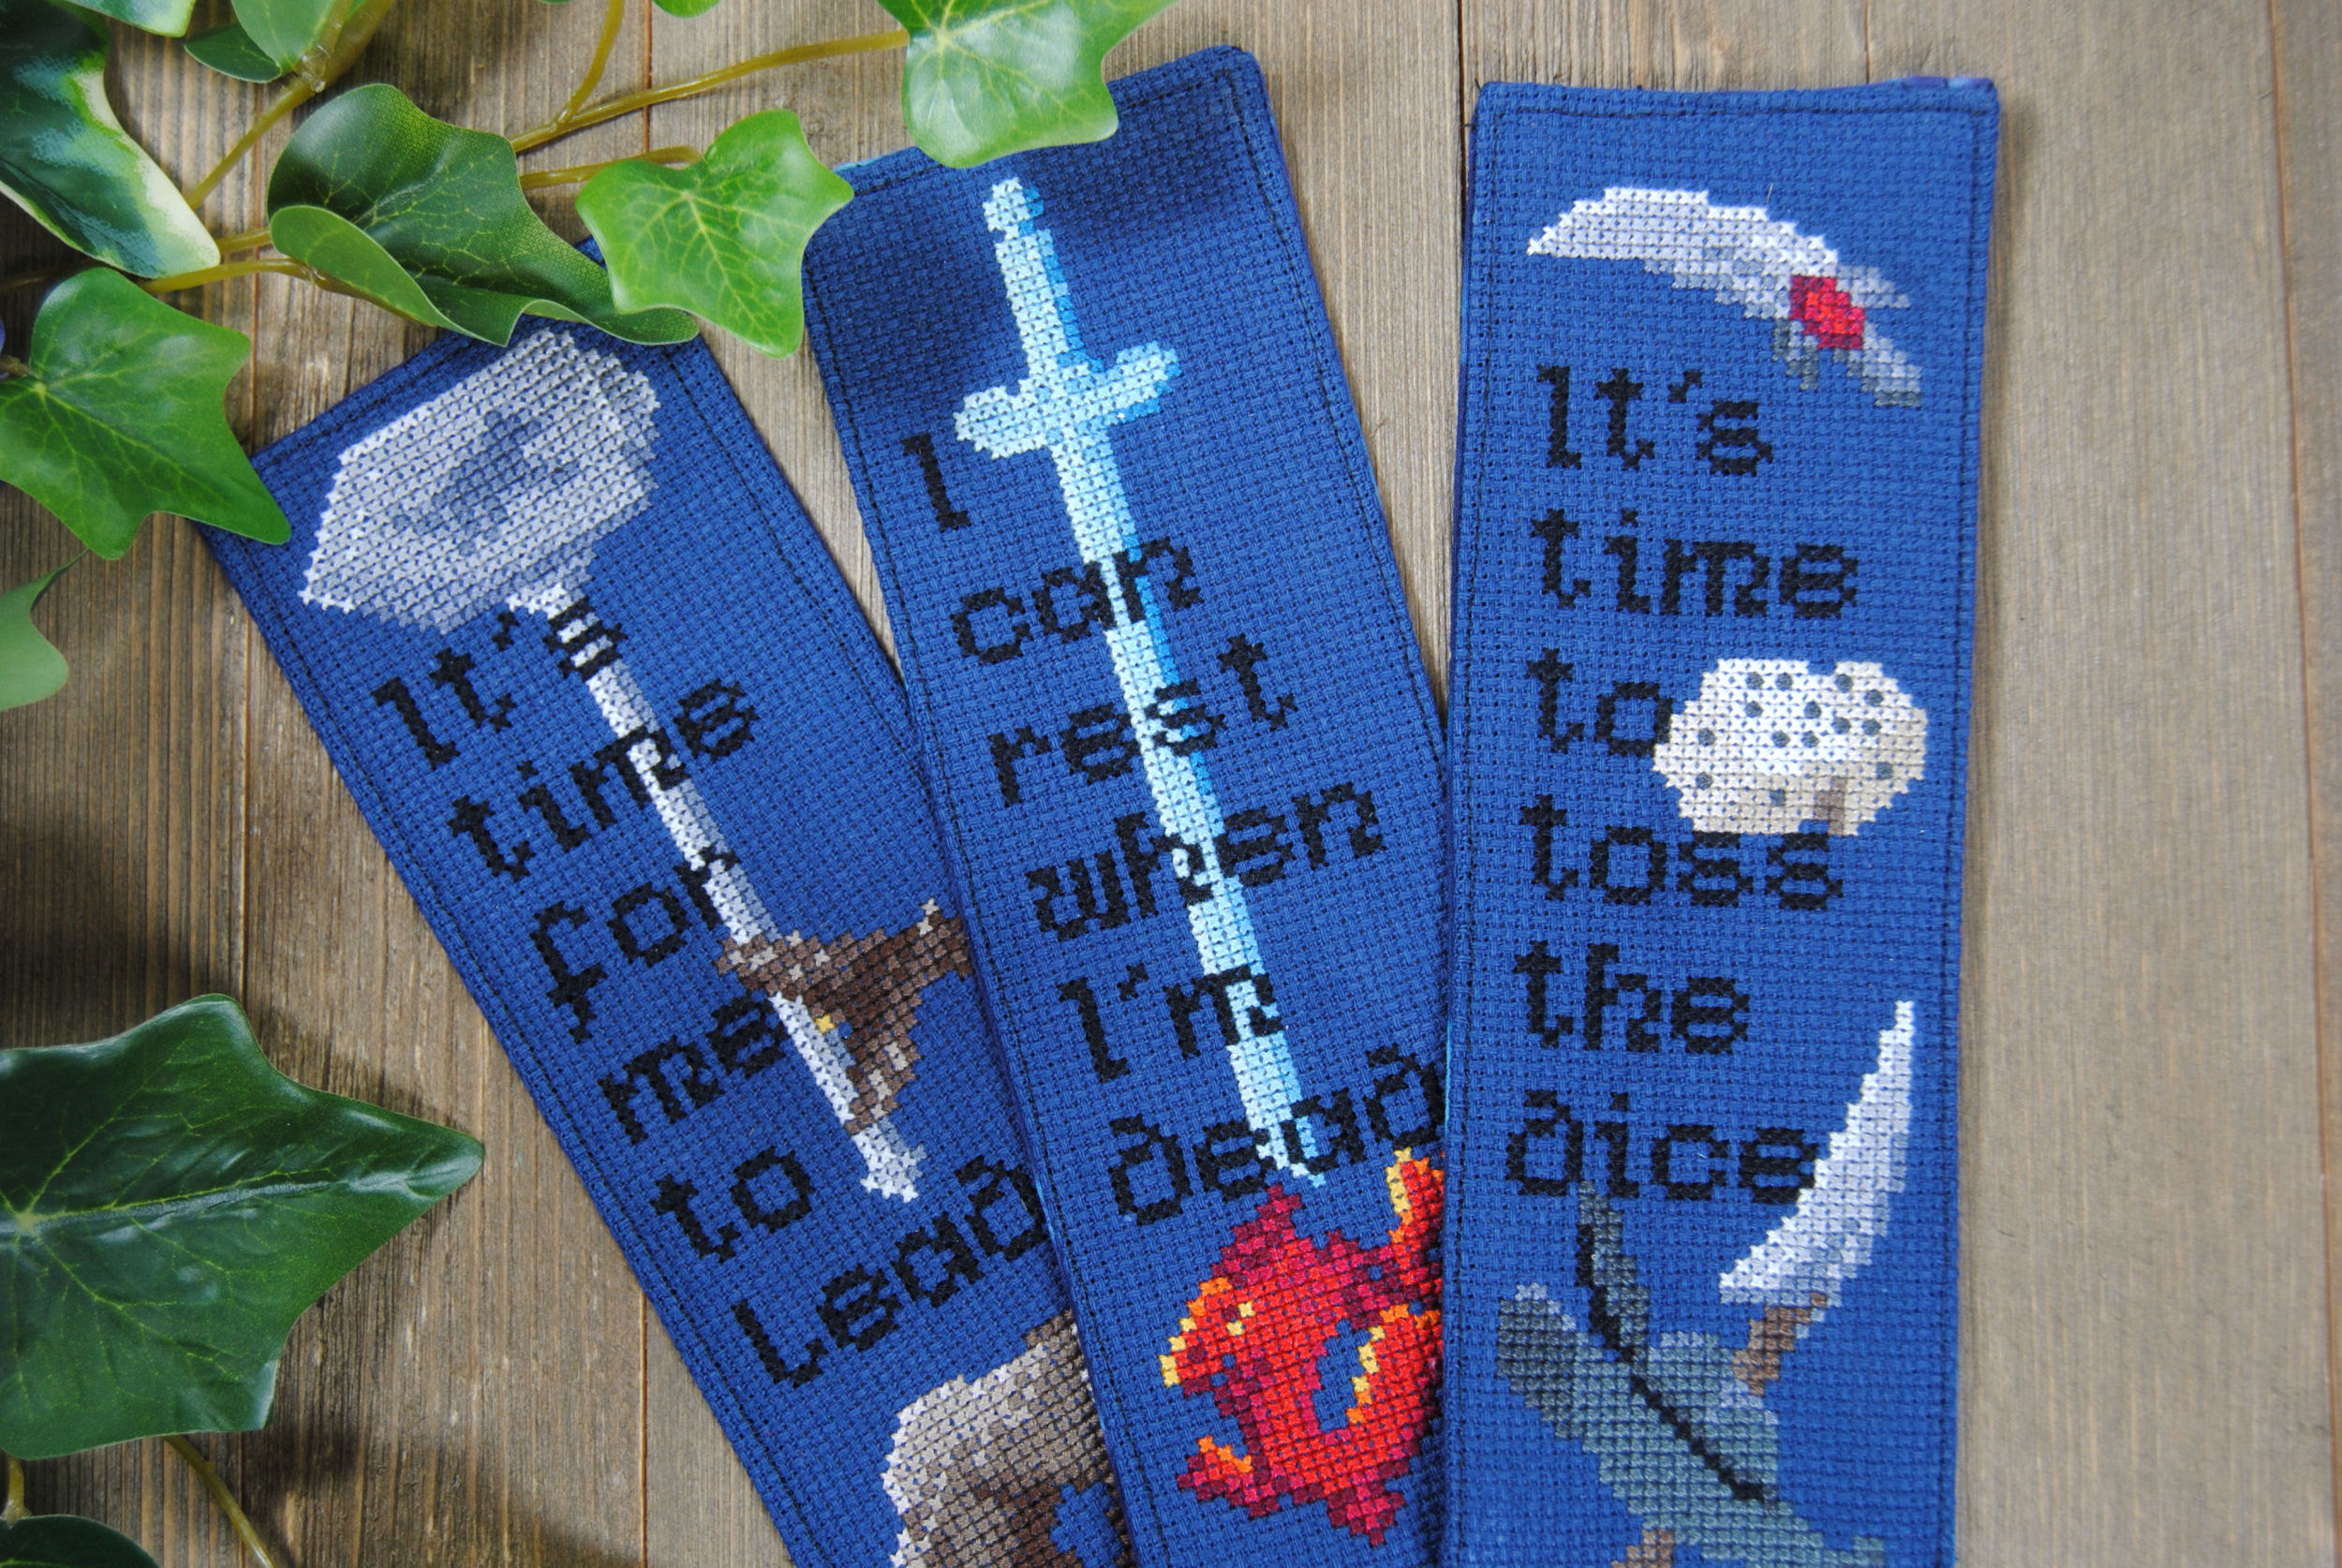
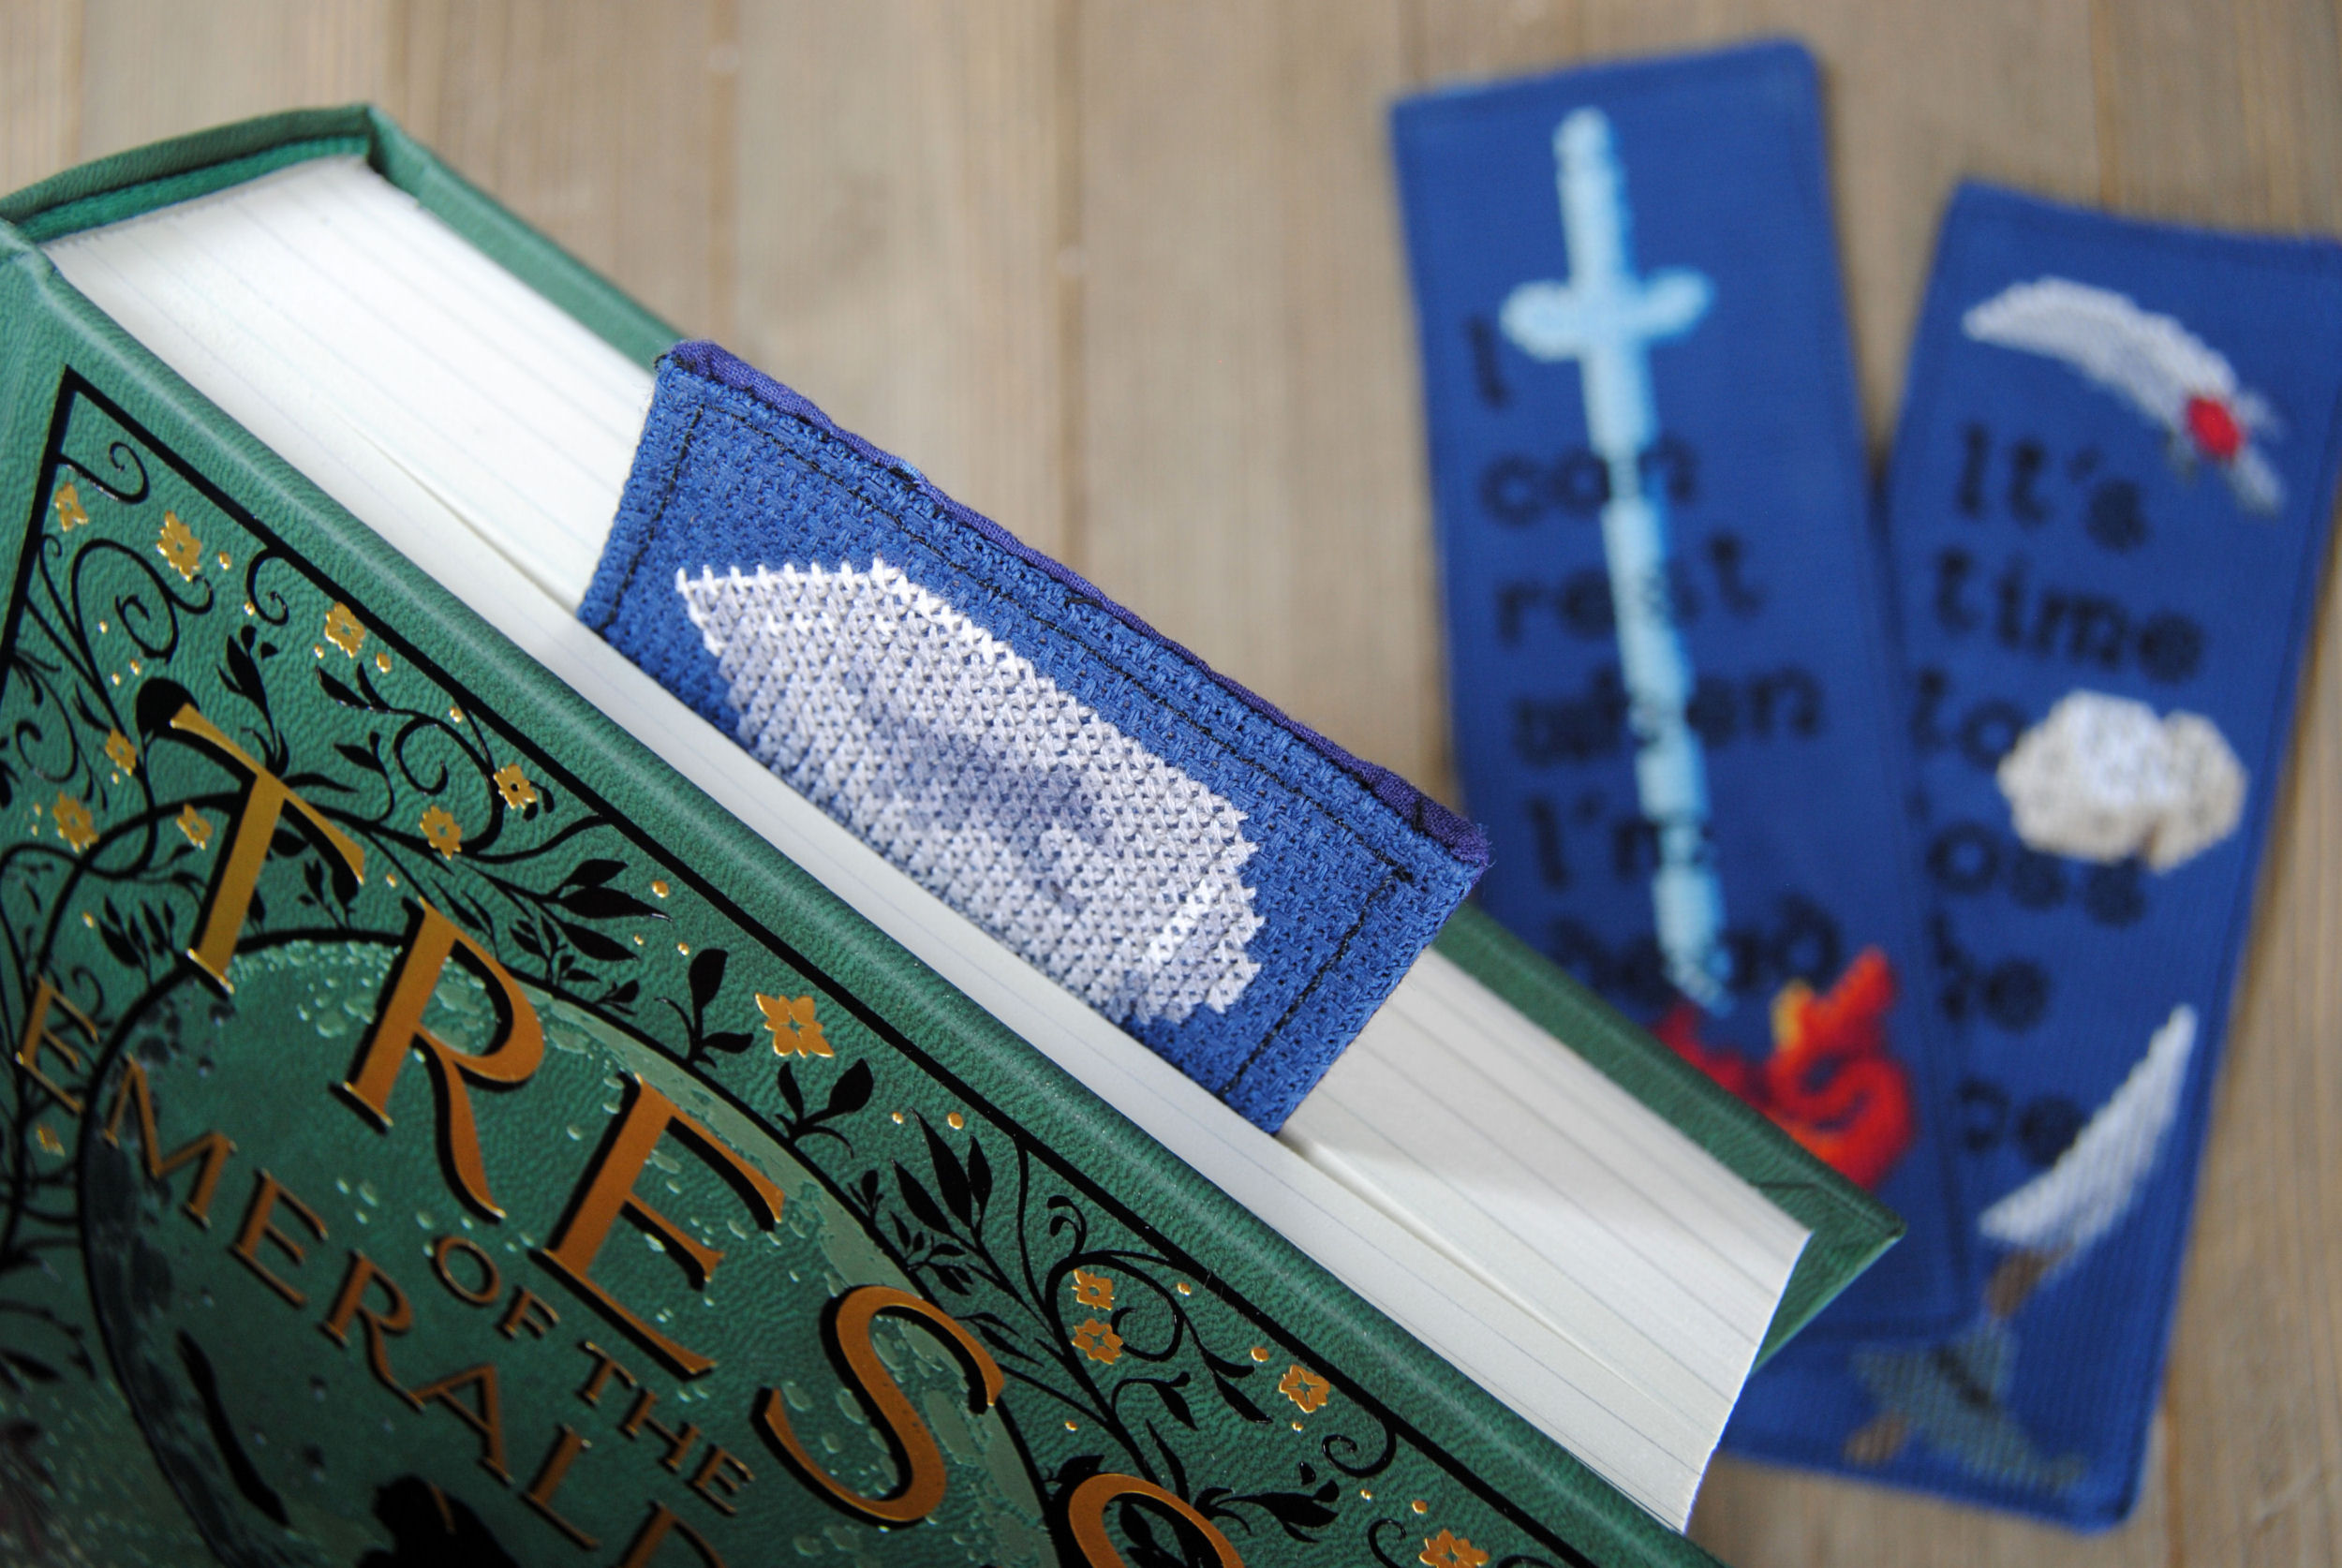
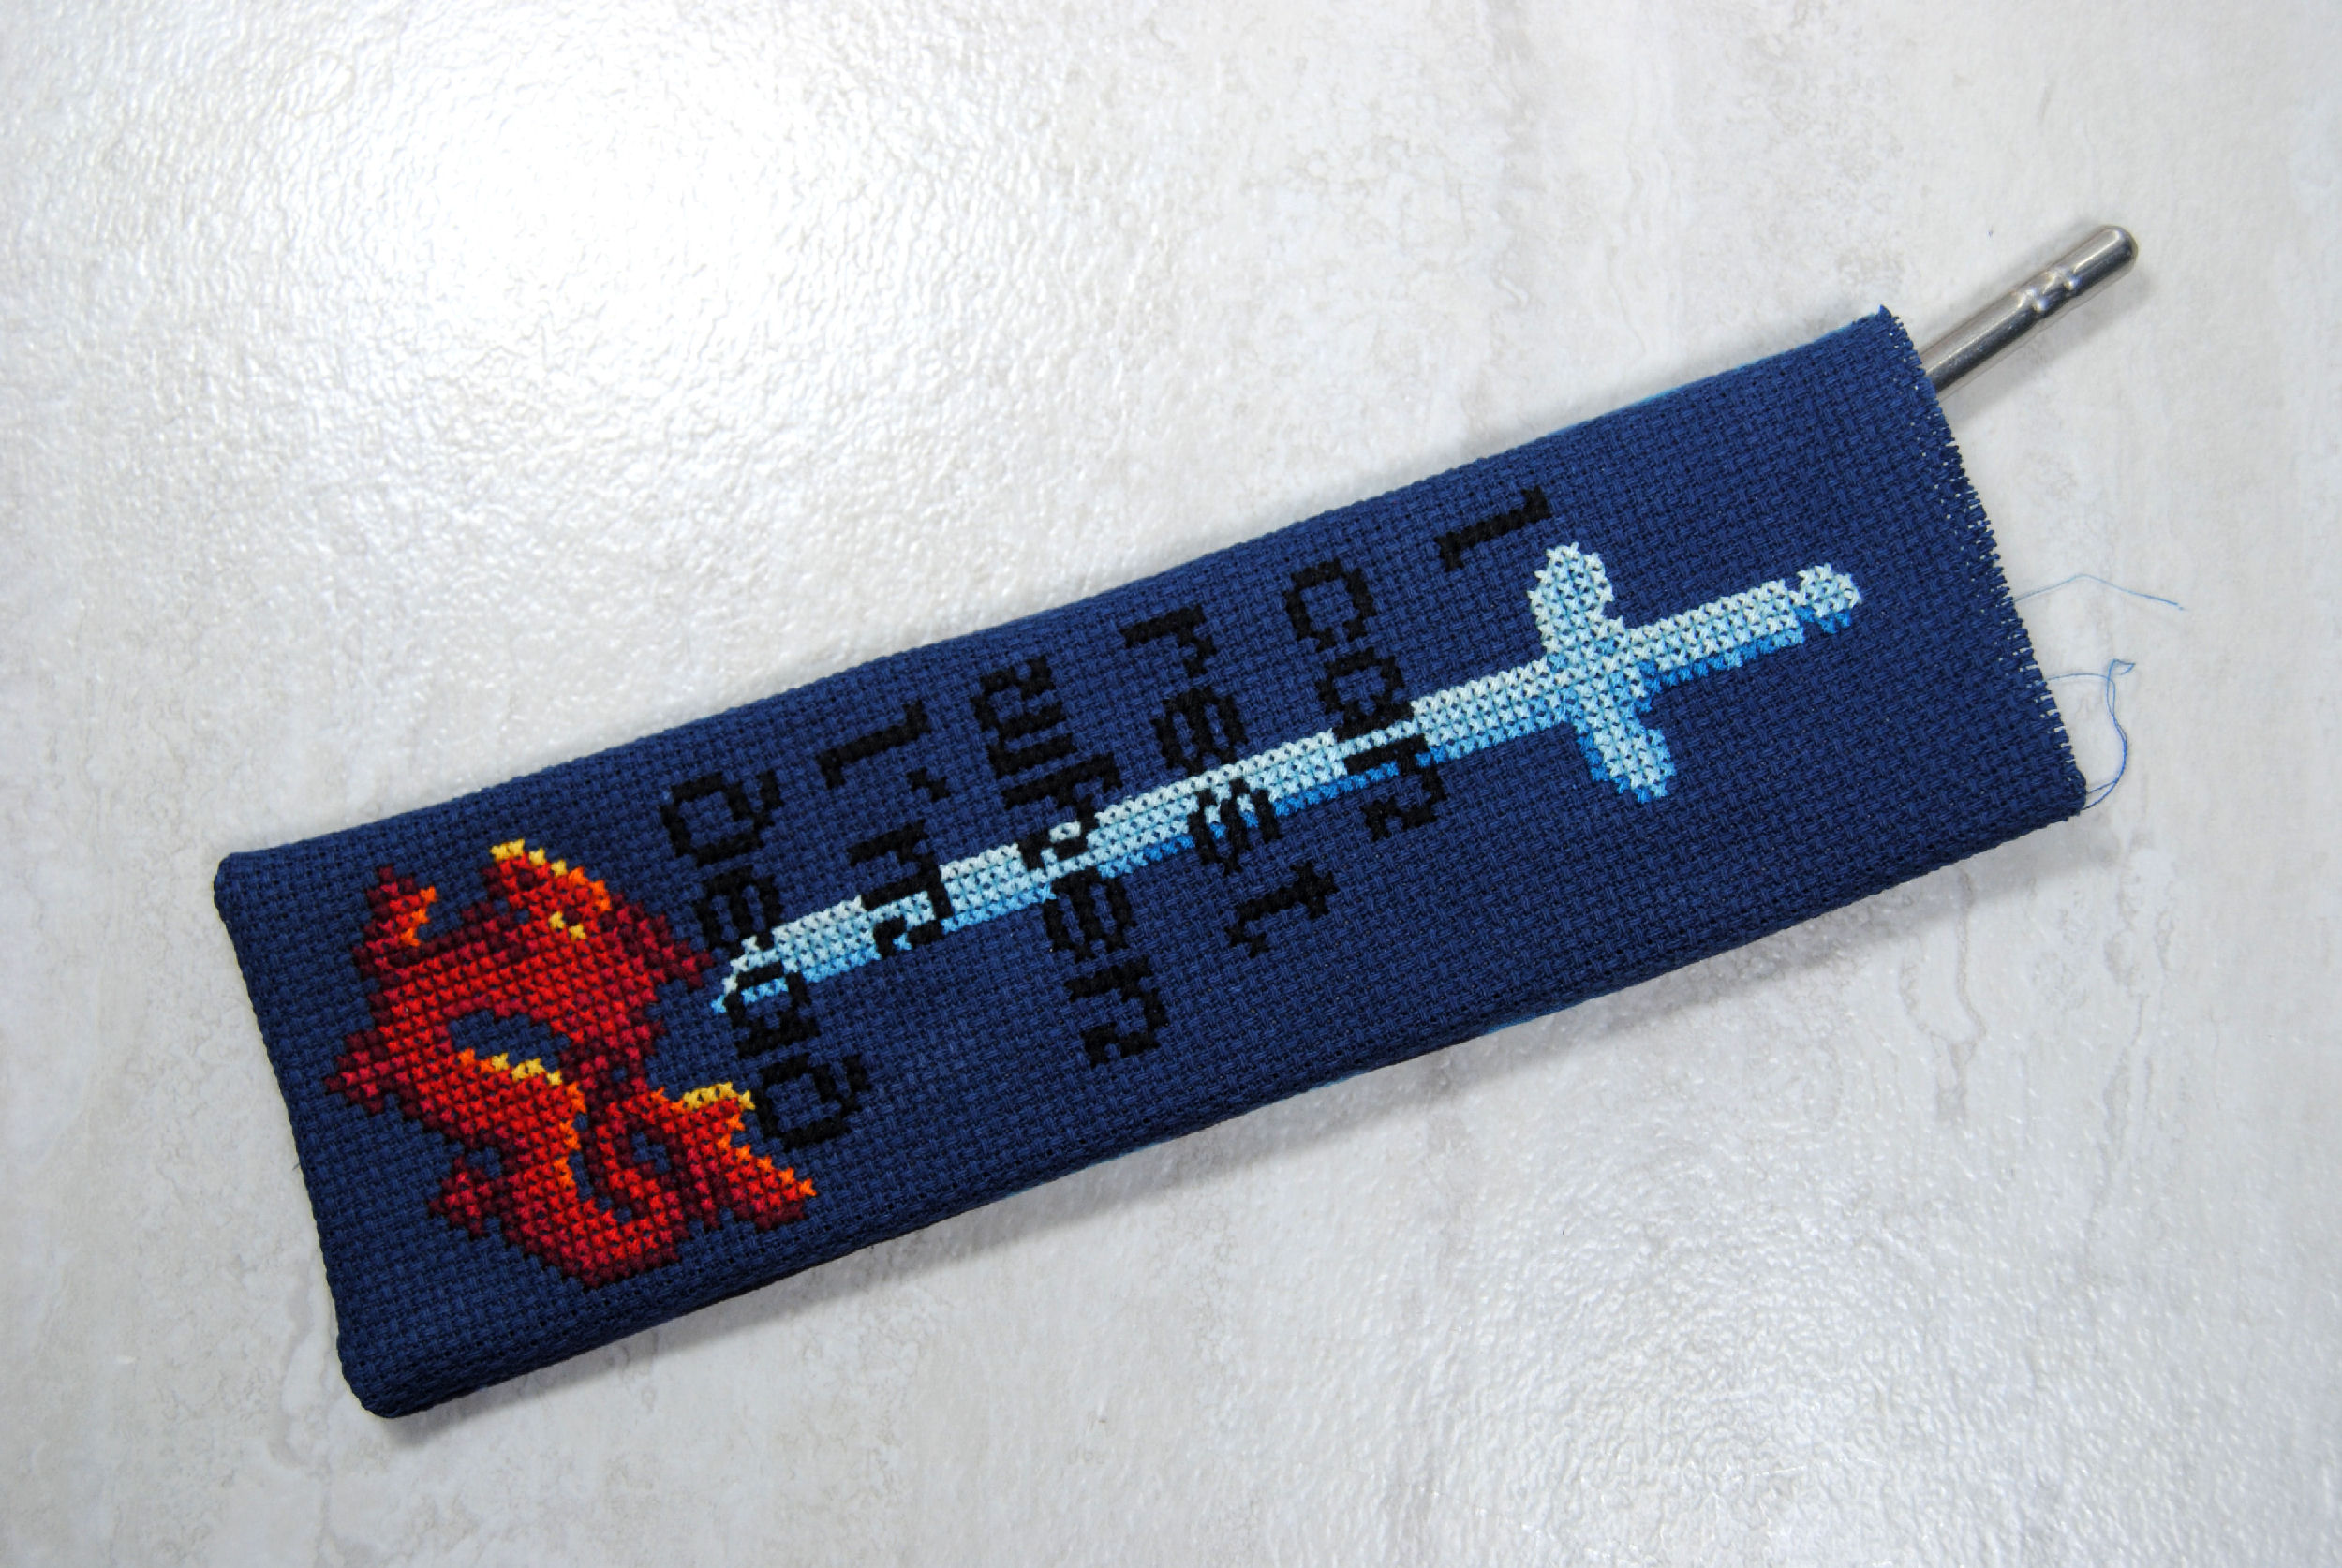
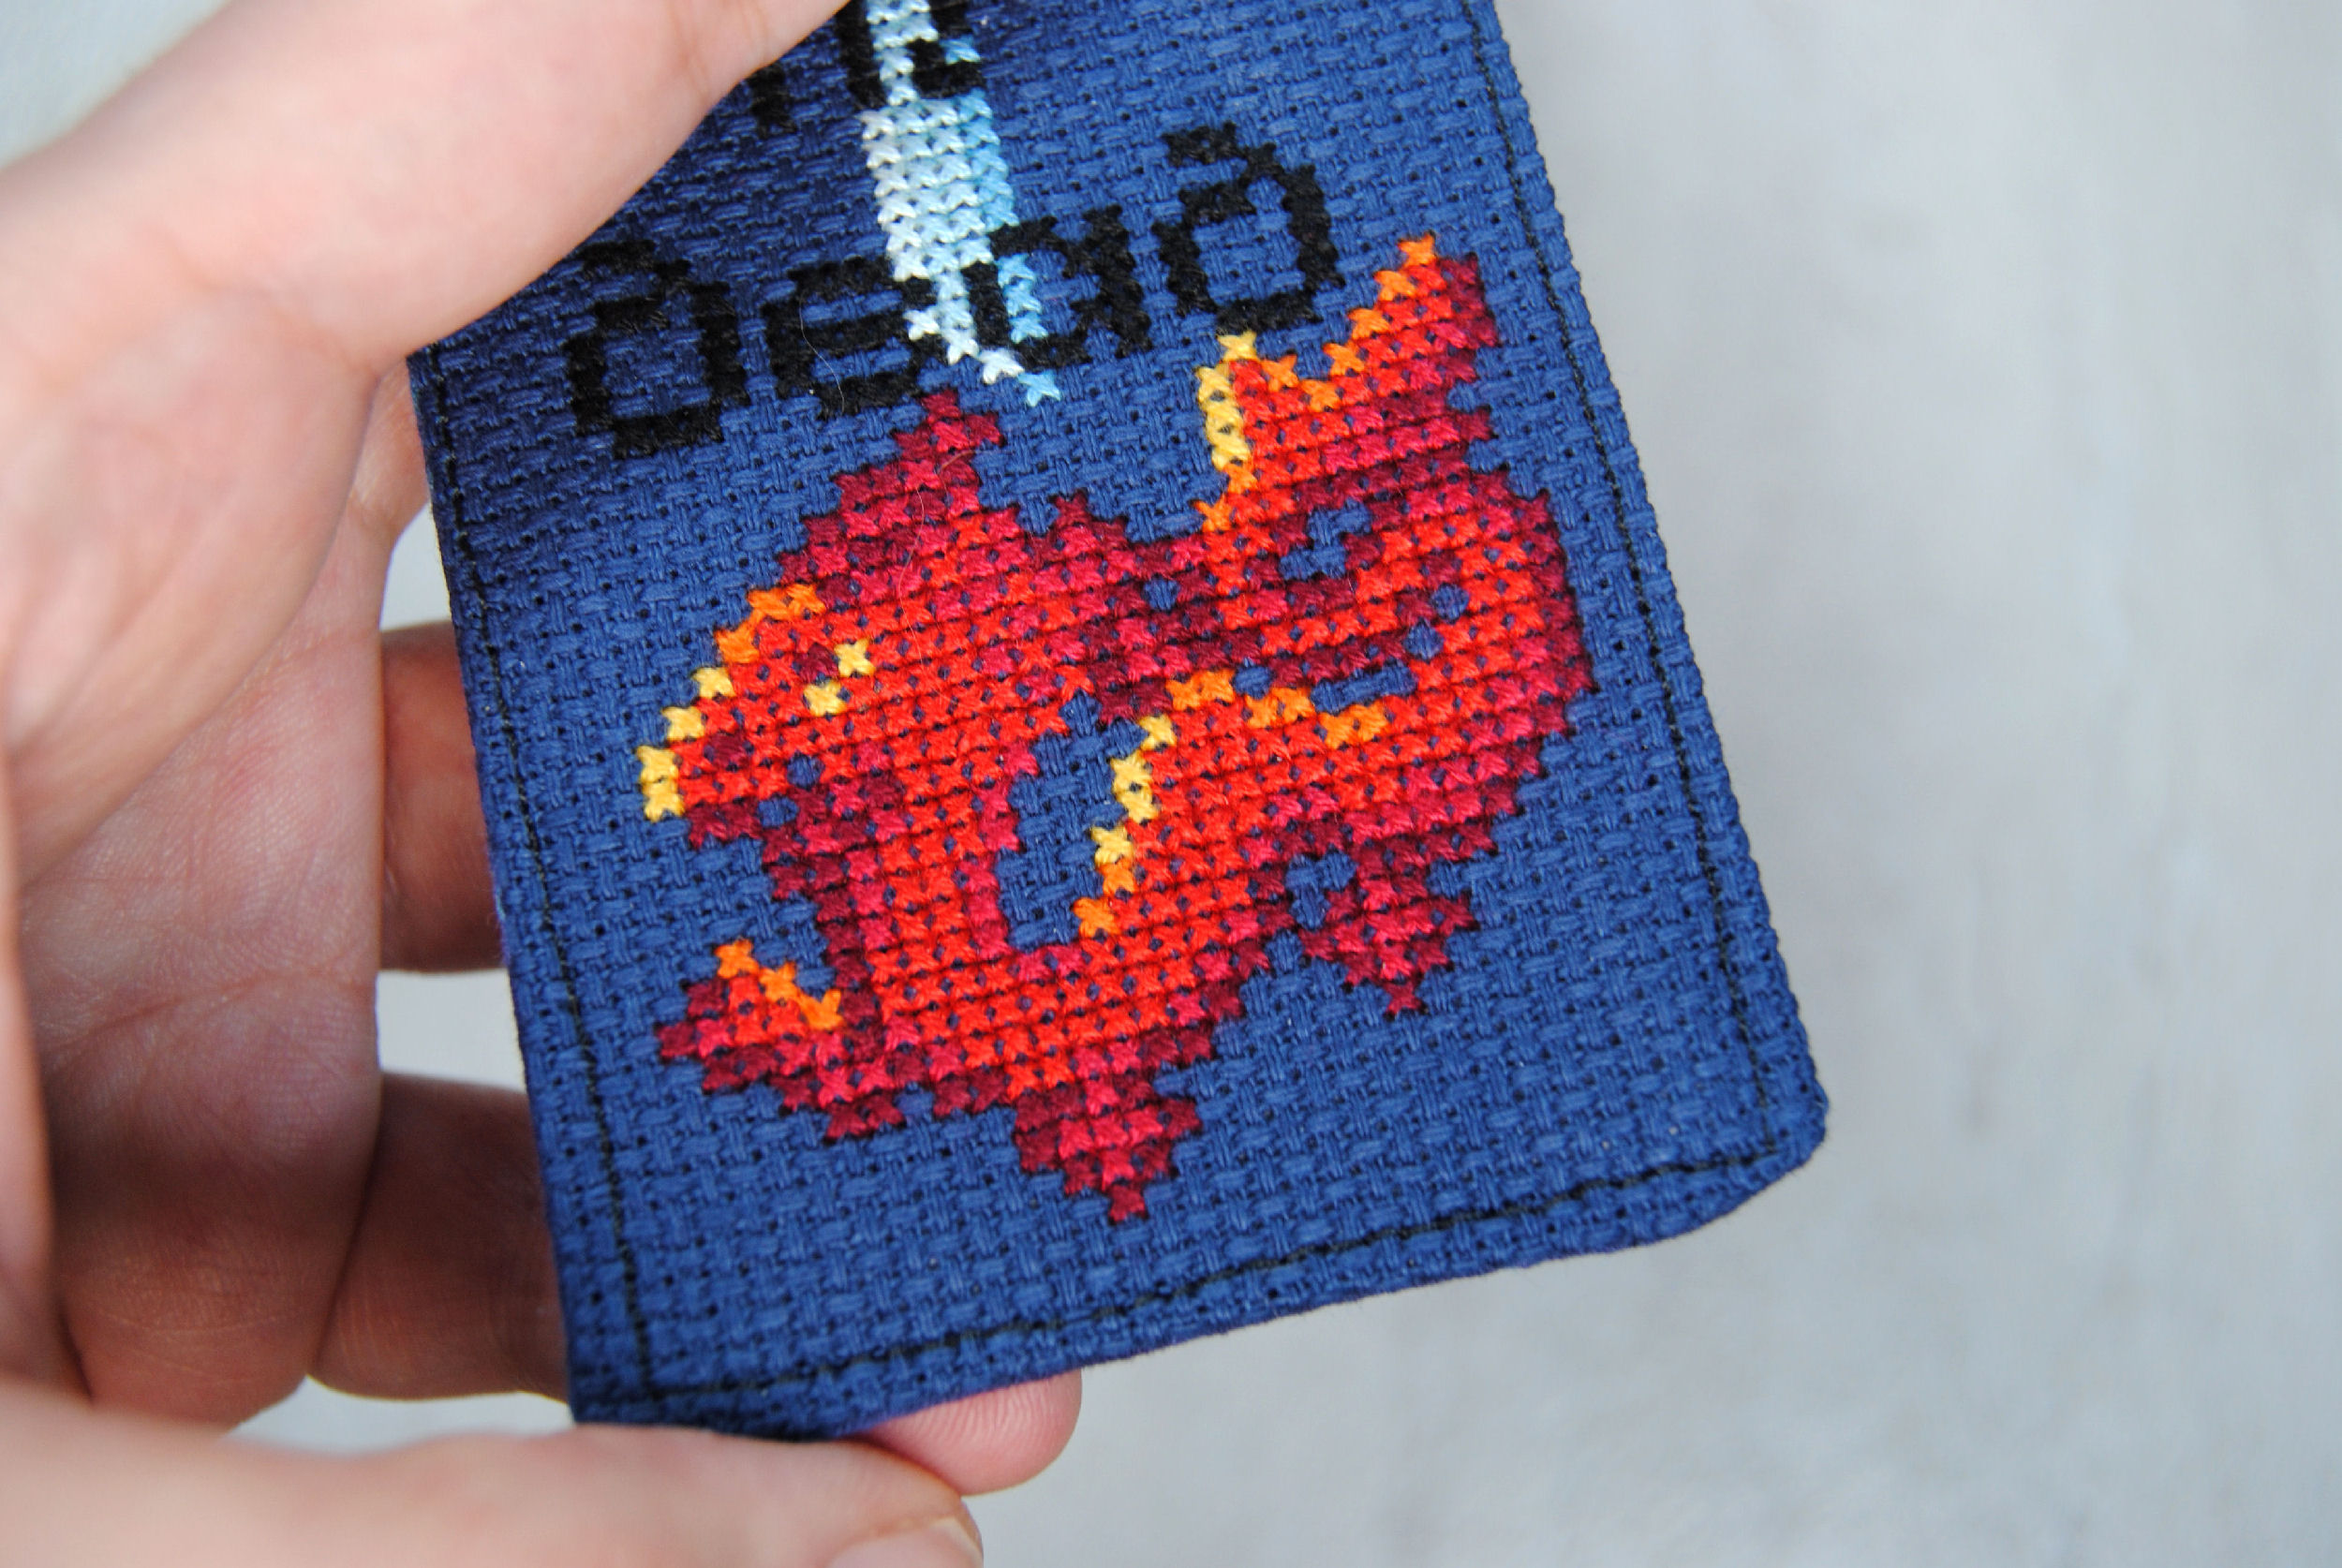
Today I’ll be showing a step by step on how I made the Wheel of Time cross stitch bookmarks pictured above. You can use the table of contents to skip down to that if you want. But first, let me share with you a ton of OTHER tutorials all with different ways to make a bookmark. That way you can choose for yourself which type of bookmark fits your needs best.
This post may contain affiliate links. If you buy something using one of these links, I earn a small commission. However, there is no extra cost to you. Thanks for understanding! Learn more in my Disclosures & Privacy Policy.
Types of Bookmarks
The first decision you must make when creating a cross stitch bookmark is what kind of bookmark you prefer. I’ll be sharing a ton of tutorial links later, but for now I’ll link Etsy examples of each of the types so you can get an idea of what you like, and so I can share some links to some awesome shops for you to check out/support. 😉
Tall Rectangular Bookmarks
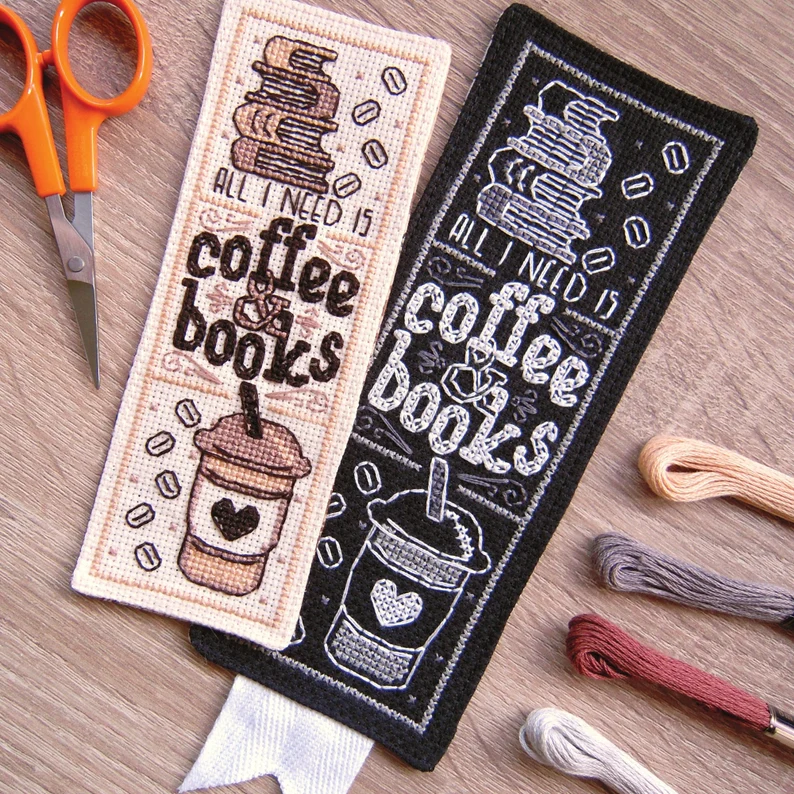
The most common design is the generic tall rectangular bookmark. You may have stumbled across some bookmark cross stitch patterns already like the ones pictured above by YellowBirdieStitches. These can vary wildly on width and length, and can also sometimes add tassels, ribbons, or end in a point, but are generally pretty recognizable as a bookmark. This is the kind I’ll be making today.
Corner Bookmarks
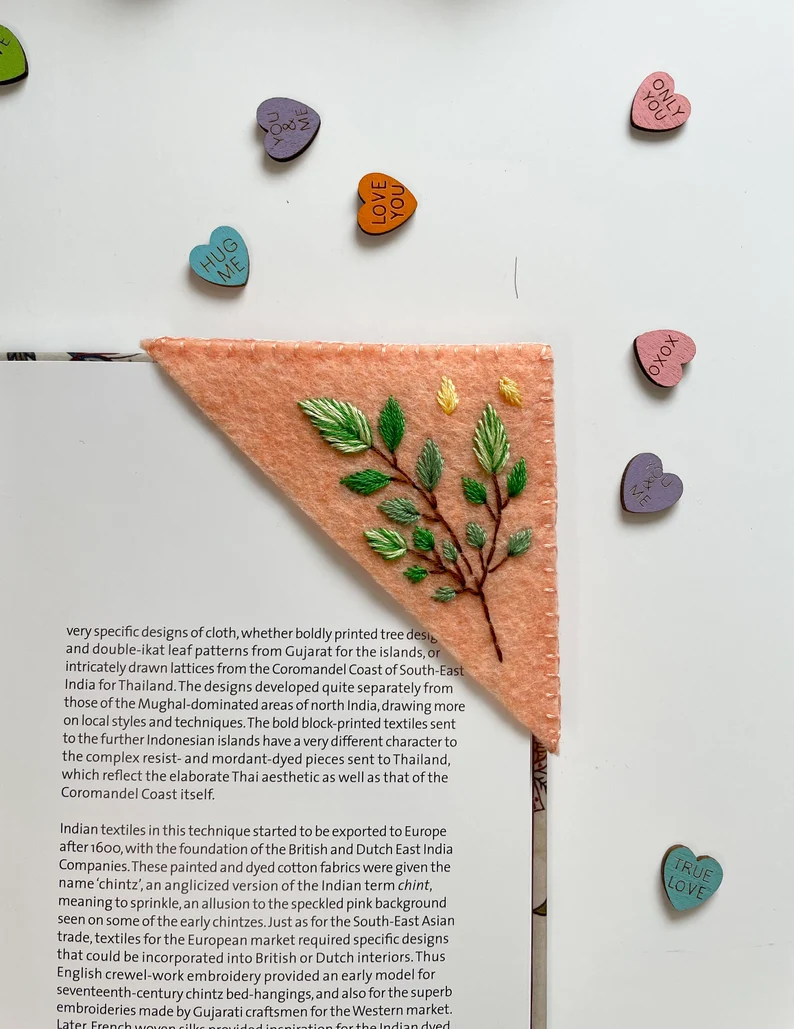
The corner bookmark pictured above is by BowslittleloveStore.
This is another type of bookmark that I’ve seen around a lot: the corner bookmark. I’ve mostly seen them out of felt or fabric, and typically with hand embroidery. However, you can also make them out of cross stitch using either aida or plastic canvas.
Clip Bookmarks
There’s also a whole subset of bookmarks that can be generally described as a clip with something decorative on top.

ninuhandmade for example decorates their metal bookmarks with hand embroidery. I have also seen plenty that are a literal paperclip with something attached to the top.
This style could definitely be adapted to cross stitch either using the techniques in my cross stitch pendant tutorial to attach cross stitch to a metal bookmark base. Or, by using plastic canvas attached to a paperclip.
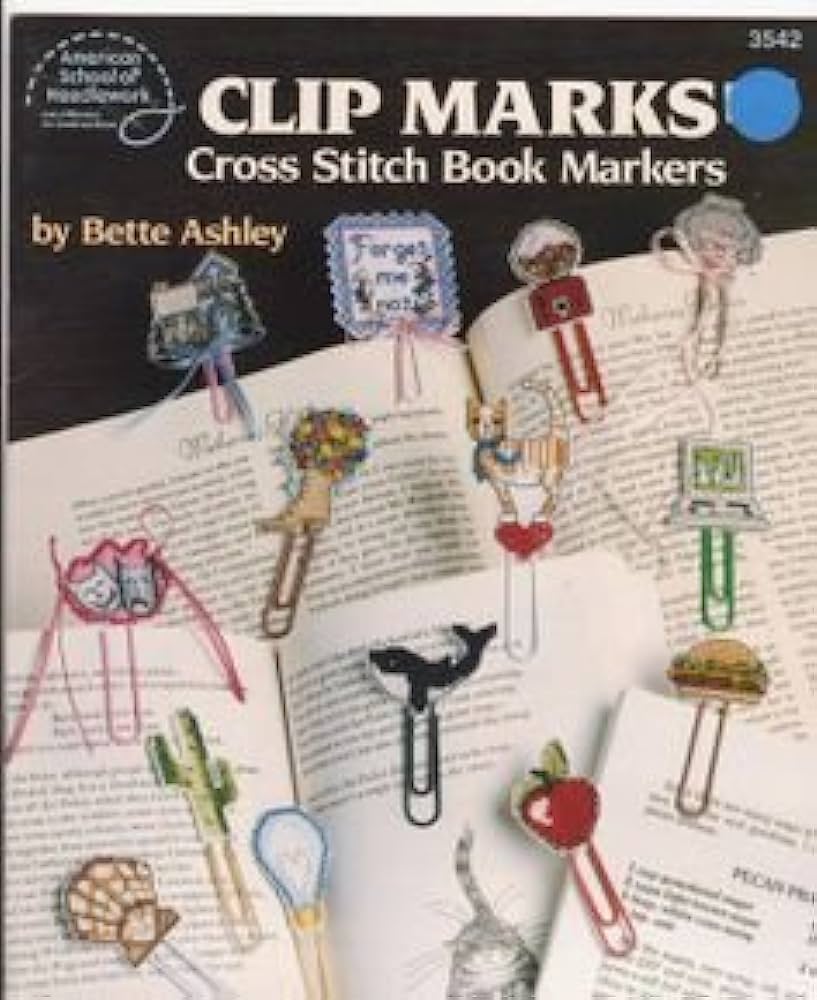
While I couldn’t find a non-blurry photo of it, there’s even a vintage book out there called ‘Clip Marks‘ that does just that!
Metal Hook Bookmarks
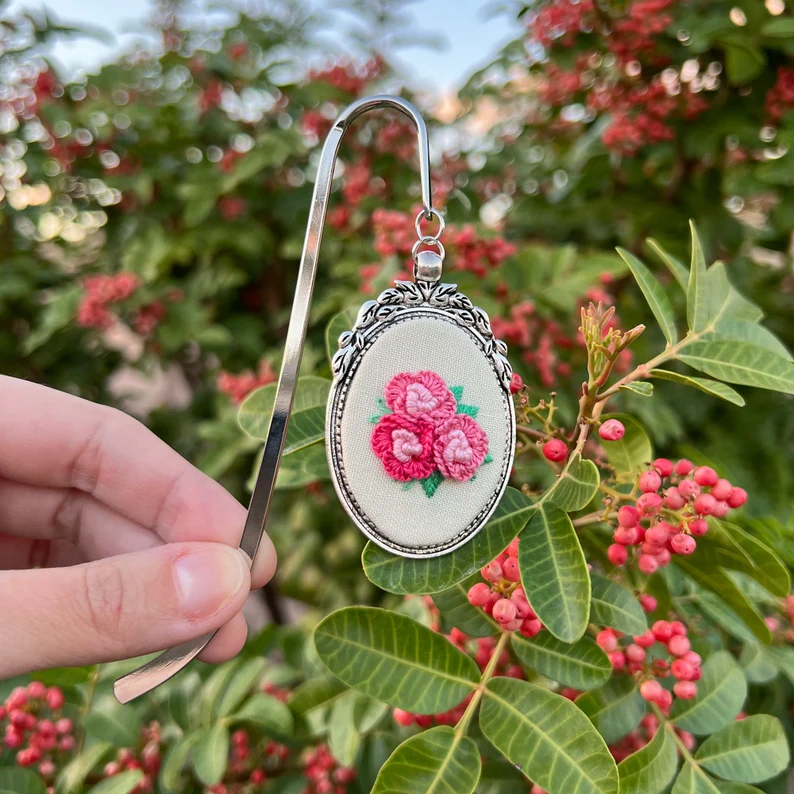
This hook bookmark example is by HappyLittleHoops.
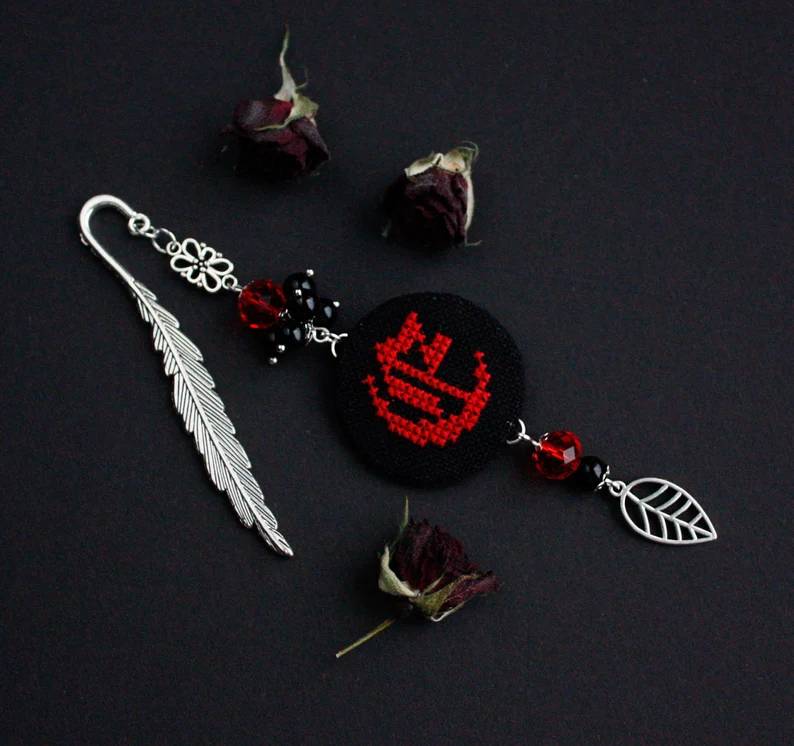
I’m not sure if there’s an official name for these, and I didn’t find one during my search. So what I’m calling ‘hook’ bookmarks are designed to hook onto the spine of your book and are often decorated with beads and charms that will dangle in front of the spine as it sits on your bookshelf. In my example you can see that you can also use it to hang cross stitched and embroidered pendants. But I can also see small plastic canvas charms working well here too, and the hooks themselves are pretty inexpensive.
Elastic Bookmark
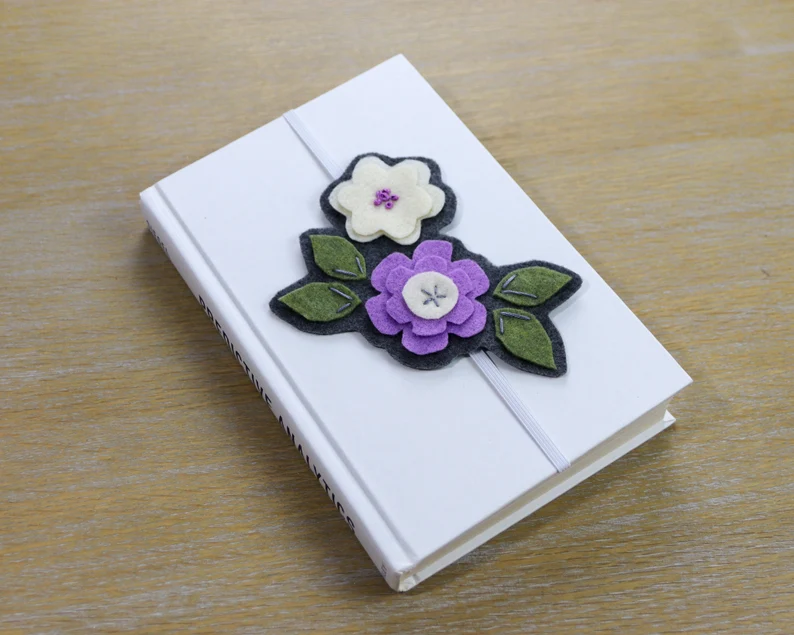
The example I chose for this one is this cute felt applique elastic bookmark by willowtreemke. However there are a ton of these that are essentially an elastic strap with some sort of decoration on it. Beads, charms, embroidery, clay, you name it. I haven’t found any cross stitch ones yet, but this could easily be done with plastic canvas backed with felt.
Elastic Bookmark Pouch
Finally, a slight variation on the above. But with a pouch to put pencils or other tools.
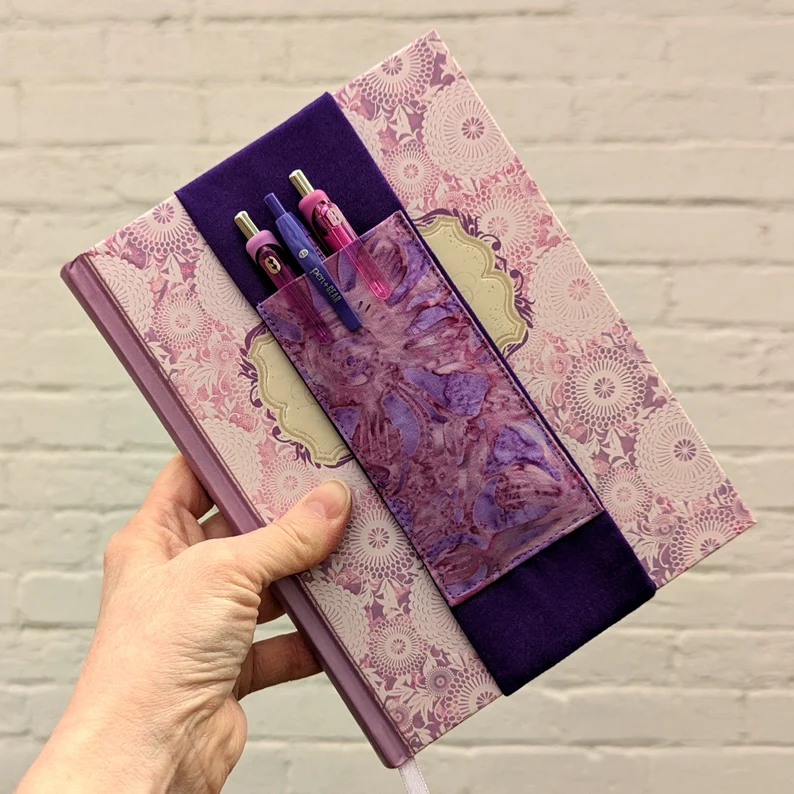
This example by DelanaFayeCreations would be great for a journal, sketchbook, or school book.
However, this style could also be similarly adapted for cross stitch. I’ll link some tutorials below for some similar styled sewing tutorials. Remember: aida, linen, and evenweave is still fabric and you can use that completed cross stitch in sewing projects as well!
Types of Embellishments
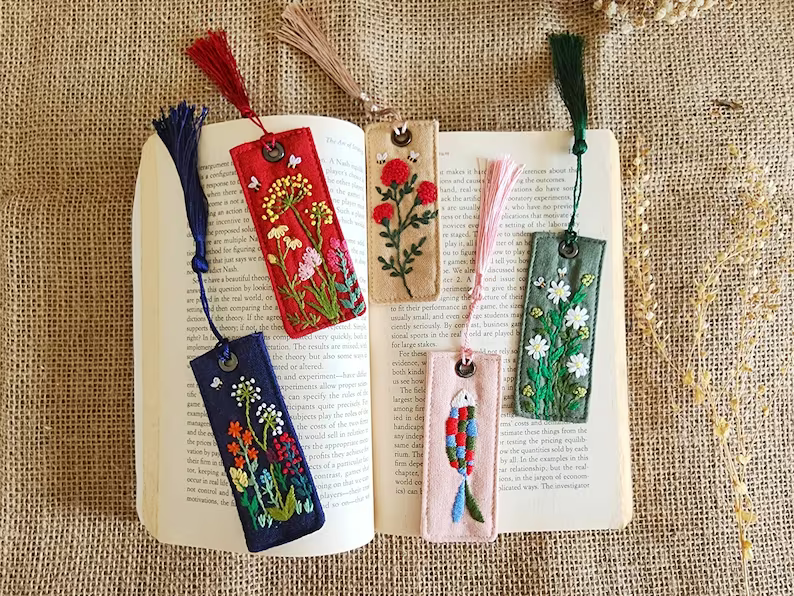
Ribbons/Tassels
Add a ribbon or tassel at the top of your bookmark so that it’s easy to find your spot.
For example, these cute embroidered bookmarks by QuinceFablesShop.
Beads
You don’t want beads on the inside of your books. It’ll just be lumpy and leave imprints on your pages. But if your bookmark goes on the outside like with the hook or elastic types, you can definitely decorate them with beads!
For example, these cool monogramed bookmarks by TianaHandmade
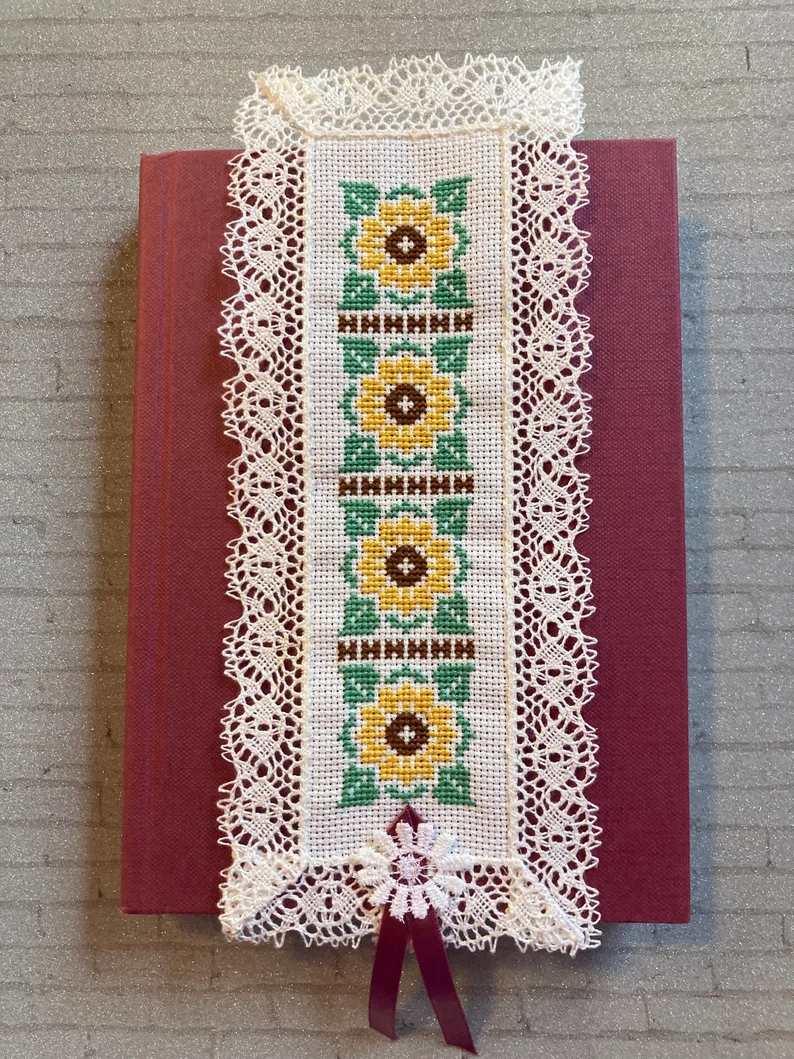
Lace edging
Spruce up that boring rectangle by adding a bit of lace along the edges.
Like this example by KoalaradoKreations
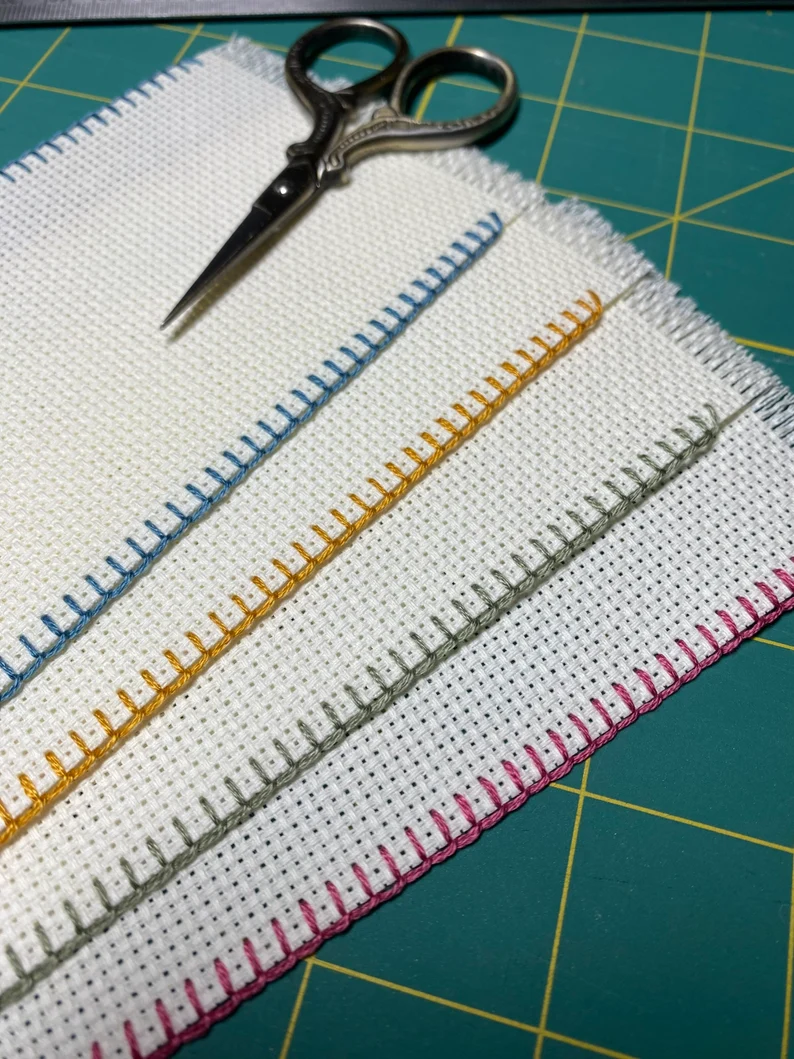
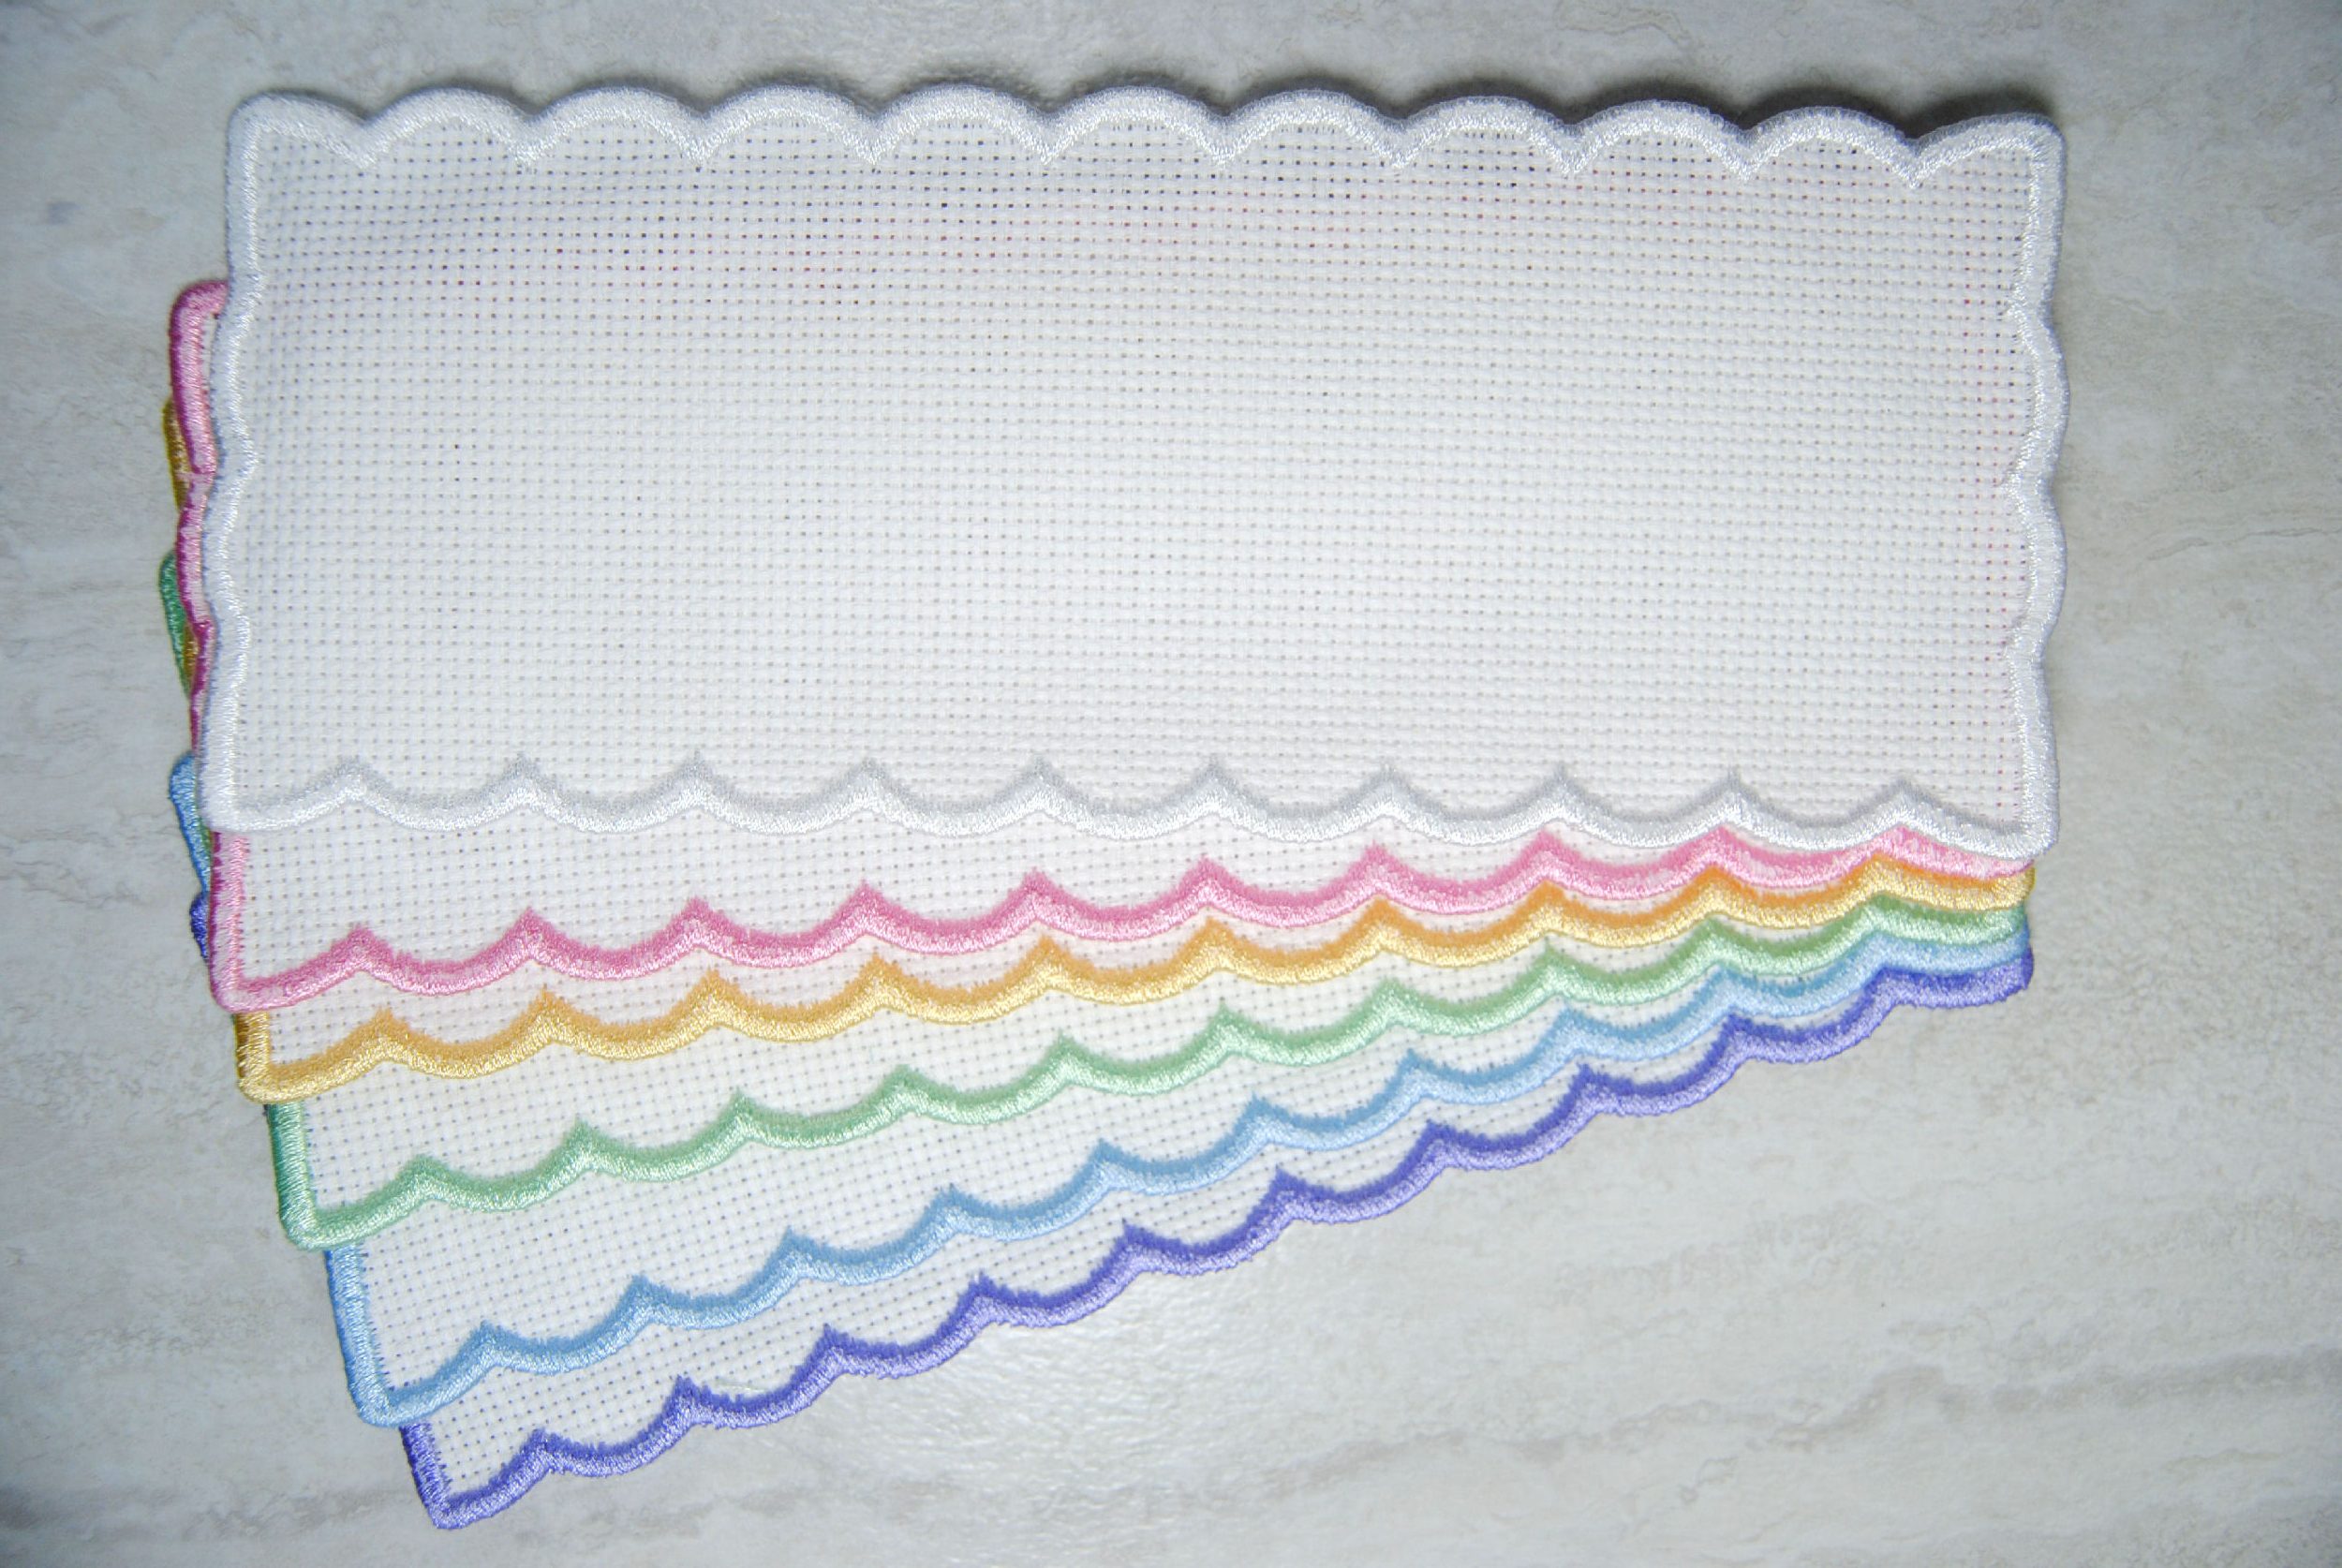
Colored edging
Stitching it by hand? Try using contrasting colored thread to make that stitching part of the design. For added flair use a buttonhole stitch or blanket stitch along the edge to make a cool pattern as well.
For example, these pre-edged bookmarks by MuddyPetals
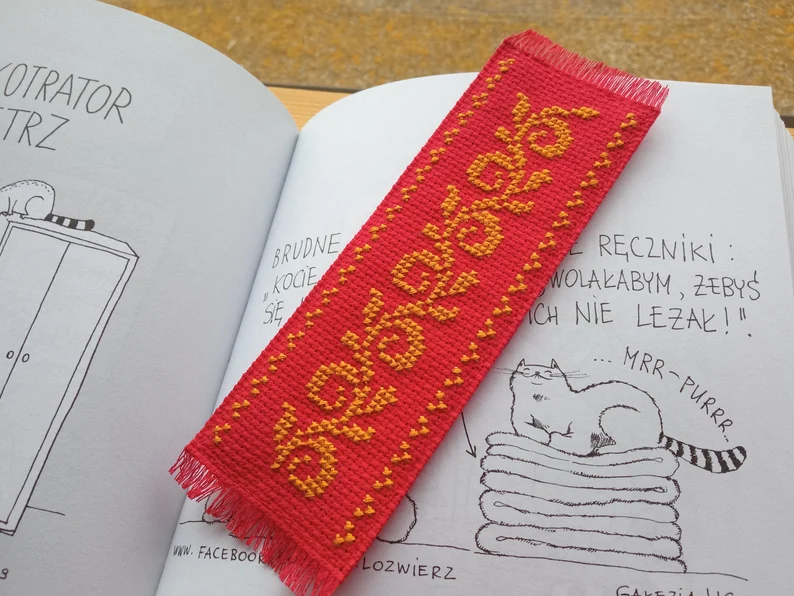
Frayed Edging
Leave a little room around your stitch, then pull out some of the aida strands to create an interesting frayed edging.
Alternatively, try pinking shears to both prevent fraying and make a cool pattern along the edge.
Frayed Example by MariAnnieArt
Other Bookmark Tutorials
As mentioned previously, there’s a lot of ways to finish even within a style of bookmark. Here’s just some of the tutorials I ran across while researching for this article. Take a look at the ones in your favorite style and see which makes the most sense for you based on your preferences, cross stitch design, and materials you have on hand. If any of the links break in the future please let me know! 🙂
Rectangle Bookmark Tutorials
Buttonhole Stitch Seam Aida Bookmark
Video: Glued Felt Backing
Corner Bookmark Tutorials
Embroidered Felt Corner Bookmark
Plastic Canvas Corner Bookmark
Video: Embroidered Corner Bookmark
Clip Bookmark Tutorials
Metal Clip Bookmarks with Embroidery
Elastic Bookmark Tutorials
Video: Elastic Pencil Pouch Bookmark
Pre-Finished Bookmarks
Not tutorials, exactly. But there are products that let you skip some or all of the finishing steps entirely.
You can buy aida that has been embroidered along the edge already. Once stitched, you can then use it as is or back it if you prefer to hide the threads on the back.
Similarly you can find aida with lace borders, or aida band that has a border just on the long sides so you can decide just how tall the bookmark is.
You can also buy wooden bookmark blanks or even metal bookmark blanks that are pre-perforated for stitching!
Lastly, there are also Perforated Paper bookmarks available for stitching. Or you can just buy perforated paper and decide for yourself how big your bookmark is.
Cross Stitch Bookmark Sewing Tutorial
Finally, let’s go over how I decided to finish my own bookmark after doing all of this research.
I wanted to use only materials I had on hand. So that ruled out hook, clip and elastic styles. Also no lace or tassels or anything this time, I kept it pretty simple.
There needed to be ample room for a text-based design, so corner bookmarks were out. Just goes to show that the tall rectangle shape is popular for a reason. 😉
I also wanted it to be a quick finish since I was planning on making four of these and would already be spending a ton of time stitching the designs. Thus I decided these needed to be machine sewn.
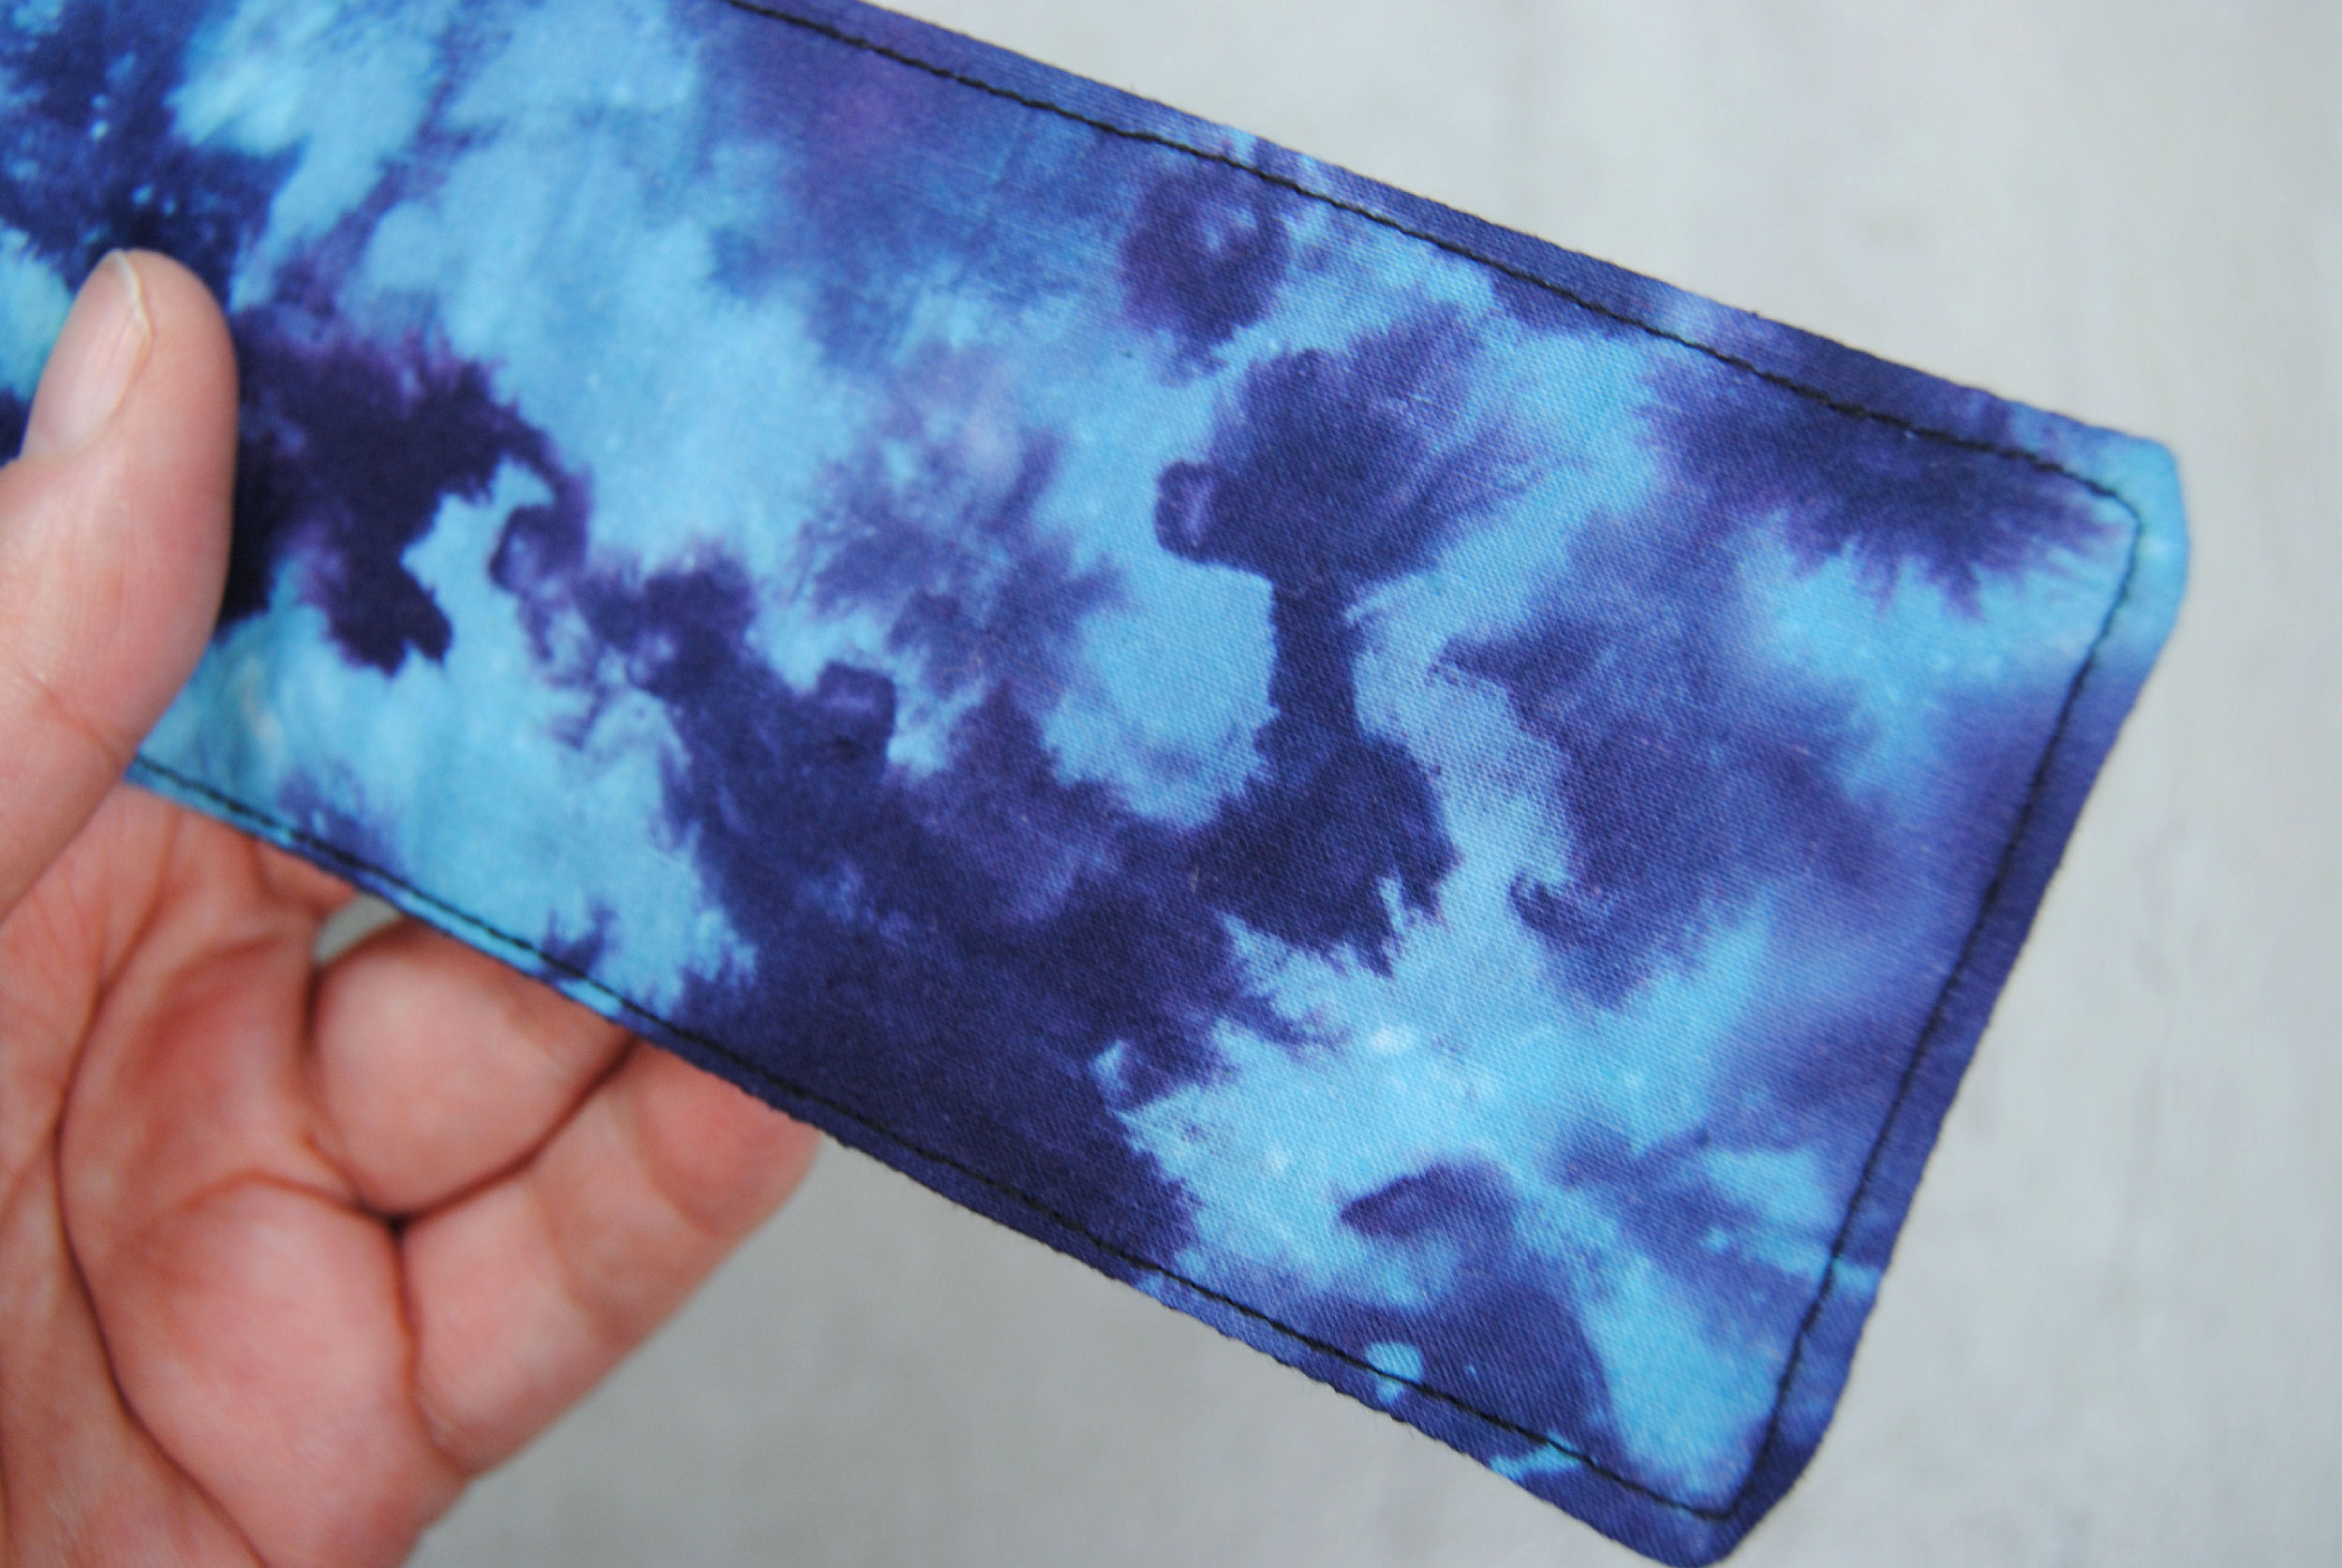
Finally, I wanted it to be thin to avoid any sort of bulk in what few physical books I actually own. So I chose to back them with quilting cotton rather than a second aida layer or thicker felt.
Sizing Your Fabrics

First, I stitched my design on a larger rectangle. These designs will be available on my Patreon first, and will then be released on Etsy.
Using pins I marked out the edges of my design with one or two stitches leeway to avoid stitches being right up on the edge. Measure that as your design space.
I then marked out another two more squares which we will use for top stitching later. Finally, I trimmed my aida about 5 stitches away from that as my seam allowance.
Once I had my sizes, I cut a rectangle of quilting cotton the same size as my aida. Then cut some fusible interfacing to the size of the design space.
Fusible Interface (Optional)
The interfacing is optional, but I’ll be using it to secure any loose strands on the back of my stitching.
Center your interfacing on the BACK of your cross stitch. Make sure that the rough side of the interfacing, aka the little glue dots, faces your fabric.

Now Iron that interfacing in place following the instructions provided with your interfacing. Mine said to cover with a damp cloth and iron on low for 10 seconds at a time. But yours may differ depending on brand or type of interfacing.

Again, this step is optional. But will help keep any thread tails in place, as once it’s all put together it will be much more difficult to re-stitch a square if it gets pulled out somehow.
Stitch right sides together
Now I clipped the ‘right’ sides of both of my fabric pieces facing together with wonder clips. Taking the time to line them up as straight as I could.
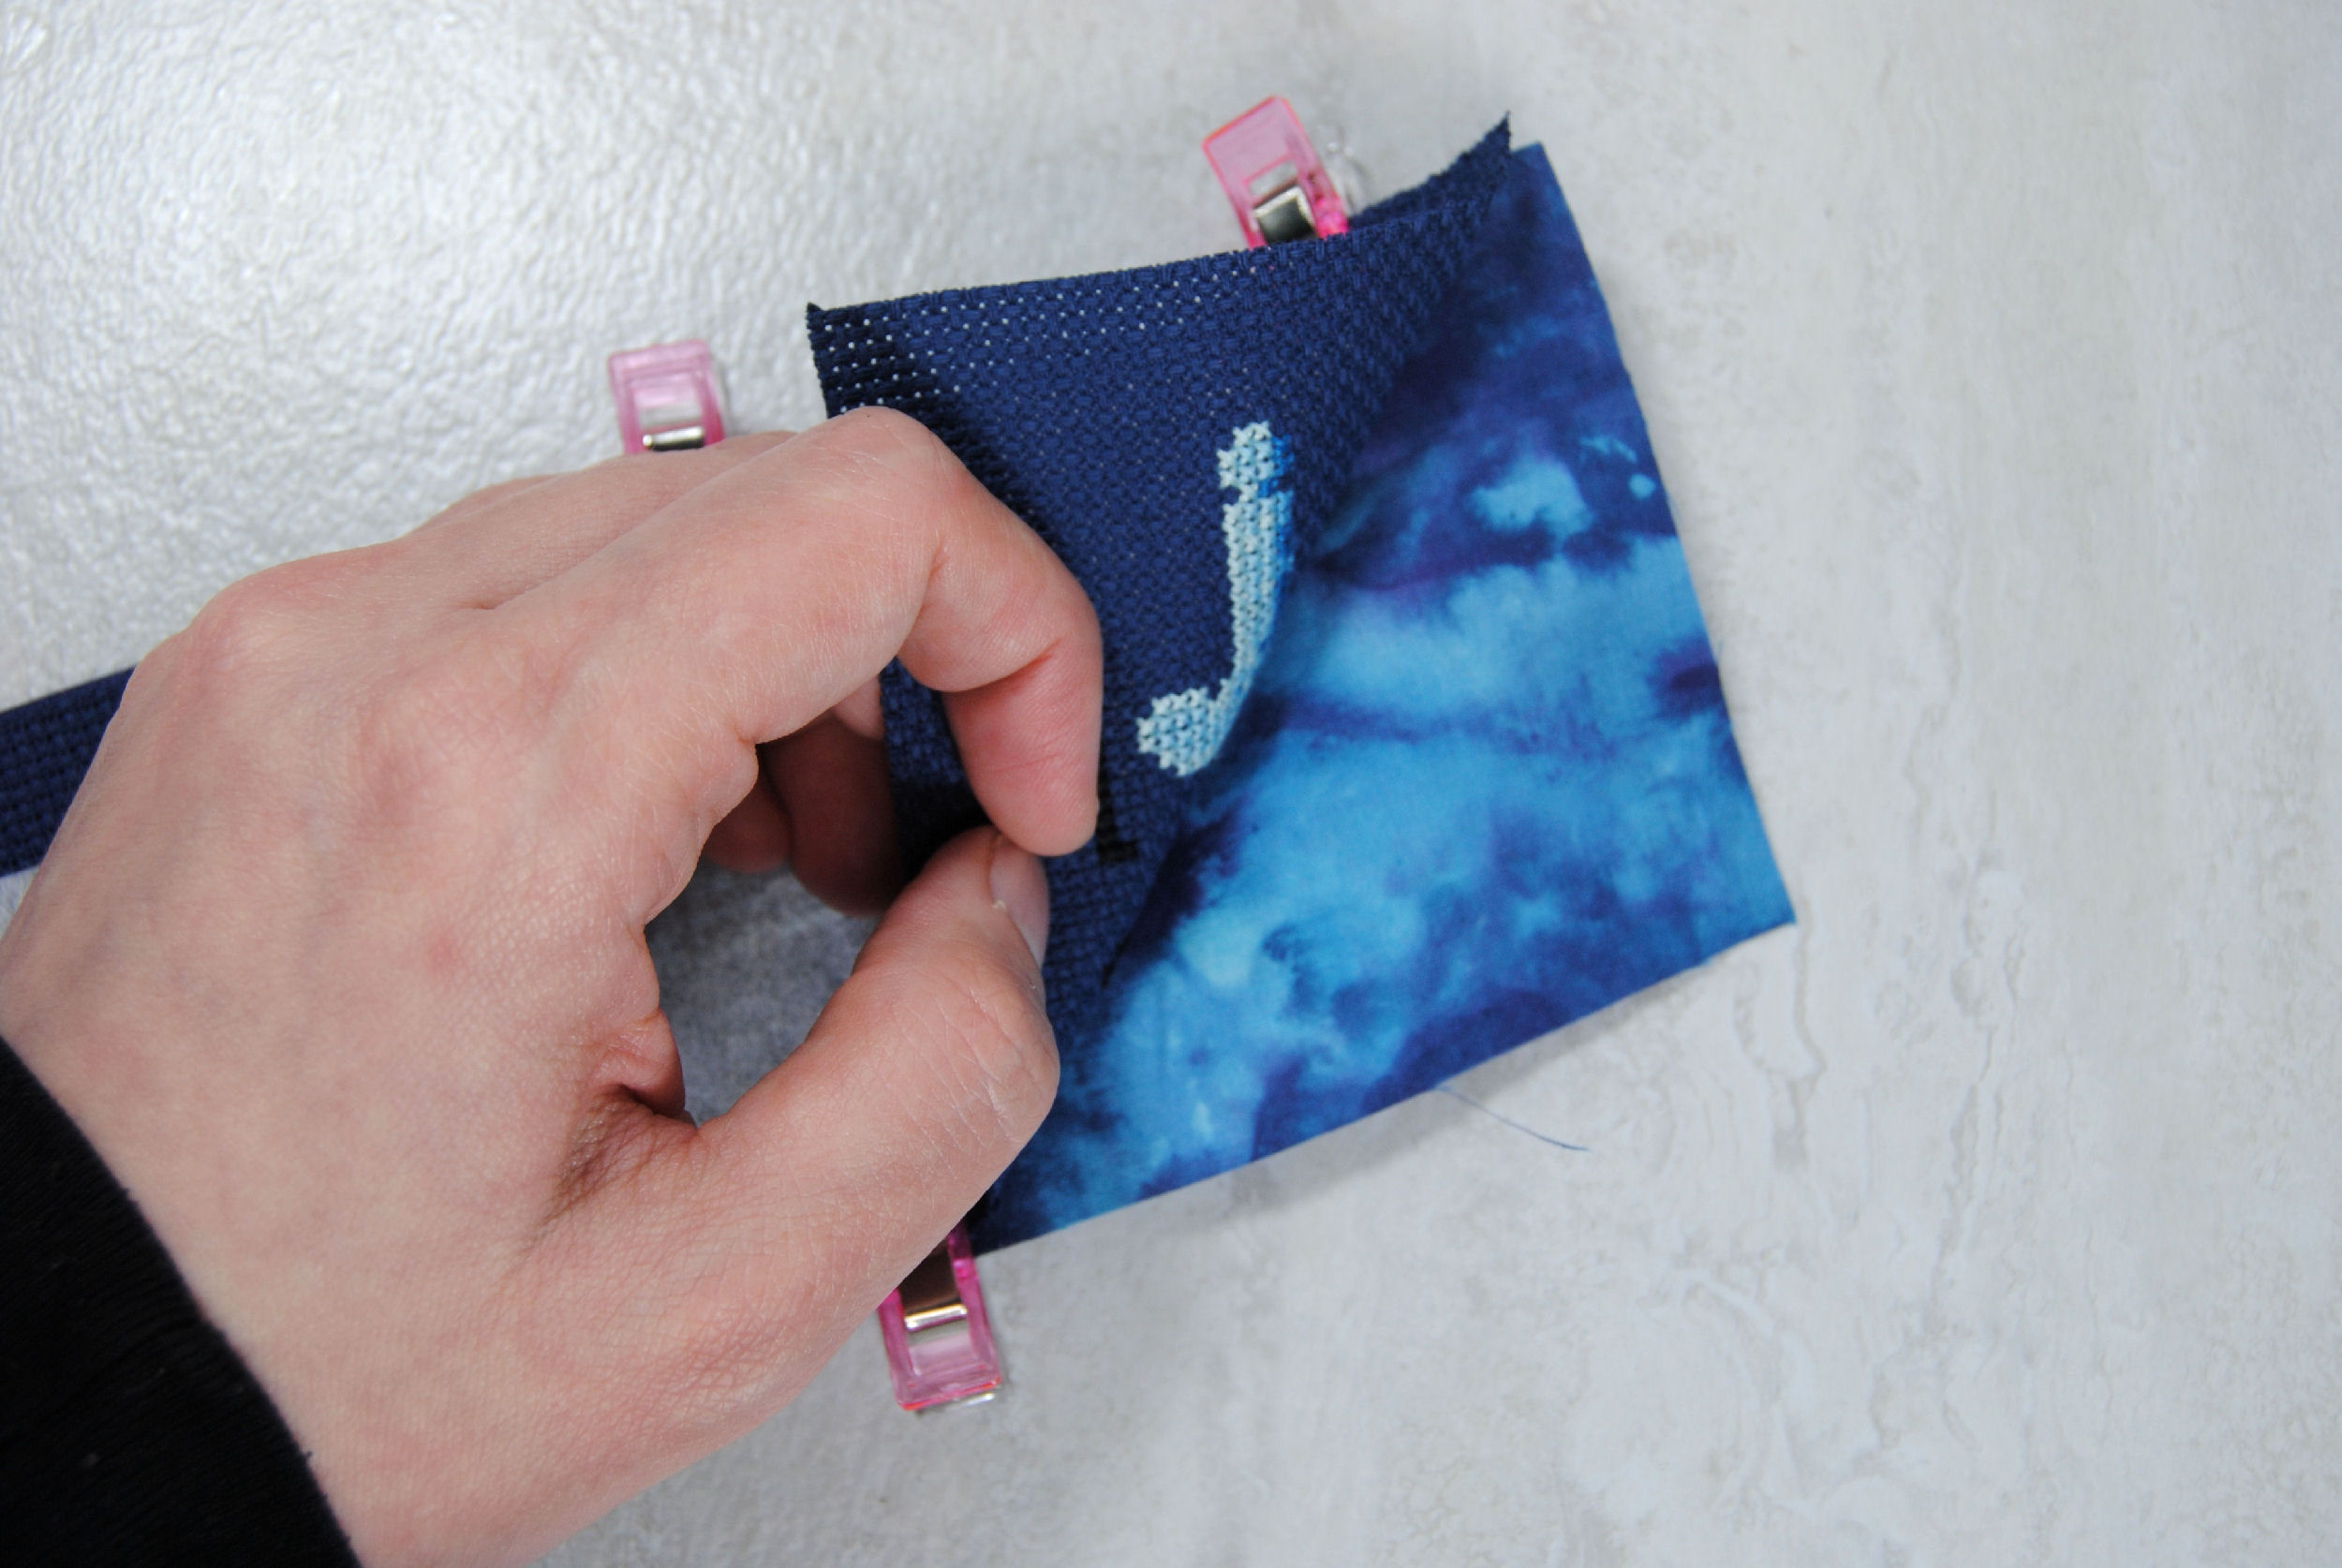
Earlier I had cut the fabric to size 5 squares from the edge. So now I used that same aida grid to guide me as I stitched down one side, across the bottom, and up the other side of my fabric sandwich.

Note that I left the top section open. It doesn’t actually matter if it’s the bottom or top as long as you left one side open here.

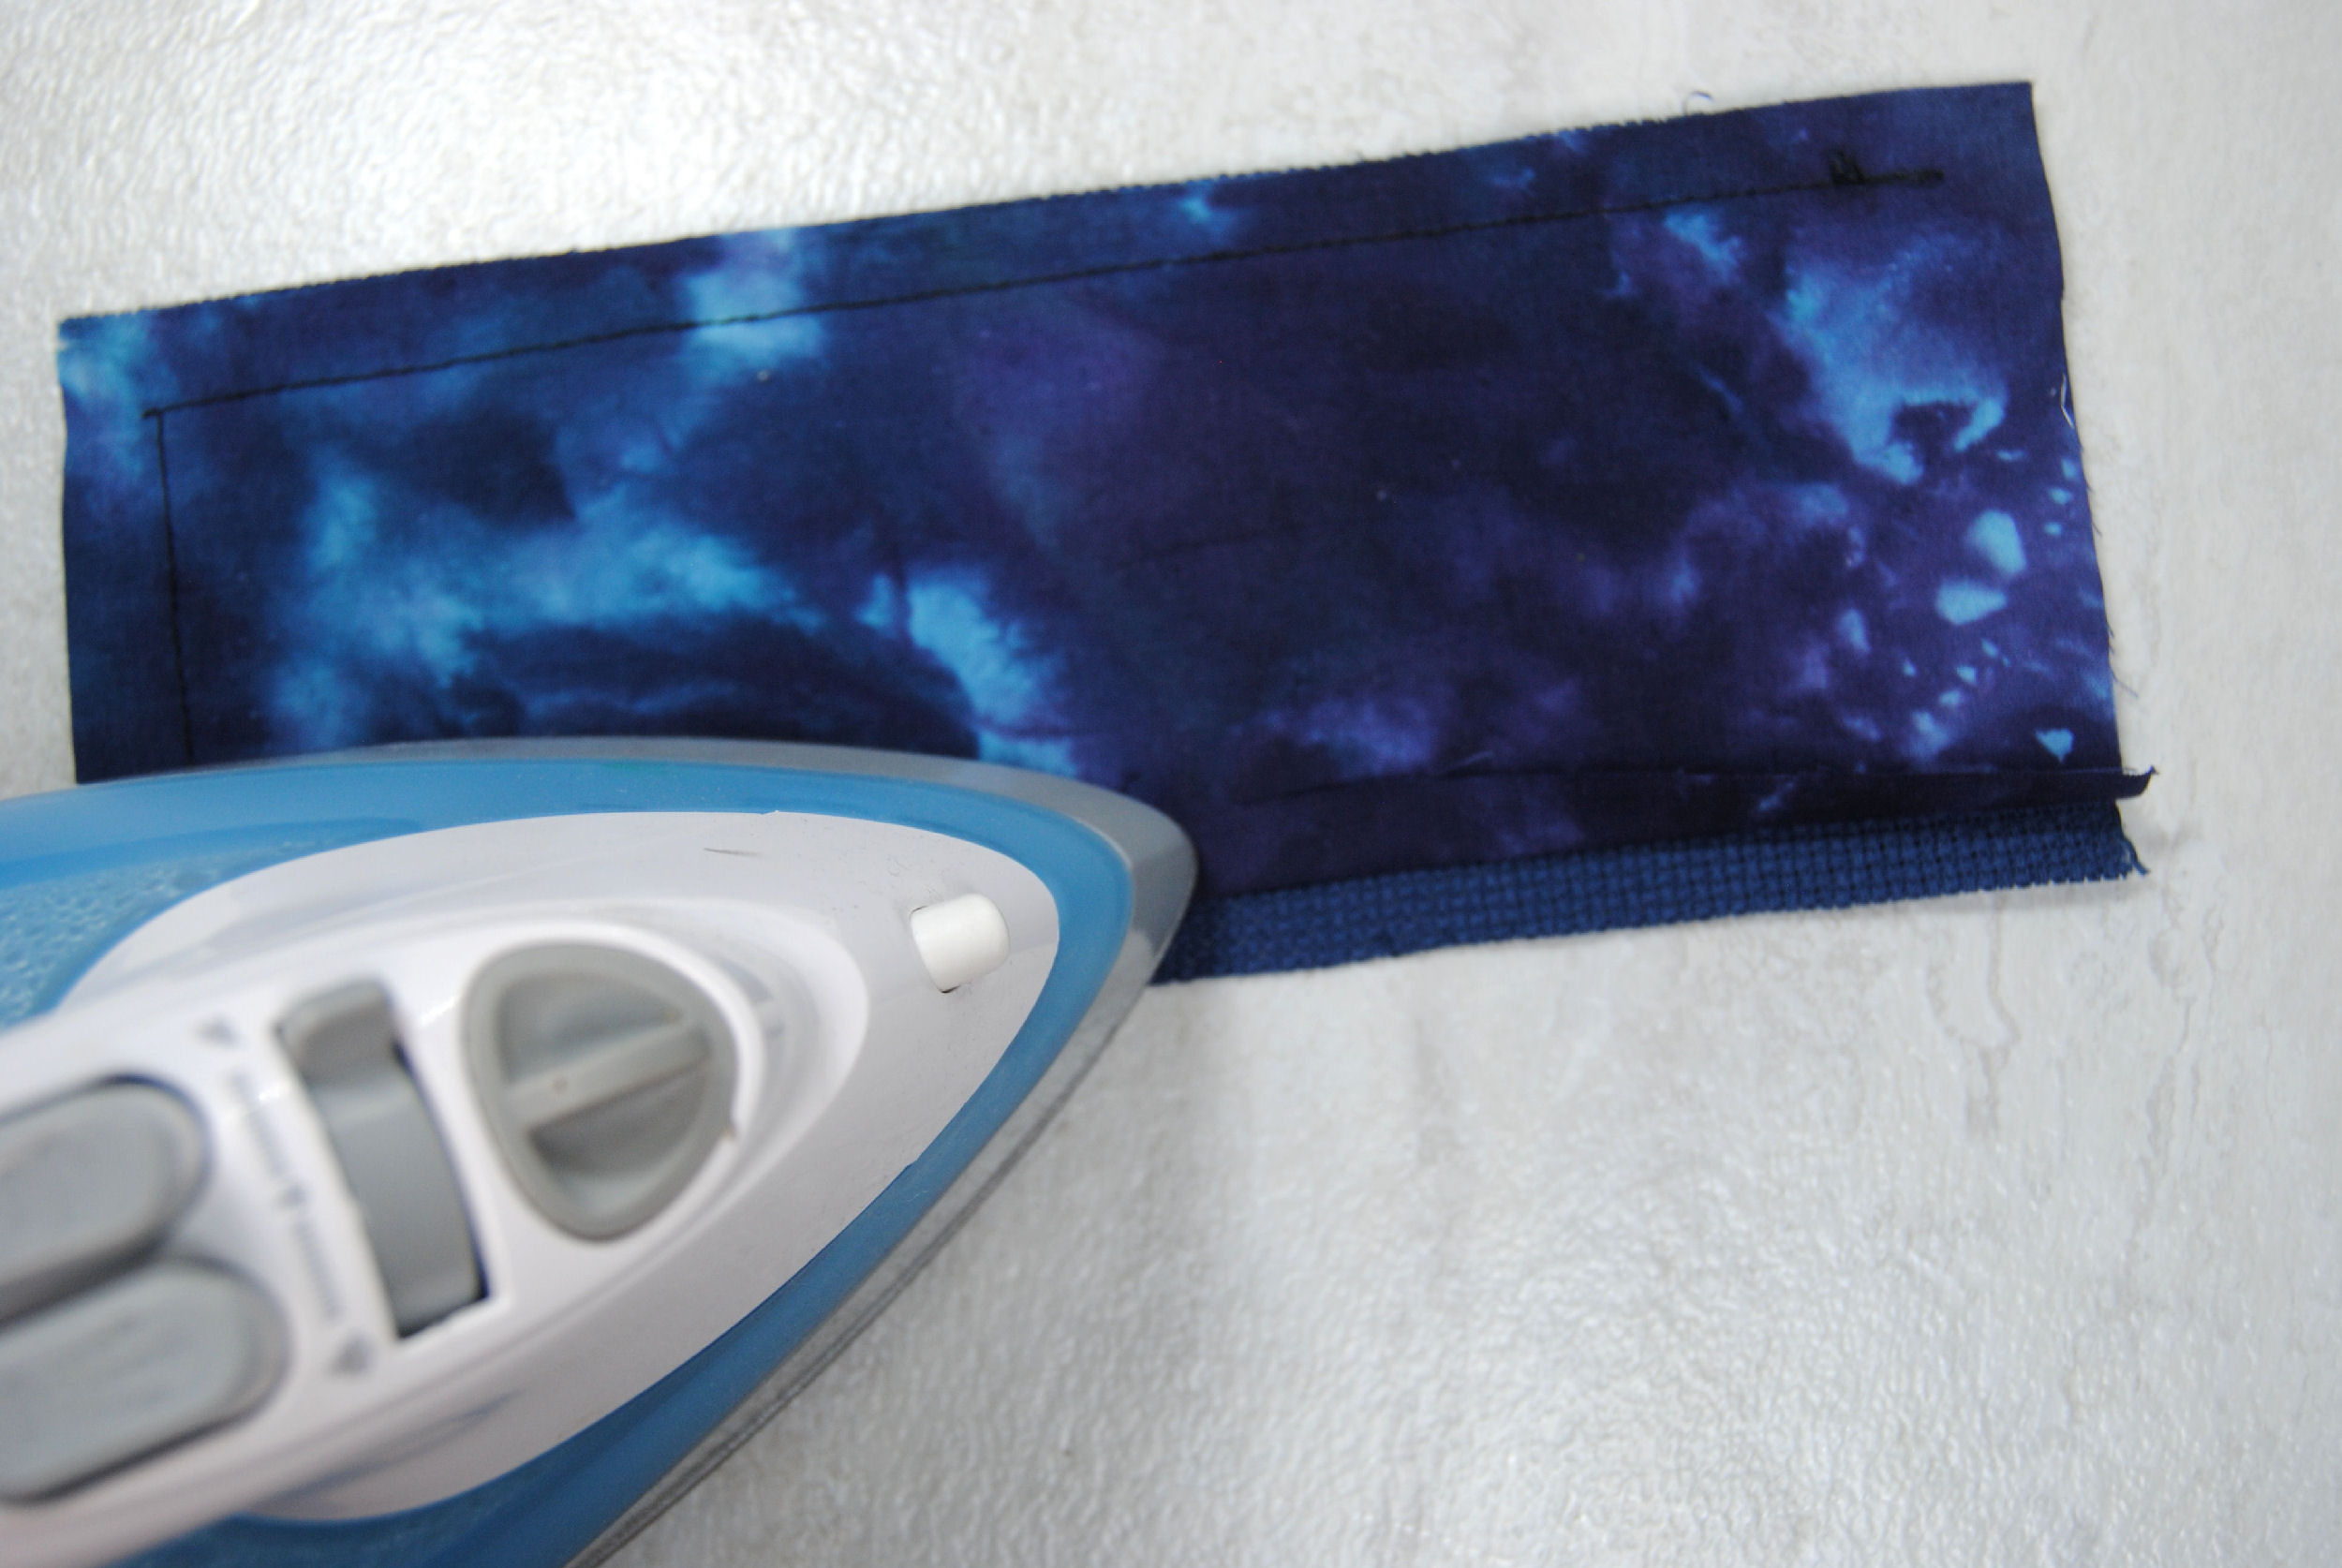
Iron Down Your Edges and trim your corners.
Another optional step, but it will help out a lot in the future. I ironed in the edges of my cotton, then flipped it over and ironed the aida in the opposite direction. Finally I cut off the corners just outside the stitched area. Then proceeded to forget to take a photo of them.
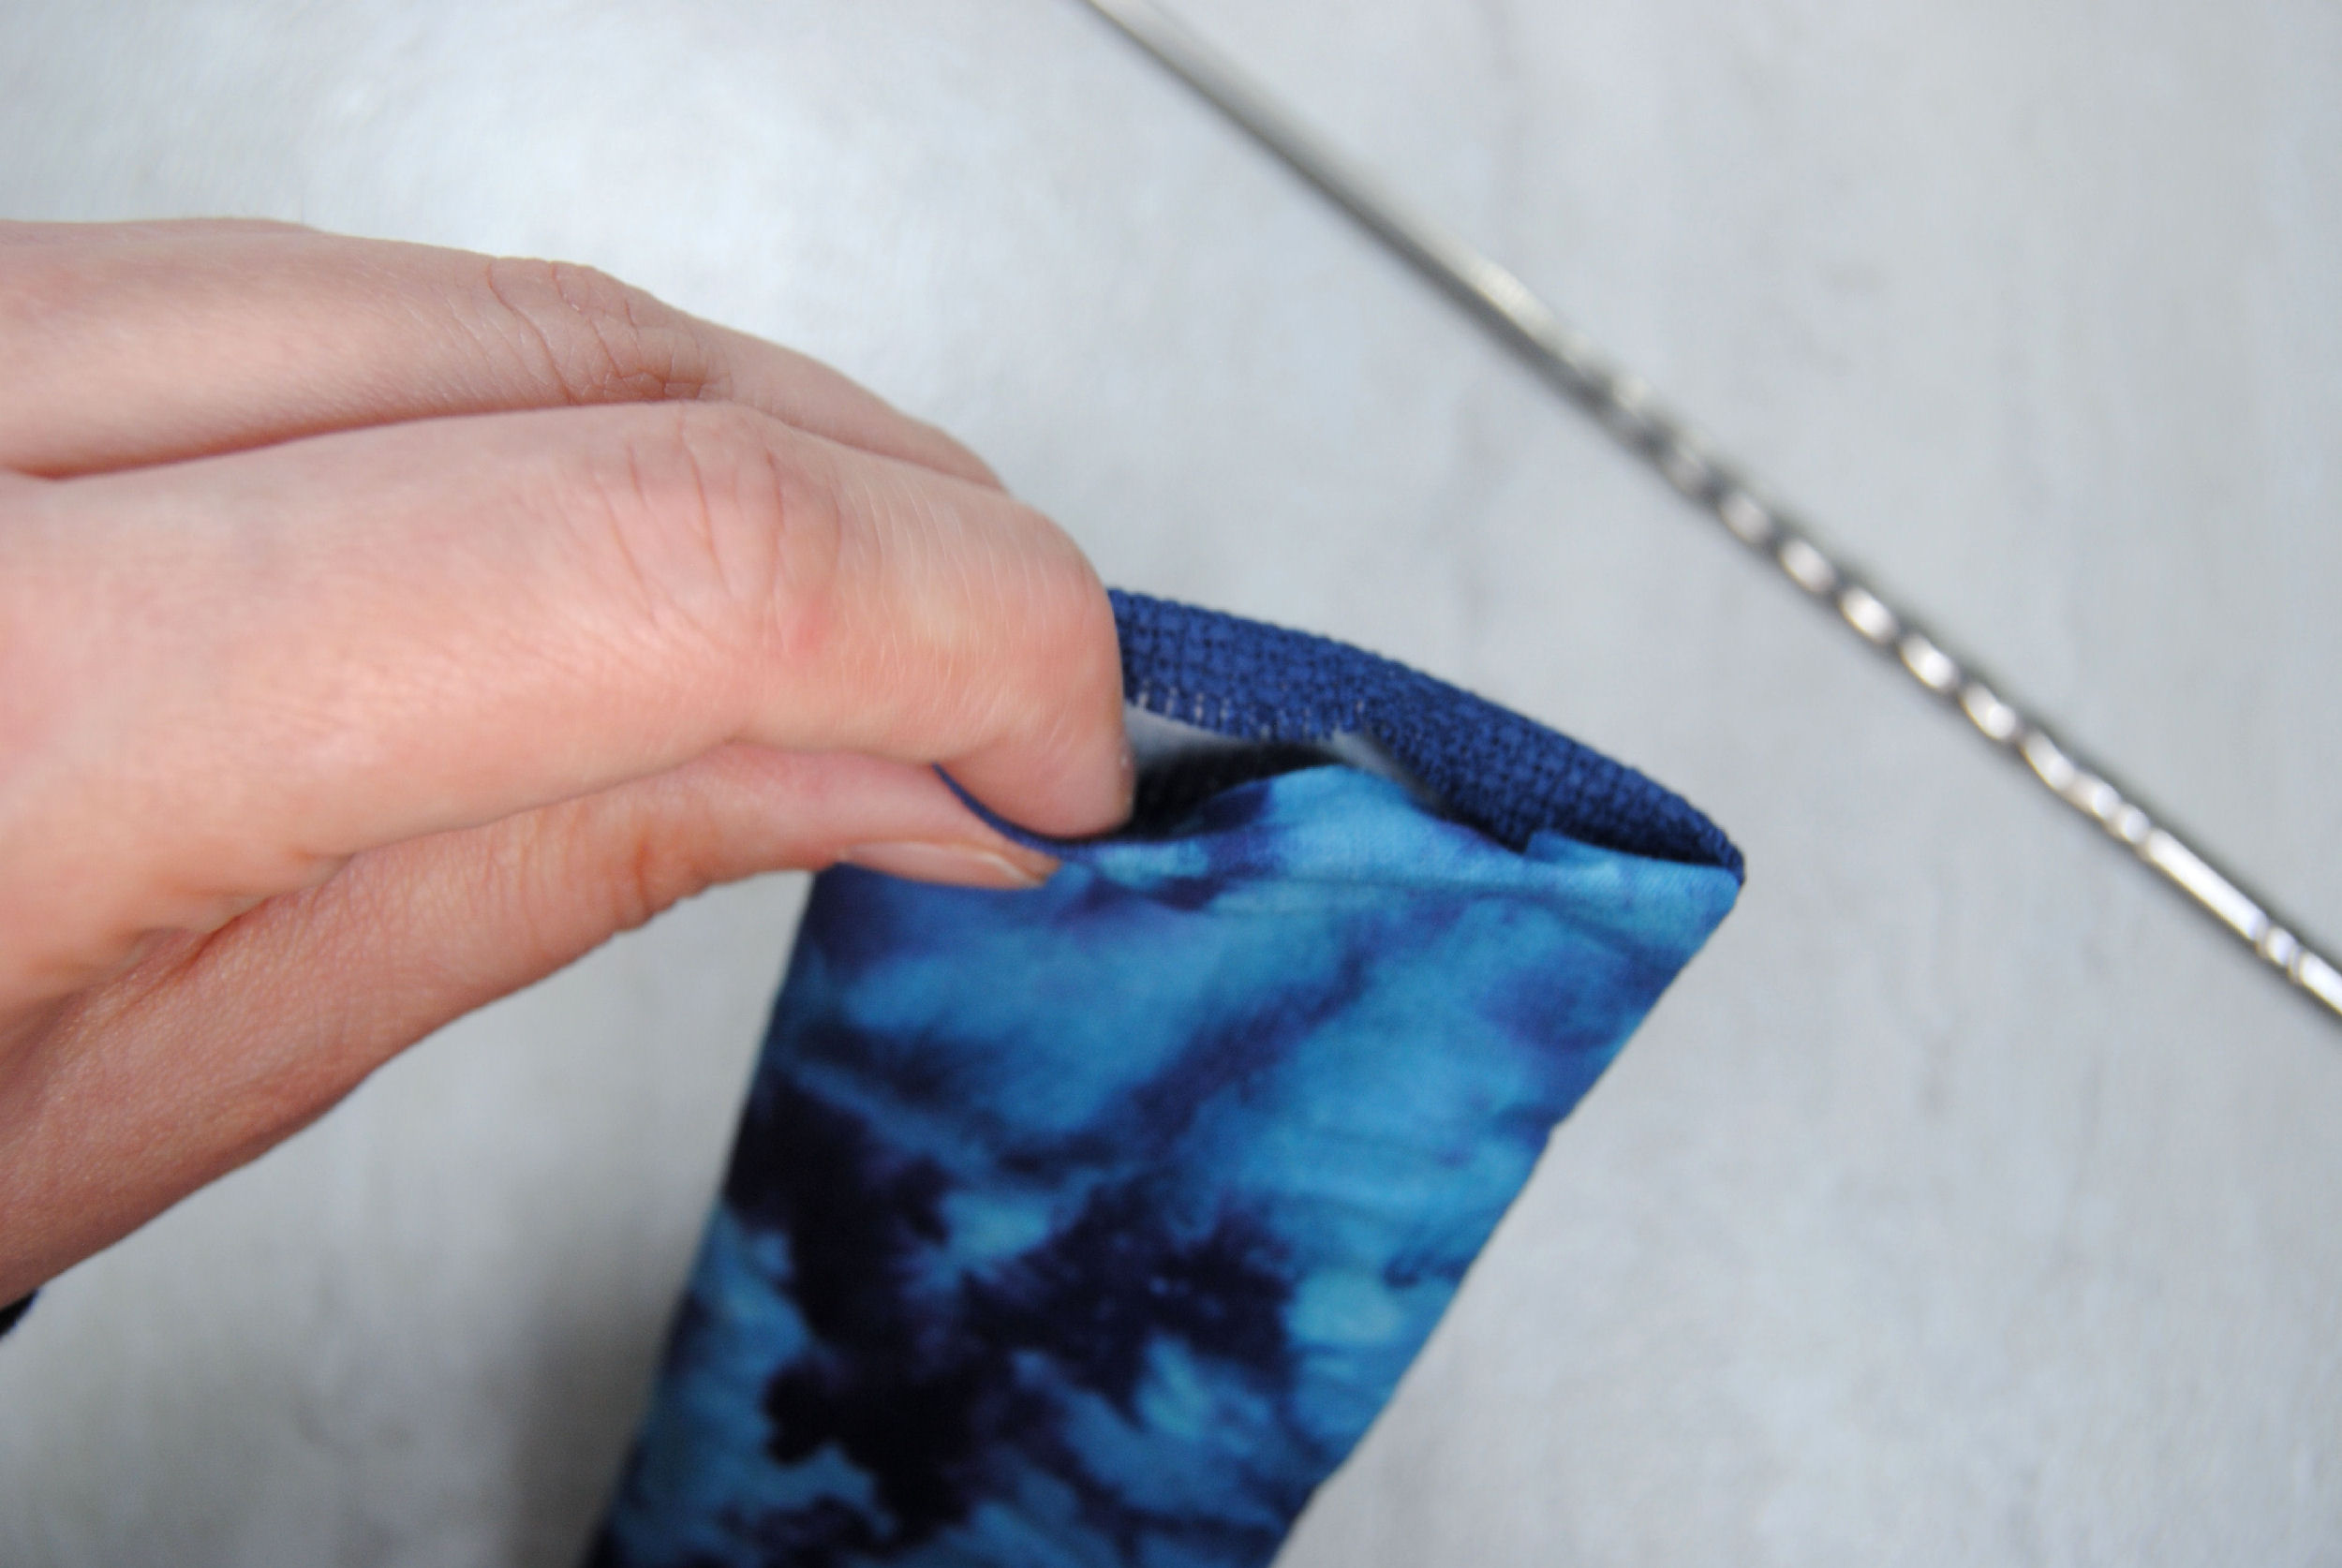
Flip Bookmark
Now you’ll be awkwardly reaching into that opening and pulling all that fabric out to flip the entire thing inside out.

If you’re wondering why there was a chopstick randomly in that last photo it’s because they’re super useful for pushing out the rest of the fabric and poking the corners out.
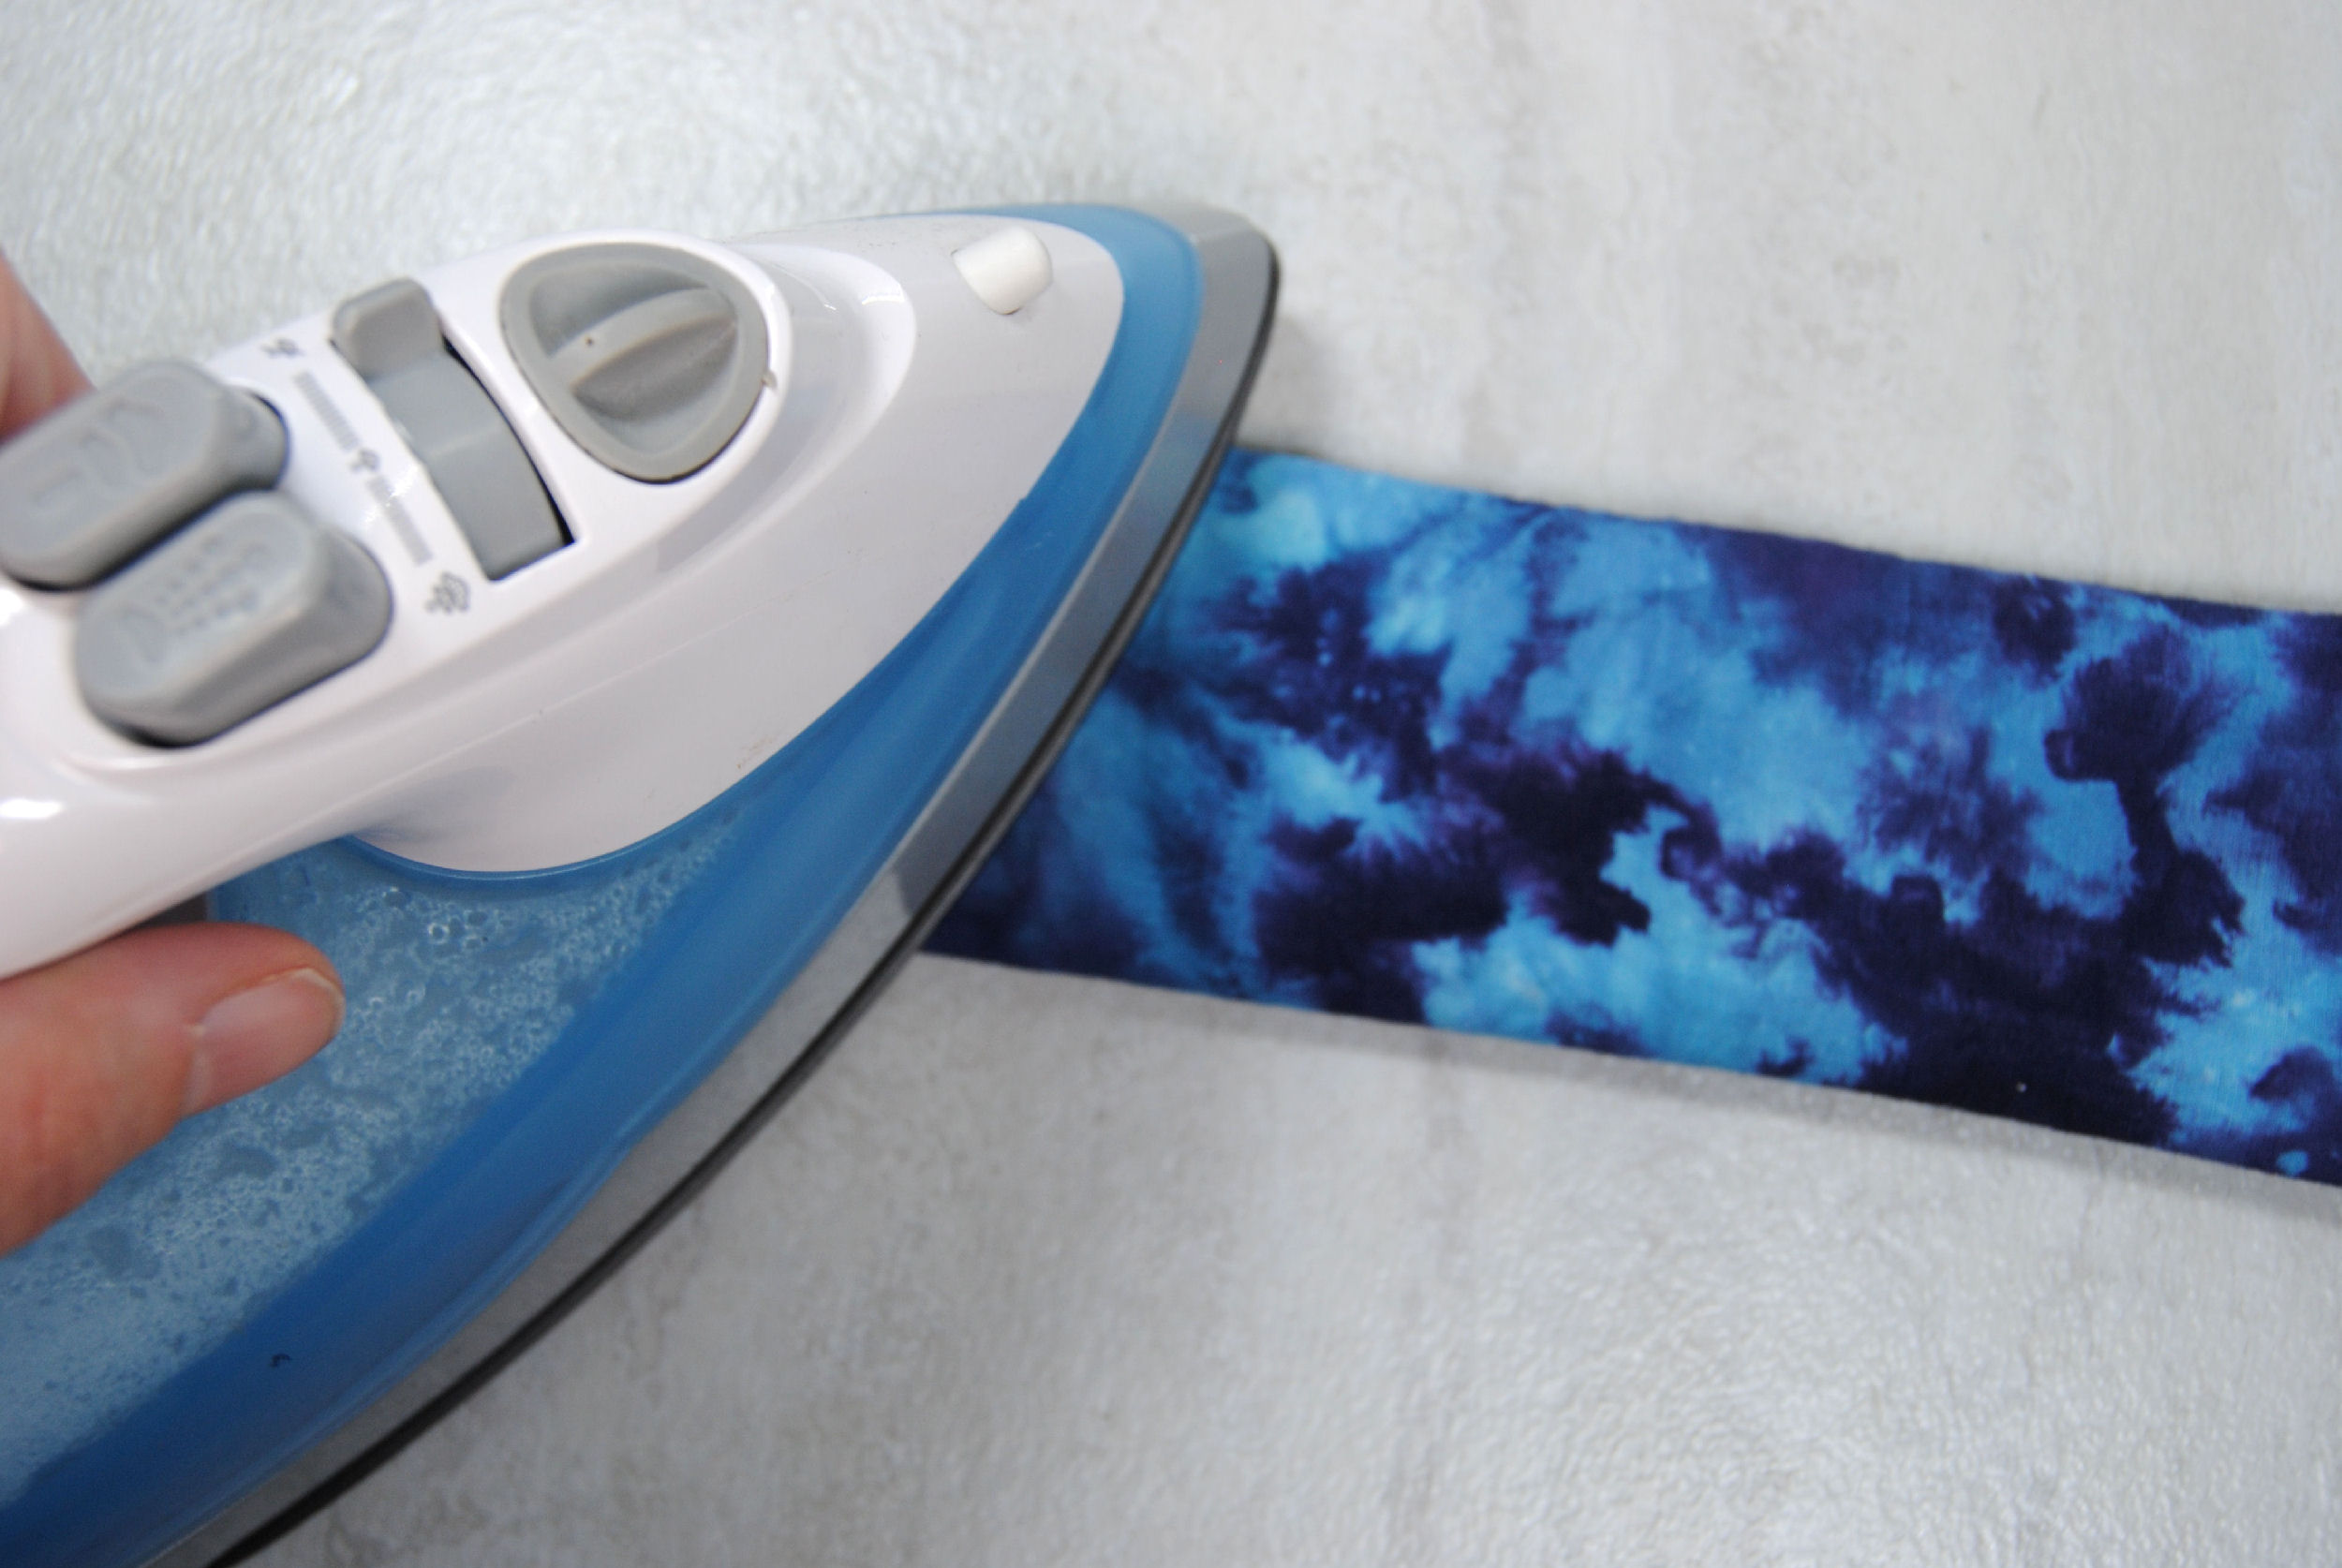
Hand stitch remaining edge
Looking good already, but we still have one edge to go. I started by manually pinching the fabric over into the inside of this weird tube we’ve created.
Bring that iron out one more time and iron those folds down along the open edge. You can also go ahead and iron the rest of the bookmark flat while you have that iron handy.
Top Stitch around Bookmark
Starting with that open edge I top stitched two squares from the edge all around my bookmark.
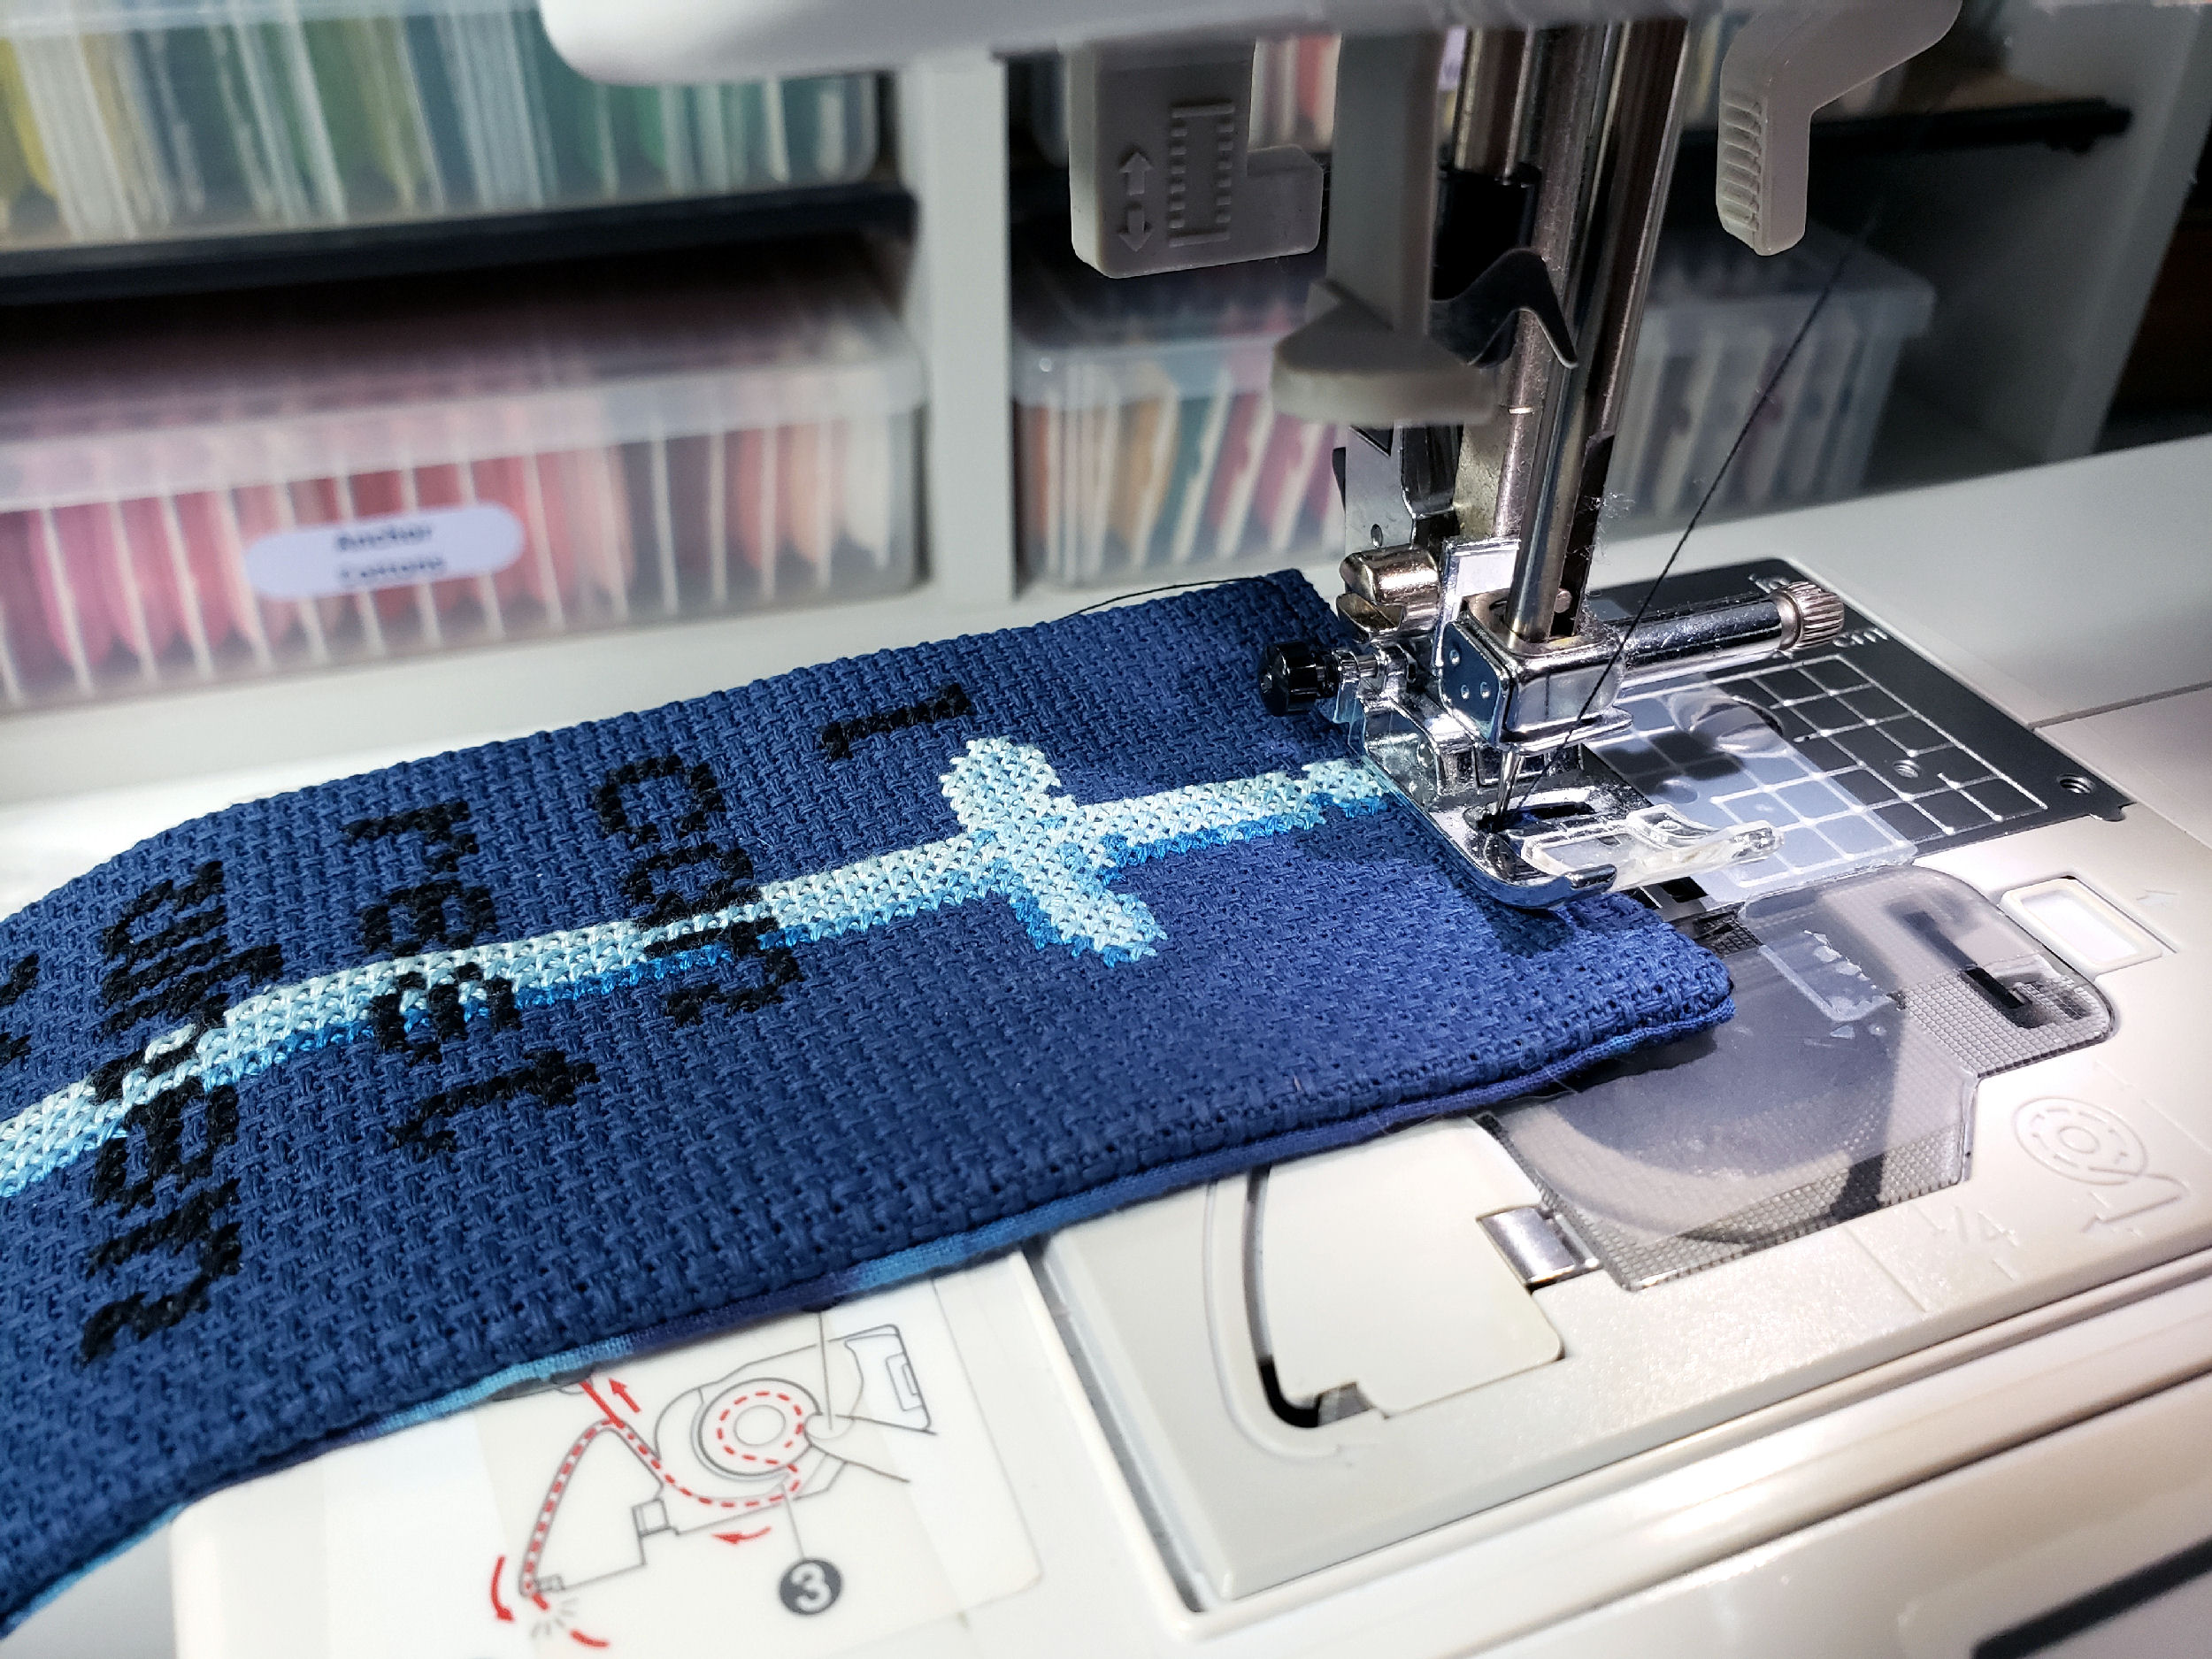
Did I do it perfectly? Absolutely not. I’m still very much a beginner when it comes to sewing and stitching in a straight line is hard even with that aida grid to guide you.
Does it matter? Absolutely not. It’s a handmade item and will have some slight imperfections. Try not to let it get you down. Your technique (and mine) will improve in time.
Regardless, I love how they turned out. Even without the extra frills. This fabric made it quite special enough already! Maybe next time though I’ll try adding some edging or a tassel though. We’ll see!


