Hoop Decorating to Embellish Your Cross Stitch & Embroidery Projects
This month I wanted to share with you some creative ways to decorate your embroidery hoop for framing! I’ve gone over a lot of finishing techniques on this blog, but I’ve always kind of avoided hoops and frames. They’re so common, and there are tons of tutorials out there for backing hoops or framing your cross stitch. I didn’t really have anything to add!
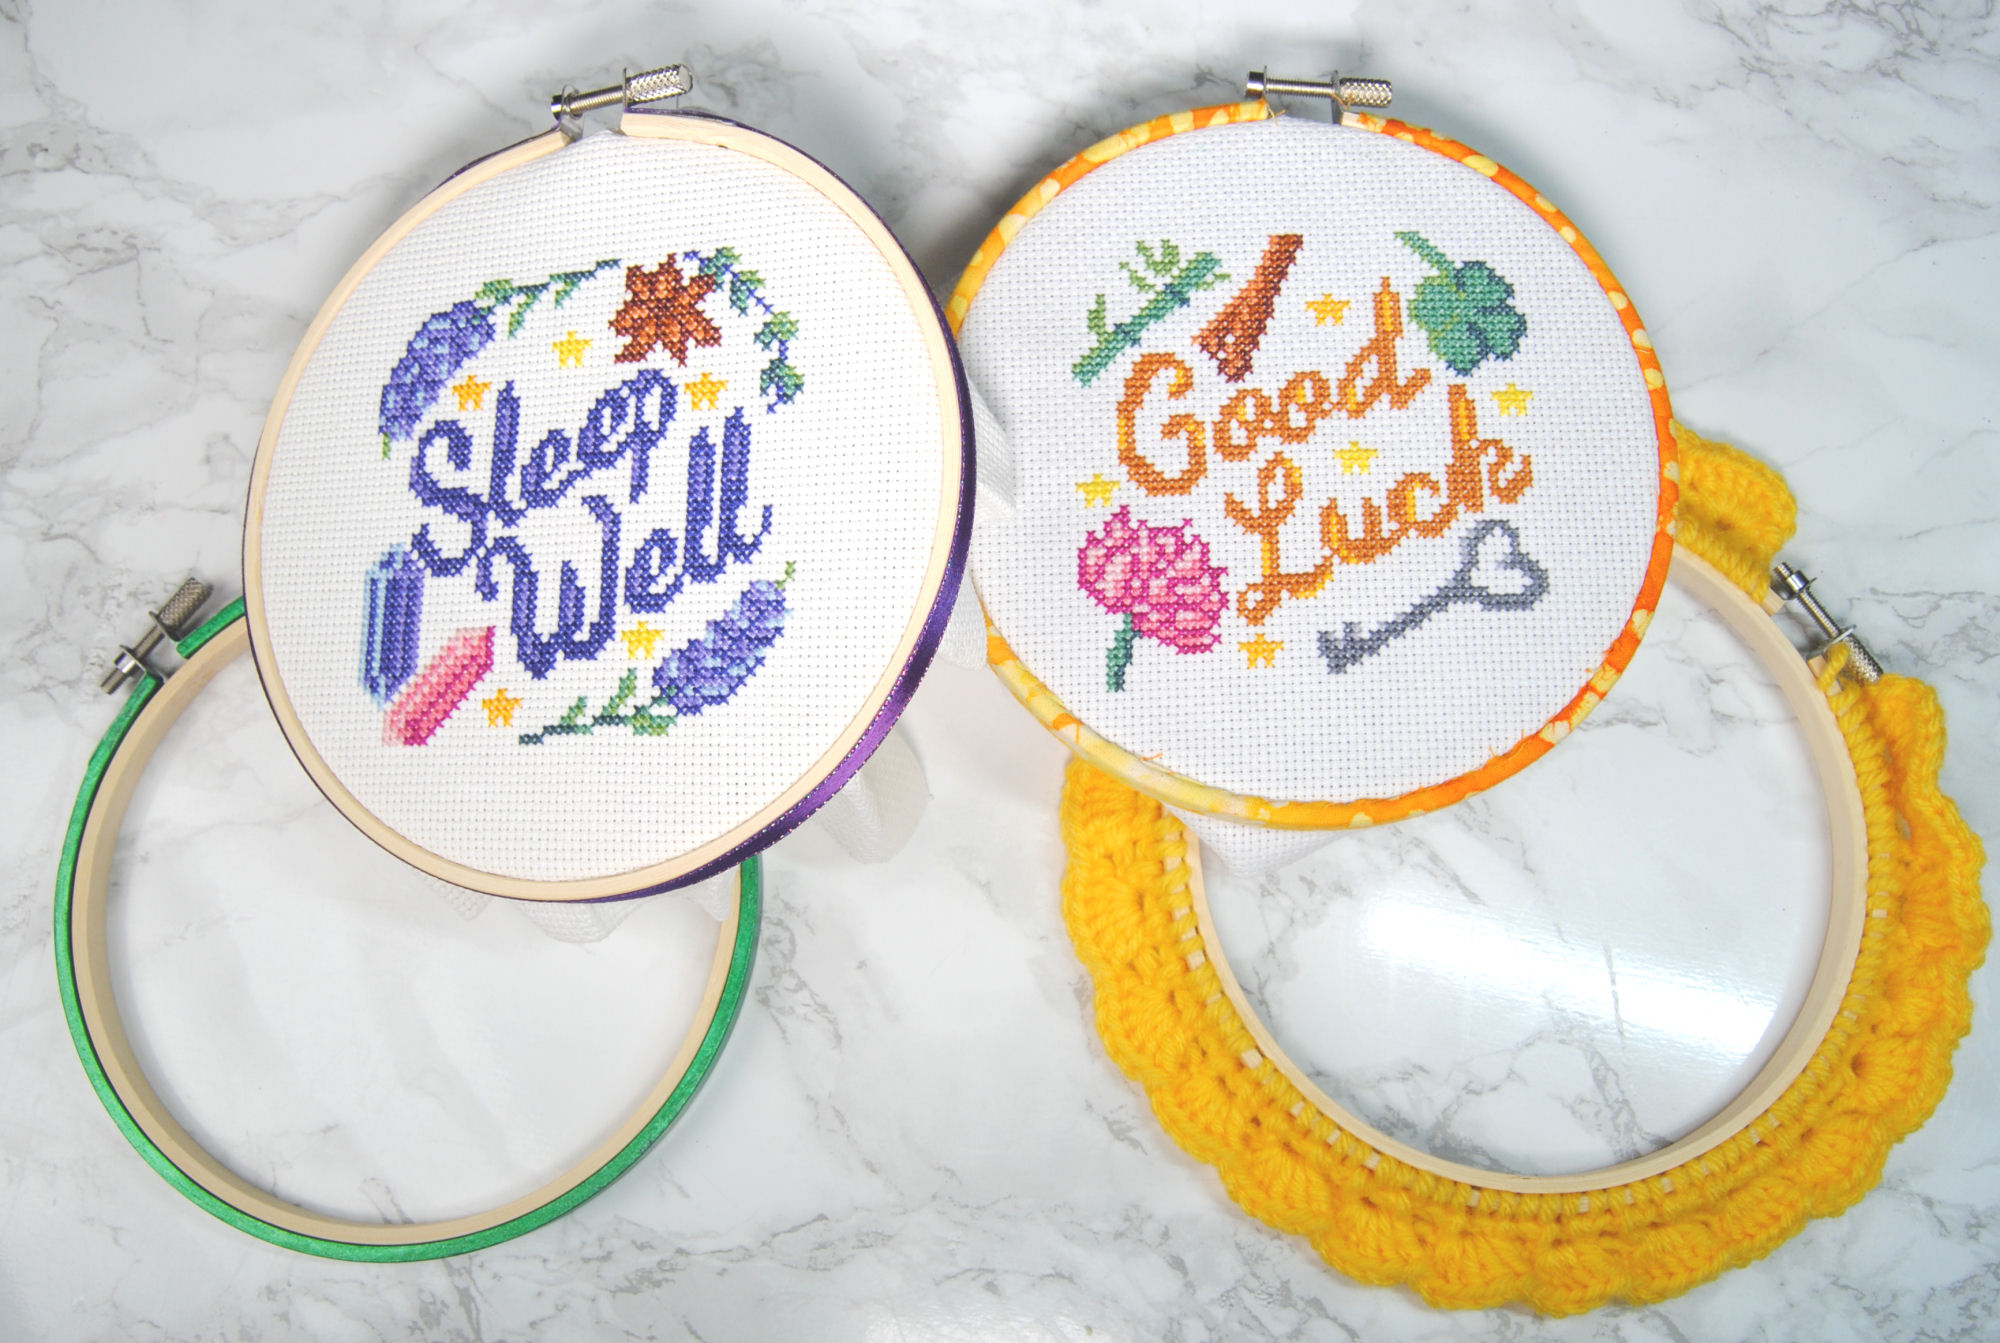
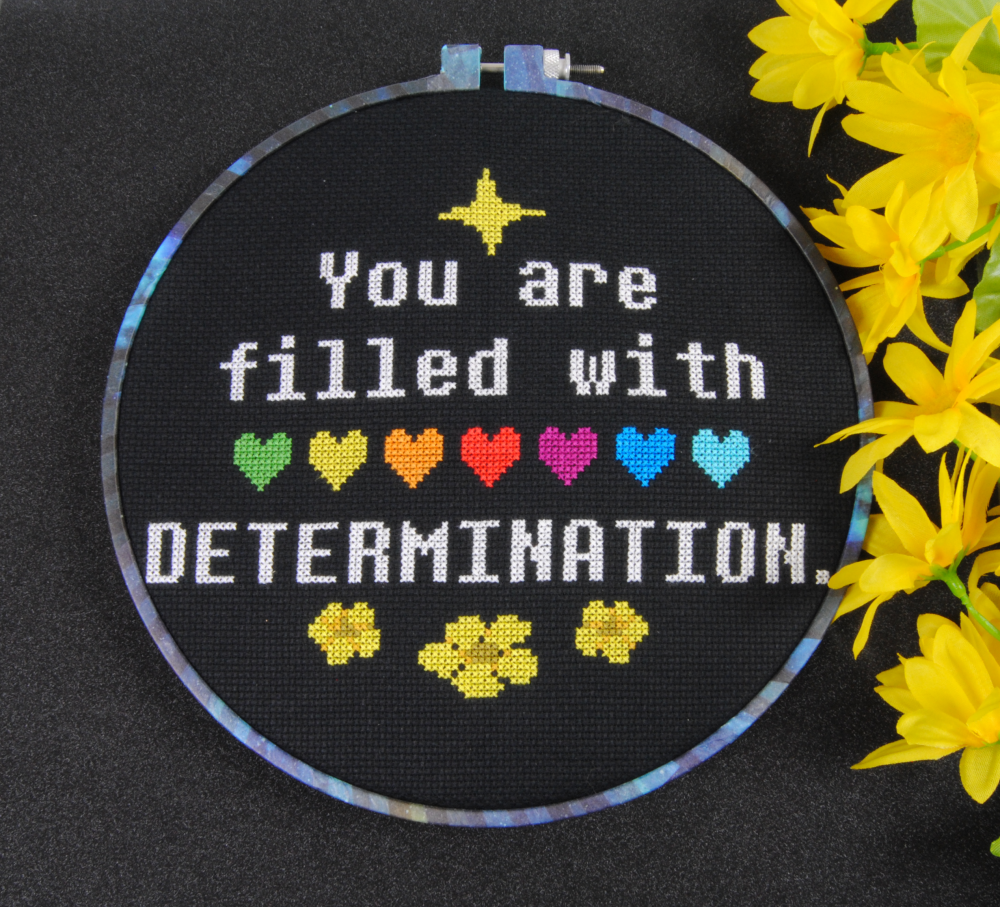
But ever since the Undertale Cross Stich Book came out, I’ve gotten tons of questions on some of the finishes I included. One of which is this determination hoop! When I was putting together the book, I wanted to make sure each example was unique and would give you ideas on what to do with your stitching. Including the ‘obvious’ ones like hoops and frames.
That said– the only hoop I had at the time was bright blue, and that didn’t quite fit what I was going for! So I had the idea to wrap it with washi tape. And you guys loved it! So today I want to explore some other ways to decorate your hoops to make them stand out amongst others.
I only have 4 hoops to work with, so I’ll be partially doing and undoing some of these techniques so I can show you more options. I’ll also be using the same couple of projects so you can see how big of a difference the framing can make on your finished piece. This is gonna be another long, image heavy post, so let’s get started!
This post may contain affiliate links. If you buy something using one of these links, I earn a small commission. However, there is no extra cost to you. Thanks for understanding! Learn more in my Disclosures & Privacy Policy.
Table of Contents
Washi Tape
Since this is the hoop that inspired the post, let’s get to it right away. I simply wrapped the hoop with washi tape at an angle. You can also see where I kind of cut it around the top pegs.
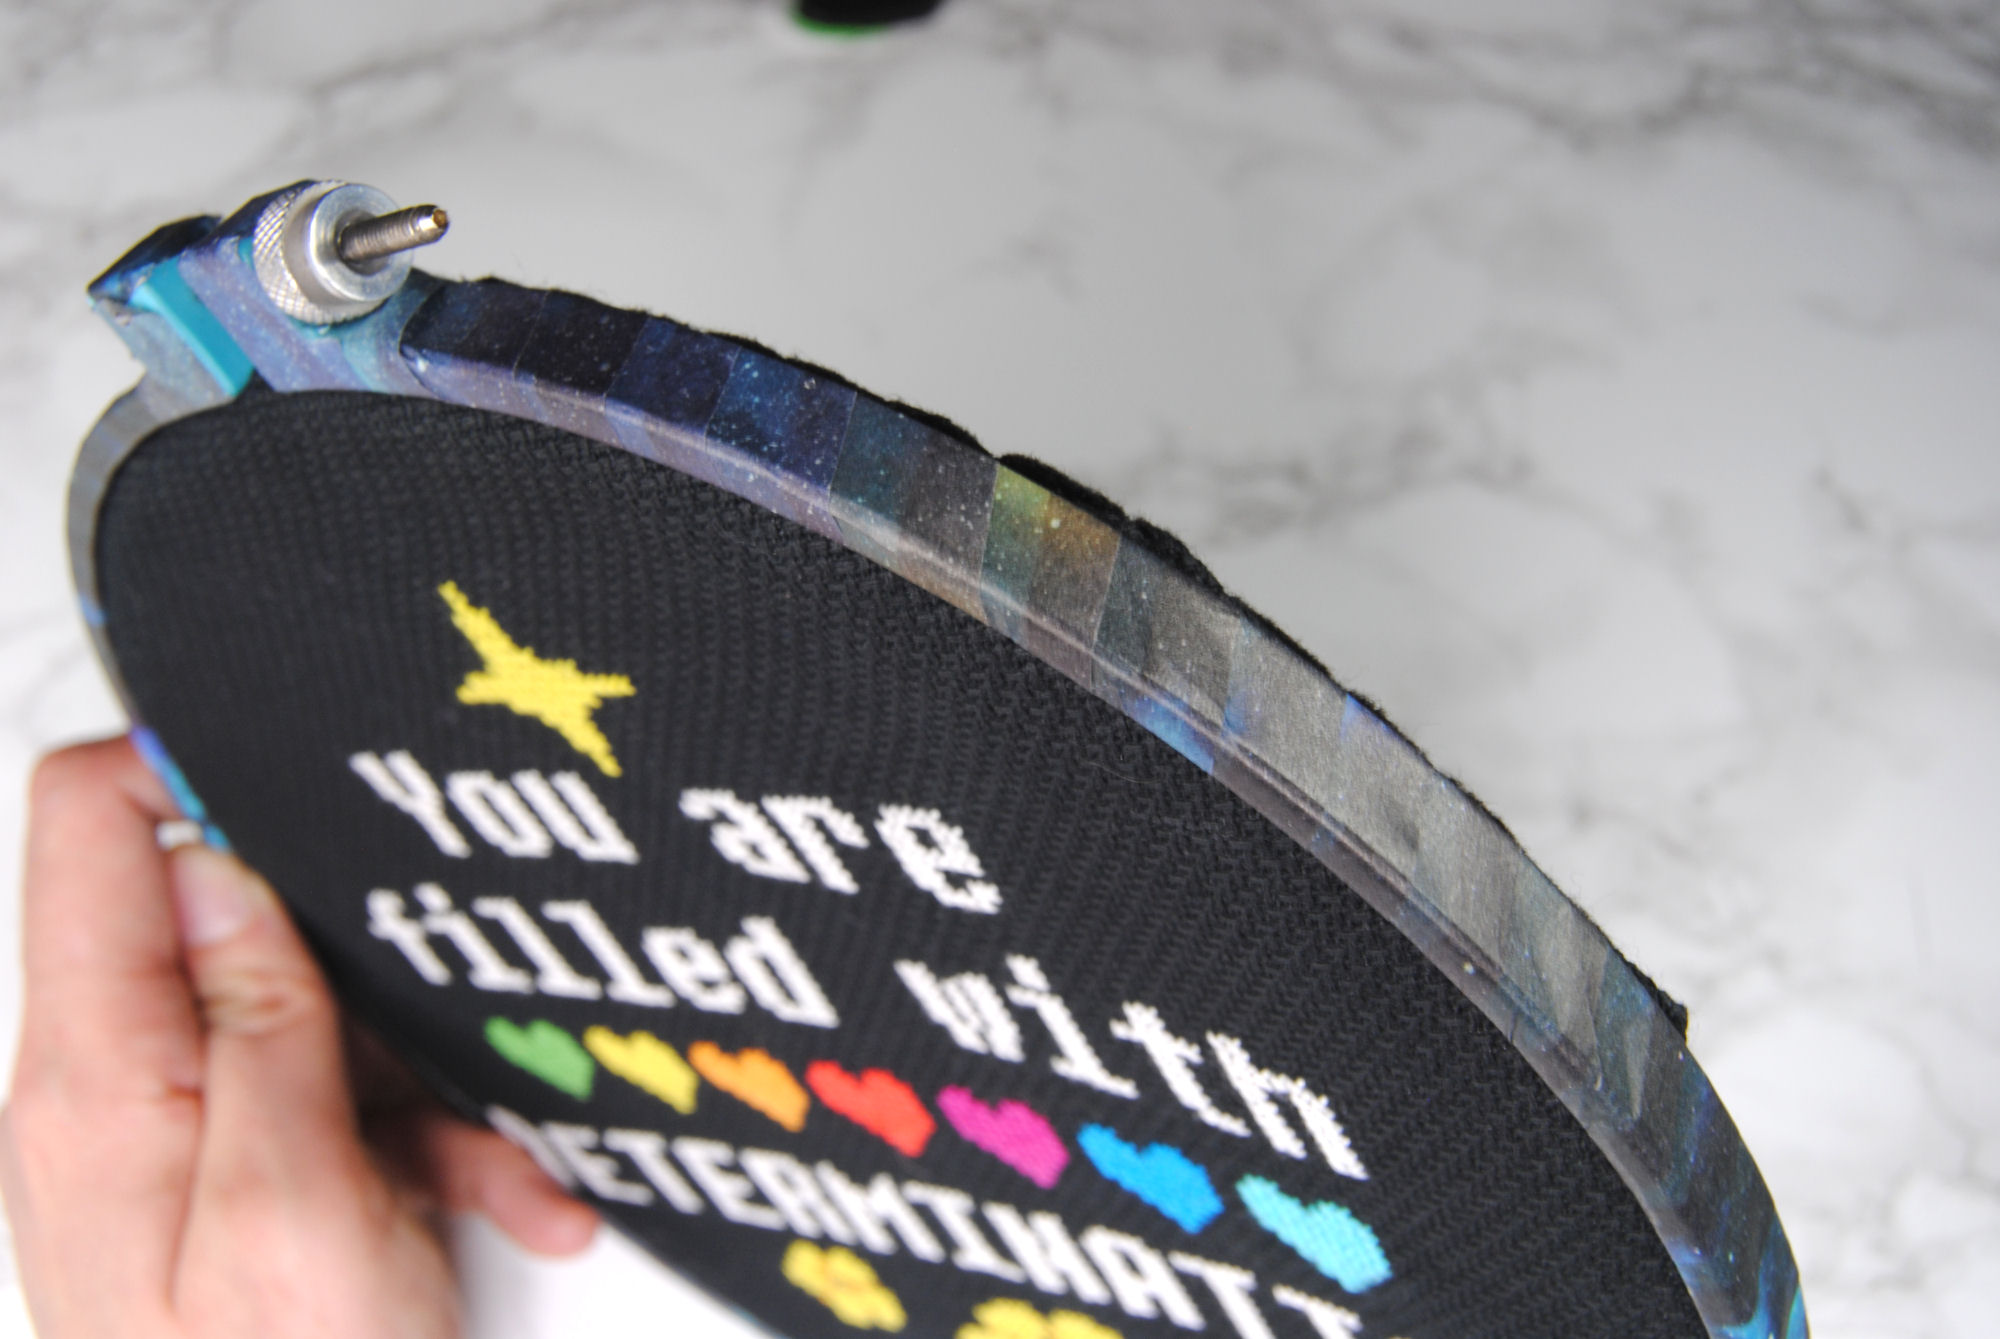
This particular design was from a cheap set of ‘galaxy’ washi tape. I don’t know how well this would look on a heavily patterned tape like the monstera leaf or pineapples pictured in the background there. I’d recommend solid colors or abstract designs for this. But please feel free to experiment and let me know how it works out!

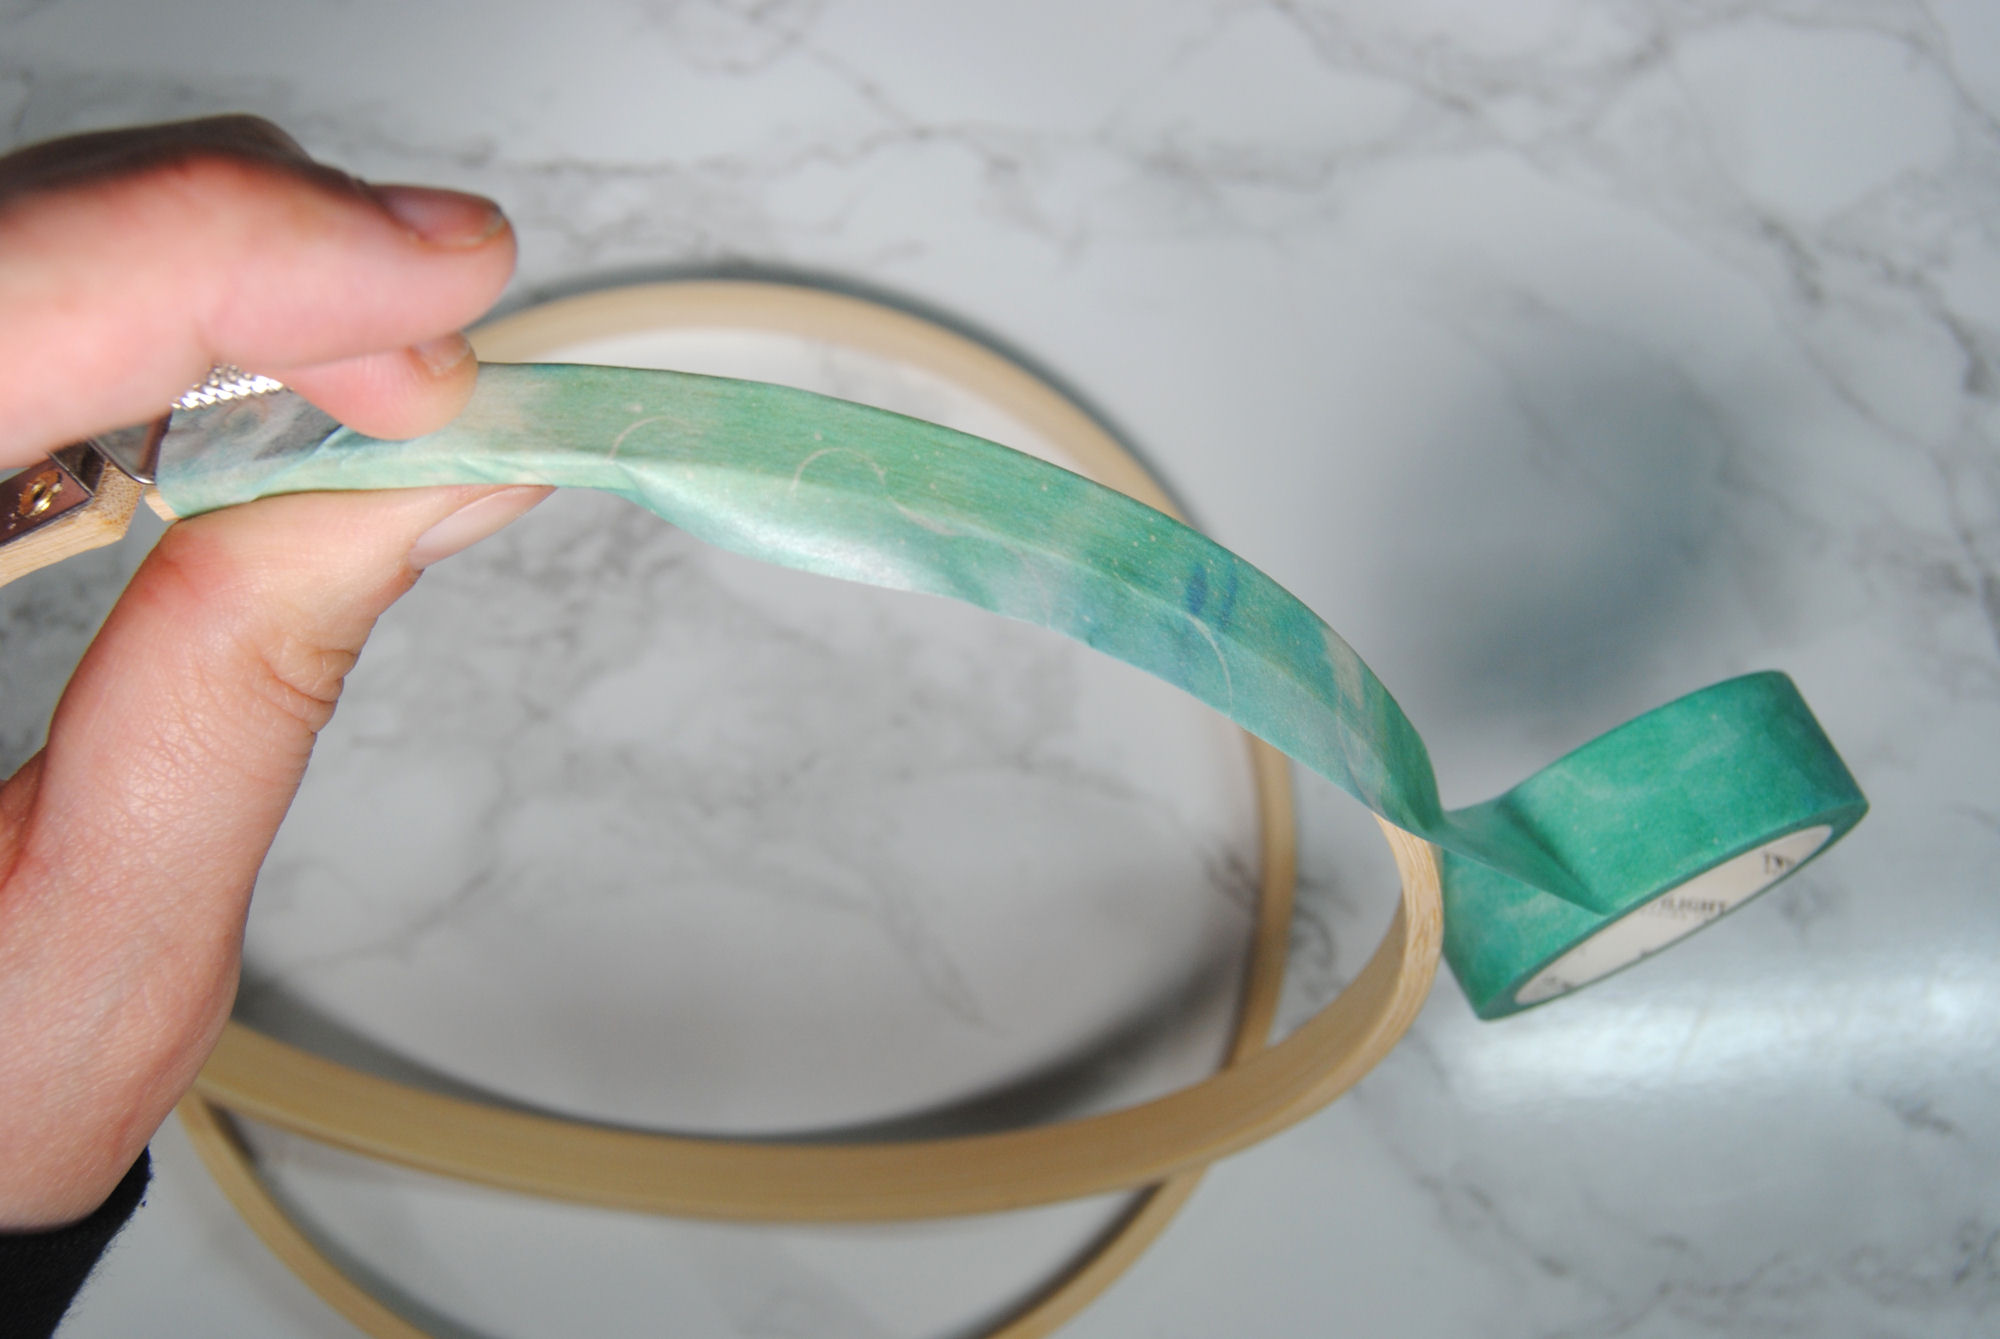
It takes a bit of patience to get it to wrap cleanly and stay flat without wrinkling up. Here’s an example using another color from that same set, again wrapped horizontally around the hoop. You can see where it has started to bunch up and wrinkle because I was rushing it a bit. Take your time with it to make sure it lays flat for the best effect.

Alternatively, since the inside of the hoop won’t be visible anyway, you could use the tape flat against the hoop and just fold down the sides.
Since the hoop is round, this is more likely to cause creases along the sides though. The edges of the hoop are what’s most visible when looking at the stitch from the front, so this is not quite ideal unless you’re going for a ‘marbled’ look.
I actually don’t mind it, but it’s all a matter of personal preference.
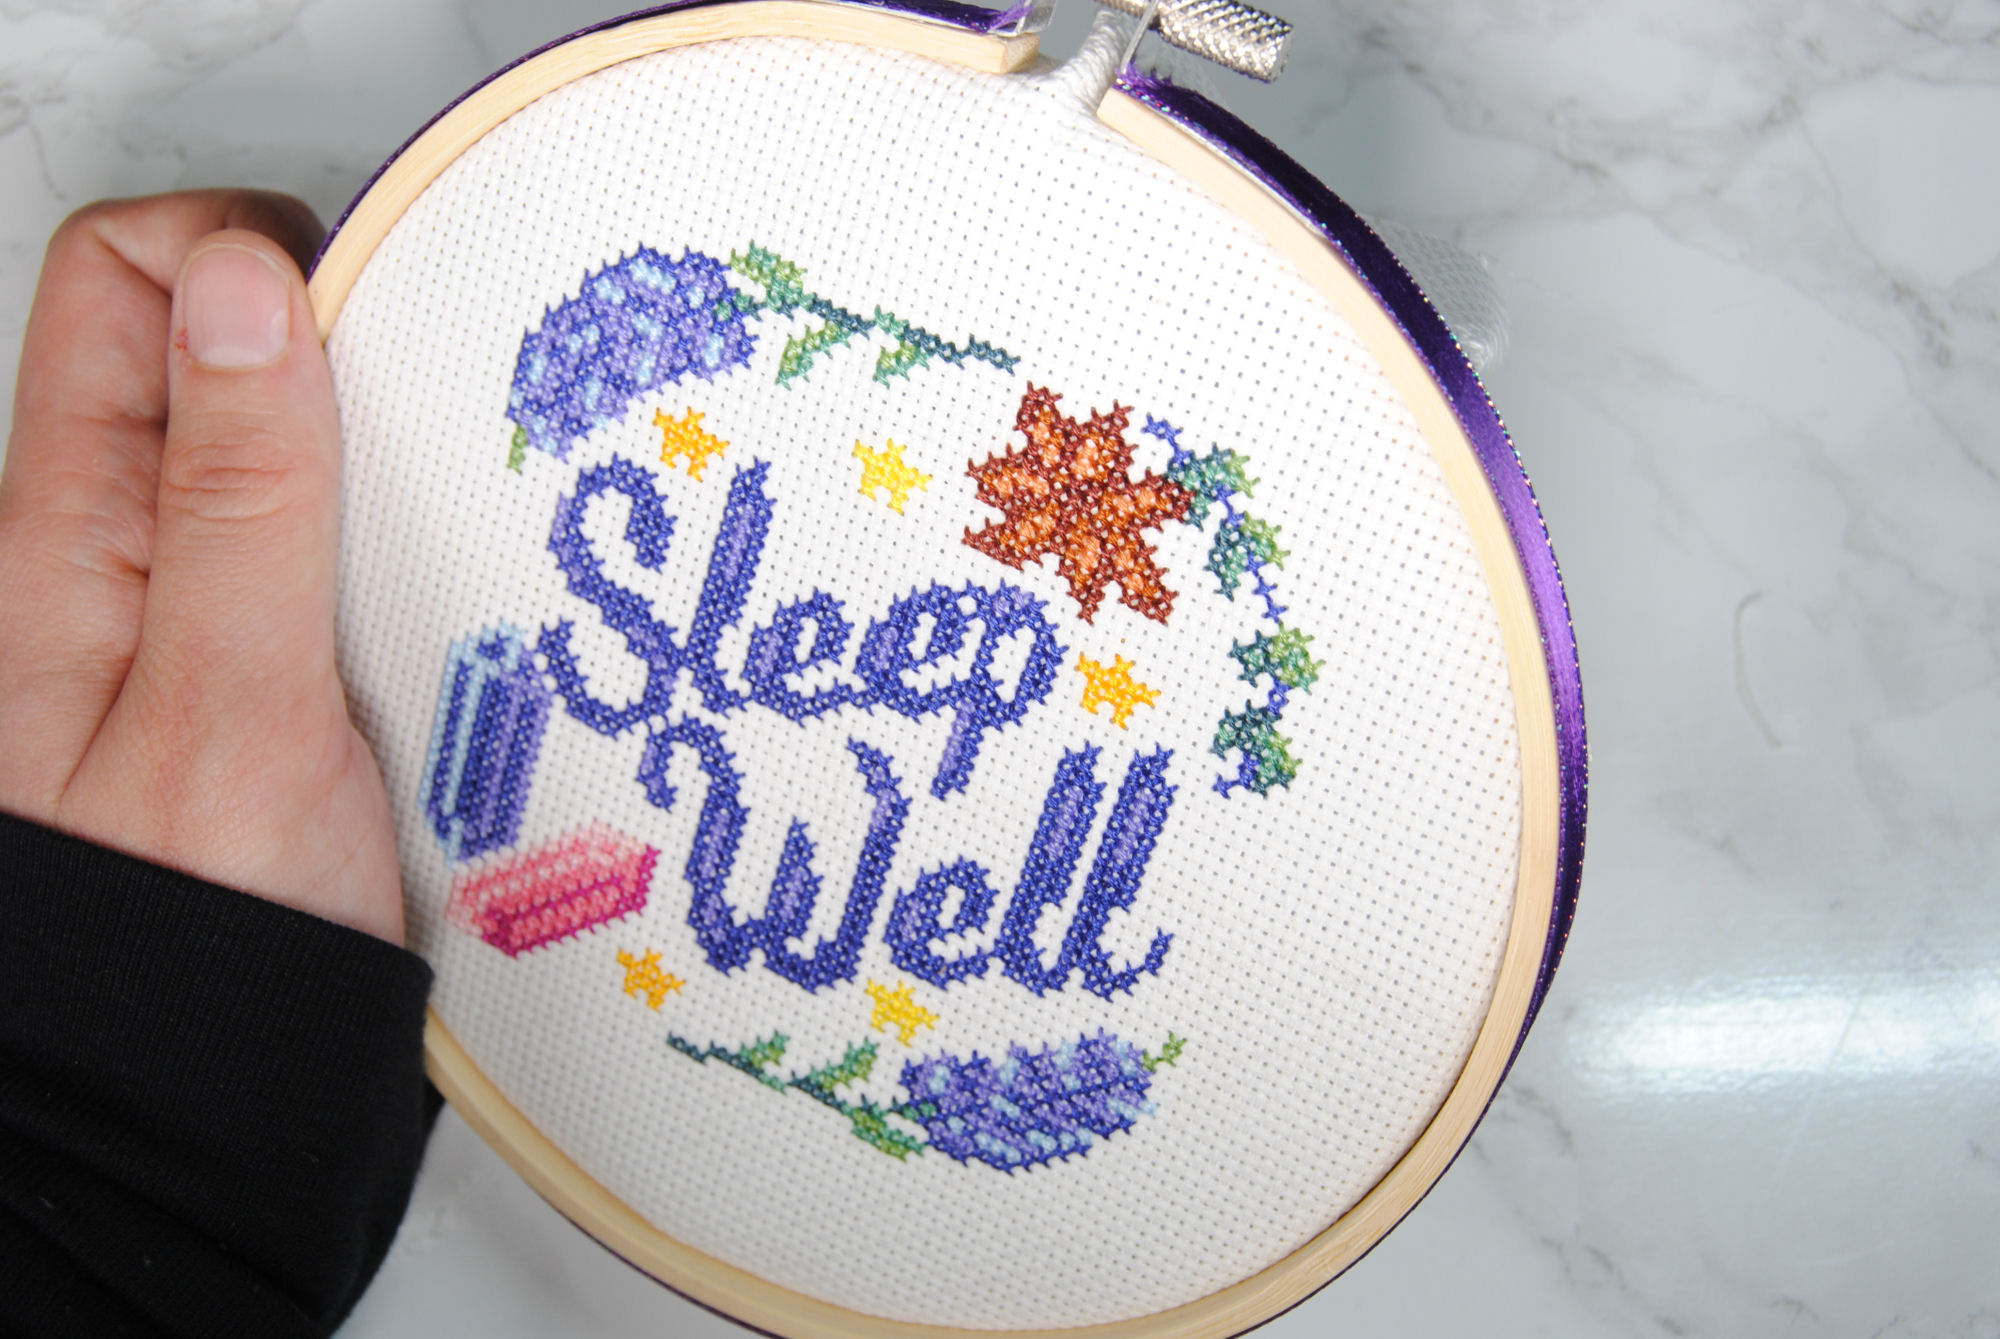
Ribbon
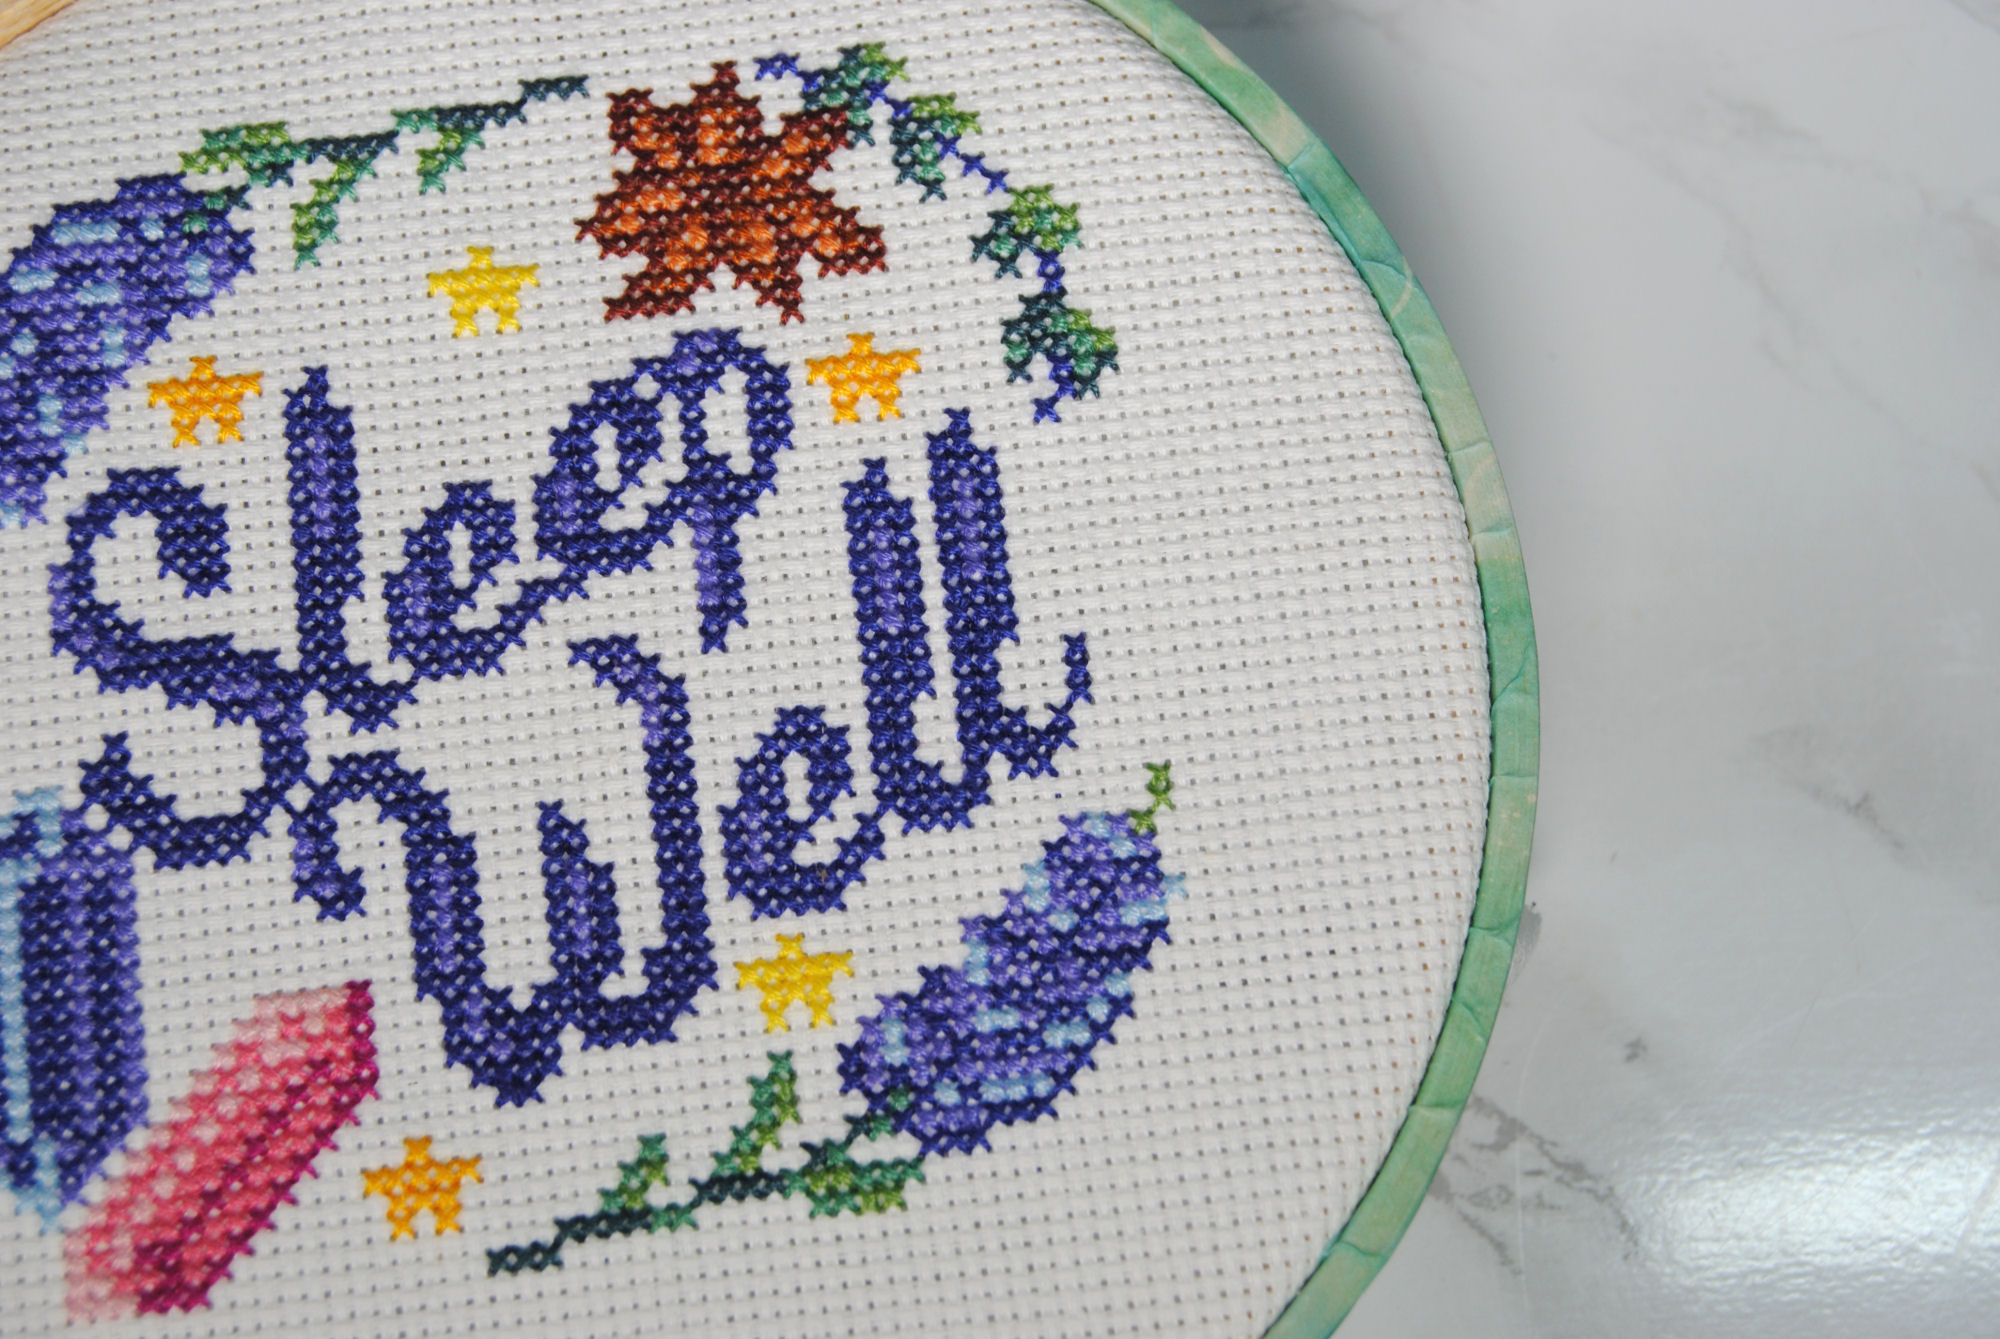
Similar to the washi tape above, you can wrap ribbon around your hoop instead! Ribbon can be found in all sorts of colors and textures to really add some shine to your hoop. I chose this lovely purple with an iridescent trim.
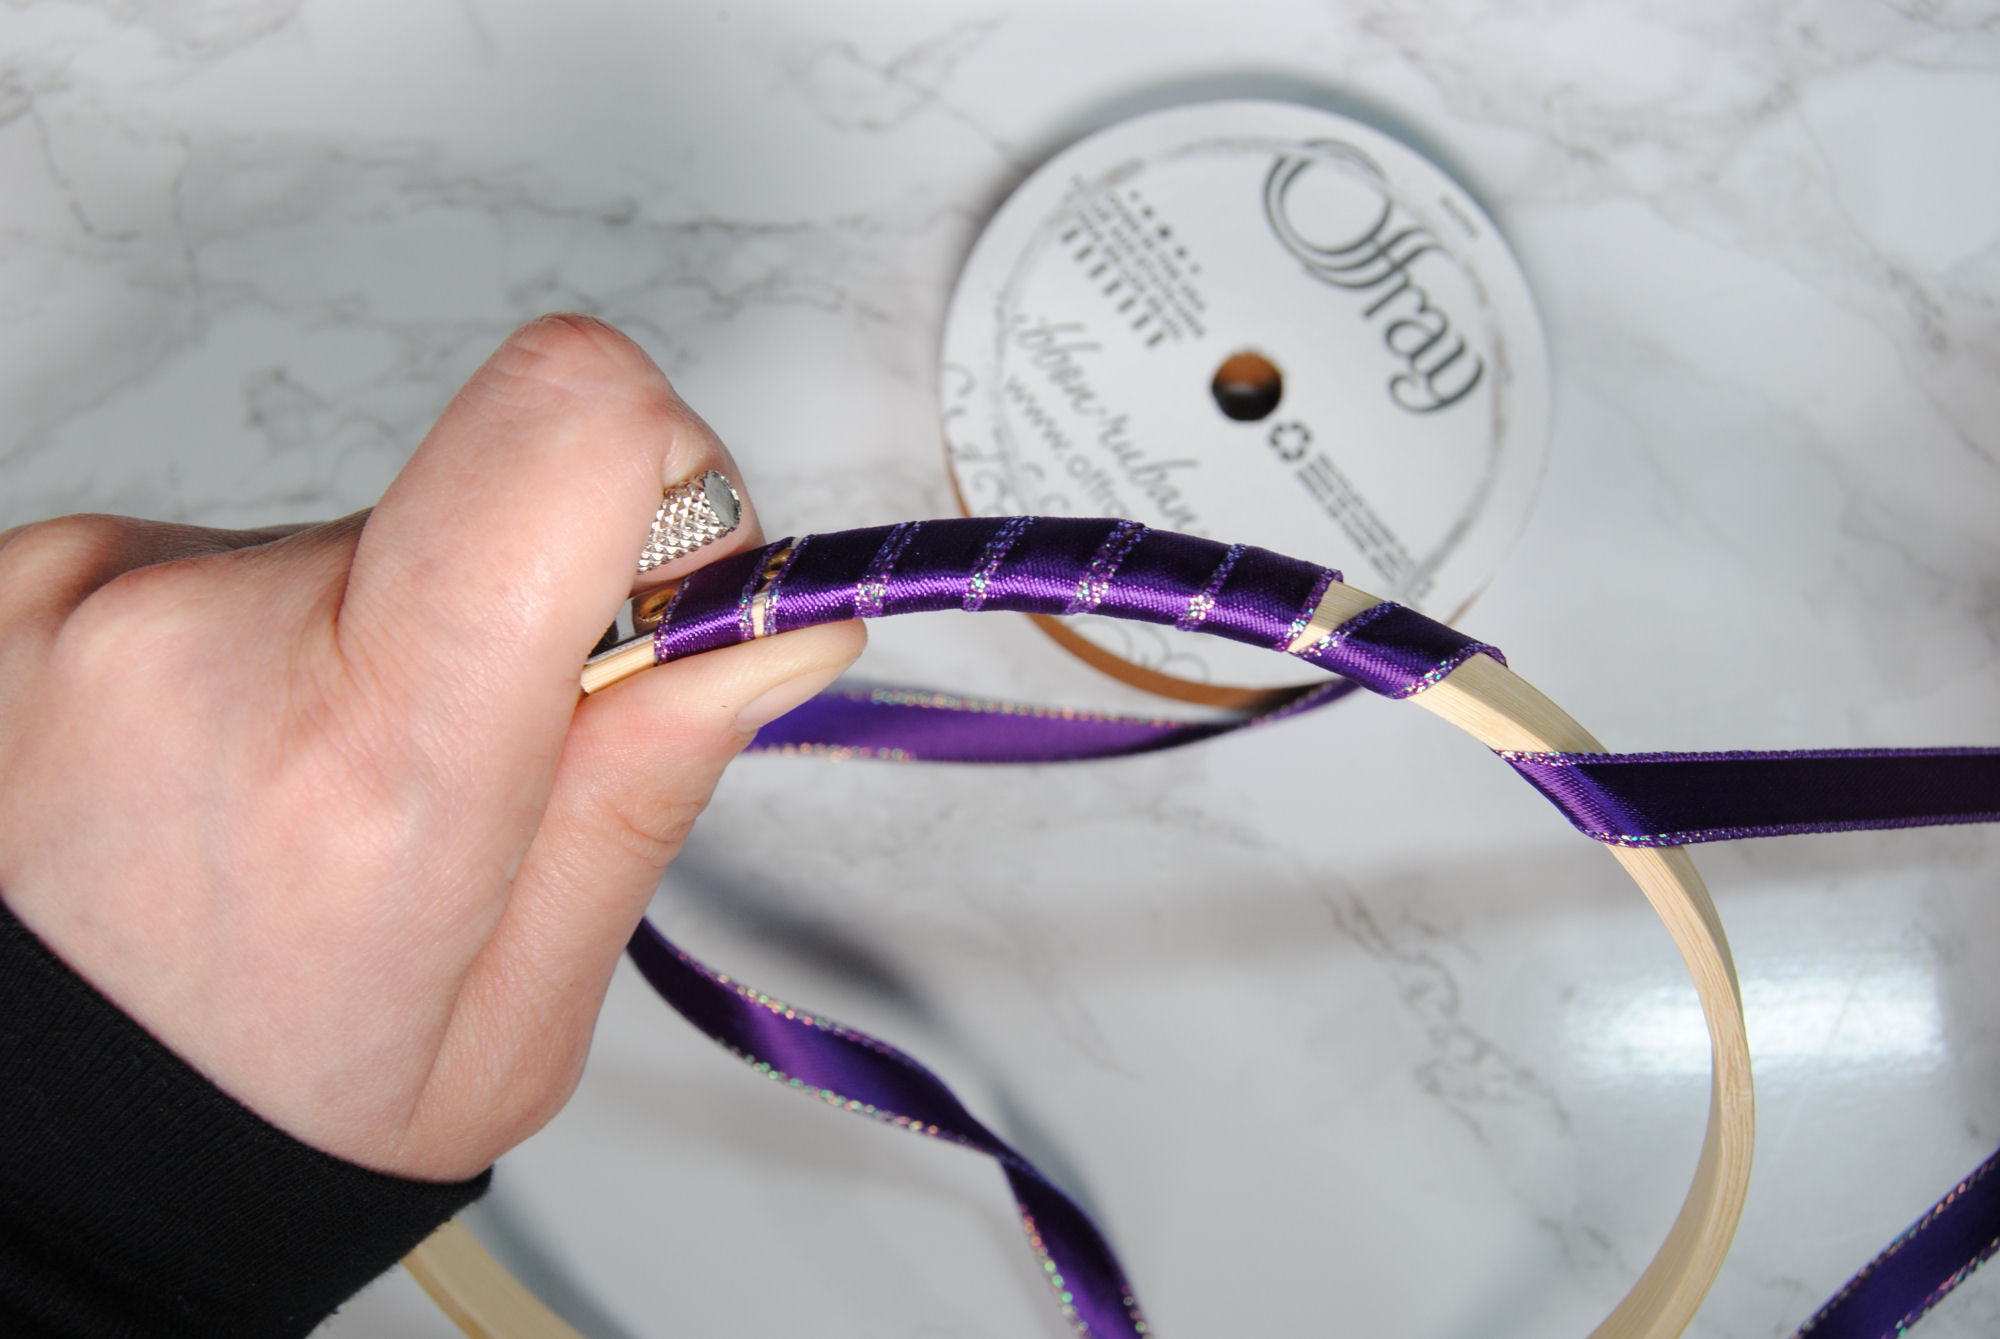
I started by dabbing a small amount of E6000 glue to the tip of the ribbon to get it to stick on the underside of the hoop. This would eventually be pinned in place by the fabric and inner hoop, so it doesn’t have to be permanent. Just enough to get you going.
A glue gun may work, but you’d want to do it on the outside as that glue tends to be thicker and could make it harder to hoop your project later.
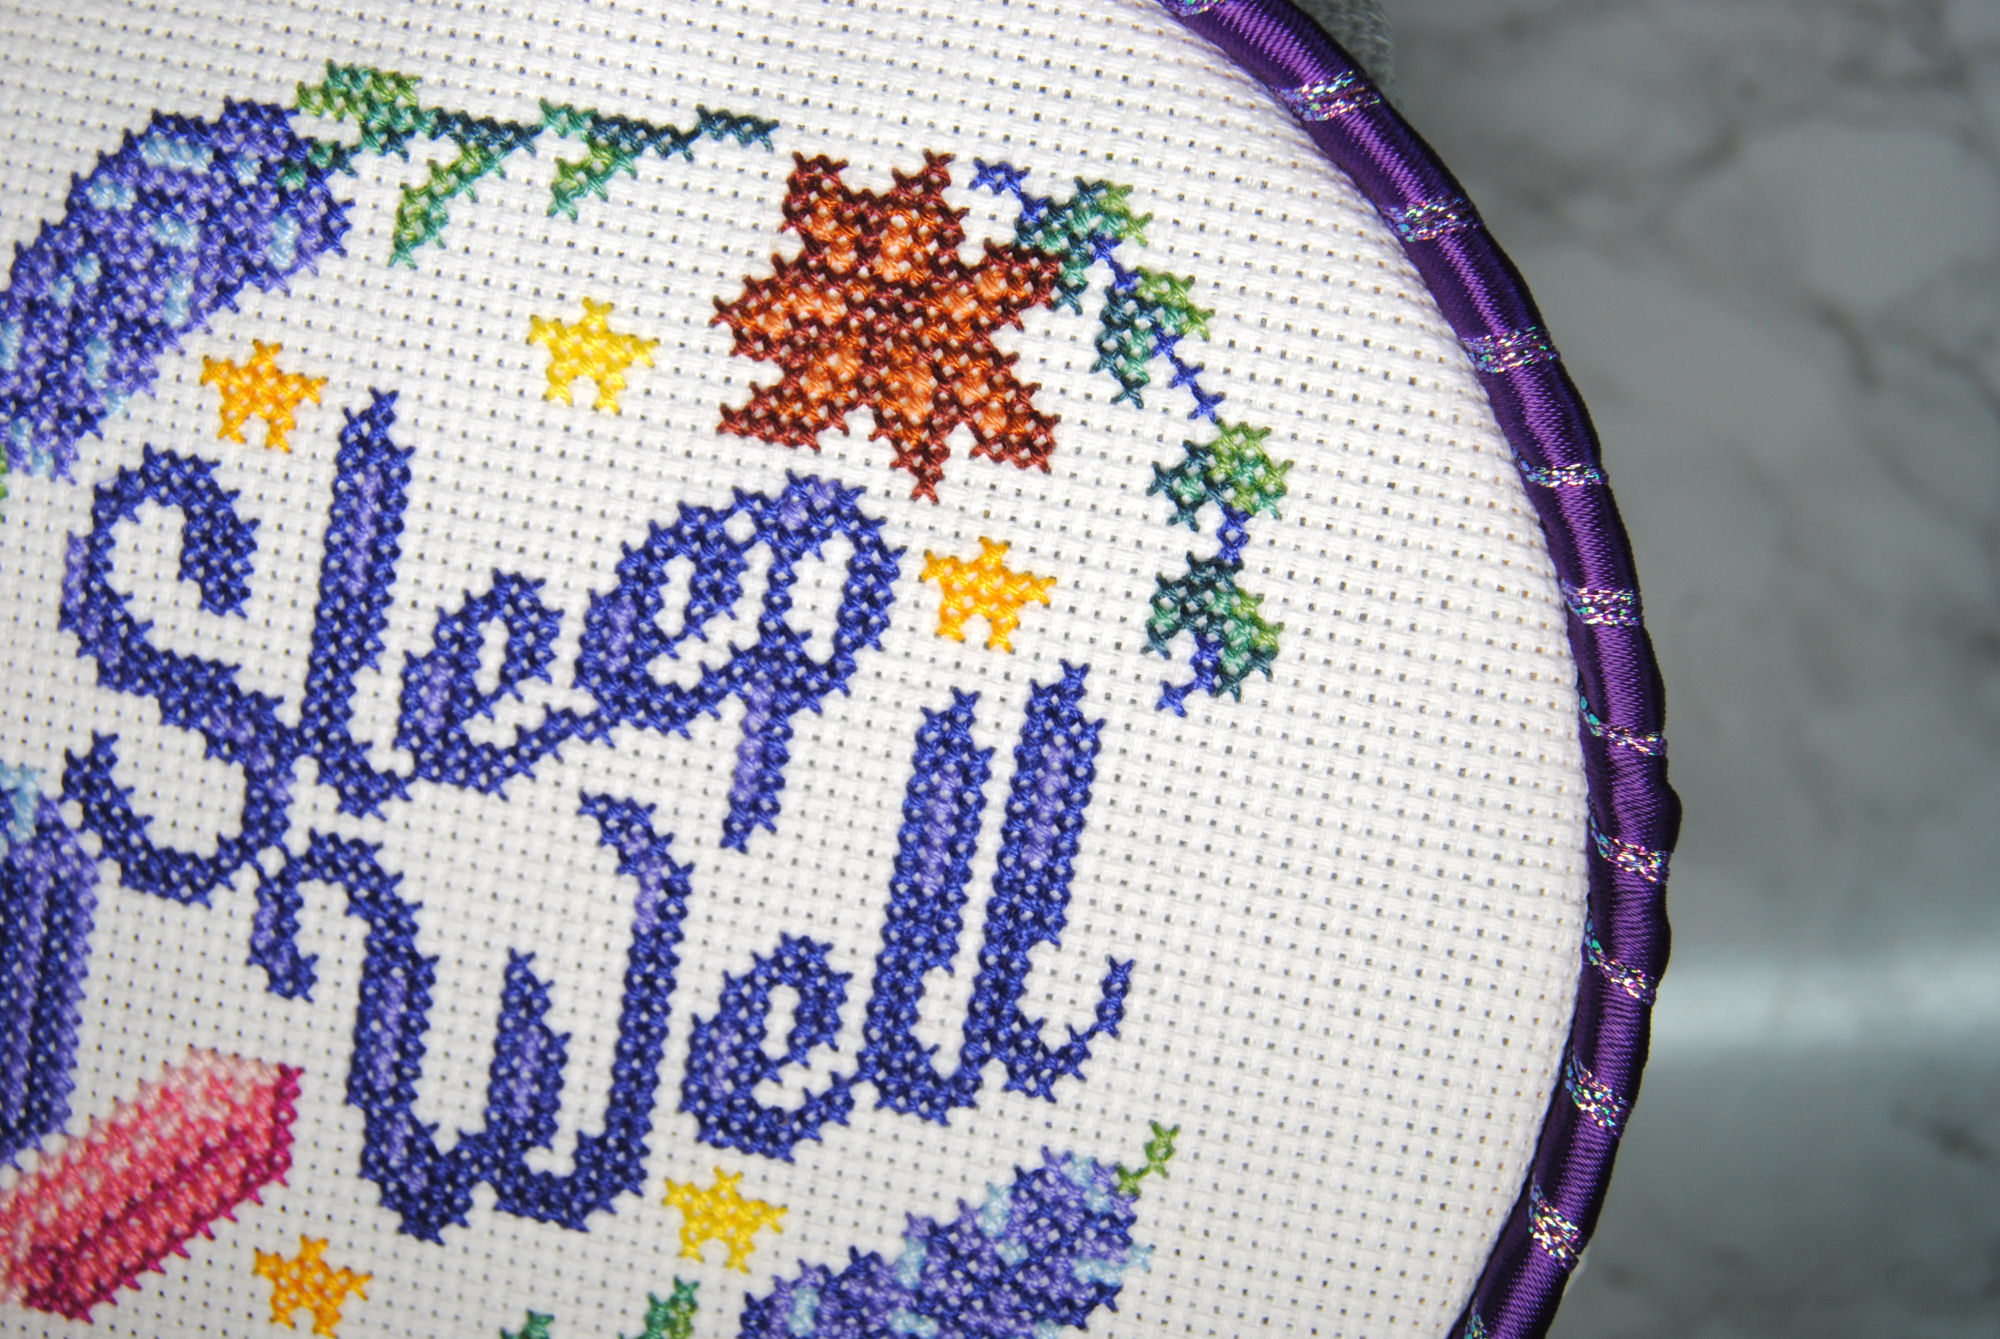
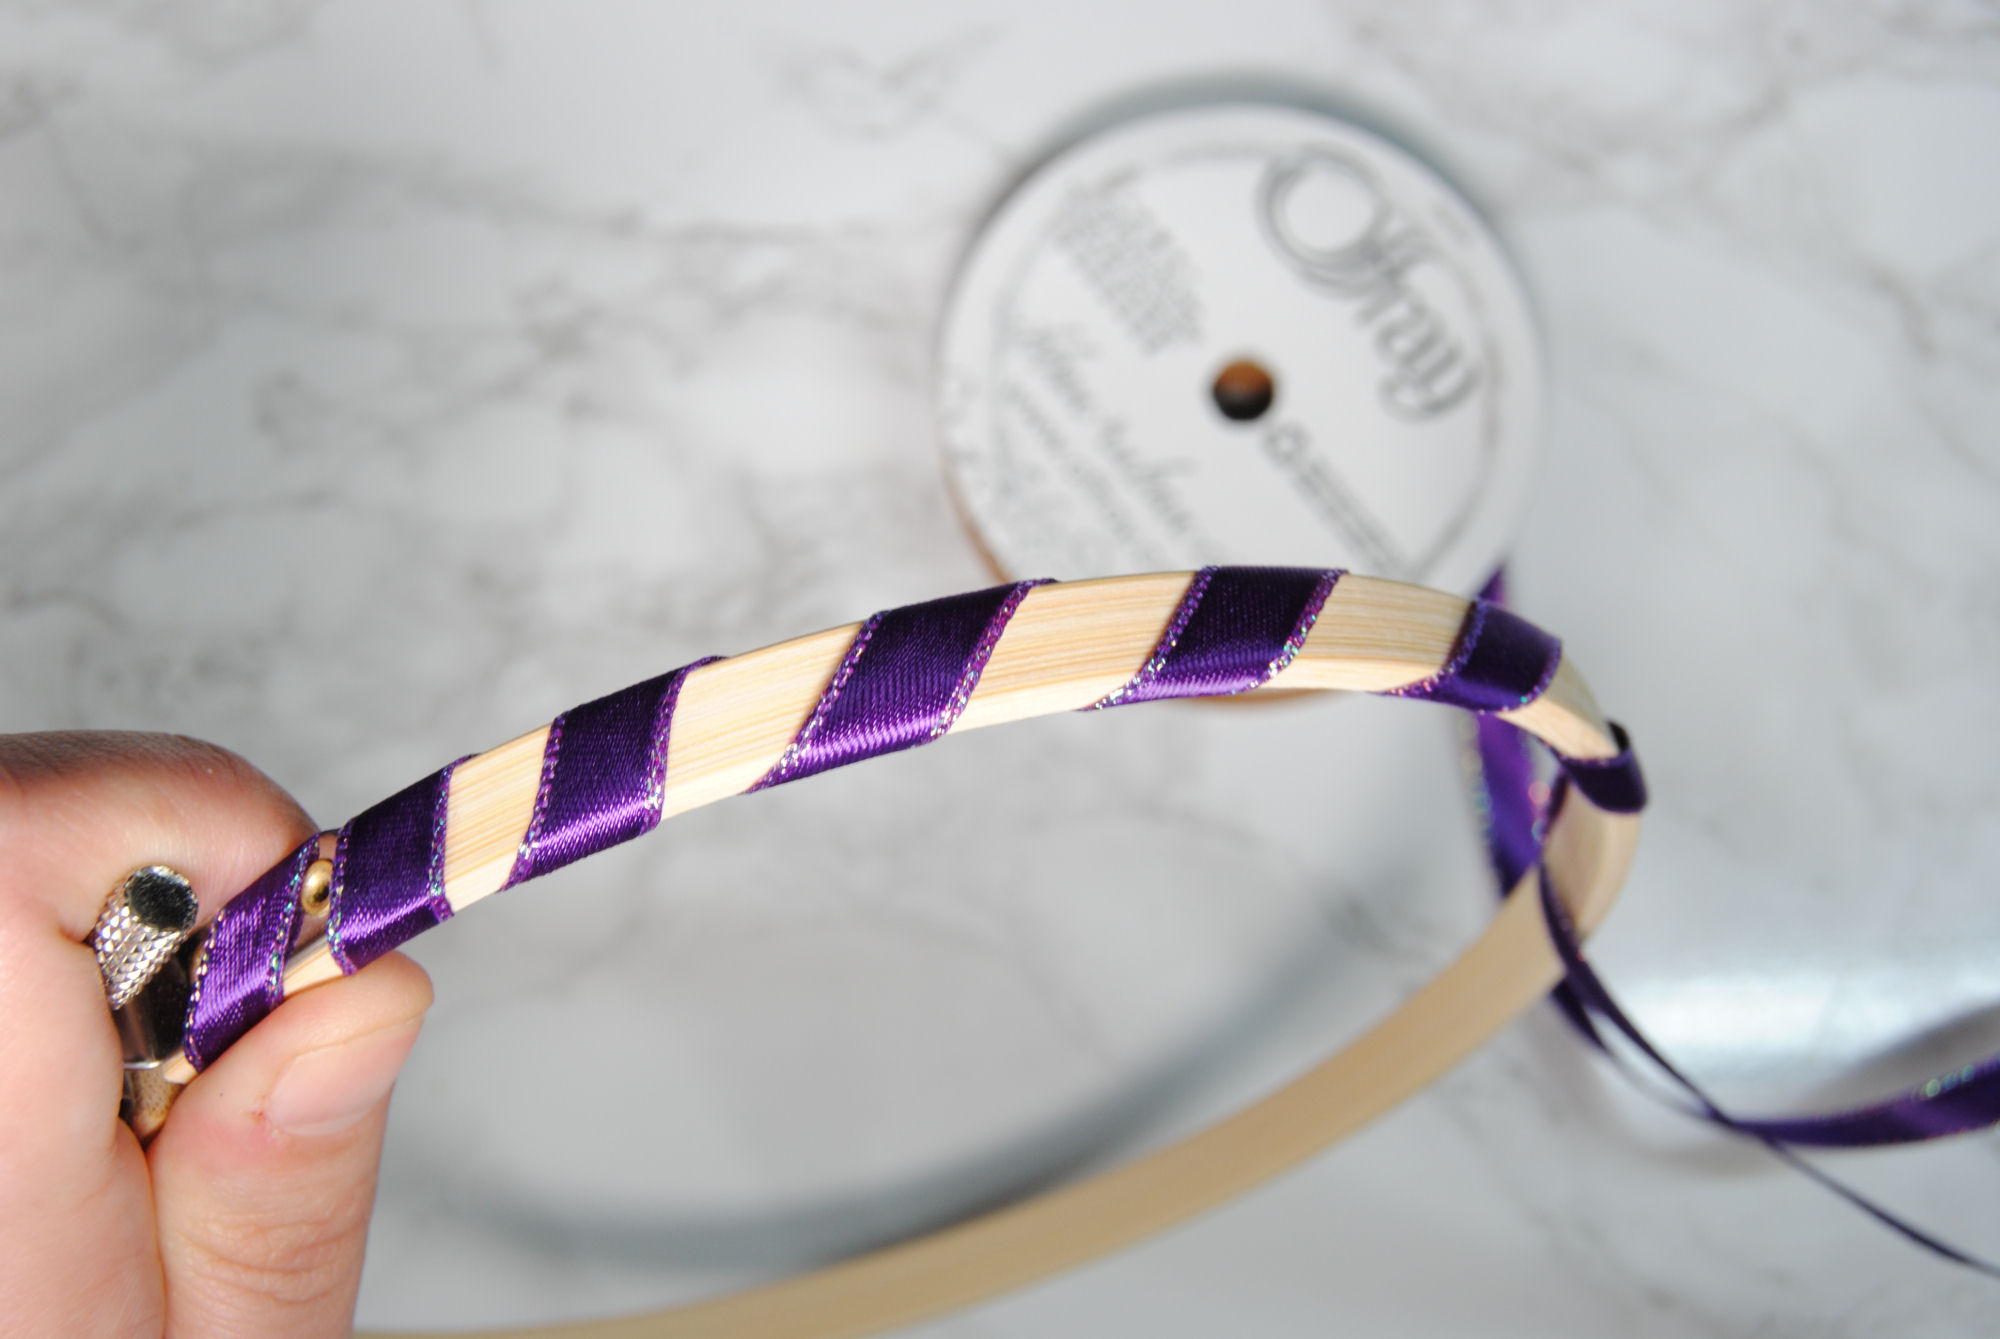
You could keep the ribbon wound closely together like we did with the washi tape, or you could space them out. This would be really cute on a Christmas design for a ‘candy cane’ type feel with a red ribbon!
If all that wrapping feels wasteful of ribbon — you could just glue it flat to the side of your hoop. It won’t be visible from the front, but can add a bit of flair to the hoop none the less.

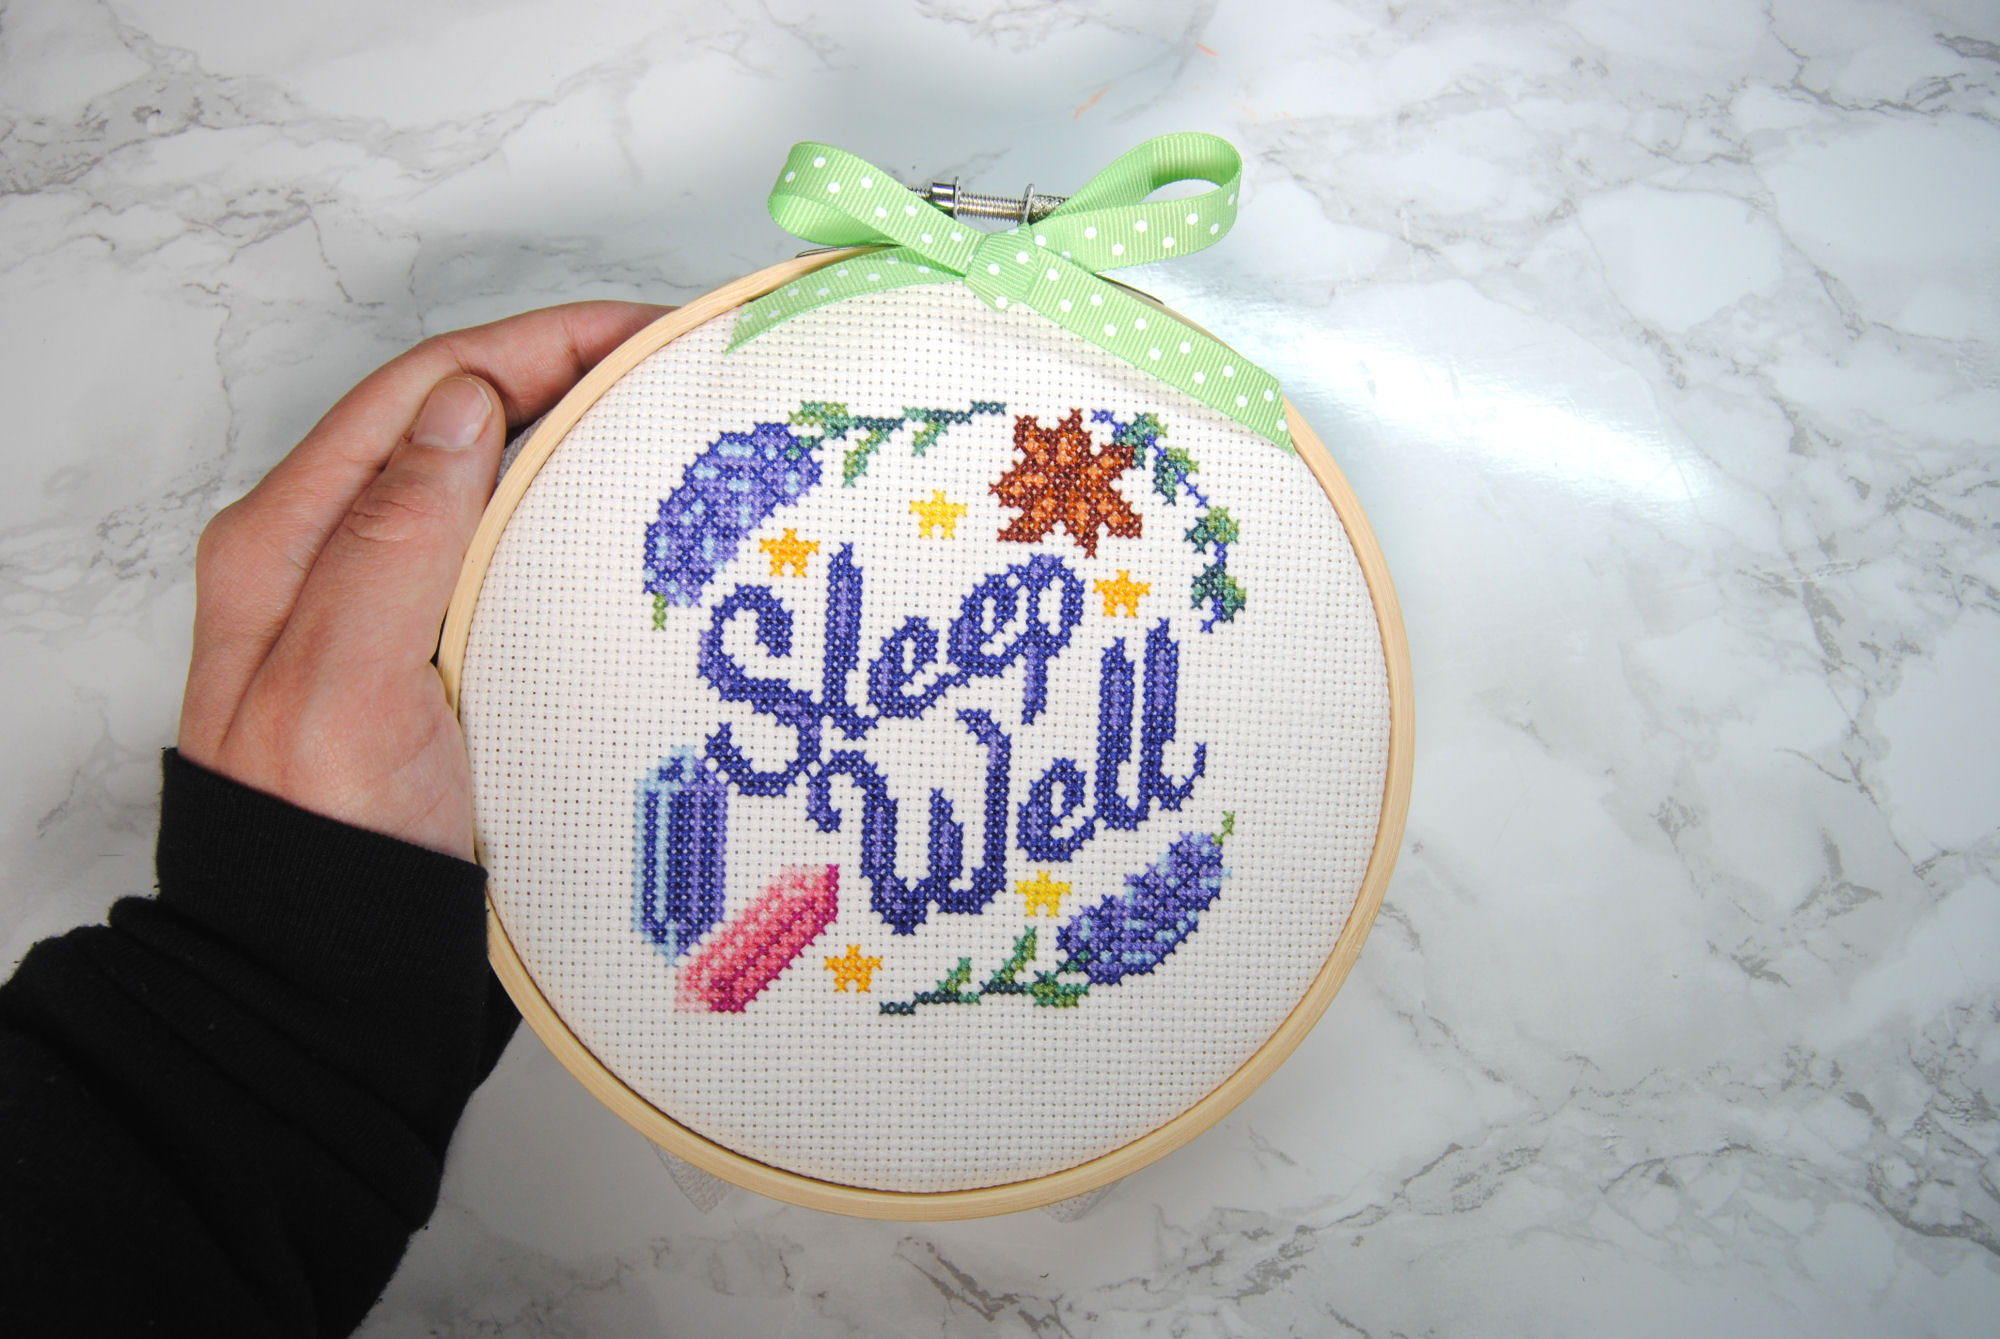
Maybe you’ve already decorated your hoop some other way, or simply prefer the plain wood with your design. You could also just use a bit of ribbon to decorate the the top to ‘hide’ the metal screw. Or a bow at the bottom, depending on your design and preferences! I’m not the best at tying bows, but you get the general idea, right?
Paint or Wood Stain
Another way to decorate your hoop is simply to change the color of it. Using paint or wood stain to achieve your desired look is a fairly simple change, but can have such striking effect!
Now, I didn’t have any wood stain on hand to show you, but I do have lots of paint available! Let’s start by taping off anything I don’t want to be painted. I wanted to keep the metallic bit clear of paint. Even if you’re not using spray paint, I’d still recommend it. Things happen.
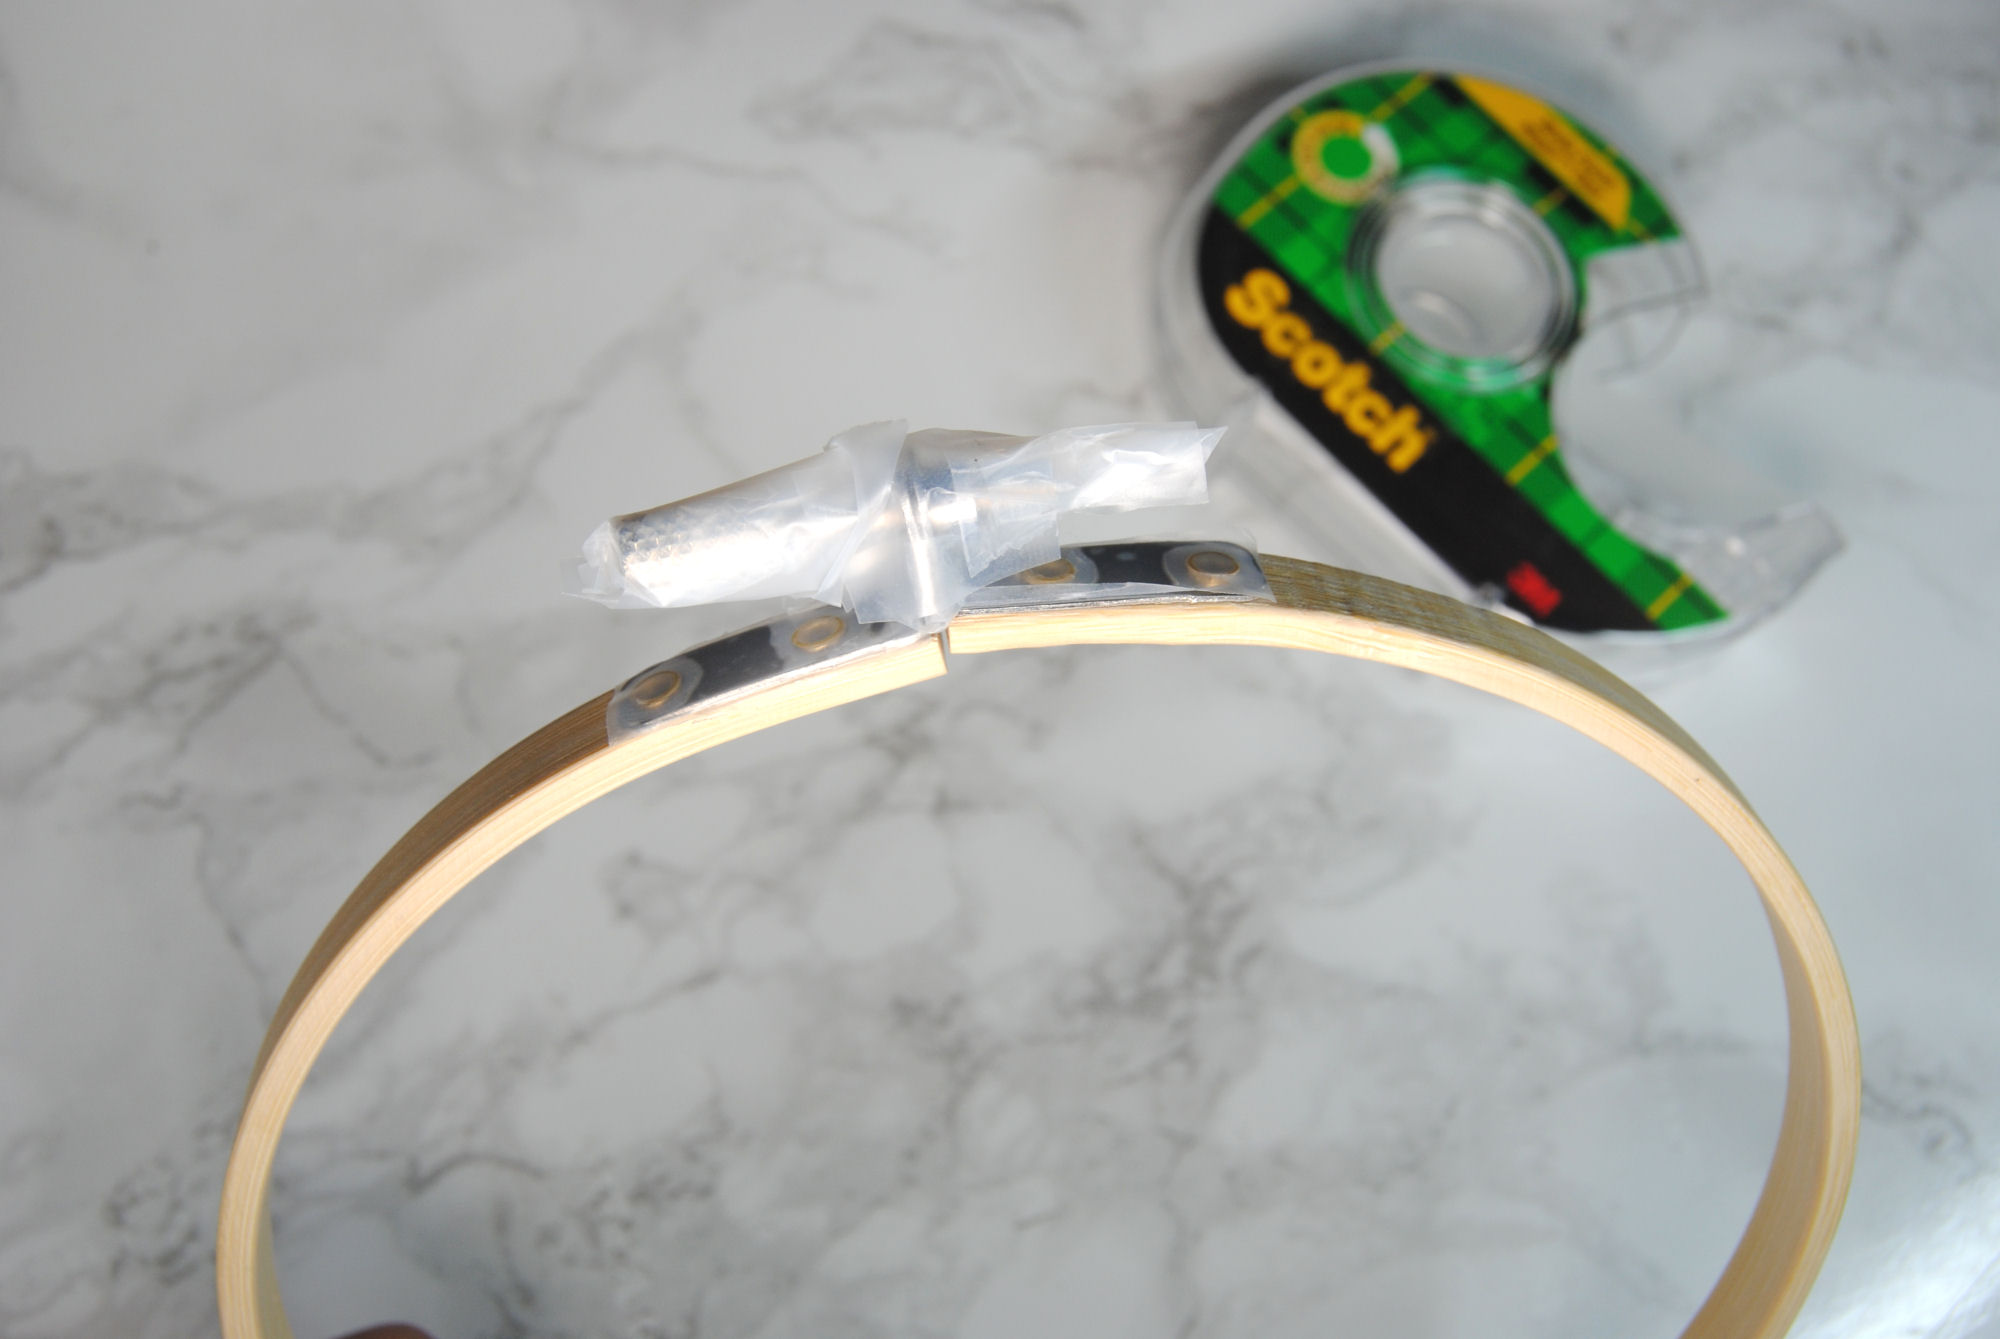
You could also use this to tape off designs on the hoop, like if you wanted to do that ‘candy cane stripe’ I mentioned earlier with the ribbon.
After that, I started with a rustoleum white primer spray because I had it on hand from painting miniatures. You could just as easily use spray paint in your desired color as long as it’s rated for wood.
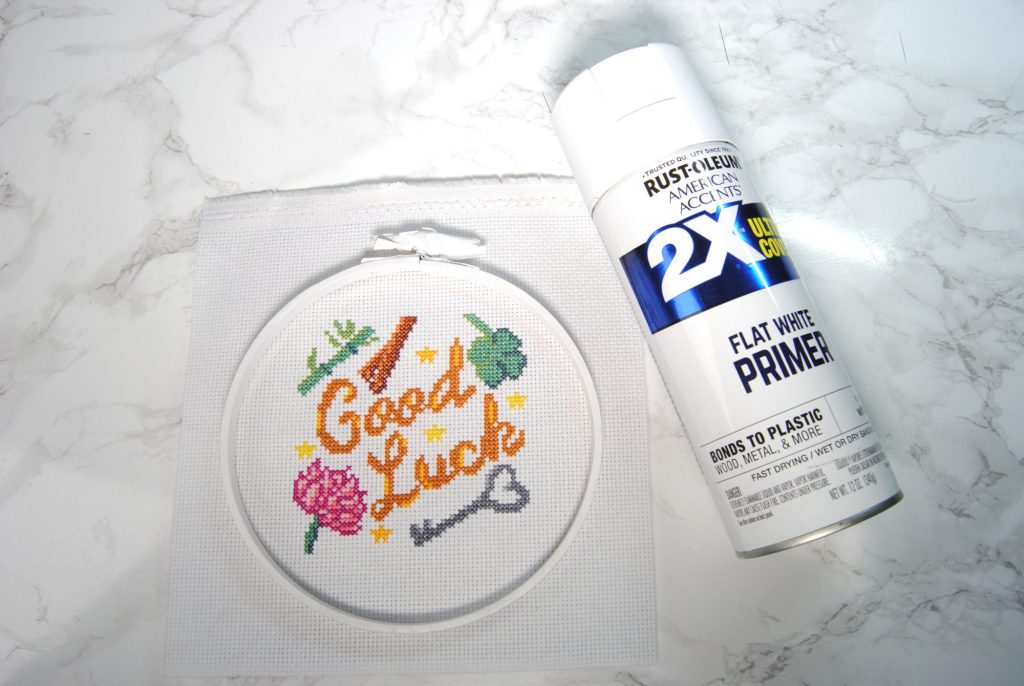
Here I’ve laid it on my finished design so you can kinda see how it would look with just a plain white hoop. I like it! But in the end, I wanted a green hoop. So I dug through my acrylic paints and found this lovely metallic green.

After laying down a piece of acrylic on my desk to protect it from stains, I got to work. You can see this first pass is a bit thin and streaky. I ended up doing 2-3 coats to get a nice solid green color.
Finally, I used a clear matte coat to make sure it was sealed and wasn’t gonna rub off easily onto my fabric. In the end I’m quite pleased with how shiny the green is! Though it’s really had to see it in photographs, so here’s a rudimentary gif.
Fabric
If you do any sort of sewing, you might have some fabric laying around not being used. While you could turn it into a new grime guard, why not use it to decorate your hoops too?
First thing you’ll want to do is measure around your hoop. I determined I needed about an inch of fabric to get it all the way around the wood.
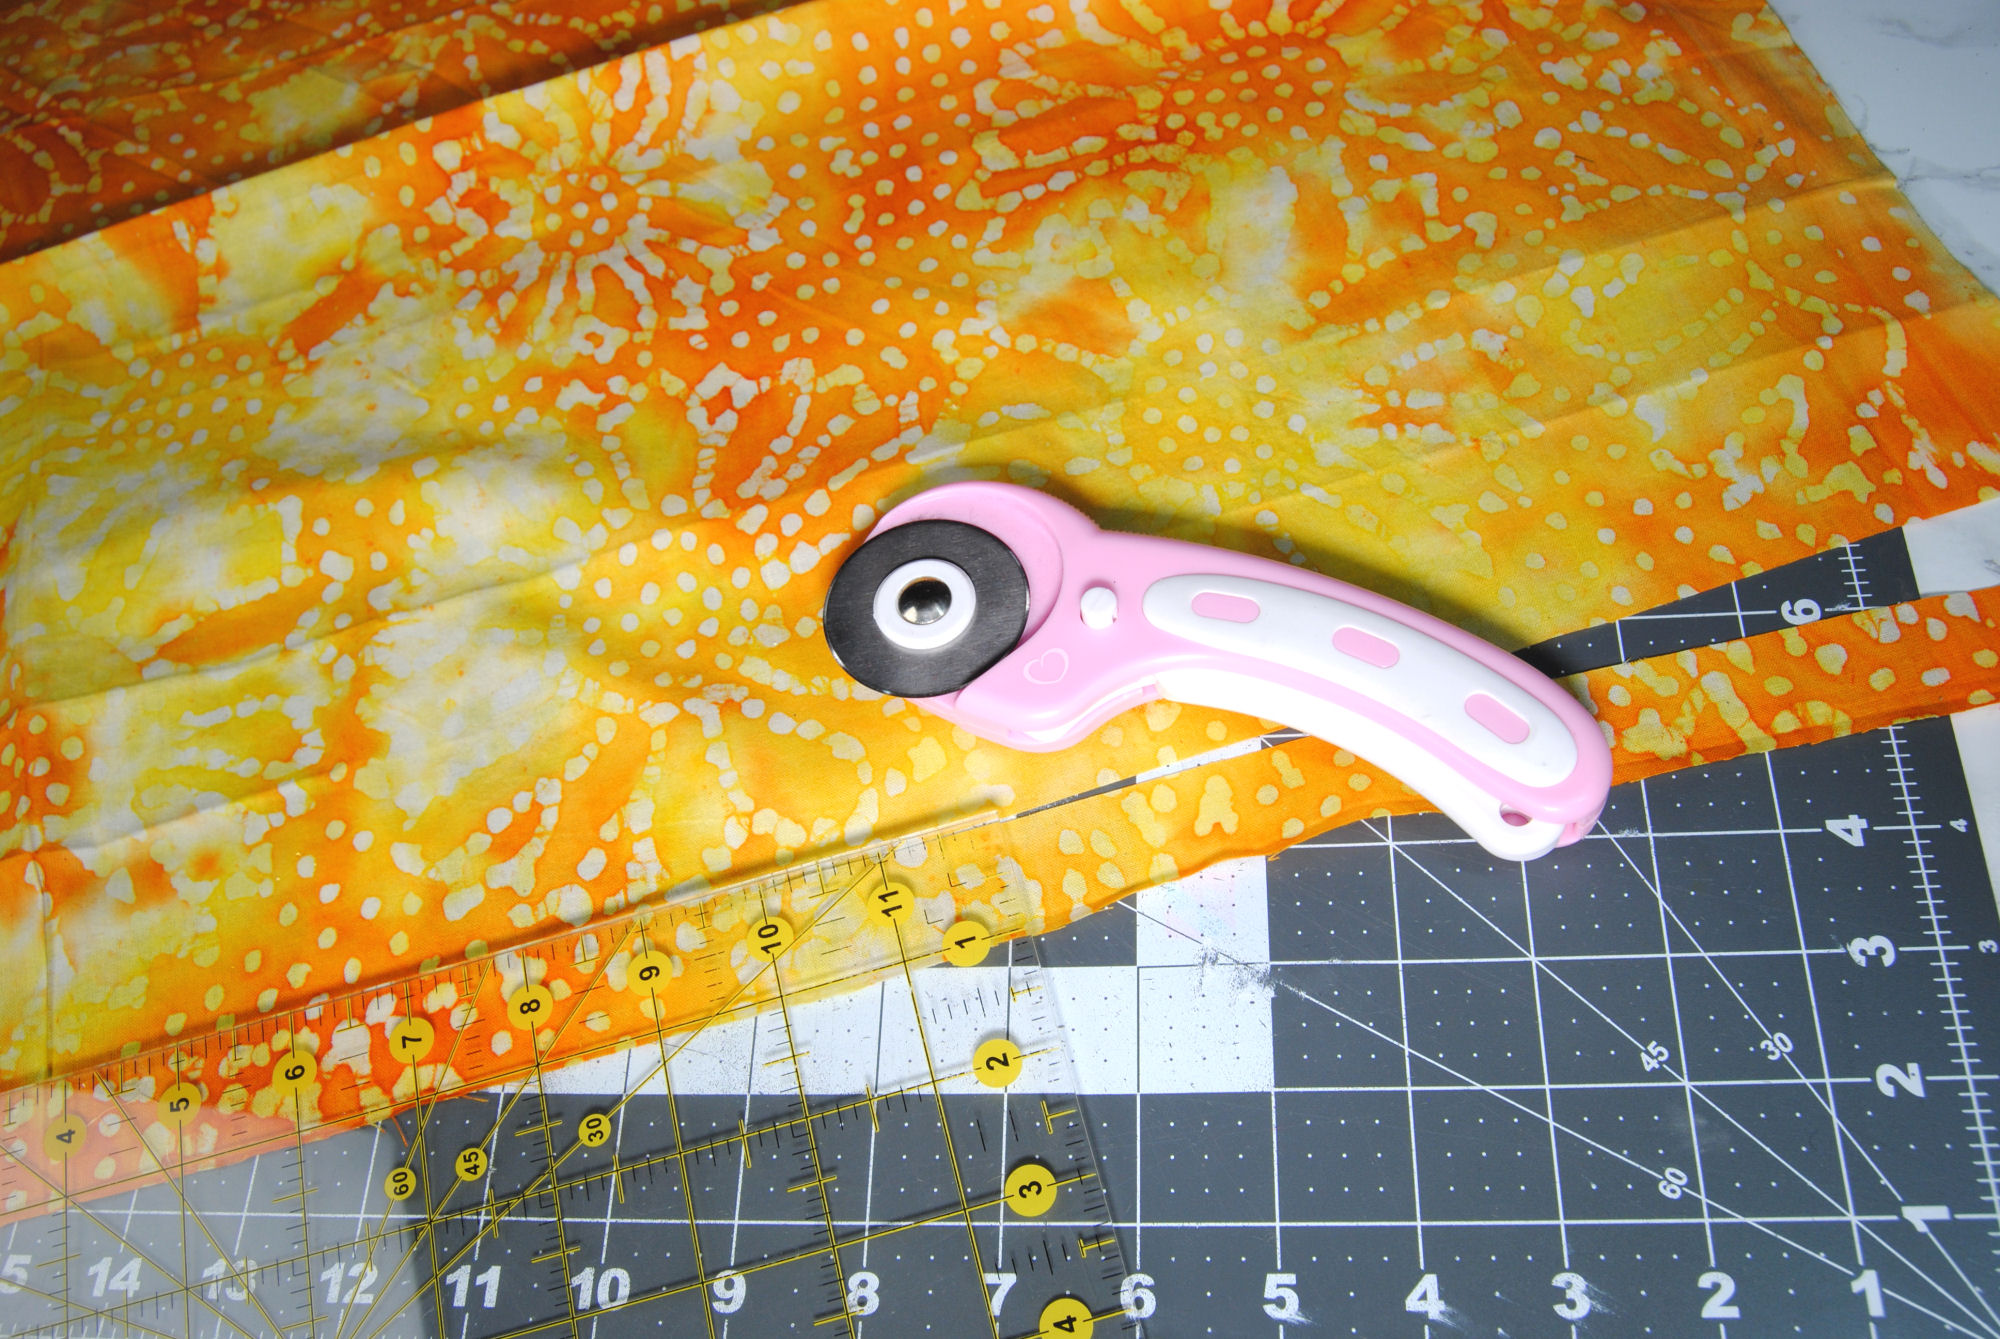
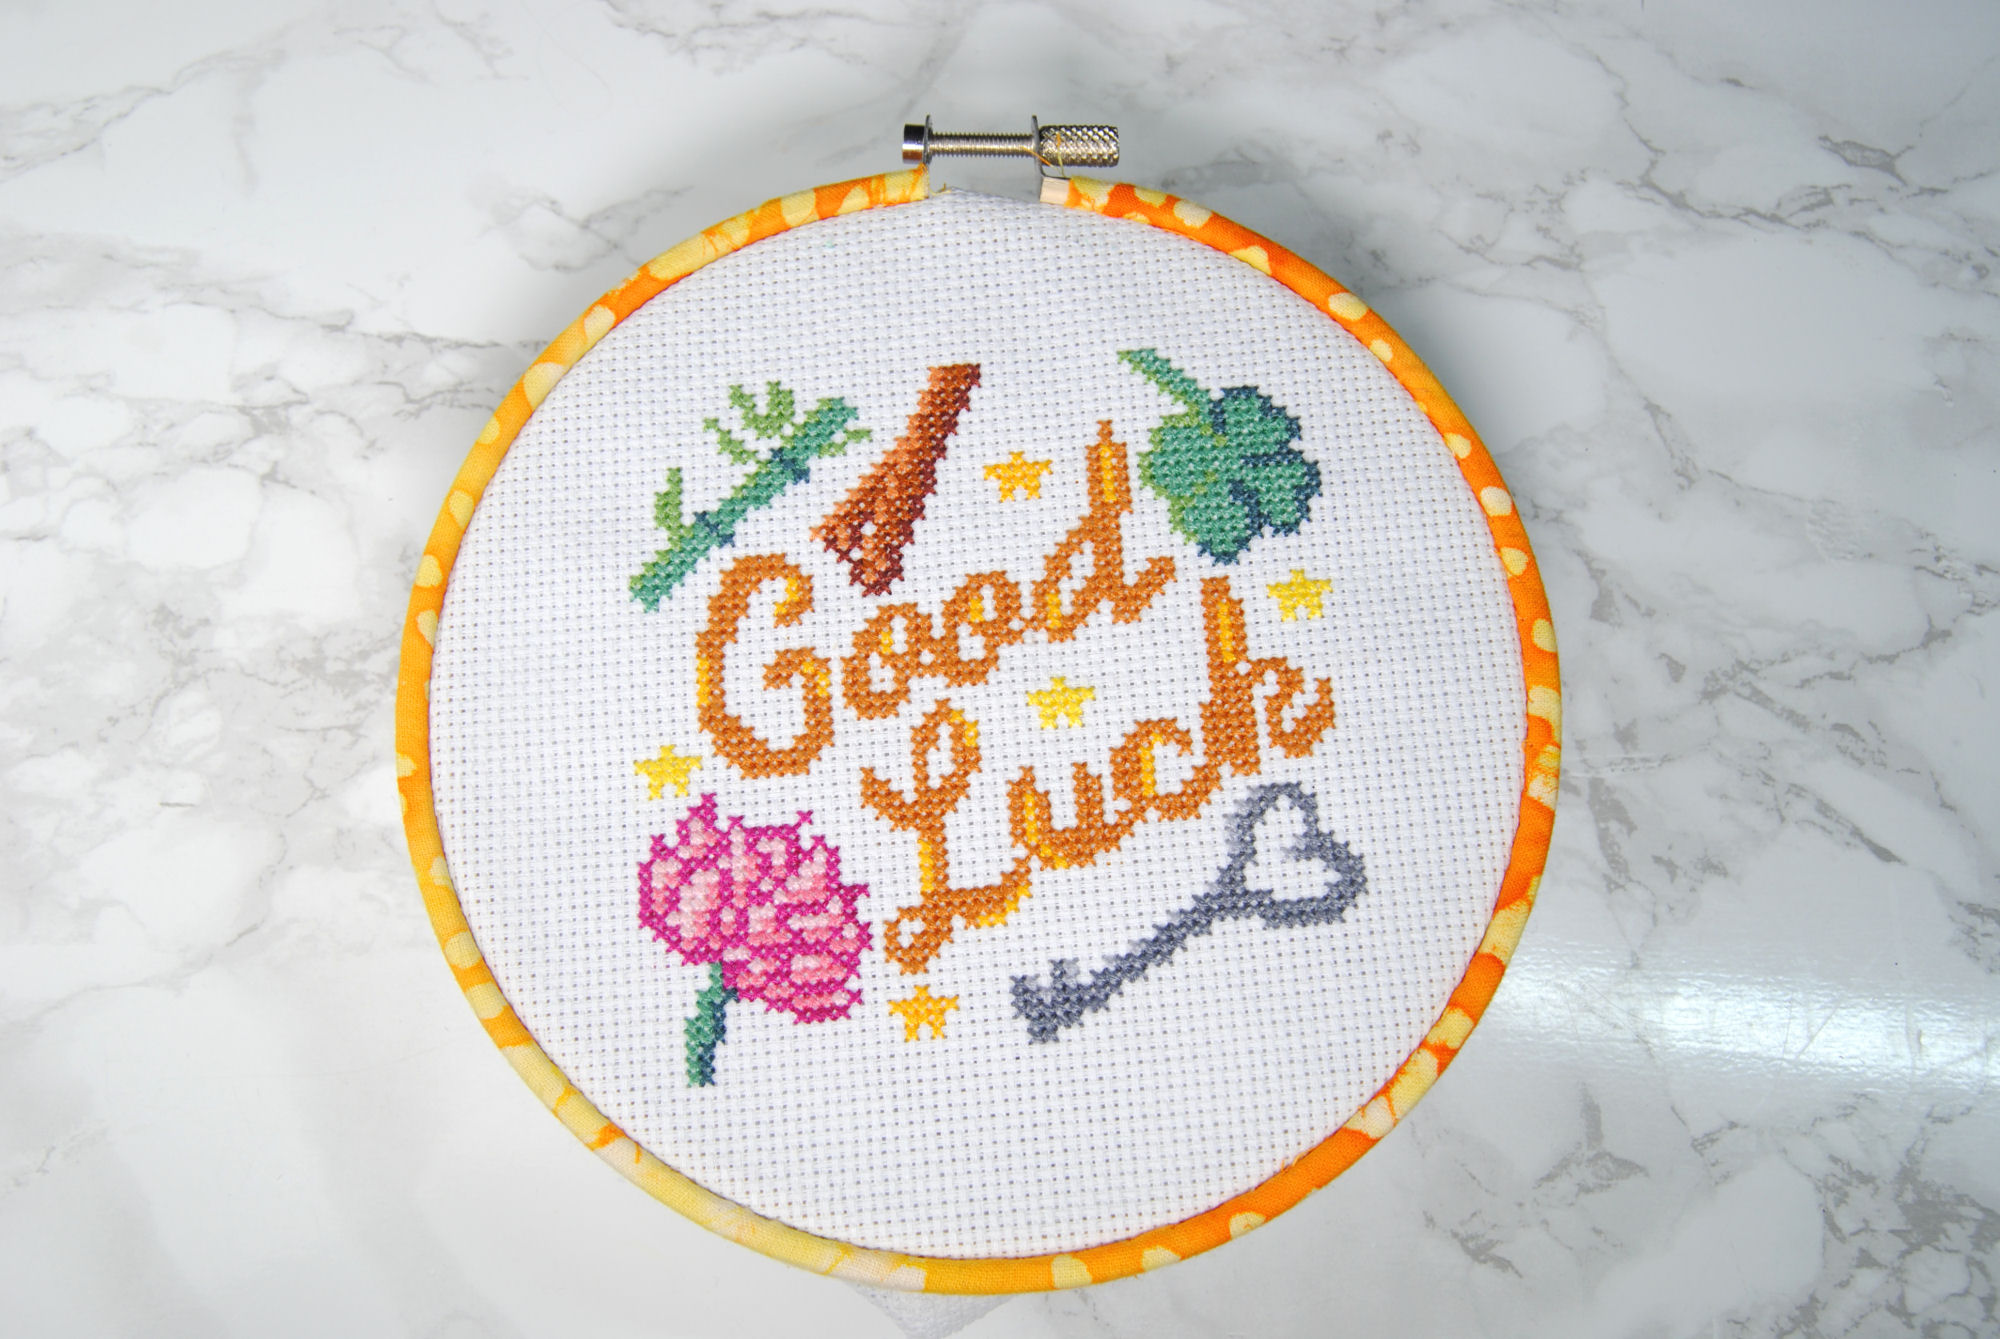
I chose this yellow batik to go with my ‘Good Luck’ hoop, and cut a 1″ strip from the longest side of my fat quarter.
Starting from the top, I wrapped the fabric around my hoop and started stitching fabric back together on the underside of the hoop.
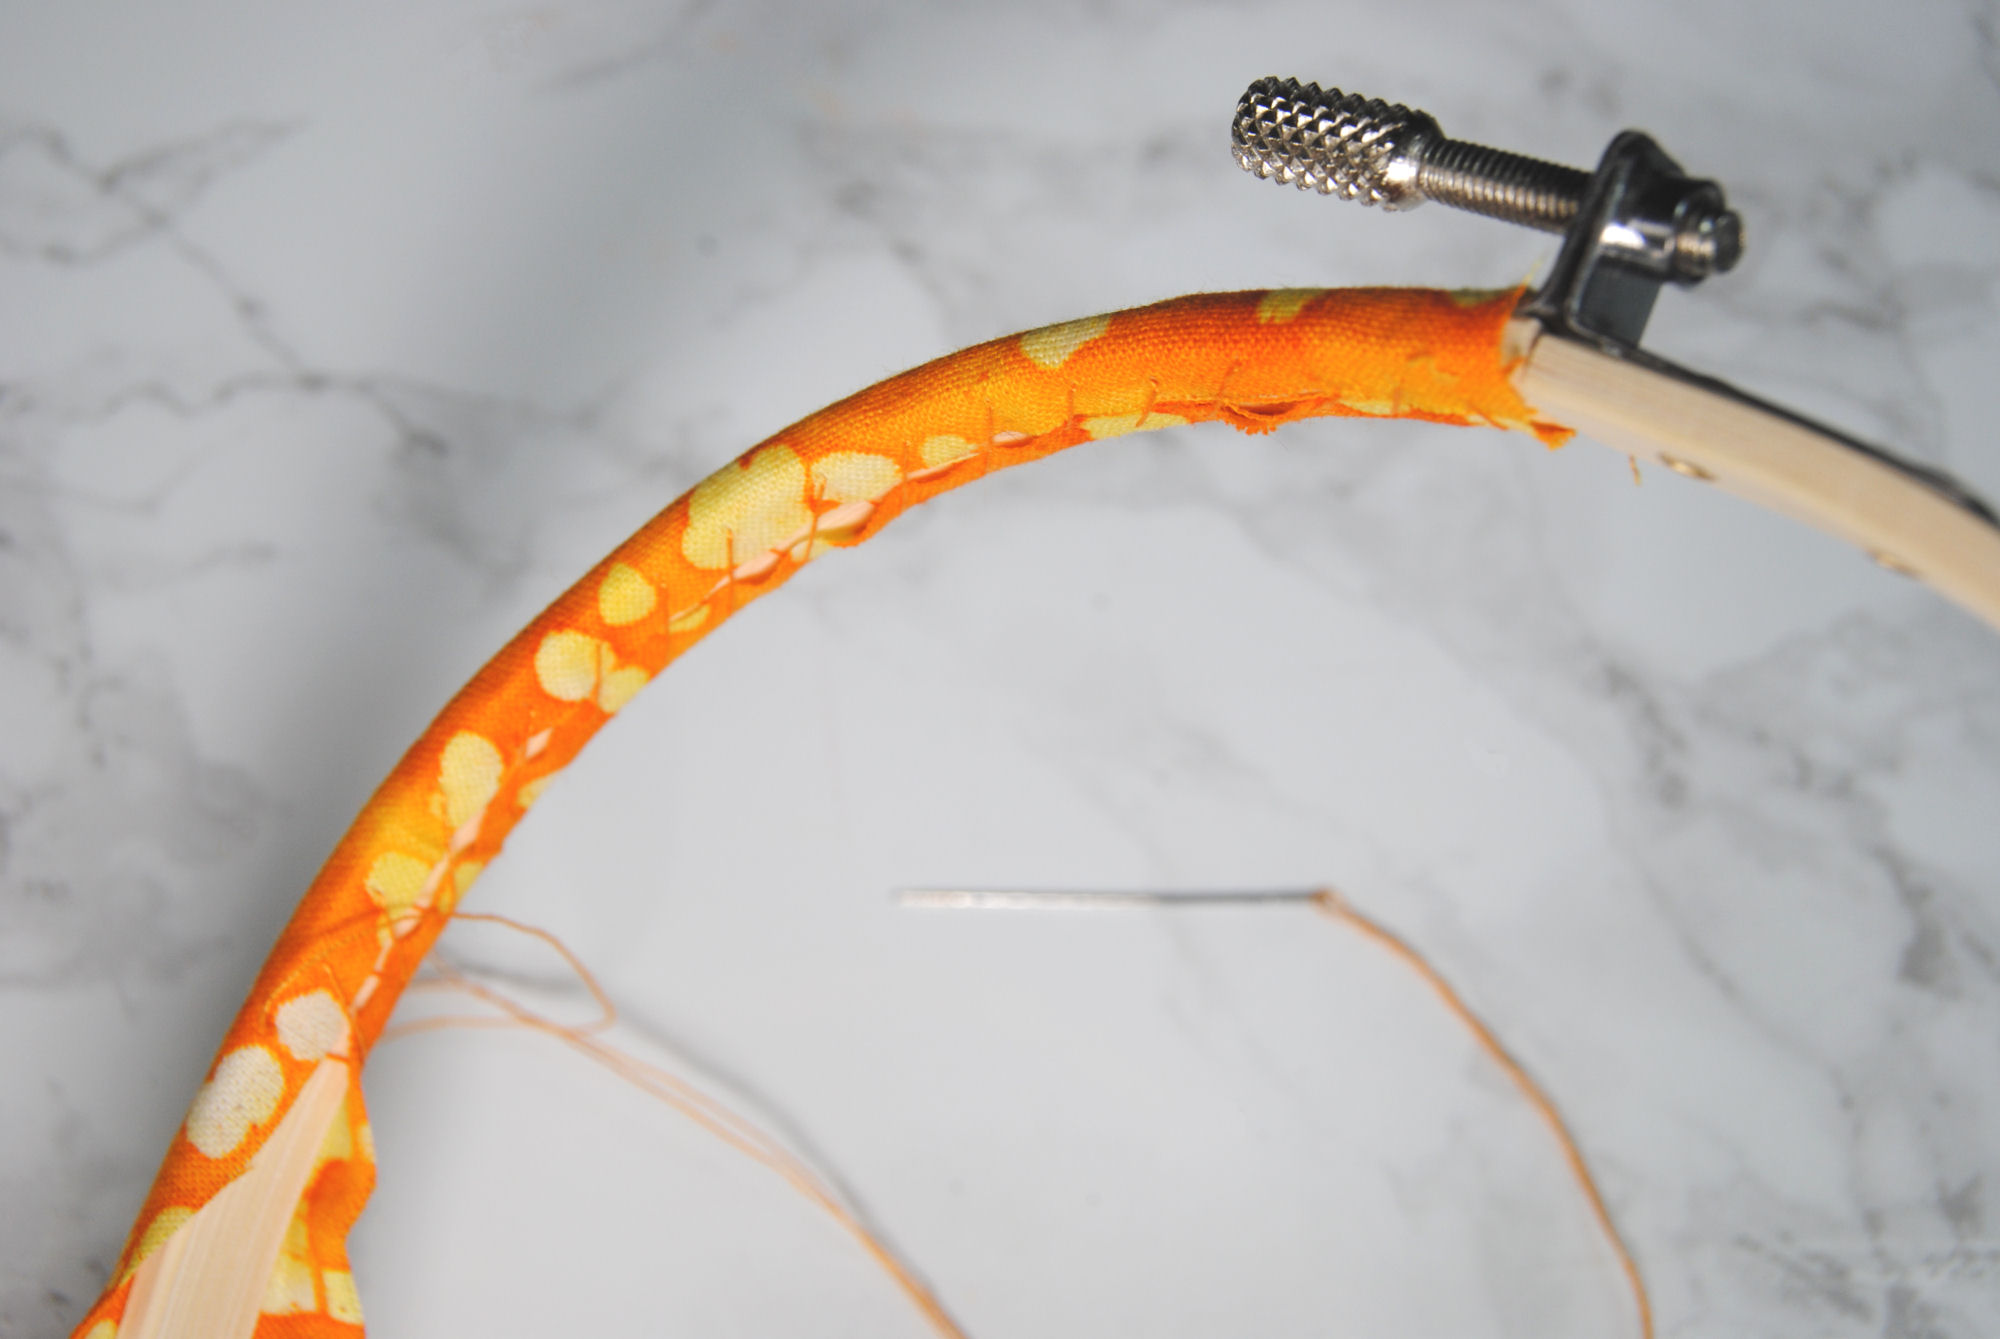
If you don’t quite have the patience for stitching it, you could also use a light layer of glue to secure it in place on the underside of the hoop.
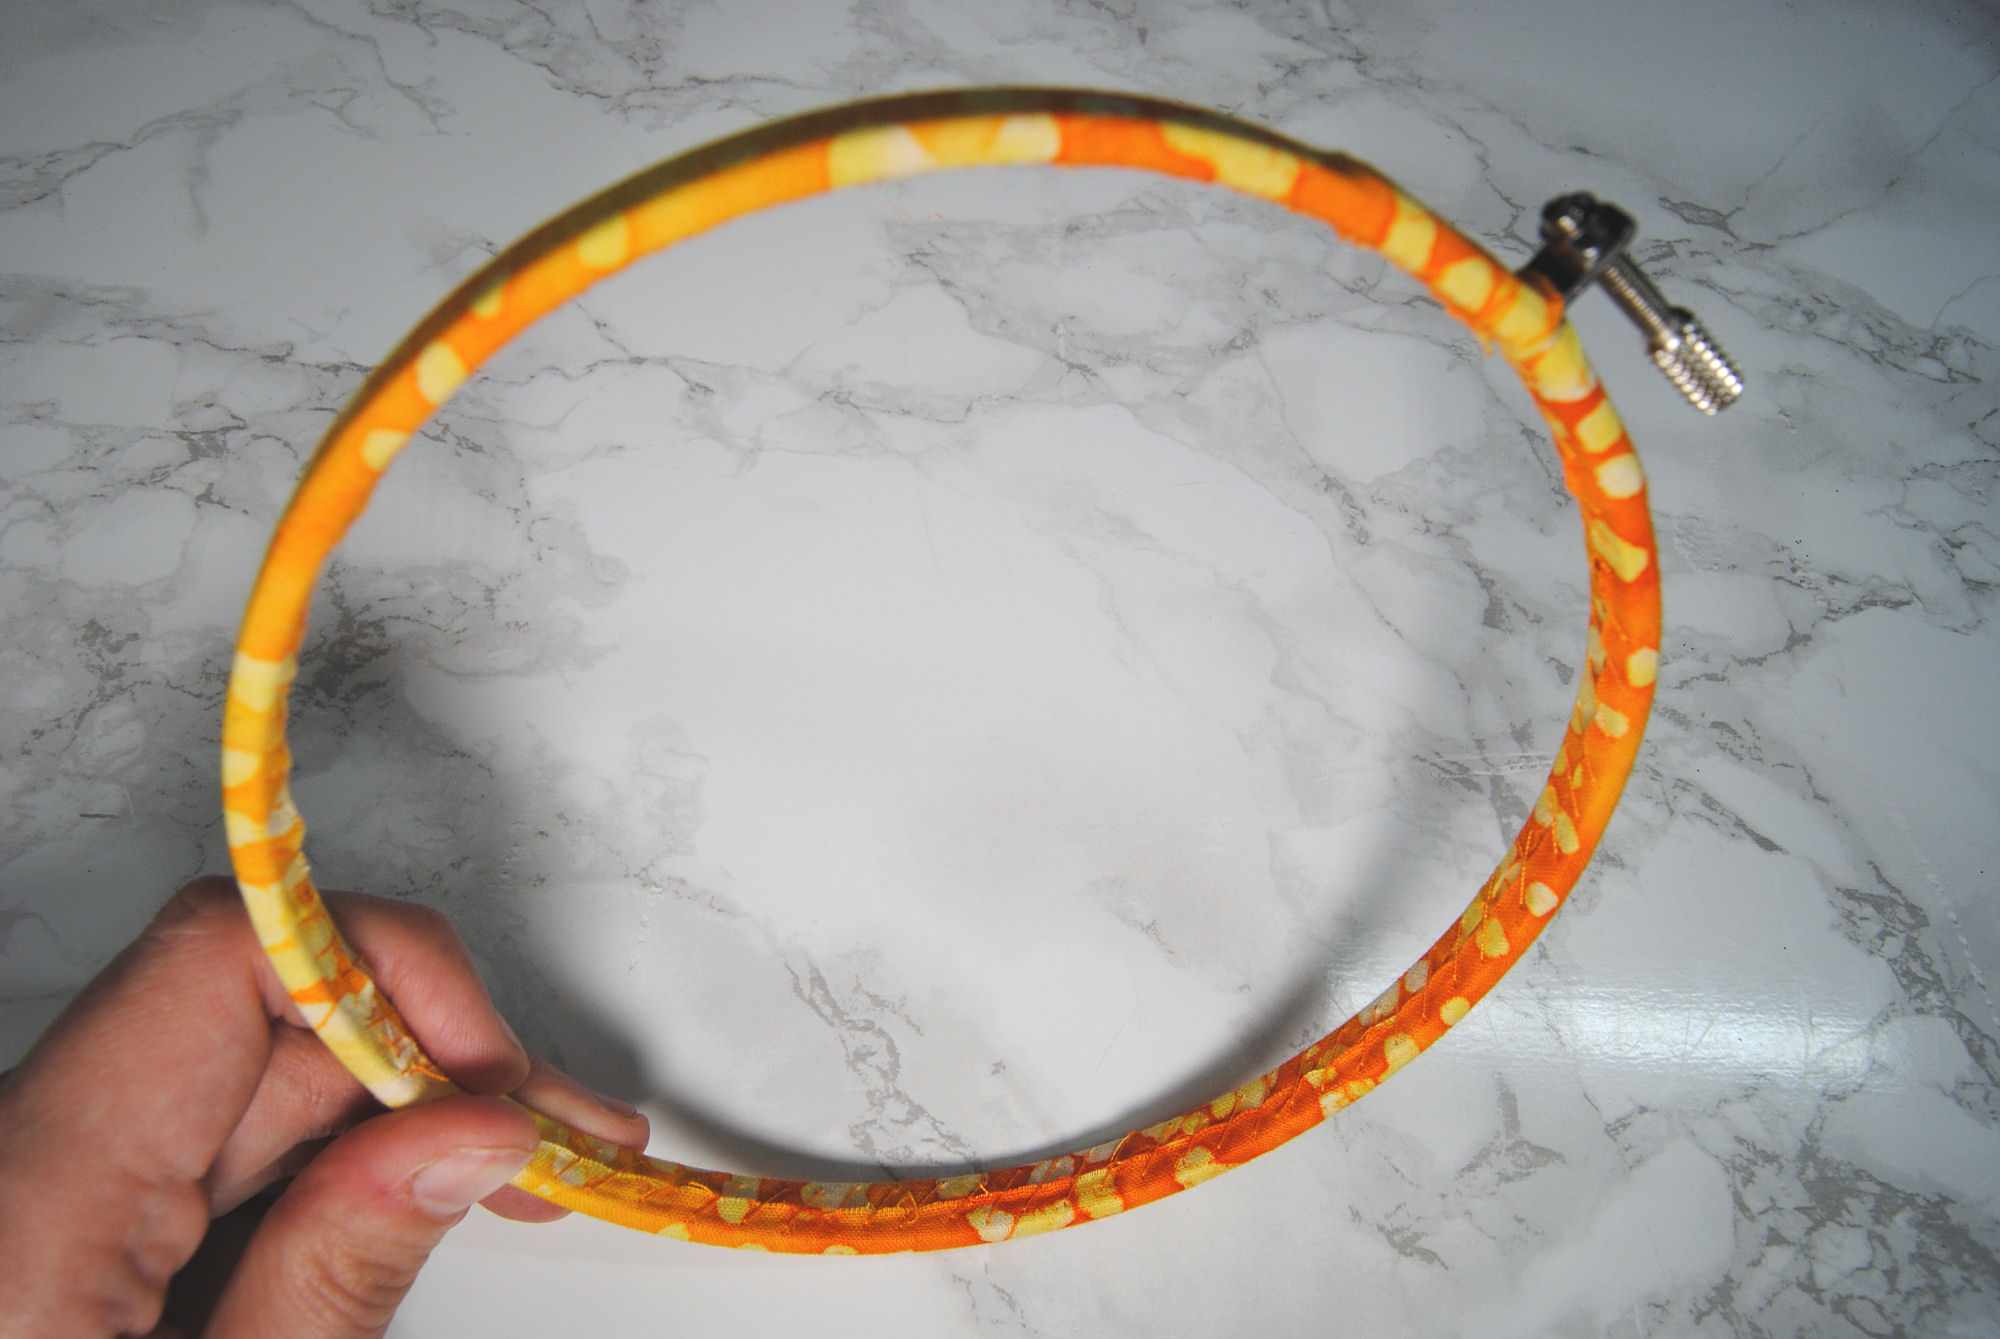
You’ll notice here that I had to unscrew the metal part quite a bit to get it to fit with all the fabric around it! But it does fit.
Crochet
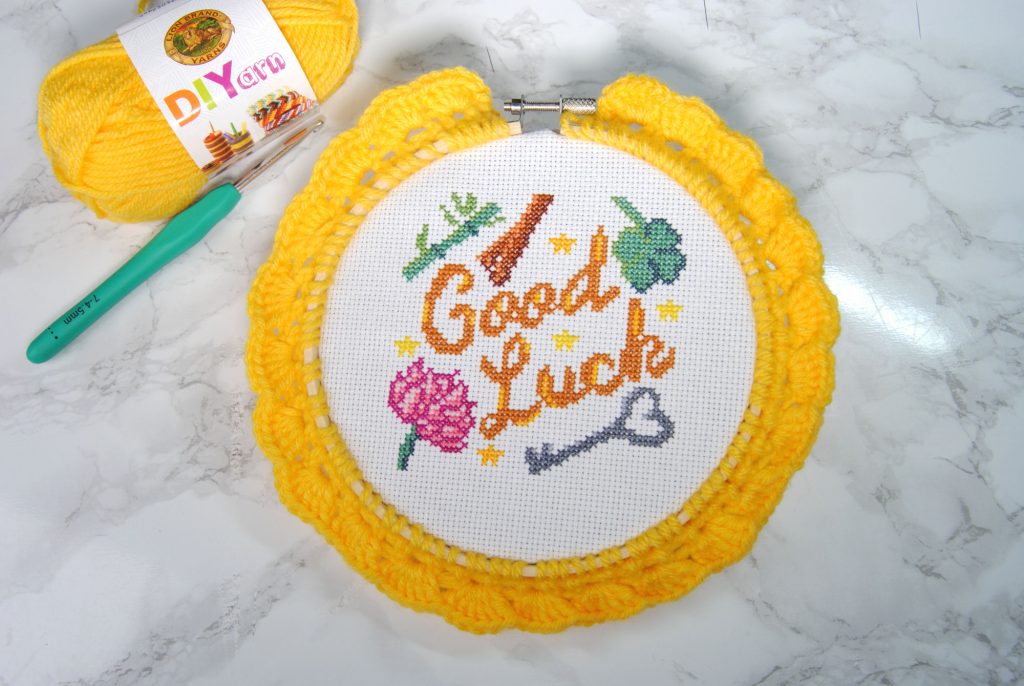
If you’re one of my Patrons, you’ll know I started learning crochet in January. I’m still very much a newb, so I looked up a tutorial and found this lovely crochet edged embroidery hoop pattern. It’s quite a simple design, but it has such a huge effect on the feel of your hoop!
I also found a tutorial on another blog with 3 more crochet borders for embroidery hoops if you’re looking for some more options here.
Thread / Yarn Wrapping
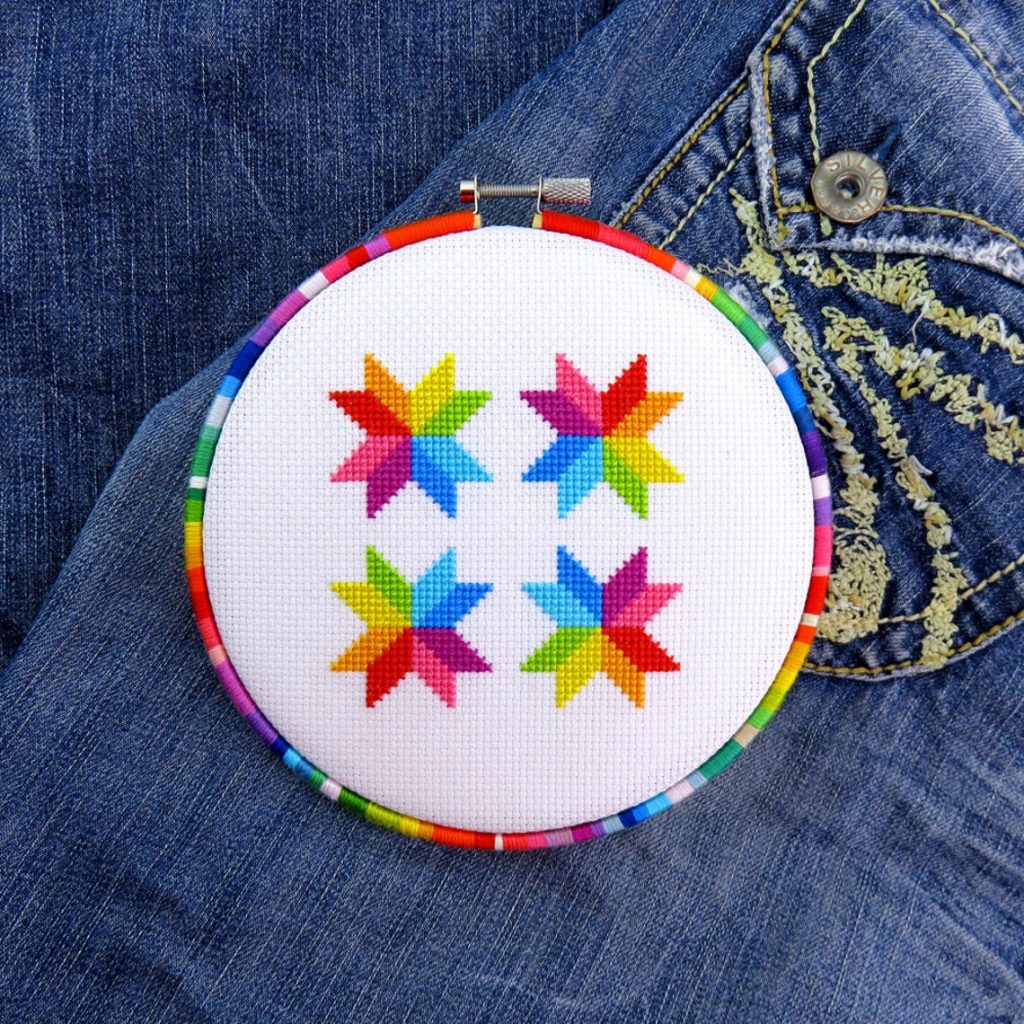
One of the reasons I wanted to do this post was so I could share these amazing hoops LuckyStarStitches does. Just look how absolutely stunning these hoops are and how they complement and elevate their cross stitch designs.
In fact, they have a tutorial available showing you exactly how to get this lovely tight wrapping and how to deal with color changes and so forth. Not to mention plenty of awesome patterns to check out. 😉
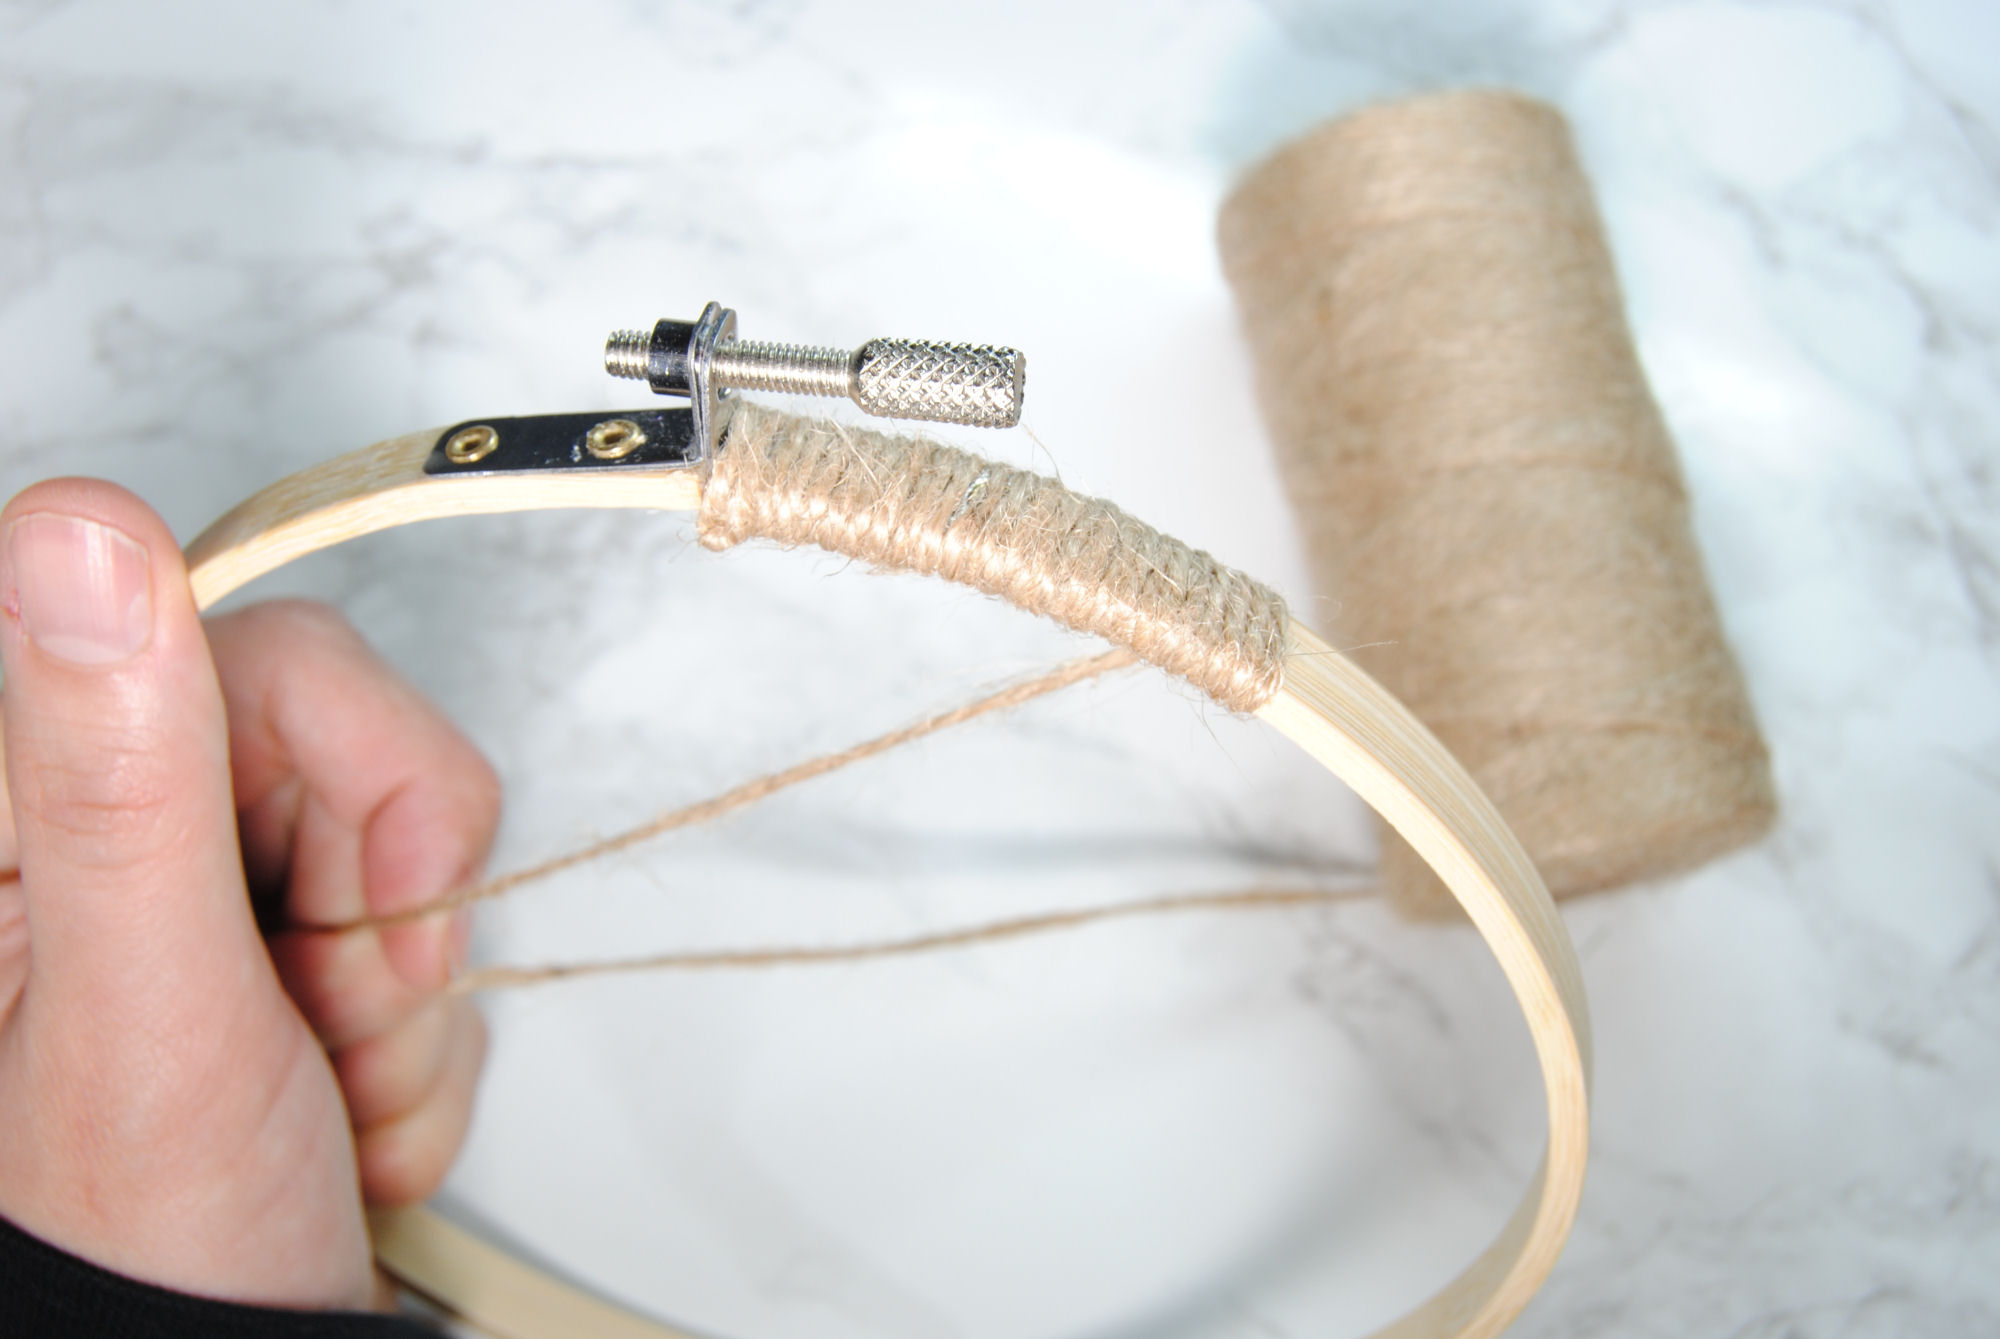
Don’t crochet, but happen to have some yarn laying around? You could wrap that around your hoop as well! Just having that color and texture around the hoop in a complementing color can have a huge effect on your design!

No yarn? Other types of cording could work as well. You just don’t want it to be too thick, or it’ll be harder to get around your fabric. Even with the hardware unscrewed as far as it will go.
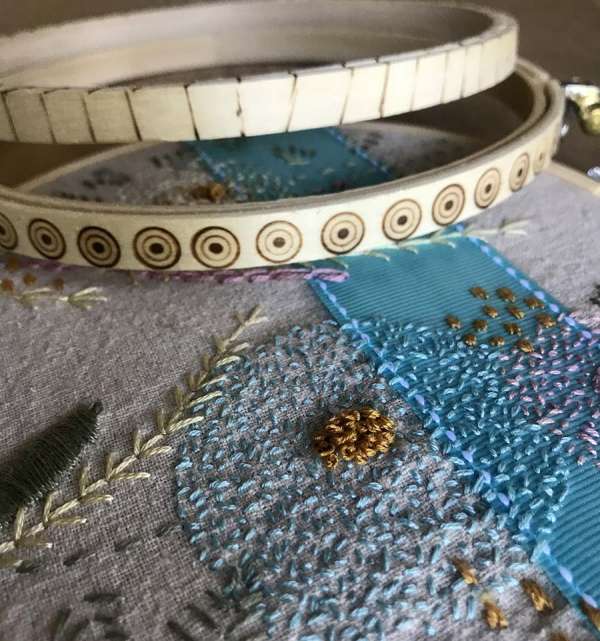
Woodburning
Another cute idea I stumbled across while doing research for this post is woodburning. Totally makes sense, with the hoop itself being made of wood! Another case of ‘now why didn’t I think of that?’
You can see some great examples of this over on the LauraBrayDesigns blog. Or at least, you used to be able to. It seems that site has gone down since I originally posted this article. So here’s the picture that was on that blog. The instructions for doing it may be lost, but if you’re familiar with woodburning or do some research of your own here’s an idea of some designs you could make.
Buttons & Embellishments
Need some more flair? How about gluing things to your hoop?! The creative crafty_avocado was kind enough to let me share with you one of her button hoops. She’s decorated a number of hoops this way so far, so be sure to check out her instagram for more.
My favorite so far is this pastel baphomet. Pattern by NightSpiritStudio, Stitched and framed by crafty_avocado.
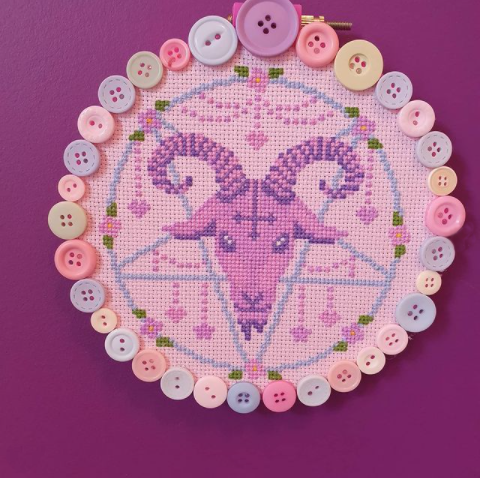
Isn’t it absolutely amazing?!
You could use this technique and glue other things to your hoop, too! Try sequins, glitter, or rhinestones for a more flashy hoop. Or maybe fake flowers and leaves? Could make a great border for seasonal designs! Get creative~!
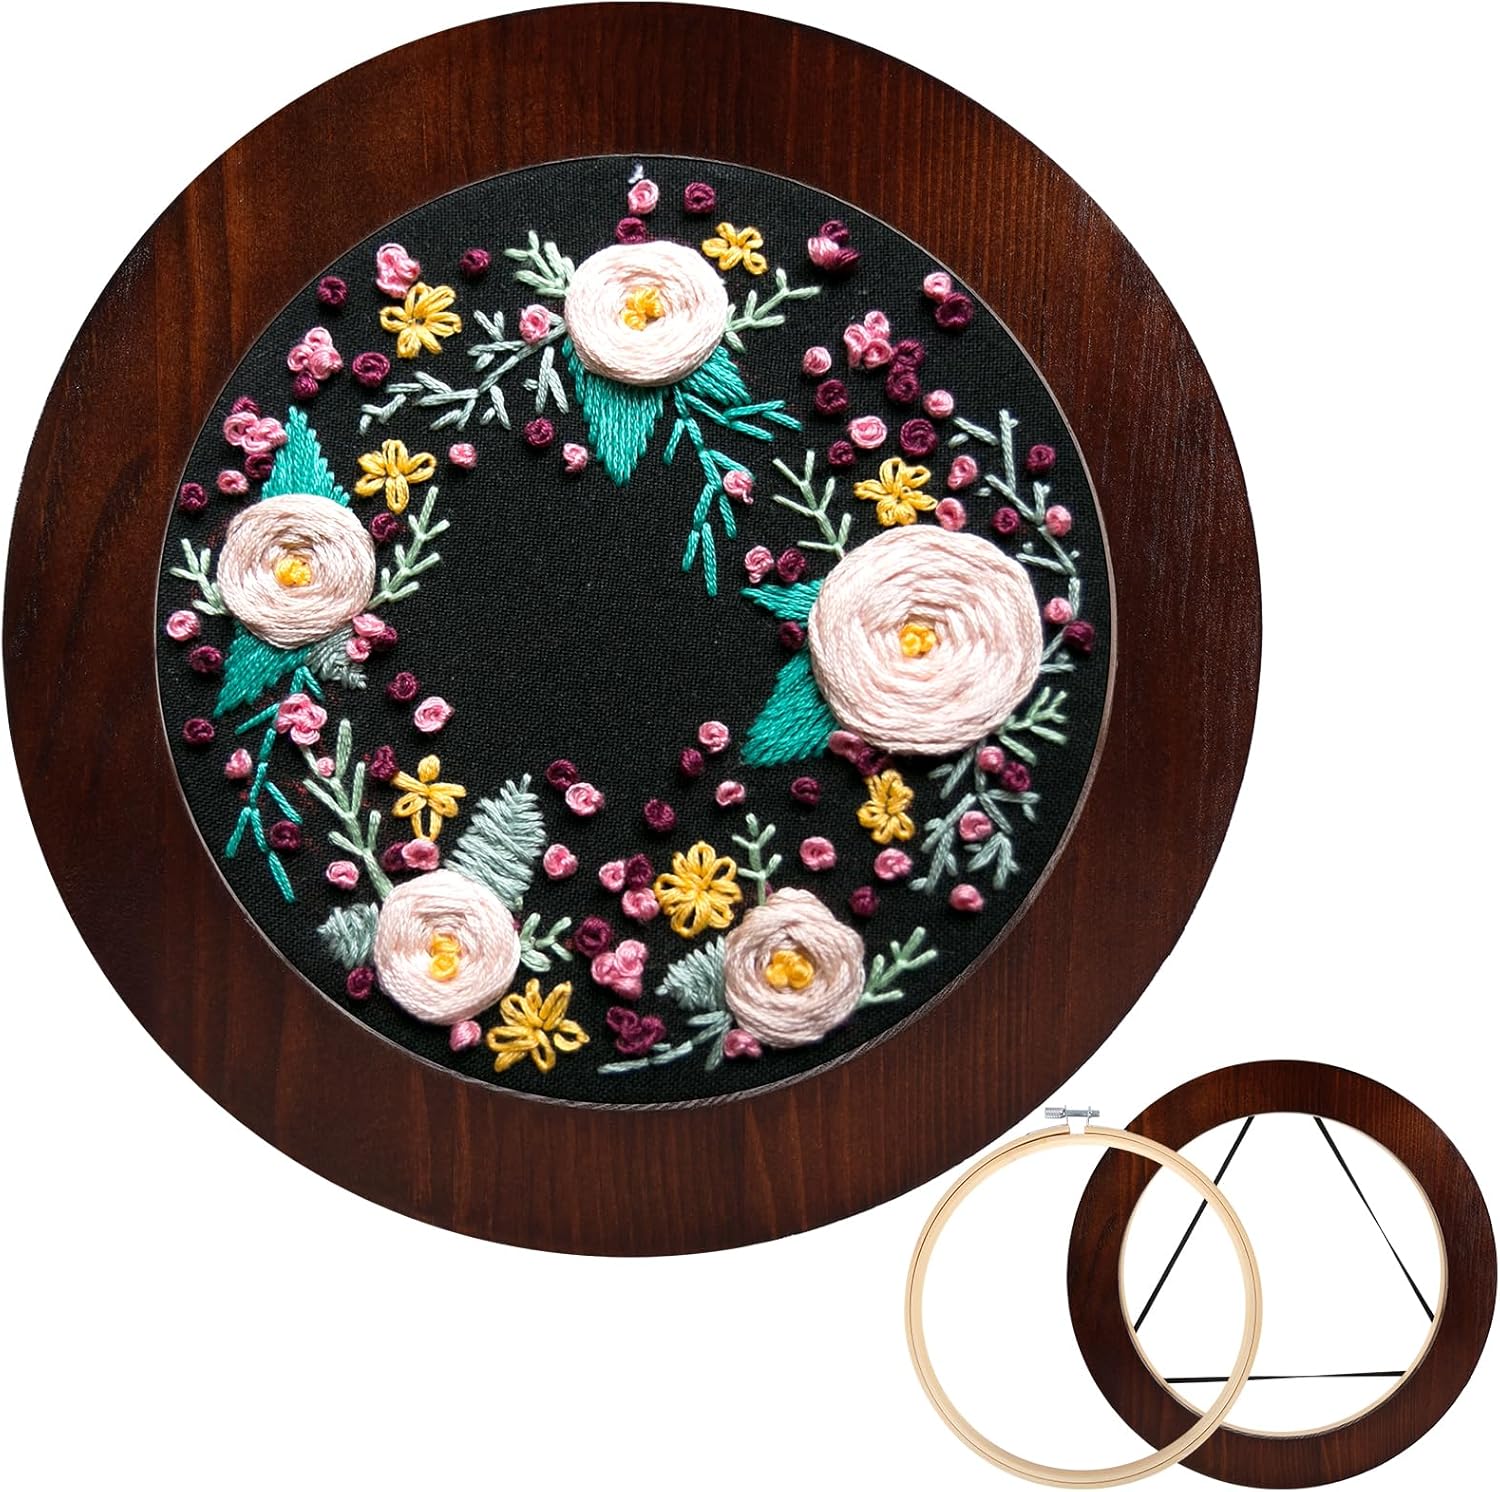
Hoop Frames
Don’t want to decorate it yourself? How about a frame you can just slide your finished hoop into, such as this scalloped one by StitchLifeStudio.
Or these classy dark wood ones available on Amazon?
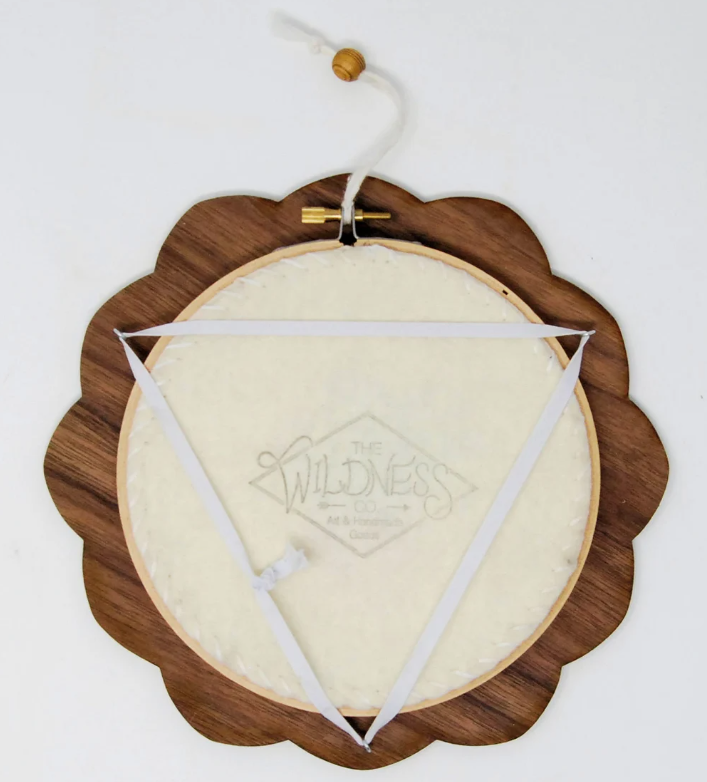
Decorate the Back, Too!
Ok, so finishing the back of your hoop is it’s own blog, but I just couldn’t pass up sharing this one with you!
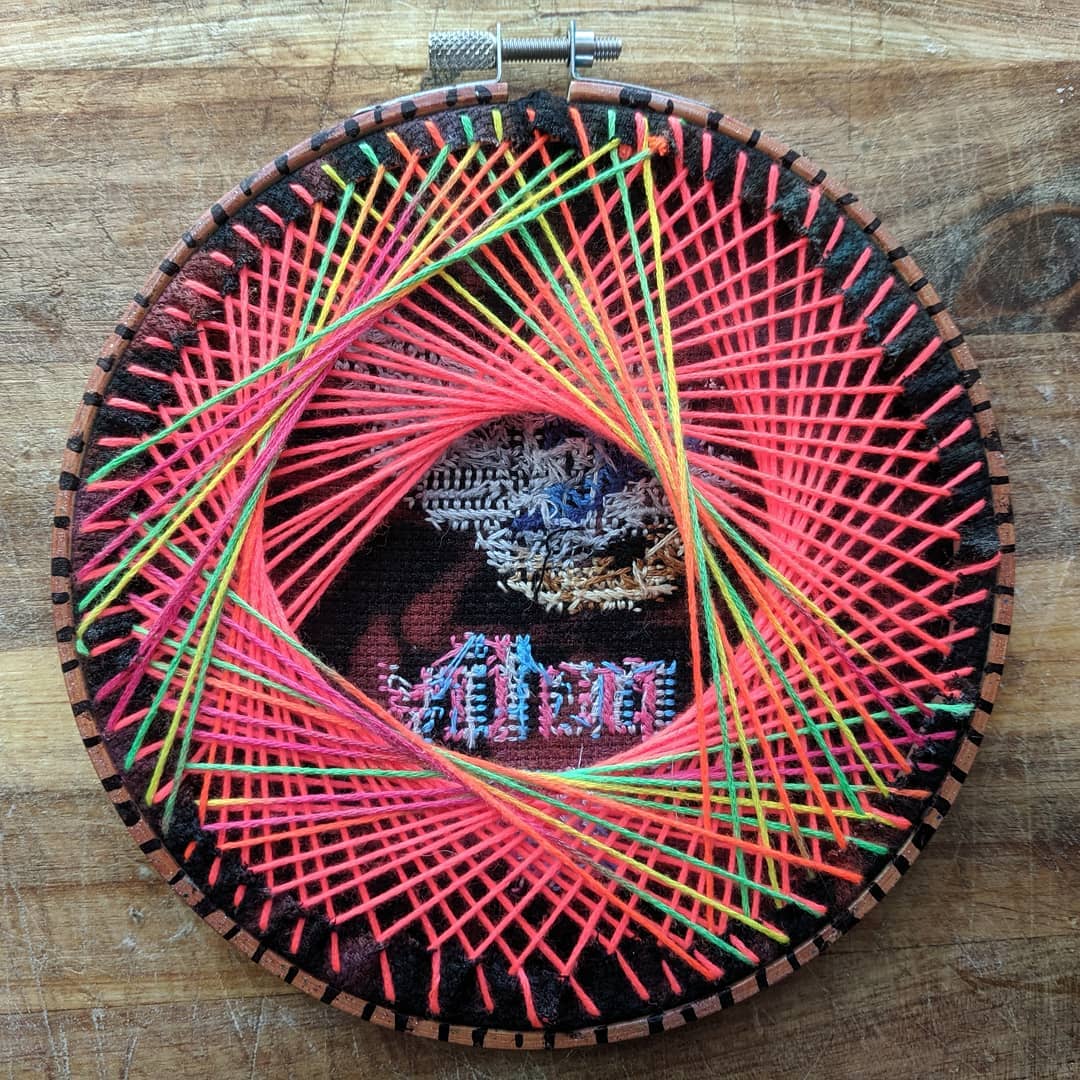
phdyed has come up with this awesome way of backing hoops, reminiscent of old school spirograph. I absolutely love them! You can see this process in action here.
But it does bring me to a good point. If you’re going through all the trouble of decorating the hoop — why not spruce up the backside, too?
Be Creative!
Aaand that’s all that I could think of for now. But man, that was a lot to go through. Again, these are not all the ways to decorate your hoop! But I hope it has given you a place to start and some inspiration to try out some new things! Feel free to share your experiments with me! I’d love to see them.


