Thread Starts for Cross Stitch — 7 Ways to Anchor Your First Stitch
Hello everyone! This month I wanted to bring to you a quick rundown of some of the different ways to anchor your stitches when starting each new length of thread! There’s a few different thread starts that I use depending on the situation, and probably more out there.
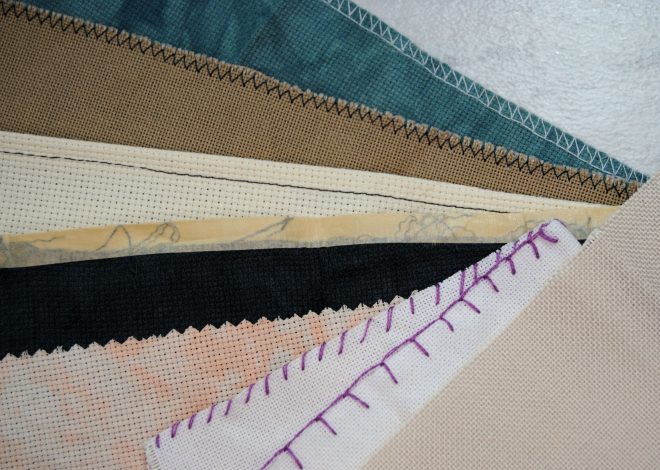
In my examples I’ll be using two strands on 14 count aida. But I’ll mention if a start does or does not work stitching with one strand, or higher count fabrics.
I’m also not an illustrator so I’ll be taking photos of my stitching. I’m not sure how clear they will be but bear with me. 😉
These thread starts probably aren’t the only ways to do it, so let me know if you know of any others! I’m always looking to learn as well.
Table of Contents
This is a No Judgement Zone
Before we get started, I want to point out that some of these are designed for ease and speed. And others are specifically geared towards trying to get a neat back. Let’s make one thing clear: you do not have to have a neat back.
It’s a fun thing to work towards, and is even important if you’re going to be taking your cross stitches to state fairs and have them judged. But ultimately, you should have fun stitching and not stress yourself out unnecessarily. Especially if you’re stitching a biscornu, if you back your hoops, or really anything where the back is gonna be completely hidden and no one will ever see.
Even if your back is visible (like in a stretched canvas), having a ‘messy’ back in no way devalues your work and is what makes your project unique. Never be ashamed of it! Show it off!
That said, let’s move on to the start methods.
Freestyle Start
Ok that’s not actually what it’s called. I’m not sure what it’s called. This is just what I call it and I needed a header, okay? Anyway…
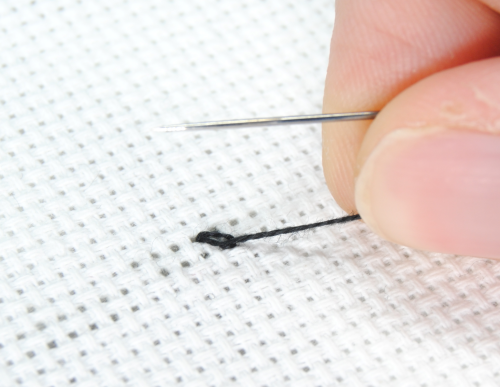
The first of the thread starts is the one you see most often in printed kits. At least it was when I was doing kits back in the 90’s. I’ve no idea what’s going on now, to be honest.
To start pull your needle through the fabric, leaving a ‘tail’ in the back. The length of this tail is up to you, but you can always trim it later. The key is to have enough back there to anchor it down with your stitches.
Now continue your first stitch, but hold that tail towards you so that your stitch goes over that loose strand on the back. Regardless of where the next stitch is, pull that tail in the direction you’re stitching.
The general idea is to pin down that tail as you stitch, holding it in place. Once you have a few stitches down you can trim off the rest of the tail, or keep going.

Once you have your first color down, starting gets much easier. Just run your needle under some of the nearby stitches, and pull it towards your next stitch. Hold the tail in place while you work your first stitch, and then carry on as normal.
Pros: No extra time prepping the thread, pretty secure, looks tidy. If you normally tuck at the end of the thread, it will look the same.
Cons: Takes a little getting used to, you may need frequent access to the back of your project for each new start. Not ideal for single stitches all on their own. Doesn’t work with backstitch, either.
Knotty Start
Now here’s the most controversial of all the thread starts: The dreaded KNOT. Hear me out.
This is actually my go-to of all the thread starts. Well, technically the next start is. But we’ll get to that, and it’s just a variation of this one.
Yep. The shame, I know. But I’ve never had an issue with it. Never has a thread come loose. Never has my framing been bumpy. It’s become such muscle memory at this point that the thread is knotted before I even realize it.
This actually made taking photos of the other starts really difficult. I kept having to cut off the knot that I made out of sheer reflex. Whoops!
Anyway, this start isn’t very complicated. You tie a knot on the end of your thread. If you’re using a single strand you may need to double knot it just to make it thick enough to not get pulled through the hole.

It doesn’t need to be super thick though. The thicker it is, the more likely you’ll get those dreaded bumps people claim that knots create.
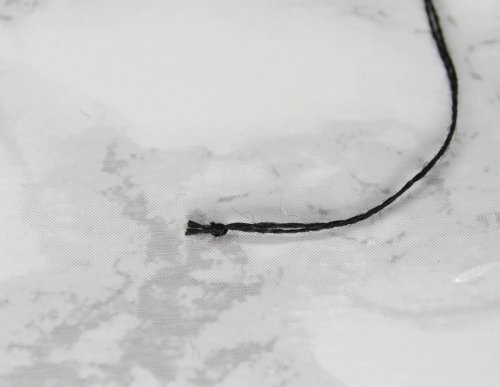
When first pulling through, you want to pull gently. If the knot is the right size, it WILL pull through if you tug on it. It just needs to be big enough to catch on the hole.
If you already have some stitches down, you can thread your needle through nearby stitches and the knot will catch on them instead.
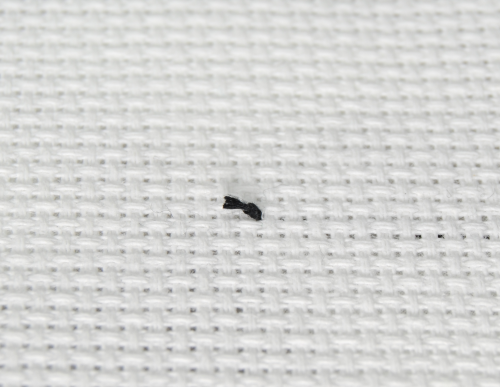
You’ll note I also trim the knotted end down pretty small, too. That keeps it from having lengthy tails all on the back, so it still looks pretty neat.
Pros: Quick and easy. Doesn’t require being able to see the back of your project, if you’ve got things on a scrollframe or similar.
Cons: Not recommended if you’re getting your work professionally judged. You may personally not like the look of it. If you’re worried about ‘bumps’, or your back will be visible you may prefer a different start.
Note: I post the backs of my projects pretty regularly on Instagram/Twitter, if you’d like to see how a full piece looks like with this start. Keep in mind though, neatness is not a priority of mine and the direction you stitch also plays a part in how it ends up looking!
Loop Knot Start
Remember when I mentioned my favorite start was actually a variation on the knot start? Here’s what I mean by that.
It starts exactly the same, making a small thin knot. But instead of pulling it all the way to the hole I continue the first half of my stitch, flip it over, then tuck my needle between the strands.
This makes it so the knot can’t get pulled through the hole and you can continue to stitch without worrying about tension or it accidentally getting pulled through when you stitch nearby.
Pros: Slightly more secure than the plain knot start
Cons: Doesn’t work when stitching with a single strand
Away Knot Start
For those of you with knot aversion, I promise this is the last knotty start. 😉
But this is one you might actually like, since you won’t be keeping the knot in your finished piece!
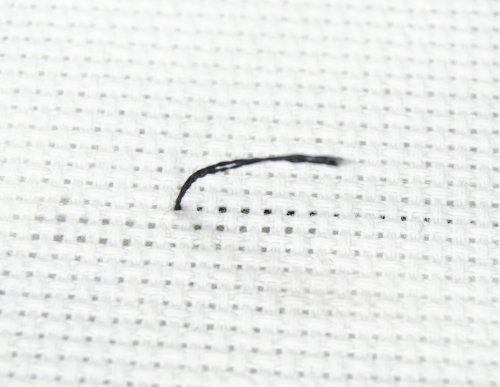
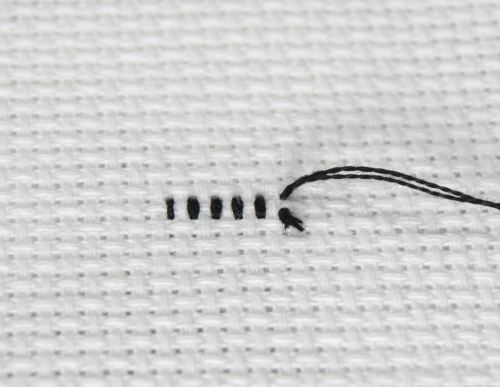
For this start, you’ll knot your end like before, but actually start on the front of your project, a few stitches away from where you’ll be stitching.
In my example I’m stitching a row of stitches from left to right, so I’ve placed my away knot off to the right of my first stitch.

As I stitch my row, I’ll be sure to stitch around the trail it left on the back. Flip over your work to keep an eye on it if needed, or use your finger to push it towards your stitch by feel.
Continue stitching until you feel that trailing thread is secure.

Then cut off the knot on the front of your project!
Pros: Great if you like the look of the freestyle start, but struggle with not pulling the tail all the way through by accident. Doesn’t require looking at the back of your project, if you’re able to guide that tail by feel. No actual knot left on the back of your project.
Cons: Uses a wee bit more thread, can be annoying to have to bust out your scissors more often.
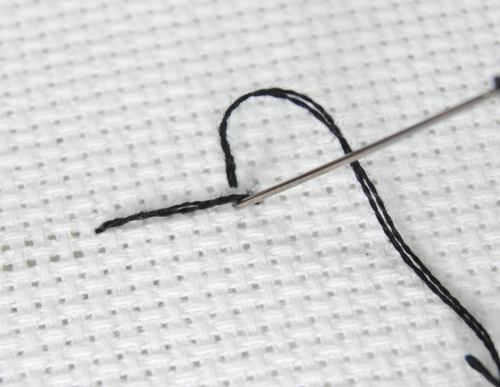
Loop Start
Ah yes, the infamous loop start. Now we’re getting to the thread starts designed for immaculate backs.
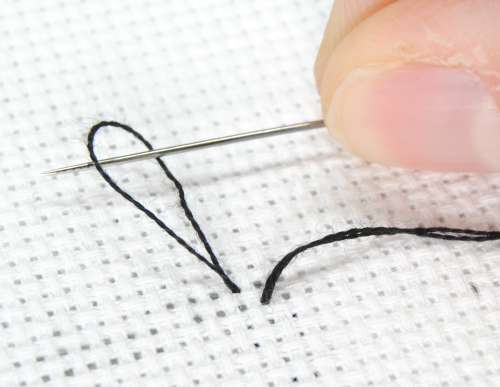
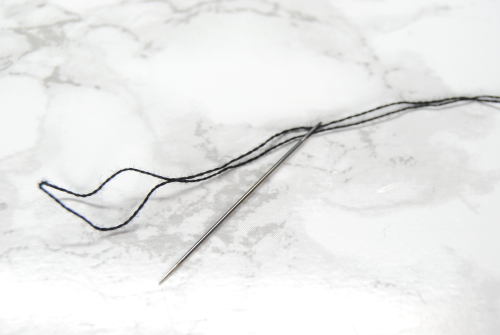
For this start, you’ll begin with a single strand of thread, twice as long as you would normally stitch with. Then fold it in half and thread your needle with the two loose ends.
I’m using a pretty short strand to make it easier to keep on camera, but you can use whatever length you’re comfortable with.
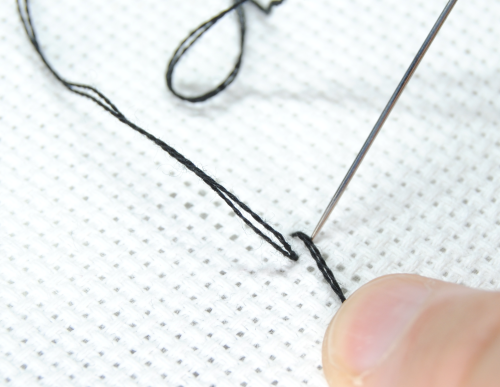
Now pull through the first leg of your stitch, leaving a small loop on the back.
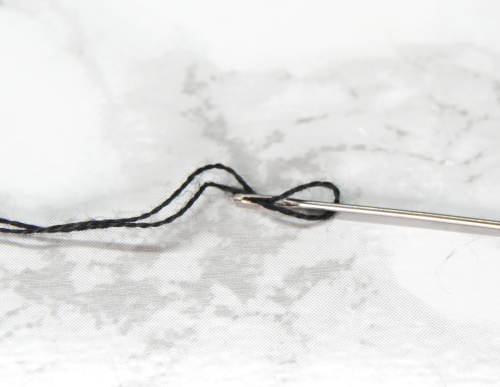
Continue your stitch, and angle your needle through the loop.
Pull your strand taut (but not too tight) away from the loop to anchor it in place.
Aand… that’s it! Continue stitching as normal. You’ll see the back stays pretty neat, you just have a slightly angled stitch where it started.

Pros: Easy to do; tidy back.
Cons: Doesn’t work for single strand stitching.
Personal Con: Once you end your thread, you have to cut off the ends, right? If you’re not using the entire length of thread you’re now left with two shorter strands. If you want to keep using the loop start, you’ll have to pull one and fold it in half to make it even shorter. I find this ends up wasting a bunch of thread, so I only use it if I know I’m going to use up that entire length, such as on a big patch of color. Your preferences may vary.
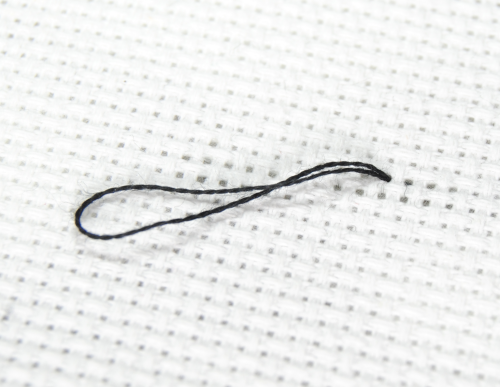
Needle Loop Start
Are you the type of person that seems to accidentally pull too far and end up having to re-thread the needle multiple times while you stitch? Well this start is for you!
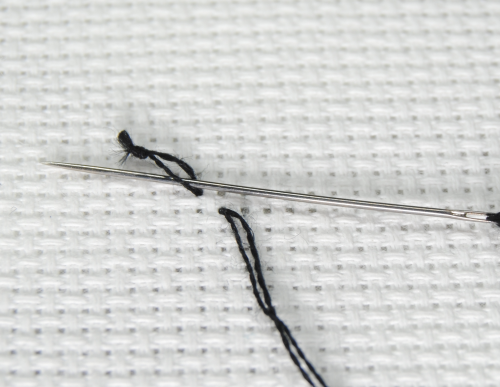
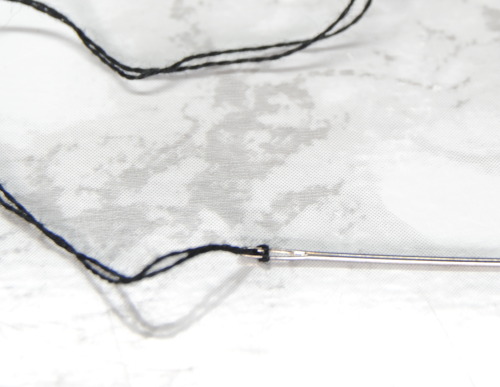
It starts the same way as the loop start above: By folding over a single strand of thread. But you thread the loop instead of the ends.
Get your needle far enough down the strand that you can feed the needle through the loop.
Then pull it tight at the head of the needle.
You can now stitch away without any worry of the needle becoming un-threaded! You can use any of the other starts on this list (except the loop start).
Pros: No more re-threading your needle mid-strand because you pulled a little too hard!
Cons: If you regularly play thread chicken, you won’t be able to rethread to get in that last stitch. Doesn’t play well with higher count fabrics, as it makes the needle head a little thicker than normal. Doesn’t work with single strand stitching either. Like the loop start, you can only effectively do this once per thread length.
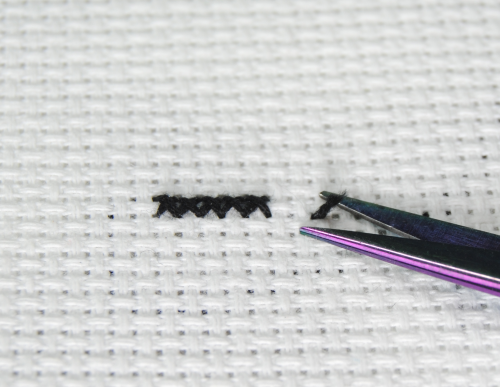
Pin Stitch
Finally one of the newer thread starts that has been making its rounds online. The pin stitch!
This one is really difficult to photograph as it involves tiny stitches inside of a single stitch square. As such, I will recommend checking out this illustrated tutorial if you’re having trouble understanding it.
I’ll be demonstrating a straight pin stitch, but you can also do the pin stitch at an angle so it mimicks one of the ‘legs’ of your cross stitch and is more seamless!
You start by stabbing through the very center of one of your stitches, from the front side of your fabric.

Come back up from the middle bottom (or one of the corners if you’re doing the angled pin stitch). Then back down through the very center again. Hold your tail off to the side while you work.
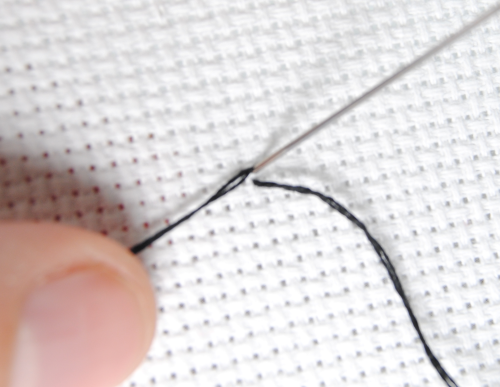
Now come back up from the middle top (or the opposite corner, if doing angled pin stitch), and back through the middle again. It’s probably starting to feel a little crowded, eh?
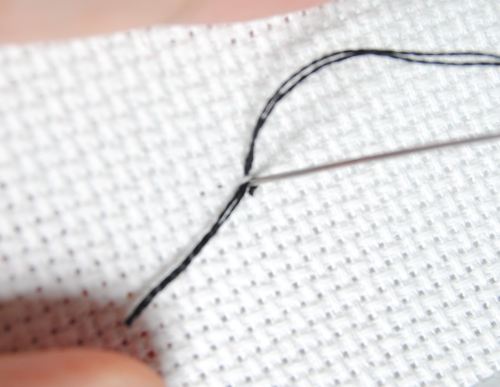
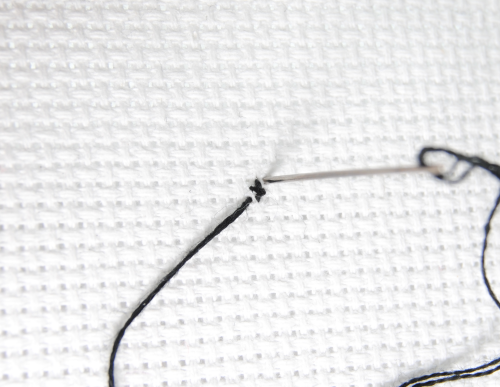
You can now trim off that extra tail, as close to the fabric as you feel comfortable with.

Stitch over your pin stitch like normal
I stitched a few extra stitches so you could see how it compares. In a full coverage piece, it won’t be as noticeable, but on stitches that are out by themselves you can see the tiniest little vertical line.
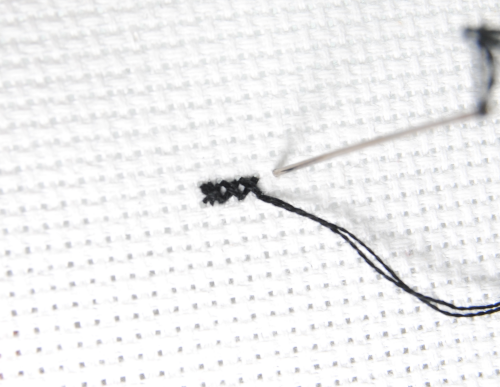
That’s when that angled stitch comes in handy; you can just make it match whatever your ‘bottom’ leg is on your stitches, and it will blend right in!
If you’re using a higher count fabric and stitching over 2, you can even use that middle hole instead of having to pierce your fabric!
Pros: No need to look at back of your fabric, everything’s done from the front. Keeps your back tidy. Great for solo stitches off by themselves where you don’t have anything to anchor your thread to.
Cons: A little tricky to learn and get the hang of. Doesn’t work well if you’re stitching over one on higher count fabrics due to the precision of the tiny stitches.
What’s your favorite?
And that’s all the starts I can think of for now! Which one is your favorite? Do you mix and match depending on the stitch?
Are there any thread starts I missed? I’d love to hear from you!