
Cross Stitch Tarot Bag – Adding Embroidery to Sewing Patterns
Hello! Welcome to another issue of I have no idea what I’m doing. In which I attempt to follow someone else’s tutorial and adapt it to make a cross stitch tarot bag. Hopefully by outlining my method for adapting cross stitch to this tarot bag tutorial it will inspire you to turn some of your stitched-but-not-fully-finished pieces into something, too.
The tutorial I’ll be following today is by FancyTigerCrafts, be sure to check it out too!
This post may contain affiliate links. If you buy something using one of these links, I earn a small commission. However, there is no extra cost to you. Thanks for understanding! Learn more in my Disclosures & Privacy Policy.
Table of Contents
Determining Measurements
Finding the right tutorial is key here. The one I followed was nice enough to include an entire section for calculating the size of your bag! I was making a cross stitch tarot bag for my current favorite deck, the Tarot of the Divine. These are the measurements I came up with for the fabric:
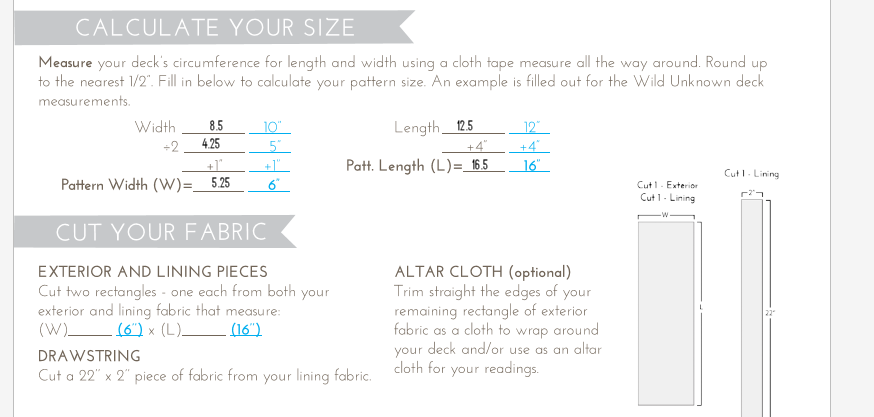
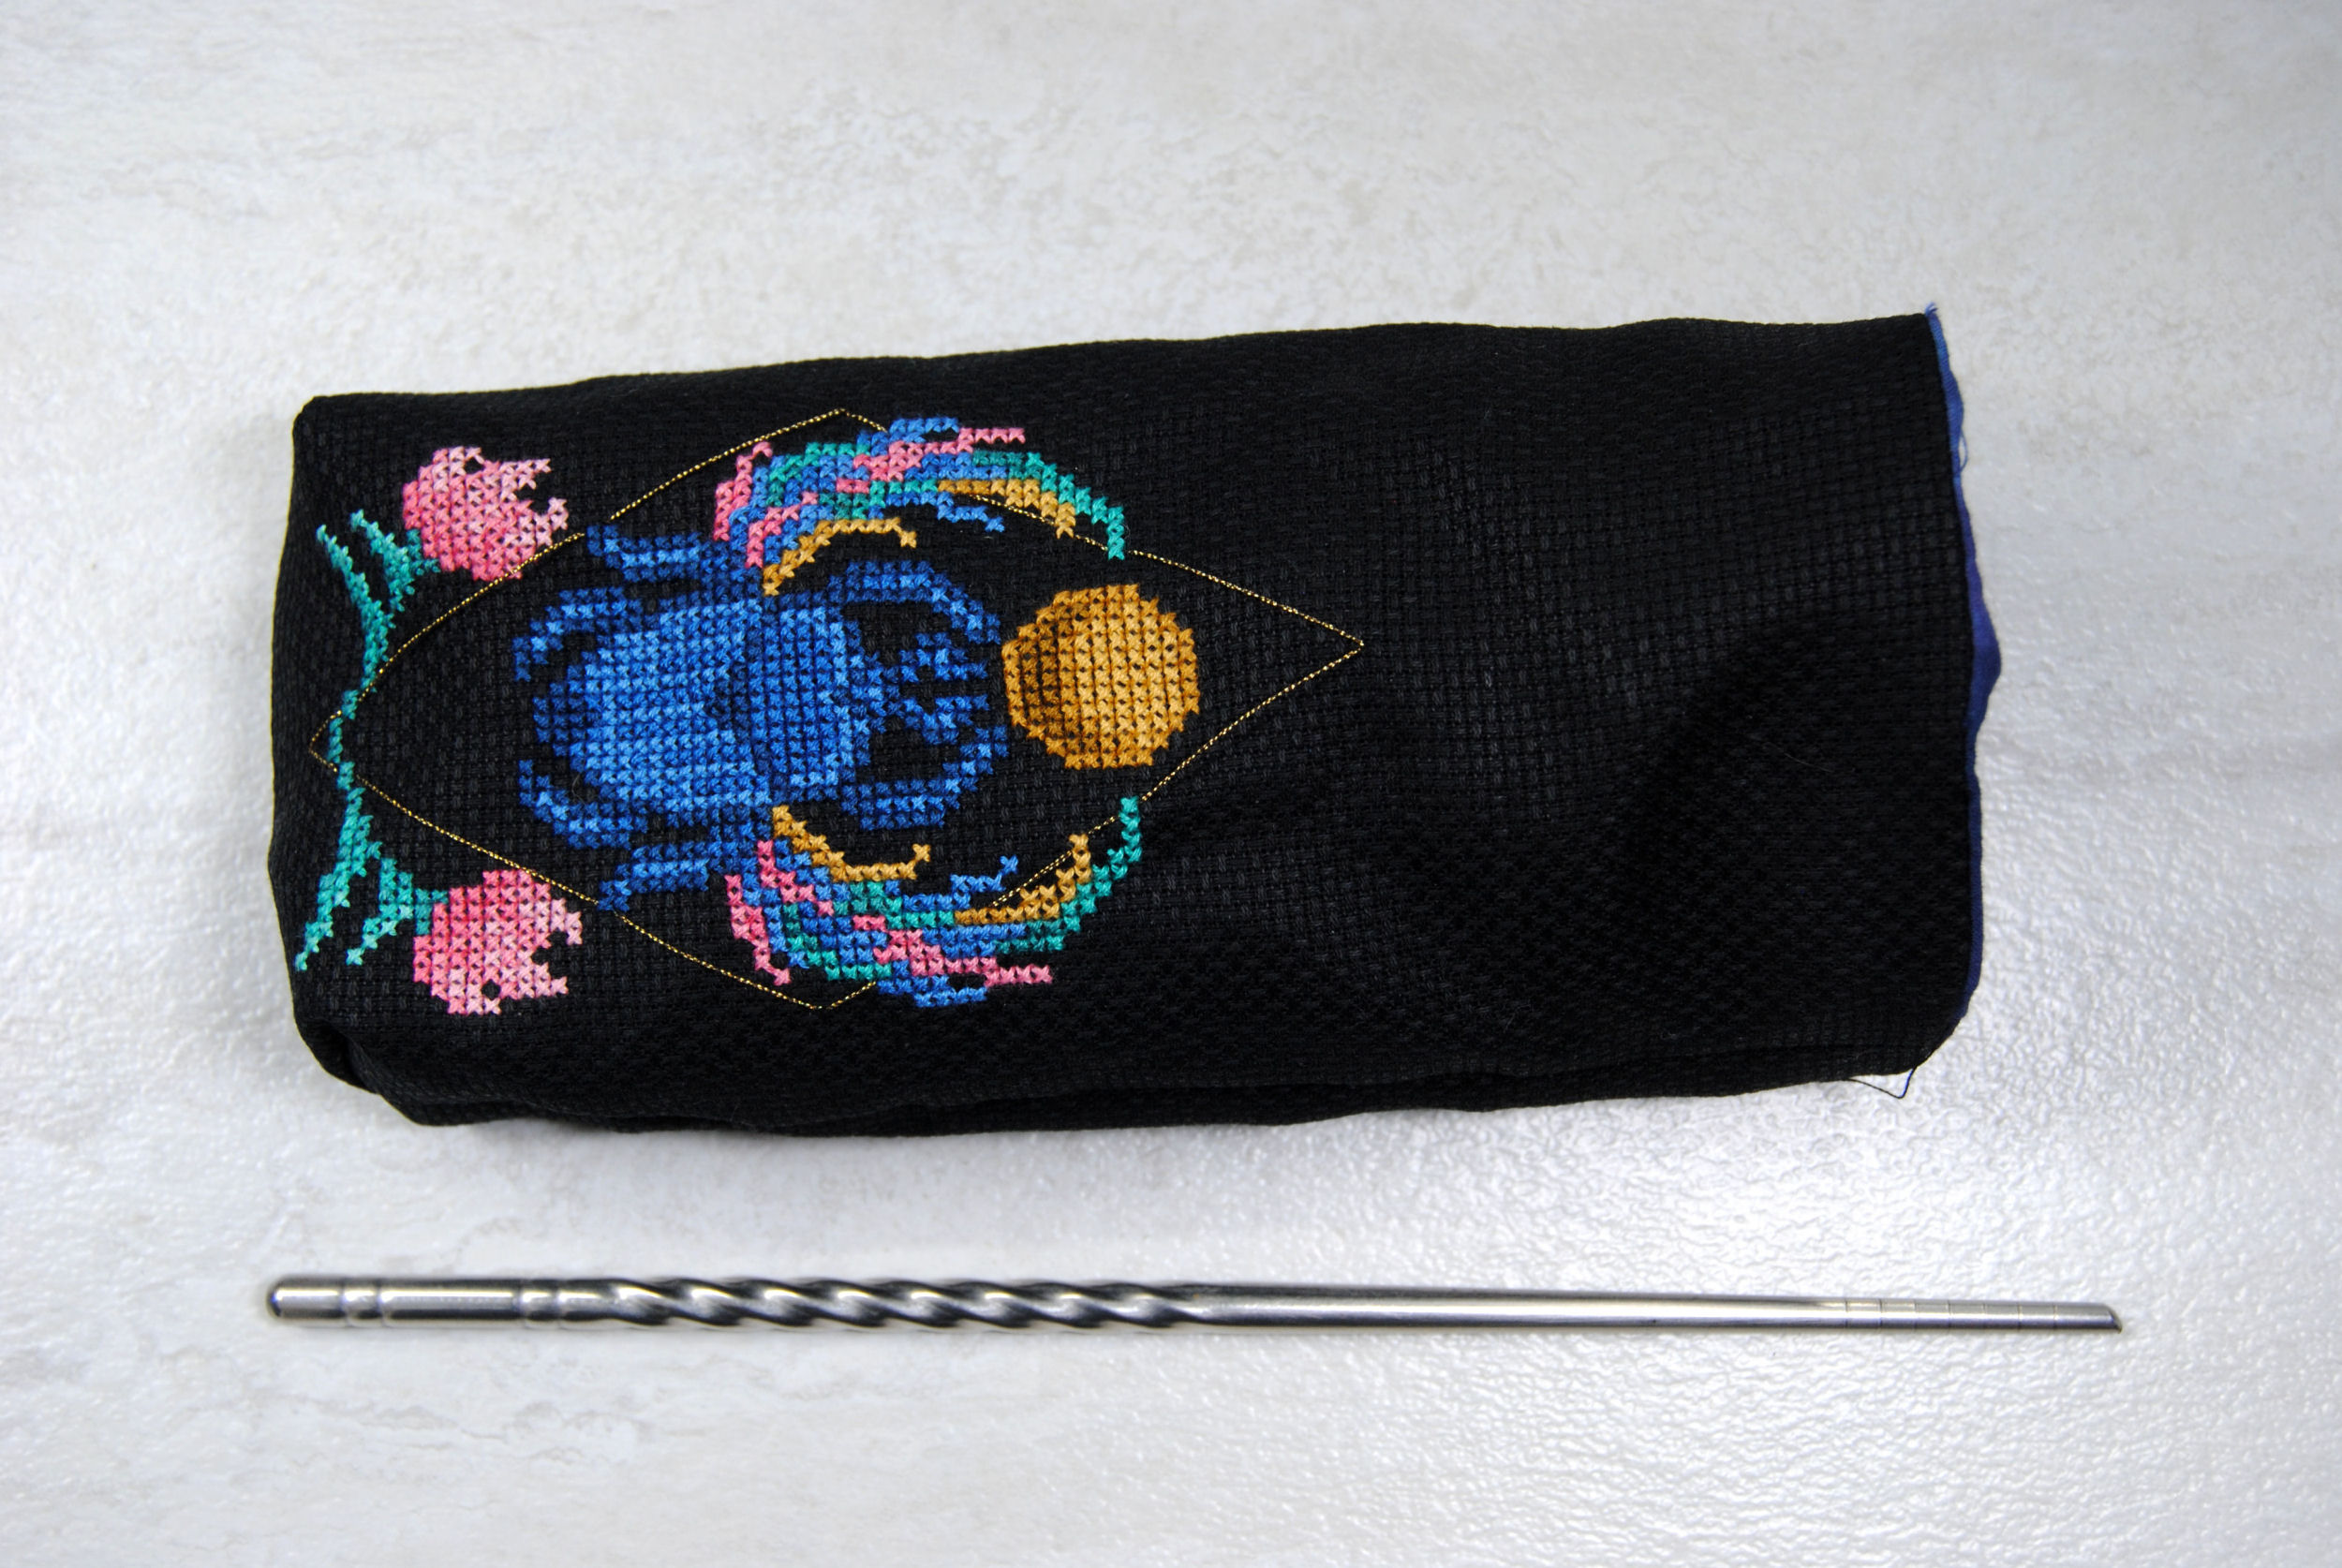
I then cut out a 16.5″ x 5.25″ rectangle of 14 count black aida.
Since I wanted a cross stitch design on the front of my bag, I measured one of my cards in inches and multiplied it by 14 to get the size my design would be. Since the bag was meant to hold these cards, it would be at least as tall and wide as the cards themselves, after all. In my example, it ended up being 41×68 pixels.
As usual, I made my design using a pixel art program and then onto an easier to read grid via PCStitch before picking my own thread colors. You can get the scarab pattern via Etsy. Or, design your own!
Where to stitch your design
Part of the trickiness of converting sewing patterns is figuring out exactly where your stitching should be on the base fabric before assembly.
I forgot to take photos of this, but to get my pattern in the right place I folded my aida rectangle in half, and marked off the fold, which would be the bottom of the bag. Then I read through the sewing instructions and marked off where the drawstring channel and seam allowances would be.
Once they were marked, I centered my design between the bottom seam and the drawstring channel.
Cross Stitch Tarot Bag Assembly Process
Again, I’m following the tutorial I linked at the beginning so I won’t be going into great detail on the process. But I will note any struggles I had related to working with aida specifically.
I did use a sewing machine, but you’ll note my sewing lines aren’t straight or perfect. Yours don’t have to be either! It’s a little rough, but still a cute and functional cross stitch tarot bag. Don’t be afraid to branch out of your comfort zone! Even if you end up having to stitch it by hand.
Preparing Materials
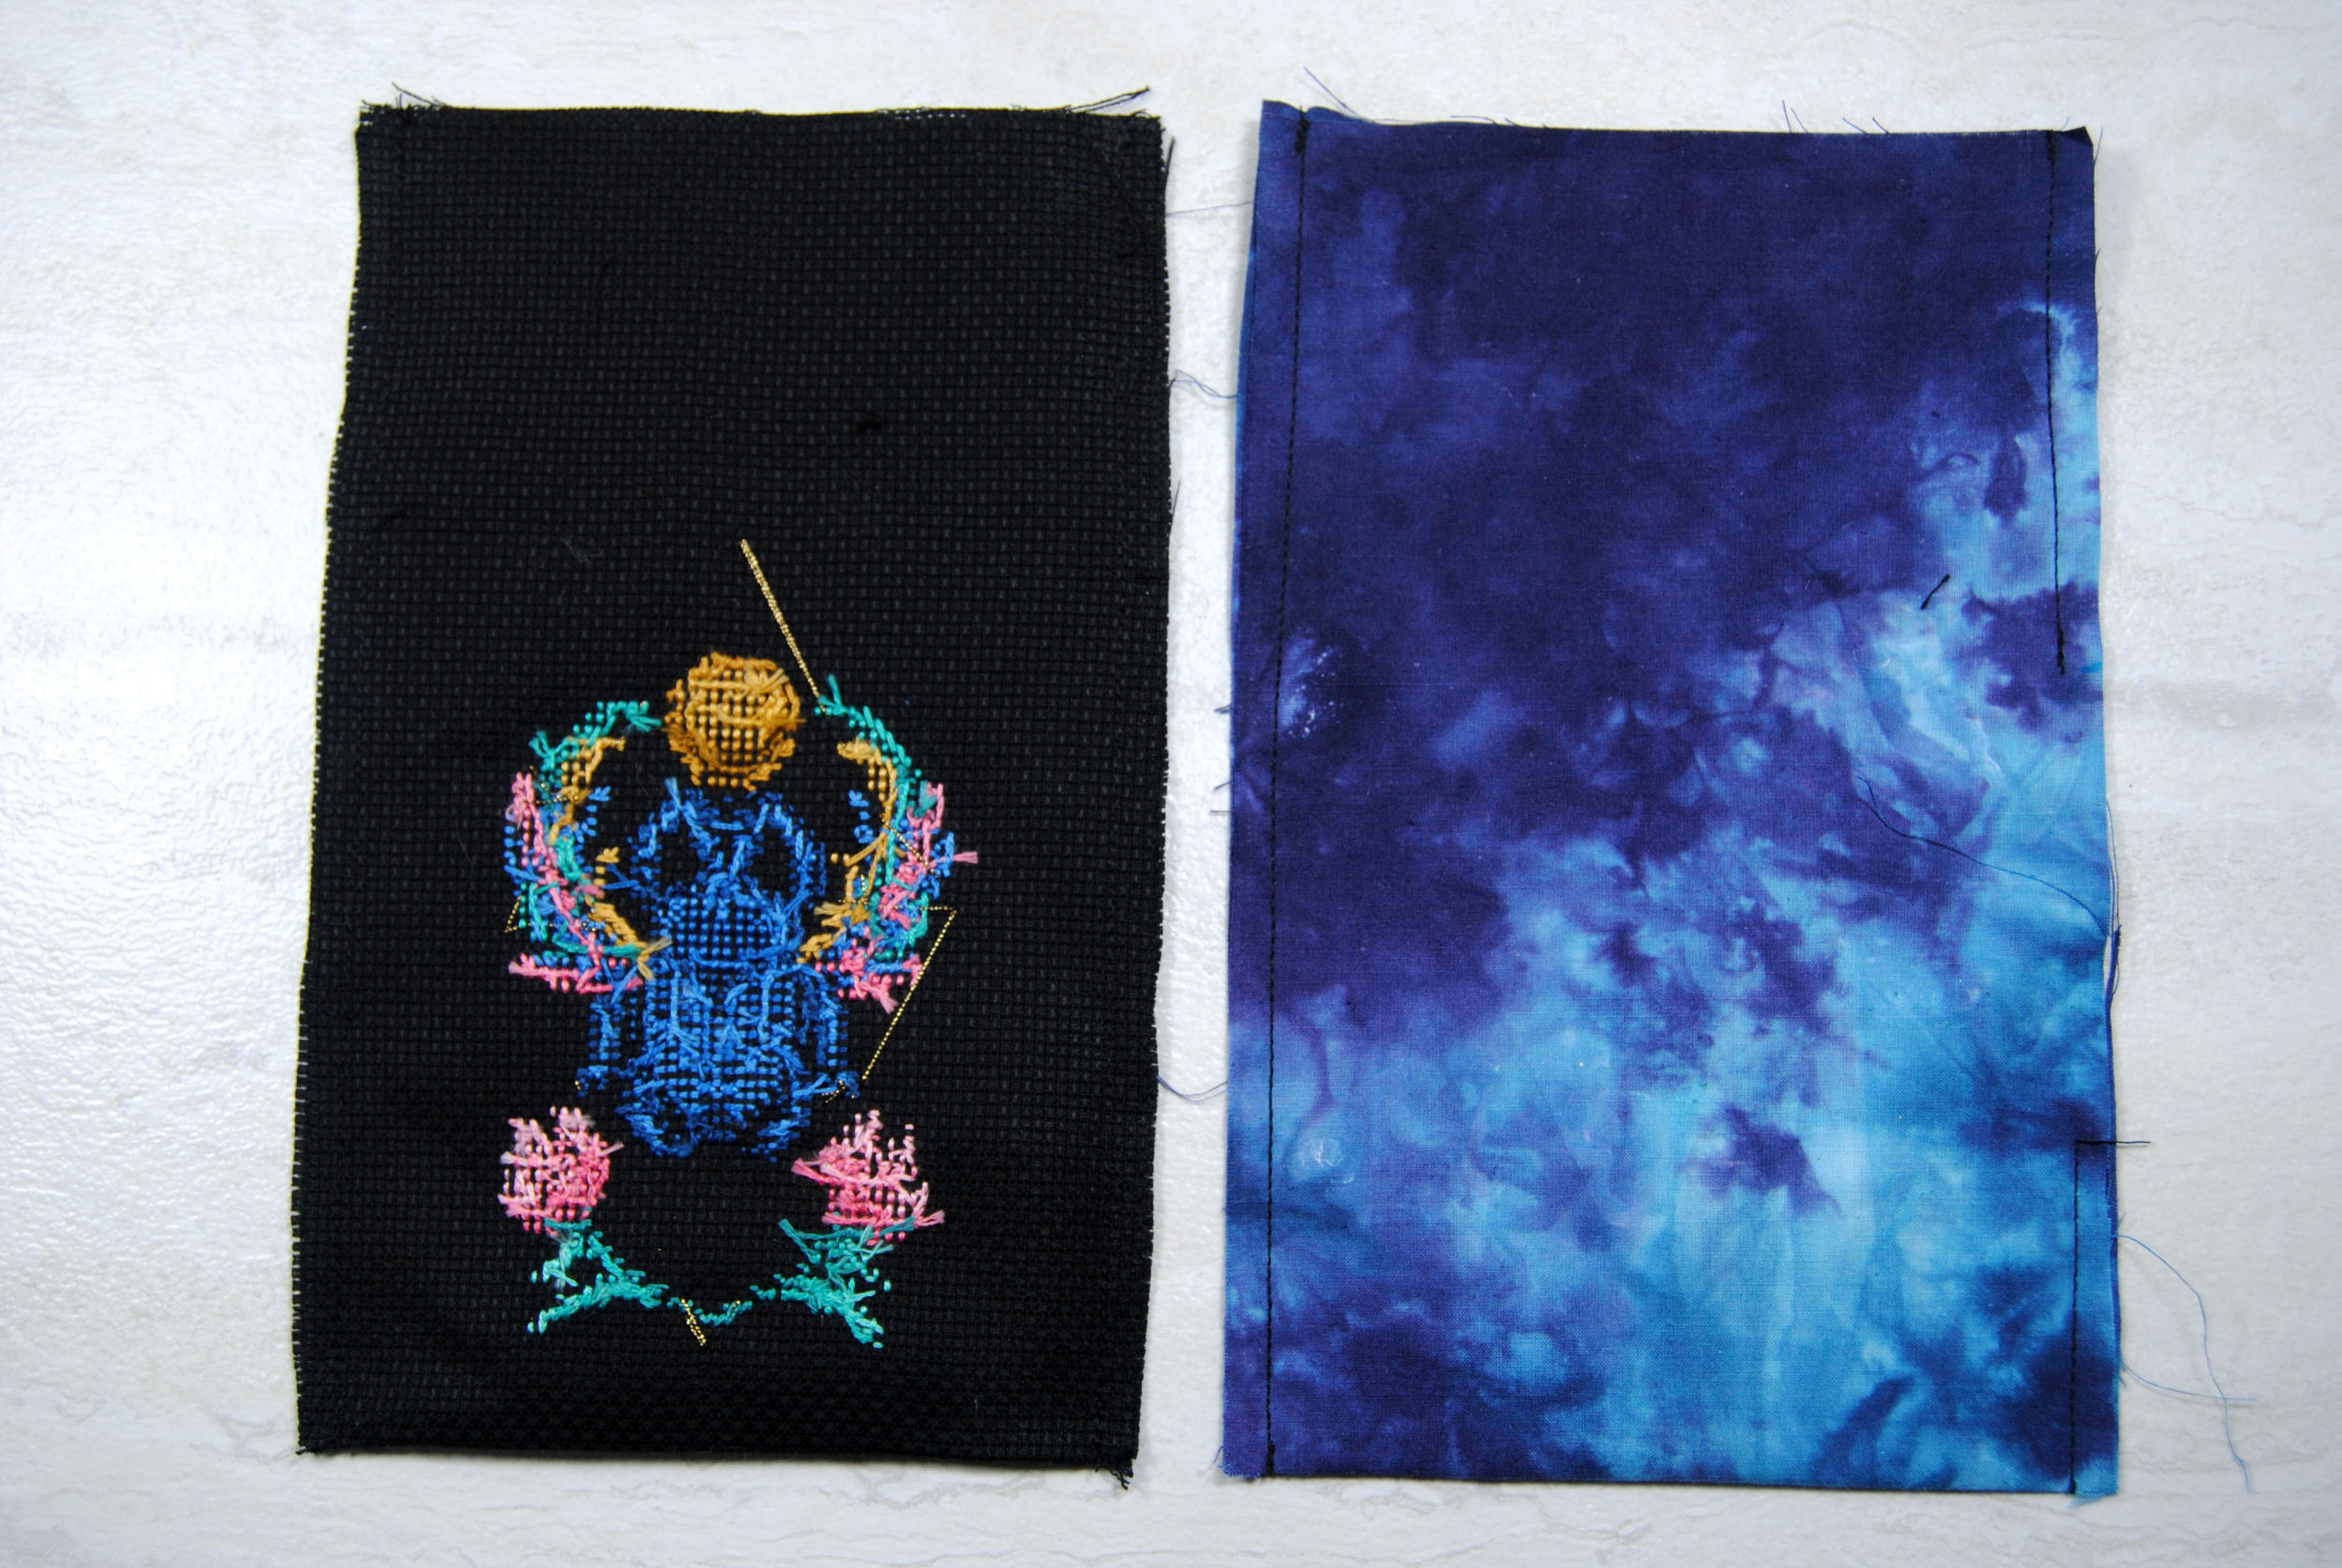
This blue batik(?) seemed perfect for this bag, as it’d reflect both the blue of the scarab I designed, and backs of the Tarot of the Divine.
I was, however, too lazy to make my own drawstring so I used some T-shirt yarn I had lying around.
In the photo you can see two pins where I had marked out where the drawstring channel would be when I was figuring out where the stitched design should go.

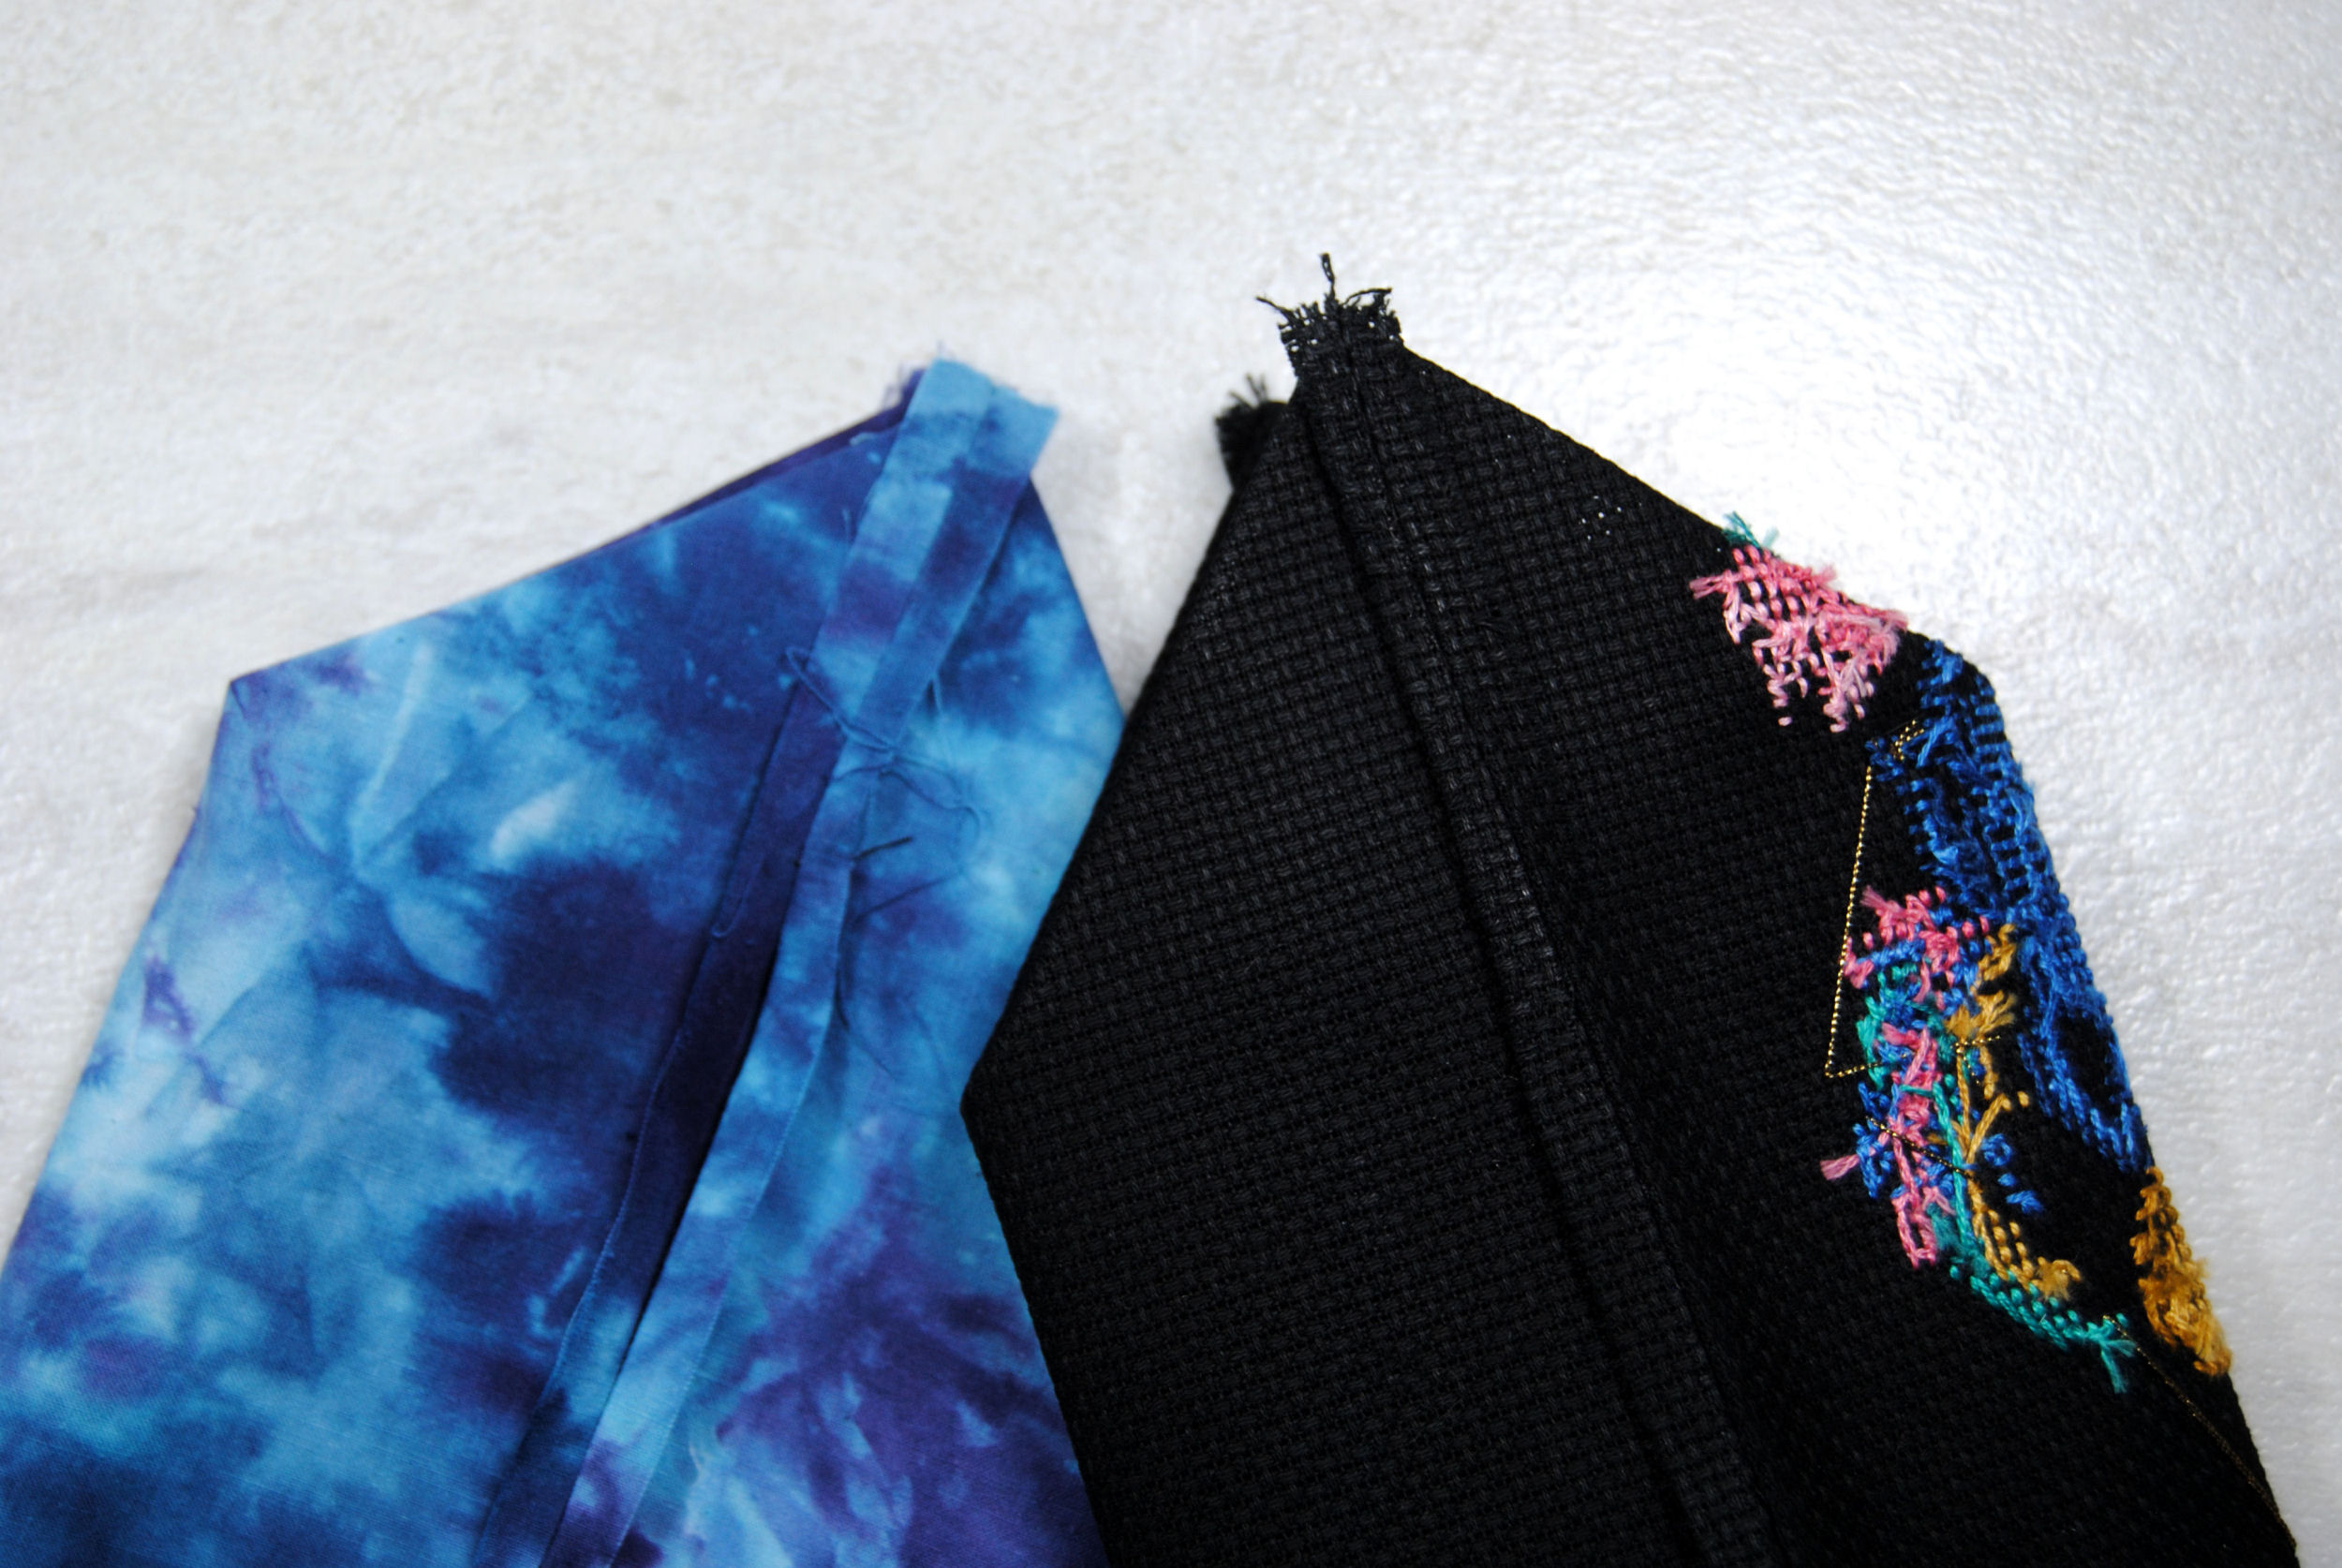
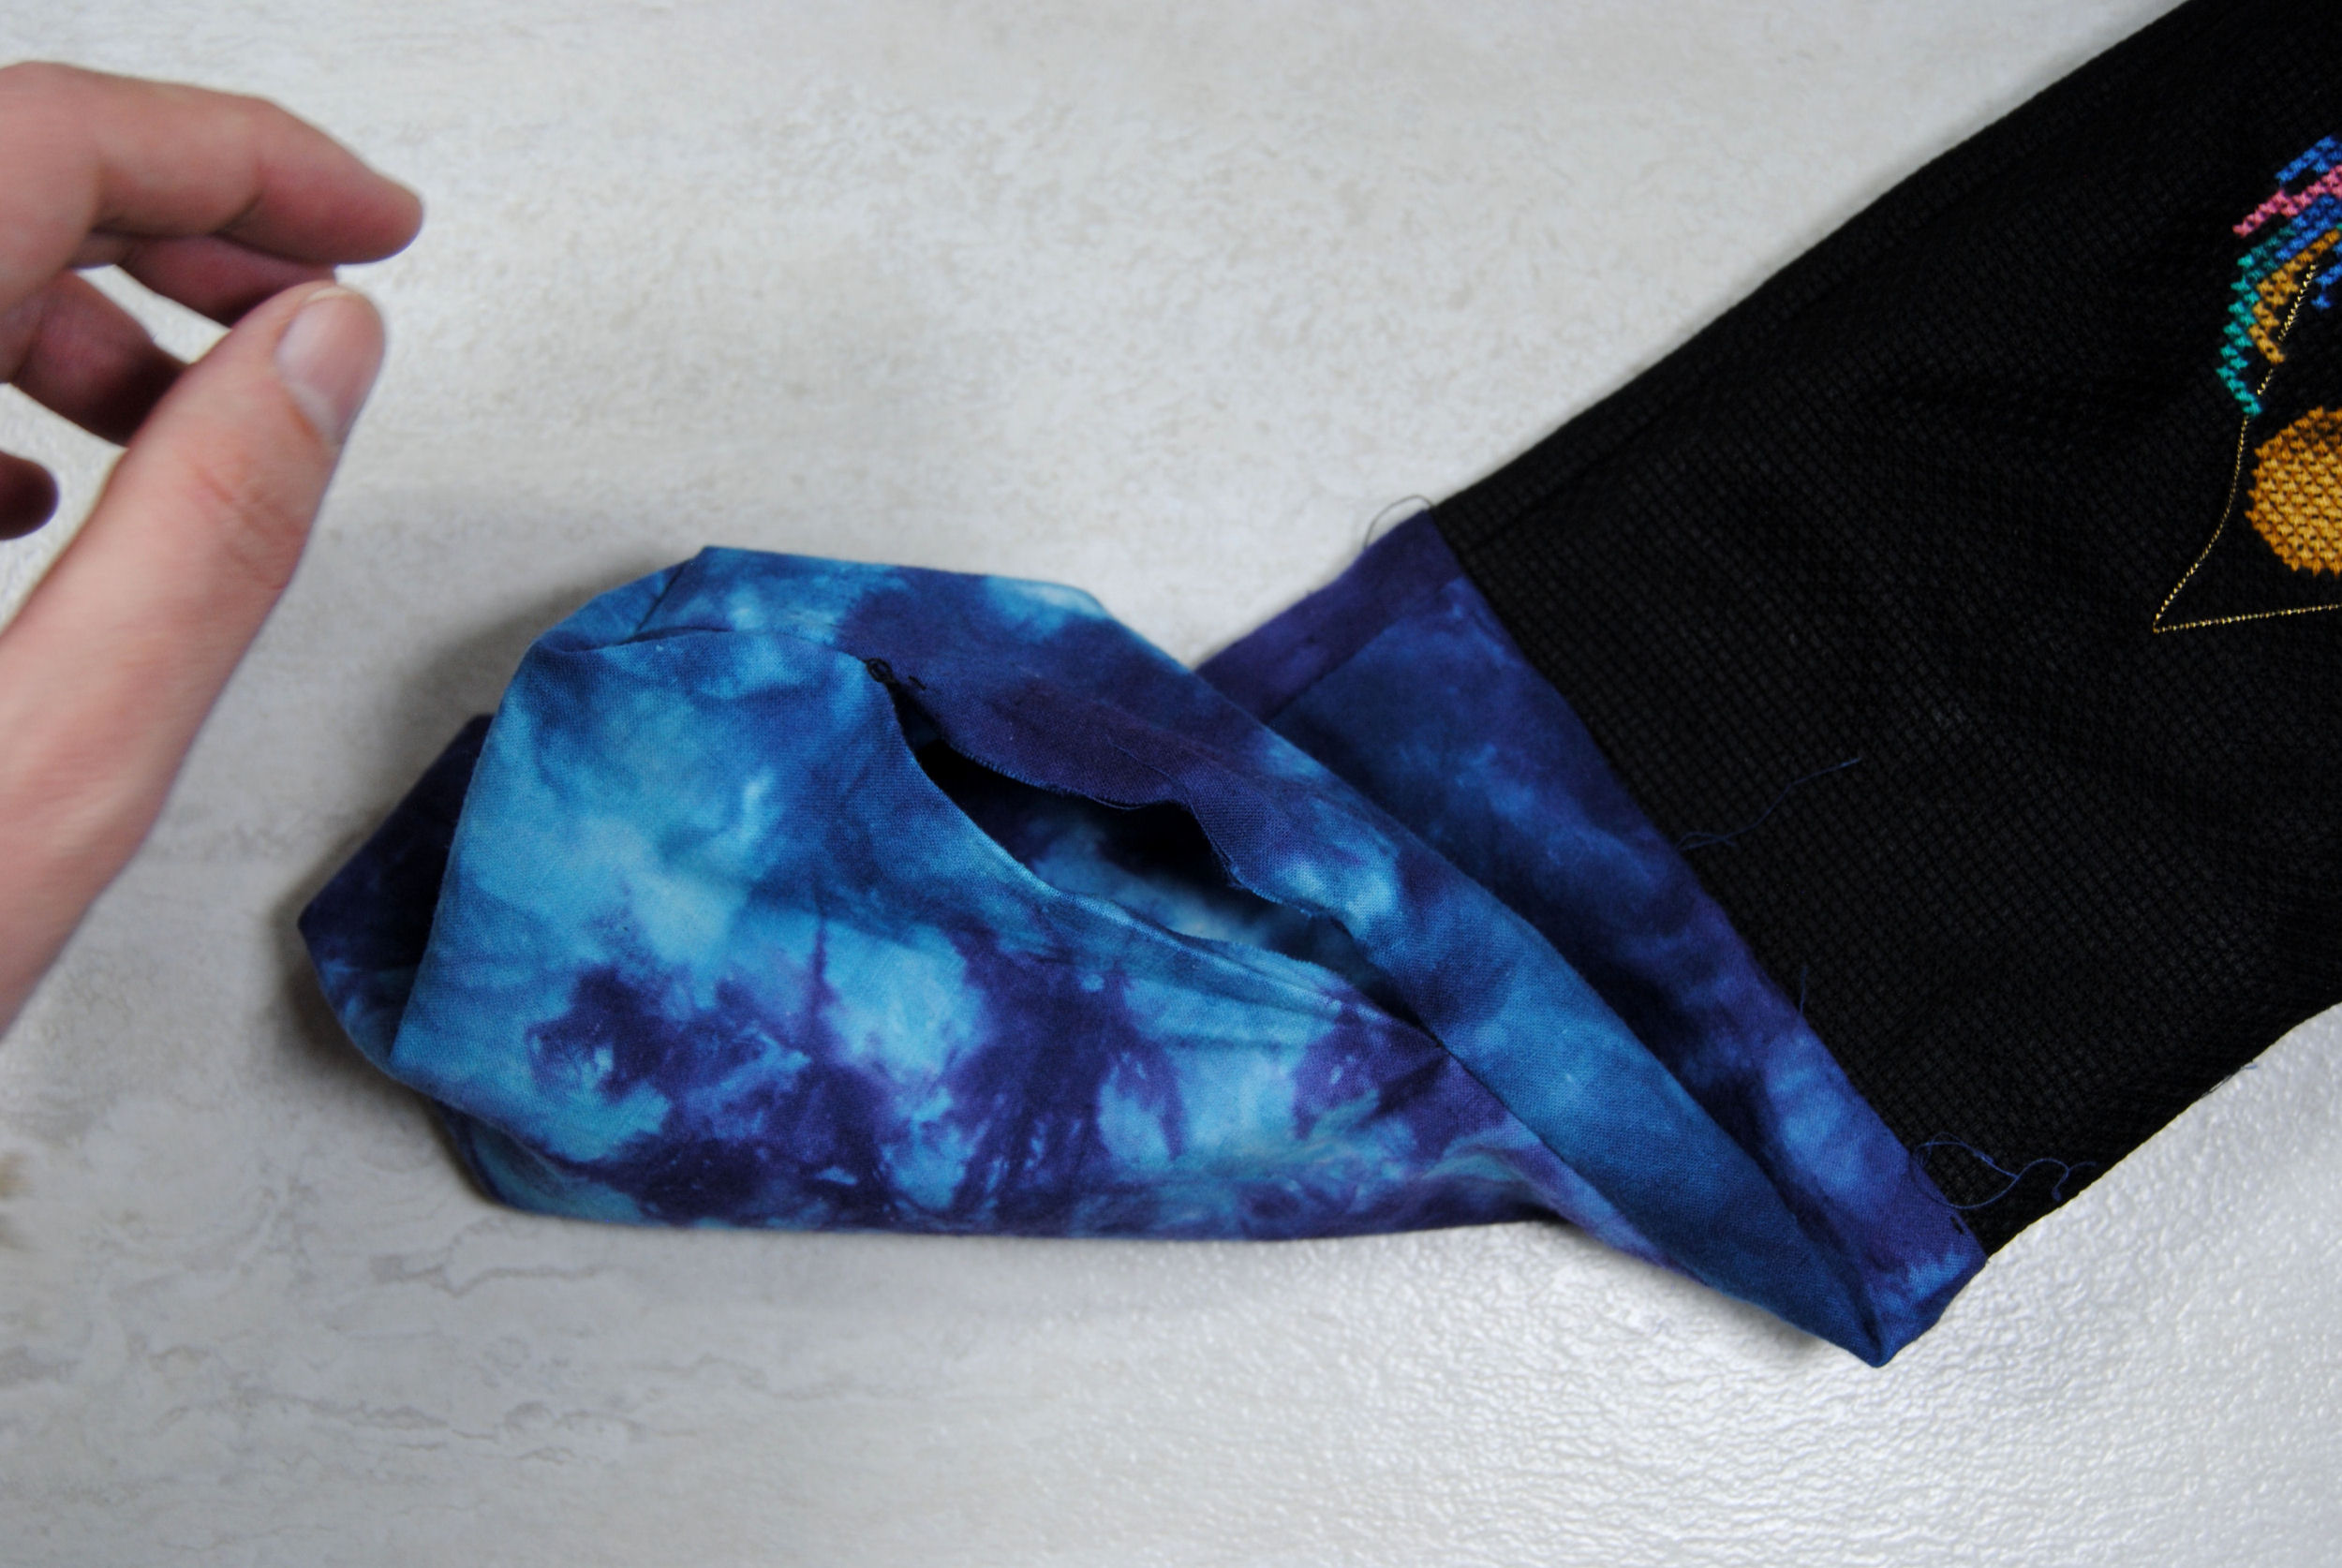
Following the tutorial, I folded my stitch right sides together and stitched along the sides. I quickly realized that showing black stitching on black aida wasn’t going to work, so most of this will be showing the lining fabric instead.
I will note however, it was much easier to stitch straight on the aida since I could just follow the weave.
Ironing your seams is always helpful, but I especially recommend it with the stiff aida.
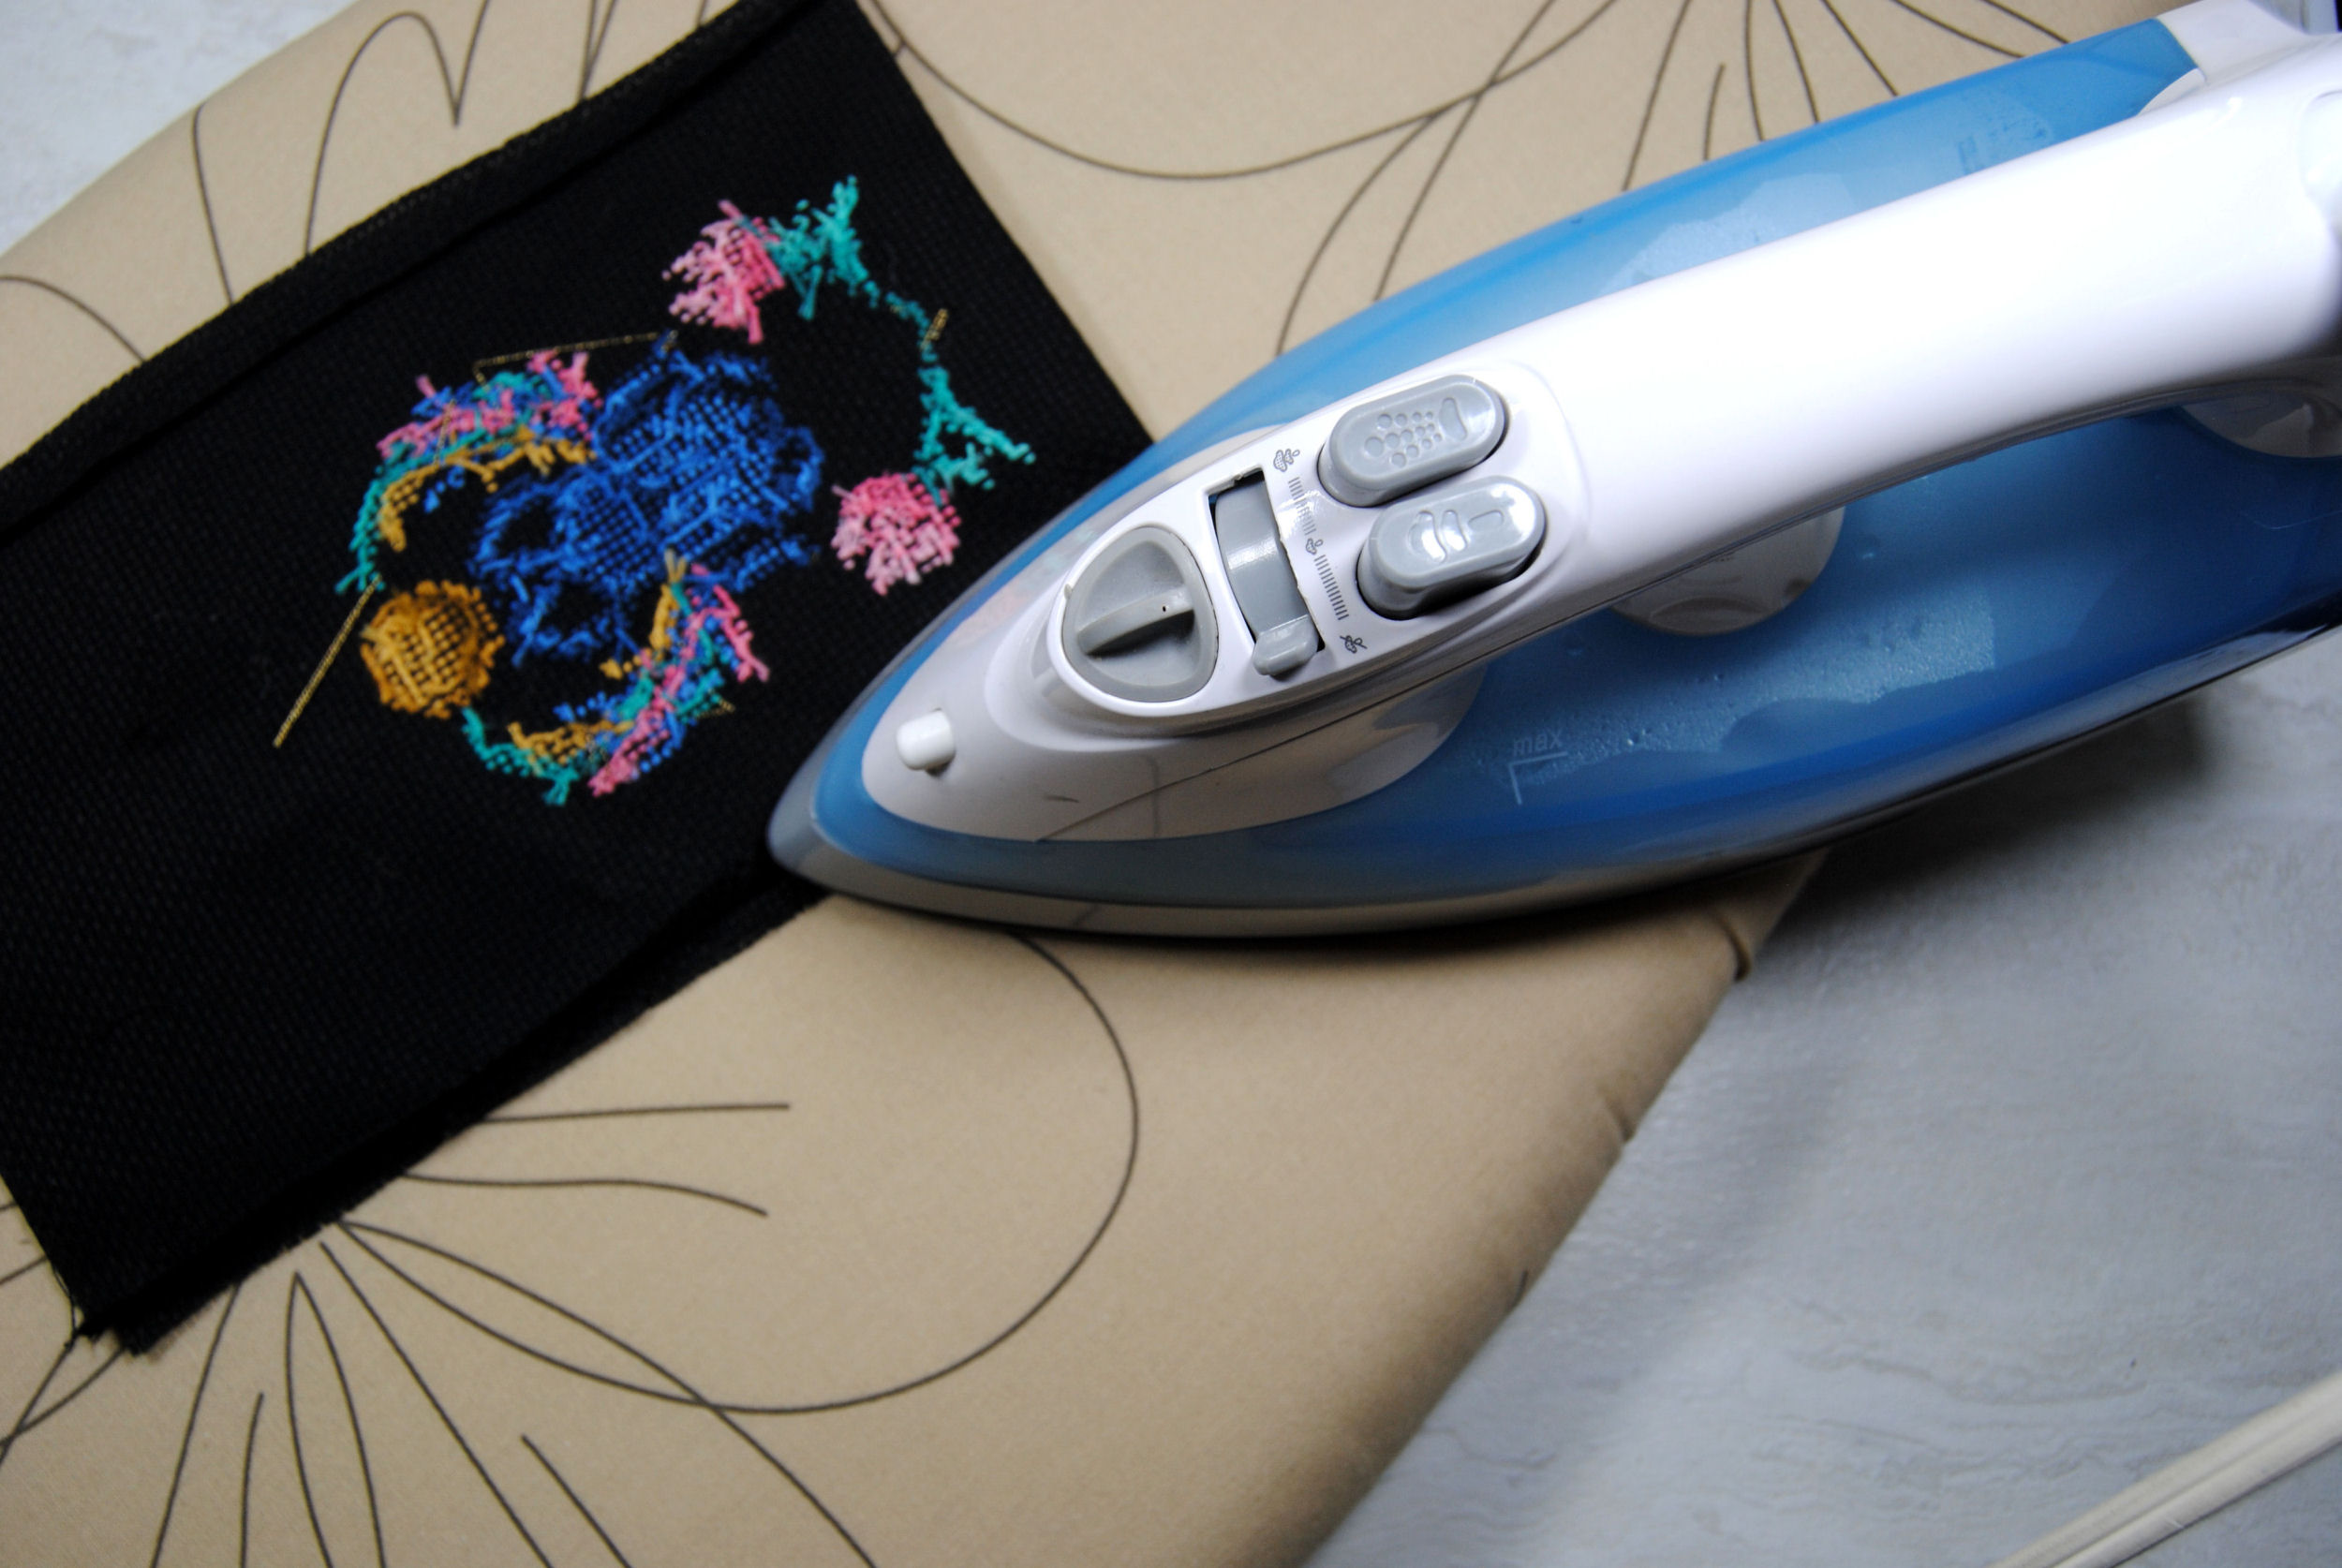
I even ironed the corners down to make them easier to stitch across! Though I will note that if like me your design has some metallic thread in it, make SURE you cover it with a cloth and do not iron it directly!
Stitching the Outer and Inner Layers Together
Finally it’s time to put these together. I slid the outer bag into the lining, and used wonder clips to hold the inner and outer seams together, then stitched around that top rim.
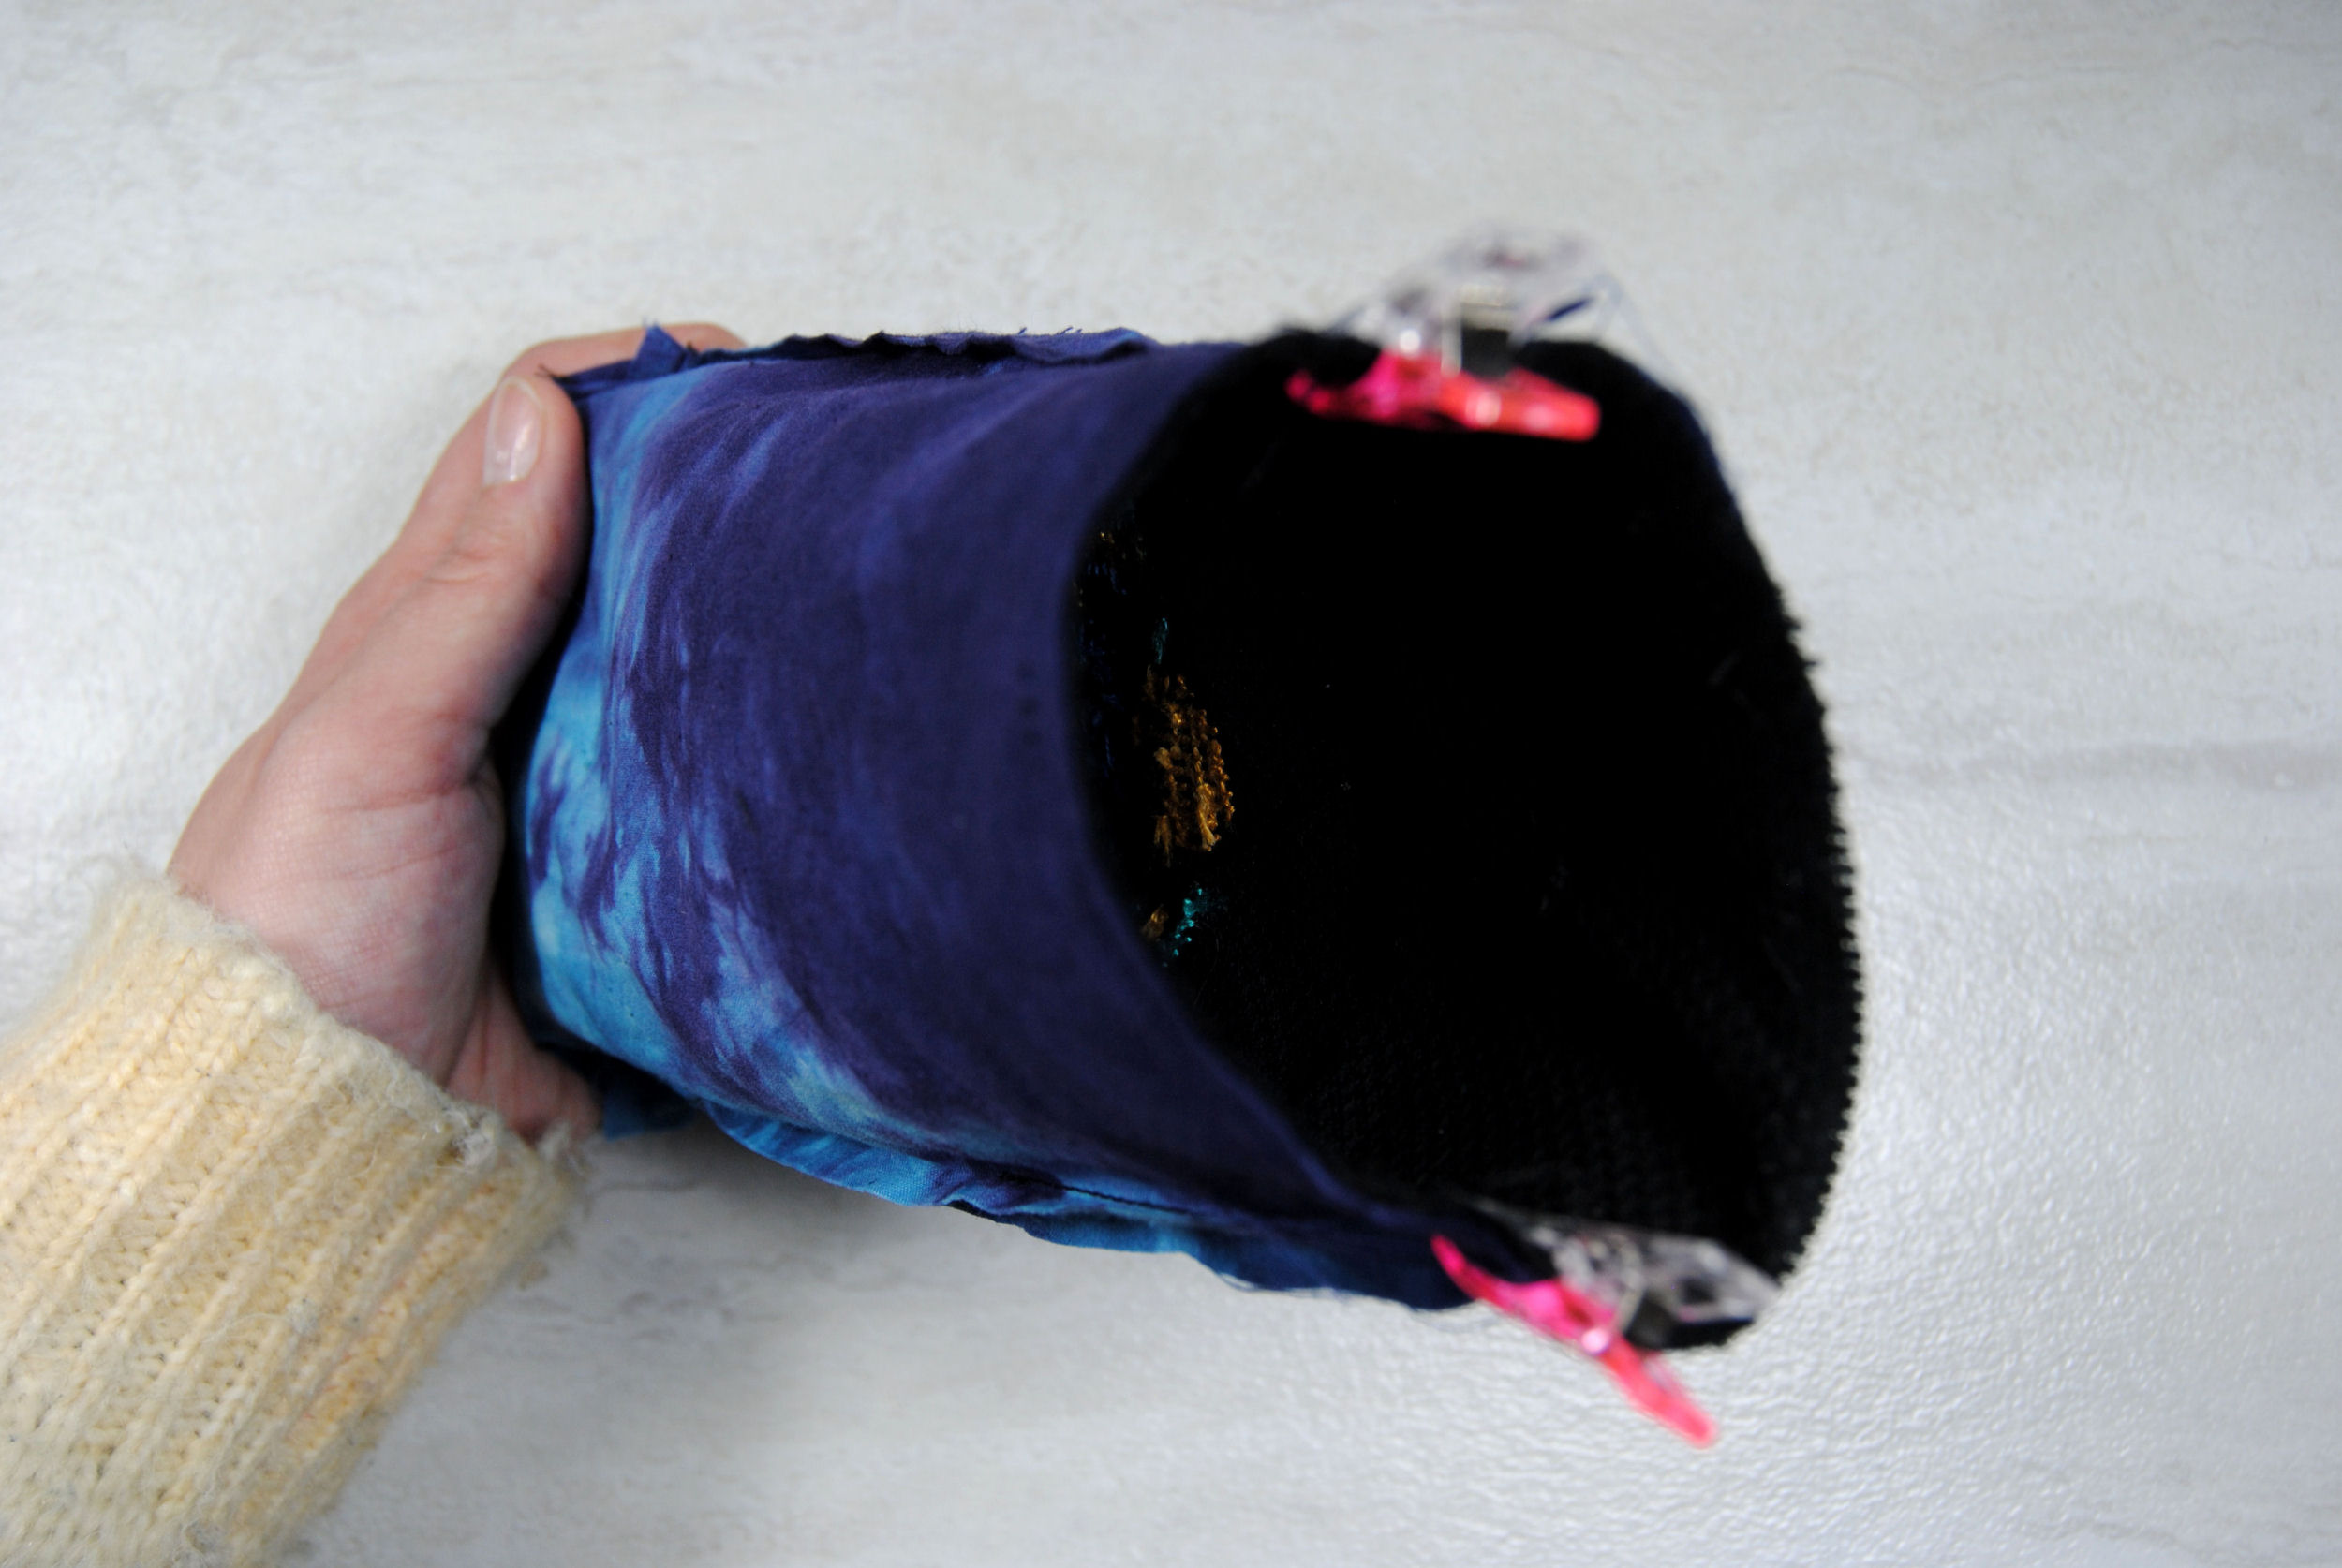
My chosen aida was pretty stiff, so I’d recommend leaving a larger gap on the lining if yours is too. I struggled a bit turning it inside out, but eventually managed it.
Since it was never really going to be seen, I just top stitched that opening closed.

Finally, I shoved that inner lining into the aida, and used a chopstick to make sure the corners were fully lined up with the outer bag.
Adding the Drawstring
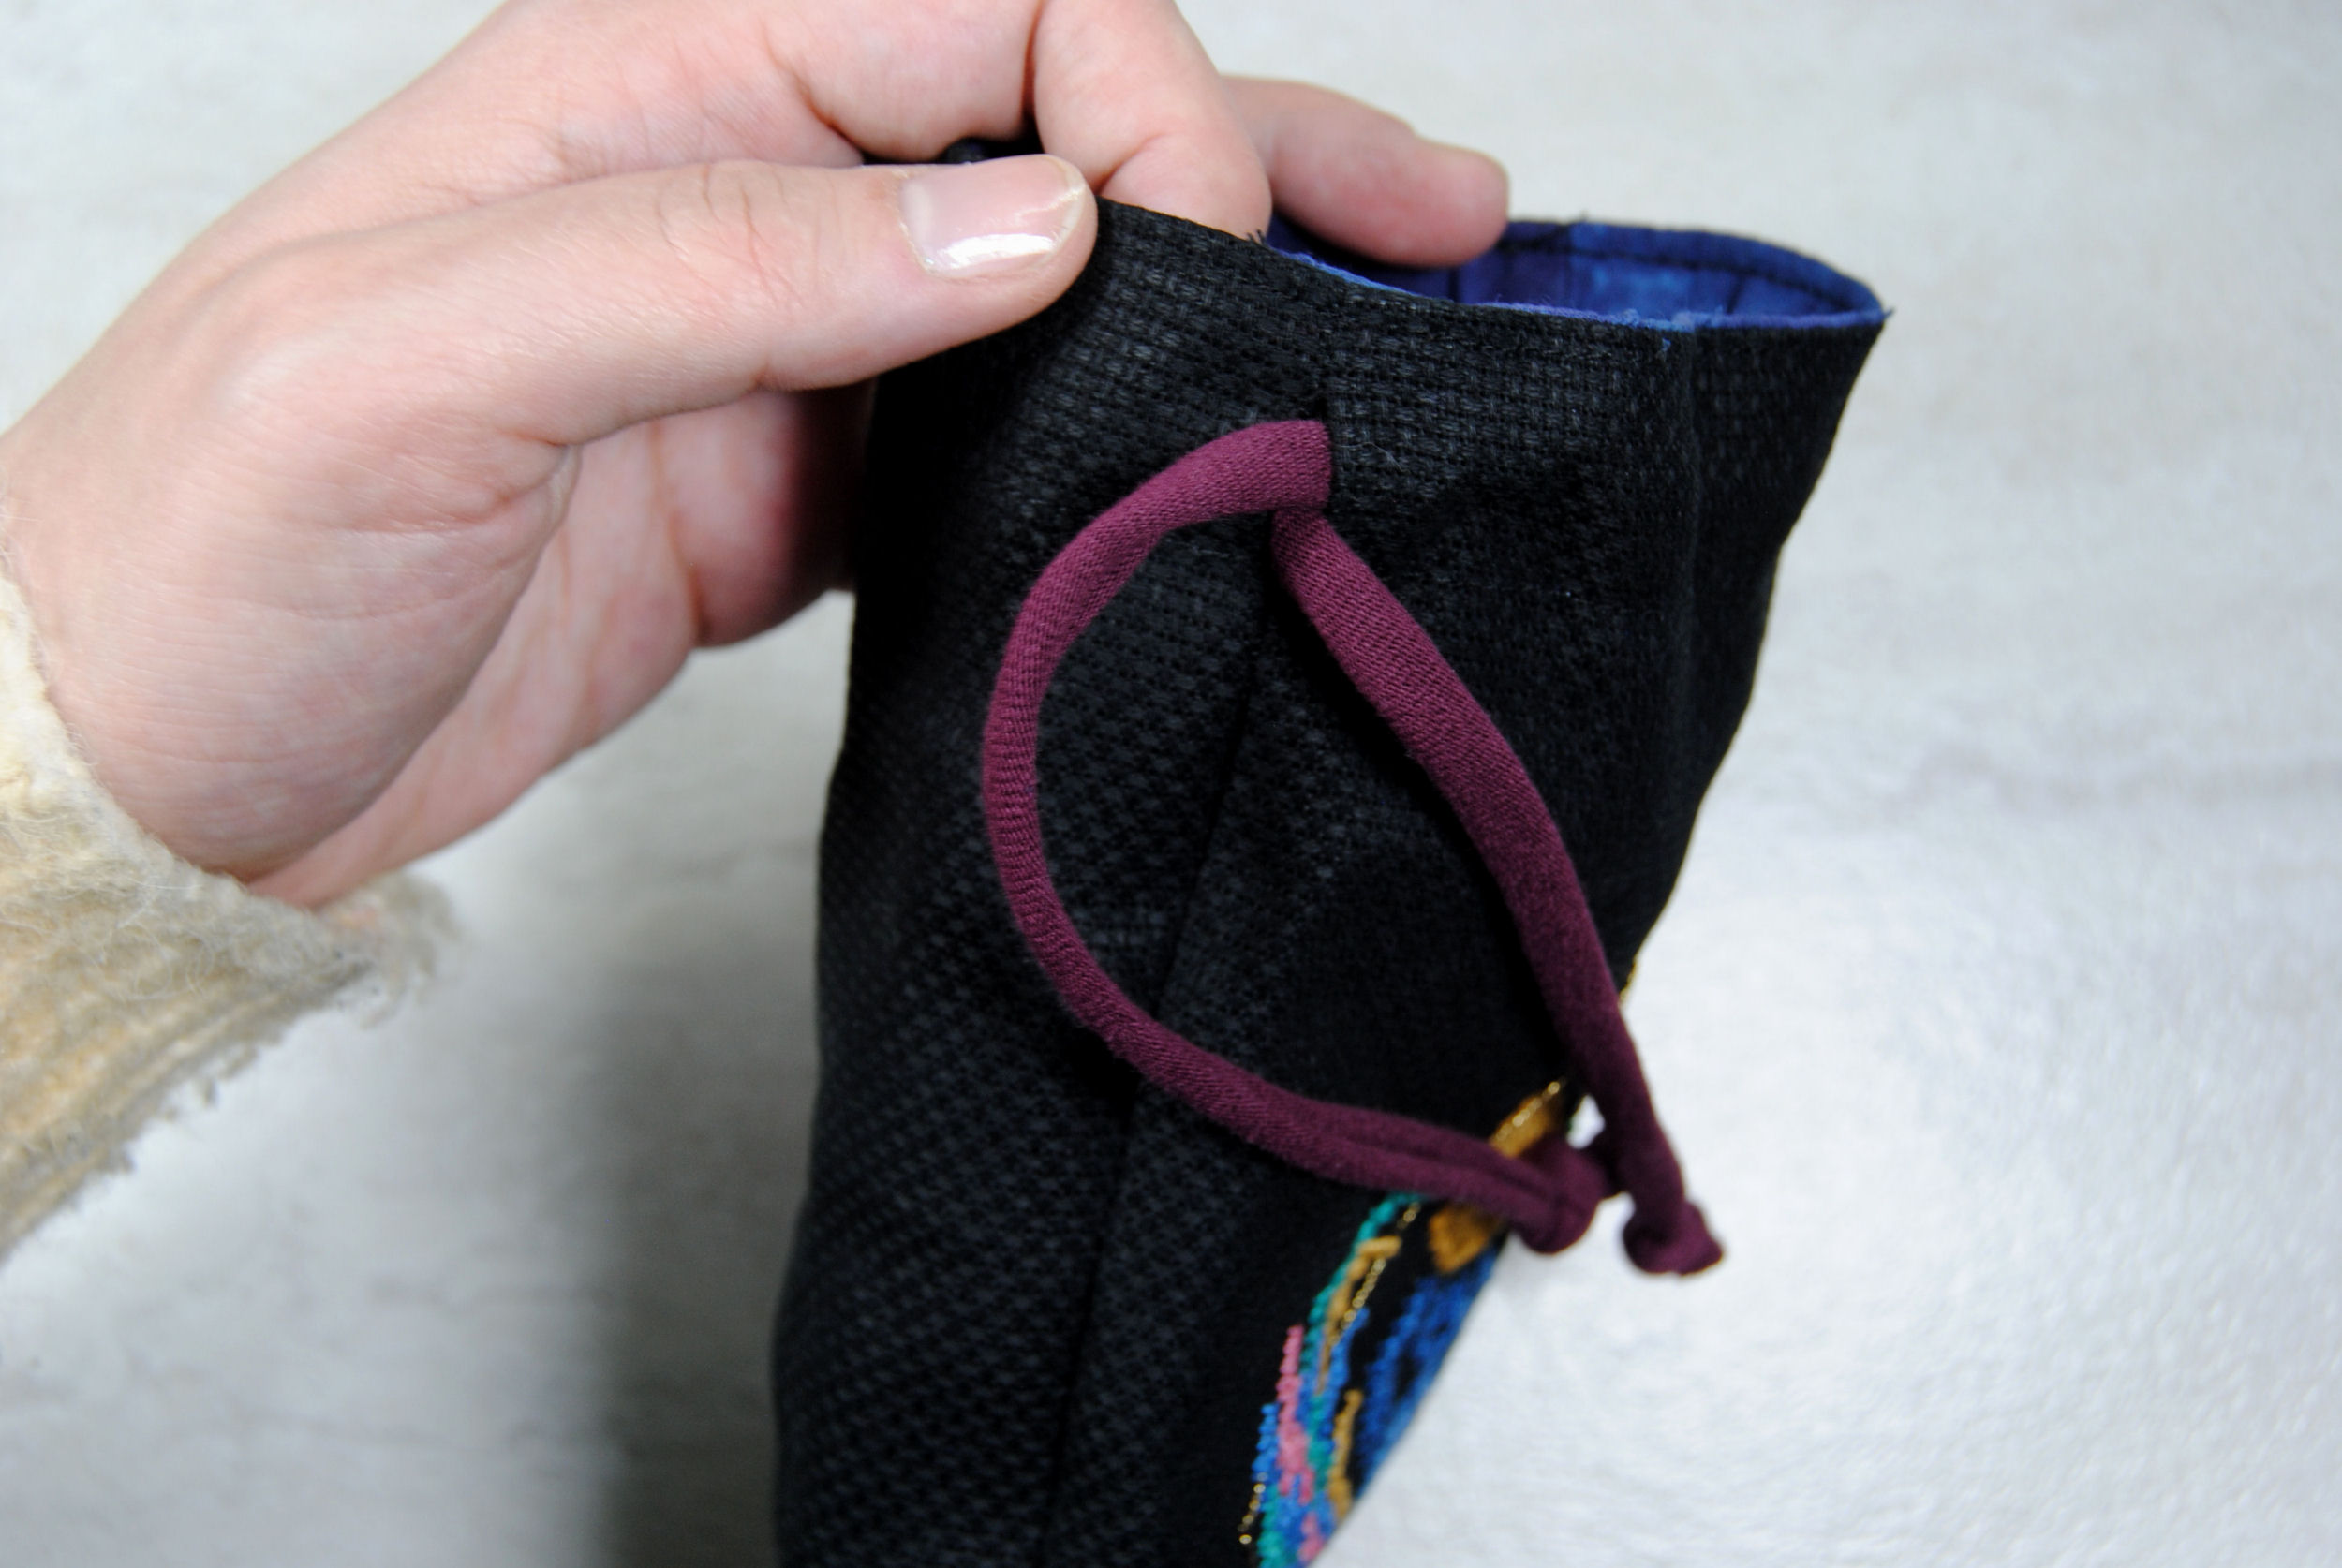
As noted earlier, I got real lazy here and used some T-shirt yarn instead of making one out of the inner lining fabric. As pretty as that would’ve been, it was too much of an added hassle for me. The pattern did come with instructions on how to do that though if you’d prefer that matching fabric.
As the pattern advised, I topstitched around the rim of the bag to make the drawstring channel.

Then fed it through using a safety pin, and finally knotted the ends of the yarn
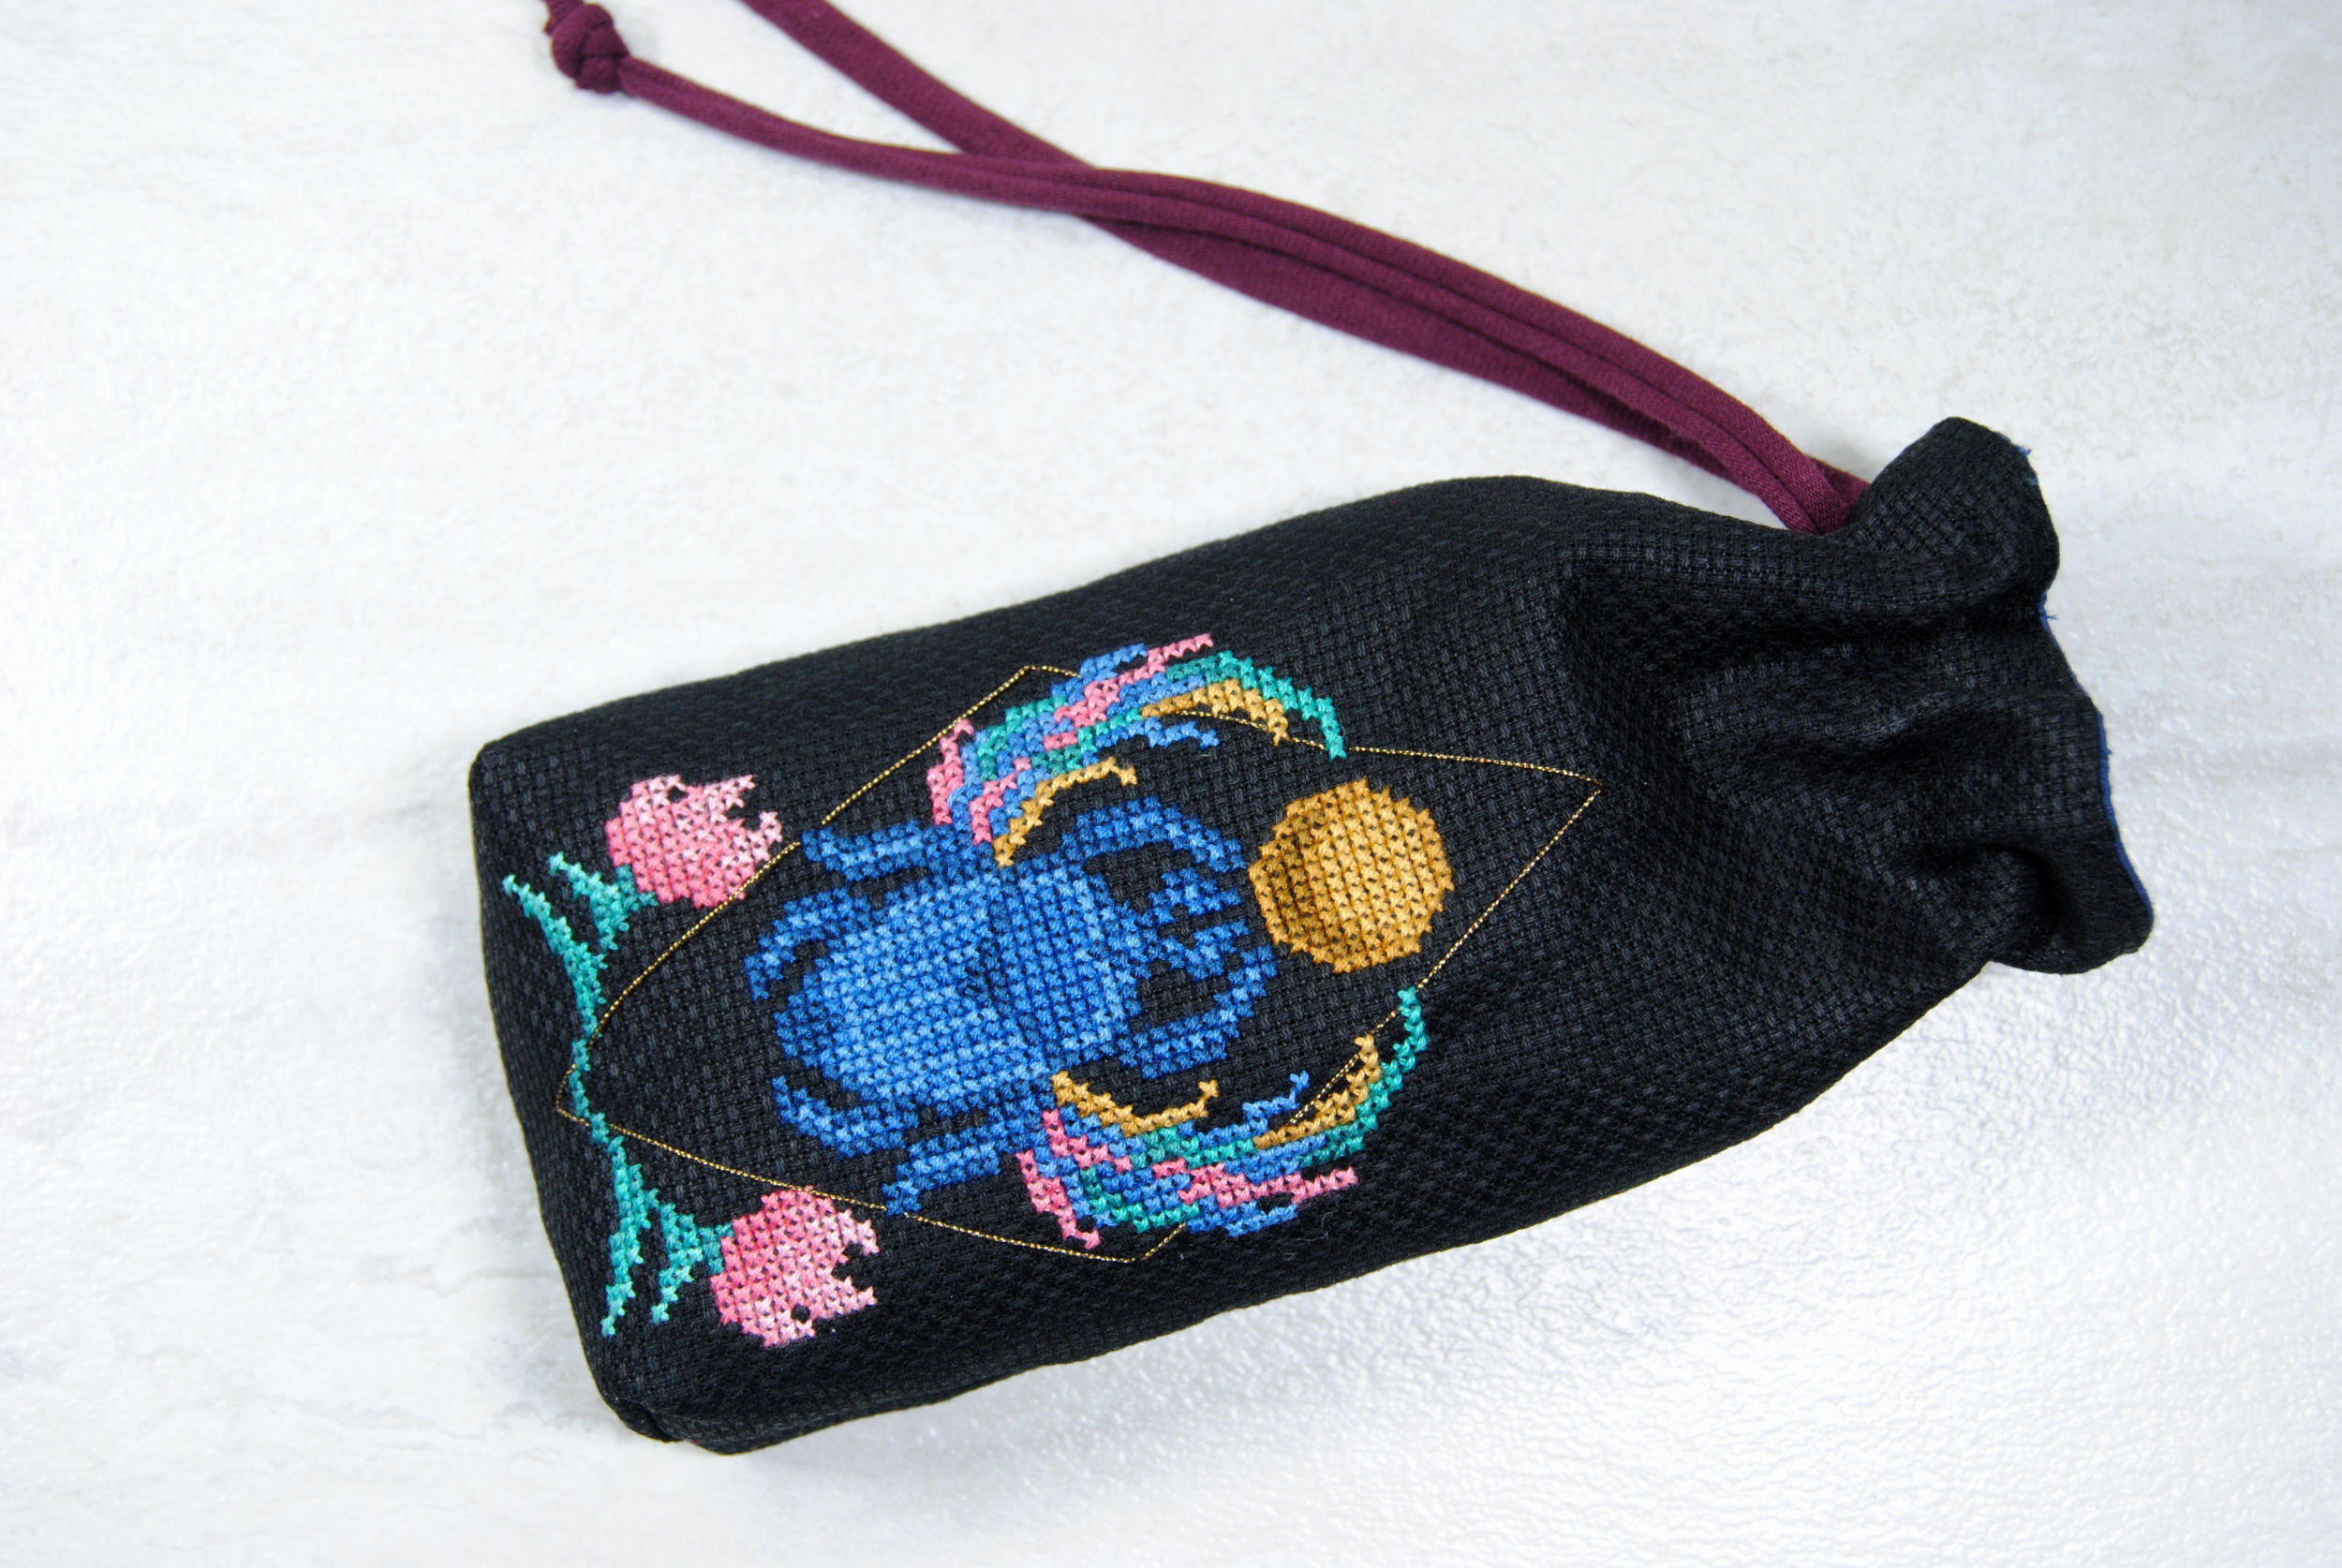
The Finished Cross Stitch Tarot Bag
All in all, the whole assembly process took me about 2 hours. But mainly because I had to rip out my seams twice and was also stopping to take photos every step of the way. I’d imagine someone actually following the instructions could get this done in an hour or so.
Not the cross stitching itself, of course. That took 6+ hours on its own. But thebag assembly, at least. And I’m pretty pleased with how this cross stitch tarot bag came out!
If you already have a finished cross stitch you’d like to turn into a cross stitch bag, you may not have a super long rectangle to fold in half into a bag. If you want the whole thing to be made from aida, or to be stitched on both sides, you’d probably want to plan this kind of project out in advance.
However, you could MAKE a longer rectangle by sewing some fabric to the bottom of your aida, and using that seam as the middle of your rectangle. Aka the bottom of your bag. Just by adding some complementary fabric to your stitching you can turn it into basically anything.
Get out there and explore the wide world of sewing tutorials and patterns and find a sewing project that might fit your cross stitch finish perfectly!


