Cross Stitch Needlebook – Storing your Needles in Style
I’ve been wanting to make a needlebook for a long time, and it’s only fitting I end up making a cross stitch needlebook in the end. After all, I use my needles primarily for cross stitch! There are MANY ways to make a needlebook though. So this tutorial is only gonna cover one specific book – mine. Before we get to that, let’s talk a little more about our options so you know if this book is gonna be the best for YOU. I’ll be linking to lots of other tutorials along the way, so don’t be shy! Go explore your options!
This post may contain affiliate links. If you buy something using one of these links, I earn a small commission. However, there is no extra cost to you. Thanks for understanding! Learn more in my Disclosures & Privacy Policy.
Table of Contents
What is a needlebook?
First off, what IS a needlebook anyway? You’ll be very surprised to learn it’s a book. For needles.
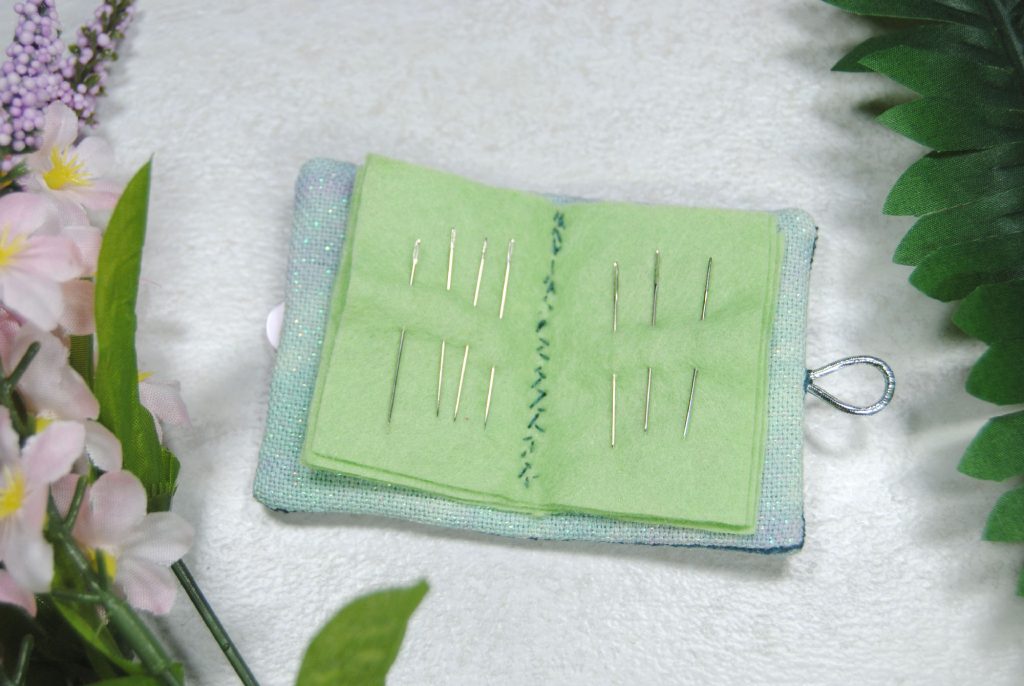
Okay, okay but seriously. It’s a small fabric book used to store needles, straight pins, safety pins, sewing clips, needle threaders, and sometimes even scissors! The main feature tends to be felt pages that you can safely tuck your needles into.
Rather than a spiky pin cushion you could have a nice flat, soft, padded book that probably won’t stab you if you store it in your travel bag and reach in blindly.
Other ways to store needles
While needlebooks are pretty dang cute, there’s lots of other ways to store your needles instead. I typically stab mine into biscornu on my desk or in my travel floss box. And many of you probably have a similar device for storing your pins. Aka a pin cushion.
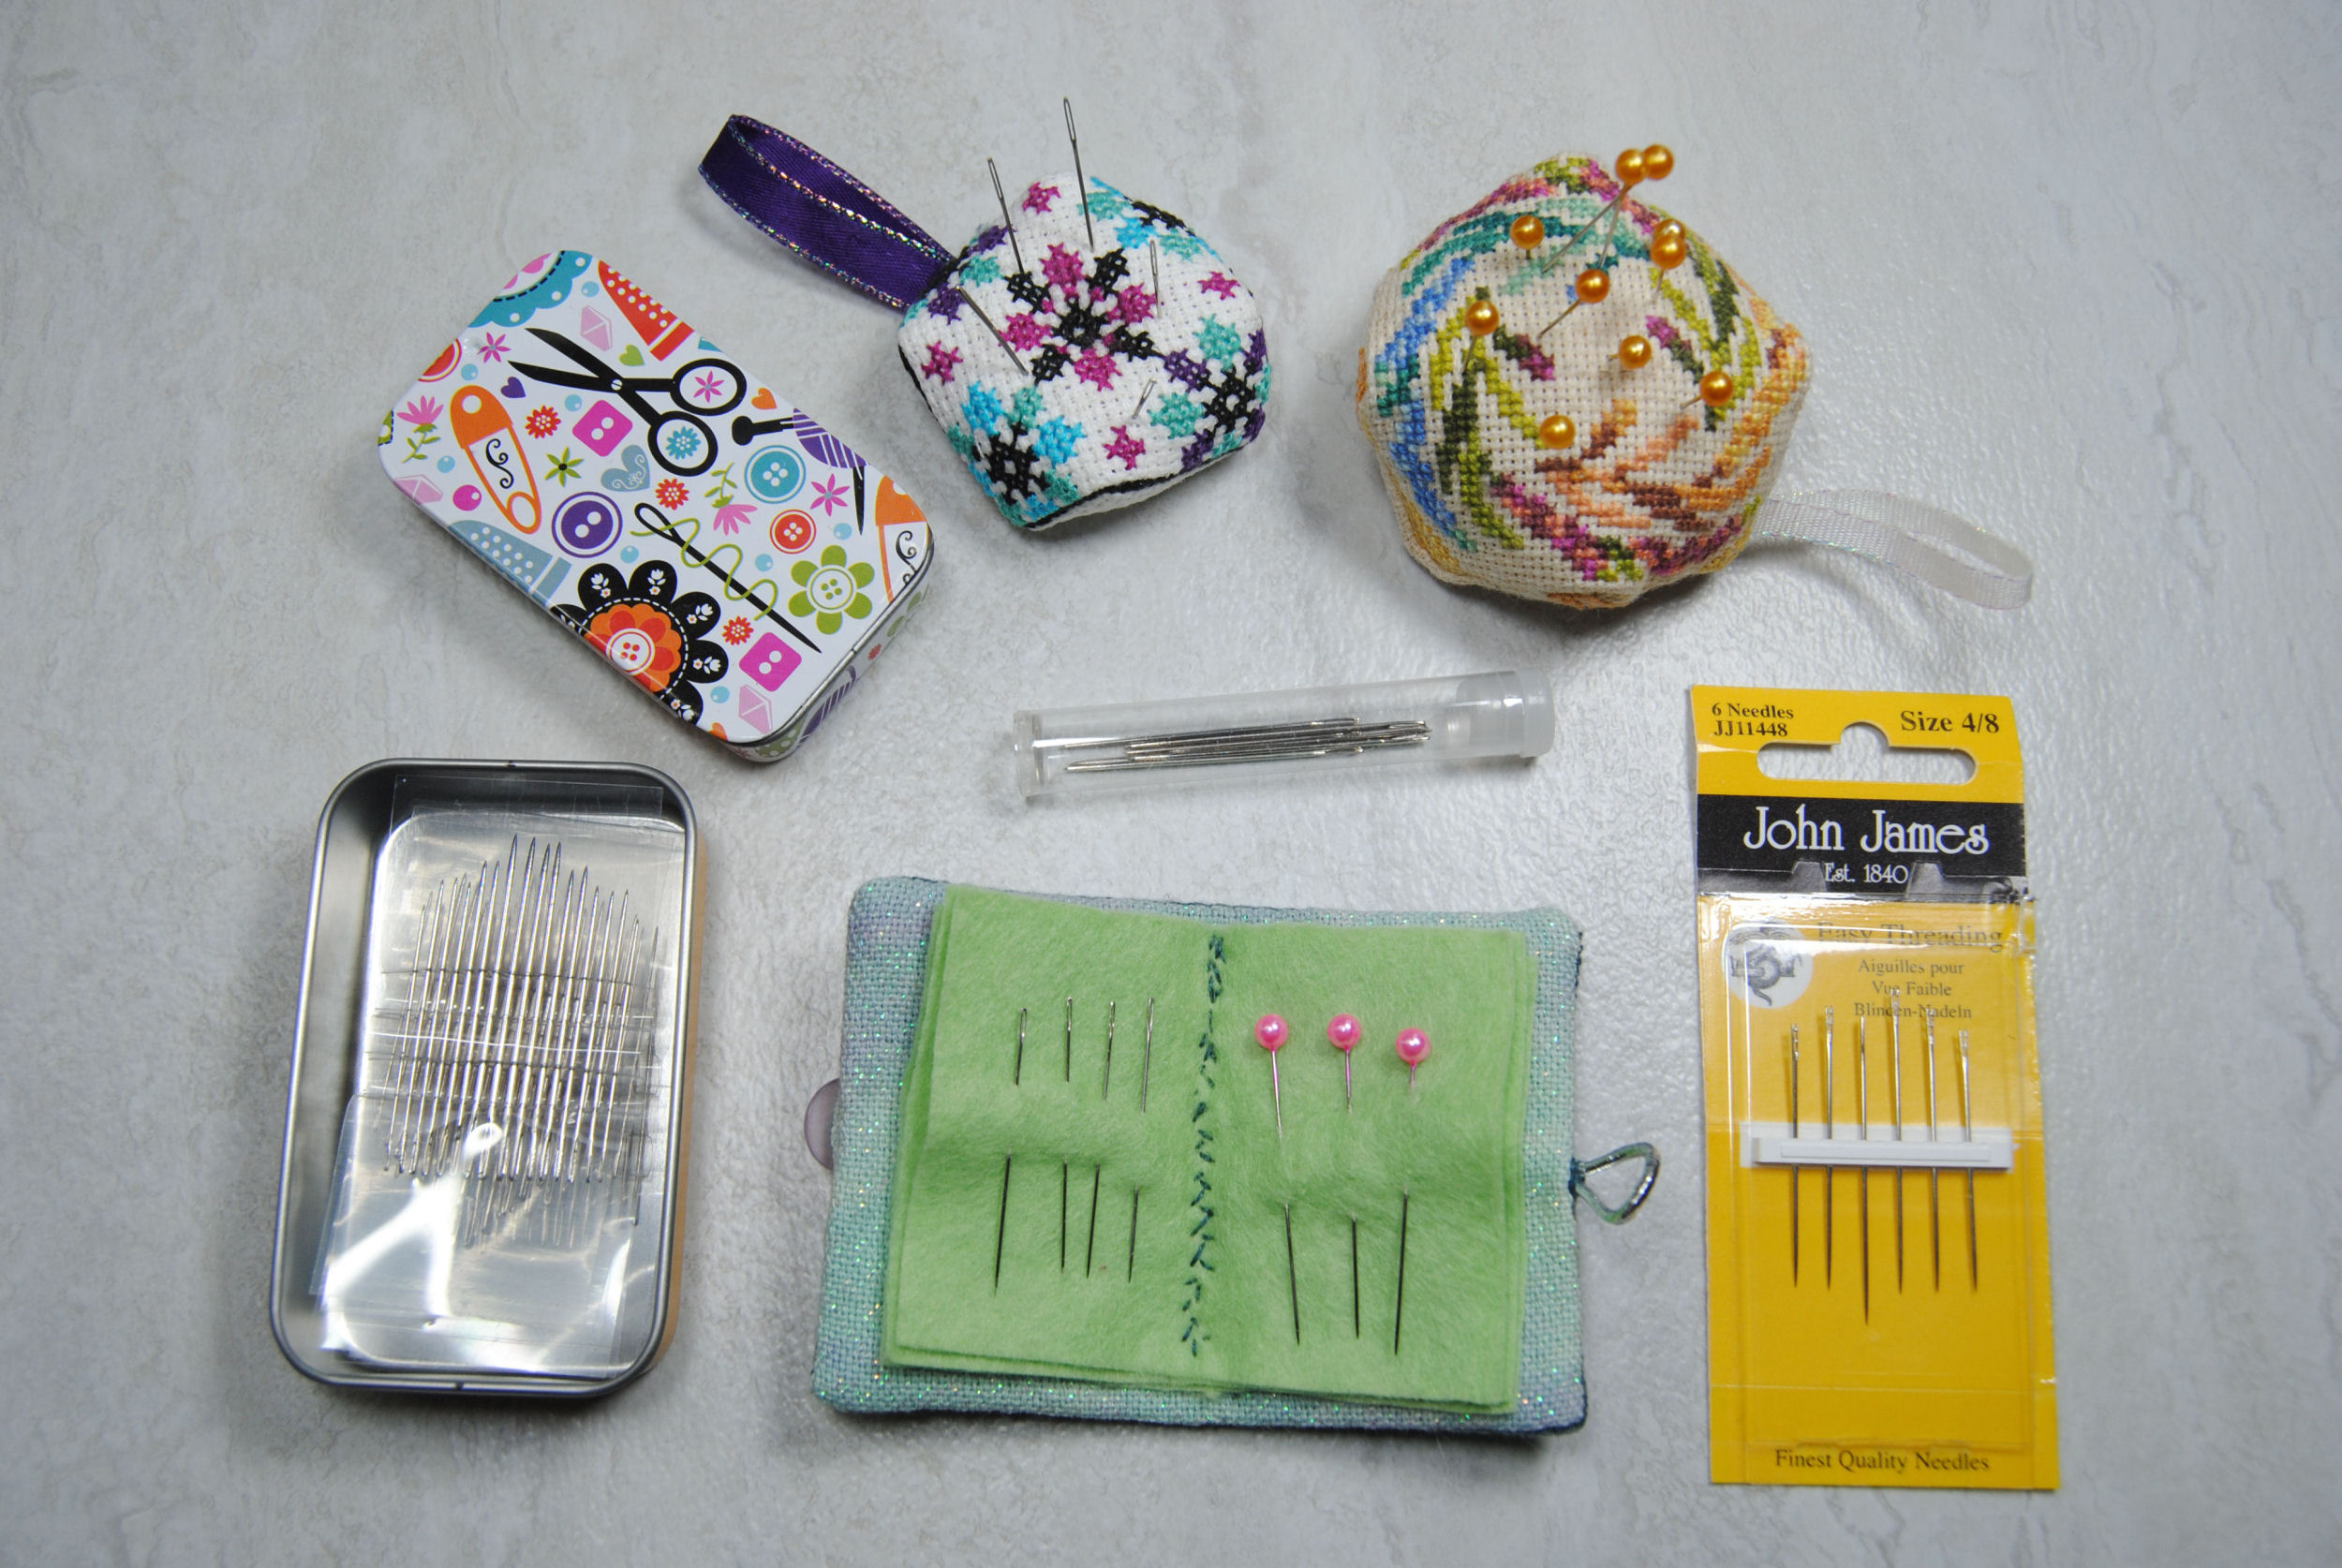
But there’s several other ways to store your needles! Some people choose to keep their spare needles in the original packaging, making it easier to determine sizes. Whether that’s the usual cardboard and plastic affair, or the round compact cases sewing needles tend to come in.
You could also store your needles in tubes. Whether clear plastic needle tubes, or fancy wooden ones.
Another popular method are small magnetic tins. Whether you buy one advertised as a needle holder, or simply plop a magnet into an old mint tin.
Types of needlebooks
Consider the size of your book
While the example book I’ll be making in this article is just large enough to hold needles, these useful books come in all different sizes. As you read through the following options you’ll get a better idea of what you want to include in your book. You’ll then want to size accordingly.
For example, if you want to have a pocket for your scissors or a loop for a pen… you’ll need a book big enough to accommodate those things.
Different Closure Options
While your book doesn’t necessarily have to secure closed, it’s probably a good thing you can keep it shut if you’re putting it in a travel case. So here’s just a few options I’ve seen around.
- Buttons – A button and loop type closure
- Snaps – Those nifty snap fasterners, usually on a small strap that extends from the back cover and wraps around to snap onto the front.
- Ribbons/cording – Long ribbons or cords several times the width of the book so you can wrap it around a few times and tie it off. Or simply two lengths of ribbon you can tie on the side of the book
- Zippers – To be extra secure, you could have a zipper all along the outer edge so it is completely shut off once you’ve zipped it up.
Also, your book doesn’t literally have to be in book form! Consider for example this adorable needle letter, which uses a snap fastener.

Types of Embellishments
Your needle book can be as decorated however you want. You can just have simple designs and bindings or go all out. It’s up to you! But again, here’s some options I’ve seen around.
Cover Designs
- Cross Stitch Designs – I mean, of course I had to list a cross stitch needlebook as an option. But that’s certainly not your only option!
- Embroidery – You probably saw this coming, too. I just wanted an excuse to link to another great tutorial.
- Quilting / English Paper Piecing – This seems like a great use of scrap fabrics!
- Felt appliqué – And look, sequins too!
- Hardback Needle Books – If you want a little extra security or weight to your book.
Inside Embellishments
It’s not just the cover that needs decorating though! There’s a lot of fun ways to add extra flair to the pages of your books as well.
- Lace Trim – This can be used to decorate the outside as well, of course. But also some cleverly stitched lacing can serve as little pockets to hold the thread of pre-threaded needles.
- Ribbon – This clever book uses a bit of ribbon to old wonder clips in addition to straight pins.
- Size Labels – This blackwork needlebook has needle size numbers stiched onto each page so you can tell them apart!
- Felt Ridges – This needlebook features an extra strip of felt on the page to make it easy to to get your needle in the right place.
- Pen Holders – A little loop of elastic allows you to slip a pen into your book easily
- Pockets and Pouches – Your book doesn’t have to just hold needles. Many of these examples also have little pockets for scissors, seam rippers, needle threaders, and so on!
Cross Stitch Needlebook – Materials
If any of you are still here after I’ve bombarded you with a dozen OTHER needlebook tutorials you could follow instead…. it’s finally time to discuss how I made MY needle book.
After considering all the options above I decided to start with a nice simple little book. I wanted a cross stitch needlebook. It would close with a button and loop. And I wasn’t ready to get too creative with decorating my pages. I just wanted a cute place to store my needles.
Here’s the short list of what you’ll need:
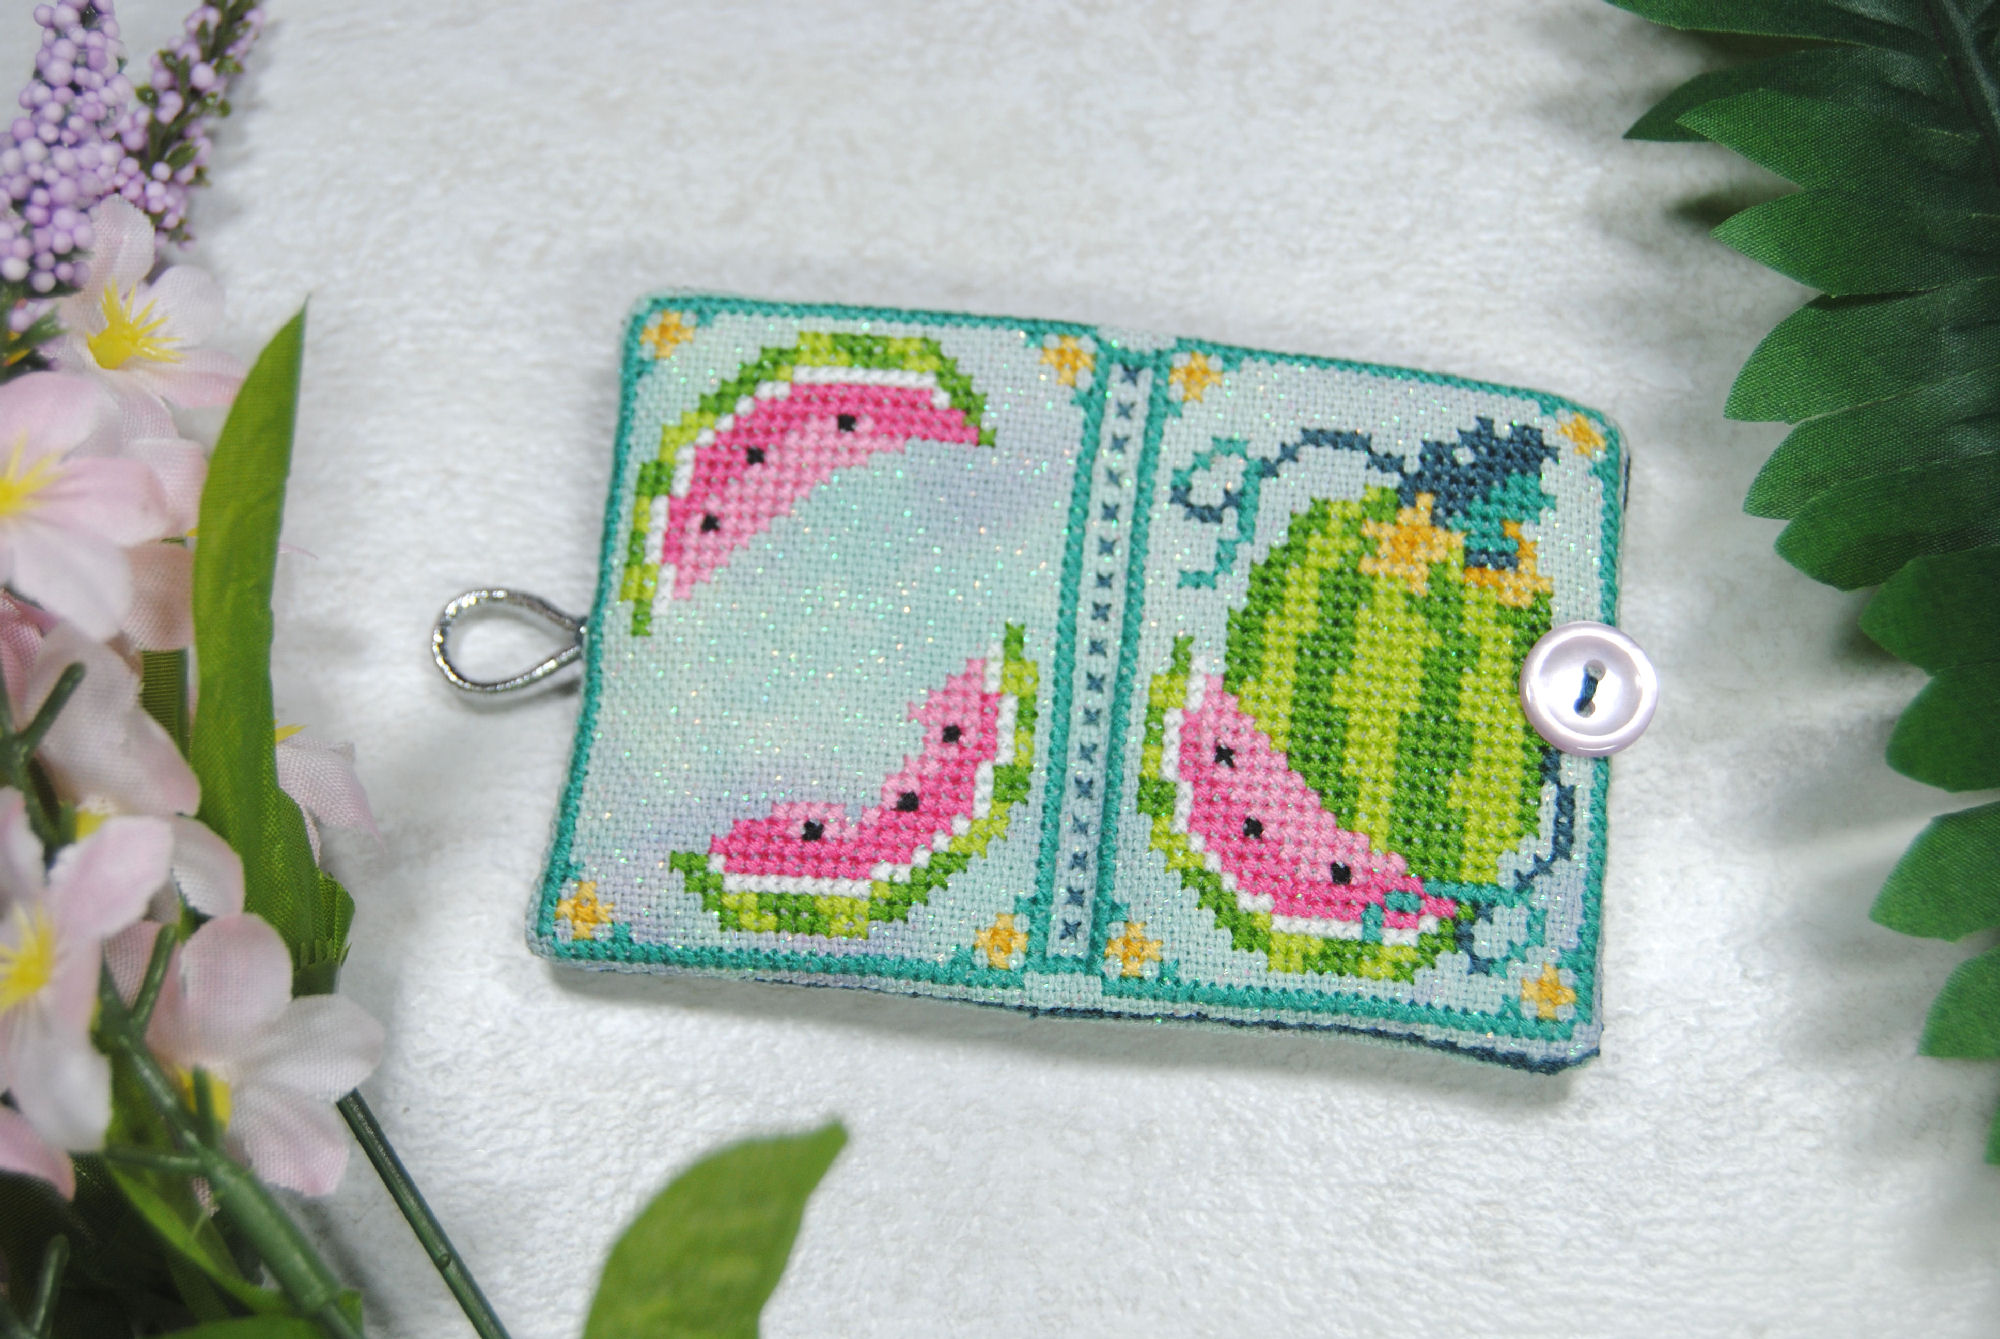
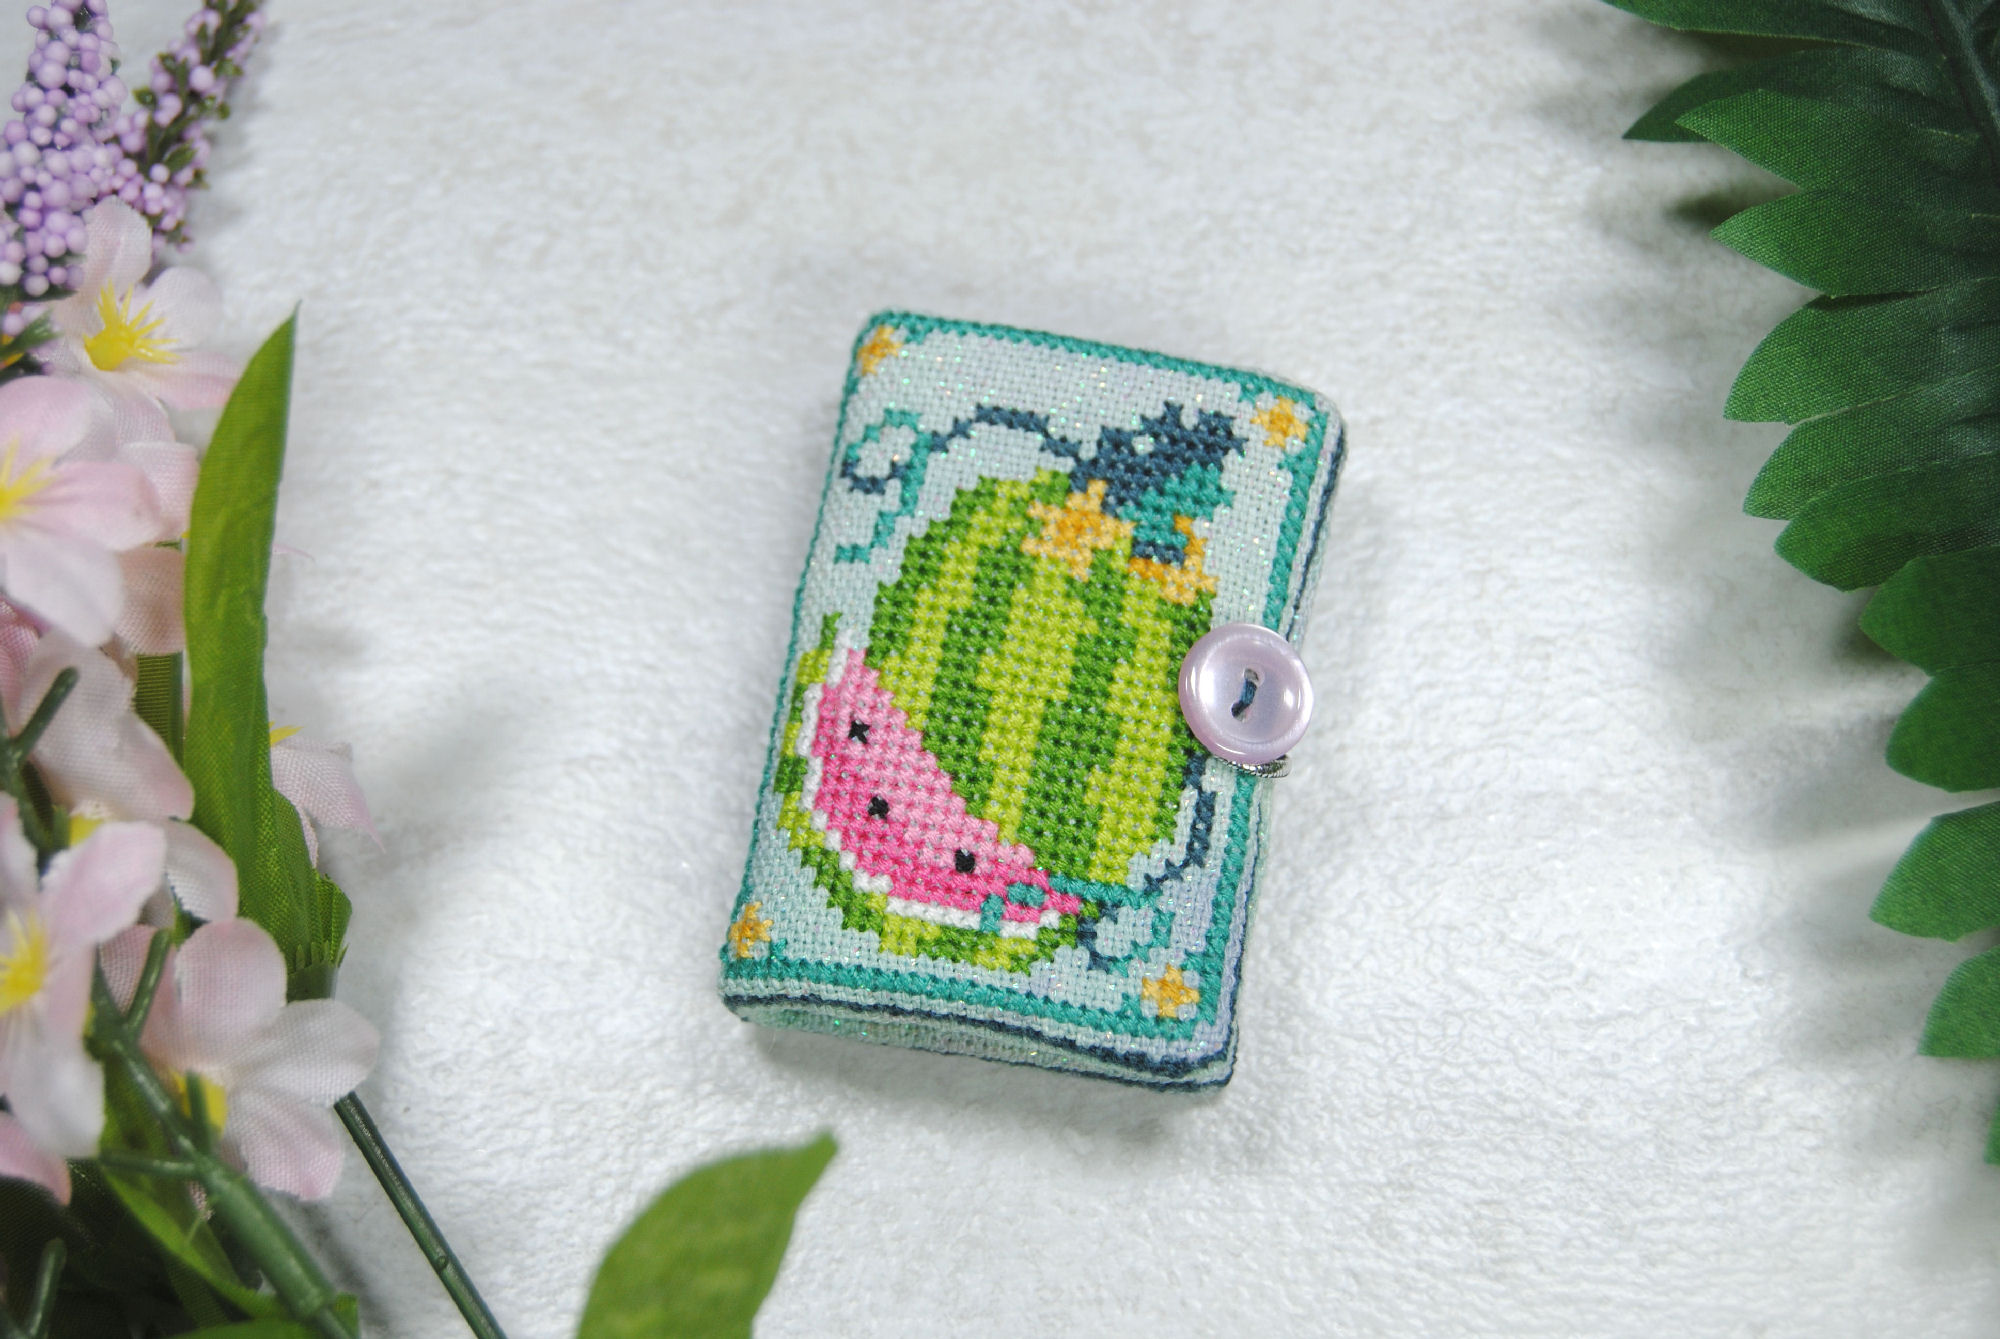
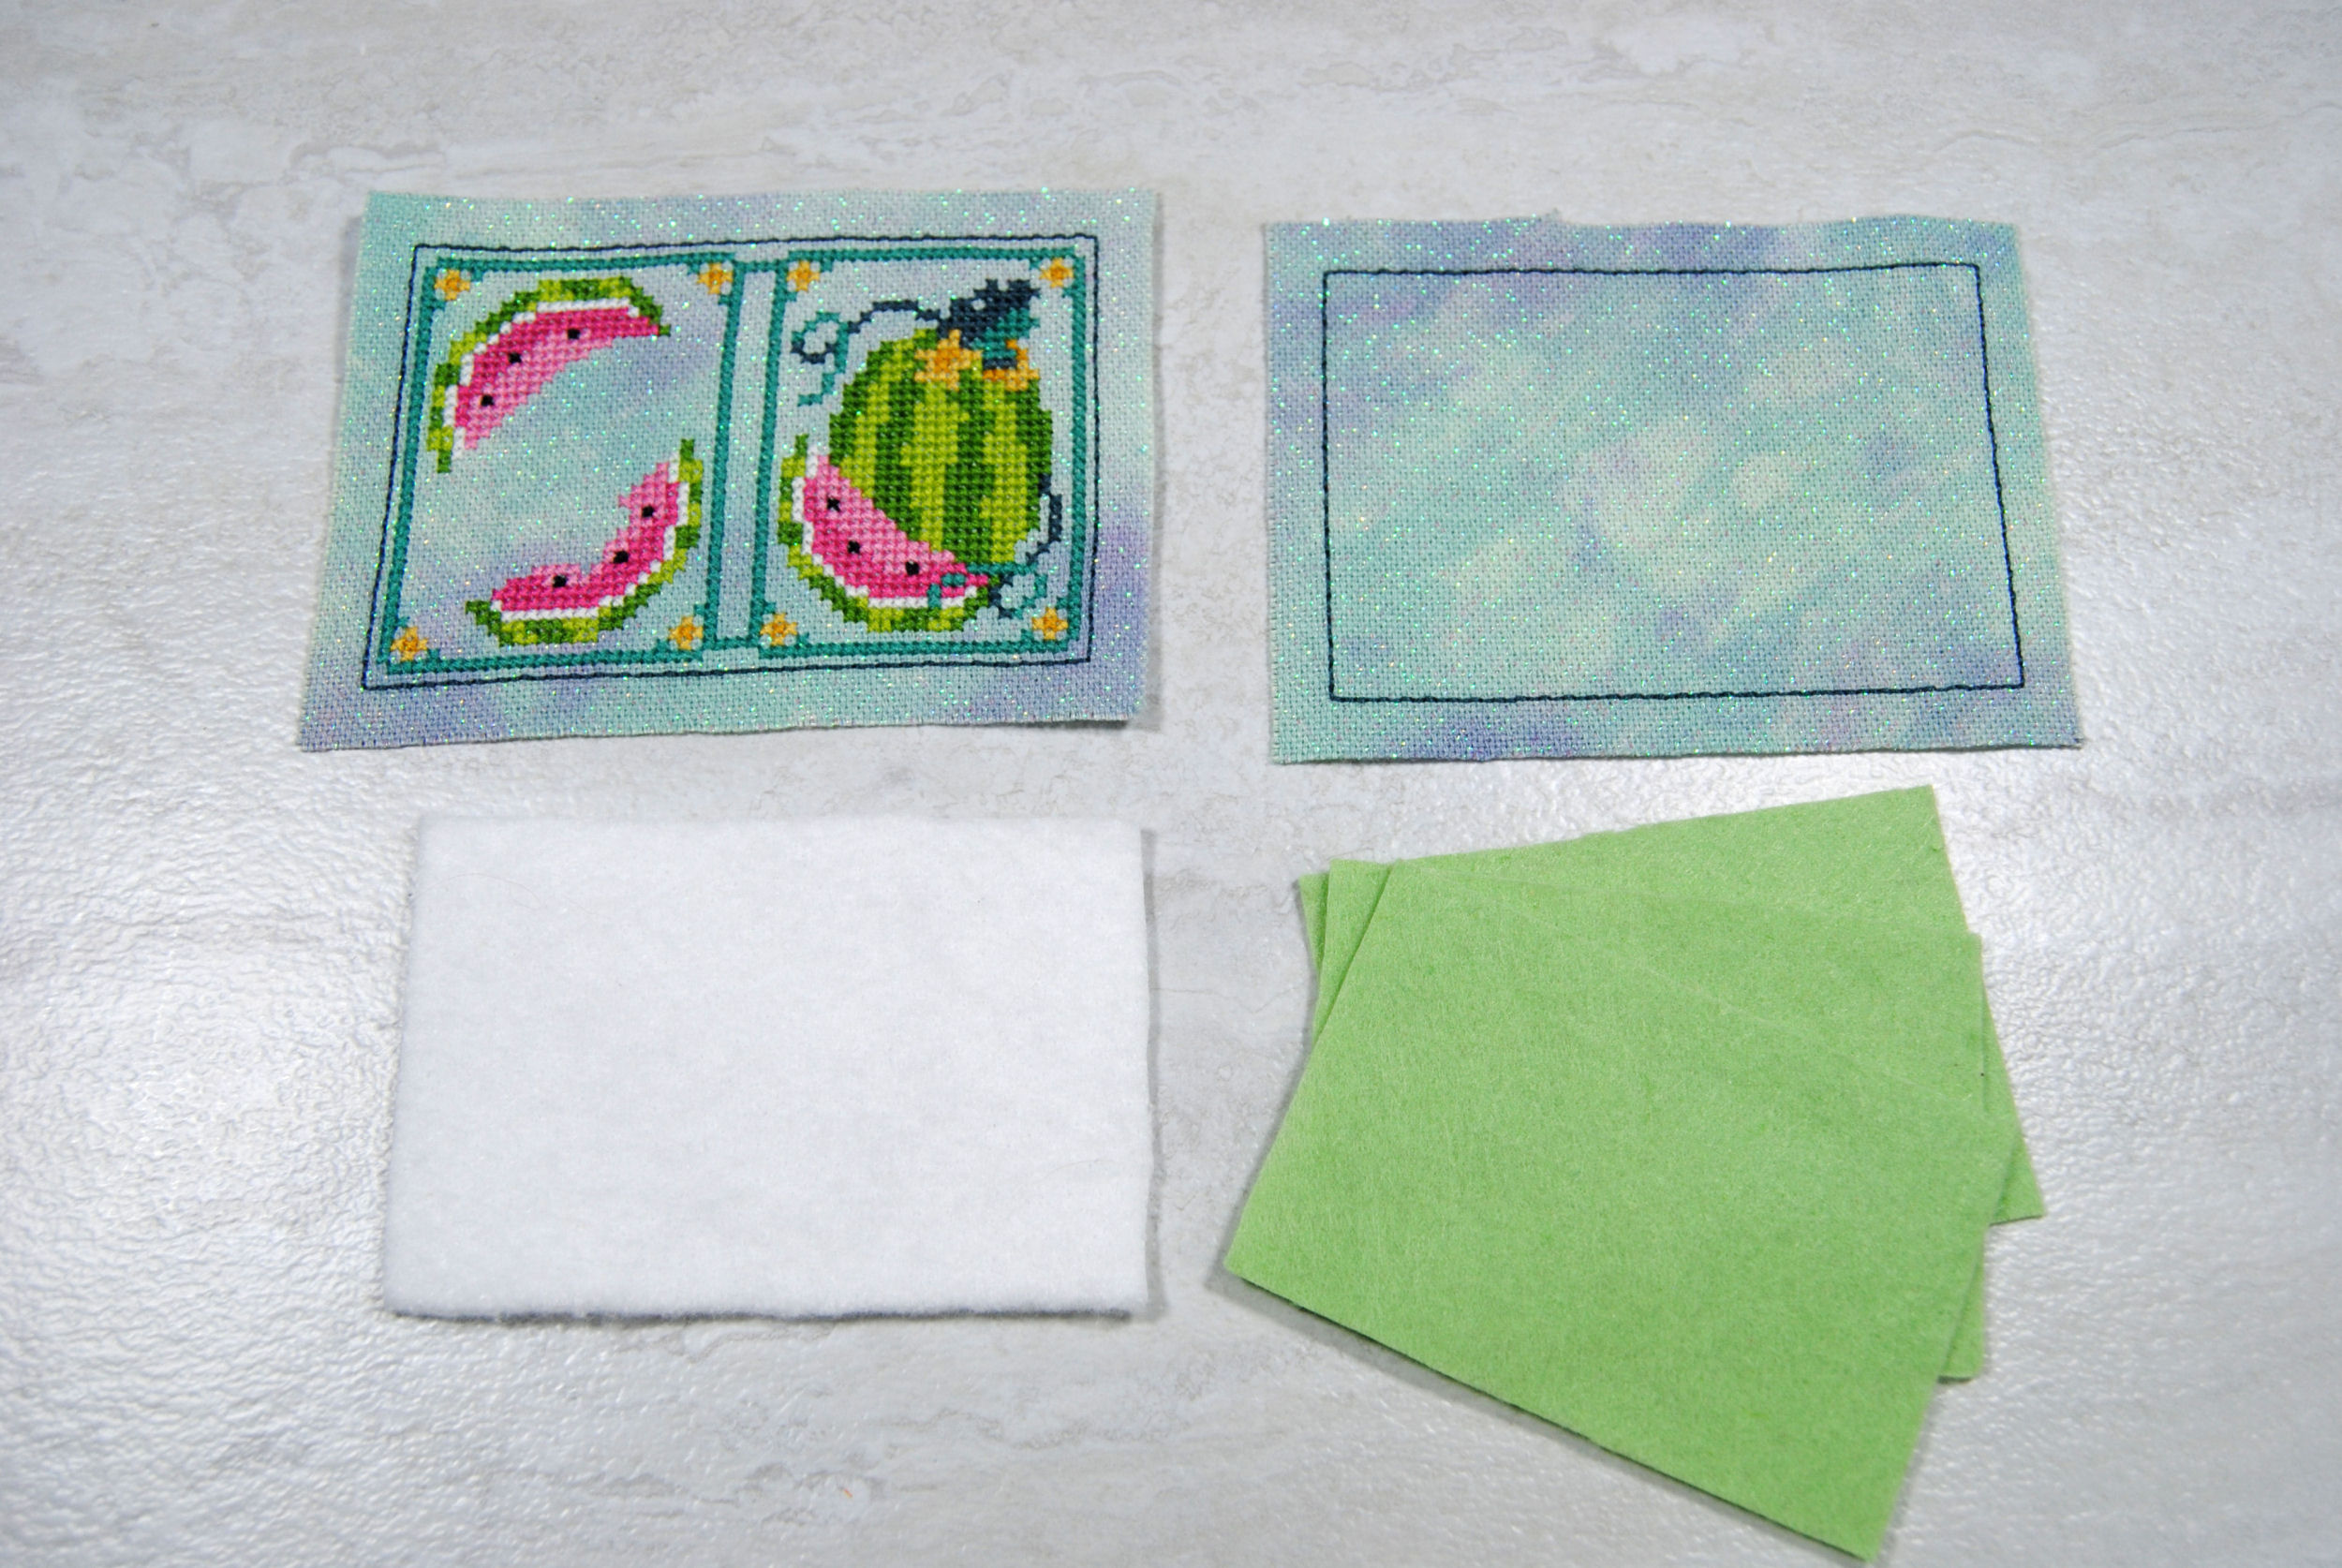
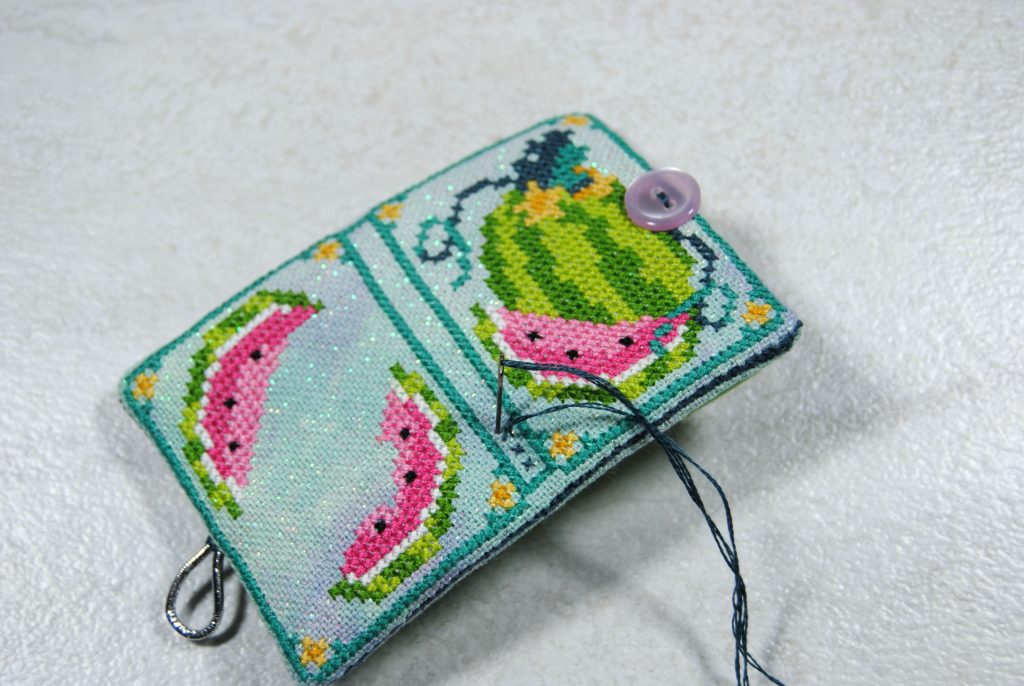
- Cover Design – A cross stitch design with a backstitched rectangle that includes both the front and back of your book as well as the spine. My rectangle was about 4.5″ x 3″, plus a little bit of a border so it doesn’t fray apart.
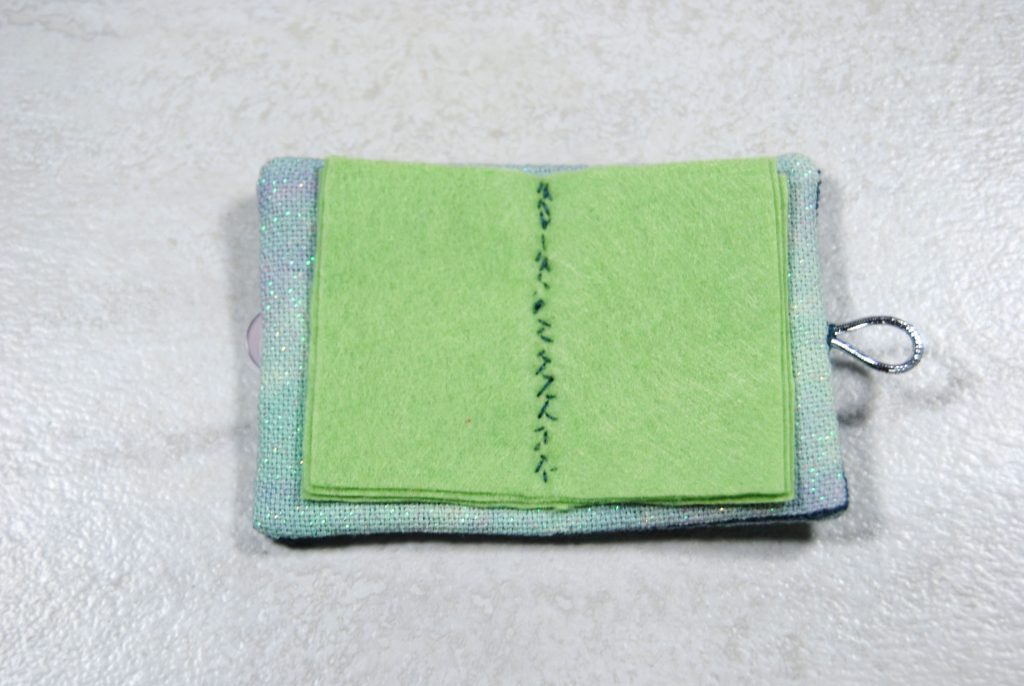
- Cover Backing – A second backstitched rectangle the same size as the above to act as the inside covers. You can stitch on this as well if you’d like! You could include your name or what size needles this book stores. Or simply add more decorative motifs.
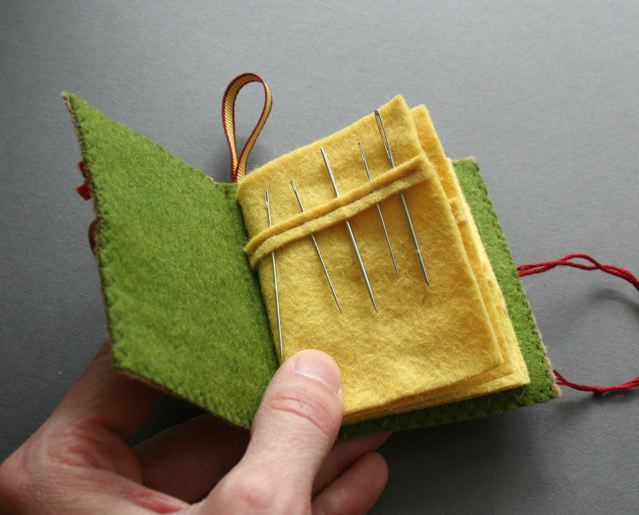
- Inside padding – Optional, but I chose to use a bit of cotton batting the size of my cover to give it some heft. You’ll want this just a little smaller than your backstitched rectangle.
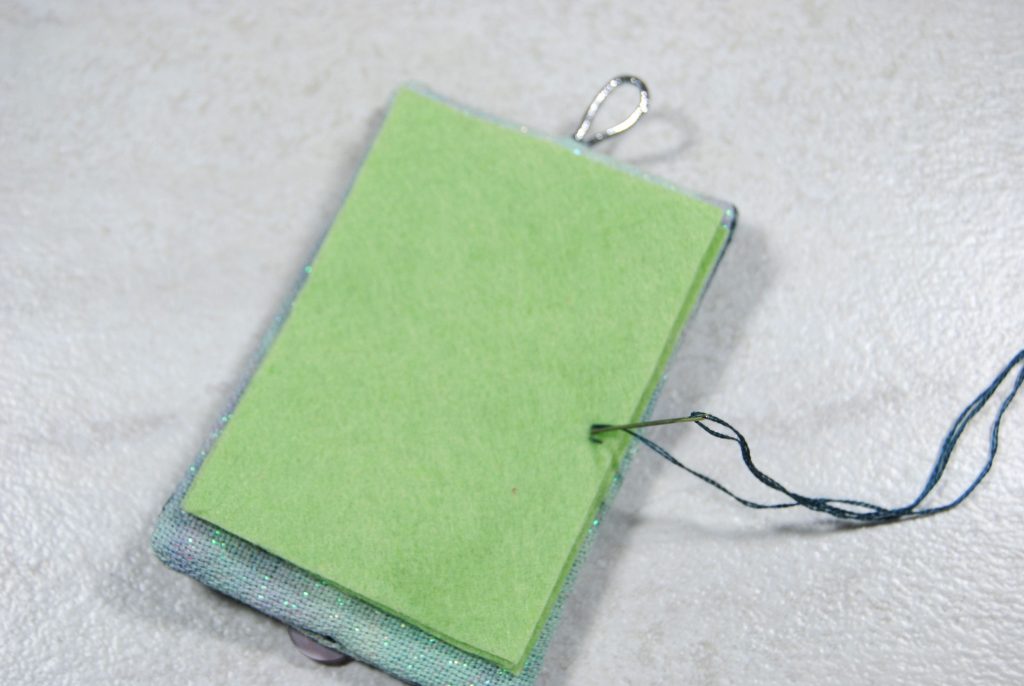
- Felt ‘Pages’ – Cut out however many pages you want in your book, a little bit smaller than the covers. Keeping in mind that each rectangle here will actually be TWO pages once you fold it all up
- Closure – (Not pictured). Whatever you’re using to close your book. For mine I had a small button and a length of elastic cord.
Cross Stitch Needlebook – Designing a pattern
Before we get too far, let’s discuss patterns. If you’re not using a cross stitch needlebook pattern someone else has designed, you’ll have to draft your own.
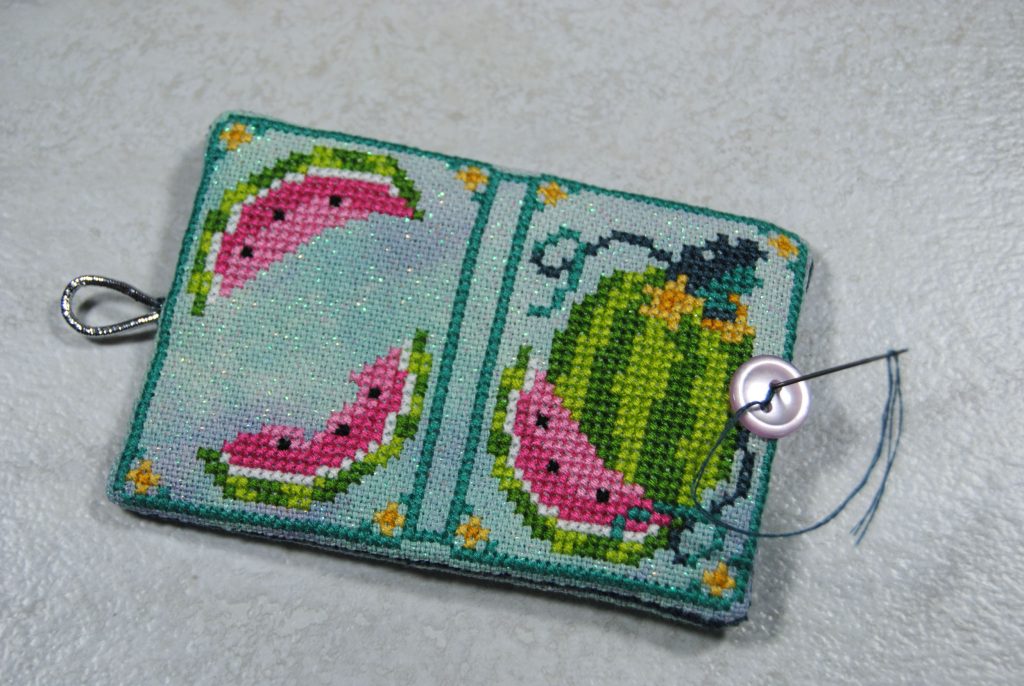
The example I’ll be using in this tutorial is my Watermelon Needlebook design. But let’s discuss how I decided what size to make the design.
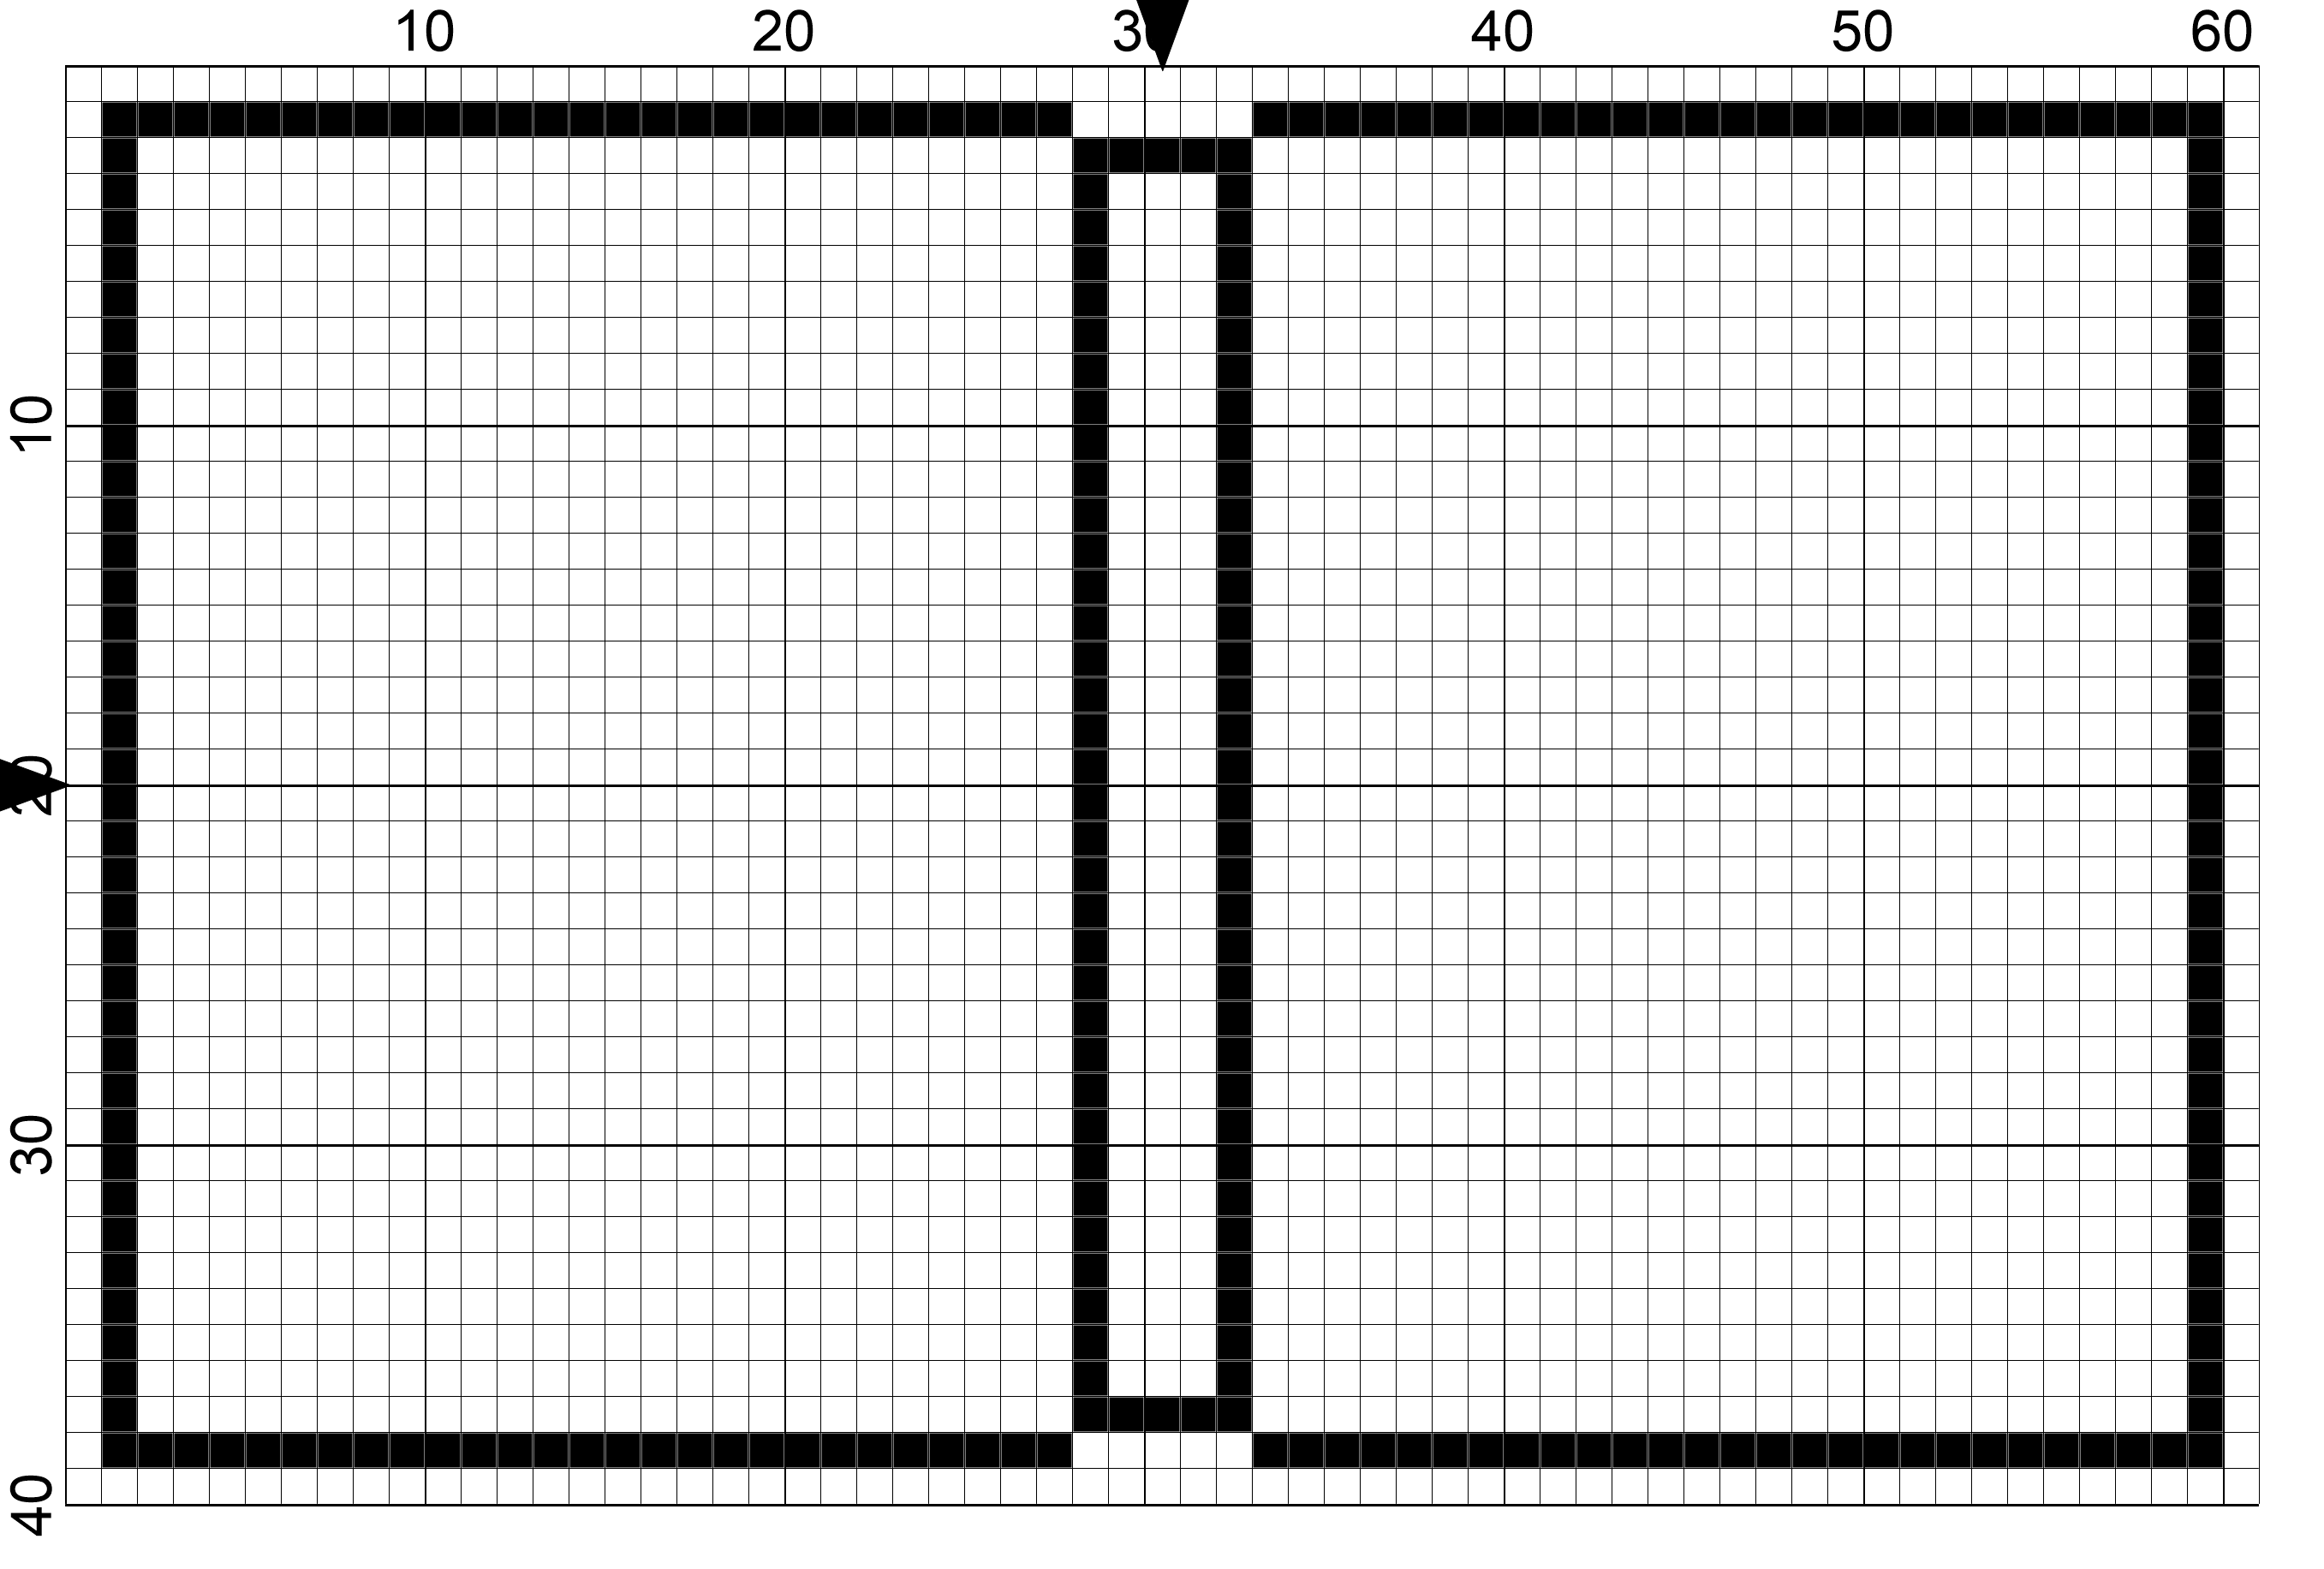
2.5″ seemed like a good height for the inside pages compared to the average needle size. So I tacked on a little bit extra for the outside cover. 40 stitches on 14 count fabric equates to just under 3″.
I also wanted it to have an odd numbered width so that there would be an exact ‘center’ that I could stitch down. And it needed to fit both the front and back cover as well as the spine of the book. I mocked up the outline and the final rectangle I’d be backstitching came out to 61×40.
You’re welcome to use the template below when designing your own. And size it up as needed to fit any extras you want to include.
Assembling your Cover
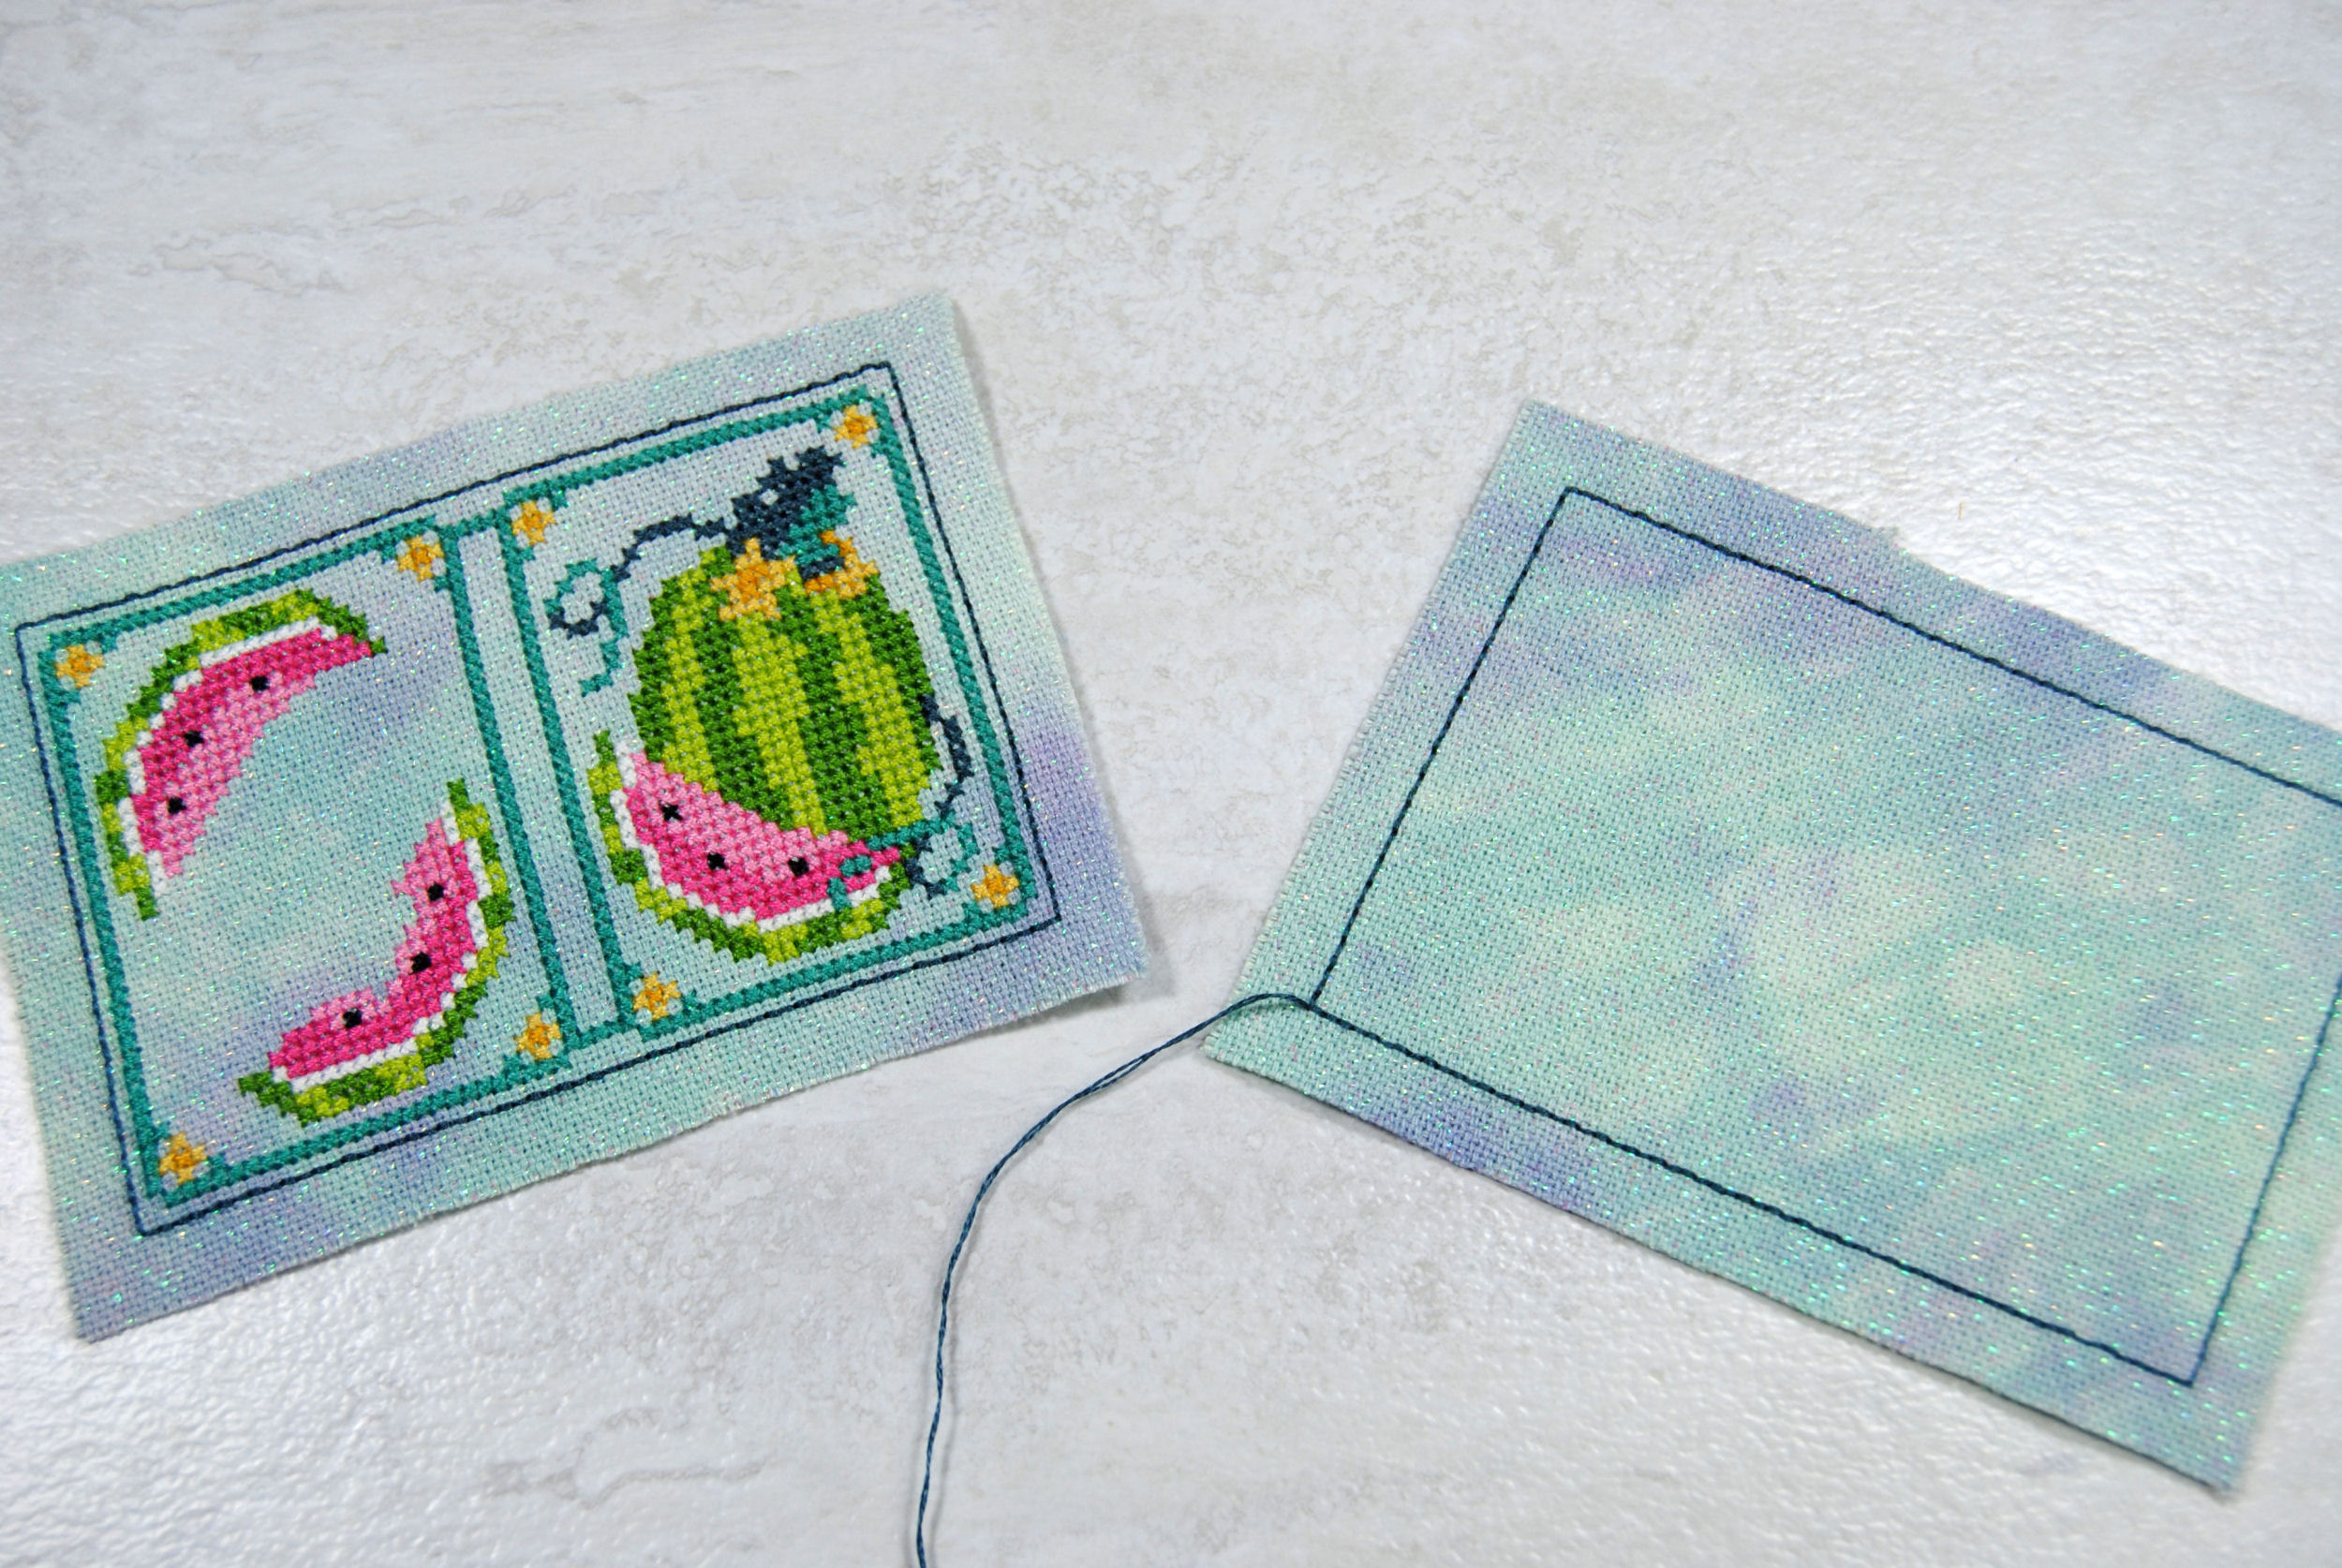
Once you’re ready to go, we’ll want to load our needle with the same color as your backstitch rectangles. Then pick a corner to start from, secure your thread on the back and bring your needle up through one of the corners.
I started on the side I was planning to stitch my button. As the other side would need the loop added in and I didn’t want to do that first thing.
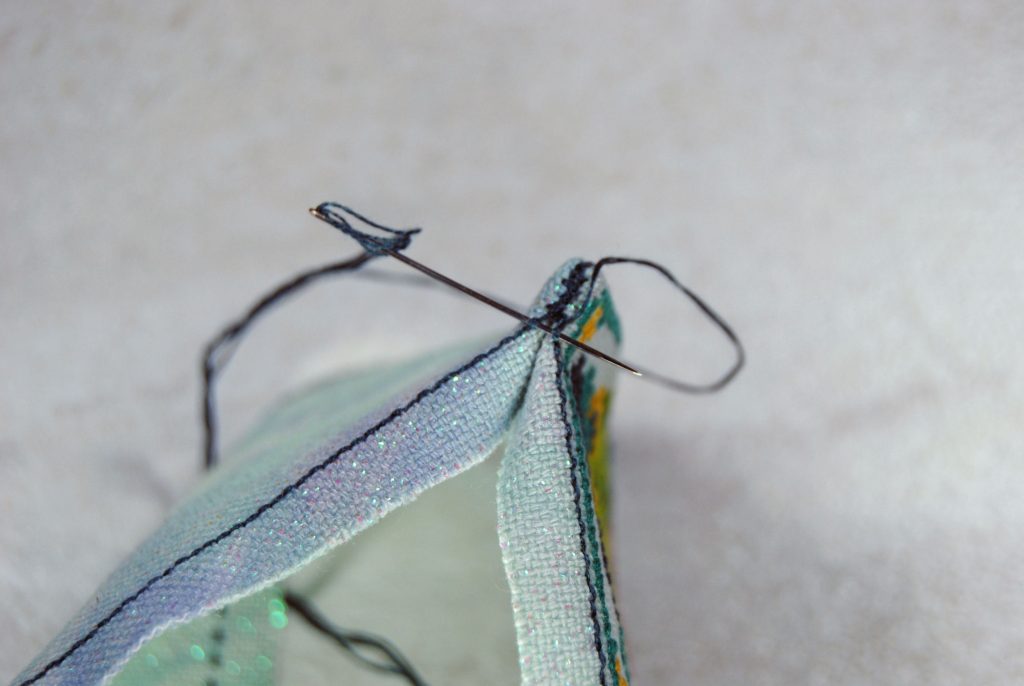
Just like assembling a biscornu, run your needle behind the backstitch on both halves of your cover to get started.

Then keep doing that all the way up your side, always starting from the same direction. (In my case, going right to left.)
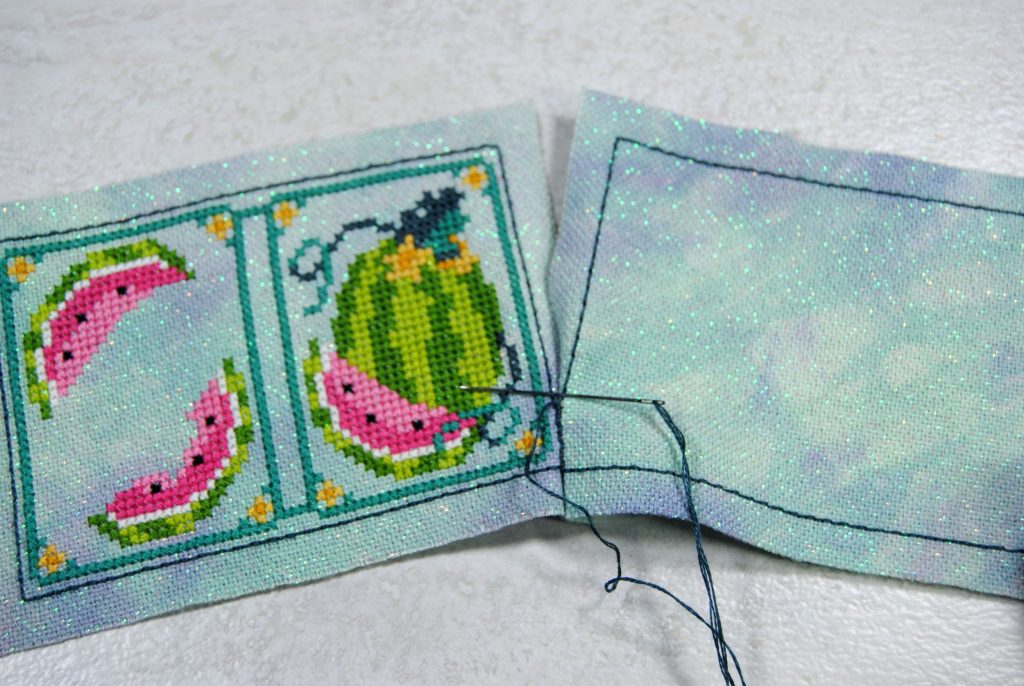
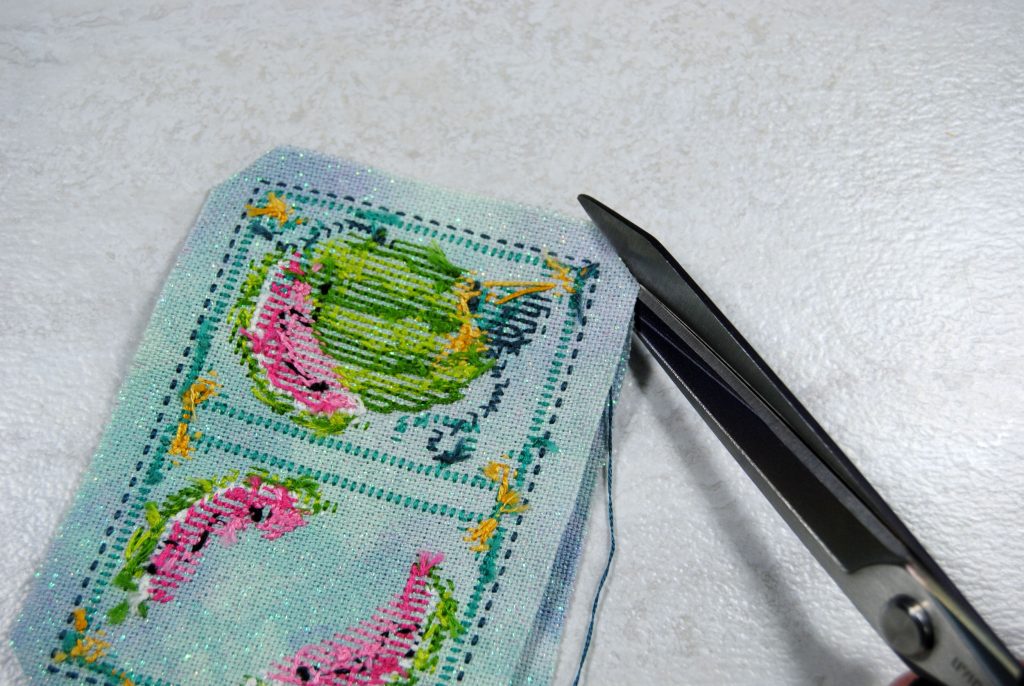
As I got closer to the turning the corner, I realized I hadn’t trimmed my corners yet. Now’s a good time to do that if you haven’t already, as it’ll make it easier to stitch around them.
As you can see, corners can be a little tricky, but just keep working your way around matching up backstitches as you go.
Halfway Mark
Once you’ve got two of the sides done you may choose to slide in whatever filling you want in the cover. For me it was just cotton batting. If you want something stiffer like cardboard, just keep in mind you’ll need to be able to bend on either side of the spine.
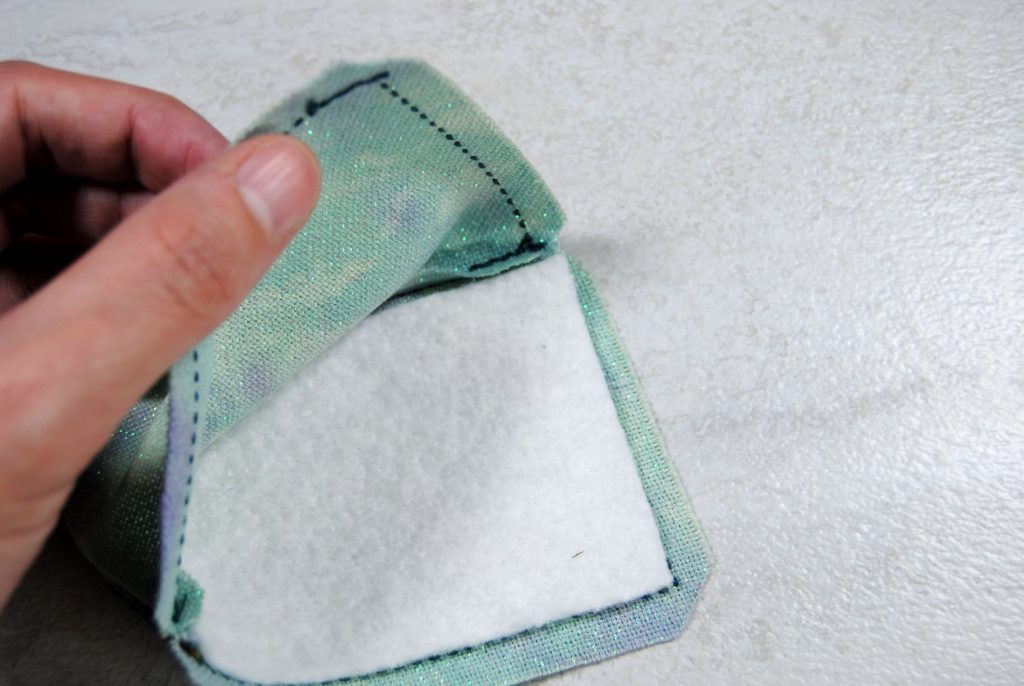
Interfacing is also a good choice here if you’re just wanting it to hold its shape a bit.
As you go around your third corner, tuck the edges in and sandwich that batting in between there to keep it straight.
Adding Closure
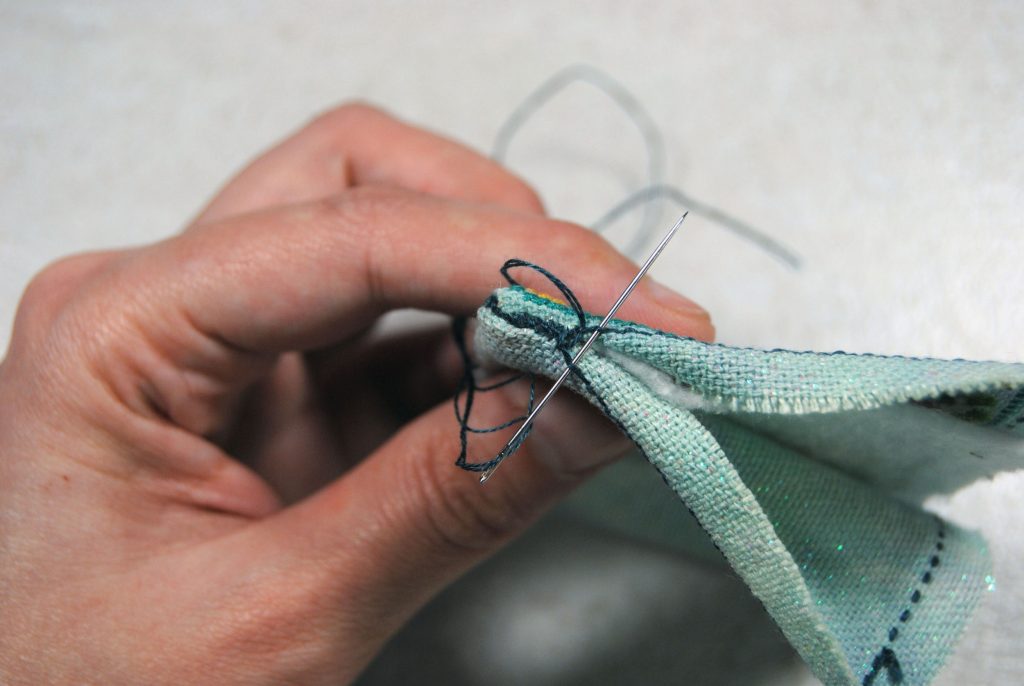
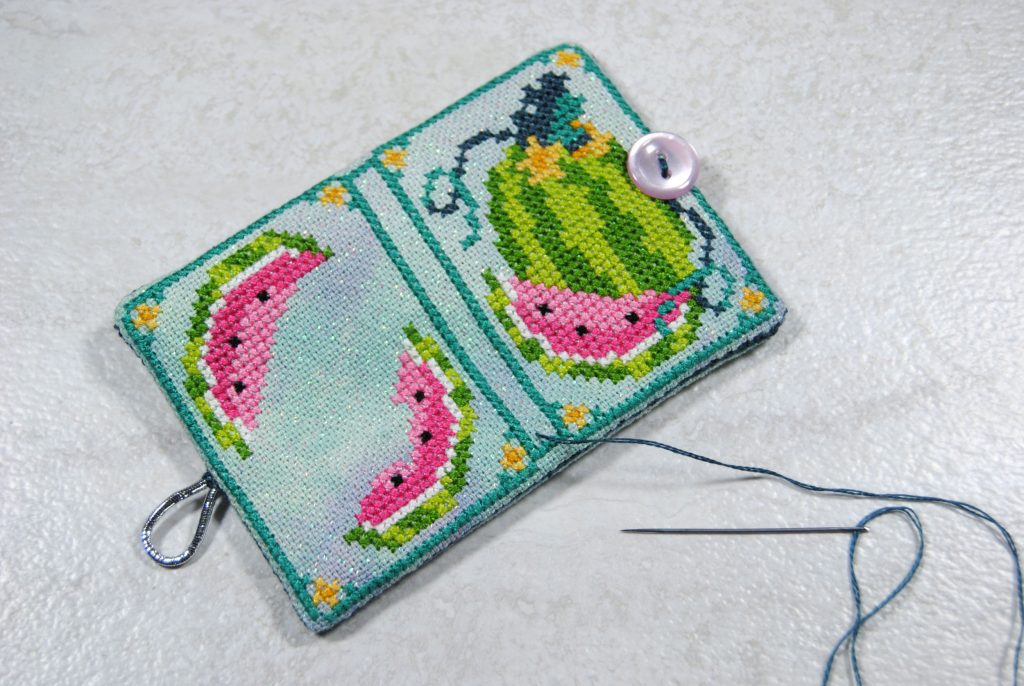
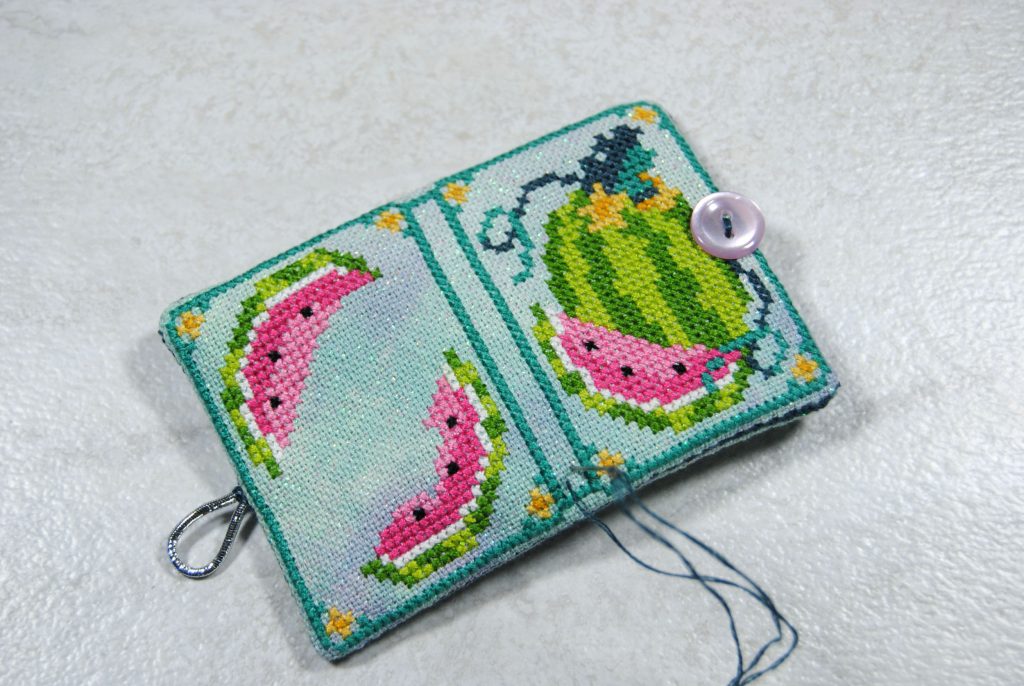
As I went up that third side I stopped halfway to add the elastic cord. Folding my cord in half I tucked the ends in and stitched through and around it several times as I worked my way up the 3rd side of my cross stitch needlebook. You want to make sure it’s really secure, as it’s gonna be the main stress point on this whole project as it has to hold the book shut. It will also get stretched repeatedly as you loop it around the button to close it each time, so you don’t want it to move while you do that.
Once the loop is in securely, continue stitching up and around that last side to close it up.
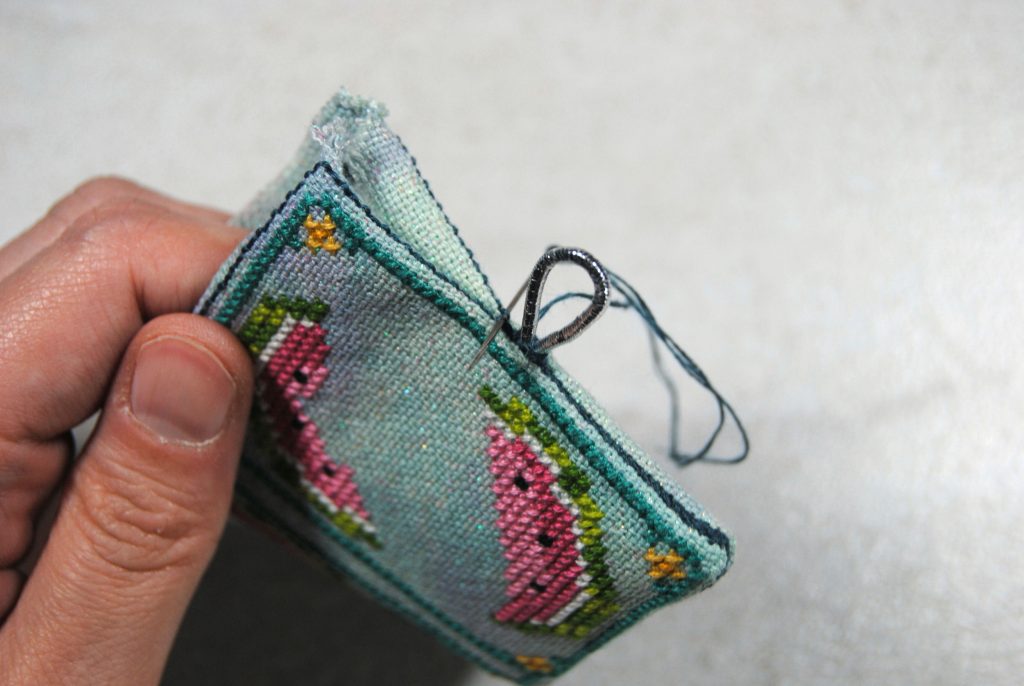
Then, we’ll be stitching a button on to the edge of the side opposite our loop. It’s hard to photo, but I stitched kinda at an angle through the backstitch edge so that the stitches wouldn’t show through the back of my cover.
In retrospect, I could’ve also attached the button to the cover before sewing the back on. But y’know. That’d make sense.

Attaching Pages to your cross stitch needlebook
If you don’t want your stitches to show all the way through to the spine of the book, you could attach them to the inside cover before assembling the book. But I wanted it to be incorporated into my design, so I started by stitching up through the entire bundle we’ve just sewn together.
You’ll note I’m using thread matching one of the colors in my cover design here, but if you wanted it to blend in better, I’d recommend matching your thread to the felt of the pages so your stitching isn’t as obvious as you’re flipping through the book.
I’m essentially stitching a row of Xs up the center of my spine, so I’ll be going back down as if I was doing a normal stitch. I started from the bottom, but if you prefer stitching from top to bottom that works too.
As I did I held all the pages I wanted in the book on the back and made sure to stitch through all the layers.
I had tostitch the next part without being able to really see where I was stitching. So I mostly stitched while looking at the outside and just feeling my way to the right location.
I kept stitching all the way up the spine, skipping every other stitch.
I absolutely paid no mind to my back as I stitched because I like the chaos of messy backs. They’re my favorite. Here’s what it ended up looking like:
Again, if this is something that bothers you, you could be more methodical in your stitching, use a color that matches your pages, or stitch in a length of ribbon down the middle to cover it up. Tucking the top and bottom behind the pages and just putting a couple of stitches at either end should be sufficient.
Decorate your pages
If you’re planning to label your pages or add embellishments like lace, ridges, or other decorations — now’s the time to do so!
You might also want to trim up your pages if they got slightly off center while you were stitching. I was going for the handmade look, so I left them as is. Trimming them with pinking shears would be a fun way to add an extra touch though!
I’m pretty happy with how it turned out! Maybe next time I’ll go for a larger one that I can tuck my embroidery scissors into for traveling. If I ever feel comfortable traveling again. 🙃


