Waste Canvas vs Soluble Canvas : Cross Stitch Your Clothes!
There’s only so many framed cross stitches you can make before you run out of wall space for them all. Gifting to friends and family extends this a bit, but eventually they’ll run out of wall space too! Waste canvas and soluble canvas can help!
What if I told you that you could wear your cross stitch? Well there’s a few different ways to pull this off. If you make your own clothes, you could use normal cross stitch fabrics and sew that panel into your design. You could attach aida to your garment like a patch. Or you could stitch straight onto your clothes to add a bit of flair!
Today I’ll be going over the last option. Sewing straight onto existing clothing! But how? Without the gridded fabric it can be tough to keep your stitches even and create that pixel-art like style. There are products specifically designed to help with this!
This post may contain affiliate links. If you buy something using one of these links, I earn a small commission. However, there is no extra cost to you. Thanks for understanding! Learn more in my Disclosures & Privacy Policy.
Table of Contents
Canvas Options
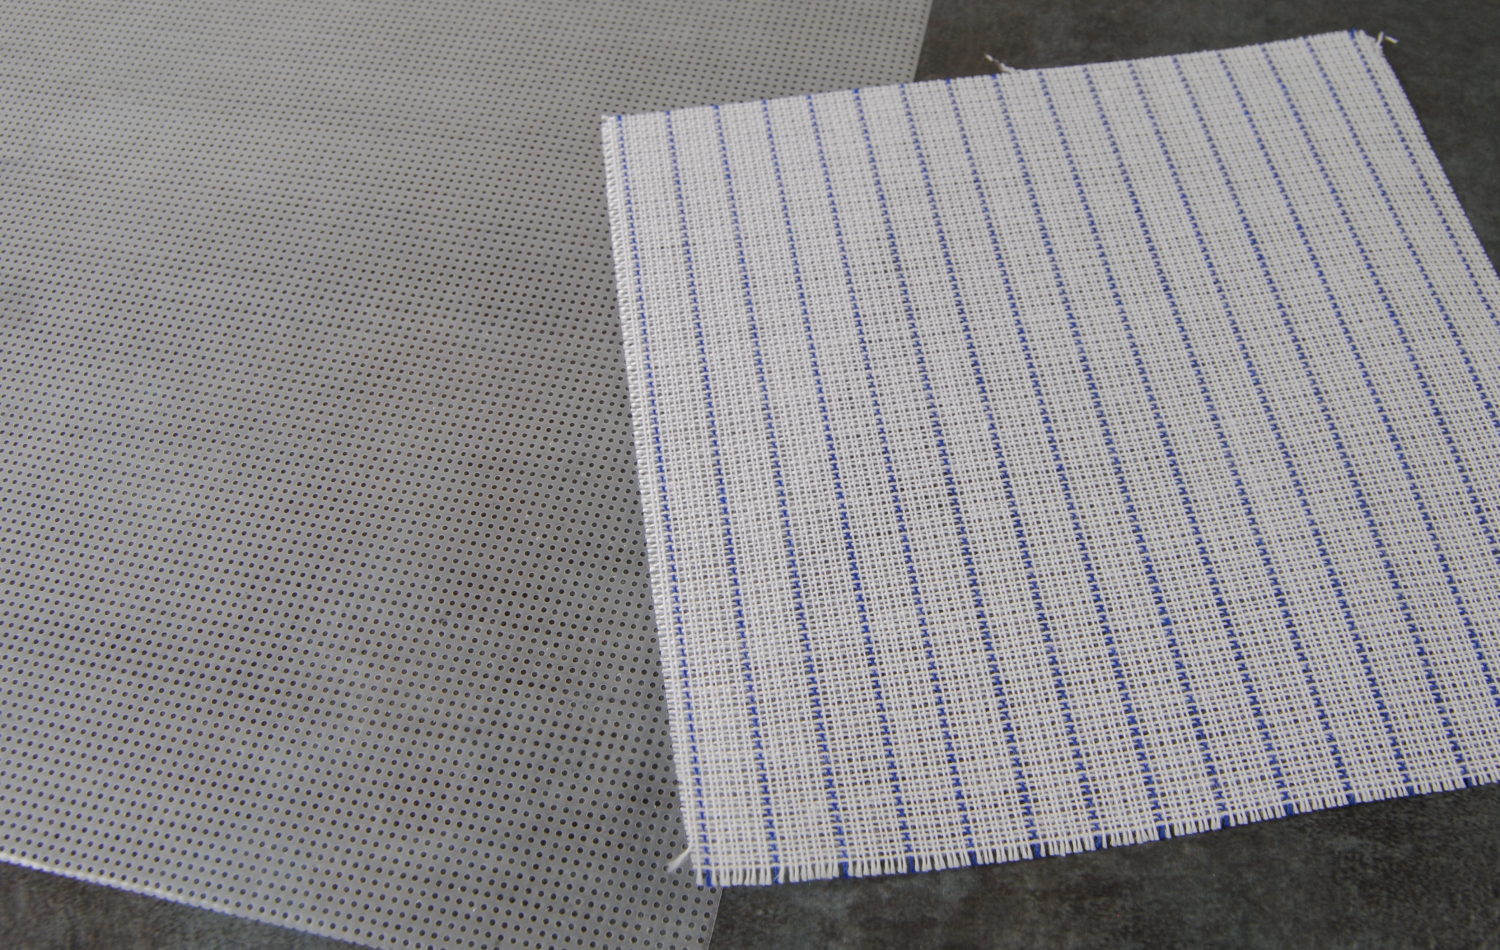
- Woven Canvas (Right) – Often referred to as waste canvas. Loosely woven fabric that you can cross stitch over and then pull out all the strands individually leaving just your stitches behind.
Downsides – Takes some time to remove after you’ve finished your stitching.
Upsides – Available in much larger sizes than some of the other options.
- Soluble Canvas (Left)- Perforated canvas that dissolves away with water.
Downsides – Tends to only come in 8″ square sheets and is more expensive. However, can baste several together for larger designs if needed. (See below)
Upside – Quick, easy cleanup. Assuming your fabric is color fast. If you’re stitching on clothing, it should be. Unless you regularly stain your other clothes in the laundry, I suppose
- Sticky-Grid-N-Tear (Not pictured)- An adhesive stabilizer with a grid for counted cross stitch.
Downsides – Can make your cloth feel stiff. Ideally done on the back of your fabric, meaning you’ll have to keep looking at the back to find the lines as you stitch.
Upsides – No basting! Just stick on and start stitching!
Regardless which of these options you go with, the general concept is the same. It’s an extra piece of fabric you layer over your chosen garment. You then stitch through both fabrics, then remove the grid layer leaving behind just your stitches.
I generally prefer Soluble canvas for easy cleanup. However, I opt for waste canvas for smaller projects so as to not waste valuable soluble canvas.
Waste canvas is much more manageable to pull away in small designs. The more stitches you add to waste canvas, the harder it can be to pull the strands away afterwards. Start small! Get used to the process first. Try not to tighten your stitches too much so the waste canvas can easily slide out.
Waste Canvas Example
Well okay, but what does this whole process look like? Let me show you!
The first thing you want to do with either of these options is find a way to hold the canvas in place while you stitch. Generally you can just do a loose running stitch to baste them to your fabric as shown below. This is recommended for stability. The thread can be easily pulled out afterwards.
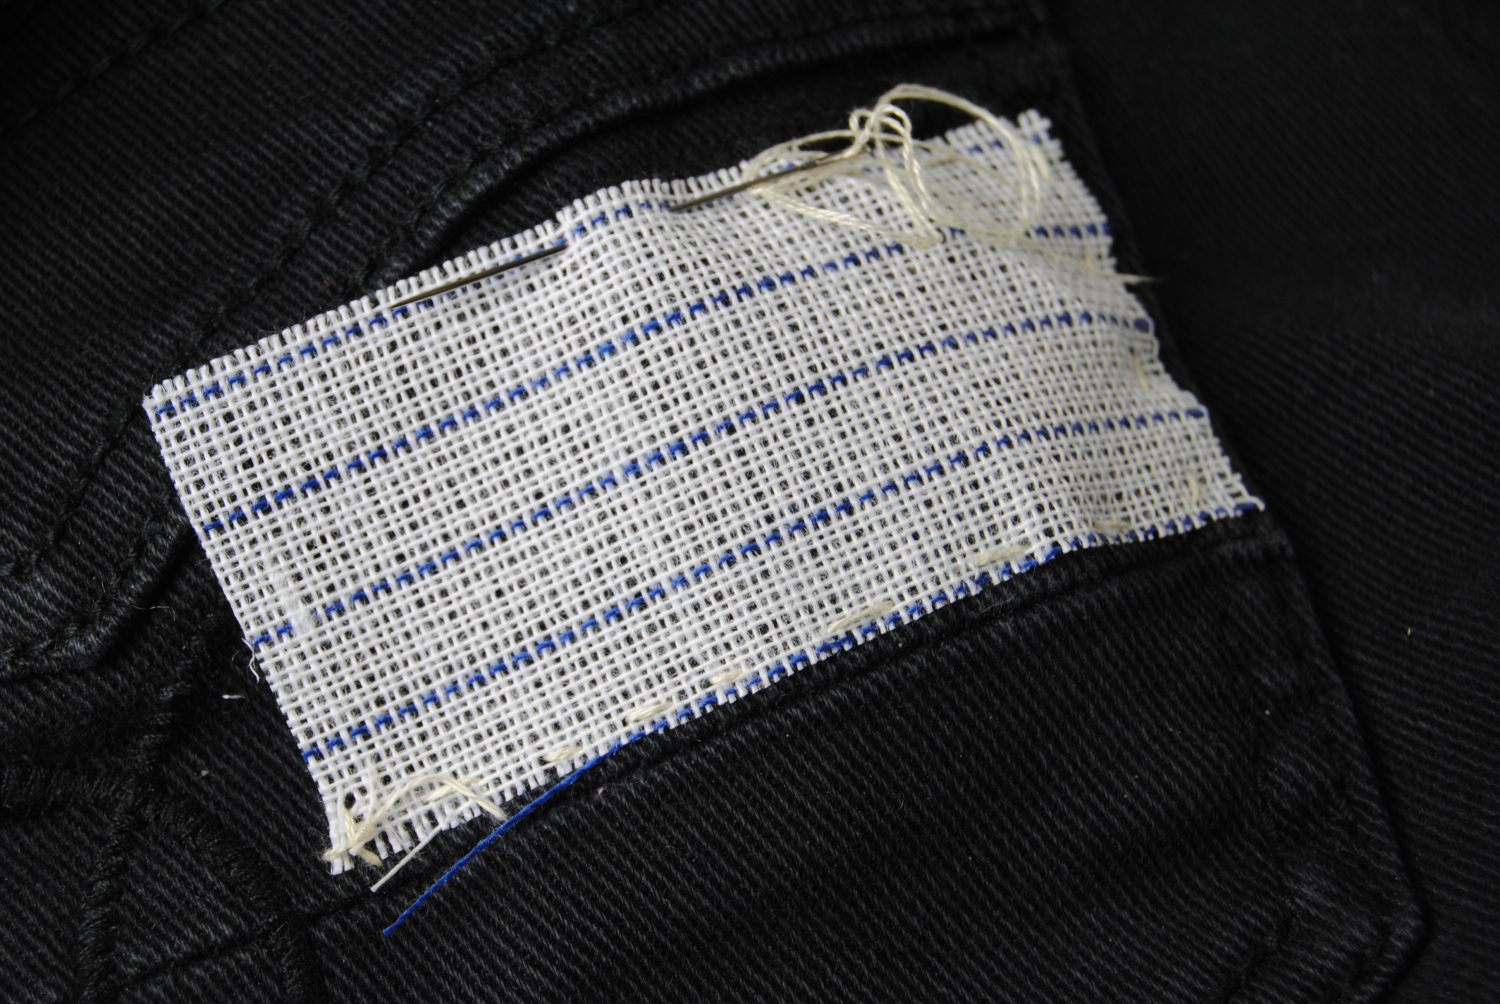
If I’m feeling lazy, I have also taped it to my fabric or used sewing pins/clips to hold it in place. Do note if you use tape or similar it is important you get your outline stitches done quickly and then remove the tape. The stitches will hold it in place just fine, and then you don’t have to worry about what adhesive does to fabric over time.
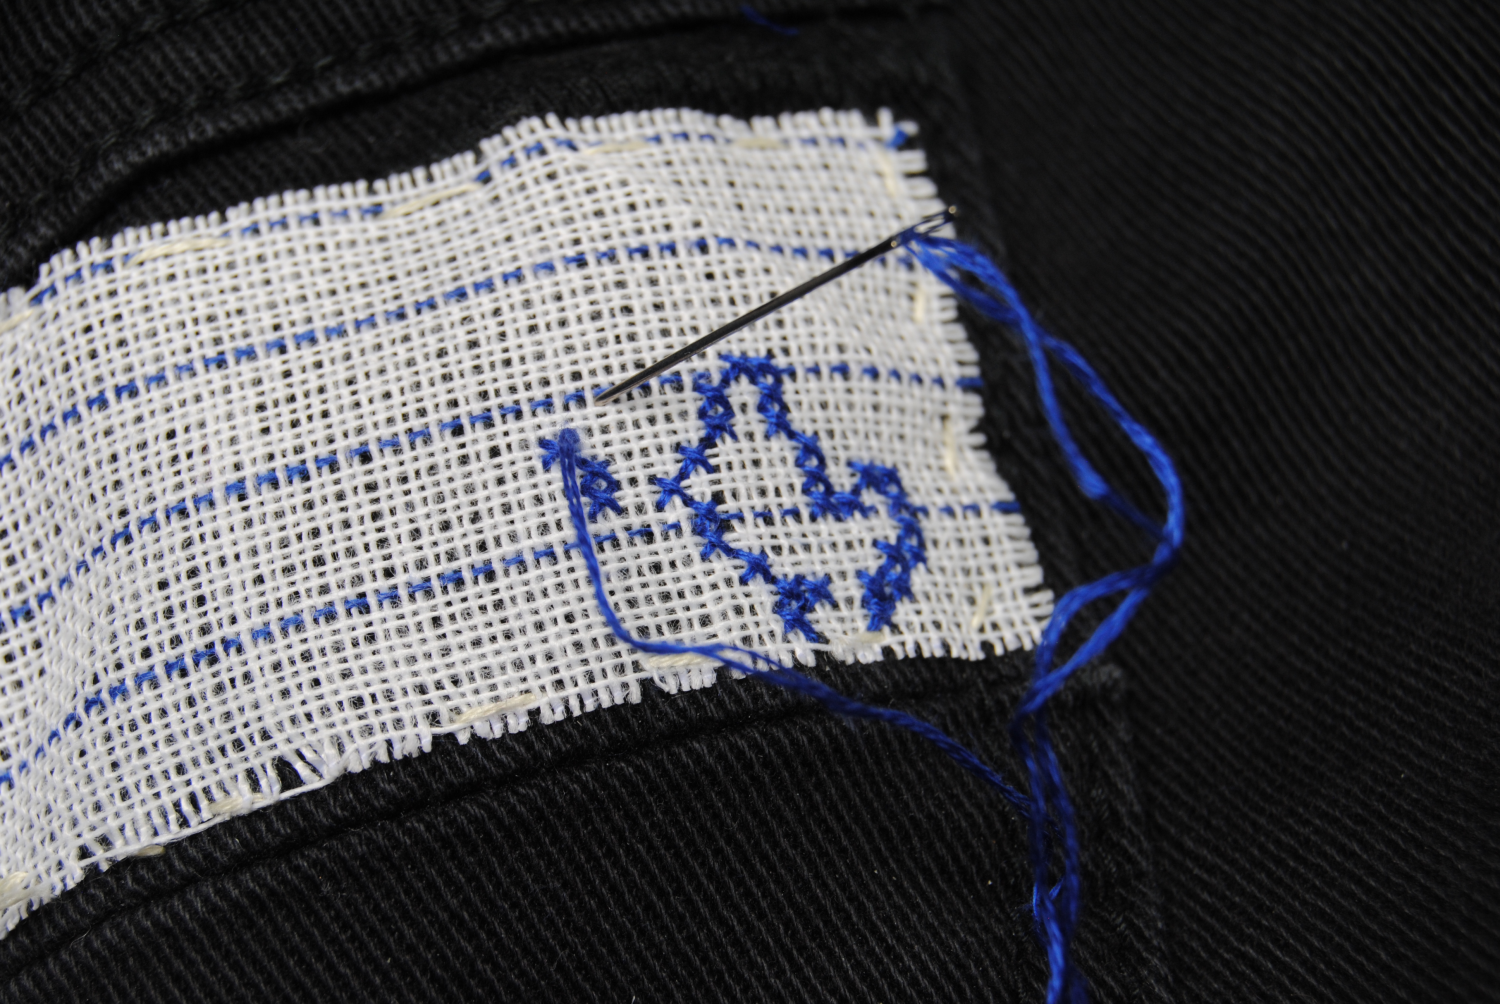
Most waste canvas should be stitched ‘over 2’. This will make the stitches the same size as they would be on 14 count. If you look closely at my photo you’ll see where the stitches skip a hole. Keep that in mind while stitching as it will affect the size of your finished piece.
Conversely, soluble canvas has the holes spaced apart for 14 count, so you don’t need to stitch over 2 on there unless you want 7 count sized stitches. It’s all up to you!
Watch for fraying
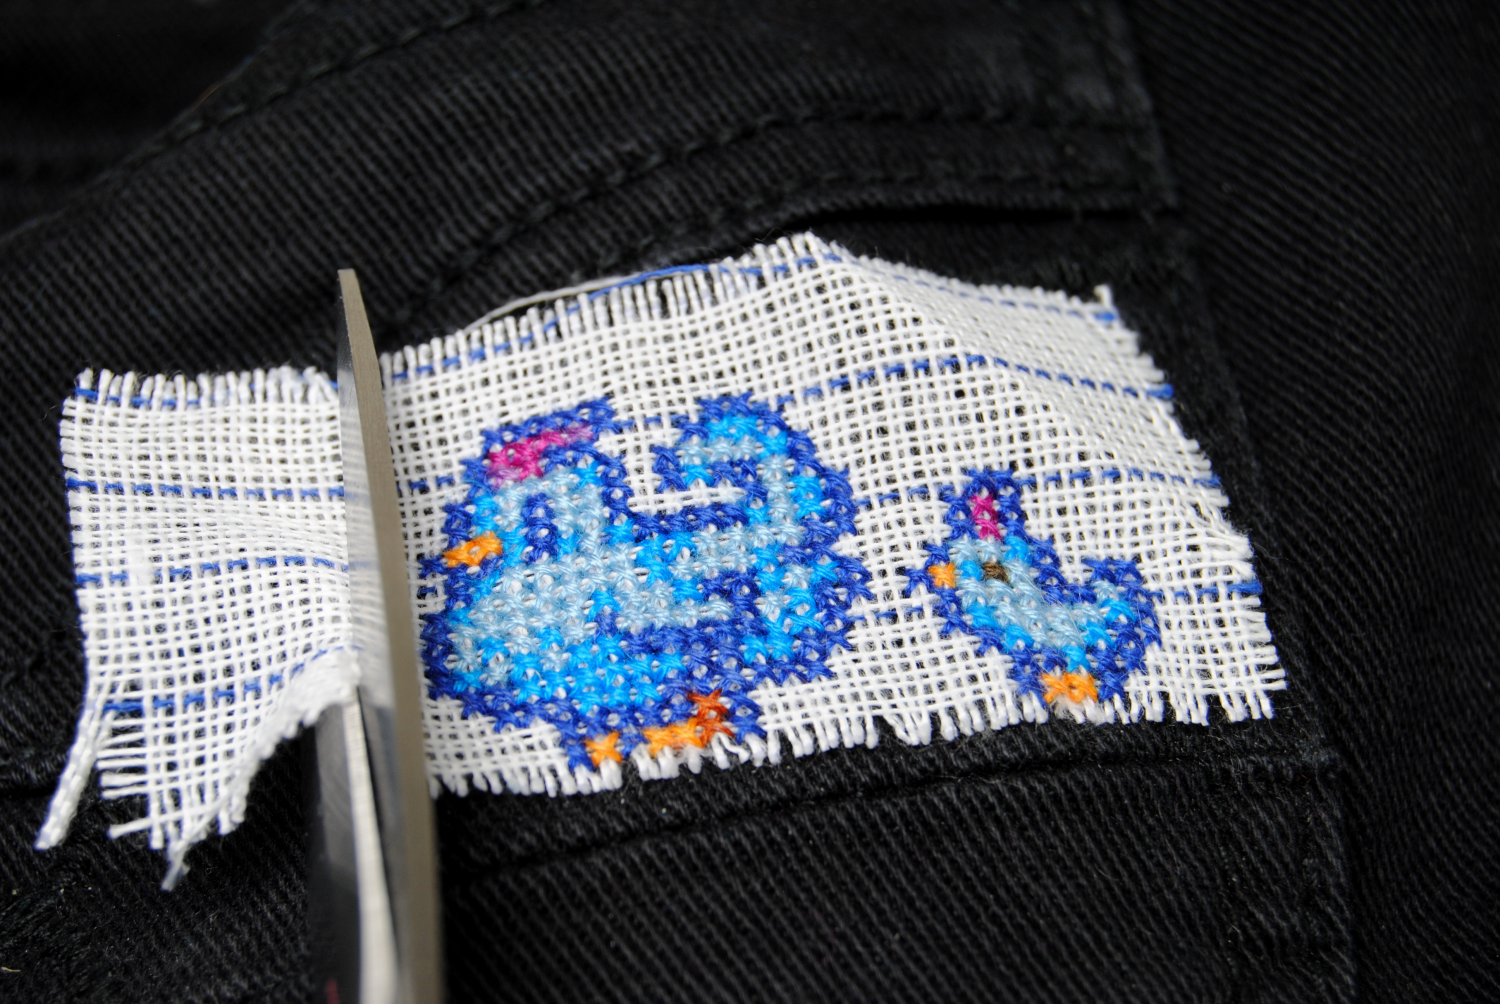
In both my examples you’ll notice I stitch pretty close to the edge. I do not recommend you do this your first time. Leave a gap around the sides of your design. The canvas will start to fray while you work.
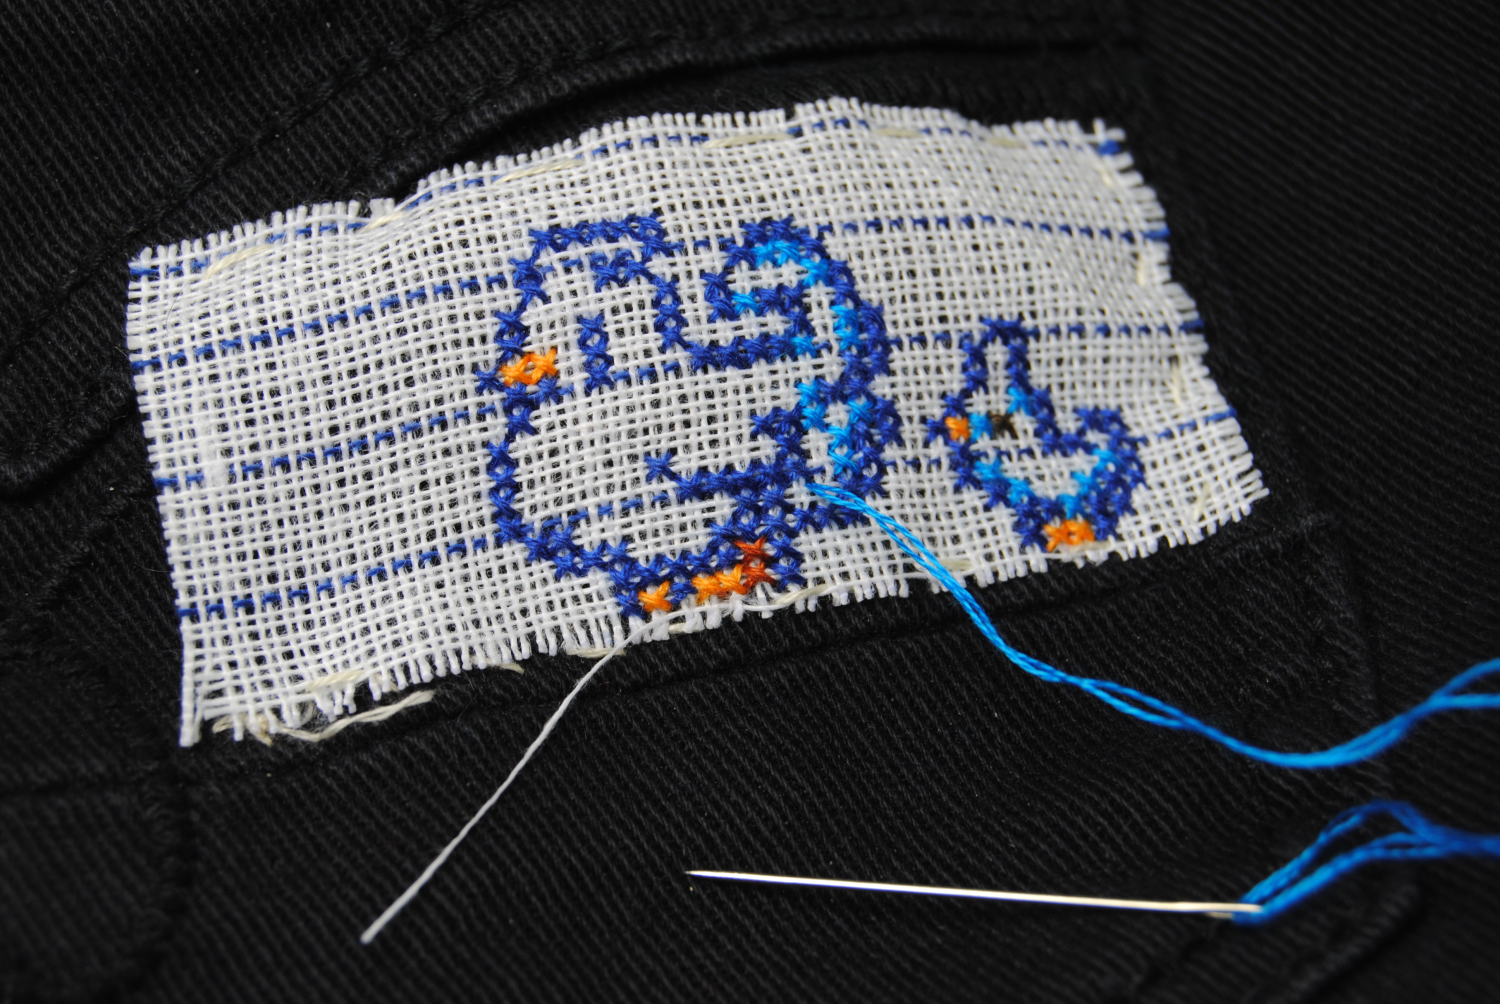
If you do need to fit your design into a smaller piece, get the stitches close to the edge done as quick as possible. Once you’ve got the stitches down, the canvas can fray without issue. You’re going to pull them out afterwards anyway.
Removing your canvas
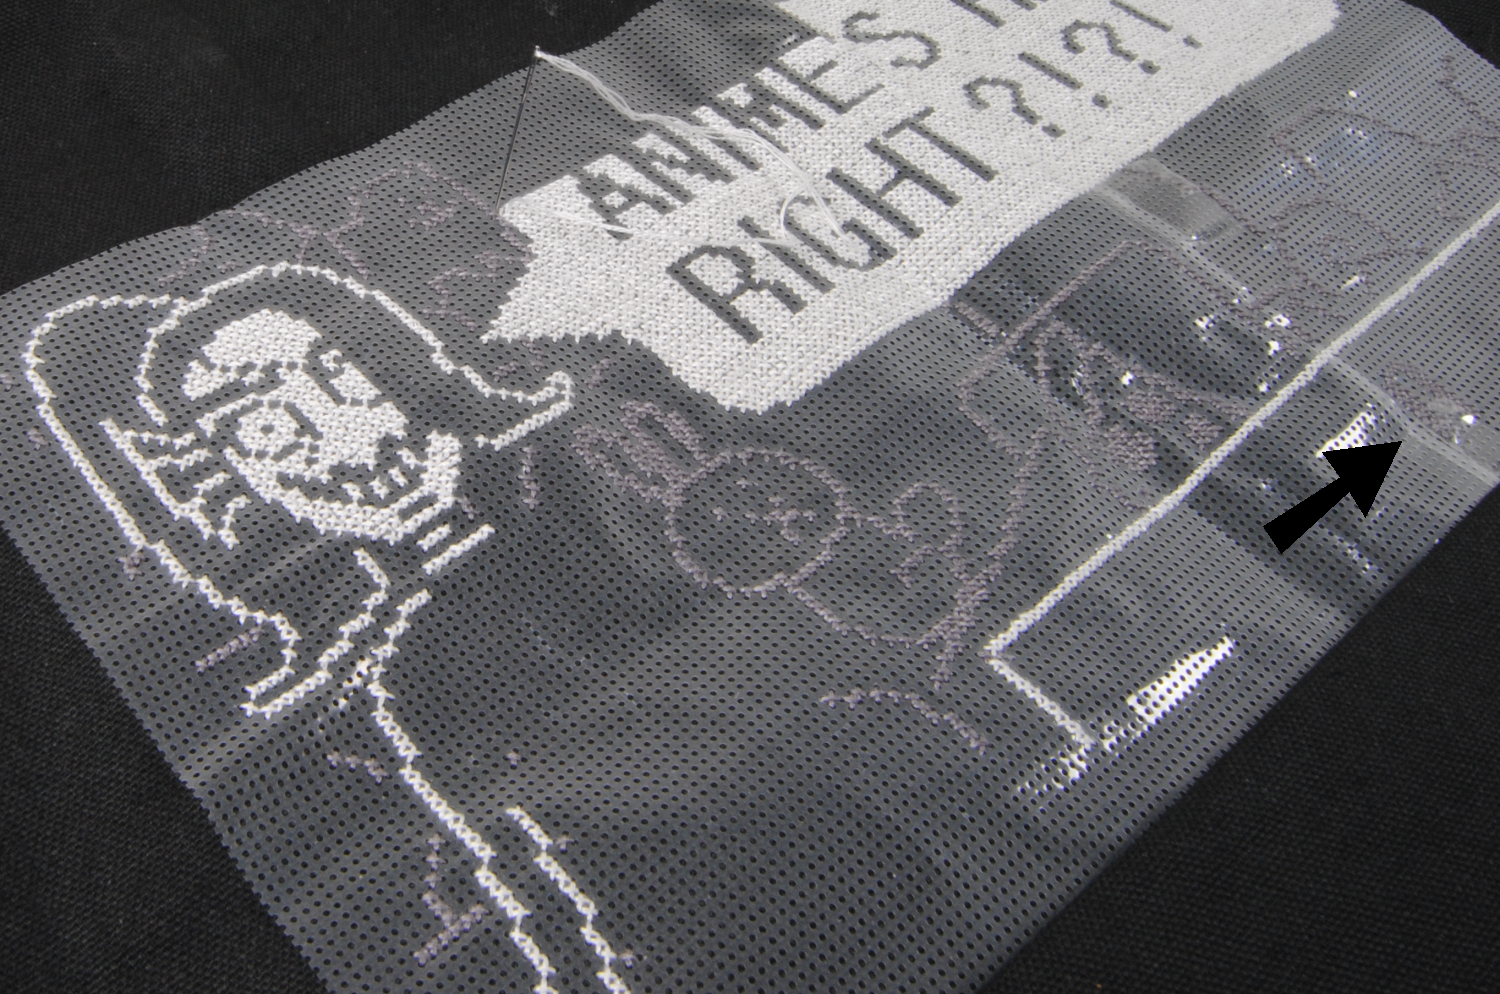
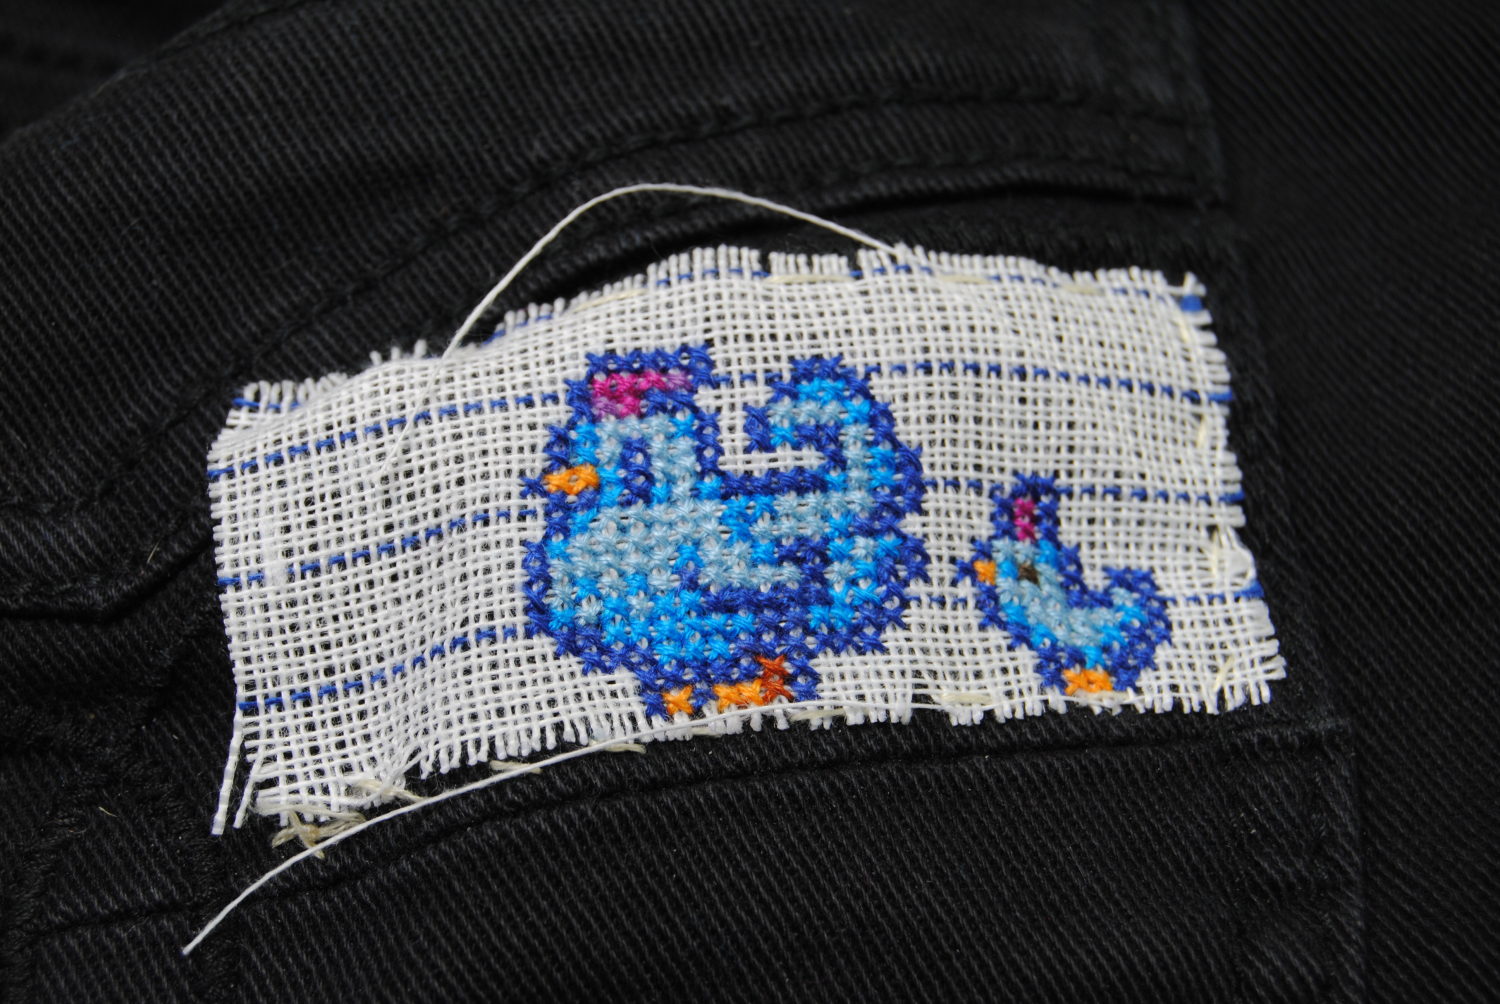
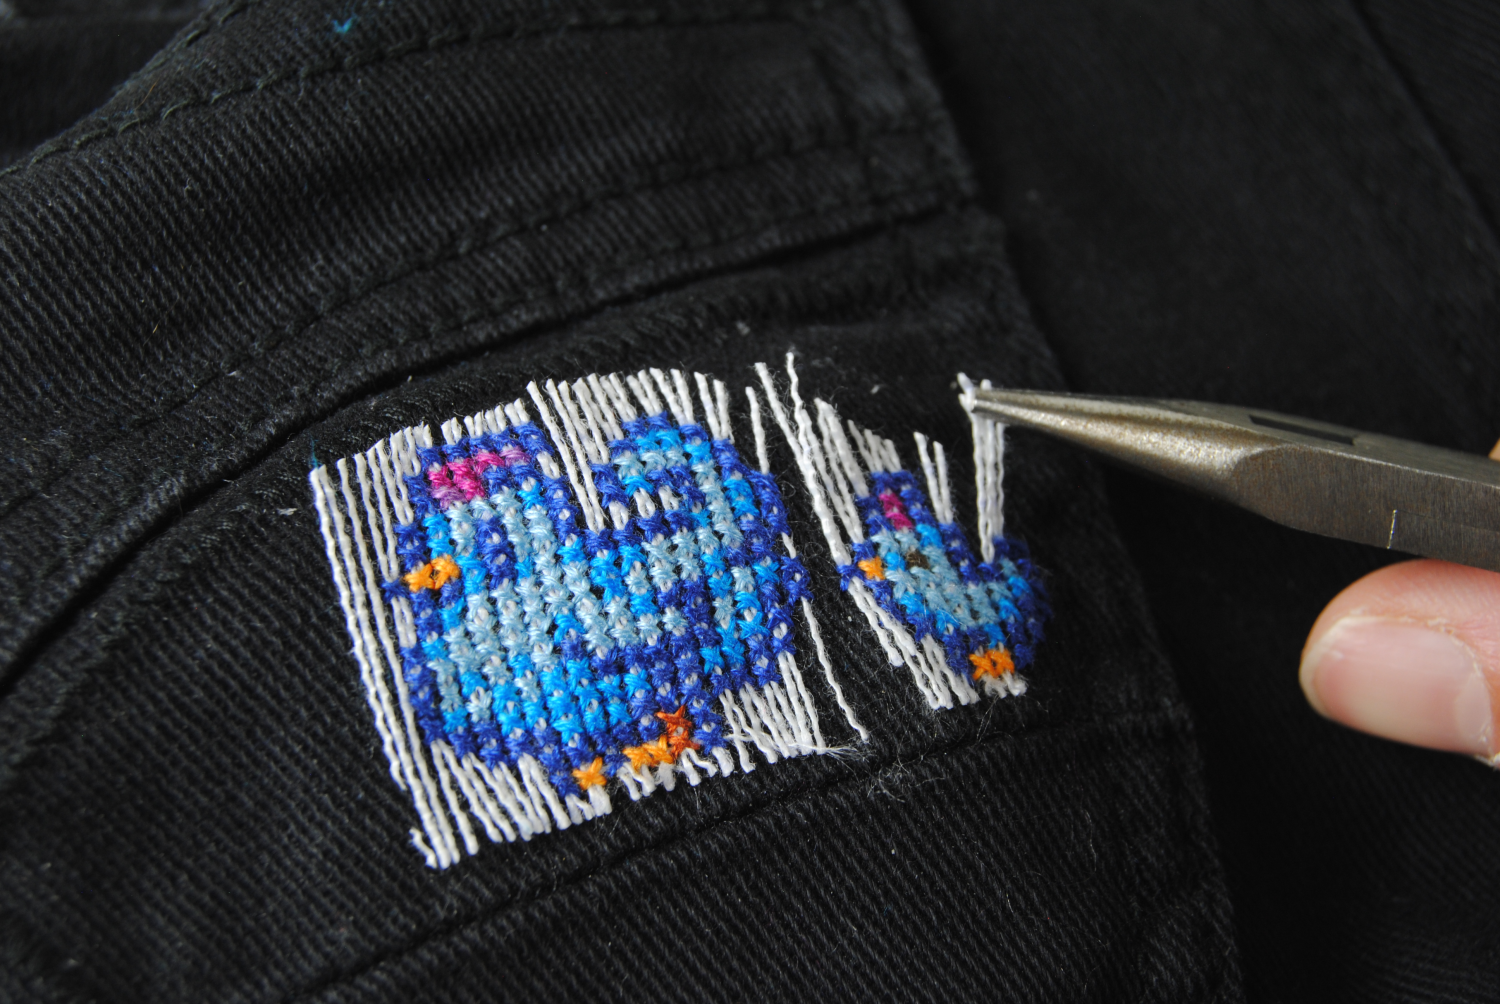
Cut off any excess canvas after you’ve finished stitching. Leave a little bit of room around the edges if you’re using waste canvas. You’ll need to be able to grab onto the strands and pull them out.
Now it’s time to completely get rid of that extra fabric. If you used soluble canvas you get to just wash it away! Be sure to follow the instructions on the package. Mine says to use hot soapy water between 104F/40C and 122F/50C, then rinse.
For waste canvas you pull the individual strand out by hand. I’d recommend using tweezers or something else to grip the thread for you. I used long nose pliers. If you’re having trouble pulling them apart you can also try soaking that area in water to loosen the threads up a bit and dissolve the adhesives used to hold the threads in a grid to begin with.
I tend to start with the horizontal threads first, but you can go in whatever order you prefer.
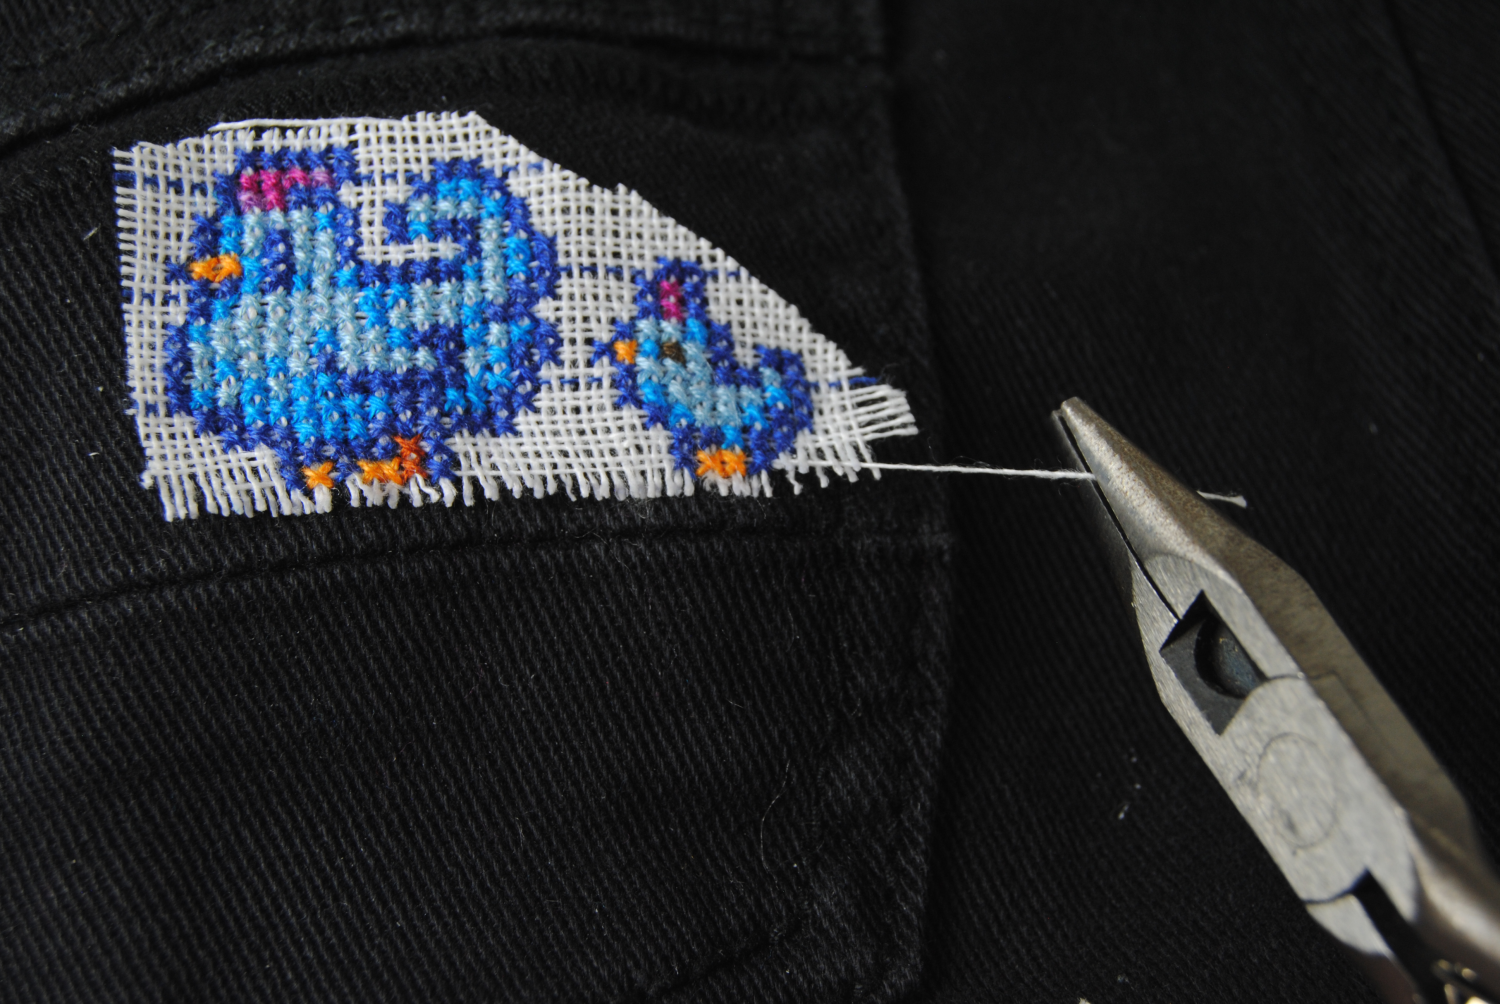
Be very careful to not pull UP on the threads as it can affect the tension of your stitches. (Photos are hard. I swear I didn’t pull up.) Instead, pull parallel with the cloth: out and away from your stitches.
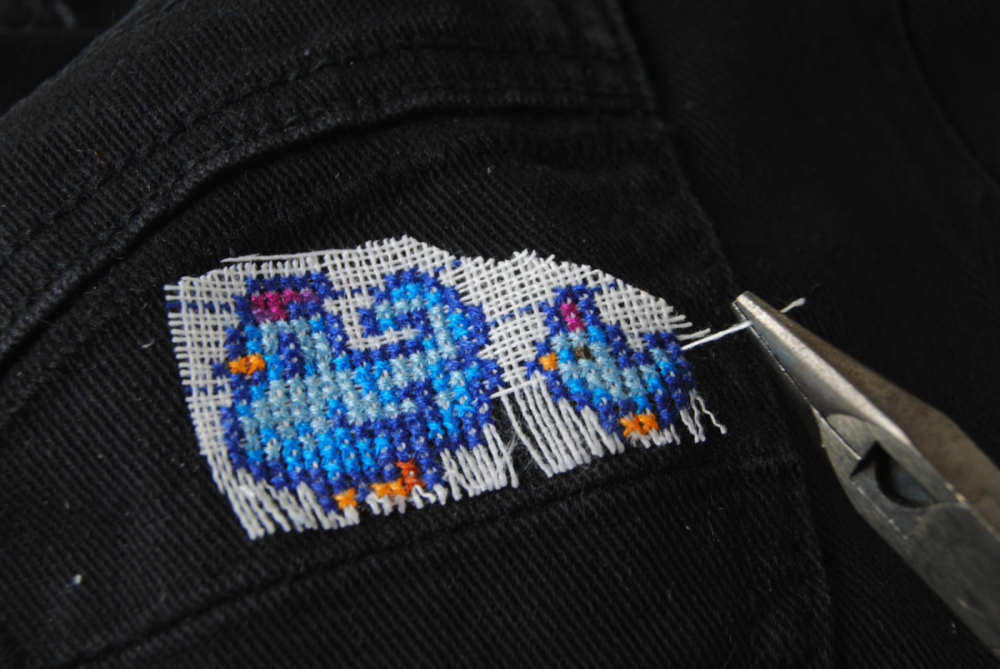
The threads on the other axis will be even easier to pull out. But still be gentle.
Back of your stitch
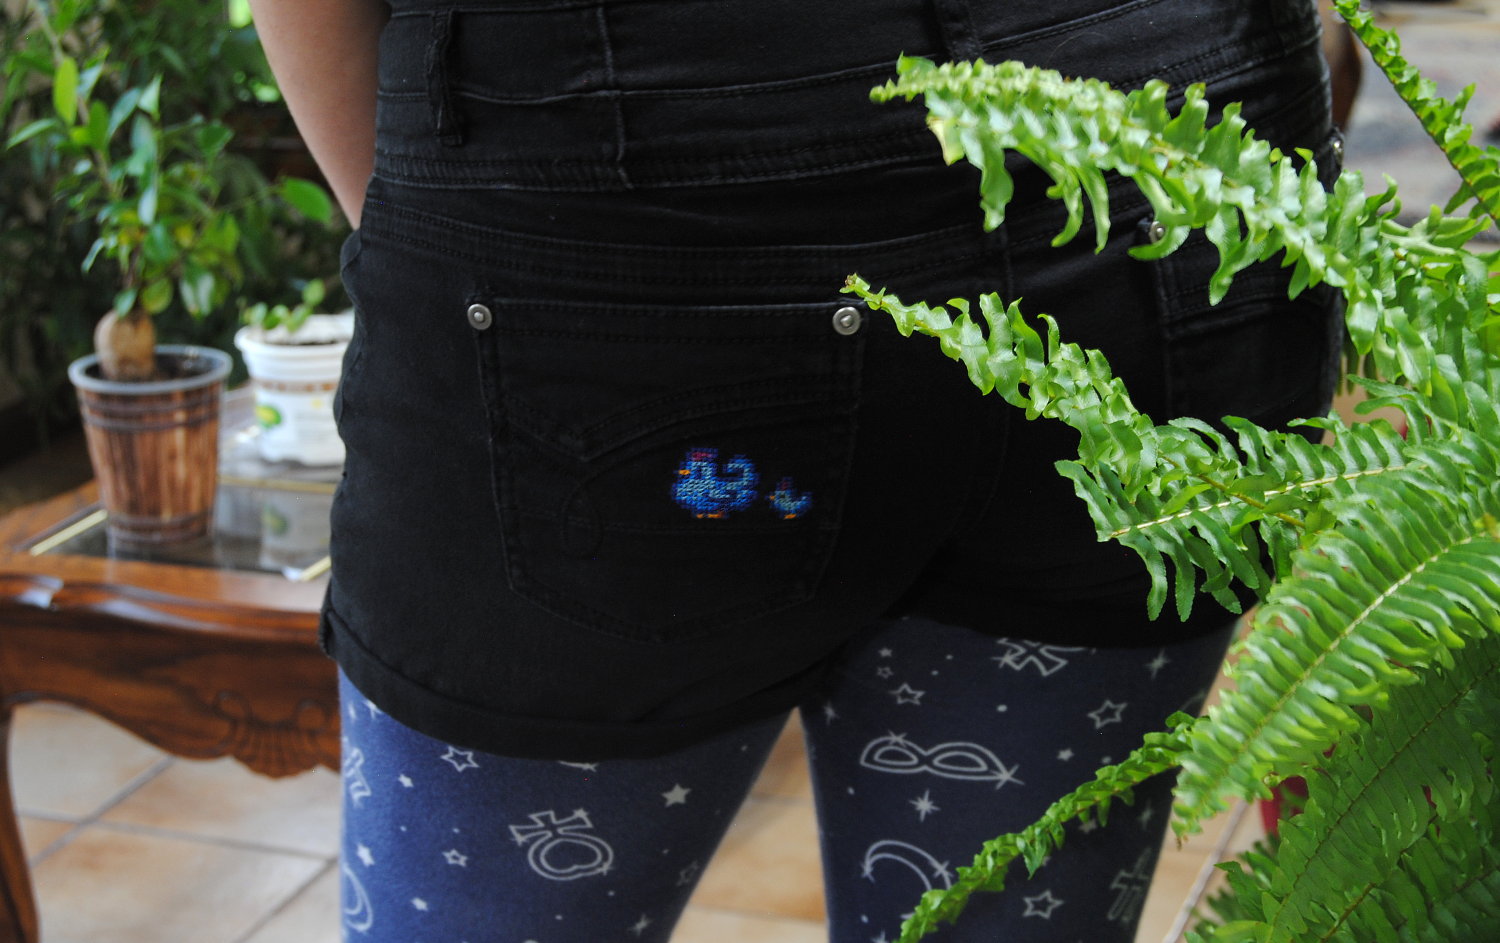
One thing to note about stitching on clothing is the back. If you’ve been cross stitching a while you know backs can get to be a mess, and sometimes have loose threads. This can be very scratchy against bare skin. I generally stick to stitching on pockets. You might also consider the hem of a skirt. Or a jacket.
If it is meant to be against your skin, you can cover the back with a bit of fusible interfacing. If you’re concerned about threads getting pulled out, do this anyway. Even if it’s inside a pocket.

And yes, I stitched this just so I could make a “Guess what? Chicken butt.” Joke. Don’t judge. I think it turned out adorable.


