I’ve been posting designs stitched on these pre-stretched aida canvases for years now. And I still constantly get questions about where I get them. I’ll give you the options below for where to buy aida canvases. However, they’re very limited in color, count, and size. And are generally not available overseas. So instead, I want to explore how to make your own stretched canvas.
I’ve always told people it would be easy to make their own. But I’ve never actually done it! It’s about time I put this to the test and find out exactly how easy it is and what to look out for.
As I mentioned, I have not done this before today. So I am by no means an expert. I did some research of my own, but if you encounter any issues not outlined here, I will probably not be able to help you. Chances are someone will have encountered that issue though, so Google it! This technique is commonly used by painters as it’s cheaper to make your own than to buy manufactured canvases. As such, there is a ton of information out there if you use paint canvas as your keywords when searching.
If you’re more of a video person, I do have a video demonstrating the process. Though it doesn’t go into quite as much detail as this article.
This post may contain affiliate links. If you buy something using one of these links, I earn a small commission. However, there is no extra cost to you. Thanks for understanding! Learn more in my Disclosures & Privacy Policy.
Table of Contents
Pre Stretched Canvas for Cross Stitch
Before we get into making your own, let’s talk about what is available. It’s not a ton, but there are a few options. If you’re in the US.
Michaels
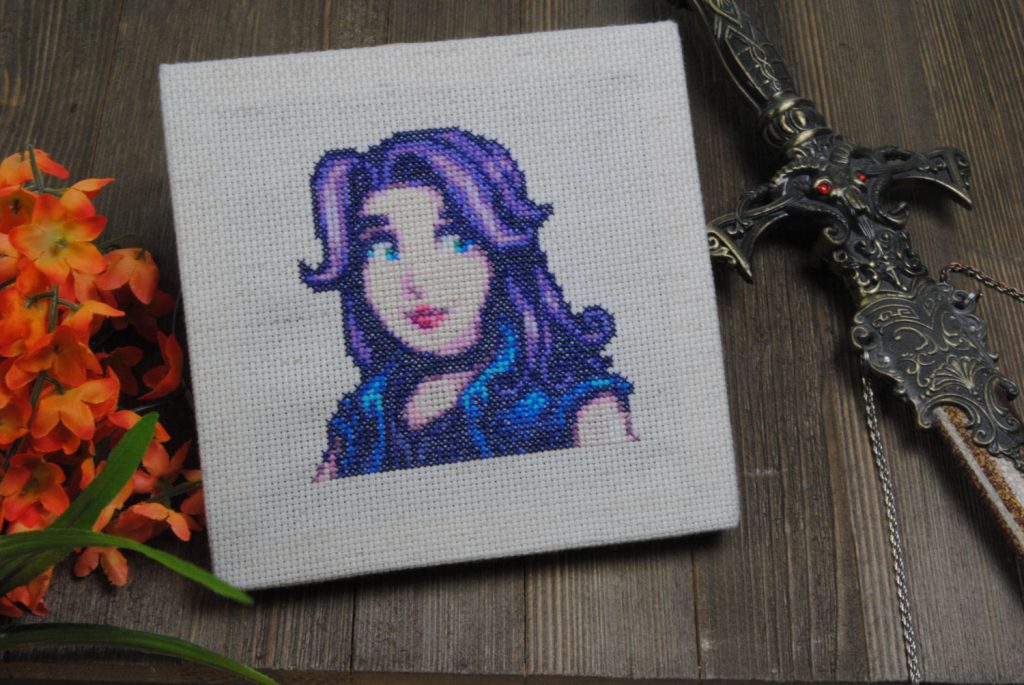
If you have a Michaels near you, their in-store brand ‘Loops & Threads’ makes some pre-stretched aida canvas. They come in packs of three 6″ x 6″ canvases for ~$9.99. Currently they only come in white or oatmeal 14 count aida. They used to come in black too, but have since been discontinued.
While the canvases are 6″x6″, the wooden bars make it pretty much impossible (or extremely annoying) to stitch all the way to the edge. The actual opening on the back is 4.5″x4.5″. I would recommend keeping your pattern at or under 64×64 stitches. This makes them the perfect size for the Stardew Valley portraits, however!
Be aware that they are occasionally completely out of stock on these for months at a time. They do eventually come back, unless they’ve been marked clearance like the black ones.
Unfortunately, the quality for the ‘Loops & Threads’ squares has gone significantly down since I first published this article, and I no longer recommend them. They’re now often slightly tilted, made with much thinner fabric, wood that tends to splinter, and a different color entirely. But they ARE an option, technically. You can see the difference when comparing them side to side.
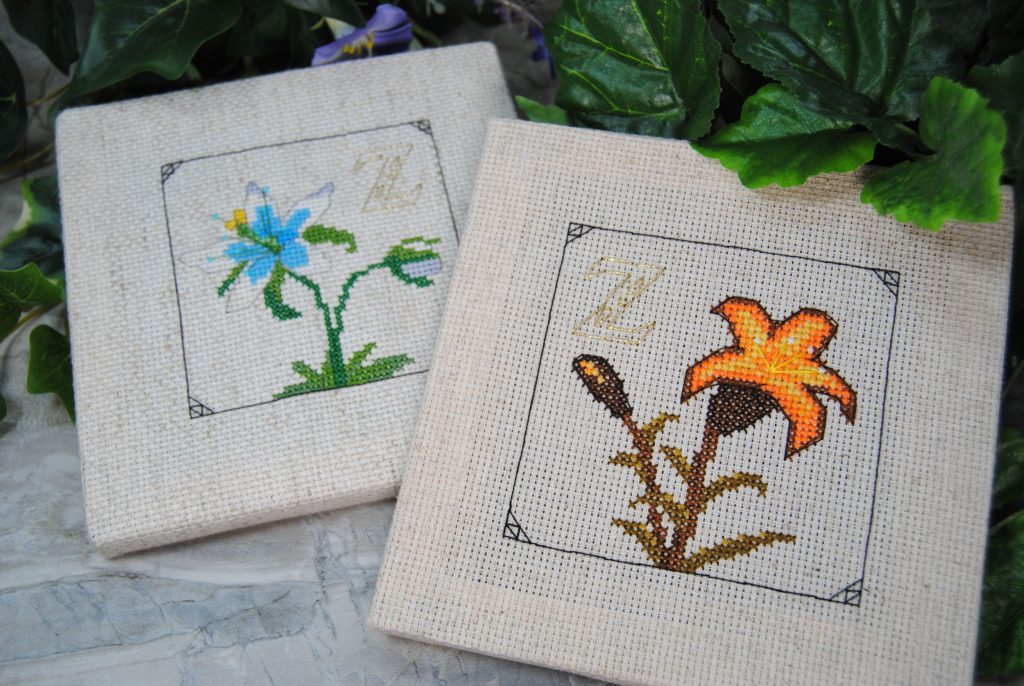
The one in the back being the old ones that I used so frequently. With the Sundelion in the foreground being the same brand and product but completely different quality, purchased nearly 6 years later.
Bucilla
The Bucilla canvases have been found at numerous craft and online stores. They are available via Amazon, and 123Stitch. I have spotted them at Wal-mart and Hobby Lobby.
That said, these are available in 6″x6″ and 10″x10″! They are also available in white, oatmeal, and black. So they’re a decent alternative if you need a slightly larger work area, or were missing those black canvases. Prices vary, but they are generally more expensive than the 3-for-$10 price of the previous ones.
I’ve only tried their canvases once. A 10″ one in oatmeal. And not even halfway through stitching my design, one of the wooden bars broke at the corner. I ended up tossing it and don’t seem to have saved a photo of it. But needless to say, I haven’t tried their brand again. I could have just gotten a bad batch though! And with Michaels’ quality going down as well, worth a shot if you don’t want to stretch your own.
Making Your Own Stretched Canvas
Now that we’ve discussed the manufactured options, you can easily see some reasons to make your own canvases instead.
If you want different colors, fabric counts, or overall sizes. Maybe you want your design to go all the way to the edge of the canvas. Perhaps you want rectangular canvases, or just want to stitch on your usual Qsnap or scroll stand instead of working around the wood of the pre-stretched canvas.
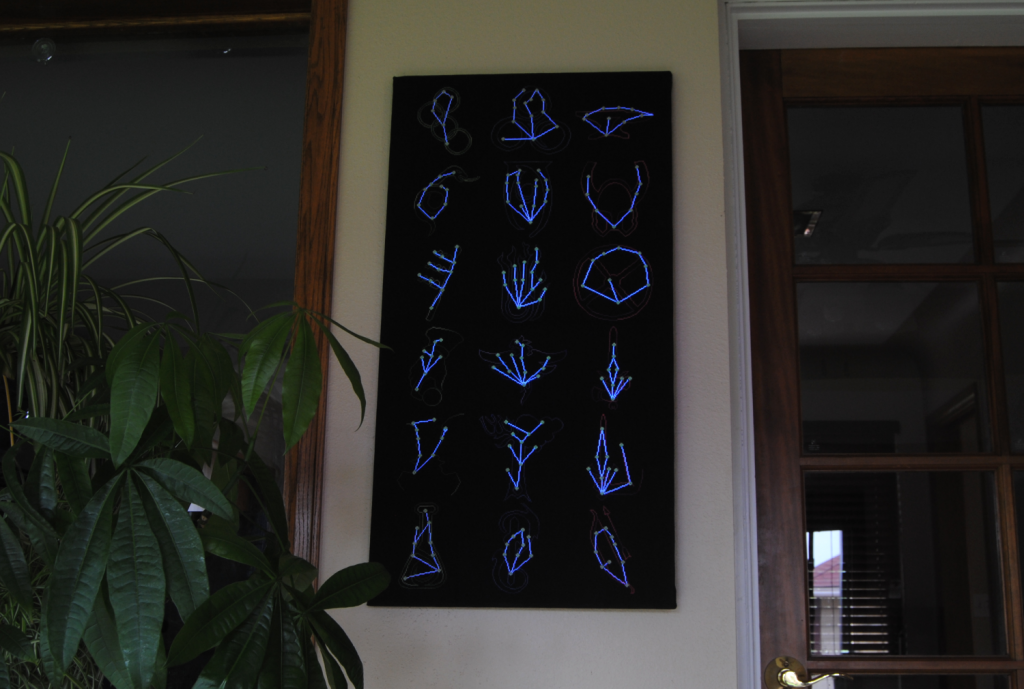
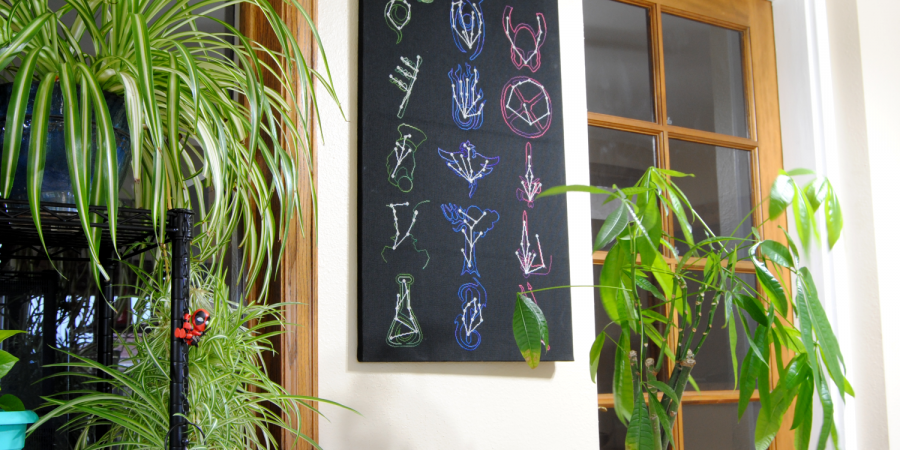
I had no finishing plans for my Skyrim SAL when I started it, but nearing the end of it I decided I want to try stretching it instead of investing in framing. It’s a pretty big piece, and I was having trouble finding a big enough standard frame. Custom frames aren’t cheap, so here we are.
If you’re interested in the pattern, it was a stitch-a-long on my Patreon. It was available at $1/monthly releases. Currently, the Constellation patterns have been bumped up to the $10 tier. This is because when you sign up at the $10 a month tier you immediately get access to all the patterns at that tier and all tiers below it. You can then change your monthly contribution at any time, though.
The full Skyrim SAL will be available on Etsy as soon as I can figure out how to best format the PDFs to fit their upload limits. I’ll post on Instagram/Twitter when that happens, if you prefer.
Materials
It doesn’t take much to put these together;
- Stretcher bars
- Staple gun
- Chosen fabric or finished cross stitch with at least 4″ extra fabric on all sides, depending on the thickness of your stretcher bars.
Optionally, you might want some thumbtacks or large binder clips to test the position of your fabric before securing it in place. You might also want a hanging mount to hang your canvas from. If you’re planning to make a lot of these, it would be helpful to invest in some canvas pliers.
Ideally I would’ve gone into a store like Michaels or a local niche art/framing shop, and gotten the stretcher bars in person. To be able to see the wood and make sure it wasn’t bent or warped. Instead, I did this in the middle of global pandemic. So I ordered some stretcher bars online from Amazon.
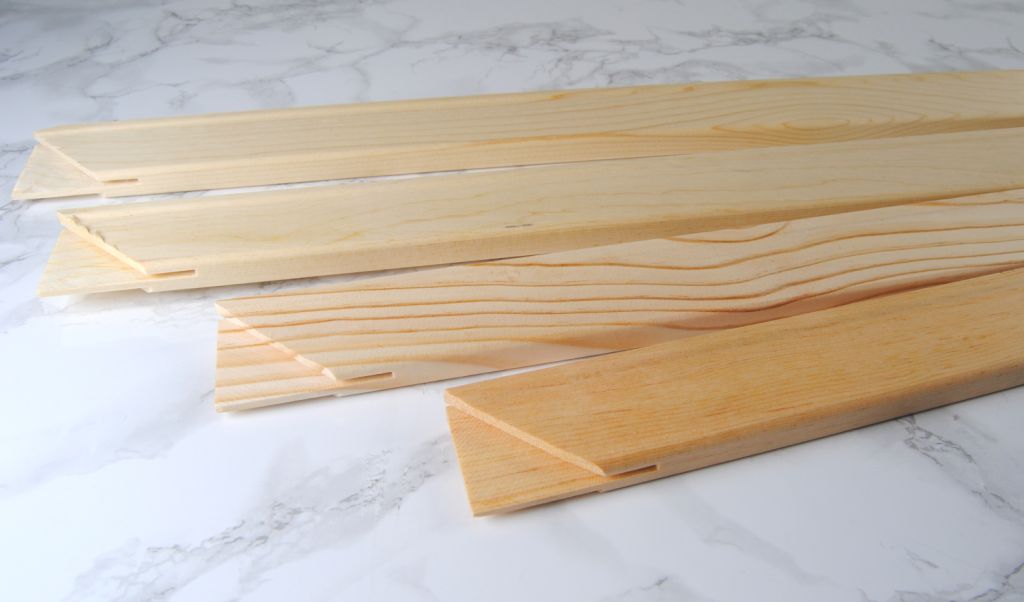
Stretcher bars generally come in sets of 2 so you can mix and match to make rectangles. I measured out what I wanted my finished piece to be, and picked up a set of 34″ and 18″ bars.
My partner already had a staple gun on hand, but they’re fairly inexpensive if you need to pick one up. If you’re planning to stretch your finishes more often, or even have some old ill-fitting T-shirts you want to stretch and hang, it can be a good investment.
Preparing Your Frame
You’ll see in my photos that the ends of my bars are chipped and uneven. This is what happens when you purchase online rather than in person. I probably could’ve sanded down the rough edges or complained at the seller I purchased them from.
That said, it honestly isn’t noticeable once everything’s assembled and for a first project it didn’t make too much of a difference to me. Your mileage may vary.
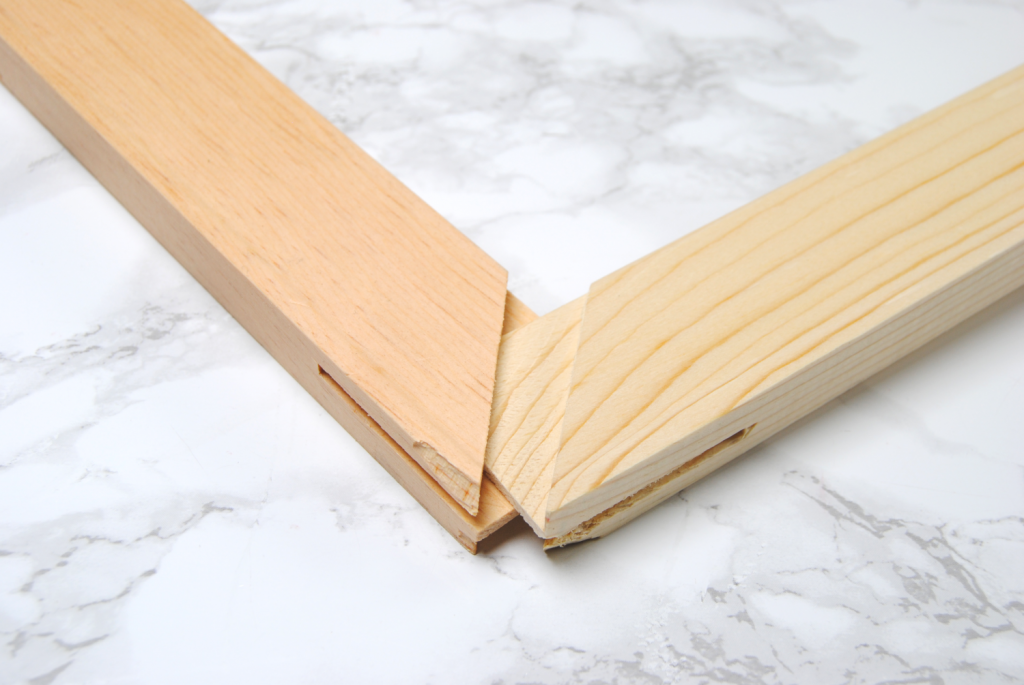
Regardless, commercial stretcher bars are made to fit together quite easily at the corners. You shouldn’t have much trouble sliding them in to place. Make sure that the outer edges are lined up as evenly as possible.
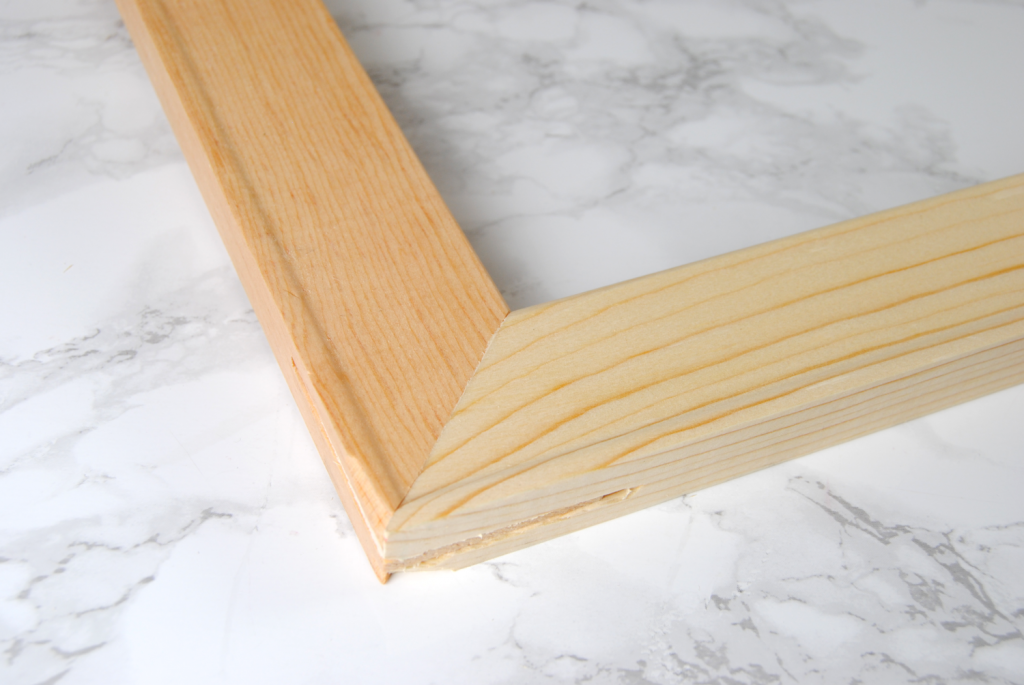
Once you’ve gotten all four corners together and are content with how they’re placed, you can staple the corners just for a little extra stability. Others like to use wood glue, so that’s an option as well.
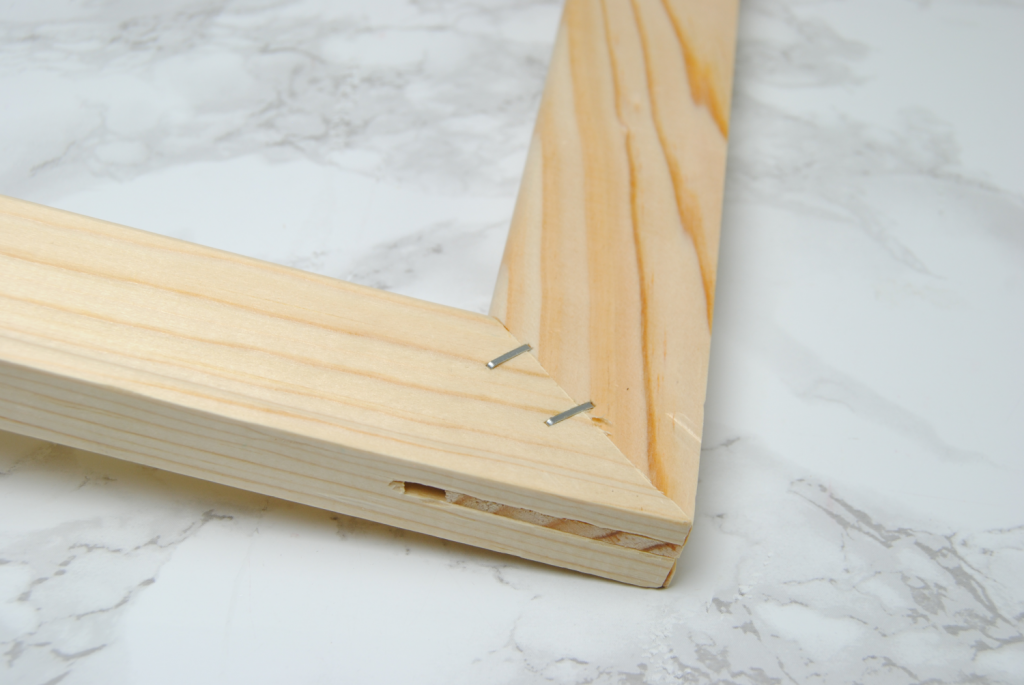
If your bars only have that beveled edge on one side, make sure that side is the one facing your fabric. Mine had that raised edge on both sides, so it didn’t make much of a difference. But if you’re stapling your bars, you’d want that to be on the backside so it doesn’t leave raised bumps on the front.
Prepare Your Fabric
Now that you have your basic frame, you should spend some time preparing your fabric. Wash and iron your fabric now if it needs it, as you won’t be able to easily iron it once it’s stapled onto a wooden frame.
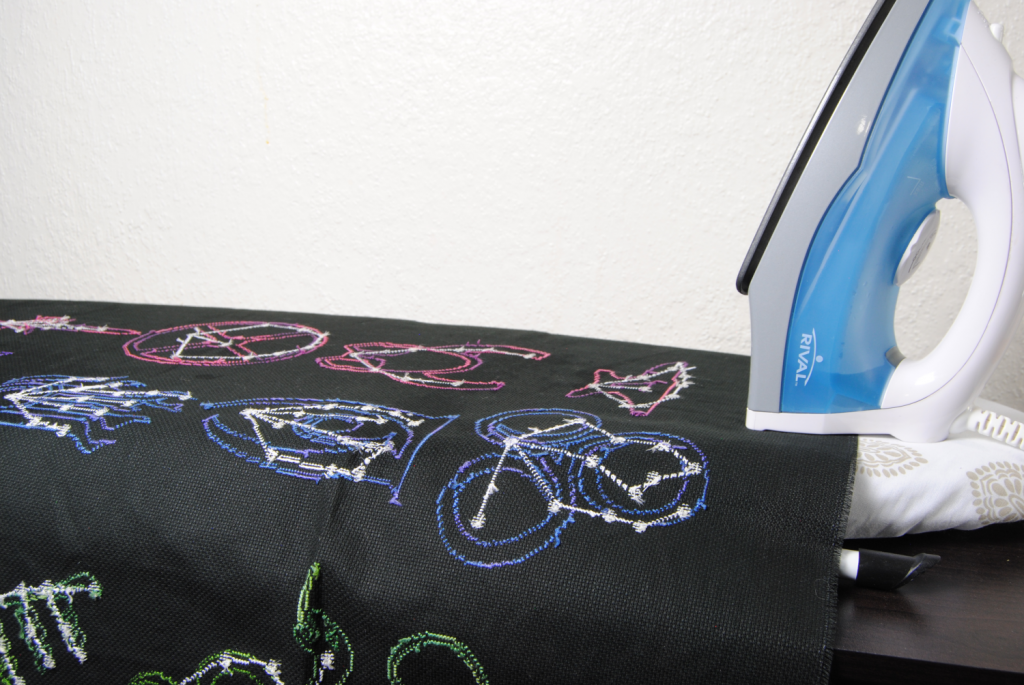
Lay your fabric on a flat surface, wrong side up. Place your wooden frame on top of the fabric and figure out exactly how you want it to sit. If you’re not sure, you can use pushpins to hold your fabric in place temporarily. This allows you to carefully pick it up and view it from the front to check and make sure it’s centered.
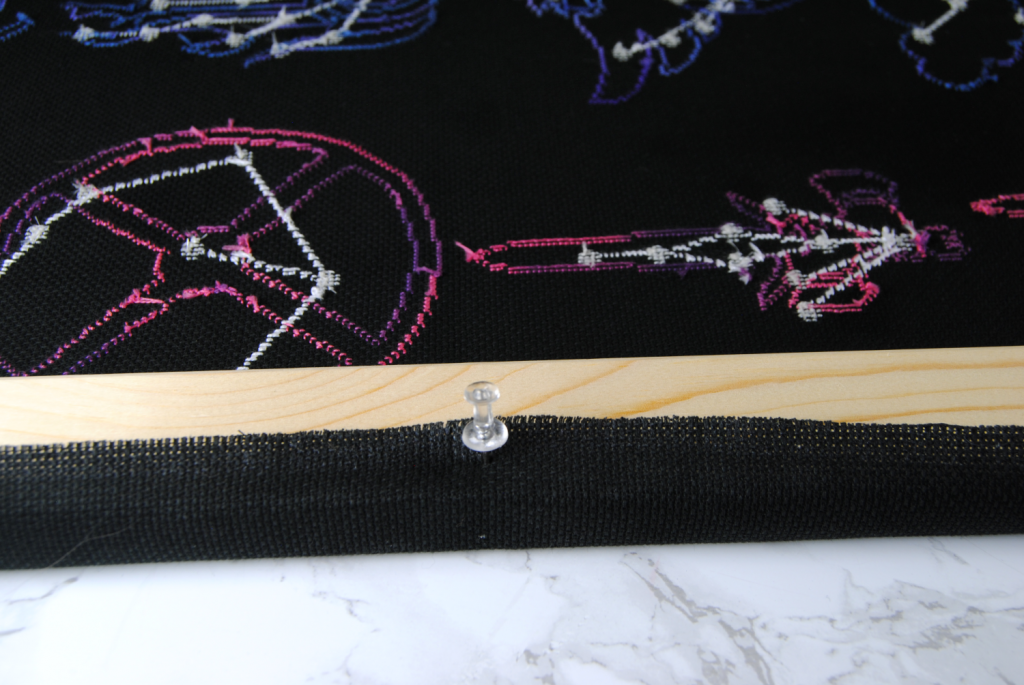
Note that because I wasn’t originally planning to frame this in this fashion, I did not have 4″ of fabric around the sides of my design. You’ll note my fabric doesn’t reach all the way around the bars and doesn’t leave much room to staple. When attempting to do this project yourself, leave a larger allowance around the sides for an overall easier time. That said, it is clearly still doable with only the ~2.5″ allowance. So don’t let that stop you from trying.
Especially since the smaller size stretcher bars are also often thinner, so not as much fabric is needed.
Start Stapling
Pinning the fabric down how you want it to show on the front, pull one of the longer sides tight and staple the middle of your stretcher bars. (Or any side, if yours is square). Then, turn it around and staple the middle of the opposite side. Be sure to stretch the fabric tight as you do this. It is called a stretched canvas, after all.
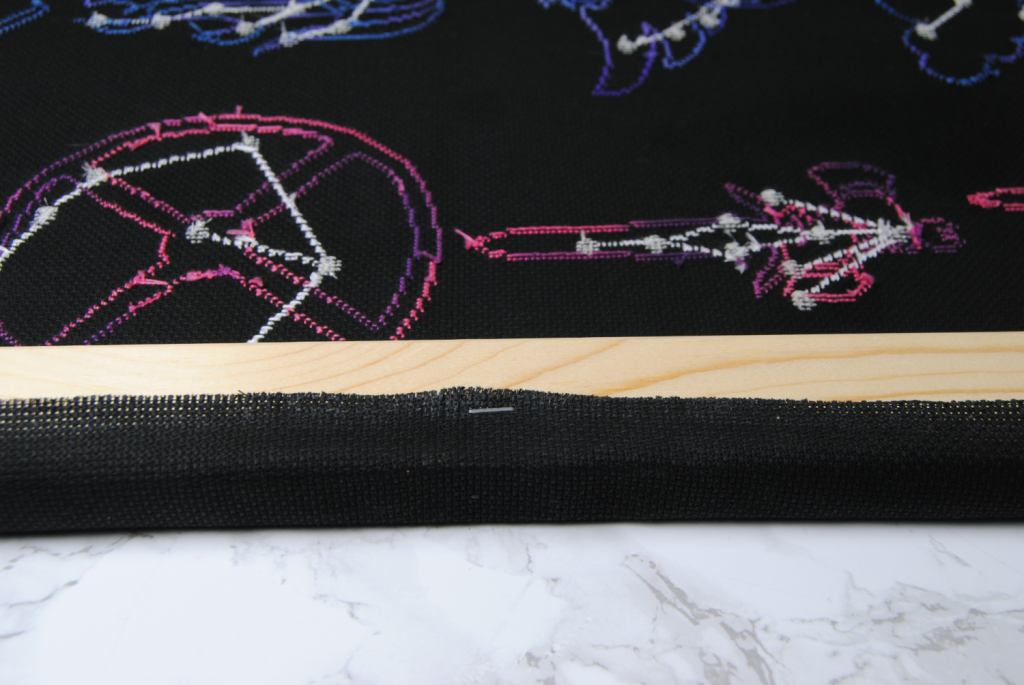
Now staple the middle of the other sides down as well, pulling them tight as you go. You should have just a single staple on all four sides. This is your last chance to pick it up and make sure your fabric is still centered. It’s much easier to pull out a staple now and make a few adjustments than it will be once it’s been fully tacked in place.
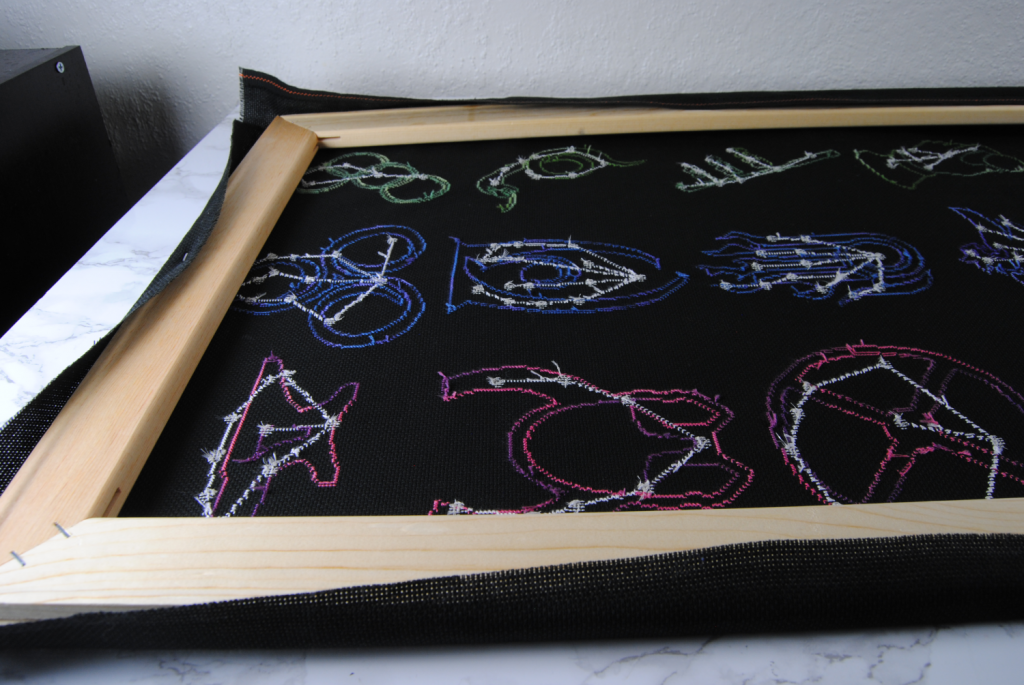
Once you’re sure, start again on the longer sides. Pull the fabric tight and place another staple about an inch from the first. Then on the opposite side, pull it taught and place a matching staple. Now do the same thing, but on the other side of the original middle staple.
I’m sure you get the idea by now, but remember to always alternate sides to make sure the fabric is even along the way. Check the front on occasion to make sure you’re not pulling one side tighter than the other and skewing the design.
Even if you’re just making a blank stretched canvas that you plan to stitch later, it’s important the grid of your fabric stays straight, so pay attention as you go.
Turning the corner
Eventually you’ll make it to your corners. There’s probably a dozen ways to do this, and your research in stretching painter’s canvases will show you multiple options. Here’s a shot of how I did it, tucking the shorter side forward and folding the top side of the fabric over.
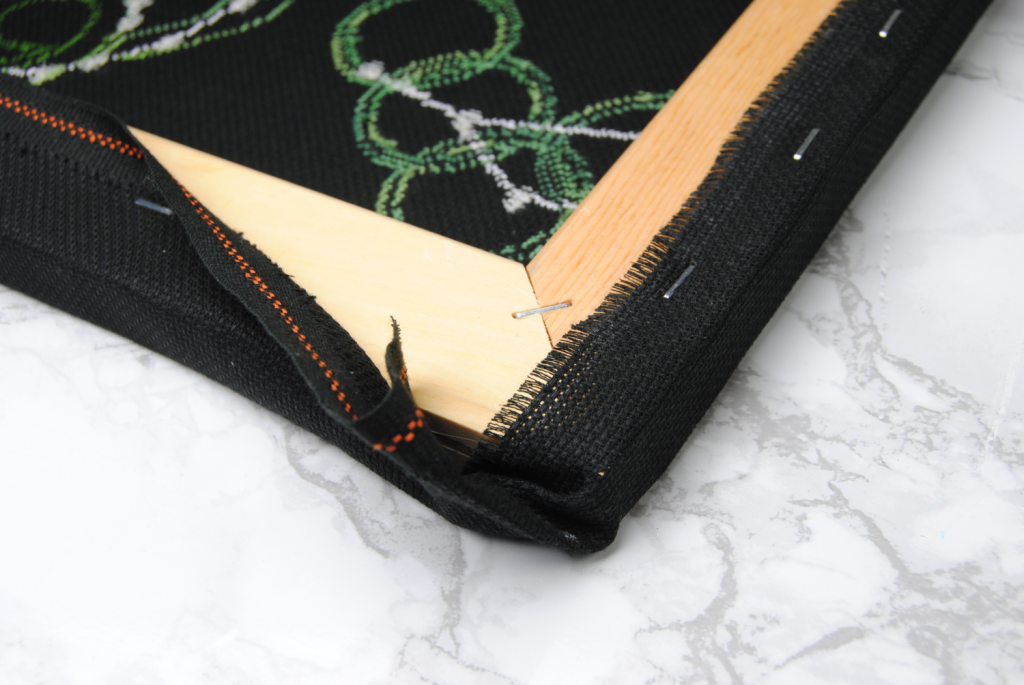
You may want to try a few different ways and see which one makes most sense to you or you think looks best. Then staple it in place and move on to the opposite corner.
Once the corners are done, finish up the remaining two sides as you did before. You’ll note due to the selvage I did actually have 4″ on one side and thus it actually goes all the way to the edge of the wood. Again, if this is the look you’re going for on the back, be sure to leave that extra border around your design.
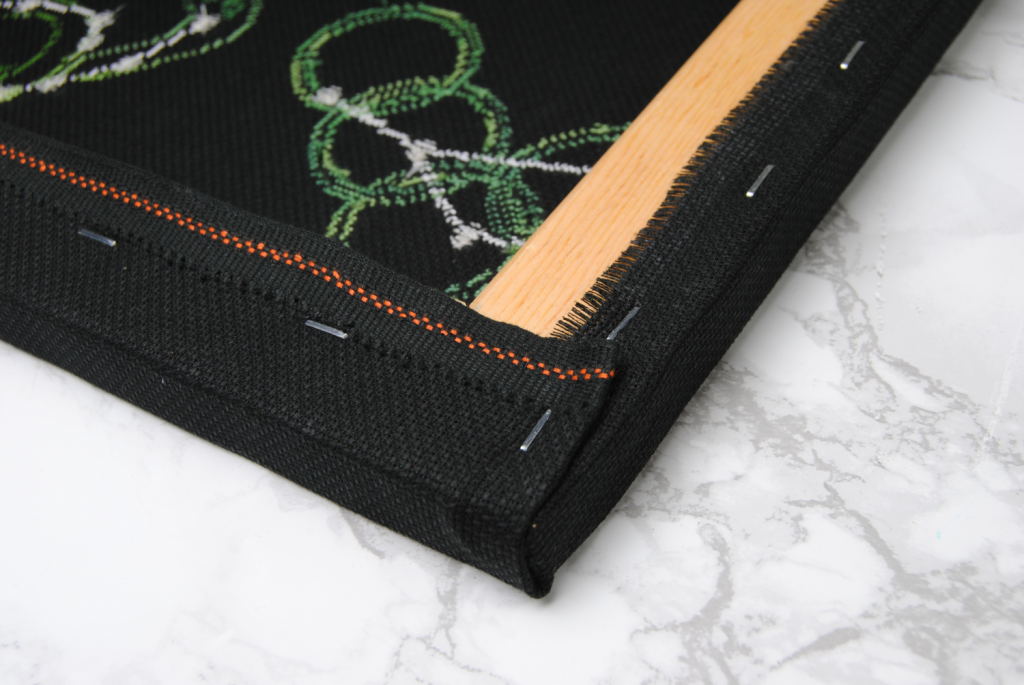
Once you’ve finished stapling your cloth on, attach the hanging mount if desired. You’re now ready to hang that stretched canvas finish on your wall!
Want to hide the back of your stitch?
Note that you could do this entire process over an already pre-stretched painter’s canvas if you prefer or already have on hand. Keep in mind the white canvas can shine through the holes of your fabric and may not be the effect you’re going for.
If you want to hide the back of your stitching, it is an option though. I prefer being able to show off the back personally. Not because mine is especially neat or anything, mind you. But because it’s the back that really gives it individual personality.
Regardless, this is a pretty neat way to hang your pieces without having to try and figure out the best frame and mat color to go with your design. It also wasn’t terribly hard, even for a total newbie like me.
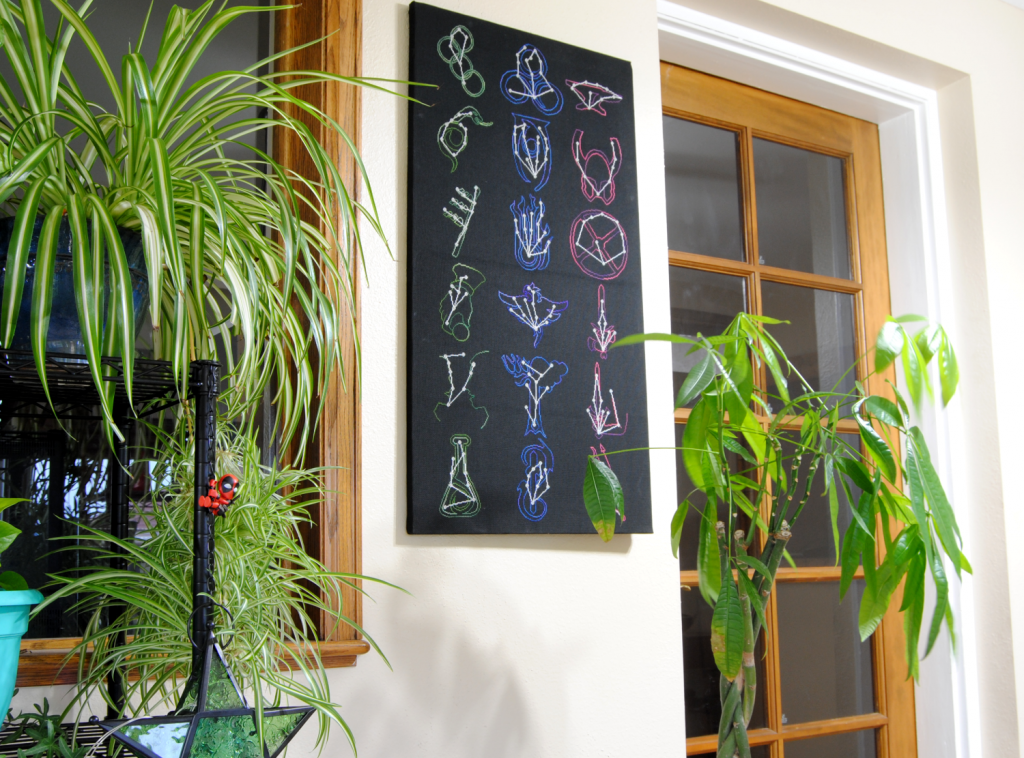
Mine also glows in the dark! Or for the photo’s sake, under blacklight. How cool!
