Cross Stitch Gift Card Stocking Tutorial
Table of Contents
What’s a Gift Card Stocking?
Ok, first off. What is a gift card stocking anyway? It’s pretty much what it sounds like. A Christmas stocking like you would put on your mantle and fill with goodies for the holiday. But small sized just large enough for a gift card. A mini stocking.
You can sew a stocking as normal and just make it smaller. Or crochet one, knit one, etc. But this is a cross stitch site, so we’ll be cross stitching one!
If you’d like to skip ahead to the template/tutorial, make use of the Table of Contents. Otherwise let’s discuss what you can put in one first. Y’know, to really convince you that you need one.
This post may contain affiliate links. If you buy something using one of these links, I earn a small commission. However, there is no extra cost to you. Thanks for understanding! Learn more in my Disclosures & Privacy Policy.
Other Gifts That Fit in a Small Stocking
Don’t like gift cards? What else can you put in a small stocking? Obviously size is the main factor, but here’s just some quick ideas to get you started. Get creative!
- Cash – Ok that was an easy one, and is similar to a gift card but doesn’t have to be spent at a specific shop.
- Custom coupons – Customize them to the things your partner or family would want!
- Chapstick / Lip Balm – Because you should definitely moisturize.
- Candies or Chocolates – Fill them with small individually wrapped candies. I’m partial to Andes mints.
- Jewelry – Not the kind you put in a fancy box and spend entirely too much on. But a handmade bracelet, a set of earrings, a pack of body jewelry.
- Dice – I was able to fit a full set of D&D dice! Not in a chessex box, just loose.
- A Pet Rock – Or just a cool rock/crystal you found.
- Small Sewing Supplies – If your recipient is also a stitcher, consider small notions like a spool of Kreinik, a small tub of thread conditioner, a nice new pair of embroidery scissors, a scissor fob or needleminder, a fresh pack of needles, etc. Check out my Gift Ideas For Your Favorite Cross Stitcher post for more suggestions big and small!
Plus it doubles as an ornament! So you can hang your gift in the tree itself rather than under it!
Designing a Gift Card Stocking
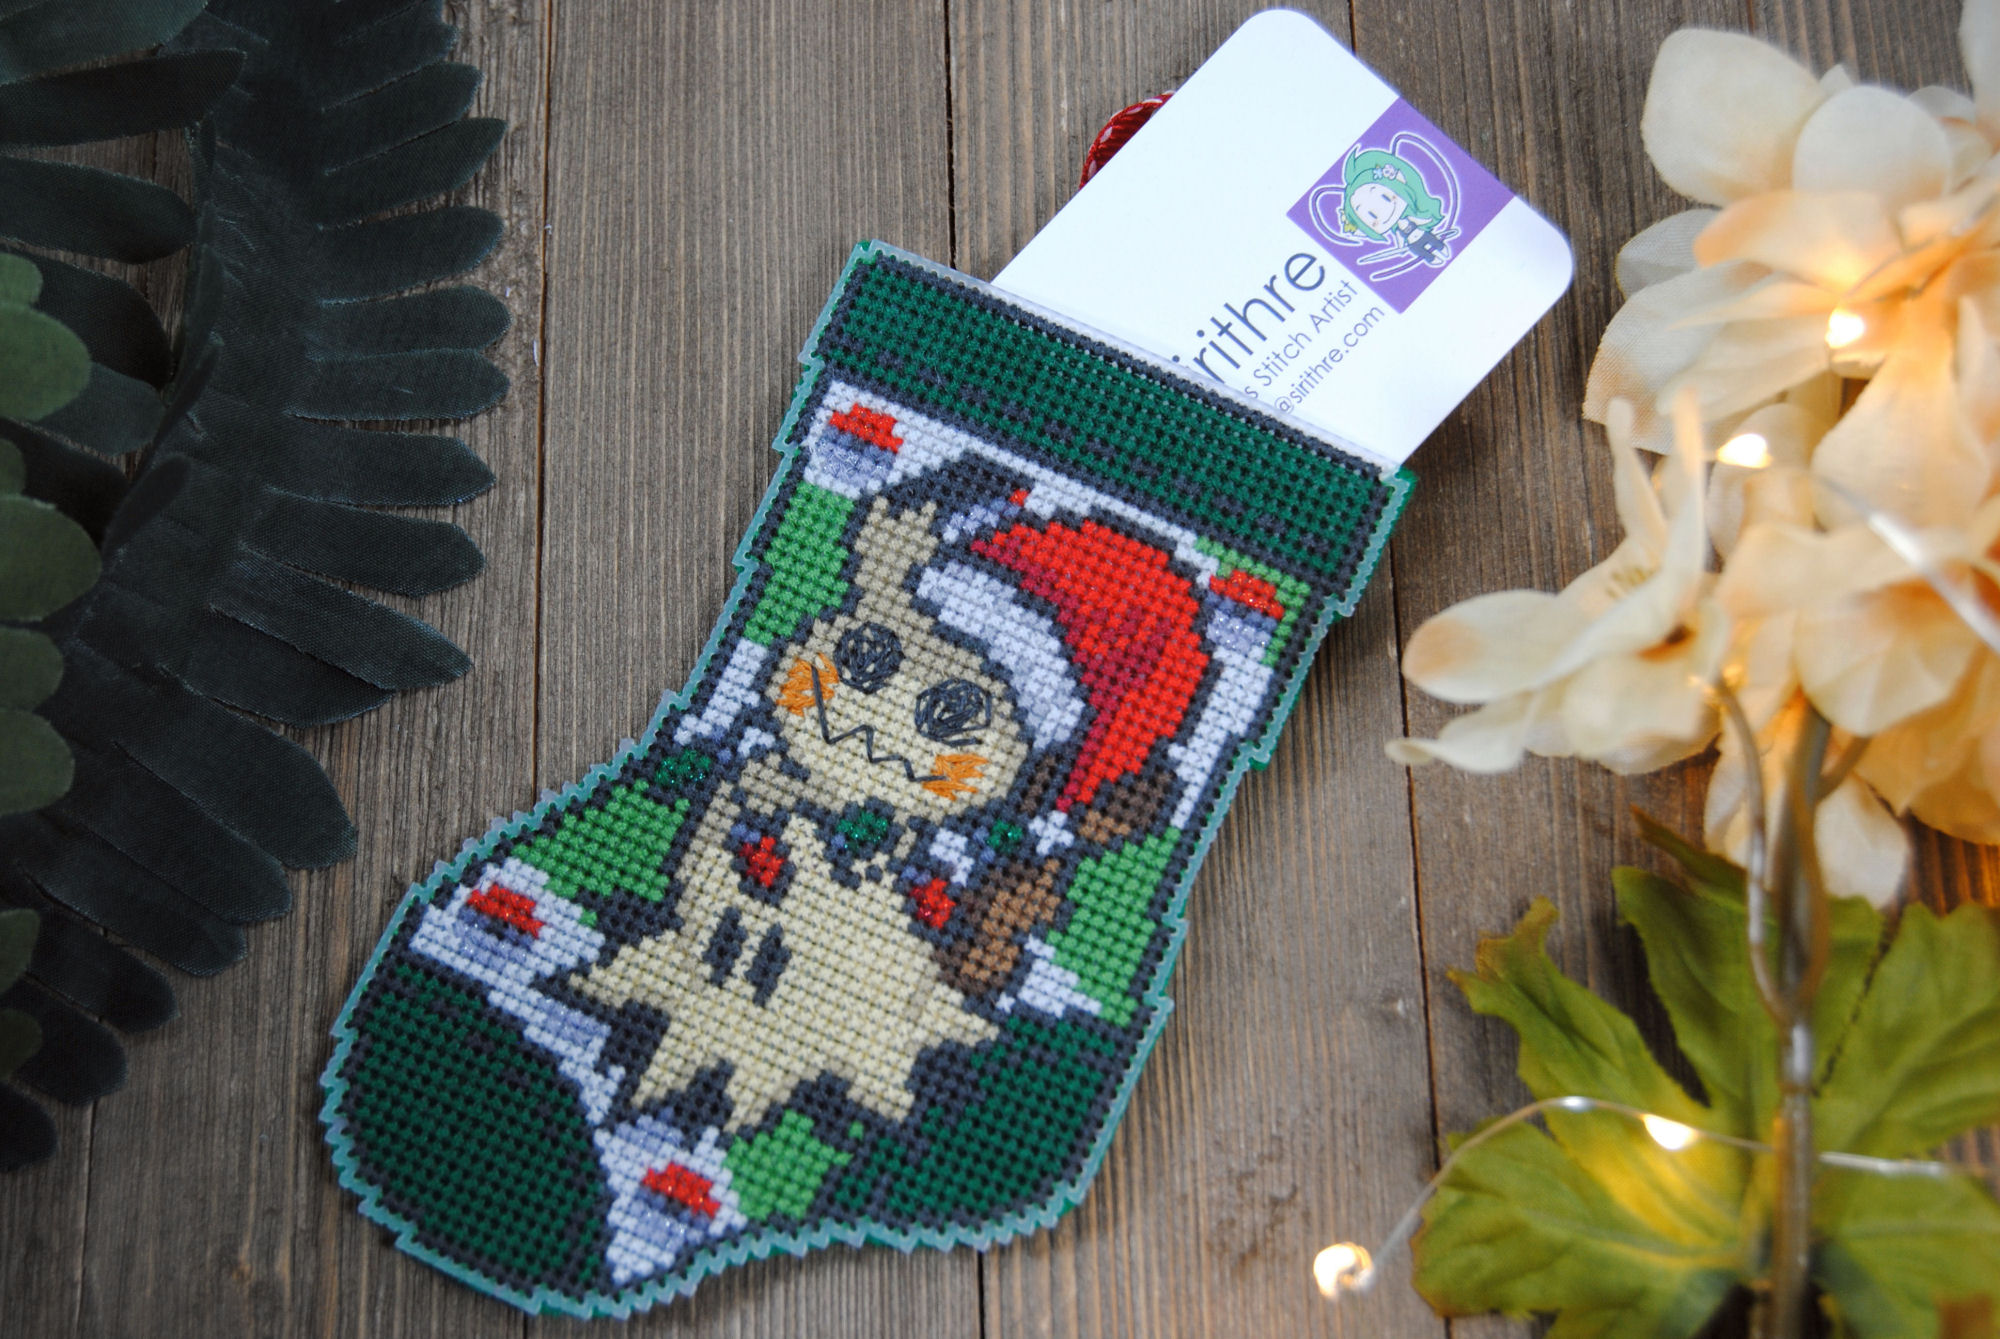
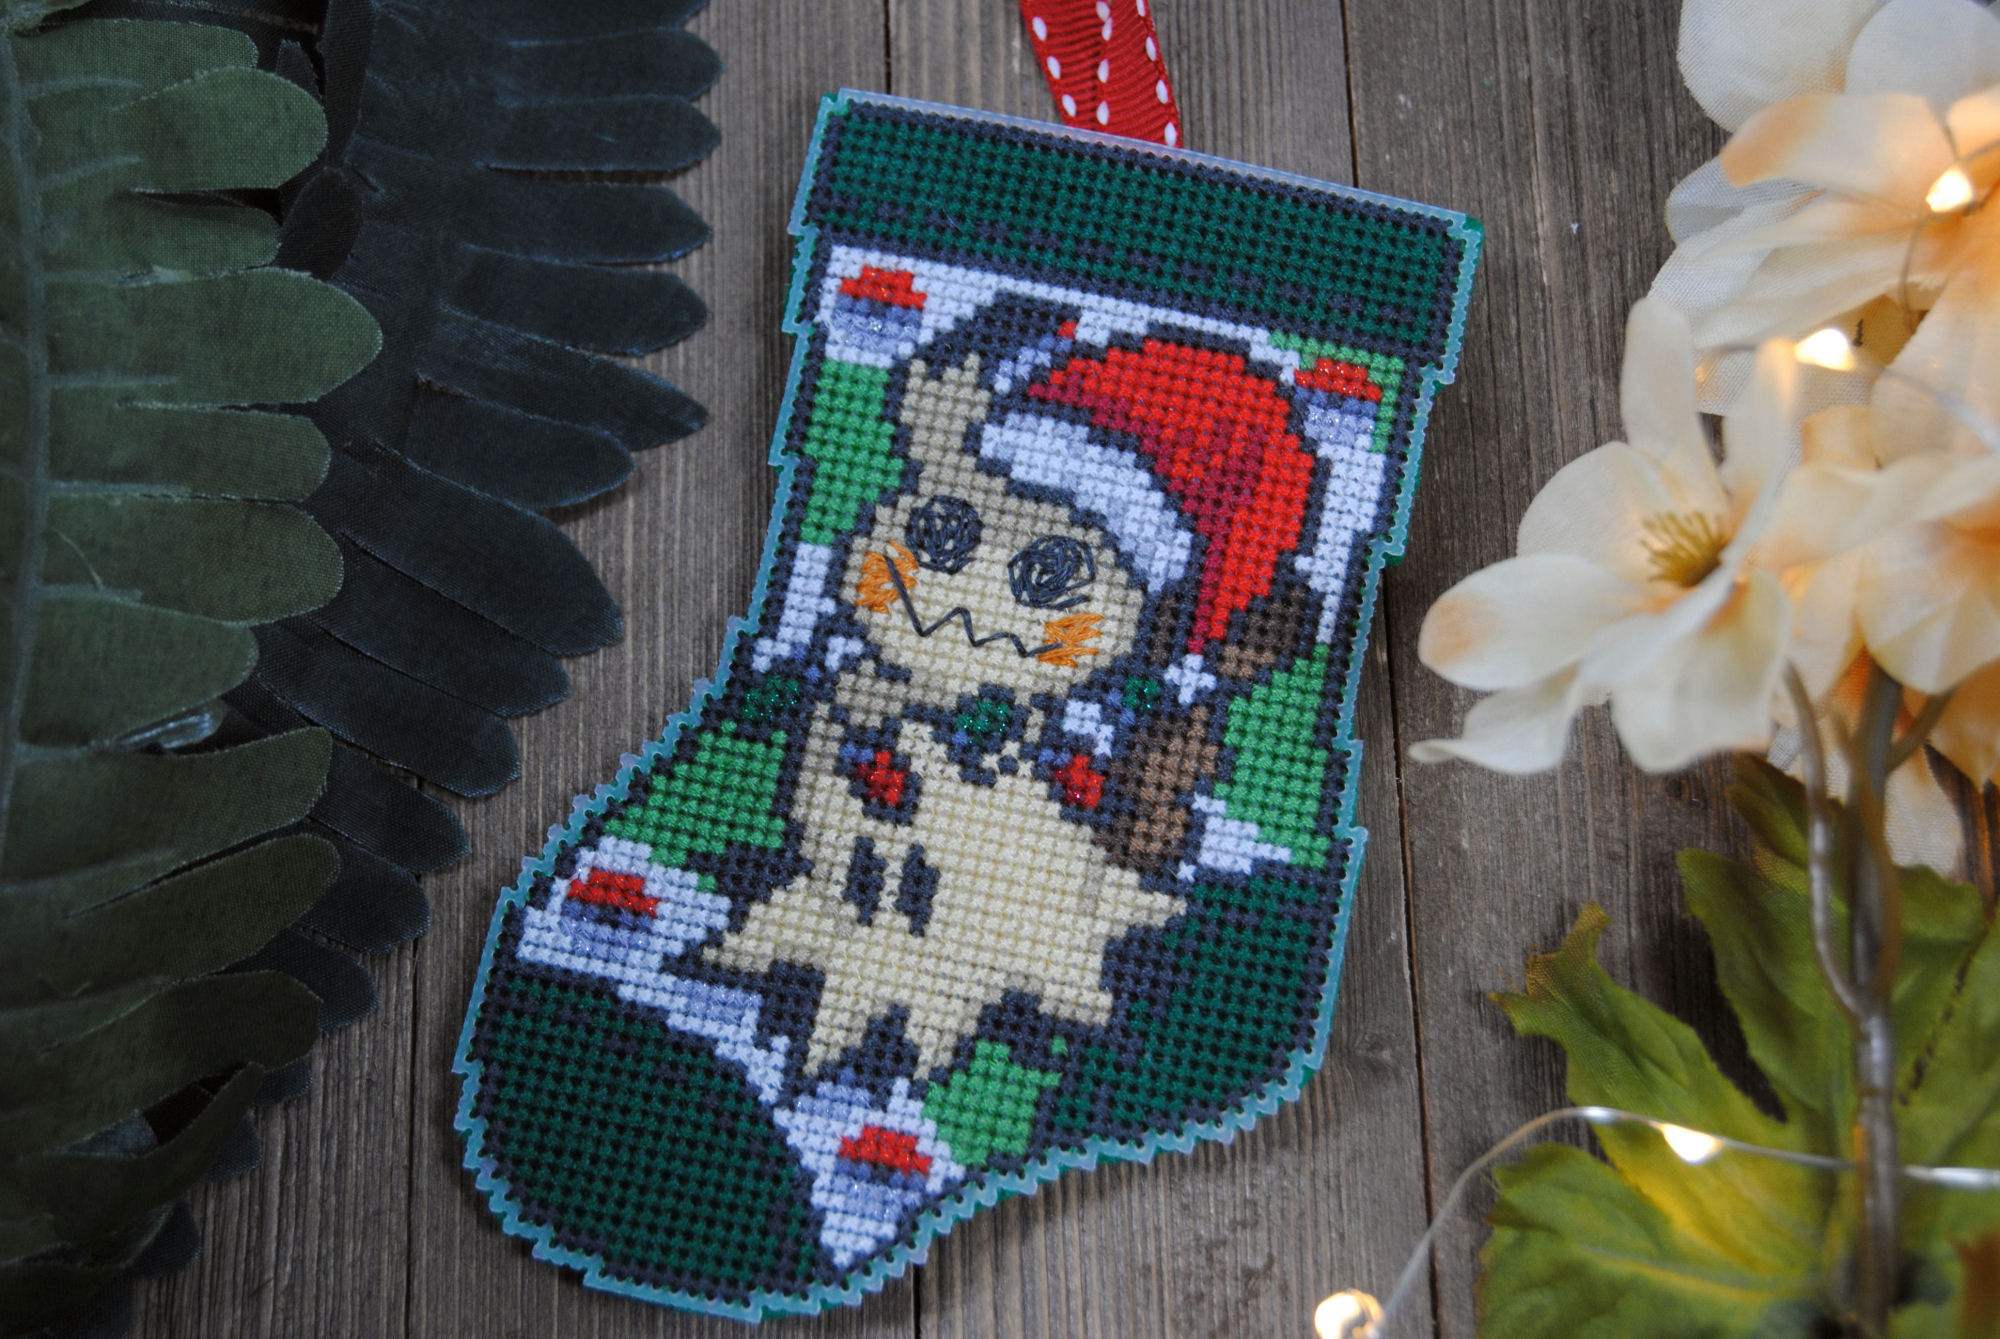
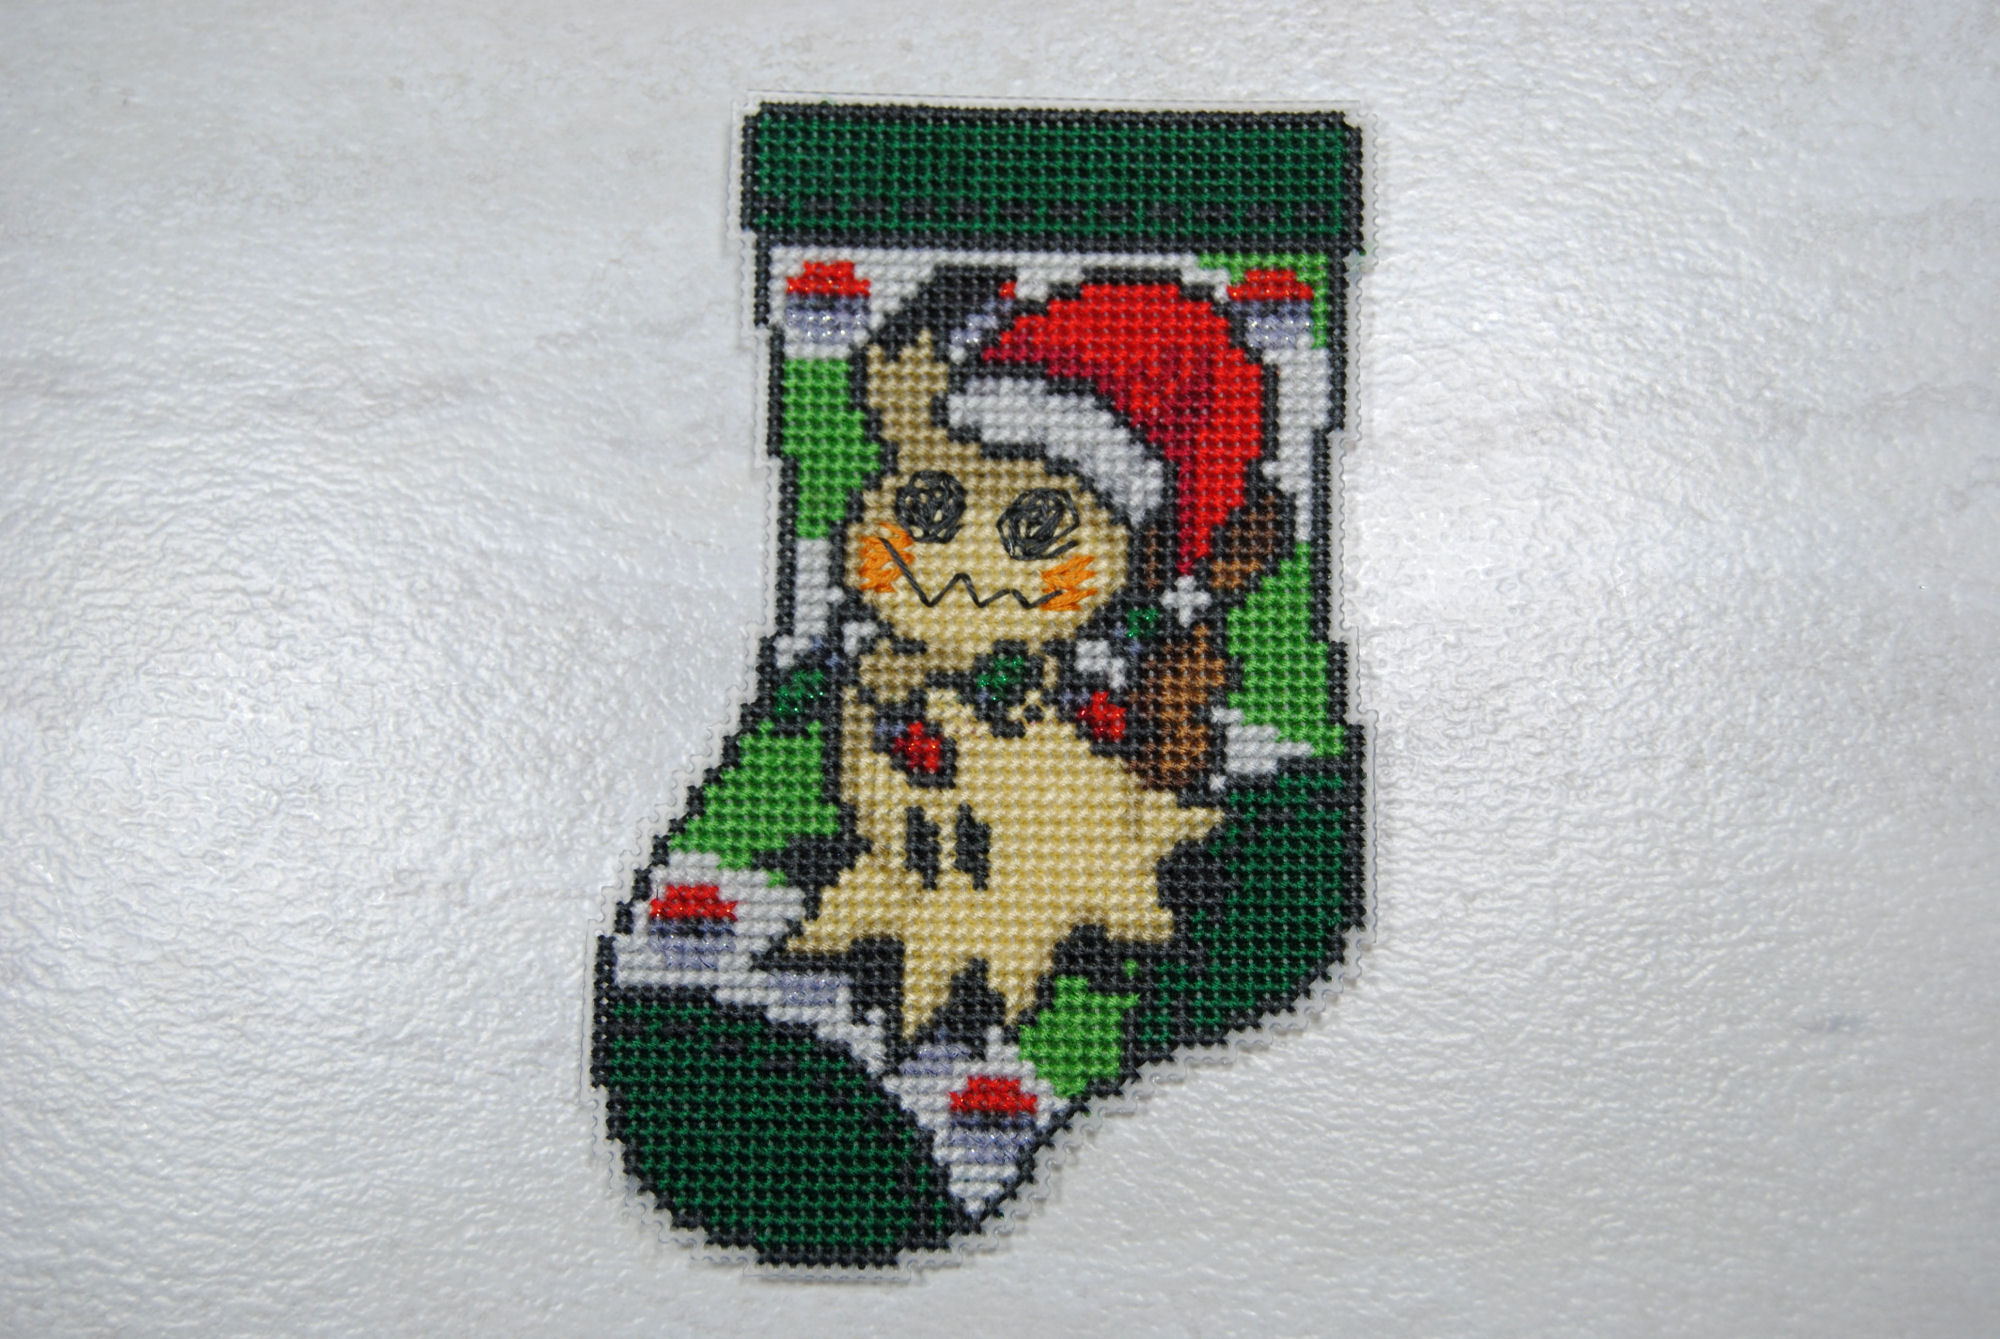
Alright, you’re sold. Let’s make one! First off we need a design for the stocking. Of course you can get the Mimikyu pattern I’m using as an example from my Patreon (before March 1, 2024) or Etsy (after Jan 3, 2024).
Otherwise, I’d like to help you design your own! So here’s the outline I made for my design:
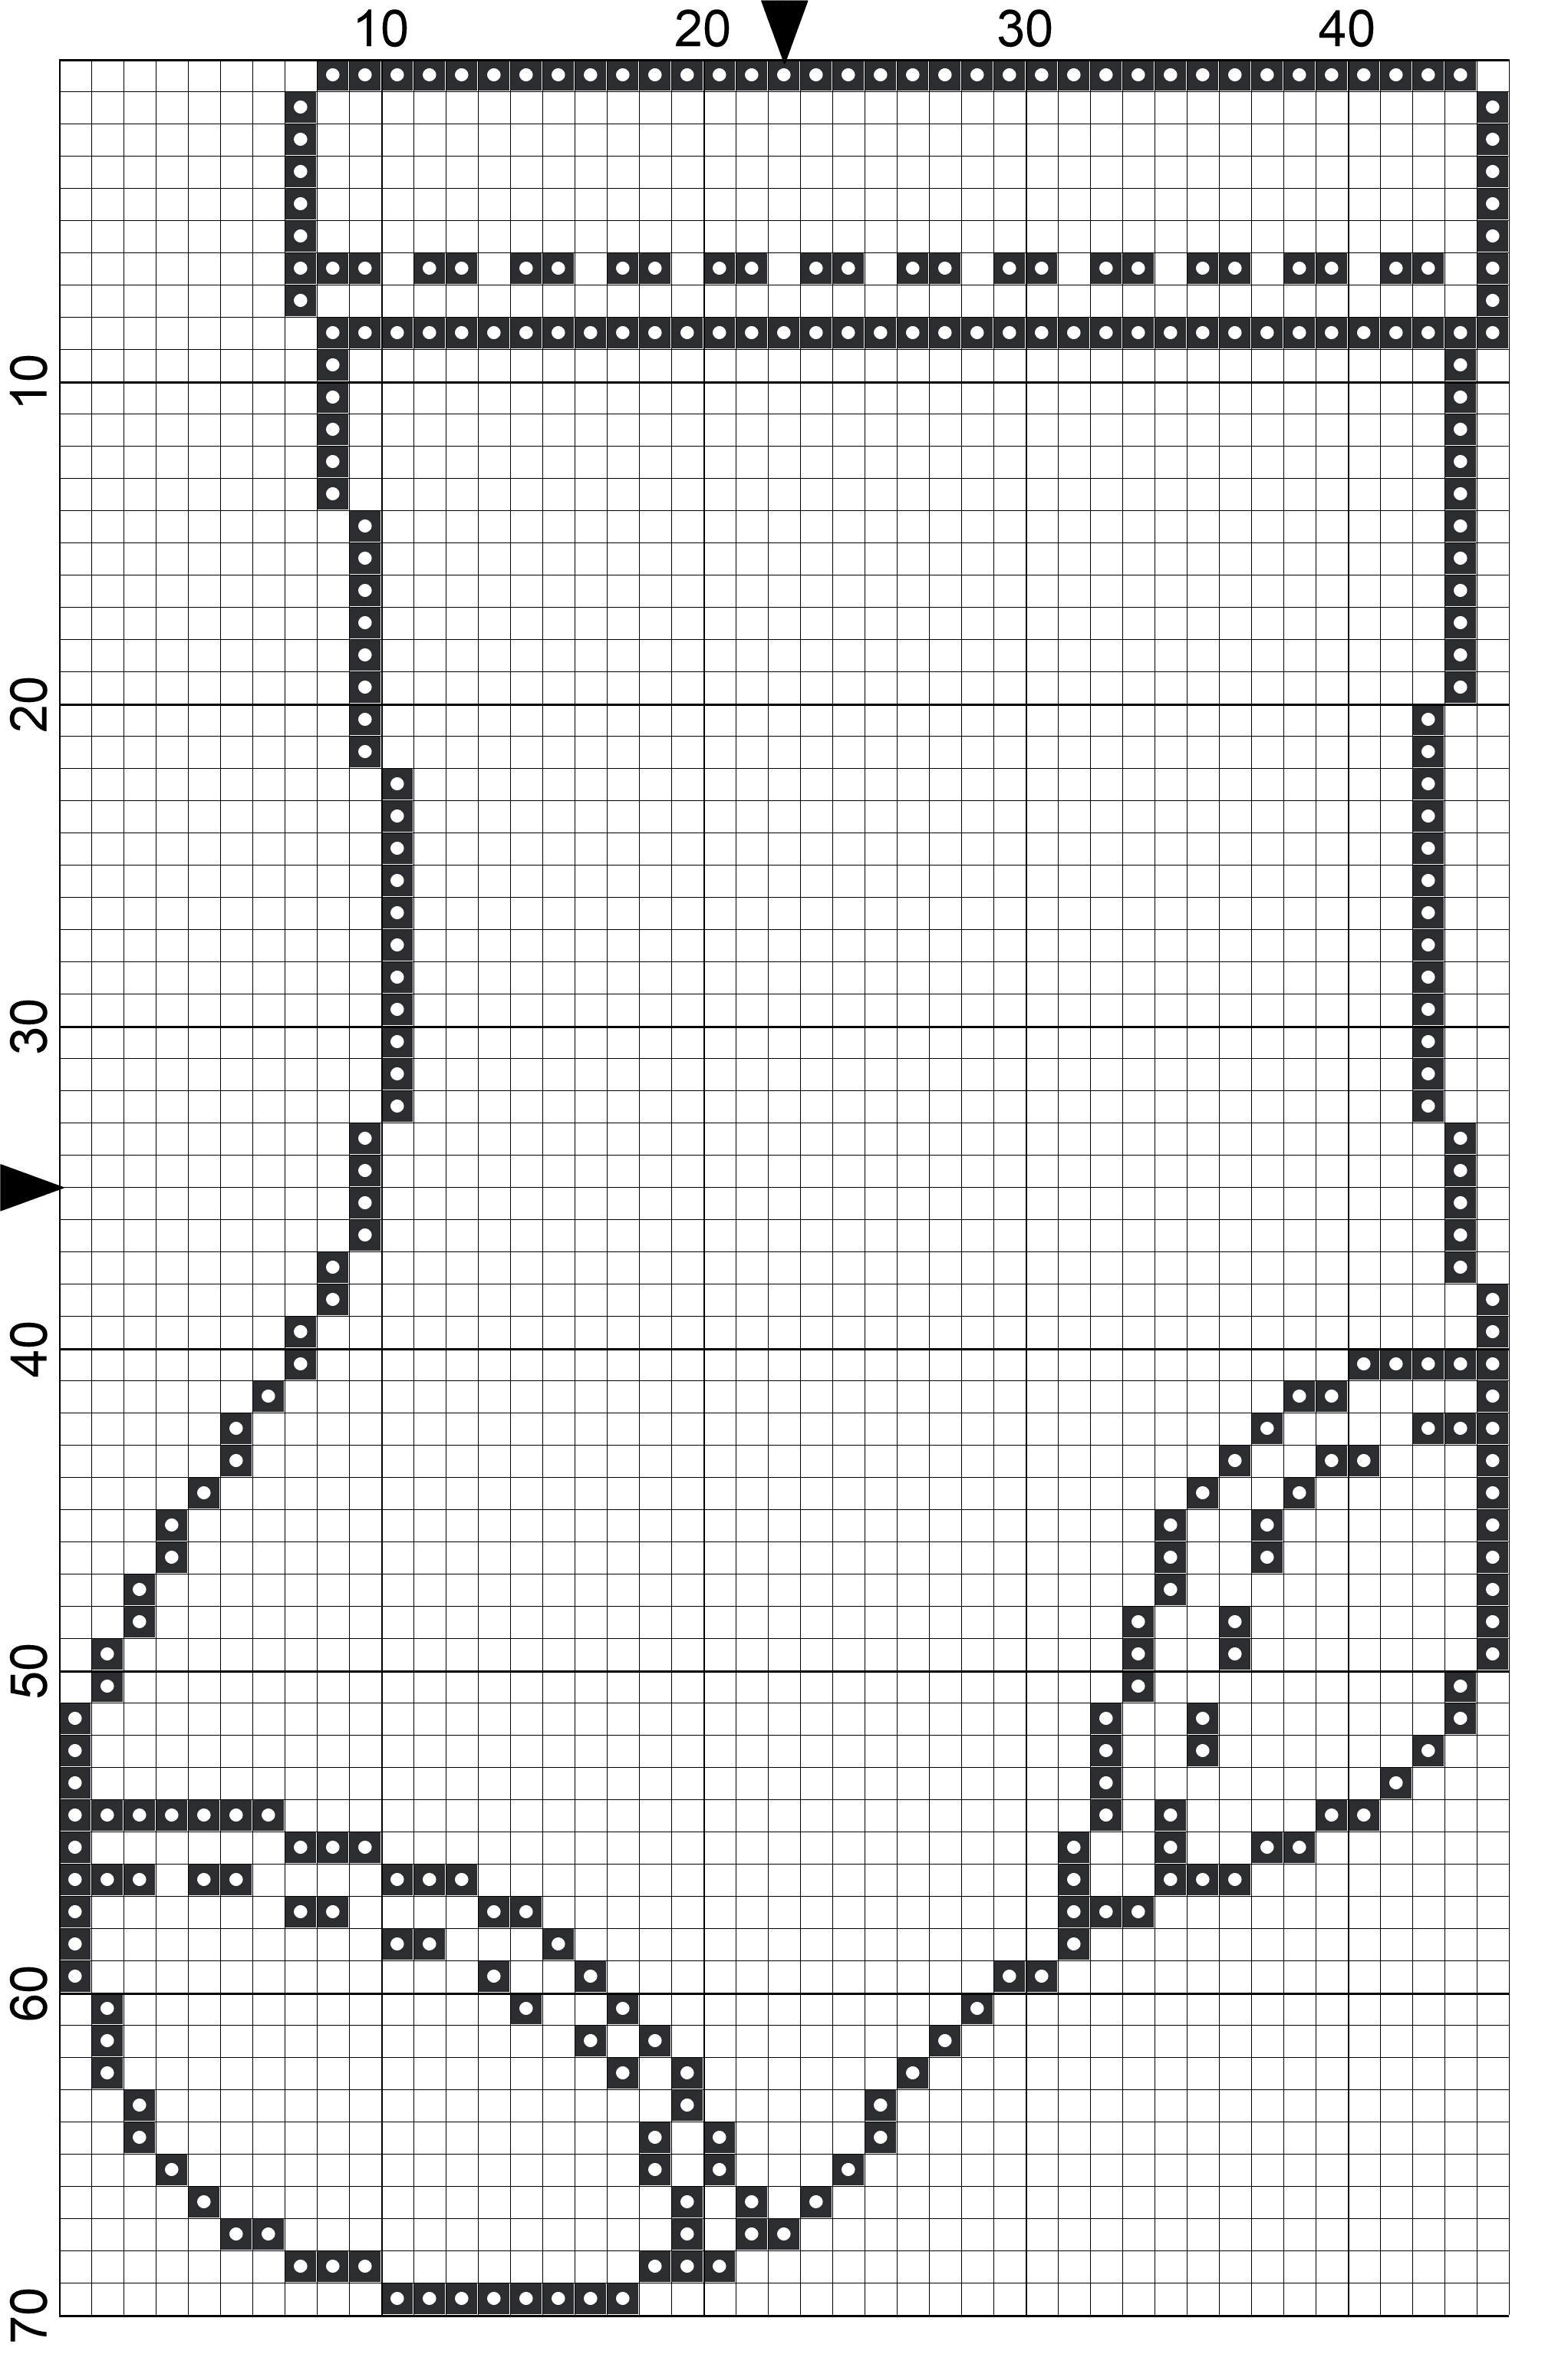
If you’re not normally a designer, that’s okay! Click on that template, print it out, and try drawing on it in colored pencils. It doesn’t have to be perfect! If you don’t think of yourself as an artist, you can lean into that ‘ugly Christmas sweater’ style, or find some mini designs online and just arrange them in the space you have.
But if you’re more familiar with pattern making and happen to use PCStitch, here’s a .PAT file if you’d like to design it digitally instead.
While we’re here, here’s some free backstitch fonts I found if you wanted to add a name at the top like a traditional stocking. The one that’s 3 stitches tall I think fits the outline as-is. 🙂
You can of course adjust the outline too! For example, if you want to widen the strip at the top to fit in your favorite cross stitch alphabet for personalization. Or if you want to remove the heel/toe area to have more room to design. Get creative! Change the shape entirely! I’m not gonna stop you.
Materials Needed
Once you have your design ready it’s time to stitch your gift card stocking! Here’s what you’ll need to make it.
- Plastic Canvas – I used clear 14 count to keep it the right size. You could also use vinyl aida if you prefer.
- Needle/Thread/Scissors – Pretty standard for a cross stitch.
- Felt or other fabric – I used felt, but you can back it with whatever you have on hand. A cute patterned Christmas cotton would be perfect! But make sure it’s one that either doesn’t fray or that you give yourself a seam allowance and fold it over at the edge before stitching the canvas on.
- Ribbon or thread – Really anything you can make a loop to hang it up with. Whatever you have on hand.
If you’d prefer a video version of this tutorial, I have one up on my YouTube!
Assembling your Gift Card Stocking
Start off by stitching your pattern onto the plastic canvas, then carefully cut it out leaving a one-stitch border around your design. We’ll just be attaching a backing to make it a functional stocking.
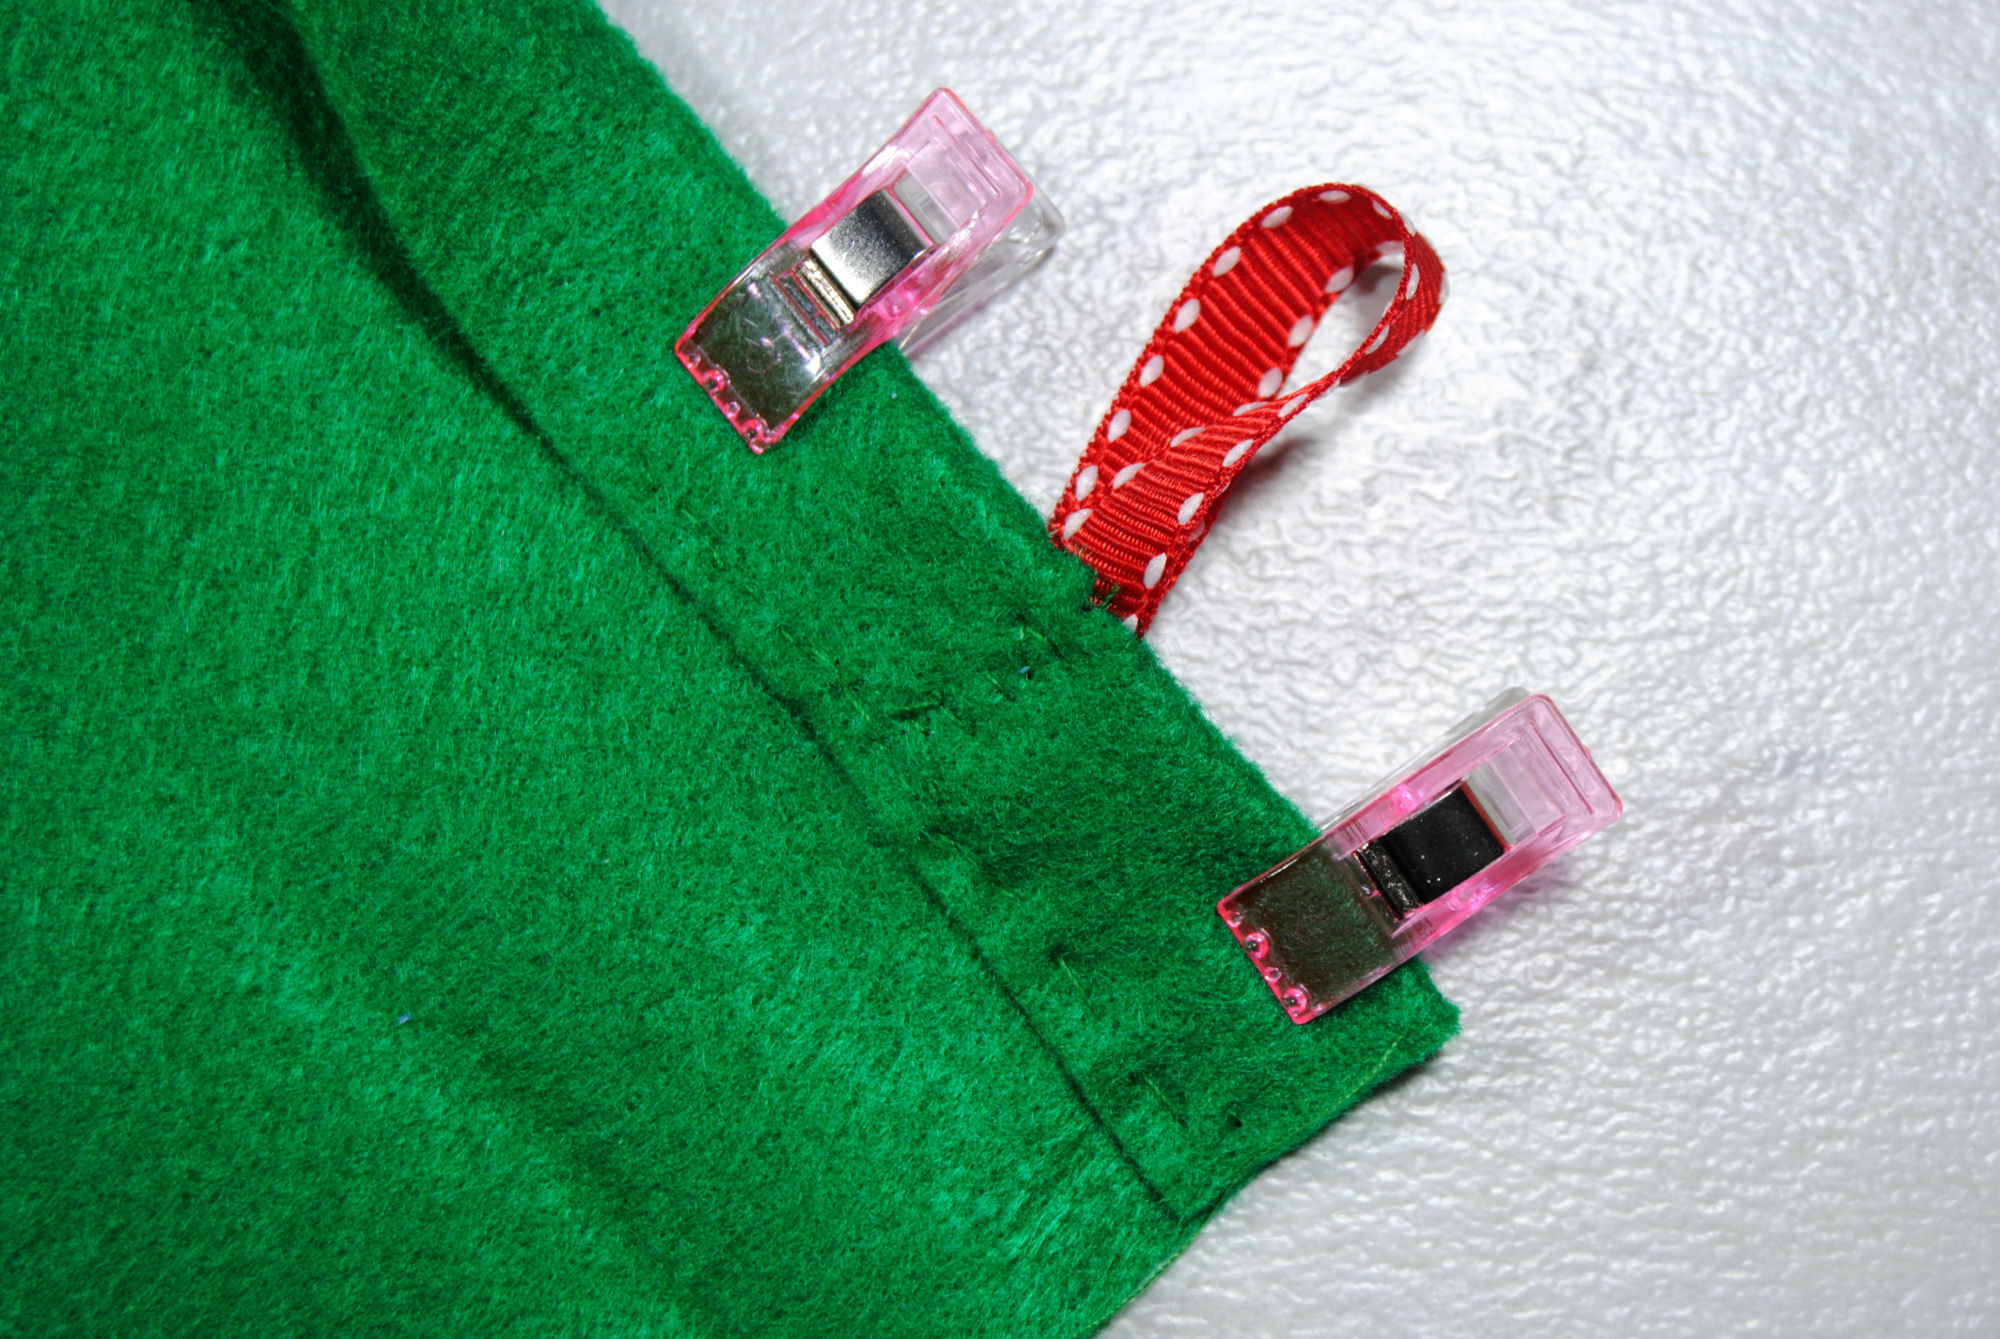
Prepping your backing
The first thing I wanted to do was make it so the opening wasn’t just a blunt cut edge of felt. So, using my stitch as a guide I folded over the edge of my felt to match the width of that green strip. I used clips to hold it in place. You can pin it, use paperclips, whatever you have on hand.
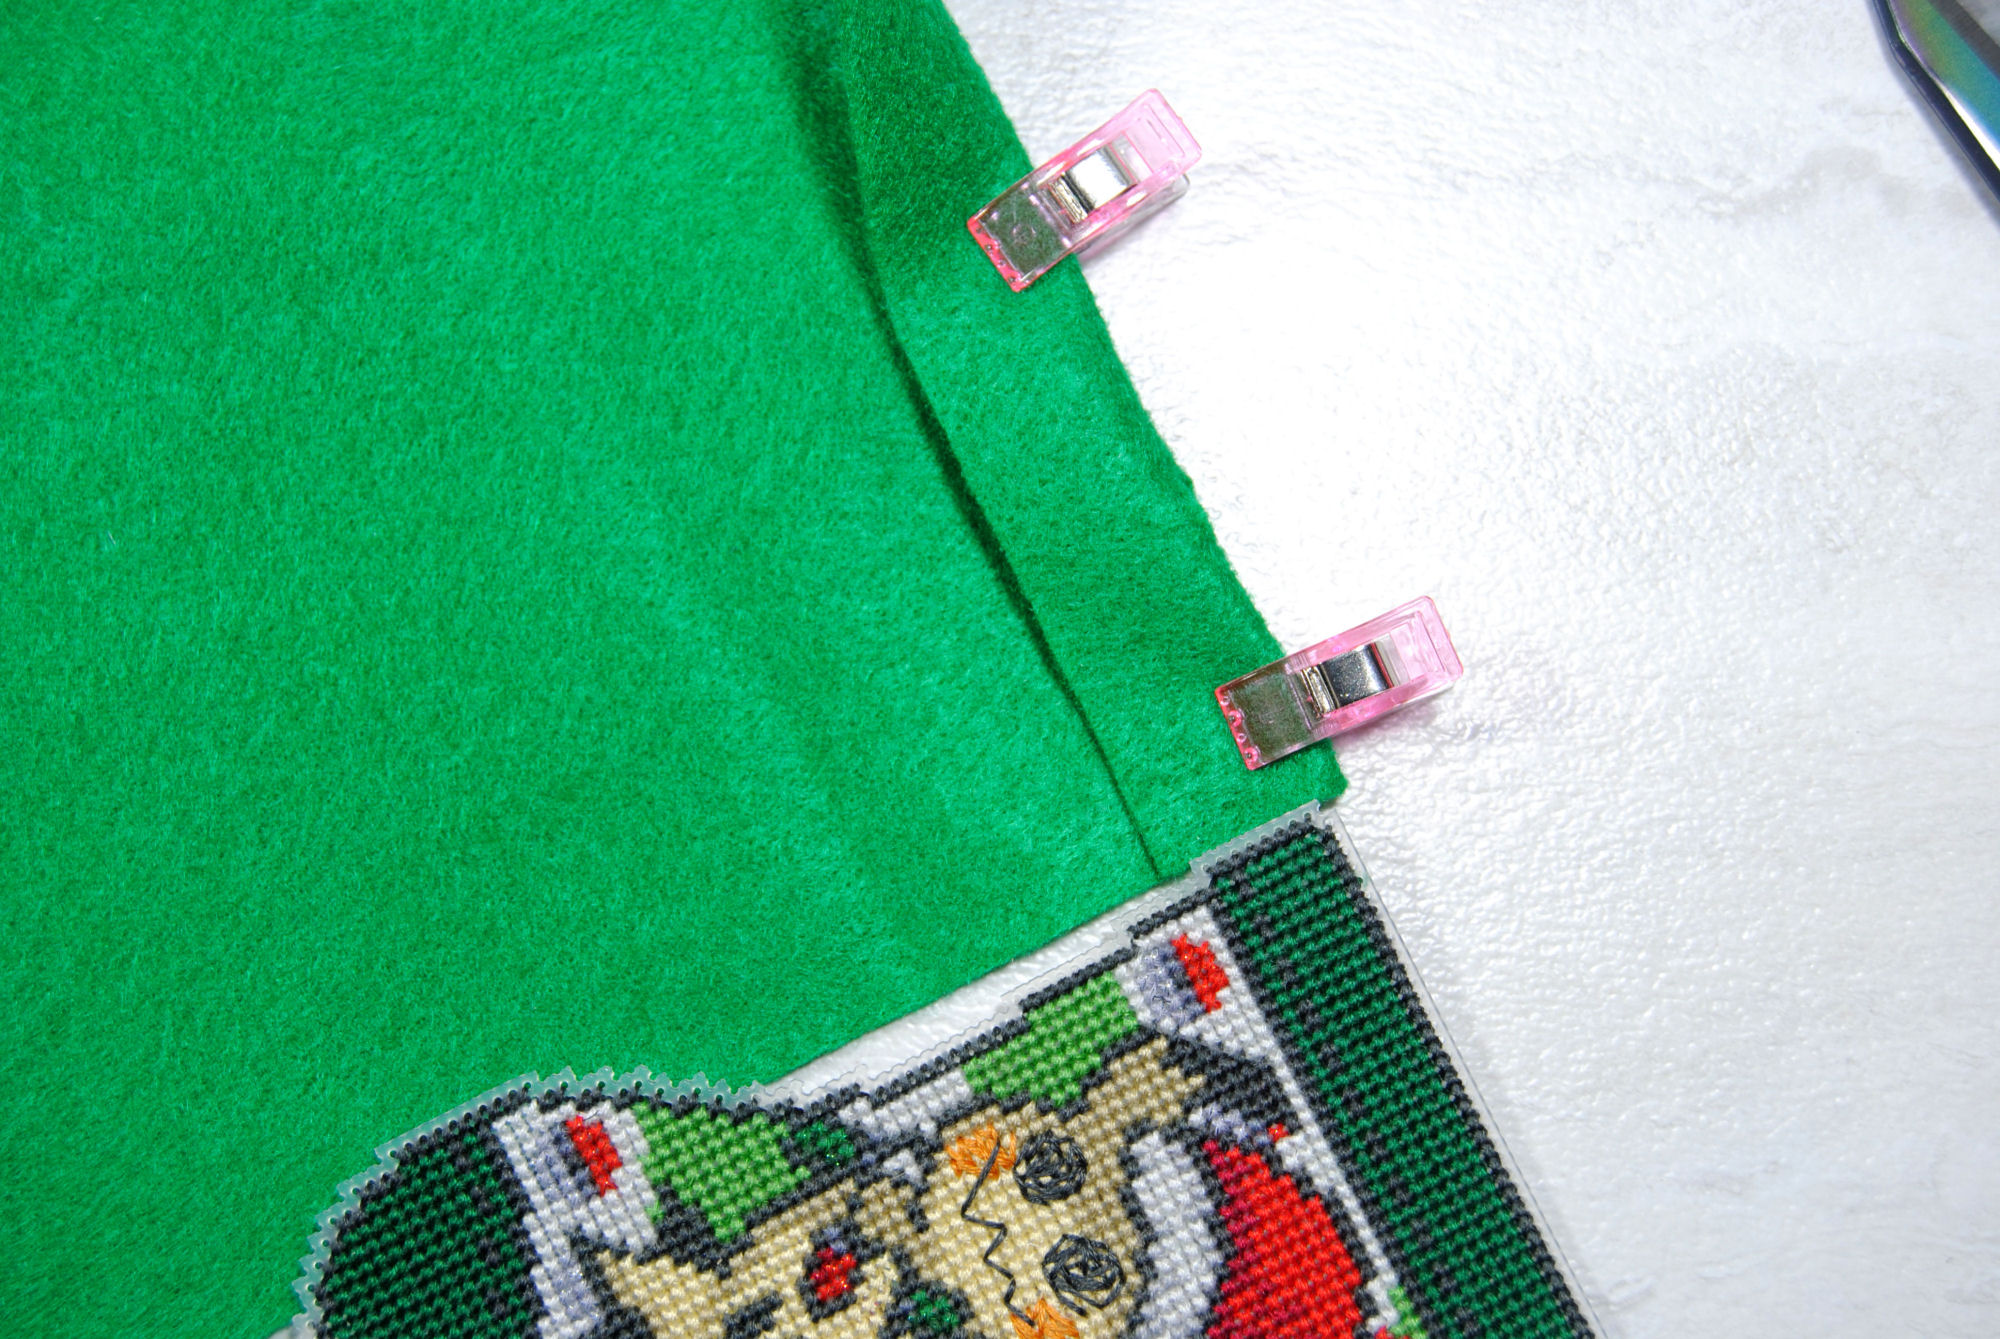
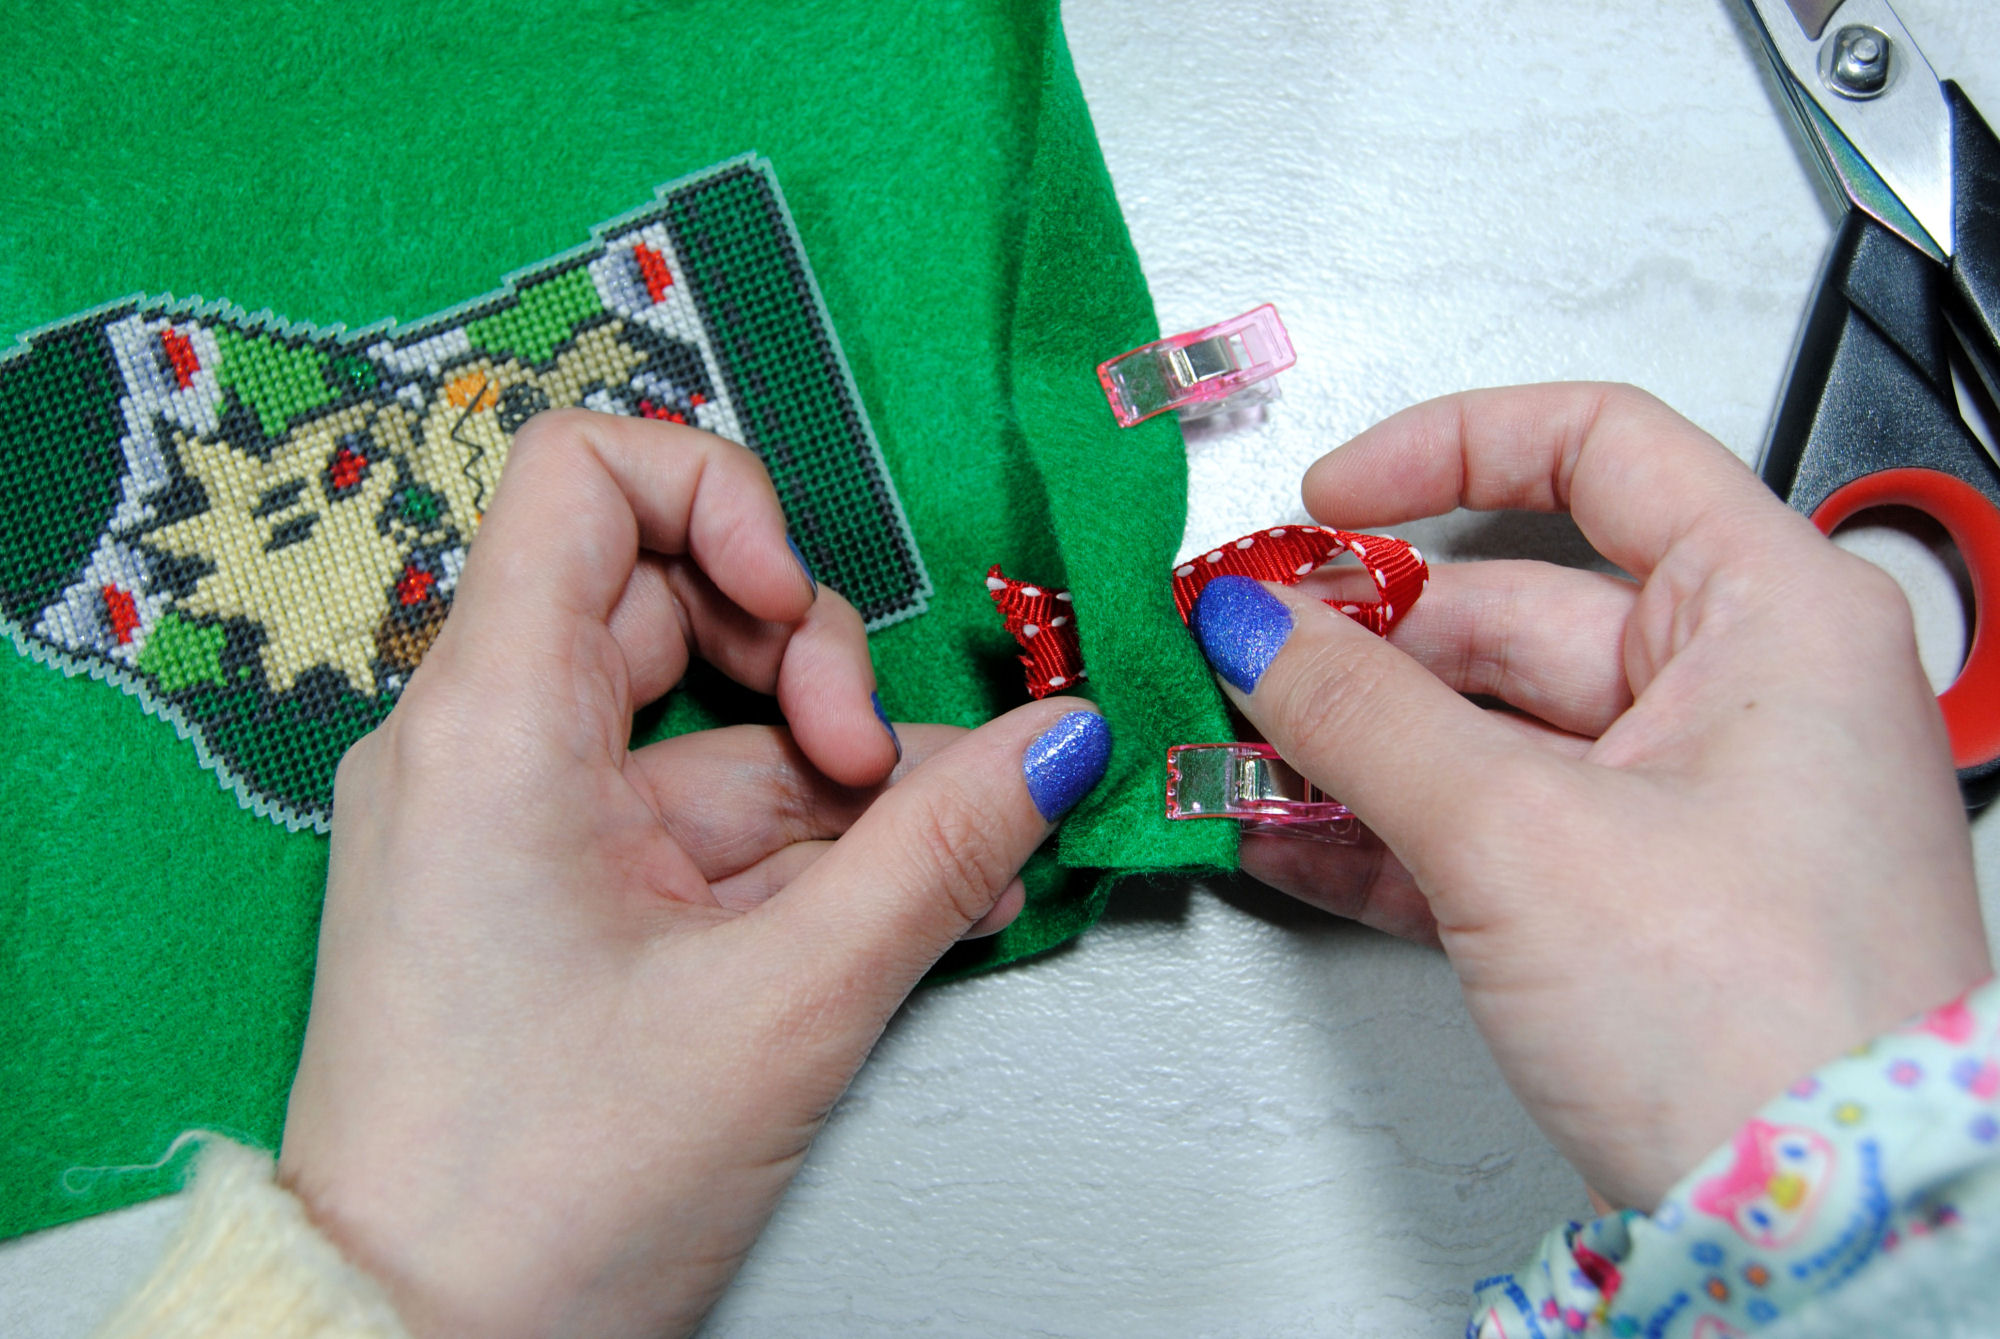
I also wanted to make sure I could hang it up easily, so I cut a small slit in the center of that folded edge.
Don’t make it too large. Just enough to fit a small loop of ribbon into that hole. Make sure it goes all the way up to the edge of the folded felt so you can easily secure it.
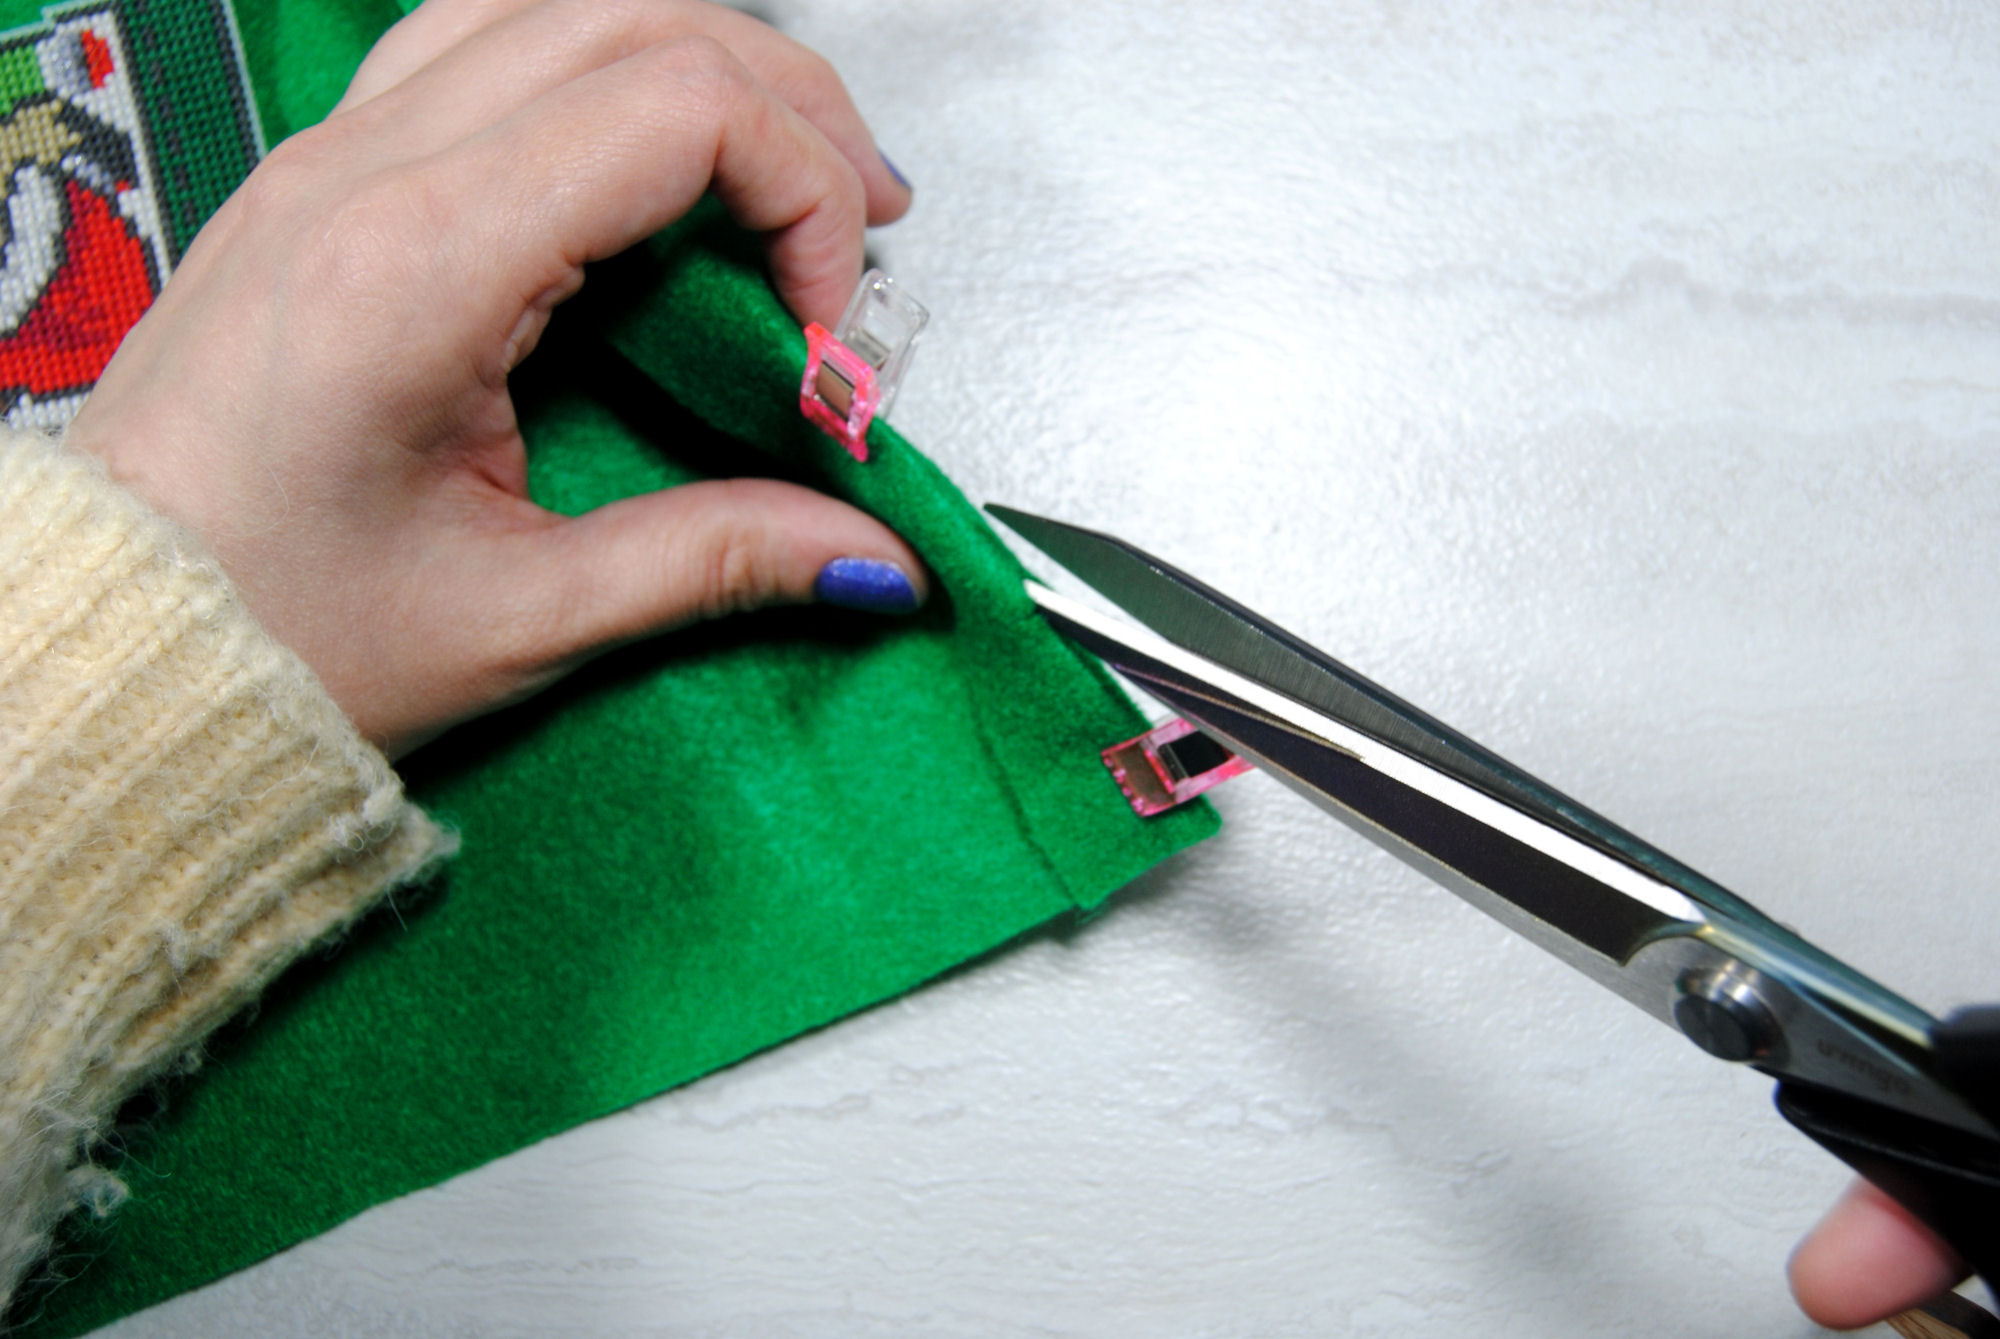
Using a strong sewing thread, I hand stitched all along the edge of the folded felt so nothing will catch on it inside the stocking. You could use a machine for this but I was too lazy to set up my machine just for a single seam.
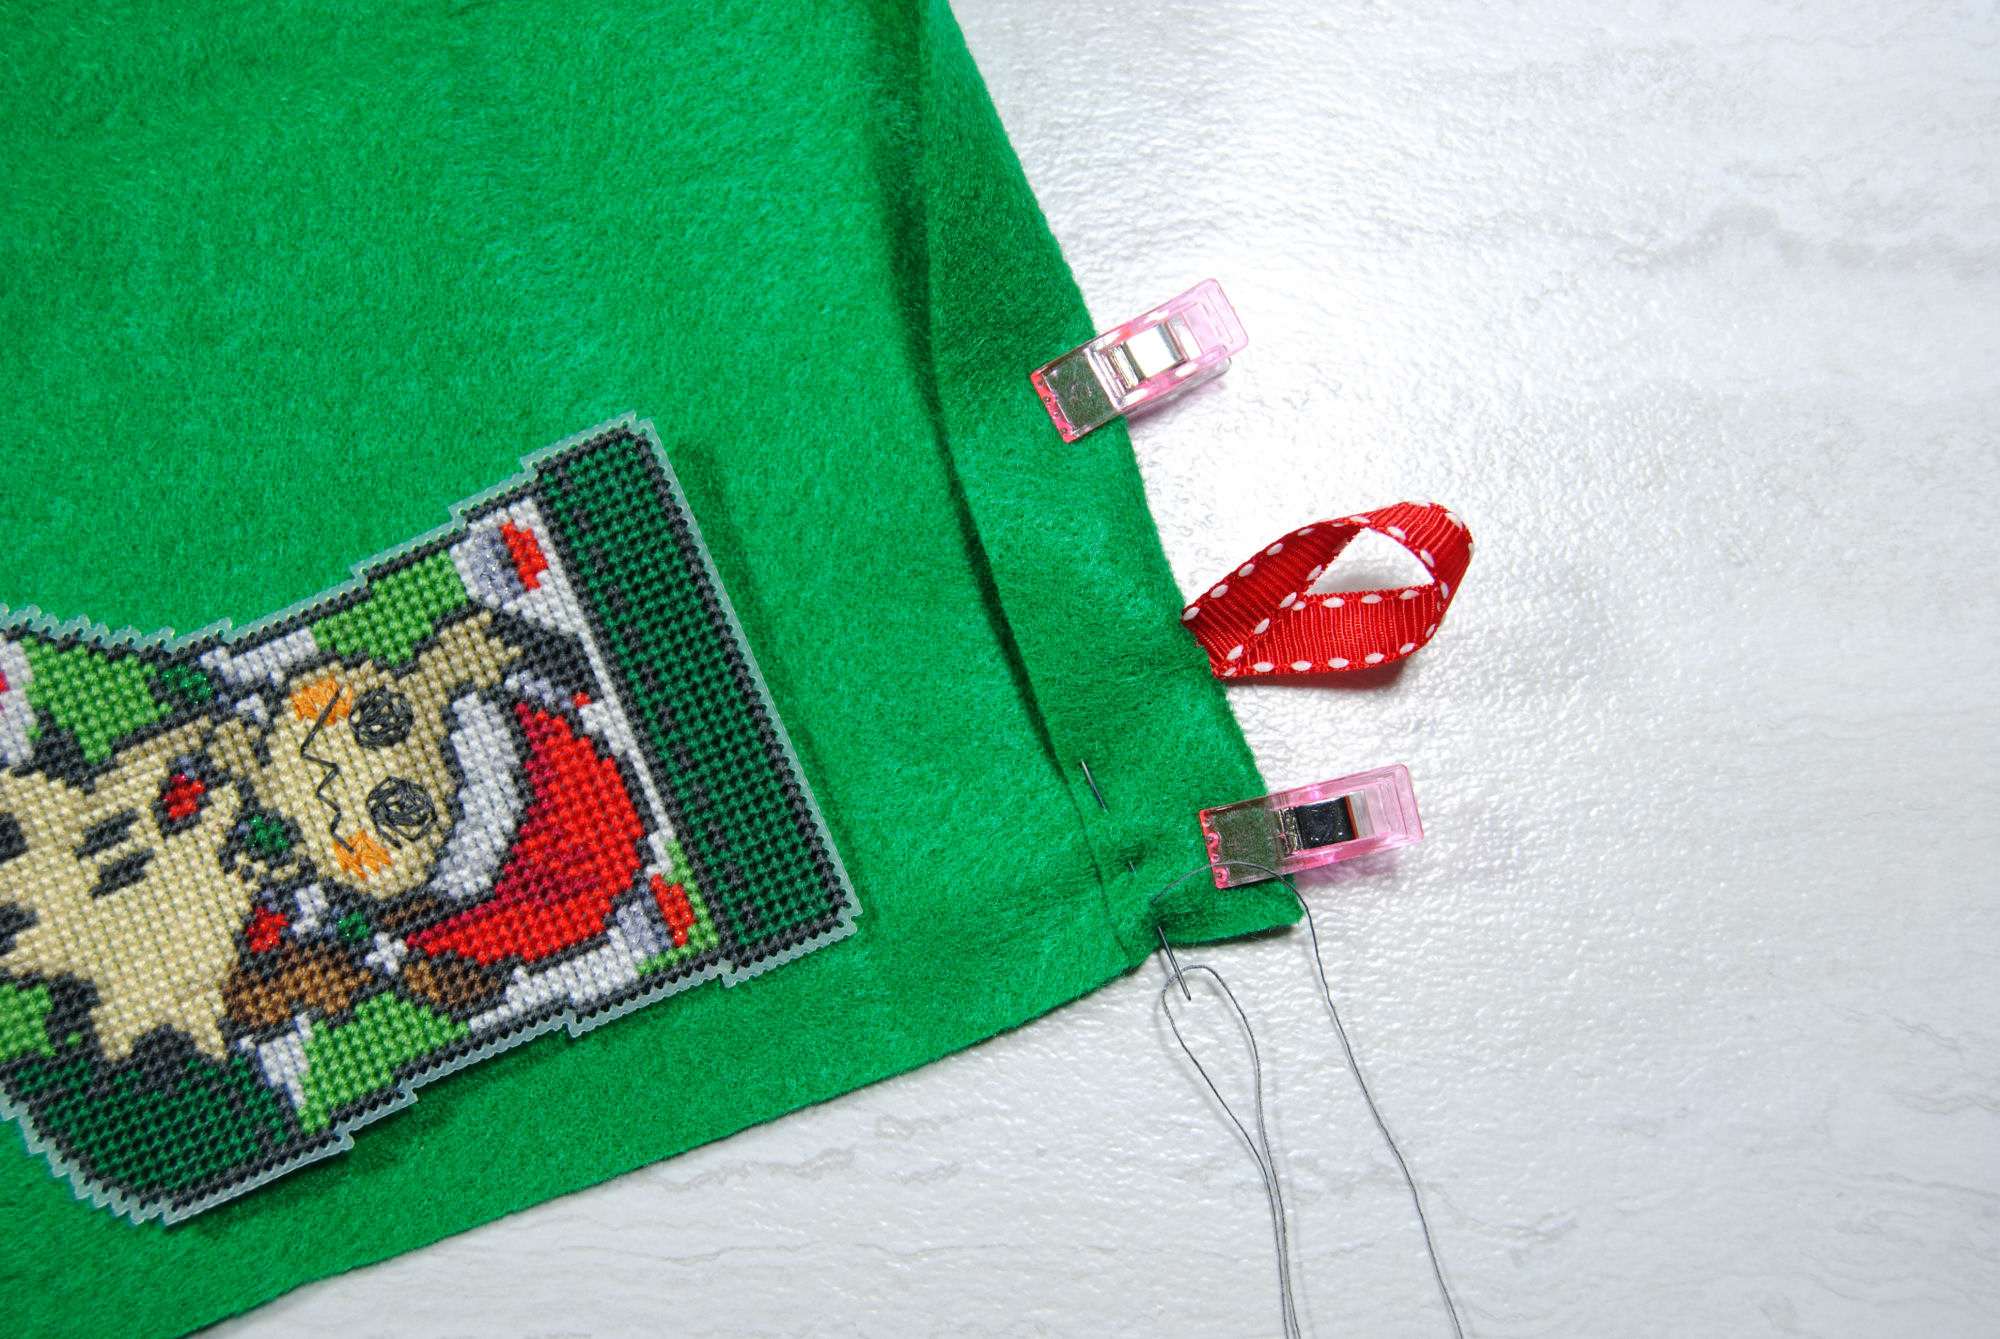
Take extra care around where the ribbon is to make sure it is secured in place. You’ll see I haphazardly stitched up the ribbon and back down before completing my seam. It’s not super tidy, but the thread matches the fabric. It’s fiiine.
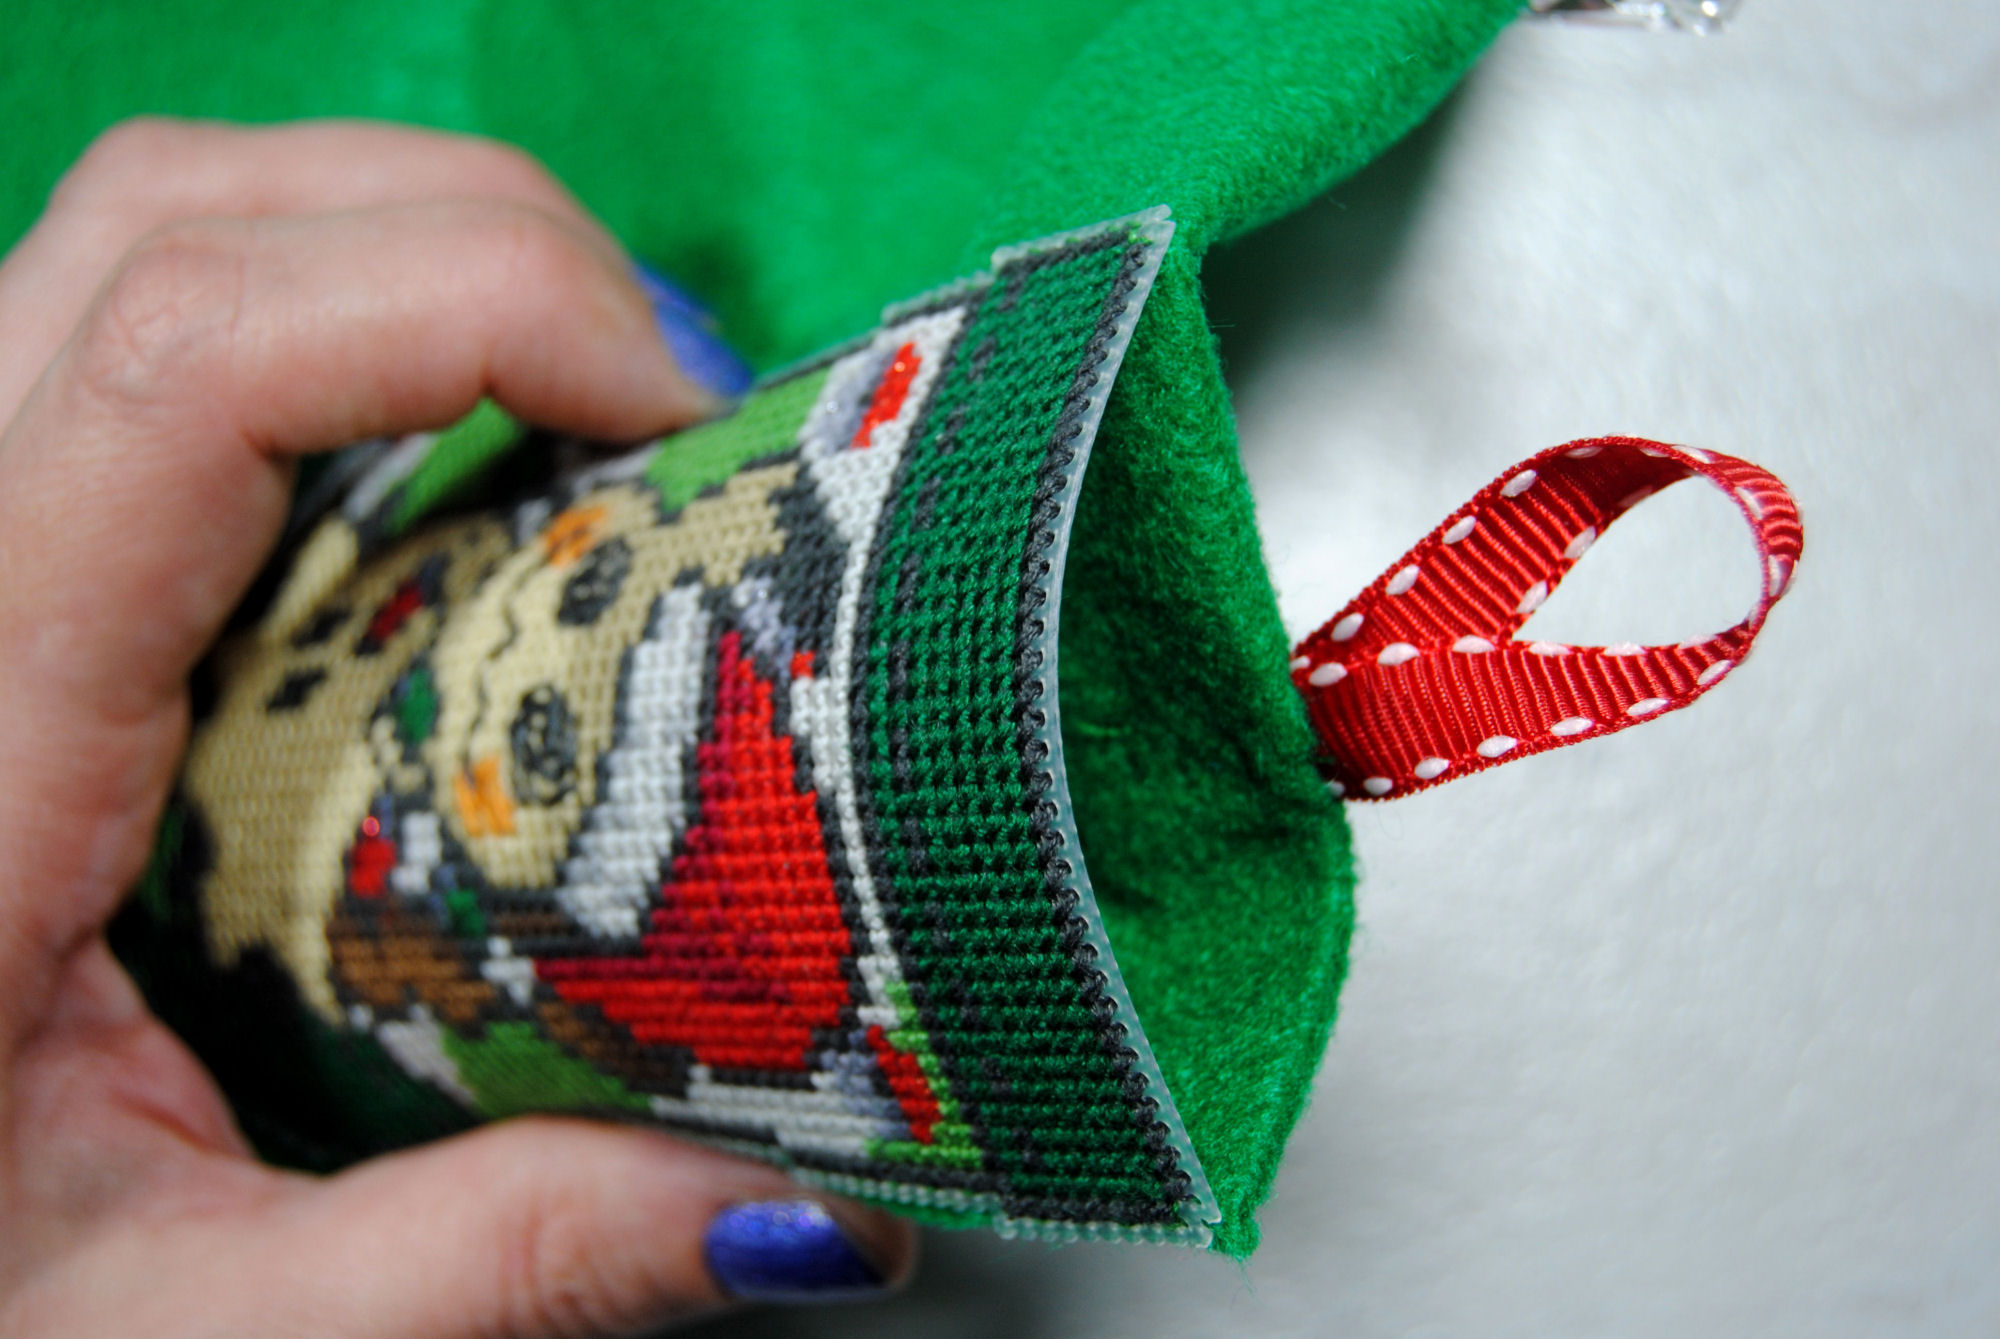
Attaching the stocking
If you’ve done any other plastic canvas work, you’re probably familiar with the following bit. I’m basically just backstitching around the edge of the stitched piece, making sure to pierce through the felt each time.
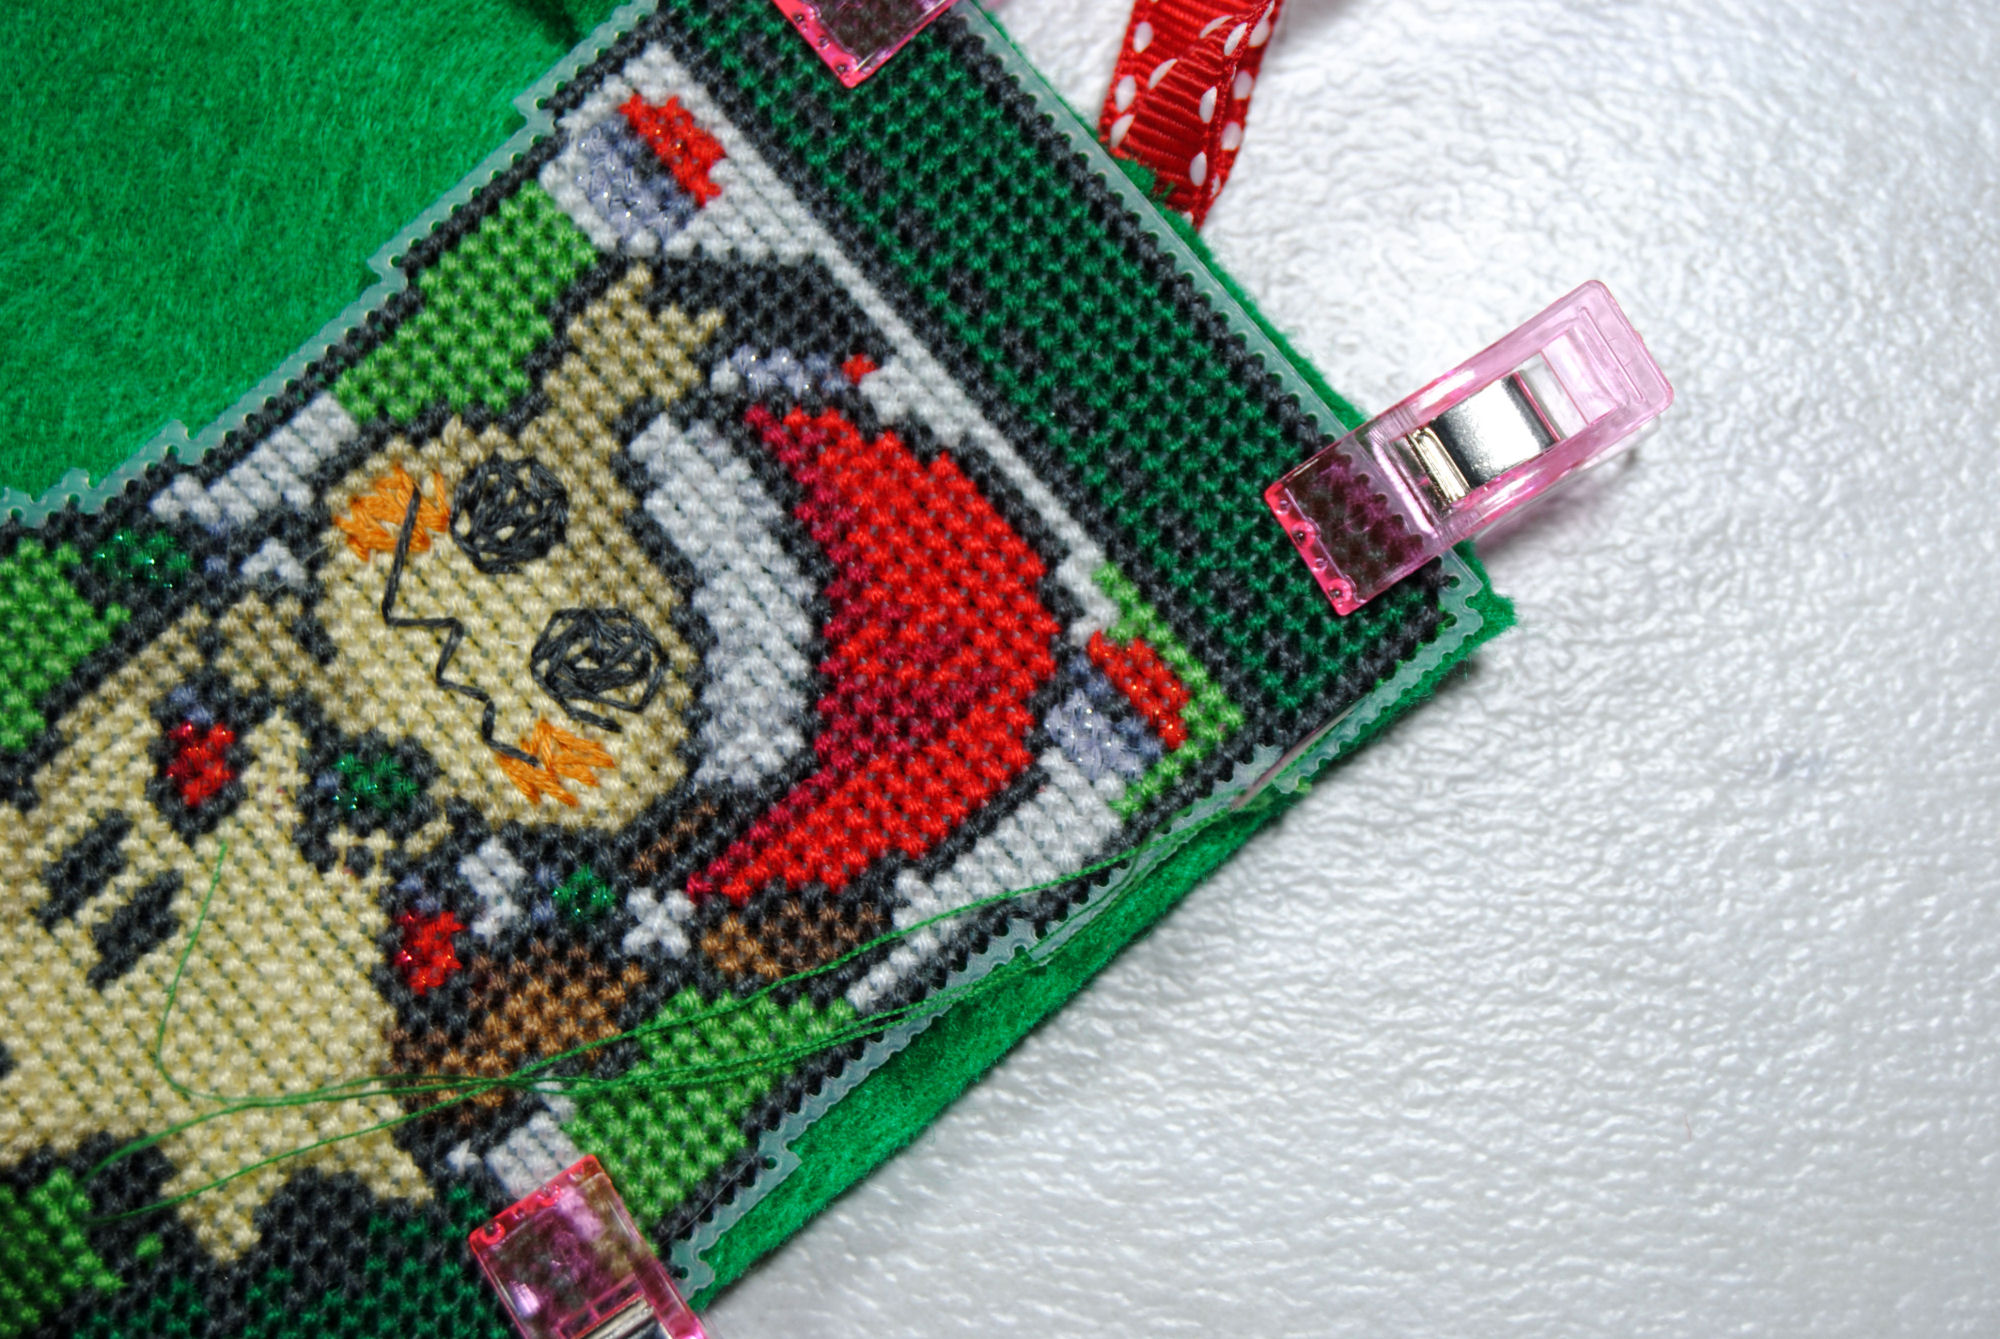
Start at the top of one side of the stocking and finish on the other side. If you don’t need it to be functional, you can close up the top as well if you like. But as I wanted to use it as a stocking, I left it open.
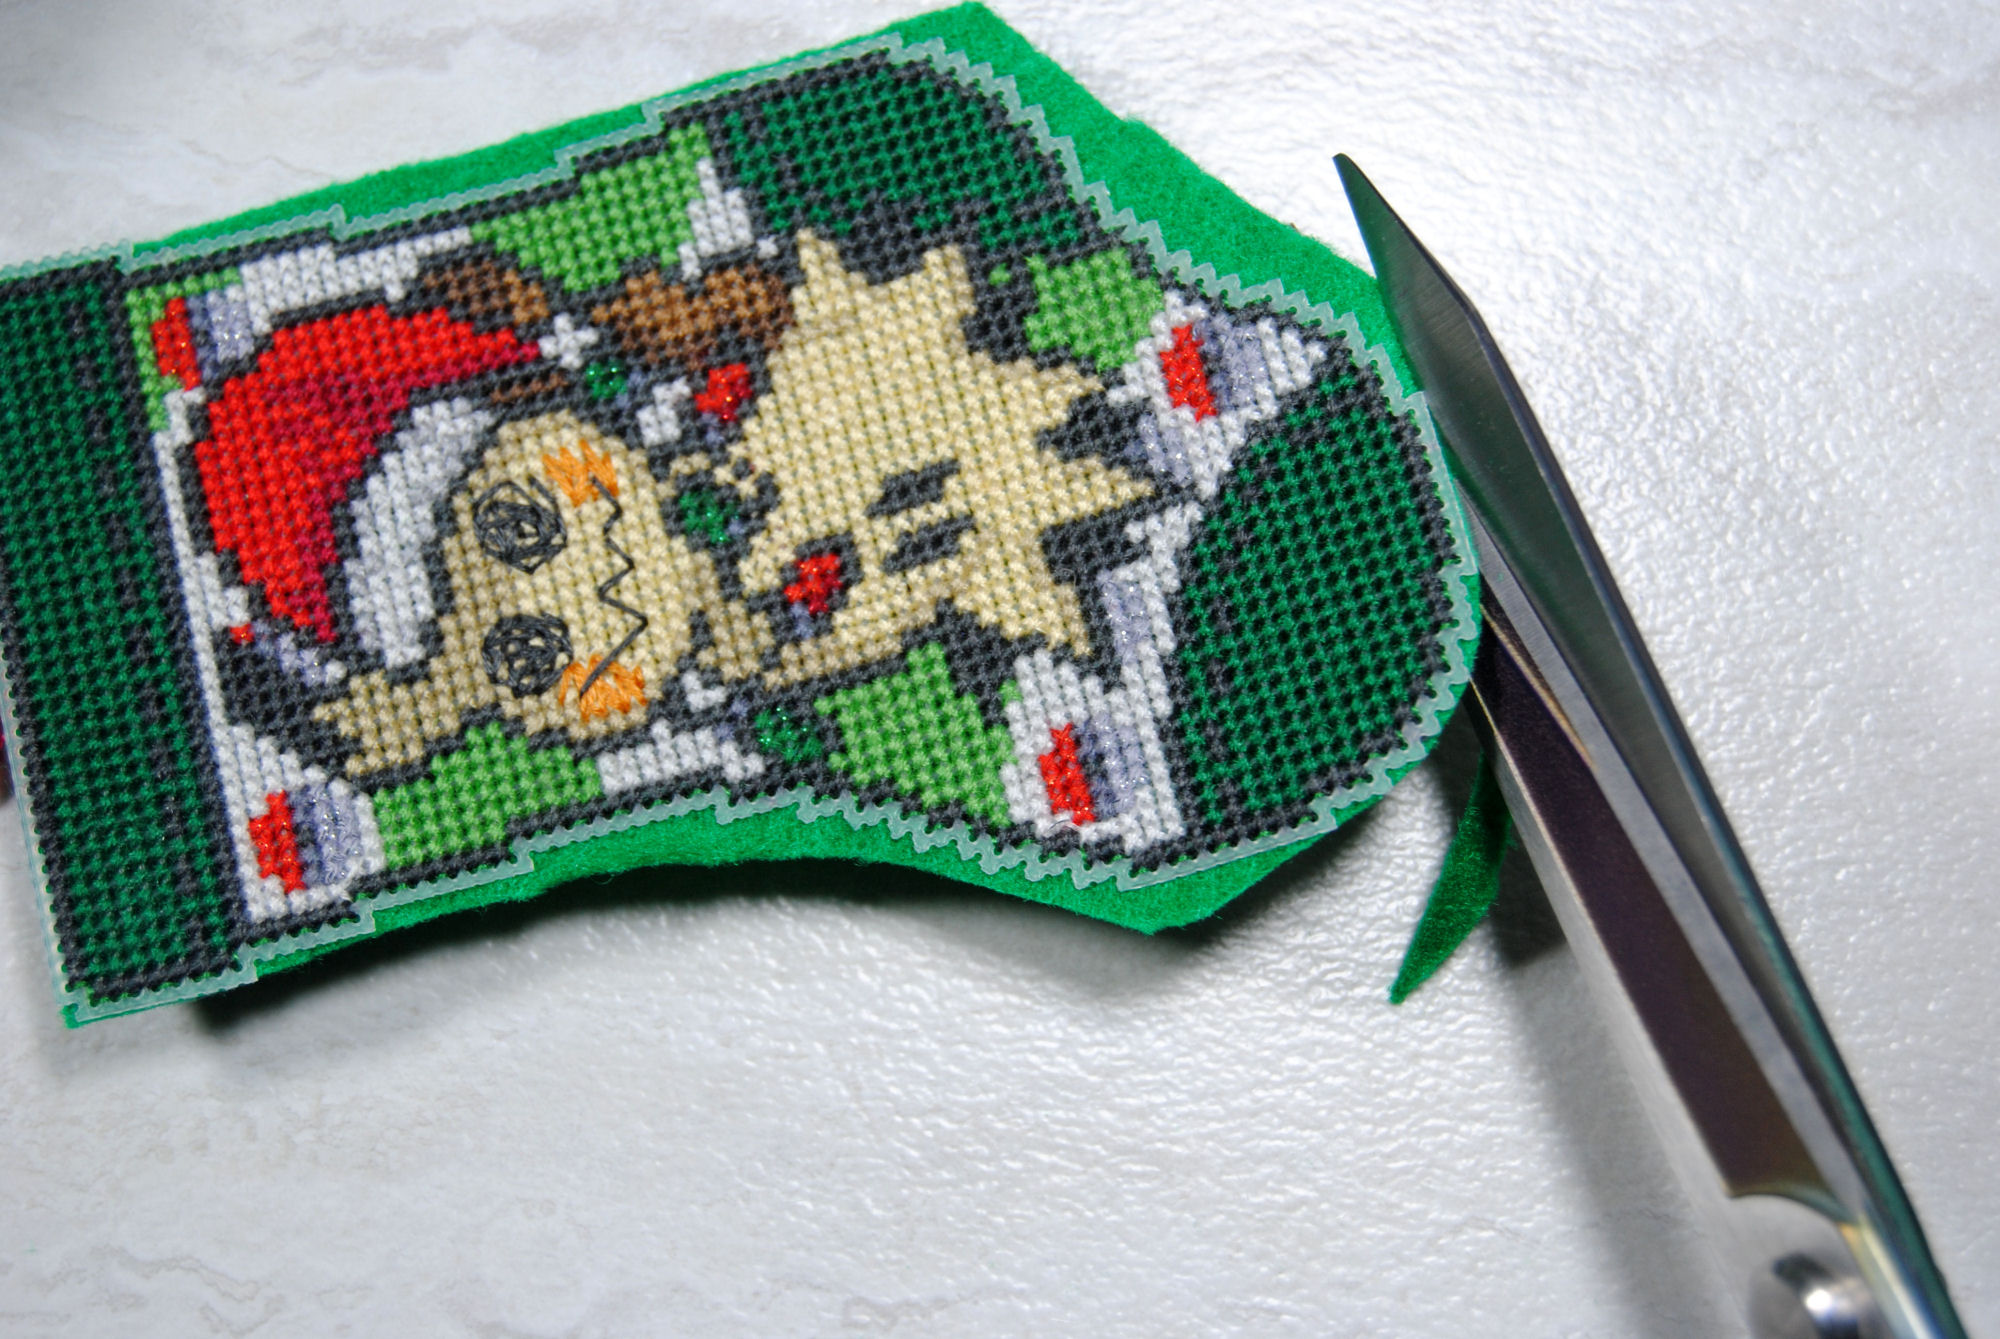
Finally, trim the excess felt off. I usually start by roughly cutting out the area so I’m not working off a full sheet anymore. Don’t be too precious the first time around, just get most of that fabric out of your way.
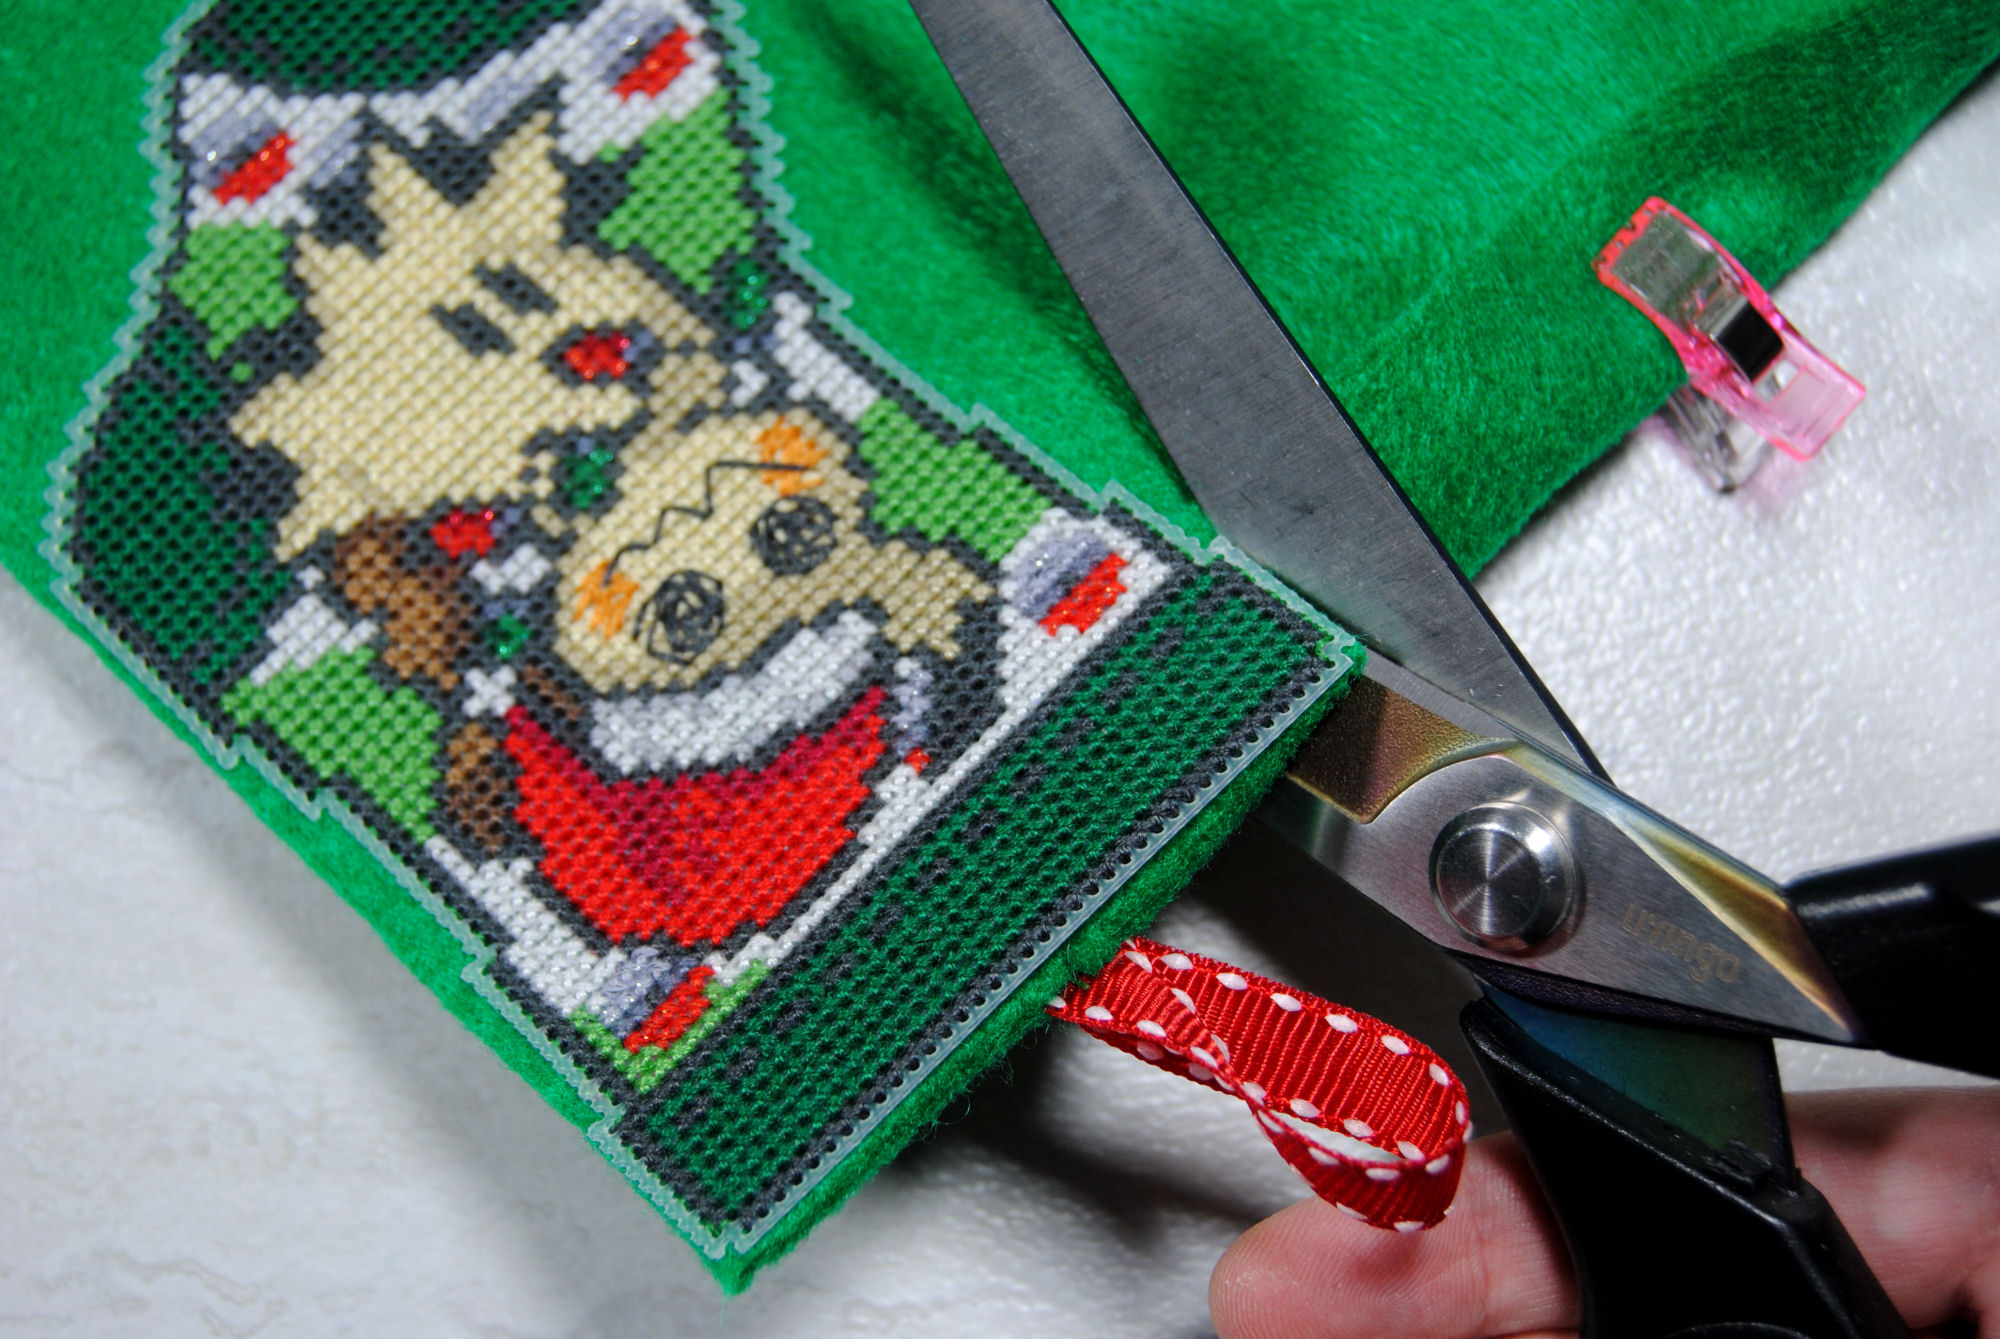
Then, I go back and trim closer to the plastic. If you hold it at an angle you can trim the fabric a little shorter than the canvas so it doesn’t stick out. But you also don’t want to accidentally get too close to the stitches holding it on, so take your time.
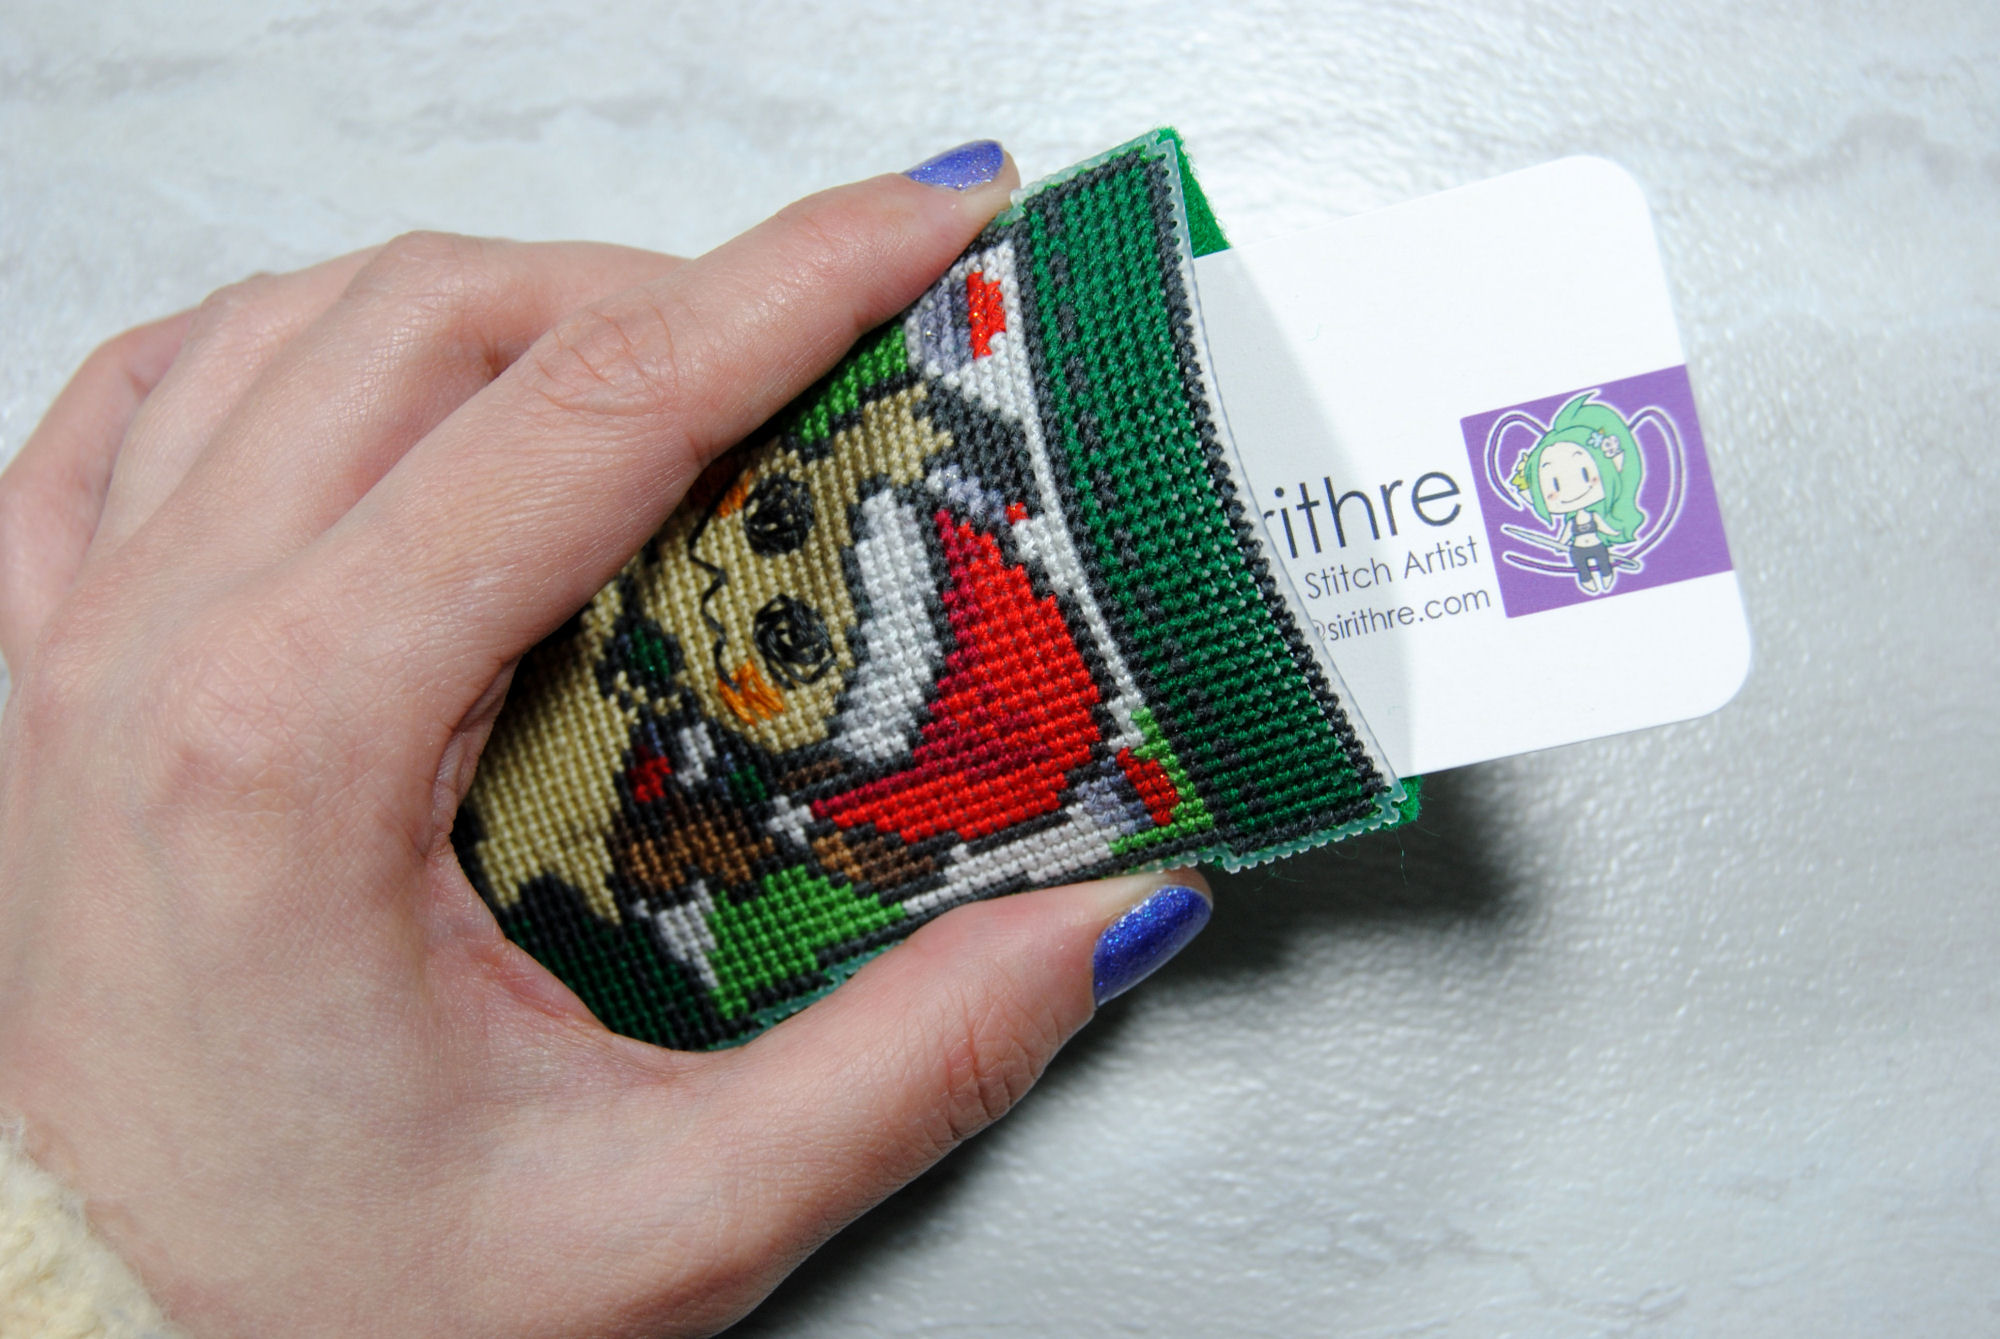
Fill the stocking
You’ll then have a fully functional mini stocking! Go stuff it with whatever will fit. Here I’m demonstrating with a business card because I didn’t have a gift card on me while taking these photos, but that’s what mine will be filled with soon.
I will point out I did not cover up the back of the stitch. It is just bare in there. I start my threads with knots and loop through that. Plus I generally tuck my strands pretty far and trim my trails as close as I can. So I wasn’t worried about things catching on my stitches.
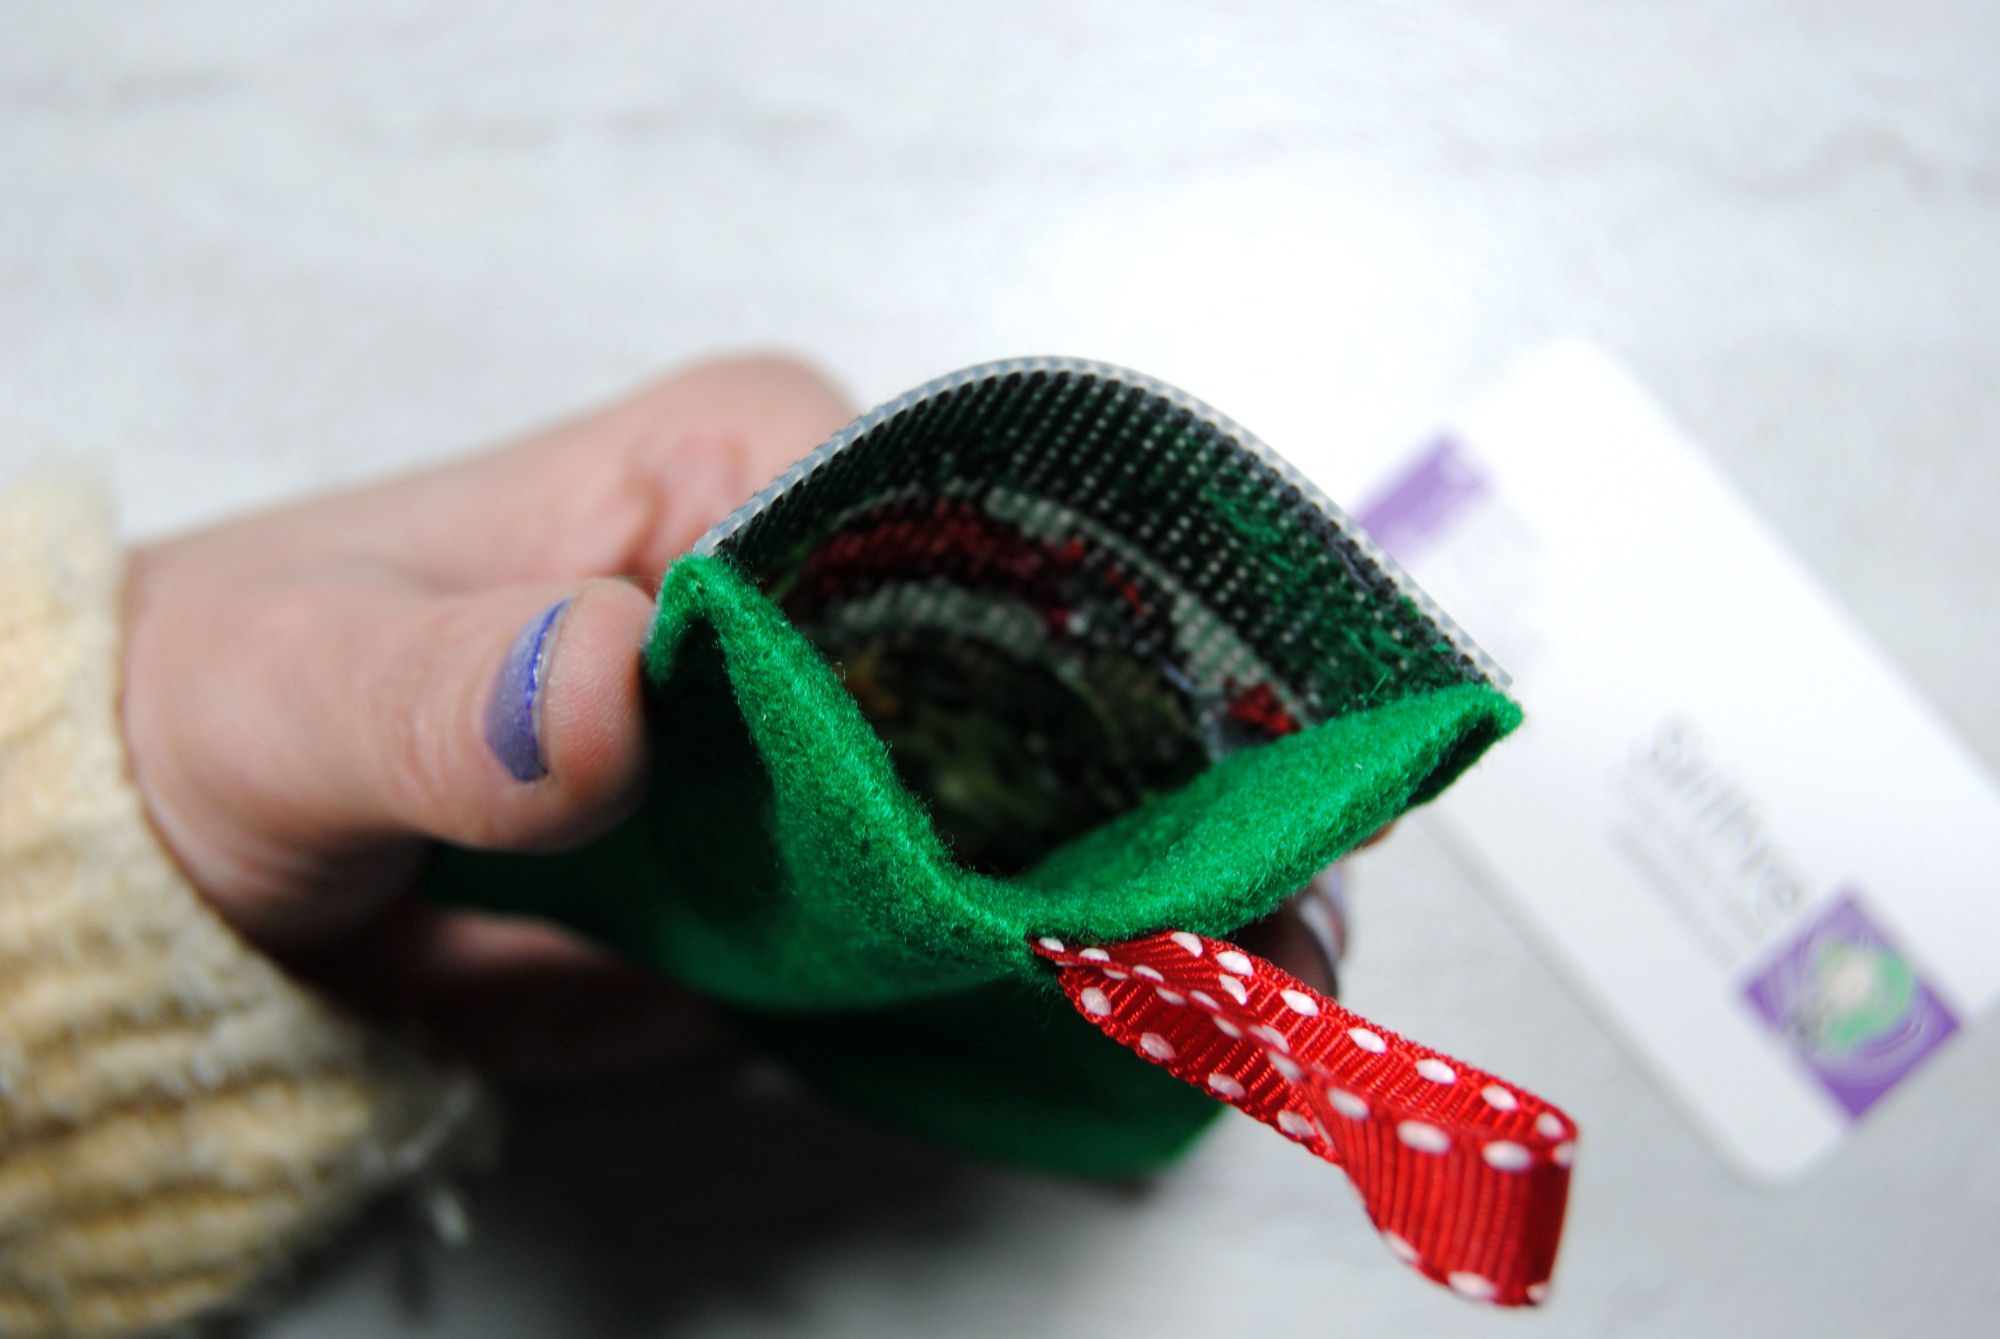
If you are concerned about the back of your stitch however, you can always do a second layer of felt and just stitch up the top on the one closest to the canvas.
You might even do a layer of quilting cotton inside instead just so you’re not adding as much bulk as a second layer of felt. Up to you!
Either way I hope you enjoyed making a mini stocking. I’d love to see what you made!