Pendant Tutorial + Free Cross Stitch Heart Flower Pattern
I love making my cross stitch designs into something I can use rather than just hang on my wall. A while ago I started making some of my designs into pendant necklaces and I still frequently get asked how I do them!
Recently, I did a review on Lecien threads and some of you really liked the designs I made for testing their thread. So I figured I’d kill two birds with one stone and remake my pendant tutorial with this new pattern.
There are other ways to do this, and I encourage you to experiment and find out what works best for you! This is just my preferred method.
And if you’d prefer a video version of this tutorial, I have one of those too!
This post may contain affiliate links. If you buy something using one of these links, I earn a small commission. However, there is no extra cost to you. Thanks for understanding! Learn more in my Disclosures & Privacy Policy.
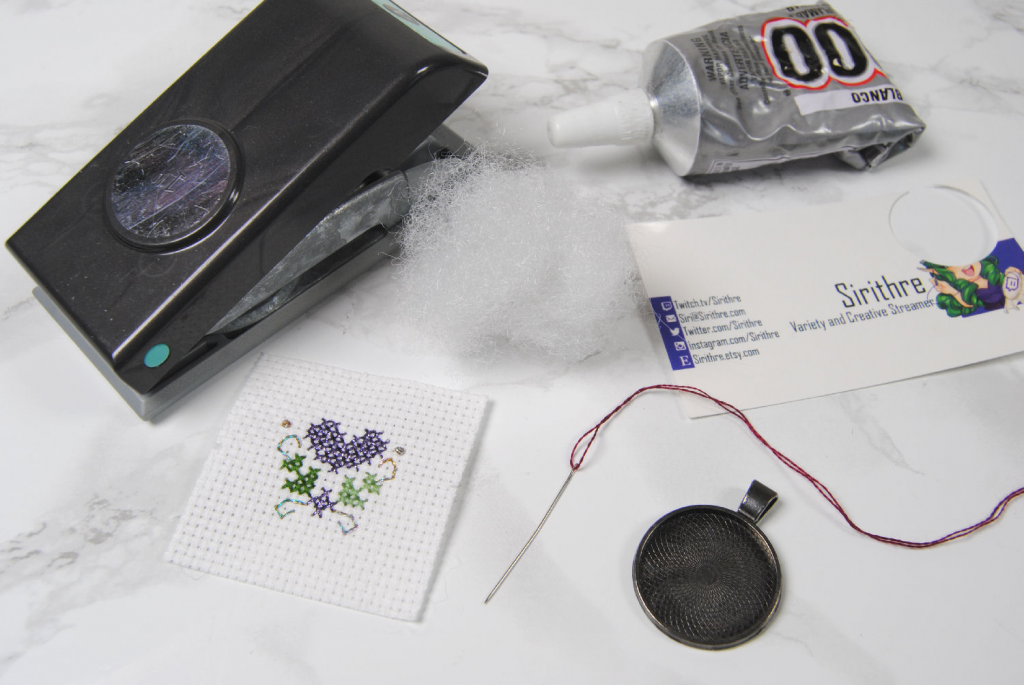
Table of Contents
Materials
Pendant Trays
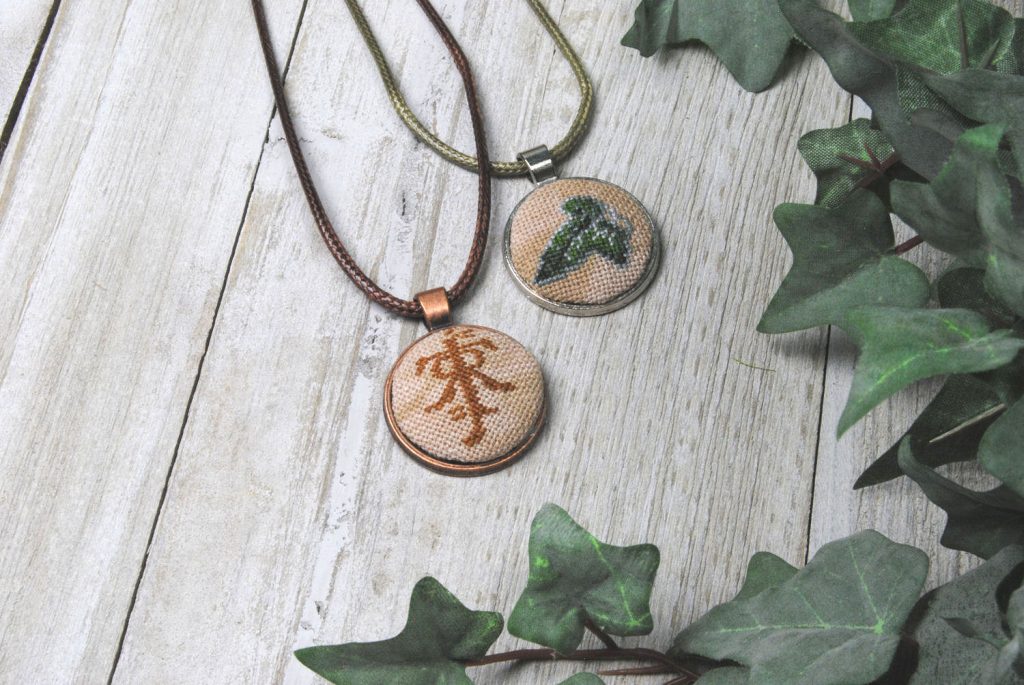
First up are the pendant trays, or cabochon trays. It’s important that you pick out your trays first, as this will determine the size and shape of your pattern!
I used 1″ round pendant trays. This particular listing happens to come with cabochons, but they’re not required. You can wrap your cross stitch around one of those glass cabochons instead of my cardboard method if you prefer.
I did try this, seen below. But I ended up preferring the flatter look of the cardboard. But it’s all subjective! Maybe you like the rounded dome shape better!
Pendant trays come in many different shapes. and also in different sizes. I’d recommend looking around and see which styles most appeal to you, or fit the pattern you have in mind.
Design
Once you have picked out your pendant tray, you’ll want to pick your cross stitch pattern based on the shape and size of your pendant tray. This will also determine the count of fabric you should be using.
I ended up making two patterns for my thread tests. The first was made with 14 count aida in mind, and to fit in a 1″ tray. As you may notice from the photos of the finished pendant, I did not take into account that the roundness of the tray would cut off the corners, and the french knots get kinda pulled to the edge of the tray. I like how this looks, but if your pattern has anything important in those corners, you may want to chose a different design.

The second cross stitch pattern was designed with 28 count fabric in mind. You have to stitch ‘over 1’ in order to be able to fit it into the pendant tray properly. Experiment with either stitching full crosses with 1 strand of thread, or tent stitching with two strands of thread. In my example stitch, I opted to use two strands and tent stitch the design. This gives it a more delicate look.
You can also get (free) PDF versions of these two patterns on my Ko-Fi.
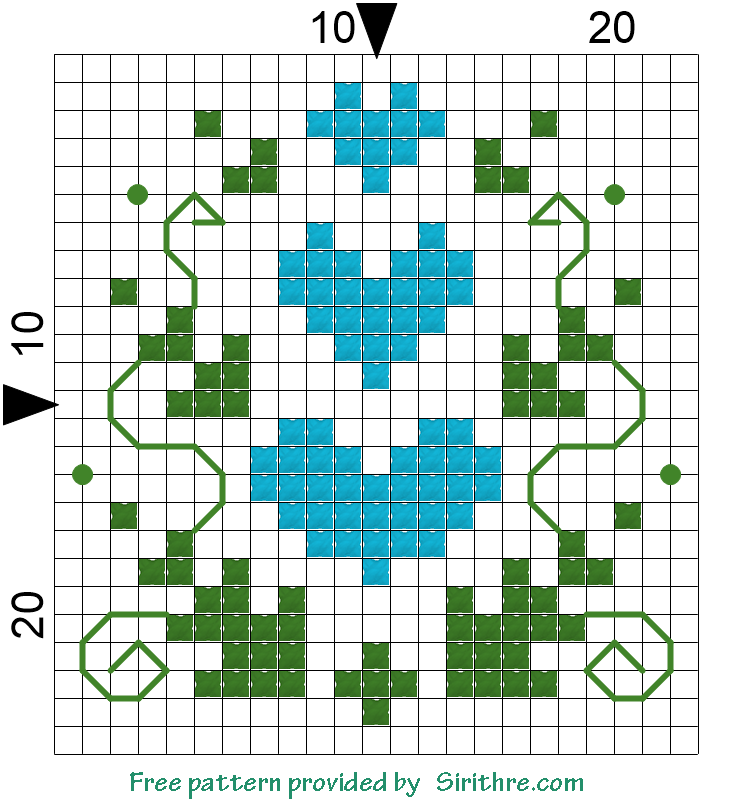
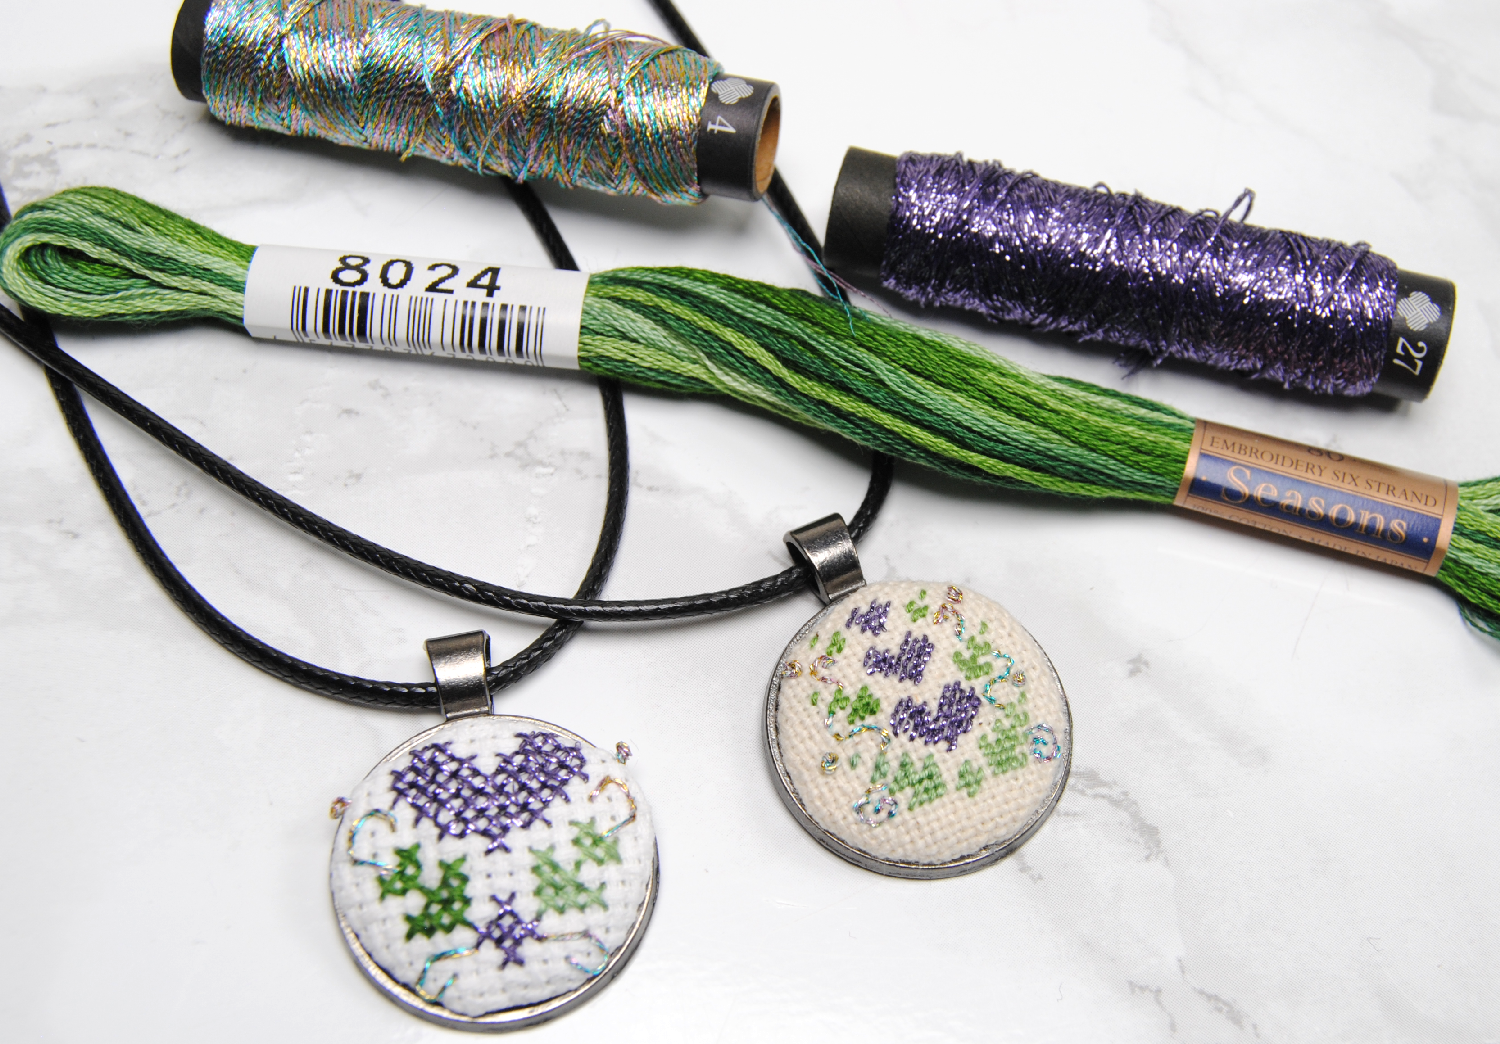
You’ll note I did not include a color list for these designs. That is because I planned to change them out to whatever colors I had on hand when doing my thread tests. You can see the colors I used for my examples over in the Lecien Thread review. When I review other brands in the future, I’ll likely be using entirely different colors. If you use this pattern, you should use whatever colors feel right to you!
Fabric
Now that you’ve picked out your design, you’ll need to decide on your fabric. I could have gone with a colorful fabric, but I wanted to see how the thread looked on just plain white 14 count aida for the review.
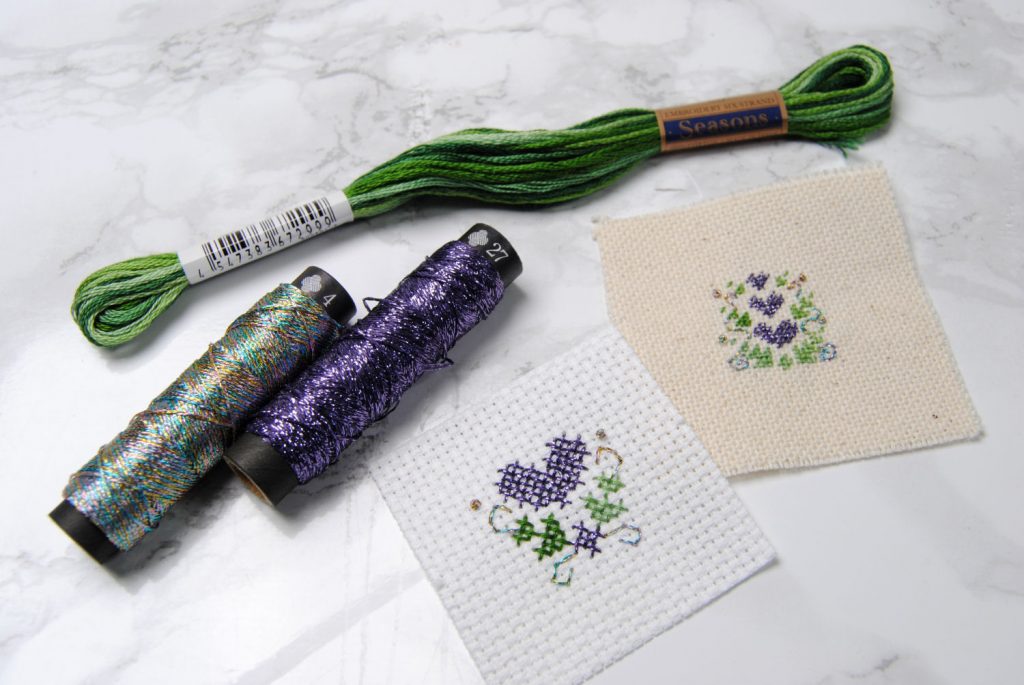
For the second design, I went with an antique white evenweave to see how the threads looked on a more natural background.
Whatever fabric you use, it should be of whatever count allows your pattern to fit within your chosen pendant tray. Ideally it should also be of a color that complements and does not distract from your design.
Glue
While I don’t like using glue on my finishes, I have not found a good alternative to affixing these to the pendant tray. This is irreversible and you should take care when using glue on your handiwork.
On the rare case I do use glue, my brand of choice is E6000. It is usable on a variety of surfaces, and is waterproof and temperature resistant.
Cardstock
I tend to use old or damaged business cards for this. But basically you want a stiff, but thin cardstock. Ideally you’ll want to use some form of acid free cardstock if you have it on hand. But you can also get creative with this if needed.
Hole punch (optional)
In order to fit in the pendant tray, you’ll need to cut your cardstock into a circle that fits just inside the pendant tray. I use a 1″ round hole punch for these pendant trays. Hole punches also come in square and other shapes if you have a different type of tray. If you can’t find a hole punch in your size though, you can just trace you tray onto the cardstock and cut it out.
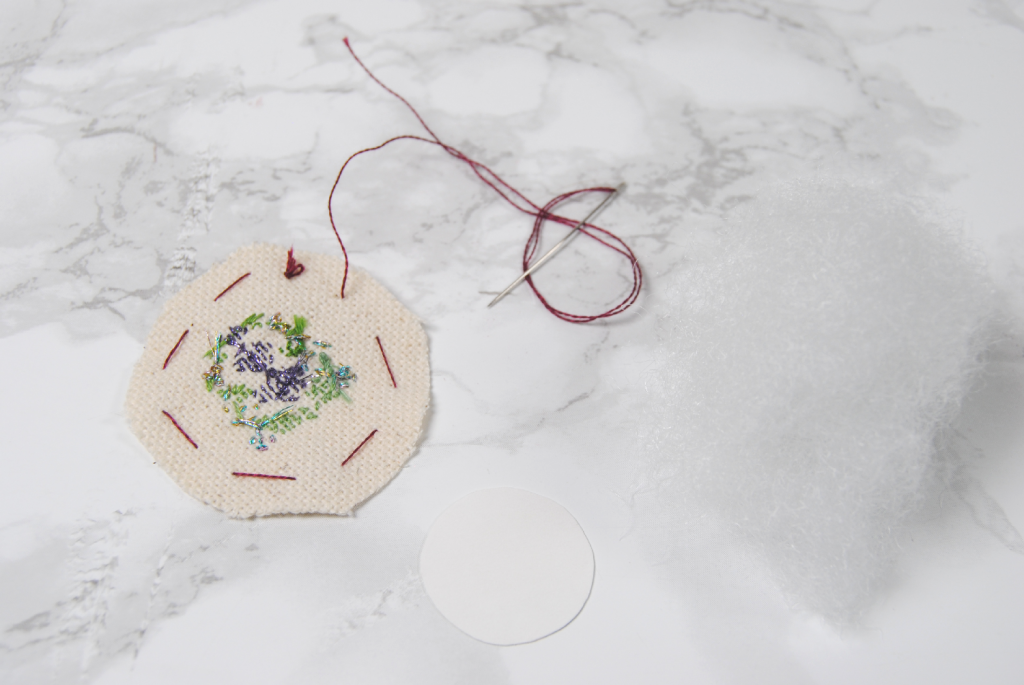
Stuffing (optional)
I like to put a little bit of stuffing between the stitch and the pendant tray to give it a little bit of roundness and texture. I have a huge bag of Poly-Fil that doesn’t seem to get any lighter despite all the biscornu I’ve made with it, so that tends to be my go-to. Sometimes, I use a small disc of cotton batting for these, the same size as the cardstock.
Assembling your Pendant Necklace
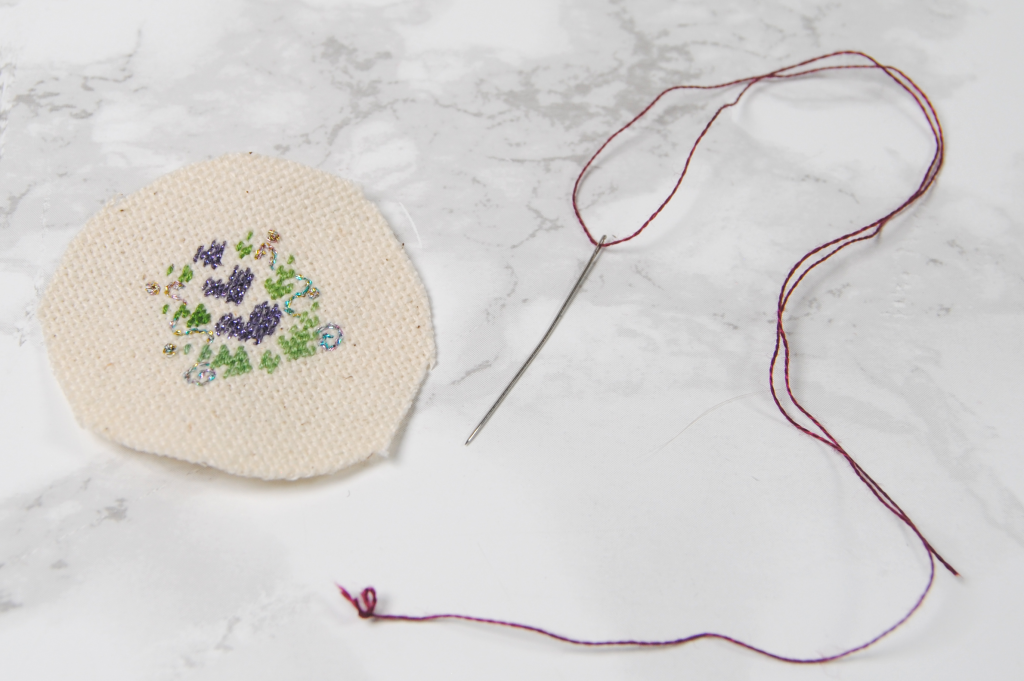
To start, you’ll want to trim your fabric down into a circle (cut off the corners) with enough of a border around your design to be able to sew up the back. I usually take one of the pendant trays and trace it onto the back of the fabric around the stitched design and then trim a 1/2″ or so past that.
Cutting the Cardstock
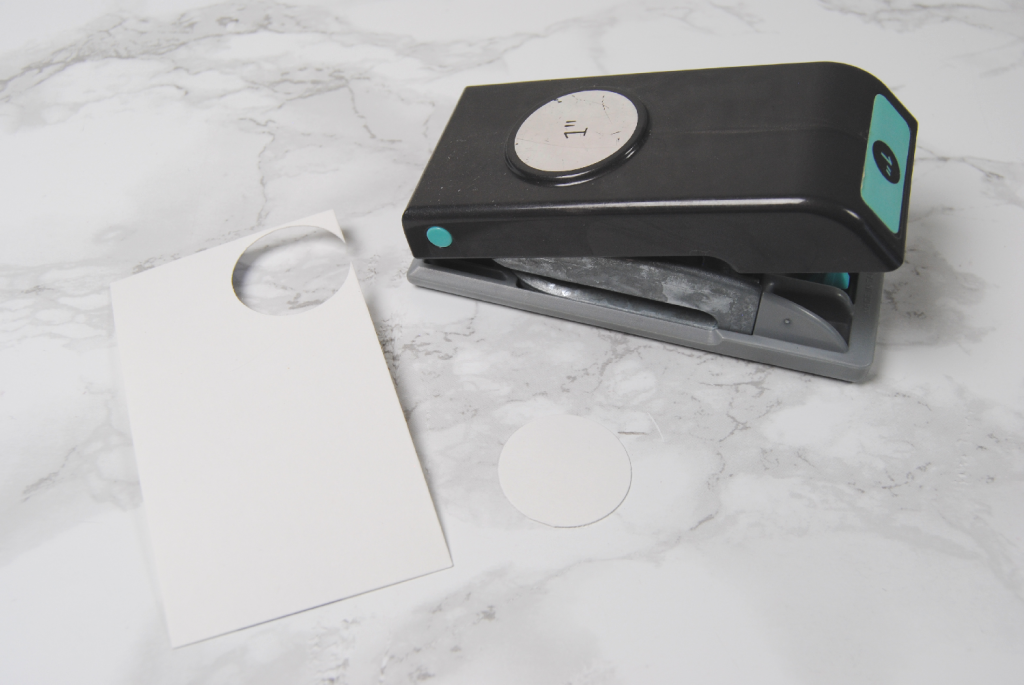
Now you’ll need to get a piece of card stock that fits just inside your tray, with a little extra room to have the fabric wrap around it. This is the tricky part: getting it the right size. In my case, I need it just under 1″, so I use a hole punch and then carefully trim the slightest sliver around the edge of the circle.
Assembling your Pendant
Now get some thread and do a loose running stitch around the edge of your design. Thread color doesn’t matter, as it won’t be visible. Be sure to stay well outside the pattern area that will be visible on your pendant. Don’t cut off your thread yet.
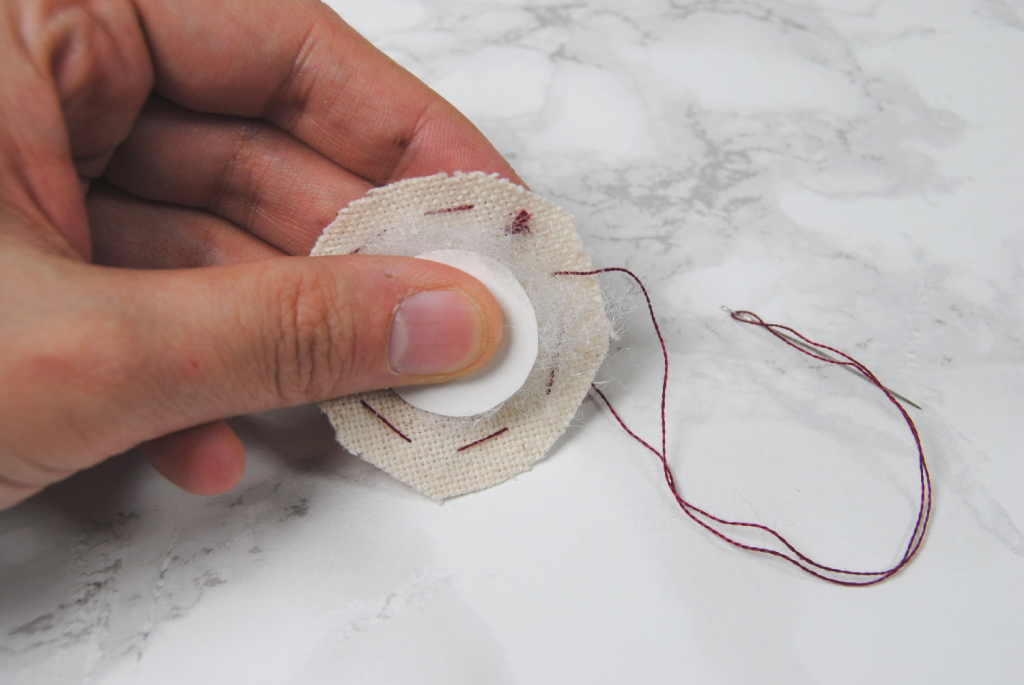
Place the stuffing or batting circle on the back of your design, and stack the cardstock on top of it. Hold it centered on your design and then carefully pull the end of the thread so that the fabric cinches up around the disc.
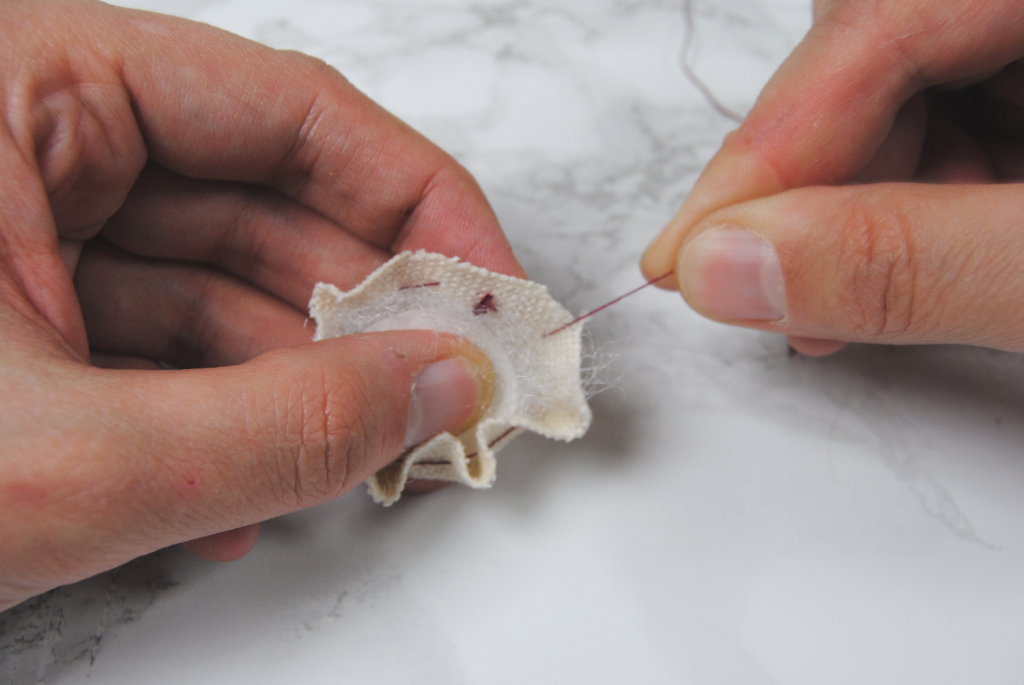
Don’t pull too tight, as you don’t want the paper to bend. Now take a look at it from the front to make sure it’s centered. If not, now’s the time to shift it around until it looks right before proceeding.
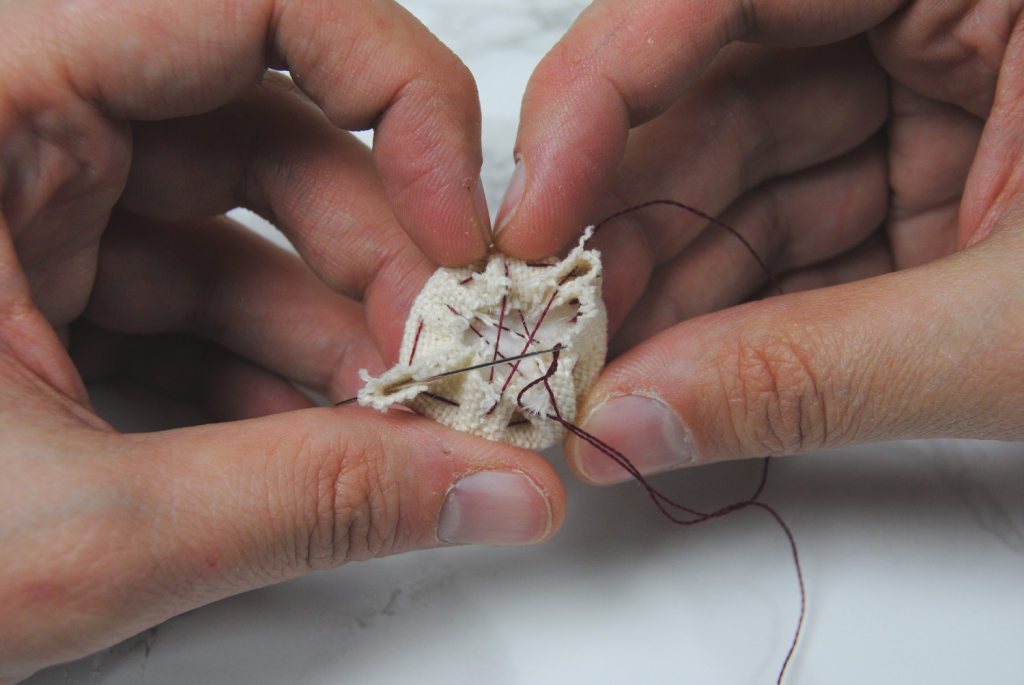
Start sewing back and forth across the back of your bundle, trying to get the bumpy ridges to lay as flat as you can. It doesn’t have to be perfect, but you want a clean round edge.
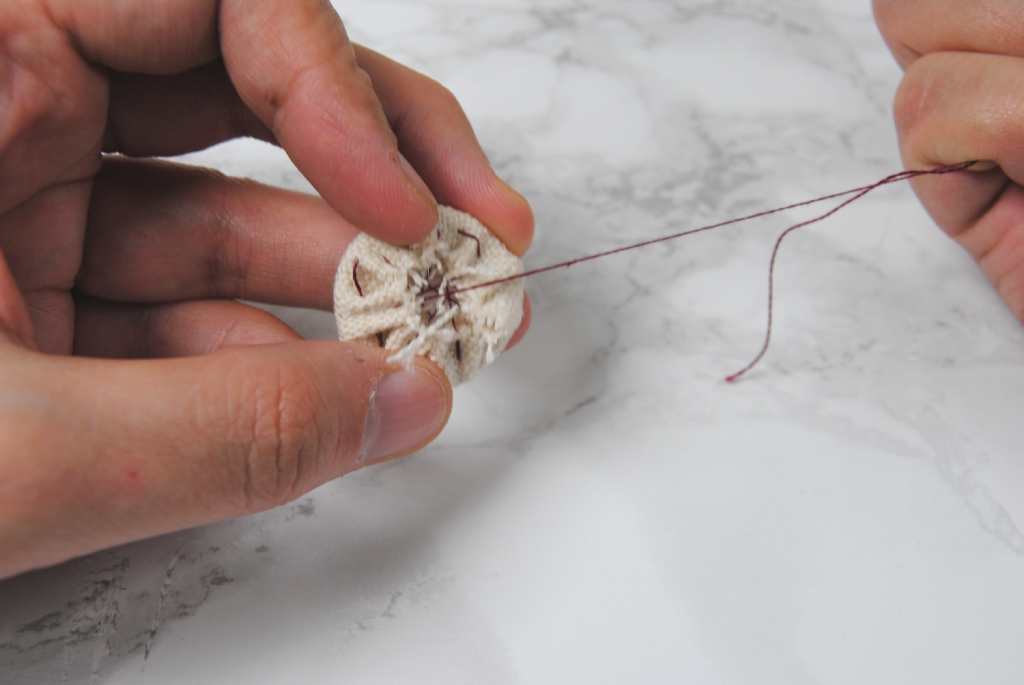
Once you think it’s flat enough, cinch it tight again and trim off your thread. I do a small slipknot to make sure it won’t get loose before I have a chance to secure it to my tray.
Securing it to the tray
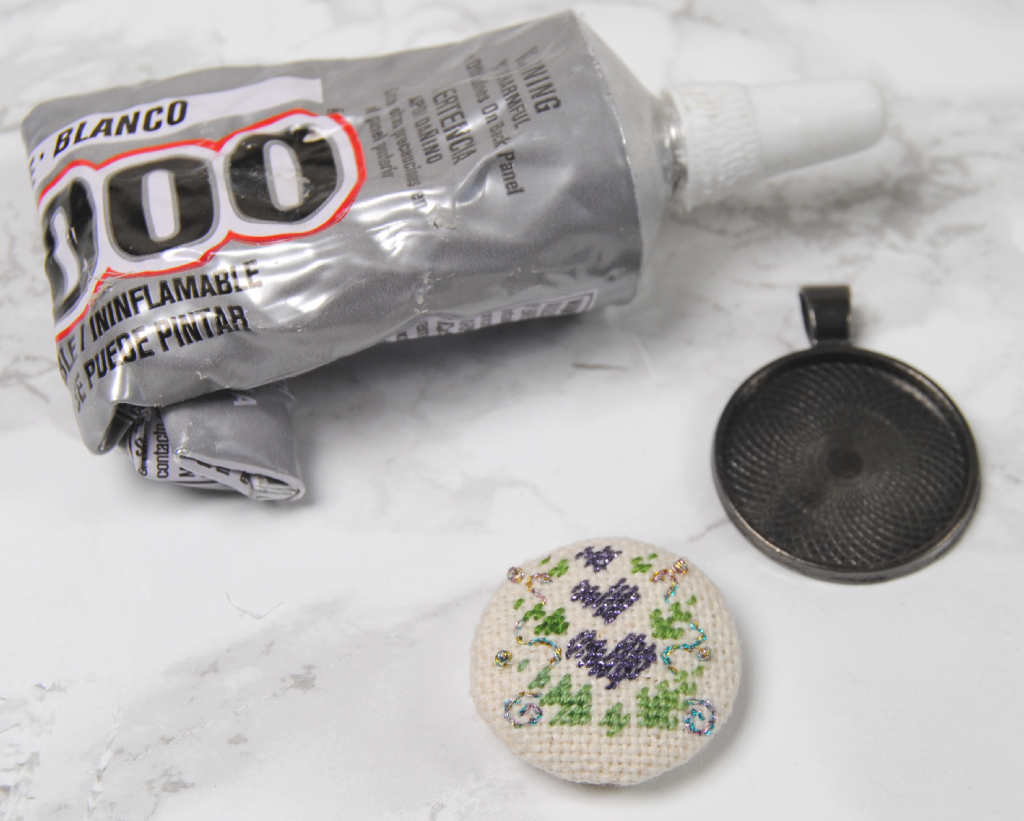
Once you’ve got your bundle all stitched up, it’s time to set it in the tray. I usually place it in there without glue at first to make sure the edge looks round, ad that it fits snugly. You also want to practice making sure it’s in there straight and lined up with the top of your pendant.
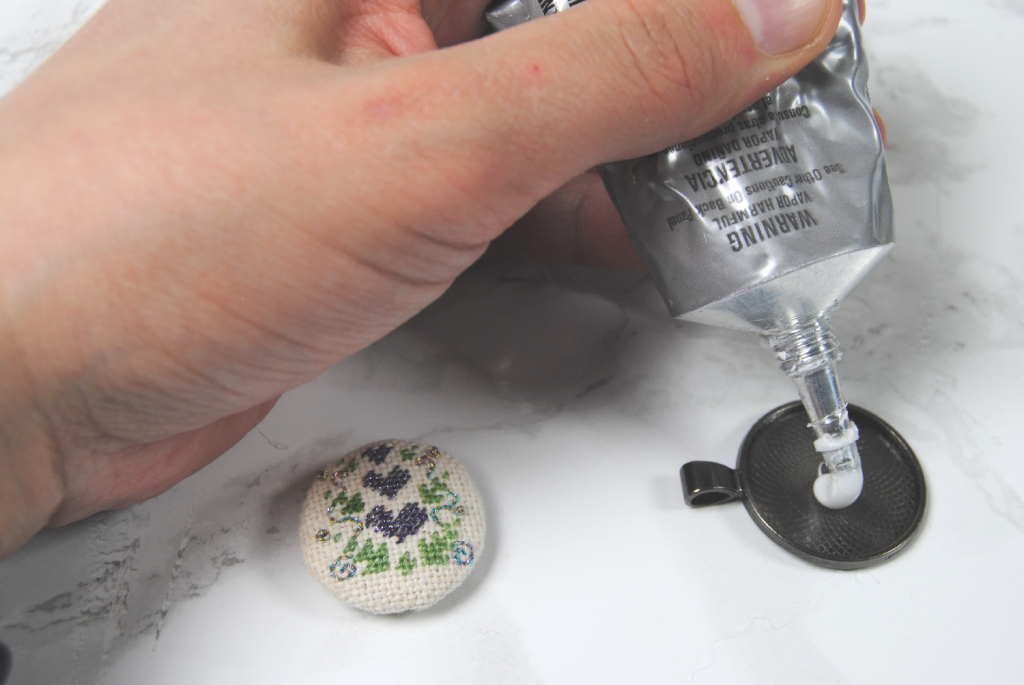
I use just a small dollop of glue and then spread it out along the bottom of the tray into a thin layer using my finger. You don’t want too much glue or it will seep out the edges once you press your stitch in. But you also don’t want too thin a layer or it won’t stay secure. It may take a little bit of experimenting to get this just right.
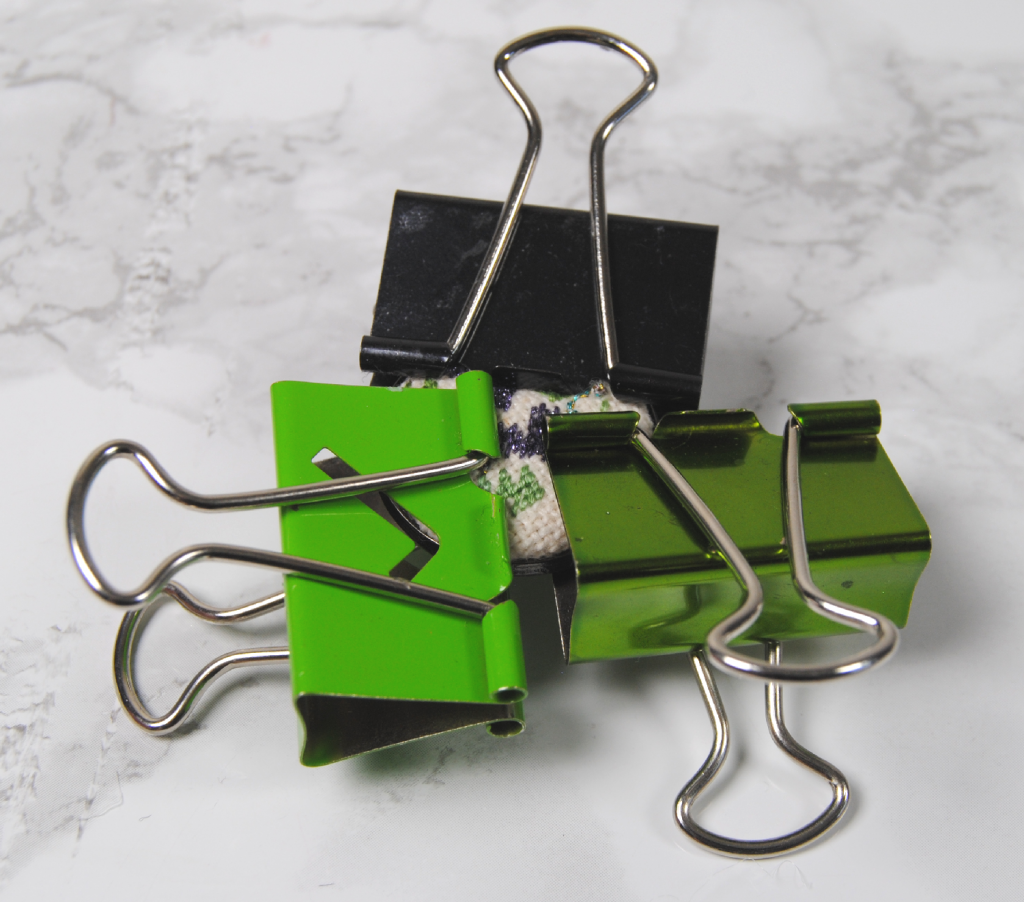
You can then set your pendant under something heavy, or use binder clips or other items to secure it in place while it dries. Walk away for a bit and do something else, and when you come back it will be ready to put onto a chain and wear.
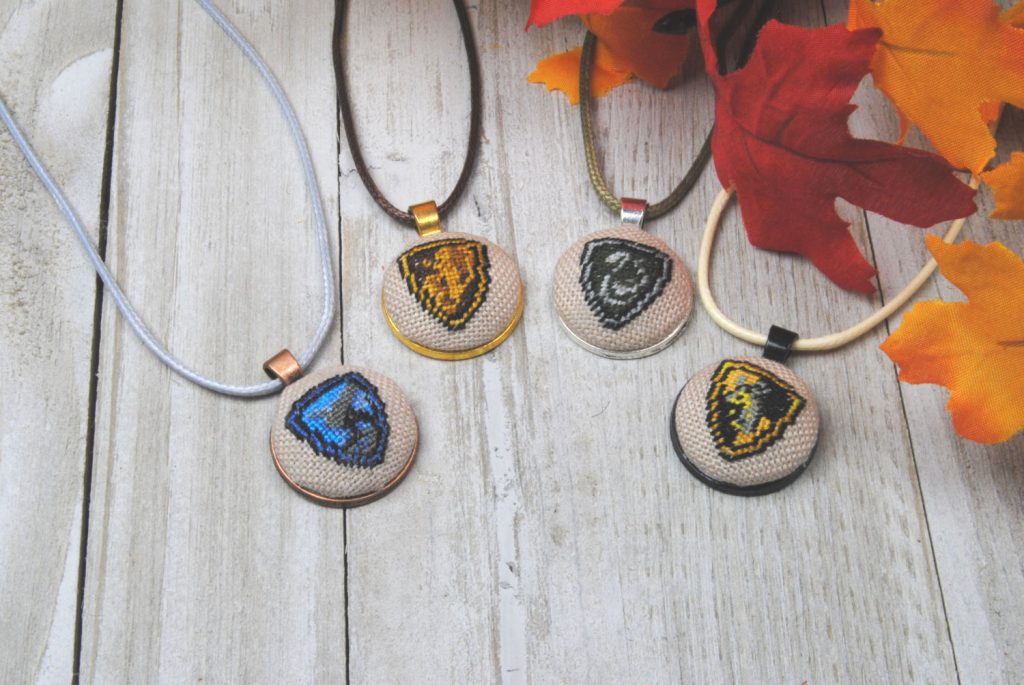
Mine came with black cords, but they also come in all sorts of different colors. Find one that matches your style or your cross stitch pattern and have fun with it!