Blended Threads: Creating New Floss Colors With Tweeding
If you’ve been around the cross stitch community long enough you’ve probably run into blended threads. They used to be quite frequently used in larger detailed patterns, I don’t seem to see this technique used as much nowadays except in certain pattern styles.
Today though I wanted to discuss what blended threads are and how to work with them. Whether you’ve picked up a pattern that uses them, or you’re wanting to incorporate them into your designs more.
Perhaps as more people learn about blends we will start to see a resurgence of this technique in modern patterns!
Table of Contents
What are blended threads?
Blended threads (sometimes referred to as tweeding or simply ‘blends’) is a technique by which you use two differently colored threads together.
This can be done for a number of reasons, but typically is used to create the illusion of a color that doesn’t otherwise exist in the thread brand you’re using. Up close you can tell it’s two different colors, but at a distance it can look as it’s own unique color.
For example, this Panthara design I stitched based on the art of Frenone needed a number of different shades of purple.
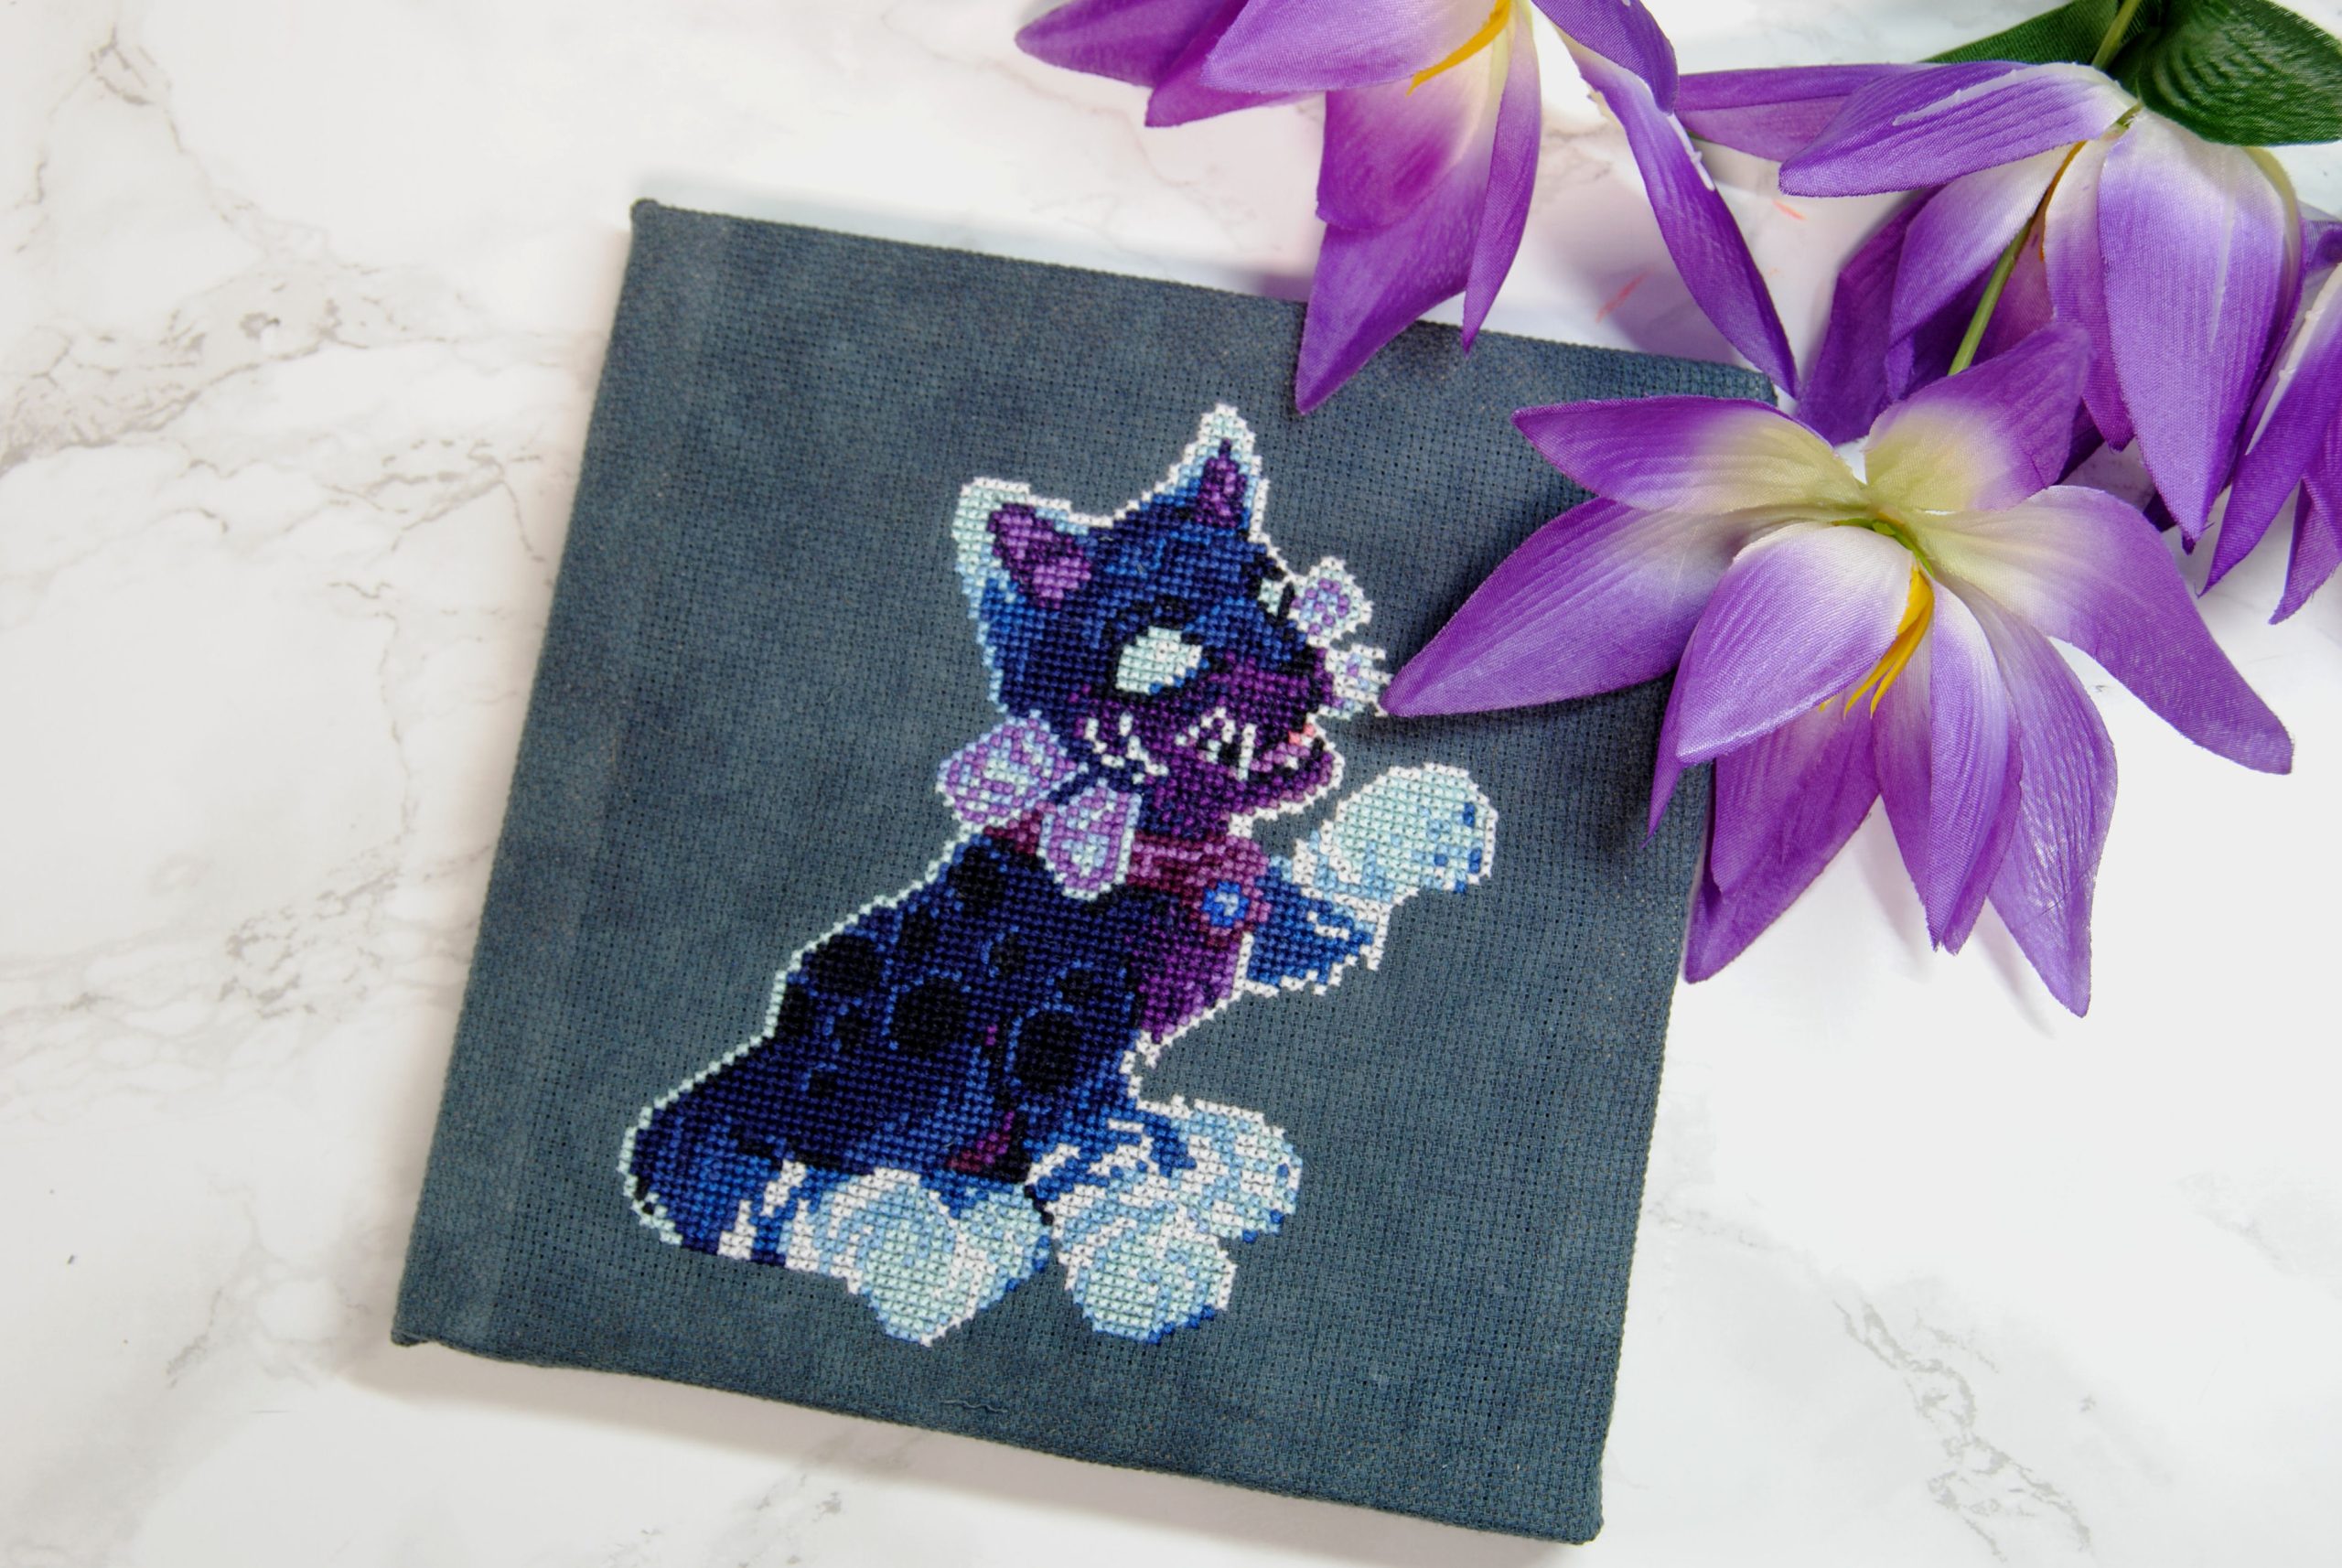
Unfortunately there isn’t really a purple shade darker than 550 in the DMC line. There’s 154 I guess, but that leans more of a reddish tone.
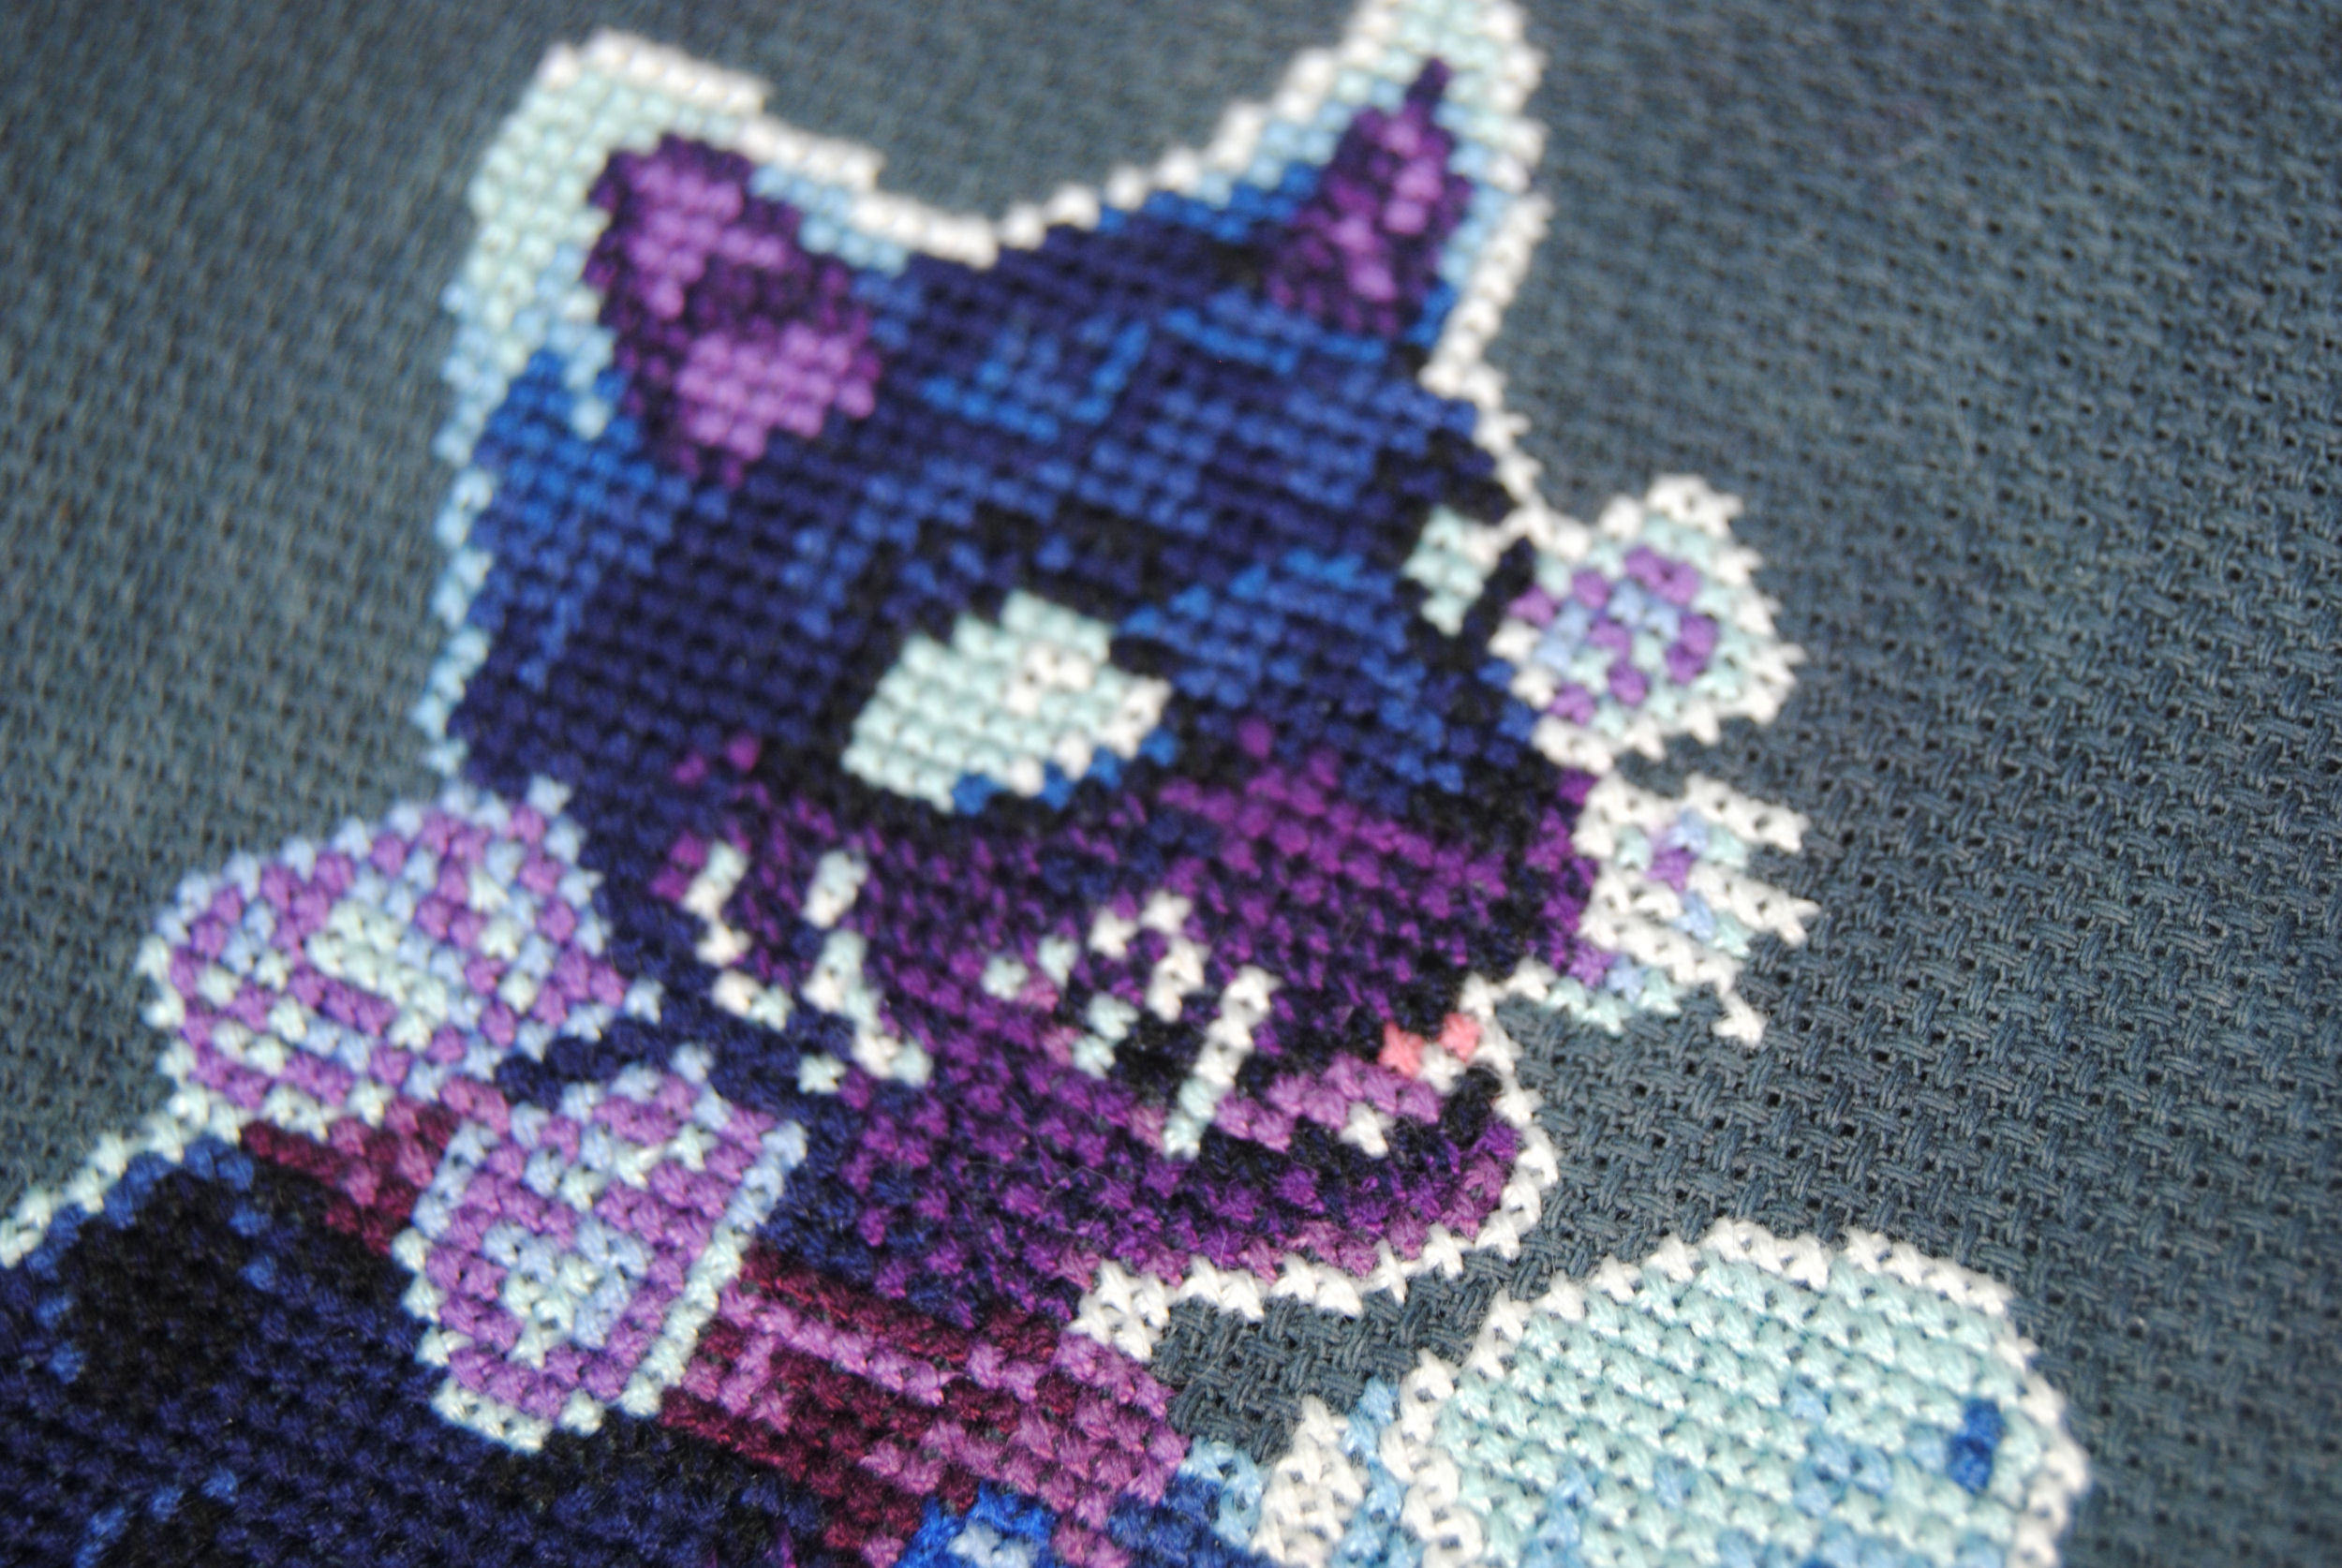
Instead, I ended up mixing it with a dark blue (939) to create a gradient from the purple of it’s mouth and chest to the blue of the rest of it’s body. It’s hard to tell from a distance, but if you zoom up close you’ll see what I mean:
Later, I’ll go over some other reasons you might want to work blends into your designs. But first let’s discuss how they show up in patterns and how to actually stitch them.
What kinds of patterns use blended threads?
As mentioned previously, this technique used to be more common.
I’m most familiar with them from Dimensions Gold Collection kits. Others have mentioned Riolis kits use them a lot as well..
Designers known for large detailed pieces also incorporate blends into their designs. Teresa Wentzler and Mirabilia are two big names that come to mind.

I also see them mentioned frequently when it comes to Russian and Ukranian designed patterns, which tend to focus more heavily on subtle color gradients and heavy backstitching. You can find a ton of examples of this on mybobbin.com.
What do blended threads look like in a pattern?
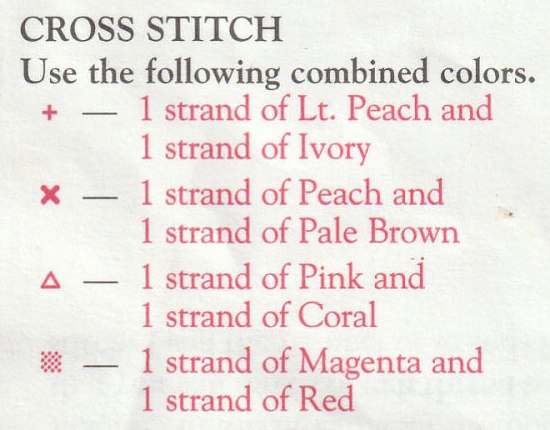
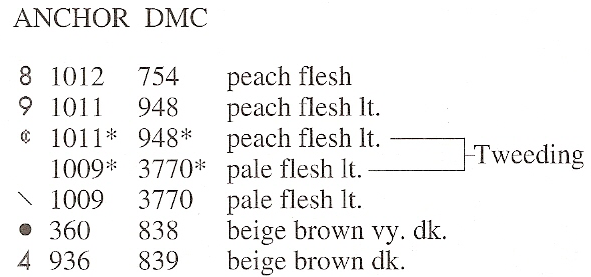
Blends can look very different from pattern to pattern and from designer to designer. Here I’ll show a few examples from different designers and how they’ve chosen to represent blends. The main thing to look for is if you see one symbol reference two or more colors, it’s probably a blend.
These are just snippets from a larger pattern color list, but you should get an idea of how you might find them listed in a pattern.


How to stitch Blended threads
For my examples today I’ll be using some of the colorful combinations from this pattern.

This is actually from a gorgeous free pattern by Lyova Letova! You can find it on their VK shop. While the listing there shows a cost of 1₽ (probably due to vk’s listing limitations), if you look down in the comments she’s provided the PDF for free!
Now let’s go over the different ways to stitch with blended threads.
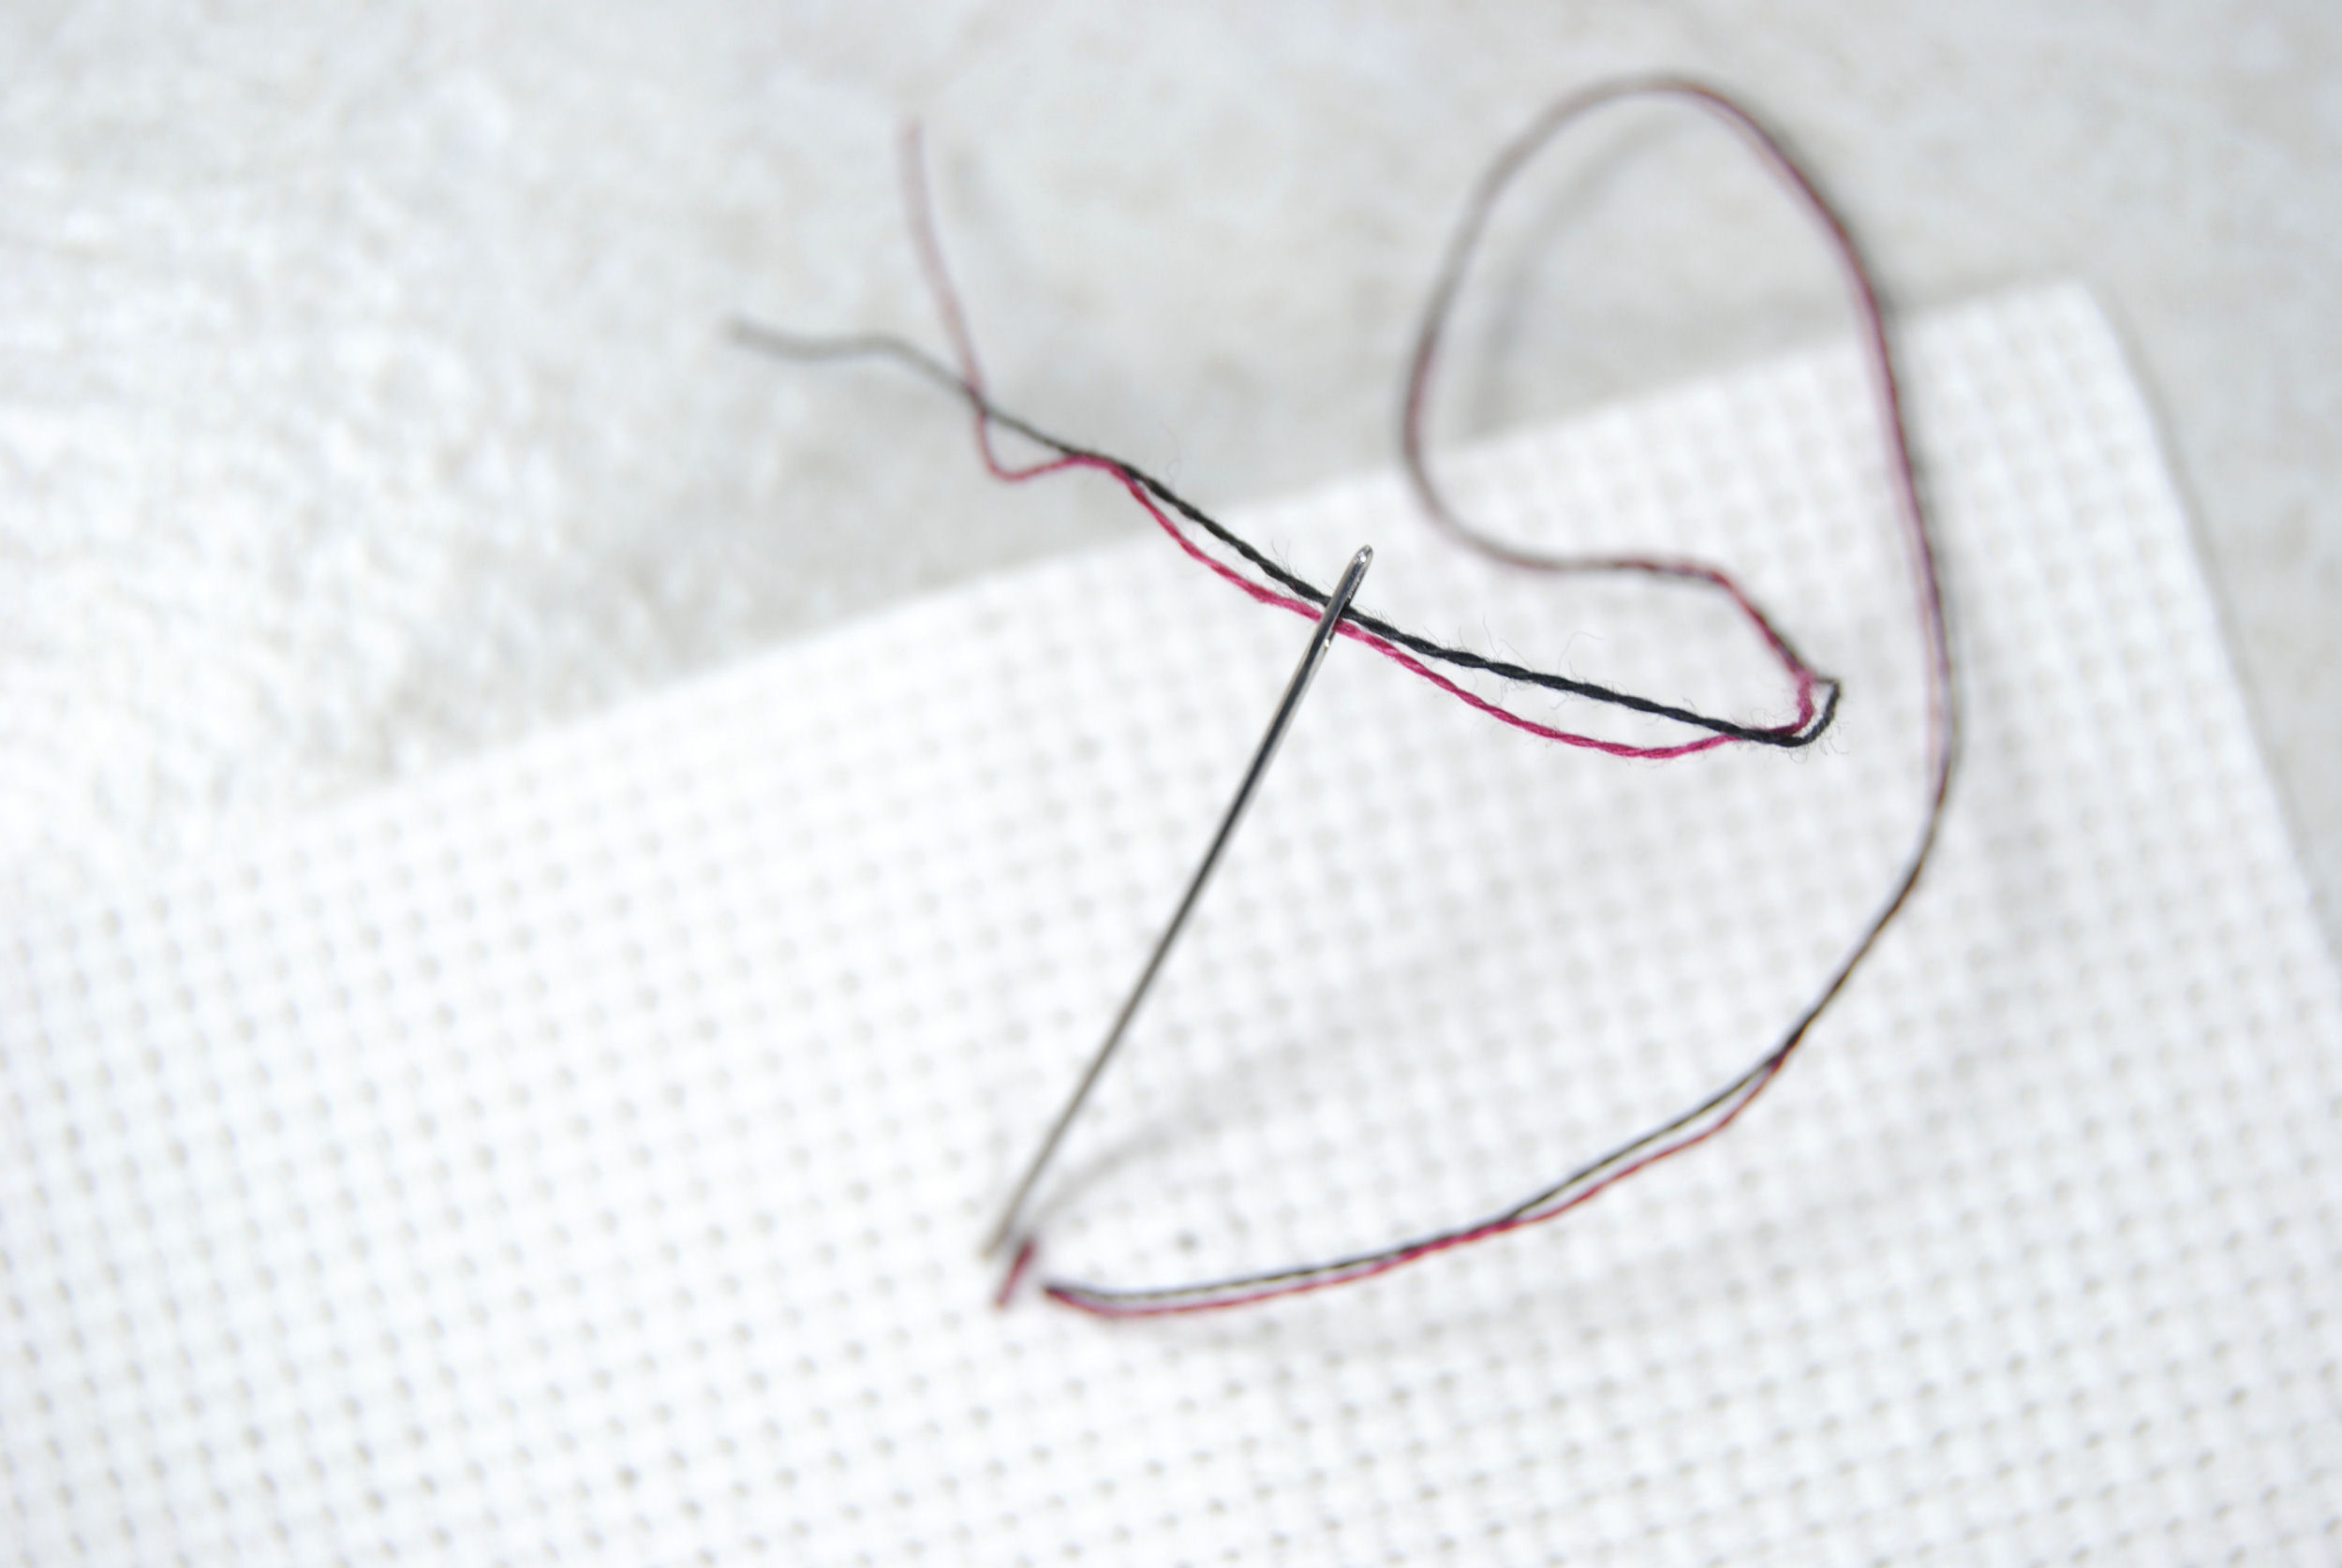
Two stranded blended threads
The most common way to stitch blends assumes you’re stitching using two strands to begin with. Take one strand of each color and thread them onto your needle together. Then stitch as normal.
For my first example, I mixed 310 and 3685 to make a darker version of this reddish hue.
In the second star you can get an idea of how it creates a gradient between the two colors. However, zoomed in like this makes it really obvious that it’s a blend. Try zooming out or holding your phone at a distance to see how it blurs into a color of its own!
Three stranded blended threads
If you prefer stitching with three strands of thread for better coverage, you could just increase the fabric count and go down to two strands. For example if you stitch three stranded on 14 count, you might consider instead stitching on 16 or 18 count and using just the ‘normal’ two strands. This will however make your finished project smaller too.
Instead, another method requires you to make some decisions. Possibly even a sample.
But basically, you’ll be using two strands of one color, and a single strand of the other. The trick is in figuring out which color gets the double strands.
Dark colors tend to overwhelm the lighter colors. If you’re stitching in an area of a pattern that uses blends to form a smooth gradient from a dark color to a light color, you’re most likely going to want to use two strands of your lighter color, and a single strand of the darker.
If however your blends are meant to create a shadow on whatever you’re stitching such as a darker tone for the shaded portions of a character’s skin, you’ll want to lean towards the darker color.
In this particular example, these colors are the shading of the skull’s eye sockets in the Lyova Letova pattern I mentioned. So I’d probably lean to the darker color for this pattern.
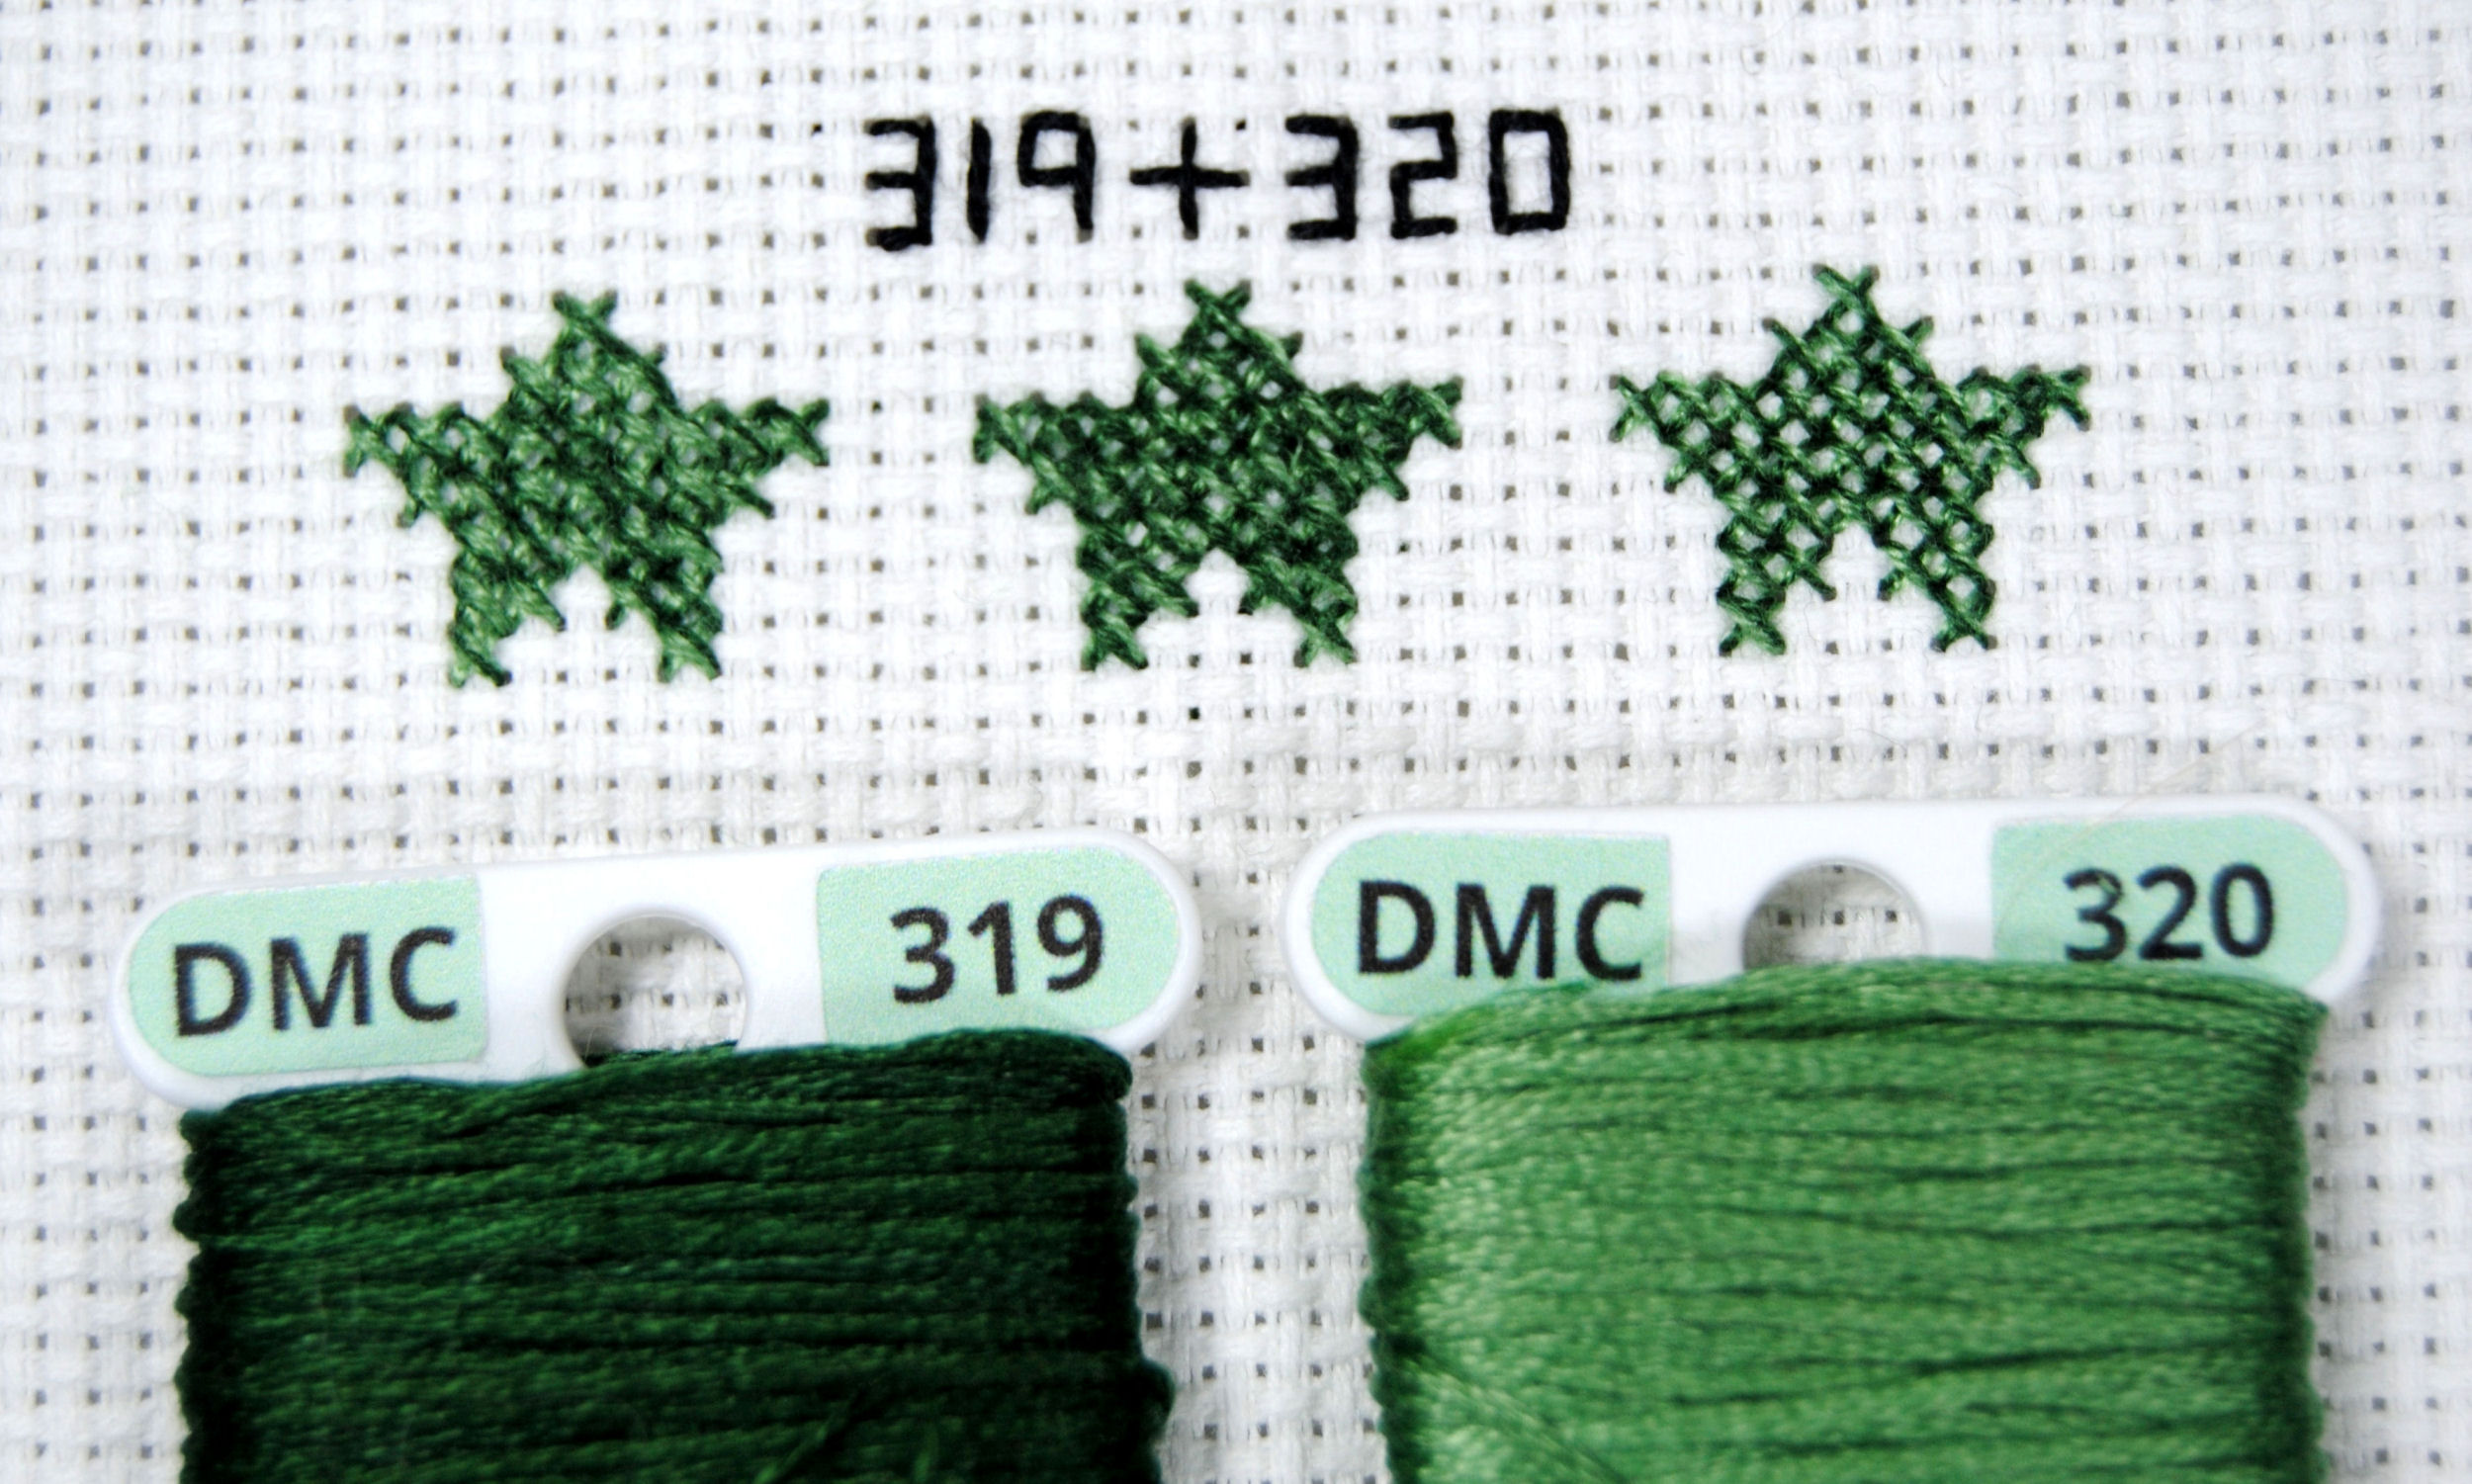
Can’t tell the difference between the stars? It’s pretty subtle! Let’s break it down further. And show the original colors so you can see how different the samples actually are.
The left star is two strands 320 and one 319. The middle star is two strands 319 and one strand 320. Meanwhile the right star is a single strand of each so you can see how it compares to “normal” blended threads.
Unfortunately the only way to really know, is to stitch a sample. I’d recommend stitching the areas around the blended color first. You’ll need to be able to see how your blend looks next to the other colors in the pattern. Then stitch a small section of your blend with two strands of one color. And a second section away from the first (if possible) with two strands of the other.
You’ll have to frog and re-do whichever combination you don’t like as much. But at least you’ll know for sure which blend fits best with your pattern!
Loop method / Single strand blended threads
We’ve gone over various thread start methods here on the site before, but if you’re new here and you haven’t heard of the loop method: prepare to have your mind blown.
Take a single strand of thread twice as long as you would normally stitch with, then fold it in half! Now when you start the first leg of your stitch, slide your needle through the loop formed by that fold. No worrying about the tail end of your thread getting loose somehow! Magic!
Unless of course you’re trying to do a blend. This next method is also relevant if you’re stitching single stranded on a high count fabric.
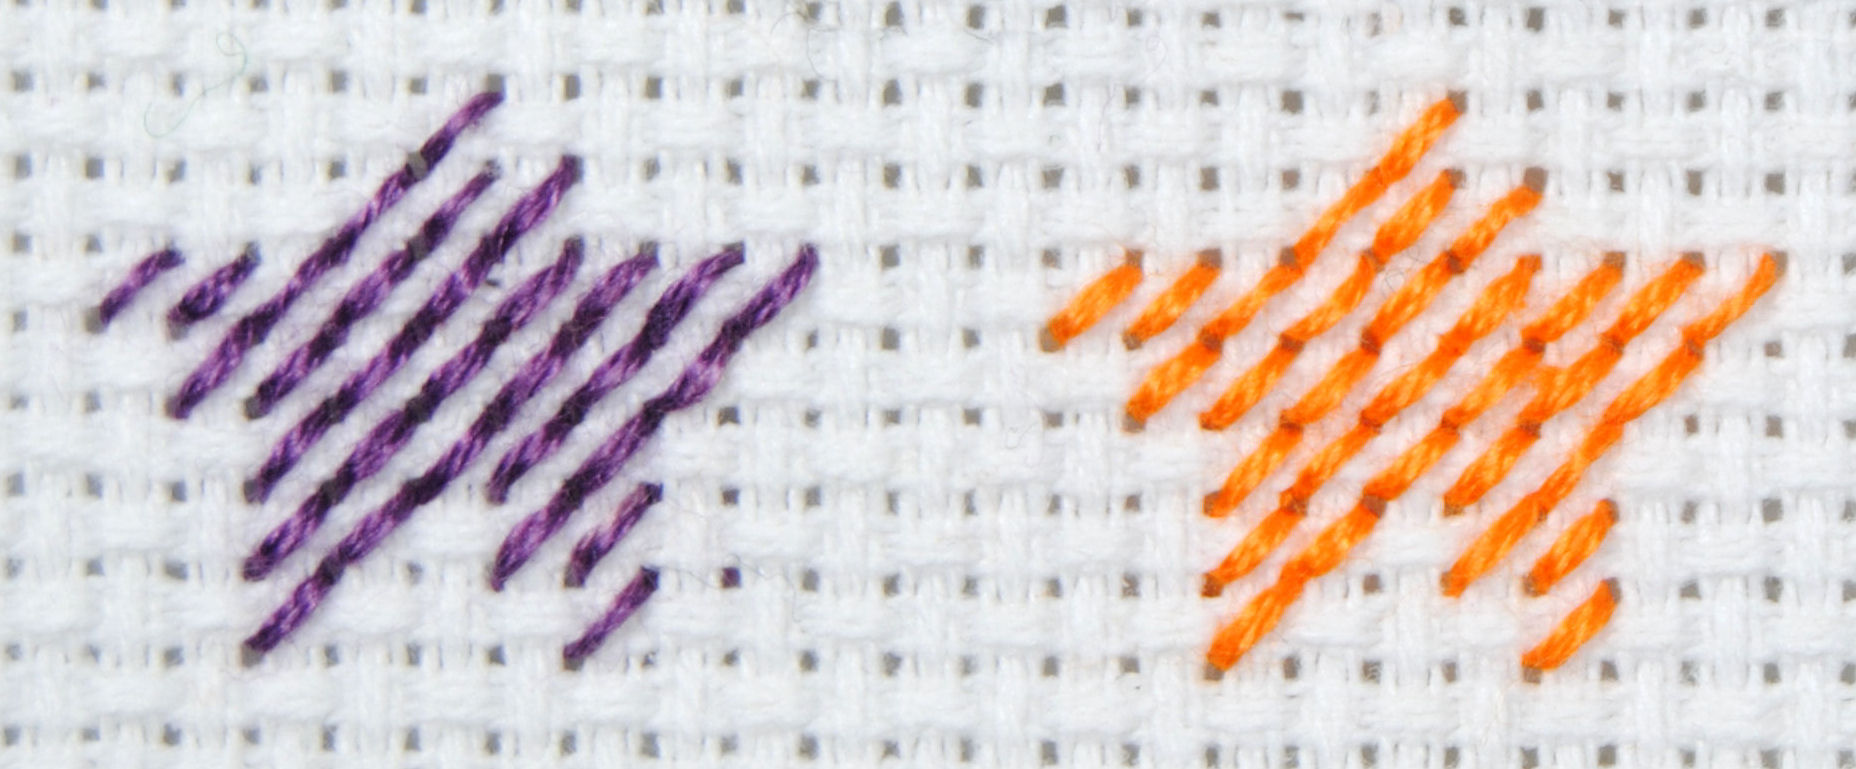
Instead of stitching both colors together on one needle, we’ll be doing the bottom leg of our stitches all in one color, then crossing them with the other color. This makes a different texture than the normal blends but still creates a similar optical illusion when looked at from a distance.
Like before I also included a third star showing how it looks with the normal single strand of each method.
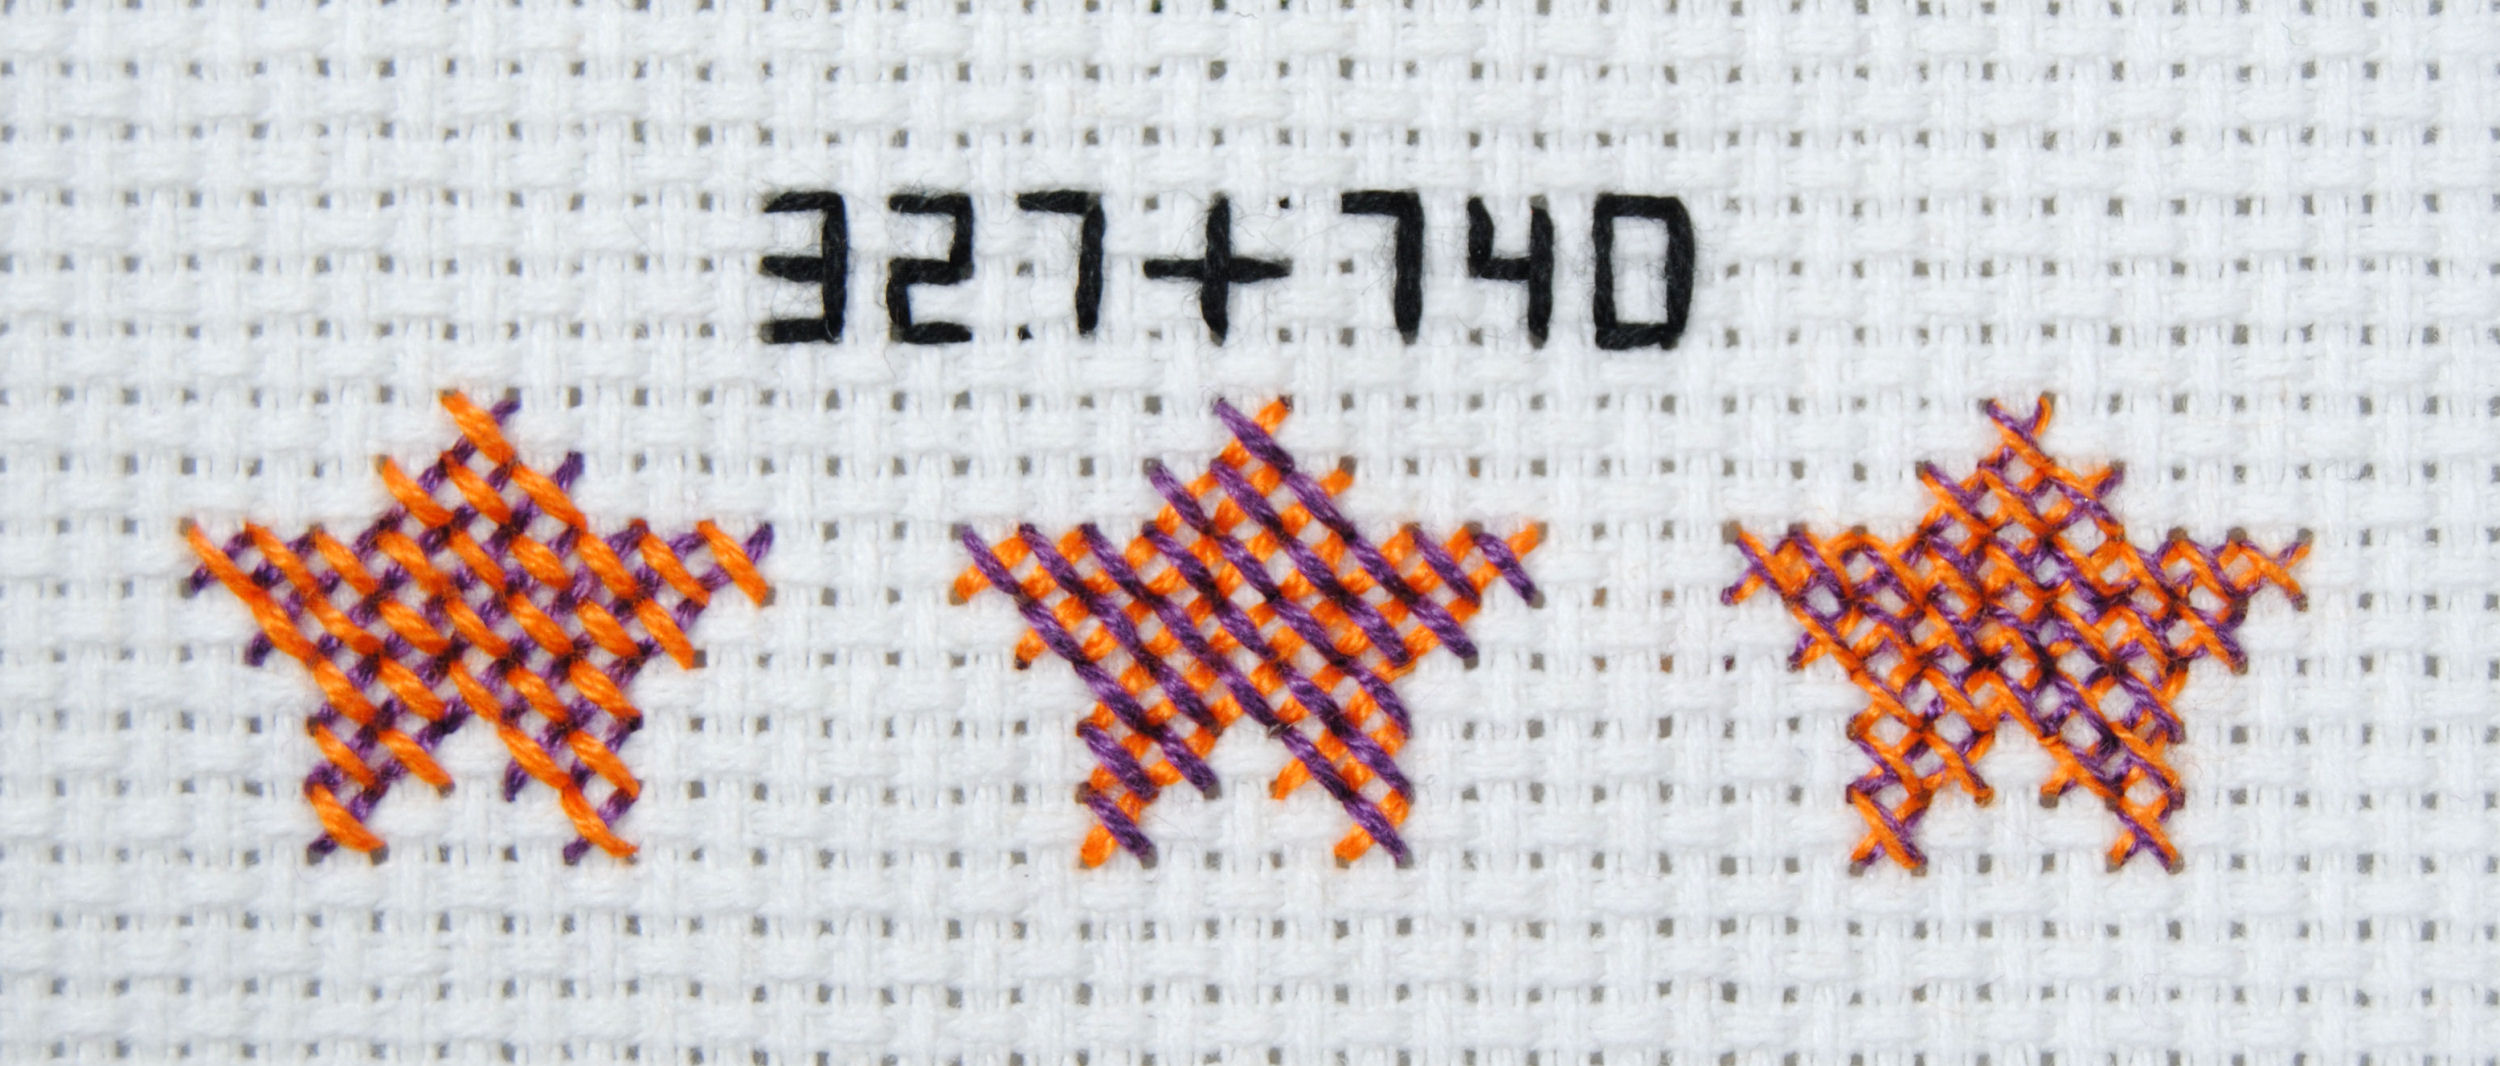
All three stars are very different, huh? You’ll note the top ‘leg’ of the stitch tends to take over quite a bit. It’s pretty obvious with these contrasting colors.
As with the three strand method, it will take some trialing to decide which color should be on top. If the area is meant to be shadow, the darker thread should probably be on top. But try out both combinations and see which you prefer!
Also, once you’ve stitched your samples step away from your project for a bit and come back to it with fresh eyes. If you’ve been looking at it up close for too long the optical illusion isn’t as strong.
So give it some time, look at it from a normal distance and in different lightings to make sure which blend works best for you.
Is railroading necessary?
What is railroading you ask? I have a whole other article explaining railroading in cross stitch and why, so I won’t go into it too much here. But essentially it’s a way to make your stitches lay flatter or more uniformly by taking the time to guide the threads into place.
In the bottom example, the left star does not make use of railroading and the right star does. You can see the right star is a bit more uniform, while the left has a bit more twisting of the threads. It can be hard to tell if you’re not looking for it, though.
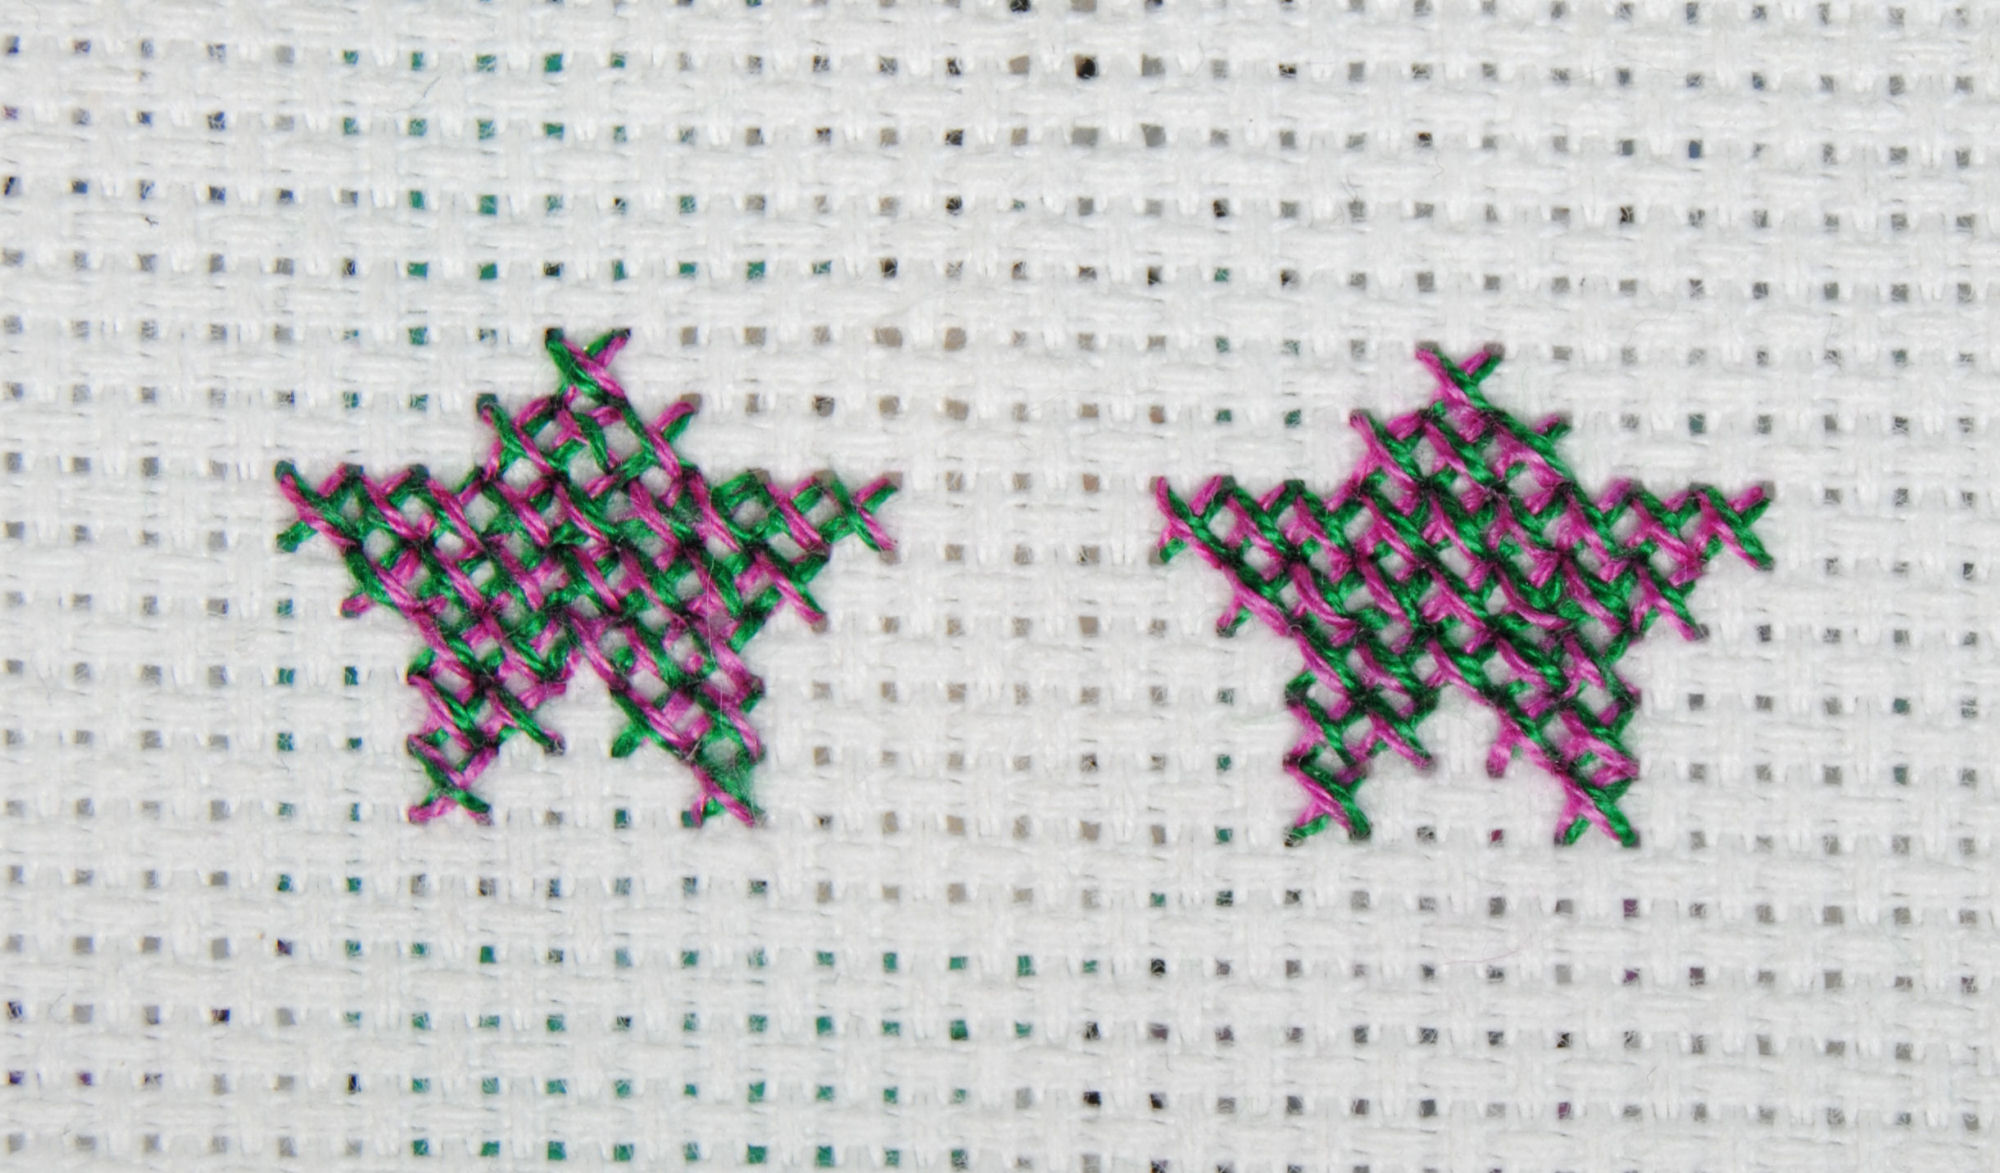
Is it necessary for working with blended threads? No, not at all. Like many things in cross stitch, railroading is personal preference. If you prefer how it looks, and don’t mind spending the extra time then do it! If not, then it will still look just fine.
I usually only take the time if they’re two very different colors like the ones above. Similar colors don’t need it as much as they already naturally blend together better.
Designing using blended threads
All right, now you know the different techniques and have some examples of colors you might blend together, but how do you work these into your designs?
Chances are if you’ve been designing patterns for a while you’ll have run into at least one of the following scenarios. So let’s use our examples from above and explain why a designer might have chosen them.
Creating lighter or darker versions of a color
The first combo was 3685 and 310. Much like my cat example where I needed a darker purple, you sometimes need a darker version of a color than what exists in the standard DMC line. Whether you mix it with 310, or a dark blue or brown you can easily create a darker shade of any color you need.
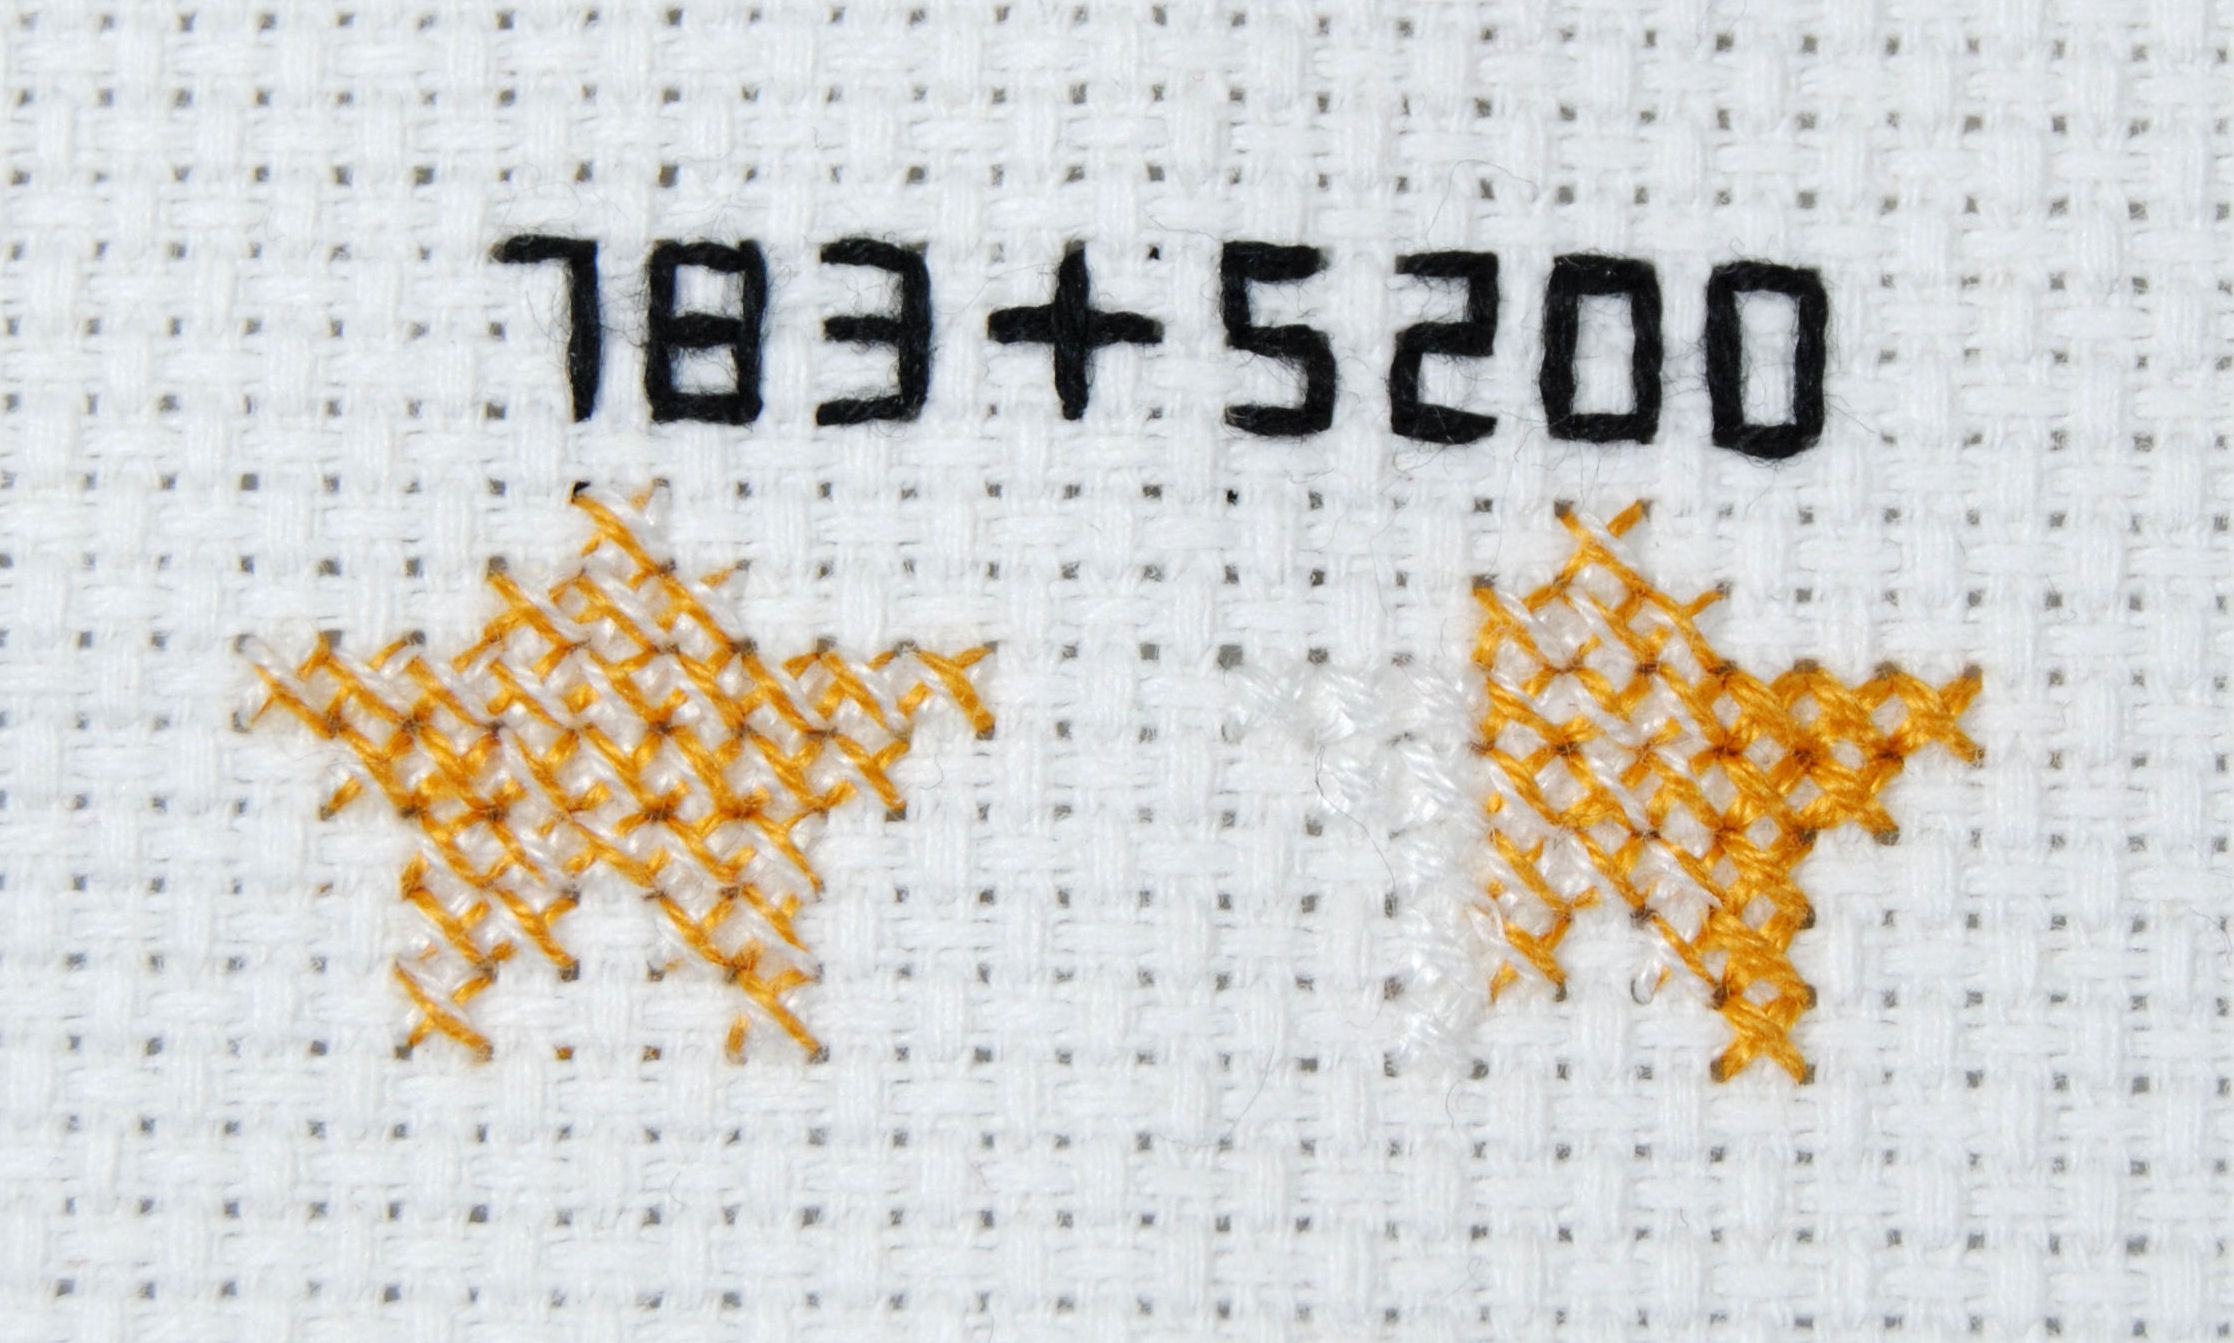
The same is true for creating lighter versions of a color! Mixing this yellow with white has a lightening effect on it. If B5200 is too bright for you, you might use a light creamy color like 746 or 3866 instead.
Could we have just used a lighter yellow instead? Sure. But that can also up the color count on your design, so if you’re trying to keep your shopping list small blending is an option as well.
Creating middle colors in a gradient in same family
What if you have a sufficiently dark and light color, but not the one in between? Mixing colors from the same color family can create a medium tone.
Again, could we have used 367 instead of mixing these two greens? Sure, probably. But this is just an example there are definitely color ramps that don’t have a good gradient (I wish we had more greys and purples, for example).
Or maybe you don’t have the middle color and don’t want to go out to the store for a single skein. You can create your own middle color with the use of blends!
Creating middle colors in a gradient of different colors
What if you’re wanting to create a gradient between two very different colors? In the Lyova Letova pattern I pulled these examples from, you can see the raven’s feathers go from a dark purple to a bright orange. There is no in between color there in the standard DMC line. There is no yellowish purple or blueish orange. So to avoid a very sharp line between the two colors, she’s chosen to do a section of blends using the two colors to make it a smoother transition.
Creating fake metallic threads
What if you want the illusion of metallic thread, but don’t want to go out and purchase specialty threads just for your design? Maybe you’re worried others won’t want to stitch your design because it involves metallic threads. A lot of people have been scared off from metallic thread in general due to how horrible DMC Light Effects can be to work with. It’s also possible they simply can’t seem to find other metallic brands where they live.
That was the case for one of my Skyrim flower designs. Specifically, my Nightshade pattern which originally calls for Kreinik 5845 “Golden Cabernet” which is this lovely purple mixed with gold.
Unfortunately, not everyone has easy access to Kreinik, and I had a buyer reach out to me about possible replacements. But even checking many other metallic brands I couldn’t find one that had that same combo of purple and gold. So they had the lovely idea to just blend a purple and yellow color together.
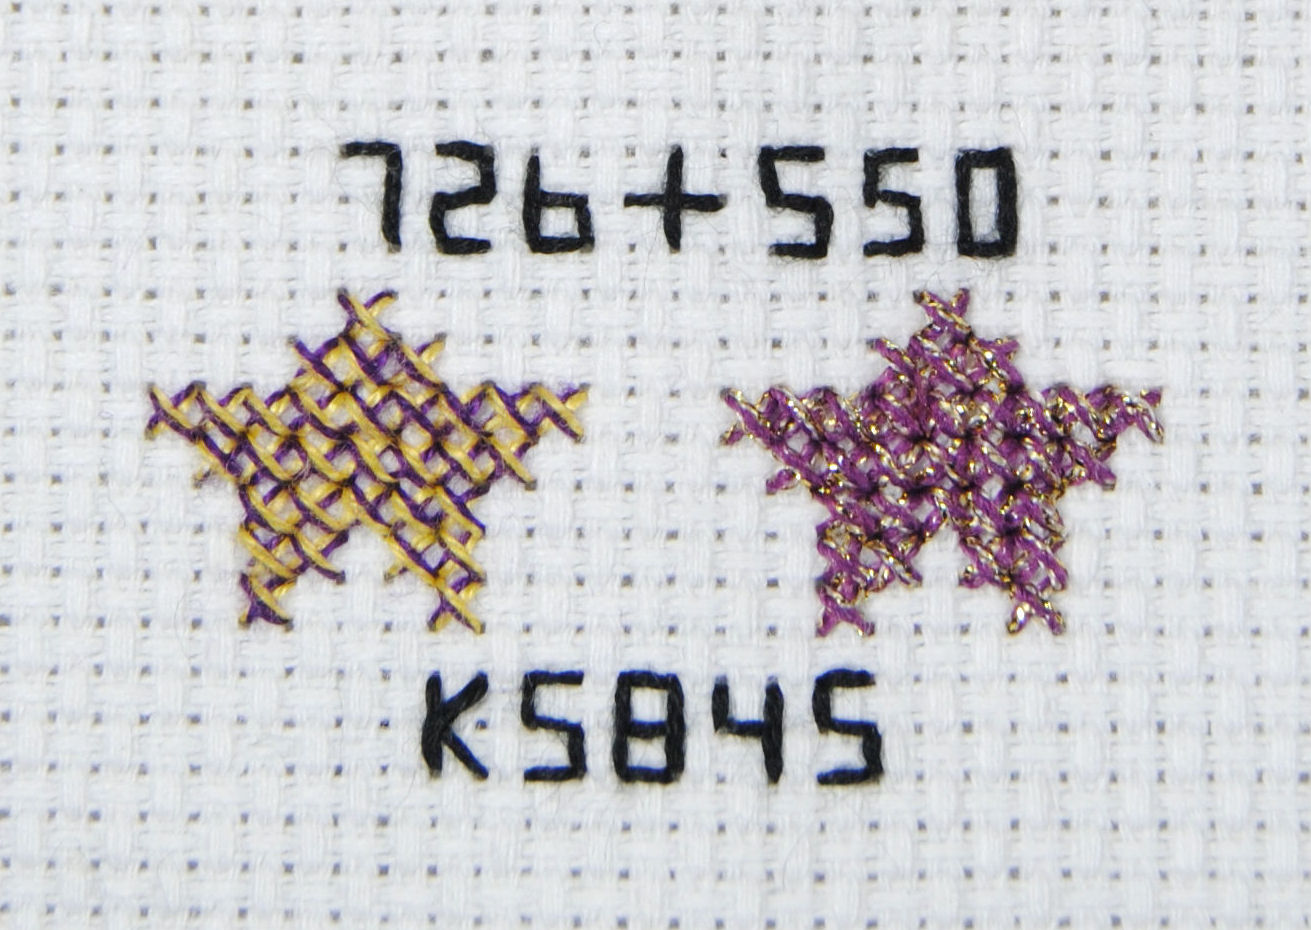
Is it perfect? Maybe not. At least not when you’re looking at them on their own, side by side, and extremely zoomed in. If you’re working with three strands in this case, two strands of purple will help that bright yellow become a little more subtle. Or if you’re stitching a larger area, a darker shade of yellow might look a little better.
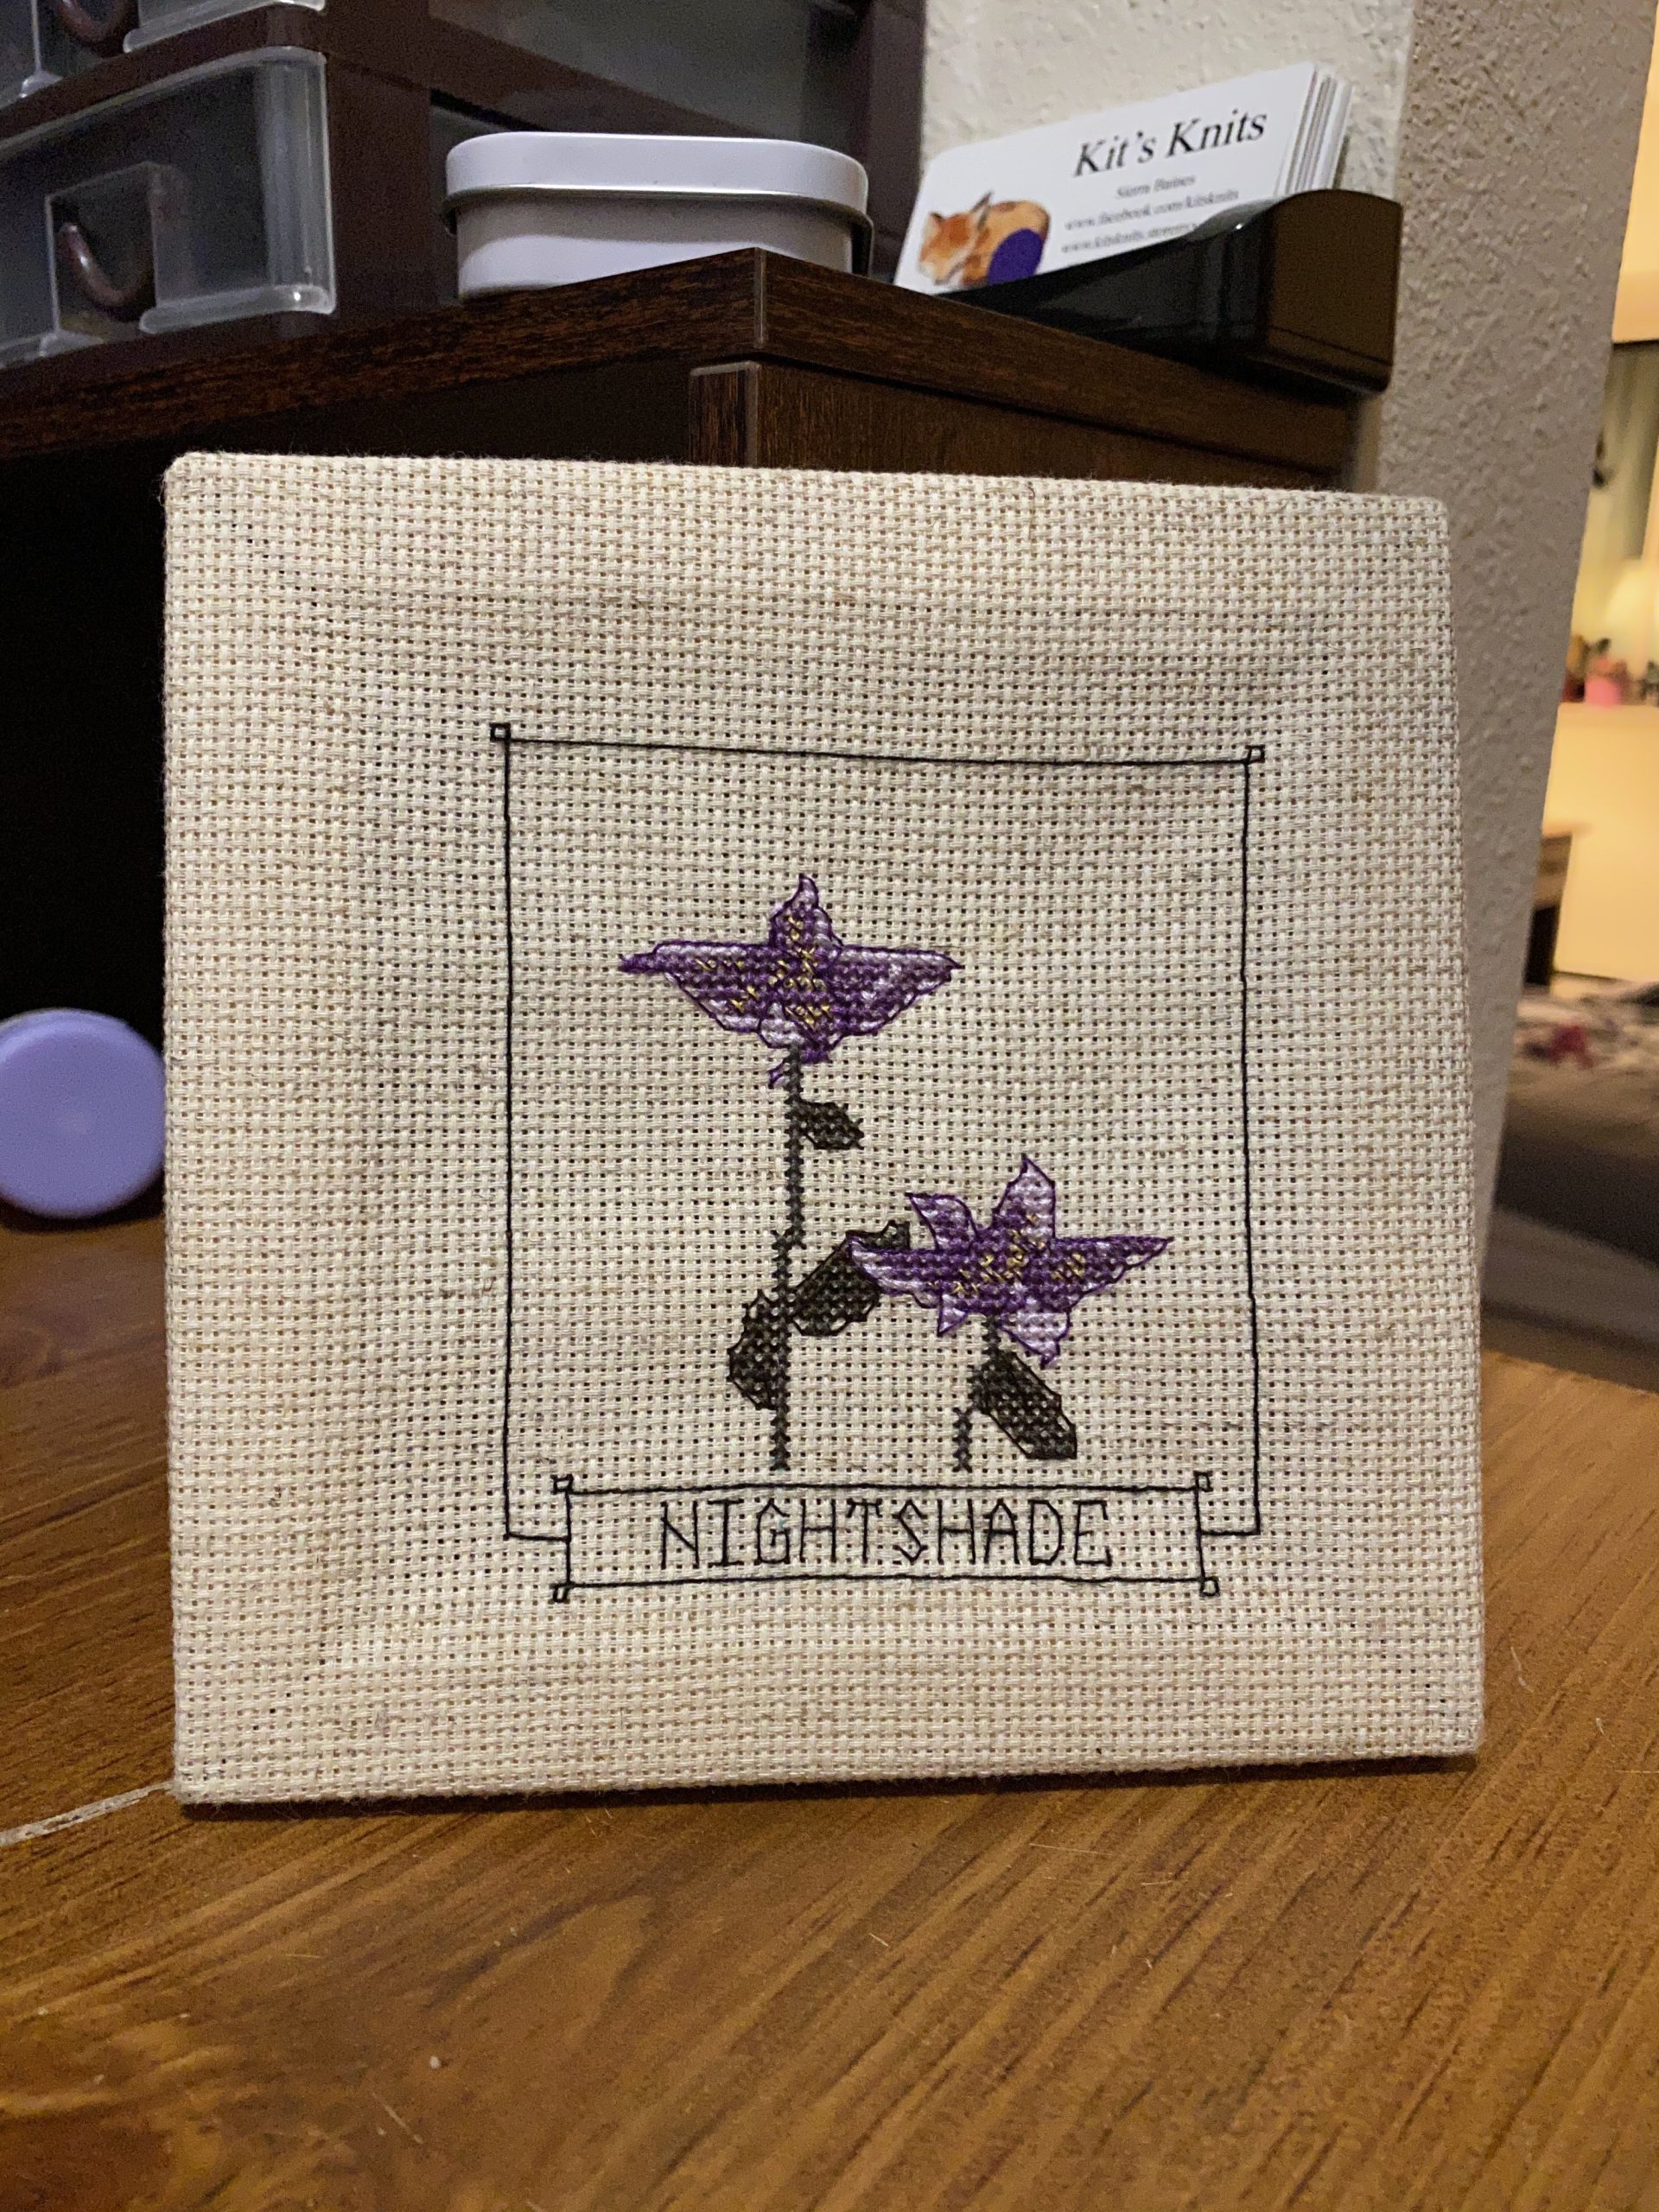
But in just the small sections of the inner flower that needed a fleck of gold? It worked absolutely perfectly! Kit was kind enough to pass on a photo of their finished piece so you can see how it looks in once stitched and next to other colors. Be sure to thank them for me by checking out their awesome crochet creations as well!
Since then, I make sure to include a cotton blend alternative for any specialty threads I happen to use in my patterns. Because not everyone has access to those specialty threads or wants to invest in them.
Adding accents
Ok, one last scenario I can think of. What if you don’t mind metallic threads. Maybe you even like that purple/gold combo above. But you only need it for a very small section of a pattern and are afraid you’ll never find an excuse to use it again?
Well that’s where blending filament comes in! It’s specifically made to be blended. I’ve done a whole article on blending filament if you’d like more details.
But basically, with just one spool of filament you can now make an huge number of differently colored metallic threads just by blending it with your standard cottons. Rather than one very specific spool of purple flecked with gold, you can make any gold-flecked color you want!
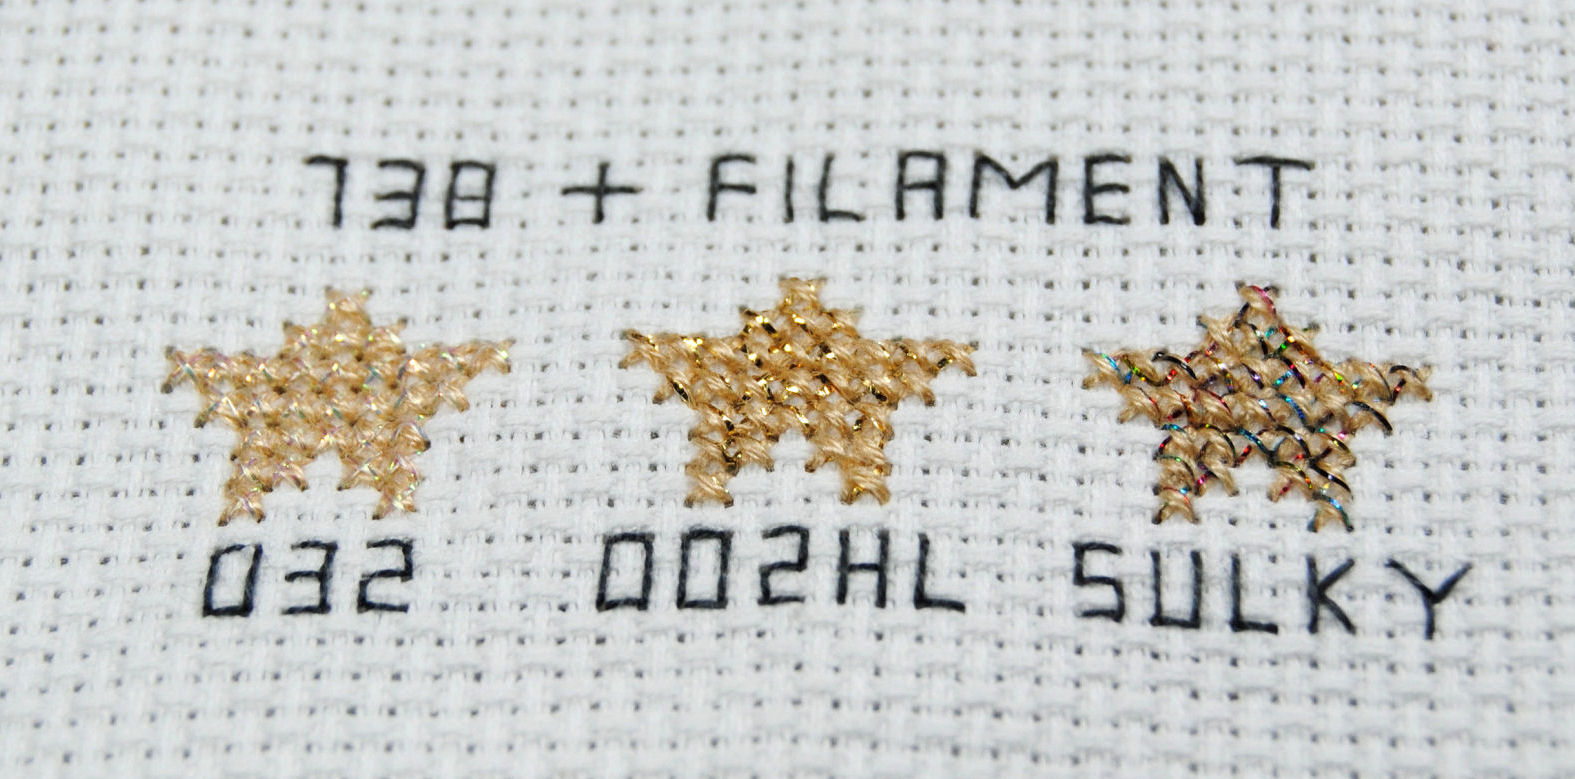
And you can make all sorts of different effects with it as well, whether making a traditional gold sparkly blend, making it iridescent, or making it stand out with a contrasting color!
Trying Something New
If you’ve been designing for a while, you may also have just run across art block at one point or another. Or simply want to push your art style further. Sometimes the best thing for that can be to just try some new things. Add in specialty threads! Use some advanced stitches! Try out blended threads. Whatever it is that inspires you. 🙂
Regardless of what reason you end up using blended threads for, I’d love to see more people try out this technique!