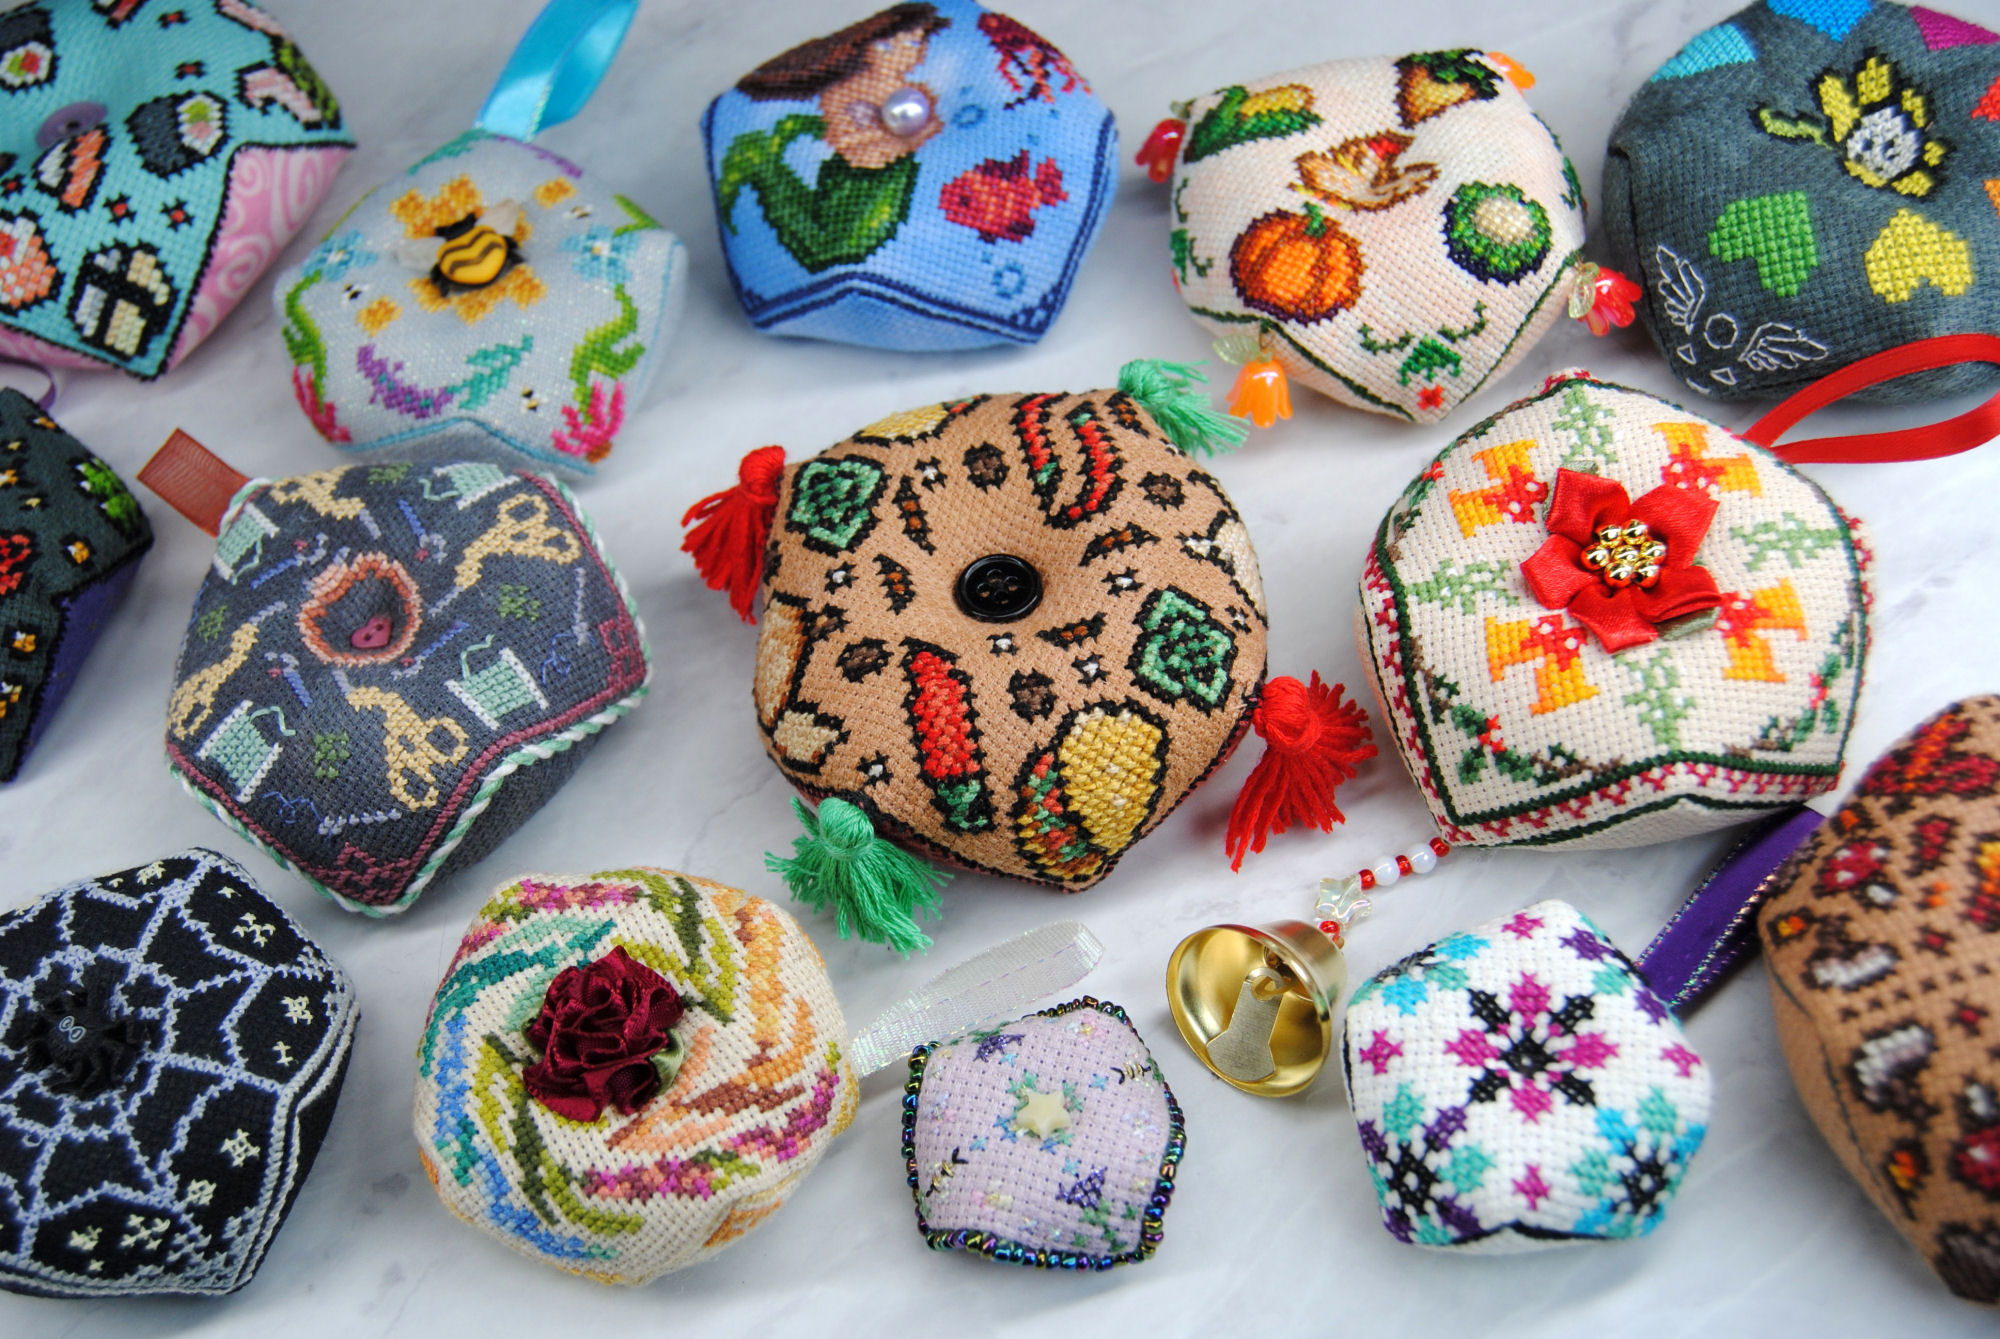
Biscornu Embellishments – How To Bedazzle Your Biscs
I love making biscornu. I’ve got a whole basket full of the things. Some end up as pincushions, others hang out on my christmas tree or as seasonal decor. There’s even a few that work out as lil tiny pillows to hold rings and things. That said, the majority of my biscornu are pretty plain and focus entirely on the cross stitched design. But it can also be fun to add some embellishments to your biscornu to make it a bit more decorative. So today, I want to go over some of the various options you have for biscornu embellishments. And maybe go back and spruce up some of my older ones!
If you’re new here and have no idea what a biscornu is — I have a whole article on it complete with a biscornu tutorial to make your own! But basically, take two square pieces of fabric and stitch them together along the edge with a half square offset and you get this weird little shape many of us have come to love. Now let’s spruce it up a bit.
This post may contain affiliate links. If you buy something using one of these links, I earn a small commission. However, there is no extra cost to you. Thanks for understanding! Learn more in my Disclosures & Privacy Policy.
Table of Contents
Embellish the Pattern
For the sake of this article I will be focusing on things you can do to a biscornu once it’s “done”. Something to add an additional little bit of decor to your piece to make it feel fancier.
However, I want to briefly touch on embellishing the pattern for your biscornu as well. Since this is a cross stitch blog, I’m going to assume you’re cross stitching your biscornu top. But of course you can make biscornu from any square piece of fabric. Whether plain cotton, embroidered fabric, a pieced quilt design, a knitted square, or even a bit of weaving.
But either way, the first option is always to embellish the fabric itself. Whether that’s choosing your prettiest hand dyed aida, or swapping out some of the threads in your cross stitch pattern for metallics or variegated threads. You could swap french knots for beads, or add in some fancy stitches or sequins or whatever else you want. Don’t be afraid to embellish the pattern itself!
Decorating The Bottom
The bottom of your biscornu may not be seen a lot depending on how you use it. For example, as a pin cushion sitting in your craft space you might only see the corners of the bottom piece. As such most biscornu end up with pretty plain bottom panels. But let’s talk about how to add a little detail to the bottom.
Make it Double Sided
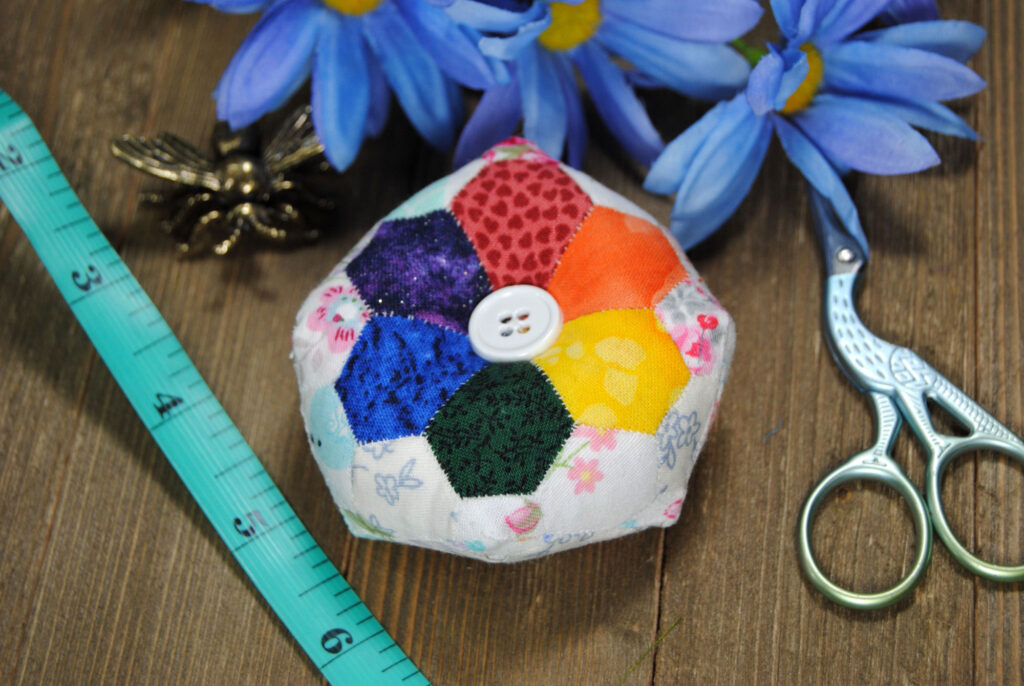
You could, of course, make your biscornu double sided. Whether that means stitching the same pattern twice, or two complementary patterns. I don’t do this much mainly because I need to take photos of my projects for sale and photographing double-sided things is hard. But here’s an example of a non-cross stitch biscornu as well. This little english paper pieced biscornu sits on my desk and is rainbow on both sides, but the other side is a more jewel toned rainbow.

Small Motifs
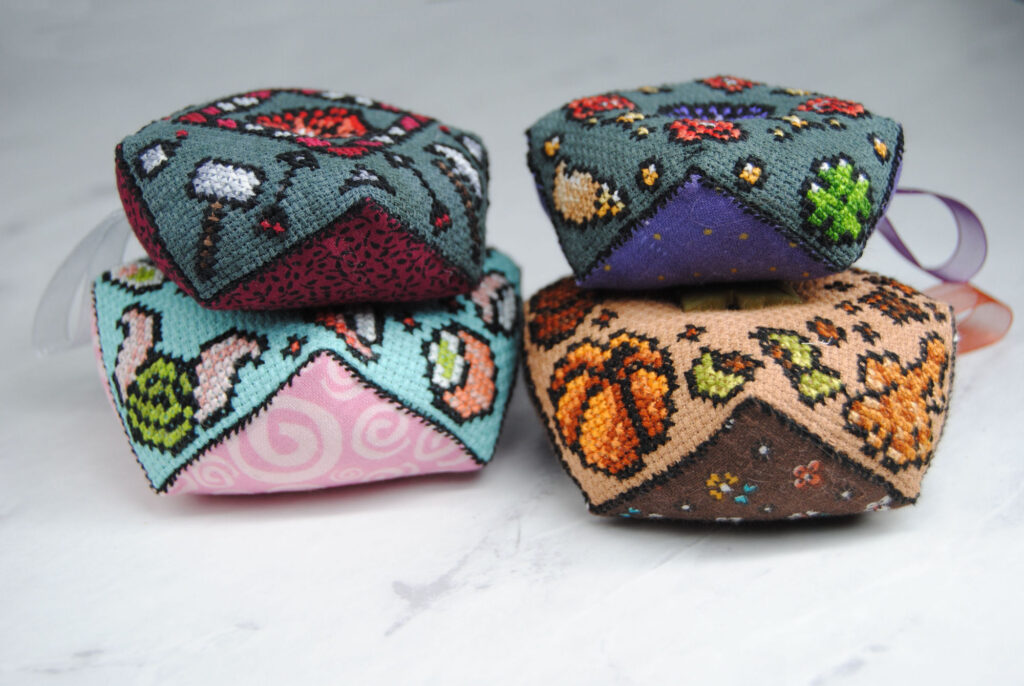
Rather than completely stitching the backside though, you could just decorate the corners. Whether your pattern comes with a bottom side, or you just reuse the corner elements from the top design. For example, for this zelda-themed biscornu I repeated just the triforce elements in a different color on the bottom. So you can see them from the side.
Patterned Fabric Bottom
Alternatively, you don’t have to use the same fabric on both sides! And you can mix-and-match textiles. Cross stitch the top, embroider the bottom. Quilt the top, have a plain cotton bottom. Whatever you decide.
I actually have a whole tutorial on how to use quilting cotton as the bottom of your cross stitched biscornu. And it’s a technique I use a lot!
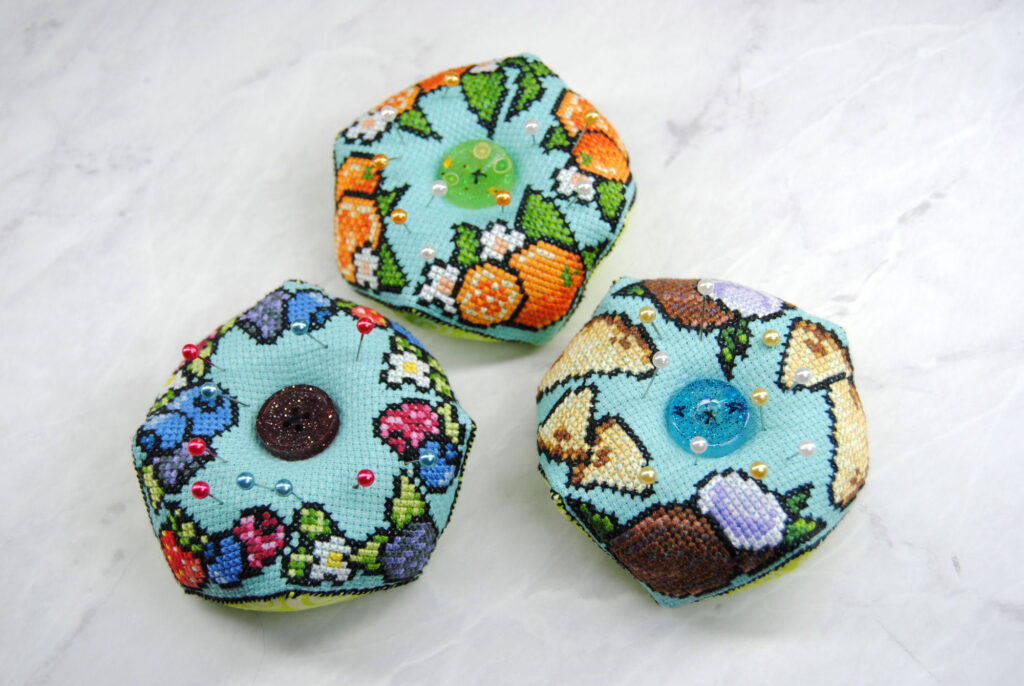
Pick a complementary color or something contrasting. Up to you! Here’s a few examples from my collection:
Hanging Loops
You’ll probably notice on a lot of my biscornu (not all), I’ve included a bit of ribbon looped in. This allows you to hang your biscornu as an ornament.
In my biscornu tutorial I do discuss how to stitch one in as you finish up the bottom.
You don’t have to use ribbon though. Cording is also an option, whether you make your own cording or purchase some. You could braid a couple of lengths of embroidery thread together and use that, or use some colorful yarn, etc.
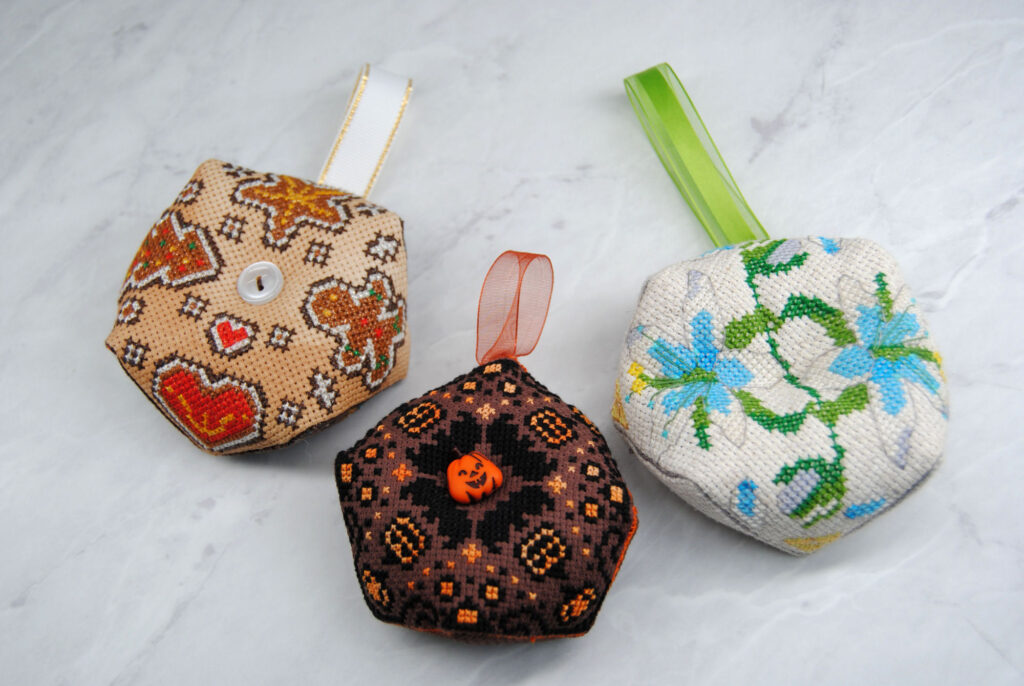
Mostly though, I use ribbon. So here’s a few examples from my stash.
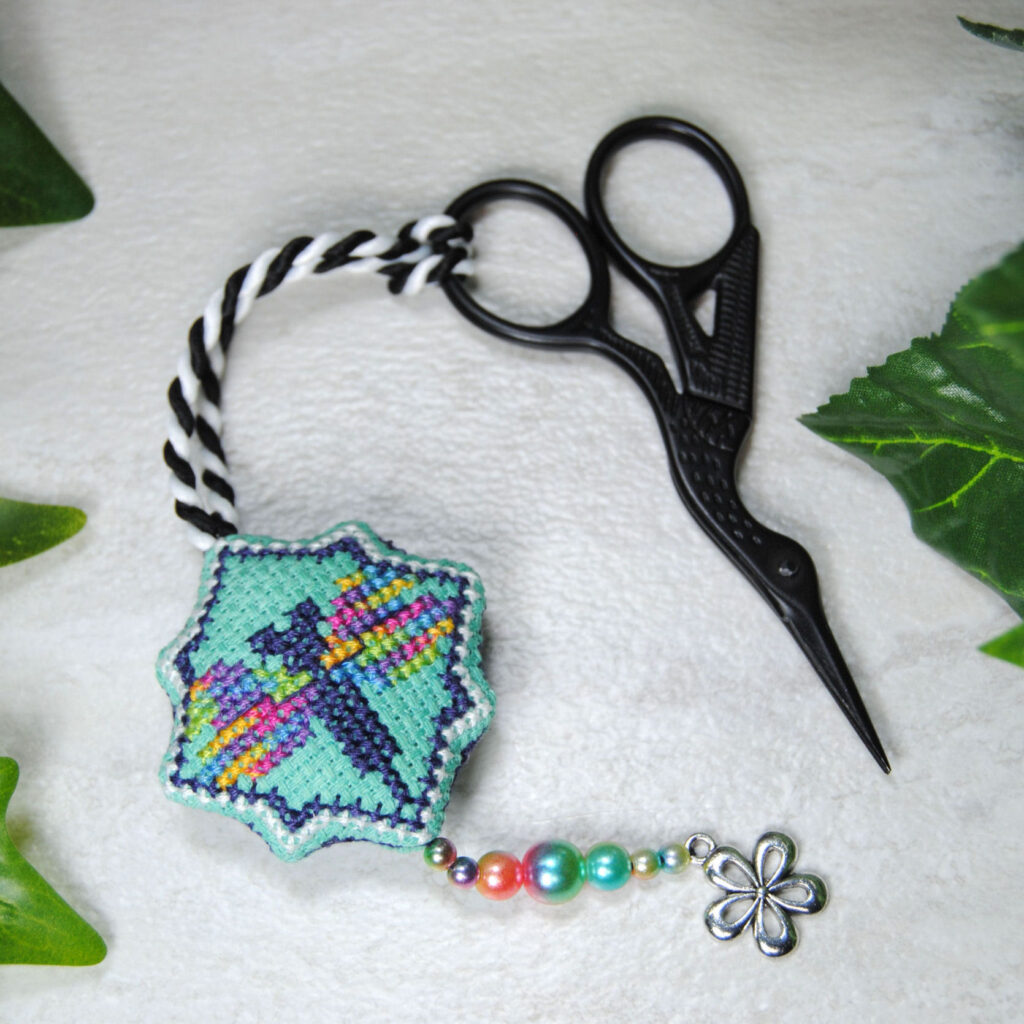
Rather than just a small loop you could do an even longer one and use it as a scissor fob! (just pretend that’s a small biscornu instead of… whatever you want to call that shape.)
But these ideas so far are for how to change up the assembly of your biscornu. If you’ve already got a finished biscornu and just want to spruce it up a bit… keep on reading. 🙂
Center Decorations
Even if you’ve already finished your biscornu and are just wanting to decorate it — you can swap out your center elements pretty easily.
Despite the majority of biscornu you’ve probably seen… you don’t actually NEED to include a button or cinch in your biscornu at all. They’re pretty cute without it, too. Especially if your pattern is very busy in the center and needs to be visible. But even if there’s a gap in the middle of the pattern where a button would normally go… you don’t have to.

Fancy/ Novelty Buttons
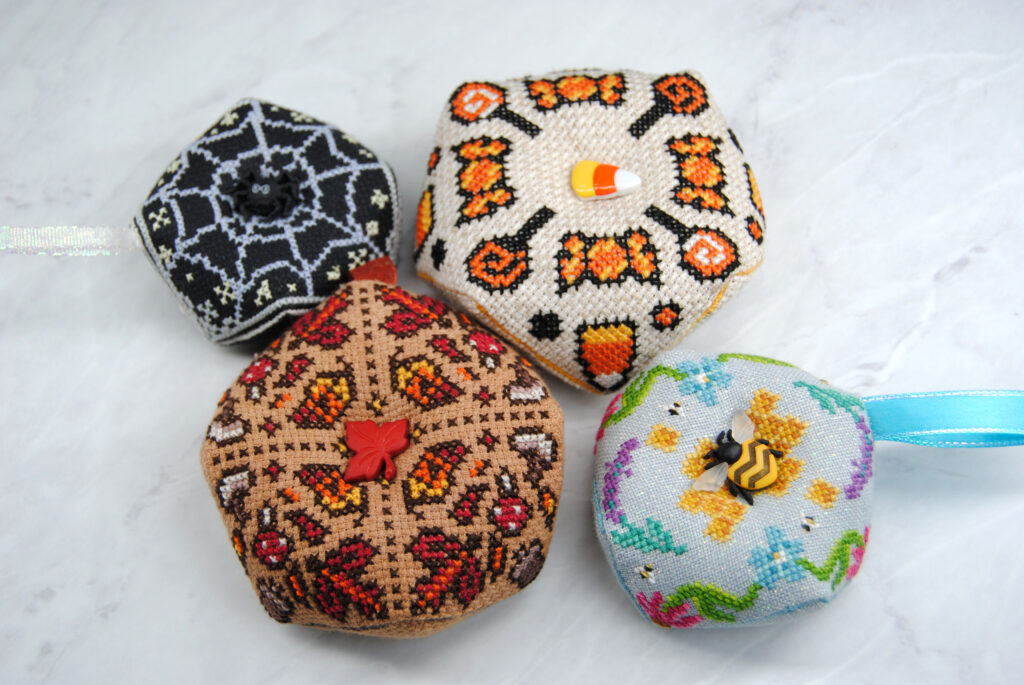
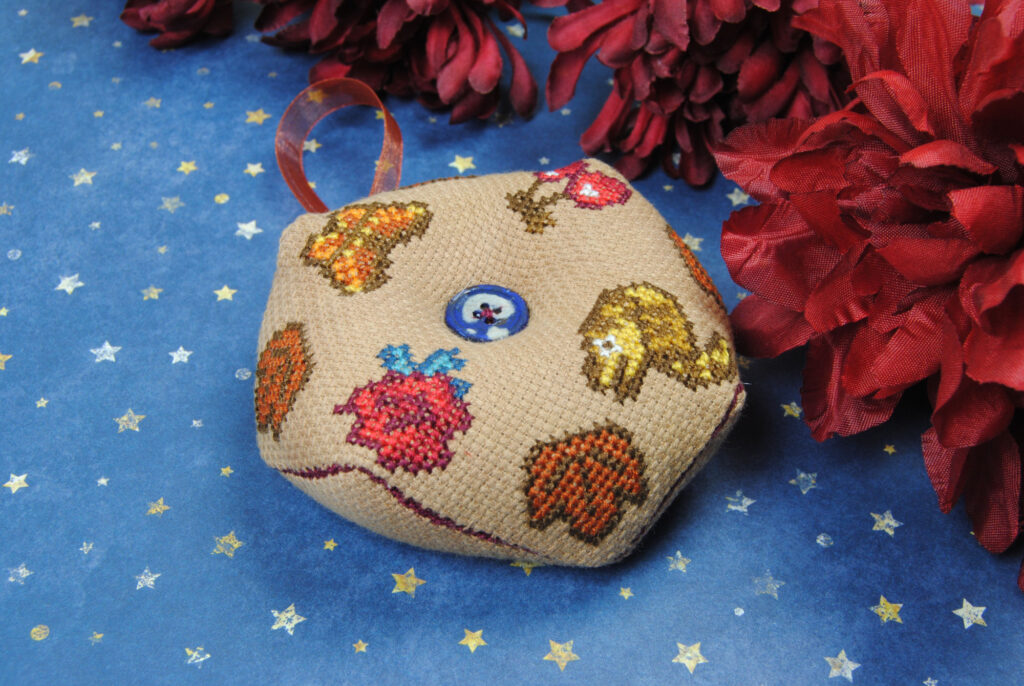
That said, buttons are a great and easy way to decorate your biscs! From elaborate gold buttons, cute shaped buttons that match your theme, or plain colored buttons. I’m still working through a pack of halloween buttons from years ago! And I almost always get questions about my bee buttons.
I’ve even got a few buttons I made myself using resin and a button mold.
If you’ve already got a button on your bisc… you can of course easily swap it out for a different one. Or you could even learn to paint your button. Here, I took a normal blue button and tried to make it into an animal crossing fossil. With admittedly mixed results.
Button Substitutes
You don’t have to limit yourself to just buttons though! You can pop pretty much anything into that center spot. Here’s just a few ideas for you:
- Beads
- Gems
- Charms
- Ribbon Flowers
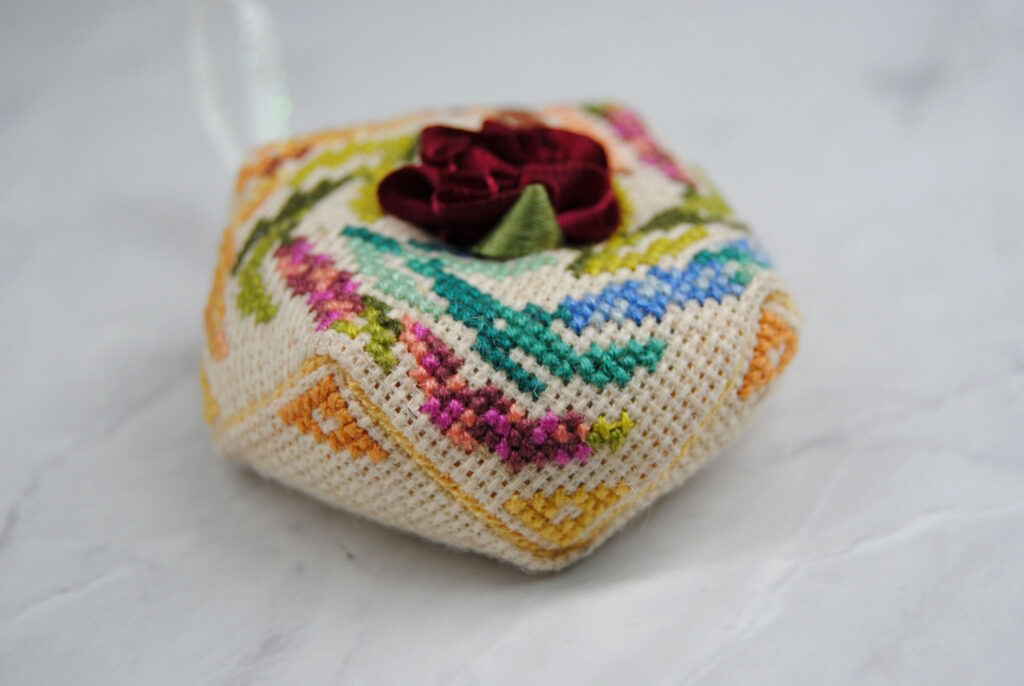
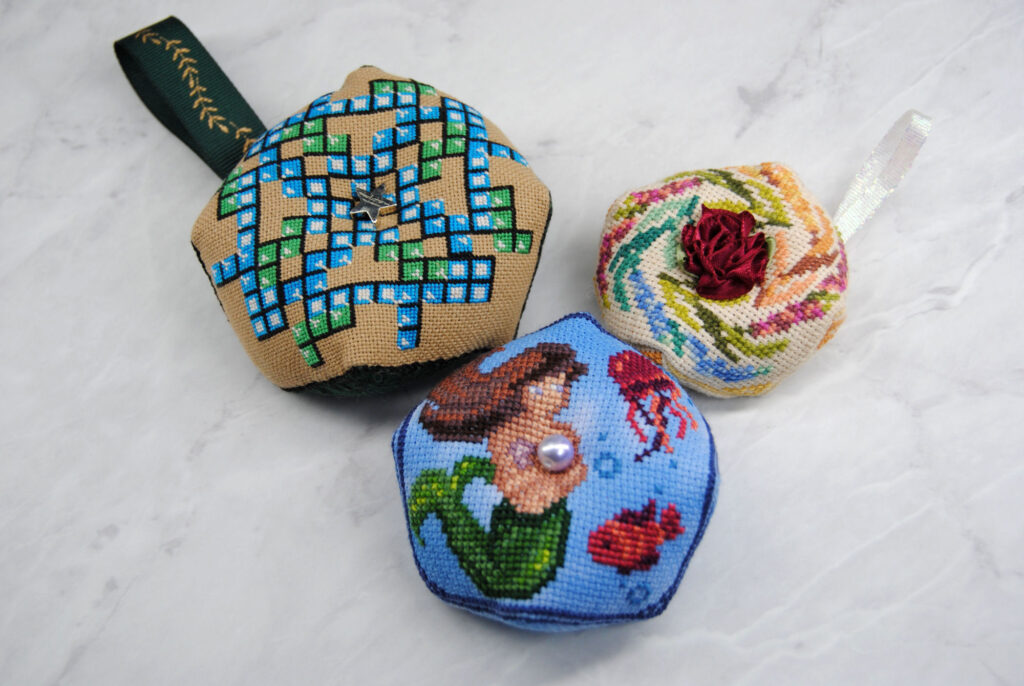
And some examples I’ve done. The floral bisc features a satin ribbon carnation. The tetris biscornu uses a metal star shaped bead rather than a button. And my mermaid is holding a plastic faux pearl bead.
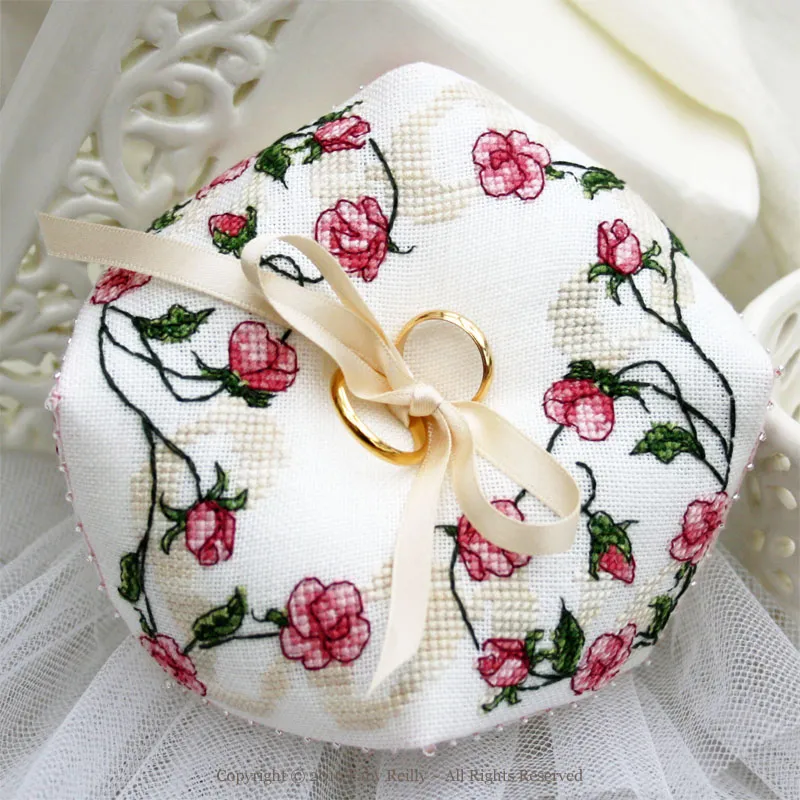
This example from the talented FabyReilly has simply a long piece of ribbon stitched to the center to use as a ring pillow!
I even found this needlepoint example from Bedecked & Bedazzled that features a big ol’ tassel in the middle!

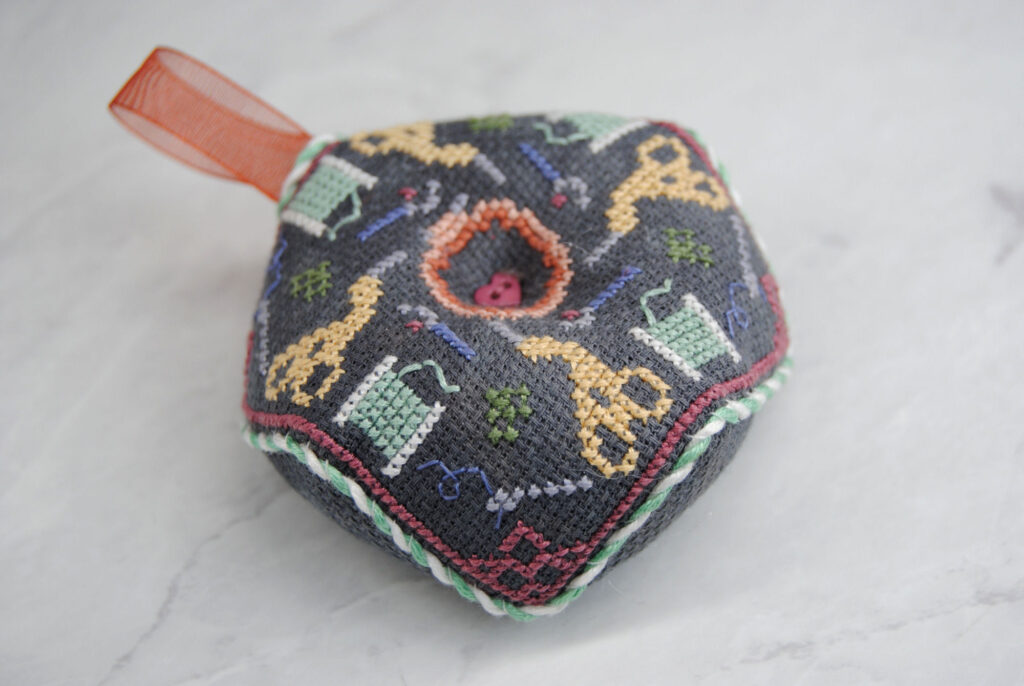
Decorative Edging
And that last one leads me perfectly into the next decorative example… edging! A lot of these you can attach while you stitch the two halves together. For example, you could add in a bead with each stitch as you assemble it. But you can also go back and add these after the fact! You can embellish your edges with any number of things, but here’s a few examples.
Beaded Edging
Like the needlepoint one above, you could add beads to the edge. That one leaves a little gap between the beads, but here’s a mini bee-scornu I made that is just a straight edge of stitching!
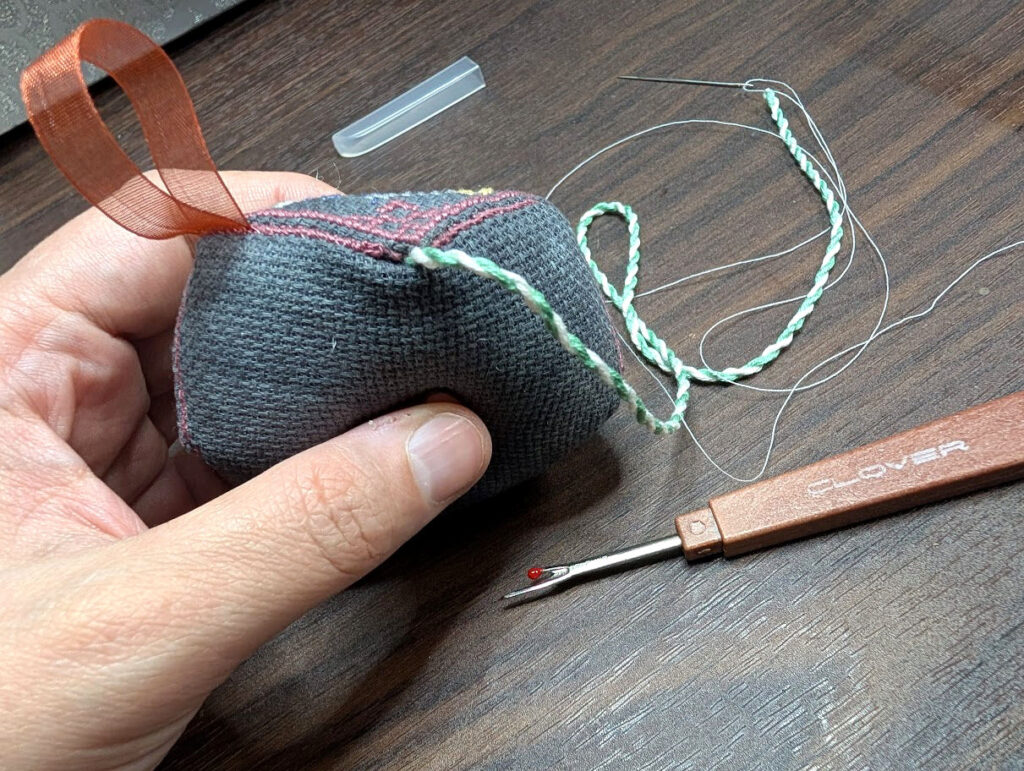
Corded Edging
Much like the assembly process of my flat ornaments, you could sew cording along the edge using some of the colors from the pattern itself will help tie it in all together.
This would’ve been easier to add as I was sewing the biscornu up to begin with. Before closing the last bit of your biscornu, you can stick a knotted end of cord into the bisc. Then baste it down along the edges of the biscornu you just stitched up. Finally, tuck the other end into that same hole before fully closing it up.
Instead, I simply used a seam ripper to open up a corner and then did the same thing. You just have to be extra secure when stitching it back up at the end, as the stitching around it will still be loose.
Ricrac/Lace Edging
Don’t stop there, raid your sewing stash! Go to the craft store and see what you can find! Biscornu tend to be relatively small so you don’t need a lot of yardage for this. And those small bits of leftover trim are exactly the kind of thing that get thrown out because you don’t have ‘enough’ for a full project. So why not use it up on a biscornu?
I was gonna go to my local crafty reuse shop and find some ricrac or lace to stitch to the edge of a biscornu, but I ran out of time for this article. Maybe next time!
Decorative Corners
Another common embellishment technique is to add decorative elements to the upper ‘corners’ of your biscornu to give them a little more flair.
Beaded Corners
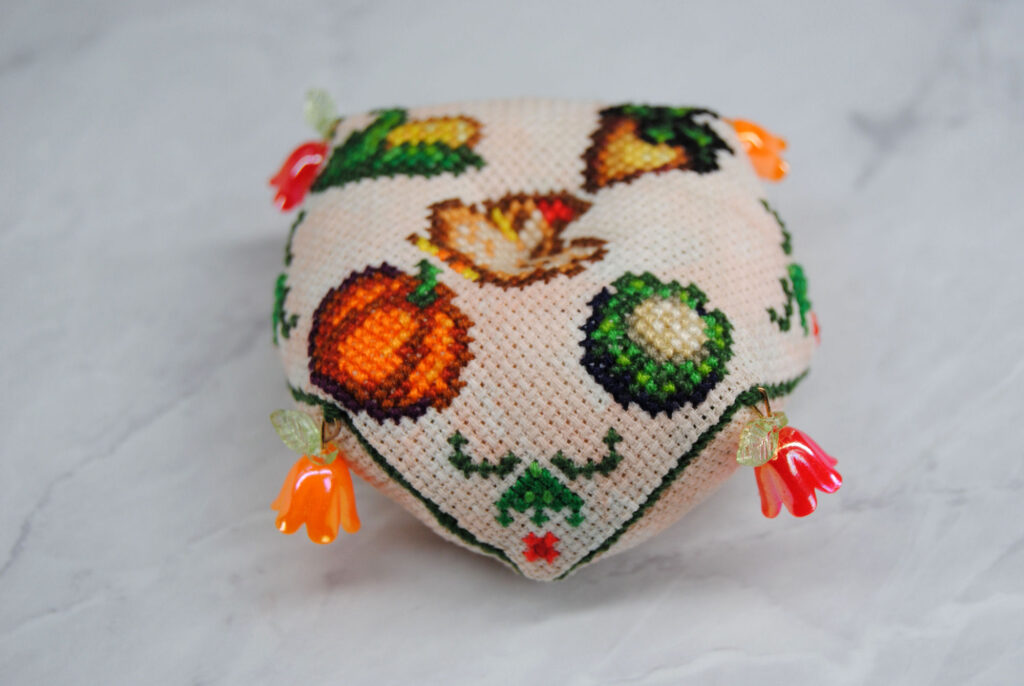
We’ve got beaded patterns, beaded centers, beaded edges… why not add beads on the corners too? Here I’ve added little dangling flower charms with some cute leaf beads to my stardew pincushion. I wanted to match the red flowers in the corner motif but didn’t have enough, so I ended up alternating red and orange. I think it turned out super cute!
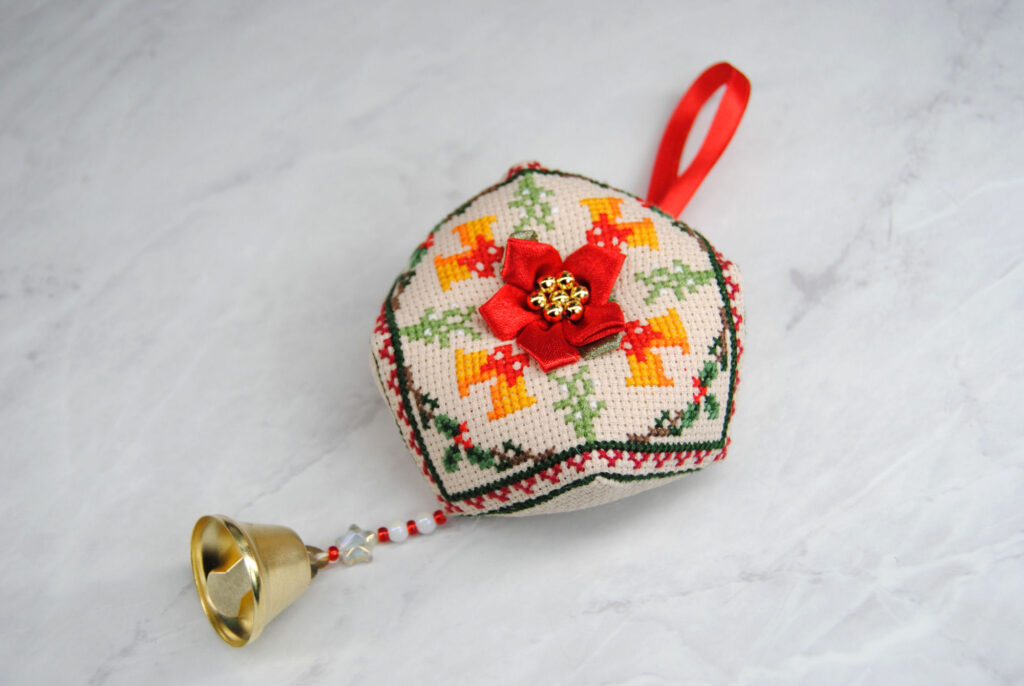
You don’t have to do all four corners though — here I have a hanging loop on one end and a dangle of beads leading to a small bell on the other for an adorable Christmas ornament. I got the mini satin ribbon ponsettias from my crafty reuse shop, so I haven’t been able to find them online. But you could recreate the effect with a similar satin flower and some gold beads.
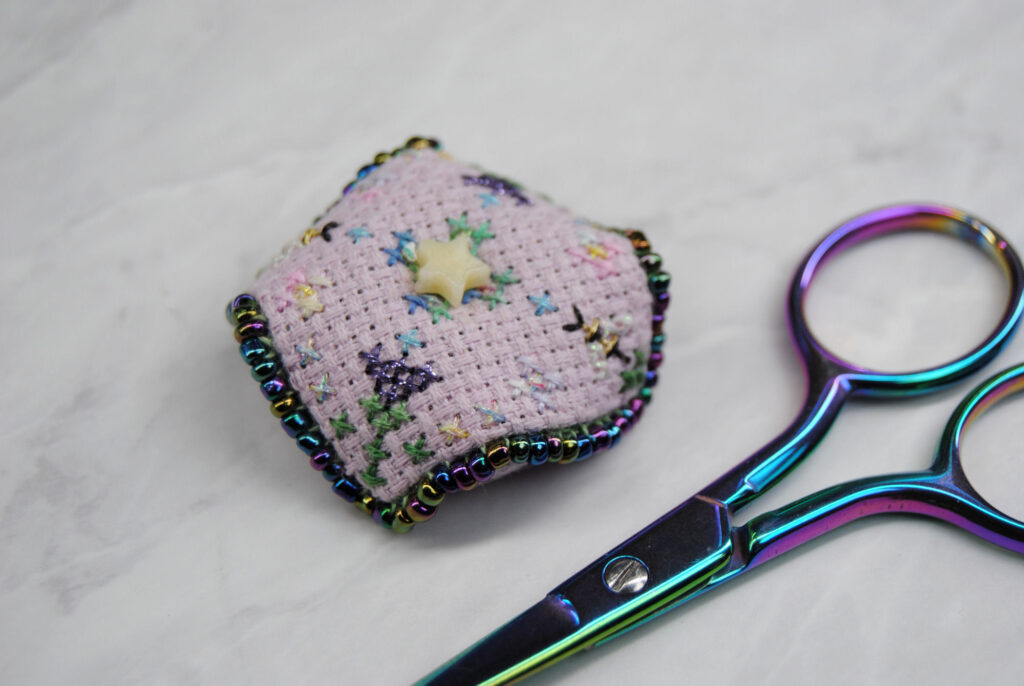
You could also do little seed bead ‘tassels’ on the corners like this option from my scissor fob tutorial.
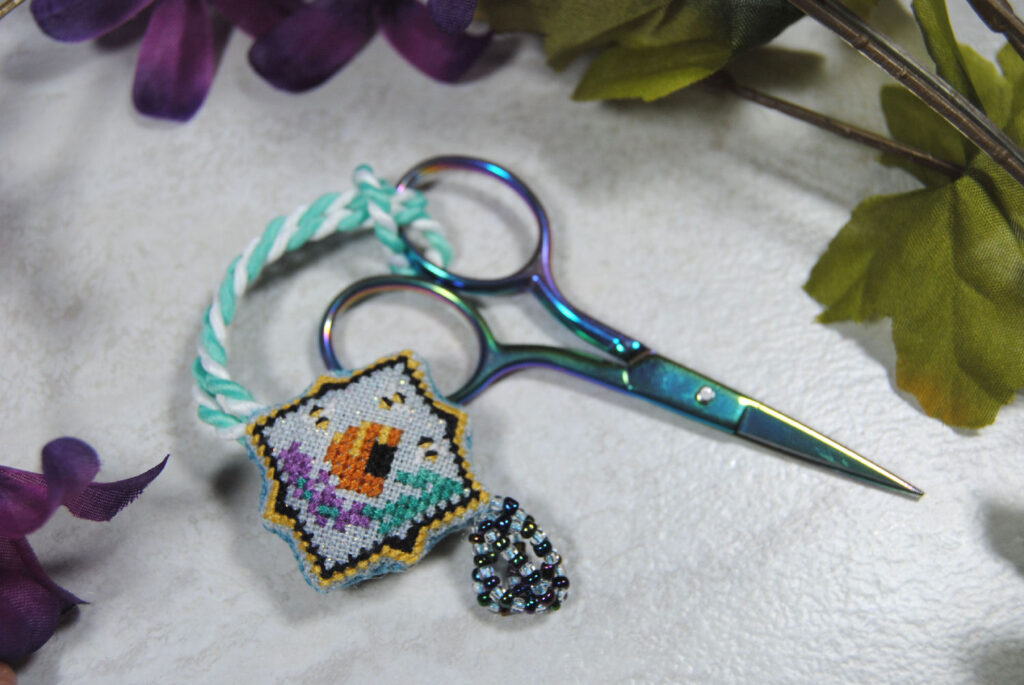
Tassel Corners
Speaking of tassels, you don’t have to make those out of beads! You can make tassels out of the same embroidery thread you used on your pattern! And of course you can just buy ready made tassels, too.
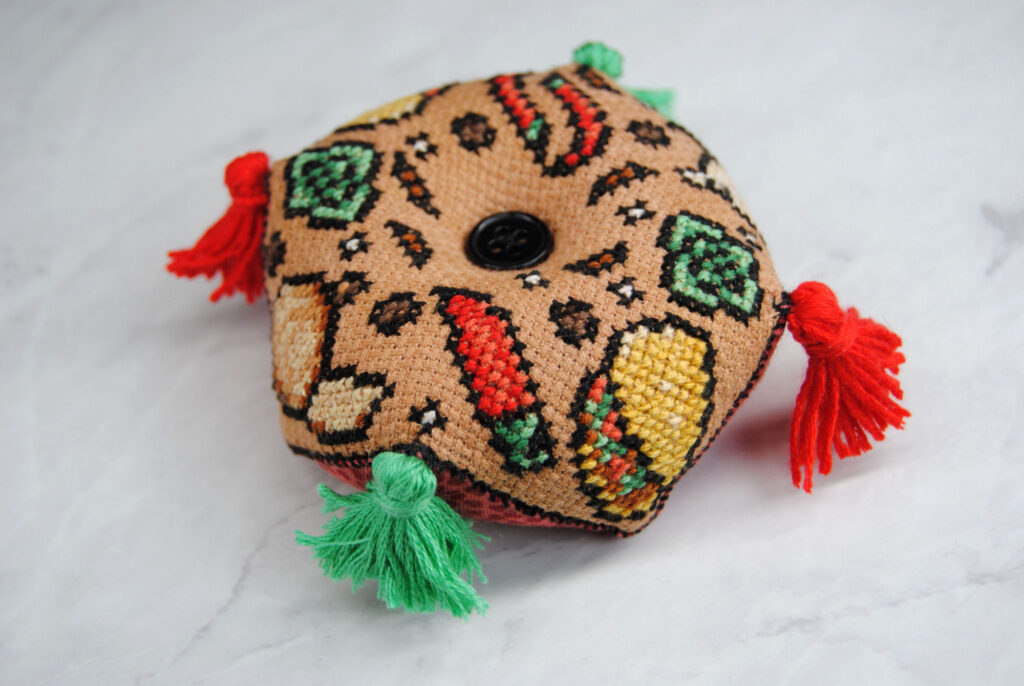
You could do all four corners, or just one corner, especially if you’re hanging it up or using it as a scissor fob.
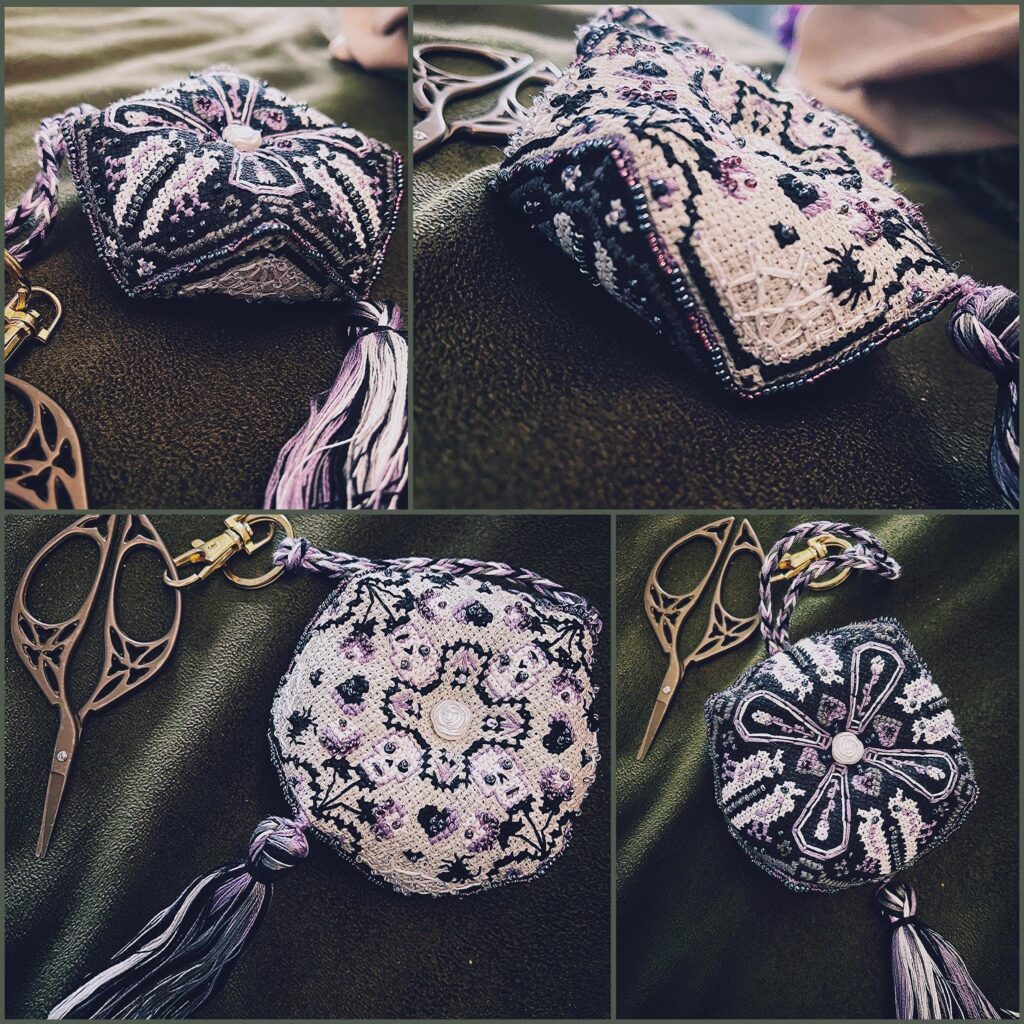
For example, this gothic biscornu by daniexanie on reddit. They absolutely pulled out all the stops here. Double sided, beaded pattern, rose button center, beaded edging, braided cord loop, AND a tassel! They’ve even included the pattern for free via a google drive link in the comments!
What a perfect example to end this article on to show that all of these options can be easily mixed and matched to fit your design.
Hopefully you’ve found something here than inspired you to embellish your next biscornu, or even to go back and spruce up an old one!


