3D Cross Stitch – Various Ways to Make Dimensional Stitches
Bit of a different article this month — rather than a tutorial I wanted to do a bit of a spotlight of all the different ways people have come up with to make 3D cross stitch. There’s a lot of ways to tackle the three-dimensional shape, and hopefully these examples will give you some inspiration. Consequently, this article will be mostly photos.
My brain struggles with 3D as I can’t visualize at all, so I leave it up to other designers to showcase these creative shapes. Hopefully though you’ll find yourself some new designers this way! I’ll of course link to everything I find so you can find the pattern, but the links may break over time, apologies in advance.
These are by no means all the designs out there, just an example of some of the unique styles I found while researching for this article. I haven’t purchased/stitched most of these. Finishing techniques are based on the photos and what is publicly available.
This is gonna be very different from my usual articles. More a gallery of inspiration. But either way, very image heavy, so I apologize in advance if it takes a bit to load depending on your internet speeds. I tried to include a variety of shapes and examples and actually cut out quite a lot of similar designs!
This post may contain affiliate links. If you buy something using one of these links, I earn a small commission. However, there is no extra cost to you. Thanks for understanding! Learn more in my Disclosures & Privacy Policy.
Table of Contents
Stuffed Fabric Shapes
The first category of 3D projects I’d like to discuss is the fabric shapes. Projects stitched on normal aida or evenweave and stitched together in the ‘biscornu method.’ If you’re not familiar with biscornu, this is done by stitching through a backstitch outline and often stuffed with polyfil or similar, but not always. There’s quite a few of these out there as they’re easier to make and don’t require special materials.
I’ll show you a few different ones to show the range of shapes that can be made with this techniques. Here we go from two flat shapes stitched together and stuffed to make a soft plush to multi-piece projects that create a gradual curve.
Single Piece Folded Fabric Shapes
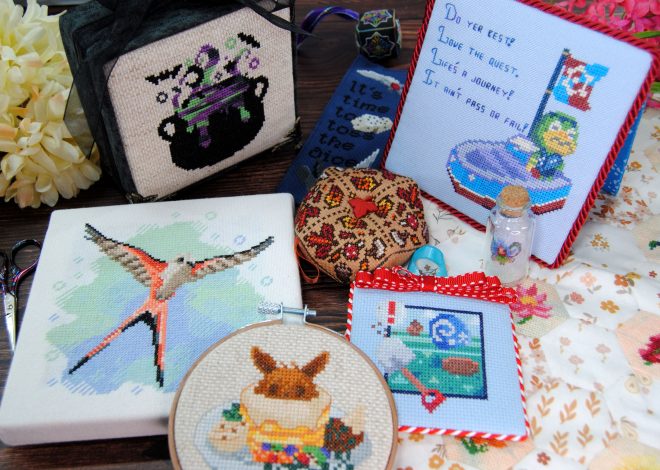
To start off with, here’s a category with just one piece of fabric folded over to create creative shapes. Yeah these seem basic, and maybe you don’t feel they’re 3D enough. But in the end you’re left with an actual physical piece that can do more than just hang on a wall, so I’m counting them.
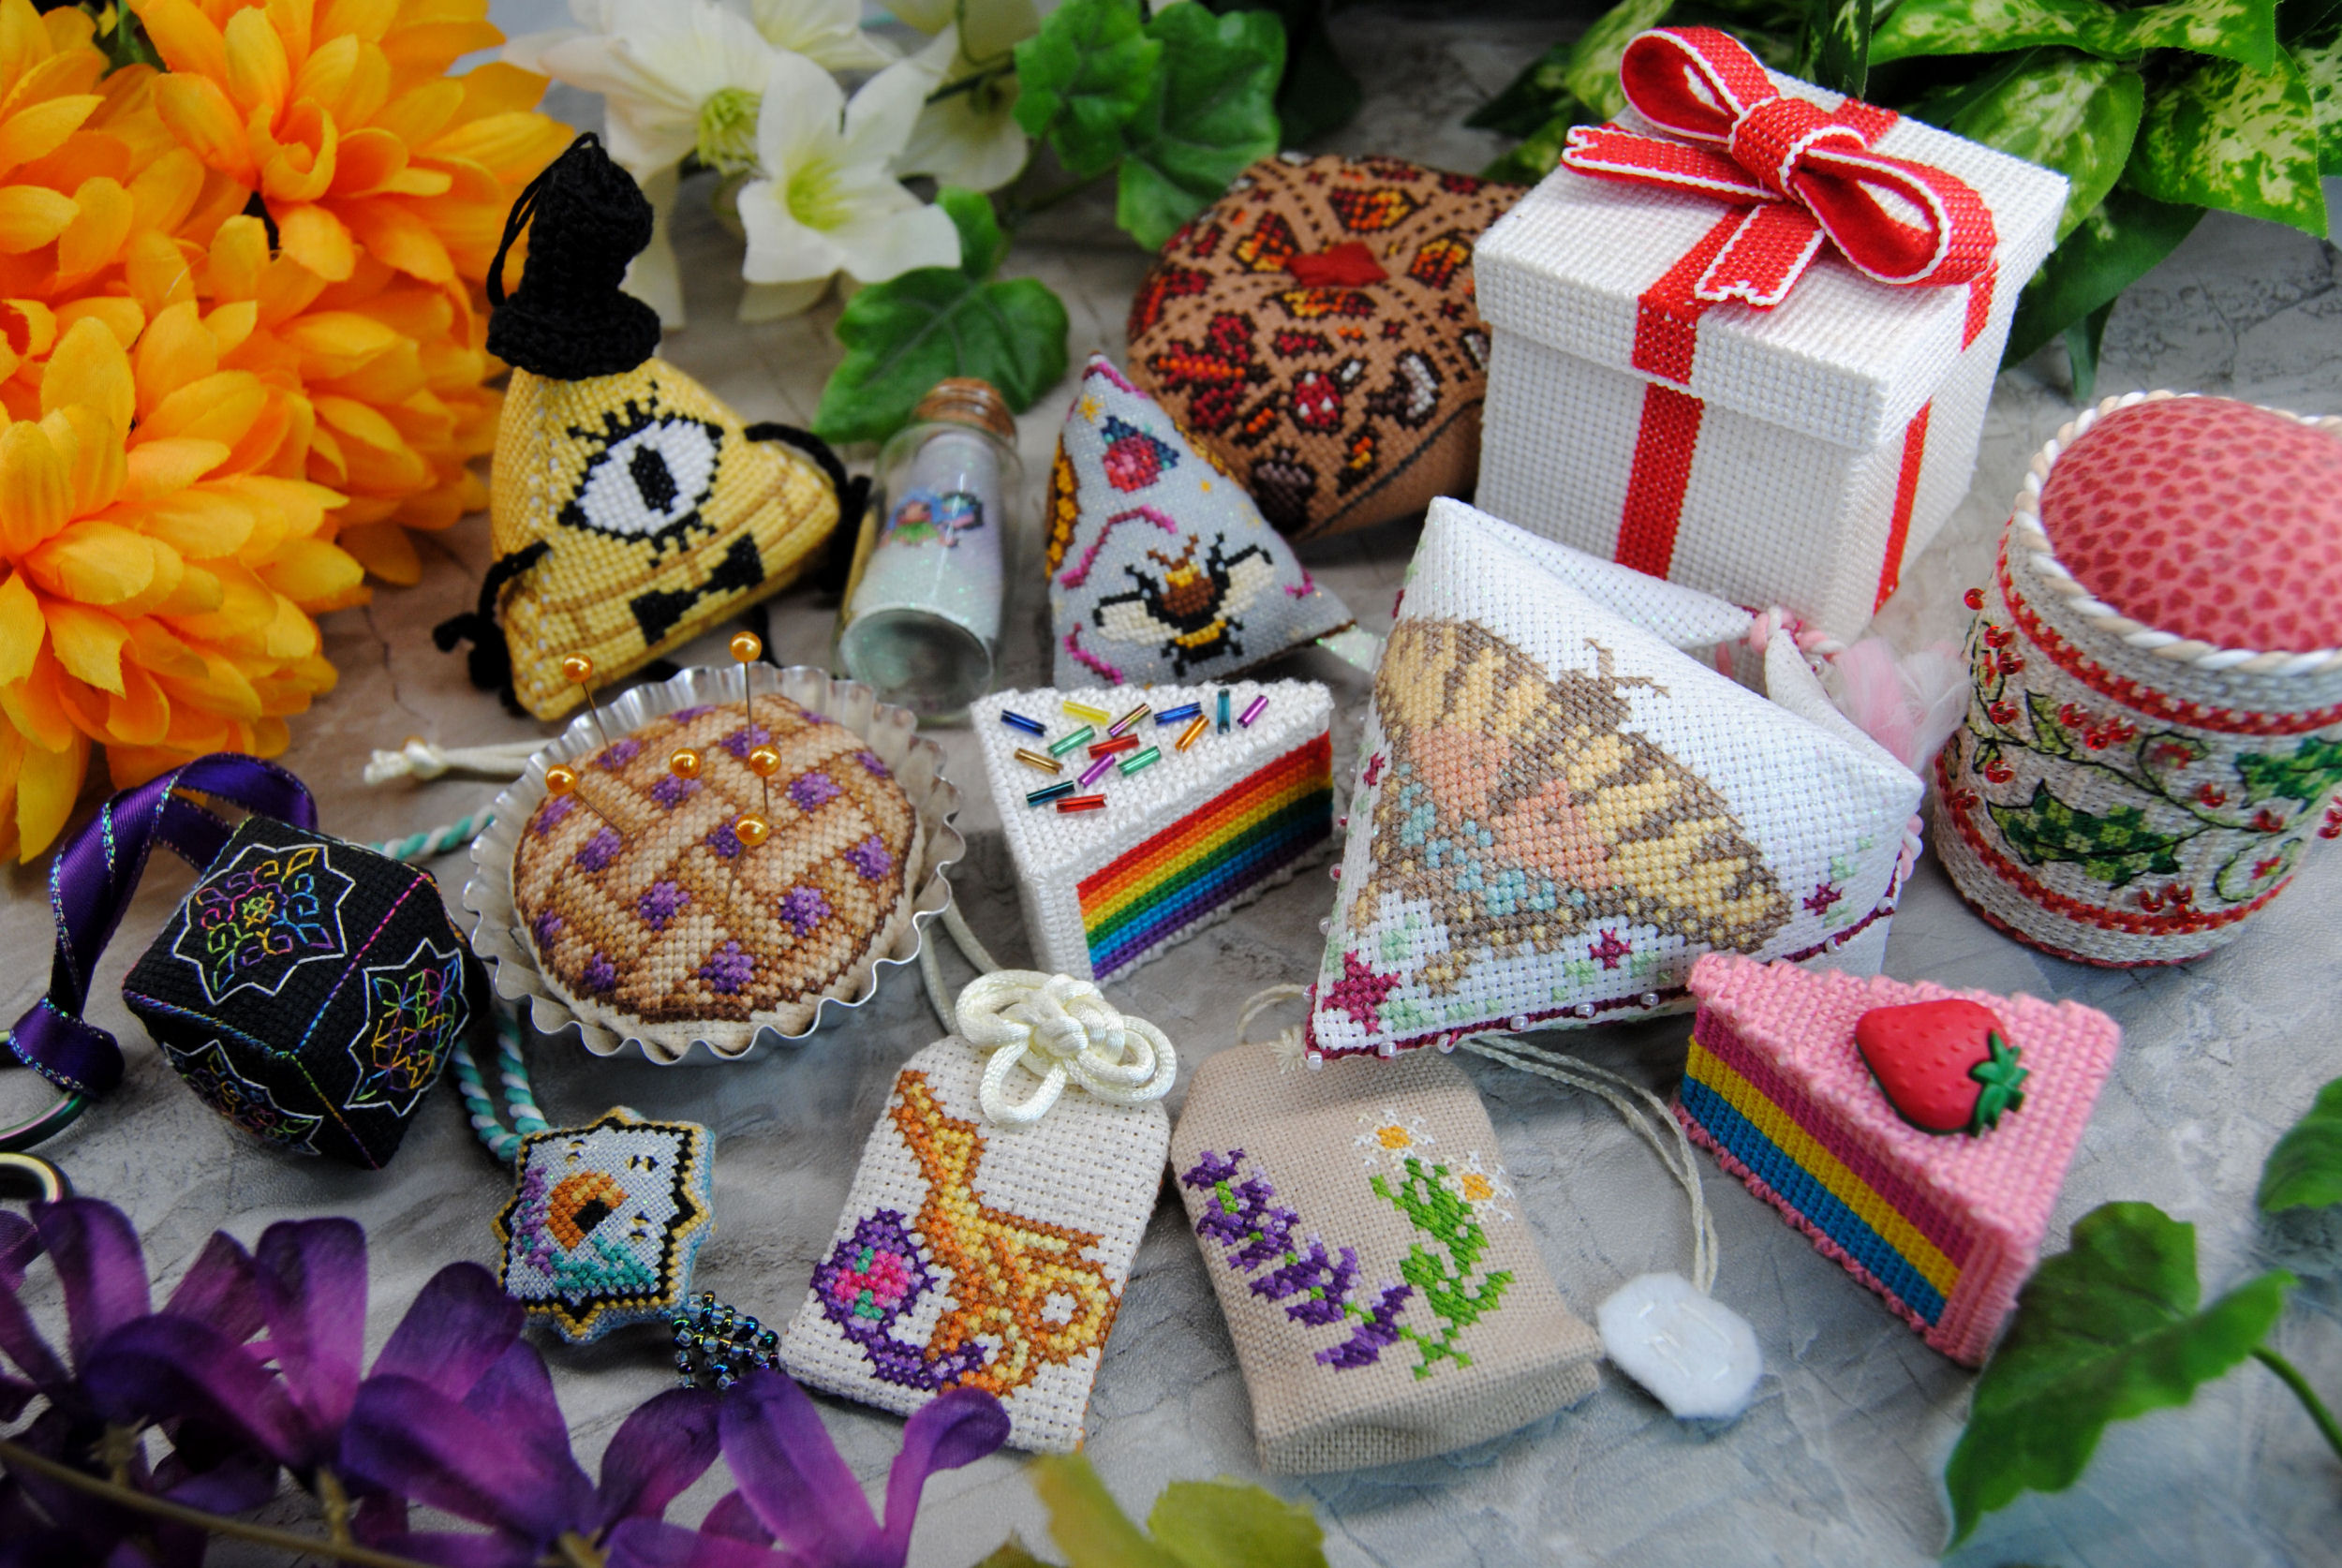
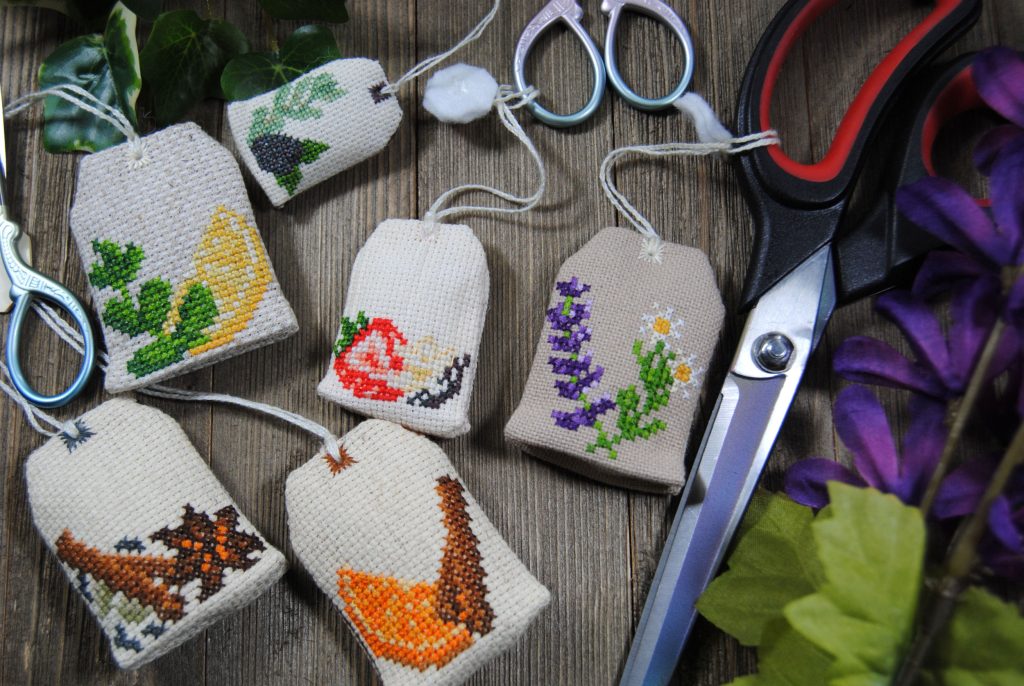
My own tea bag scissor fobs designs are great example of this technique, as they’re done on one length of fabric and folded up and stitched together on the sides.
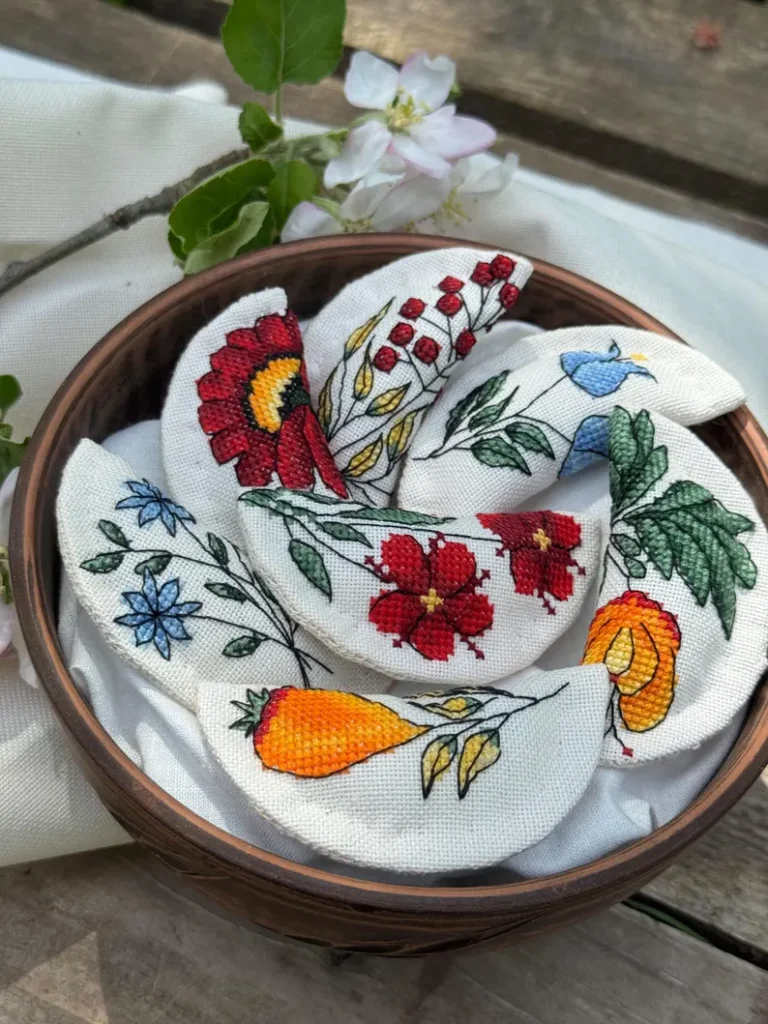
These dumplings by riznobarvna are also a good example of a simple folded shape with a big impact.
I couldn’t possibly make a 3D cross stitch article without mentioning JustNan at least once. Her little cross stitch mice are absolutely adorable and are just a semi-circle folded around. Here’s a blog I found by JanetGranger that showcases the simple assembly of these little mice!
This LindyStitches Greenhouse design is a cute example of a larger statement piece that is actually quite simple in construction. As it’s all one flat piece, the triangles sections are folded up and stitched together along the edges. Though the bottom could be reinforced with cardboard or similar, but we’ll cover those techniques a little later.
Multi-Piece 3D Fabric Shapes
Now for slightly more complicated shapes, using two or more separate pieces of fabric to form specific shapes.
There is of course the quintessential example of this: a biscornu. This fun shape is just two squares stitched together with an offset and stuffed. I have a whole article on the assembly of this simple shape and I’m clearly a little obsessed.
Yep, those are (almost) all my own designs.

These cute plushies by CottonPixels are simple in construction but just oh so cute! And shows that your shapes can be pretty much anything.
CottonPixels also has some adorable ornaments which are two squares stitched together, then folded down into a bell shape, combining the two techniques into a fun design.
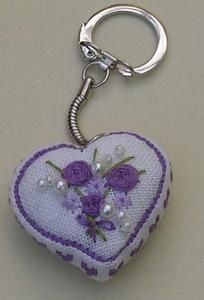
3D cross stitch shapes don’t have to be big! This little keychain freebie is a fun example of this concept in small form stitching 3 pieces together.
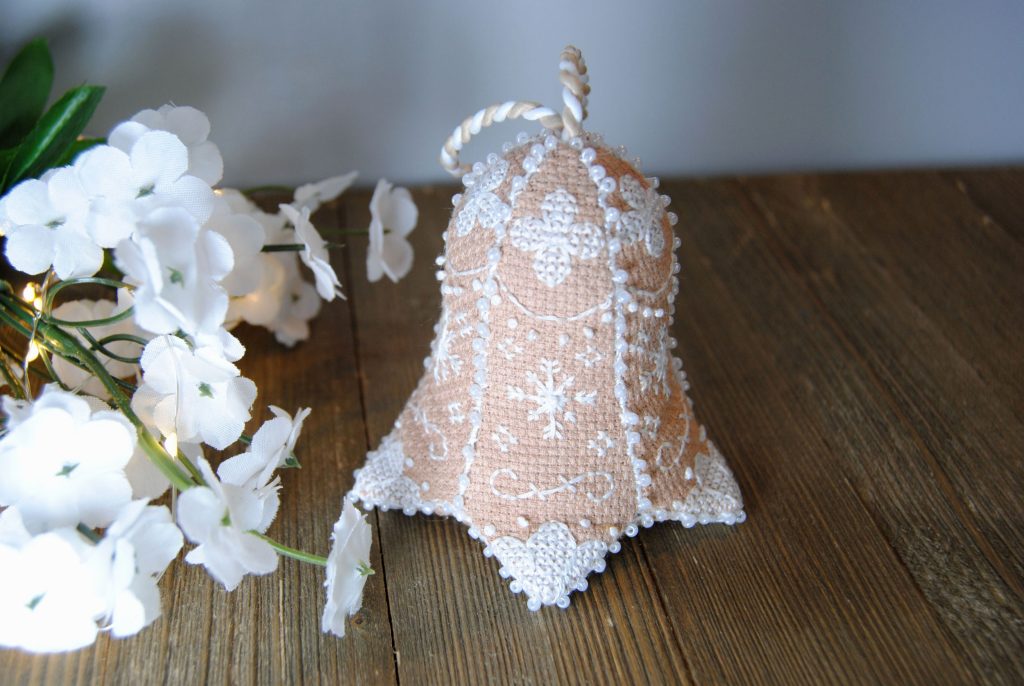
I’ve got a few other freebies for you that fit in this category. A simple bell shape with lots of french knots and beads.
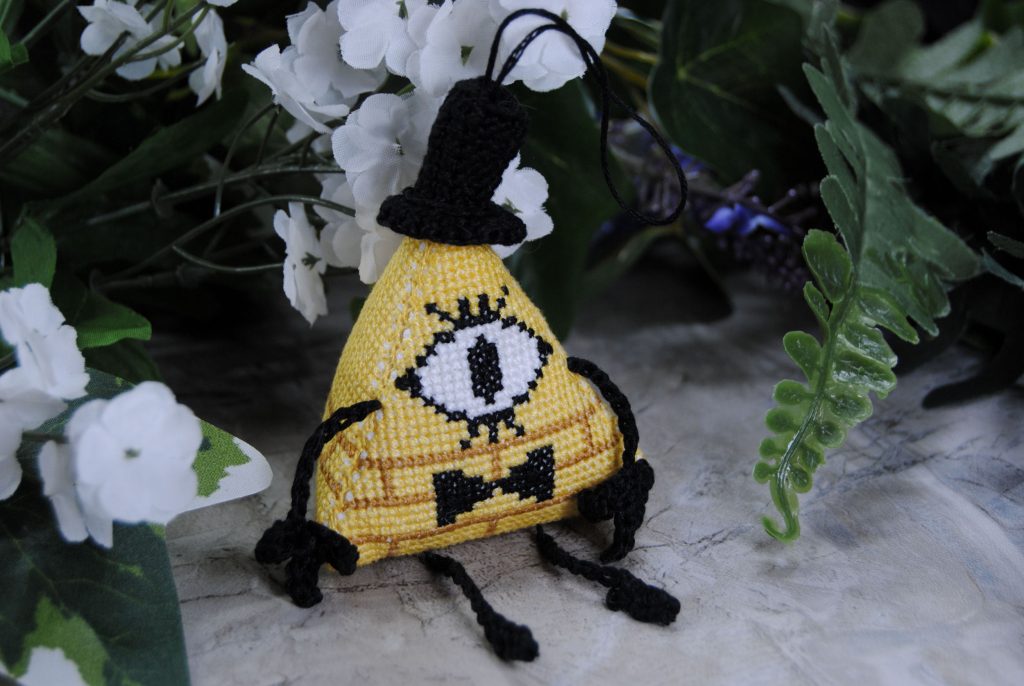
And a Bill Cipher pyramid shape that also adds some crochet pieces for his limbs and hat. Don’t be afraid to mix mediums! Don’t know how to crochet? How about some pipe cleaner arms/legs instead?
I also have a whole article on the cross stitch QuakerBall and its origins with a ton of examples of 3D ball-like shapes made up of various different shapes.

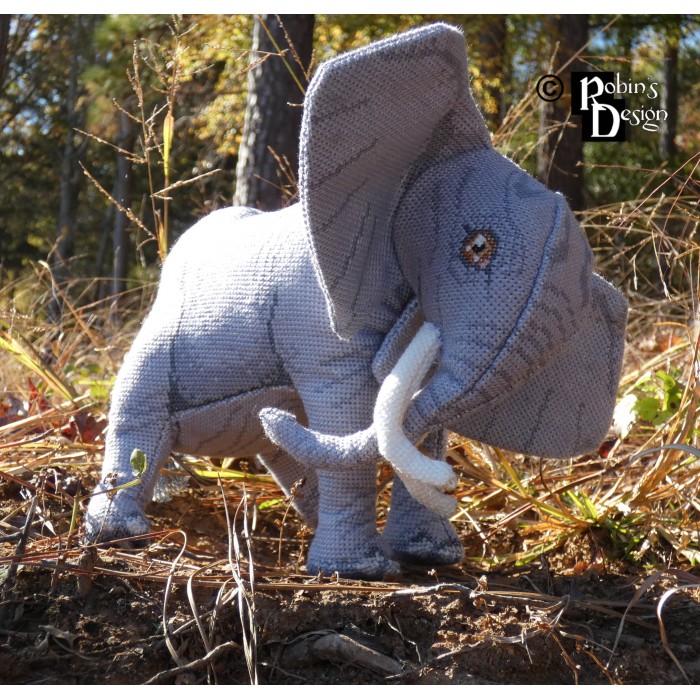
Simple geometric shapes aside, I couldn’t possibly leave out Robin’s Designs inthis article. Their 3d Animals and character dolls are absolutely works of art and a great example of how intricate these 3D sculptures can get!
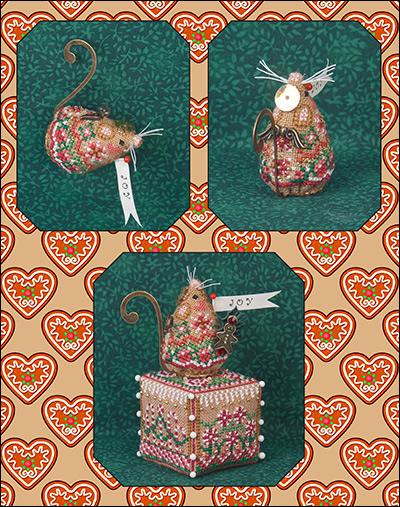
Another of the designers that inspired this article is LivingOnTheRainbow, and I couldn’t possibly pick just one of their projects to showcase here, so these next three are all from that shop. The little seasonal campers are absolutely adorable and the button wheels are such a cute touch. And they really show off that curvy shape!

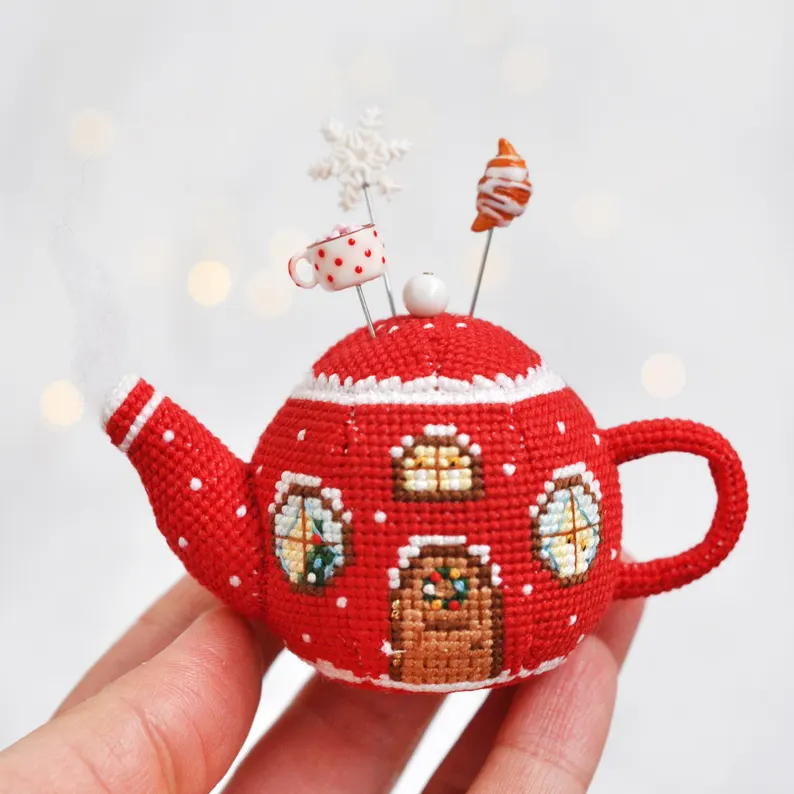
Lots of pincushion shapes in their shop, like this adorable cross stitch Teapot. But also they’ve got Mushrooms, watering cans, snowmen, houses, and all sorts of shapes.
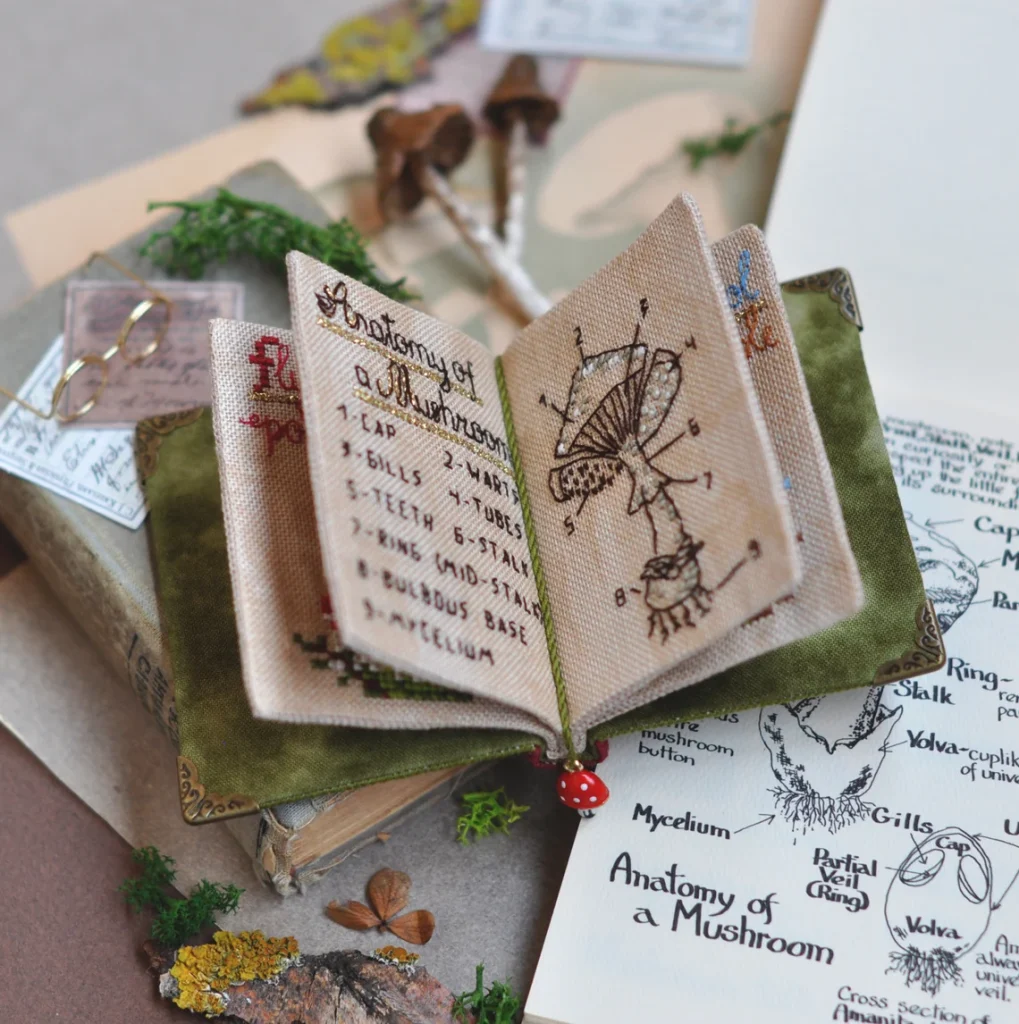
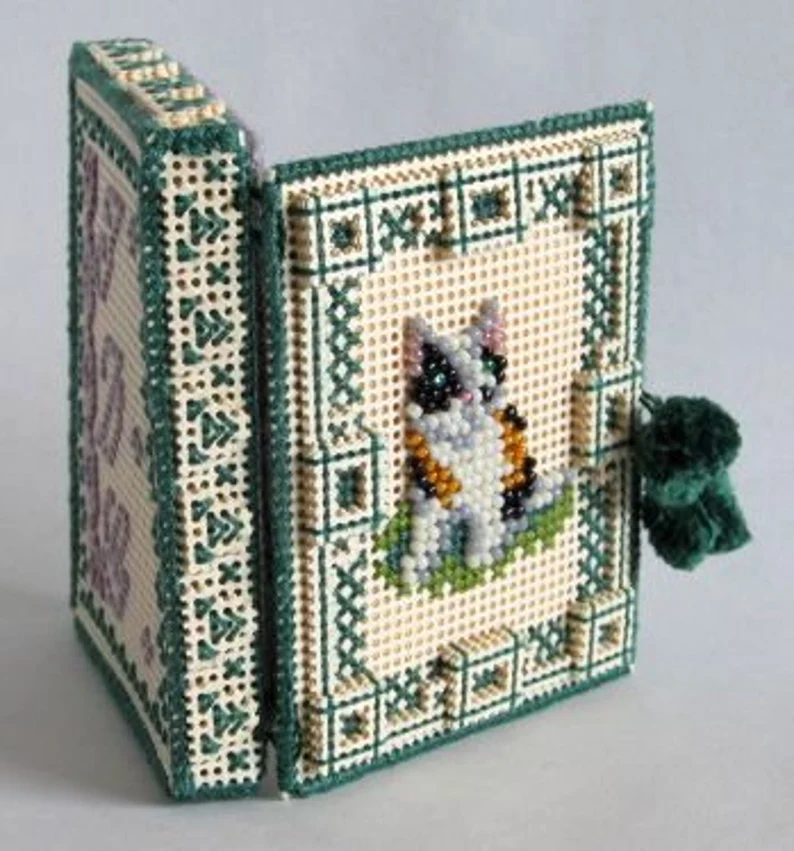
And of course their 3D book designs. This example actually is a great segue into the next category, as the inner pages are just fabric — but the covers incorporate some wrapped cardboard, which we’ll be talking about next!
Wrapped Cardboard/Plastic
There’s a subcategory of 3D shapes that are still stitched entirely on Fabric, but use something more rigid in the assembly to keep the shapes flat. This can be thin cardboard, comic board, or even plastic canvas! That’s right, you don’t have to stitch directly on plastic canvas to use it for your 3D stitches.
Assembly Blog Examples
Before we go on listing designs I wanted to include two examples with blogs that show how these pieces are actually put together so you can see what I mean by this.
This example is needlepoint rather than cross stitch, but this blog by PinsNeedles just so well described the cardboard assembly process that I had to include it. This gives you an idea of what I mean by this category — a fabric project stretched around a rigid piece for stability.
Gingerbread houses are popular in the 3D cross stitch world. Pictured is the VictoriaSampler Gingerbread House, as stitched by Wendy’s Quilts who has a ton of step by step photos of the finishing process which is super interesting to see.
Got a general idea of the assembly technique? Great! Now for more patterns.
Wrapped Plastic Canvas
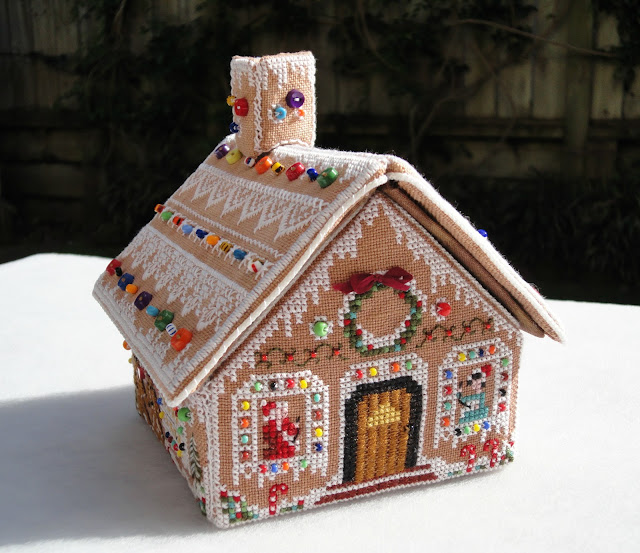
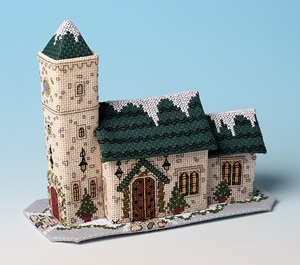
You’ll probably see TheNutmegCompany mentioned a few times in this article, as they specialize in 3D shapes. Their most popular though has got to be the various houses and buildings they’ve designed over the years. Their kits include pre-cut plastic canvas shapes to wrap your stitched fabrics around! You can see part of the assembly process in this blog by TheCraftyCreek assembling a cute gingerbread house by TheNutmegCompany.
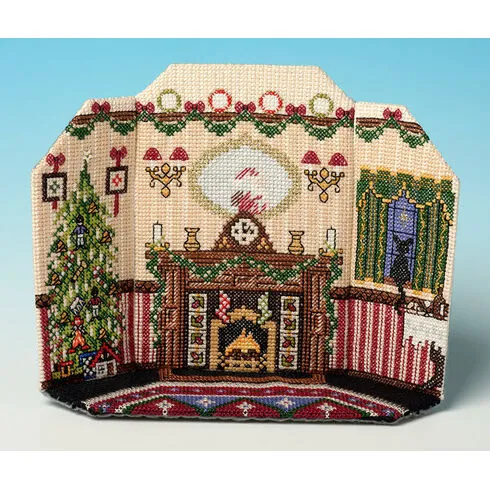
Here we have another TheNutmegCompany design, this time the interior of a house rather than the exterior. Just to give you some ideas on different designs that are possible besides full buildings.
The village designs from TidyModernist I believe also use some sort of structural element to them, though I don’t have the pattern or the magazine these were originally published in to confirm. But even if not, they’d definitely benefit from a rigid insert if you make them yourself! I’ve also seen people stitch them directly onto plastic canvas, though a close look at the official photos show they were originally stitched on fabric.

Wrapped Cardboard Designs
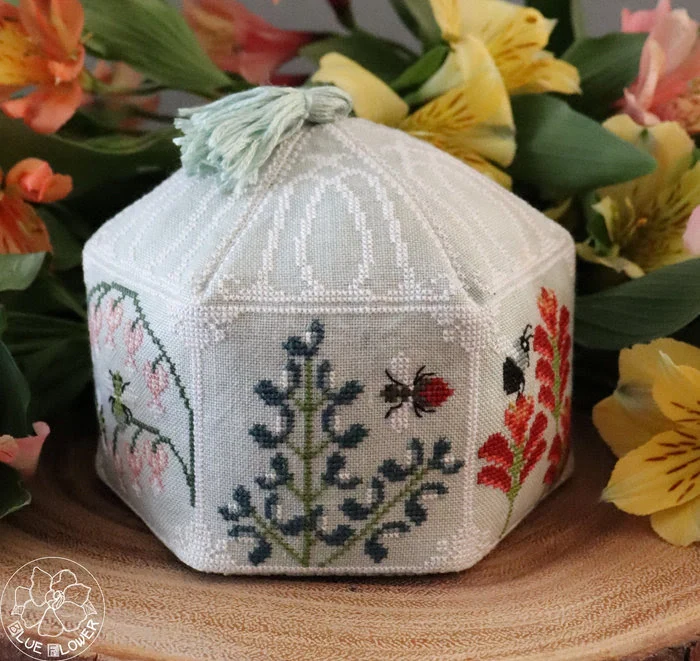
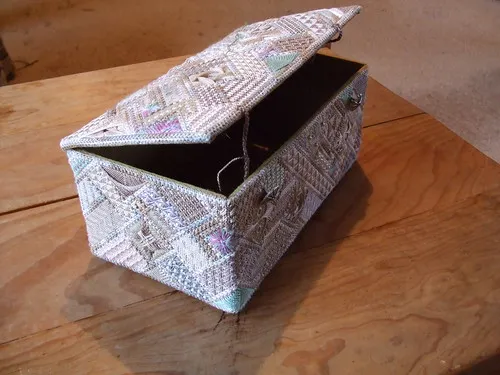
Etuis are a finish that I’ve been wanting to do a deep dive on as they’re super interesting. They come in all sorts of shapes, but are essentially made as a sewing kit. For example this greenhouse by TheCrossStitchGuild also comes with sewing accessory patterns like measuring tape and scissor holders
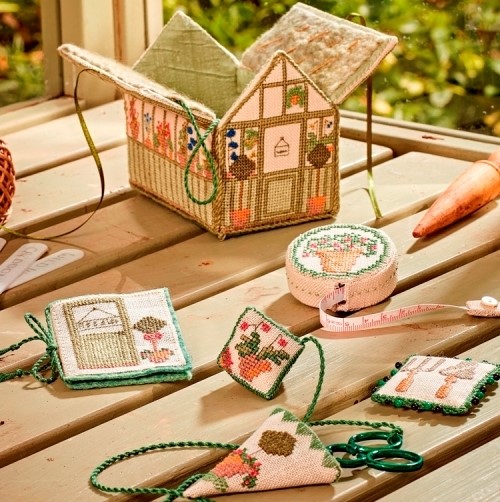
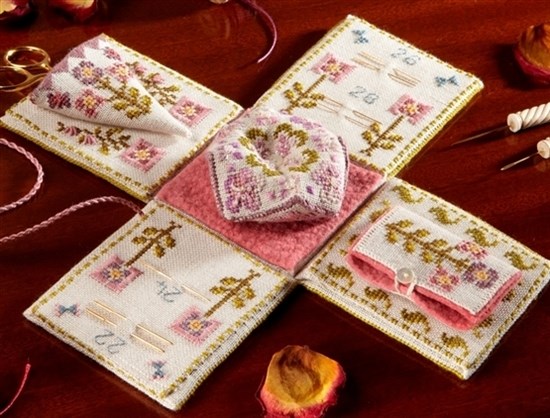
They also have a simple folding box shape Etui with built in needle and scissor holders
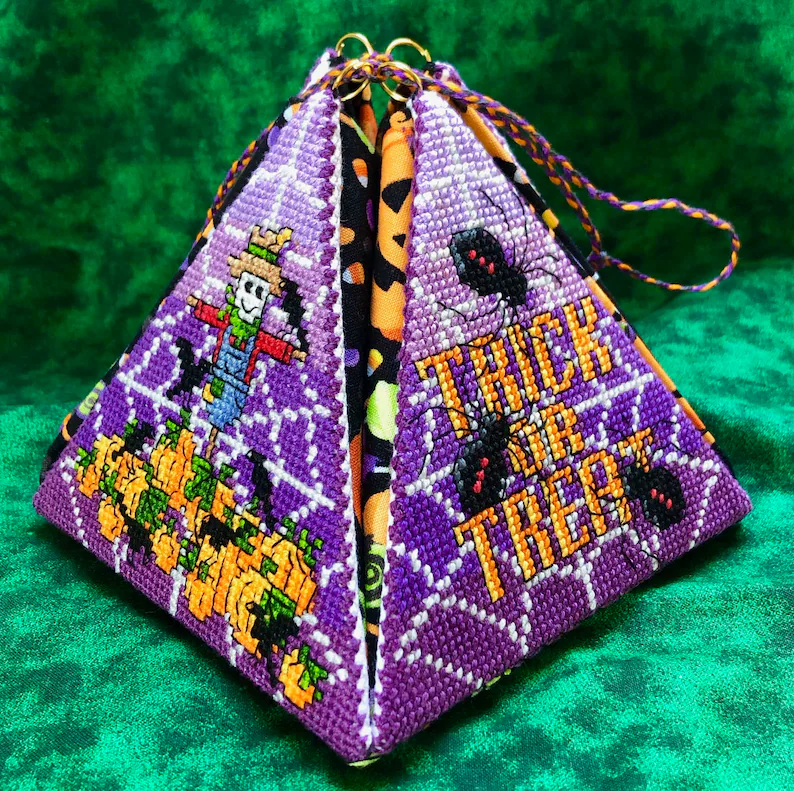
ElliJenks also has a ton of cool 3D shapes. One of my favorites though is their ‘pyramajig’ designs which are similar to the box etui above, but open up into a bag of sorts
Wrapped Styrofoam
Don’t stop there though, you can wrap a lot of things in fabric! Styrofoam is another common option for fabric wrapped items. It may not give a 3D effect, but they are in fact 3D objects rather than a flat piece to be hung on your wall, so I’ve included some examples here.
I actually did a whole article on the styrofoam cube finish, but you could take this a step further and wrap any styrofoam shapes with cross stitched fabric! My example has plain fabric on the sides and back, but you could make the whole thing out of cross stitch if you wanted.

And I have a tutorial on this site on how you can make your own cross stitched baubles from styrofoam as well.
3D Additions to Fabric / Embellishments
The next few sections will get a little weird, bear with me. We’re still working with just normal aida/evenweave/etc. We’ll get back to the more 3-D options once we’ve moved on to plastic canvas.
To start off, this wonderful example from the Mr X Stitch site, who takes a flat pattern and made elements of it separate and fully adjustable by clever use of pipe cleaners. Look how it absolutely pops out of its framing!

Adding beads and embellishments and such is another valid way to make your flat stitches a bit more 3D! Some patterns are designed with that in mind, like the Mill Hill Kits that layer cross stitch with beads and charms quite nicely. Like this Mill Hill pumpkin, which I took a step further and backed it with felt so I could lightly stuff it to give it a bit more of a rounded shape. Technically these kits are on perforated paper, but my point about adding beads and charms still stands. It adds depth to any project, fabric or otherwise.

3D Effect Flat Designs
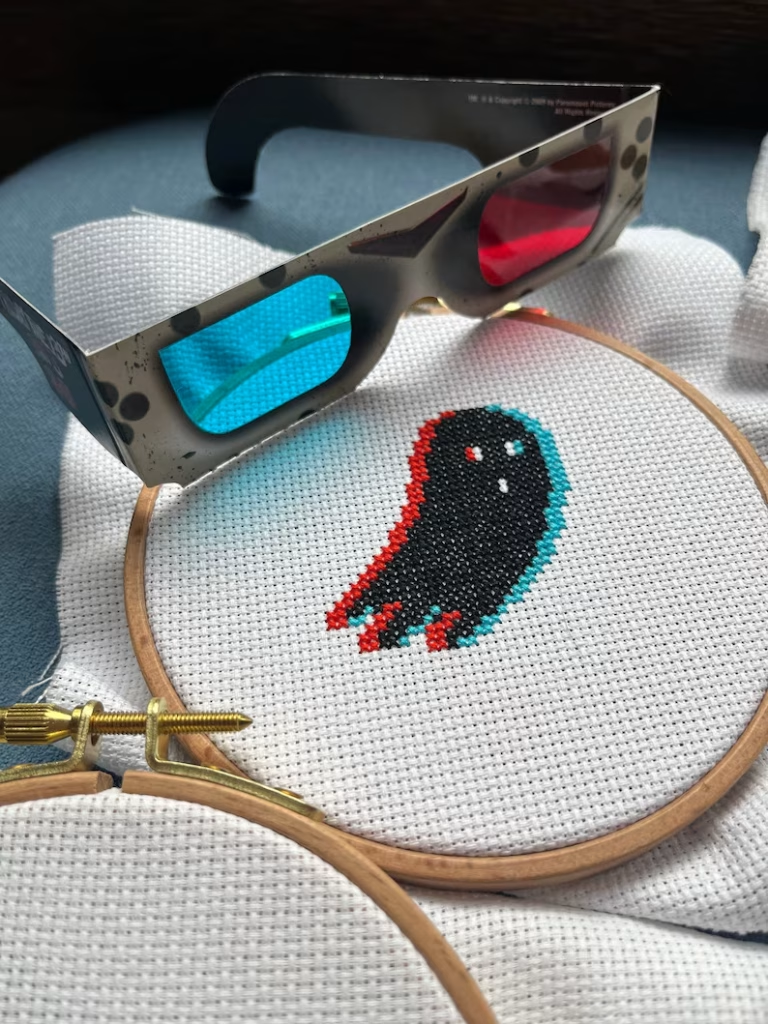
Lastly, your project doesn’t actually have to be 3-Dimensional to appear 3D.
This cute little ghostie by MessyBunStitchery becomes 3D when viewed through Anaglyph Glasses. which sounds fancy but it just means those paper glasses with the red/blue film eyes that probably only 90s kids remember at this point.
Similarly, the highly contrasting colors in Nathnolu’s 3D Bee, almost makes your eyes hurt if you stare at it too long, creating quite a wild effect.

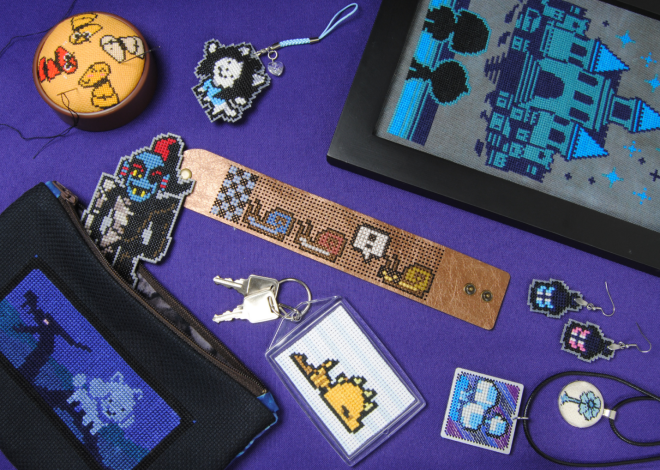
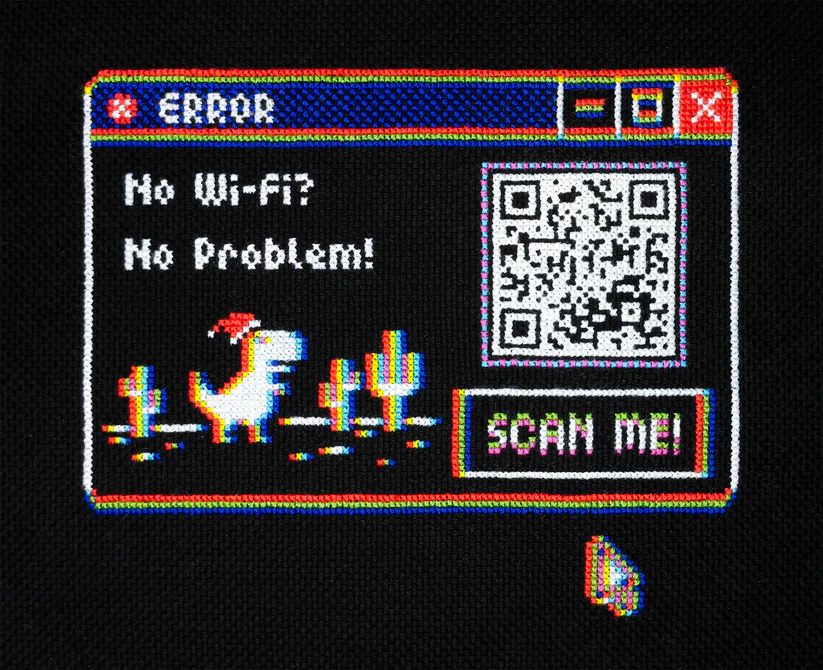
And of course all the really cool ‘glitchy’ designs over at TheRetroStitcher fall in this category too. This wifi dino is one of the subtler patterns using this effect. They’re all amazingly cool though.
Plastic Canvas 3D shapes
Now what many of you have no doubt been waiting for. Plastic canvas shapes have become more and more popular over the years, though they’ve been around for ages. Just check your local thrift store and you might find loads of plastic canvas books, though they’re typically going to be done on low count plastic with yarn.
Since this article is already long and I’ve gone over plastic canvas before, I’ll focus on just a few examples using 14 count plastic canvas, and the same embroidery thread you’re used to.
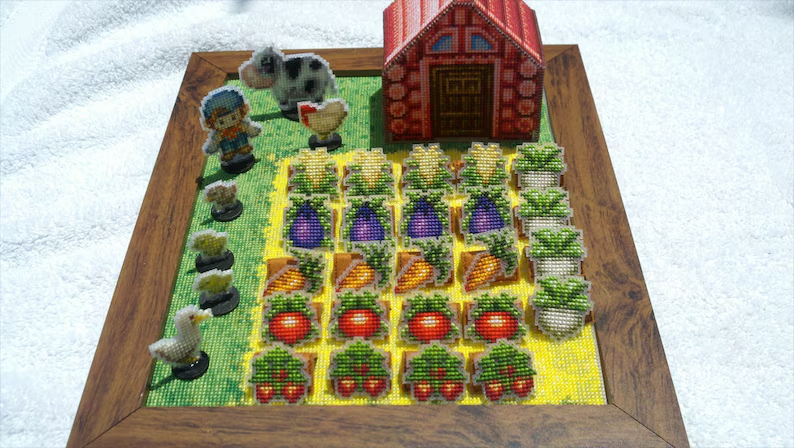
This first example by BlackMageHeart takes flat plastic canvas shapes and makes them 3D in their arrangement. There’s some creative things going on here, including little vegetable standees and canvas glued to a base to make it stand.
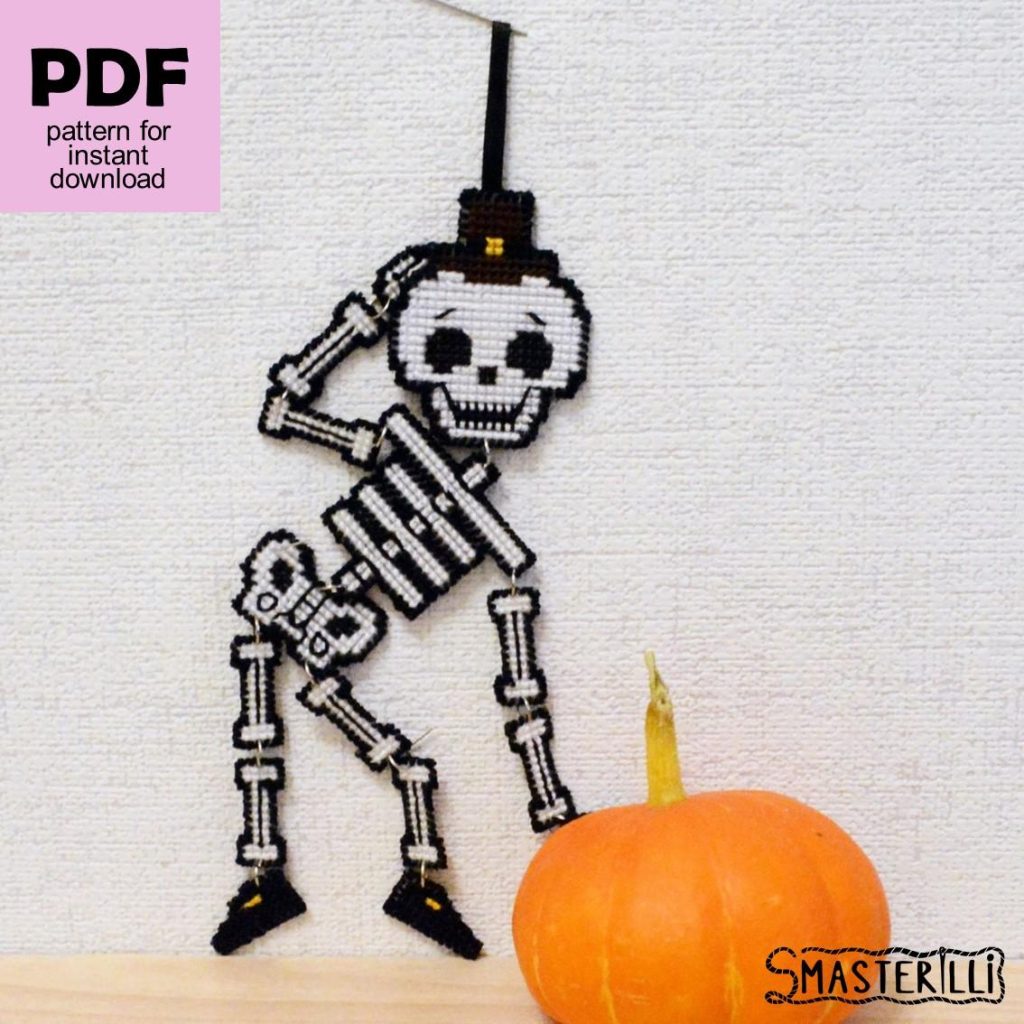
Another option for turning flat plastic canvas into a 3D design is by linking them together to make it a poseable design, like this Skeleton pattern by Smasterilli
Here, I took two plastic canvas butterflies and stitched them together with a bit of floral wire inside to make the wings poseable. A tutorial on how I did that is available here on this site.

The more common 3D finishes involving plastic canvas are done by stitching pieces of it together at the edges to make a box or other 3D shape. For example, my free Pride Cake designs make use of this technique, but with triangles thrown in the mix to make those edges extra annoying to assemble.
This also shows you that the color of plastic canvas is important. These were all stitched using 2 strands of DMC thread. But only the chocolate Ace cake uses white plastic canvas, the rest use clear.

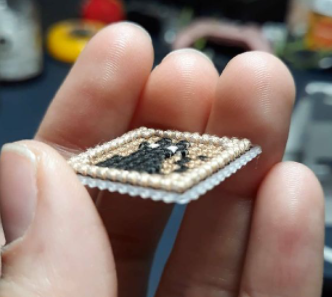
Finally, a special mention to vinyl aida. It’s also basically plastic canvas, but not as rigid, not as well known, and sometimes harder to find. It’s flexibility means it’s much easier to pull off curved designs like this chest pin cushion by rikizou113 though.

There’s one more option for 3D plastic canvas, but that leads well into my next category: layering.
Cross Stitch 3D Layers
DoomedDeanna on Instagram is who originally introduced me to this concept. They’ve done a LOT of really cool things with plastic canvas over the years, and you should definitely check them out. But basically, if you look real close the frames and some of the insects are layered to make for a interesting 3D effect.
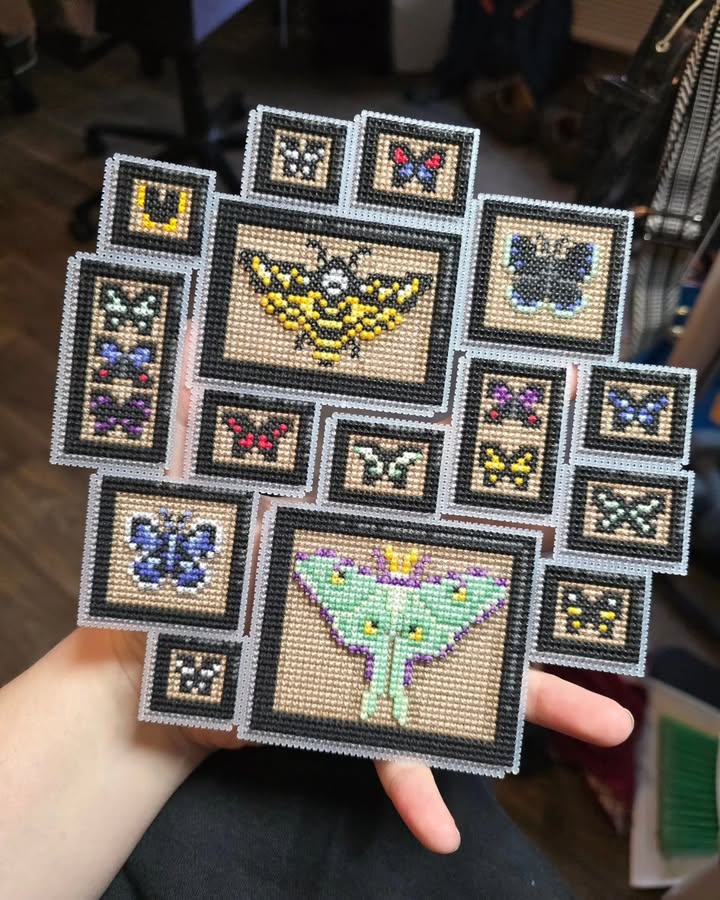
Here’s another of their pieces at an angle so you can see it better.
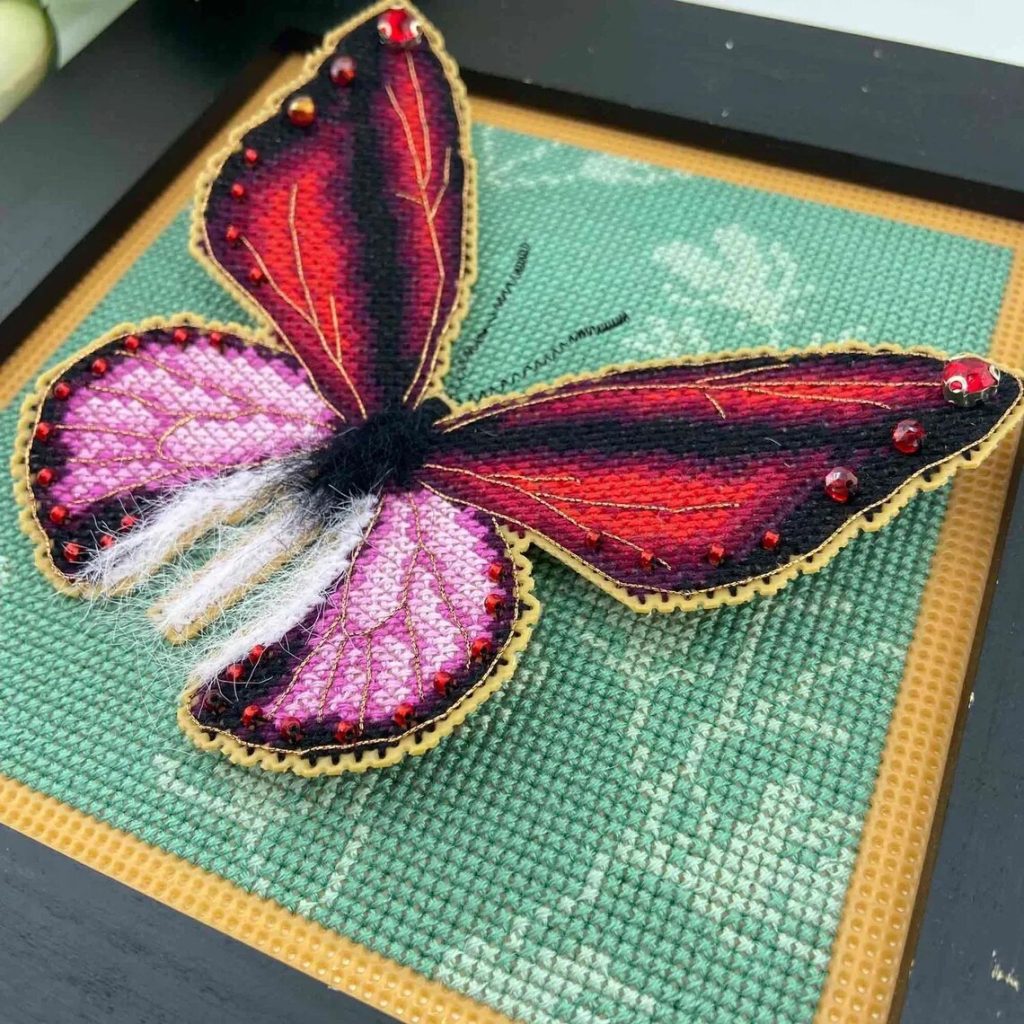
And here’s another cool example of a layered effect using plastic canvas from WonderlandUkraine. Since plastic is flexible, you can bend it a little allowing it to pop up out of the flat background.
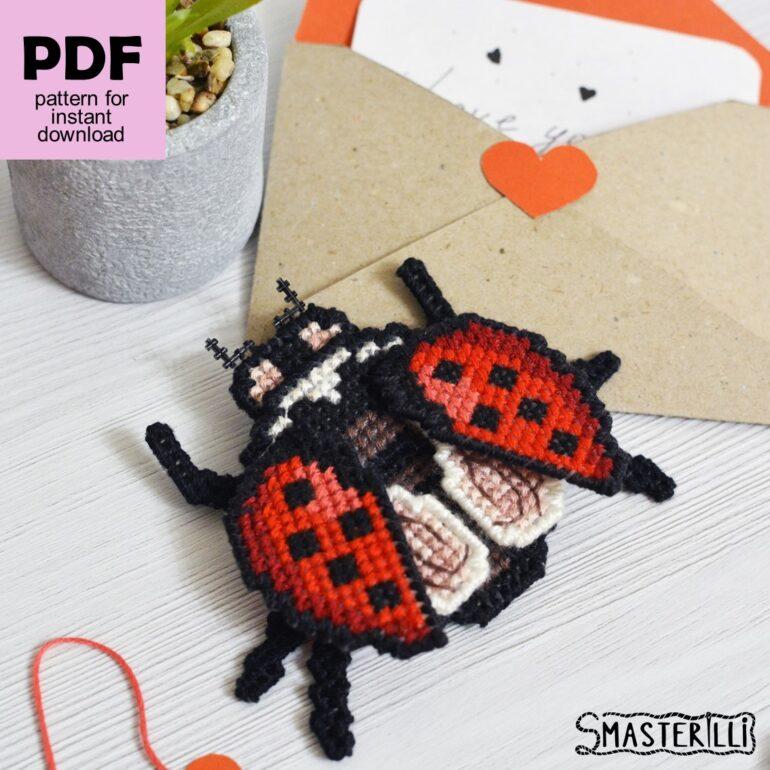
This next one uses 10 count plastic canvas, but you could likely get away doing it on 14 it’d just be much smaller. But this ladybug by Smasterilli is a great example of using plastic canvas in layers to create a 3D piece, rather than just stitching up the sides of a box. They’ve also got a 3D Fly in this same technique.
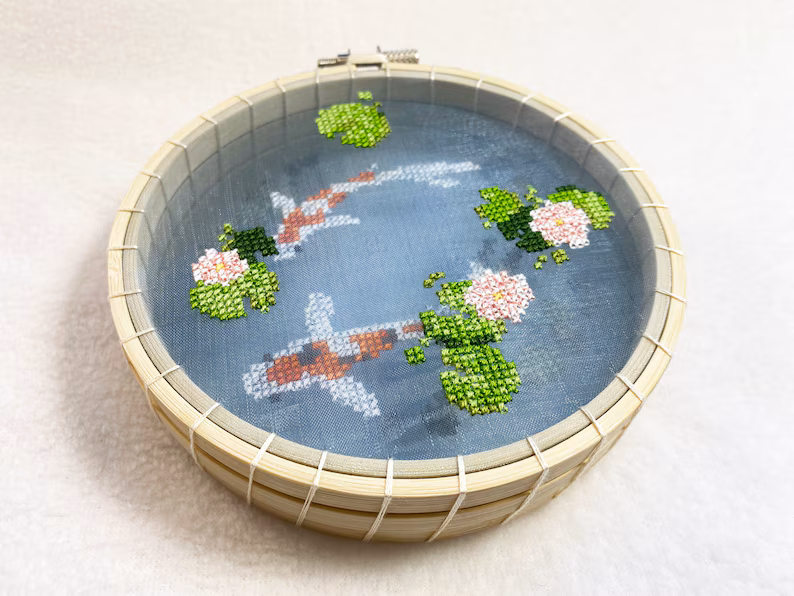
The layering technique isn’t limited to plastic canvas though, it can be done with fabric layers as well! Here, kamidake layers organza and several hoops to make a very cool layered Koi Pond.
And of course, the layering technique can also be done with perforated paper, which I’ll be going over next.
Perforated Paper
While not as popular now as plastic canvas, perforated paper used to be much more common. It’s still used a lot by some brands, such as Mill Hill. And it can be used for a lot of the same styles as plastic canvas. Plus, it’s pretty easy to make your own perforated paper!
In this first example, Heather Nugent has some fun layered pieces designed for perforated paper in a shadow box frame.

WorldofCrossStitch also has some designs by Heather Nugent that takes this same concept of layered perforated canvas and has you create an accordion style container to finish it in.
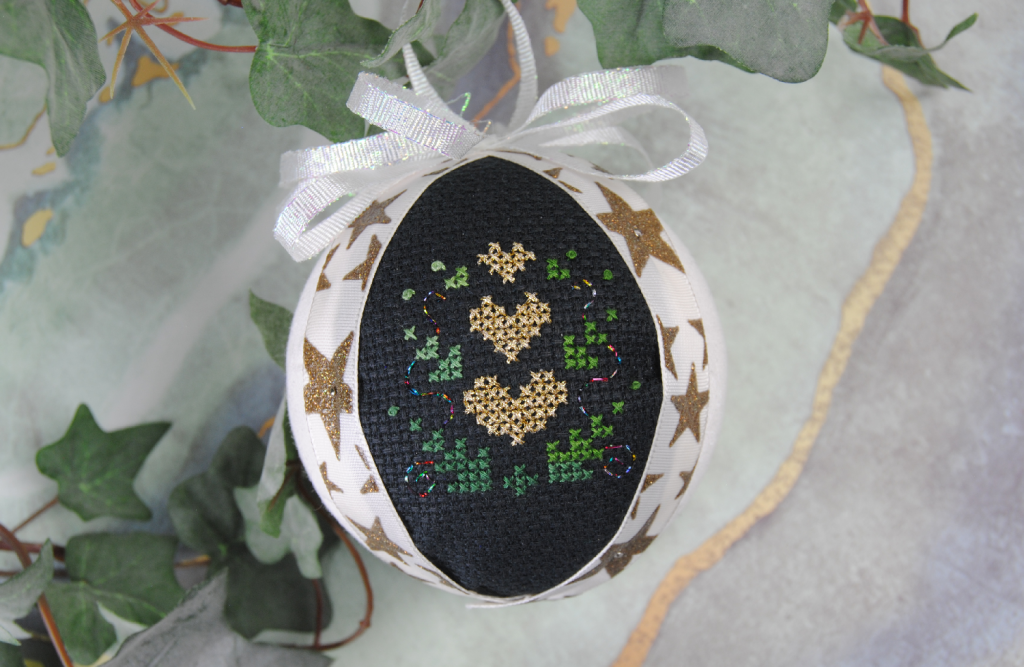
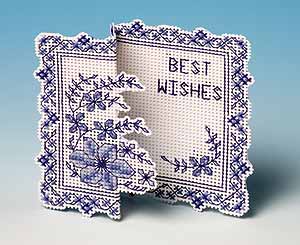
Another good example by Heather Nugent, some fun 3D ornaments that can be stitched on plastic aida, perforated paper, or stiff aida. They’re simply folded back to create a 3D cone shape!

For closer layering, beadeddesignsbyidele provides a great example in this needlebook where layers of perforated paper are stitched together to make 3D designs.
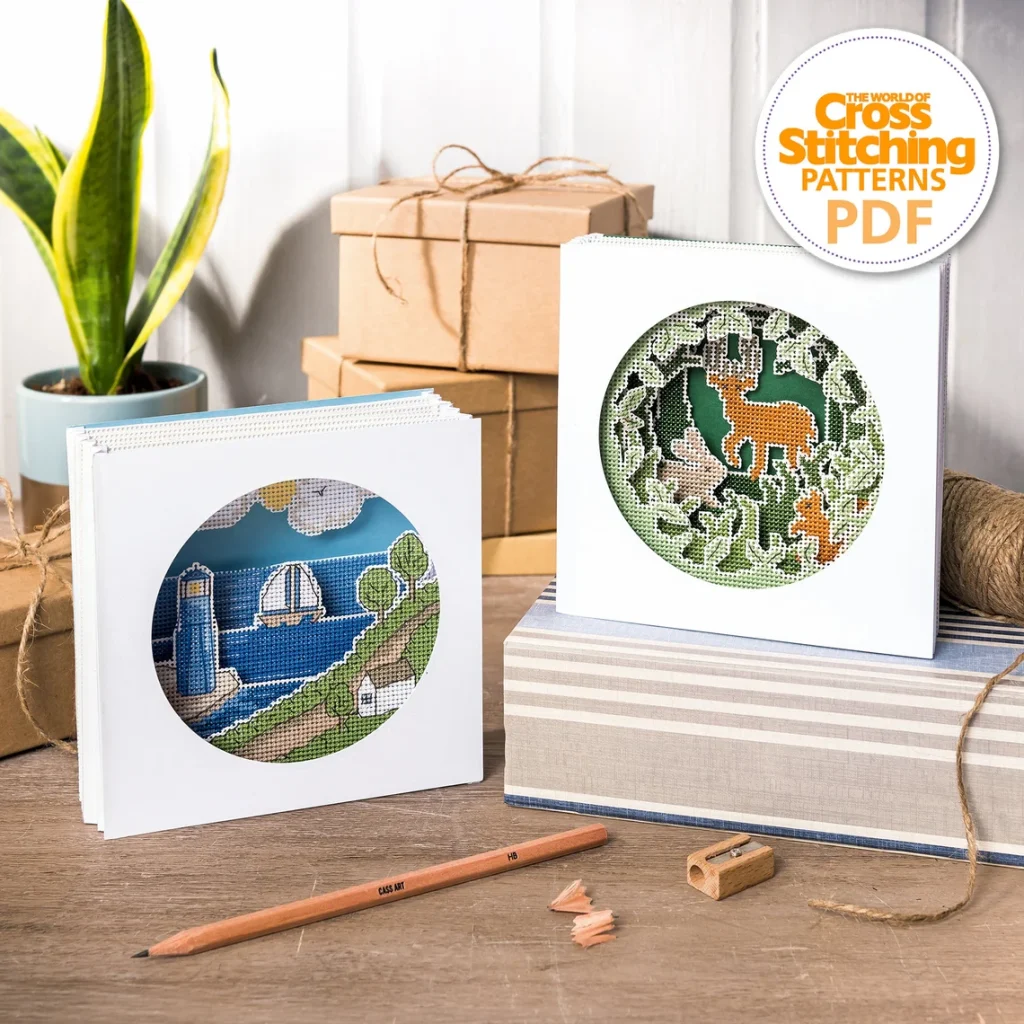
And back to the Nutmeg Company, they also have a lot of examples of 3D cards. These are made by cutting very specific areas and folding the paper back to create a card. As a result, the card stands up on its own and can be used as decor.
Other
This last section… I’m not even sure how to categorize these. Multimedia? Sometimes combining several techniques.
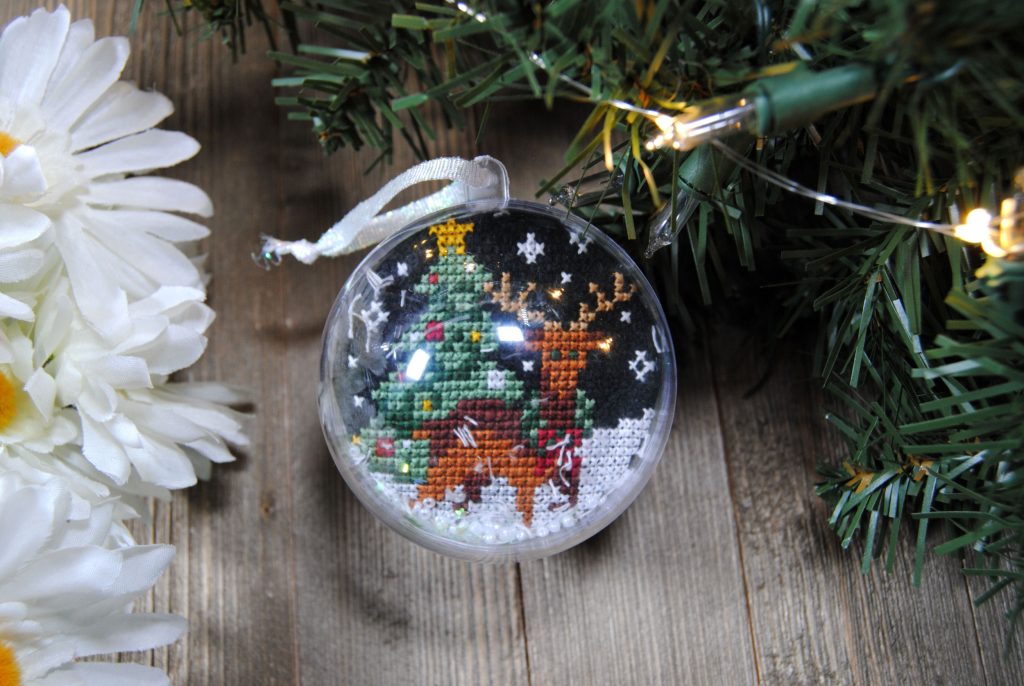
First up, these simple snowglobe ornaments made with just a flat fabric stitch but finished in a way to add dimension to the scene with snow
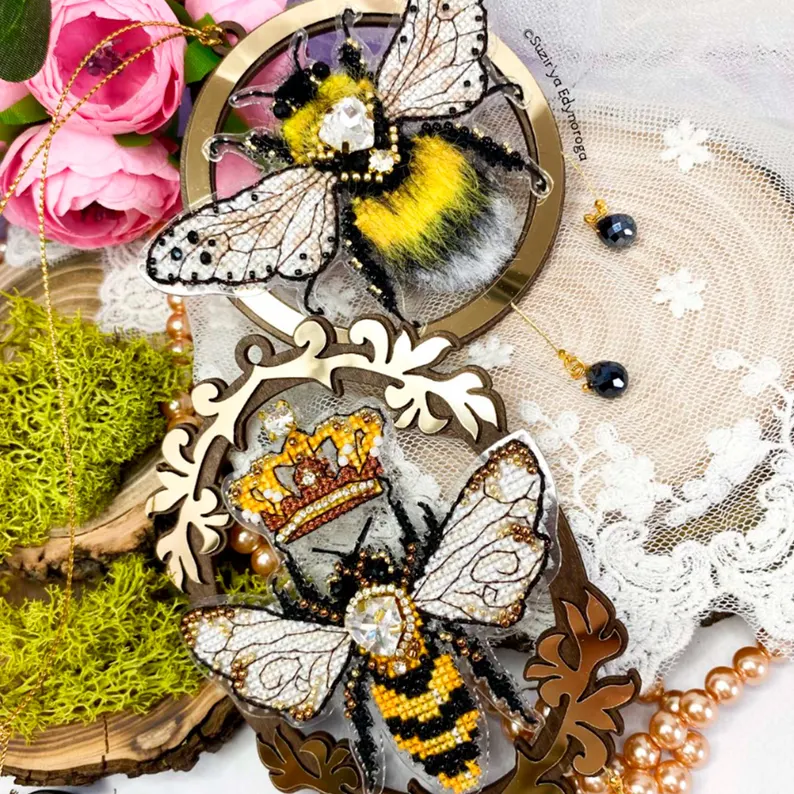
Another interesting thing I found was this layered piece from WonderfulBead. It combines an acrylic die-cut template that you stitch onto, with furry thread, beads, and a big ol’ gem. With a hoop frame that it gets layered on top of creasing a super unique piece with lots of dimension and texture.
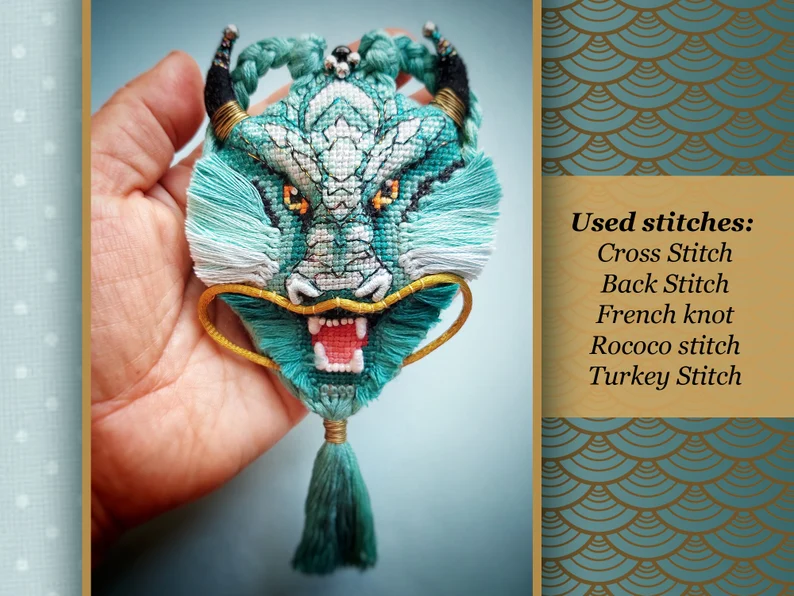
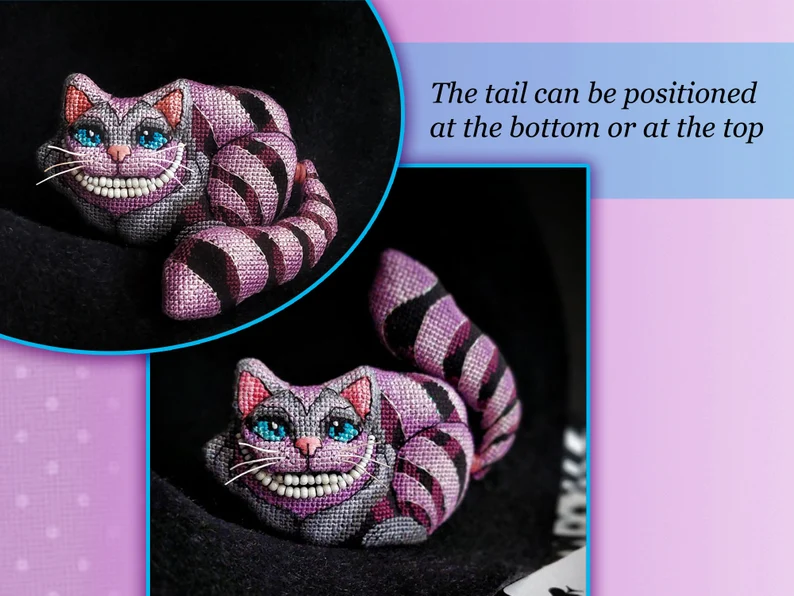
Finally some incredible sculptural stitches by XStitchLittleStories. These appear to be similar to the multi-piece assembly we covered in the fabric section, but also very sculptural and adding things like beads, cording, wire, and other details to truly make it a unique piece. Their shop has several super unique pieces, but here’s two of my favorites.
Final Thoughts
This took a surprisingly long time to research and pare down to a few main ‘categories’ of 3D techniques. What this has taught me is that people are incredibly creative when it comes to how they design in a dimensional space. Some include just a few details like beads to give a piece more texture. Others create detailed sculptural cross stitch pieces that make use of a variety of embroidery styles and materials. And everything in between!
Chances are I’ve missed some techniques. And each of these options has many more examples that I didn’t include! But hopefully it inspires stitchers to go out and seek these unique patterns to really push your craft to the next level. And if you’re a designer; maybe it will inspire you to add an additional dimension to your stitches and really stretch your creativity. Maybe you’ll even come up with a whole new style in the process!
You Might Also Like:
Cross Stitch Challenges: Ways to Gamify Your Stitching!
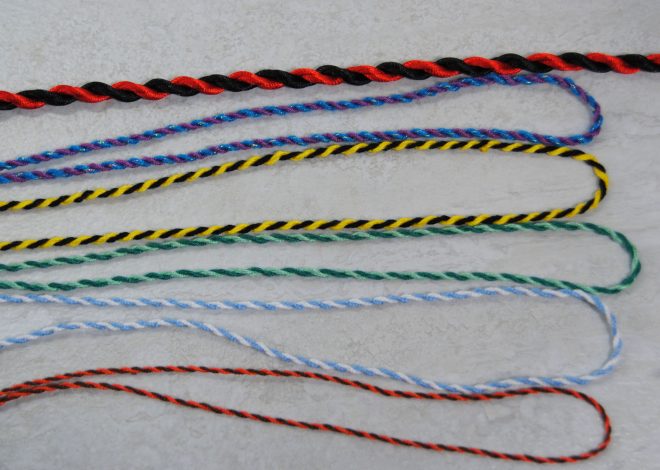
Custom Cording From Embroidery Thread