
Learning Hardanger as a Cross Stitcher
I’ve been meaning to try learning hardanger embroidery for a long time now. And there’s a high probability that if you’ve stumbled across this article you’re either looking to learn it as well, or you’ve never heard of it but are now curious.
Either way, I must warn you: This is not a tutorial. I’ve never done hardanger. I have no idea how it works. The thought of cutting holes in my fabric as part of the design is terrifying. But I bought this adorable little kit from an online thrift store and wanted to try it out.
I’m a cross stitcher. Most of the articles on this site are about cross stitching. But that doesn’t mean I only do cross stitching. It’s important to me to branch out and learn new things frequently. And learning hardanger has been on that list for a while now, so this article is mainly to document what it’s like to try hardanger for the first time from the point of view of a cross stitcher. Maybe I can inspire you to try it yourself!
This post may contain affiliate links. If you buy something using one of these links, I earn a small commission. However, there is no extra cost to you. Thanks for understanding! Learn more in my Disclosures & Privacy Policy.
Table of Contents
What is Hardanger?
So what is hardanger anyway? While its origins are not known, it flourished in Norway in the Hardanger area where it got the name we know it by now.
It’s a type of embroidery traditionally done in white on white, and typically recognized by its use of cutwork. It tends to be very geometric in design, making use of satin stitches and woven bars to secure the fabric. This allows the stitcher to cut out sections to create the distinct openings seen in this style of embroidery.

Example image is from the Wikipedia page on Hardanger embroidery.
Similarities to Cross Stitch
If you too are coming from cross stitch, you might want to know how hardanger relates. So let’s go over some of the similarities first.
Grid Based Fabric
Both Hardanger and Cross Stitch is typically done on a grid based fabric. Unlike other forms of embroidery that are often done on a variety of fabrics, these techniques lend themselves well to fabrics that have visible holes so you’re able to count out your stitches evenly. Being ‘on a grid’ is what drew me to cross stitch to begin with, as that appeals greatly to the logical side of my brain. And hardanger is no different there.
However, not all cross stitch fabrics work with hardanger. But the fabrics that work with hardanger will work for cross stitch as well. But we’ll get to that in a moment.
Simple Stitches
Cross stitch is typically done with… well, cross stitches. If you can do that one stitch you can do the majority of cross stitch projects. Learn backstitch and french knots and that pretty much covers most cross stitch projects. Sure there’s plenty of other specialty stitches. But those are the main three used in your average design.
Similarly, hardanger makes use of a few specific stitches in the vast majority of the designs. A bit of satin stitch and some woven bars and you’re pretty much covered. Other than that whole… cutting bit. Again there are more advanced hardanger stitches to add some flair, but they all seem to build off of those two techniques.
Often Combined
Clearly they’re not tooo different, as it’s not unusual to find cross stitch patterns that incorporate some elements of hardanger as a ‘specialty stitch‘. And hardanger patterns also regularly include some cross stitch elements as well! The hardanger techniques lend themselves very well to being done alongside cross stitch, and they’re both done on similar fabrics.
Here’s just a few examples:

- TheCrossStitchGuild has a number of hardanger designs available, many of which incorporate cross stitch.
- FabyReilley also has a few designs that incorporate kloster blocks into cross stitch patterns.
- In fact, whole books were created around combining hardanger and cross stitch.

Differences to Cross Stitch
Fabric Used
Okay I know fabric is literally on my similarities list. But not all cross stitch fabrics work with Hardanger.
The fabric you use should be an even weave. You’ll be cutting out sections of it to makes geometric shapes so you need those cut outs to be even in both height and with. And it needs to be easy enough to distinguish those threads so that you can cut them individually.
While you technically CAN do hardanger on aida, it’s going to be much more difficult to identify, cut, and remove individual threads. And natural linens like the one in the back pictured below can be un-even and distort the design.
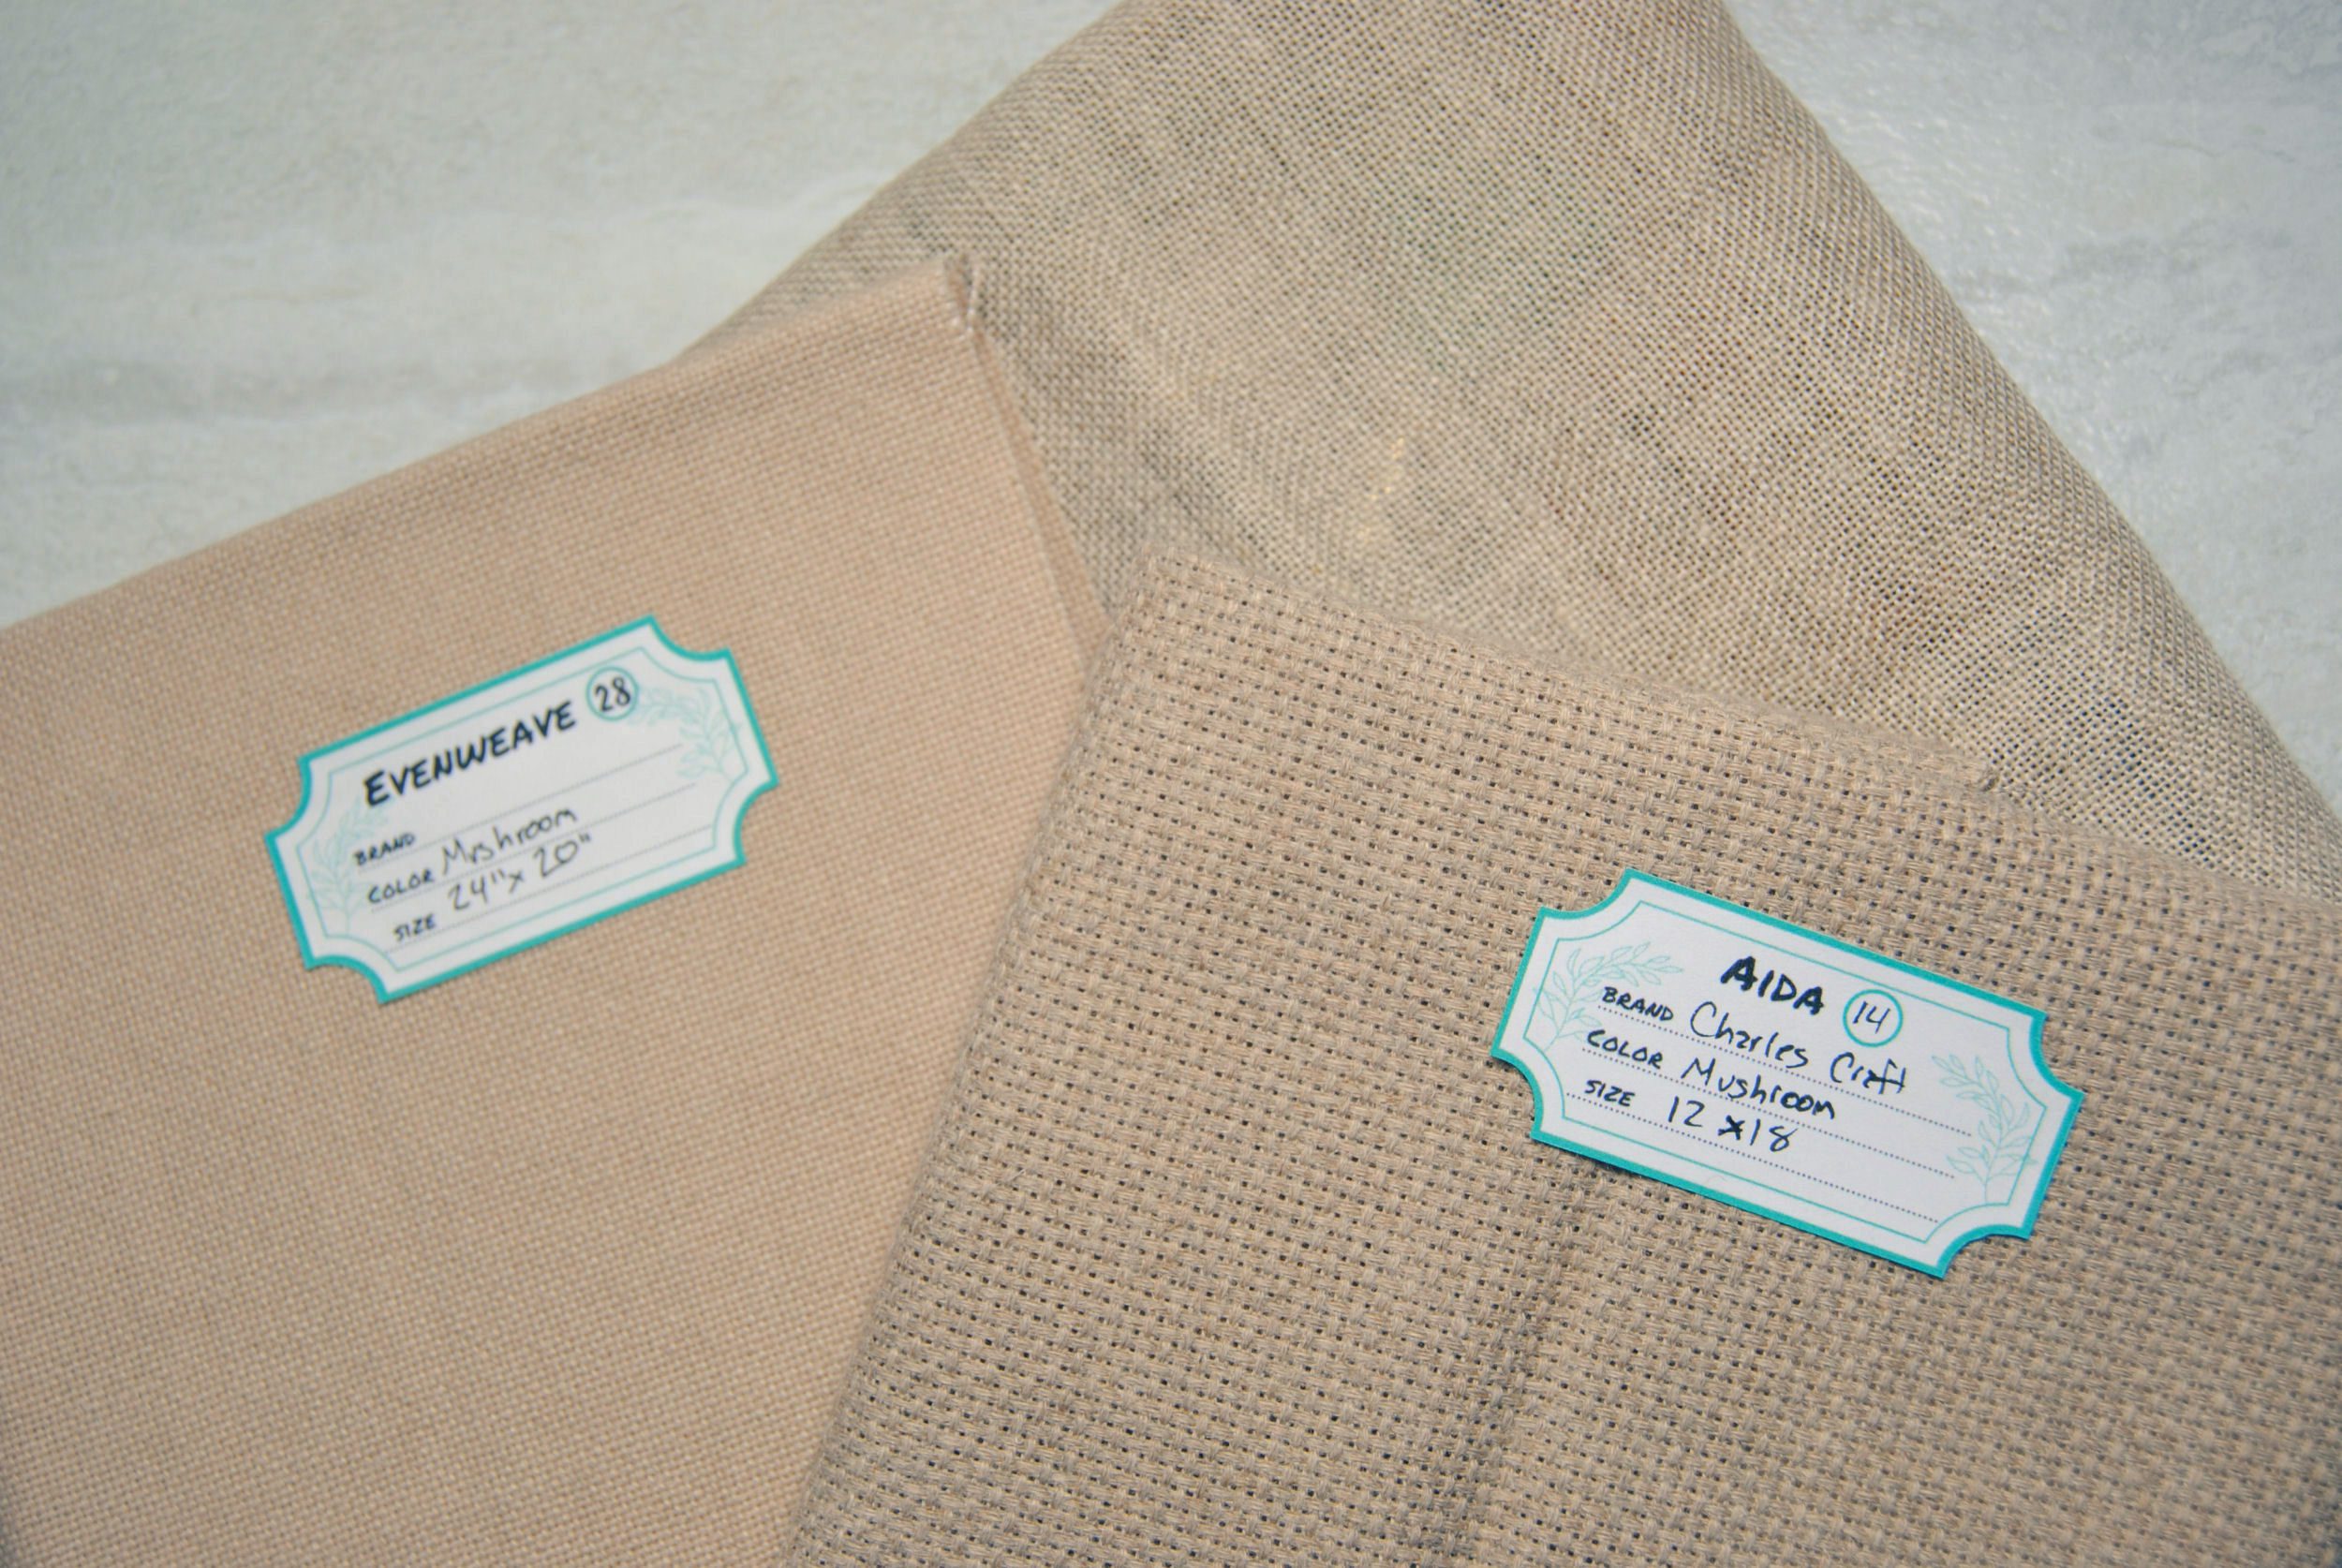
Hardanger is often done on 22 count hardanger fabric, but evenweave fabrics like Jobelan or Lugana will work as well and you can get it in counts ranging from 25-32. Plus it comes in a variety of colors!
Thread used
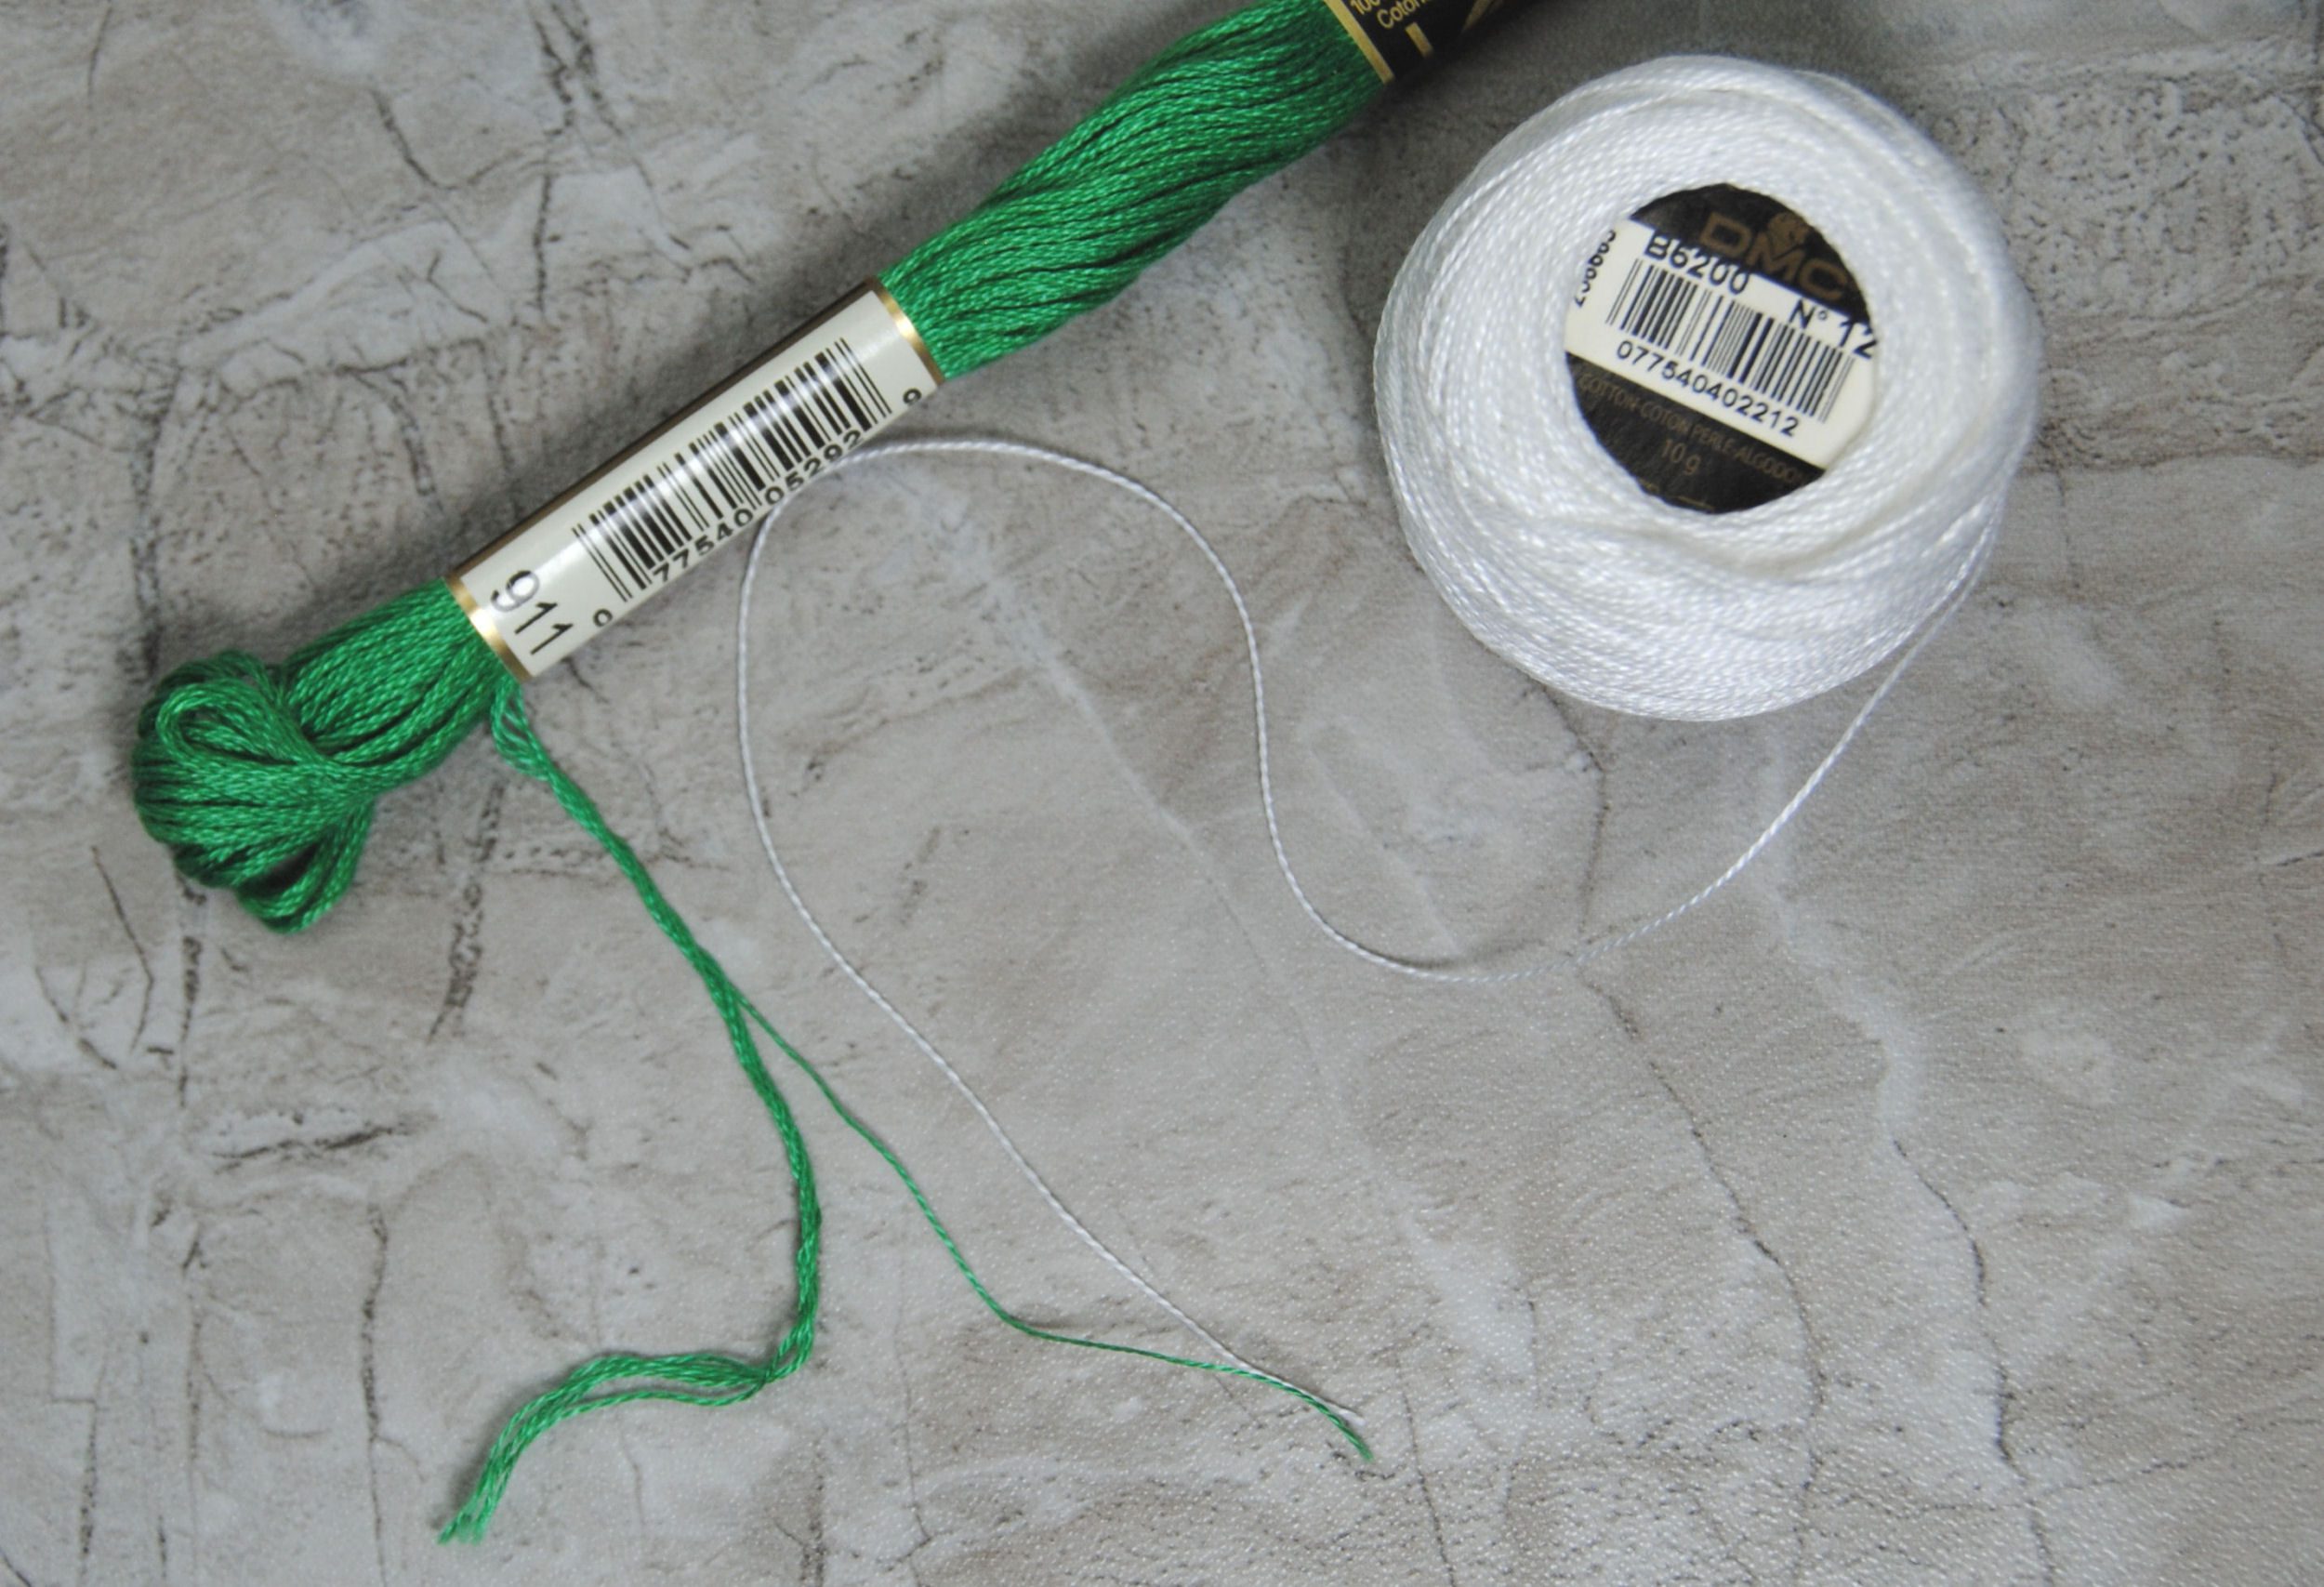
Rather than the traditional 6-stranded cotton, hardanger often makes use of perlé cotton. Usually incorporating different weights of perlé cotton such as #5, #8, and #12. Using a thicker thread for the satin stitches, and a thinner version for needleweaving.
As a cross stitcher, it’s entirely possible you’ve picked up perlé cotton by mistake when restocking on a color. Or more likely, when asking a friend or loved one to pick up a color while they’re at the store. I have a ball of B5200 #12 from just such an occasion. Learning hardanger is a good excuse as any to finally use it! As you can see #12 is about as thick as a single strand of floss.
That said, I haven’t found anything online explaining why it needs perlé cotton. Or why you wouldn’t want to use your normal 6-stranded cotton. However, I did find this blog detailing an attempt using stranded silk, in which they note due to the strands it’s pretty easy to cut one of those strands by accident.
(Image from MabelFigworthy of hardanger done with silk mill.)

Plus, the free patterns on the Kreinik site (linked below) often call for Silk Serica for the satin stitches, so there’s plenty of options for this technique beyond just Perlé cotton.
However, it sounds like it is certainly possible to do with stranded cotton if you just want to give it a go without buying new materials. Even if it’s not entirely traditional.
Learning Hardanger: Resources
I already told you I have no idea what I’m doing, so what I’ve described so far is what I’ve learned from searching online. As such, I’d like to provide some links here to the resources I used or found while searching. Use these to get a better idea of where to start, what size threads go with what fabrics, and so forth.
Text-Based Tutorials
Video Tutorials
Free Patterns
Books
If you’re more of a book person or want some more designs, there seems to be a few books on the topic still in print.
Finally Learning Hardanger
Alright, I’ve been putting it off long enough. Time for me to give it a go. As I mentioned in the intro, I was putting in an order from A Thrifty Notion a few months ago. I was picking up a 6″ Q-Snap and some aida and decided to just toss this kit in the cart as it was literally $3. So let’s give it a second life!
The kit says it’s from 1997 by Margaret Lee Rigiel. And it came with 32count Belfast Linen.
If you’d prefer to see this part in real time – I have a video of it up on my YouTube!
Step 1 – Cotton Perlé #8 Satin Stitches
The pattern recommends starting with the blue satin outlines. It also says “Stitch Count (over 2 threads)” as you can see above. However, starting a few stitches it looked… off. And squinting real hard at the small finished project photo it is definitely going over 1 other than the 8 small cross stitches in the corners.
So after immediately frogging, I tried again and it’s looking much better. And now matches the approximate design size listed in the instructions.

Either way, this part is fairly straightforward. You’re stitching a bunch of straight lines next to each other to create a shape.
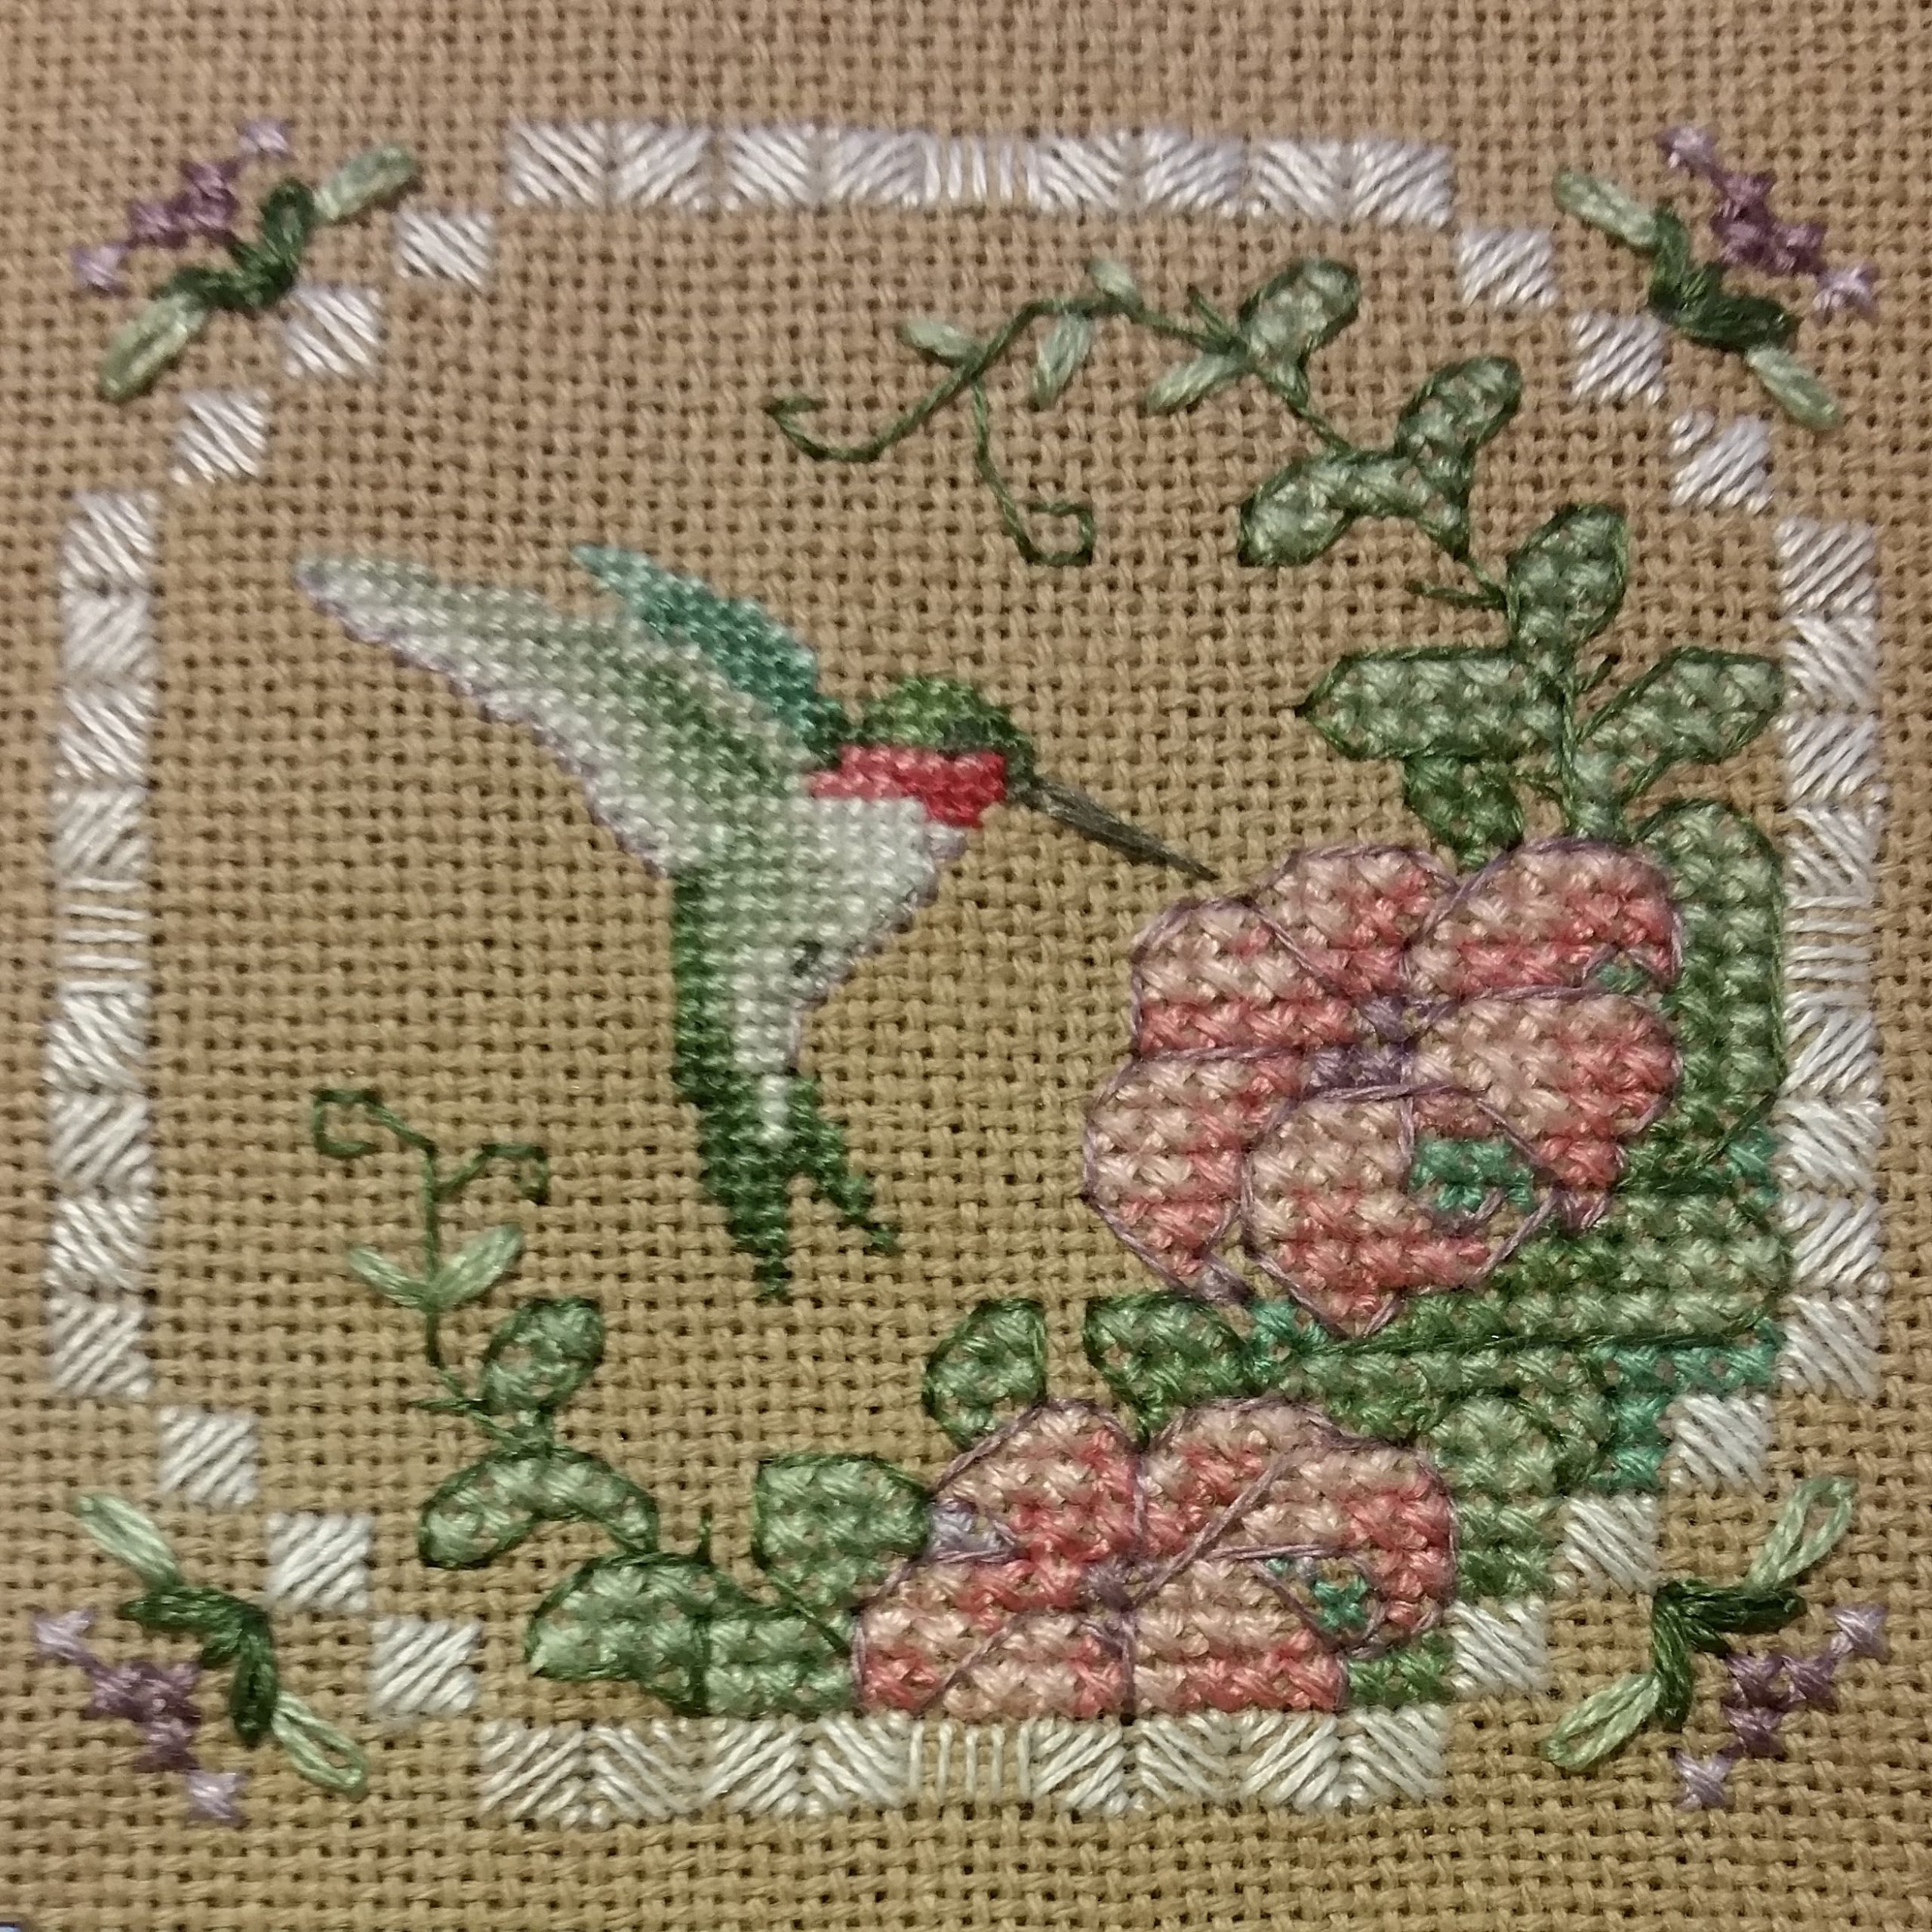
I’ve done satin stitches before for the multiple times I’ve done this Teresa Wentzler freebie. Unfortunately Wentzler’s site is no longer in operation so I can’t link you to it anymore.
The main difference being that this time I’m using Cotton Perlé size 8. Which, other than having to actually use a needle threader for once… is just a little thick for my tastes, especially on this 32 count fabric. But I suppose that’s the point, so it’s more secure?
Step 2 – More Satin Stitches
That said, the second step is to do the green square in the center and the leaves around the edges. With 2 strands of standard ol’ DMC.
Which… first of all I feel like this probably could’ve been the first step since I generally middle start to make sure I have plenty of fabric. Counting out to the blue edges was semi stressful as I hate counting higher than 5 while stitching as I can’t be trusted to count higher than that consistently. But I’m following instructions this time around. For once.
But also — that center block is just 2 stands of DMC. And we’ll be cutting right up to that as well. Which implies to me that plain ol’ DMC is indeed workable for the whole thing if you just want to try out hardanger and don’t want to splurge on some perlé just yet. But we’ll see when we actually do the cutting I guess.

Step 3 – Even More Satin Stitches
Finally, more satin stitches, this time in pink. Neat!
I will say, having the satin stitch pattern laid out on a neat grid makes it less scary than free hand embroidery for me, at least.
That heart in the center could’ve been a good place to start if center starting. You don’t have to do all the stitches of a color before proceeding. As long as you have all the stitches in place before you start cutting, it should be fine. So keep that in mind when looking through free patterns and such.
Of course, I got so into the zone I didn’t take a WIP photo of this phase, so let’s move on… to the part every beginner is terrified of.
The Dreaded Cutting
I took a page from the Sara Homfrey Learning Hardanger tutorial video here. The instructions in the kit were just “clip threads so it looks like this drawing” (paraphrased). Which… didn’t help ease the beginner’s fright.
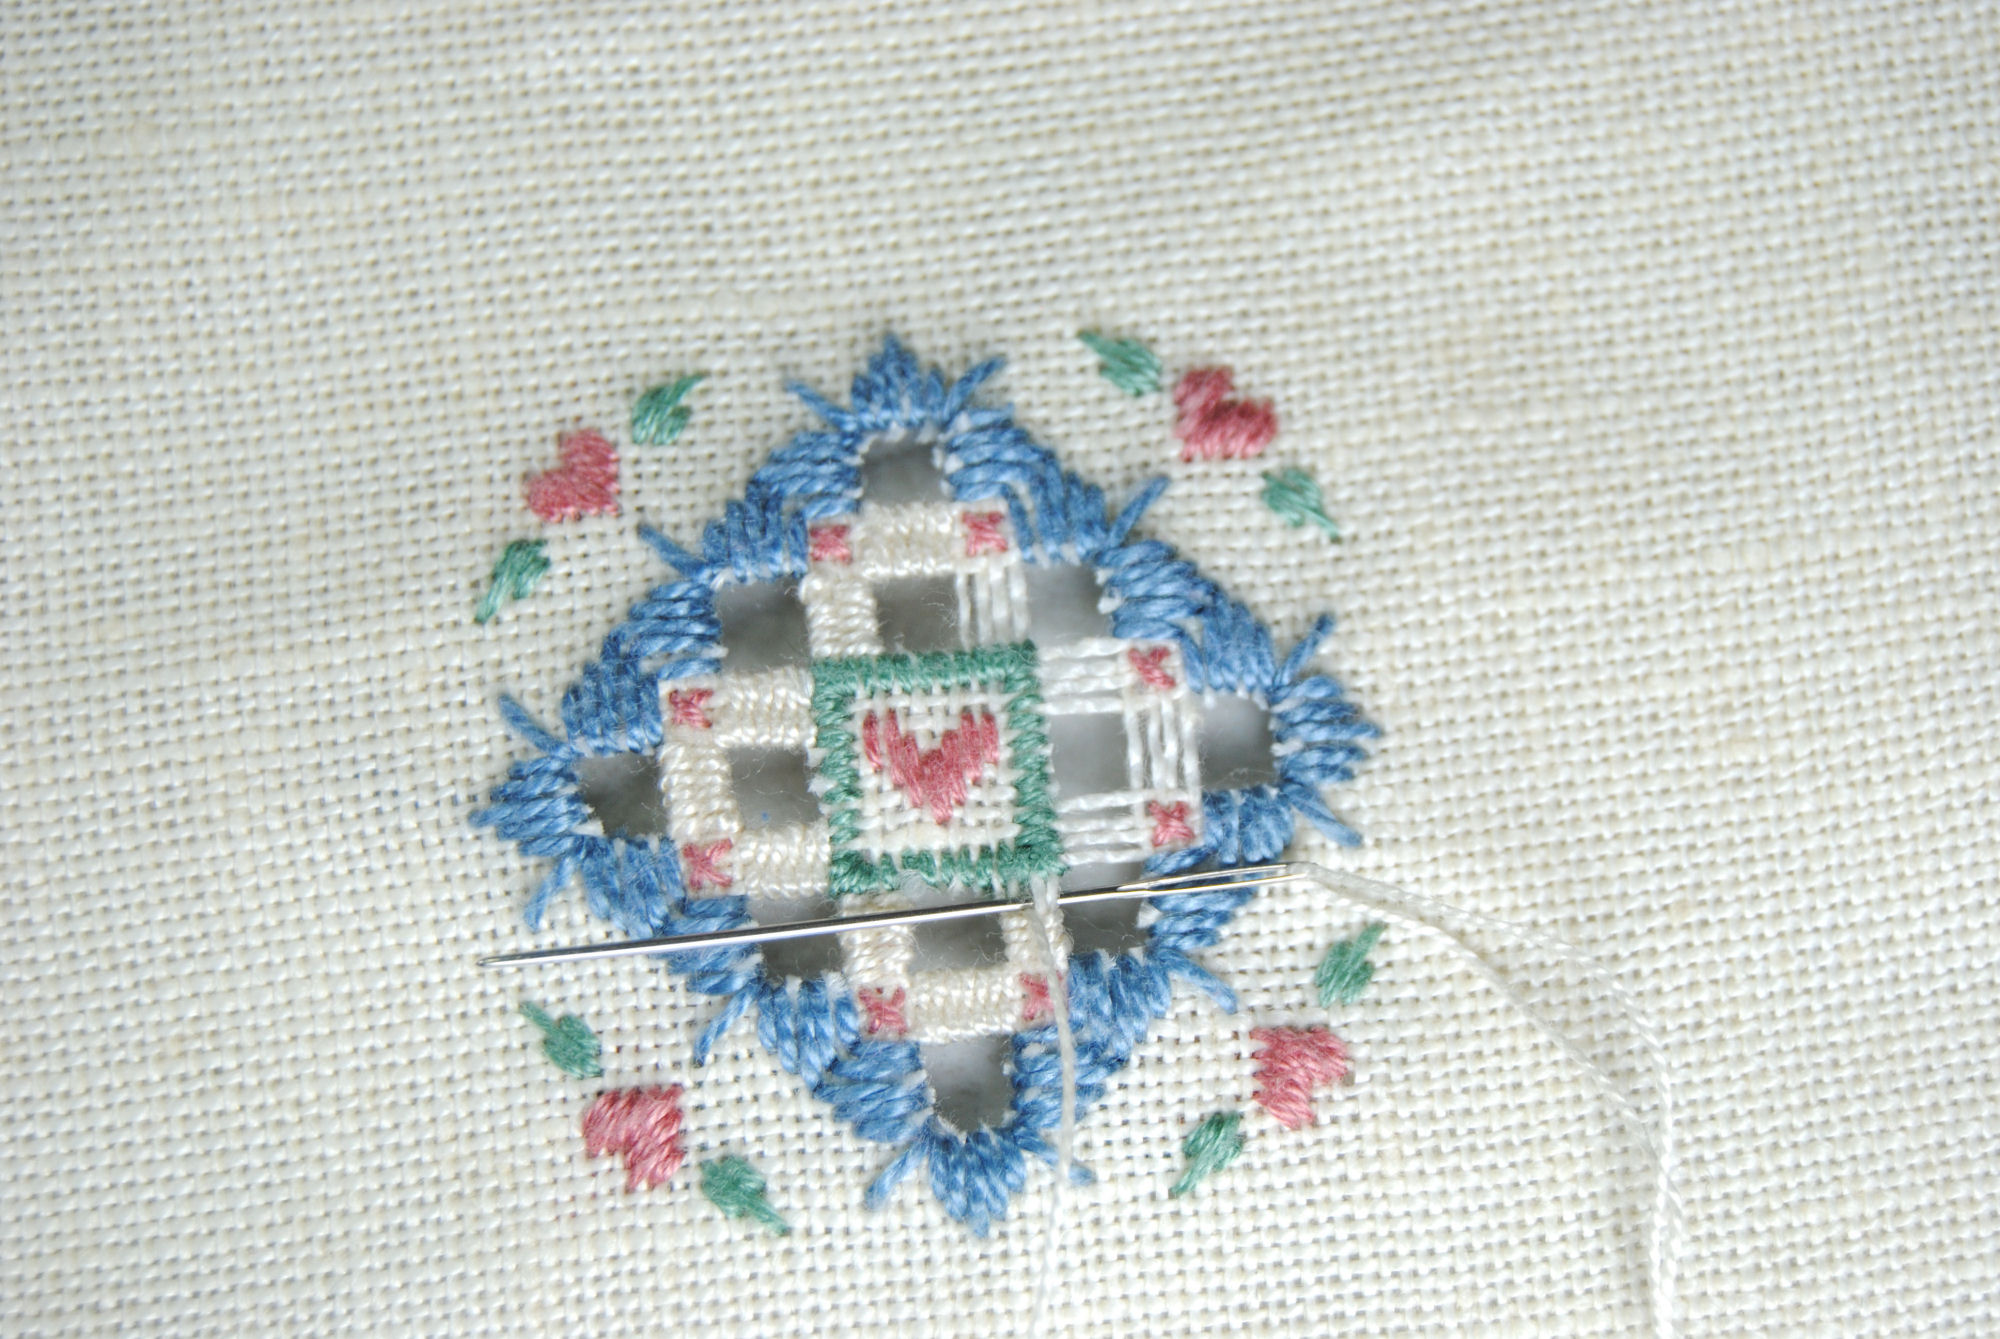
But Sara shows how to carefully pull up just a single strand at a time and clip it in the middle, nowhere near any of the stitching. So I proceeded doing just that. One strand at a time.

Then with my needle I pulled that strand away from the stitches from the back, and then finally snipped it closer to the stitching.

Doing each strand one by one made it take a bit longer than necessary, but as a beginner it’s definitely what I needed to gain confidence. And honestly? It’s not a terrible process once you get past that initial fear.
That said, I clearly was still a bit afraid to clip too close to my stitches. And some of those strands stick out a bit. But if you were doing the traditional white on white you wouldn’t even notice it tbh.

Honestly? It looks fine. I’m pretty pleased for my first piece! But we’re not done yet; let’s continue.
Good ol’ Cross Stitches
And now a quick return to my comfort zone, the cross stitches. But this time over 2 on some very thinned out fabric, which was an interesting change of pace. Not much to say about this step here though.

Not every hardanger pattern will incorporate cross stitches, but it was nice that my first had a few at least.
Last Step – Needleweaving
Those fabric strands are definitely a bit fragile though, so… one step left! Needleweaving! Once again I went back to Sara’s video for tips. I definitely recommend giving it a watch if you’re considering learning hardanger yourself.
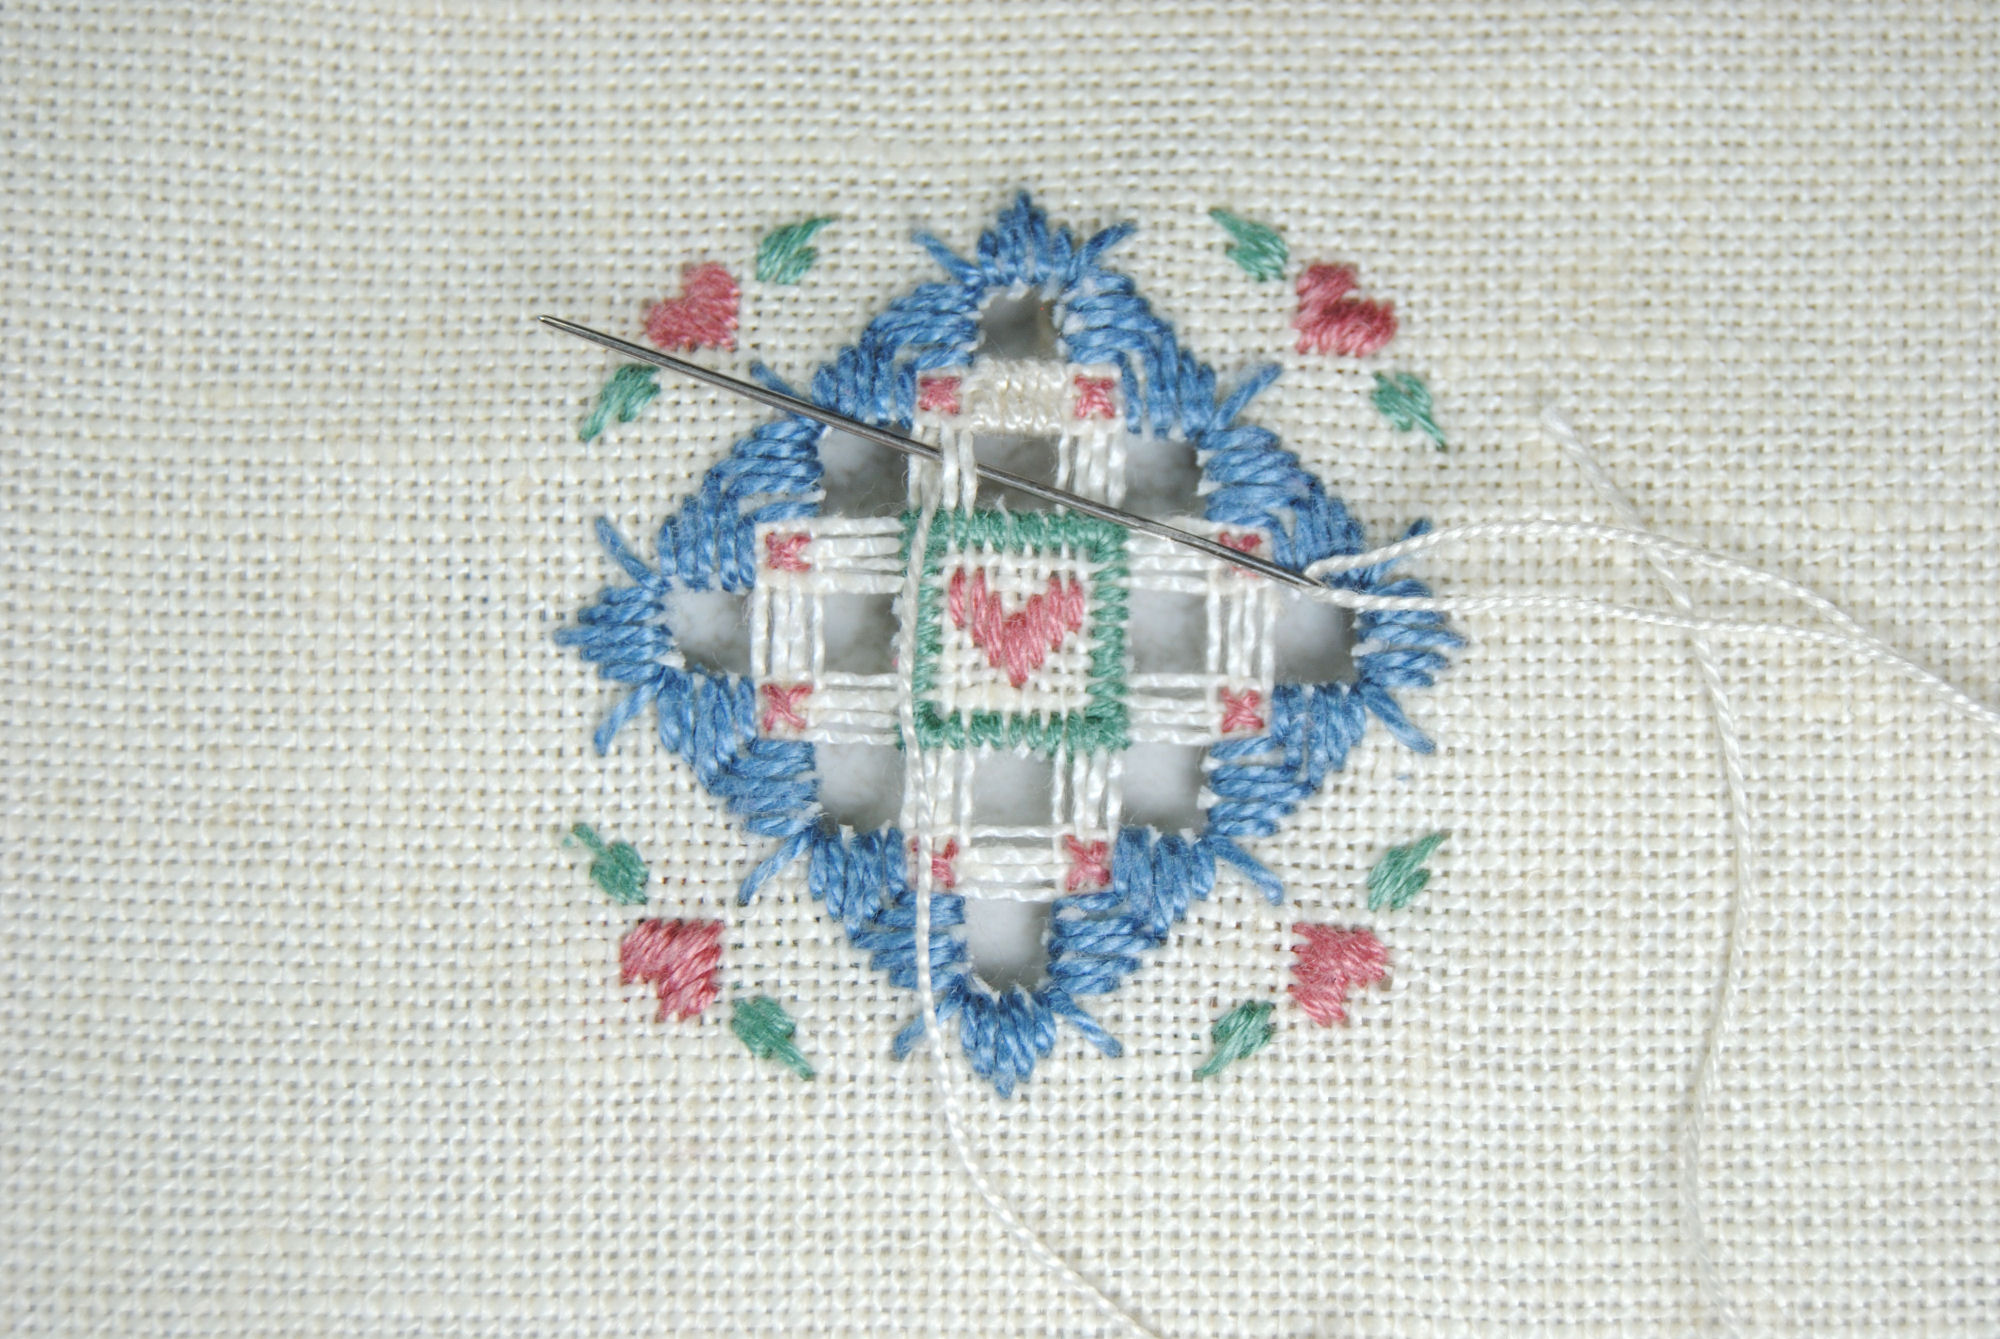
This was actually the fun part for me — just going back and forth between the strands to create that super satisfying woven bar look. No counting needed, just do it until it feels full. I definitely enjoyed this part.
It makes such a neat texture!
Learning Hardanger: Final Thoughts
Clearly this isn’t my usual deep-dive tutorial style article. I’m completely new to this technique. The pattern isn’t mine to share. I’m just referencing other people’s tutorials to figure it out.
But after being afraid of starting for so long, it’s nice to finally have at least one design under my belt. Even if it was a small kit that took a little over 2 hours.

Is it perfect? Absolutely not. Was starting on 32 count linen a great idea? Also probably not.
Will I do it again? Absolutely! In fact, there’s more than enough thread left over to do this one again, and I do have some 22 count fabric somewhere… Maybe I’ll give it another go soon.
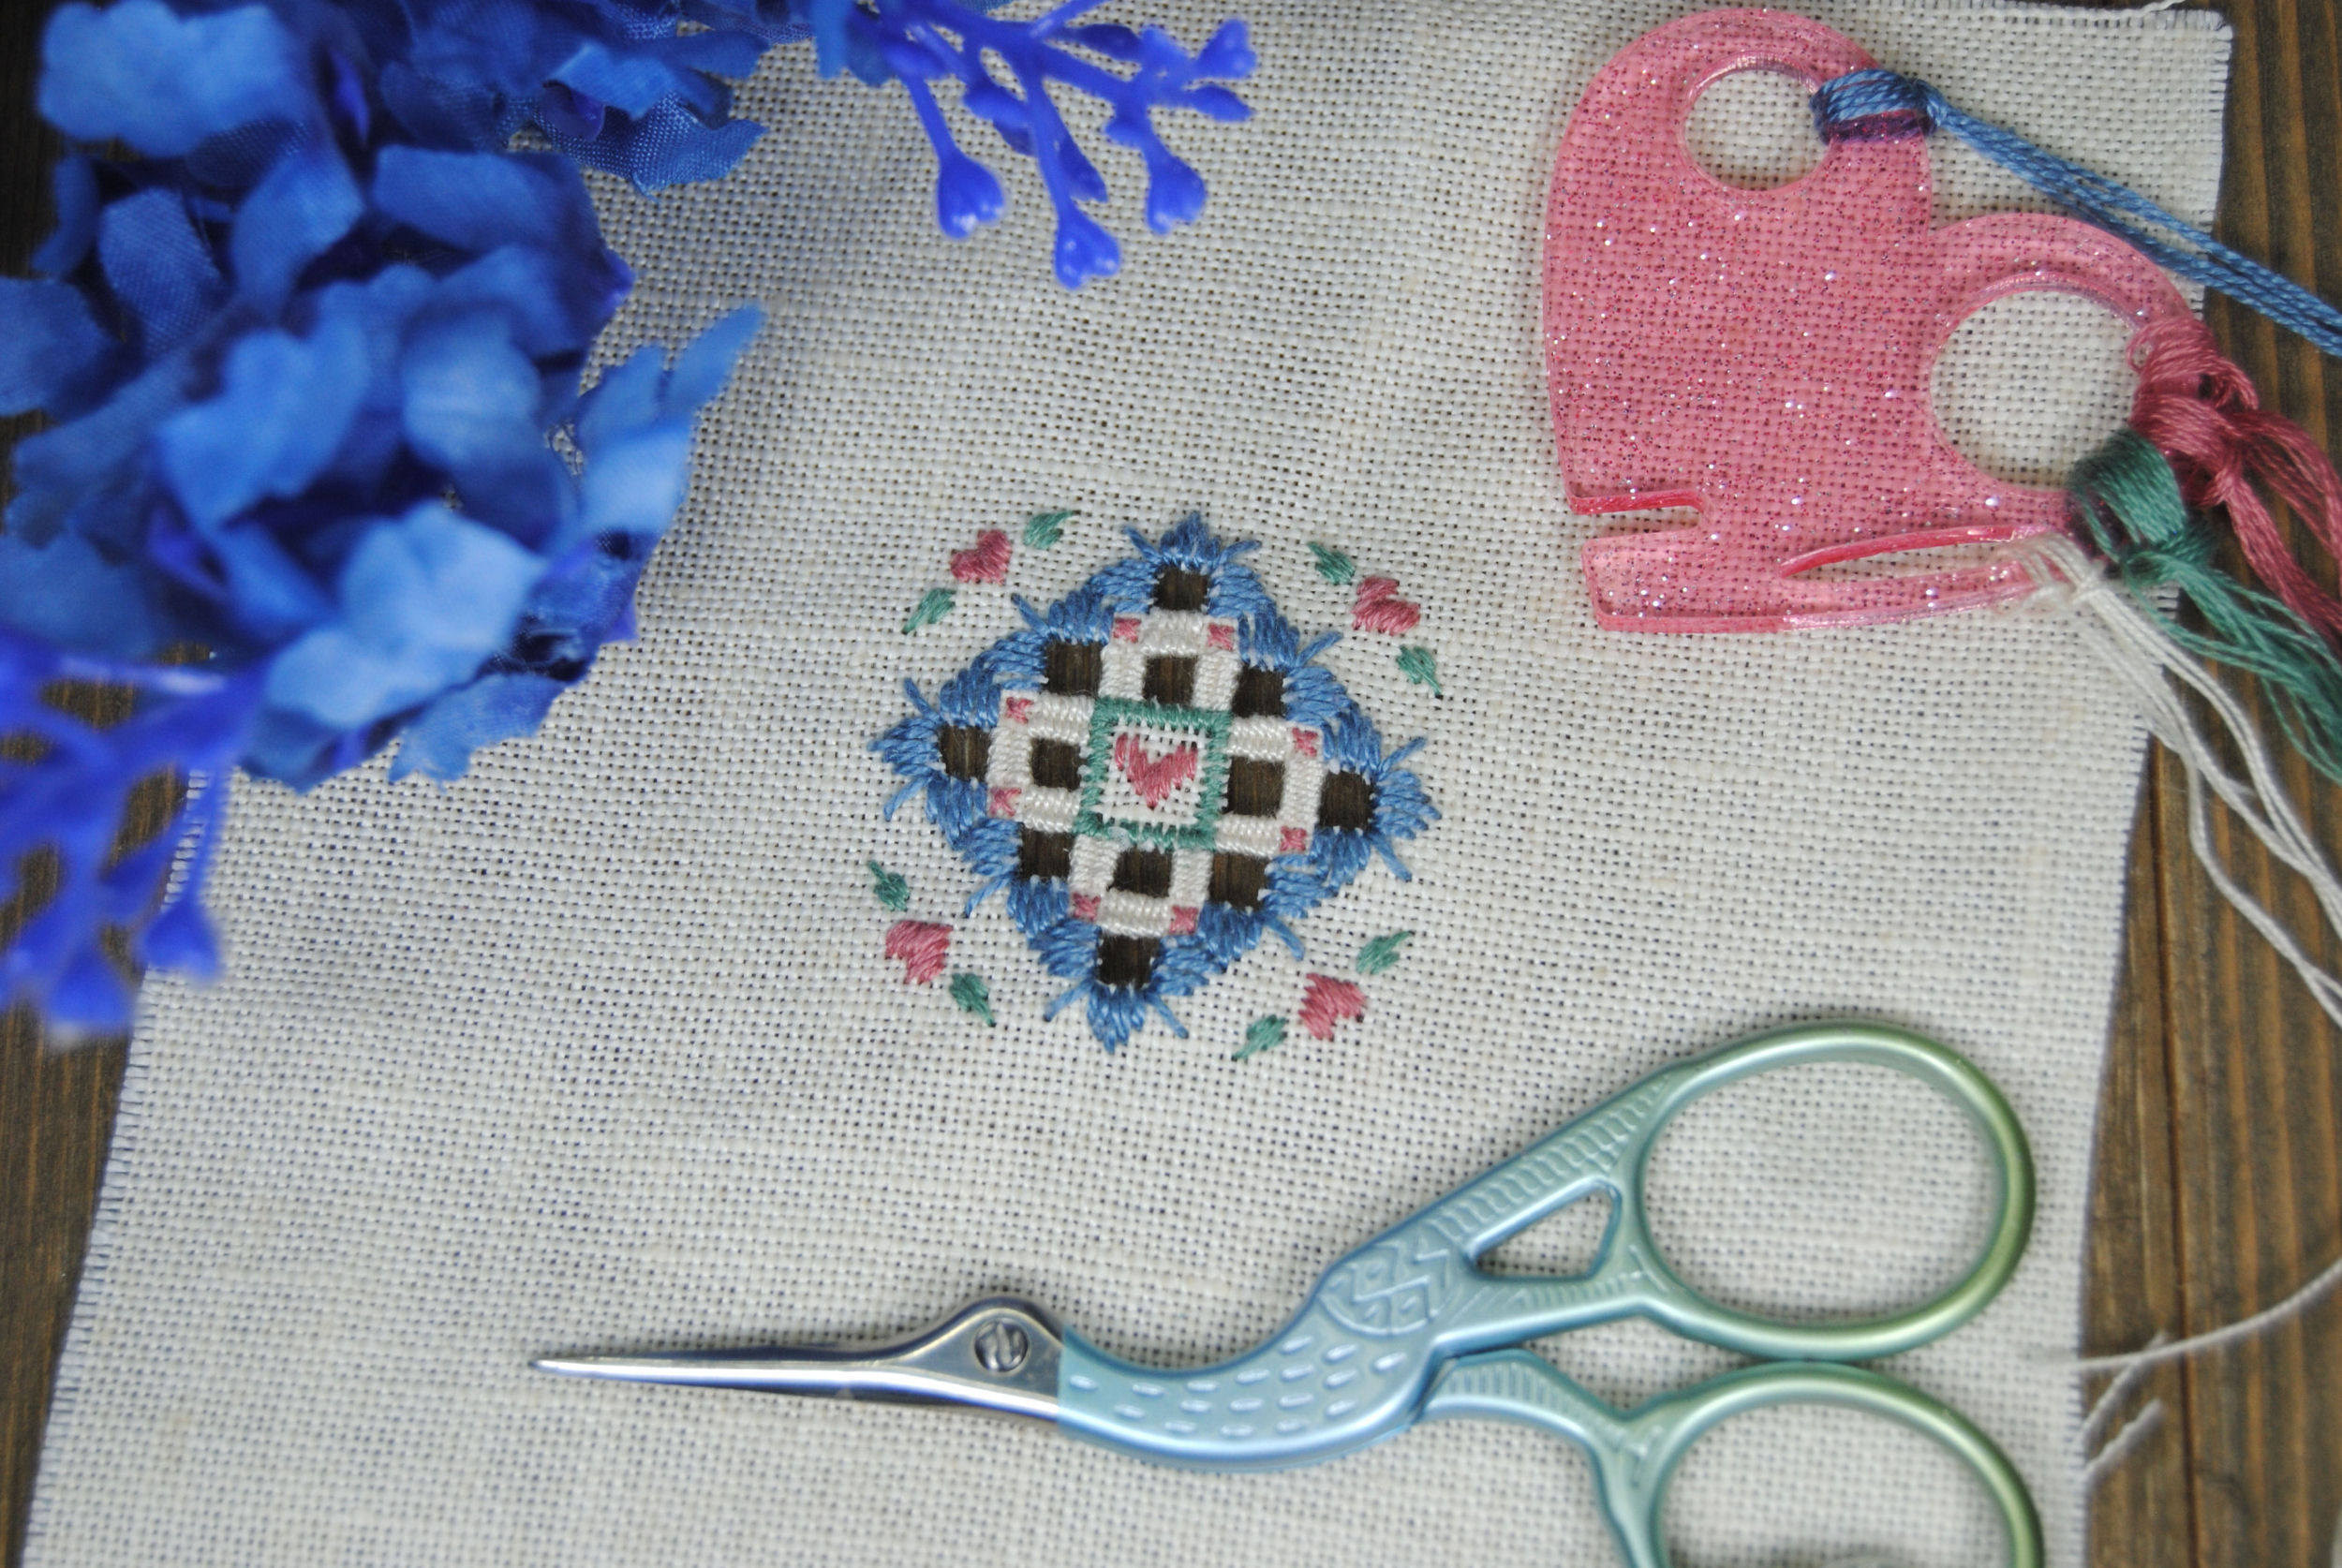
For now I just have the leftover threads separated out on this adorable thread drop from Atom Heart Cross Stitch. I’m sure they’ll come in handy at some point.
The real question now is — will YOU try it? Does it seem less daunting now? Have you checked out some of the patterns I linked above? I wanna see you try it too!
Feel free to tag me on instagram or on the Pixel Stitch Discord so I can see. We can learn this new technique together!

