
Hoop Finish Your Cross Stitch
I’ve been posting monthly tutorials on this site for SIX YEARS now. And before that on old blogs or via videos. So how is it I’ve never done an article on the hoop finish? It’s arguably the most iconic cross stitch finish and one of the easiest to do.
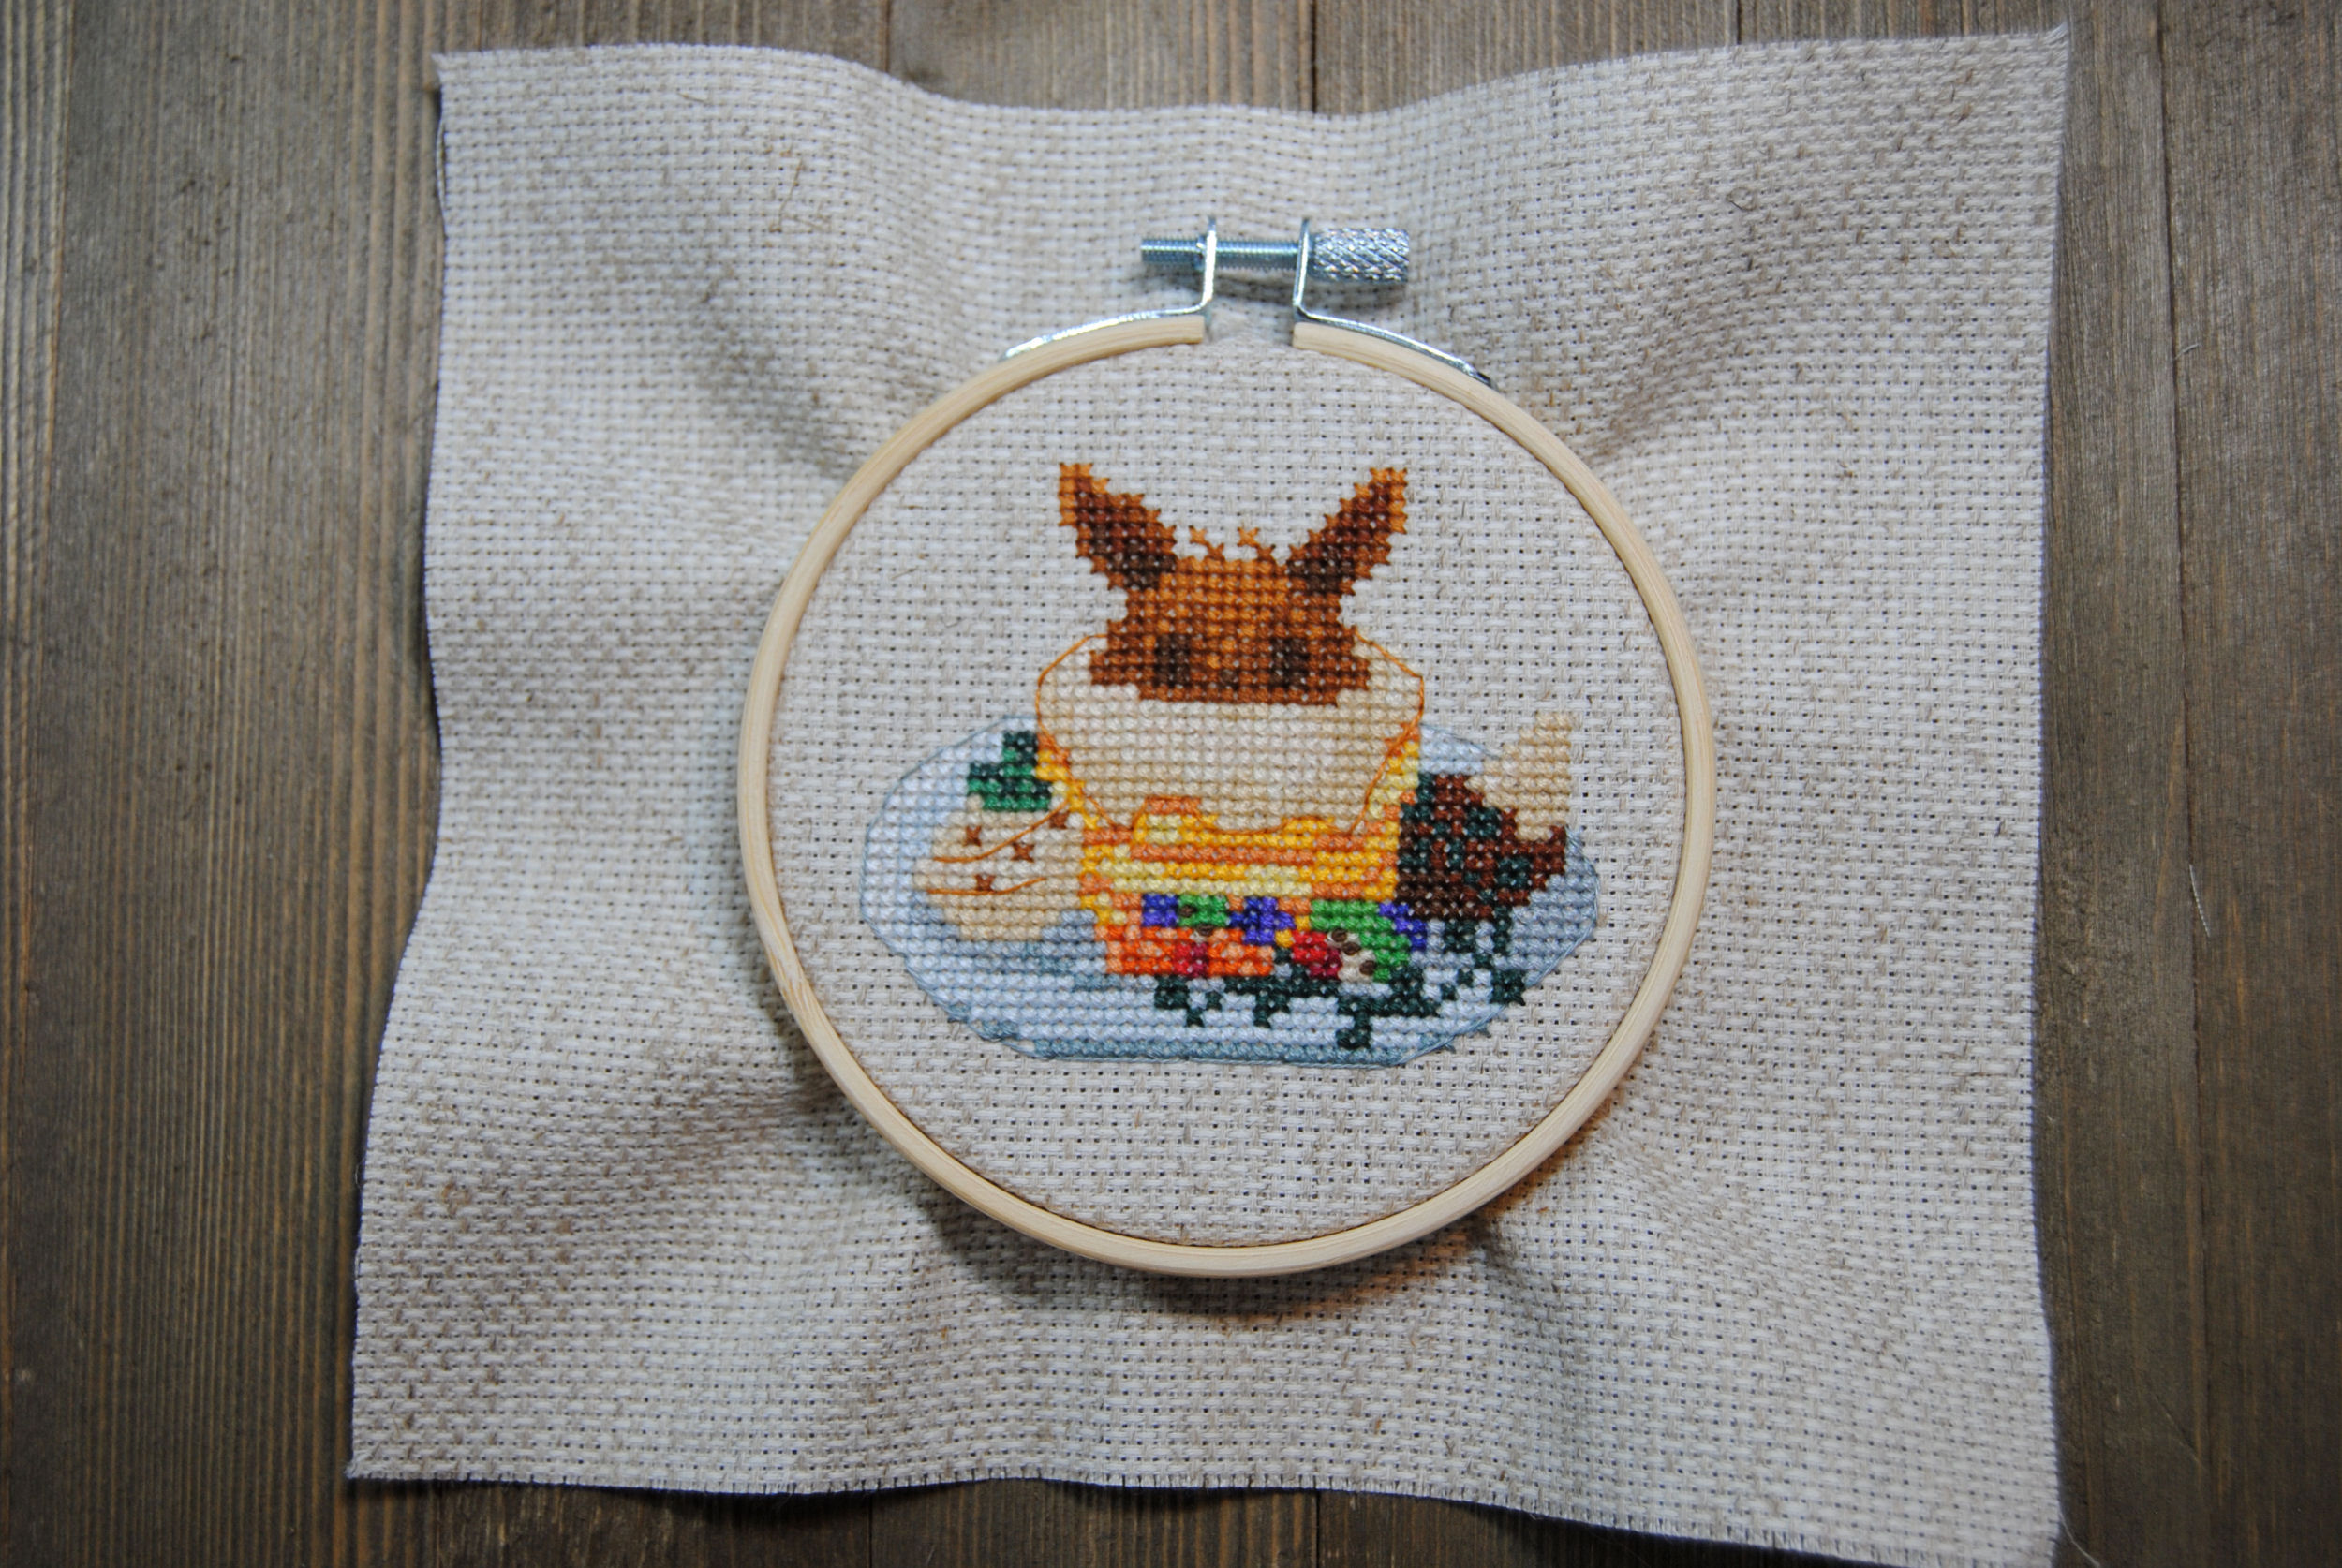
But the truth is, I don’t like hoops. I don’t stitch with them, I tend to not like designing with a hoop in mind, and I rarely finish my pieces in a hoop. But why is that? And what can I change about the standard hoop back to make me actually want to use them? Let’s find out together as I try and finish these Eevee pancakes as a hoop.
This post may contain affiliate links. If you buy something using one of these links, I earn a small commission. However, there is no extra cost to you. Thanks for understanding! Learn more in my Disclosures & Privacy Policy.
Table of Contents
What are embroidery hoops actually for?
Ultimately, embroidery hoops are not at all required for this craft. But they’re designed for holding your fabric tight to make it easier to stitch. Since hoops were so often used for working embroidery and cross stitch projects, somewhere along the line they began to seen hung on the wall as a hoop as well.
Nowadays, people even design patterns specifically for that spherical shape to be hung in a hoop or round frame. And they even make hoops that lend themselves more to framing than stitching, such as Flexi hoops which have the look of wood. Plus they come in all different shapes such as hexagons and ovals as well.
That said, you can definitely stitch without a hoop. Whether you stitch in hand without anything to hold your fabric tight, or you use one of the alternatives like Q-snaps or scroll frames.
Where to buy hoops?
You can find hoops of all sorts at your favorite needlework retailer, whether online like 123Stitch or a physical store local to you. I haven’t used them myself, but have been recommended hoops by Hardwicke Manor several times now.
If you’re looking for some inexpensive hoops, such as the ones found on Amazon, be careful as there’s a lot of cheap brittle hoops to be found on there. But I’ve had decent luck with the Caydo brand ones, and that’s actually what I used for my hoop decorating article which I’ll talk about next:
Ways to embellish your hoop
While this article is mostly about the back of your hoop, I’ve actually got a whole article already on how to decorate the FRONT of your hoop as well. There’s plenty of different ways to do that. From frames and paint, as well as wrapping in washi tape, fabric, ribbon, thread, yarn, etc. So check out that hoop decorating article for even more suggestions for decorating the front of your hoop.
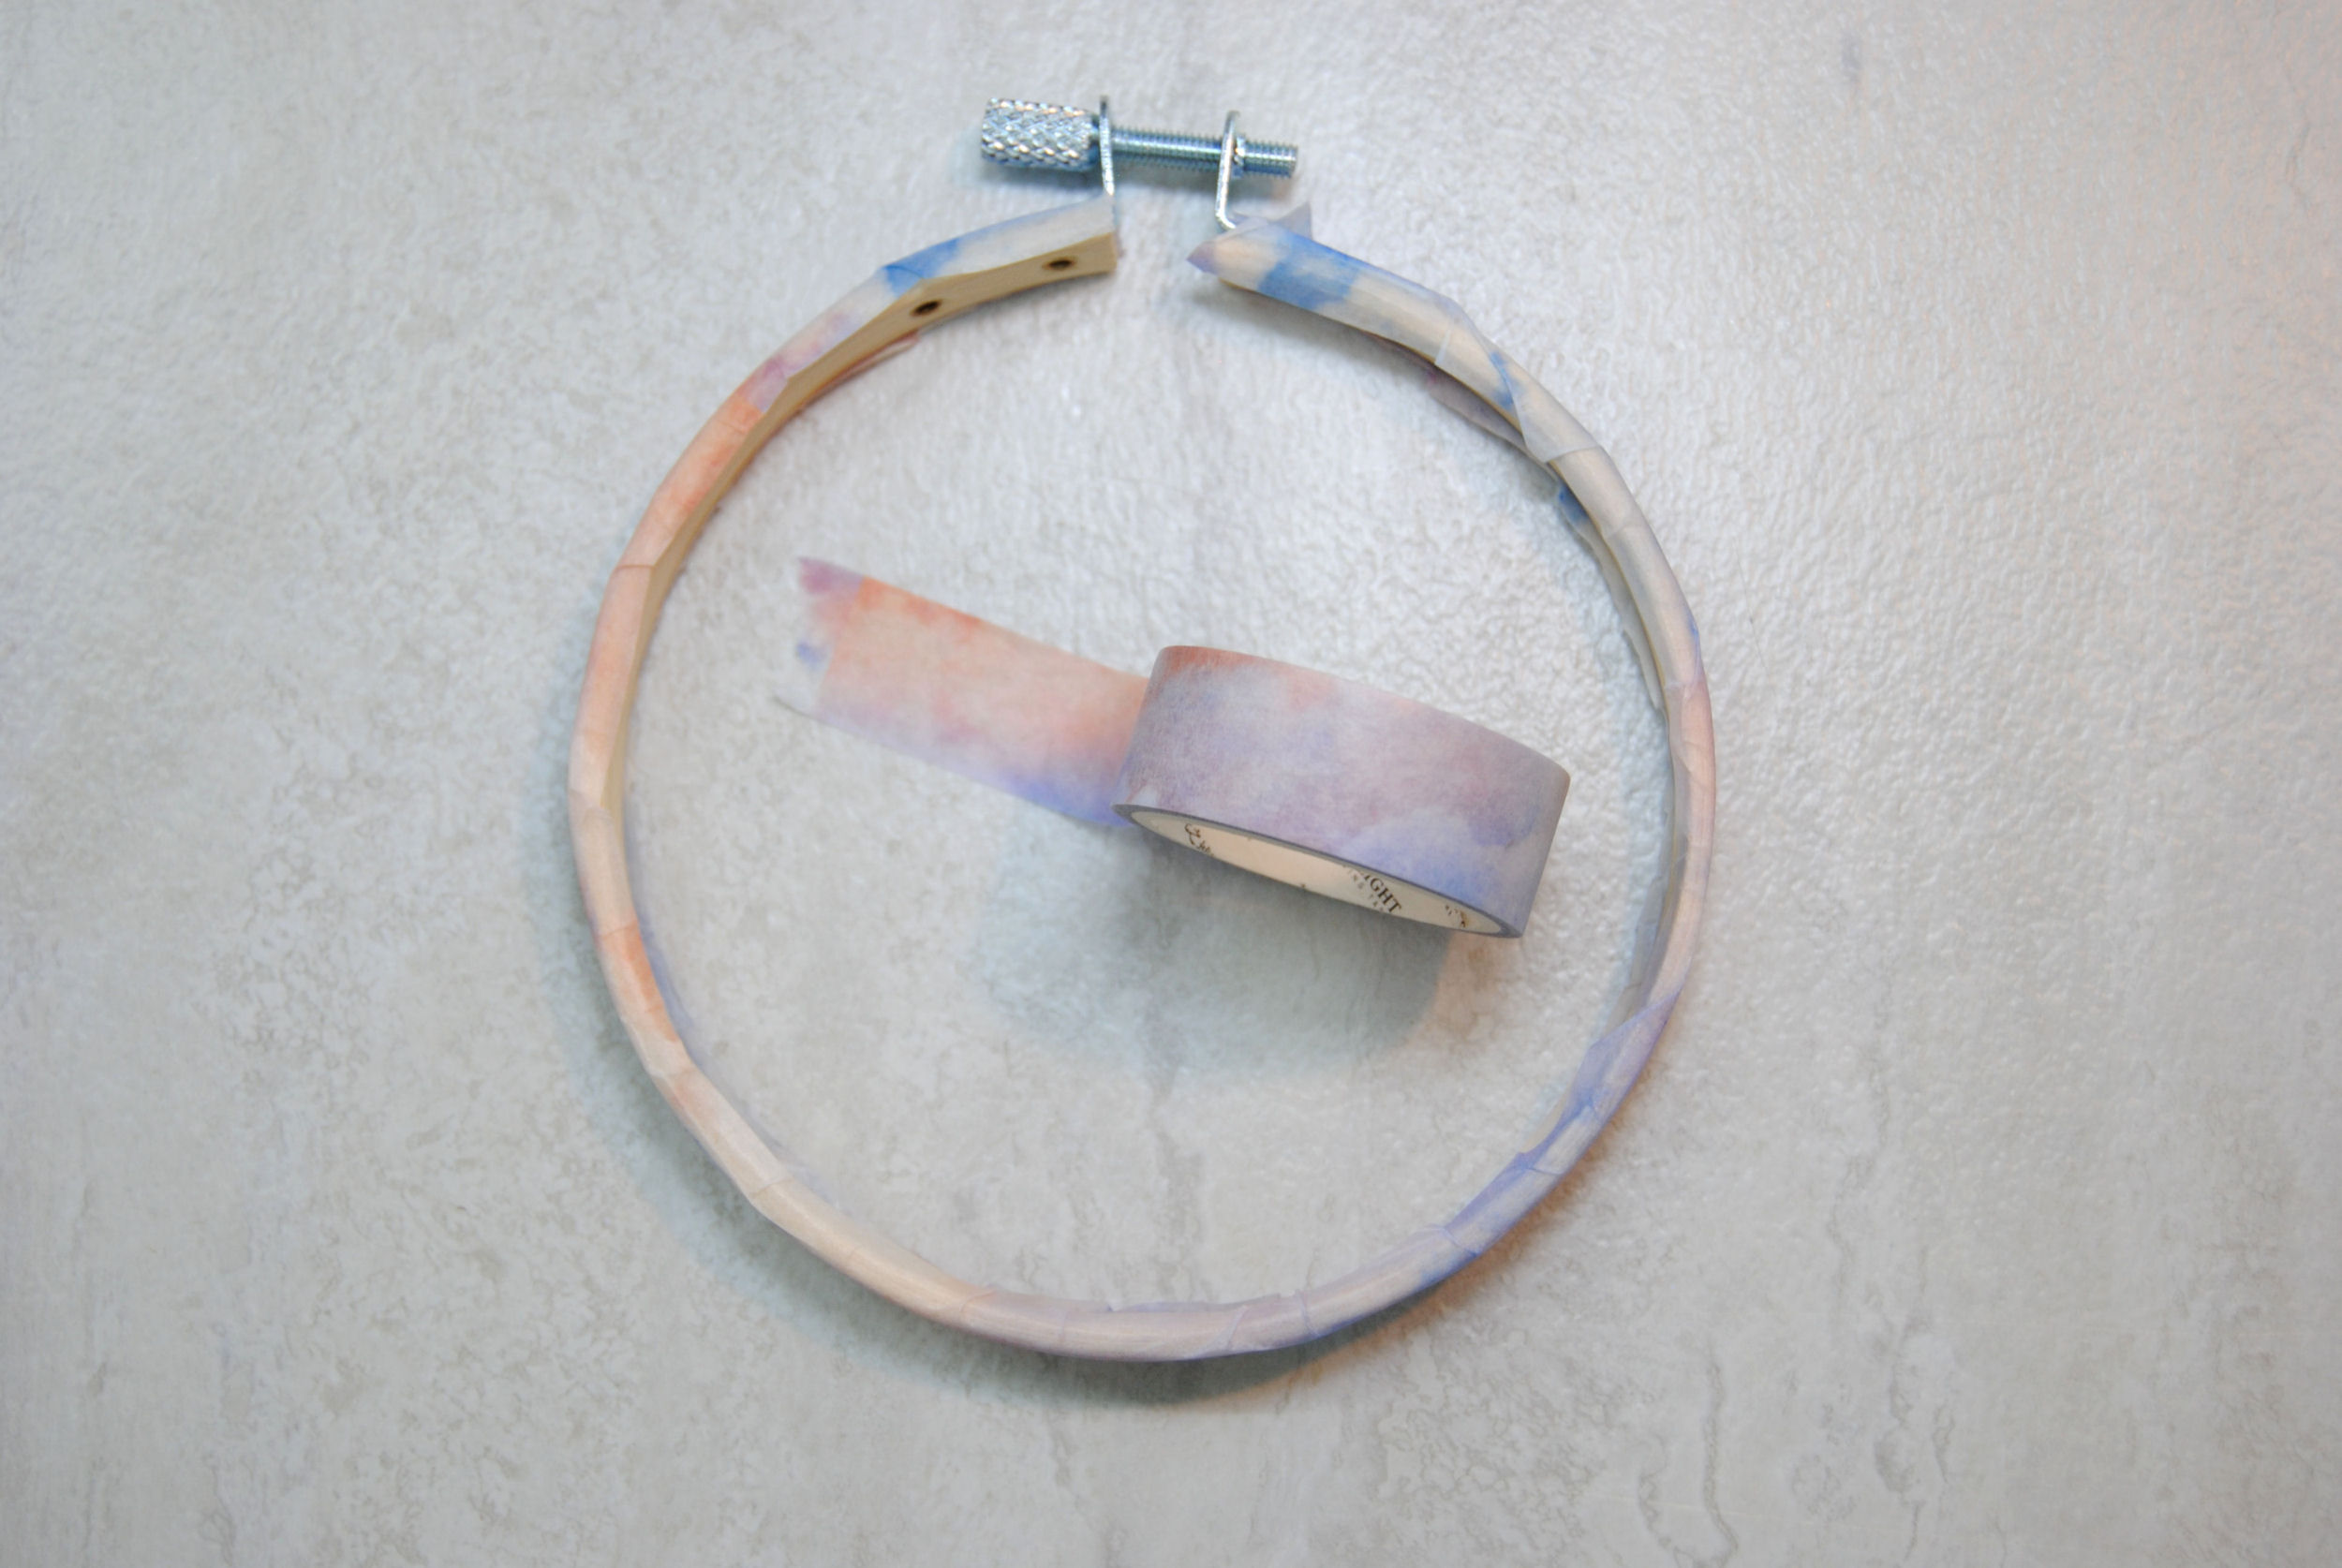
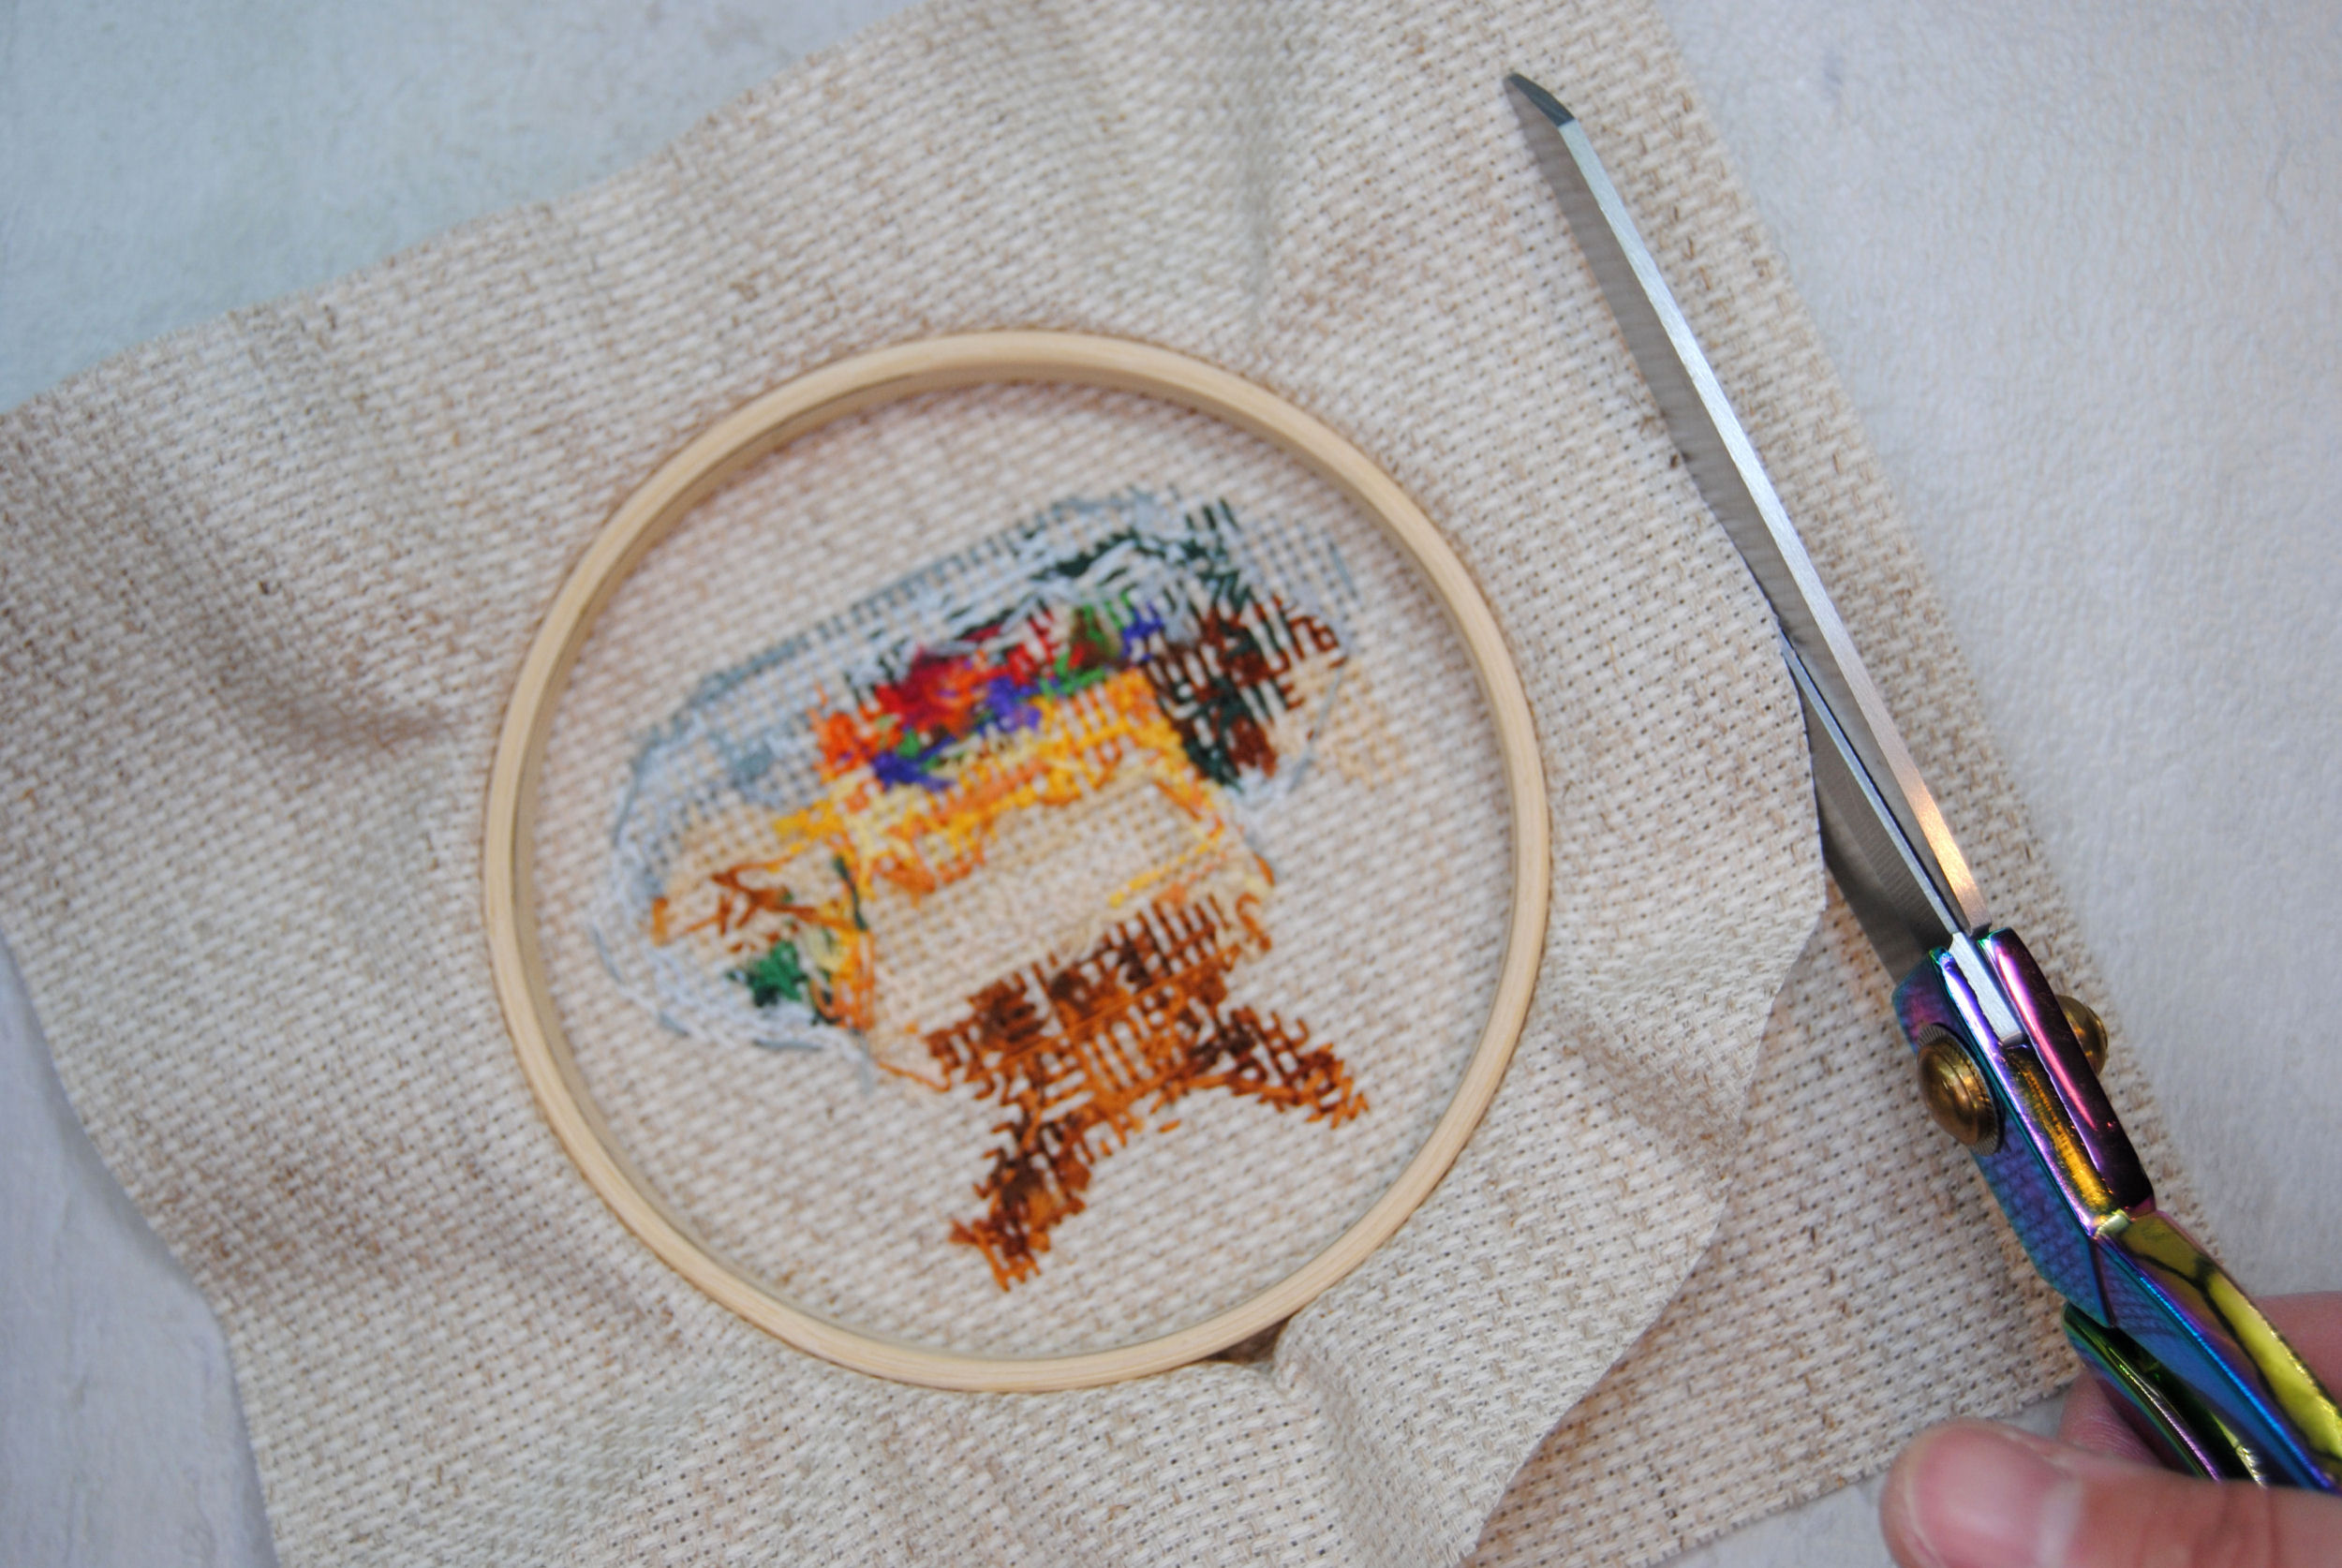
To start off today’s project, I wrapped the hoop for my Eevee finish in washi tape. Yes, it looks a bit rough. I realize that later during this article and ended up doing something else. Turns out this particular washi is not as sticky as the ones I’ve used in the past. Whoops. But in case you’re curious what’s in the first few photos below, it was washi tape.
Backing your hoop
Now for the real reason you’re here — what to do with the back. Now since I’ve already admitted I don’t do a lot of hoop finishing, I’ll be referencing a lot of other people’s tutorials here. I’ll be trying out some of them myself, but do check out their posts if you have more questions about how that backing style is done. I’m definitely no expert.
I’m just doing the research for you so you don’t have to spend ages googling to make sure you’ve got all your options before deciding.
Open Back Running Stitch Hoop
The open back finish is probably my favorite backing option, as it leaves the back easily accessible so you can see the lovely textures and unique pathing of the back of the design. Yes I actually LIKE seeing the backs, no matter how messy they get.
I found this simple tutorial by hopebroidery super helpful for this one. But here’s the basic premise.
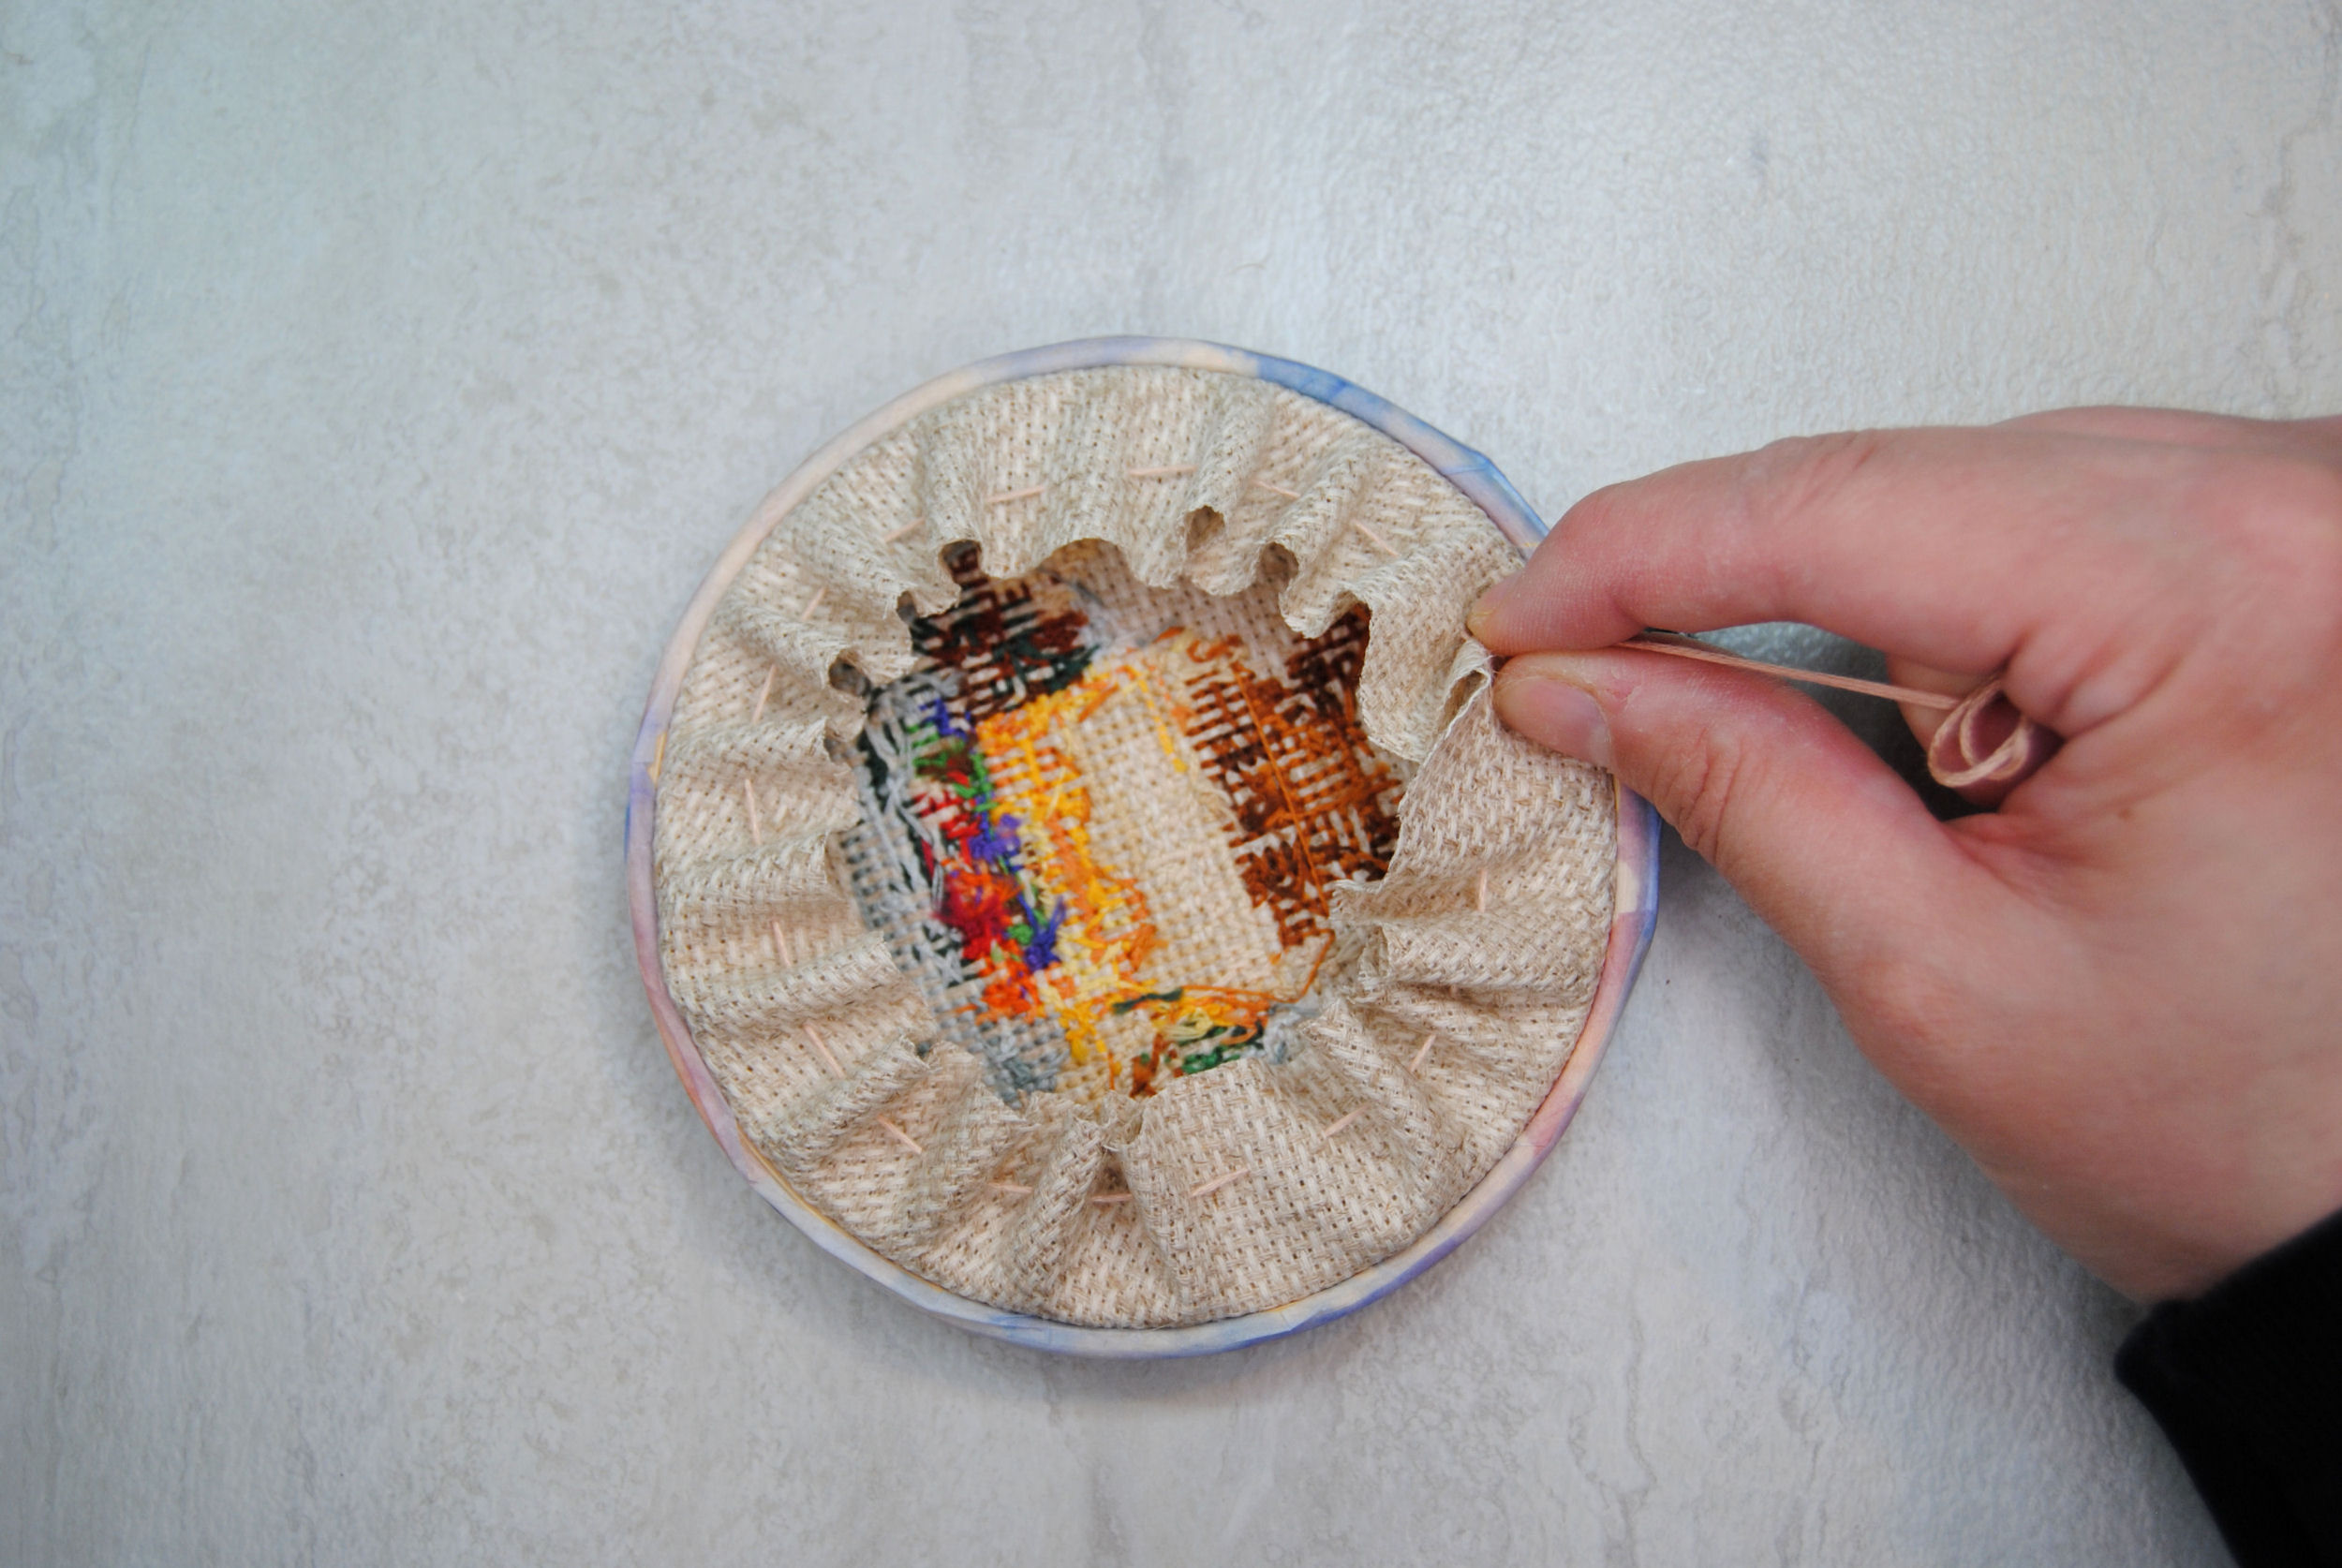
Start by cutting the fabric around your hoop I left about an inch because I wanted more ruffles. But with this smaller sized hoop I probably should’ve trimmed it even more.
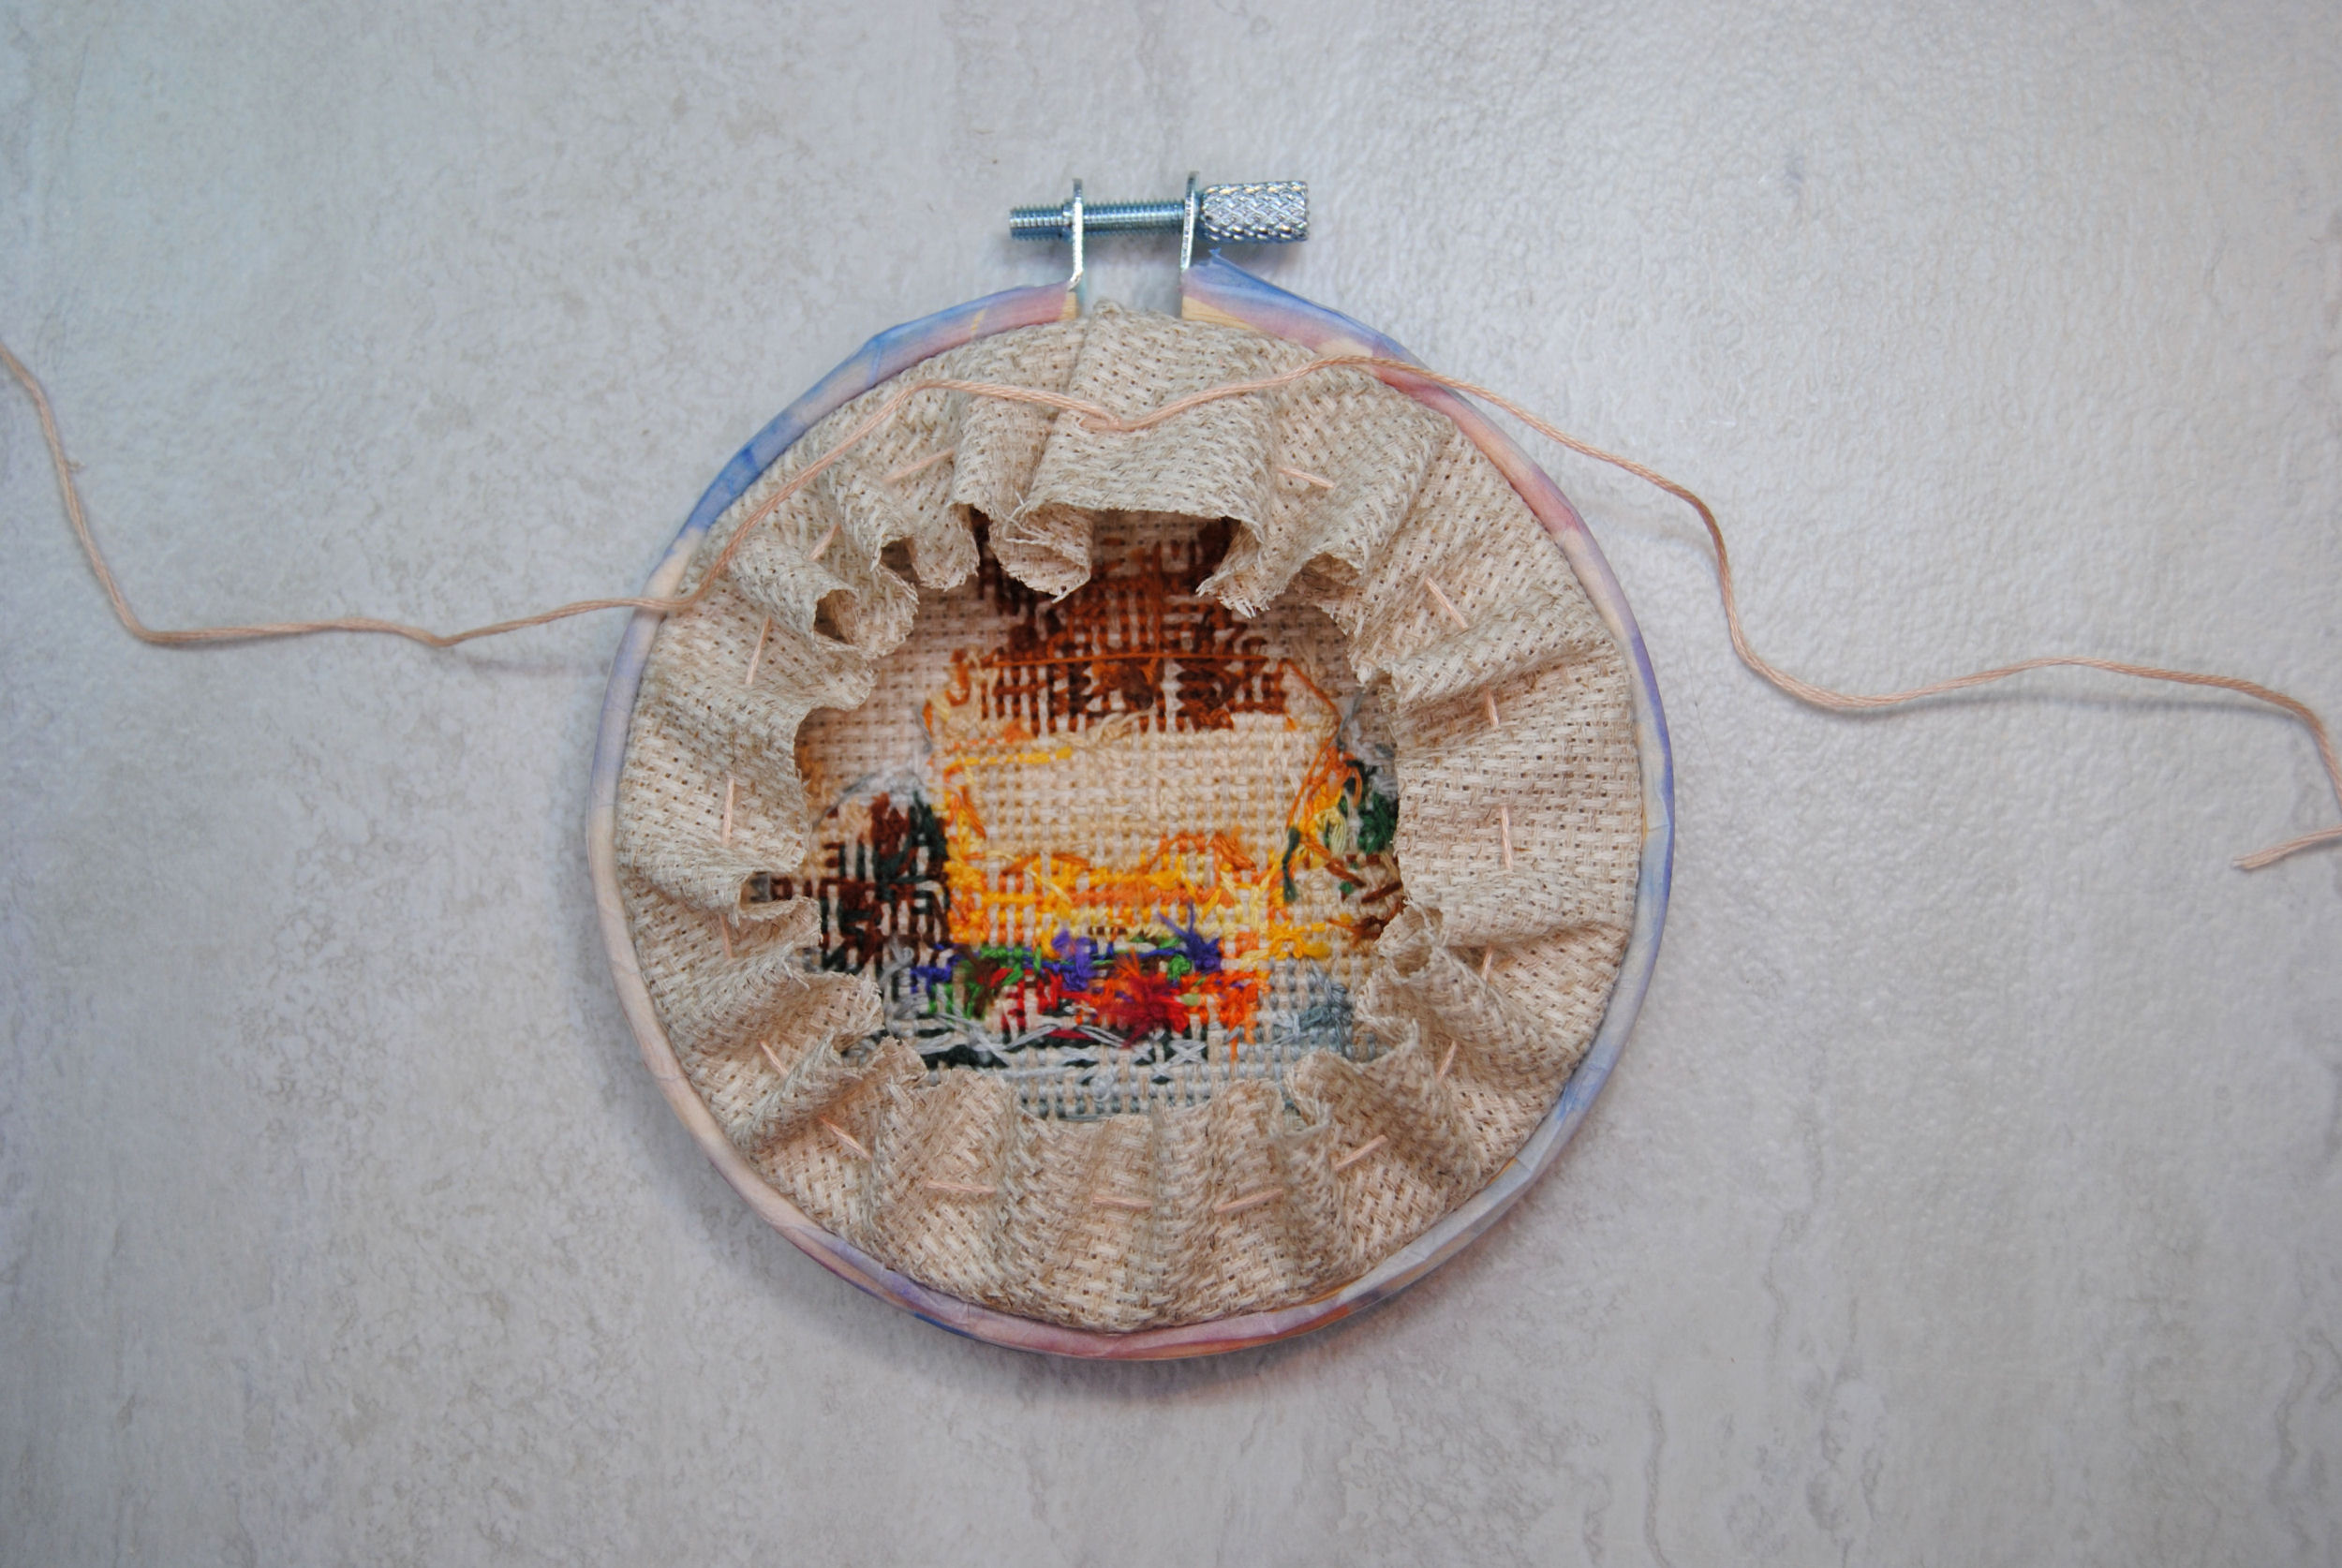
Then, using all 6 strands of embroidery floss, I did a simple running stitch around the whole back. You’ll note I left a bit of a tail at the top, that’s so I could use that to pull it tight at the end.

Then taking both ends of threads I cinched it tight like pulling the strings on a hoodie.
Finally, I tied a knot with those two strings. and trimmed the extra thread. Though you could definitely tie a bow or do something cute there too!
You could be done here, this is a perfectly finished back, but read on to find a few ways to ADD to this finish.
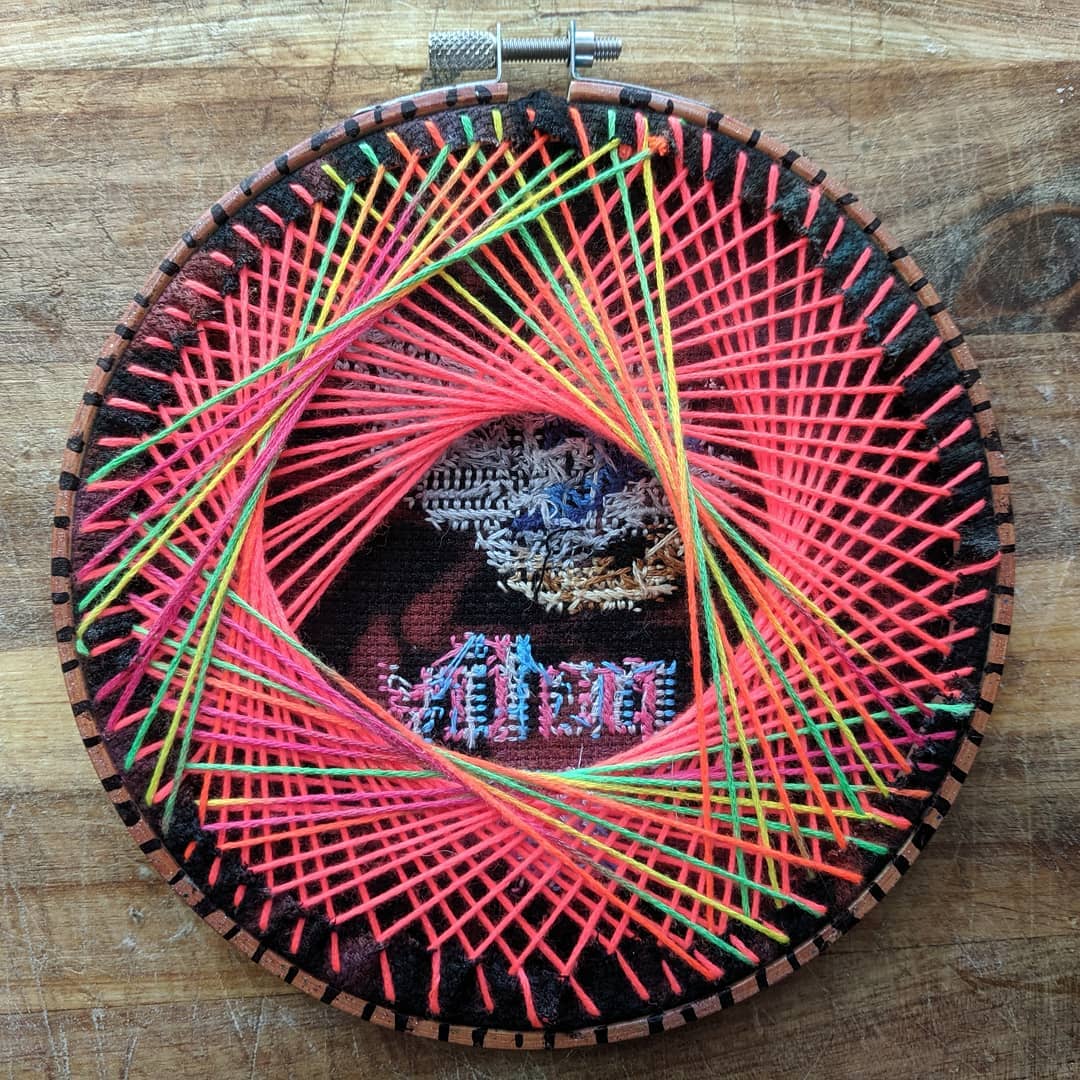
Open Back Spirograph Hoop Finish
There’s a variation on the open back design that makes your finish part of the art as well!
I’ve mentioned this finish before in my hoop decorating article, but it never ceases to amaze me.
@phdyed on instagram started the trend of doing some decorative hoop backing using fun colors and geometric designs.
You can also see a video tutorial of this same method demonstrated by SonovaStitch.
This is definitely a gorgeous finish I’d like to try out one day as an excuse to use up some of my thrifted or off-brand threads. But today is not that day. Let’s look at our other options.
Blanket Stitch Felt Back
Unfortunately, a lot of people like to hide their embroidery backs. While you should never feel obligated to hide away the back of your design no matter how messy you think it is, it is a totally valid option as well.
This also seems to be the most common option, as I found a TON of tutorials on the felt back method. This are just my favorites:
- Ysolda
- Crewel Ghoul
- Creative Whimsy
- Wandering Threads Embroidery
- Hailey Stitches
- Clever Poppy
- Dano Does Things (Video)
It starts off with the same running stitch method above, but after that you cut a ring of felt the size of your inner hoop and use blanket stitch or another decorative stitch to sew it to the back of your hoop.
And… well, this is about as far as I got before remembering I hate blanket stitch and felt, so I moved on to the next method. Whoops
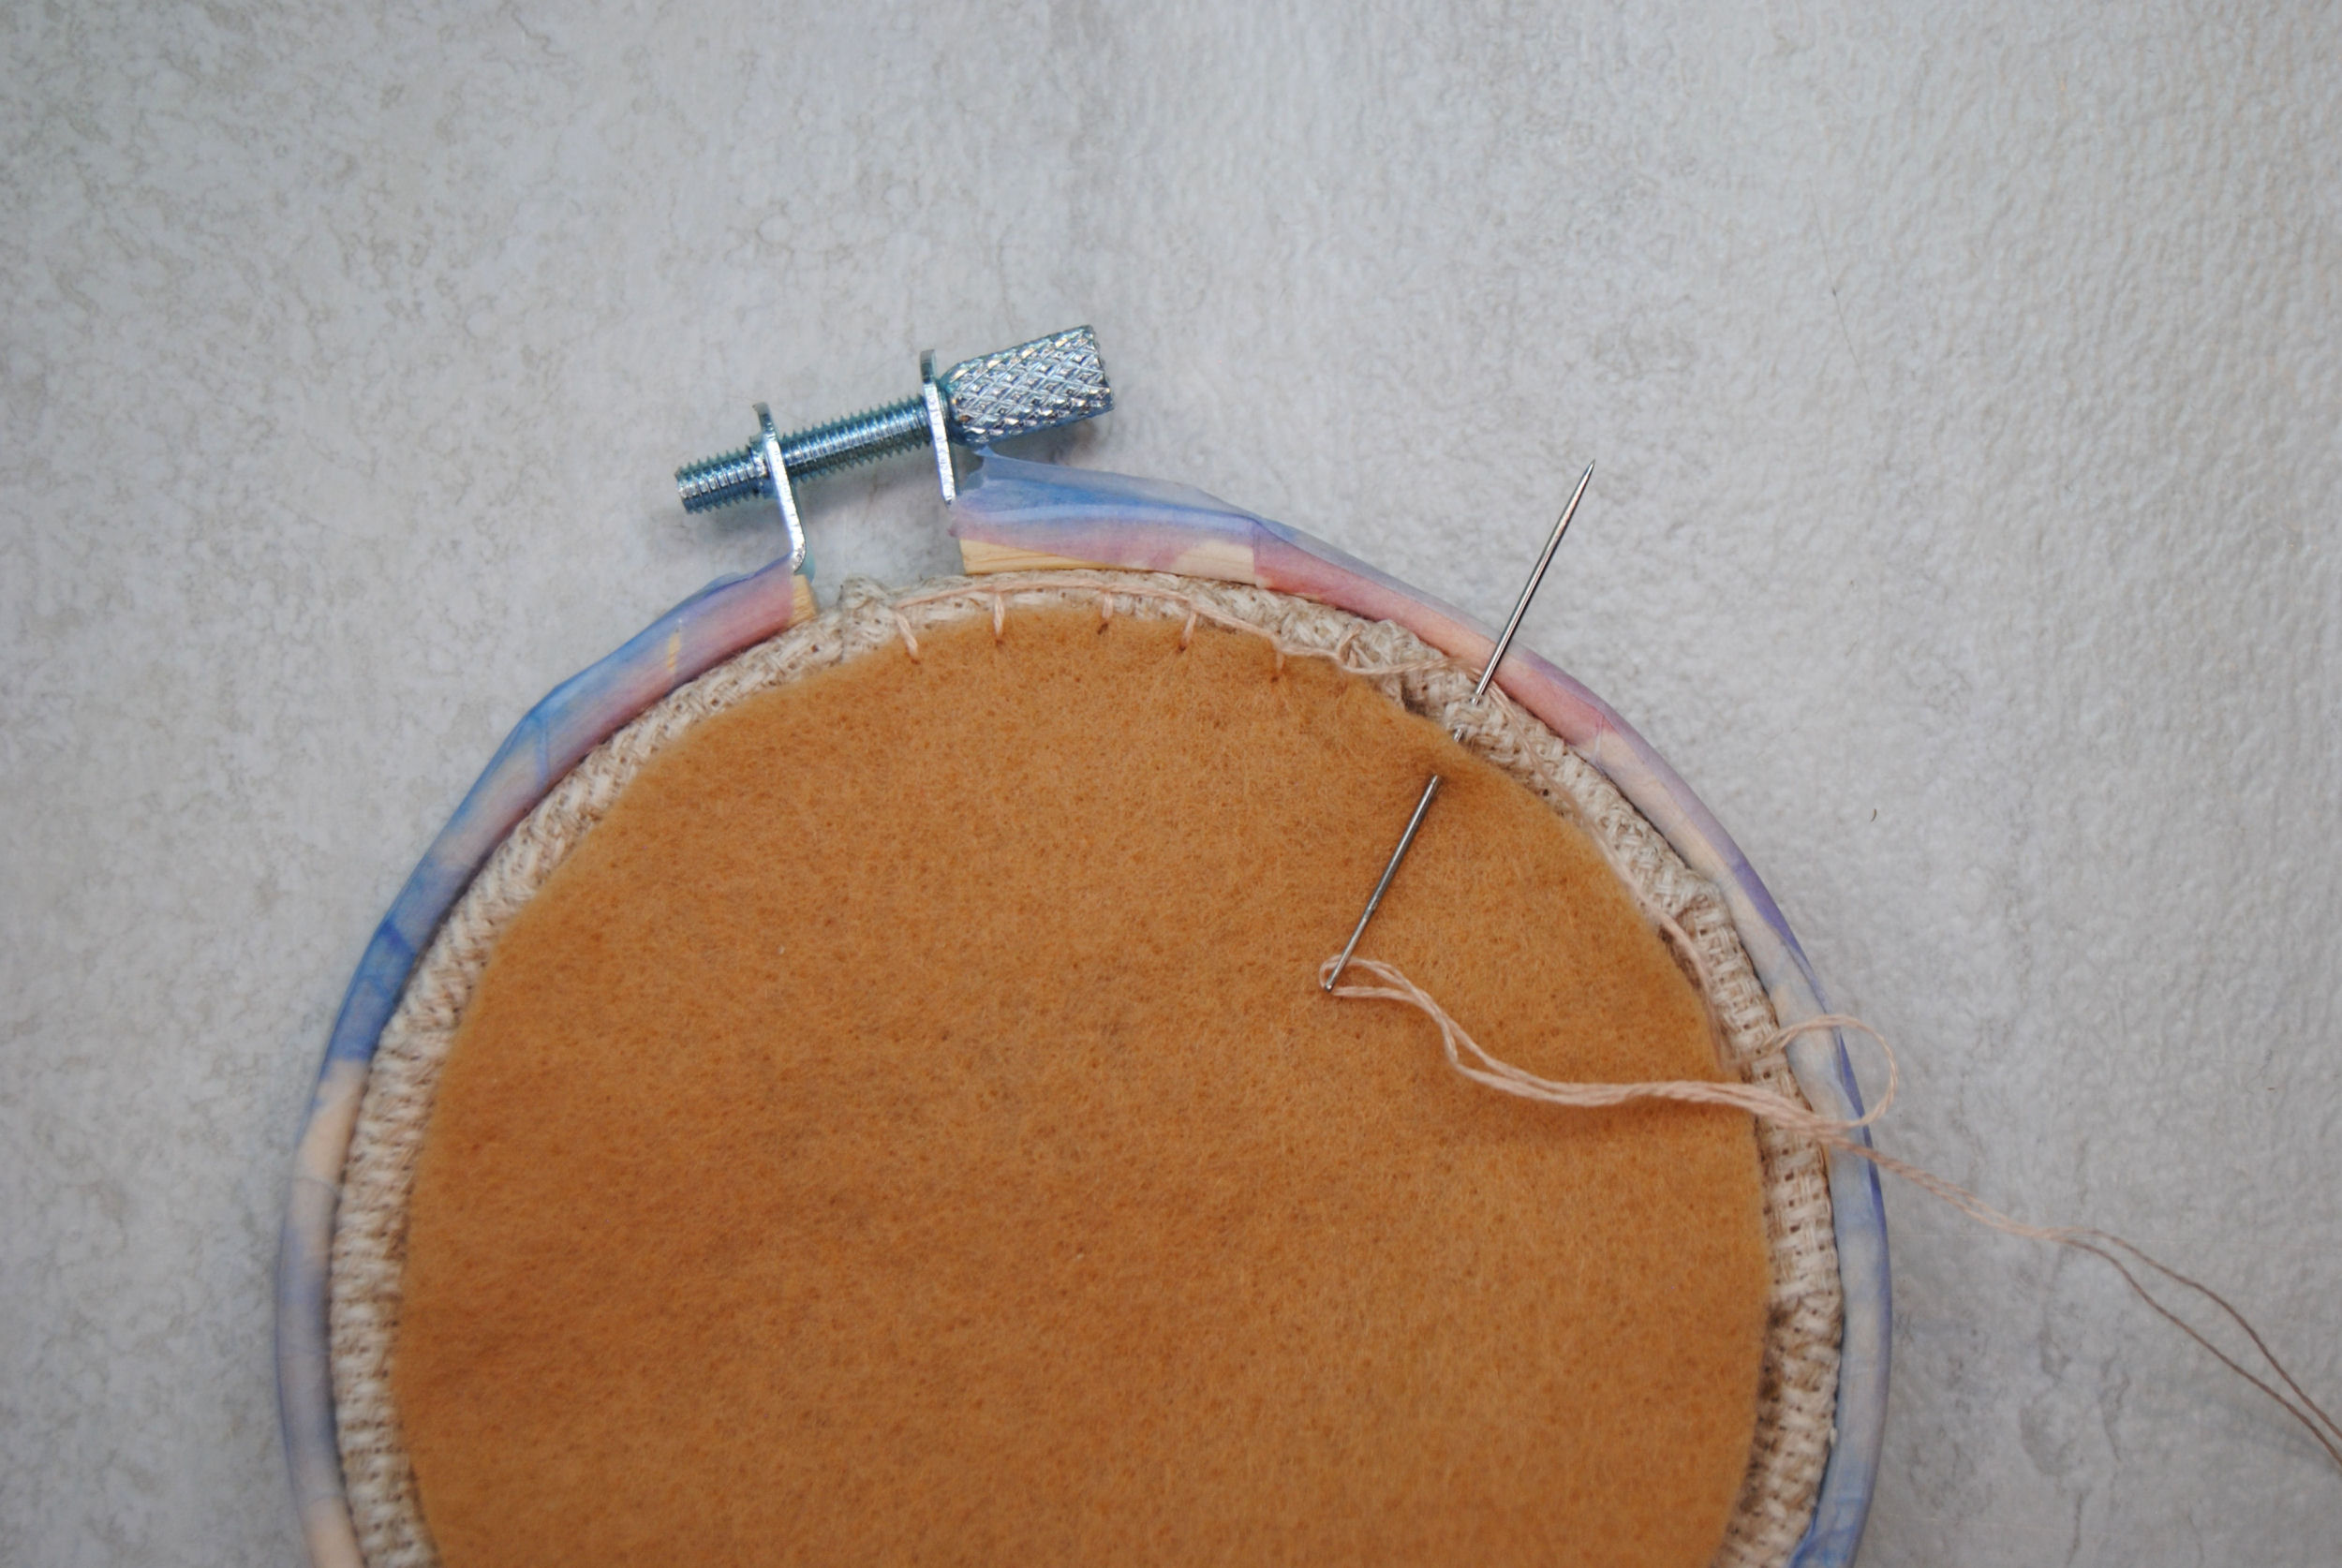
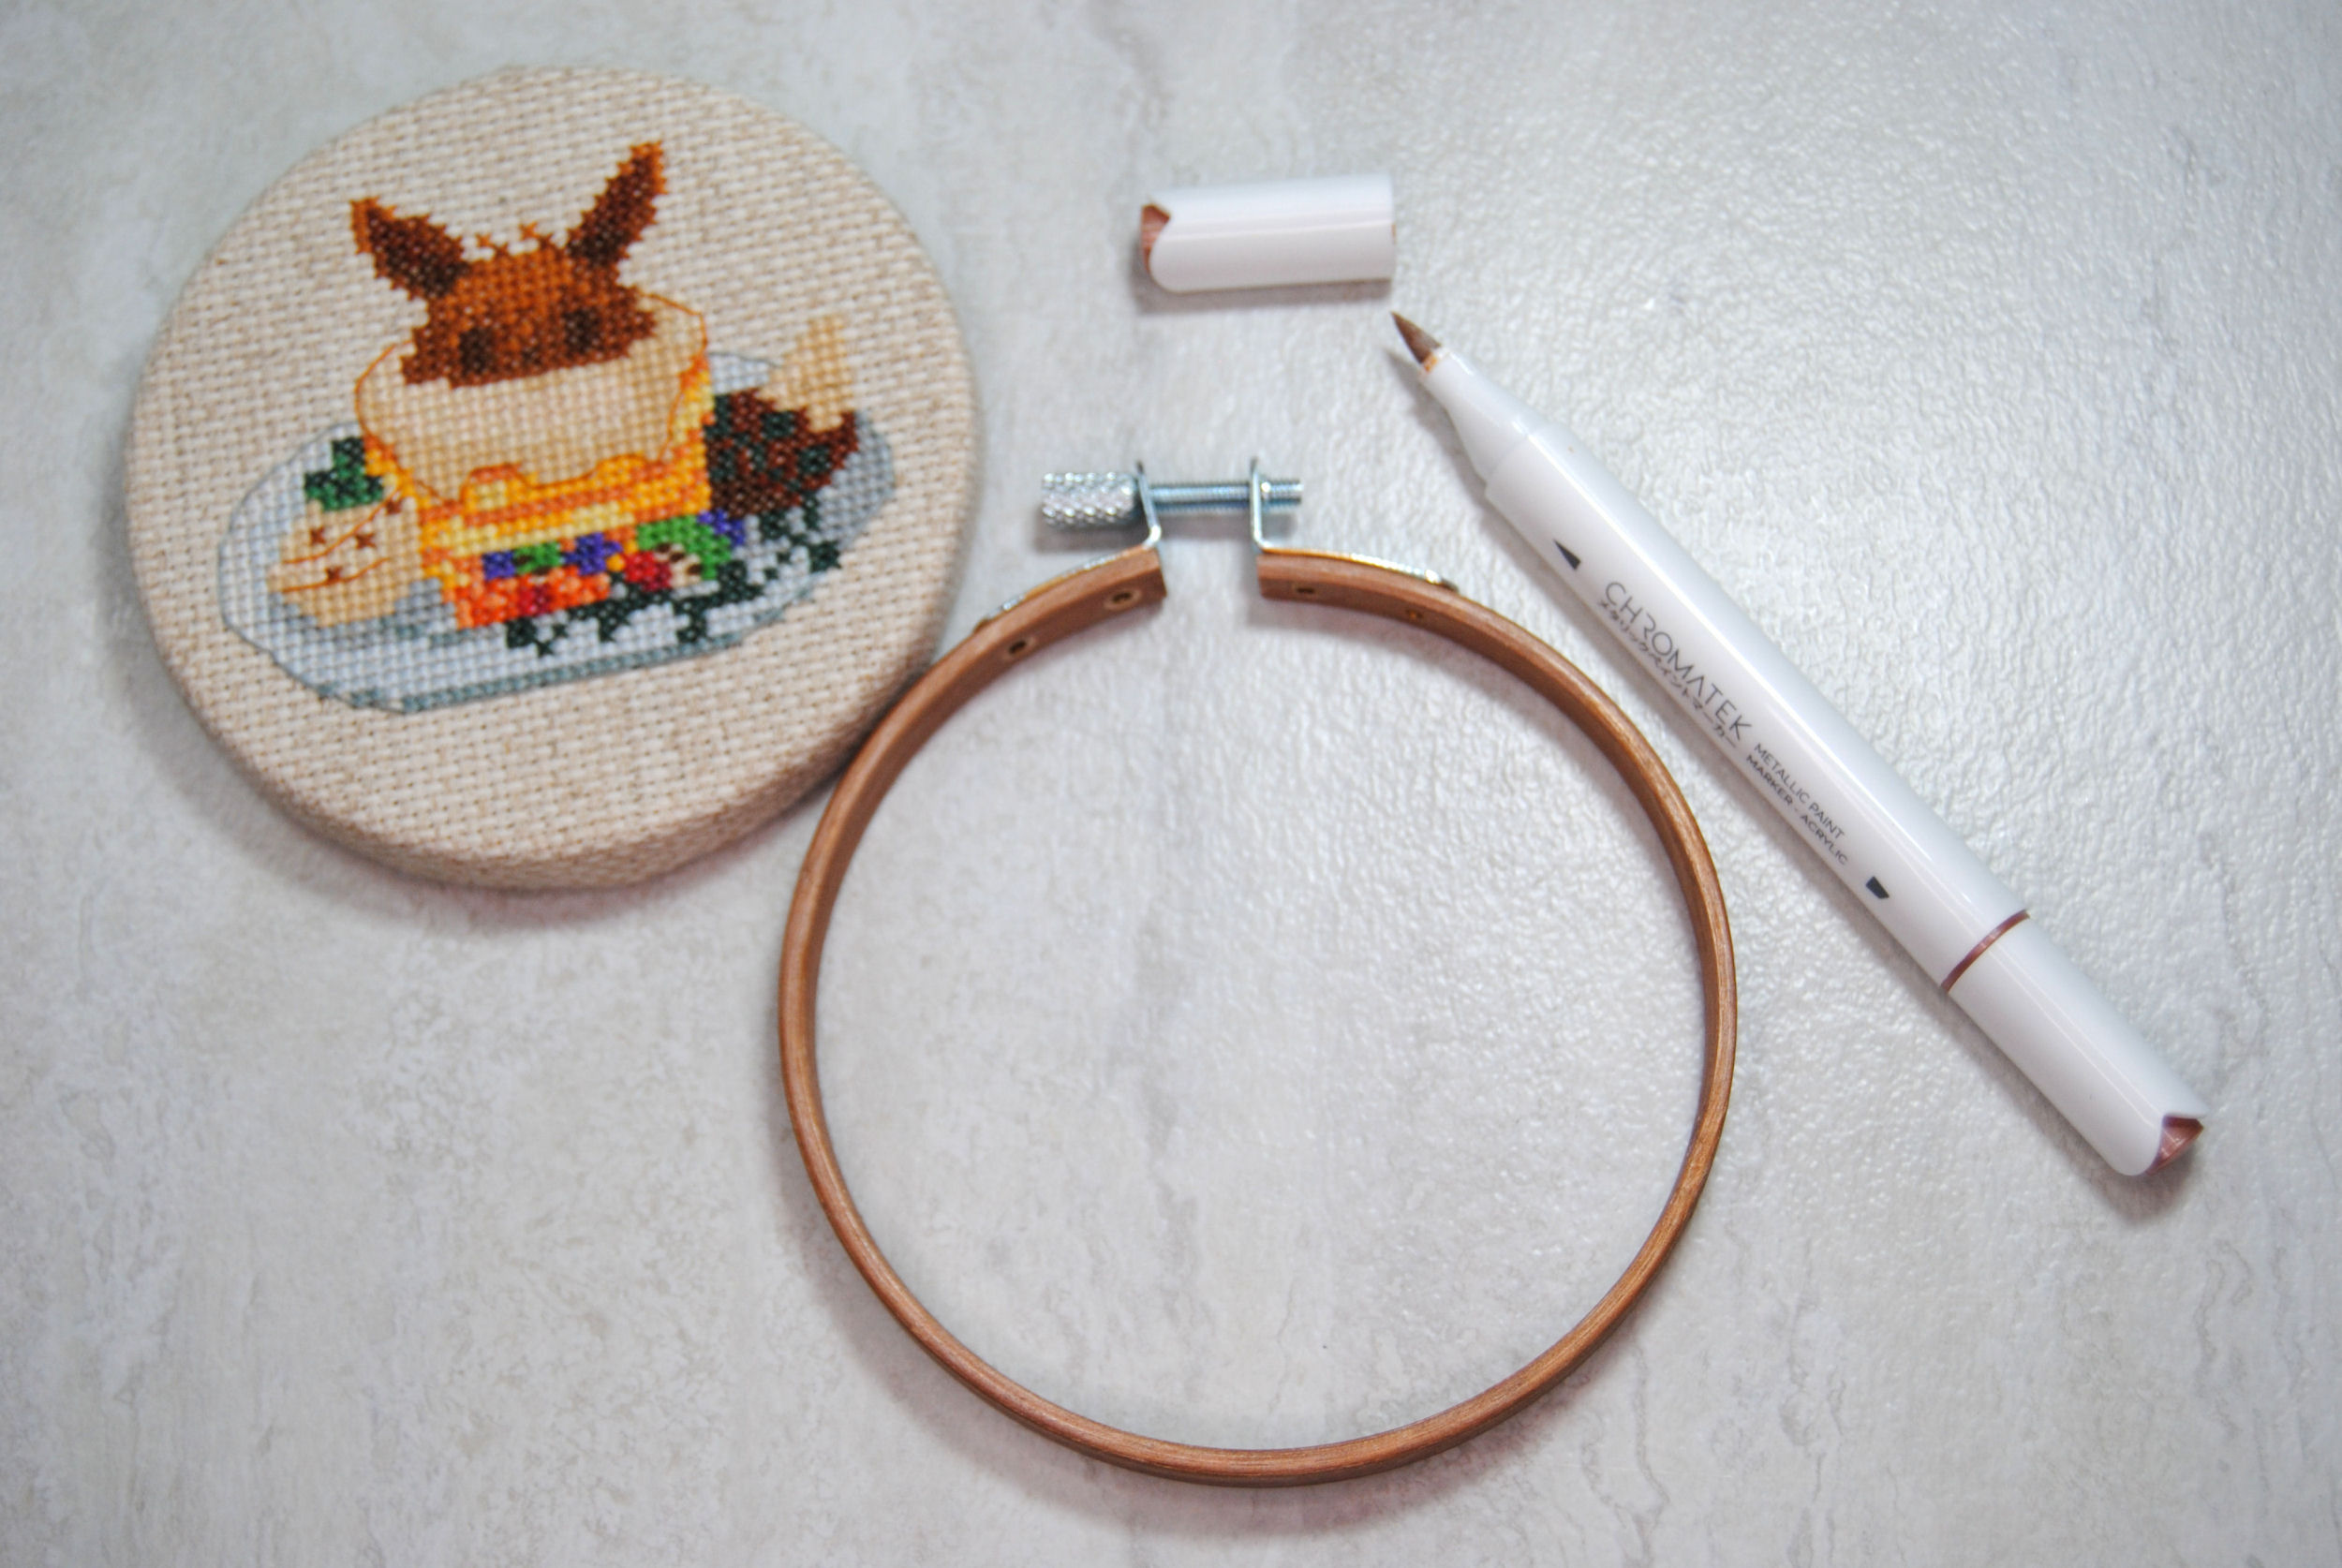
This is also about the time where I realized this washi tape is significantly less sticky than the ones I’ve used for previous hoop decorating and it kept peeling off like you see in the photo above. So if you notice a different hoop in the rest of my examples, that’s because I ripped off the tape and took a paint pen to my hoop instead. It’s a lovely metallic orangy-brown very reminiscent of Eevee and I thought it worked perfectly with the colors!
No-Sew Fabric Hoop Finish
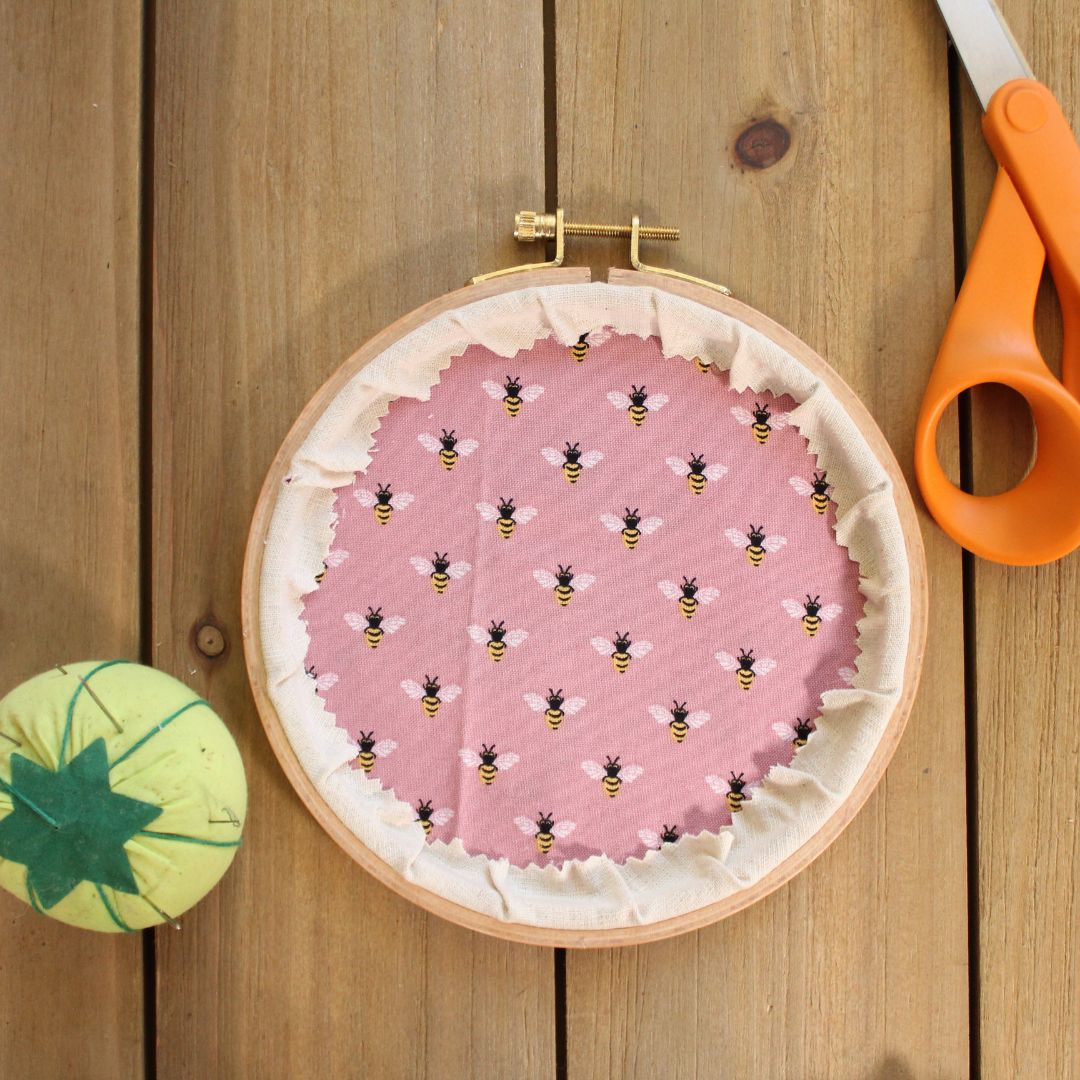
If you’re not a fan of sewing, you can also glue your fabric into the hoop, often with a felt or fabric backing to cover the stitches.
I’m not a fan of glue in my projects on principle, so I’ll be skipping this method myself, but definitely check out the Crewel Ghoul for a simple tutorial on backing your hoops with fabric.
They’ve got examples for finishing cross stitch in a hoop as well as finishing embroidery in a hoop.
It’s the exact same technique either way, but looking at both gives you an example of how you can use fun fabrics to embellish the back. Like these adorable bees!
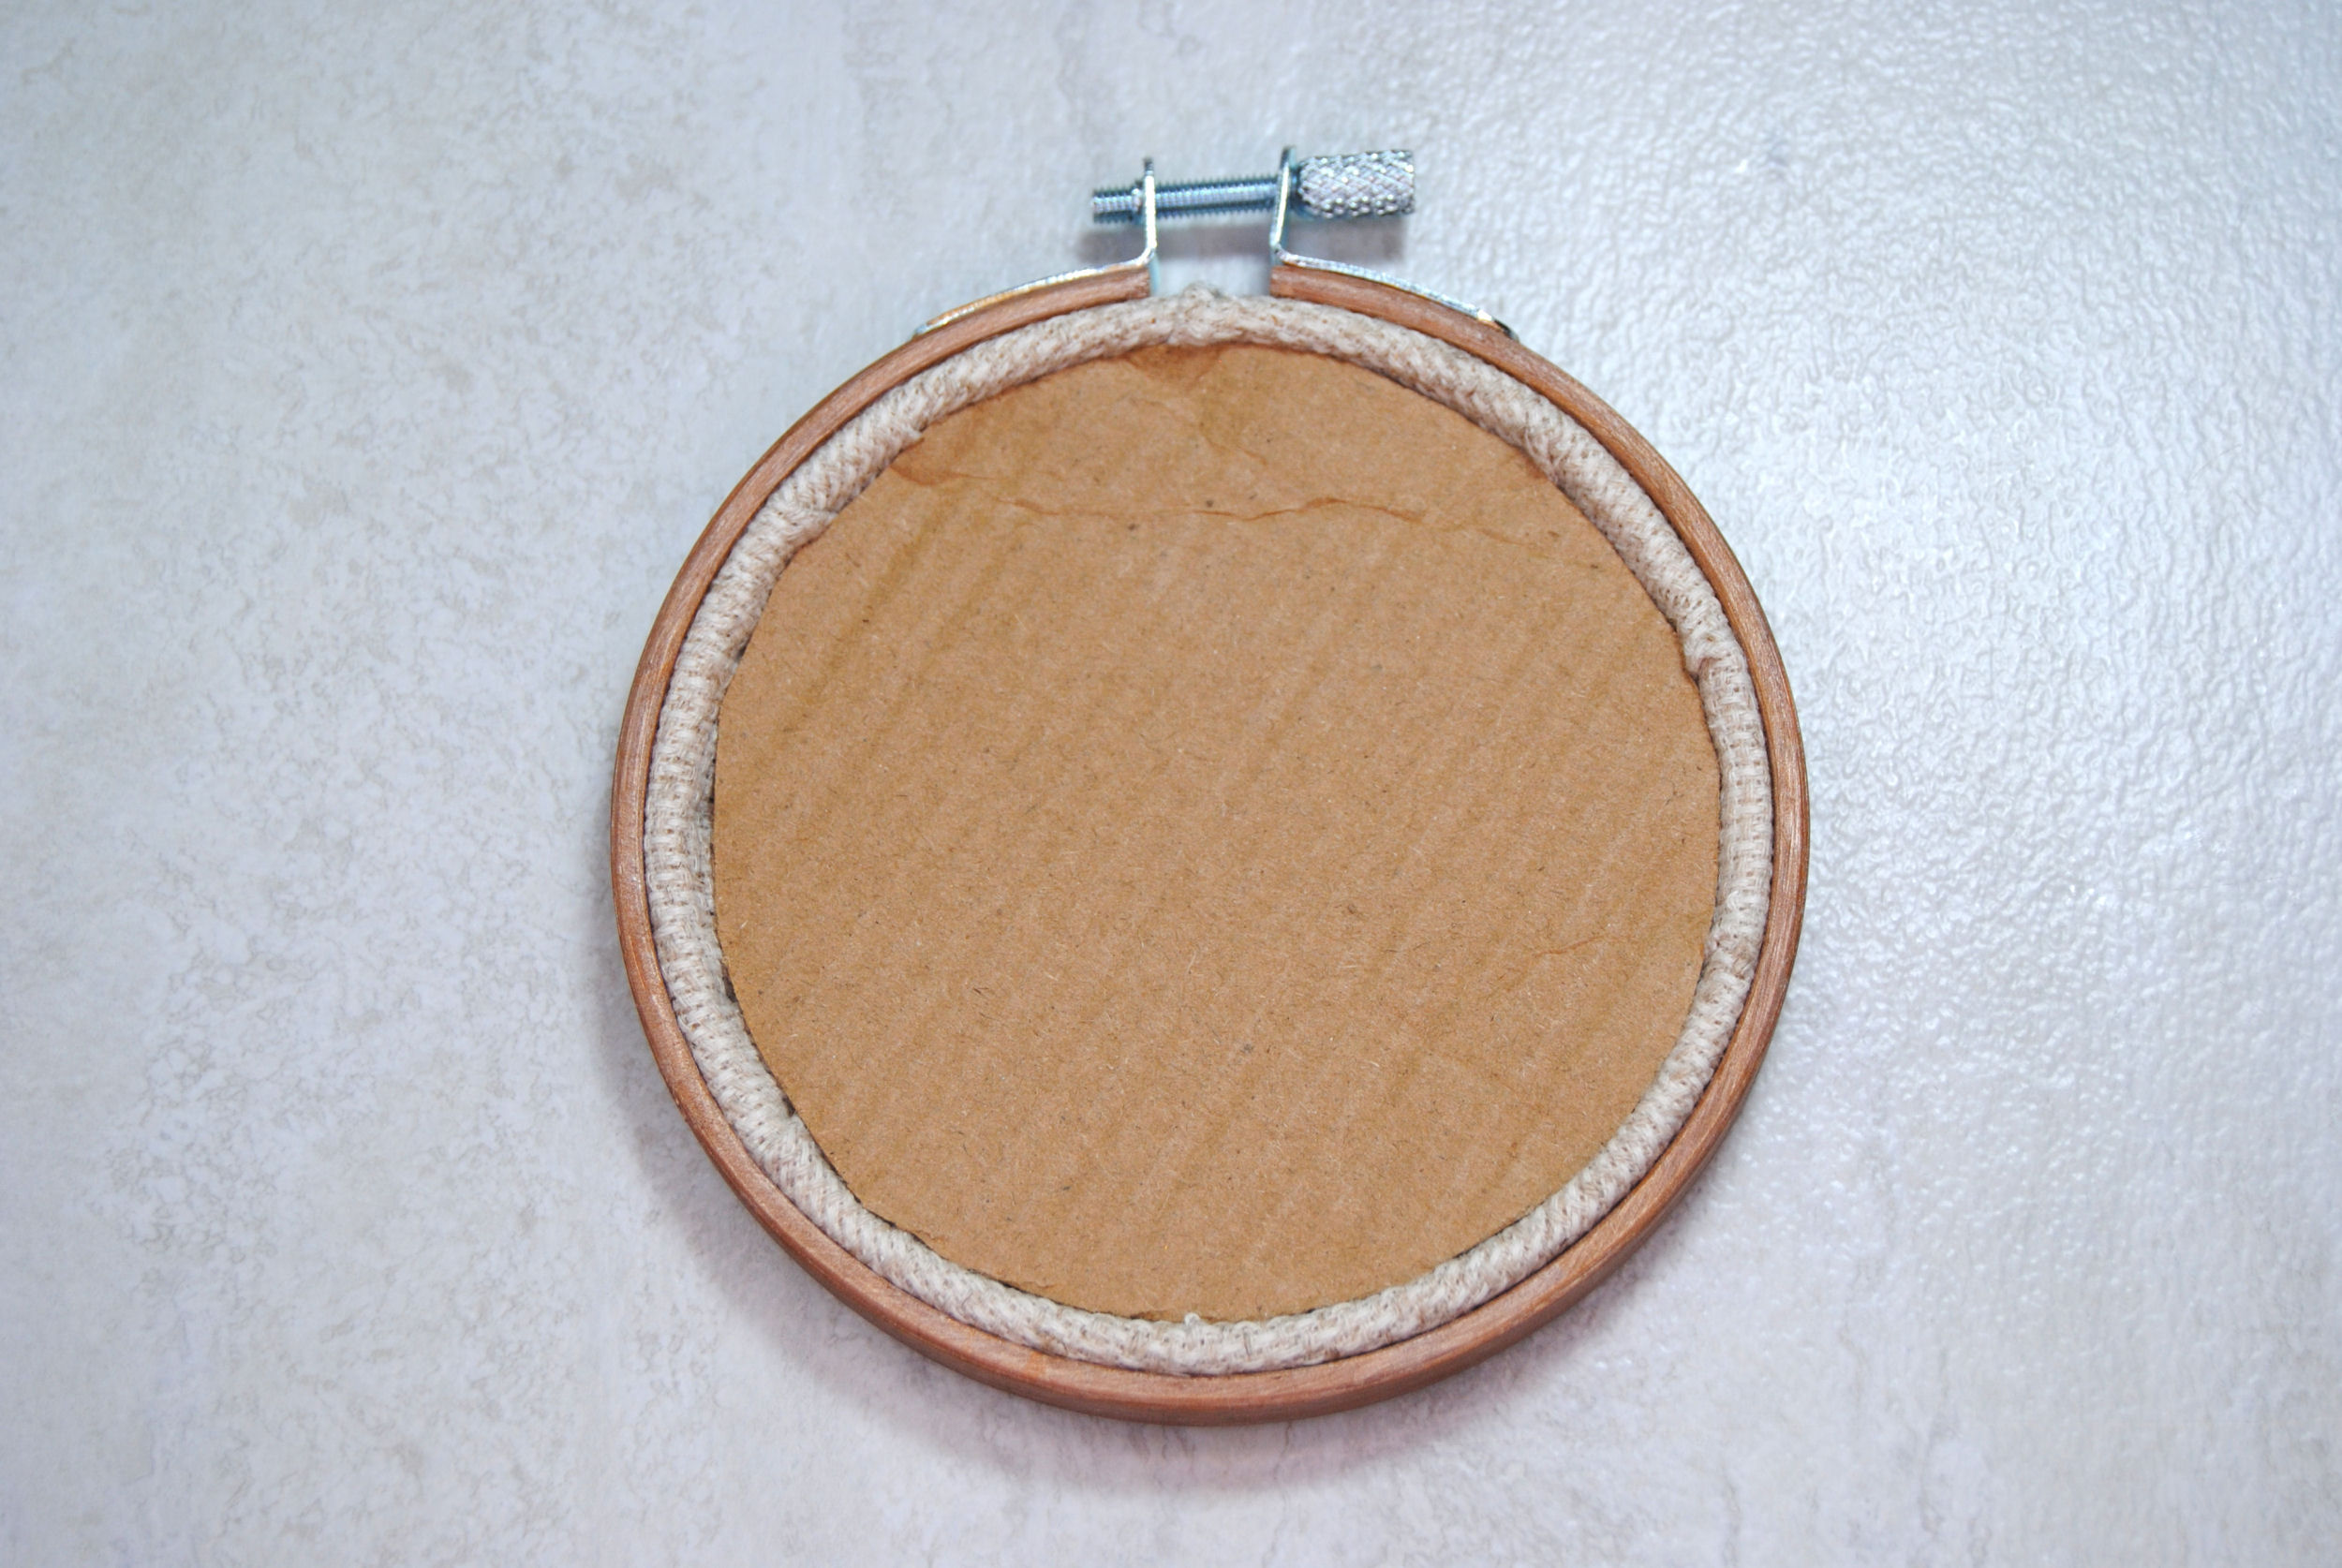
Paper / Cardboard Hoop Finish
If you want a simple backing that doesn’t require sewing OR glue and can be easily removed… how about using paper or cardboard? Crewel Ghoul comes in clutch as well with a paper backing tutorial.
But here’s a simple video by hopebroidery showing this hoop finish method using cardboard too.
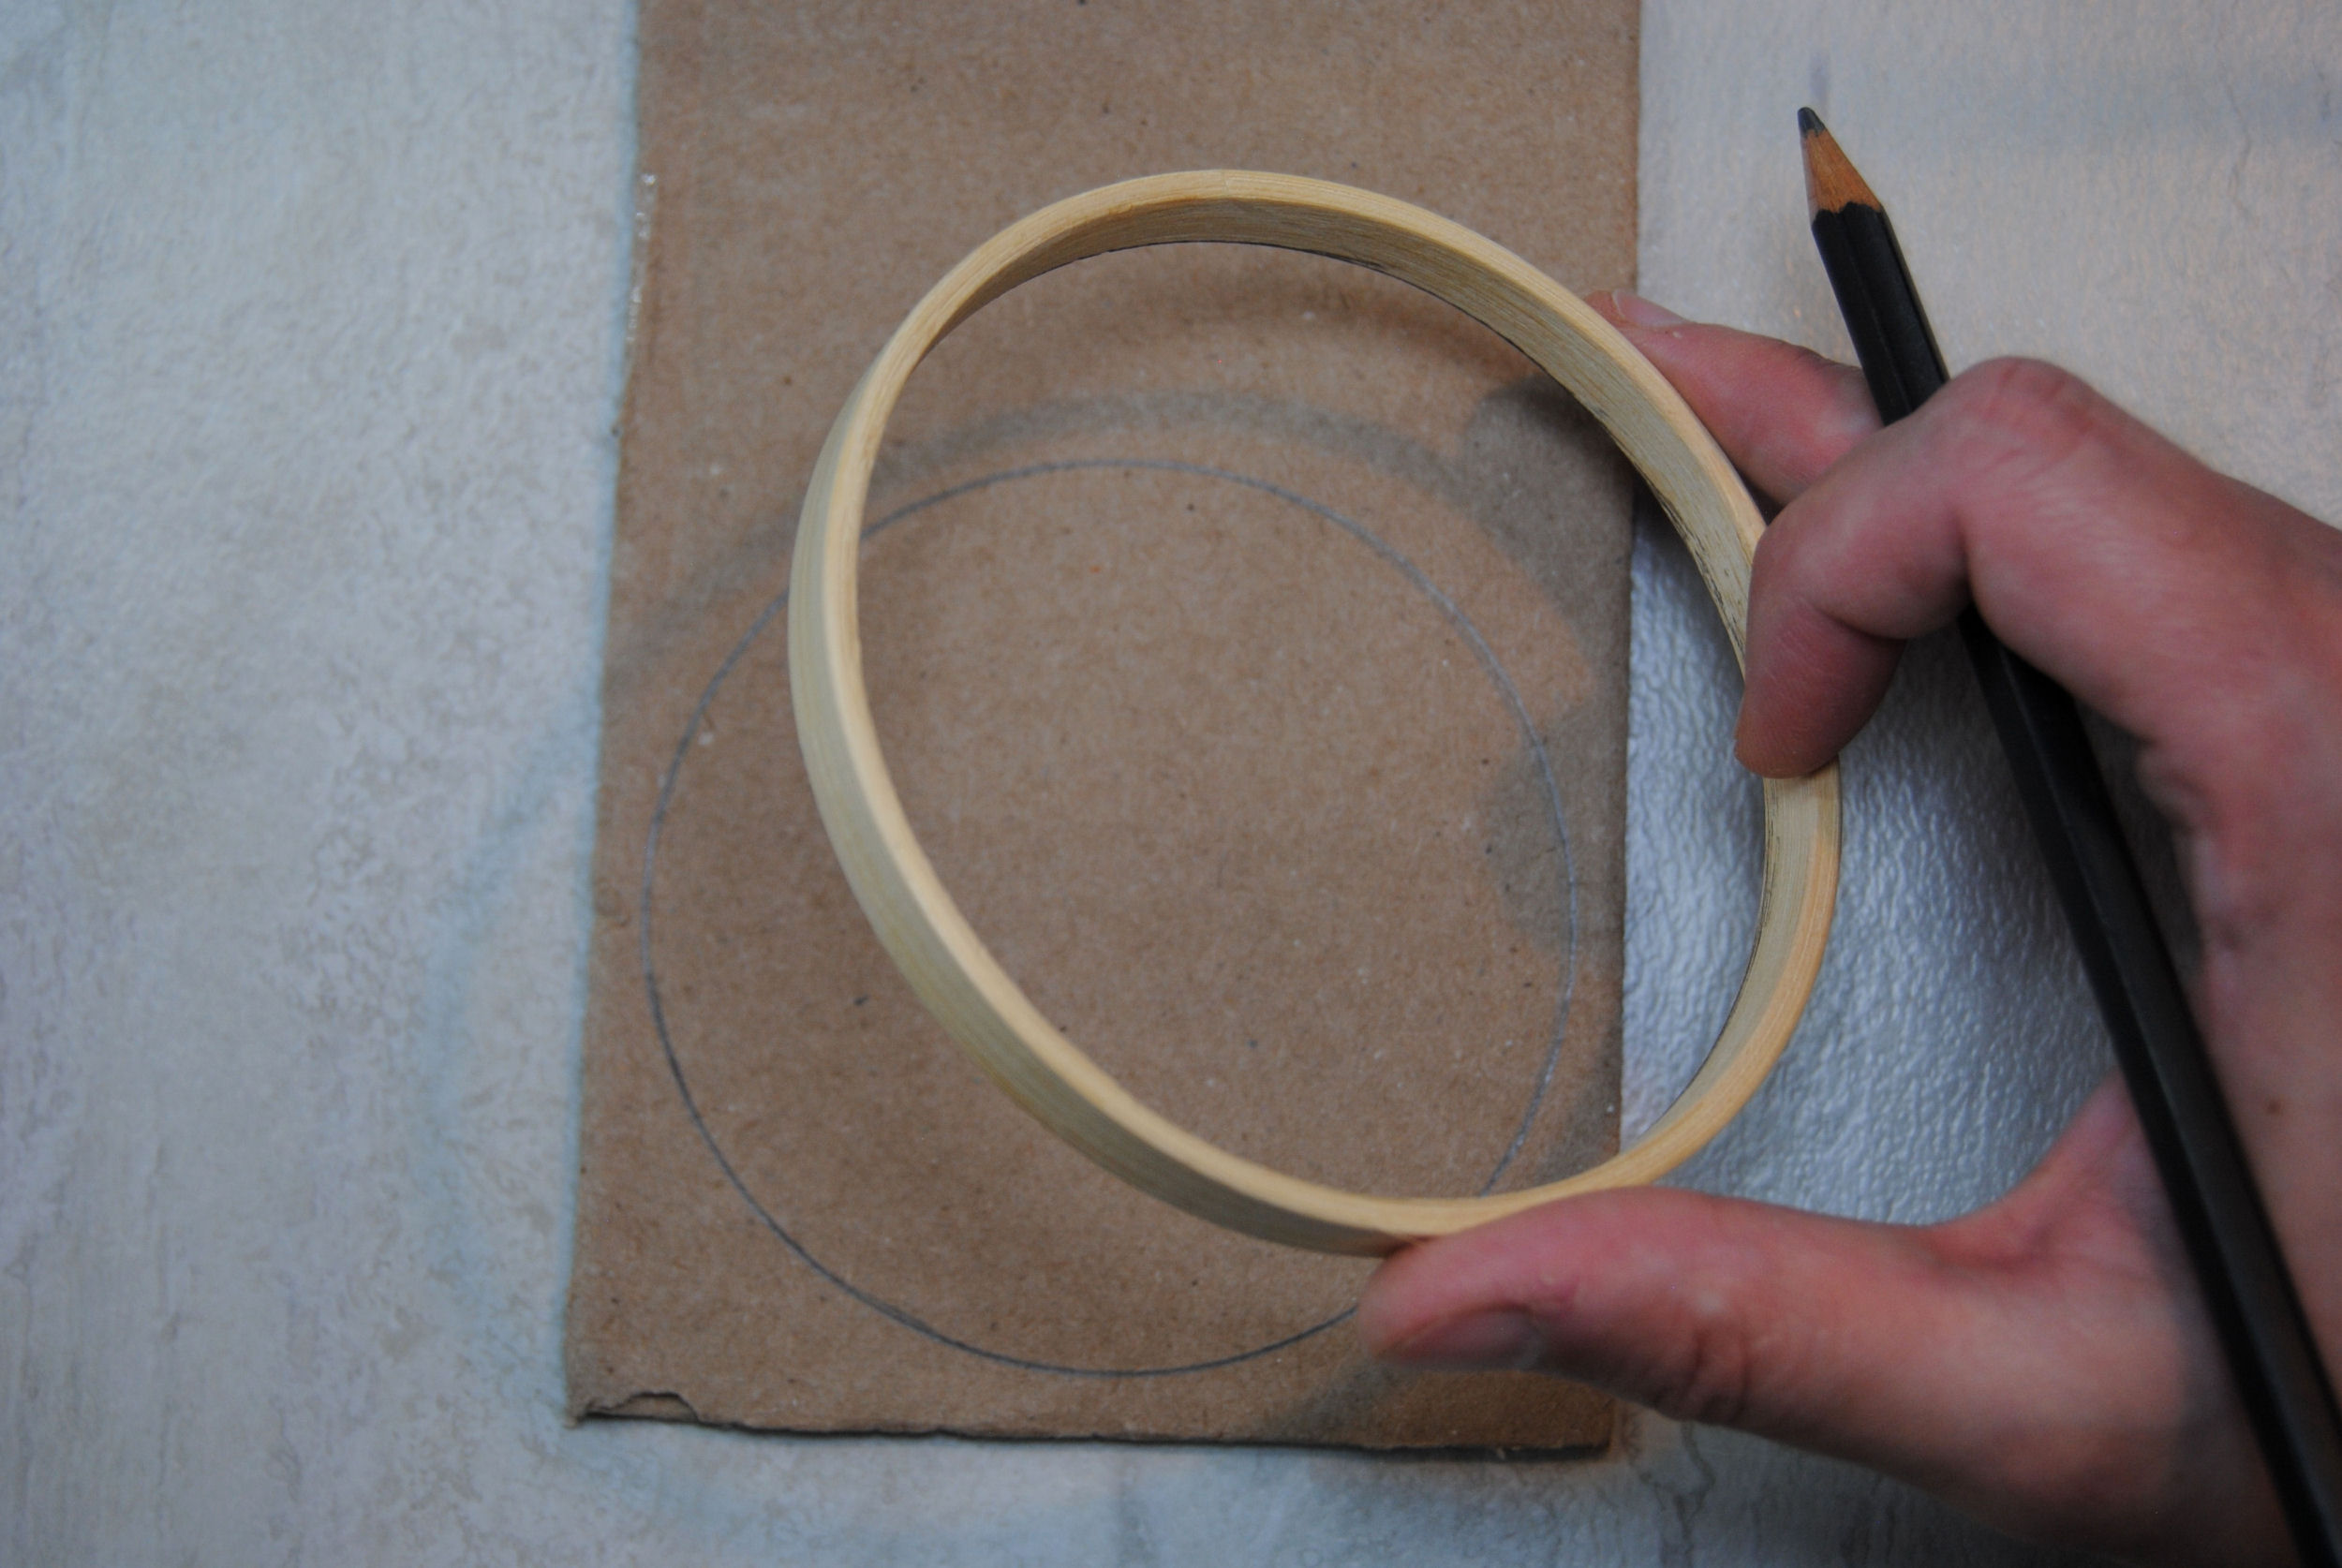
Take some thick paper or cardboard (mine is the flap of an amazon box.) And trace the inside of the inner piece of your hoop, then cut it out.
After you’ve cinched your fabric in the back with the running stitch, you just… pop that ring of cardboard right in there. If you’ve cut it exactly to size, it should fit snugly and be sturdy enough to hold up on its own. But it can also be easily popped out if you want to have a look at the back.
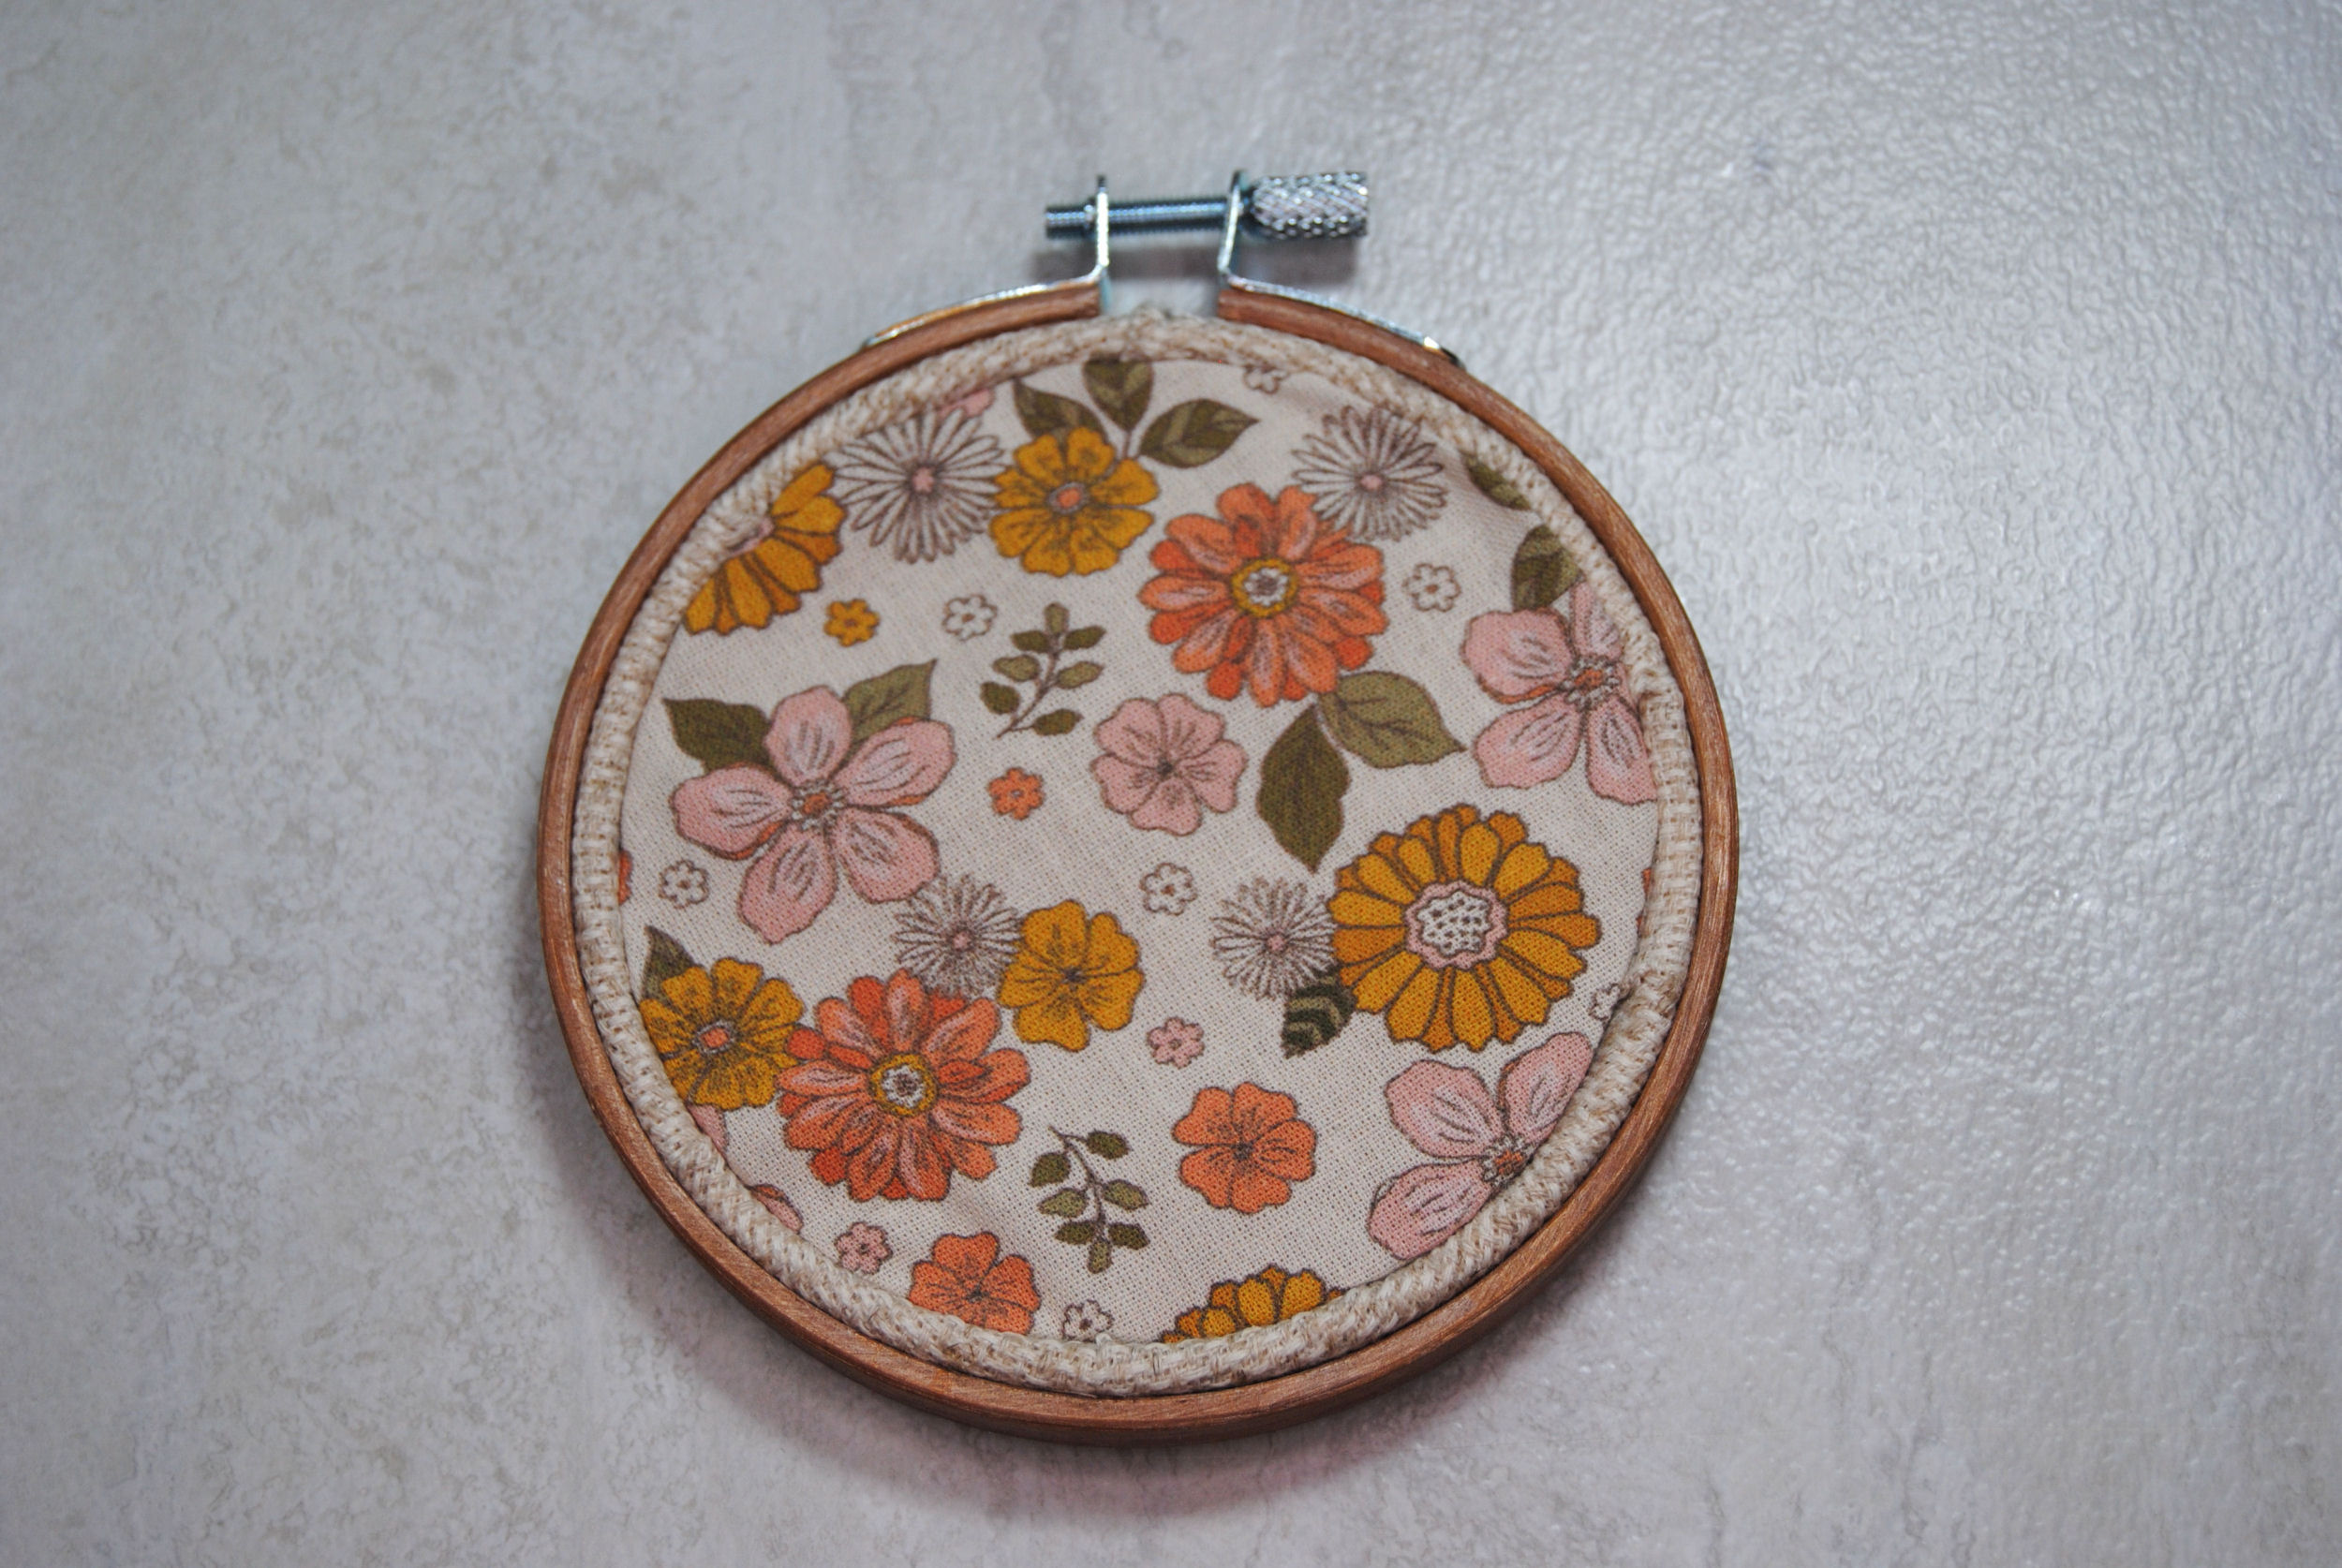
I took this an extra step and decided to wrap my cardboard in fabric. I did the same running stitch cinch method to get this ring of floral quilting cotton around it first.
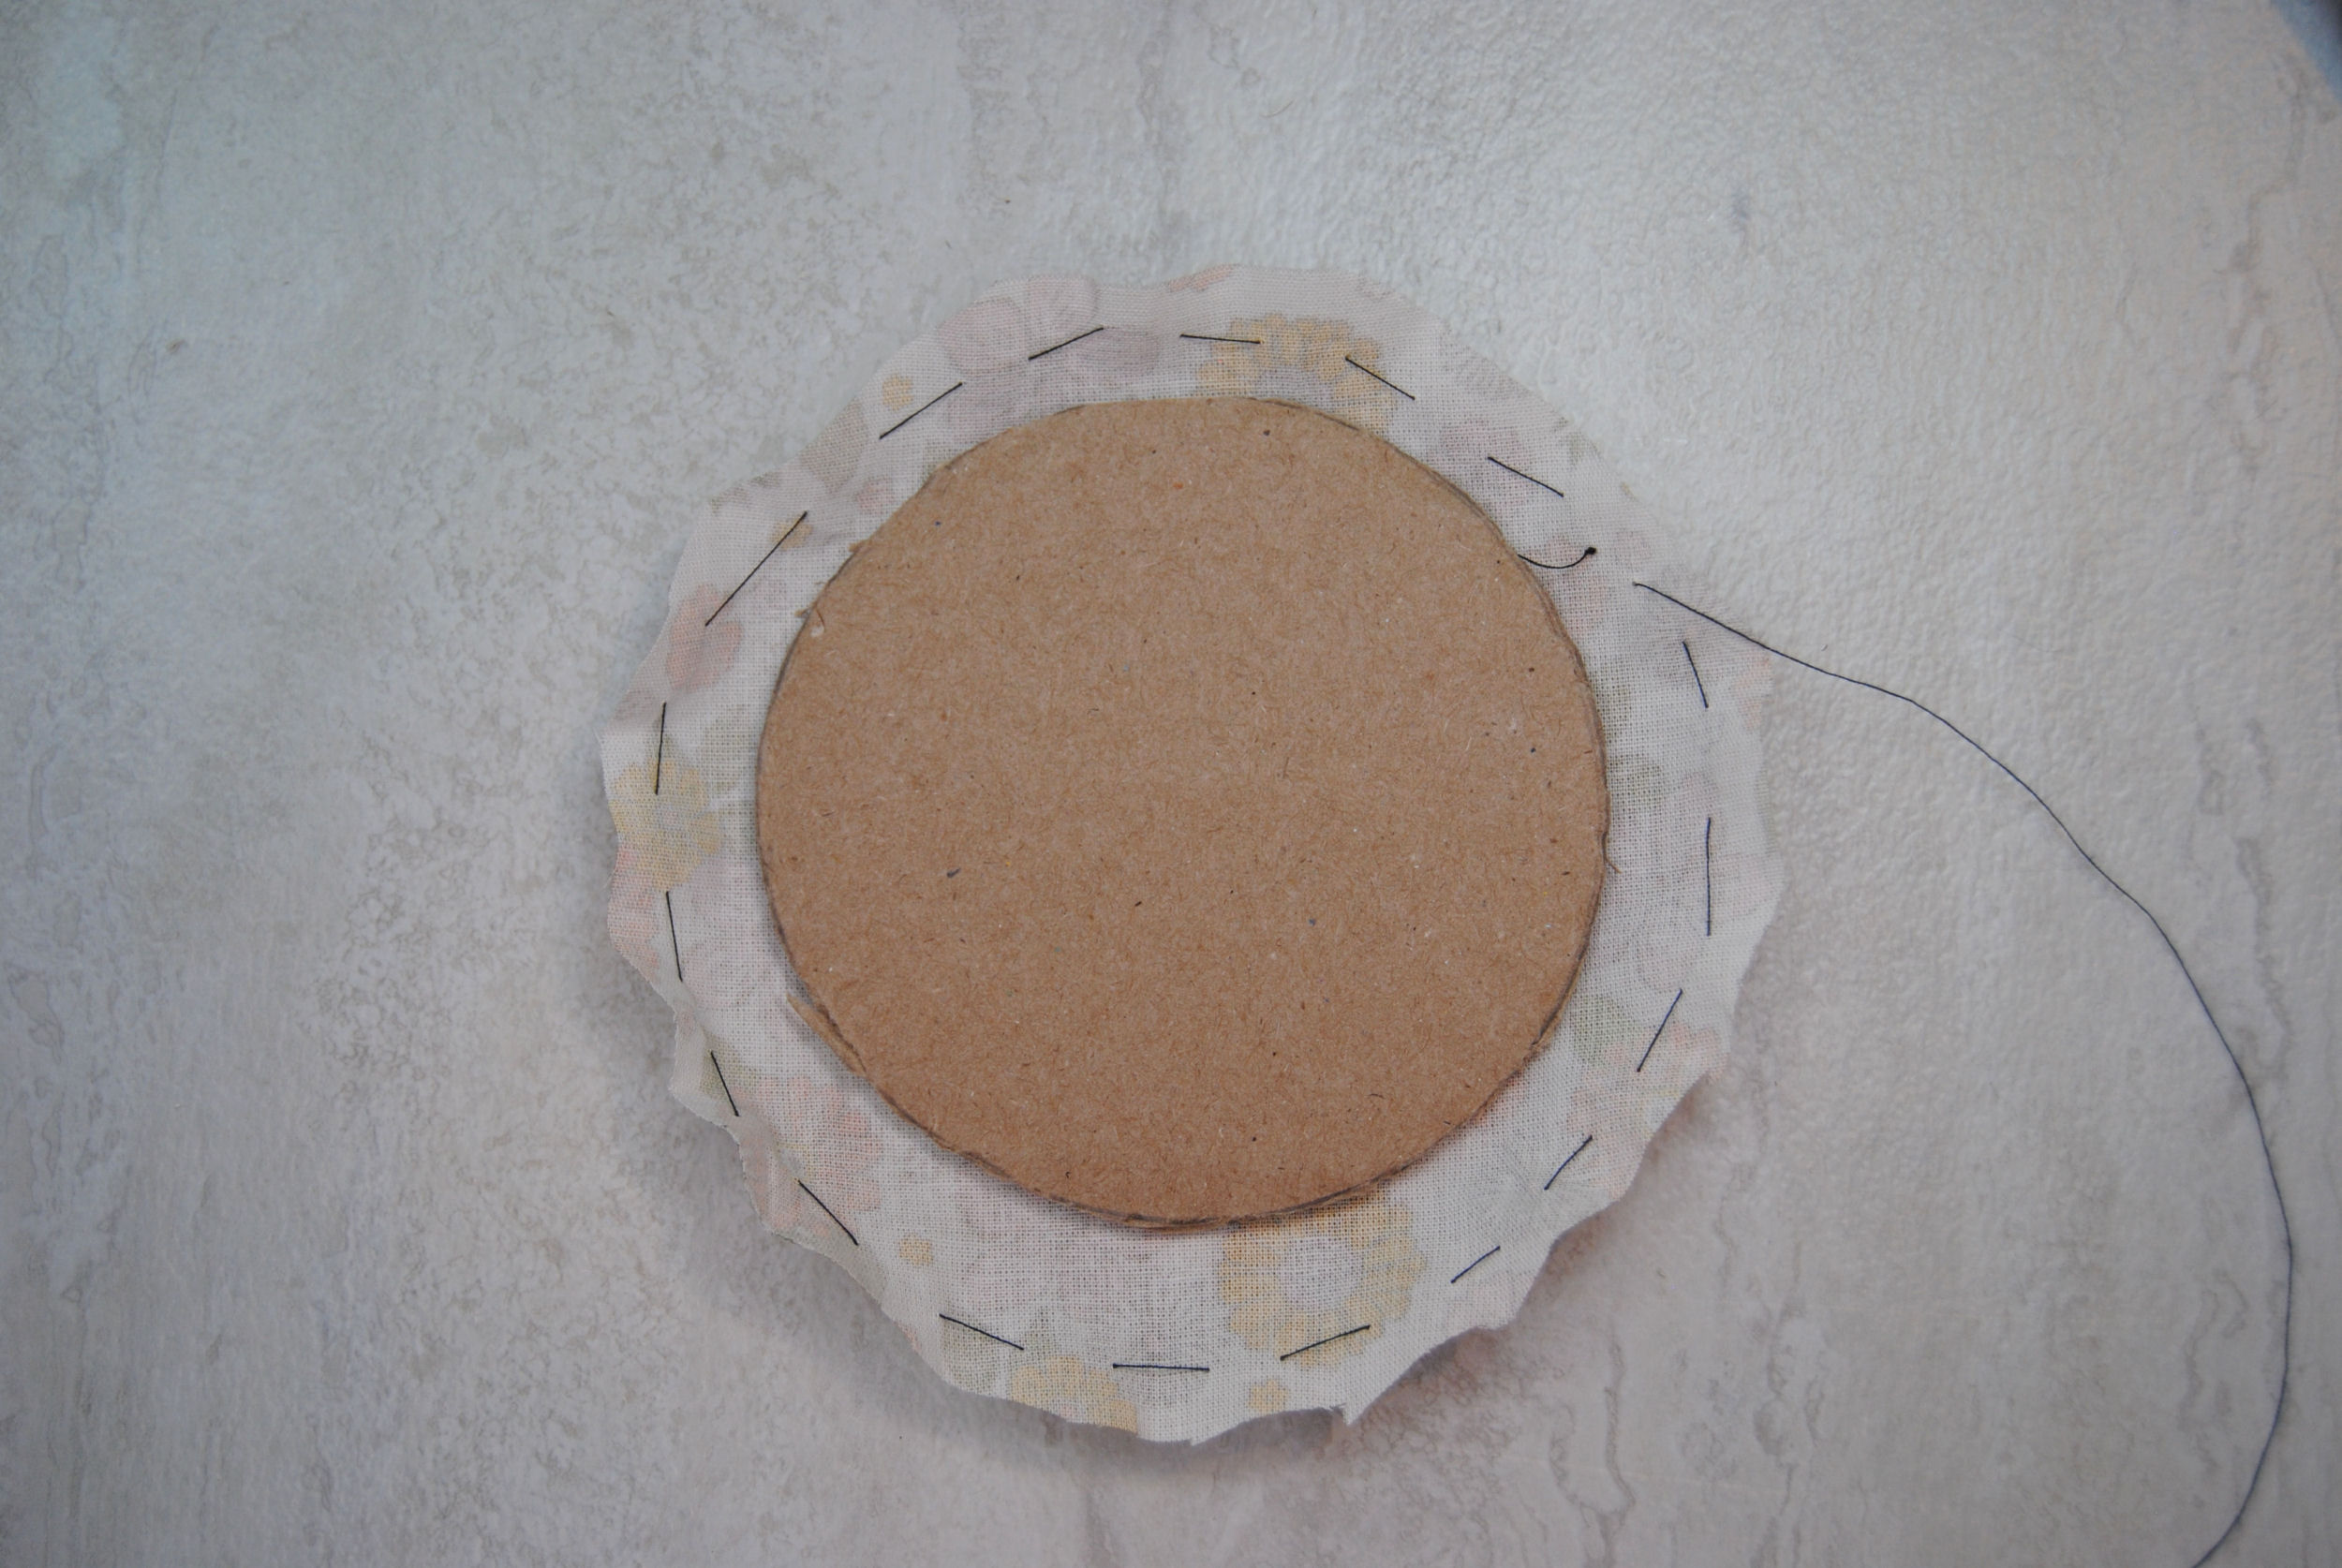
Then I randomly zig-zagged across the cardboard just to make sure it was on there snugly.
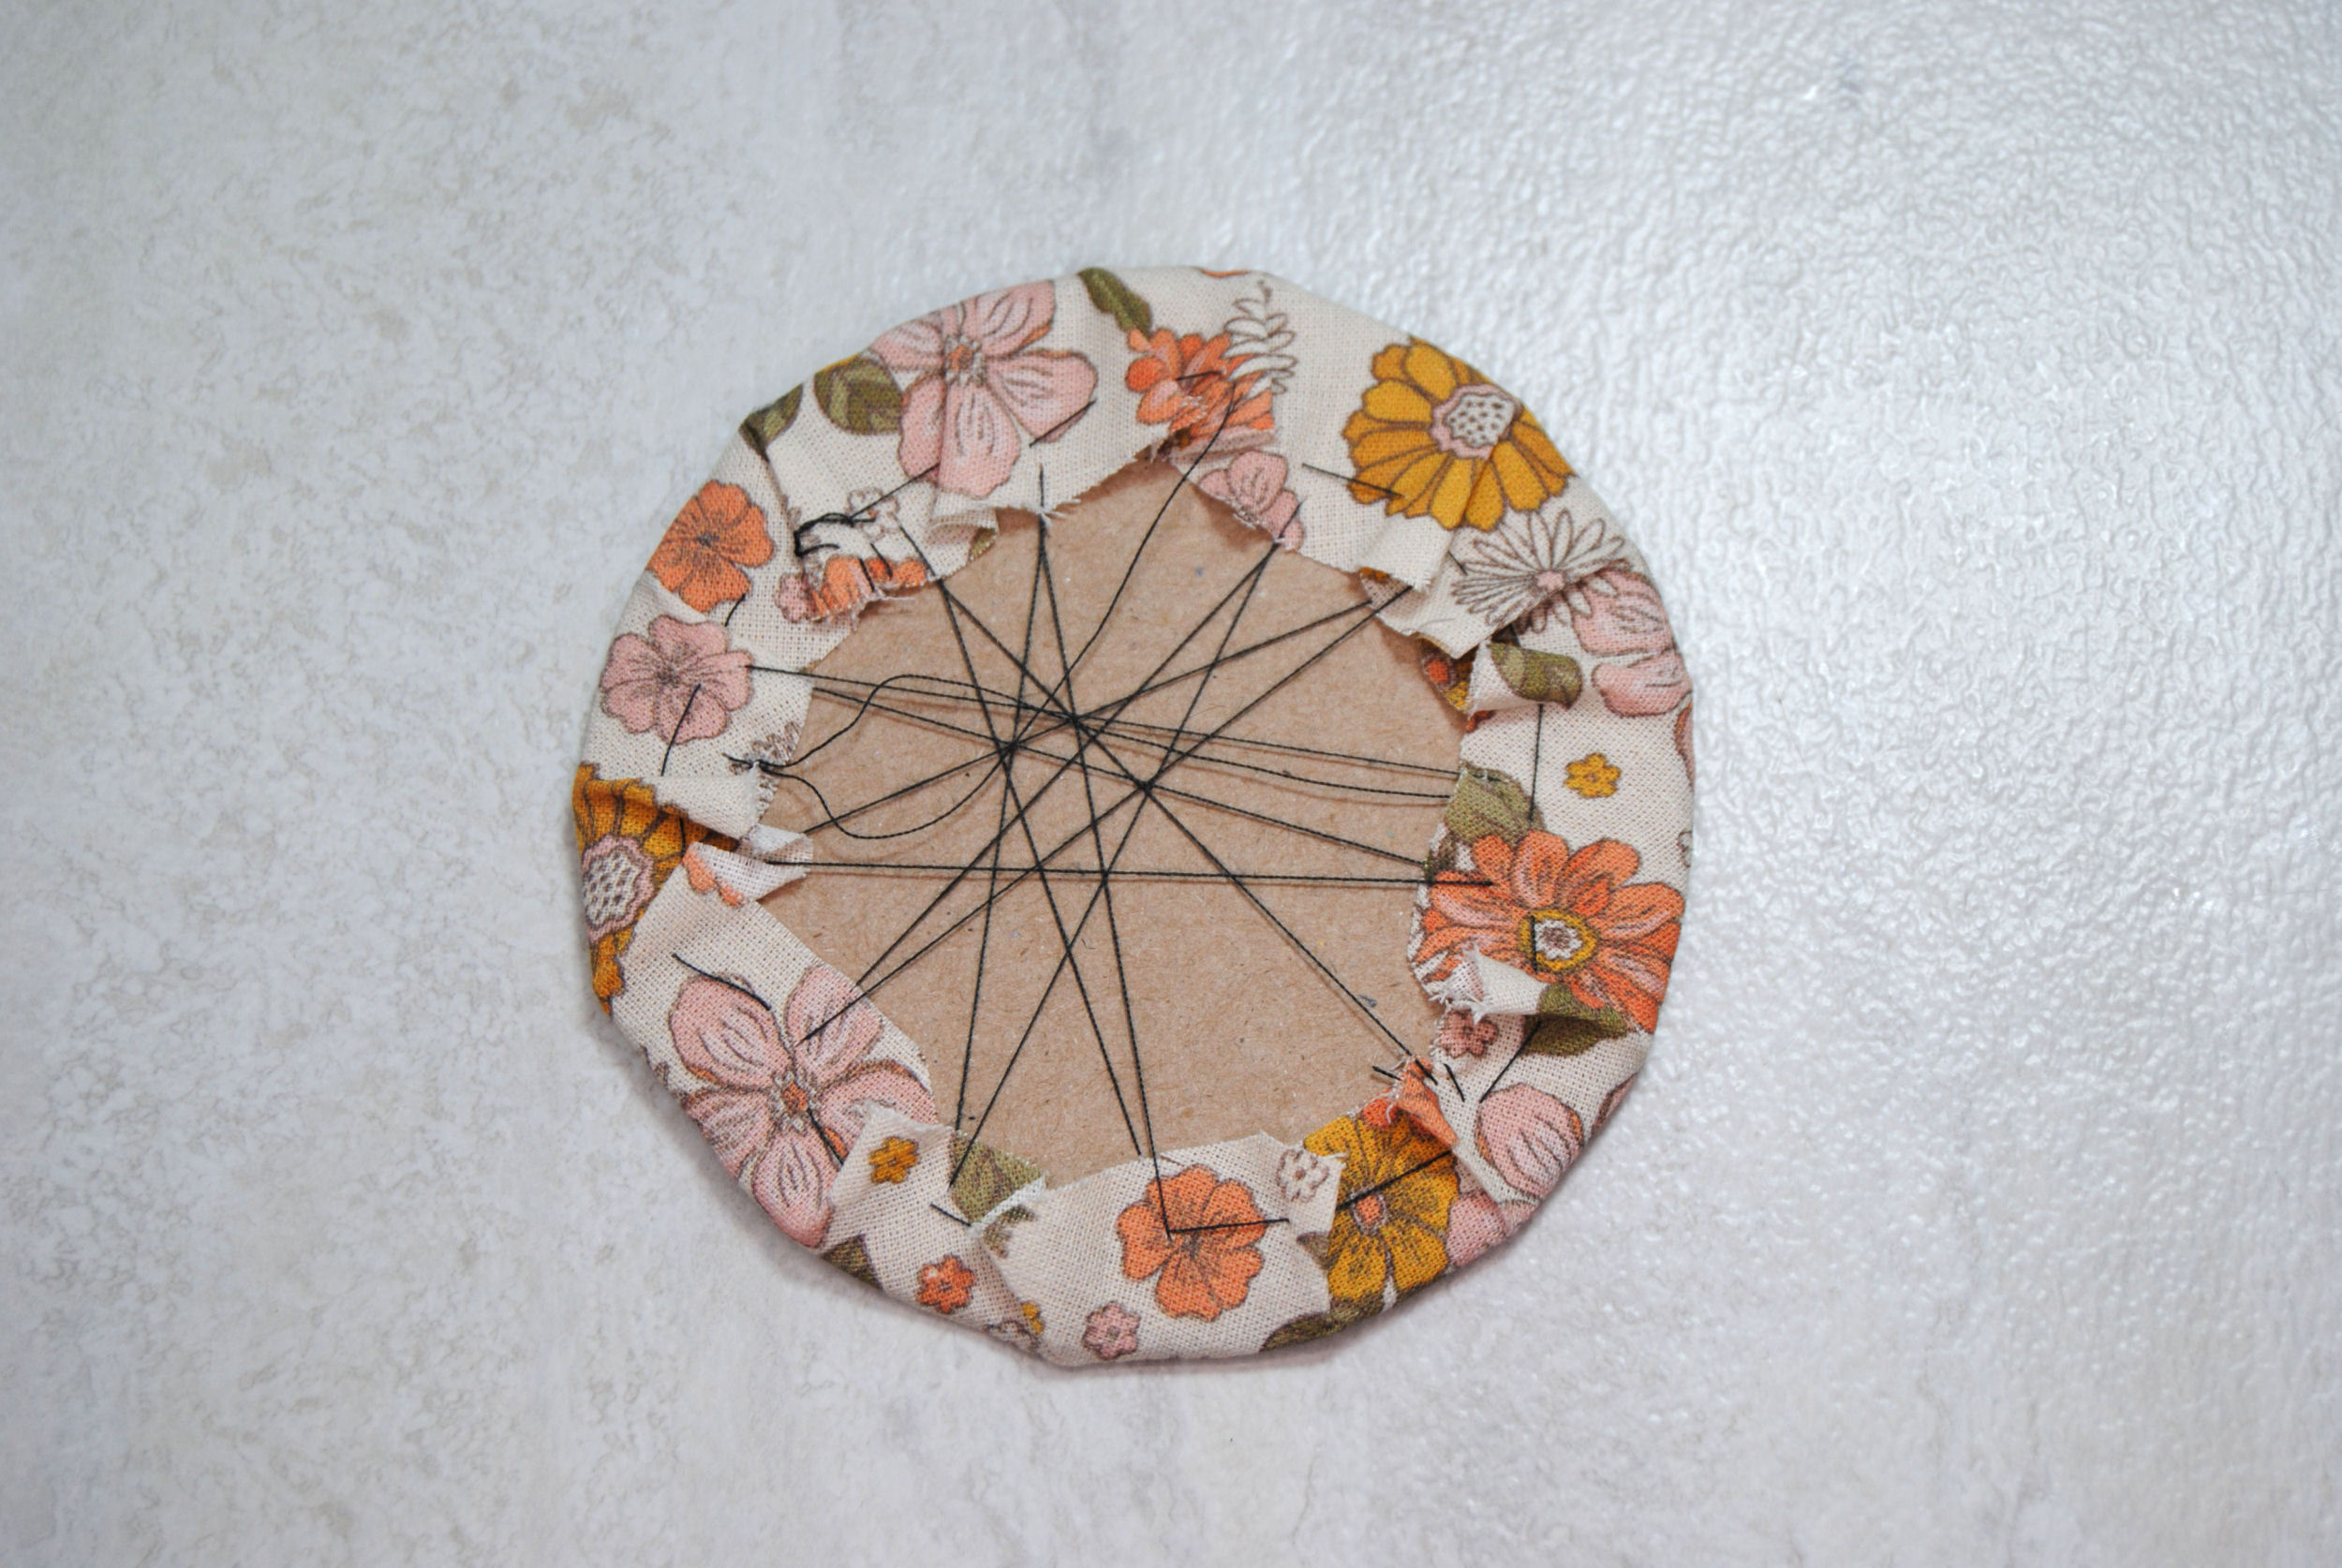
Finally, I put it back into my hoop with the stitching facing inwards. And there! A nicely finished back where I still have easy access to look at my stitches if I need to. This might be my new favorite hoop finish!
Wooden Hoop Back Blanks
Making a gift? Want something a little more classy than cardboard? You can finish the same way using wooden discs. Such as these engraved ones by KateJBlanford. If you’re not in the UK, be sure to pick up some thread drops and needle minders from her while you’re there to justify that international shipping. 😉
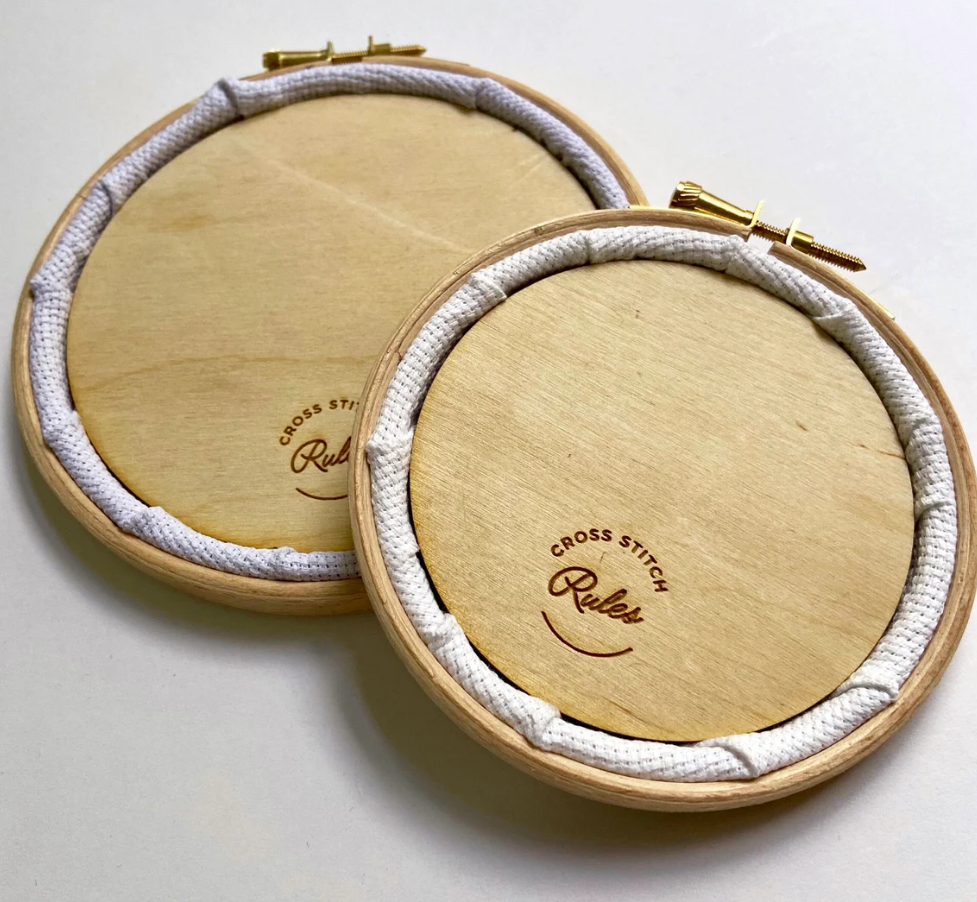
Alternatively, a wooden disk sized to the outside of that inner ring can be glued on the back instead if you don’t want your loved ones peeking at that messy back.
Aaaand that’s all the hoop finishes I could find really, other than some small variations of the above methods. For example, using whip stitch to attach felt rather than the blanket stitch. But ultimately there’s only so many ways you can finish a hoop.
There’s frames you can just pop your hoop into but they don’t really address the back usually, so I left those to the hoop decorating article instead.
Regardless, you still have a lot of room for creativity with these finishes based on what fabrics and colors you decide to use to make it your own! So get out there and be creative.


