Large Projects: Tackling Huge Cross Stitch Patterns
Okay, so you’ve gotten through a few patterns and are ready to tackle some large projects. I mean big. Think Chatelaine, Paine Free Crafts. Or one of the epic Pokemon patterns.
Feeling overwhelmed yet? Well, don’t! These aren’t technically any more difficult that stitching anything you’ve already stitched. Just more time consuming. I do have a few tips for you that will make things go by more smoothly, though.
What makes me qualified to give you advice? I haven’t done a large project in a while, but I used to do quite a few and I’ll include photos throughout this article. That said, I do run a cross stitch Discord server with over 2,000 members and quite a few of those members have done or are working on a large project and are more than happy to share their experiences! I’ll be mentioning them by name below, but feel free to join us on the server and get to know them and ask questions as needed.
Everyone works differently and what works for some may not work for others. Whatever works for YOU is the best way to do things. But you need to know your options before you can figure out what works for you. So let’s discuss some of the advice and suggestions I’ve seen over the years when starting a large project.
Important Note! What people consider large will vary from person to person depending on what you normally stitch, so I’m not going to attempt to define ‘large’. It’s whatever you want it to be and your definition may change over time. Whatever feels large to you.
This post may contain affiliate links. If you buy something using one of these links, I earn a small commission. However, there is no extra cost to you. Thanks for understanding! Learn more in my Disclosures & Privacy Policy.
Where to Find Large Patterns
There’s a lot of AI slop out there as well as folks just lazily running unlicensed photos through a program and not bothering to clean it up. So it can be difficult to be sure you’re picking up a good pattern.
I always recommend looking through reviews for someone else to at least have started stitching it and can give you a WIP photo of what they’ve done. If not of the particular pattern you’re looking at, at least something else in their shop so you can get an idea of how much ‘noise’ has been left in the image.
For large photorealistic designs this noise can be necessary, but it should be clear at least some effort has been taken to clean that up a bit. For more illustrative designs, stitches should be pretty clean fills or subtle gradients. Just make sure you have some measure of what the final project will look like so you can better decide if this is the pattern for you.
Here are some reputable shops that sell large projects made by real artists. This is by no means an exhaustive list, but should be enough to give you an idea of what’s out there. Many of them have small designs as well, though!
Modern ‘fancy lady’ and illustrated designs:
Big designers that have been around for a long time:
- Mirabilia
- Chatelaine
- Lavender & Lace
- Teresa Wentzler
Low color / “quaker” style designs
Full Coverage Art
Gathering Materials
If you’re reading this, I will assume you’ve already got a pattern in mind. Whether it’s a large pattern you got online, or a photo you ran through a cross stitch program and cleaned up yourself. Either way, you should have an idea of the size of your design, and the colors you’ll be working with. So let’s talk more about actually setting that up.
Sourcing Fabric
Your first decision will need to be what kind of fabric you’ll be using. There are many different count sizes, colors, and textures to cross stitch fabric. You’ll want to pick a fabric count first, as this affects the final size of your pattern. Fabric count is just the number of stitches per inch. So lower counts will mean bigger stitches, and thus a bigger project.
You might want to do it on 14 or 18 count to keep it large for a big epic framing. Or pick something like 28 count so you can get away with doing half stitches and still get full coverage!
Calculating How Much Fabric You Need
Most patterns nowadays will give you height and width in number of stitches. You’ll need to divide that number by the count of your fabric. This will tell you how many inches of fabric you need. You’ll want to also leave a 3″+ border around your project for future framing, and to account for fraying fabric. You can get away with less of a edge. But especially with large projects that you might be handling for years it’s best to leave a large border. Double, and triple check to make sure you have enough room for your project.
Whatever final numbers you come up with, you may have to order online or from a specialty shop in order to get fabric big enough to fit a large project. There are places that even allow you to order full bolts of aida! Some only offer this on request, you may need to reach out and ask them if they have any available. But most specialty stitch stores will at least have white fabric available by the yard. I’ve got a list of shops that I try to keep updated, but shop around and try to find a good deal!
Picking The Right Fabric
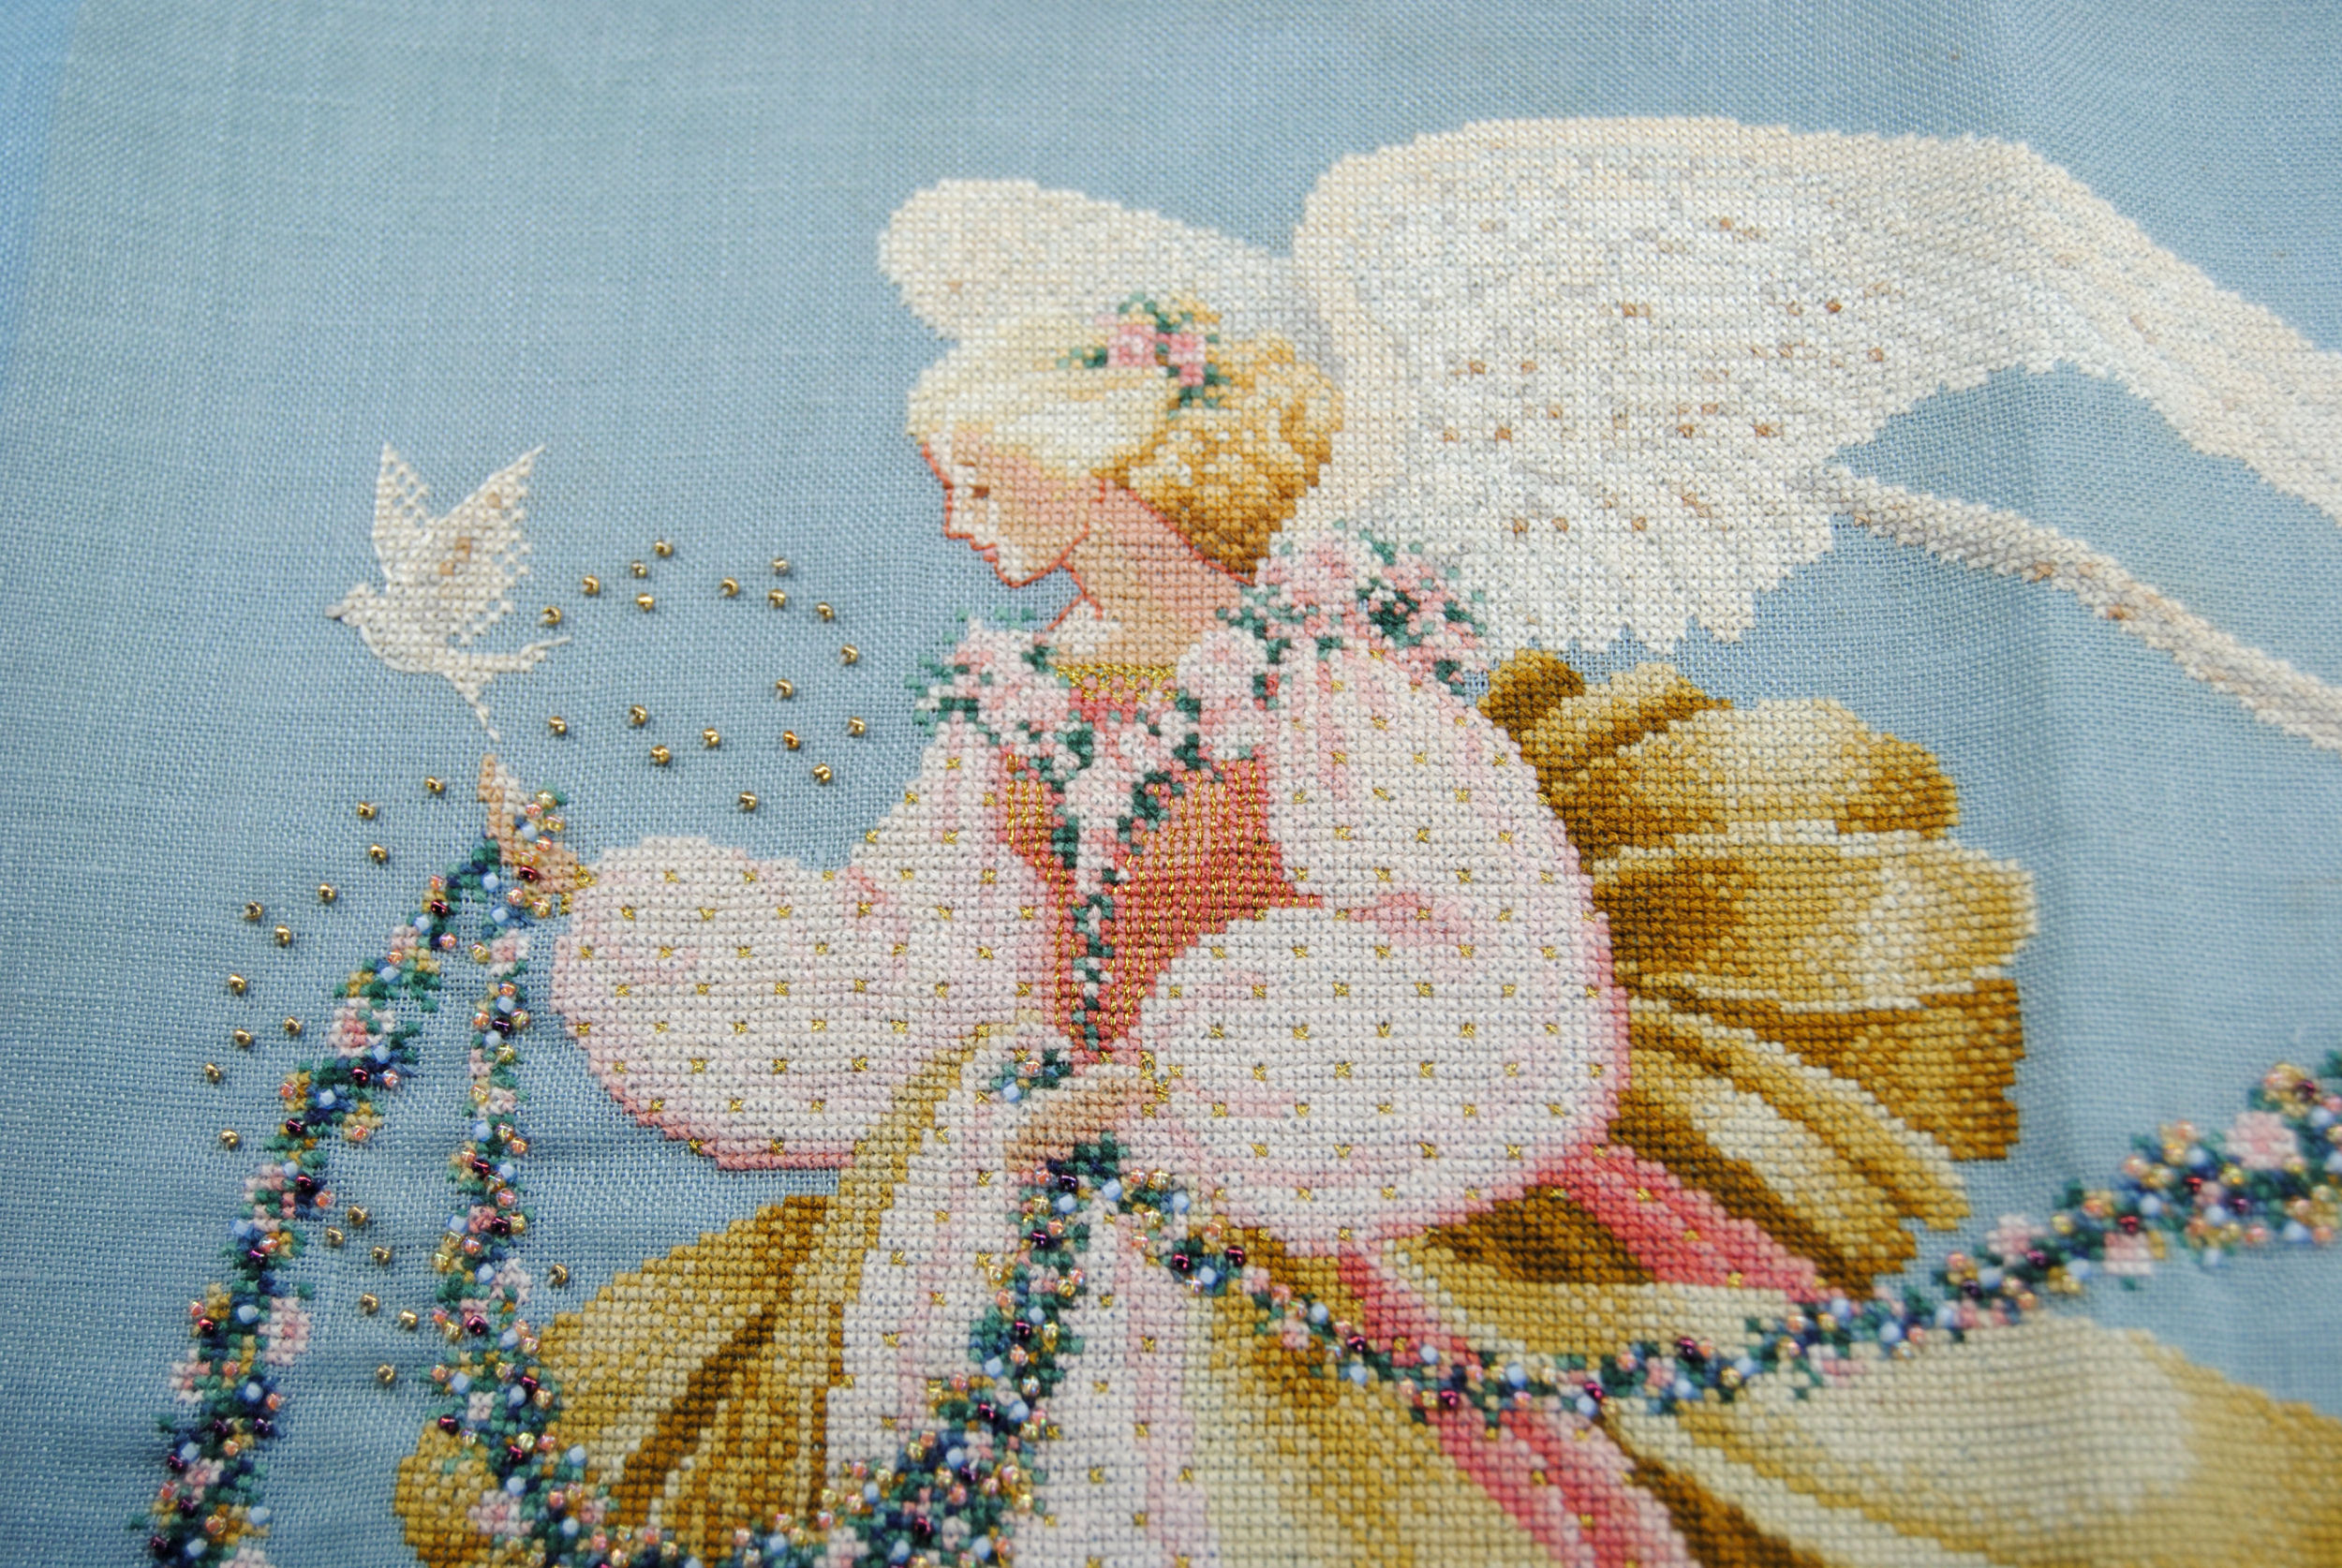
If you’re doing a large piece that does have a lot of background such as this Lavender & Lace design, you want to pick a complementary color that won’t detract from the design, or even a gorgeous hand-dyed fabric that will enhance it.
However, if you’re doing a full coverage piece, the color of your fabric won’t matter much. By full coverage I mean a pattern that will be a full big block of stitches with no gaps. All that fabric will be covered, and you’ll likely be framing pretty close to the edge, so the actual fabric likely won’t be seen. Because of that, many folks go with white fabric as it’s generally cheaper. Or you can even use pre-gridded fabric so you don’t have to grid it yourself.
If you have concerns about bright white peeking through the edges of your stitches you could go with a darker fabric or fabric in a color that works with your pattern’s colors so it won’t stand out as much. Or you could stitch with more strands of thread, but your thread cost can easily add up fast on a large project.
Plenty of Thread
It’s very important that you pick up all of the thread you need of a color at once. Some designers will give you a stitch count, or estimate how many skeins of floss you might need of a color. If they don’t, it’s best to order extra. DMC and all other thread brands occasionally have to create a new vat of dye. And while they have formulas for each of their colors, it never turns out *exactly* the same. It doesn’t happen all that often but since these big projects can take years to complete, there’s a chance that if you run out of a color and go to pick up more, it will be a slightly different shade.
You don’t need to buy every single color in a project up front, if you just want to stitch a few colors at a time. But at least pick up all the skeins you need for the colors you’re starting with, and any ‘adjacent’ colors. Here’s an example of the 208-210 range pictured below.
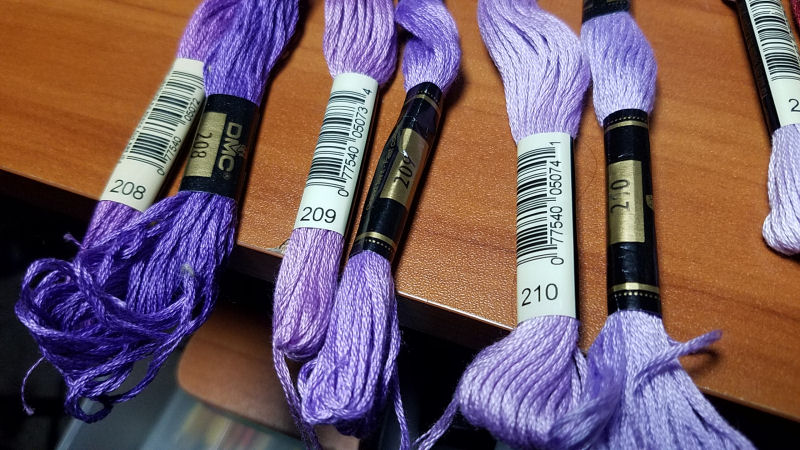
You can tell by the labels that some of these are really old, but it does show you how different the colors can look over time. Even just a subtle difference from one dye lot to the next is a lot more noticeable once stitched, so it’s best to prepare in advance.
Project Bags
You may also want to pick up or make yourself a project bag to keep all your materials together. That can be as simple as a tote bag or it could be a bag specifically designed for cross stitch. Up to you!
The point being, if you’ve got 3 skeins of a color specifically set aside for this project, you don’t want to accidentally use them in another pattern completely defeating the point of making sure they’re all from the same dye lot. Try to keep all the materials for your large project together.
Or at the very least you may simply want a way to store your project when you need a break from it. Which is also an important part of the process. But we’ll get to that. Let’s actually get started first!
Preparing Your Fabric
Before you start, you’ll want to prepare the fabric for stitching. For the most part it’s the same as any other project, but there’s a few additional things you should consider.
Managing Fraying
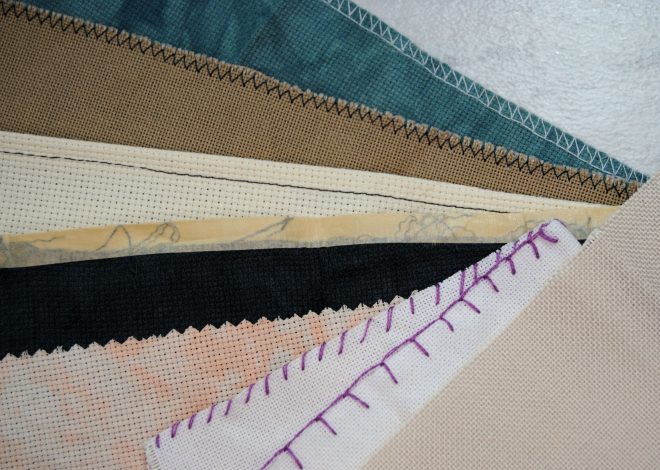
You’ll likely be working on this a long time, so your fabric fraying is almost inevitable. To help prevent that, there’s a few options you can try. I’ve got a whole article on various ways to deal with fraying fabric ranging from masking tape to sewing up the edges.
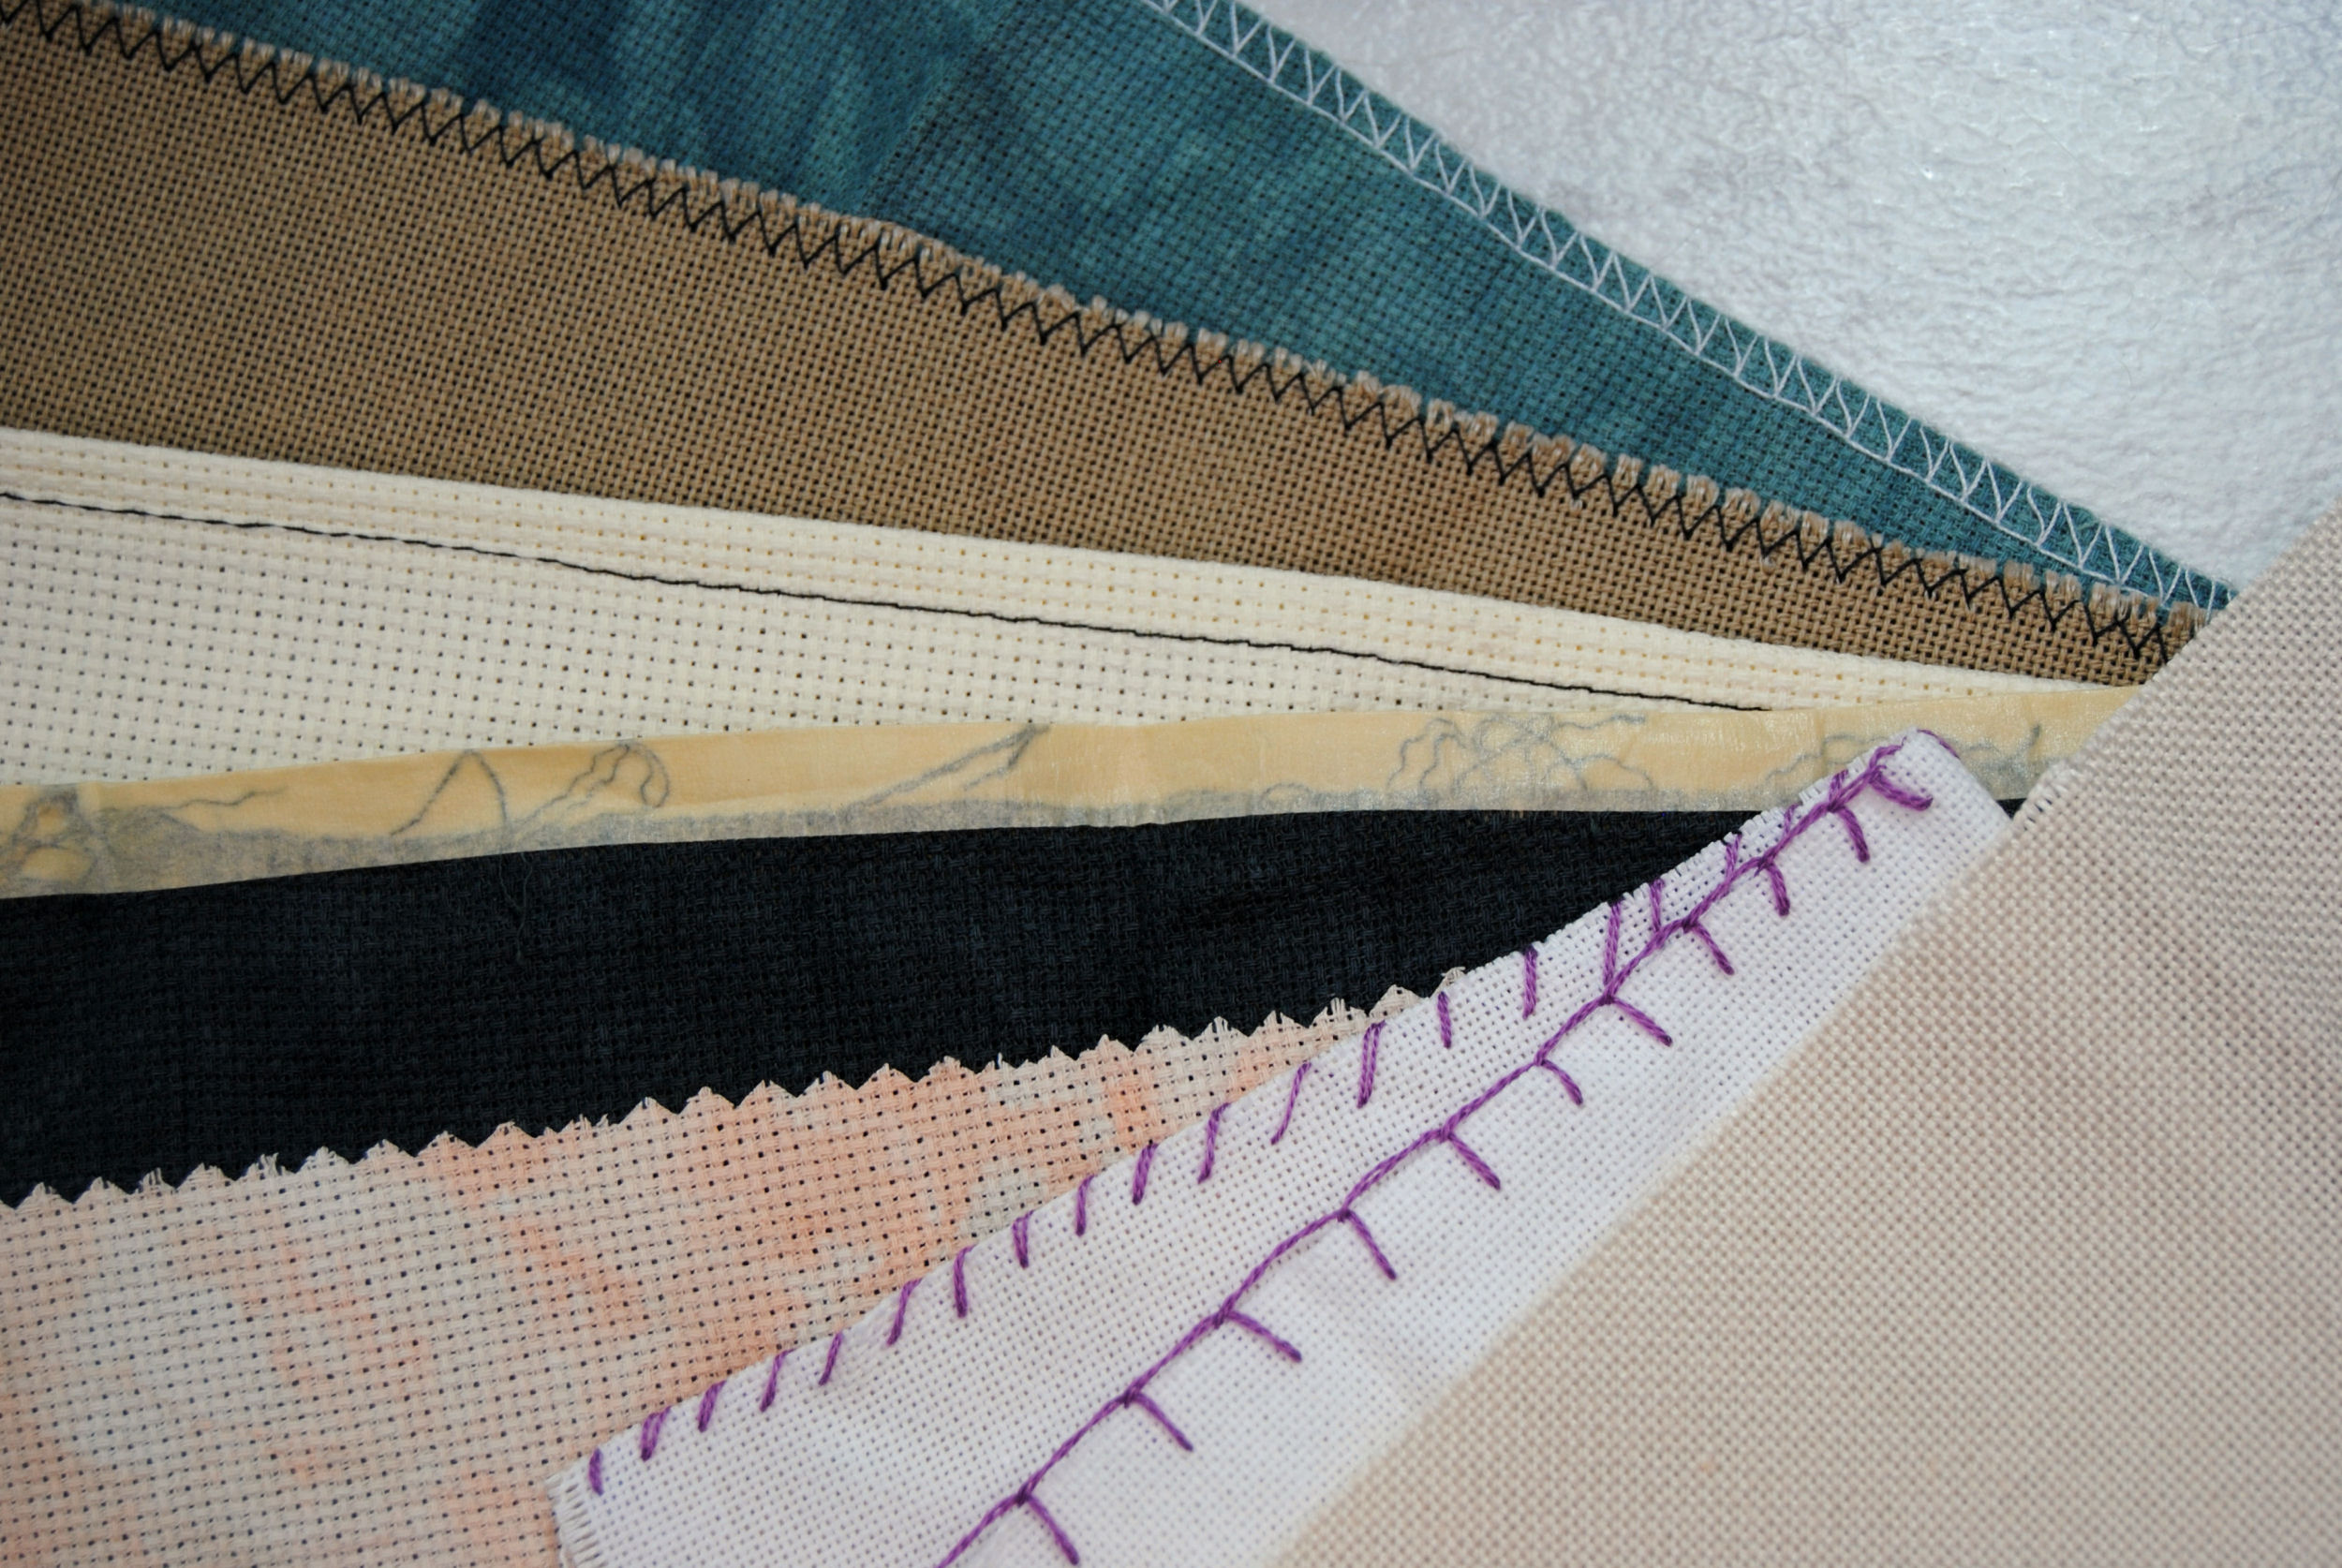
If your fabric seems like it’s the fraying type, it’s best to tackle it early and not wait until it starts unraveling on you to try and get it under control.
Gridding
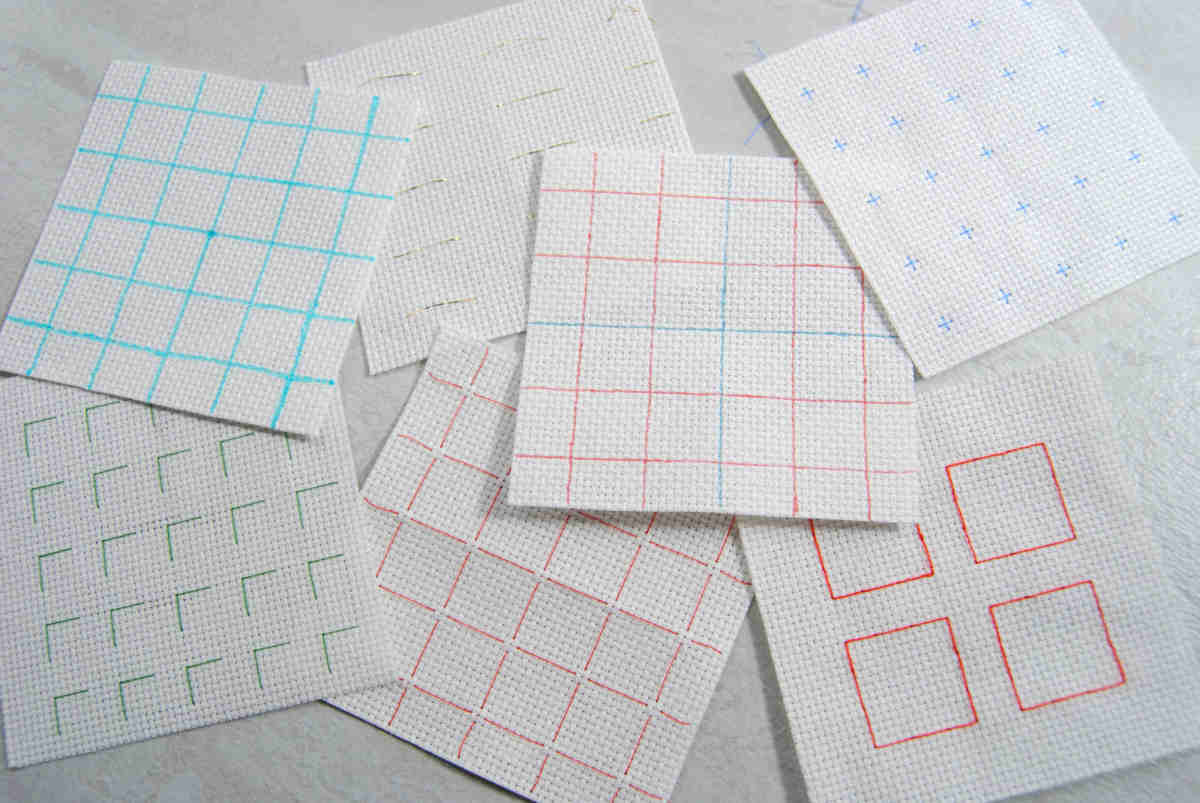
The other thing you might want to do to prepare your fabric is gridding. This is not necessary, but definitely helpful for many if you want to avoid miscounting and having to undo progress. It also helps you make sure that you do in fact have enough fabric. Basically, you’ll be marking 10×10 grids (or at whatever spacing makes sense to you) on your fabric that you can easily follow along on your pattern. As with most things, there’s many different methods to this.
Once again, I have a whole article on various ways to grid your fabric. Ranging from washable markers to fishing line, and from stitching out full squares or just your page breaks.
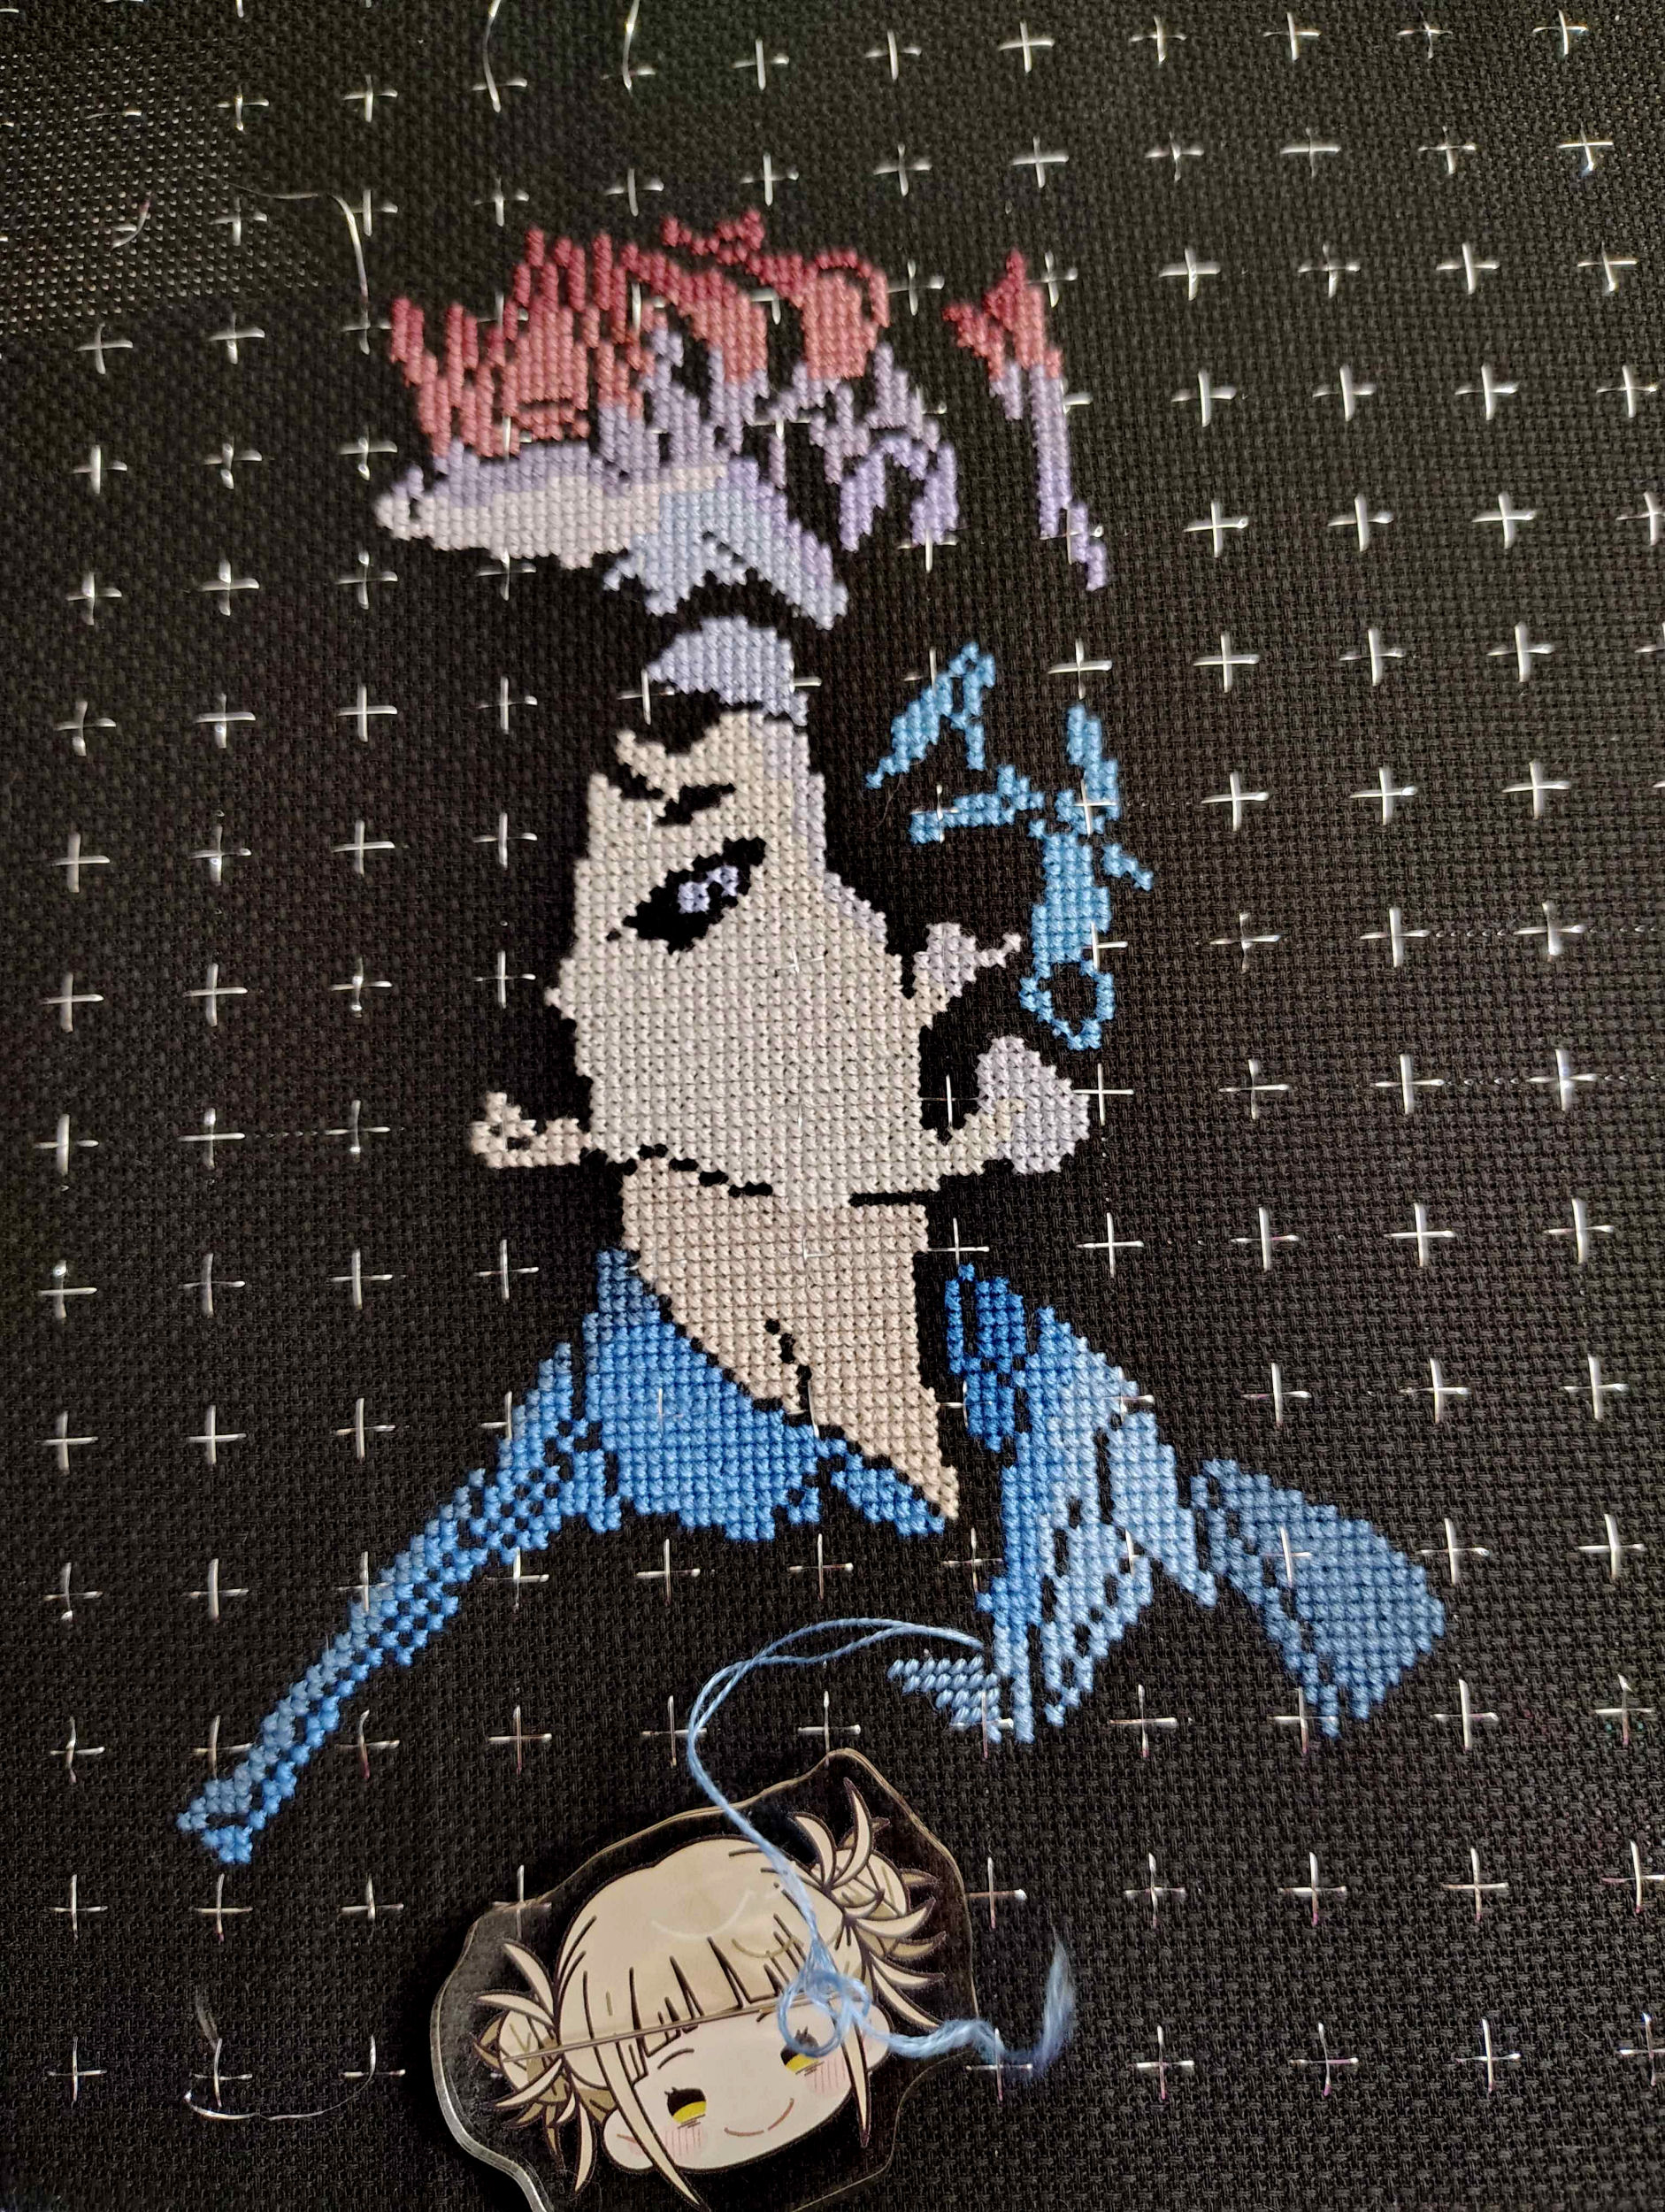
You can grid as little or as much as you want. For example, Luca from the Pixel Stitch Discord server shared this project where they gridded just the inner corners of the squares, using Sulky Holoshimmer thread so it shows up nicely on black aida!
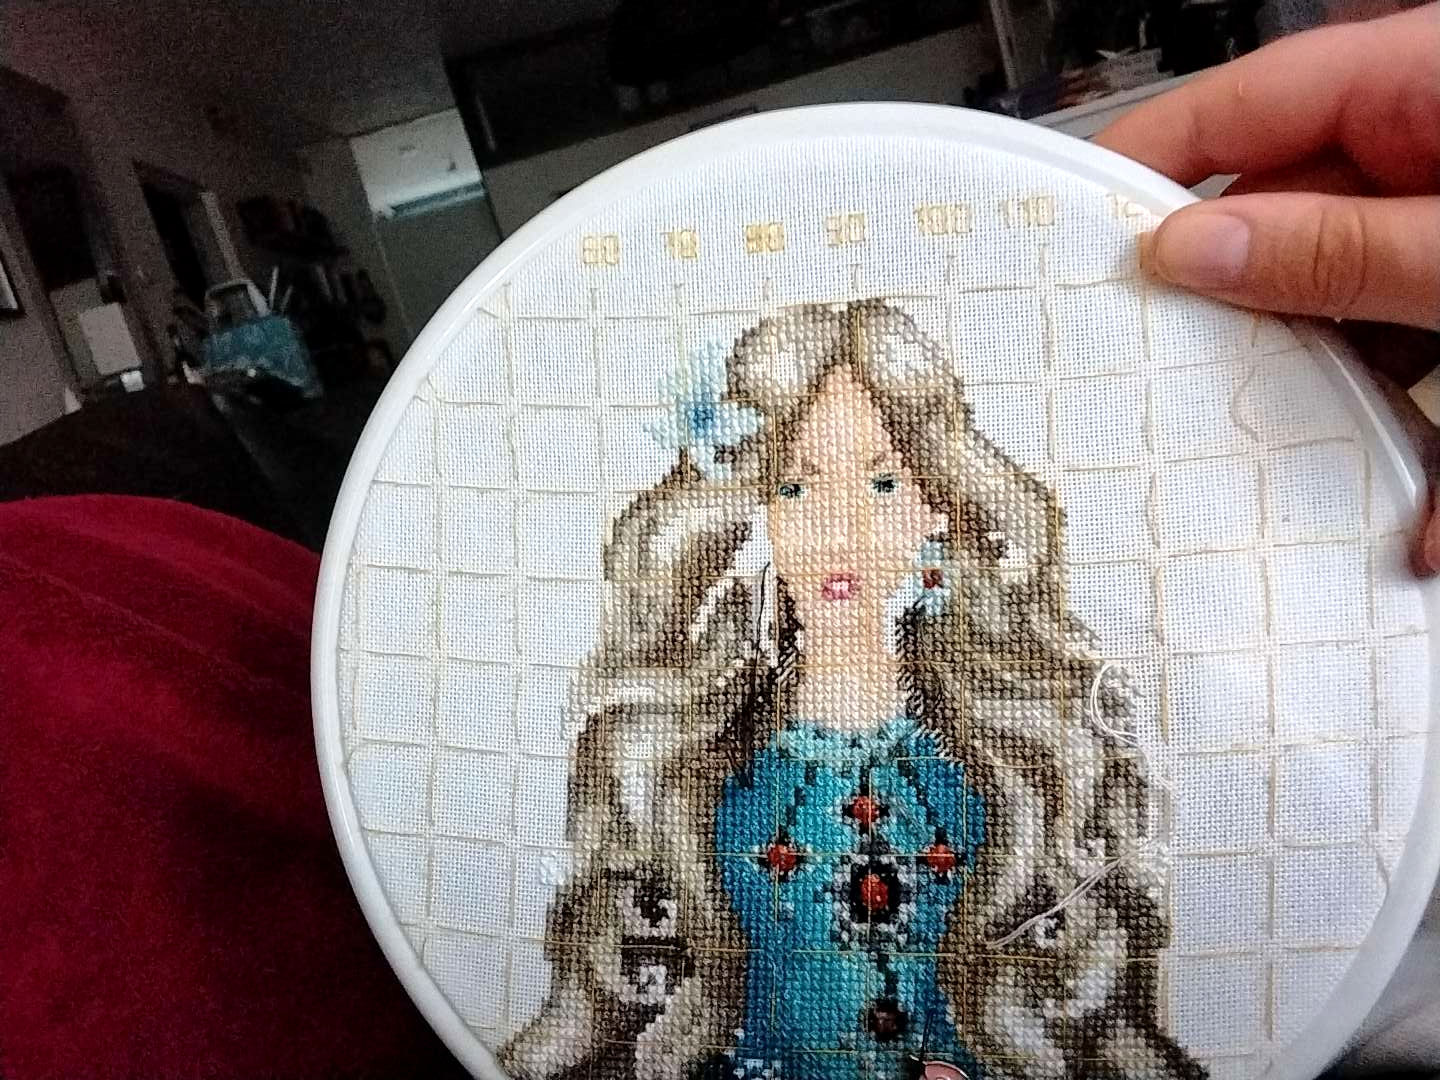
Or you can grid full squares like this gorgeous lady stitched by lovely_poekie (also from our Discord community). Labeling the gridding lines could be helpful as well!
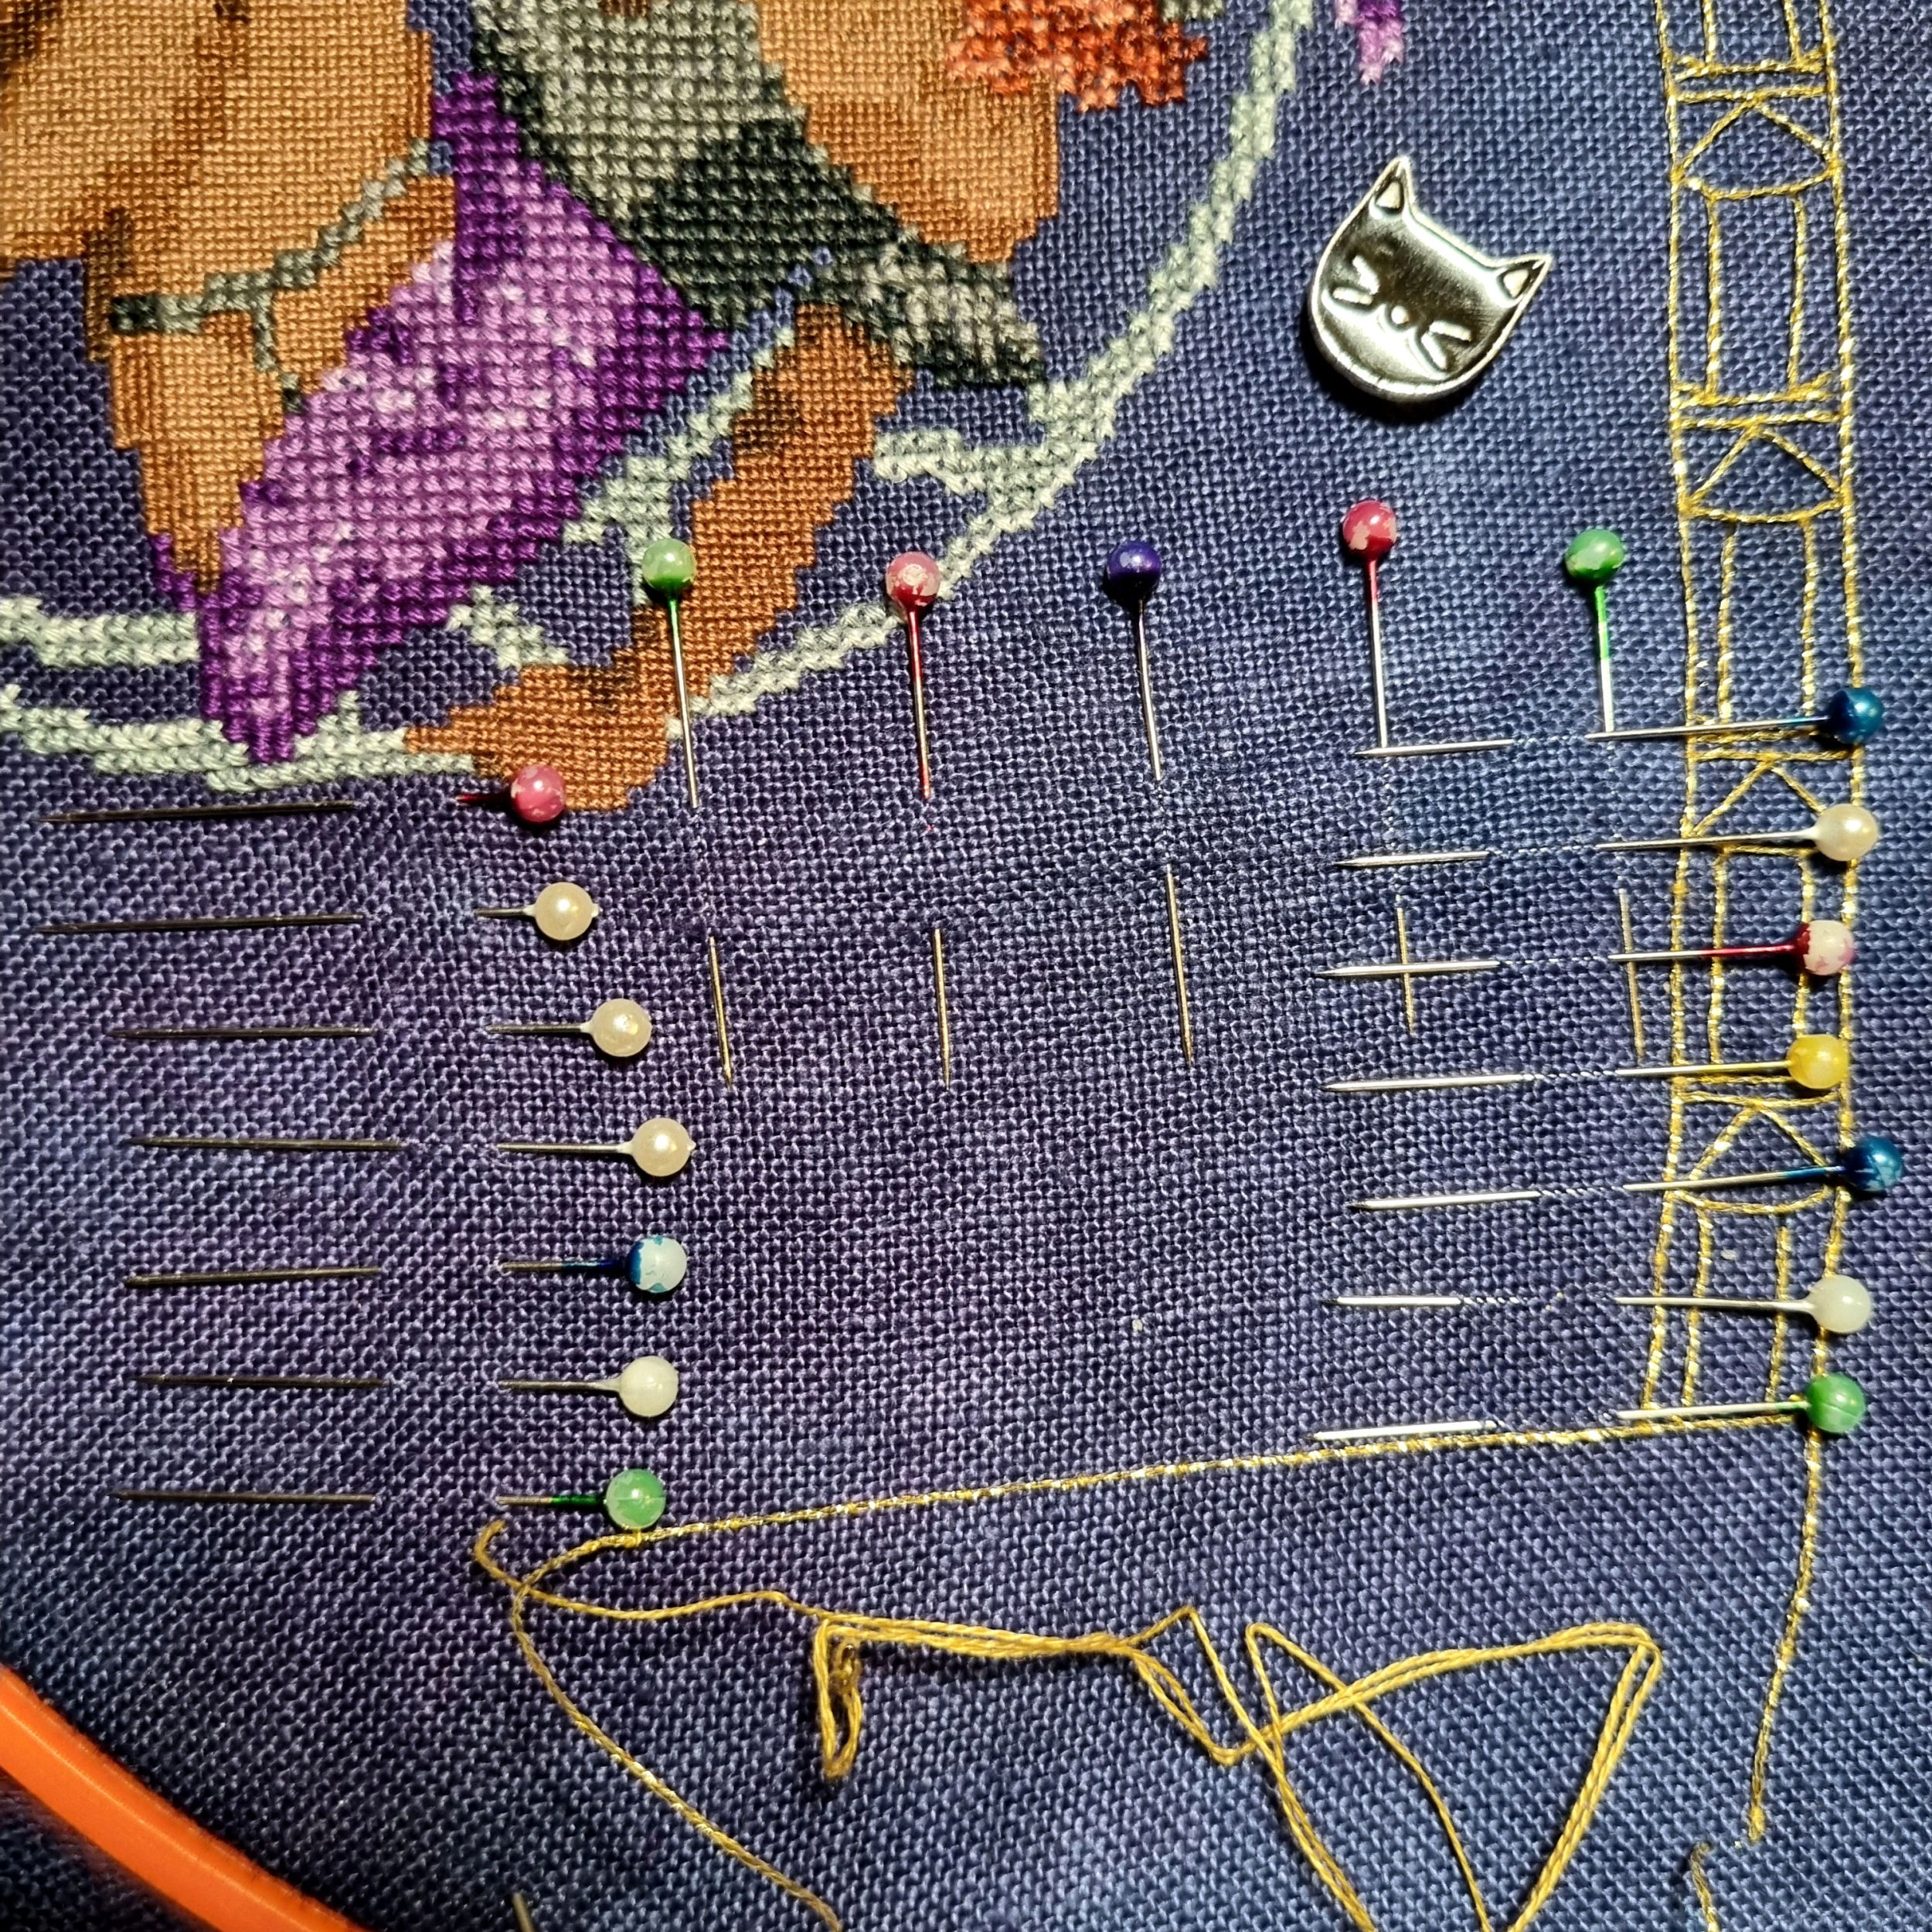
You could even just grid as you go and only where you need to. Like this excellent example from echoandmine of pin gridding just to avoid miscounting a large open space that won’t have any stitches in it. For when you just can’t trust yourself to count higher than 10. This helps avoid realizing later that your entire border was one stitch to the left or something silly like that. It happens.
Where Are You Starting?
Whether you decide to grid or not, you’ll need to decide where you’ll be starting stitching. Do you normally start in the center? For big projects a lot of people start in the upper left. Or upper right, if you’re left handed. But it could also be lower left or lower right. It’s up to you! But starting from a corner can be very helpful. This is because most large patterns come with several pages. Trying to figure out where the center of a multi-page pattern can be daunting at best, so it’s often easier to just start in a corner.
This is another area where gridding can come in handy, even if you’re just doing one big box outline to make sure you have enough room on your fabric for the full pattern. And to make sure you’ve got it centered after all and are still leaving enough room on all sides of your design for framing and the like.
Feel free to just start wherever you’re comfortable, though.
Preparing to Stitch
Finally you’re all set up and are ready to start stitching. Or are you? A few more decisions need to be made.
Choosing a Frame
Are you going to stitch in hand? Use a hoop? Q-snap? Set up a scroll frame? This is all a matter of personal preference really. And you guessed it, I have a whole article to help you choose between a Hoop, Q-Snap, or Scroll Frame.
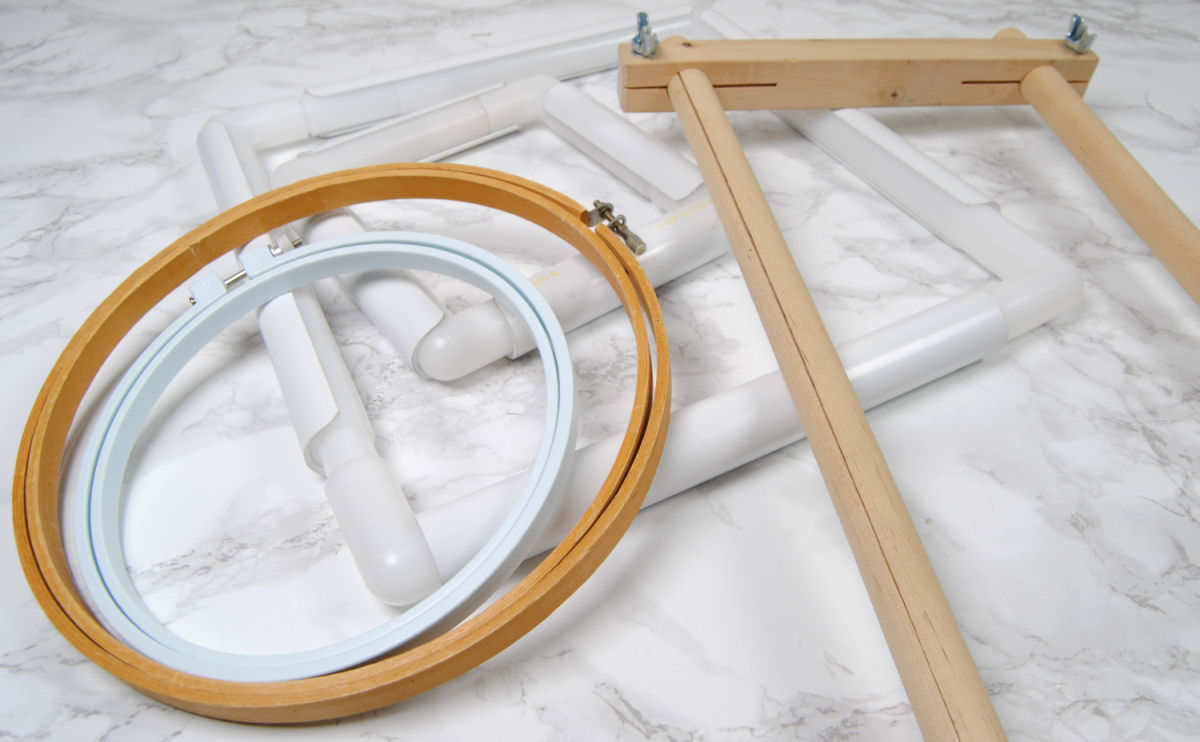
With large projects there’s a few extra considerations, such as getting a frame big enough so you don’t have to move it around as much. They do make some pretty large hoops designed for quilting, and Qsnaps get pretty big as well! So you have options.
The other thing that will help in picking a frame: figuring out what to do with the excess fabric. That fabric could make it awkward to stitch using your normal method. I’ll talk more about fabric management here shortly, though.
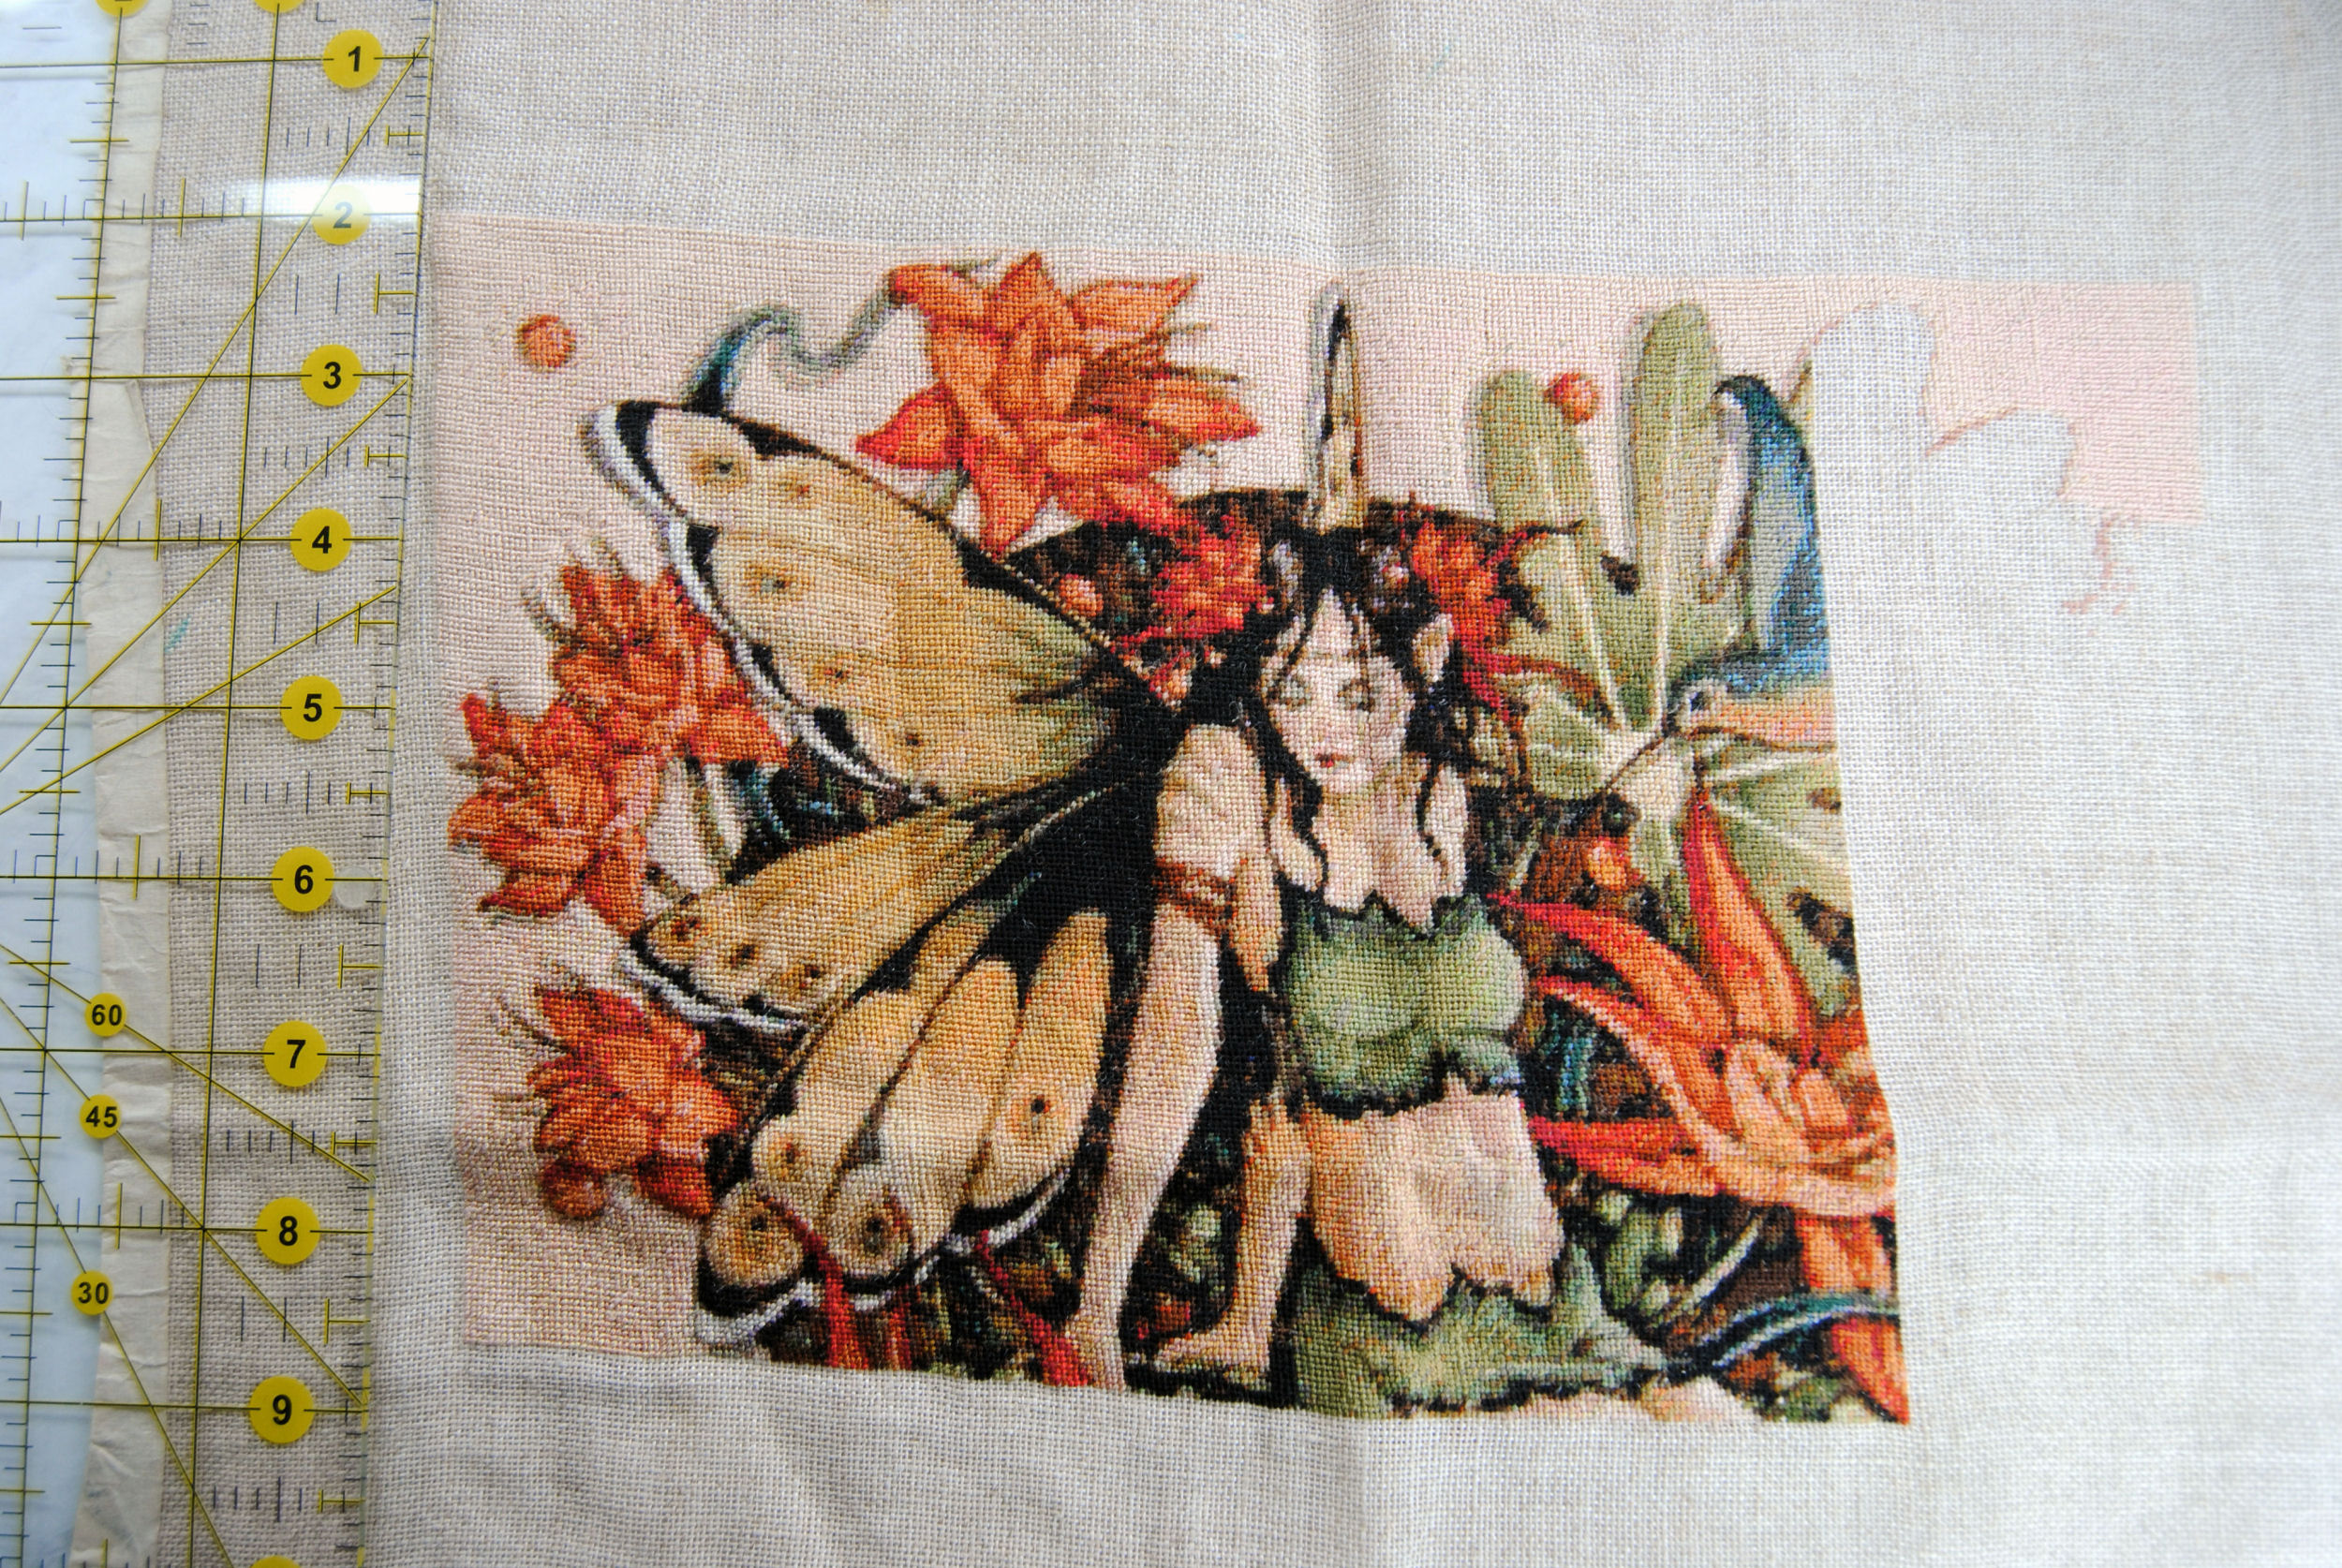
You don’t have to use a frame. But they are helpful to keep tension even, or that perfect square pattern can end up being more of a parallelogram, like this Heaven and Earth pattern I started years ago and have never finished.
Do You Need a Stand?
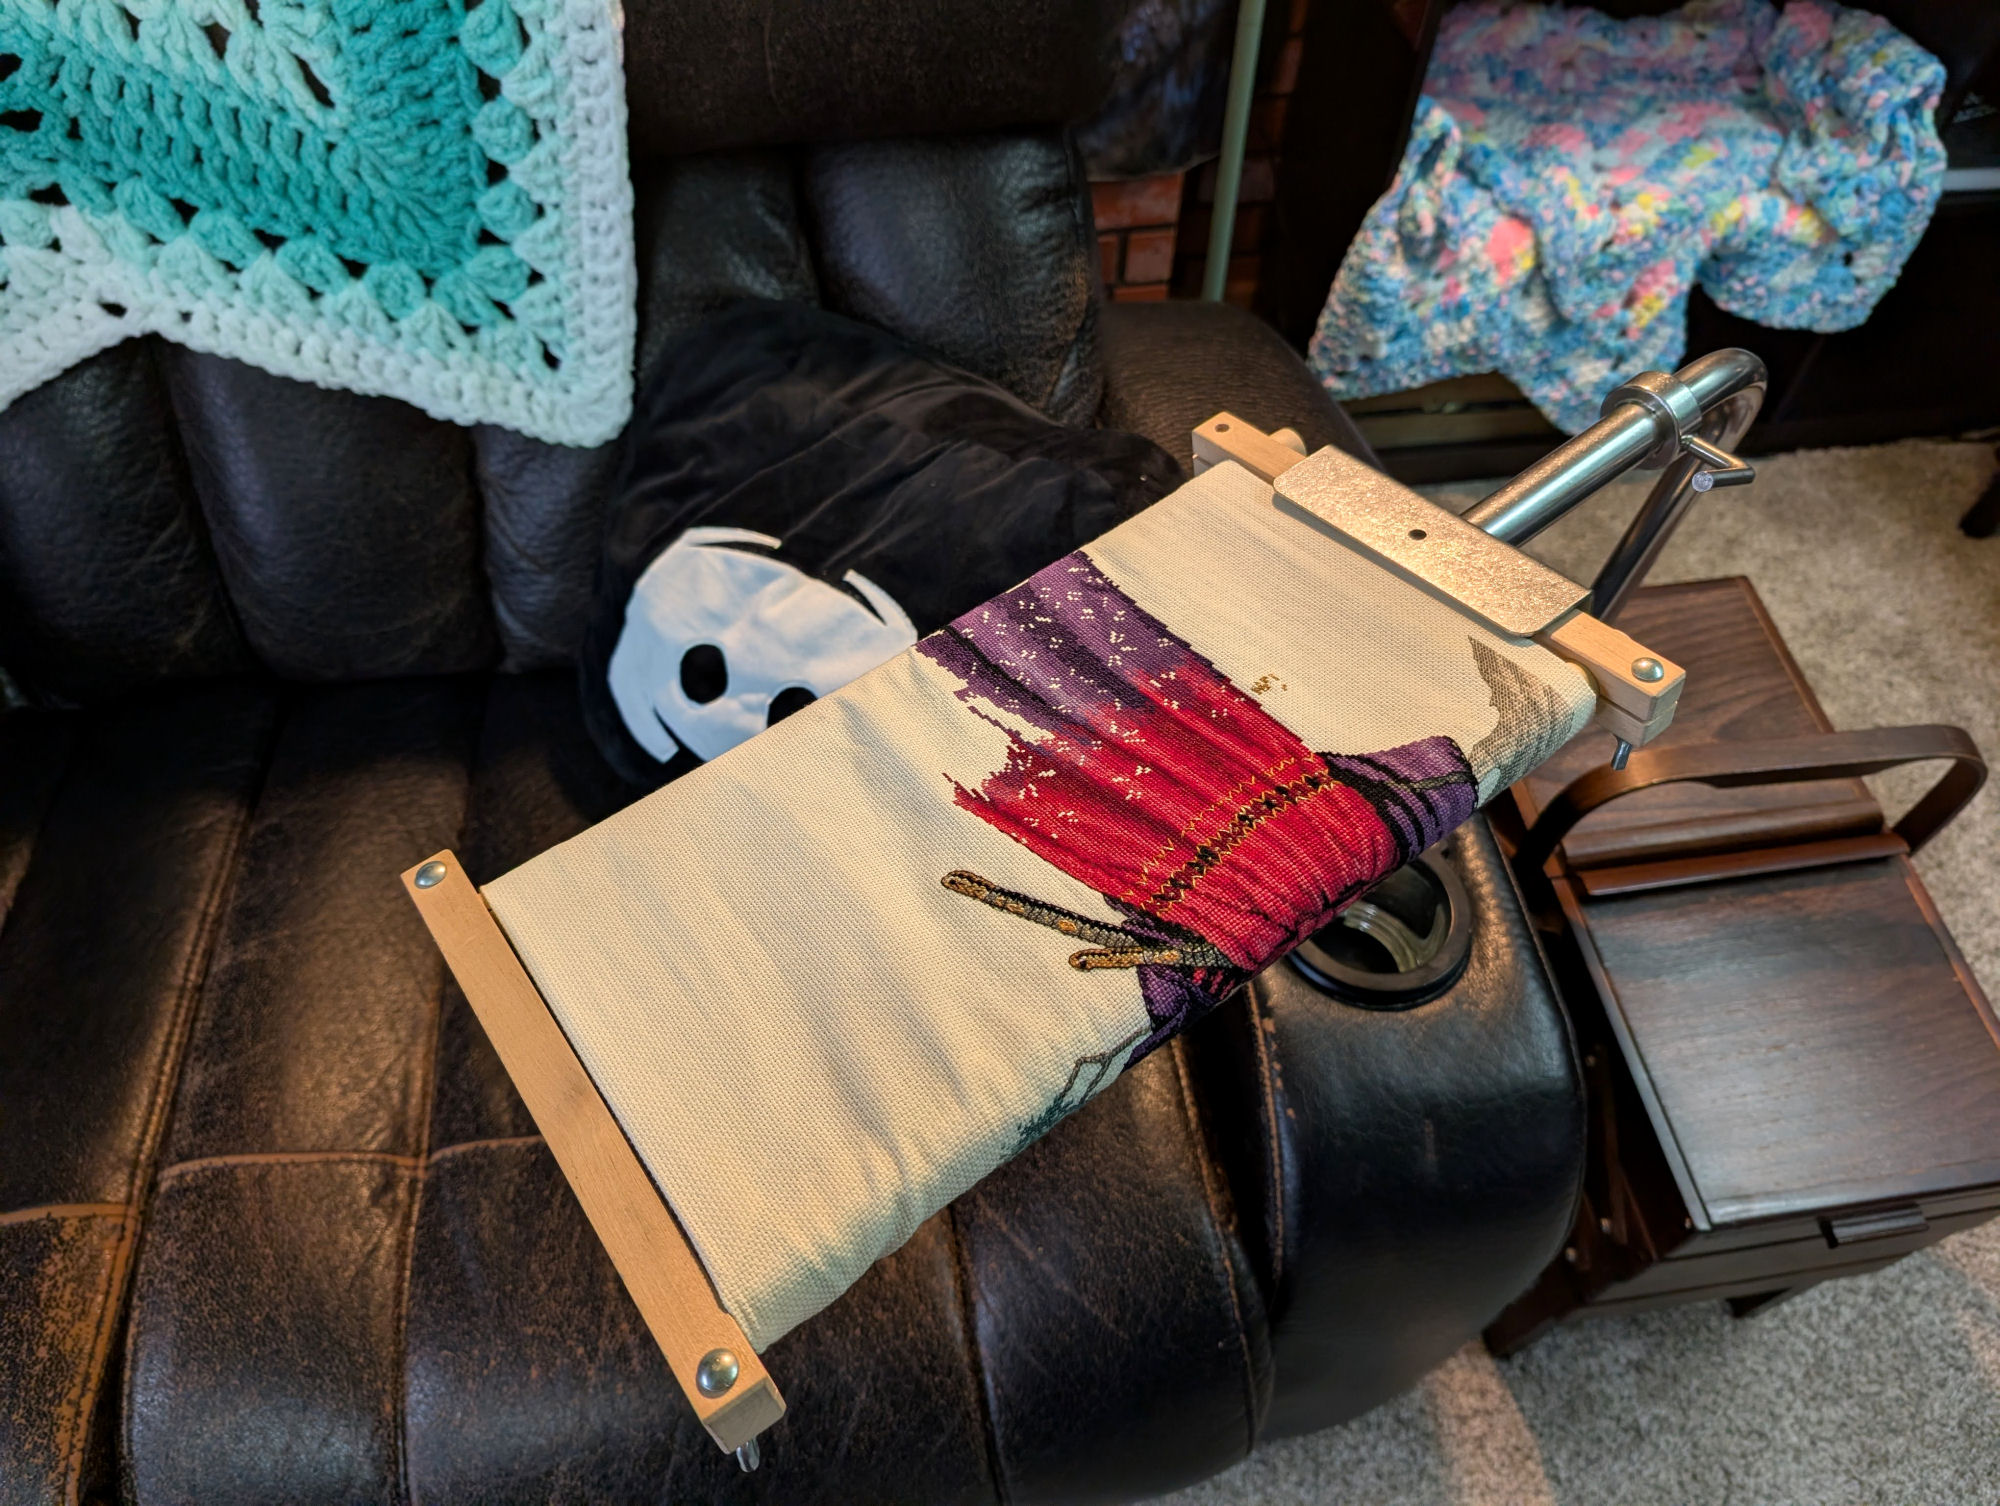
The larger your frame, the heavier it’s going to get. So for large projects many folks consider buying or making a stand of some sort to hold your frame in place while you stitch.
This also has the added benefit of letting you work two handed, with one hand in front of your project and the other feeding your needle up from the back. This can take a lot of practice to get the hang of, but once you’re used to it can speed up your stitching significantly! And since you’ve got a large project ahead of you, you’ll have plenty of time to practice.
Stands come in all shapes and sizes as well, and could be a frame designed to sit on a desk. A frame that sits on your lap while you work, or a metal floor stand like the often imitated Lowery Workstands.
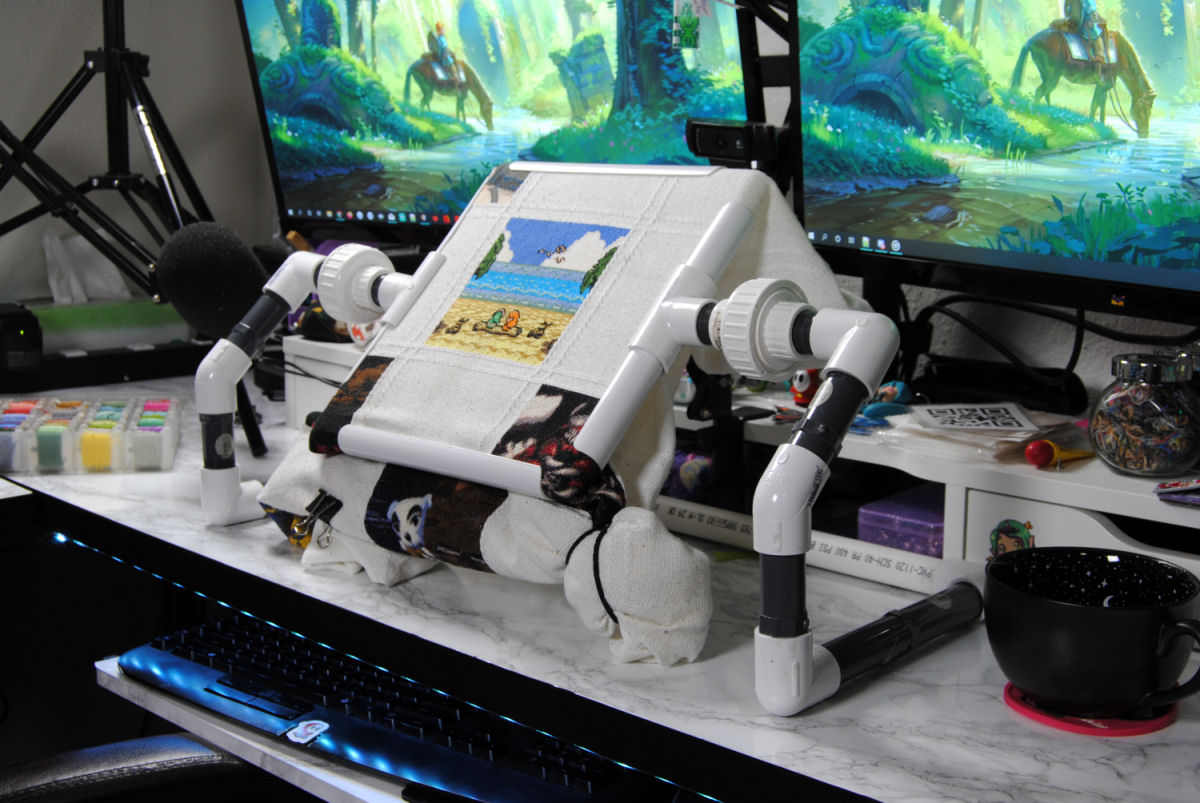
Or you could build your own stand, like this one I made out of pvc pipe and connectors picked up from the hardware store. Whatever works for you.
Handling Excess Fabric
One of most often asked questions about large projects is how do you manage all that “extra” fabric while you’re working? The fabric that’s not currently in your frame and is just billowing about getting in your way. Well, like with anything in this craft folks have come up with all sorts of different ways to handle this problem. And it’s all personal preference which method is best.
If you’re using a scroll frame, it actually manages the fabric for you! Definitely one of the biggest benefits of using one, as the fabric gets rolled up on the bars and you just rotate them to move the fabric up or down as you work.
You can see in the Qsnap frame photo in the previous section that I usually just use some hair ties and binder clips to keep any superfluous fabric out of the way. That’s a common option. Just using whatever you have on hand to keep the fabric rolled or folded up along the edges of your frame.
What seems to have replaced binder clips as most common are the magnetic cable ties, at least in our community. They work kind of like a needleminder, except the two magnets are connected by a cord which keeps your fabric pulled close to your frame. You just roll up your fabric nicely and wrap these around it. Here’s an example by Spooky from the Discord server. She’s working on Pandemic, by Long Dog Samplers
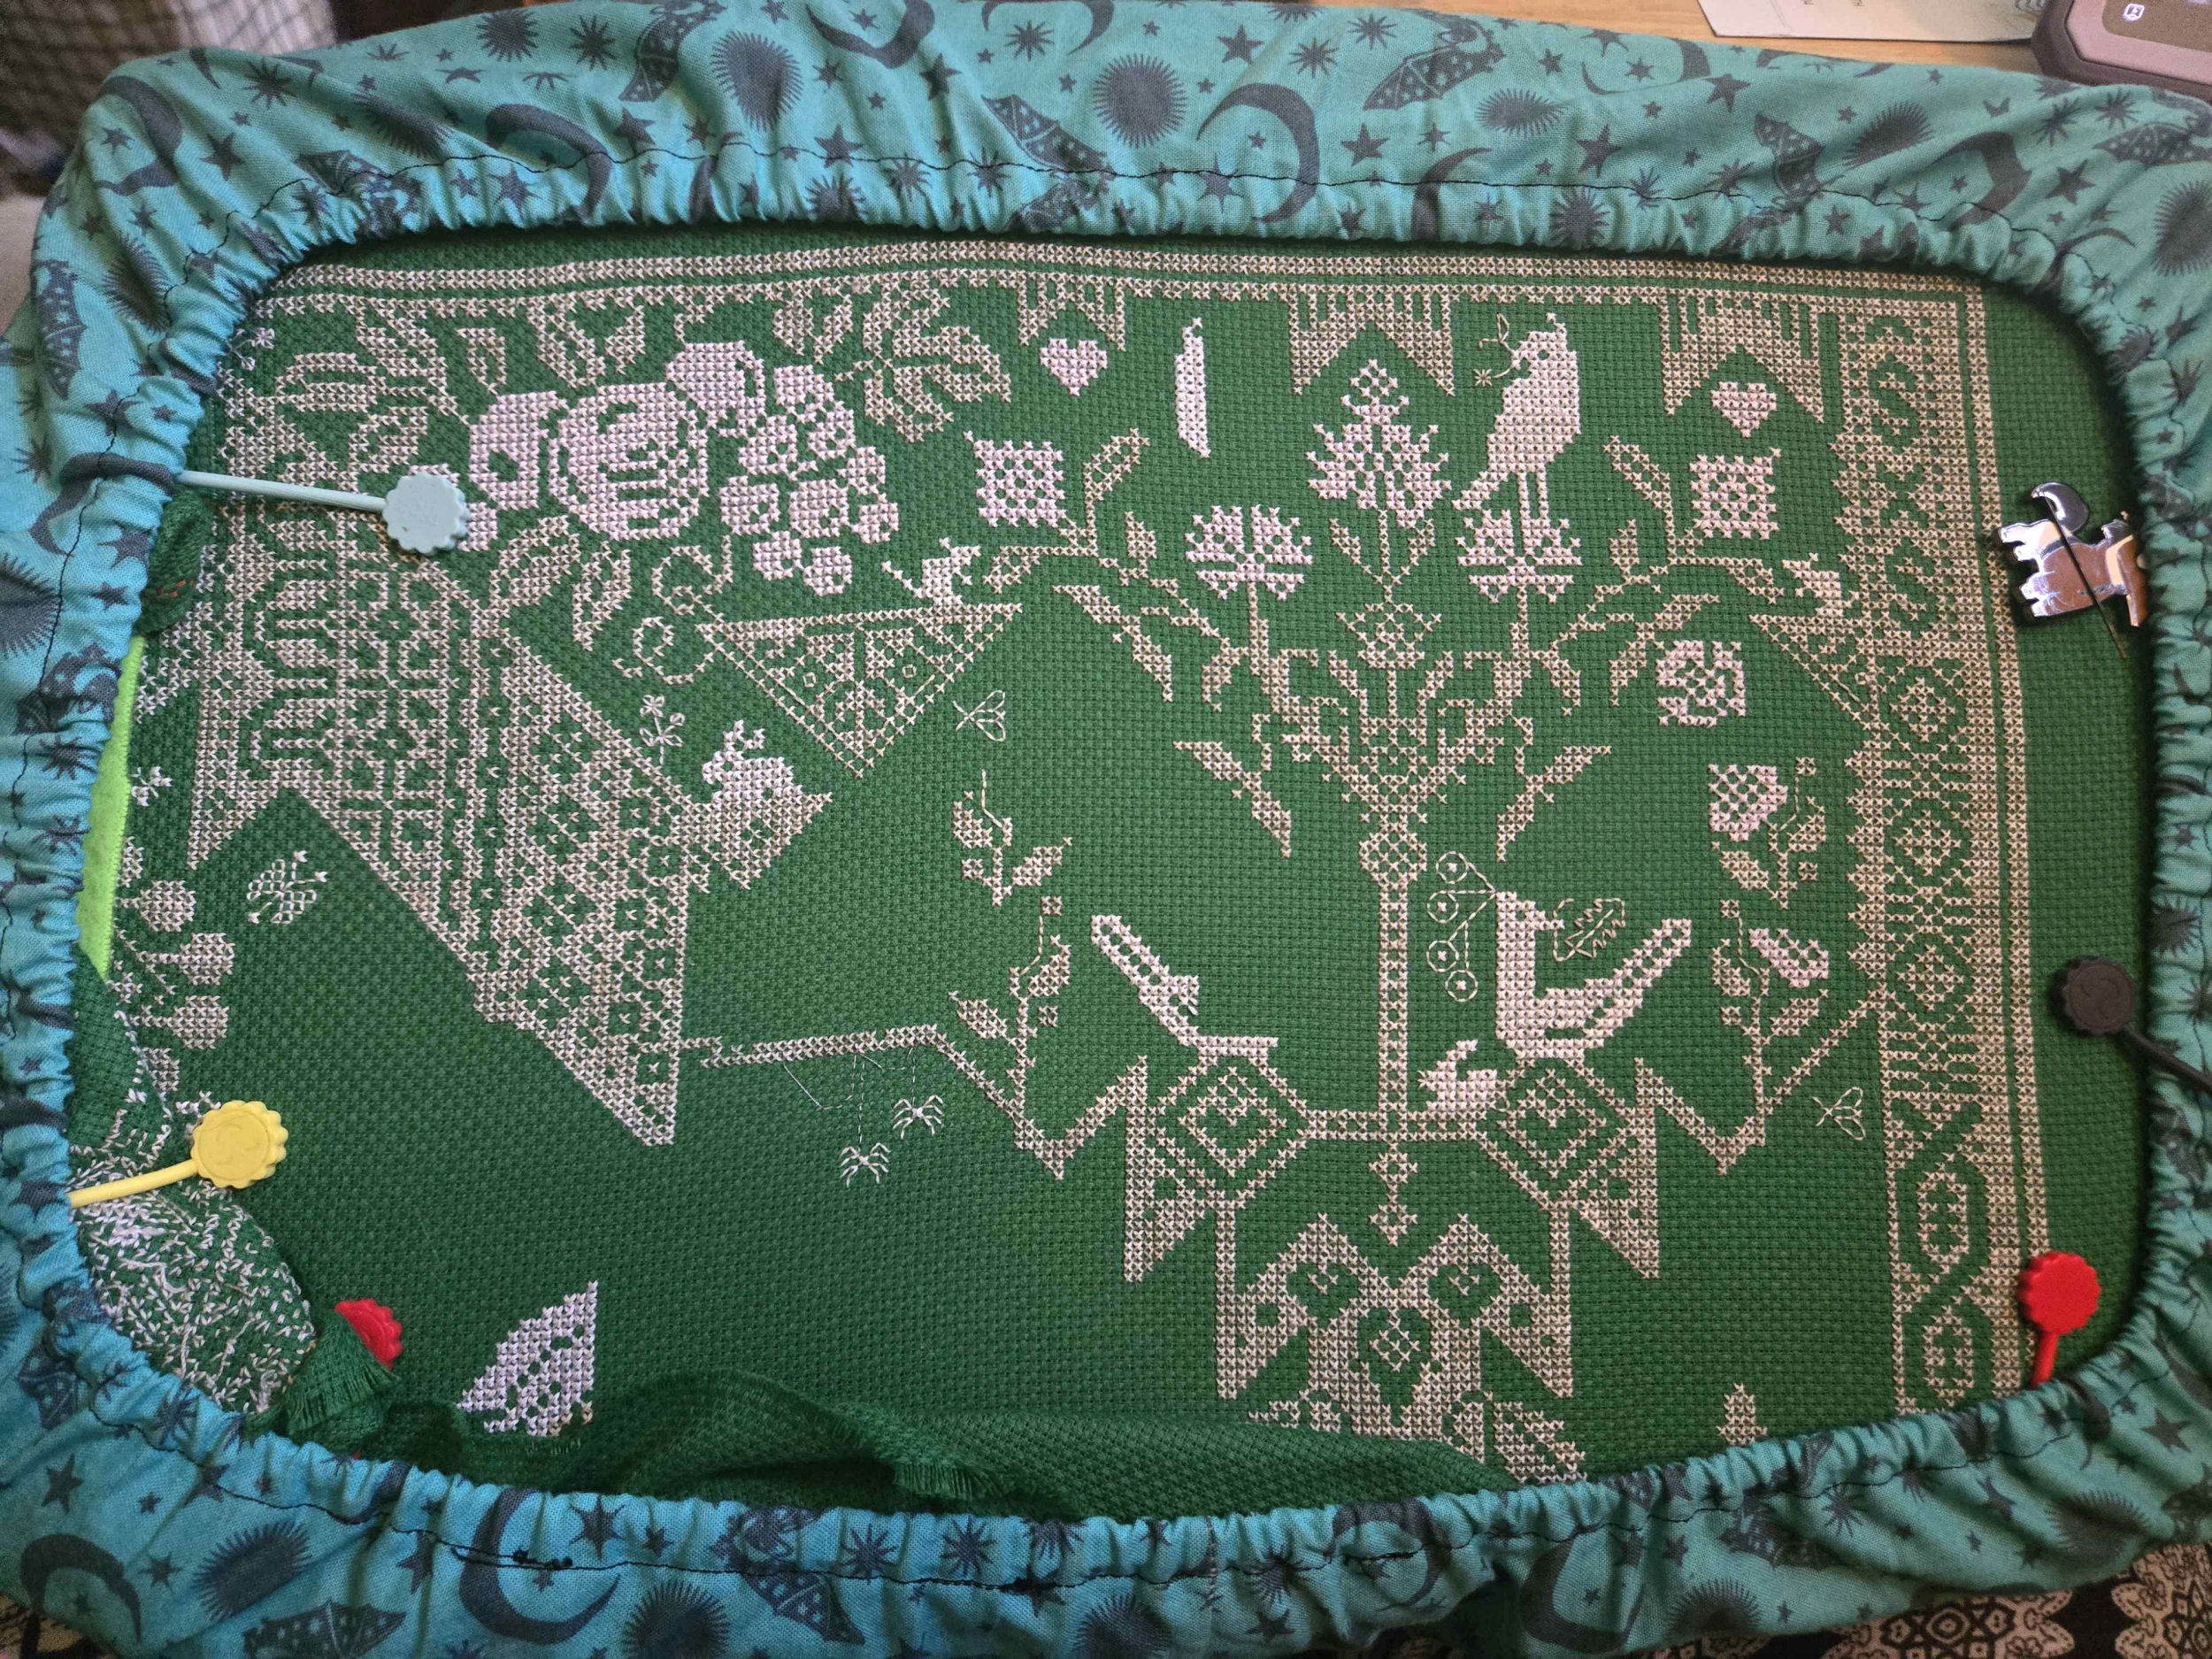
Sometimes there’s a lot of extra fabric and your grime guard may not hold it all in place, this is normal. Keeping it rolled up at least makes it easier to reach around to get to the back of your project.
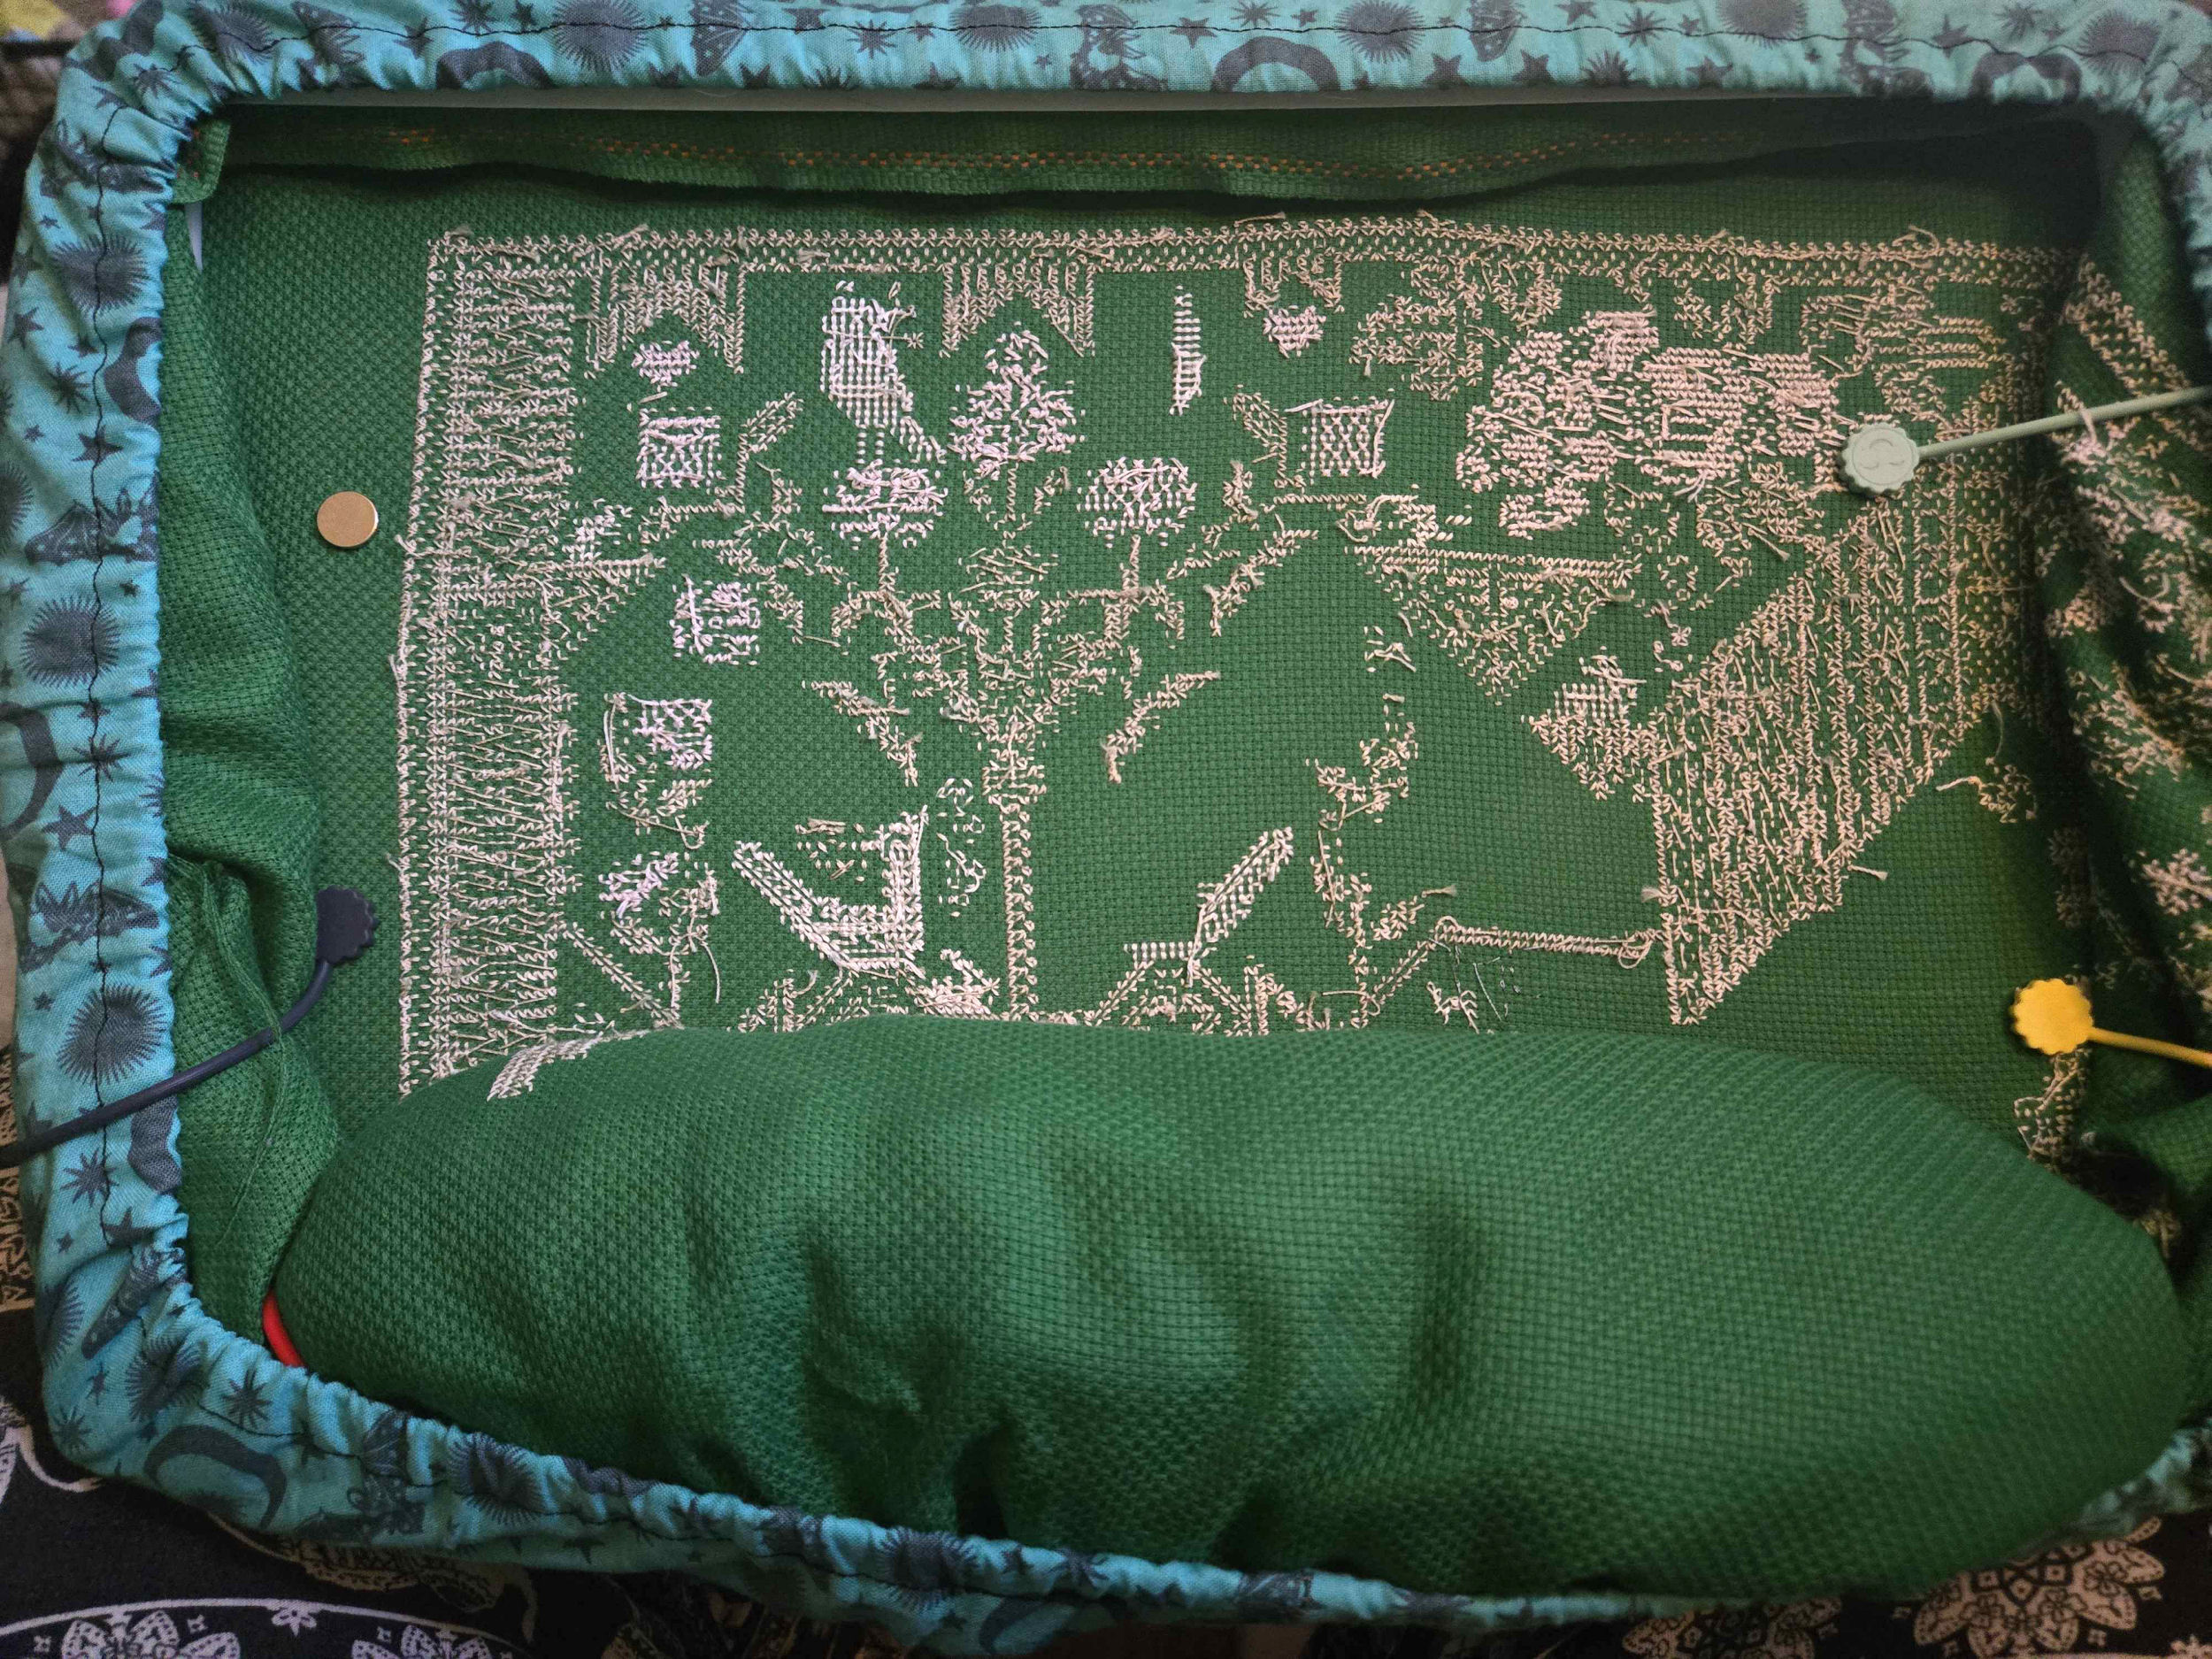
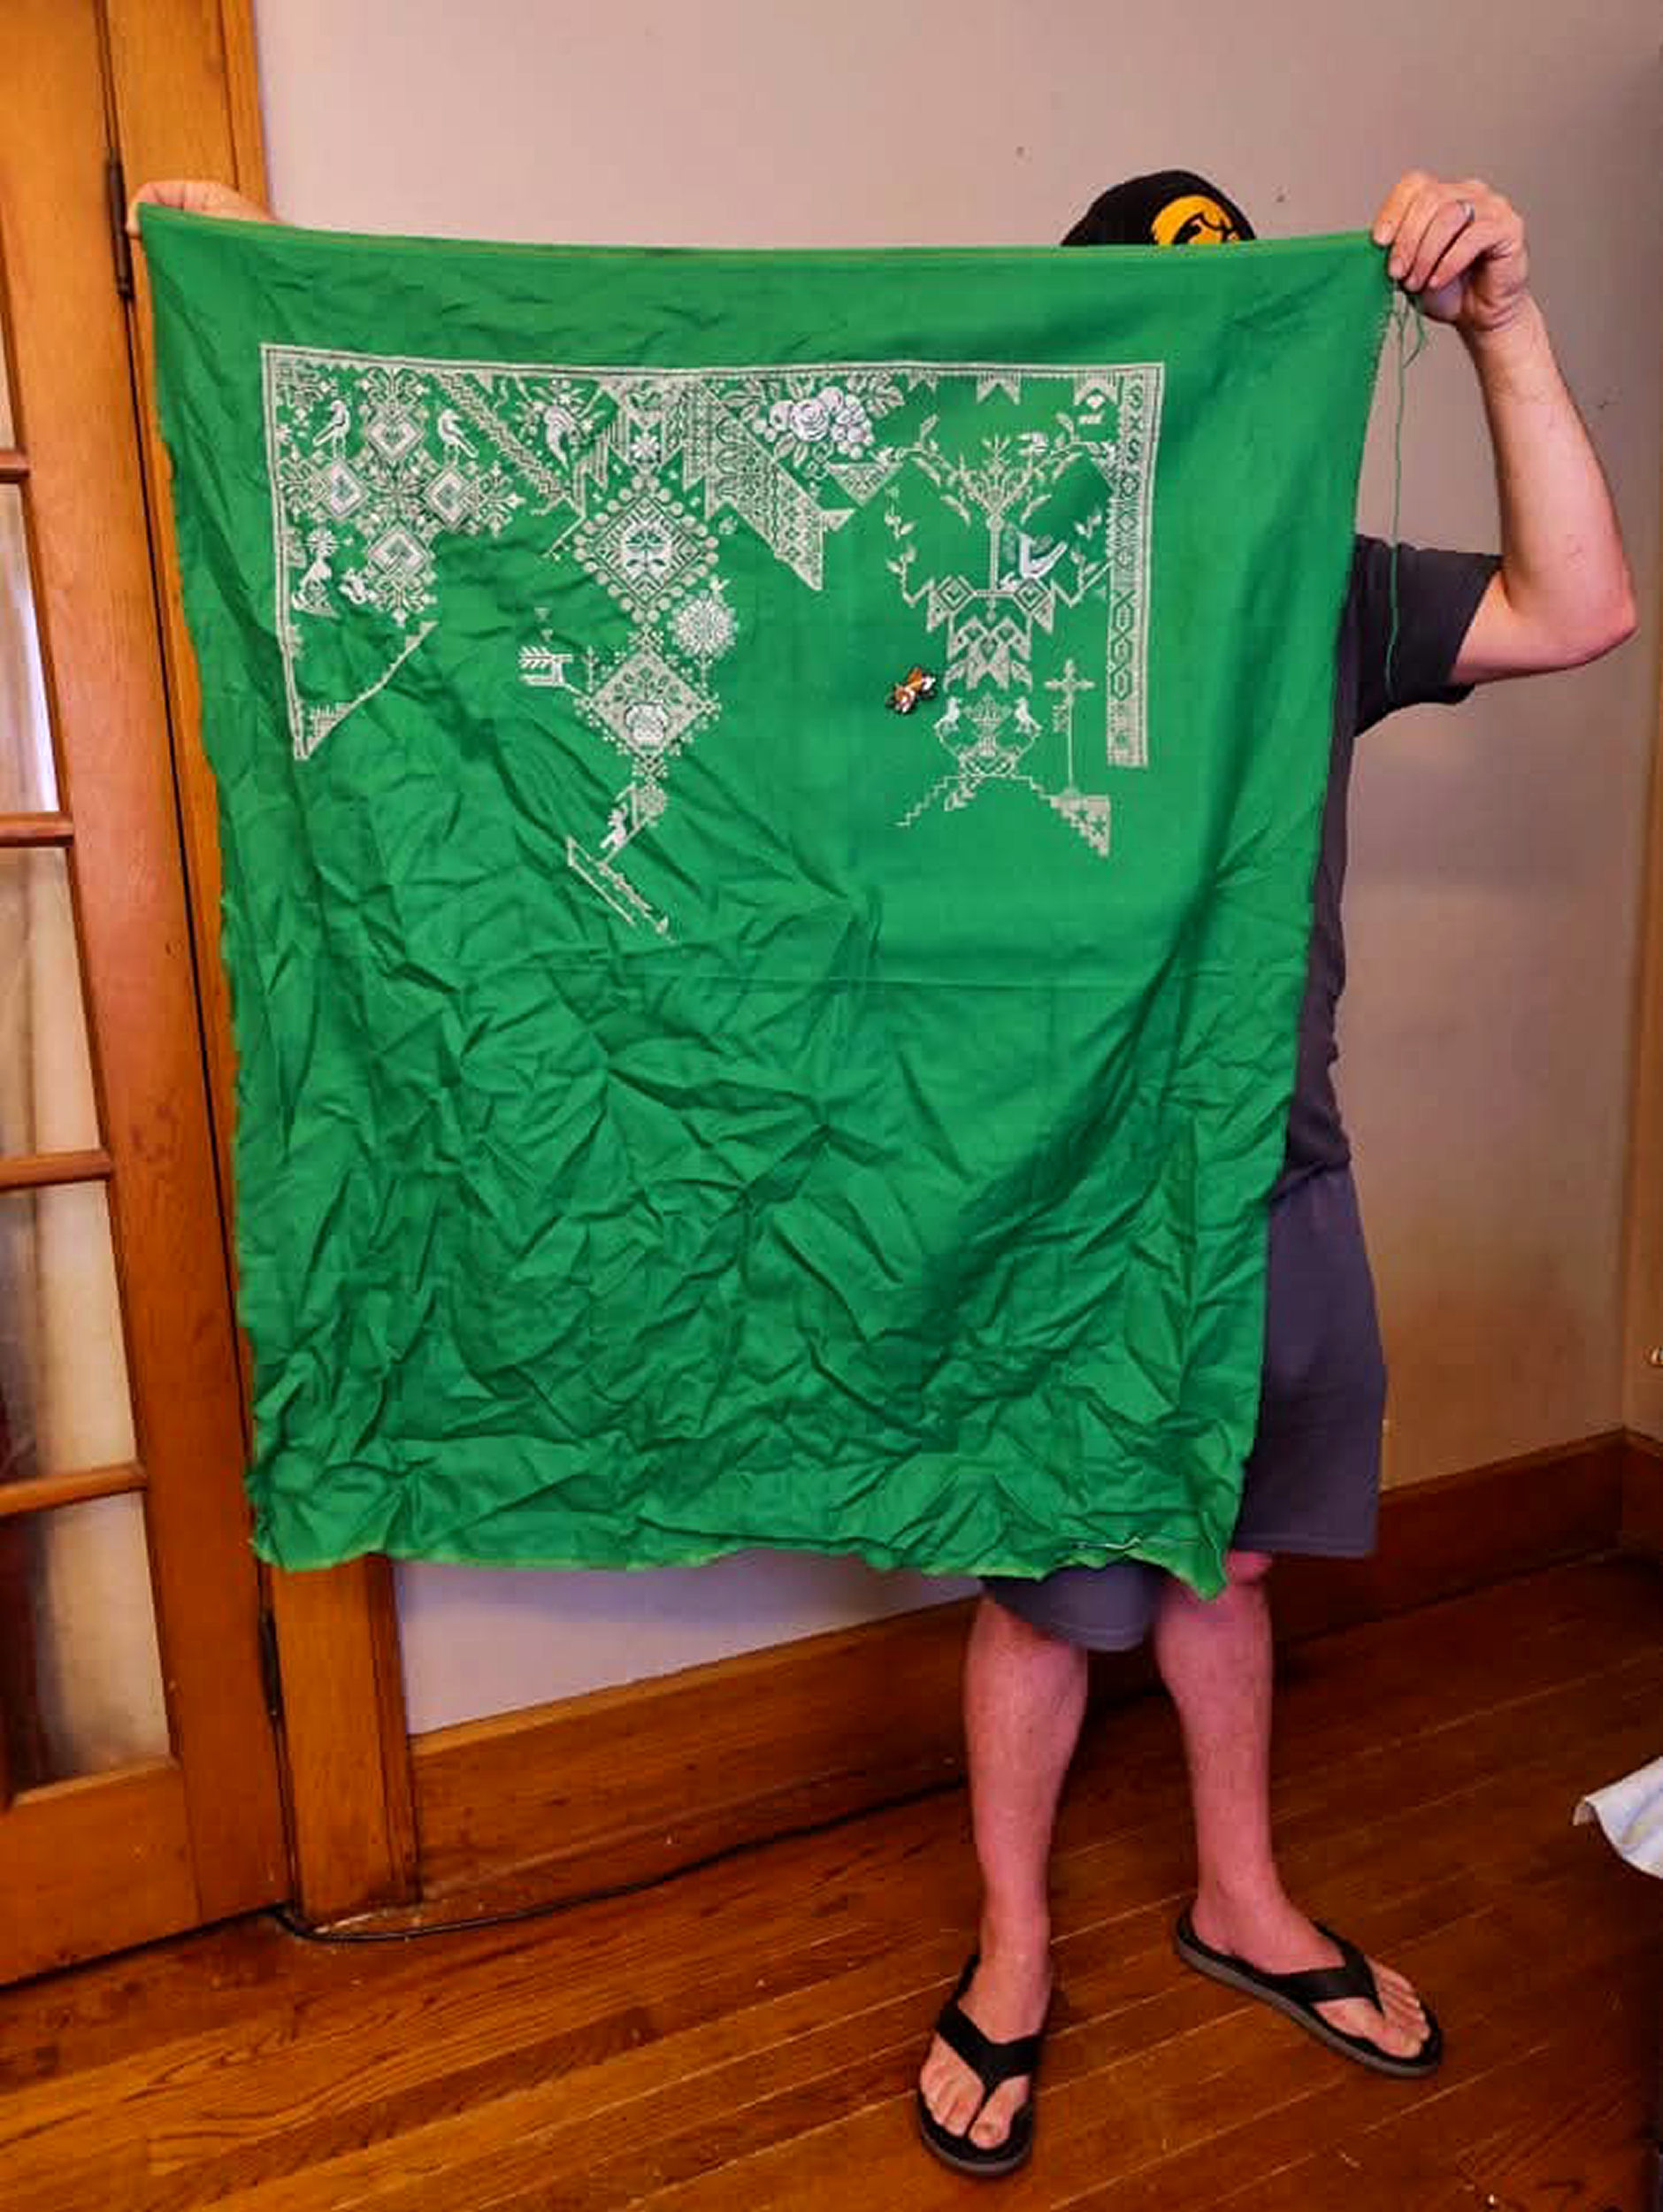
Doesn’t rolling it up or otherwise managing your fabric make it get all wrinkly? Well, yes. That’s to be expected. As you move it around your frame the area you’re stitching on will be straight at least, since it’s being pulled taut by your Qsnap or hoop. But you absolutely will want to at least iron it when you’re done.
Stitching Method
Think you’re ready to start? Just one last decision to make: how are you going to tackle the stitching?
What do I mean by that? Well there’s a few different methods of stitching big projects, but it’s not really unlike stitching a normal project. Like everything else this is all a matter of personal preference, and you won’t really know until you try. I’m not going to go too deep into these methods, as there are many resources online about these, but I just want to make sure you’re aware of the different stitching styles.
Parking
If you’ve researched big projects already, you’ve probably come across this method. There’s several variations to this and it’s hard to explain without really showing you each one, but the basic idea is that you stitch all of a section at a time, and just leave your thread dangling wherever the first stitch in your next section. This method is nice in that the image starts developing as you go and you’re only moving your frame once an area is completely done.
What NOT to do
First, what NOT to do. In the example below, I was stitching one 10-stitch tall row at a time. I’d pick a color, stitch all of that color in the row, and then leave the thread dangling at the next stitch of that color in the following row. I’d work one row left to right, then the next right to left.
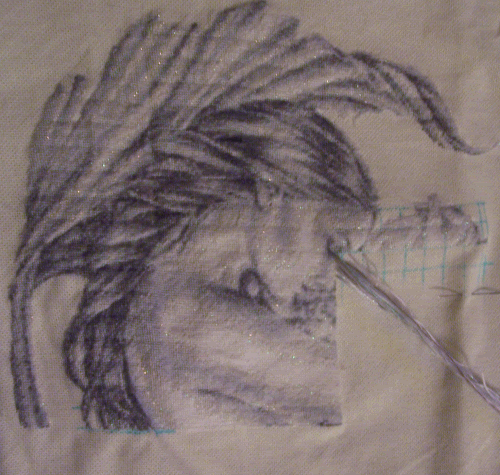
I do not recommend working 10×10 rows like I did, as you’ll see it leaves grooves in the fabric showing. I even tried washing, parking, and ironing it to see if the lines would come out. The washable pen came out cleanly, even after over twenty years. The lines however did not. So. Learn from my mistakes.
So how DO you park?
I recommend searching for parking methods on YouTube, as it’s a lot easier to demonstrate these methods than to put it in writing. A video I recommend is this one by Atom Heart Cross Stitch:
In my second attempt at parking, I started being a little more random in my stitching. Following clumps of a color to their completion and just parking the thread after that clump ends. This keeps those grooves from forming and looks a lot more natural. You should also go across pages once you get close to an edge, otherwise those same lines will come back and haunt you! It can be tricky handling two pages of pattern at once, but thankfully it should only be for a little while.
Your needleminder can also be used to wrangle parked threads! Some folks even keep multiple needleminders or use a spool minder for keep their extra threads tidy.
Here’s a parking example from Jaedia who’s working on Kitsune Law from Heaven and Earth Designs.
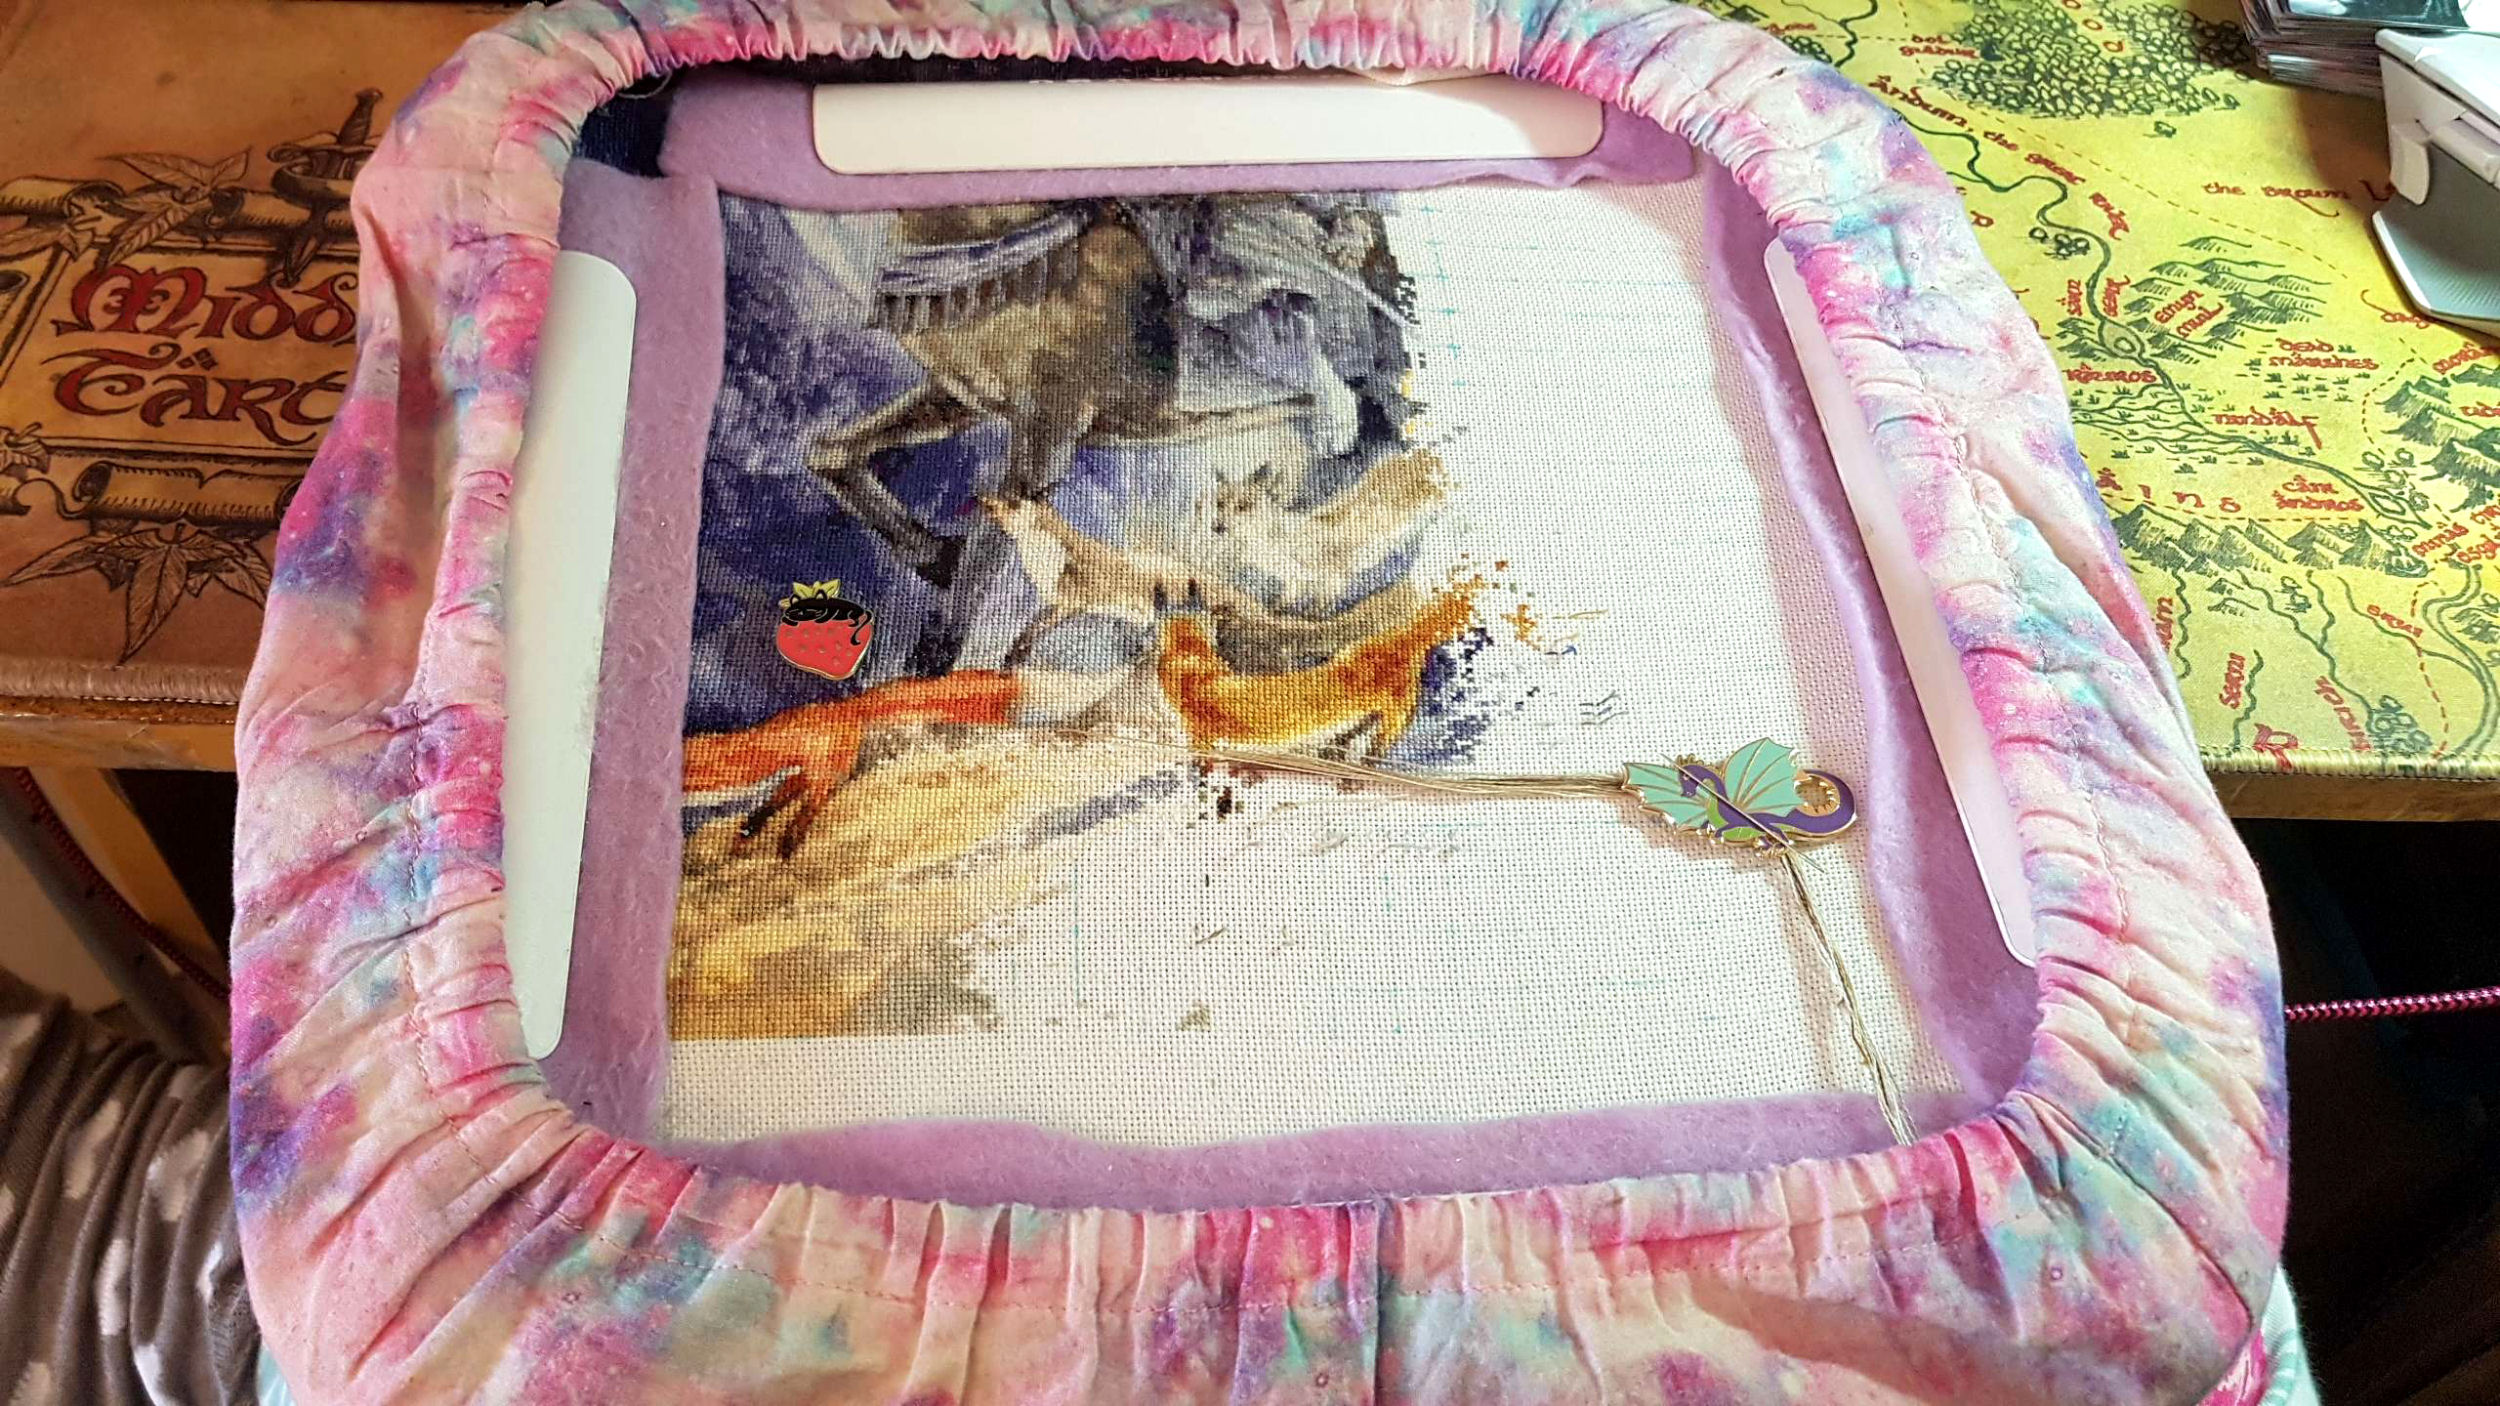
If you look around online you’ll find lots of parking methods. Some stitch in a diagonal, some do some sort of zig-zag pattern along the edges of a page, etc. Some even leave the color threaded and just have a collection of needles tucked into the fabric nearby for when they’re next needed!
Cross Country
This second method of stitching is something you may already do in smaller projects. Quite simply, it means doing ALL the stitches of a single color before moving on to the next. Most people who use this method start with whichever color has the most stitches, as that will form the foundation of your project and all the others can be counted off of that one. This is typically a dark shadow color. However you may also choose to start with the smallest color and start eliminating colors early to keep up motivation. That’s best done on gridded fabric as the less of a color is needed the larger the gaps become between sections.
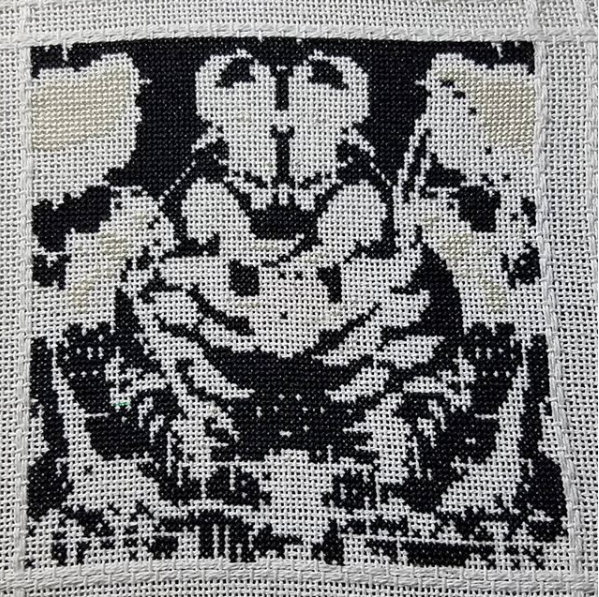
Above, you can see where I started my Secret of Evermore quilt square by stitching all of the black first. (and then the white, before I took this photo) This made for a stark outline and made it easier for me to fill in the rest of the colors as I could always reference a nearby black stitch without having to count too far.
Another good example of this is hapaddict on Instagram, who does some HUGE projects, and generally stitches one color at a time. She tents to save the largest colors for last, which really makes the design come together.
Chaos
Okay, that’s not technically the name of a method. But it’s what I do. There might be a name for it, I don’t know. But basically I start in the upper left corner, then I look for the largest chunk of color in that section. I thread my needle with that color and then stitch until either that thread ends, or the next stitch is 5+ stitches away.
Then I pick another color. It could be back up near the upper left, where I left off, or somewhere along the way. But simply whatever color draws my fancy and is adjacent to something I’ve already stitched.
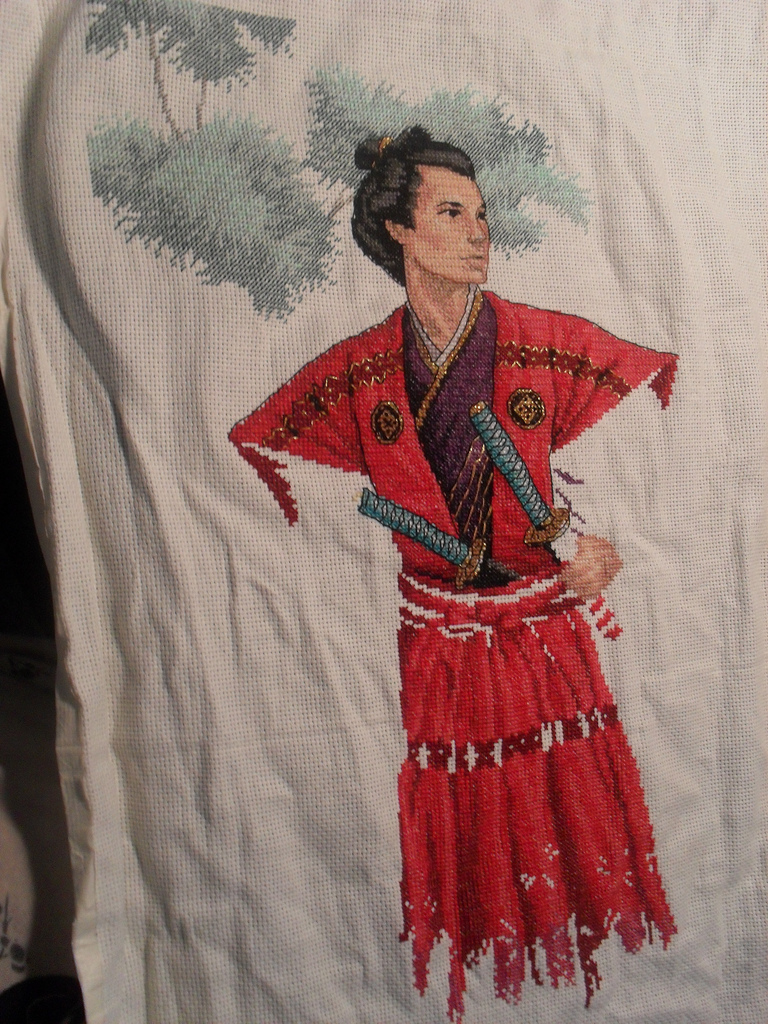
I try not to do 2 lengths of the same color if I can help it, but if there’s a LOT of one color in an area I might alternate 2-3 lengths of that color, then 1 of another nearby. In the end I’ve found this method to be the most enjoyable for me, as it keeps me from getting too bored with a project, and easier to break up the monotony of one large color. While still always having a reference point nearby from a color I’ve already stitched.
Keeping Motivation
One more thing I want to talk about for huge projects. Motivation. Arguably the hardest part of a large project is not the stitching itself, but the time investment.
It happens with smaller projects too, of course. But it’s especially noticeable in larger projects
By their very nature, progress seems slower. You’re actually going at your usual rate, but compared to the overall scope of the project, it seems smaller. It’s important to do things to help keep your motivation up and remind you why you started this endeavor to begin with.
Cross Stitch Challenges
Okay, a large project can feel like a challenge on its own. But maybe taking on an official Challenge will help motivate you to get that piece done! There’s a number of Cross Stitch Challenge options out there, from just setting a stitch goal per day/week/month, to letting a wheel or some dice determine what project you’re working on that day.
This can be a great way to keep things fresh while also making consistent progress on your goals.
Tracking Progress
Whether you use a program like Pattern Keeper or just a small notebook where you jot down what days you worked on this project, it can be very motivating to see “number go up”. Whether that number is hours spent, stitches stitched, colors finished, pages tackled, etc.
As you get over the halfway mark it can be equally exciting to see the number of stitches that still need doing go down.
You know yourself better than anyone though, so have a think of what you can track that will motivate you. But also what you should NOT track if it’s going to make the project feel too overwhelming. Figure out what will work best for your brain!
Small Victories
Since you won’t get that rush of excitement that comes with finishing a project for a while, it’s recommended to set smaller goals along the way. Whether it be a page finish, completing a color, or some other arbitrary goal, those little victories can help keep morale up and remind you that you /are/ making progress.
What those milestones will be really depend on what the pattern is, so I can’t really advise here. But try not to tie any of these small goals to a timeline if you can help it. Life happens, and you will absolutely fail to meet some of those goals. Set yourself up for success instead!
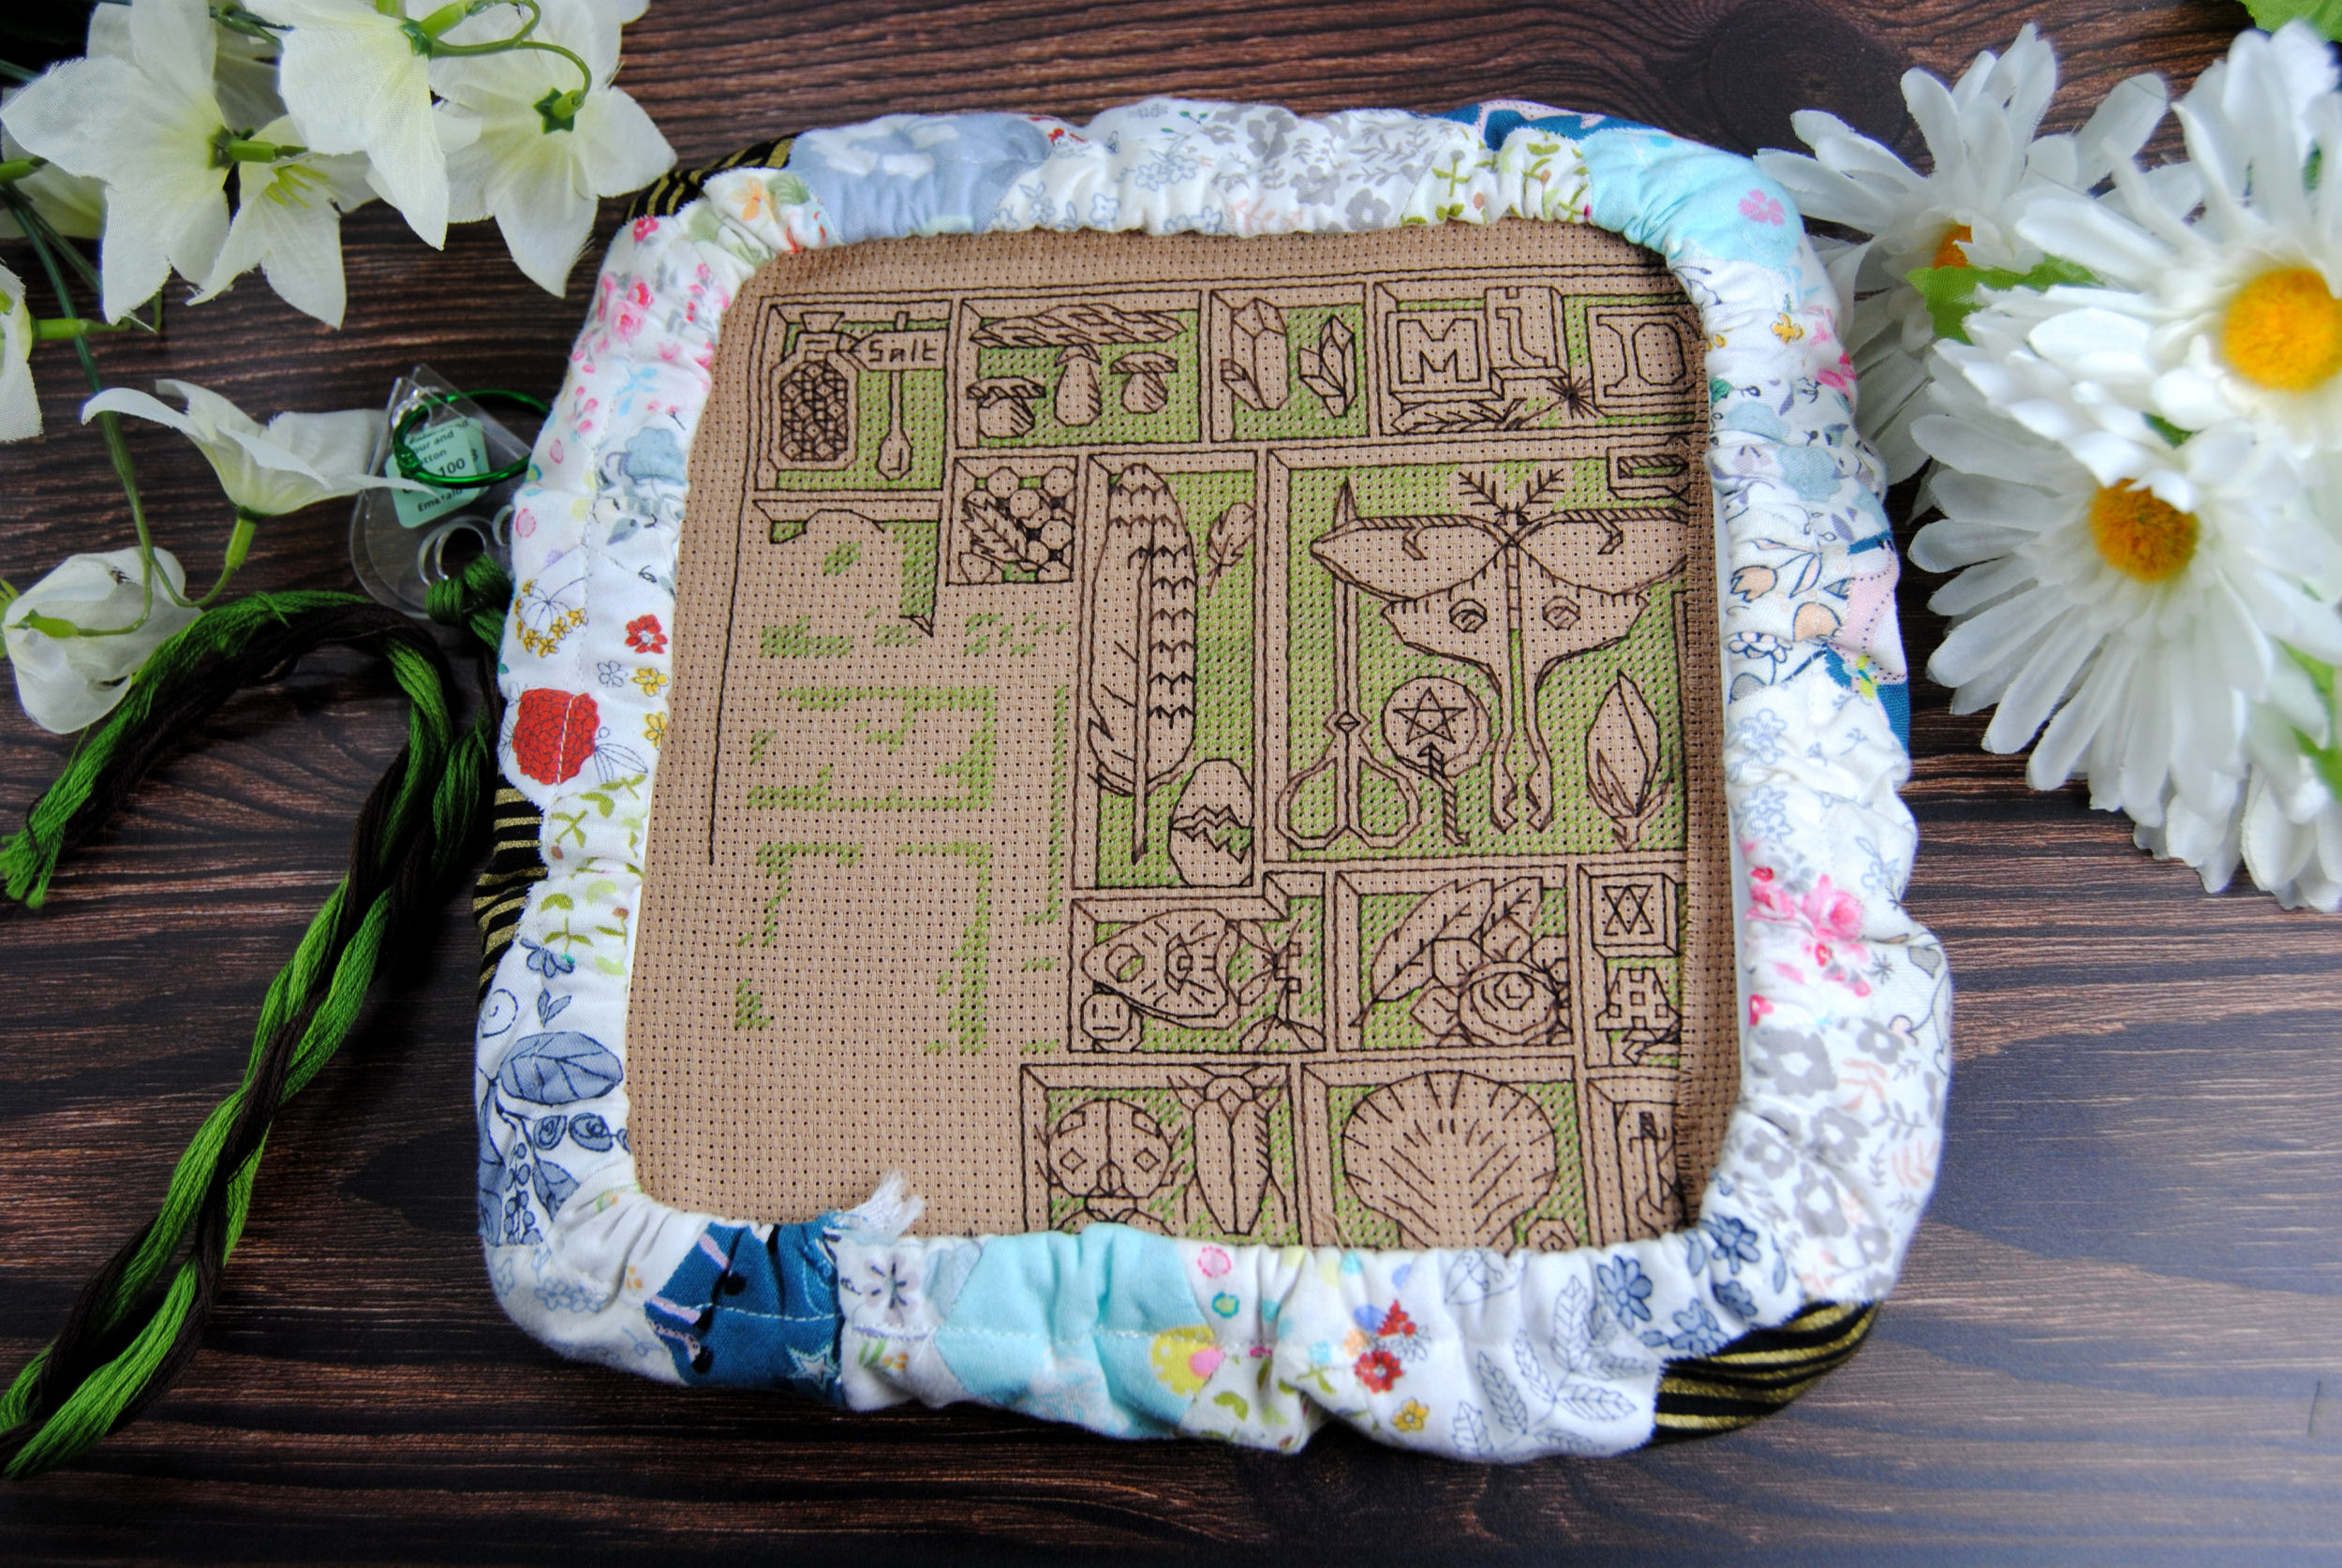
Midnight Whispers by Urban Stitches is my current personal project, and I simply celebrate every time I finish one of those little cube sections. Some are larger than others, but they’re all little finishes to enjoy along the way. Especially since I don’t get to work on it as often as I’d like.
Space Out Boring Bits
Most large projects have their ‘boring’ parts. Especially full coverage stitches, which may have large blocks of background colors. I often recommend dividing those sections up and completing a certain amount of the dull areas and ‘rewarding’ yourself by skipping over to an exciting/fun part of the pattern, such as a particularly colorful section.
For example, EmzOLV had ‘motivational squares’ stitched into the sea of 797 in this Yoshi’s Island pattern she did. She’d work on other parts of the pattern and every so often would stitch just a few squares.
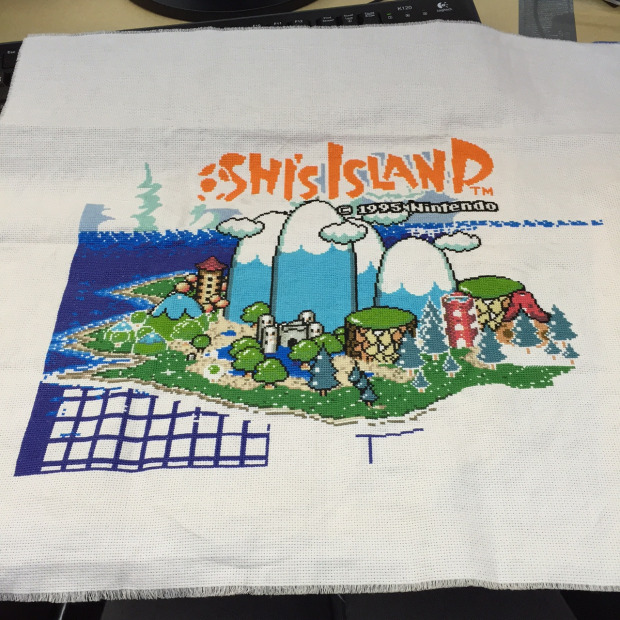
If you’ve gridded your fabric, this should be really easy to do. You can stitch square outlines like this. But that can also risk creating those unintended shadow lines I discussed in the parking section, so be careful. Maybe x number of rows or x number of thread lengths would be a better idea?
Share Your Progress
In this day and age we have all sorts of social media you can share your WIP photos on. It can be incredibly motivating to see those likes on your photos and comments congratulating you for how much progress you’ve made since the last one. It may also benefit you to follow others working on large projects as well. Seeing the strides they’re taking and how other’s projects are developing can also inspire you to work on your own.
Online communities like Discord, Flosstube or Facebook groups can be great for getting to know those fellow stitchers and keeping each other accountable.
Other projects
Unless you’ve some absolutely amazing focus, you’re likely going to want to take some time out for other projects. I find it helpful to interrupt large projects with a few small trinkets, or a medium sized project just to break up the monotony. Those finishes will boost morale and often get you excited to work on your large project again.
Other folks start multiple huge projects and just have a ‘rotation’ where they’ll work on 1 for a week/month/whatever, then move on to the next. This is a great strategy as well to keep things fresh if you’re not a fan of smaller stitches.
Take Breaks
Don’t be afraid to take breaks from cross stitch entirely if you need it. It’s better to take a week off when you’re starting to feel the project is getting too tedious, than to push yourself into complete burnout and end up not stitching for months/years at a time.
This has definitely happened to me before. I took nearly a decade off after ragequitting that black and white HAED parking debacle I showed you earlier. I’ve also taken smaller breaks when finding a miscount on a project that involves a fair amount of frogging. It happens. Your projects will be there for you to pick back up when you’re ready to continue.
Just keep working away at that project when you can. Whether it takes months or years, you’ll one day have a finished project to be proud of.
Finishing Your Piece
Should You Wash Your Project
I once again have a whole article about washing your projects on how to wash your project. But here we’ll talk about about whether or not you need to wash it to begin with. Spoiler alert: I usually don’t.
However, I definitely make an exception for large projects. Mainly because they take me forever, and that means they’ve likely come in contact with all sorts of grime over the years. That could be my hand oils getting all over them while shifting the qsnap from one section to the next. It might be my cat claiming the Qsnap as her new favorite bed. It could be that it was sitting idle too long on my WIP shelf and got a light layer of dust.
The longer you spend on a project also increases the likelihood of accidents like spilled drinks, snacking while stitching, and simply not washing your hands *every* single time you pick up your project. It happens.
If you don’t feel like your project needs a wash, you don’t have to! But before you make that decision think back at everything it’s gone through.
Ironing a Large Project
Whether you wash it or not, it’s gonna need an ironing. Mainly because of all that fabric wrangling you had to do to make it this far. You’re likely to have hoop marks, some measure of Qsnap curl, or at the very least some crinkling around the edges where you unceremoniously crammed the fabric you weren’t currently working on into a bundle to get it out of your way.
Once you’ve washed and let your project dry, place it face down on a towel and iron the back to avoid your stitches getting flattened too much.
If your project in any way involves metallic threads (or glow in the dark!), make sure you put another layer of fabric between your project and the iron! They can and will melt.
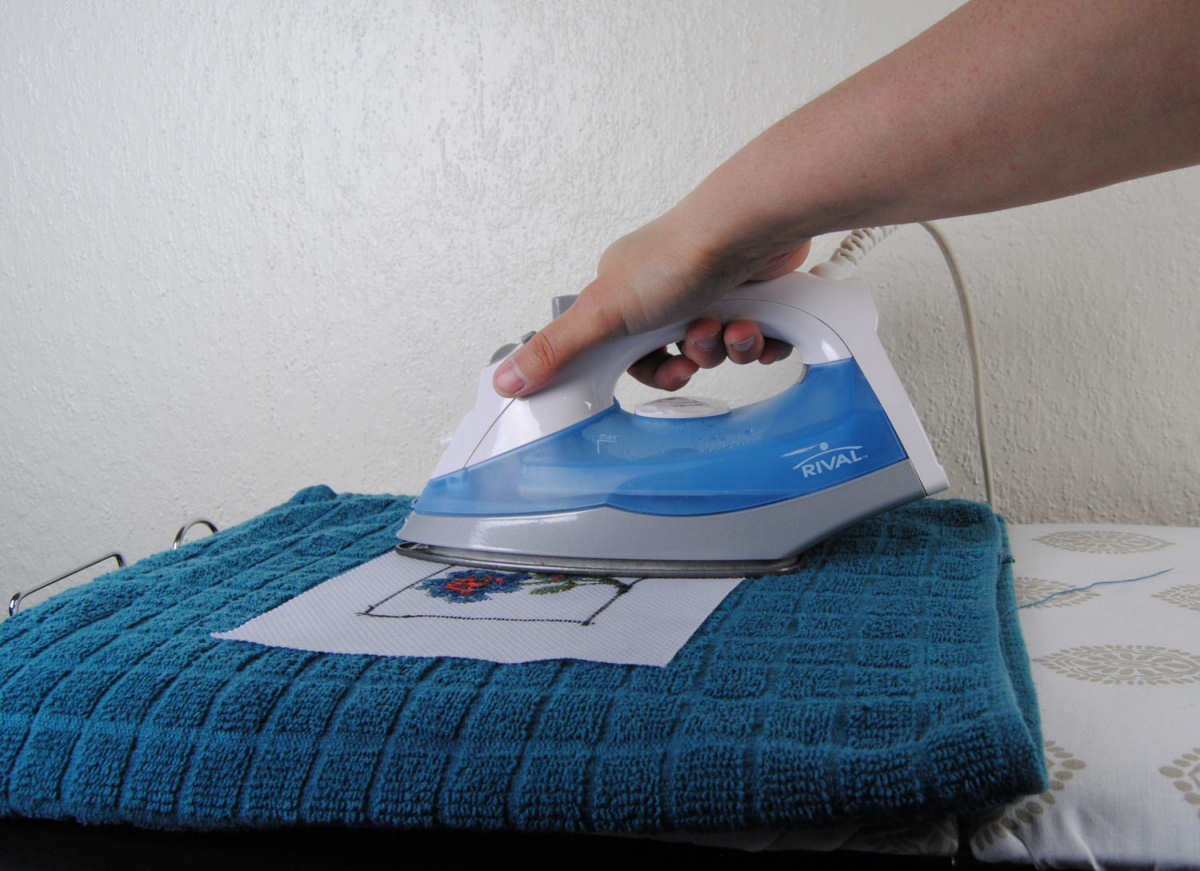
I obviously don’t have a photo of ironing a large piece bc all mine are very much UFOs at the moment. But the process is the same as any projects. Just do it a section at a time and be gentle with it. You’ve put a lot of work into this project!
Framing – DIY or Professional
While I absolutely encourage you to DIY your framing and have a whole article on that topic as well… large projects are often when people splurge on that professional framing. It really does elevate your work and everyone I’ve talked to who has had custom framing for their large pieces has said it’s totally worth it.
For example, this absolutely massive Rick & Morty design both patterned AND stitched by StKildaFan. Yep, that’s a COUCH for scale. 563,305 stitches. This man deserves some applause.
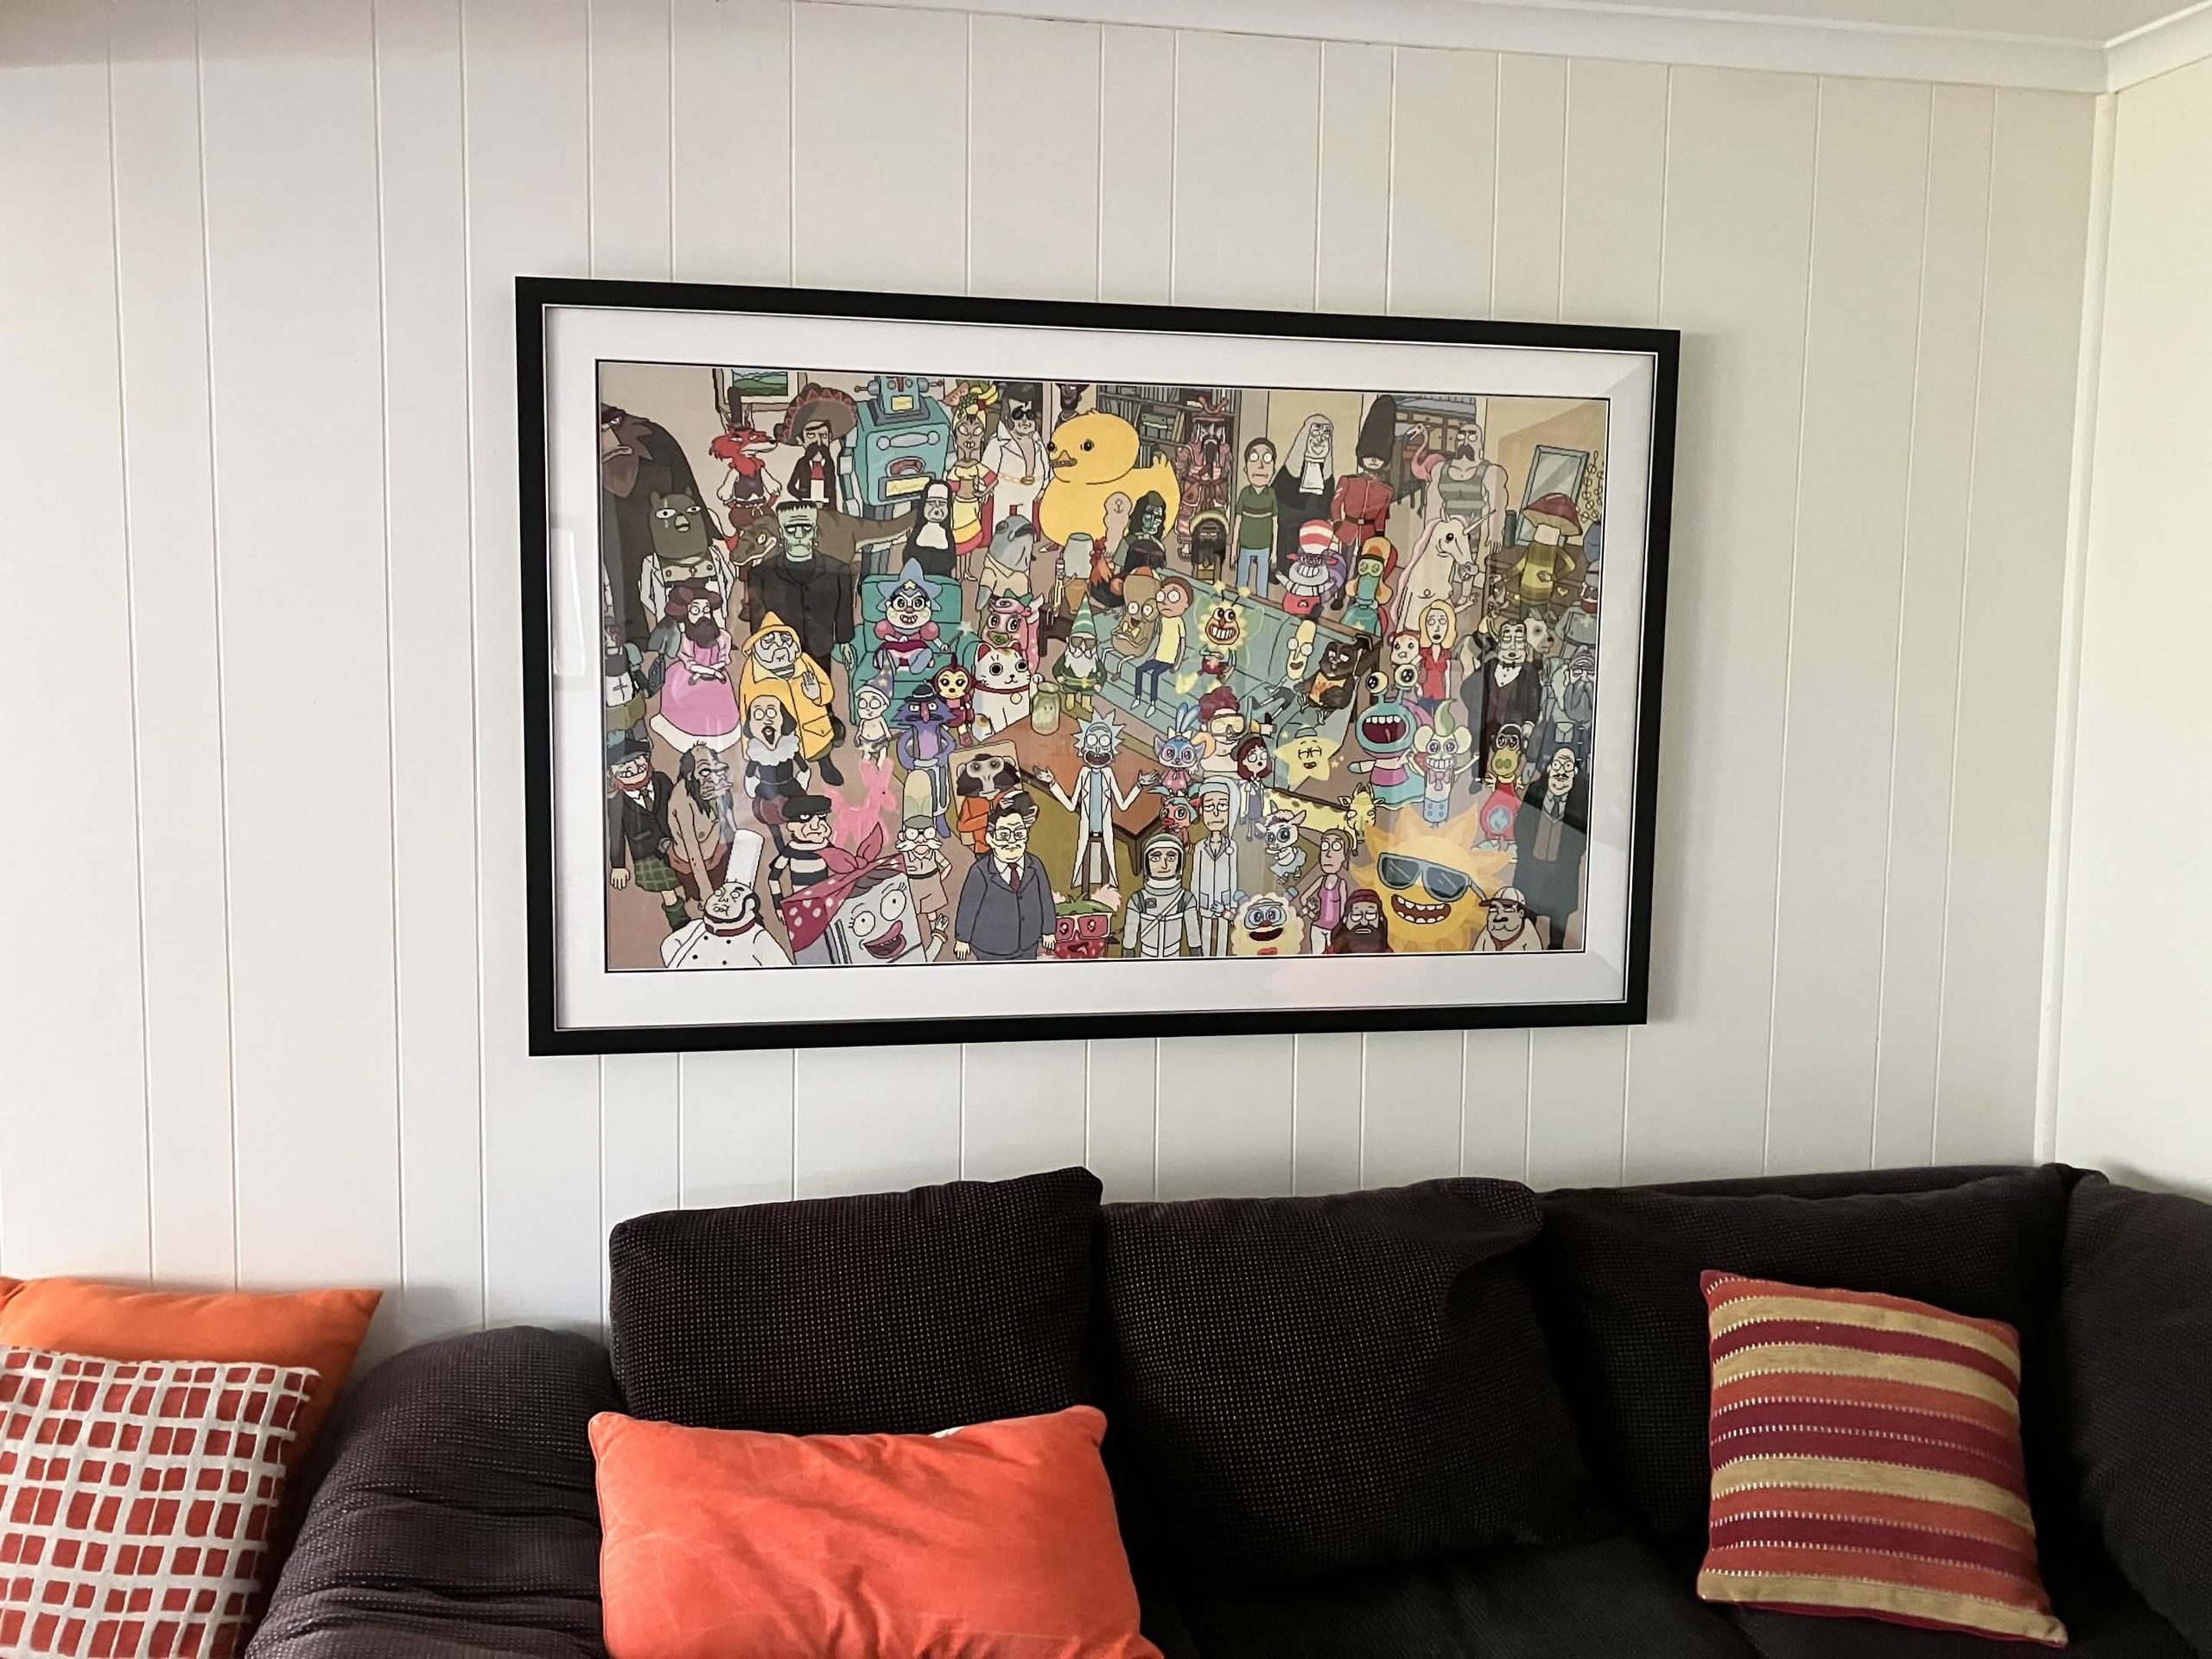
If you can’t afford professional framing, at least take some extra care with framing this project. Don’t just chuck it in a cheap frame and call it good. I know you’re nearly at the finish line and probably just wanna be done at this point, but ironing, blocking, lacing, finding that perfect frame at an antique shop, or sourcing a mat color that will complement your design is well worth it. You’ve spent so much time on it already, why rush it right at the end?
Other Finishing Options
Frames too expensive? How about some other options? I’m a fan personally of stretching large pieces to make a canvas. And yes, I have a tutorial on how to stretch your own canvas. But this does make your stitch the central focus of the piece. No mat board or elaborate frame to distract you from the design. Just the stitch itself!
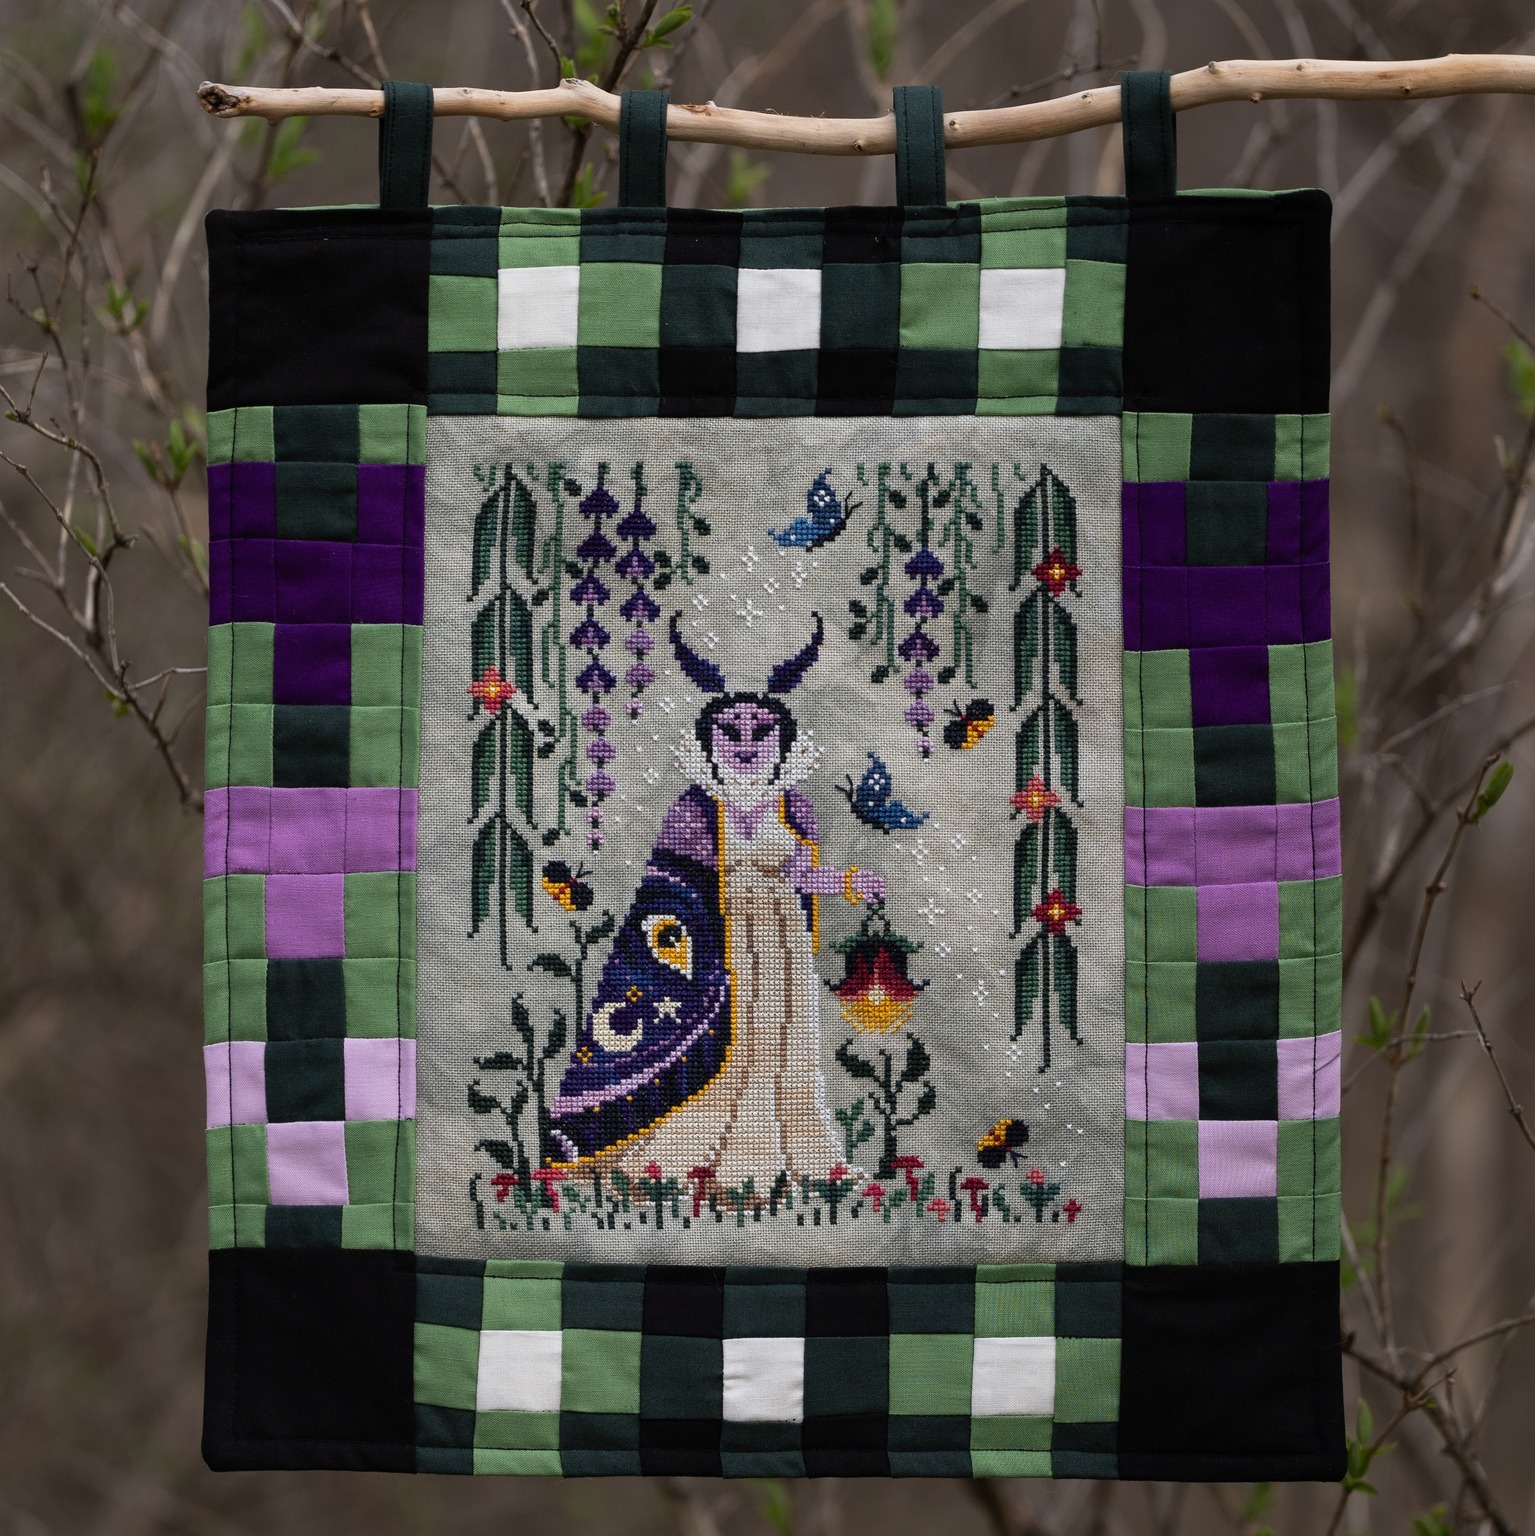
Another option I’ve been seeing more of lately is quilting as a finish! If you’re a quilter or confident sewist, perhaps finish you piece as a quilted wall hanging like this Sylph Queen design and finish by SproutingLupine.
Whatever you decide to do with the finished piece, you’re either hooked and already planning your next giant project, or you’re over it and sticking to medium and small pieces from now on. Until you stumble across that perfect pattern you just have to stitch, of course.