Fabric Storage Options – Organizing Your Cross Stitch Stash
I’ve covered fabric storage before, but just the option I use. The thing is, everyone’s storage needs are different. Whether that’s due to the space you have or the amount of stash to keep. Some have more fabric than others. The further you get into the cross stitch hobby, the more fabric you tend to accumulate. At this point as a designer for over 10 years, my stash has definitely gotten out of control. But you definitely don’t need to be a designer to end up with a ton of fabric! So today I’d like to talk about some of your options.
This post may contain affiliate links. If you buy something using one of these links, I earn a small commission. However, there is no extra cost to you. Thanks for understanding! Learn more in my Disclosures & Privacy Policy.
How Does Fabric Accumulate?
If you’re new to the hobby you may be wondering how someone ends up with this much fabric. It’s not cheap, after all. At least not at full retail price.
Some folks inherit their stash from someone else, directly or indirectly. Whether that’s a family member whose eyesight just won’t let them do it anymore, or you find a sweet deal at a huge bundle of materials at an estate sale or craft reuse store. In this rare case you’re likely to end up with a large amount seemingly overnight and not know what to do with it.
The more likely option though is the slow accumulation over time. That fabric you bought for a specific project you never quite got around to. The leftover chunk from a finished project for which you bought a larger piece of fabric than you needed. Those several different blue fabrics you bought online because you weren’t sure which would fit your pattern best without seeing them in person. The fabric subscription you signed up for and kept forgetting to cancel. Those random cuts of fabric you picked up in a sale with no specific project in mind. That random bolt of plain white fabric you picked up thinking you’d get into fabric dyeing and still haven’t touched.
Okay maybe that last one is a bit too specific. But it can’t just be me, right? When fabric accumulates slowly like this you often end up with a mismatch of storage options. Some are bagged, some are just bare. Some are serged along the edges, some just neatly trimmed. And you might even have a pile of scraps. Let’s see if we can come up with a storage solution that will work for your stash and your space.
Protecting Your Fabric From the Elements
So what are we ultimately looking for in a storage system? What are we trying to accomplish? Let’s discuss what you actually want from your storage. And I try and break it down into two categories. Protection and Organization.
First thing you should consider in your storage system is what you’re actually trying to protect your fabric from. This will be different for everyone. And some folks will not bother protecting their stash from things that don’t matter *to them*. There’s no ‘wrong’ way to do this. Just different priorities. And why there’s so many different options for storing your stuff.
For example, someone with kids or pets might prioritize simply keeping their stash out of their reach and contained over whether or not it gets some folding creases in it.
Meanwhile, someone who struggles with the ‘if I can’t see it, it doesn’t exist’ phenomenon may prioritize being able to SEE and easily access all their fabrics over say, protecting them from light damage.
Below are some common concerns you might think about when planning your storage system. It’s up to you which of these concerns matter most to you.
Dust Concerns
Some homes seem to accumulate dust faster than others. This depends on a lot of factors including your climate, how your home was built, how many people/pets live there, how good your air filters are, and whether you open the windows regularly.
And some folks also care about dust more. Some are fine just dusting their stash occasionally or washing their project when it’s done. Others have dust mite allergies and need to be in a constant battle against dust and definitely don’t want to be in close contact with a dusty fabric to stitch on it for hours a day.
If you have dust concerns, your storage method might feature a closed container of some sort. Whether that be bags, boxes, bins, or cabinets.
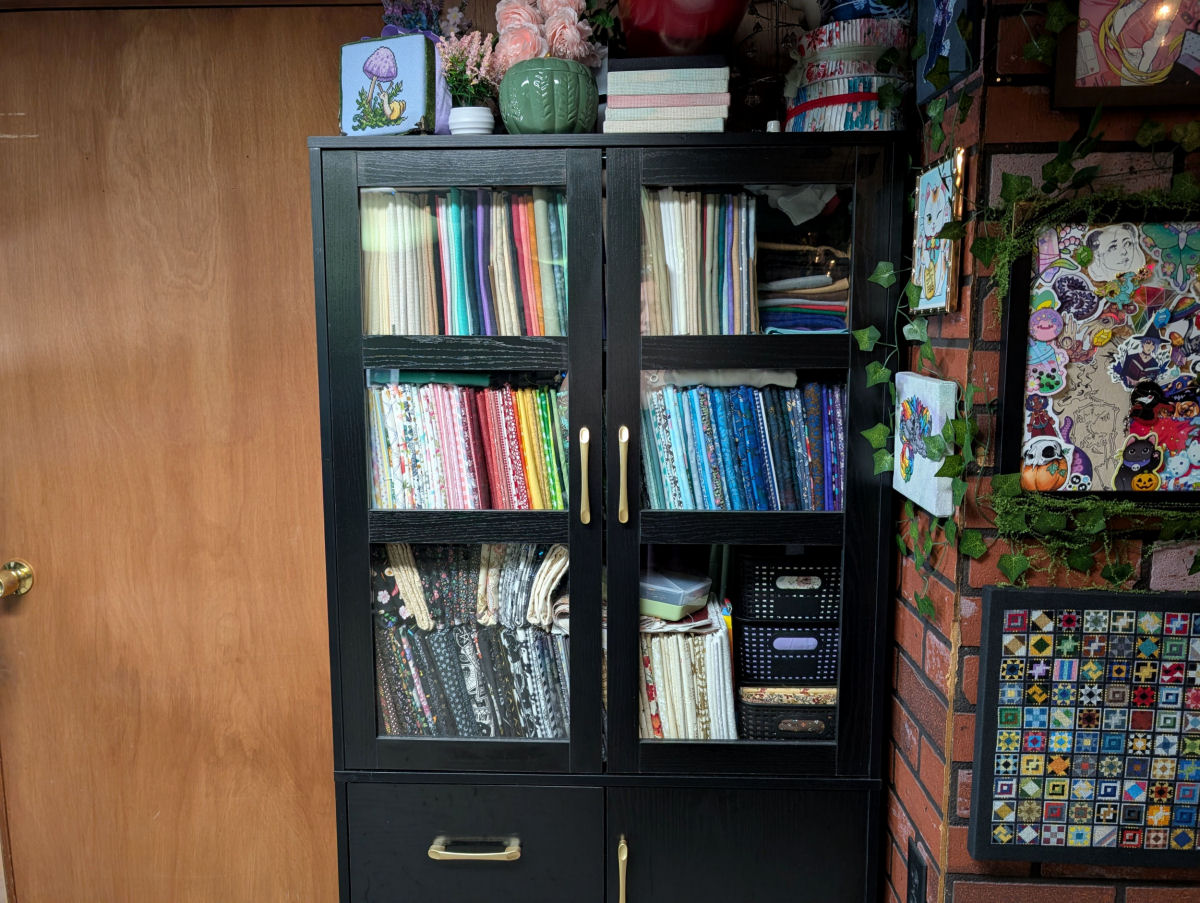
I went the cabinet route personally, though I got a cabinet with glass doors because I need to be able to SEE my stash or it doesn’t exist. This does not however protect from light damage, which is the next consideration I want to discuss.
Light Concerns
Sunlight is a very real concern for fabrics. It causes not only dyes to fade but over time can make the fabric weak and brittle. This damage builds up overtime and can’t be fixed. If your craft room (or simply the room you have your craft supplies in) has a lot of natural light, this is something to consider when figuring out where you want to put your fabrics and threads. Mine thankfully does not. I’m in a basement office and the tiny window I do have is well covered.
But it’s not just sunlight you need to worry about. Artificial light can damage your fabrics as well. Fluorescent lighting (like what I have…) is a higher risk as they produce UV light. But other forms produce UV as well, if in smaller amounts. So while it may take years to cause the same amount of damage as the sun, if you’re prone to holding on for fabrics for a long time this might be a valid concern for you.
If you’re concerned about light damage, your storage option might focus on keeping them in a dark space. Whether that’s hanging in a closet or in a bin under the bed.
Moisture Concerns
If you’ve ever inherited an old stash or done some shopping at a thrift store or antique shop you might’ve run across dry rotted textiles. Fabric that easily tears and is practically falling apart in your hands. This often stems from dry rot. And one of the main issues leading to dry rot is moisture.
If you pre-wash your fabric, live in a particularly humid climate, or like to run a humidifier in your craft room this might be something to think about. Especially if stored in a way that does not have a lot of airflow making it harder for your fabrics to dry out on their own.
If you’re concerned about moisture, make sure that your fabric is stored in a cool, dry, and well-ventilated space. Plastic bags can trap moisture. This is why garment bags for clothing storage often have a clear front so you can see what you put in it, but a breathable non-woven material on the back to keep air flowing.
Acid Concerns
Okay, no one is literally pouring acid on their stash. But what I mean by this is that acidic materials like cardboard and untreated wood can cause discoloration in your fabrics. So throwing your fabrics directly in an old amazon box might cause damage to your fabric over time. This may not be a big concern if you tend to burn through your fabric stash regularly, though.
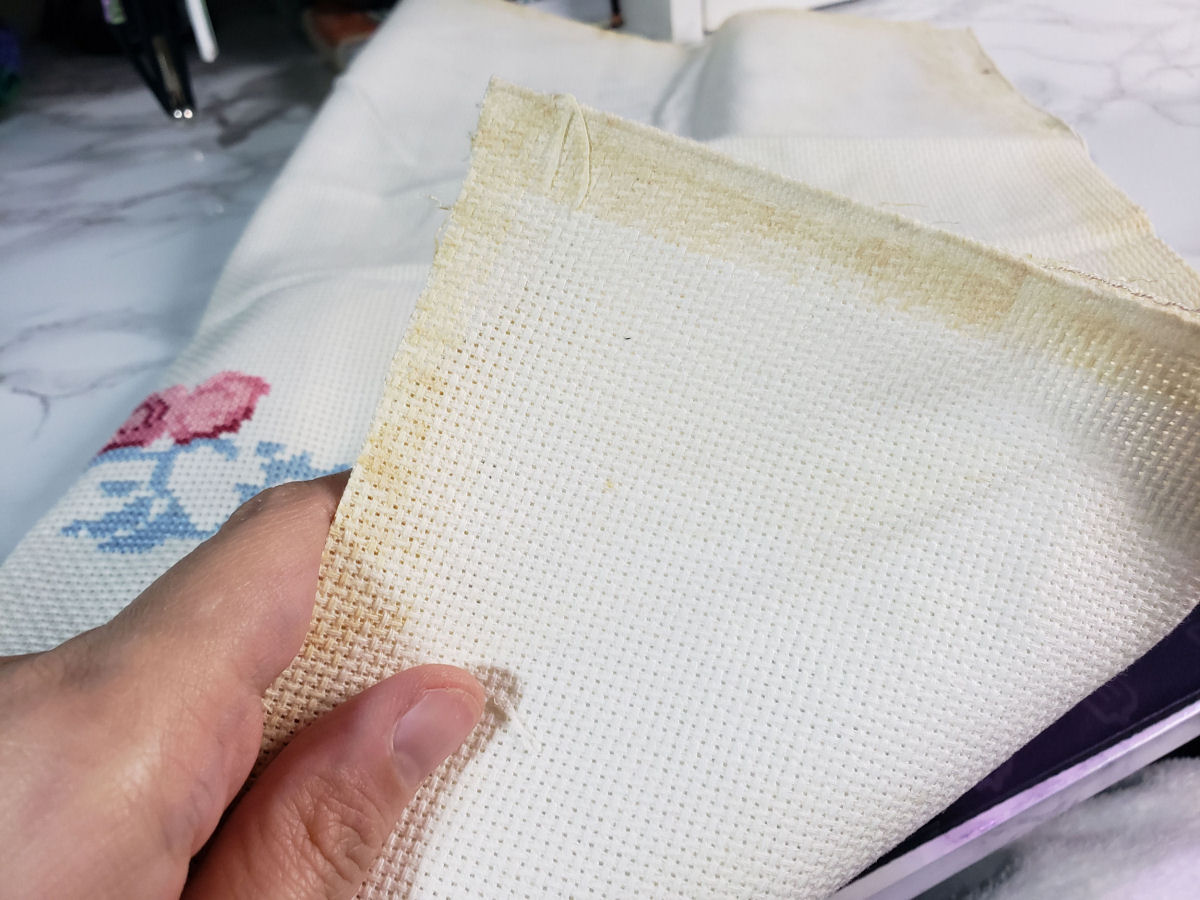
But you never know when you’ll need to take a break from a hobby and your temporary storage might end up sitting there for years. So thinking ahead and using acid-free materials for both storage and finishing can help ease these concerns.
If you’re concerned about acid damage you might wrap your fabrics in acid free tissue paper, or wrap them around acid-free boards. You might remove labels, cards, and stickers that are directly against the fabric. And definitely don’t use masking tape to protect your fabrics from fraying unless you’re prepared to cut that edge of fabric off when you’re done.
Fraying Concerns
Another concern many folks have is fraying. For the most part aida doesn’t have too much of an issue with fraying. But some cross stitch fabrics are definitely fray-prone. If you’re buying fancy hand dyed fabrics, most of them come already treated to prevent fraying, such as having serged edges.
However, if you buy larger cuts and cut off pieces for smaller fabrics, then you might need to look into some fraying options yourself. I’ve got a whole article just on various ways to deal with fraying fabric for you to review. But most of them are things you do to the fabric itself rather than how you store it, so I’ll not be bringing it up much in the rest of this article.
Crease Concerns
Some folks go out of their way to avoid folding their fabric to avoid creasing it. Especially fabrics like aida that come pre-starched and really take to folds well. Hence why hoop rings are so annoying to get out once you’re done stitching. Especially if you can’t wash or steam your fabric after due to non colorfast dyes. Or you simply hate ironing.
Depending on your work flow and what kind of fabrics you use, you may want to store your fabrics in a way to minimize folding. and that’s absolutely valid!
For those concerned about creasing their fabrics, your storage method might involve hanging or rolling your fabrics rather than reducing the amount of space it takes up by folding.
Space Concerns
Some folks simply don’t have a lot of space. Maybe they live in a small apartment and only really have a box under the bed to dedicate to the craft. Even if you have a large home, if you have a lot of different hobbies, you may not want any one hobby taking over a space. For those with kids and pets, there may simply be a small amount of space that is truly safe from their reach.
If you have space concerns your storage system might prioritize condensing to take up as little room as possible over making it easy to flip through or access.
Hoarding Concerns
This last one will sound wild to some of us. But for some, their storage method is intentionally small. Not because they don’t have enough room to put it all. But because they want to prioritize actually USING the fabrics they purchase and want to limit how much they can accumulate.
Definitely not me. But if that’s you, maybe your storage solution has more of a focus on fully kitted projects where each piece of fabric is pre-assigned to a project rather than just fabric for you to browse when you find a new pattern you want to do.
Labeling & Organizing
Something else I’d like to discuss here is what kind of information you should keep for your fabric. A lot of fabric dyers include a little card with this information, but you may not want to keep that if you’re worried about long term conservation. Especially if it’s stapled to the fabric or if you’re not sure the card is acid free. Most modern sellers are pretty good at keeping these storage issues in mind, so you’re probably safe. But if you’ve got concerns, or just want all your labels to be uniform there’s nothing wrong with tracking this information yourself!
Information to Track
But what information should you keep on there? Basically whatever information you’d need to be able to potentially purchase it again. Whether you want to be able to restock when you use it, or you go to use it but it’s not quite big enough for your design and you need a larger cut.
- Brand Name
- Type of Fabric
- Fabric Count
- Color Name
- Size (optional, may change)
Size is difficult to track if you often do smaller projects that you’re chopping off a larger cut. Do you update it every time you take a chunk off? Do you just track how big it was to begin with?
And of course, track anything else that you feel would be important to know for actually using it. For example:
- Whether or not a fabric is color safe. That way you know if it’s safe to was your project afterwards.
- If a fabric is a special edition, one of a kind, or an ‘oops dye’ where you probably won’t be able to purchase more.
- If you have a specific project in mind for that piece of fabric and don’t want to end up accidentally using it for something else.
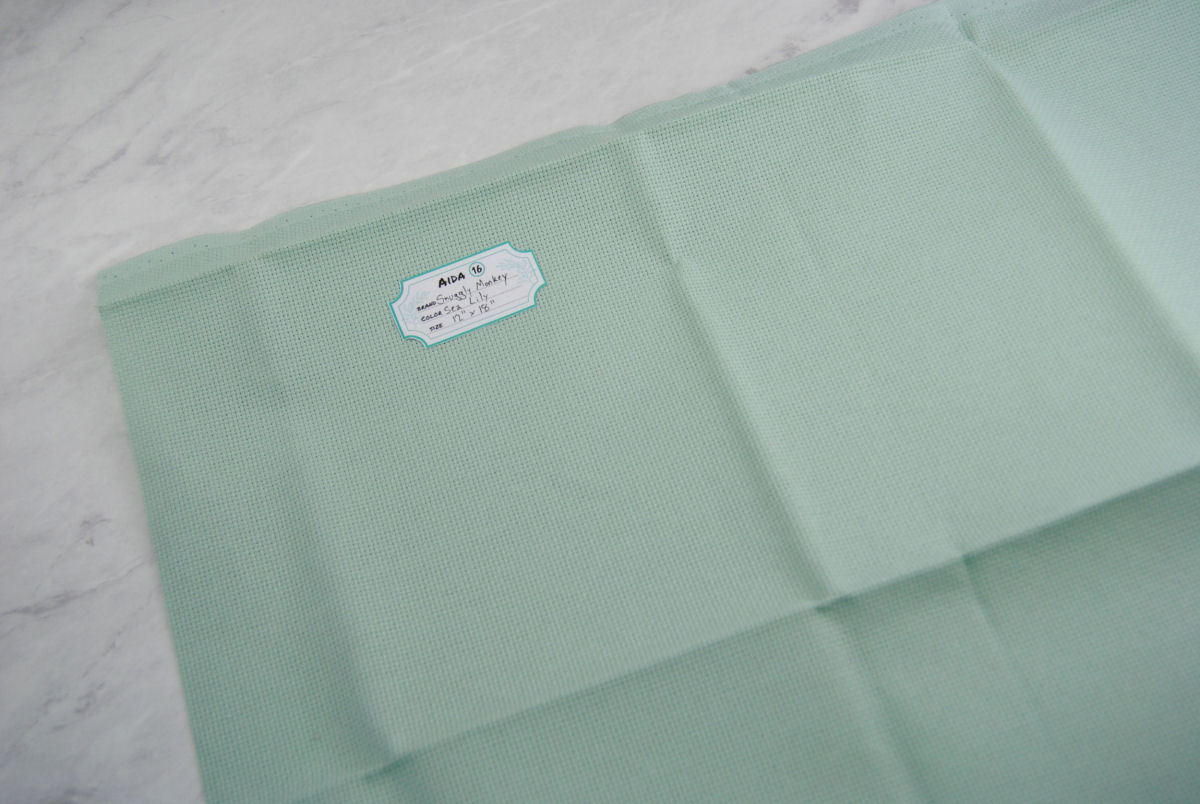
The fabric sticker labels I sell just lists the basic info and are printed on Matte sticker paper which complies with the NSI/NISO Z39.48-1992 for “Permanence of Paper for Publications and Documents in Libraries and Archives”. Which is just a fancy way to say they should be acid free and safe for conservation. But of course you can also apply these labels to a protective bag or to the top of a mini bolt to avoid adhering them directly to fabric if you prefer.
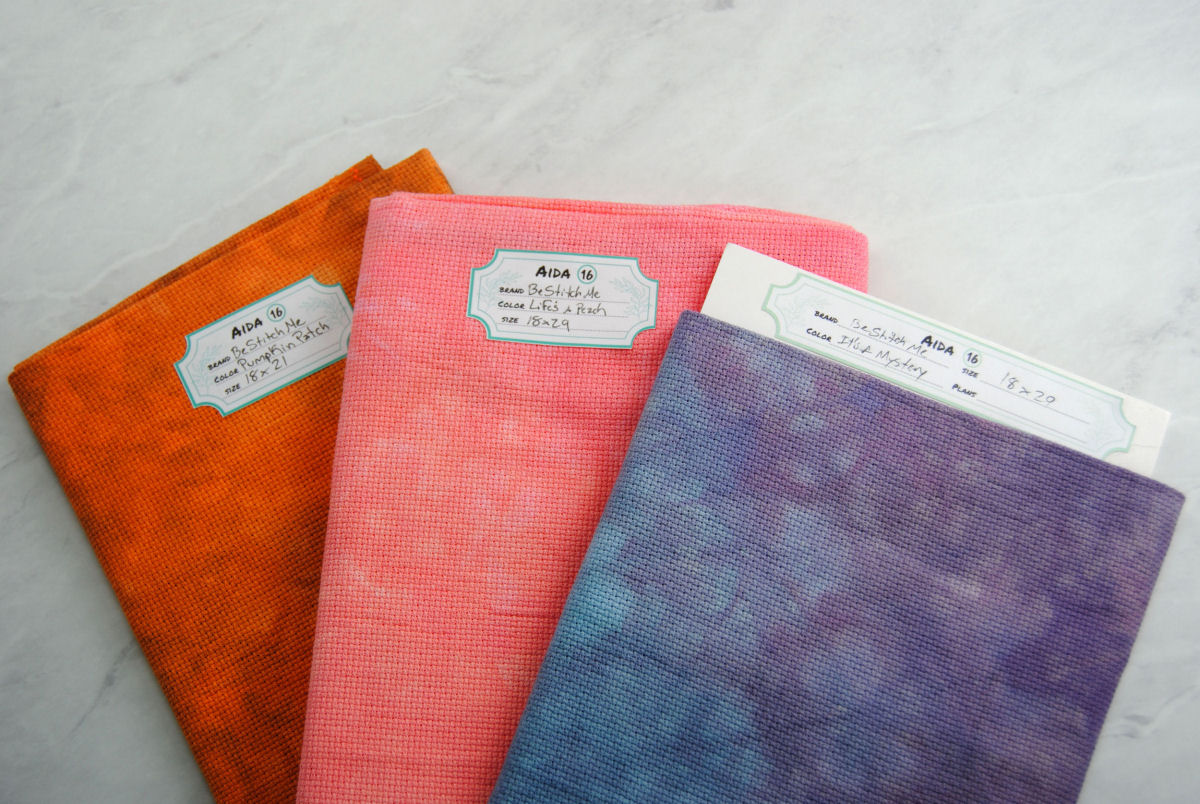
Pictured above: Some lovely fabrics in my collection from BeStitchMe.
Organizing Your Fabrics
The other thing to consider is how you want to organize your fabrics.
You might want to keep all fabrics from a specific brand together. This can be helpful if one of those brands is not color safe so you know which fabrics to avoid when planning a project that needs washing, like a quilt with cross stitch panels.
Do you prefer to organize all your fabrics by color? Very helpful when you find a pattern that would just look really nice on a green fabric. Or if you’re considering tackling a full coverage project that is fine on plain white fabric.
Would sorting by size make sense for your stash? Keep all the bigger cuts together for those large cross stitch project you will definitely get to one day?
How about sorting by fabric count? If you like to use different count fabrics a lot, you might have your fabrics grouped this way. Helpful for adjusting a pattern to fit a specific frame by scaling up or down as needed.
Maybe mix some or all of these options together? I mostly sort by count, and then in each count ;section’ I have them sorted in rainbow order. But I also keep really large cuts and any smaller scraps separate. With the scraps just thrown in a bin and the larger cuts tucked above my ‘normal’ cuts. (Or in the case of that full bolt of plain white aida, behind my workbench.)
Whatever your organization whims, consider your organization needs when looking over your options for storage.
Storage Options
Okay, on to the meat of this article. How many different ways can I come up with for storing your fabric? Some of them can be combined like using bags, and then putting those bags in a file cabinet. So I’ve tried to put these in an order that makes sense. But of course mix and match as needed based on what your priorities are!
Plastic Bags
Ah, bags. Chances are if you order fabric online you’ve got a ton of fabric-sized bags of all different qualities. From the super crinkly ones, to the resealable ones. Dyers will use bags for a number of reasons, from keeping fabrics safe while stored and waiting to be sold to protecting them in shipping in case the outer package gets damaged or rained on. Though typically the package is also a bubble mailer designed to protect from the elements as well.
Bags are a quick and easy way to get your fabrics protected from dust, moths, spills, and all manner of things. There’s a reason this is a popular choice for sure!
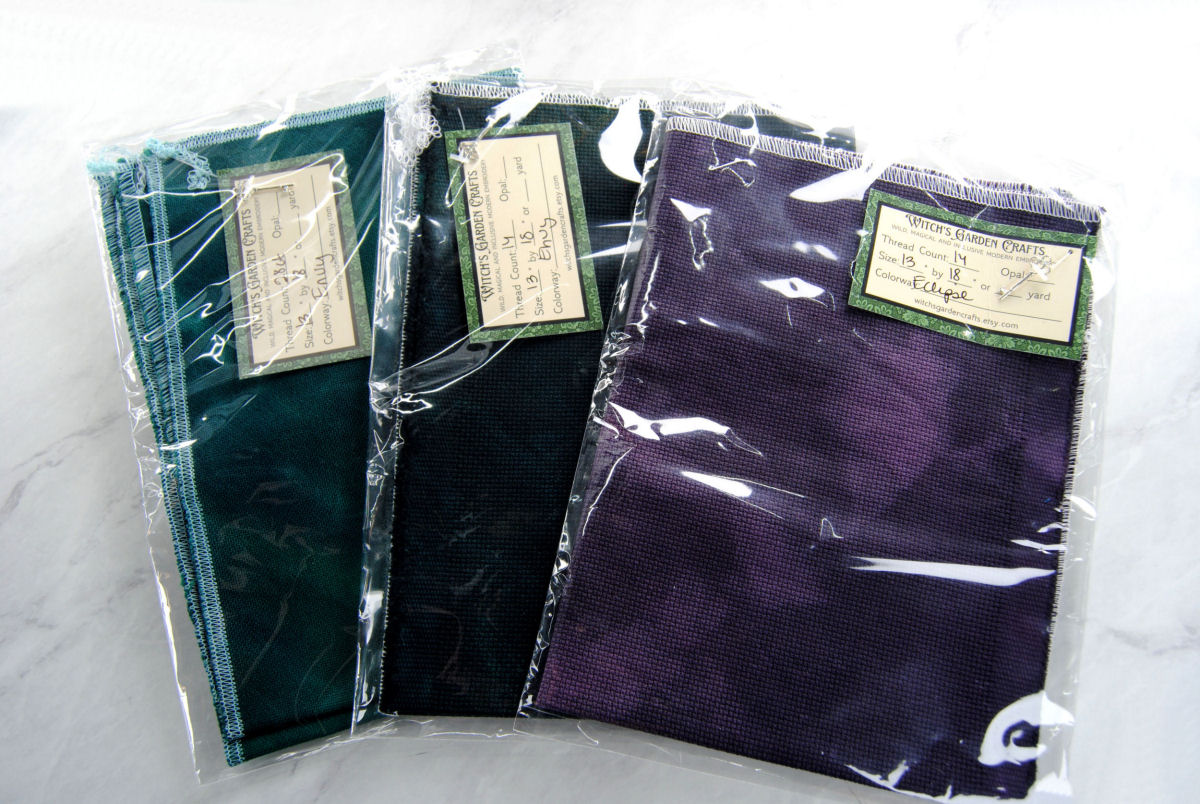
Pictured above: Some gorgeous fabrics from Witch’s Garden Crafts.
Totes, Boxes, & Bins
Whether you use bags or not, large plastic bins and cardboard boxes are also a popular choice as they come in all sorts of sizes. You can find specific ones designed to fit under your bed, on a particular shelf, or in a closet.
You can stack them all up and have to leaf through them, store them vertically or horizontally. Whichever way makes most sense to your brain or keeps the colors visible for you to browse through without having to pull them all out.
If you’ve got limited storage space, this may be the solution for you.
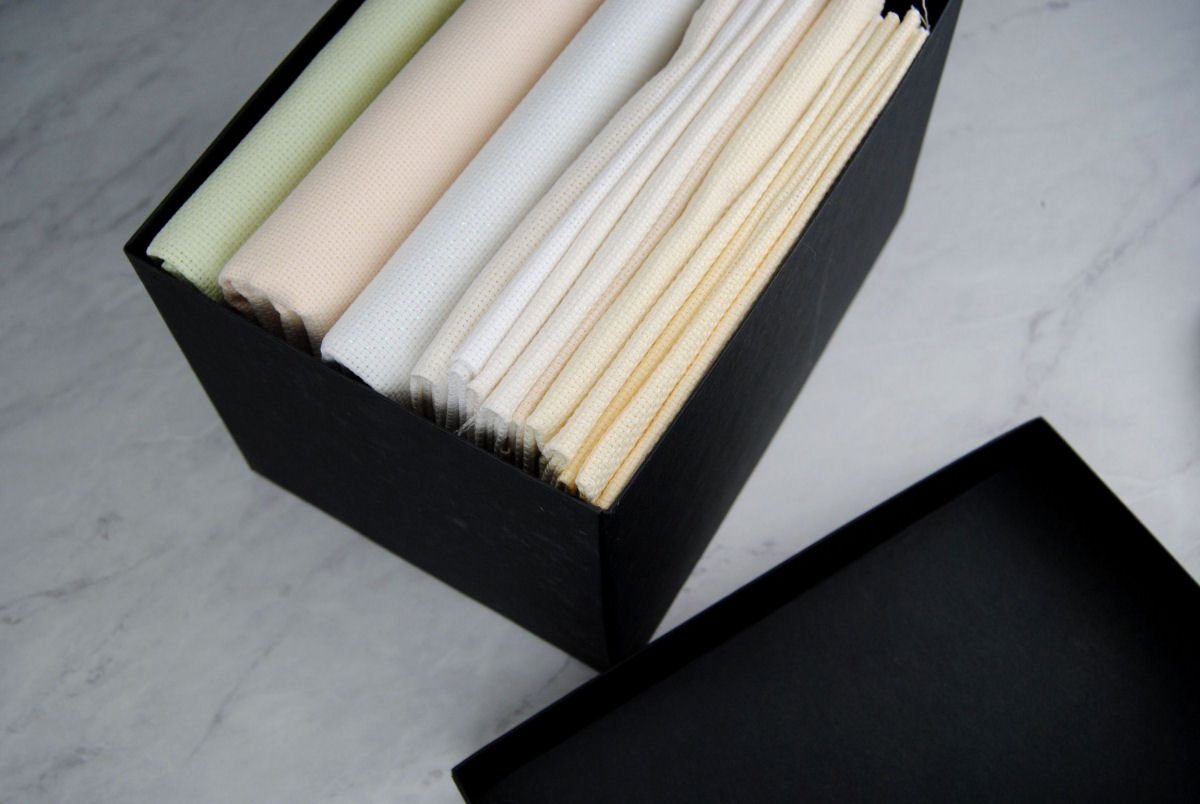
Pictured above are some plain fabrics stored in an IKEA Tjena box. I’ve had it for ages, so modern Tjenas look a bit different and even have a handle!
Hanging Bags
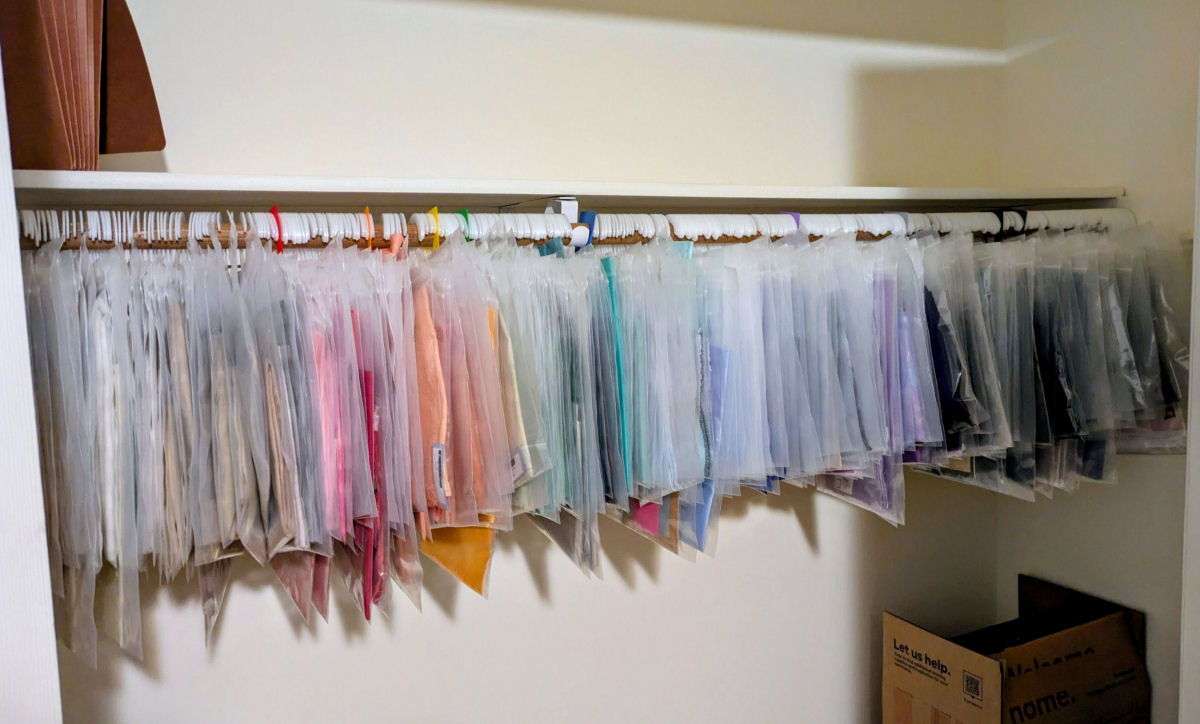
Got a lot of fabric or a big craft room with a closet? How about hanging up all your fabrics? This gorgeous photo courtesy of one of my lovely Patrons, Journey. What an absolutely gorgeous setup! And so many fabrics to choose from, all in rainbow order!
These fabrics are stored in hanging storage bags, combining the protection of bags, with the convenience of being able to easily browse and reorganize your collection.
Hanging Clips
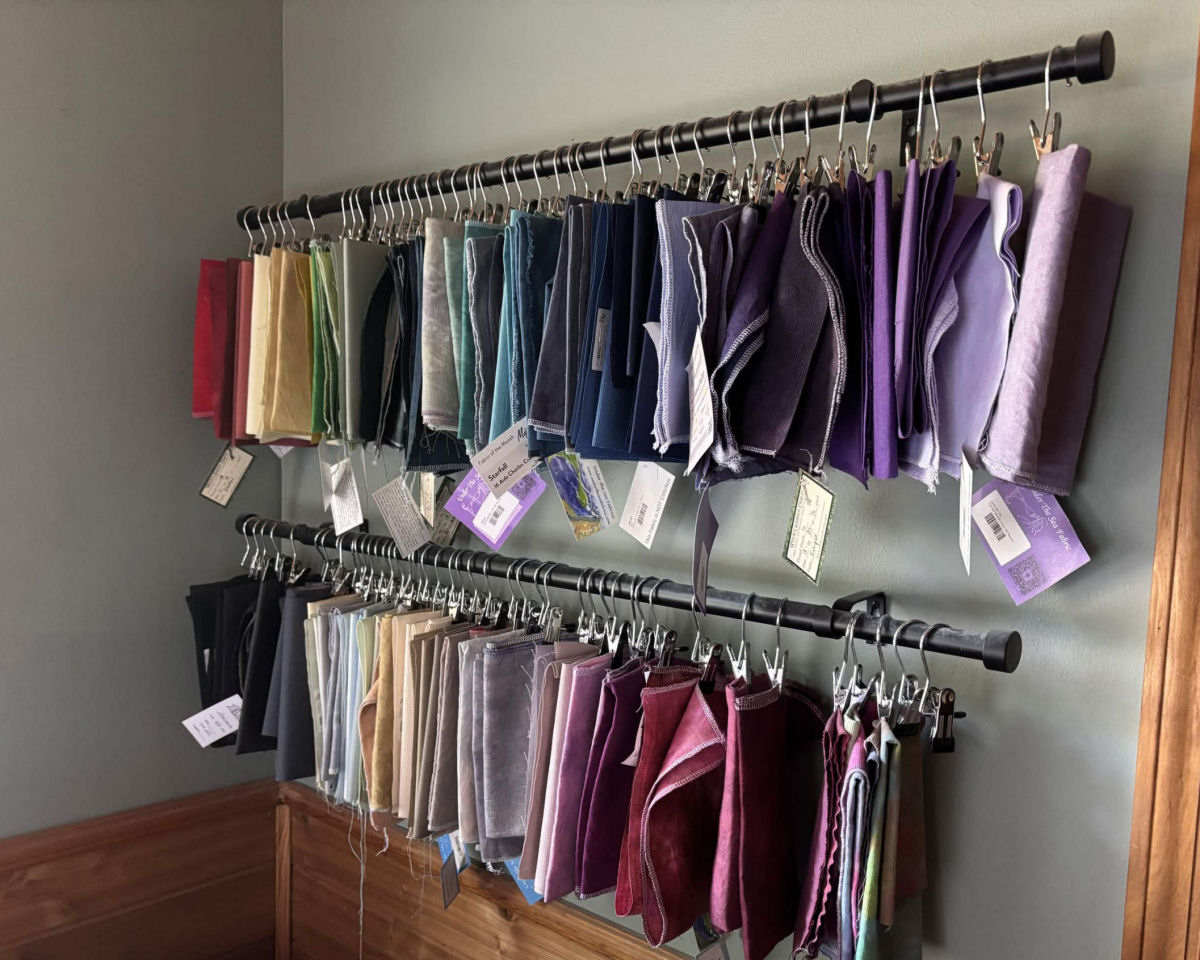
Don’t have a closet? (I don’t either), you can also hang your fabric just by hanging a curtain rod on your wall.
Here you’ll see a great example by Steph of FineFrogStitching. Being a designer, she also values keeping her fabric visible for inspiration.
Rather than bags though, these fabrics hang freely on her wall using Pants Hangers. This makes it easy to pick out fabrics for her next pattern without having to de-bag each one to see its true color.
Fabric Binder
A storage option I’ve seen rising in popularity is the fabric binder. This makes it easy to leaf through and find the right fabric for your current project. If you use an art portfolio with built in plastic sleeves like shown below, you may need to spend some time rearranging your fabric when you get some new ones if you want them in a specific order. You can also get yourself a cute 3-ring binder and some rainbow pocket dividers to help you color code your fabrics while also being able to easily rearrange them later.
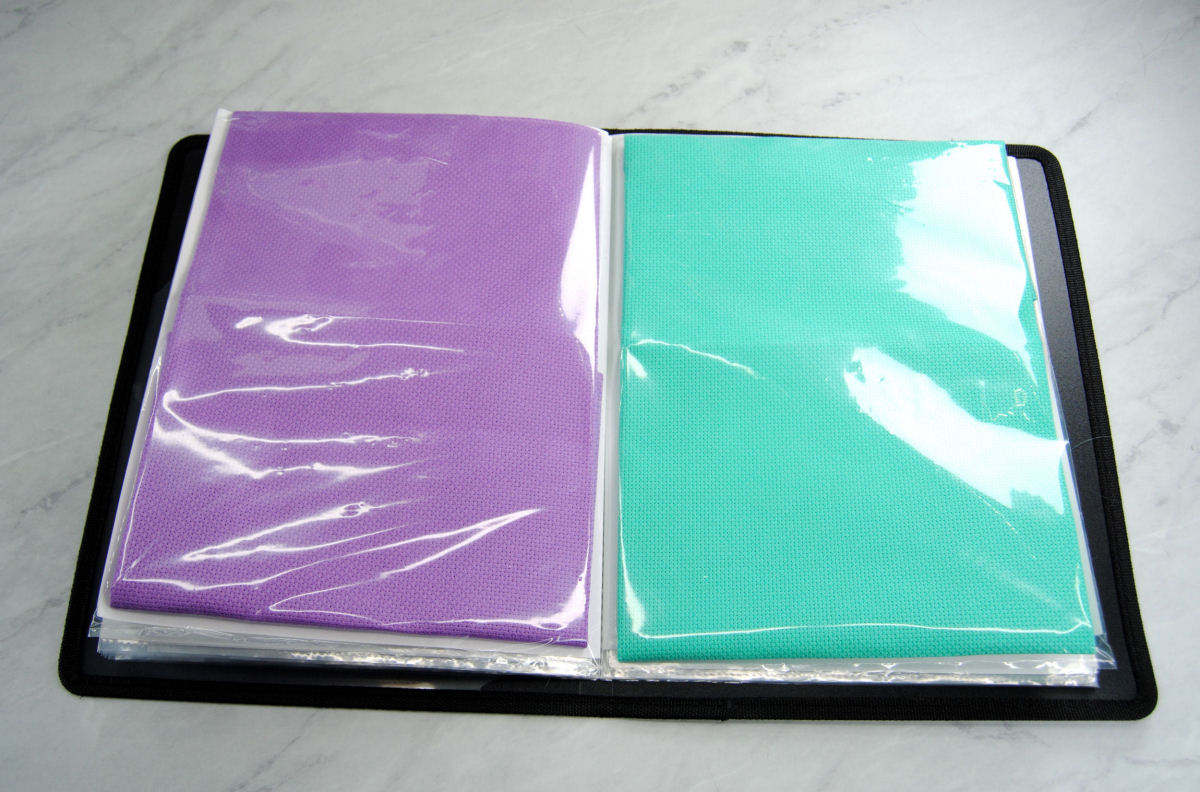
Above I’ve shoved some Lavender and Teal aida fabric into the Portfolio book I normally use to store my paper patterns. Y’know, just to give you an idea of how it would look. These colors are so very on brand for me, I can’t wait to find something to stitch on them!
The binder options keeps things protected but also accessible and portable, which is always a plus!
Filing Cabinet
Another option I’ve seen a lot of lately is the humble file folder. Such as this gorgeous collection I found on reddit.
Whether you use one just to store paperwork or have expanded into craft storage already, these are quite versatile. I happen to have a file folder drawer in that cabinet I use for the bulk of my fabrics. And I mostly use it to store UFO’d kits, paper patterns, plus sheets of perforated paper and plastic canvas.
But for demonstration purposes I’ve draped a few of my fabrics over these plastic file folders I picked up at Staples years ago:
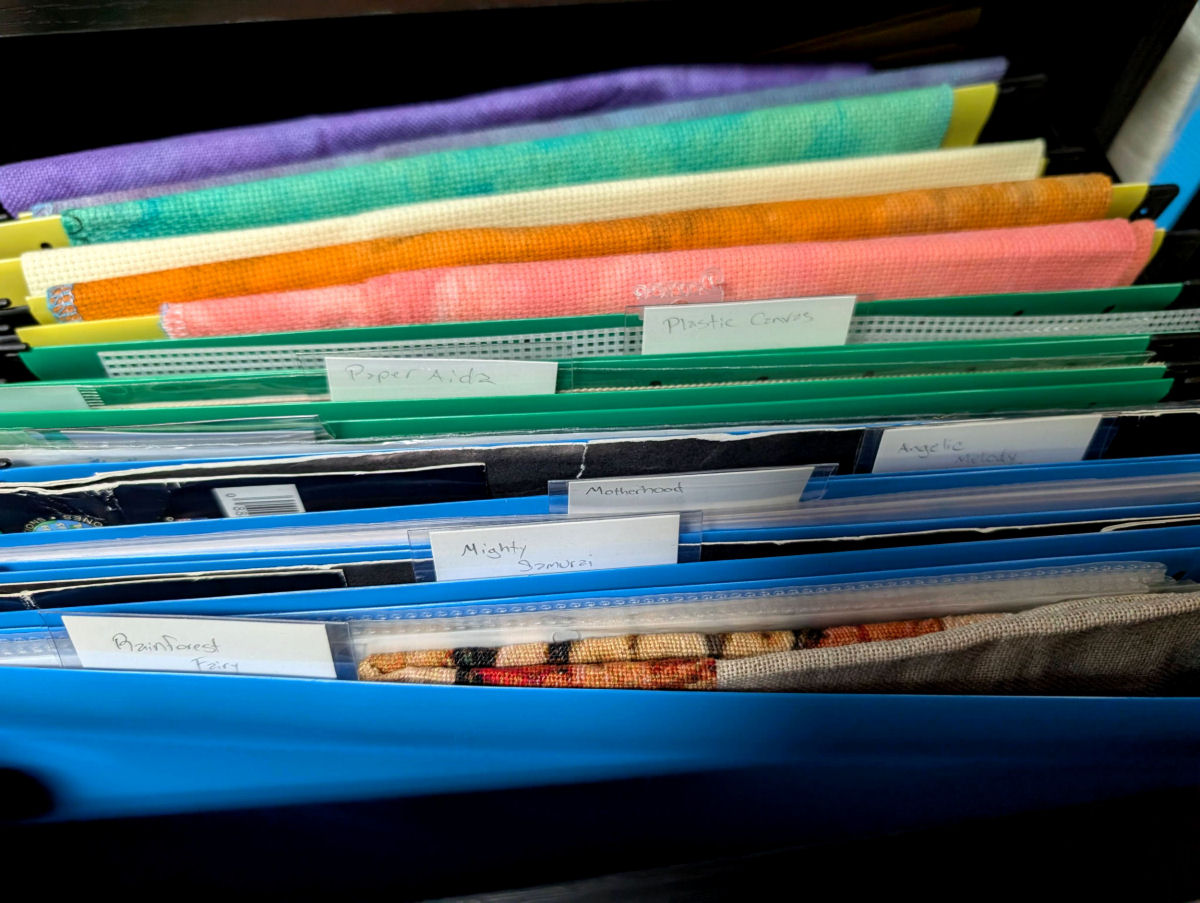
Now if you don’t think you have room for a file cabinet, don’t fret! There’s a whole range of different sized options
My storage cabinet never seems to be in stock anymore, but I’d definitely recommend it if it was and you have the room for it.
I’ve also got a rolling cabinet / printer cart that mostly houses tax paperwork now, but used to be where I kept these same folders before I got the big one.
And before either of those cabinets, I had a simple plastic hanging file folder box I could carry around wherever! I got that forever ago from Staples at the same time I got those folders! You can see it featured in an article about Storing Cross Stitch Patterns from… 5 years ago.
Nowadays it lives in my board game room housing printed setup guides and rules cheat sheets for our large board game collection.
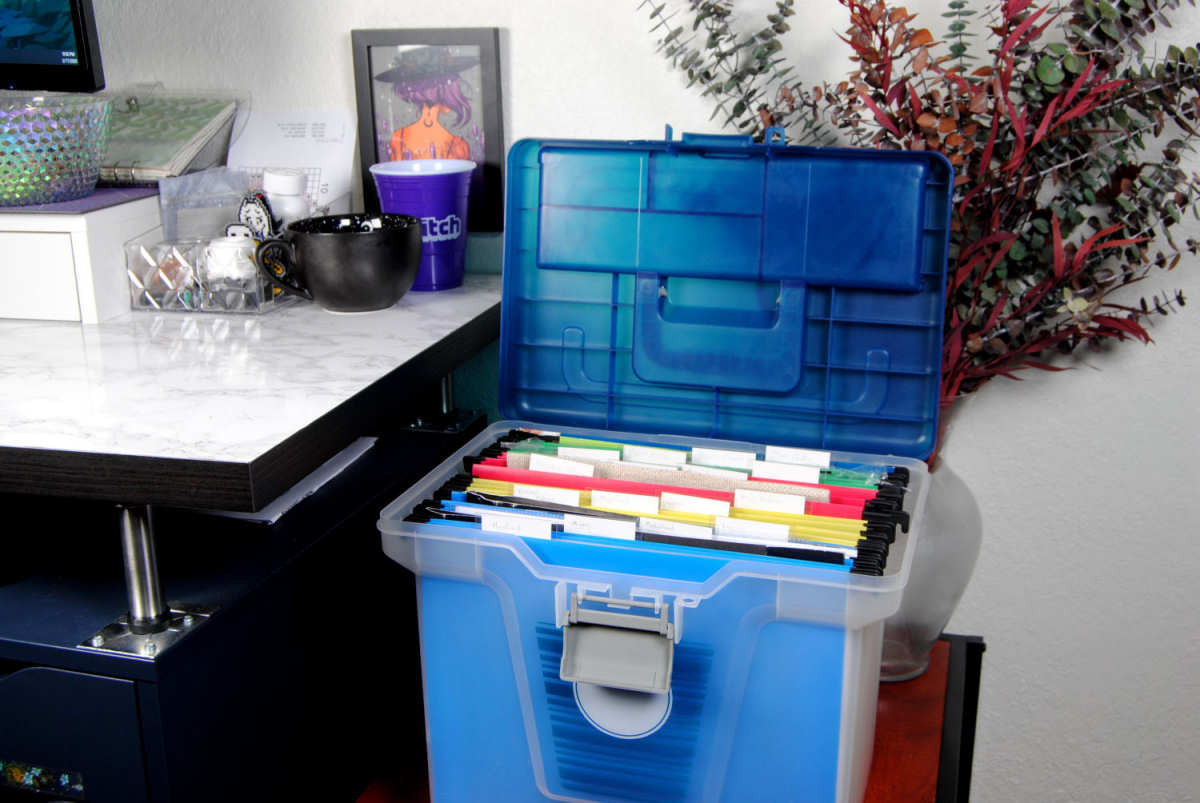
You could also do one of those accordion folders for very similar effect, whether you drape them over the dividers like above, or just shove them in the individual pockets. Just keep in mind that the bulk of a folded up cut of fabric will add up fast. So if you’ve got a lot of fabric to store you may want the type of accordion folder that fully expands rather than connecting at the bottom.
It also all depends on how portable you need your stash to be!
Fabric Drawers
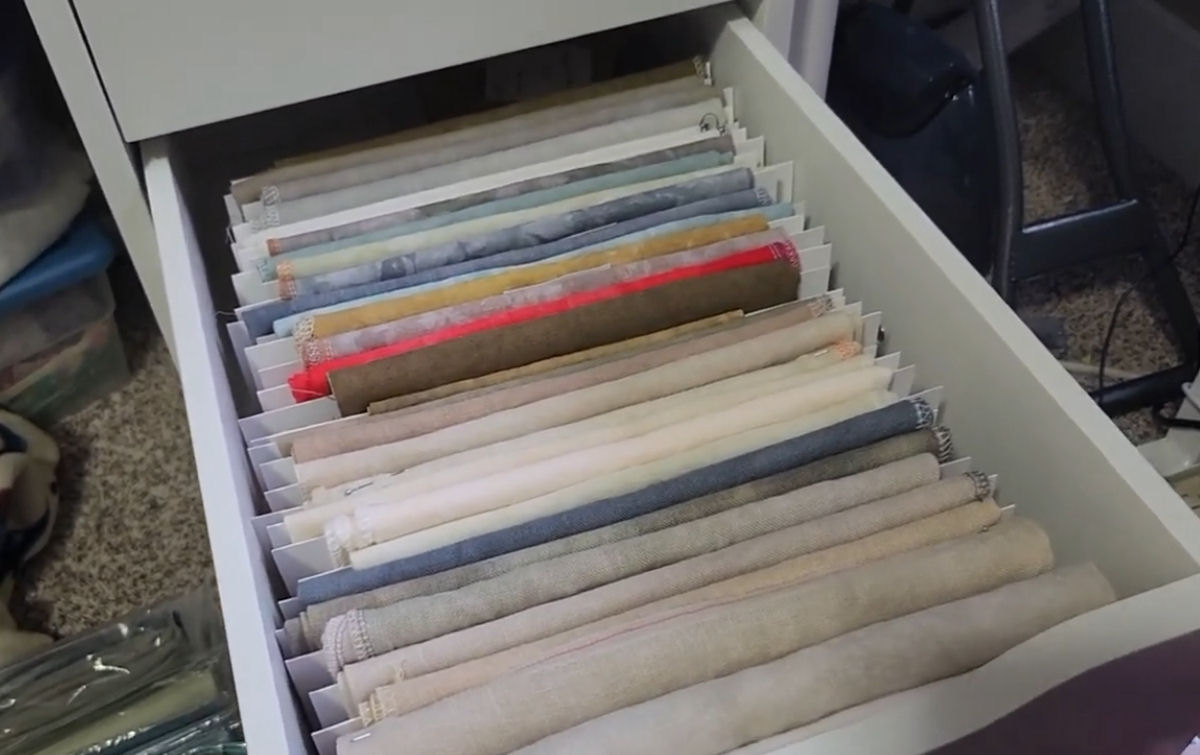
Those same fabrics could be put in a dresser drawer! If you’ve got a craft room with an IKEA Alex like GerXStitches on Flosstube, or just have an old dresser you got off Facebook Marketplace, you can store all sorts of things in drawers and fabrics are no different.
If they’re deep drawers you can even store your fabrics vertically so you can see them all, and the drawer will protect them from dust and light. Throw in some silica packets and any moisture concerns are taken care of as well!
They’re using mini bolts to store them (which we’ll discuss later), but bagged fabrics work great in drawers as well!
Rolled Fabric
So far we’ve been doing a lot of folding. So here’s an option for those of you who just can’t stand fabric creases. Roll up your fabrics!
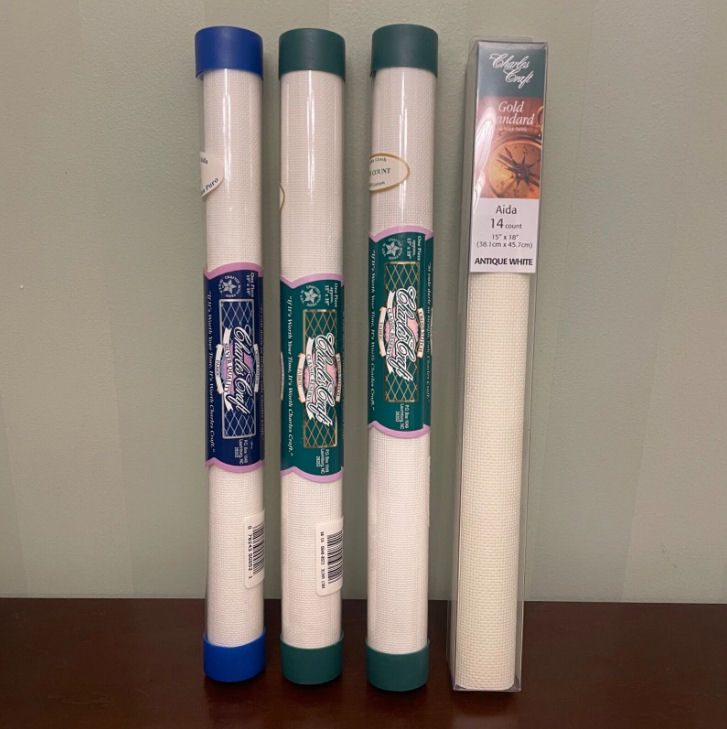
In fact, some fabric brands used to sell their fabric in tubes for this very reason! You may’ve seen CharlesCraft fabric hanging on store walls before!
The older CharlesCraft came in tubes. Some of the newer Charlsecraft comes in long boxes, that I imagine are better for shipping purposes. Plus they don’t roll away from you when you set them on the table.
I got rid of my tubes, but here’s an example from an Ebay listing:
But of course your fabric doesn’t have to come in a tube for you to prefer storing your fabrics this way! Once you’ve ironed out the creases it came with, you can just roll them up yourself. You could even use this method for storing finished cross stitches you haven’t quite gotten around to framing or making into something.
You could just keep the rolls plain. Maybe just tied with a bit of string to keep them from unrolling on their own too much.
If you want to protect them from the elements, a popular option is mailing tubes, as they can be pretty inexpensive. They’re not see-through so you’d have to label them and get out the fabric to see what it looks like, but they’ll be well protected.
You could of course just use paper towel rolls, but those don’t come with lids. Note that most cardboard is not acid-free, so if you’re concerned about that, maybe go with a poster tube instead, or wrap your fabric in acid-free tissue paper before putting it in the tube.
There are fancy archival storage tubes specifically designed for textiles or old maps. But those can get pricy fast.
You could also get project rolls made from quilting cotton! Or you can make them yourself, I found a tutorial on making a project roll as well. These are mostly used to store finished projects rather than unstitched fabric.
If you do want the fabric to be more visible, they make poster tube bags for storing blueprints and the like which might be an option for you. This will protect them from dust and water, while keeping the color visible. You could also use them in conjunction with cardboard tubes. The plastic protects from dust and water getting through the cardboard tube, while the tube protects from light.
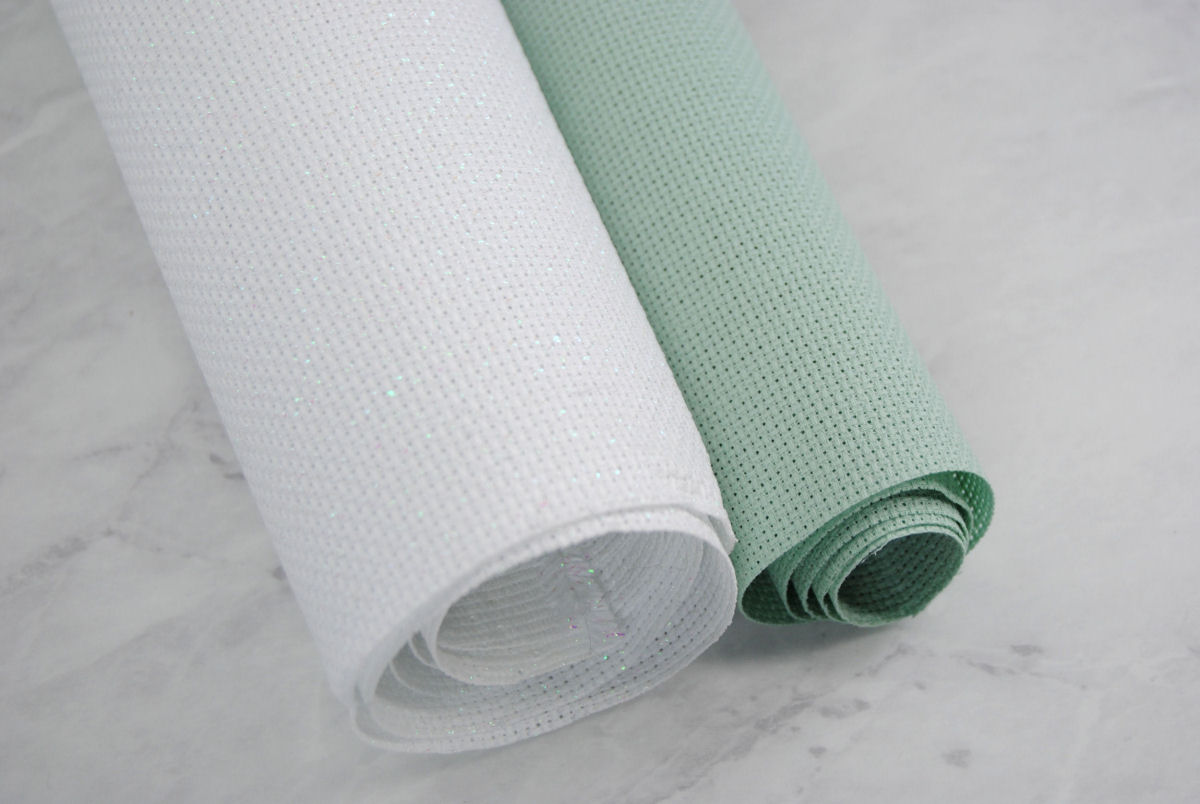
But then where to put them? You could just have a stack of bare rolls on a deep shelf for you to pick from. But there’s also a number of ways to store tubes. Look for “gift wrap storage”, “vinyl roll holders” or “blueprint racks” for a variety of ideas ranging from rolling carts to wall displays
Mini Bolts
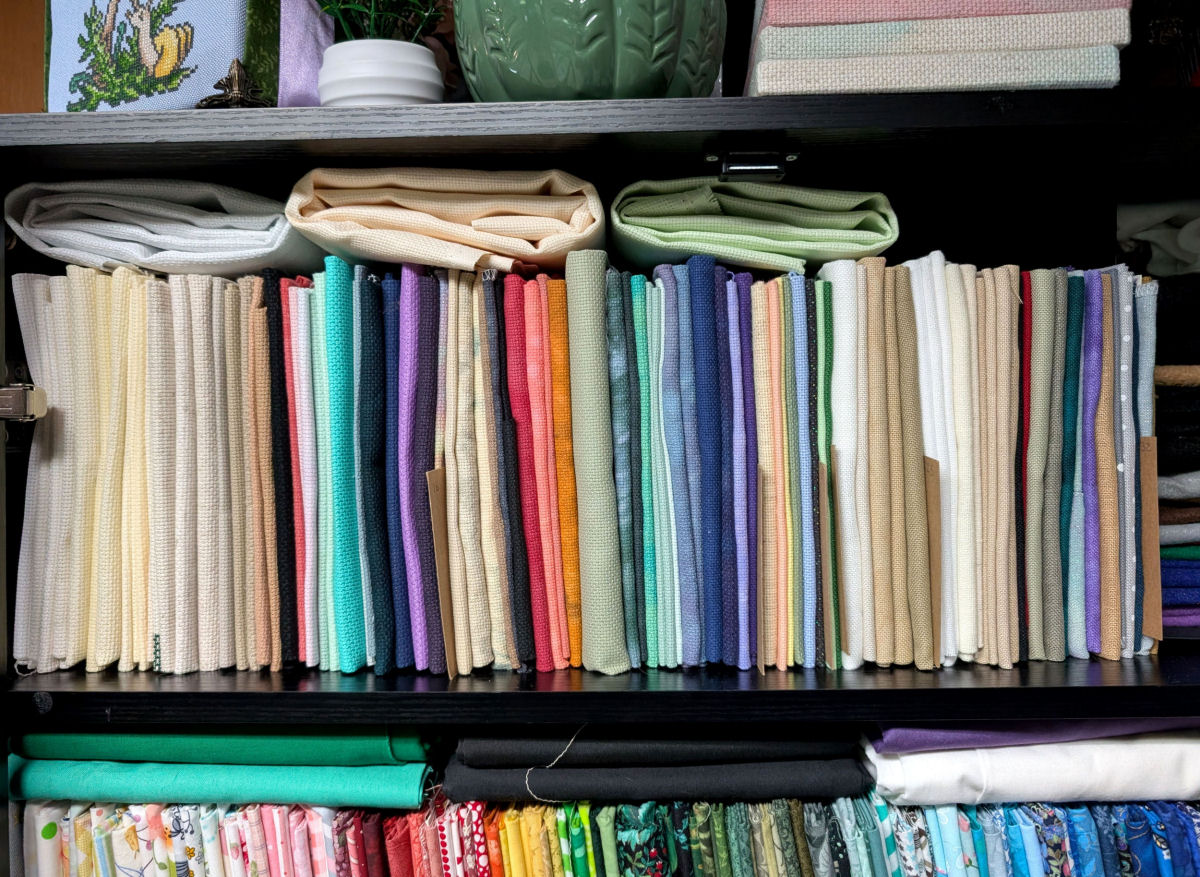
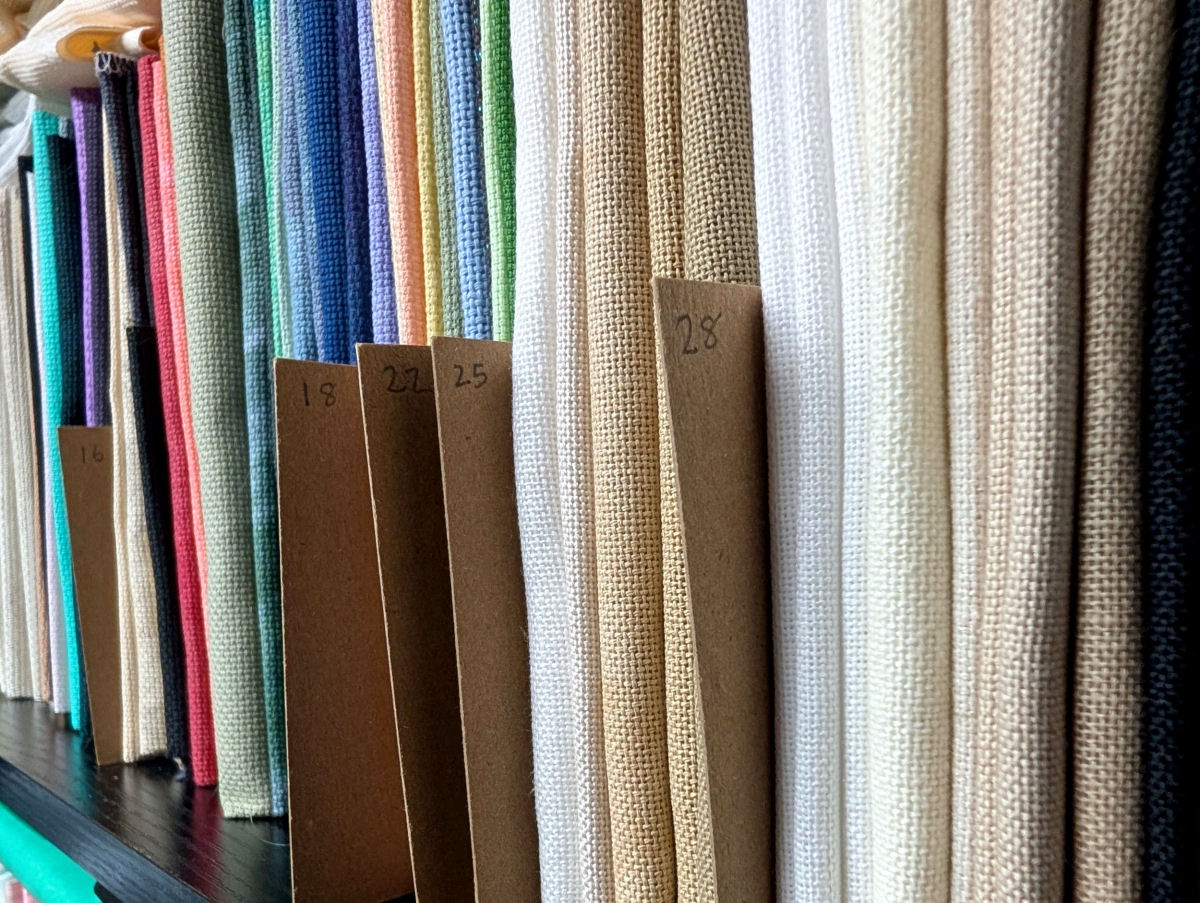
Finally, my favorite storage method. Mini-bolts. I did an article on my fabric organization method 6 years ago. And despite moving houses and having a completely different shelf, this is still my favorite option! The main difference from that old article is I now wrap my fabric around the comic book board completely, rather than leaving a bit of board along the top to write the brand and size on. Instead, I use sticker labels to keep that information handy.
Rather than sitting on the built in shelf we had at the old house, I ended up getting a glass-door cabinet. Which you’ve already seen earlier in this article. The glass doors provide protection from dust but still keeps them visible so my brain doesn’t forget they exist.
I do have them in rainbow order, but separated by fabric count. So they don’t quite look as satisfyingly rainbow as I’d like. But that just means I need to fill in the color gaps in certain counts, right? I mostly have a bunch of neutrals (white, beige, oatmeal, etc). Why? Because that’s what you tend to inherit from other people’s stashes and find at thrift/op shops and craft reuse centers. The bright fun colorful fabrics tend to be the ones that actually get used, so I don’t have as many of each color.
I have little cardboard dividers for the different counts of fabrics. You’ll note 16 count is the most colorful. That’s because I was in BeStitchMe’s monthly fabric club for over a year I think. Definitely recommend it as a great way to build a fabric stash. I’ll be working through those for a while. And it led me to find some of my favorite fabrics which I reorder all the time!
Fabric Scraps
Lastly, a brief note on fabric scraps. My scraps are nowhere near as aesthetically arranged. I’ve got a ton of these plastic storage bins in my storage area, which I’ve printed labels for to keep my smaller craft bits more organized.
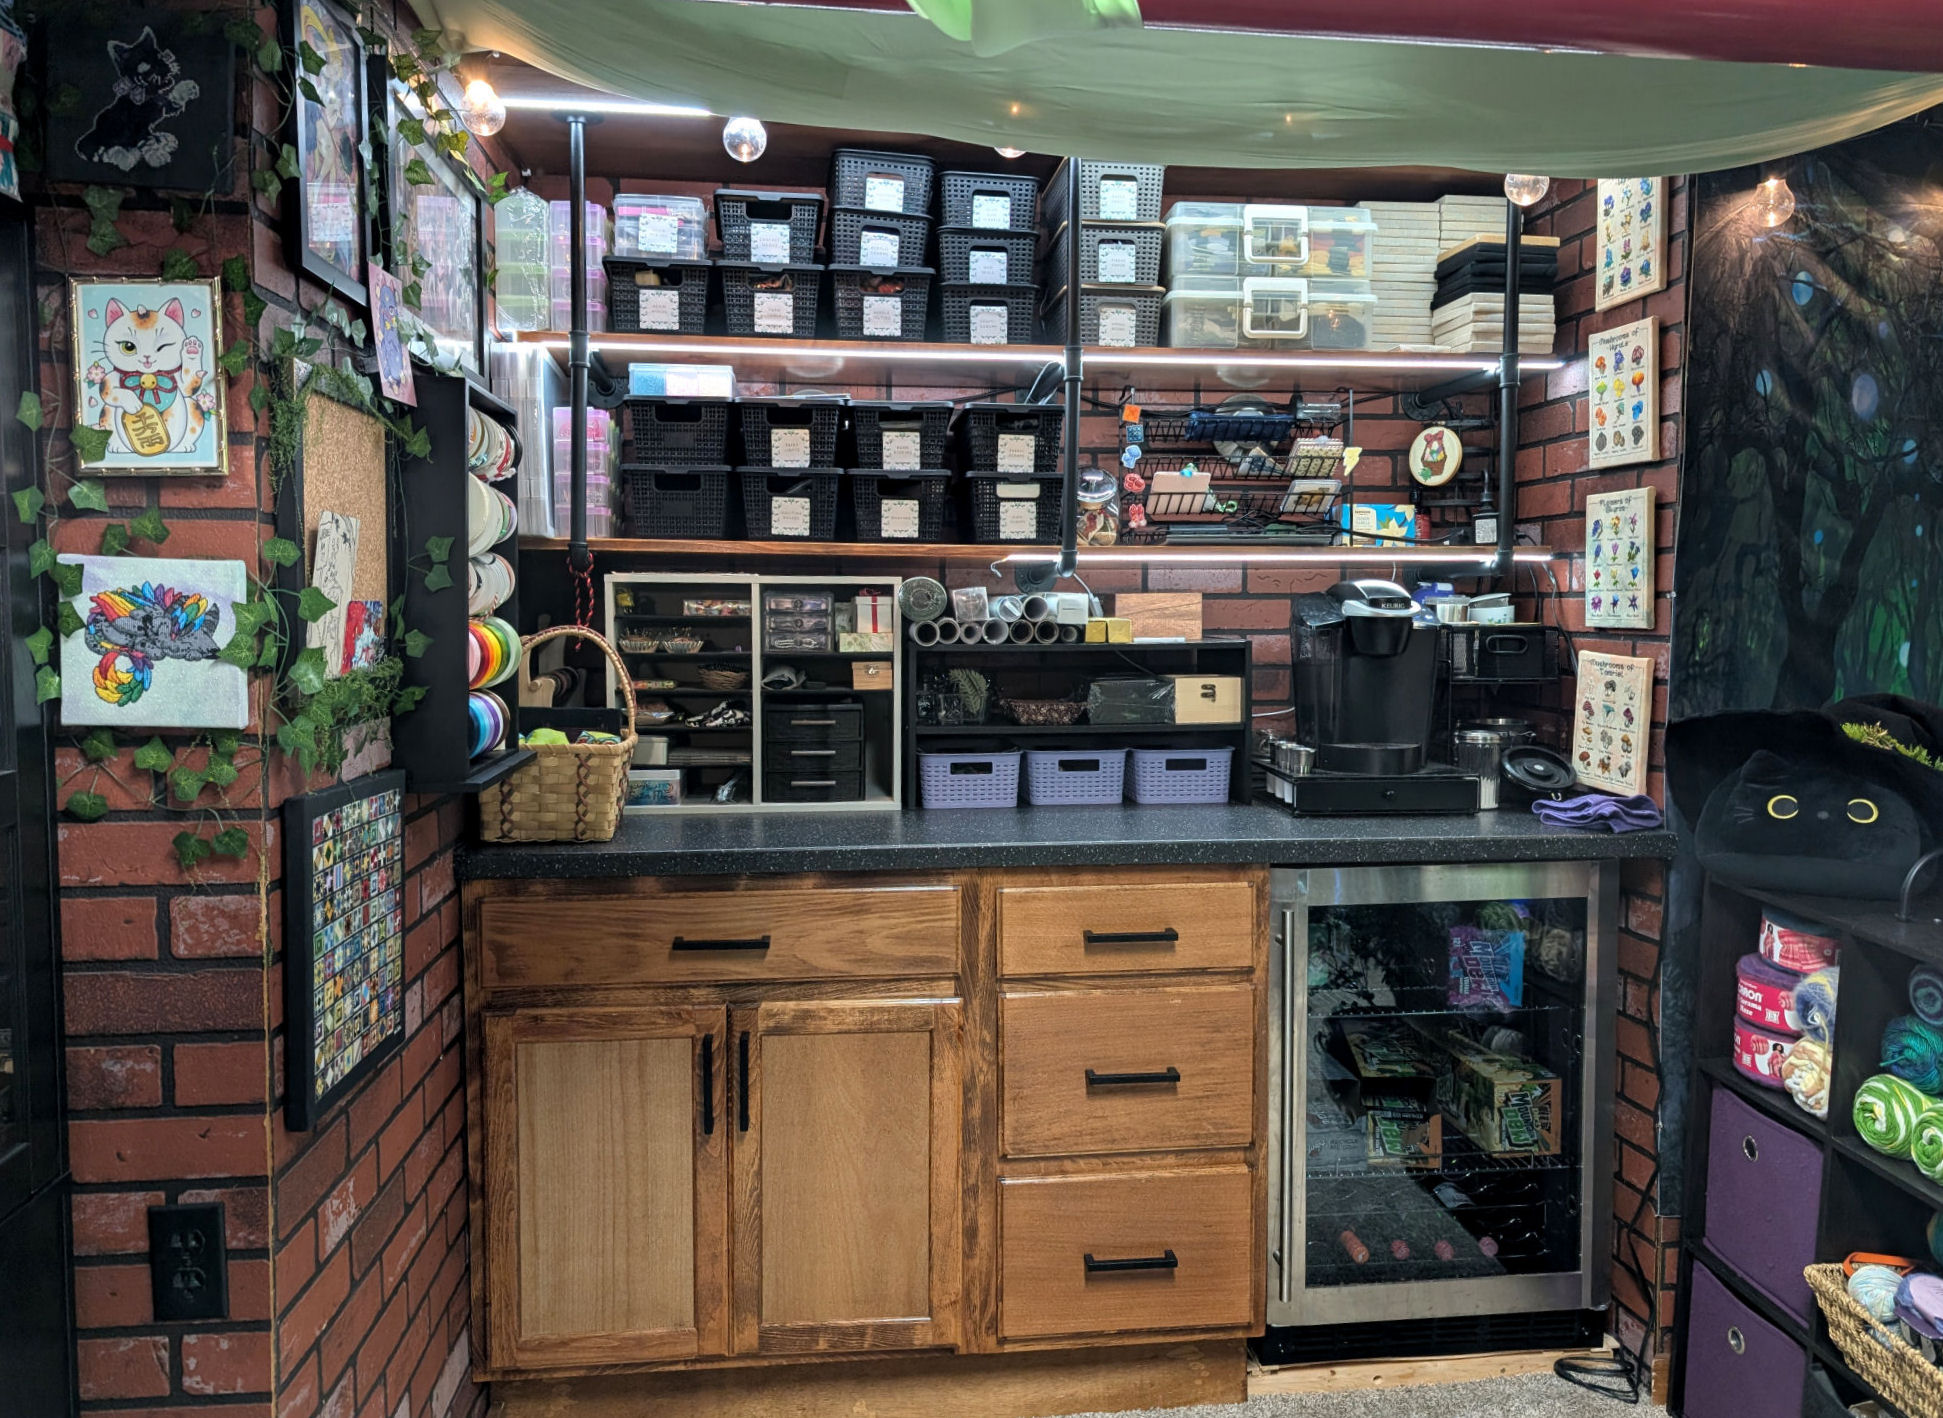
I prefer these deeper baskets with latching lids, but I also have a set of the shallower baskets as I can stack 3 per shelf.
They look real nice all stacked on my shelves like that. And inside the basket… I just have all my smaller fabric pieces shoved in various sized plastic bags labeled by count in sharpie. Glamorous, I know.
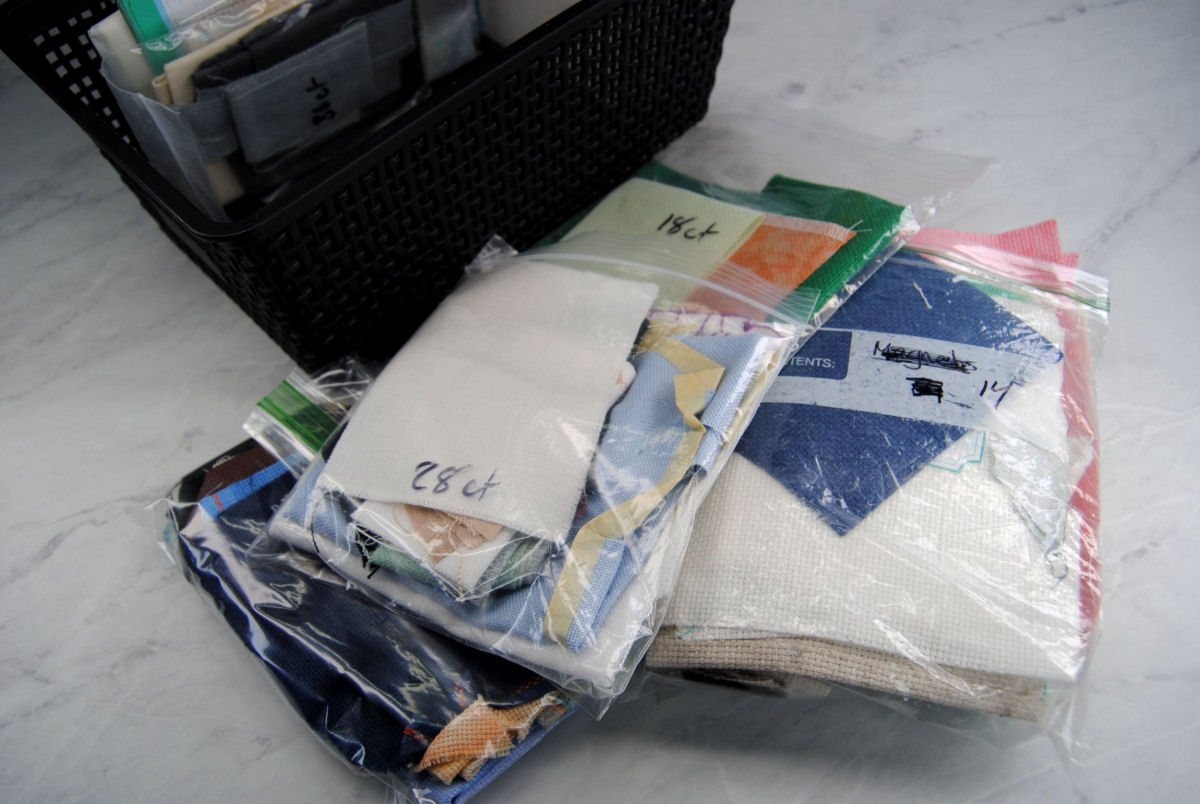
Basically anything that isn’t at least as tall as my comic board bolts, and can’t wrap around the bolt at least once. Why keep these scraps? Well if you look at my shop you’ll note I design a lot of smaller patterns. Ornaments. Biscornu. Coasters. Pendants. These kinds of projects really don’t need a lot of fabric. And I don’t like wasting fabric. So I keep everything and work through those small bits when I can.
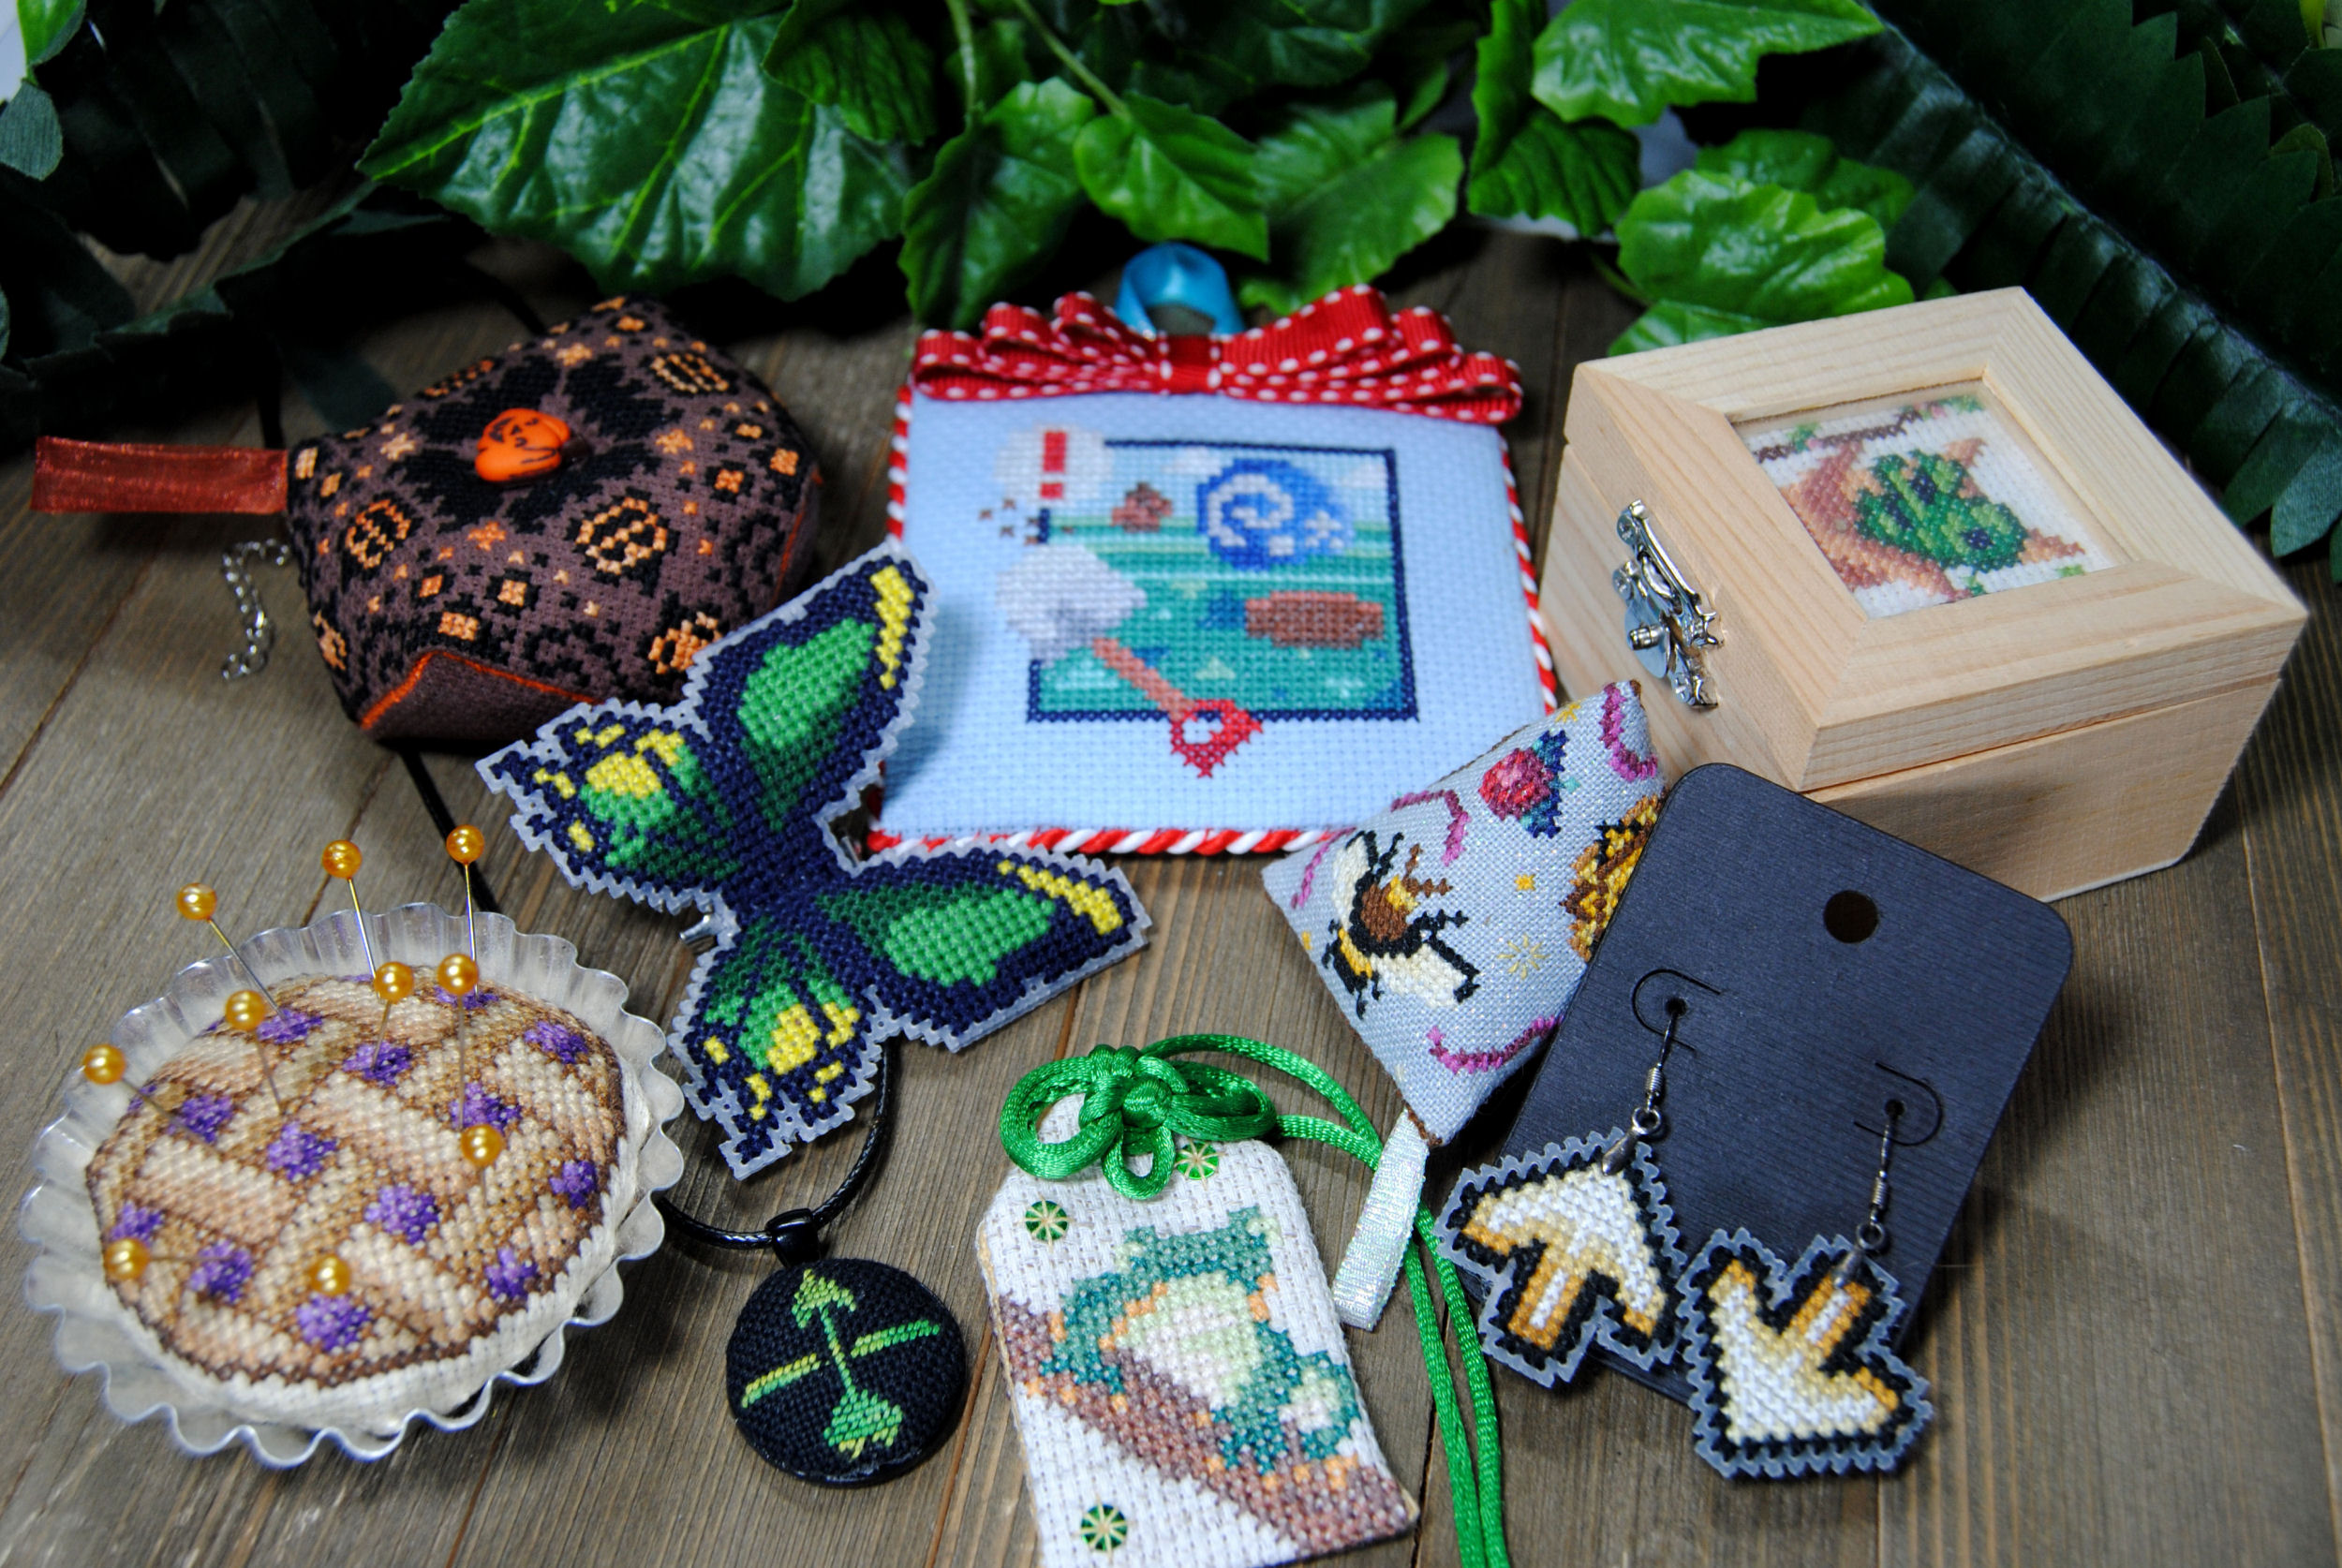
So if you also have a bunch of small bits of fabric laying about as well, maybe check out the free patterns I offer, the paid patterns in my shop, and of course all the free finishing tutorials I keep here on my website!