Backstitch: Outlines and thin details
This article is part of a series on Advanced and Specialty Stitches. Check the main article for a full list of stitches. This one is just about backstitch.
Table of Contents
What is backstitch?
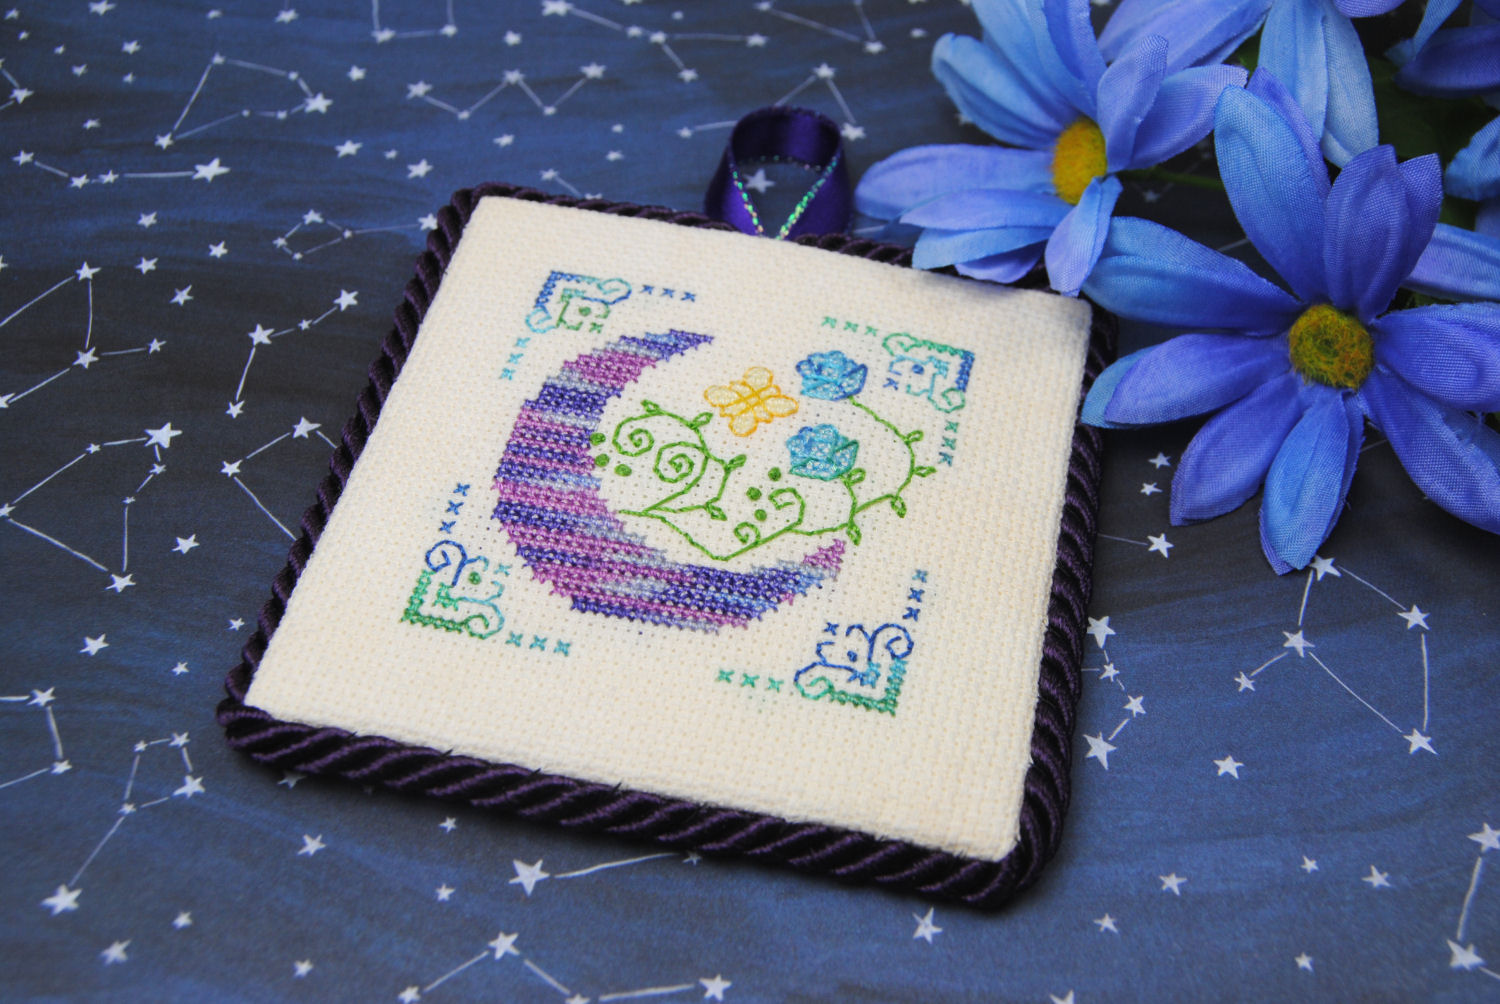
Backstitch is a type of stitch frequently used to create outlines such as the ‘star’ shape in this design. It can also be used for borders, and when something needs to be thinner than a full cross. As you can see from these vines.
Backstitch in Patterns
Backstitch is represented on patterns by a thick line. Often black, but be sure to check the pattern as it can be any color as needed to create the desired effect. As an example, here is a free pattern that was included as part of my Cross Stitch Pendant Tutorial. The colored lines represent backstitch.

Also, you’ll notice that backstitch on charts can sometimes land “between” stitches depending on the designer. I try to make sure my lines end in the corners of a square, but others do not. If you’re stitching over 2, this isn’t a big deal as you have that extra middle hole to work with. But when stitching on Aida you may want to use a sharp needle so you can pierce between the holes.
Should you wait until the end of your project?
It is recommended to do backstitch AFTER all your cross stitches are done. Backstitch can often go on top of existing stitches, and you don’t want to have to try and stitch underneath existing backstitch. But with the above example, there’s not really any overlap so it would be fine to do it as you go. If you’re working on a large design where you may have to move your hoop or Qsnap around, you may want to leave it ’til last to avoid snagging it while moving.
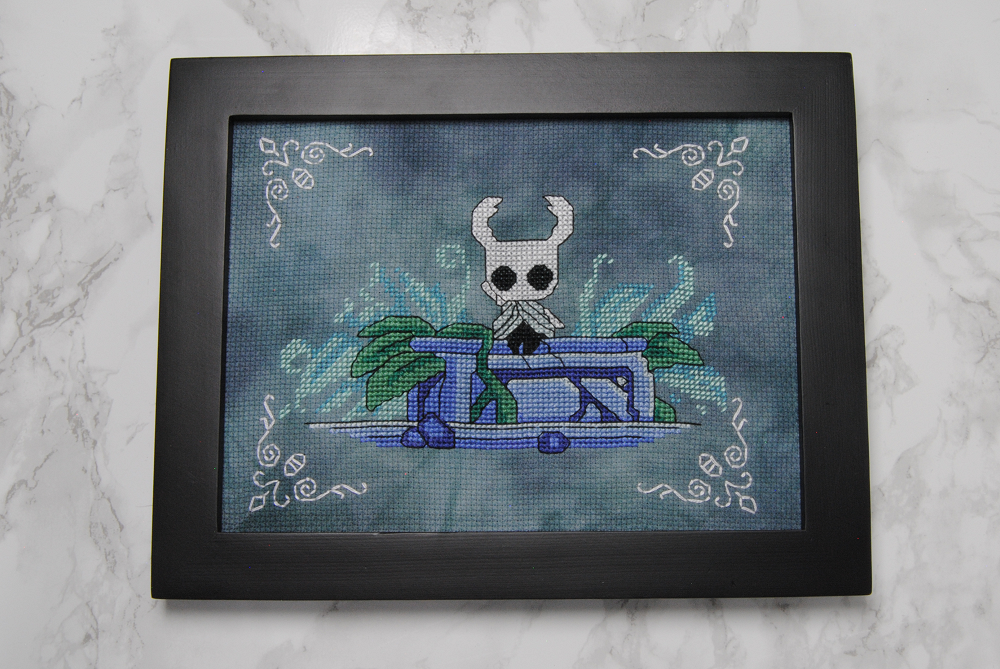
Plus, having a before and after backstitch photo is simply satisfying! Here’s my Hollow Knight design before I added backstitch. Keep reading to see how different it looks afterwards!

How many strands to use?
Note that while usually it is usually done with a single strand of thread, some patterns recommend using 2 to get a thicker line. You can also choose to use 2 strands yourself if you don’t feel it looks thick enough.
In my Hollow Knight design, I did outlines with a single strands. But the corner details with two strands for added thickness.
How to Backstitch
But how do you you actually backstitch? This again varies depending on who you ask.
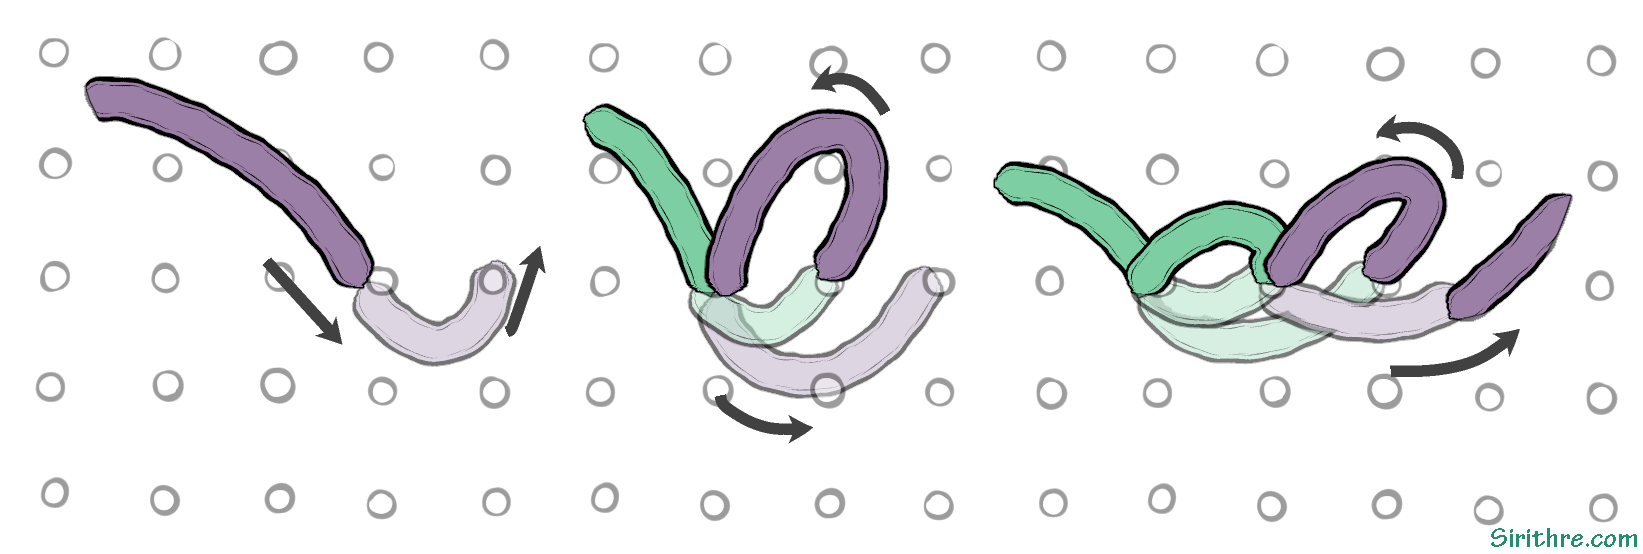
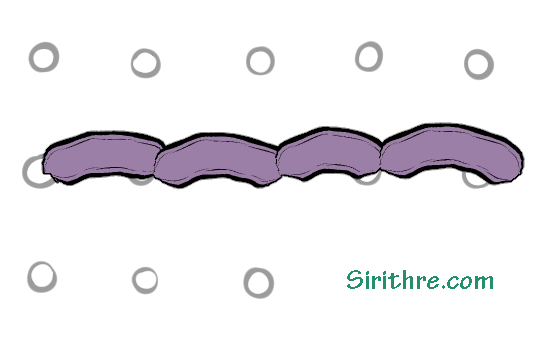
In the official way, you loop back each time so that the line is solid on the back as well as the front.
Bring your needle up on the second hole from where you want to make your line, then move back and down into the first hole. Then continue the same way, each time working backwards on each stitch.
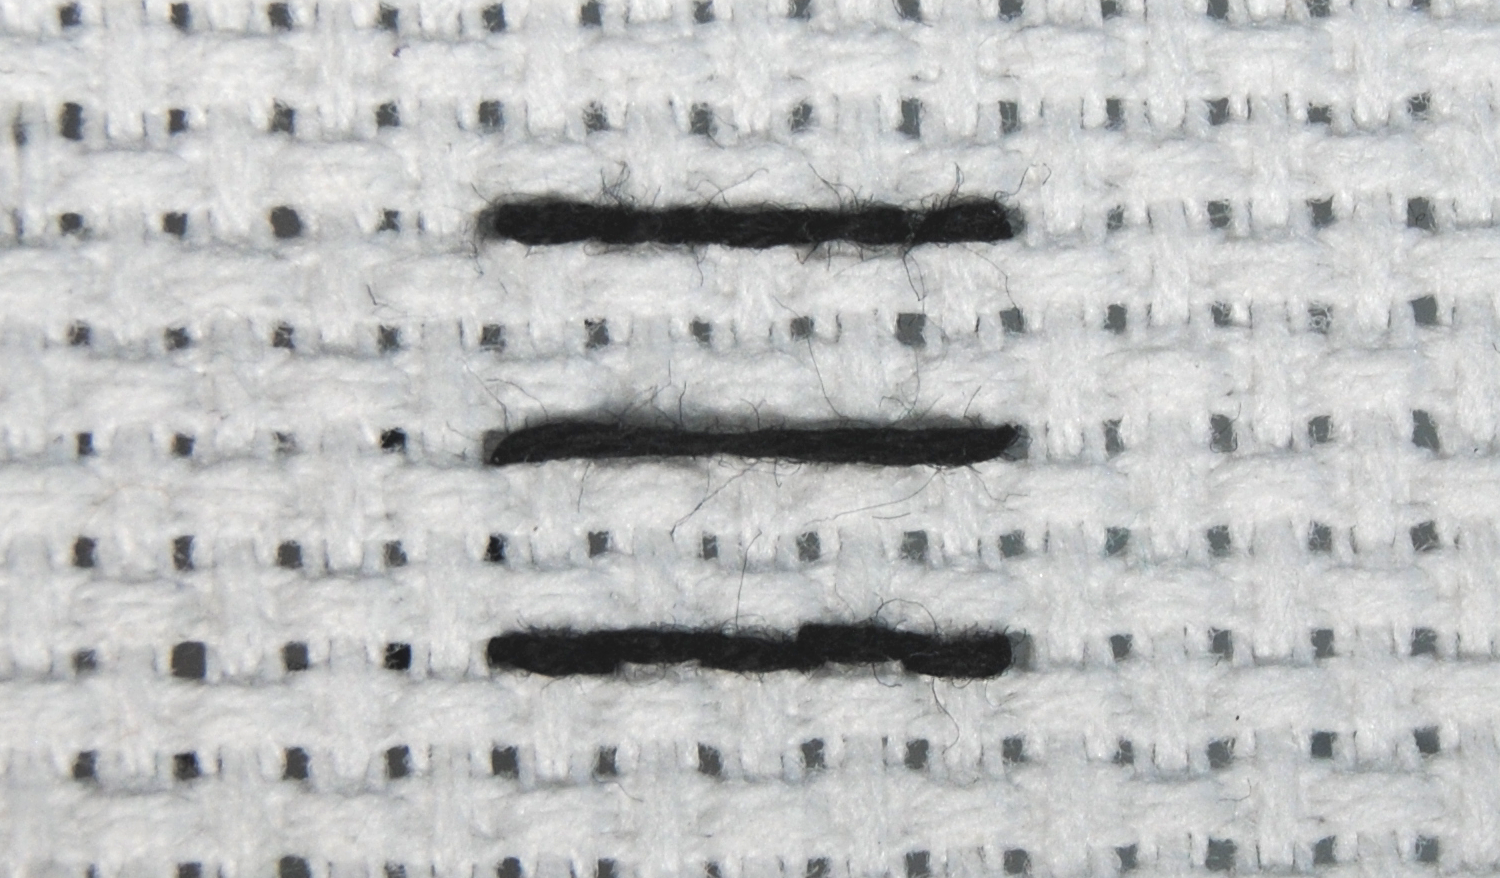
The other thing to discuss is length. This again varies from person to person. Some insist on not going more than one square at a time. Others feel it’s not okay to go further than an arbitrary number of holes, usually 3-5, with your stitching. And some will stretch across the fabric as needed.
For some sections it’s necessary to go across two holes, though. Especially when it’s on a diagonal. The stitch is pretty much the same, just being stitched across 2 or more squares.
This is really personal preference and entirely up to you. The longer your stitch is, the looser it can feel sliding across the other stitches on your fabric. But also the smoother it looks.
Double Running Stitch
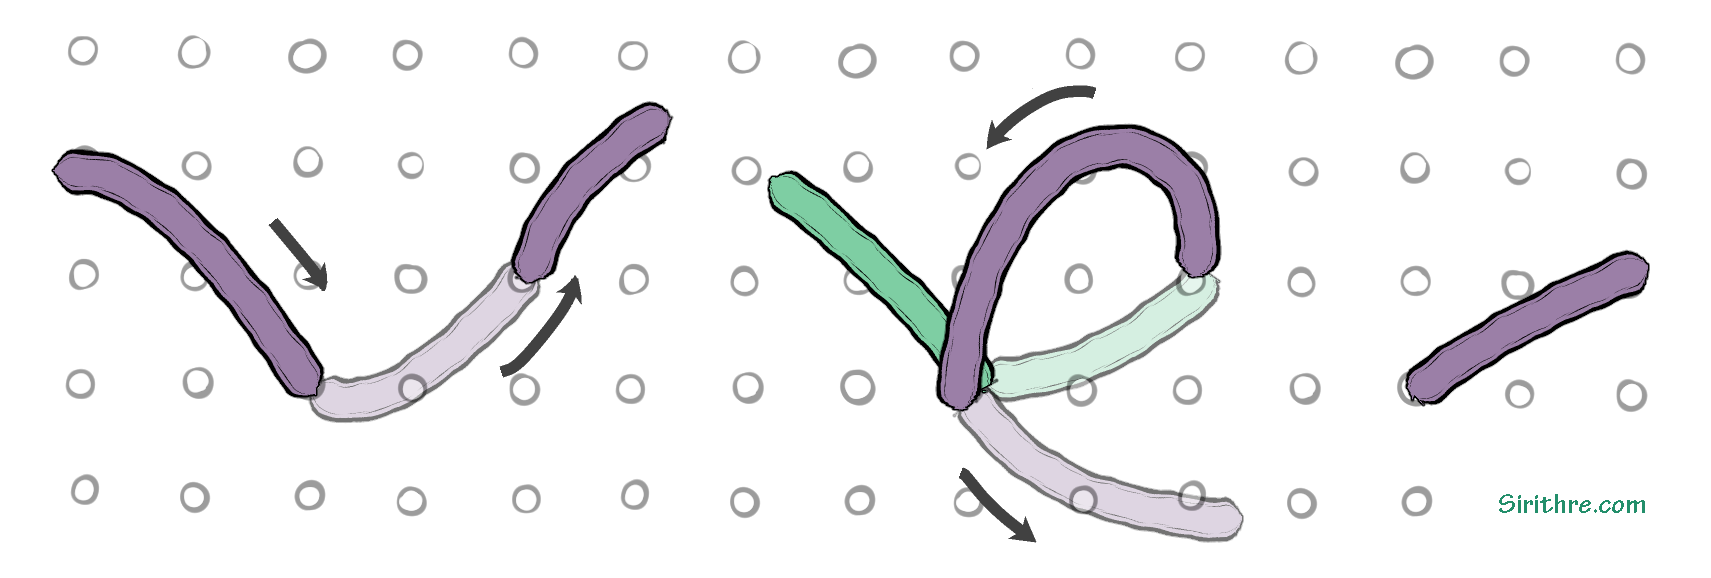
Alternatively you can also get away with doing backstitch as a double running stitch instead.
Starting from one end, go down and back up along the line, alternating so that it looks like a dashed line on top.

Once you reach the end of your line, double back and do the same thing, filling in the empty spaces on the way back.
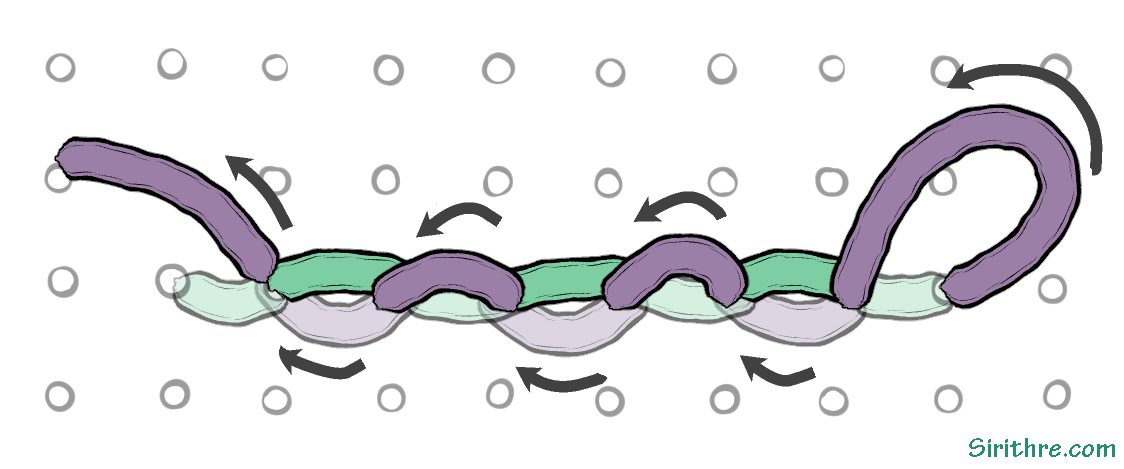
Once you’re done it’ll look the same as the official loopback method, both on the front and the back.