Custom Cording From Embroidery Thread
I’ve been wanting to make custom cording for a long time and just have never set aside the time to do so. Like with many of my explorations, making an article/tutorial on how to do it is a great incentive for me to make it finally happen. And now you have a reason to try it as well!
Now when I say cording, I mean twisted cord. The kind of cording you used to find in the trim section at Joann on ribbon spools. Typically one or two colors of thread twisted together to make a strong cord.
Since I have never done this before, I’ll be linking to all the tutorials I found along the way so you can always see different angles and different methods and know exactly how many different options you have to make cording with! Everyone seems to do it different, so there’s really no wrong way. So let’s explore!
This post may contain affiliate links. If you buy something using one of these links, I earn a small commission. However, there is no extra cost to you. Thanks for understanding! Learn more in my Disclosures & Privacy Policy.
Table of Contents
Uses For Cording
Before we get into how to make it, what is cording doing on a cross stitch site to begin with?
As it turns out, it’s useful for a number of different cross stitch finishes!
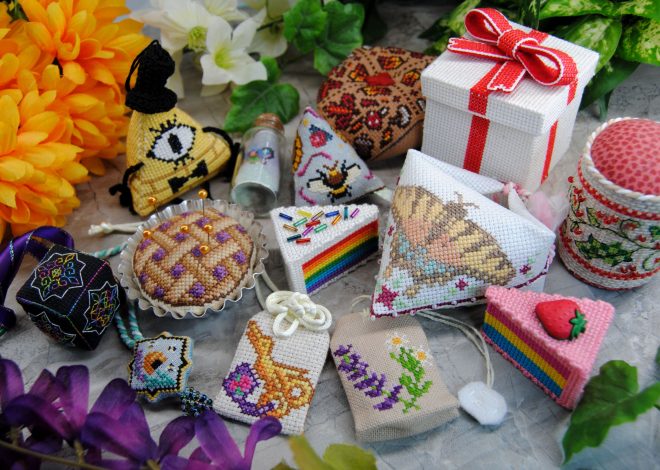
I use it for hanging ornaments like pendibulles and even biscornu.

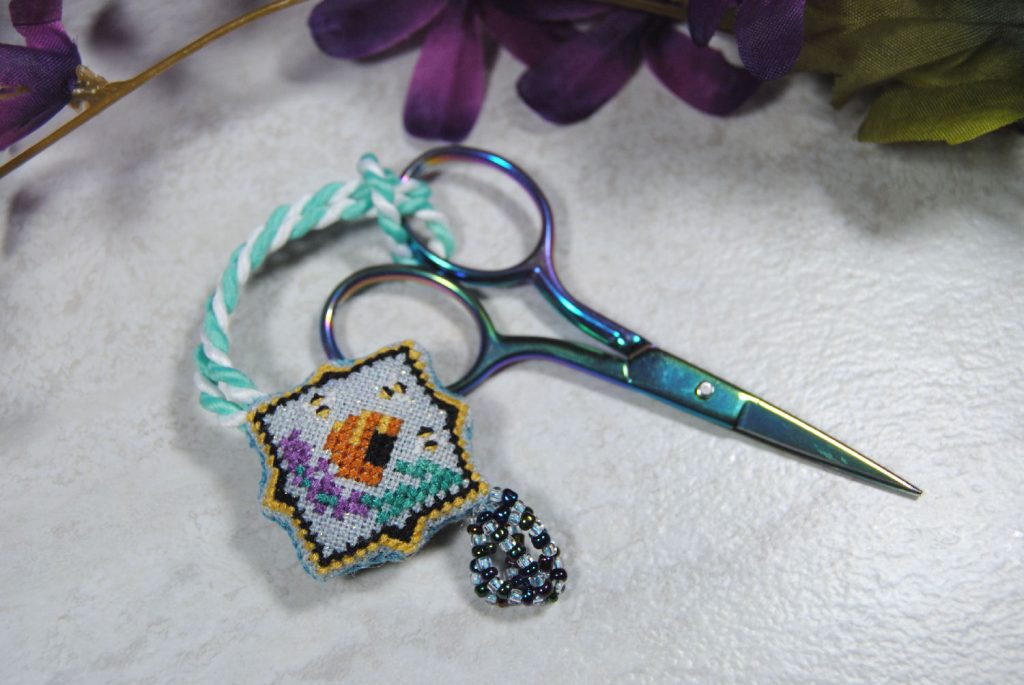
They’re also great for things like scissor fobs!
As well as flat ornaments and flat folds!

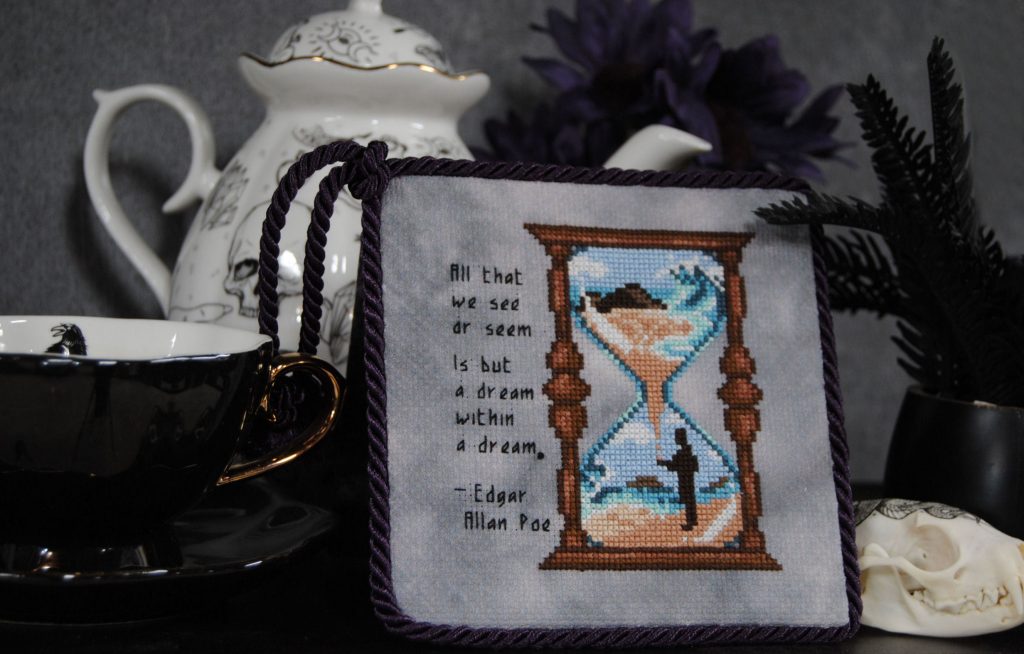
Sadly, none of the above have cording made by me. They were purchased from Michaels or Joann or similar. Basically though, cording is great for decorating cross stitch finishes. And probably for lots of other uses as well. But this being a cross stitch blog, that’s what I’ll be focusing on here.
And you know what would be cool for finishing your cross stitch? Cording that matches the thread colors of said cross stitch. So let’s make some!
What Threads to Use
The threads you decide to use for your custom cording are going to depend on your project. For most situations you’ll likely want to match colors to your project. And even the type of thread. But it doesn’t have to! Here’s just a few suggestions to get you started:
- Embroidery Thread
- Perlé Cotton
- Kreinik Braid (Or other metallics)
- Silk Cord
- Yarn
I’ll try some of these here today with the materials I have on hand. In fact, this is the kind of project that is perfect for using up those random off brand or unlabeled stash threads you’ve no idea what to do with otherwise. I even included it as part of my Floss Adventure challenge for exactly reason!
Thread Sizing
There’s two types of sizing we want to keep in mind here: the length of cord you need, as well as the thickness you want. Today I’m mostly experimenting rather than making anything for a specific project, so I’ll be using two colors for each. That way you can clearly see how they twist together.
I’ll be folding each in half to make them twice as thick. But you don’t have to stop there! Want a thicker cord? Use more thread. Feels self explanatory, but I’m just reminding you that there’s nothing stopping you from making these as thick or thin as needed. I definitely encourage you to play around a little bit with your first few cords to get an idea of how it works before you make the cord you actually need for your project.
For length, there doesn’t seem to be a perfect formula for this, as the more you twist it the more length you ‘lose’. But on average, I was getting about 1/3 of my starting length. For all my examples I used thread that was about 60″ (152 cm) long, and typically ended up with 20-25″ (51-63cm) of cord depending on how tightly twisted it was. So I recommend working out how much cording you need for your finish, and then multiplying that by three. With a little wiggle room, just in case.
All the methods I’ve found are basically the same, but with different tools. So really you can use any similar tools you happen to have on hand.
A lot of tutorials also show using something as a counterweight to let the thread spin out, but I did not find that to be completely necessary. You can also just gently run your fingers over the final cord to help settle it into place. So it’s up to you if you want to use one! I didn’t for the most part.
Prepping Your Thread
Alright, now to the fun part. Actually making the cord. I’m going to be doing two-color cord, but there are a few different variations I’ll cover later.
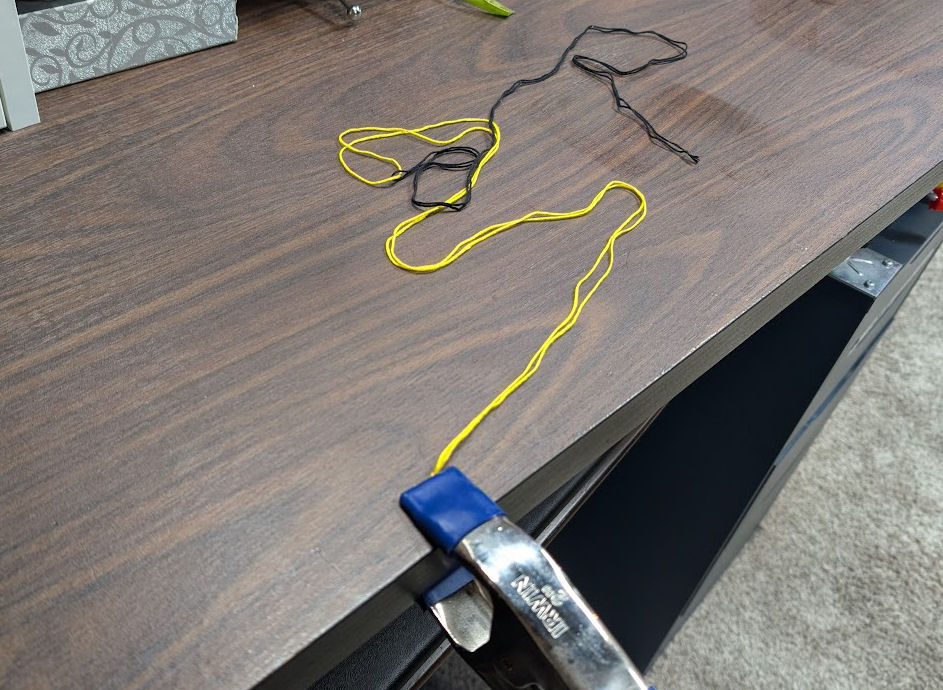
If you’re using two colors, take one of the colors and fold it in half and knot the end. Then take the other thread and loop it through your first thread, and then fold it in half and knot the ends.
You should have one really long cord that is half one color and half the other. Though you can of course make them both the same color if you’d like.
The other thing you need to do is secure one of those ends to something. This could mean taping it to the floor, looping one of the ends on a wall hook, clamping it onto your desk, etc.
You could even have someone else hold the other end, though I recommend using someone that won’t get easily bored and wander away.
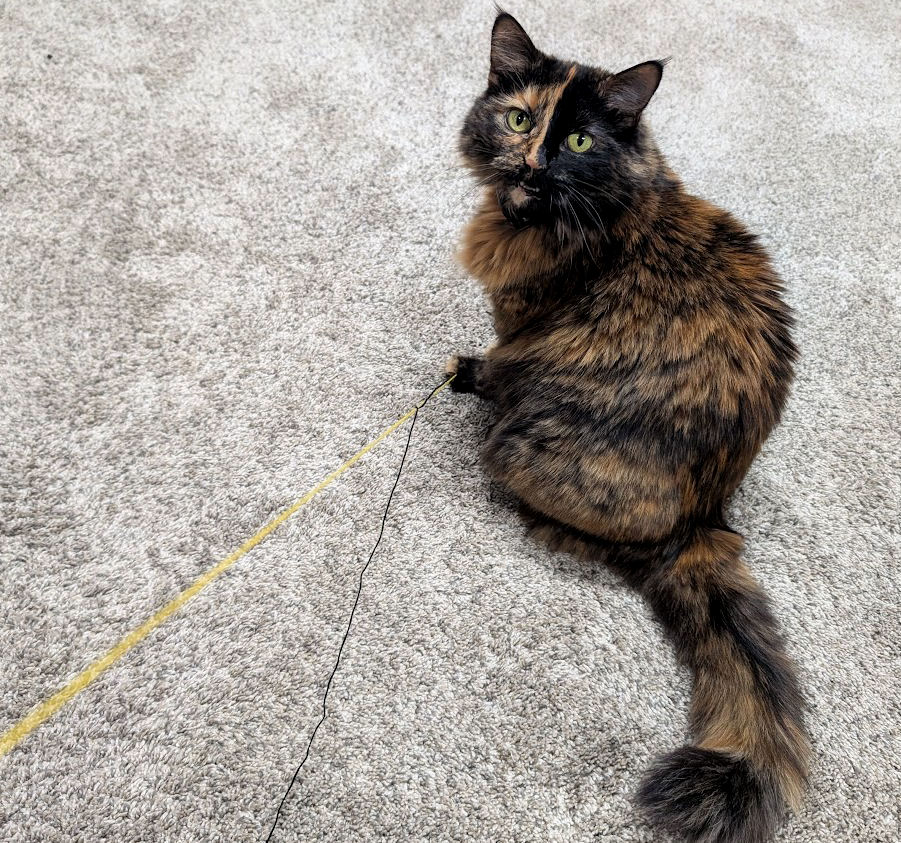
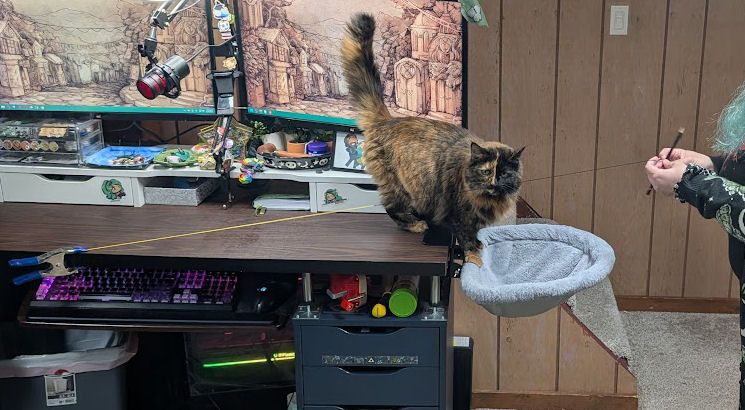
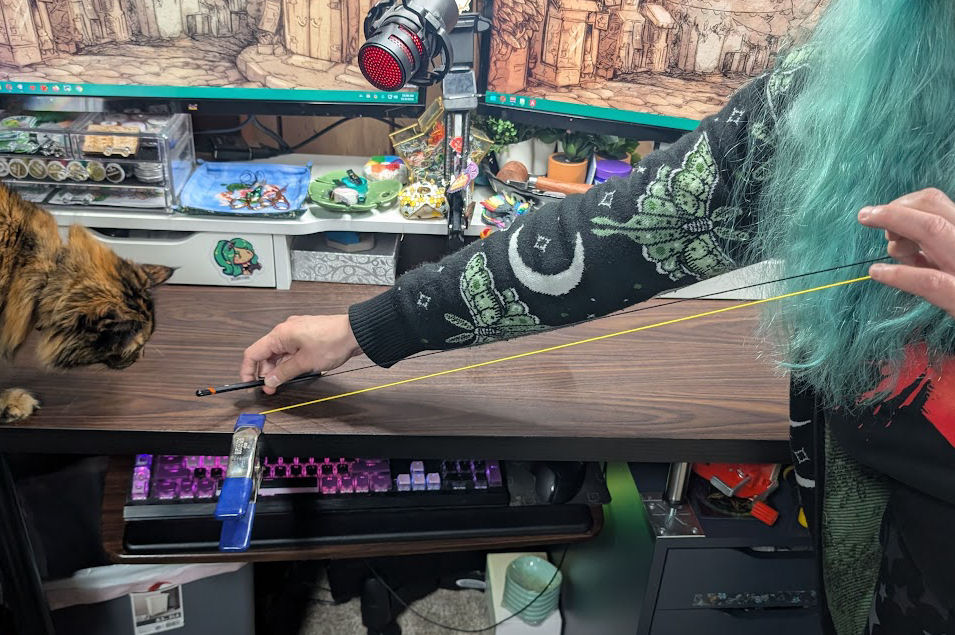
Midna here doesn’t take instruction well so I will instead be using a clamp I found in my husband’s toolbox to hold one end to my desk. I also had to enlist said husband to take some photos of the process for me since I couldn’t figure out how to take photos while also doing the cording. So this time around you get unaesthetic views of my office desk! Oh no! Proof I’m human too! Oh well.
Making Cording By Hand – No Tools!
If you’ve got no tools on hand — that’s okay! You can do this all by hand. I found a few examples online completely doing all the twisting by hand. You can use whatever you have around you to secure the thread.
Here’s two videos I found doing it all by hand.
- Tangled Threads And Things has a video using embroidery floss, tape to secure it to a table, and uses two colors but puts them together rather than doing the half-half method I’ll be using.
- Wool Couture has a video one color of yarn and secures it using a binder clip secured to a crate.
I tried doing one by hand, but immediately got bored at how long it was taking so I moved on to the next method. Sorry not sorry.
Pen Method
This is the same method, as you’re still doing it all by hand, but with a pen, pencil, stick, or really anything you have on hand to give you a better handle on the thread. This made it easier to twist without accidentally dropping and undoing all your work.
The idea is to just keep twisting your thread all in one direction until it starts to resist being twisted.
Then you grab the middle section where the two colors meet and carefully fold the thread in half while holding that tension.

Once you’ve got the two ends next to each other, let go! Or with some methods, you attach a counterweight to that middle bit where the colors meet, just to weight down the thread as it twists together.
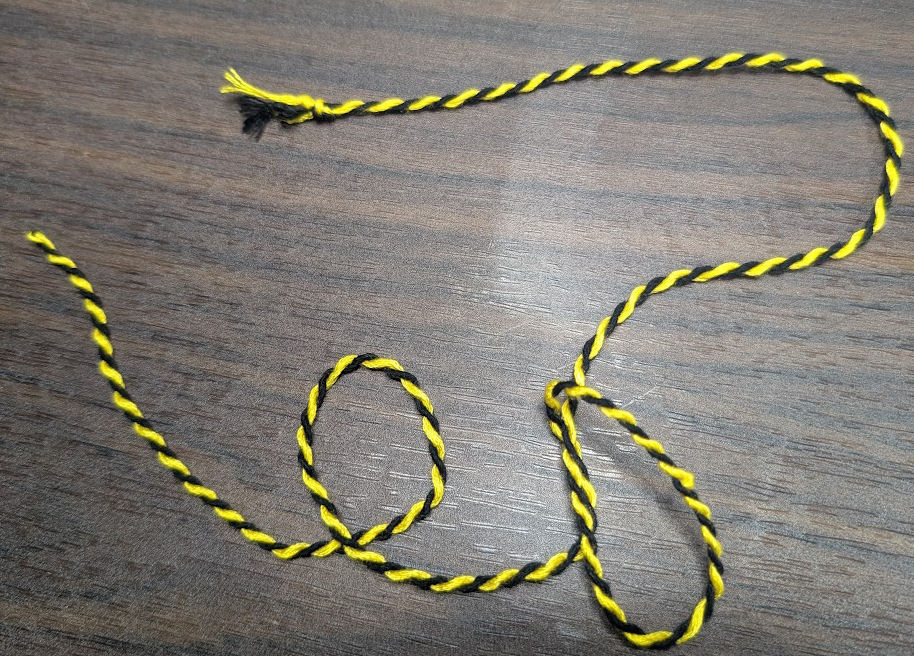
But I found that they’ll twist together on their own just fine. As it turns out, this is hard to photograph.

But before you’re done you may want to run said cording through your fingers a bit to work out any obvious kinks and to get those spirals all nice and even.

At this point if needed you can also stretch it back out again and twist the thread more (or untwist) and do it again if your cord isn’t looking quite right! No harm done!
But once it’s looking how you want it, remember to tie off that far end to make sure it doesn’t untwist on you.
Need to see that again? Here’s some other tutorials I found online using this same method.
- Tiny Modernist tapes the thread down and uses just one color.
- BeeTreeDesigns secures the thread simply using her other hand! But uses the same two-color method I’m using.
- National Quilters Circle has a video using a clamp like I did, but with a dowel rod and two colors held next to each other.
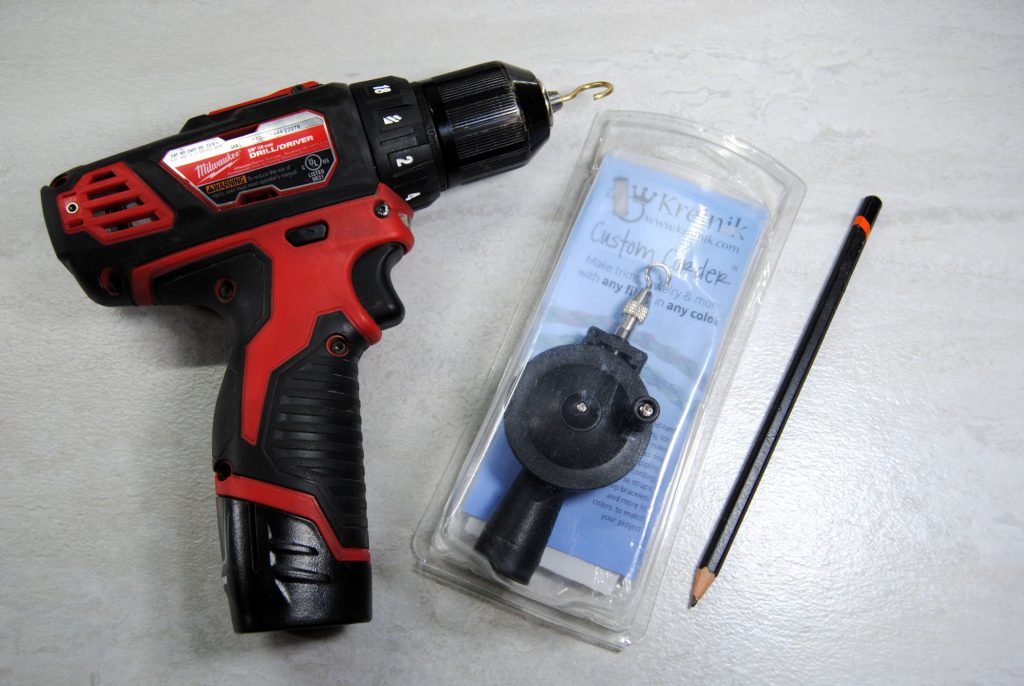
Kreinik Corder and Other Specialty Tools
Up next I’ll be trying out the Kreinik Custom Corder. We’re doing the same thing as before, but this time with a hand crank that makes you feel like you’ve gone fishing.
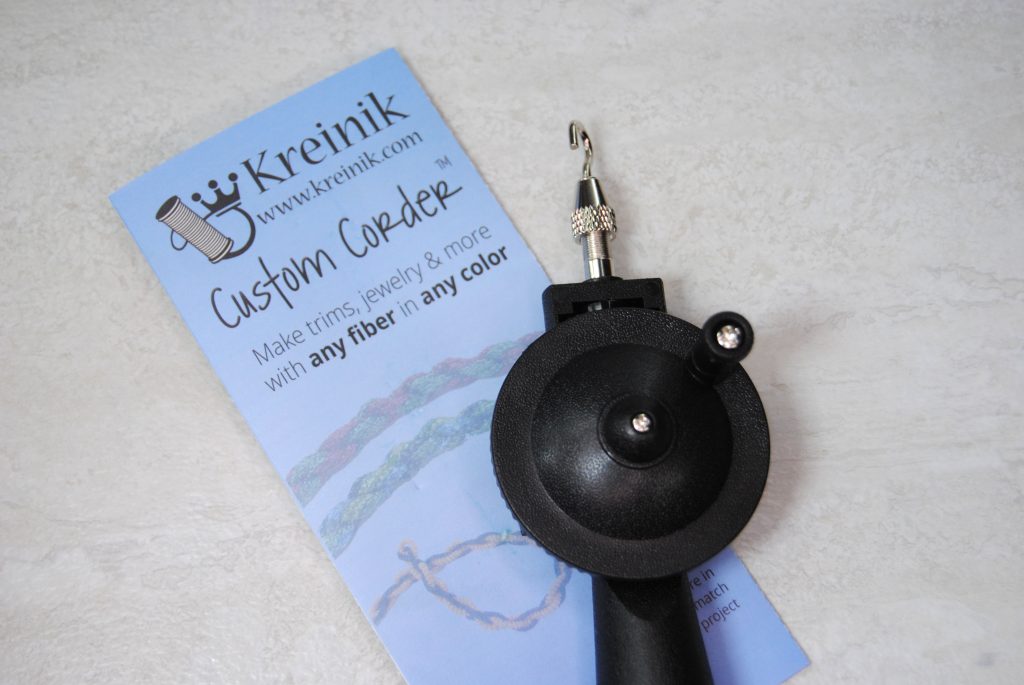
I will note there are other cording-specific tools out there, including battery operated cord makers that can even do four threads at at time! But I’ll just be using this basic hand crank for now. It even comes with a little instruction book that details how to to use it. Though you can find those same instructions on the Kreinik website.

I got a little used to how much time it took with the pen method that I ended up over-winding it.
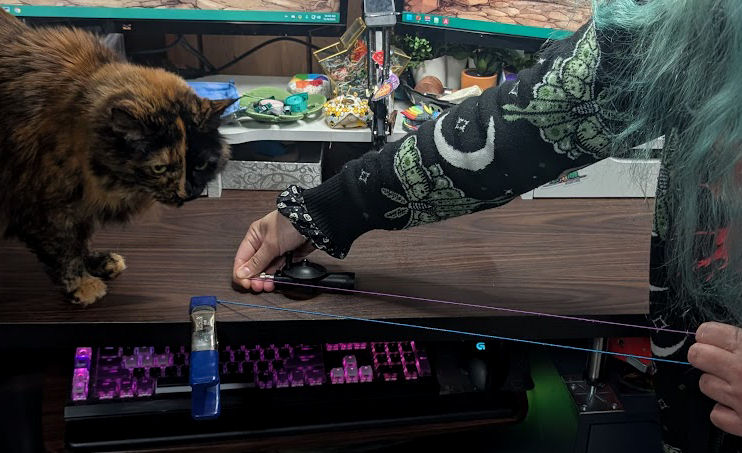
You’ll see when I let go that it’s wound up just a bit toooo much. and it starts to form little loops. So I stretching it back out to that single thread and wound in reverse for a little bit before trying again.

Want a video? Shabby Fabrics demonstrates this same Kreinik Corder using a 4 strands of thread and command hook on her desk to hold the thread. It also shows how you can use the corder as counter weight to make sure the cord twists together in a more even fashion!
123Stitch also has a video showing how this kind of cording can be made using the Kreinik Corder.
Power Drill Method
Another common method you see online is using a power drill with a hook instead of a drill bit.
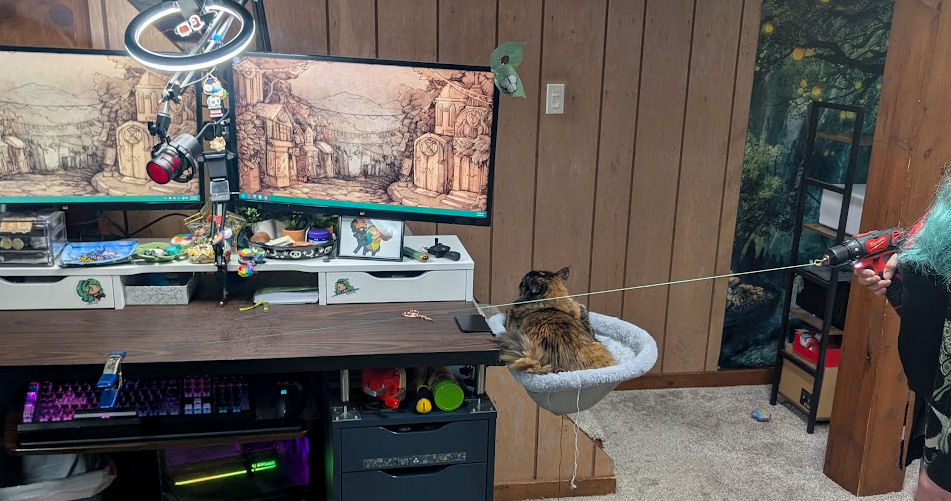
Sure enough, it’s definitely faster. But I had the same issue of over-twisting it and needing to go in reverse for a bit to loosen the tension up a bit.
Once you’ve done it a few times though it does get easier to tell when it is you should be stopping.

I ended up using this method for the rest of my tests using different types of thread. Mainly for the speed factor. Though I think for general use in the future I’m most likely to just use the Kreinik Corder, as you do have a little more control with it.
Once again, some examples from others with tutorials using a power drill:
- Tiger Lily Designs has a video using embroidery thread and a wall hook to wind up her cording.
- Instructionables has an example using the back of a chair to hold the thread.
I also found files for your 3D printer to print an adaptor that lets you use the drill to twist four strands together!
Sewing Machine
If you don’t have a power drill but have a sewing machine, this method I found on SewGuide might be what you’re looking for.
Basically, using the bobbin winder to twist your thread.

Hand Mixer
If you don’t have a drill or a sewing machine but happen to like baking, one more method I found is using a hand mixer.
You can check out Stitch Diva’s blog for more info on how they did that.

Color Variations
Now that we’ve got the basics down, let’s discuss a few different options you have in terms of patterns.
Single Color Cording
The most obvious one here is using all one color to make a single color cording.
You can do one(or many) long thread and just fold it in half, or use the same loop method as we did with the two-color cording, that way it’s easier to tell when you go to fold it up where that middle point actually is.
Two-Color or ‘Candy Cane’ Cording
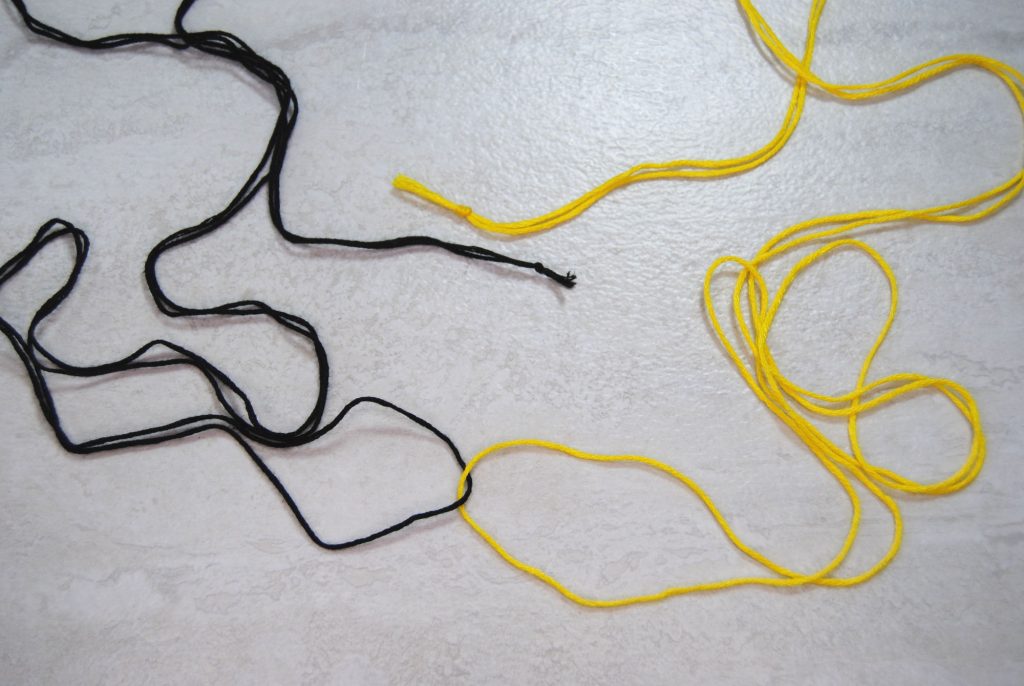
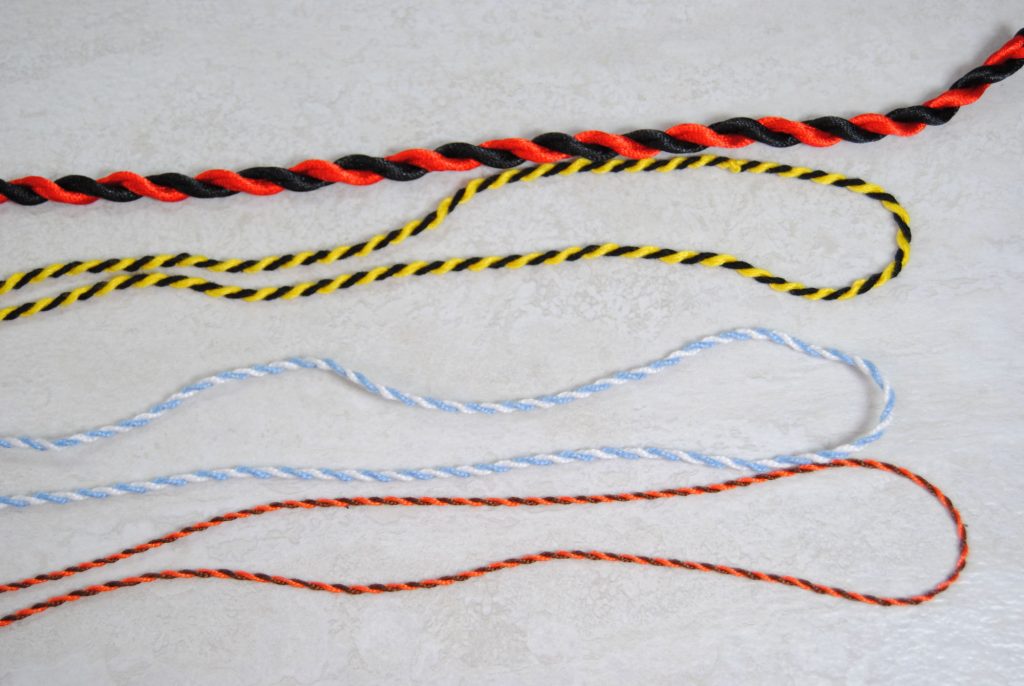
For each of my tests I used two colors of embroidery thread, using all six strands. I did just one length of each folded over, so essentially two threads of each color.

You’ll note the blue and purple one actually has a bit of sparkle. I also added a length of a generic metallic thread to just the blue thread. It added a nice bit of sparkle without adding a ton of thickness, which was nice.
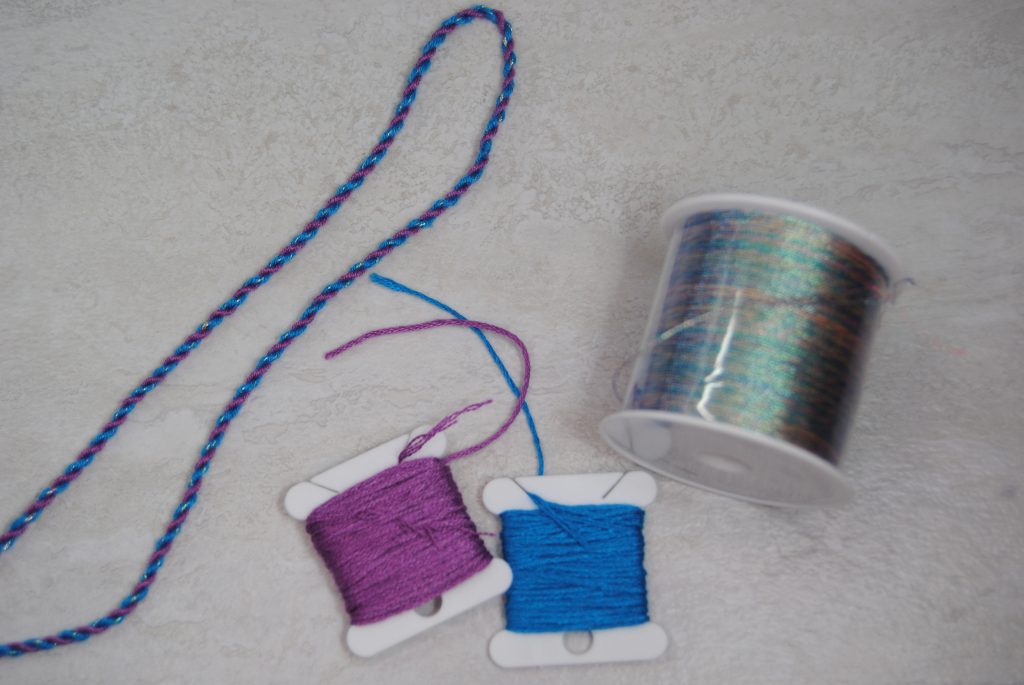
I also ended up trying with a few other threads I had laying around.
The red and black is a Silk Cord, which is of course much thicker than the standard embroidery floss I used for that black/yellow. Then I tried blue and white with a No 5 Perlé Cotton, which was a little thinner. And the orange and brown was a No 8 Perlé Cotton which was even thinner still!
Multi Color Cording Using a Parking Hook
So what happens if you want to include more than 2 colors in a cord? Well I did mention some battery operated cord makers allow for 4 threads. And that there’s 3d printable adaptors for power drills.
Kreinik also recommends having help, with multiple people helping hold the threads while you add more colors.
But one interesting method I found is just doing them one at a time right next to each other, twisting them individually before then letting them twist together.
LouiseFrench shows a setup with a drill holder and a nearby row of hooks. So once the thread is twisted enough, you just move it over to one of the hooks until you’ve got all the ones you need.

‘Herringbone’ Cording
I’m not sure what else to call it, but Kreinik refers to it as herringbone in their Corder Basic Instructions.
Basically, this is what happens when you do two colors side by side from the beginning, rather than the folding in half and and doing the split color like I did in my previous examples.

I probably could’ve chosen colors with more contrast to make them easier to see, but you can still tell it blends together a bit more with this method. It creates a more chain like or variegated look. A very cool effect! Even if my camera struggled to color balance these particular colors.

My main takeaway from this though is that you should experiment! Play with your threads! Use multiple types or thicknesses of thread in one! Use colors you wouldn’t have thought of using!
And of course, share your results so we can all learn from it. That’s half the fun!