Some of you may have heard of railroading before, others likely haven’t. But what is it exactly, and how does it help your cross stitching look neater? More importantly, is it worth the extra effort? Let’s find out together!
This post may contain affiliate links. If you buy something using one of these links, I earn a small commission. However, there is no extra cost to you. Thanks for understanding! Learn more in my Disclosures & Privacy Policy.
Table of Contents
Why should you be railroading your stitches?
Railroading is a technique to force your thread to lay flat so that they look nice and even. It’s also a good way to reduce how much your thread naturally twists as you stitch. This is especially helpful for threads like glow-in-the-dark and metallic that tend to twist up even more than usual.
Some people even claim that improves coverage so that less fabric shows through the edges of your stitch. The only time I really use it is when working with blends, but I’ll cover that a bit later.
Potential downsides
There’s not too many downsides, but I did want to address this. The main reason people don’t railroad is because they’re already used to their own stitching style. It has become muscle memory and training yourself to do it can be difficult.
The other downside is speed, but only temporarily. Any time you change up your technique it’s gonna take a bit longer because you have to focus on learning it. This is only in the beginning though, and if you stick with it you will eventually be stitching as quickly as before.
For now, let’s go over how to railroad. There’s a few different methods on how to get this done, but the end goal is simply to make your threads lay flat.
Railroading by separating strands
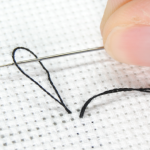
The most common and simplest method for railroading is to put your needle between the two strands before putting it through the fabric. This is kinda hard to describe, so I’ll show you some pictures and a gif here:
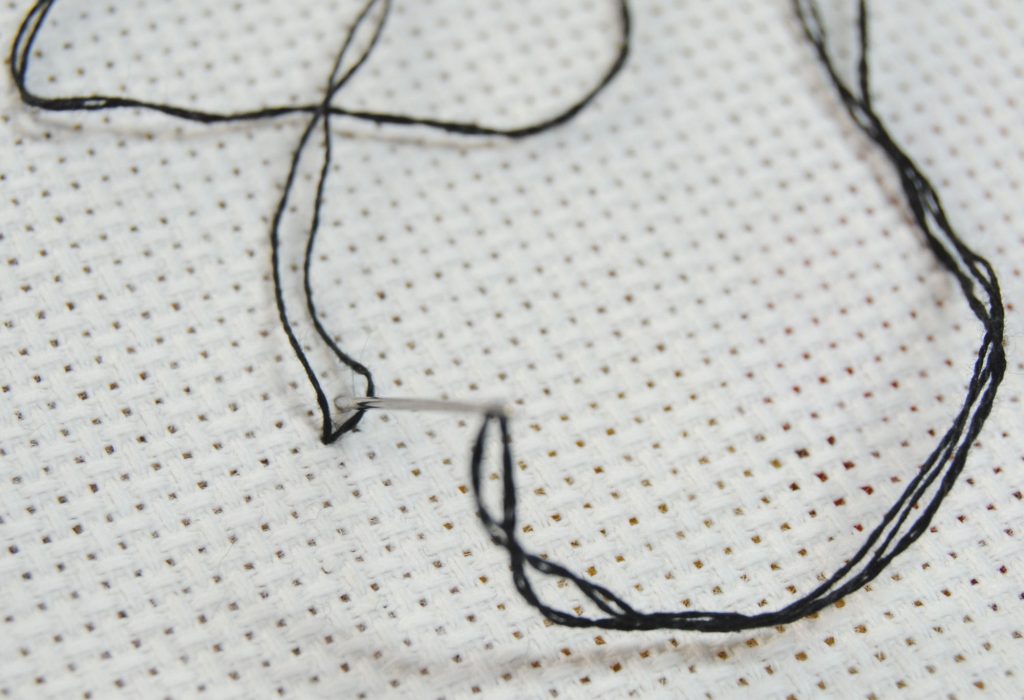
As you pull your needle through with the threads separate, they don’t get a chance to twist together. This forces them to lay straighter. The only downside, especially with a sharp needle, is that you want to be careful not to pierce a strand by accident.
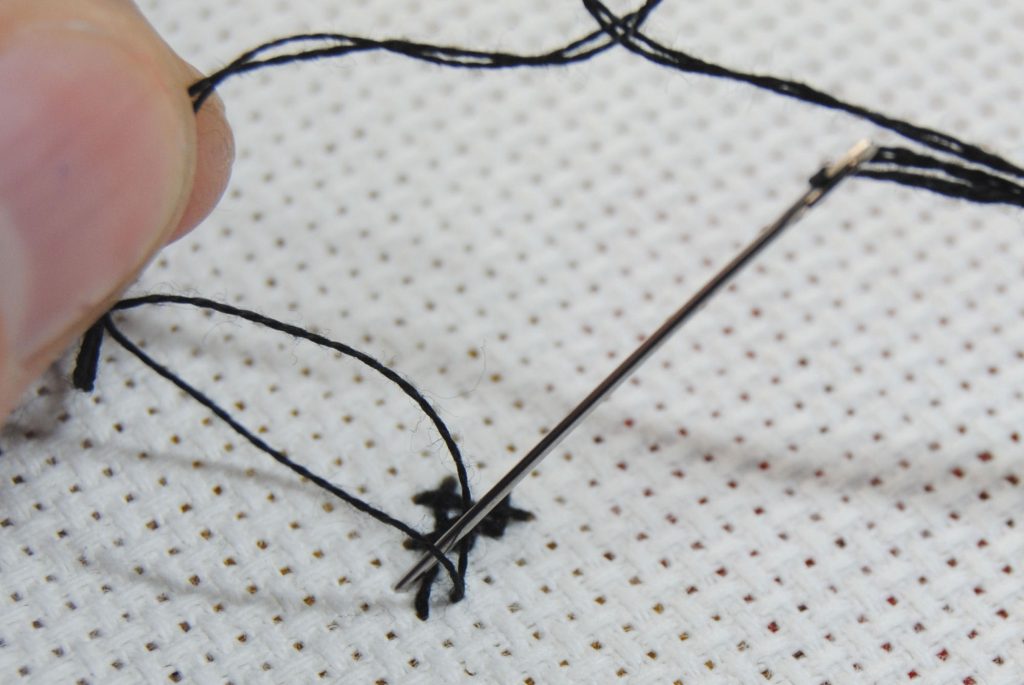
Apologies for my disgusting nails and the wobbling. But here is the technique in action:

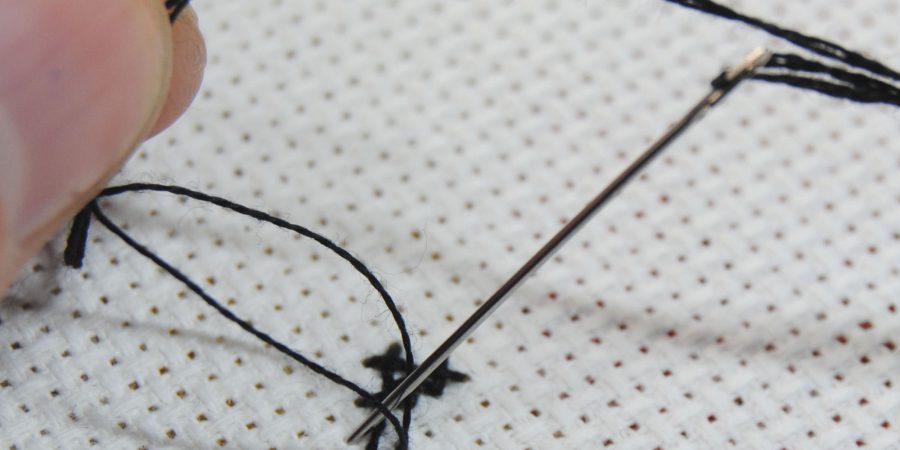
Railroading with a laying tool
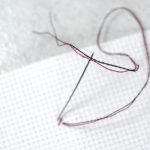
The other main technique is to use a laying tool or sewing stilleto. They even make laying tools that you stick on the end of your finger! But honestly you could just use another needle, especially thick tapestry needles. But really, anything long and thin would work, including chopsticks! Which is what I’ll be demonstrating with today.
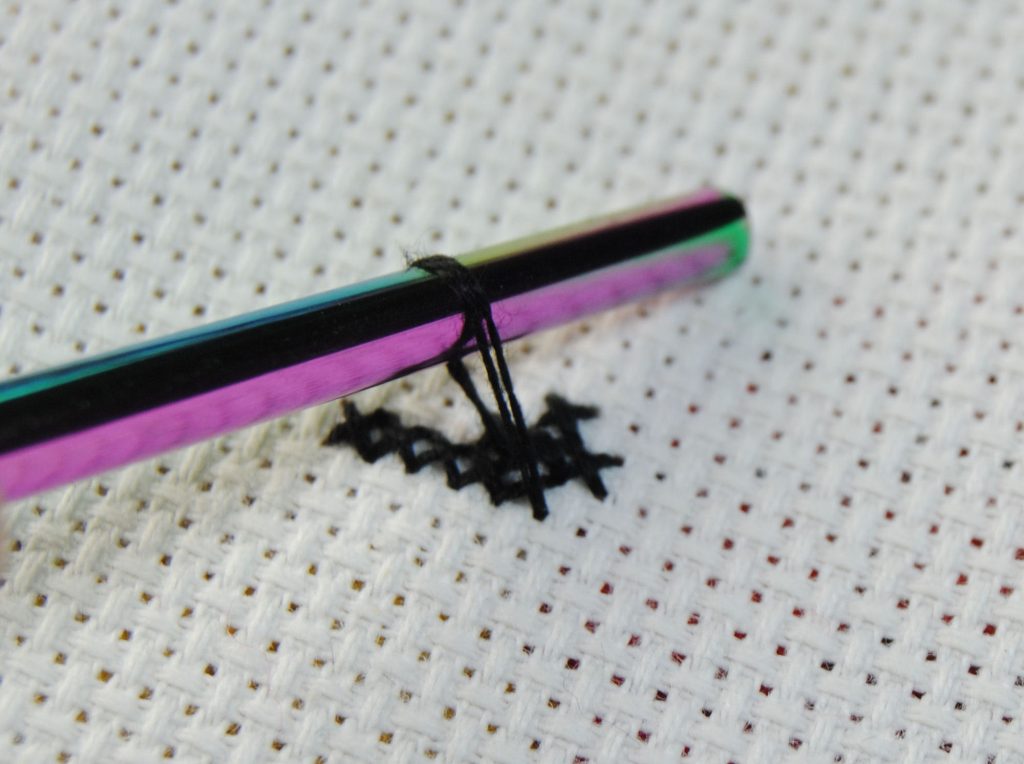
Rather than splitting the threads, your laying tool is used to pull the thread tight away from the fabric as you pull the needle through your fabric. It’ll seem pretty awkward at first, and will definitely slow you down. But as with most things, it will become habit and muscle memory and you’ll be back up to speed before you know it.
Just wrap your thread over your tool, making sure the two threads are side by side rather than wrapped over themselves. Then pull the tool away from the fabric slightly as you pull the thread through the fabric.
Once you’ve practically sewn your tool into your piece, slide it on out and finish pulling that stitch taut.
Both legs or just top?
So you’ve decided to give it a try — your next question is will you do it for both ‘legs’ of your cross stitch? There are plenty of people who only railroad their top stitch, as it’s the most visible and thus more obvious when it’s a bit twisted. For most stitching, this is plenty. It’ll make things look just a bit neater, but will take less time than trying to do both.
If you’re working with blends I would recommend doing both legs, as it will help both colors be visible throughout the stitch. If you’re just wanting more coverage, you’ll want to do both as well, as the whole point is to spread the stitch out flatter. But let’s try it out ourselves and see how they look.
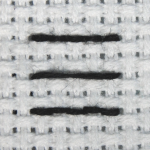
Comparison – Does railroading improve coverage?
Out of curiosity, I ran a little test. I’m using 310 as people often complain that it has lower coverage. The white aida is a nice contrast and makes it easier to see the coverage.
I mean, technically? On the left was me stitching without paying attention to whether my thread twisted up or not. I stitched at my usual speedy rate. On the right, I took a little more time to railroad using the thread splitting method.
It looks to me like the railroading one has a bit more coverage. But not a ton more. And only in some areas.
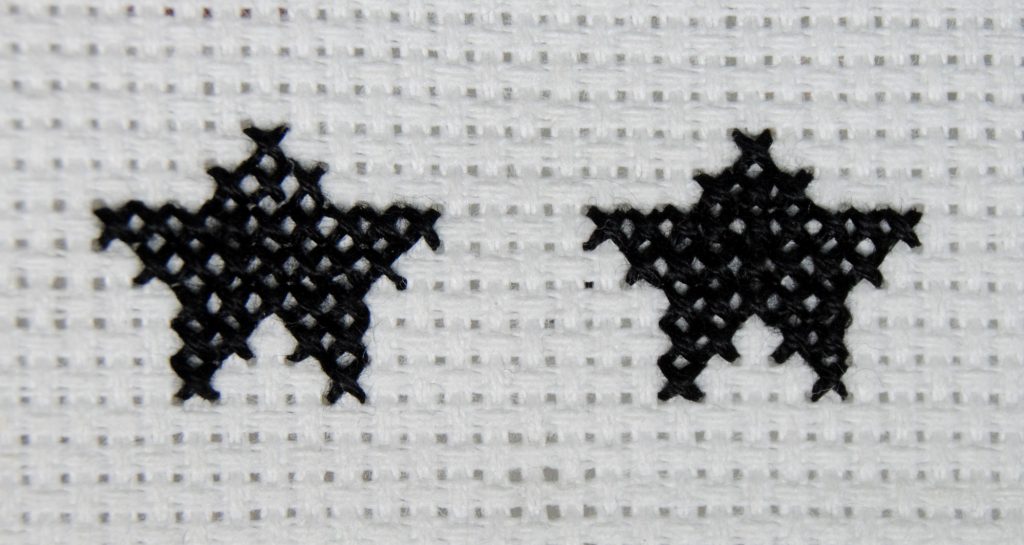
Your results may vary, depending on how ‘messy’ you normally stitch. So it’d be best to do your own test if you want to be sure.
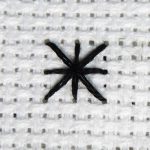
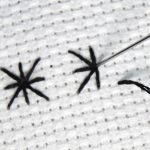
Comparison – Will stitching with metallic thread be easier?
Well. It’s been a while since I used DMC Light Effects. If you’ve ever tried it you probably know why. If I need something to be shiny, I use Kreinik. Or Sulky, or Nishikiito, or Diamant, or LITERALLY ANYTHING ELSE. It can be a real pain in the butt to work with.
But for you? I’ll bring it out one more time. As before, I’m using darker shades to help the thread stand out on the fabric so you can see better. Left is ‘normal’ stitching, right is railroaded top and bottom. I used threads half as long as I usually do to try and avoid the normal light effects BS and be more fair in my comparison.
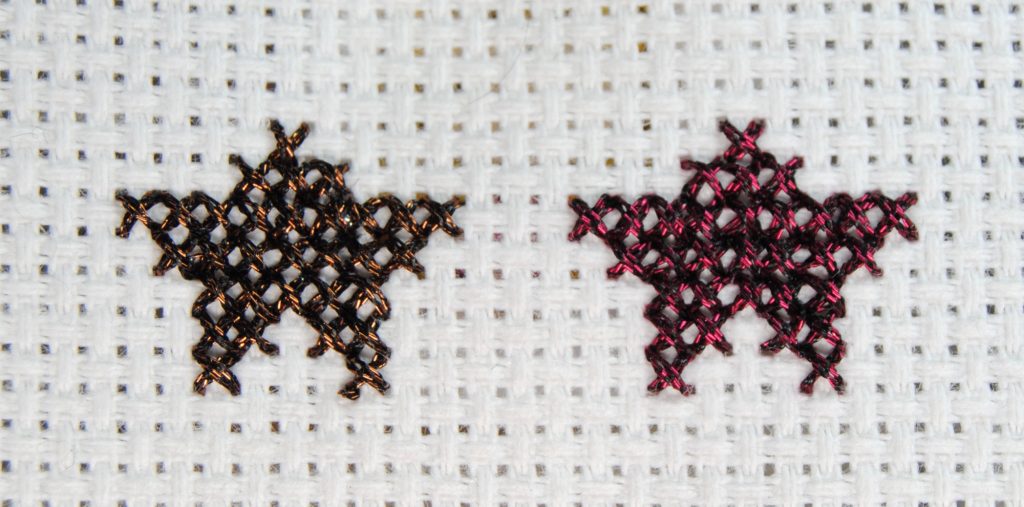
So… does it make it easier? Easier is not exactly the word I would use, but it does kinda look neater. If you stare at it long enough. With your nose practically touching the fabric. And mostly because I completely missed hole at the top of the brown star.
I did notice that with railroading it didn’t twist up as much (I mean, that’s the point). And consequently I didn’t get that issue where the inner thread base starts to pull out of the metallic and form weird little loops. So that’s nice, I guess.
Regardless, if you’re trying to make light effects easier — Use a different brand of thread. =P
Alternatively, use some thread conditioner to help keep the fraying down.
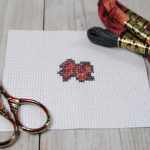
Comparison – Why you should railroad when using blends
This is the main reason I choose to railroad — to make blends a bit more uniform. If you’re not familiar with blends, it involves using 2 strands of different colors together. Usually this is done to make a mid tone between two colors. Or to make a color darker or lighter. For example, mixing 550 and 310 to make a slightly darker purple.
For my example, I’ll be using two contrasting colors to make it easier to see:
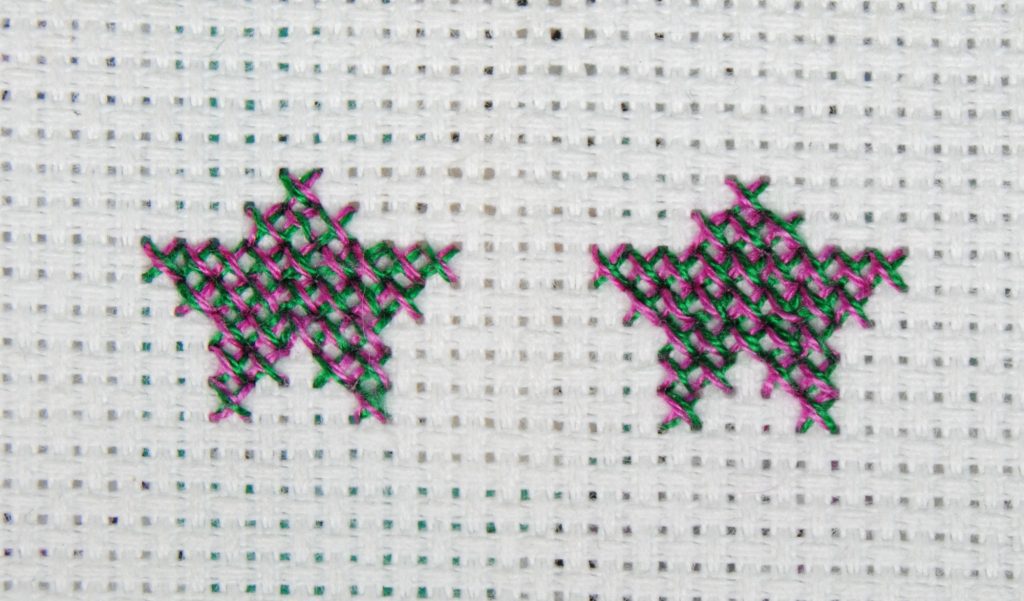
On the left, I stitched as normal without paying any mind to how the stitches fell. On the right, I used railroading to not only make the stitches lay flat, but to make sure the green was always on the ‘right’ side, and the pink was on the ‘left’ (or top and bottom depending on how you look at it.).
With them all generally facing the same direction it looks much better. The color combination is much more even rather than the left where stitches were sometimes more pink, and other times more green.
I definitely recommend at least being more mindful with your stitches when using blends.
Is it worth it?
That’s really all up to you. It’s personal preference. I would recommend at least trying it yourself. Pick out a small freebie pattern and give it a go. See how it feels and decide whether that extra effort is worth it for you.
If you’re planning to enter your piece into some sort of competition, this attention to detail could be what gets you a higher spot in the rankings.
I would definitely at least recommend it when using blends, but if you’re already a pretty neat stitcher it may not be necessary at all!