
Today I’d like to go over the basics of PCStitch 11. I get a lot of questions regarding my process in creating designs. And part of it I can’t really teach – the actual design. I just kinda doodle in a Pixel Art program like Pyxel Edit and then turn it into a cross stitch pattern. I don’t use backstitch much in my designs, and I find designing in PCStitch clunky at best, which is why I use a separate program to make my art.
But that’s where PCStitch comes in — I use it to put my pixel art onto a grid and pick thread colors and actually make it look like a cross stitch pattern.
It’s a fairly useful program once you get used to it. There’s a lot of different features you could use for creating designs in the program itself. I couldn’t possibly go over everything. I will, however, be going over my most used features and my tips for making a clean design.
Table of Contents
Other Pattern Programs
Before we get started I want to make it clear PCStitch is by no means the only cross stitch program out there. Most of them, including PCStitch, have free trials you can use to play around with them.
I would recommend you try out several of them and see which UI makes most sense to you. They all have basically the same features, and their own upsides and downsides. It’s all a matter of personal preference.
Here’s some of the more common ones:
I am definitely in no way sponsored by PCStitch. But it IS what I’m most familiar with, so that’s what I’ll be going over today.
Preparing Your Image

The methods I’ll be describing today work best with pixel art. If you try importing a photo or drawn image, there’s going to be a lot more cleanup to do. This is why I create my designs in pixel art programs first.
For today’s example though, I’ll be using a game sprite. This Prism Flower is from the game Shining Force 2. I pulled it from Spriters-resource, as part of a sheet. This is a great site if you’re wanting video game sprites to work with.
Important: I wouldn’t recommend selling patterns of just straight game sprites unless you have permission from the developer, but it can be great for personal use patterns. Please also don’t steal random pixel art off the internet without the artist’s permission either. That’s both illegal and rude.
Regardless, you’ll want to crop the image to the part you want to pattern. If it has a transparent background, you’ll want to fill in the background with a color that is not in the image. Like this bright magenta. PCStitch treats transparent backgrounds as black, and that can merge with the outline of your design so be careful.
There are plenty of free editing programs out there such as GIMP if needed. This tutorial is already gonna be long, so I won’t get into that now.
Importing the Image
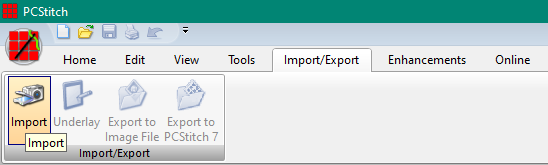
Now that you have your art, head over to the Import/Export tab and click Import.
Click browse and find your image. You’ll then get a screen showing the image you imported and a blank preview. Click the “Show Preview” box on the right and OH GOSH WHAT IS THAT?! IT LOOKS AWFUL!
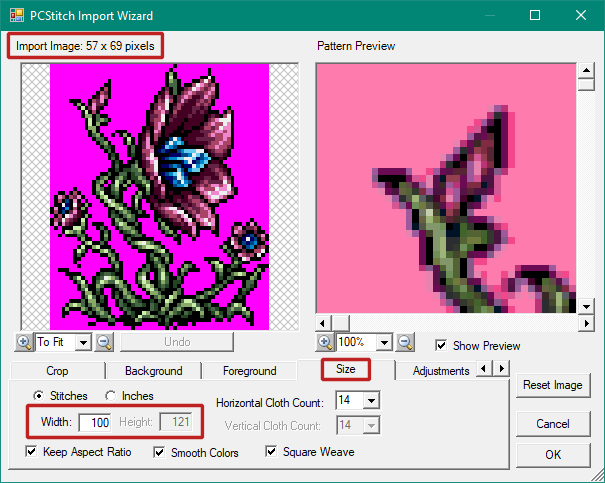
With pixel art especially, you want to make sure PCStitch is converting your image exactly. By default, the size of the pattern will be larger than your pixel art. Unfortunately, PCStitch is not great at resizing pixel art, as you can see.
You’ll want to change the size to match the original image, as shown in the upper left. It should look much better now. You’ll also get an idea of how it handles colors. If you chose something with a lot of purple, I’m sorry.
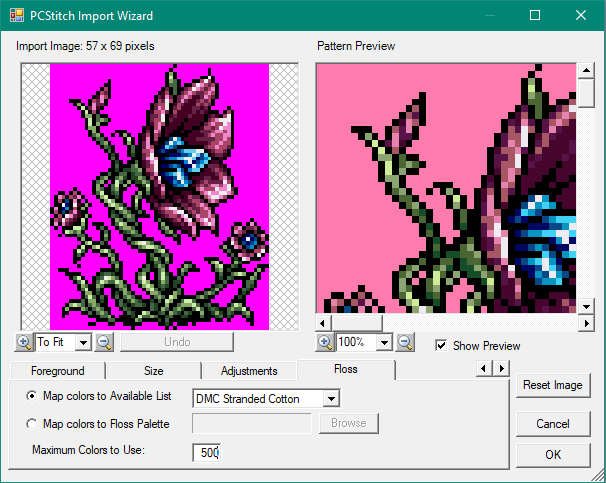
Speaking of colors, it defaults to the last thread palette you used. So if you ever start adding Kreinik or other brands, keep that in mind. Once you’ve confirmed your preferred thread brand is selected, go ahead and click okay and we’ll get into the main program area.
Reduce Colors
The first thing you probably want to do is remove the background. Find the color down in your floss palette. Right click, and remove.
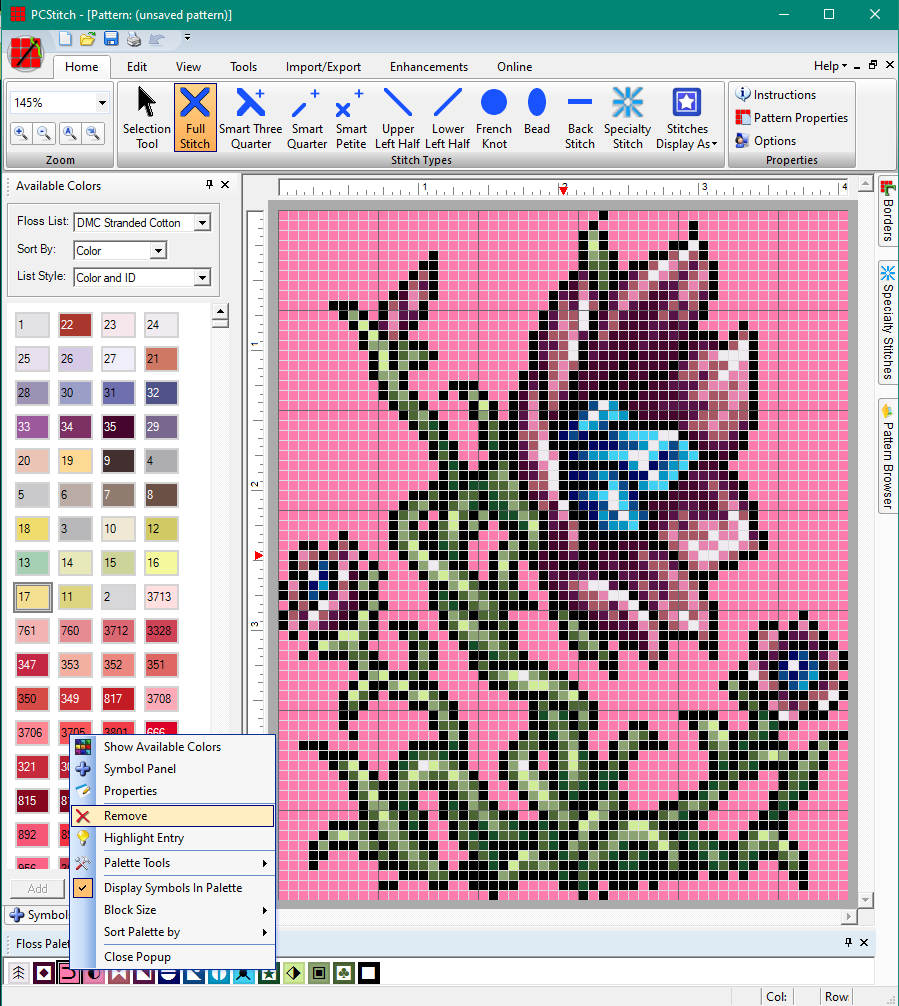
Now let’s see if there’s any colors we don’t need. Right click any of the colors down in the Floss Palette, go to Palette Tools and Floss Usage.
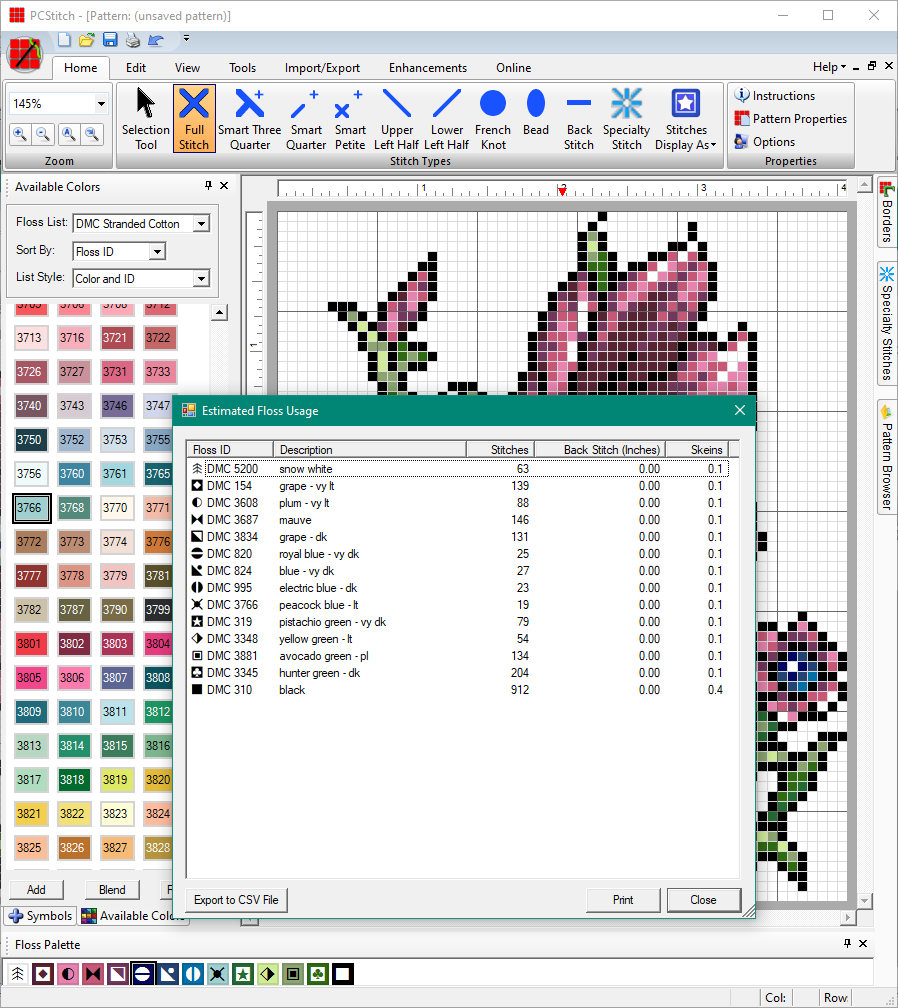
This will show you a breakdown of how many stitches each color has. This can be useful if there’s any colors with just a couple stitches. Unless absolutely necessary for the design, most of the time you don’t want to have to thread your needle for just 3 stitches, right?
Even if there’s a lot of each color, there may be some stray stitches off by themselves. To see this more clearly, right click a color and choose Highlight Entry.
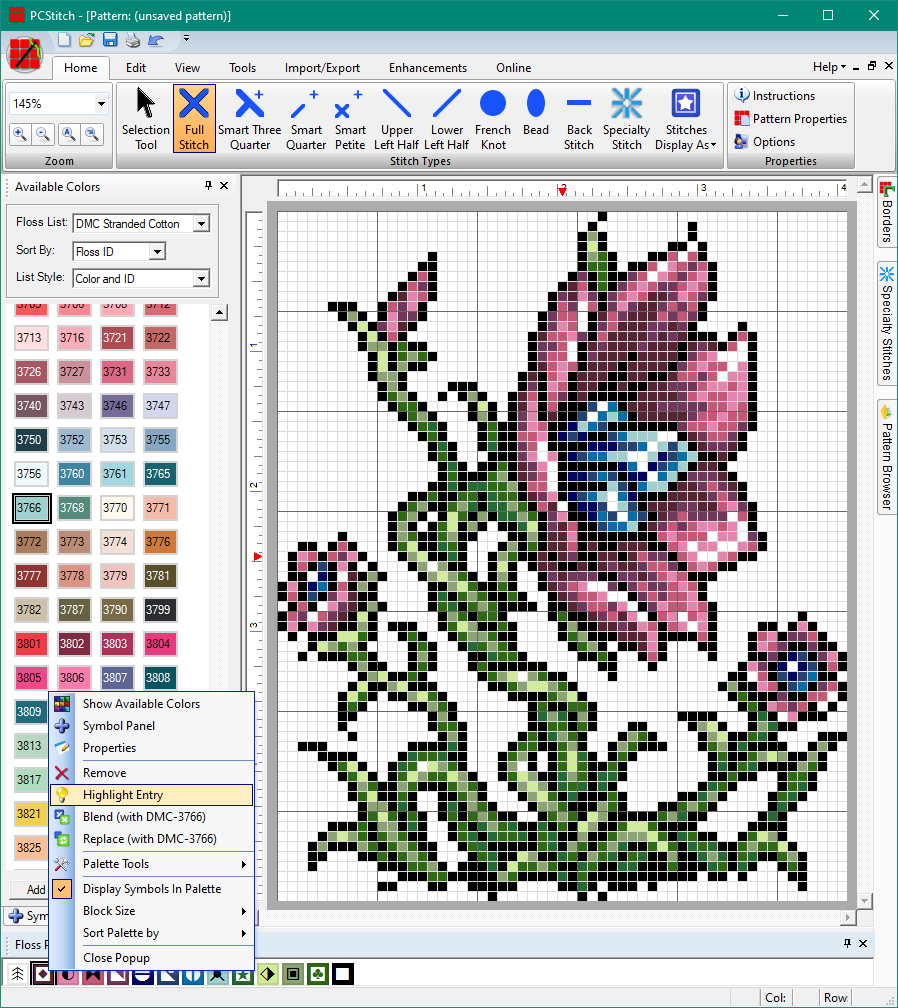
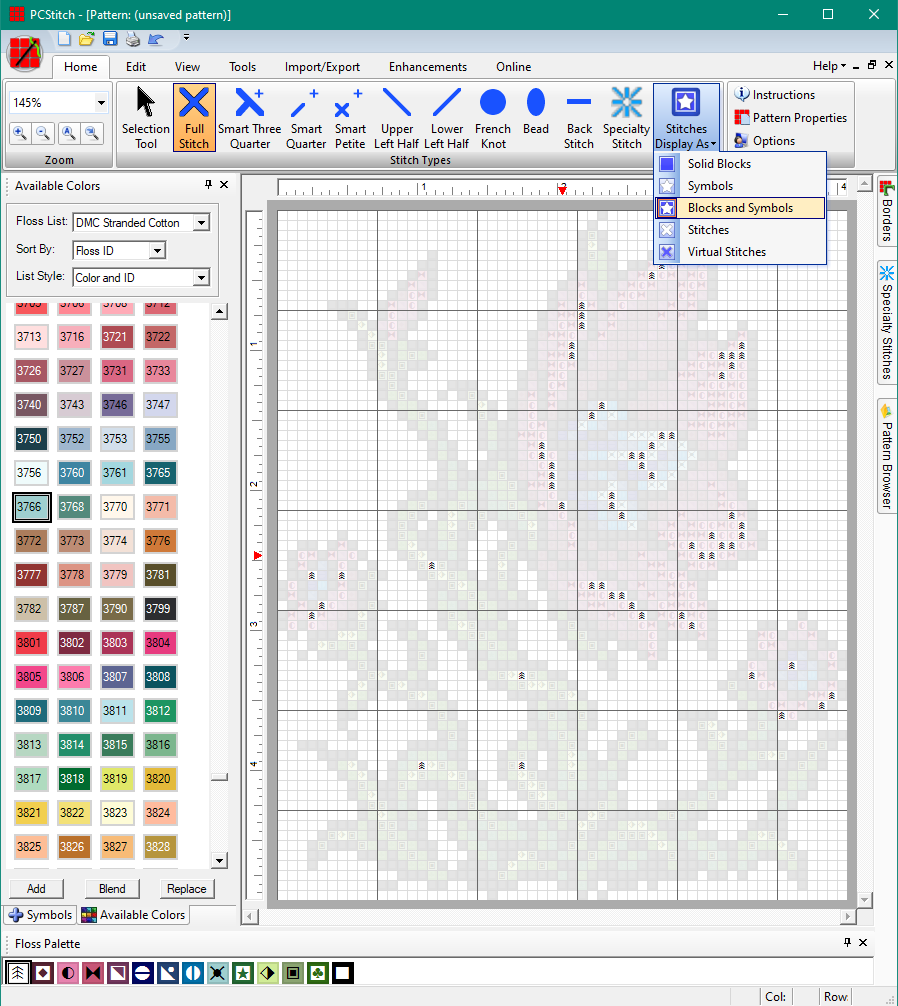
This will show where on the pattern the stitches are located. If you chose a light color (such as white) to highlight, it may still be hard to see. You can switch over to Symbols at the top right of the Home tab.
In my example, there’s quite a few single white stitches in the stem. I’d probably just fill those in with the lightest green to avoid those single stitches like that. But really, it’s up to you.
Go through each of your colors and make adjustments as needed. Speaking of adjustments, let’s fix some of these colors next.
Adjusting Colors
You’ll already note the color picking is… mediocre at best. It does okay at giving you a place to start, but you’ll probably want to pull out your actual threads and do some comparison.
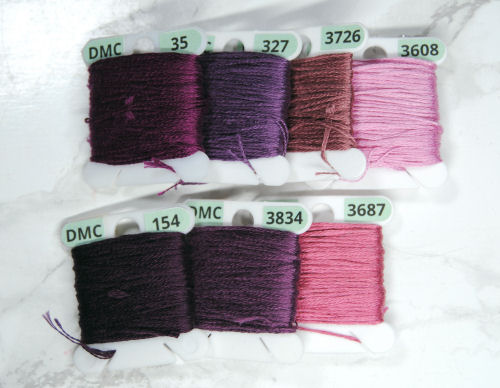
The top row of thread is what PC Stitch chose. The bottom is what looks better to me.
You’ll note mine aren’t necessarily more accurate, as I couldn’t find anything really close to that dusty purple. Purples are notoriously difficult to pick thread for. But it is more of a smooth gradient than the original which should look a bit more intentional, at least.
I kept the light pink, as that was close enough for me. Here’s the original colors from the game sprite for comparison.

Now let’s update the colors in PCStitch. First click on the color you want to replace down in your floss palette.
Second, find the color you want to replace it with in your Available Colors palette. You can sort it by color or number, whatever’s easiest for you.
Lastly, click on the Replace button.
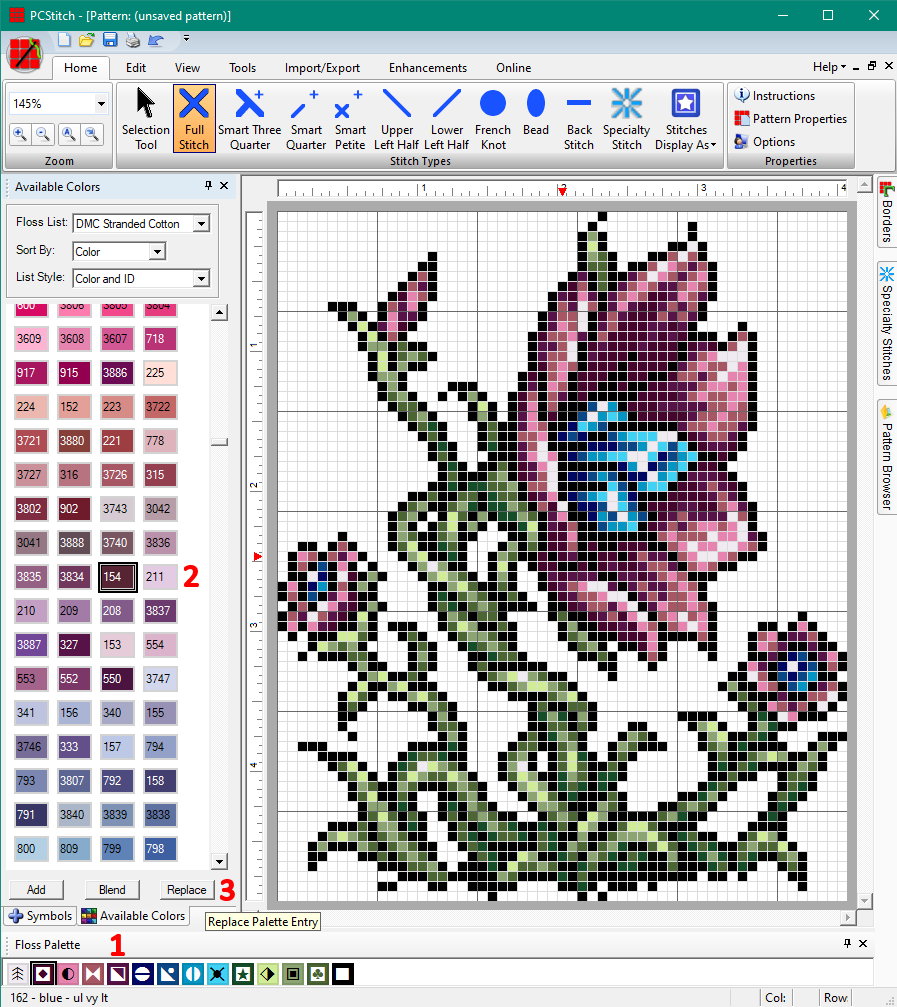
If for whatever reason you don’t see the Available Colors palette, you can find it in the View tab.

Keep going down the list, and replace any colors that don’t look quite right to you. Remember that colors can look very different in PCStitch, or in any other program than they do in real life, so check your thread in person if you can.
If you don’t have a full set, consider picking up a thread color card if you’ll be making a lot of patterns. They’re super useful! More so if you get the one with actual thread rather than simply printed.
If it’s out of stock from DMC, check other stores that sell cross stitch supplies too!
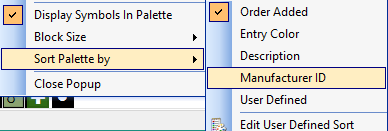
Lastly, you’ll want to probably resort your colors. You can right click on any of them and “Sort Palette by” whatever you like. I tend to prefer by Manufacturer ID (aka color number).
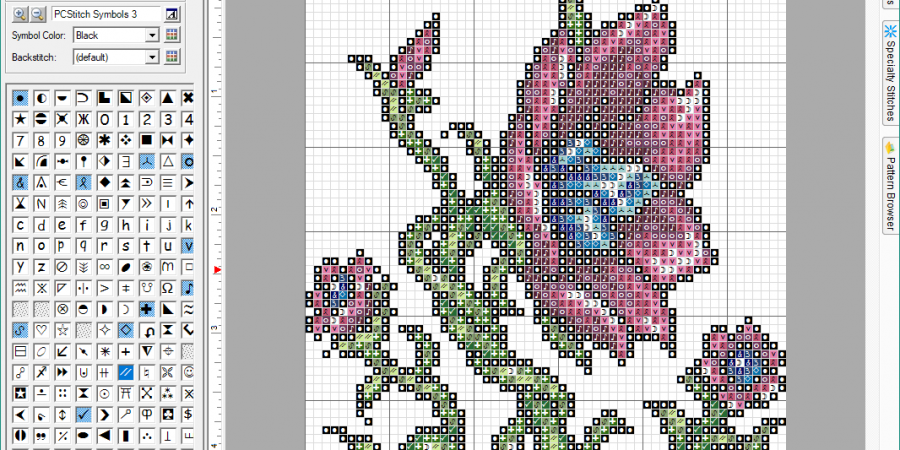
Replacing Symbols
Now let’s change up the symbols. There’s nothing more frustrating than stitching from a pattern where two or more symbols are waaaay too similar to each other. Especially if you’re printing out black & white version to work from!
You’ll want to alternate between displaying stitches as Blocks & Symbols and just Symbols. Like mentioned earlier, you’ll find that setting up in the Home tab under “Stitches Display As.”
If you’re not finding the Symbols palette, that’s under View – Panels, like the colors one was earlier.
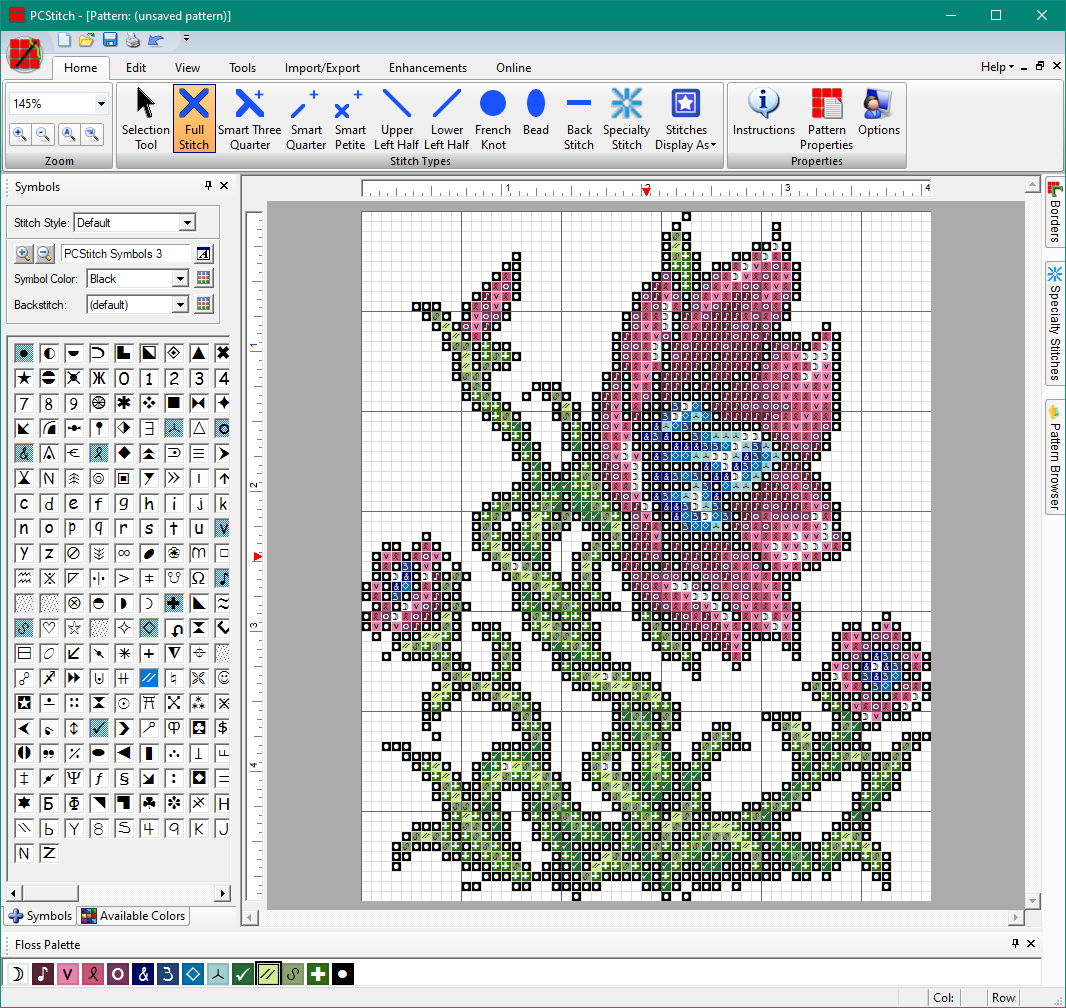
I typically go through each color trying out a few different symbols to see how they look, especially in black and white. You could even use other fonts like wingdings!
Eventually you’ll likely have go-to symbols for certain colors like black and white. But generally I just choose thinner symbols for lighter colors, and bolder symbols for darker colors. That way you can kinda still make out the shape in black and white.
Printing
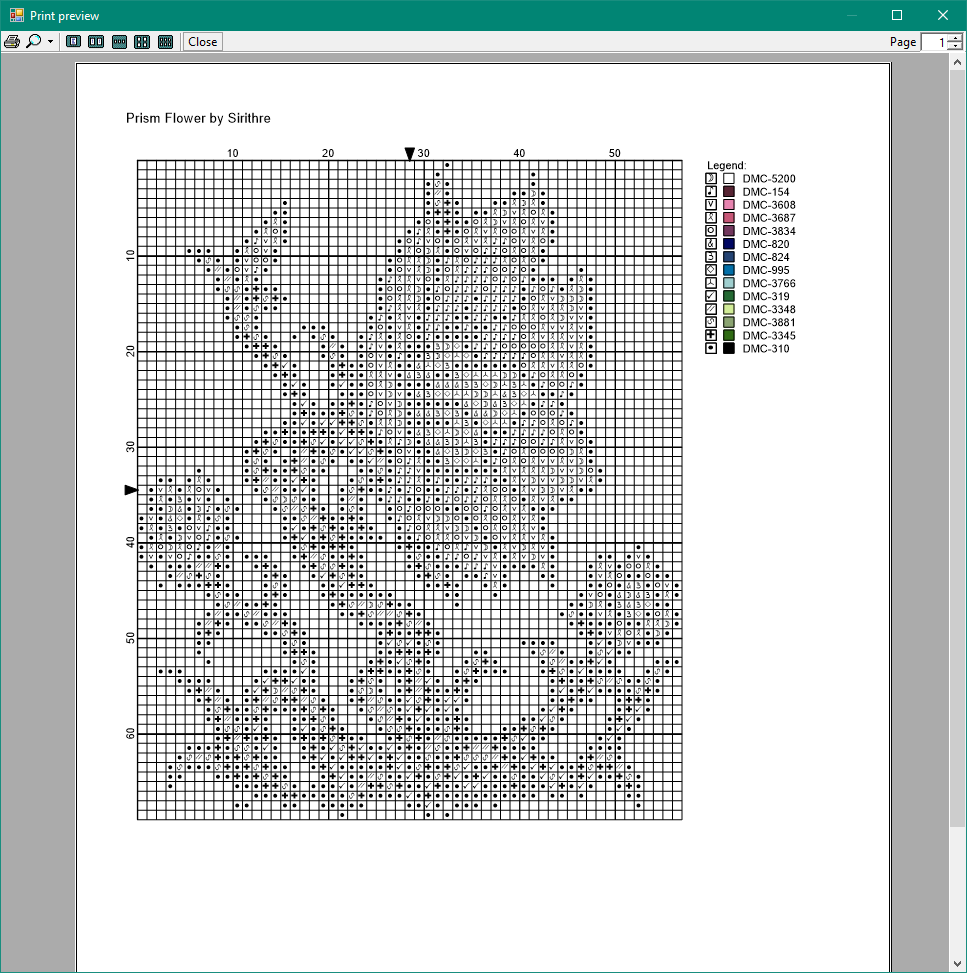
Everything look good? It’s time to move on to printing. Clicking that PC Stitch logo in the upper left and going to Print /Preview greets us with the usual print properties.
I definitely recommend previewing your pattern to see how it’s fitting on the page.
Once you know what you want to change, go back to the properties window. Here you can tell it to cram it all into a single page, or space it out to a certain page count, etc.
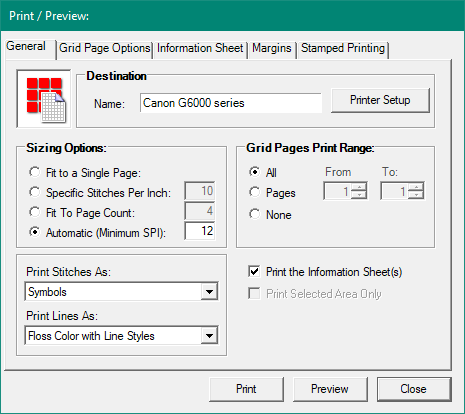
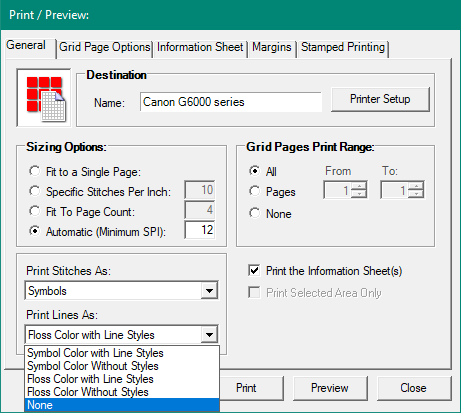
You can also tell it whether you want it in black and white (Symbols) or in color. You can even change how it treats any backstitch you might have (which we didn’t really cover this time, sorry…)
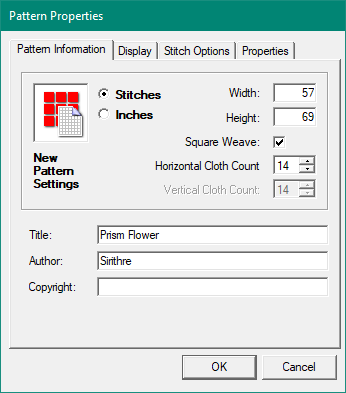
As an aside you may have noticed in my preview it says “Prism Flower by Sirithre” along the top and yours says <title> by <Author> probably.
You can set these fields back in the Pattern properties section on the main Home bar as pictured below. Or, within the print properties you can remove this or edit it in the ‘Grid Page Options’ tab

Exporting as an Image
But what if you don’t want a PDF? I tend to work from an image file in photoshop or on my phone. I have it open in a photo editing program so I can mark things as I go.
This is also useful if you want to put together your own PDFs in another program like Word and customize them entirely.
Regardless of your reason, it’s good to familiarize yourself with the options. So head over to Import/Export and choose to Export to Image File.
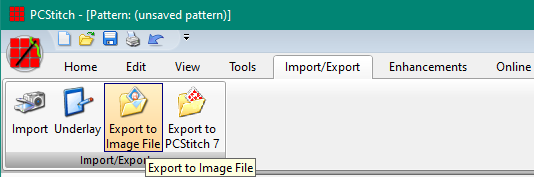
Here you’ll need to check the box at the bottom to get a proper preview.
DPI basically adjusts how large the image file will be. Larger means a clearer image, but also a larger file.
You can again choose to see stitches as Blocks & Symbols or just Symbols and choose how it handles backstitch.
Another thing to note is that in 600 DPI grids it also makes every 10th line of the grid bold, which makes it a LOT easier to read.
If your design has a lot of white, you might choose a different background. Though keep in mind the grid is black by default. Though you can change this back out under Home – Options – Gridline Settings if needed.

You might also want to get a preview of what it will look like stitched. For this, I set it to Virtual stitches and un-check Display Gridlines like shown here:
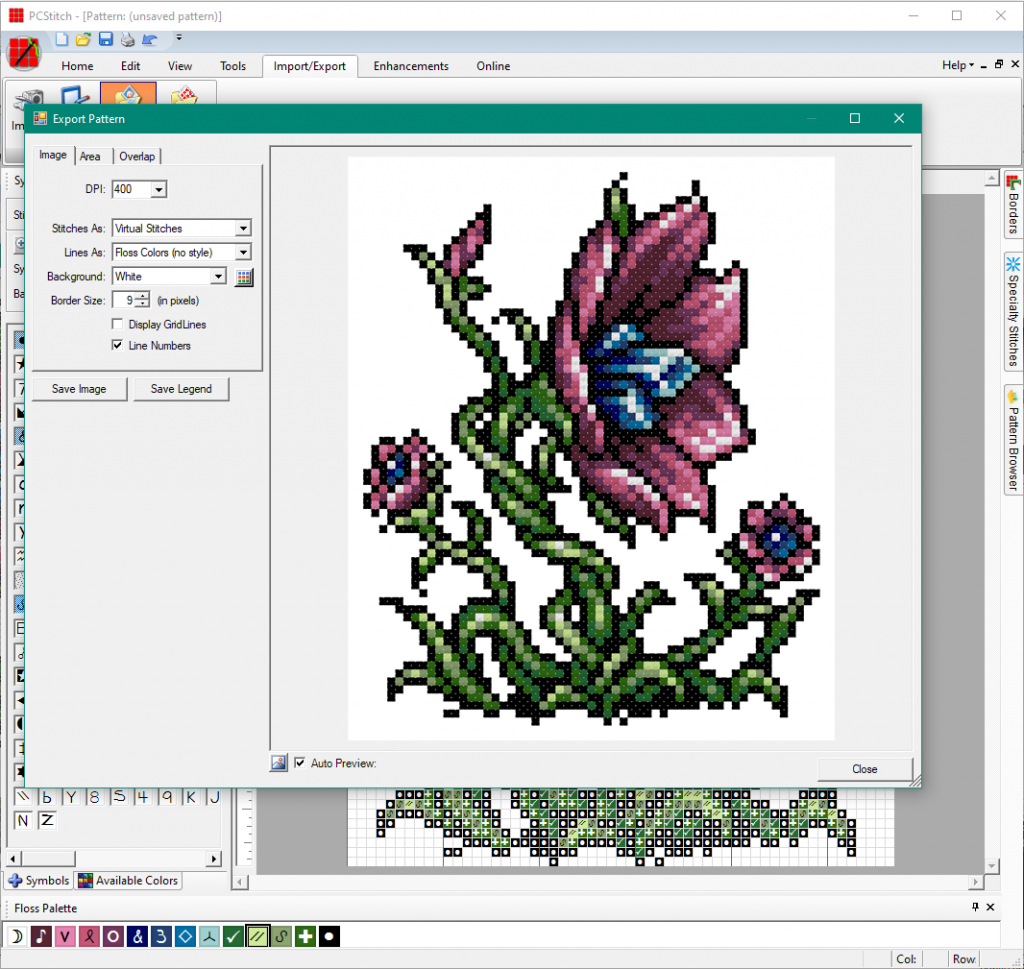
Be sure to play around with these settings a bit to see how you prefer your pattern to display, then Save Image. This pane also gives you the option to Save Legend, which exports the symbols and colors as an RTF file. You should be able to open this with Word or WordPad.
The downside to plaintext formats is if you send this to someone, they probably don’t have the PCStitch font and the symbols will show up differently. That’s why you’d want to conver to PDF, so it embeds it and can be read properly by anyone with a PDF reader.
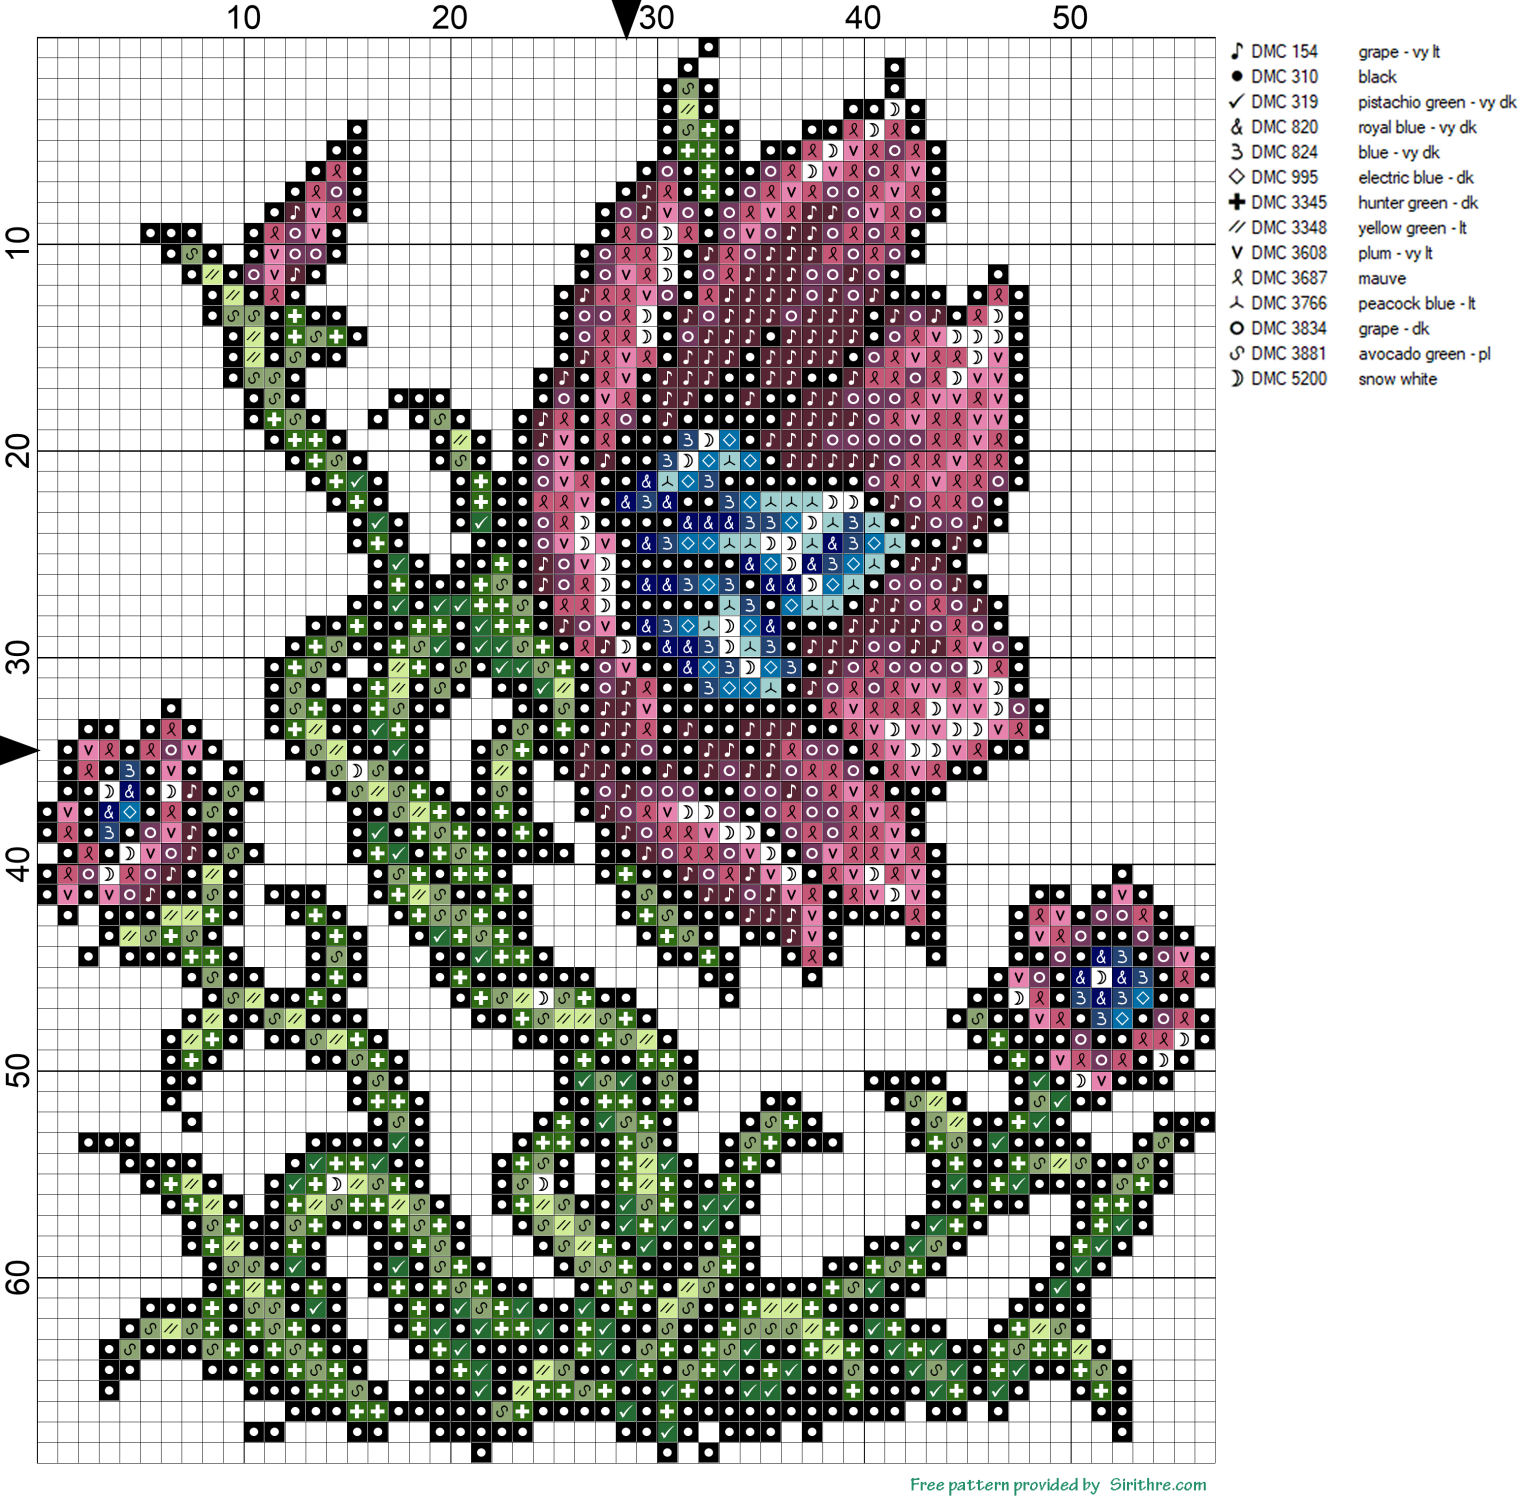
Finished Pattern
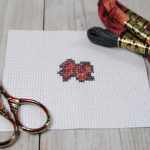
If you made it this far — congrats! I know it’s a lot to go over! If you’d like this example pattern to stitch, I’ll leave it here as a freebie for you.
I basically took a screenshot of the floss usage screen, and added it to the image export version of the pattern.
That’s a pretty quick way to get a workable pattern for posting online, if you don’t want to go about making a PDF just now.
Hope you found this useful! I hope to do other PCStitch articles regarding specific features like mirror mode, backstitch, etc. Let me know on Instagram, Twitter, or Patreon what you’d be interested in learning!
You might also like:
 Cross Stitch Beginner’s Guide
 Hoop, Q-snap, or Scroll Frame? Which should you use?
 Beads: Accenting your Cross Stitch Projects with flair
 Washing your Cross Stitch: When and Why to Wash
 Thread Starts for Cross Stitch — 7 Ways to Anchor Your First Stitch
 Gridding for Cross Stitch: Techniques to Help With Counting Stitches